
1. Mirror tray with 3 votives and pearl beads
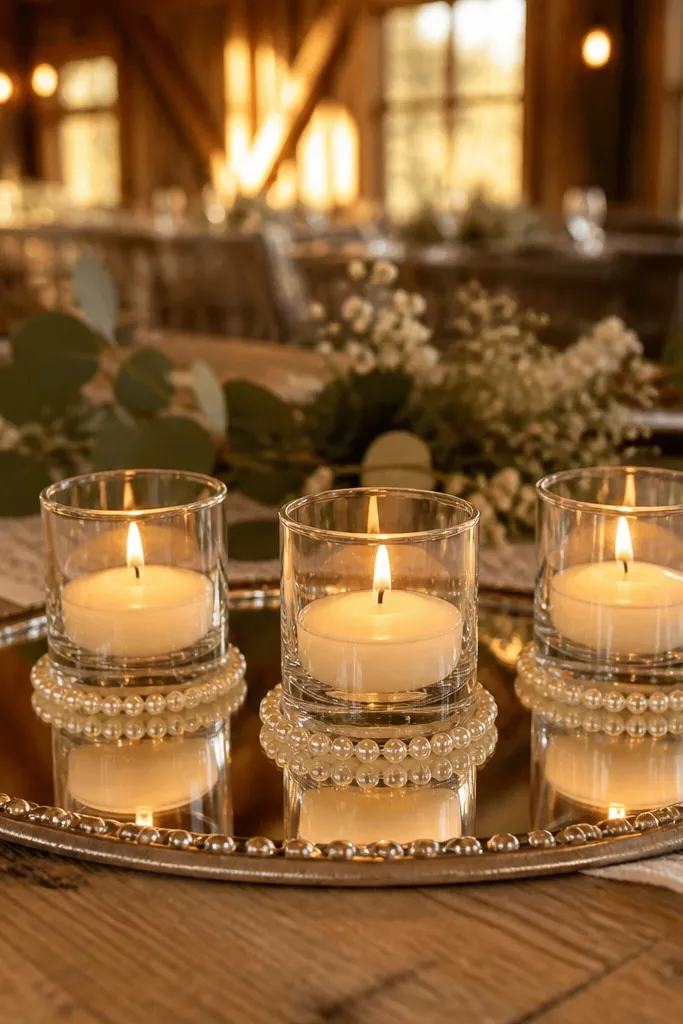
Step 1: Choose a mirror tray about 12-16 inches wide and wipe it clean so the reflection looks crisp. Step 2: Place three votives in glass holders, keeping 2-3 inches between them, then add pearl beads as a low “halo” around the base. Step 3: If the tray feels too slippery, set votive cups on a dab of removable museum wax so they don’t shift during setup.
Use a round or oval mirror tray as your anchor, then place three votive candles spaced evenly. The mirror makes the glow look fuller without adding height, which is exactly what most beginner-friendly setups need. Add a thin ring of pearl beads around the votives so the light scatters softly instead of reflecting in sharp streaks. This works great for round tables and cocktail-style place settings because it stays low and readable from every angle.
Skip thisDon’t stack too many candles on one tray — more flames often look chaotic instead of cozy.
Quick tipIf your venue has dim lighting, skip scented candles; the fragrance oils can smell stronger in enclosed spaces.
2. Tall taper trio in a white ceramic runner trough
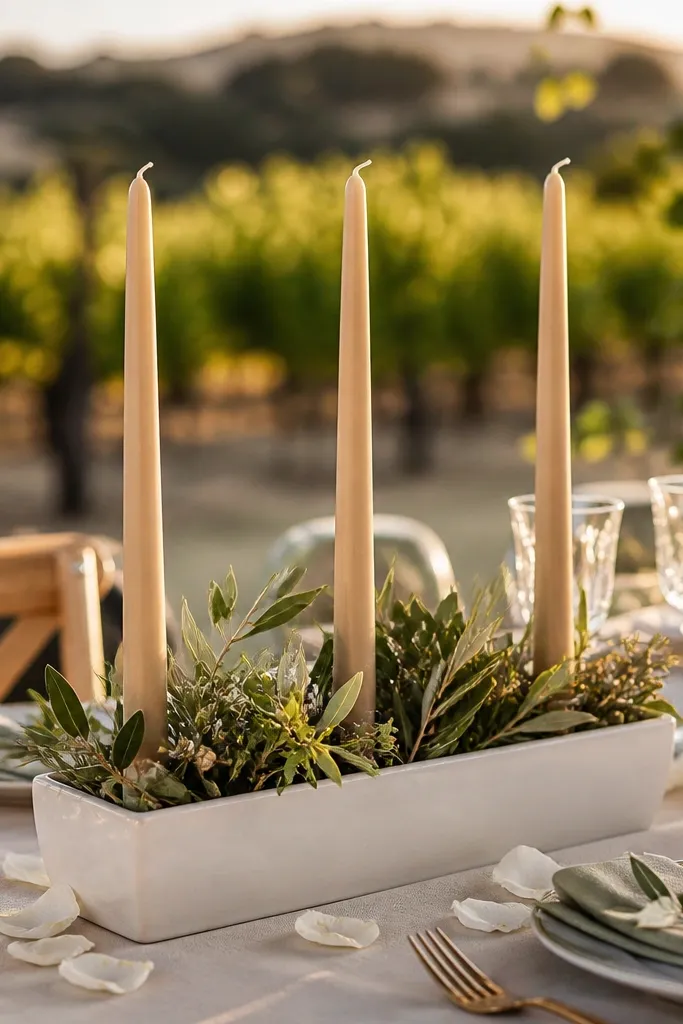
This is a clean, cozy look that still feels elevated: three tapers in a long white ceramic trough, with small greenery sprigs tucked between the candle bases. The white ceramic reflects warm light while keeping the overall palette calm, so your table doesn’t look busy. It’s beginner friendly for beginners wedding tables because the candles are all aligned, and you only have to measure spacing once. Great for head tables and sweetheart tables where you want one strong centerpiece line.
Step 1: Pick a trough about 18-24 inches long and 3-5 inches wide so tapers sit stable. Step 2: Insert three taper candles in matching holders or candle cups, spacing them evenly and keeping the flames centered above the trough. Step 3: Lay short greenery pieces across the trough edges and around the bases, not up the candle stems.
For color harmony, match your greenery to your table linens — dusty green works with neutrals; brighter green works with blush or warm whites.
Don’t use tapers without holders — wax drips and wobbly cups ruin the photo.
3. Lantern cluster with one real candle and two LEDs
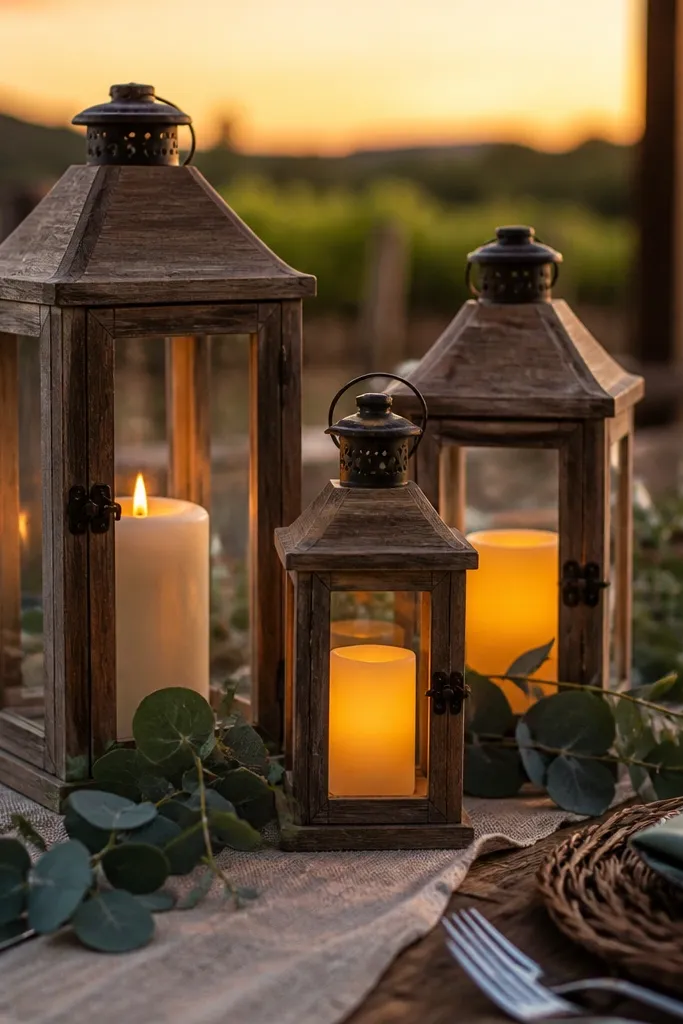
Lanterns look cozy instantly because they frame the flame like a warm window. Choose three small lanterns and place them close enough that their glow overlaps, but not so close that they crowd each other. A mix of one real candle and two LED candles keeps the look warm and reduces risk if your venue is strict. This setup is flattering on camera because the lantern glass creates soft highlights.
Step 1: Select lanterns with similar glass style and height, around 7-10 inches tall, then set them on a tray or directly on a runner. Step 2: Put one real candle inside the largest lantern and use LED candles in the other two. Step 3: Add a thin layer of faux moss or dried moss under lantern bases so the lanterns look grounded.
Use unscented candles in one lantern so any fragrance doesn’t clash with food smells.
Don’t choose lanterns with frosted glass if you want crisp, warm glow — clear glass reads better.
4. Low sage wreath ring with floating candles
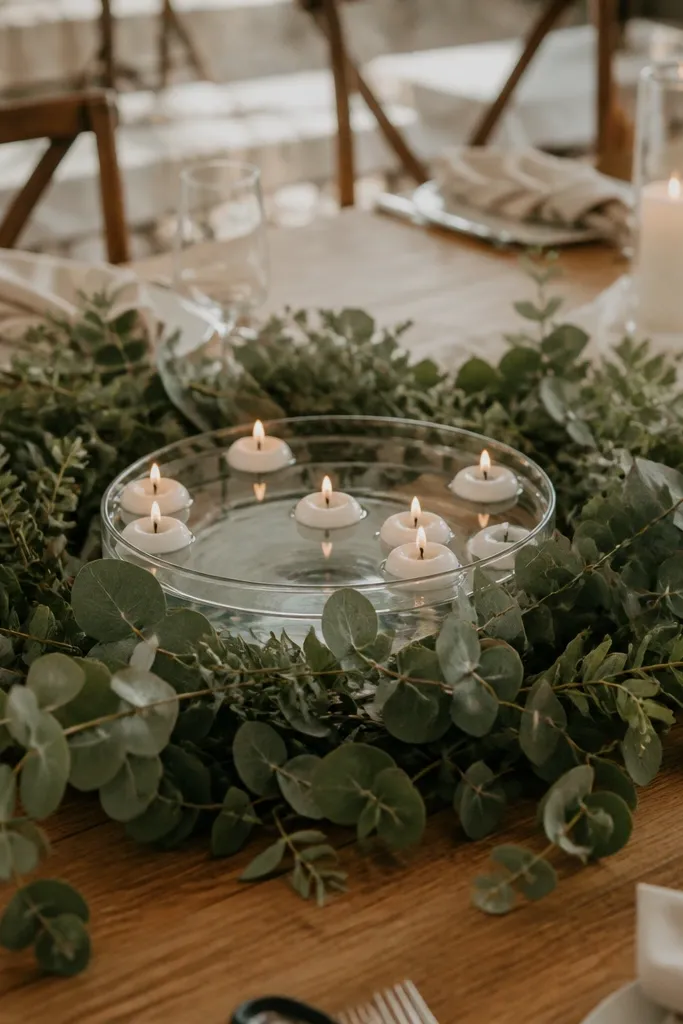
A low wreath ring around a shallow water bowl gives you true cozy glow without tall centerpieces. Floating candles spread light in a way that looks romantic from across the table, and the sage color keeps it soft and natural. It’s a beginner friendly for beginners wedding tables option because you’re not arranging dozens of items — you’re placing a wreath and a few floats. Works especially well for outdoor receptions or rustic venues with natural textures.
Step 1: Build or buy a low sage wreath ring and place it on a shallow glass or metal bowl. Step 2: Fill the bowl with a small amount of water and place 3-5 floating candles so the flames sit evenly. Step 3: Add a few dried eucalyptus leaves around the wreath edge for color depth.
Bring an extra towel for setup — water bowls can leave drips on tablecloths.
Don’t overfill the bowl; too much water makes floating candles drift and look uneven.
5. Black taper candles on a linen runner with gold dust
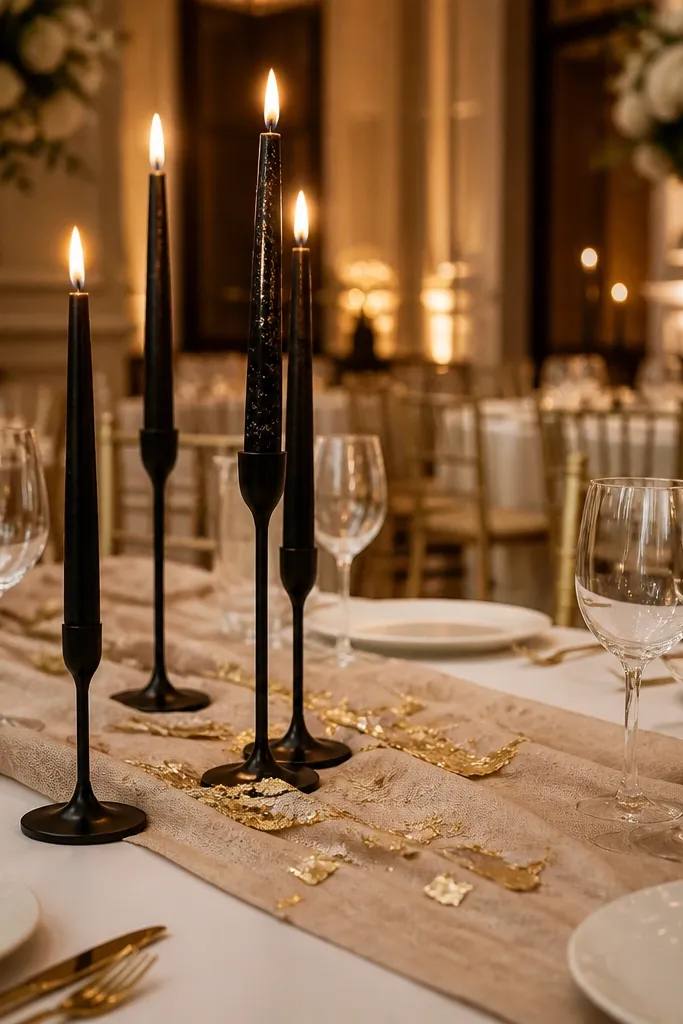
Dark tapers plus warm light looks striking, not heavy, when you keep the rest minimal. Put 2-4 black taper candles in slim holders on a beige linen runner, then add a light gold dust or gold leaf flakes around the base area. The contrast makes the flames pop and photographs beautifully in both warm and neutral venue lighting. It’s ideal for modern rustic tables where you want cozy but not childish.
Step 1: Lay a linen runner and place slim candle holders first, so you can mark spacing before you decorate. Step 2: Add gold leaf flakes in a thin border around the holder bases, keeping it low and concentrated. Step 3: Add one small greenery sprig between holders so everything connects.
Choose LED flicker tapers if your venue doesn’t allow open flames; the contrast still works.
Don’t add lots of extra gold objects — the flakes should look like a whisper, not confetti.
6. Candle-filled glass cloche with dried citrus slices
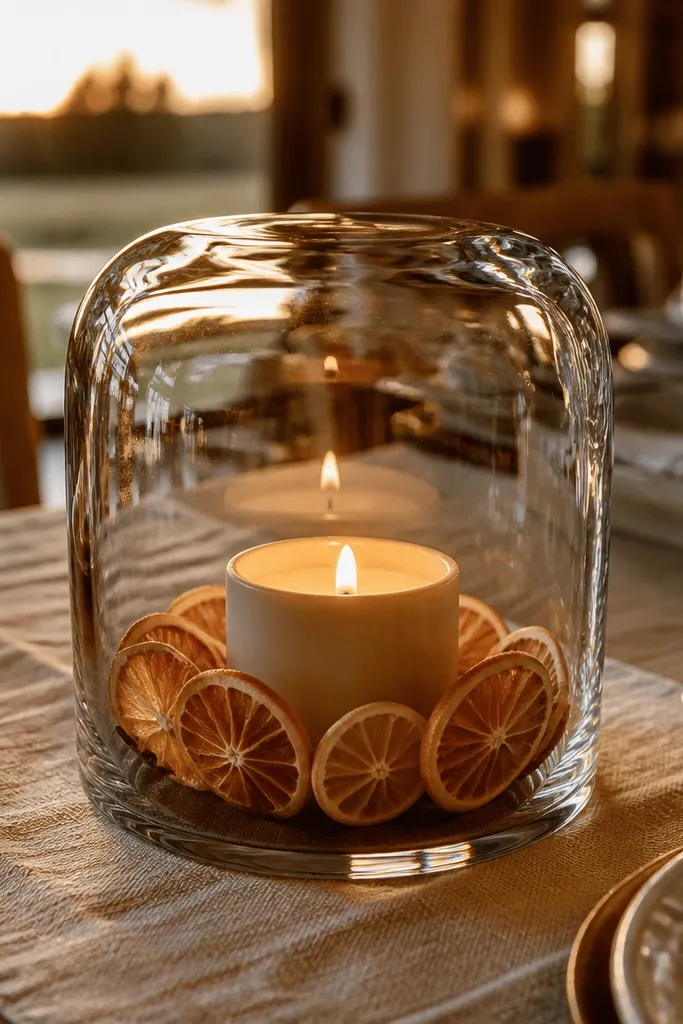
A glass cloche makes the candle feel intentional and “collected,” which is exactly what you want for photogenic centerpieces. Use a cloche over a small candle cup, then tuck dried orange or lemon slices around the base so light catches the translucent edges. The citrus adds warm color without needing a full floral budget. This is beginner friendly for beginners wedding tables because the cloche does the styling for you — everything stays contained and neat.
Step 1: Place a small candle cup or votive on a compact tray, then set the cloche over it. Step 2: Arrange dried citrus slices around the base inside the cloche so they don’t touch the flame. Step 3: Add a single cinnamon stick or two around the tray edge if you want extra texture.
If you’re using open flames, keep the cloche vented or use LED candles inside to avoid heat buildup.
Don’t use wet citrus slices; they can leak and stain the glass.
7. Geometric gold candle cups with mini bud vases
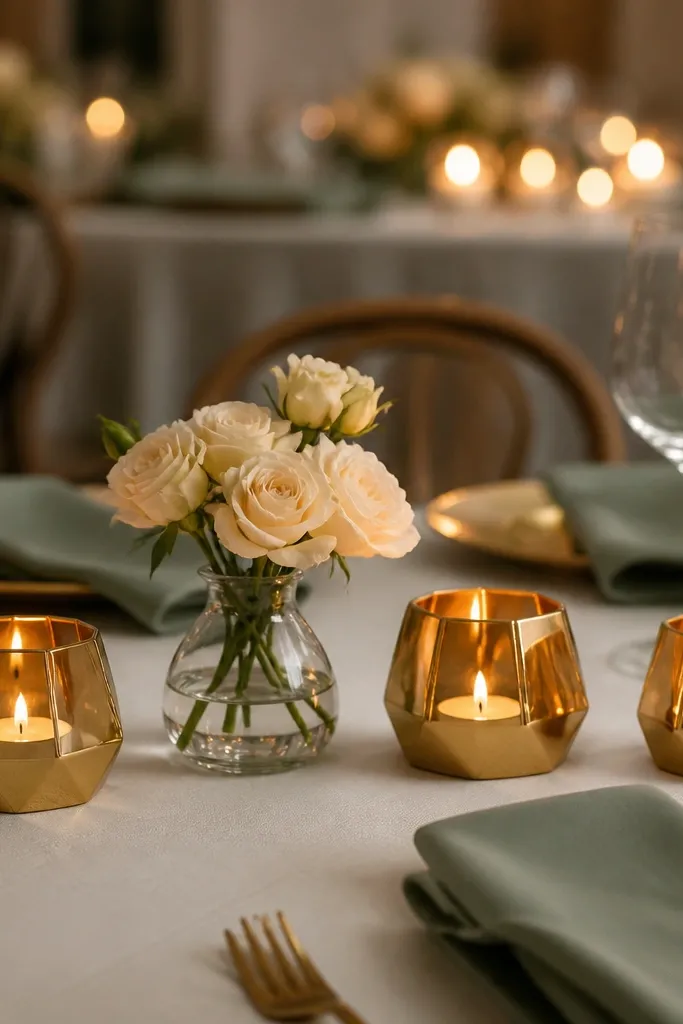
This layout mixes candle glow with tiny floral height, but it stays table-friendly because the bud vases are short. Use geometric gold candle cups and place one mini bud vase between two cups, keeping heights aligned so sightlines stay open. The gold gives you that warm glow reflection even if the candles are small. It’s best for head tables and long farm tables where you want structure and repeatable elements.
Step 1: Choose a shallow tray that fits 3 items in a row and pick candles that are 2-3 inches wide so they look balanced. Step 2: Add two gold candle cups, then place a mini bud vase in the center with one stem or two. Step 3: Fill the tray gaps with small greenery bits so it looks styled, not scattered.
Buy extra bud vases — you’ll use them later for welcome signs or bridal party photos.
Skip tall vases; if the stems rise above candle flames, the whole centerpiece looks top-heavy.
8. Stoneware crock with 5 votives and gray pebbles
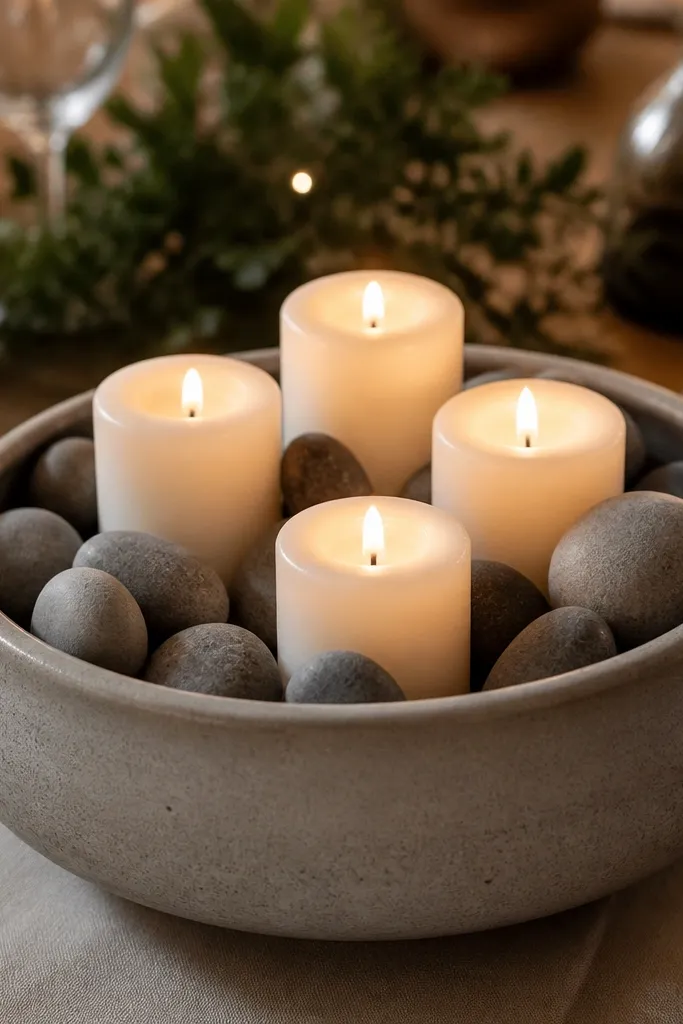
Step 1: Choose a stoneware crock wide enough for 5 votives without crowding (about 8-10 inches across). Step 2: Place votives first, then pour gray pebbles around them until the cups feel secure. Step 3: Add one sprig of rosemary or eucalyptus tucked at the rim for color contrast.
Stoneware and candles is one of the coziest combos because it reads handmade and grounded. Put 5 votives inside a wide stoneware crock, then surround them with gray pebbles for a clean, natural base. The pebbles prevent candles from looking like they’re sitting on empty space, and the crock shape keeps the glow contained. This works well for rustic weddings, winter receptions, and venues with lots of wood or stone.
Skip thisDon’t use bright river rocks; dull gray reads more natural and less “craft store.”
Quick tipIf the pebbles shift, use a thin layer of removable adhesive putty under the votive cups.
9. White hurricane vase with layered candle rings
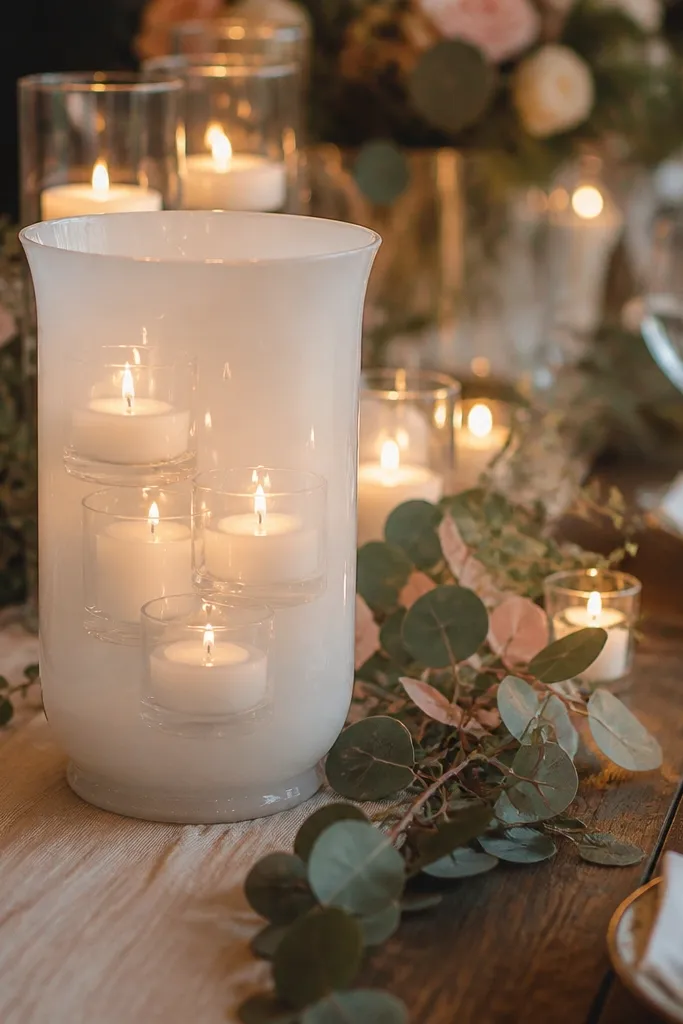
A hurricane vase hides the candle clutter and makes the glow look like it’s coming from a single sculptural object. Stack candle rings or place multiple votives inside at different depths so the light layers up. The white glass or white ceramic look keeps it soft and wedding-appropriate, not industrial. This is beginner friendly for beginners wedding tables because you can repeat one exact size piece across multiple tables for consistency.
Step 1: Pick a hurricane vase around 10-12 inches tall and 6-8 inches wide. Step 2: Add 3-6 votives in a layered arrangement, starting with the deepest placement first, then filling toward the top. Step 3: Tie a thin ribbon around the base or add a few small pearls at the rim for a finished look.
Use LED votives if you want the same glow all night without worrying about candle smoke.
Don’t overstuff — if flames touch or are too close, the light looks smeared.
10. Wood slice base with taper candles in holders
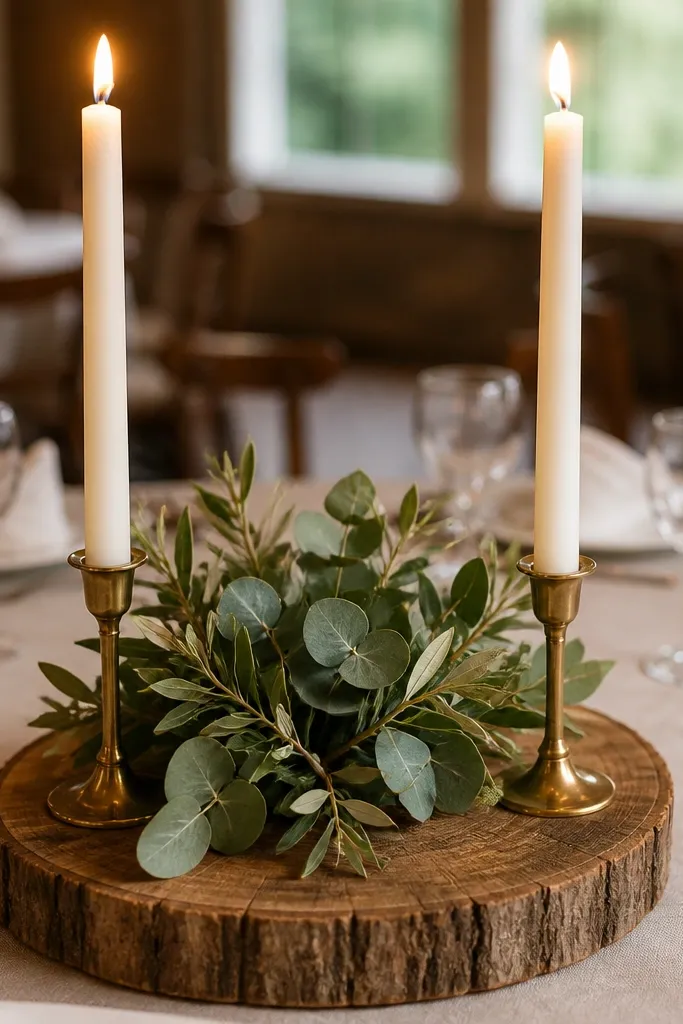
Step 1: Find wood slices 10-14 inches wide with a flat top so holders don’t wobble. Step 2: Place two taper holders at opposite sides, then add one small greenery sprig across the center area. Step 3: Add a small tray liner or felt under the holders if the wood is uneven.
Wood slices add instant warmth, and they make candle holders look like they belong together. Place two tapers on a round wood slice with a small greenery cluster between them. This setup is cozy, rustic, and still clean because the wood slice gives you a defined boundary. Great for guest tables where you want something that looks intentional without a full centerpiece build.
Skip thisDon’t pick slices with deep cracks; they can loosen and make holders unstable.
Quick tipSeal the wood slice edges with clear matte spray if you’re using real candles to reduce soot staining.
11. Terrarium-style candle jars with moss and baby's breath
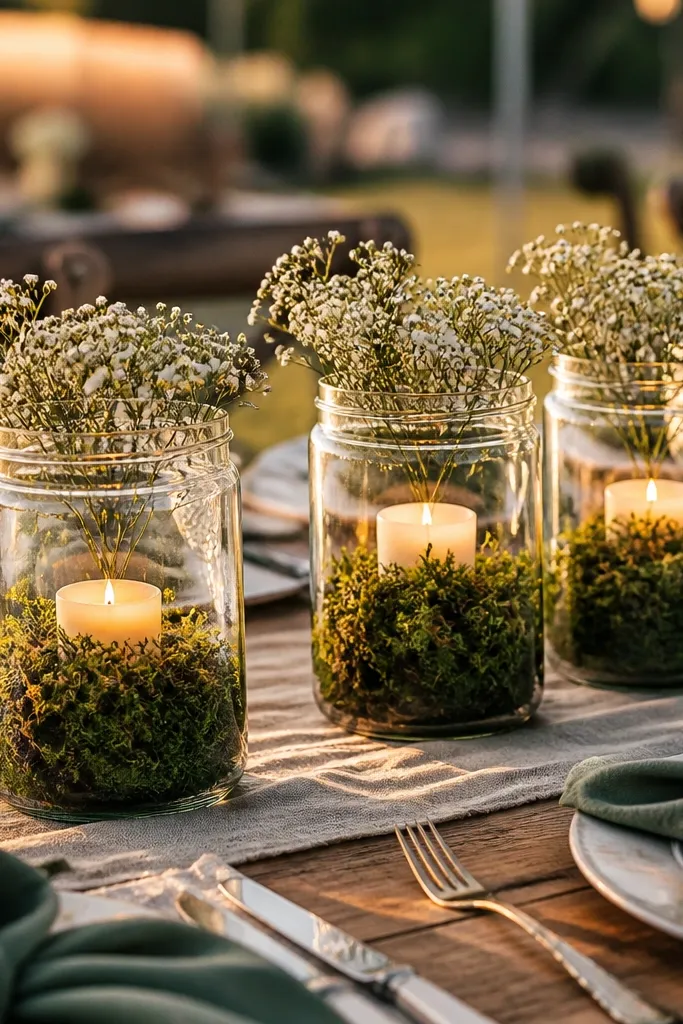
Terrarium jars look like mini gardens, which makes candles feel fresh and not repetitive. Use clear glass jars with a layer of moss at the bottom, then place a votive or LED candle inside. Add a few baby’s breath sprigs on the top edge so the glow catches tiny white petals. This is beginner friendly for beginners wedding tables because jars are self-contained and easy to transport and set up.
Step 1: Choose jars 6-8 inches tall and add dried moss at the bottom so the candle sits centered. Step 2: Place a votive in the middle, then tuck baby’s breath around the top rim area. Step 3: Arrange jars in a line down a runner or as a trio on a small tray for each table.
Use dried baby’s breath if you need the decor to last through travel and early setup.
Avoid loose moss that sheds; it makes a mess on linens.
12. Champagne coupe glasses with tea lights and faux pearl stems
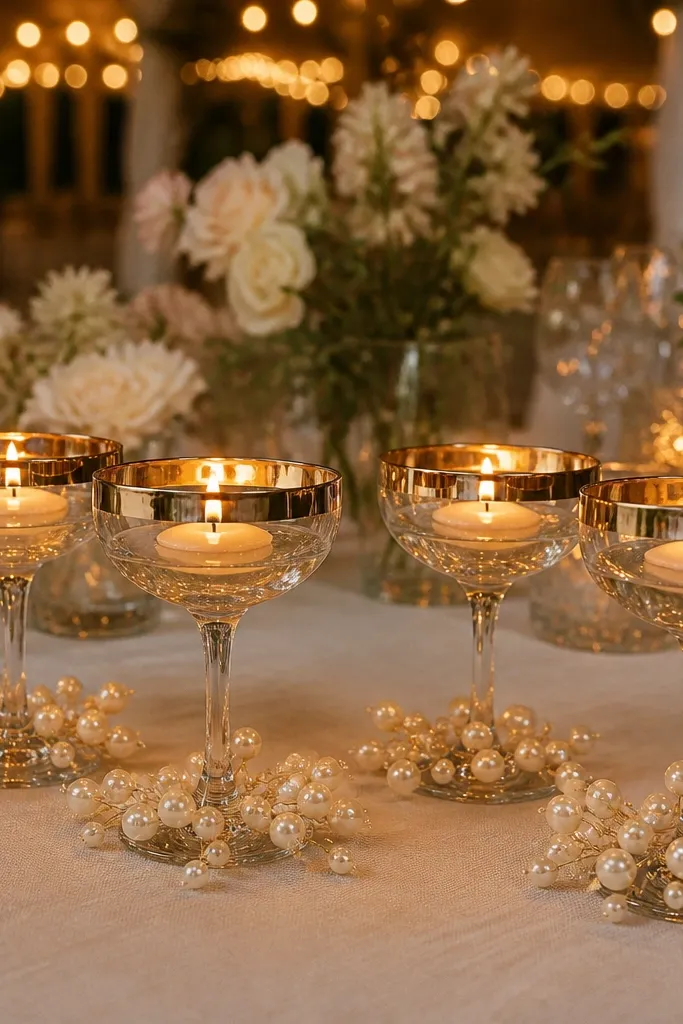
Step 1: Use coupe glasses with thick bases so they feel stable on a table runner. Step 2: Add tea lights, then wrap the outside base with a thin pearl stem or tie a pearl string with a small piece of floral tape. Step 3: Group 3-5 glasses on a tray per table for easy setup.
Coupe glasses are a sneaky way to make tea lights look upscale. Put a tea light inside each coupe, then add a small faux pearl stem or pearl garland around the base so the light reflects and sparkles. The champagne tones read romantic and match a lot of wedding color palettes. This works for tables that need a lot of pieces but still want a cohesive look, like a long buffet table or multiple guest tables.
Skip thisDon’t place coupes too far apart; the glow should overlap slightly to look intentional.
Quick tipIf you’re worried about wax drips, use LED tea lights — the glass still makes them glow.
13. Tall candelabra with low floral and floating votive base
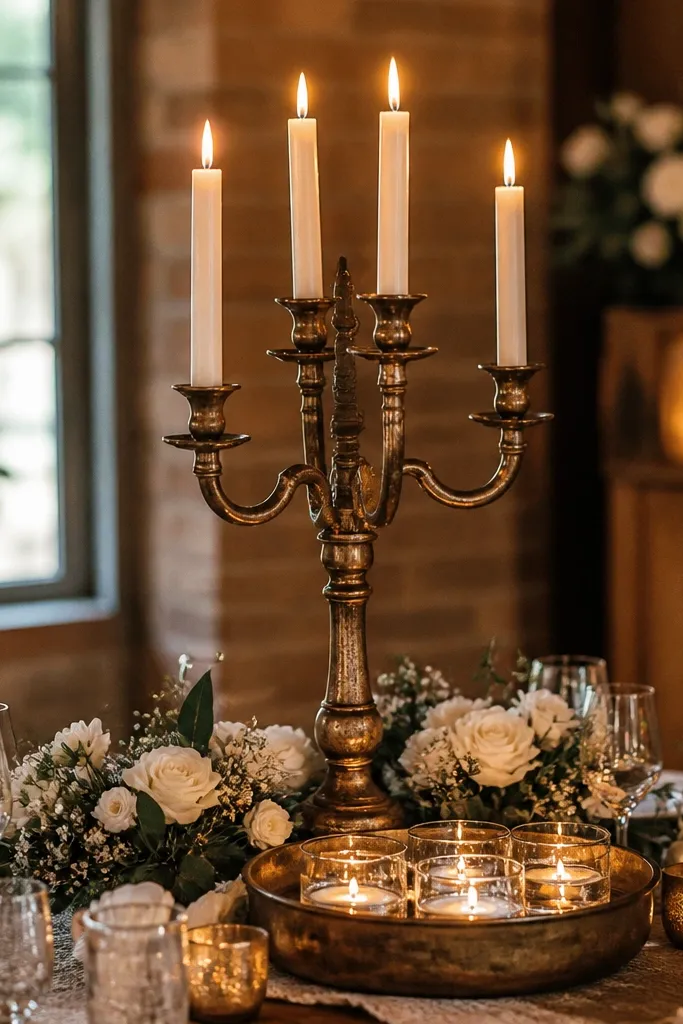
A candelabra creates drama without clutter if you keep the floral low. Use a tall candelabra with 3-5 candles, then add a ring of low votives around the base on a tray or plate. The result is tall cozy glow plus a grounded base that looks full from the front. It’s a good match for sweetheart tables and indoor venues with strong lighting where you want the centerpiece to stand out.
Step 1: Pick a candelabra that’s stable and not wobbly on your tabletop, then place it on a round tray to catch any wax. Step 2: Add low greenery or a small horizontal bouquet at the base so it stays below candle height. Step 3: Add 6-8 votives around the base on the tray, spaced evenly in a circle.
Use unscented candles so the floral scent doesn’t fight the wax smell.
Don’t let greenery climb up the candelabra arms; it blocks the glow.
14. Single oversized pillar candle in a bed of dried leaves
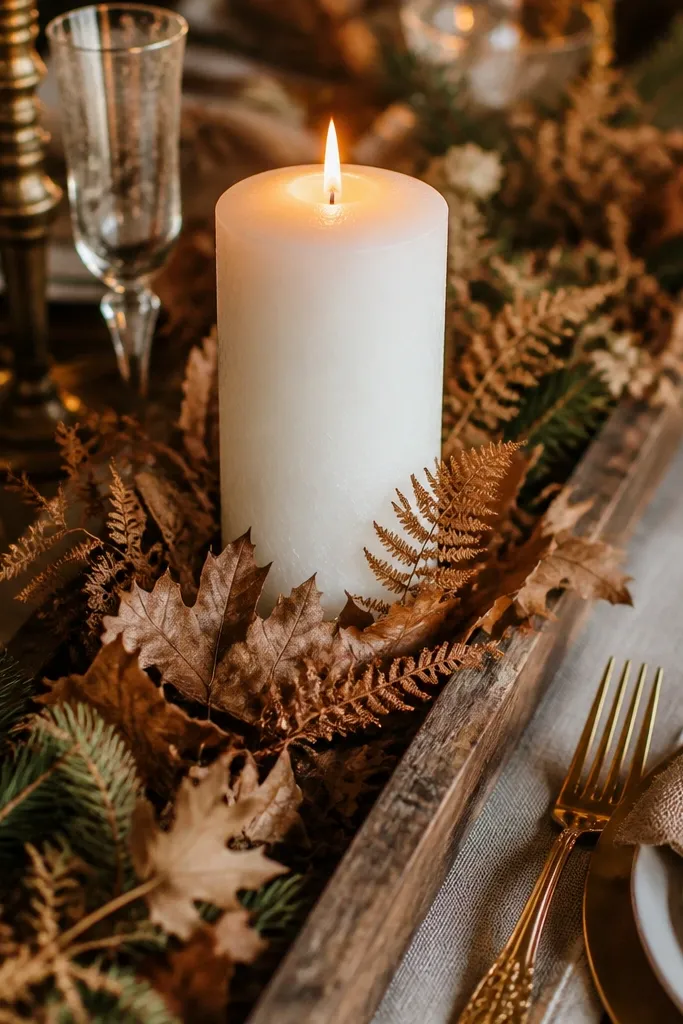
This is the cozy-glow option for people who hate complicated arrangements. One oversized pillar candle on a bed of dried leaves makes a strong focal point, and the leaves create a warm, textured halo around the flame. Add a few pine sprigs or small twigs to keep the look seasonal, even if your wedding palette is neutral. It reads beautifully from afar because there’s one clear centerpiece element.
Step 1: Choose a pillar candle about 6 inches tall with a stable base, then set it on a round tray. Step 2: Arrange dried leaves around the base in a shallow ring, keeping them away from the flame edges. Step 3: Add a few pine sprigs tucked between leaves for color depth and texture.
Use LED pillar if you’re using dried leaves; it keeps the look without heat risk.
Don’t use glossy leaves or anything dusty — it looks messy under candle light.
15. Blush glass votive steps on a cake stand
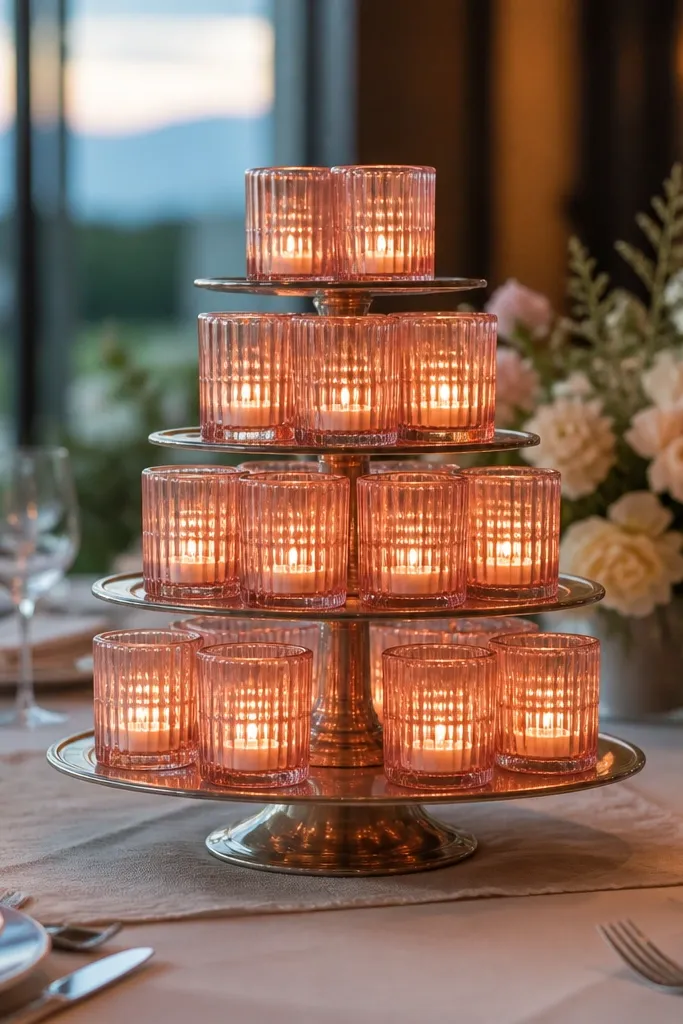
Step 1: Pick a cake stand with at least two tiers, then clean it so the glass looks bright. Step 2: Fill the top tier with one larger votive, then place smaller votives on the lower tier in a triangle or straight line. Step 3: Add a few blush ribbon loops at the base of the stand if you want a finishing touch that’s easy to see in photos.
A cake stand makes candles feel like a styled centerpiece instead of scattered decor. Use a tiered cake stand with blush-tinted glass votives, stacking them so the glow steps upward. The blush glass softens the light and looks romantic in photos, especially with neutral linens. This is beginner friendly for beginners wedding tables because you can set it once and repeat the same stand on each table.
Skip thisDon’t use too many different candle holders; stick to one glass style for cohesion.
Quick tipKeep candle flames centered on tiers; off-center placements look lopsided fast.
16. Terracotta tray with tealight ring and rosemary
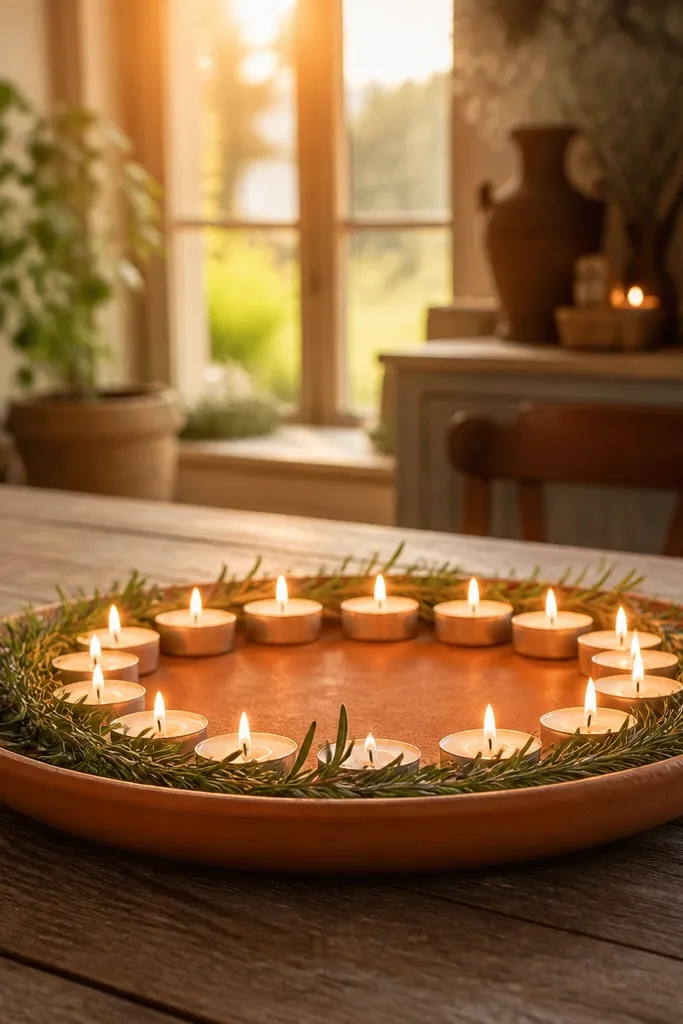
Terracotta makes candlelight look warmer because it has a natural matte texture. Arrange tealights in a ring on a terracotta tray and add rosemary sprigs around the outer edge like a border. The green and warm clay color combo reads cozy and rustic without needing flowers. This works for farmhouse tables and destination weddings where you want a natural look that still photographs well.
Step 1: Choose a terracotta tray 14-18 inches wide and place tealights evenly in a ring, leaving equal gaps. Step 2: Cut rosemary sprigs to fit the tray perimeter and tuck them between tealights and the tray edge. Step 3: Add a small pinch of coarse salt or faux sand in the center for a textured glow effect.
Coarse salt looks great in photos but can scatter; use LED tealights to avoid real flame issues.
Don’t overstuff the tray with extra candles; the ring shape is what makes it look intentional.
17. Hydrangea-color candles in gradient glass holders
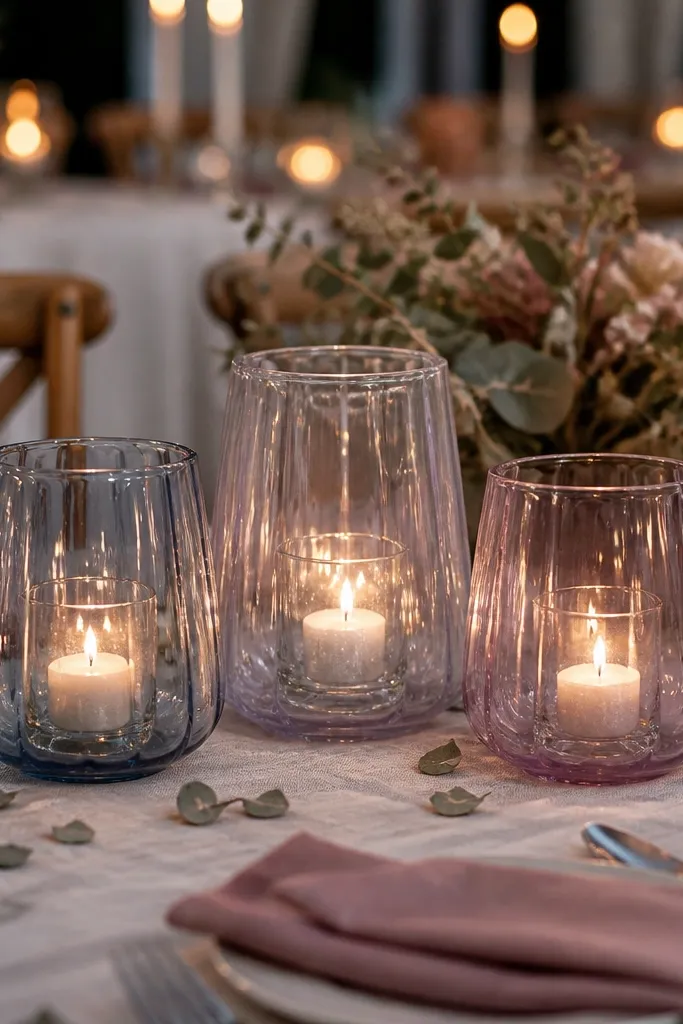
Step 1: Choose 5-7 matching glass holders and decide the gradient order before you set them down. Step 2: Place each candle in its holder, then line holders on a tray or directly on a runner with consistent spacing. Step 3: Add one neutral element like white pebbles or a strip of linen so the gradient doesn’t feel like a craft project.
A gradient of candle colors gives you a polished look that still feels cozy, especially with wedding palettes that include blue or lavender. Use glass holders with candle inserts, arranged from pale to deeper blue-purple across the centerpiece. The different tones create depth so your candles look more expensive than they are. This layout is beginner friendly for beginners wedding tables because you’re not arranging flowers — you’re placing a color-ordered set.
Skip thisDon’t mix random colors; gradients need a clear start and end color.
Quick tipMatch your napkins and candle colors lightly; exact matches look staged, while close tones look natural.
18. Coastal candle row with white sand and starfish accents
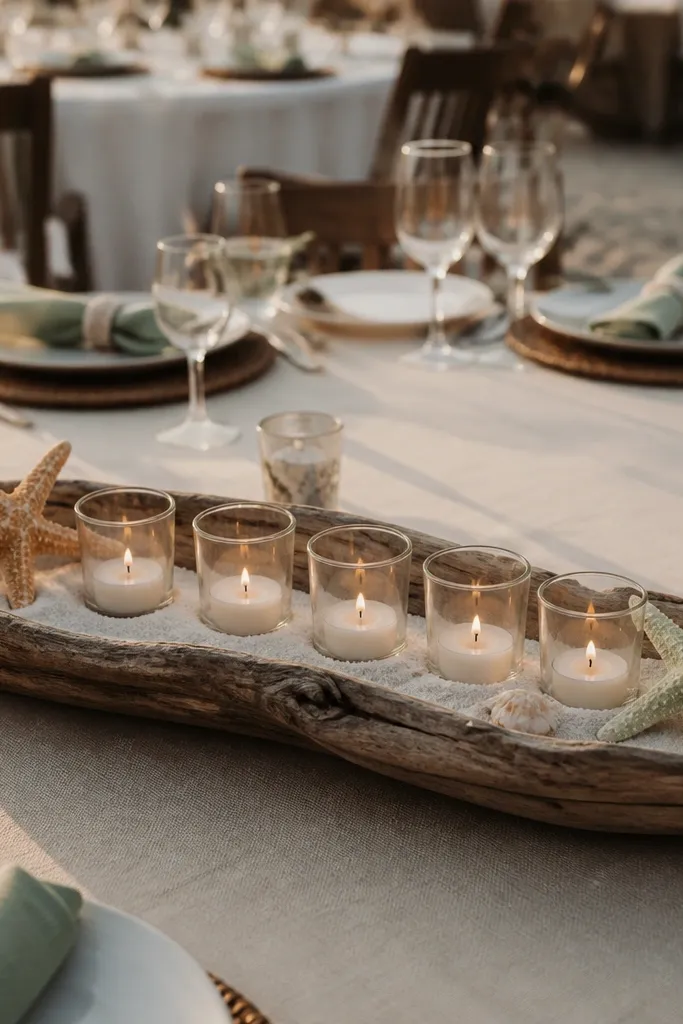
If you’re doing a beachy wedding, white sand makes candlelight look soft and creamy instead of harsh. Arrange tealights in a straight line on a shallow tray filled with white sand, then add a few starfish or shell-shaped ornaments at the ends. Keep shells minimal so the centerpiece reads classy, not beach souvenir. This is beginner friendly for beginners wedding tables because it’s one linear placement — no complex symmetry tricks.
Step 1: Use a shallow tray with raised edges, add a thin layer of white sand, and press it flat. Step 2: Set tealights upright across the tray, using LED candles if sand is dry and dusty. Step 3: Place one shell accent at each end and one small accent off-center for balance.
Use a tray liner under the sand if your tablecloth is delicate — sand grains can stain.
Skip lots of shells; they clutter the glow and steal attention from the candles.
19. Candle and flower mix in a low rectangular planter
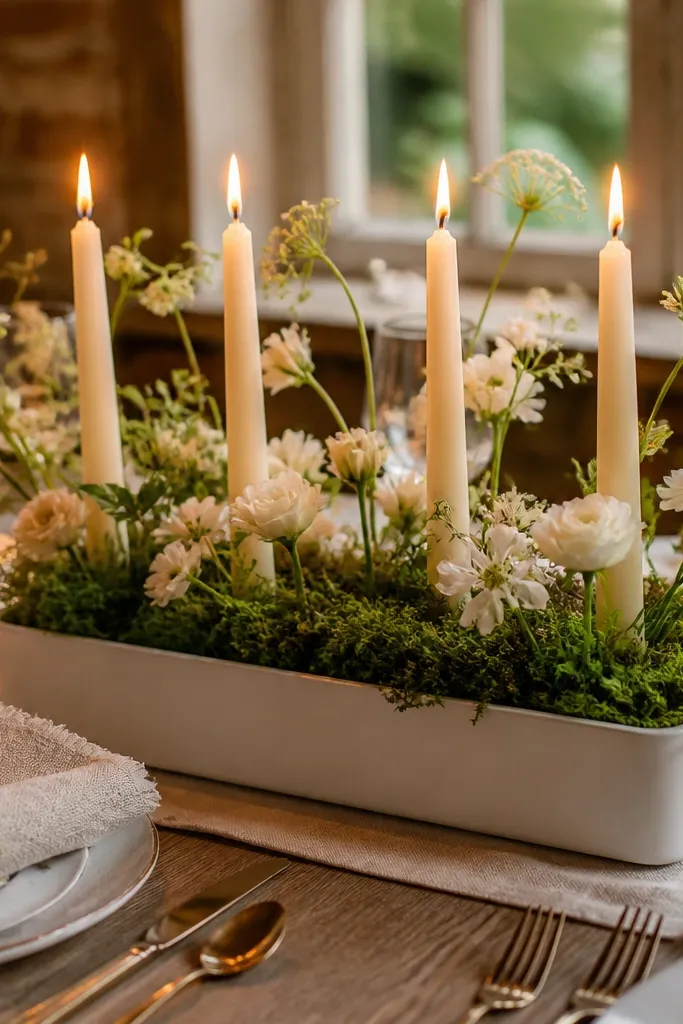
Step 1: Choose a planter about 14-20 inches long and keep the candle holders low (votives or short cups). Step 2: Place candles first, then insert short stems around them so no flower rises above the candle tops. Step 3: Add filler greenery along the planter rim to hide the base so it looks full from the front.
A low rectangular planter lets you combine candles and small florals without height drama. Place 3-5 candles along the planter length, leaving space between them for short flower stems and greenery. The planter walls keep everything contained, which makes it beginner friendly for beginners wedding tables when you’re still learning how to space decor. It’s especially good for long tables because the shape naturally repeats across sections.
Skip thisDon’t use tall stems; they block candle flames and create awkward sightlines.
Quick tipBring a small spray bottle for greenery; a light mist helps it look fresh in photos.
20. Gold wire votive holders with clear cups
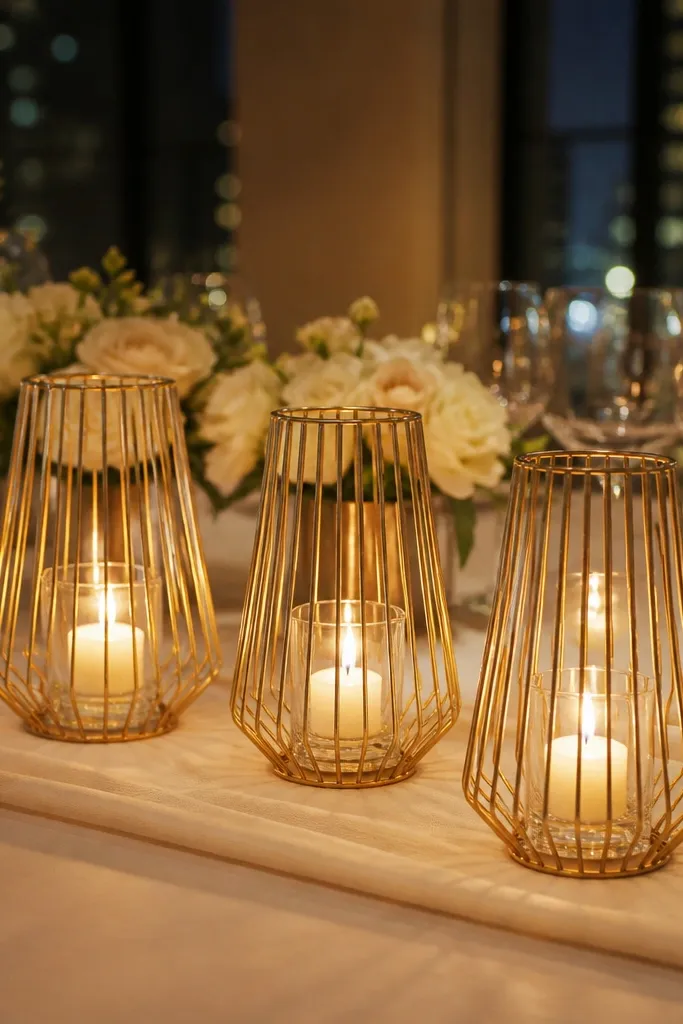
Gold wire holders add shape and airiness, so your centerpiece looks photogenic even when candles are small. Use clear cups inside gold wire frames to keep flames visible and warm. This combo reads cozy and modern, and it doesn’t require a lot of extra decor because the holder is the design. It works well for city weddings where you want candle glow but the decor budget is tight.
Step 1: Pick wire holders that are sturdy and have a flat base, then place them on a tray or runner. Step 2: Add clear cups with votives inside so the flame is centered. Step 3: Tie a small ribbon or add a strip of greenery between holders so the group looks intentional.
If you’re using LED candles, pick ones with realistic flicker mode so the light movement still looks warm.
Avoid flimsy wire frames; they tip easily when guests brush the table.
21. White taper candles in a tight circle of eucalyptus
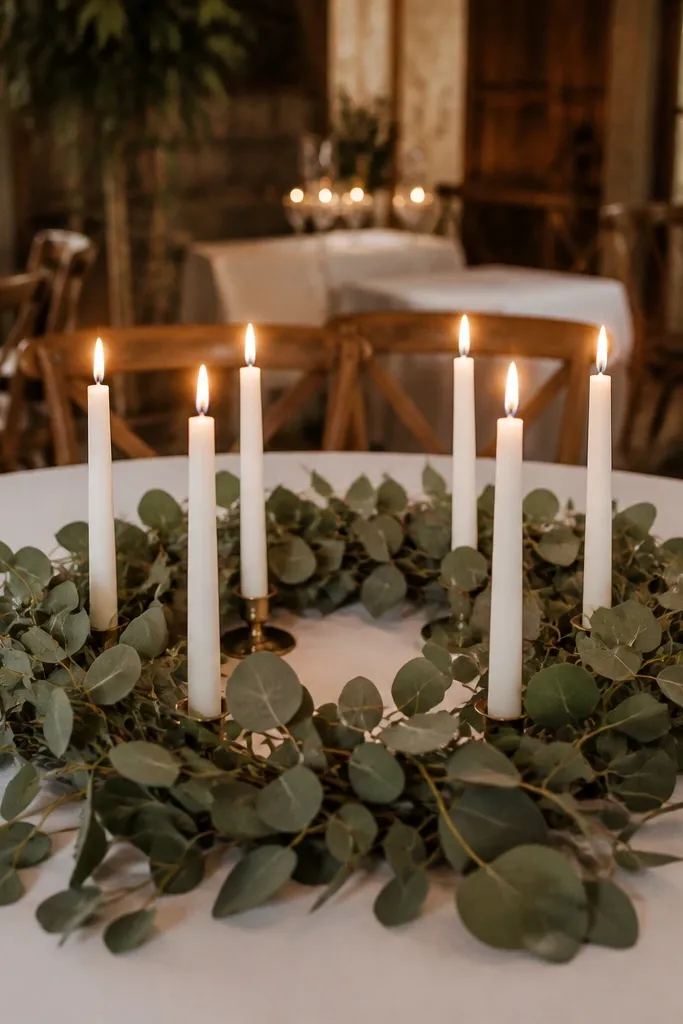
A tight circle of eucalyptus around white tapers creates a halo effect that reads romantic and clean. The candles stay tall enough to glow, but the surrounding greenery keeps the centerpiece cohesive. This is beginner friendly for beginners wedding tables because the circle is the organizing principle — you don’t need to “design” every gap. It’s perfect for winter weddings and any table where you want a calm, neutral look with strong photo impact.
Step 1: Arrange 4-6 taper holders in a circle on a round tray, then place eucalyptus leaves around the holders so they touch lightly. Step 2: Insert candles and make sure flames sit above open space in the center. Step 3: Add one small filler element like white berries or a few pale flowers only if you need extra contrast.
Use fresh eucalyptus only if you can set up close to ceremony time; dried eucalyptus looks great too and lasts longer.
Don’t let eucalyptus cover the candle holders — it makes the flame look blocked and messy.
22. Color-blocked candle trio on a black slate board
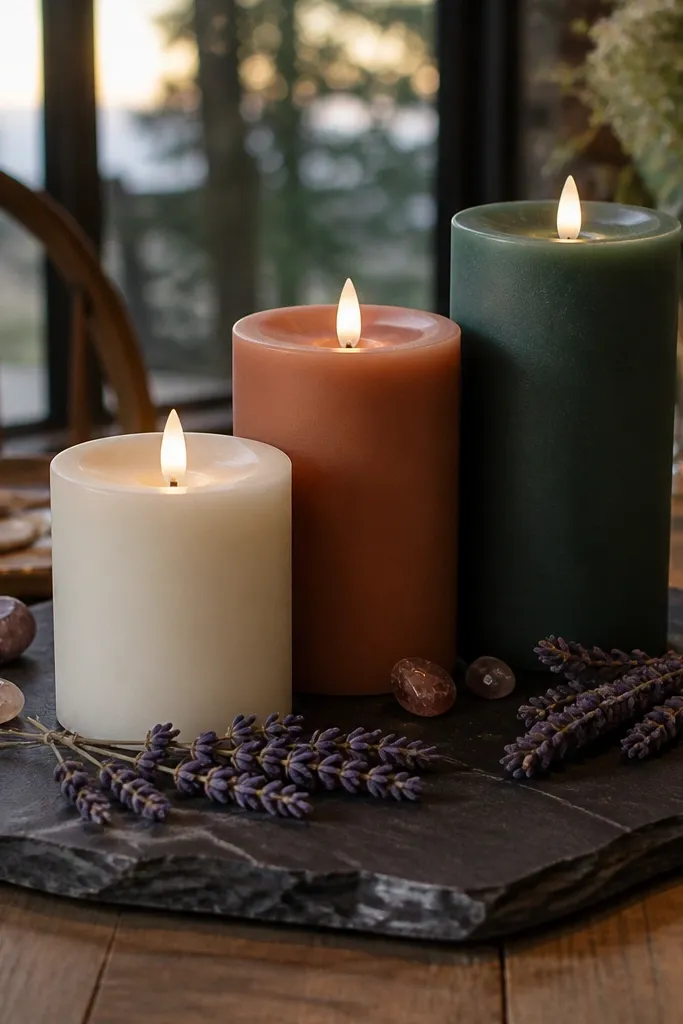
Step 1: Buy a slate board about 12-18 inches long and place it centered on the table. Step 2: Set three candles in holders across the board with even spacing, then add color accents at the corners or near the bases. Step 3: Wipe the slate surface before setup so dust doesn’t show up in photos.
Black slate makes candlelight look richer and more dramatic, especially with warm white LED flames. Place three candles on the slate board and add a few small color accents like dried flowers or colored stones — keep it minimal. The slate gives you a strong surface that photographs well and hides table clutter. This is a great option for beginner-friendly tables when you want a “designed” look without complicated builds.
Skip thisDon’t use a slate board that sheds crumbs or flakes; it will look sloppy around the candles.
Quick tipUse LED candles if your venue has strict rules; slate still makes the glow look deep.
23. Clear glass cylinder with sand and one candle inside
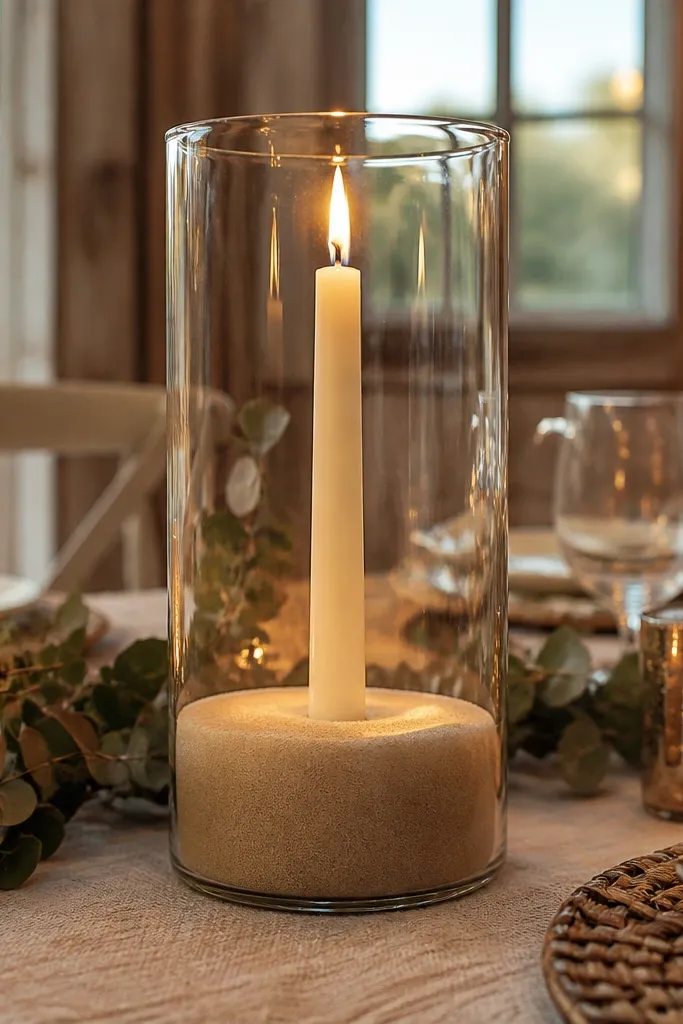
A clear cylinder is simple, graphic, and very photogenic. Fill it with sand and place one candle in the center so the light looks like it’s trapped inside a glowing bubble. This creates cozy glow without multiple flames, which reduces risk and keeps the table looking tidy. It’s beginner friendly for beginners wedding tables because you’re only placing one candle per centerpiece element, and the cylinder shape does the styling.
Step 1: Choose a cylinder 10-14 inches tall and 5-7 inches wide, then fill with sand to about 2-3 inches from the top. Step 2: Center a votive or LED candle on a small saucer inside the cylinder. Step 3: Add a thin layer of decorative sand or tiny shells around the candle base so it looks finished.
Use warm white LED candles for even glow; real flames can feel inconsistent inside glass.
Don’t overfill the cylinder with sand up to the top — it can look like a craft jar instead of a centerpiece.
24. Candle cluster with thin birch branches and white votives
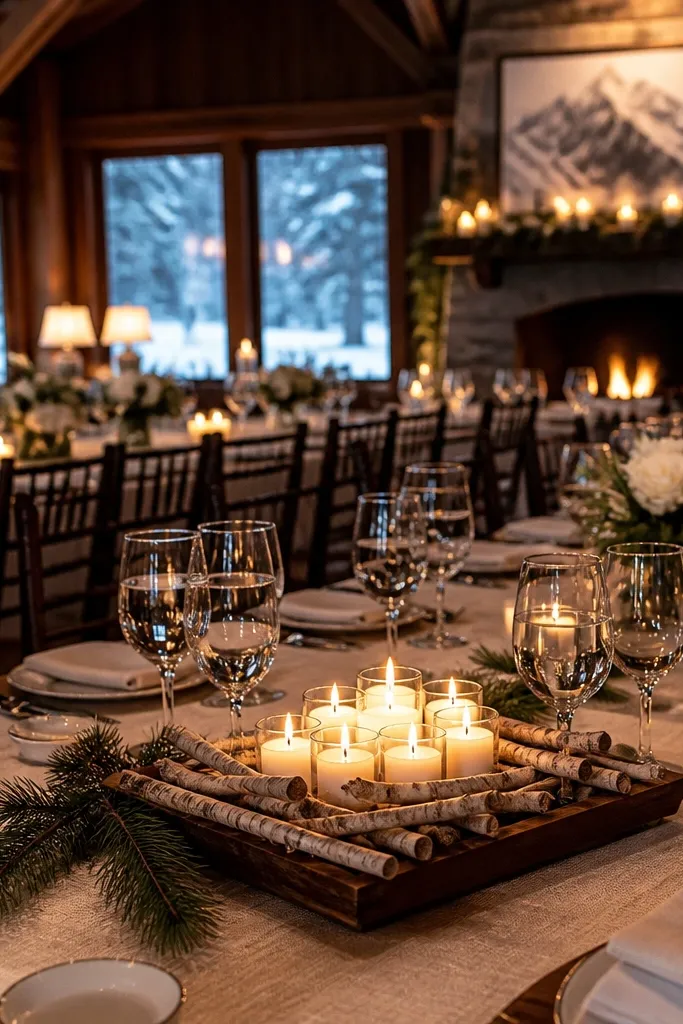
Step 1: Place votives on a round tray and keep the flame height consistent by using the same votive cup type. Step 2: Tuck birch branches between votives and the tray edge, then adjust until the branches form a gentle arc. Step 3: Add a small strip of linen under the tray so the setup looks intentional even if the table is dark.
Birch branches bring height without adding clutter, and white votives keep the glow soft. Build a cluster on a tray: place 6-9 white votives in a tight formation, then tuck thin birch branches around the outside like a frame. It looks cozy, wintery, and clean in photos because birch bark lines add texture. This is beginner friendly for beginners wedding tables because the cluster is dense and forgiving — small spacing mistakes aren’t obvious.
Skip thisDon’t use thick branches; they block the candle glow and make the centerpiece look heavy.
Quick tipIf you’re traveling, pack branches flat with paper sleeves so they don’t snap.
25. Sculptural candle cups on a long runner with spaced stones
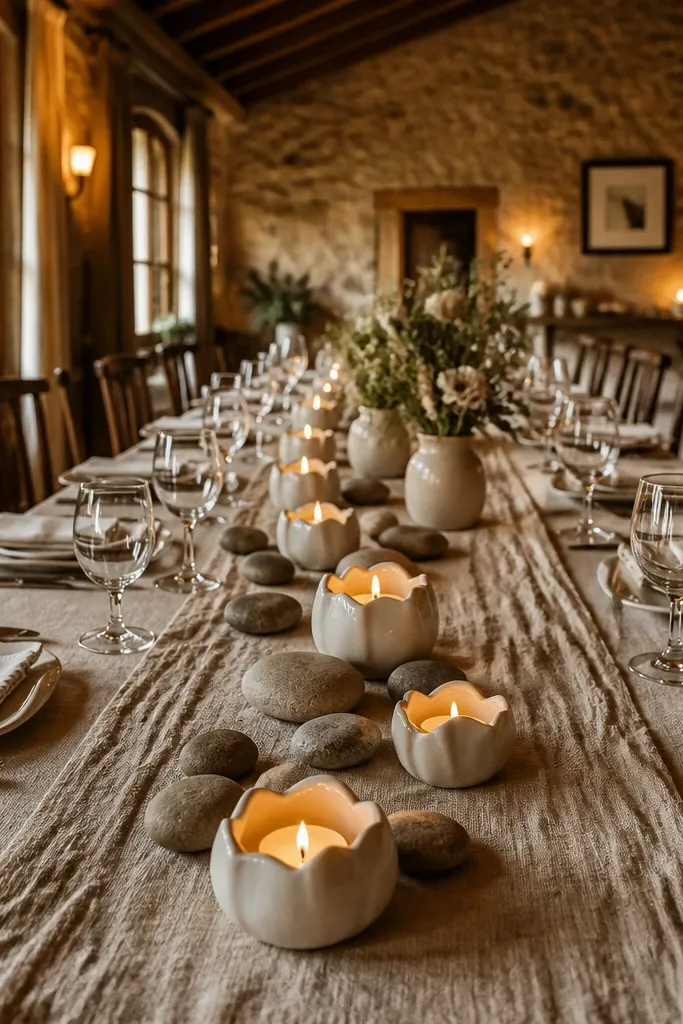
Step 1: Lay the runner and mark repeating positions along it with tape so your candles land evenly. Step 2: Place candle cups at each mark, then add small clusters of stones between cups. Step 3: Add one greenery sprig at the start and end only — too much greenery makes it look cluttered on long tables.
For long tables, a spaced runner layout looks best because guests can see each other while still getting candle glow. Use a long runner and place candle cups in a repeating pattern, with a few stones or pebbles between them to add texture. The stones catch light and make the arrangement feel styled rather than sparse. This is beginner friendly for beginners wedding tables because you can measure and repeat a simple unit every 18-24 inches.
Skip thisDon’t place candles too close to the plates; guests bump them when they reach for food.
Quick tipUse LED candles with a consistent brightness so the glow doesn’t vary across the table.



