1. Terracotta + Cream Linen Table Runners With Jute Edges
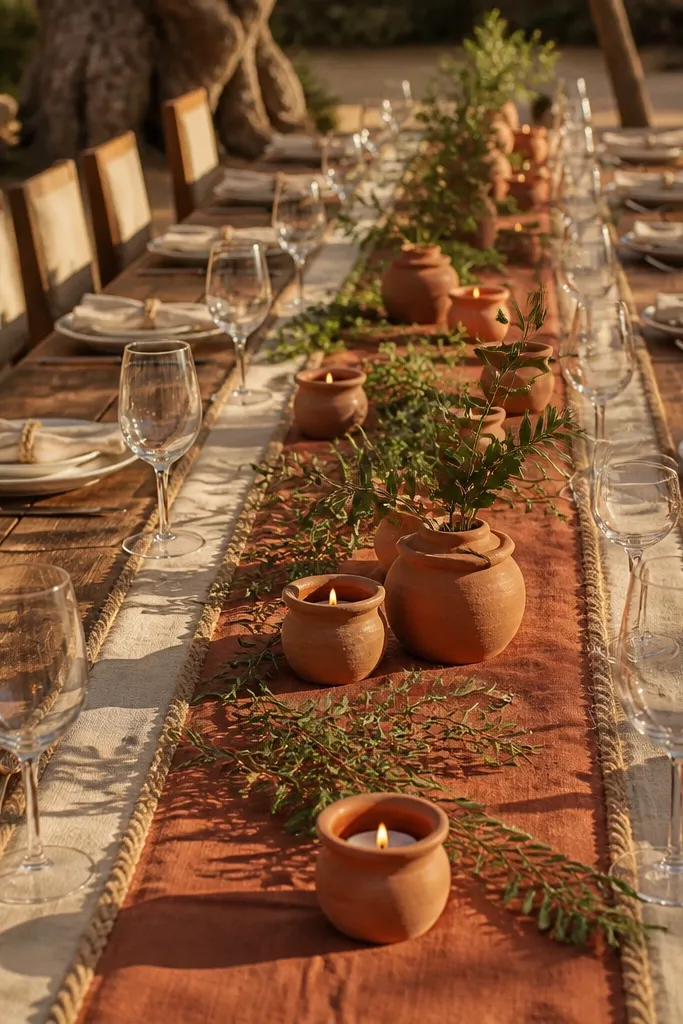
This is the quickest way to make rustic tables look styled instead of plain. The linen gives softness and movement, while the jute edge reads farmhouse without looking messy. In photos, the terracotta pulls warmth into skin tones, and the cream keeps the table from looking heavy. It works for long banquet tables, round farm tables, and even mismatched chairs because the runner ties everything together visually. Best for late spring through fall when the palette feels natural against outdoor greenery.
Start by measuring table length and choosing a runner width that hangs 6-10 inches off each side for that draped look. Then sew or pin jute trim along the edge so it stays straight when you transport it. Finally, steam the linen hard before set-up so wrinkles don’t steal attention from your centerpieces.
Pack runners rolled around a pool noodle so the linen creases don’t set.
Avoid thin, shiny fabric — it reads cheap under warm lights.
2. Macramé Aisle Runner With Linen Fringe Sides
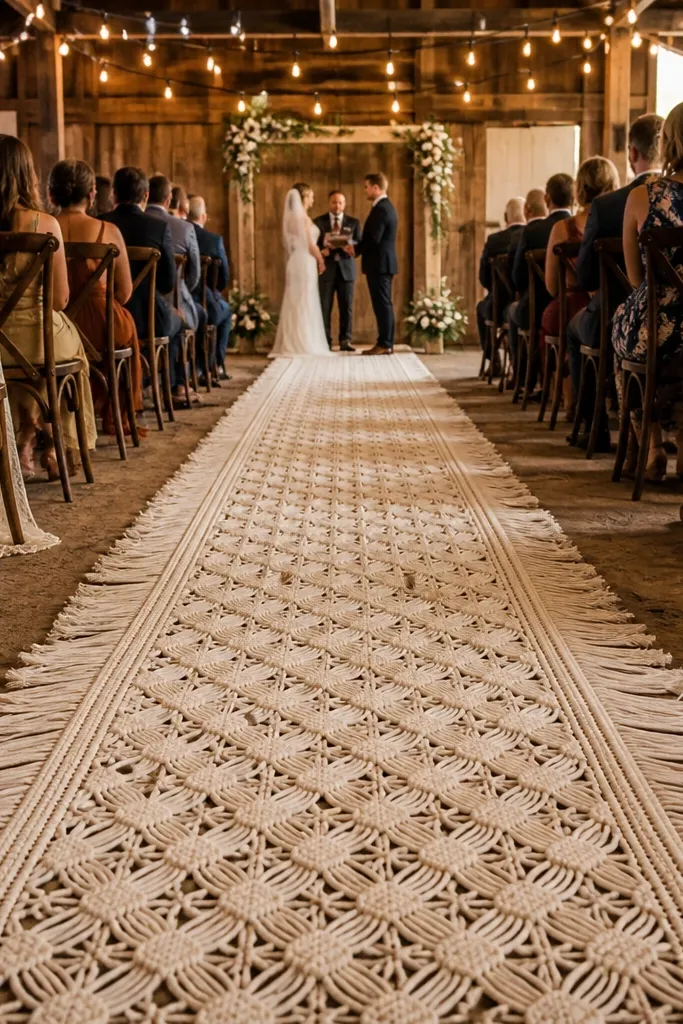
A macramé aisle runner makes the ceremony instantly photogenic because it creates a repeating pattern guests walk into. The linen fringe softens the texture so the aisle looks romantic instead of overly boho-chunky. In wide ceremony photos, the runner frames the couple; in close shots, the knot texture catches warm light. It suits outdoor ceremonies, barn doorways, and indoor stages where you need height and pattern without building a full arch. Do it when you want the ceremony to look “designed” even if your venue is simple.
Start by laying the runner from the front of the aisle back toward seating so you can adjust centering before anything is secured. Then anchor with sandbags or weighted clips at both ends and every few feet so wind can’t lift it. Finally, add a small runner-side line of greenery or dried stems only if you can keep it symmetrical on both sides.
Quick tipBring a fabric steamer and a lint roller — macramé grabs dust fast on arrival.
Skip thisDon’t place it directly on rough gravel without a protective base — it snags and frays.
3. Rust Arch With Branchy Greenery and Terracotta Florals
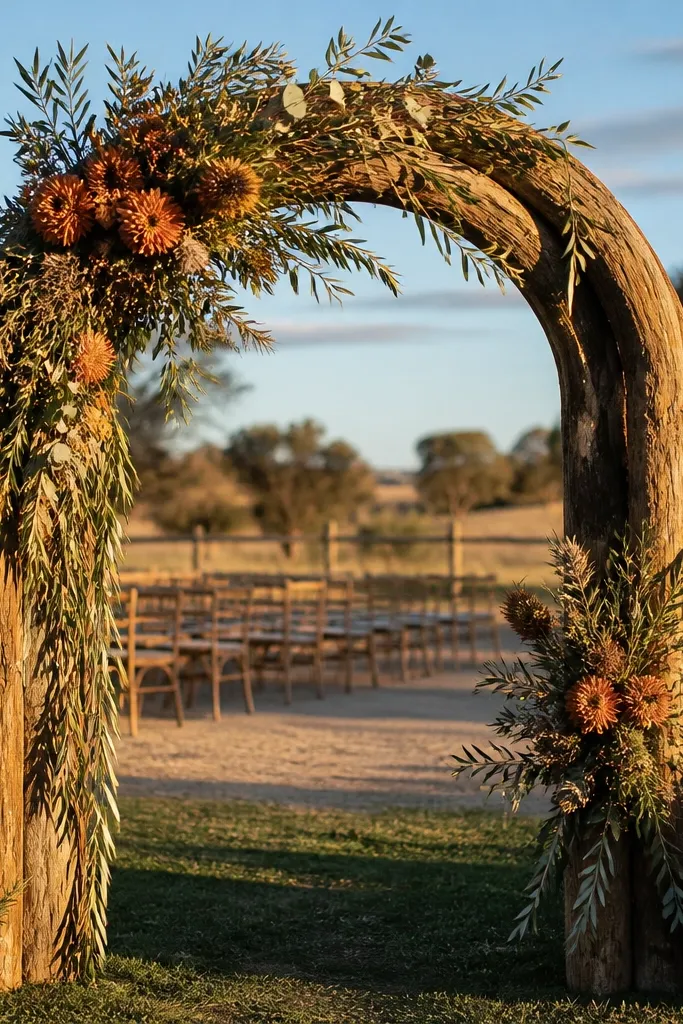
A rustic arch is the anchor for your entire wedding photo set, and terracotta florals keep it from looking like a generic barn backdrop. Branchy greenery adds movement and depth, so the arch doesn’t look flat behind portraits. This combo photographs beautifully in golden hour because warm petals reflect light without turning orange. It works best when your arch has a visible frame color — rust paint, dark stain, or iron — so the greenery doesn’t disappear against a neutral background. If your venue has plain walls or a blank outdoor fence, this is the fastest fix.
Start by choosing an arch size that matches your venue view: for most outdoor ceremonies, aim for about 7-9 feet wide so it fills photos without stretching. Then build the greenery first, wiring stems in layers from inside out so the branches create a natural V-shape. Finally, add terracotta florals sparingly in clusters at the top and sides, then step back and check from where guests will stand.
Use floral foam only if you can keep it covered; otherwise use chicken wire grids and wrap stems for a cleaner look.
Avoid all-white florals against a brown frame — it can look stark instead of boho.
4. Lantern Clusters on Low Crates for Walkway Lighting
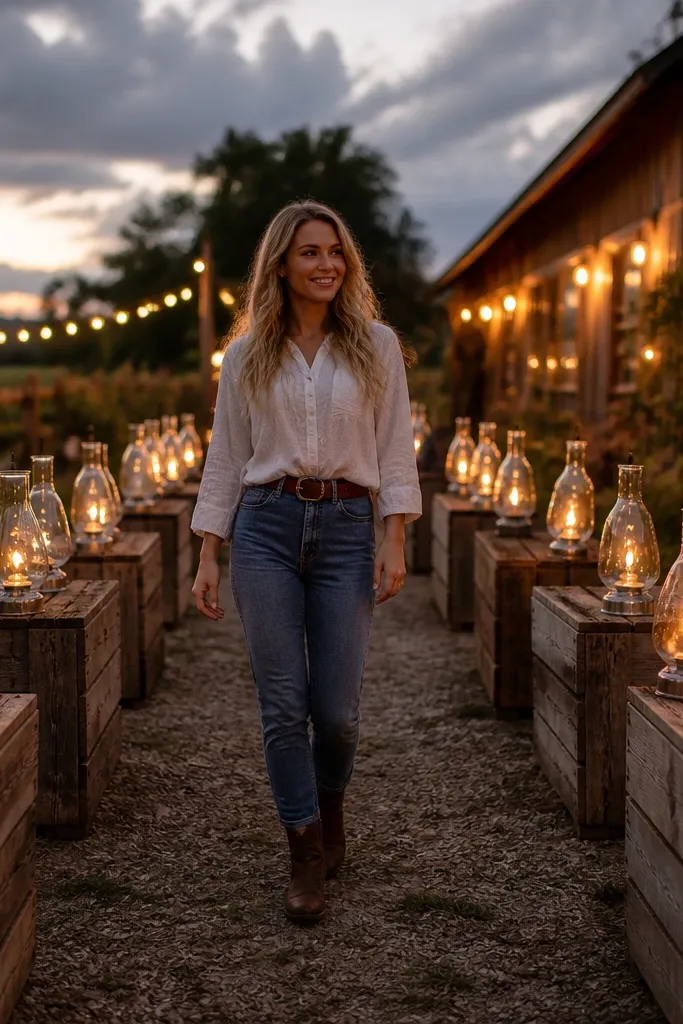
Lantern clusters turn a walkway into a photo moment because they create repeating light points. Low crates raise lanterns just enough to show their glow in images without blinding guests. Choose glass lanterns with warm bulbs or real candle inserts; the light should look amber, not blue-white. This decor is especially good for rustic venues with paths, patios, or outdoor dining. It also helps guests navigate at night without adding extra signage clutter.
Start by grouping lanterns in odd numbers, usually 3 or 5, so the cluster reads intentional. Then place them on sturdy crates or thick wood blocks and weight the base so they don’t tip. Finally, test the brightness in the same lighting conditions as the reception — if it looks harsh in daylight, switch to softer warm bulbs.
Carry spare bulbs and a small screwdriver in your kit; lanterns fail quietly right before guests arrive.
Don’t space lanterns evenly like a street — clusters look more boho and less “event grid.”
5. Cedar Slice Charger Plates With Cream Napkins
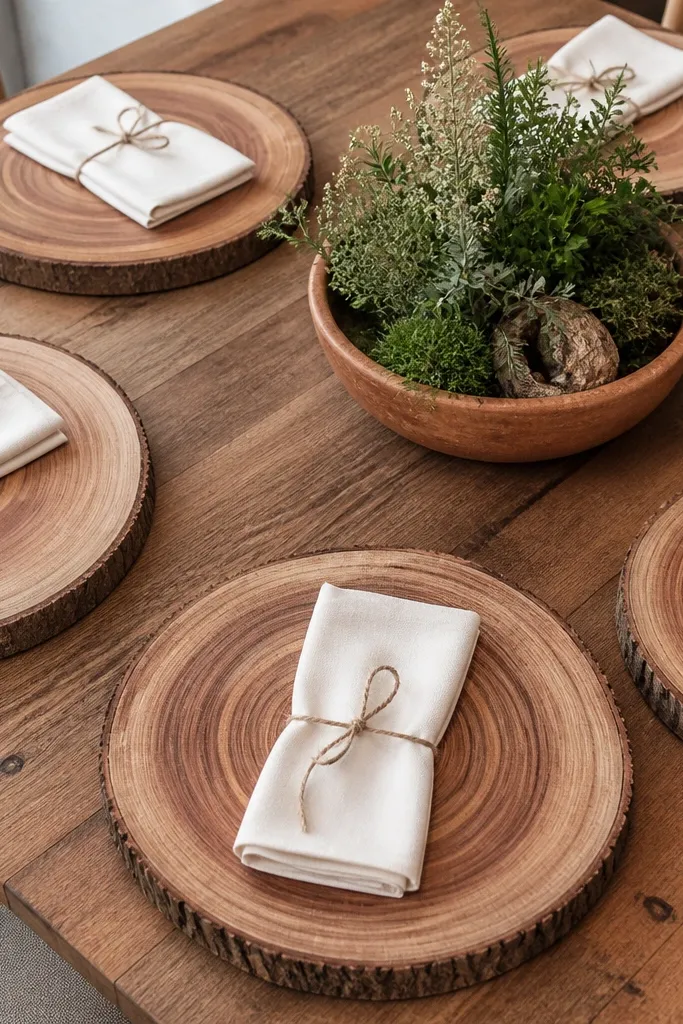
Cedar slice chargers make tables feel rustic the second guests sit down. The wood rings add texture that camera lenses love, and the cream napkins keep the look clean and romantic. This is one of the easiest decor upgrades because it doesn’t require floral volume. It also works for both indoor and outdoor weddings since wood tones match almost every greenery palette. Use it when you want the table to feel grounded and warm, not overly delicate.
Start by sanding edges lightly and wiping them clean so they don’t shed dust onto linen. Then pair each charger with a napkin folded into a simple fan or half-roll so it sits neatly. Finally, add one small centerpiece element per table that repeats your arch palette — terracotta stems or a rust ribbon.
Quick tipBring felt pads under chargers if your table surface scratches easily.
Skip thisAvoid glossy “fake wood” chargers — they reflect light in a way that ruins the cozy vibe.
6. Terracotta Ribbon Napkin Rings With Dried Herb Sprigs
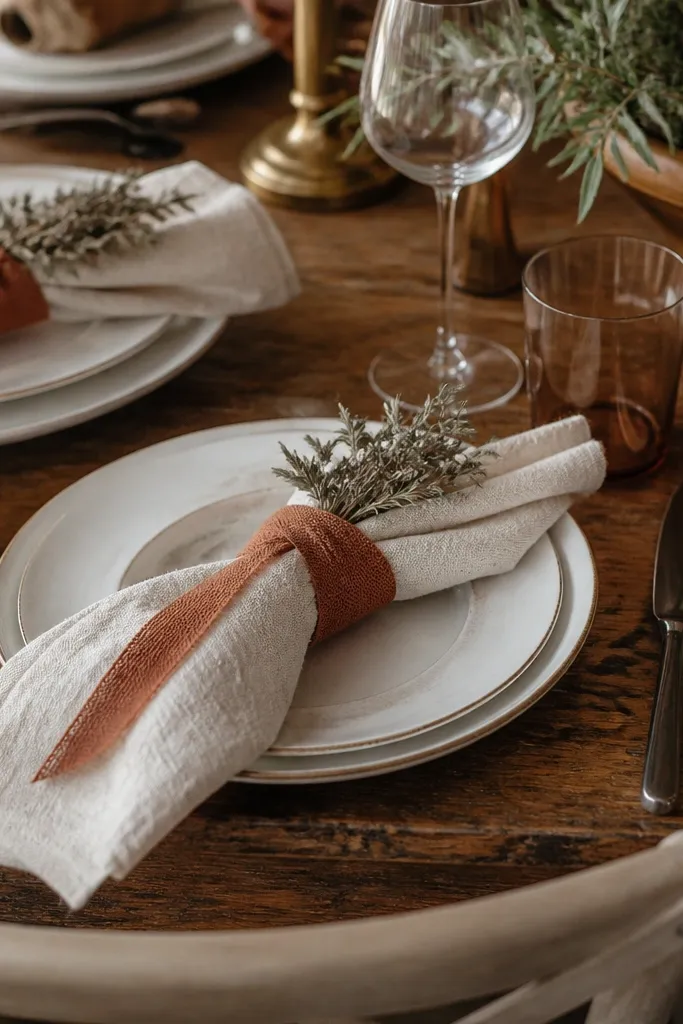
Napkin rings are small, but they photograph like details because they sit at the guest eye line. Terracotta ribbon makes the table feel cohesive with your larger decor, and dried herb sprigs add a natural scent and texture. The best part is control: you can make each ring consistent without needing a whole floral budget. This look works for reception dinners, rehearsal dinners, and even brunch-style weddings where place settings matter. It’s especially good for boho rustic themes that want “farm charm” without going full barnyard.
Start by cutting uniform lengths of terracotta satin or grosgrain ribbon, then tie them around napkins with a tight knot so the fold stays crisp. Then attach a single dried sprig on top using florist wire or a small zip tie hidden behind the knot. Finally, keep the herbs consistent across tables so photos don’t look random.
Quick tipSpray dried herbs lightly with clear matte fixative if they shed too much during transport.
Skip thisAvoid fresh herbs placed too close to heat — they wilt fast and look tired.
7. Cream and Rust Dried Floral Centerpieces in Milk Glass
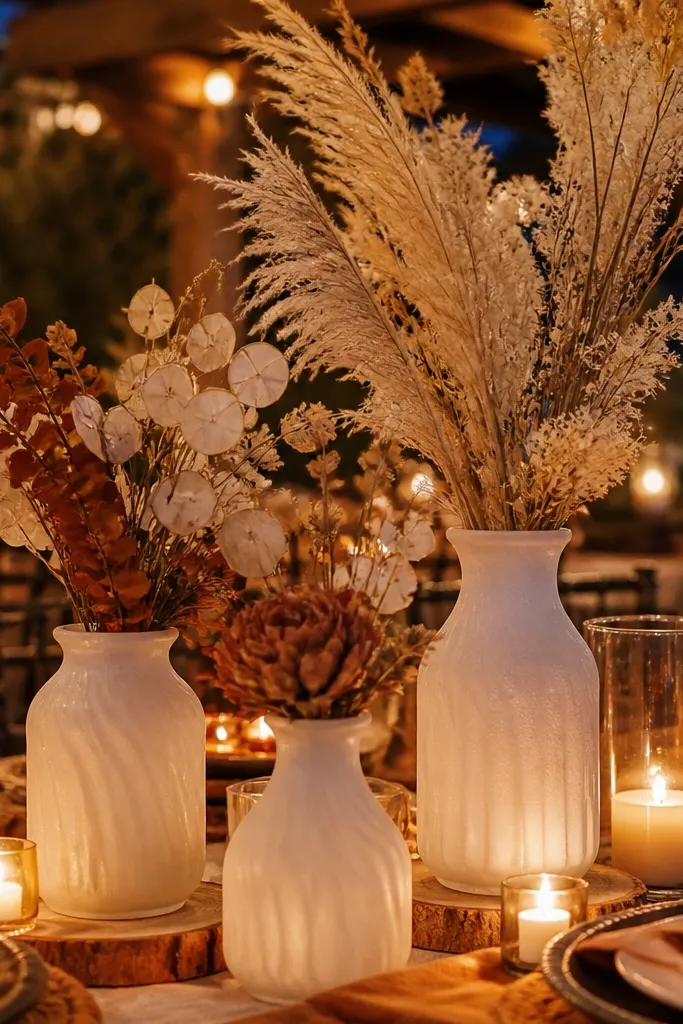
Dried floral centerpieces look dreamy because they have movement and soft color transitions. Milk glass keeps everything vintage and filters the light so the reds don’t look harsh. Cream and rust tones stay warm in both daylight and candlelight, which matters for your 3 day rustic wedding decor itinerary. This is a strong choice when you want centerpieces that survive transport and don’t collapse before the reception. It’s also a good fit for venues where you can’t guarantee cool temperatures for fresh flowers.
Start by building a small foam-free arrangement using chicken wire wrapped around the vase neck. Then group dried stems into three lengths: tall focal stems, medium filler, and low “spill” stems for the boho drop. Finally, place vases with at least 12-16 inches between them so guests can talk while still seeing the texture.
Use a clear plastic sheet under vases during set-up to catch any loose petals.
Avoid overpacking with too many stem types — it looks chaotic instead of curated.
8. Boho Hanging Macramé Planter for Dessert Corner
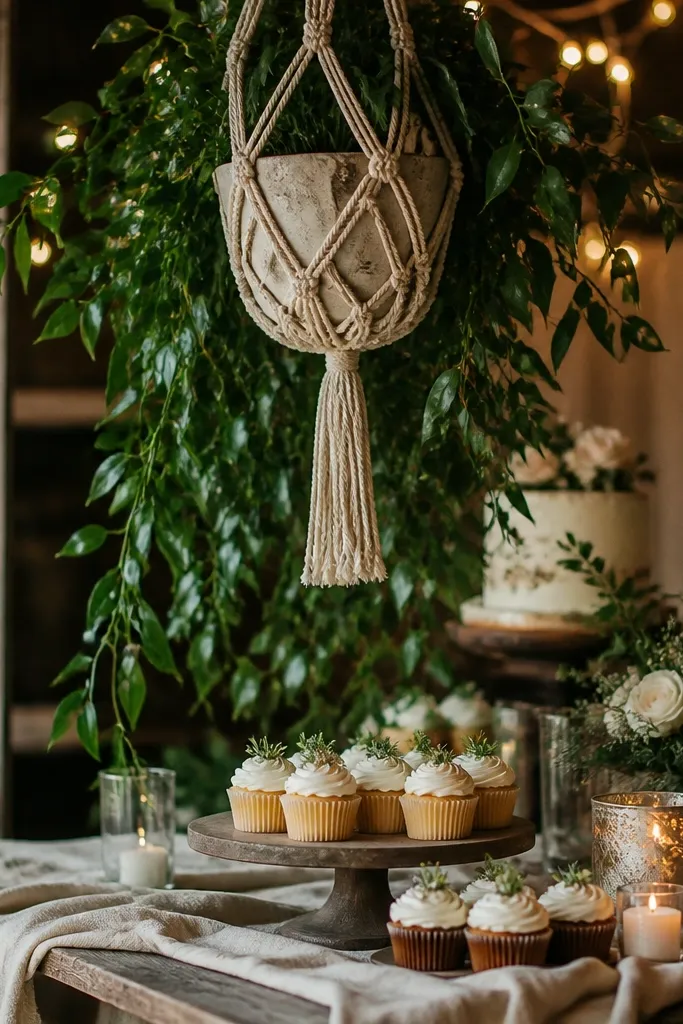
A hanging planter creates vertical interest in your dessert corner, and it frames cake photos without needing a giant backdrop. The macramé pattern looks hand-made, and the greenery makes the dessert table feel grounded instead of floating. This is the kind of decor guests notice because it’s above eye level and it moves slightly with air. It fits outdoor receptions, patios, and indoor spaces with ceiling height. Pick this when you want a photogenic focal point that doesn’t crowd the table surface.
Start by choosing a planter size that clears the tallest dessert by at least 12 inches so it doesn’t interfere with service. Then hang it using a sturdy ceiling hook and test the height with the cake box in place. Finally, tuck a few small terracotta-toned dried blooms into the greenery for color tie-in to your palette.
Bring zip ties and extra string — ceiling attachment points always need one quick fix.
Don’t hang too low — it turns into a head-bump and blocks photos.
9. Jute Rope Backdrop for Polaroid or Guest Book Station
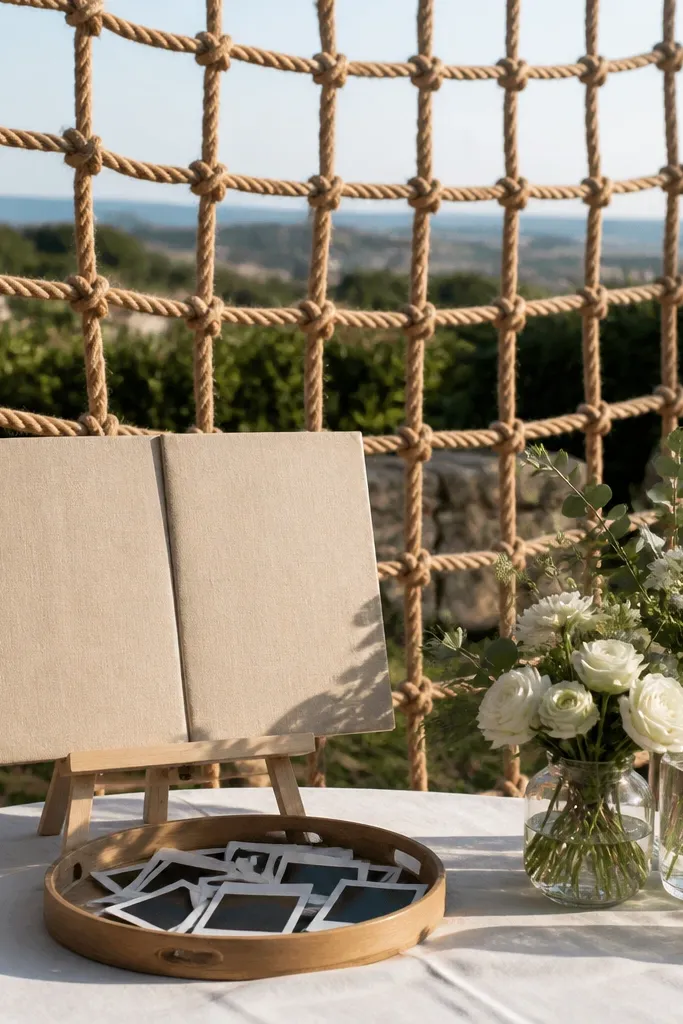
A jute rope backdrop looks rustic and intentional without needing lots of florals. It gives your photo station a natural texture that makes pictures feel warm and grounded. If you’re doing polaroids, ropes create a perfect grid-like background that makes images stand out. This also works for a guest book because the rope texture hides small imperfections and keeps the station from looking flat. Choose it for venues that already have a plain wall or blank fence and you need an instant “set.”
Start by stretching jute rope in horizontal lines on a lightweight frame, then secure ends tightly so it stays even. Then pin photos or cards with clothespins or small clips so the station looks airy. Finally, place a low table in front and keep your signage minimal — one label board is enough.
Quick tipUse thicker jute for the backdrop — thin rope looks stringy in photos.
Skip thisAvoid too many pins at random angles — keep it structured so the background stays clean.
10. Terracotta Urn Vases With Single-Variety Blooms
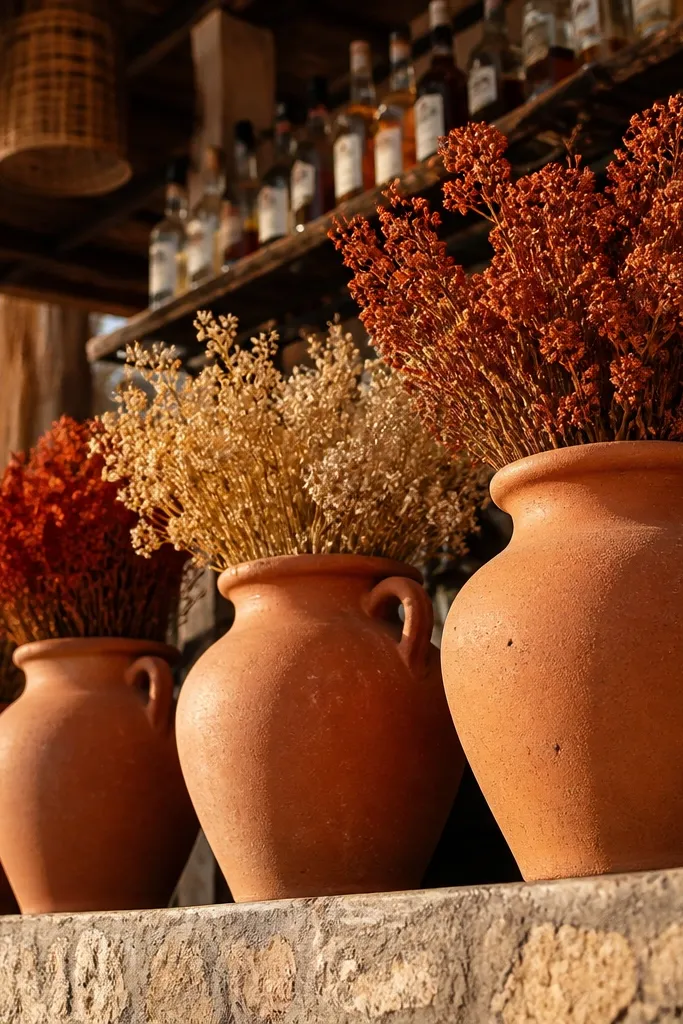
Single-variety blooms in terracotta urns look expensive because the color stays consistent and the shape reads clean. It’s a boho rustic trick: fewer types of stems makes the arrangement feel intentional even when it’s dried. The urn shape adds weight and height, so these look great near the bar, entry, or head table. Choose one main bloom type per urn — like dried wheat, strawflower, or statice — so photos show clear silhouettes. This works best when you want a “cohesive” look across the venue without buying matching bouquets.
Start by picking 2-3 main dried stems that hold their shape, then cut them to consistent heights for a repeating rhythm. Then fill urns with a base that supports stems — foam-free chicken wire or sand inside the urn. Finally, cluster urns in pairs or groups of three and keep spacing consistent so your photos don’t look scattered.
Quick tipDust urns with a soft brush before set-up; terracotta shows fingerprints and dust fast.
Skip thisAvoid mixing too many stem colors in one urn — it turns into a “grab bag” look.
11. Rustic Bar Backdrop With Hanging Bottles and Burlap Tie-Ins
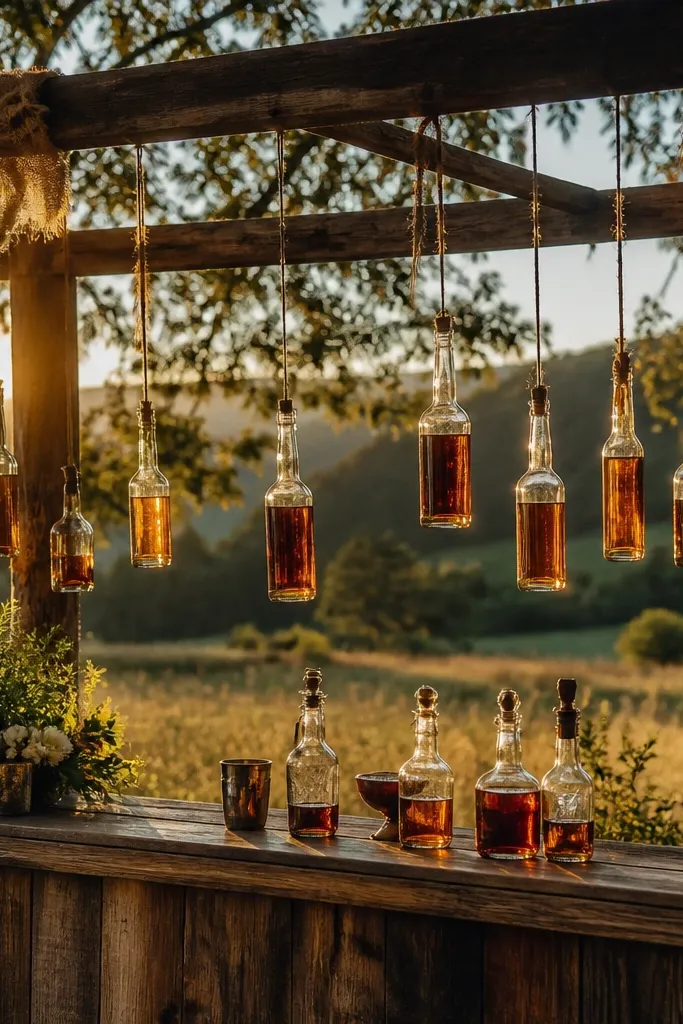
A bar backdrop is where guests linger for photos, so it needs to look styled, not like storage. Hanging bottles add height and sparkle, and burlap tie-ins keep the look rustic without covering everything. This combo works especially well outdoors because the bottles catch light and move slightly. It also helps you hide ugly bar shelving — the backdrop becomes the visual focus. If your bar area is plain, this turns it into a centerpiece.
Start by measuring the bar width and leaving enough clearance for staff to work — at least 24 inches from the front edge. Then hang bottles using sturdy hooks and vary heights so it doesn’t look like a straight line. Finally, tie small burlap strips in terracotta and cream tones to pull the palette into the bar area.
Quick tipUse clear acrylic labels on bottles so the bar looks neat in close-ups.
Skip thisDon’t overload with too many bottle shapes — one odd mismatch becomes the focal point instead of the backdrop.
12. Candle Ladder on Wood Steps for Reception Entrance
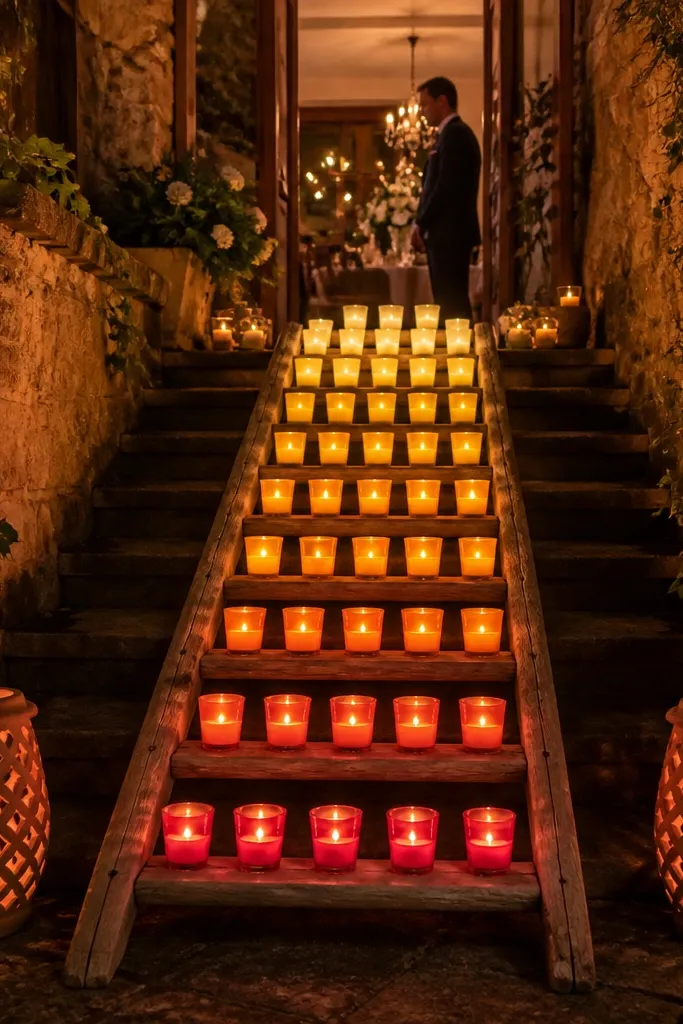
A candle ladder gives instant depth at the entrance and makes guests feel like they’ve stepped into a scene. Wood steps add height without needing a metal stand, and the candles create a warm gradient from bottom to top. In photos, the ladder pattern leads the eye toward the ceremony or dance floor. It suits barns and outdoor venues with natural structure, and it’s also great indoors when you want a “stairway” look. This is a practical decor moment because it’s easy to set and easy to keep tidy.
Start by placing the wood steps or stacked crates on level ground and test stability before candles go in. Then arrange candle holders in decreasing heights — tall in the back, short in the front — to create that ladder look. Finally, use LED candles if your venue has strict fire rules or if wind is an issue outside.
Quick tipKeep a small towel and candle snuffer — wax drips happen and you’ll want fast cleanup.
Skip thisAvoid mixing candle heights randomly; the ladder effect disappears.
13. Rustic Seating Chart Board With Burnt Edge Wood Frame
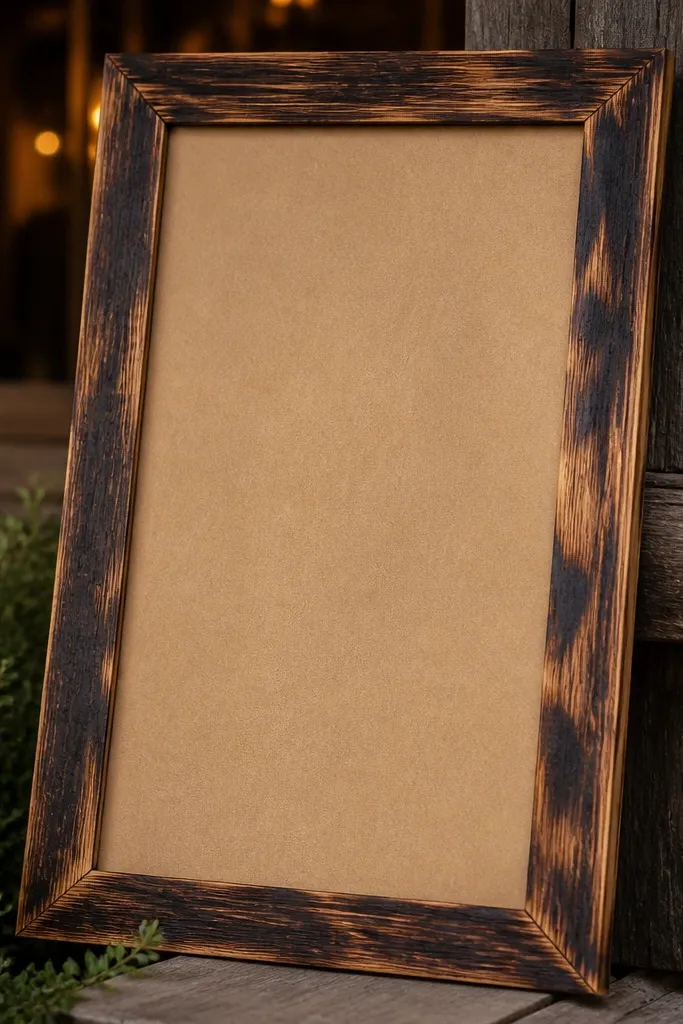
Seating charts are boring until you treat them like decor. A burnt edge wood frame makes the board look intentionally rustic, and handwritten table numbers keep it personal. This works because it’s a detail guests photograph while searching — especially if it’s near the entrance. Match your board color to your arch or candle palette so the whole venue feels connected. It’s also a smart boho move because wood + handwritten ink looks warm under amber lighting.
Start by choosing a frame size that reads clearly from 6-10 feet away, usually around 24x36 inches for most entrances. Then mount your board with thick paper or a chalkboard panel so handwriting doesn’t smear. Finally, add small dried herb sprigs or a terracotta ribbon at the bottom corner for the boho tie-in.
Quick tipWrite with a darker ink marker, not light gray — it stays readable in photos.
Skip thisAvoid tiny font — people will crowd and your board will look messy in pictures.
14. Jute + Leather Welcome Sign With Hanging Tag Letters
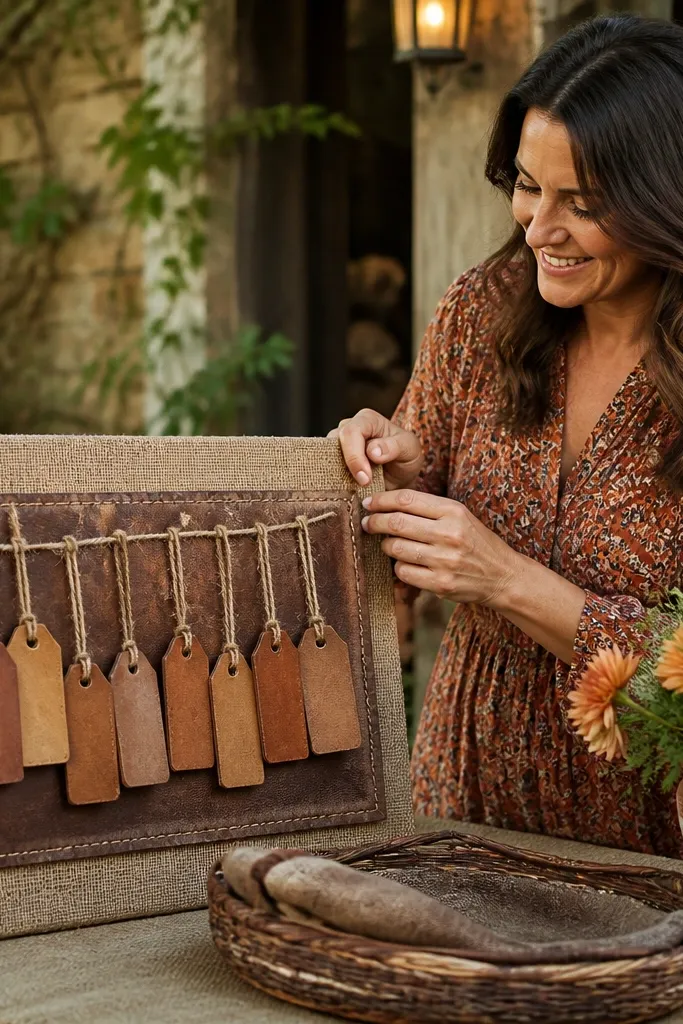
A welcome sign with hanging tag letters looks handmade, and it photographs with real texture. Jute brings the rustic base, leather tags add weight and contrast, and dangling letters create movement that shows up in video and photos. This is ideal for outdoor gates, barn doors, and entry tables where guests arrive by foot. Keep the wording short so the sign stays clean and readable. It’s also a good choice if you want a sign that doesn’t compete with your arch as the main backdrop.
Start by building a sign base from jute-wrapped wood or a heavy canvas backing so it doesn’t curl. Then attach leather tags with twine or thin leather laces, spacing them evenly. Finally, place it at eye level and angle it slightly toward the main path so it’s easy to photograph.
Quick tipUse thicker twine — thin string sags and makes the letters look sloppy.
Skip thisAvoid long sentences — guests need a quick read, not a wall of text.
15. Wildflower Meadow Table Scatters in Clear Glass Bowls
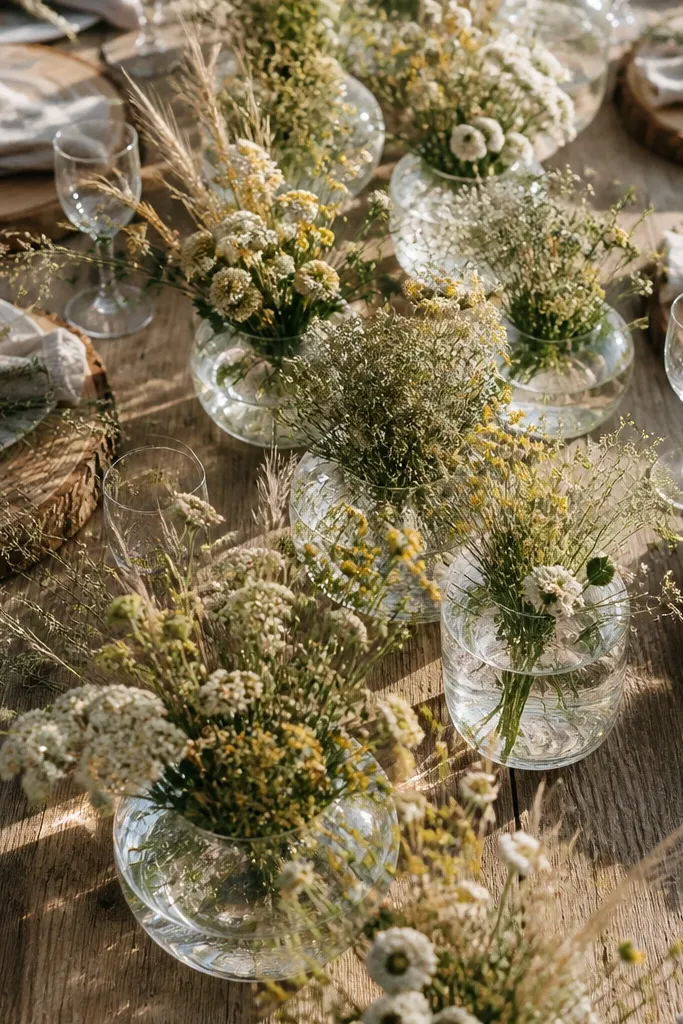
Instead of one big centerpiece, use meadow-style scatter pieces that look like a foraged moment. Clear glass bowls make the stems look intentional and keep them contained, which helps if you’re dealing with wind or tight turnaround. This creates a boho effect with lots of texture and small pops of color. It’s perfect for cocktail hour tables, sweetheart table edges, and head table styling. Choose dried or preserved stems so the look holds from setup through last call.
Start by collecting stems that keep their shape and cut them into short lengths for the bowl diameter. Then place them in clear glass bowls grouped by height — taller clusters at the back of the table, shorter near the front. Finally, repeat the same stem set across tables so photos don’t look mismatched.
Add a few cream blooms at consistent points to keep the palette from drifting brown.
Avoid loose scatter on bare linen — stems shift and look messy by the time guests arrive.
16. Sweetheart Table Backdrop With Linen Panels and Hanging Dried Stems
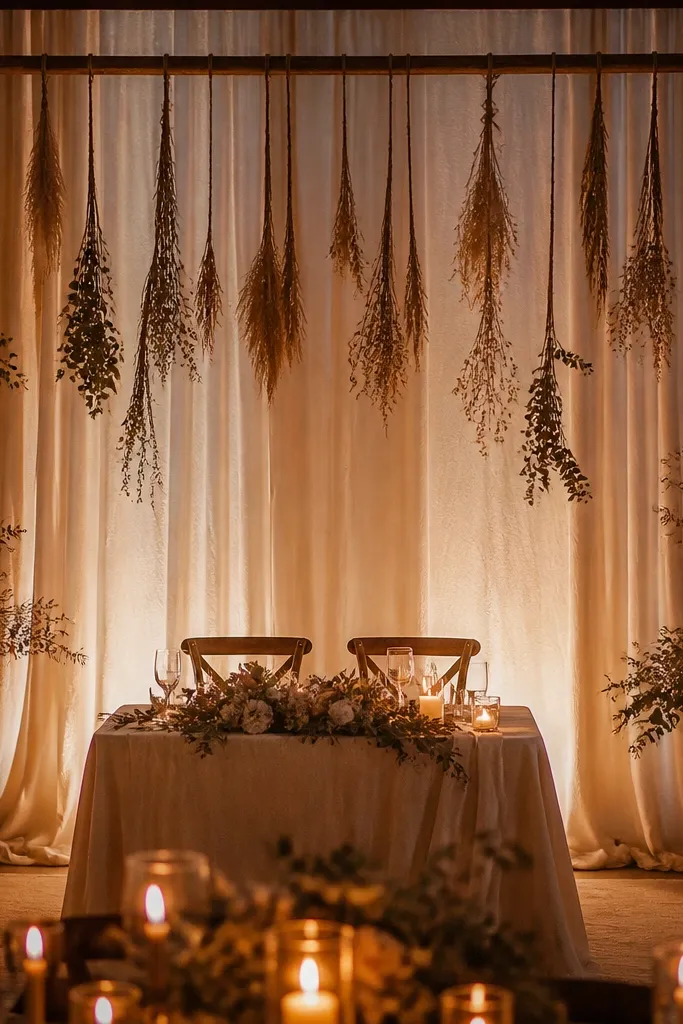
A sweetheart table backdrop needs to look good from the front and from the side, and linen panels do that without being fussy. Hanging dried stems add movement and a boho feel while keeping the center mostly clean. This works when you want your couple’s area to be the photo magnet but you don’t want a giant arch taking over the whole frame. Linen also helps absorb harsh light, which matters for indoor receptions. Pick this if your venue has bland walls or you’re using a simple head table.
Start by hanging 2-3 vertical linen panels behind the table using ceiling hooks or a tension rod so they drape naturally. Then attach dried stems to a thin grid or ribbon line so they hang evenly across the width. Finally, place two smaller floral elements on the table itself so the backdrop and table feel like one scene.
Steam linen until it looks slightly weighty — crisp fabric looks too formal for boho rustic.
Avoid thin lace panels — they tear easily and look frayed in photos.
17. Rustic Floor Vase With Oversized Pampas and Bronze Ribbon Wrap
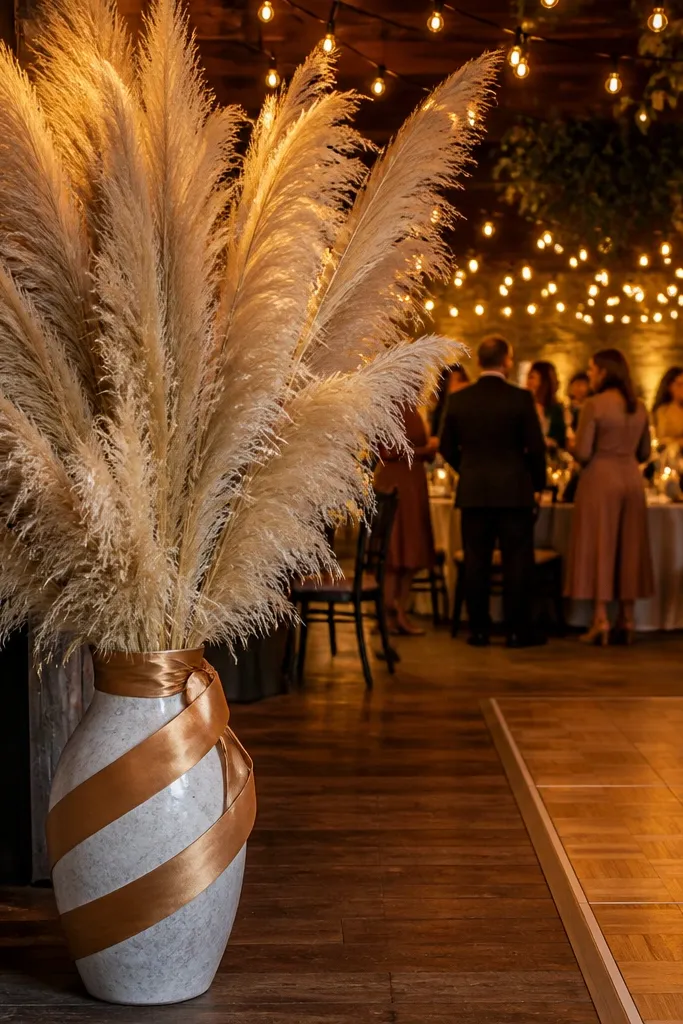
Oversized pampas in a floor vase is pure boho drama. The feathery texture creates softness behind the dance floor and reads beautifully in wide shots. Bronze ribbon ties into rust and makes the whole setup feel warm under evening lighting. This works especially well for indoor receptions and outdoor patios where you want vertical decor without building structures. Choose this when your venue has open space and you need height that doesn’t overwhelm.
Start by selecting a vase height that reaches above head level in photos, usually 3-4 feet for most venues. Then wrap the vase with a thin bronze ribbon strip and secure with hot glue or zip ties behind the wrap. Finally, arrange pampas in bundles and tie them to a support grid inside the vase so the plumes stay upright.
Quick tipKeep pampas in sealed bags until the last minute — it sheds and collects dust.
Skip thisAvoid placing pampas too close to candlelight; fibers can look darker and dusty.
18. Rustic Photo Backdrop With Window Frame and Dried Garland
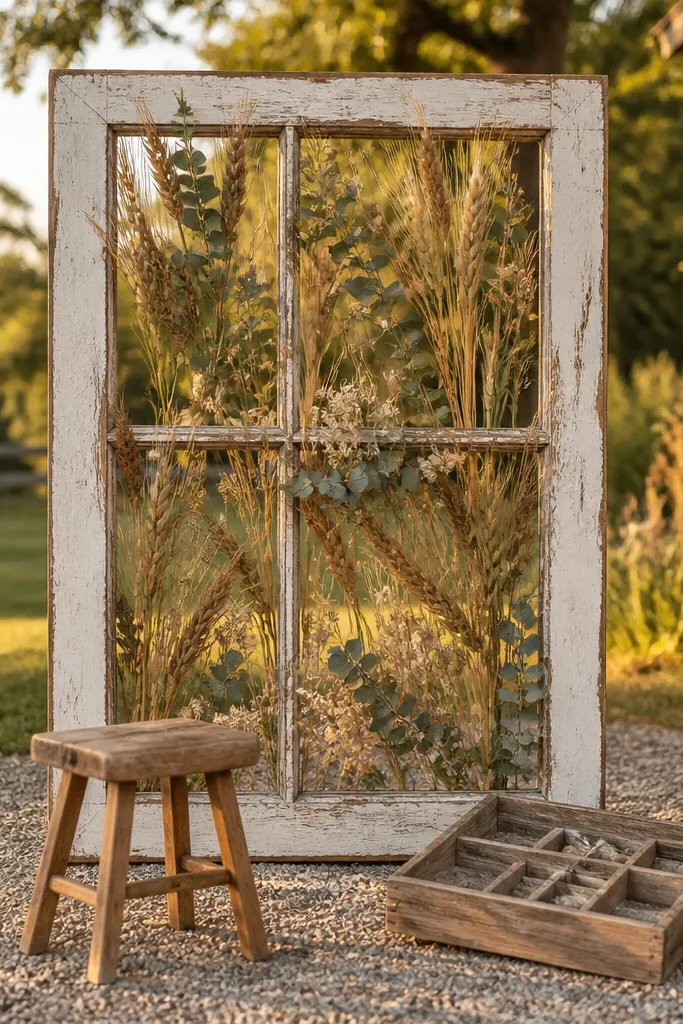
A window-frame backdrop gives you instant “set” energy without needing a custom build. Dried garlands inside the frame create depth and texture, and the frame edges act like a natural border for pictures. Guests love these because they’re easy to pose in front of, and your photos look styled even if your venue is simple. This is ideal for boho rustic weddings because it blends farmhouse structure with airy botanicals. Use it near the entrance or cocktail hour area so people find it naturally.
Start by mounting a lightweight window frame securely, either on stands or against a wall, so it can’t sway. Then hang dried garland in an arc across the center and tuck extra stems at the bottom corners for balance. Finally, add one small terracotta ribbon accent so the palette shows up even in wide photos.
Quick tipBring two extra clamps — frames shift during transport and you need fast fixes.
Skip thisDon’t use fresh flowers here; they wilt and droop in heat and ruin the photo line.
19. Burlap and Lace Cake Table Skirt With Copper Candles
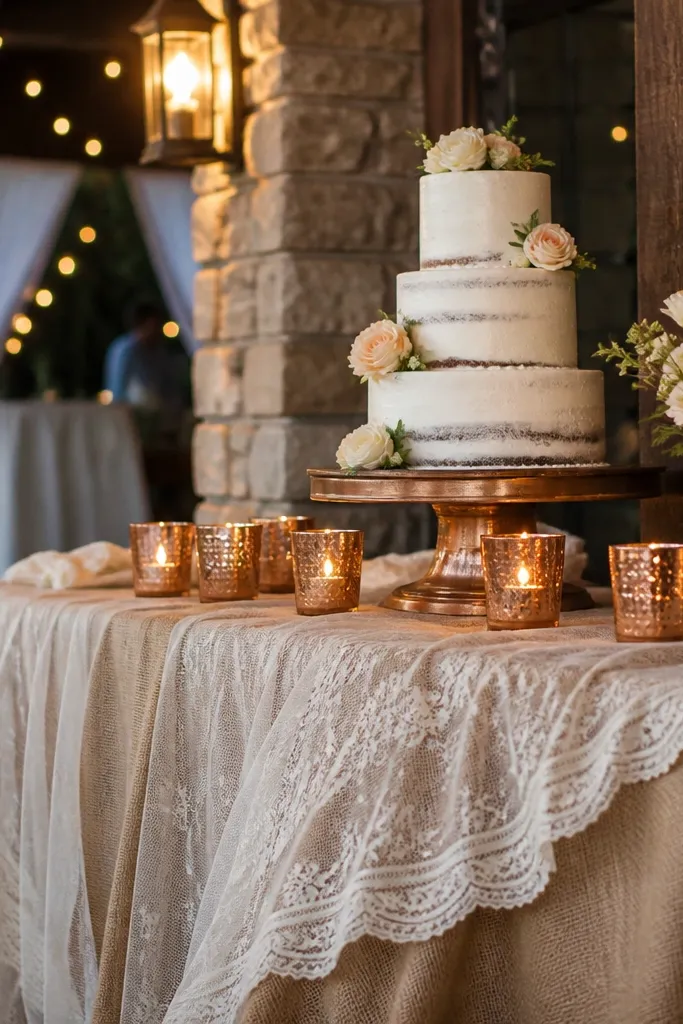
Cake tables need texture because they’re photographed from multiple angles. A burlap and lace skirt gives a boho rustic mix: burlap for farmhouse texture, lace for softness. Copper candle holders bring a warm metallic that looks great against terracotta and cream. This look works for indoor and outdoor cake setups, especially if your cake table is in a bright area where plain linens look flat. Keep the candles spaced so the cake remains the focal point.
Start by layering the skirt so lace sits over burlap at the front and sides, not underneath. Then place copper candles in a staggered line behind the cake, using LED candles if you’re in an airy outdoor spot. Finally, add one small dried floral cluster on the cake table edge to connect to your centerpieces.
Use a steamer on the lace — wrinkles show more on lace than on linen.
Avoid a skirt that’s too long and puddles on the floor; it drags in photos.
20. Terracotta Place Card Holders in Mini Stumps
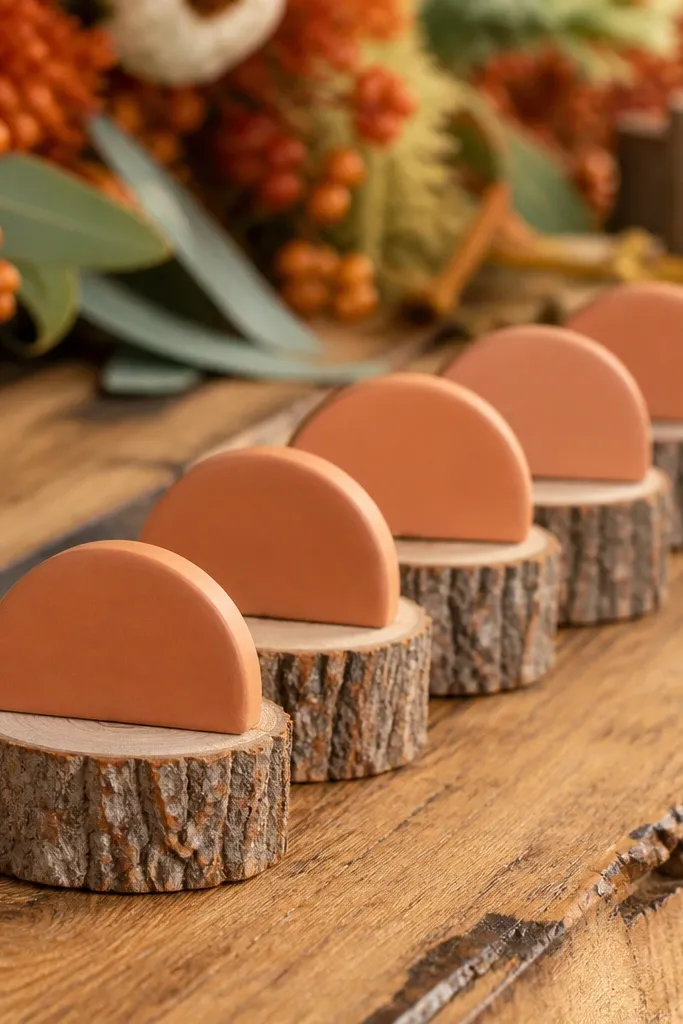
Mini stump place card holders are one of those details that make the whole place feel intentional. The wood base looks rustic, and a terracotta accent keeps it tied to your color story. Guests love finding their name because the holder is tactile and easy to spot at a glance. This works best for weddings with assigned seating and a visible place card table near the entrance. It also photographs well because each card has a clear shape and consistent height.
Start by drilling small holes or slots in mini stumps so place cards stand at a slight angle. Then write names in a dark ink and add a terracotta sticker or ribbon loop to match the palette. Finally, arrange holders in a neat grid, leaving 2-3 inches between each so the table doesn’t look crowded.
Quick tipBring a small handheld brush to knock off wood dust before photos.
Skip thisAvoid handwritten cards in light colors — they disappear in warm lighting.
21. Rustic Chair Back Sashes With Jute Bow and Terracotta Button
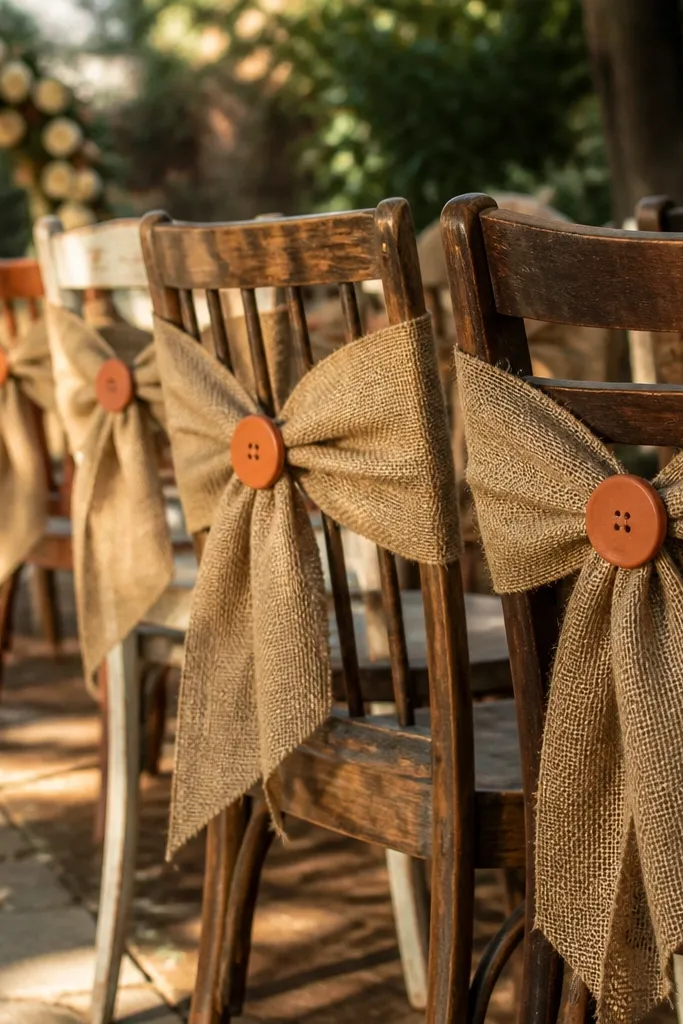
Chair back sashes make ceremony and dining photos look cohesive fast. Jute bows give the rustic texture, and a terracotta button adds a focal point that reads in pictures without adding clutter. This works with mismatched chairs because it unifies the look across rows. It’s also practical for outdoor weddings where you need something that holds shape and doesn’t cost a fortune. Pick this when your venue has plain chairs and you want the aisle to look styled.
Start by cutting long strips of jute or burlap ribbon and tying them around chair backs with a consistent bow height. Then add a small terracotta button or charm at the center using a piece of wire or strong hot glue. Finally, step through your aisle and adjust tension so every chair has the same drape angle.
Use a zip tie hidden under the bow if wind is a concern — it keeps the bow from twisting.
Avoid overly bulky knots; they throw shadows and look uneven in close photos.
22. Terracotta Floating Candle Vessels for Outdoor Dinner
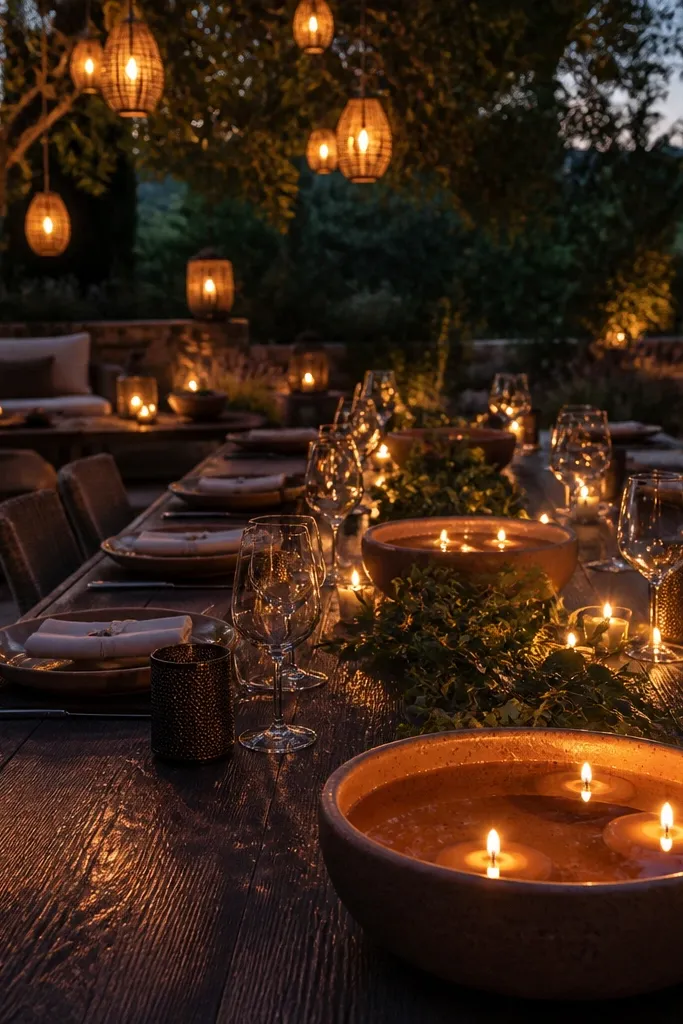
Floating candle vessels look magical because the light sits low and softens the whole table scene. Terracotta bases keep the warm glow consistent with your palette, and the low light looks flattering in evening portraits. This is a great choice for outdoor dinners where you want a calm, cozy mood without heavy centerpieces. It also helps photos because candles create a natural bokeh effect. Use this when you want ambiance to do the heavy lifting for the boho rustic look.
Start by choosing shallow candle holders designed for outdoor use, with stable bases so they don’t tip. Then place them spaced evenly across the table runner area, keeping enough room for plates and serving. Finally, test in the same outdoor lighting conditions at dusk so you don’t end up with candles that are too dim or too bright.
Bring extra wick trimmers — uneven wicks make candles flare and look messy on camera.
Don’t place candles directly next to tall centerpieces; the light gets blocked and looks flat.
23. Dried Wheat and Pampas Balloon Arch for Cocktail Hour
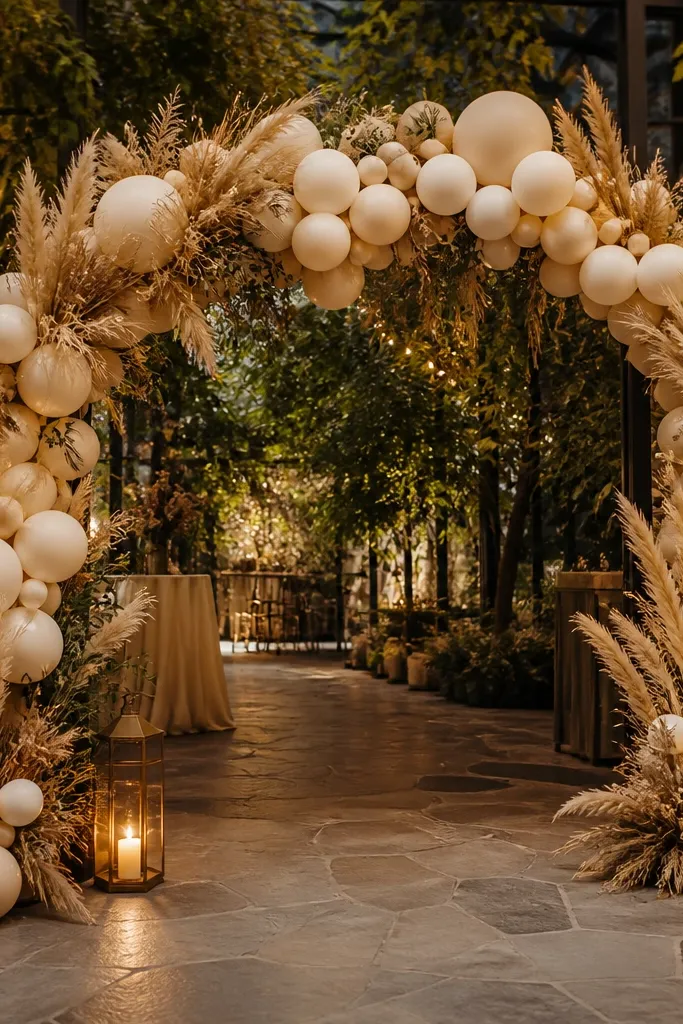
A balloon arch is usually seen as party decor, but dried wheat and pampas turn it into boho rustic. The dried textures soften the balloon look and make it feel organic instead of shiny. This works for cocktail hour because it gives people a place to gather and take photos before dinner. Choose neutral balloons like cream or matte beige so the arch doesn’t fight your terracotta palette. It’s a strong move when your venue lacks built-in photo corners.
Start by building a base frame using a balloon arch kit suited for outdoor wind strength. Then wrap the frame with dried wheat bundles and pampas plumes in repeating clusters, securing with zip ties covered by greenery. Finally, keep balloons matte and in 2-3 tones max so the arch reads cohesive rather than multicolored.
Quick tipUse heavier balloon anchors or sandbags for outdoor set-ups — light frames drift fast.
Skip thisAvoid mixing glossy balloons with matte dried textures; it looks mismatched in photos.
24. Boho Cloth Drapes on Barn Beams With Rust Clips
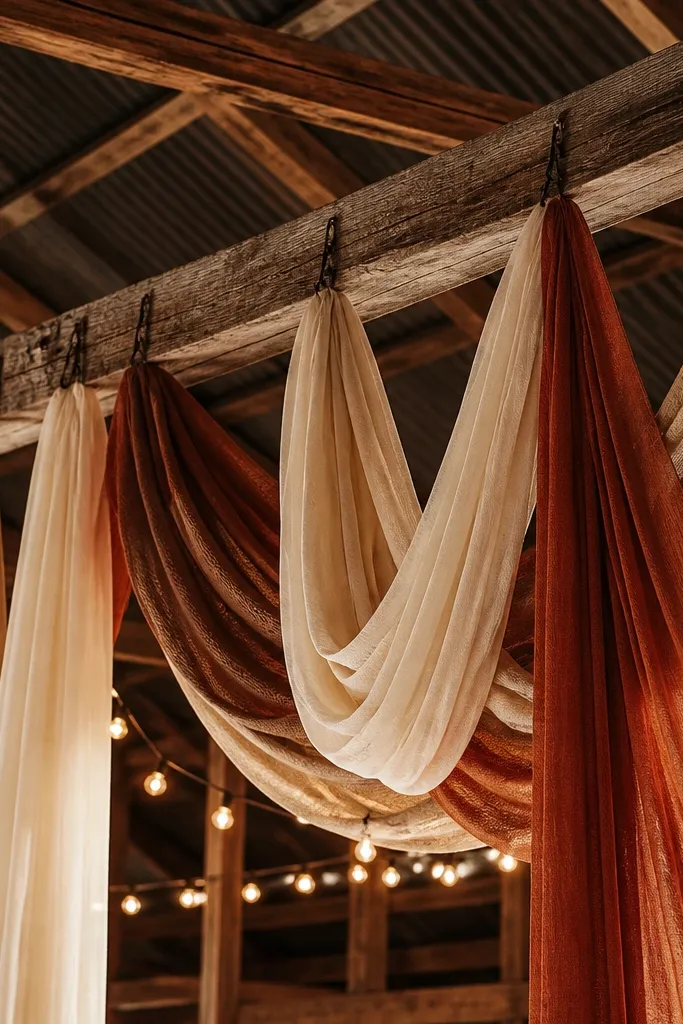
Cloth drapes make barns and rustic sheds look instantly more “wedding” without building new structures. The trick is choosing fabric that moves — linen, cotton voile, or a light textured blend — and hanging it from beams with visible clips or ties that look intentional. Rust and cream drapes tie into your overall palette while keeping the space soft and romantic. This is great for indoor barn receptions where ceiling height is dramatic and you want to fill that empty space. It also makes your head table and dance floor feel framed.
Start by measuring beam spacing and planning a drape length that falls 10-16 inches below the beam for a clean look. Then clip fabric panels in 2-3 points so they hang with natural folds instead of straight lines. Finally, add one small terracotta accent ribbon at the top of each panel to unify the drape system.
Quick tipBring rust-colored binder clips or heavy clothespins; they photograph better than random clear tape.
Skip thisAvoid draping too low — it crowds guests and looks like clutter from the dance floor.
25. Woven Willow Frame Seating Lounge With Dried Sage Garlands
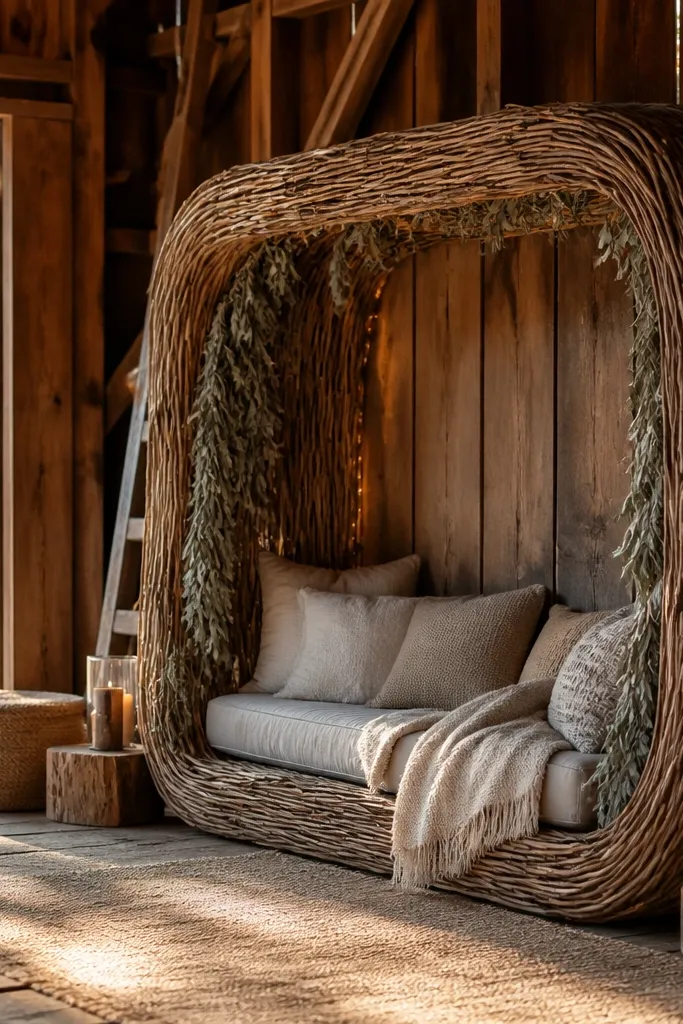
This is the decor moment that makes people stop walking and actually hang out for photos. A woven willow frame around a lounge corner looks rustic without feeling heavy, and the dried sage garlands keep it soft and airy in every light. Use it for a guest comfort zone near the bar or the gift table so the decor has a job, not just a view. It fits a boho rustic wedding perfectly because willow, linen, and dried botanicals all read handmade and calm. Plan it for late spring through early fall when outdoor light is warm and the dried greens still look fresh on camera. You’ll get that dreamy charm because the frame gives the background shape and the garlands add movement when guests walk past.
Step 1: Set the frame first, then build inside it. Place the willow frame on a flat patch of grass or a rented wood platform, then add two to three linen cushions in cream and oat, plus a small woven rug or jute runner under the seating. Step 2: Add garlands that don’t sag. Drape dried sage garlands loosely along the top curve and tie the ends to the frame with neutral twine so they sit airy, not tight. Step 3: Get there and around without stress. If the wedding is at a venue with an event coordinator, ask about load-in access time and whether they allow freestanding frame setups; if it’s a remote spot, plan a 30-45 minute buffer for setup and photography. Expect to spend about $250-$600 for the frame and garlands if you buy new, and $150-$350 if you rent the frame and source dried sage locally; give yourself 2 hours for placement and styling, plus 30 minutes for touch-ups before guests arrive.
Quick tipBook dried garland pickup or delivery at least 10 days before the wedding so nothing arrives brittle or dusty. Assign one person to check garland ties during cocktail hour so they stay photo-ready when people pass through.
Skip thisDon’t hang garlands tightly — they look flat and unnatural once guests move around.