
1. Linen runner with rolled edge + single-color bud vases
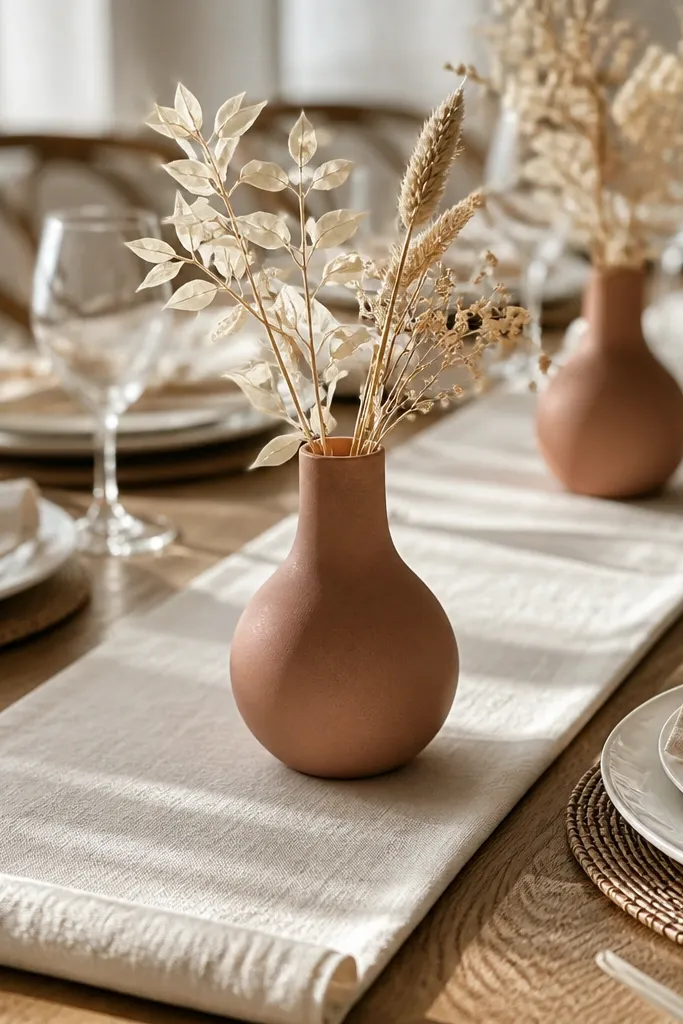
This is the “quiet expensive” option for an itinerary 3 day weekend wedding because it looks styled even when you’re short on time. A linen runner with a rolled edge gives texture and structure, so the table doesn’t look flat in photos. Bud vases in one color family keep the palette tight without needing big floral builds. It suits modern, classic, and garden venues because the runner reads natural and the vases read intentional.
Start by laying the runner so it’s centered and the rolled edge faces the guest side, not the wall side. Then place 5-7 bud vases per table down the center line, spaced about 10-14 inches apart; use the same vase shape across the line. Finally, add one low filler (baby’s breath, waxflower, or similar airy stems) inside each vase so they look full from the camera angle.
Steam the runner right before setup and use a lint roller on the rolled edge — it shows up in every photo.
Don’t mix too many vase shapes; it reads busy when the room lighting hits glass.
2. Clear glass cylinder candles with eucalyptus base
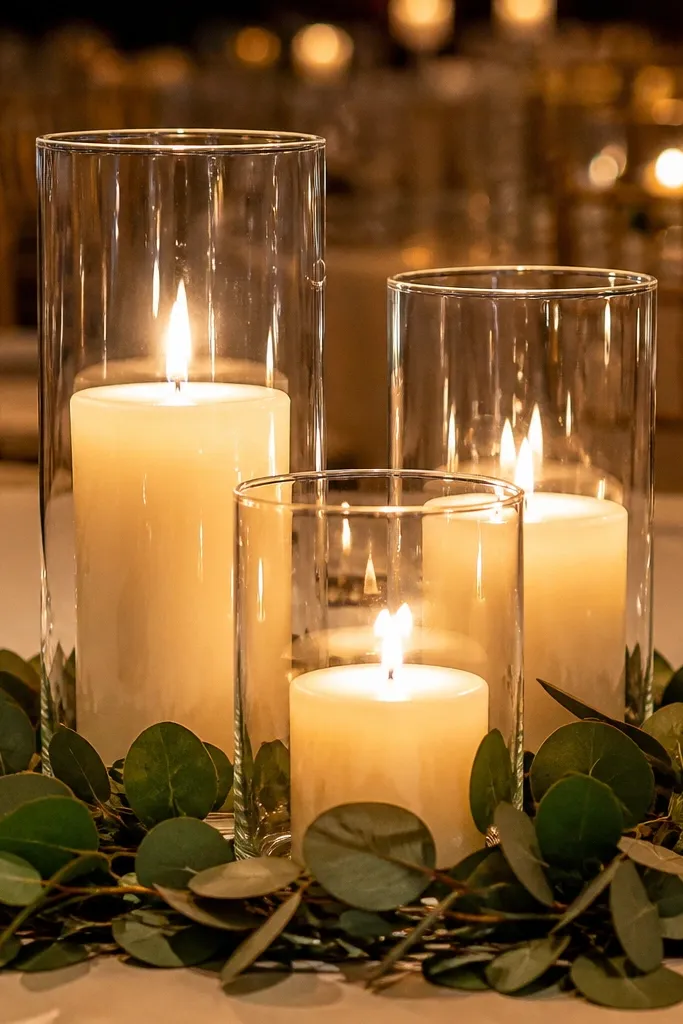
Glass cylinders plus eucalyptus is a dependable combo because it photographs cleanly and looks lush without bulky arrangements. The eucalyptus base adds movement and green contrast, while the candle height stays guest-friendly. This works especially well for evening receptions where candlelight glare is a factor — glass helps the glow look intentional. If your venue has neutral walls or wood tones, this setup ties everything together fast.
Start by placing a low strip of eucalyptus along the center, about 12-18 inches long per candle cluster. Then set 3-5 glass cylinders on top, keeping the flame height aligned so the photo looks symmetrical. Finally, tuck in a few white blooms or a single color accent stem between cylinders, then stop — overstuffing makes it look like potpourri.
Use LED candles if your venue has wind or strict fire rules; pick warm-white LEDs so the color matches real flame.
Avoid placing cylinders directly on a glossy table surface; it can create harsh reflections behind glass.
3. Monochrome maxi floral centerpiece in a low ceramic tray
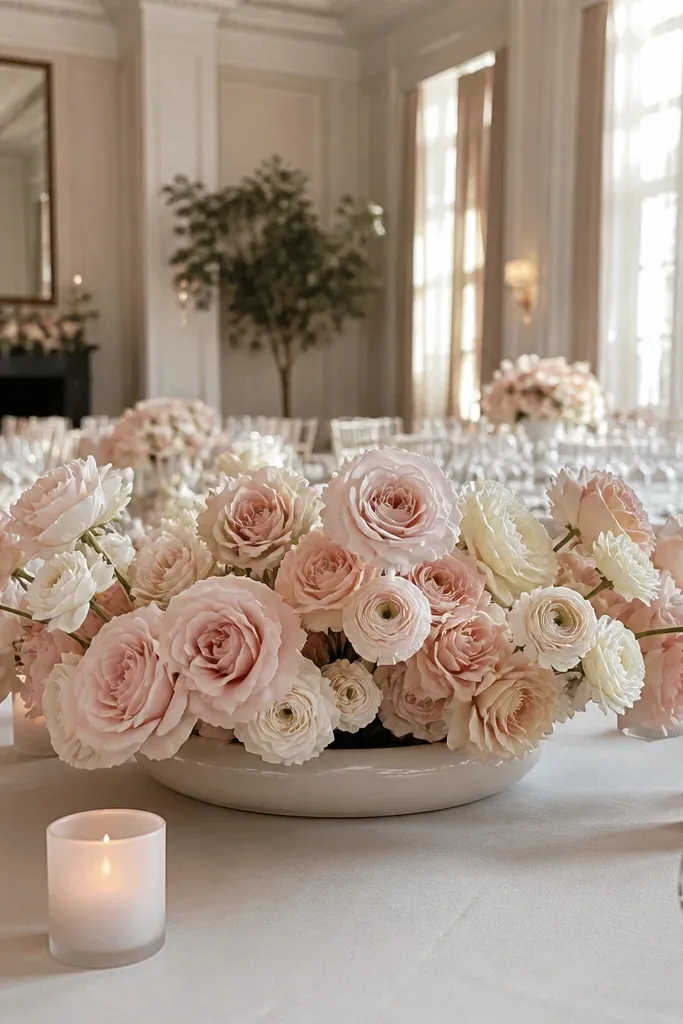
A low ceramic tray makes a big floral look controlled. You get width for impact, but the height stays in the sweet spot for conversation and photos. Monochrome florals — think all-white or all-blush — read high-end because the eye has nothing to fight. This is perfect for a weekend wedding when you want one statement piece per table without complicated mechanics.
Start by choosing a tray that’s wider than your napkin fold — aim for 14-18 inches long for a standard reception table. Then build the floral in foam or in a shallow water base, keeping stems low and fanning outward. Finally, add candles at the corners of the tray (not in the middle) so the centerpiece still reads as one composition.
Quick tipPack the tray components separately and assemble on-site; floral loses shape faster when carried fully built.
Skip thisDon’t add tall stems in a tray — the whole point is a low, wide silhouette.
4. Black taper candles in a staggered runner grid
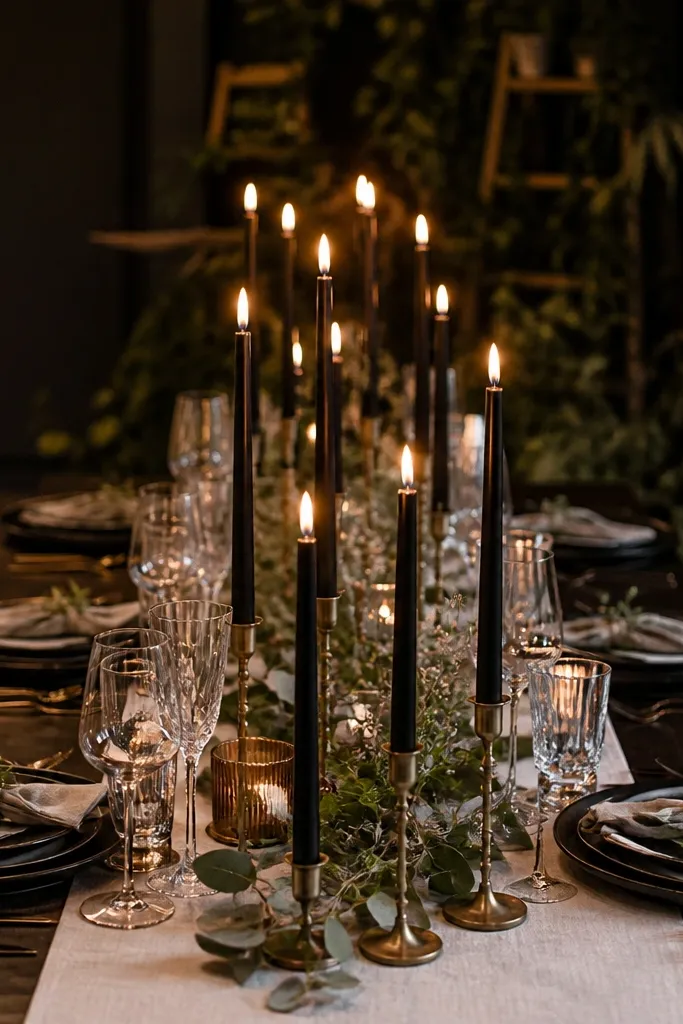
If you want photos that look editorial, go black. Staggered black taper candles create rhythm down the table and make place settings look crisp. The look is especially striking with light linens and greenery accents because the contrast is clear in low light. This works for modern venues, city hotels, and any reception where you want a bold mood without heavy florals.
Start by laying a runner in white, cream, or soft gray; keep it matte. Then place candle holders on a staggered grid — for a 72-inch table, try 9-12 candles total with equal spacing between holders. Finally, weave in a thin green garland or a few eucalyptus sprigs between candle groups, not across every gap.
Quick tipBring a small bag of black matches or a lighter wand; ceremony lighting delays happen on weekends.
Skip thisAvoid thin, wobbly holders; uneven bases ruin the clean lines in photos.
5. Floating candle bowls with rose petals and mirrored accents
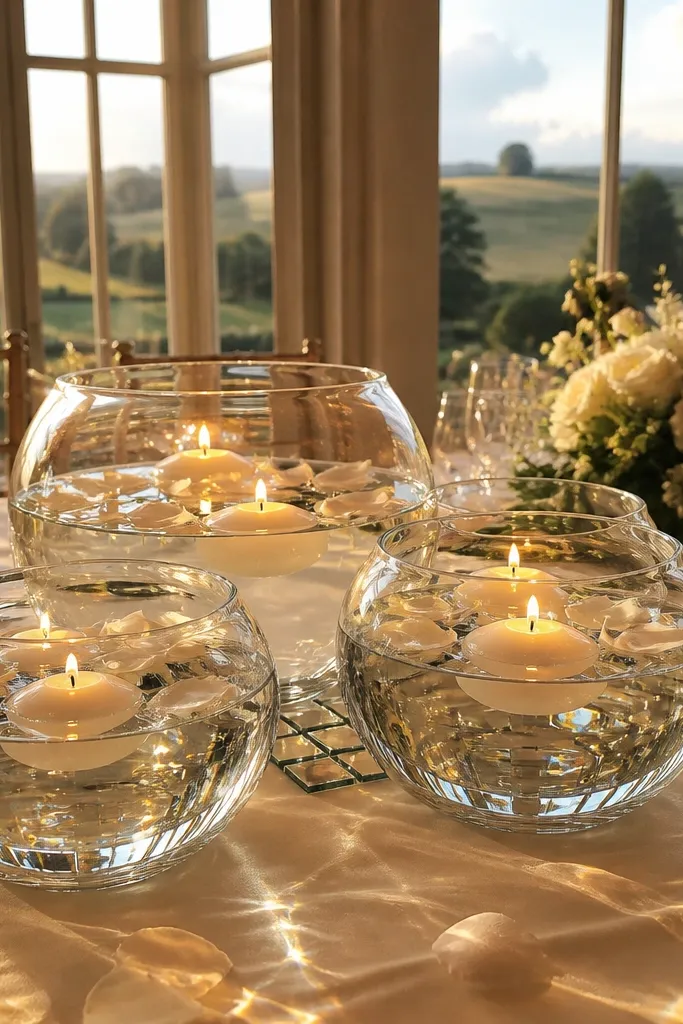
Floating candles look romantic, but the real reason this wins is the mirror effect. Even with a few bowls, the table reflects light and makes the whole setup feel fuller. Rose petals add color without needing big floral volume, which is ideal when you’re building during a weekend schedule. It’s a gorgeous choice for spring and summer receptions with warm lighting.
Start by placing a small mirrored tray or mirror tile under each bowl so reflections stay contained. Then fill bowls with water and drop in floating candles; add a light scatter of petals only at the top layer. Finally, keep the bowls spaced evenly so the center line stays readable between place cards and dinnerware.
Use petals that won’t bleed color — test one or two in water before you commit to the full table.
Don’t overload petals; too many makes the water look cloudy in photos.
6. Wildflower mix in vintage milk glass for a garden-table look
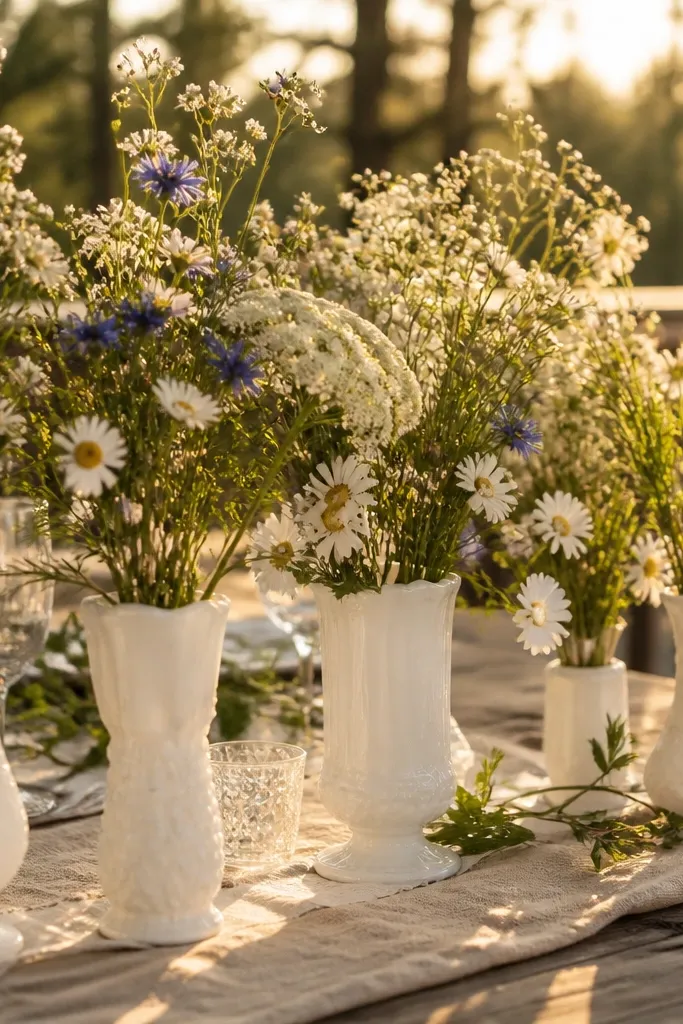
Milk glass softens everything. It makes wildflower mixes look curated even when the stems aren’t perfectly matched. This is a strong choice for outdoor receptions or venues with lots of natural light because the milk glass catches highlights without glare. The vibe reads casual-luxe, and it’s forgiving if you’re still refining your color palette during the weekend.
Start by collecting 6-10 milk glass pieces per table in similar scale, not identical shapes. Then use one “dominant” bloom color family (like yellow and cream) and let the rest be supporting accents. Finally, add a simple ribbon tie or paper wrap around the stems near the base for a tidy top edge from camera height.
Quick tipKeep stems cut shorter than you think; tall wildflowers block place settings in wide-angle photos.
Skip thisAvoid mixing strong, saturated colors that clash under venue lighting — it turns the wildflower look chaotic.
7. White stoneware bud vases with black berries accents
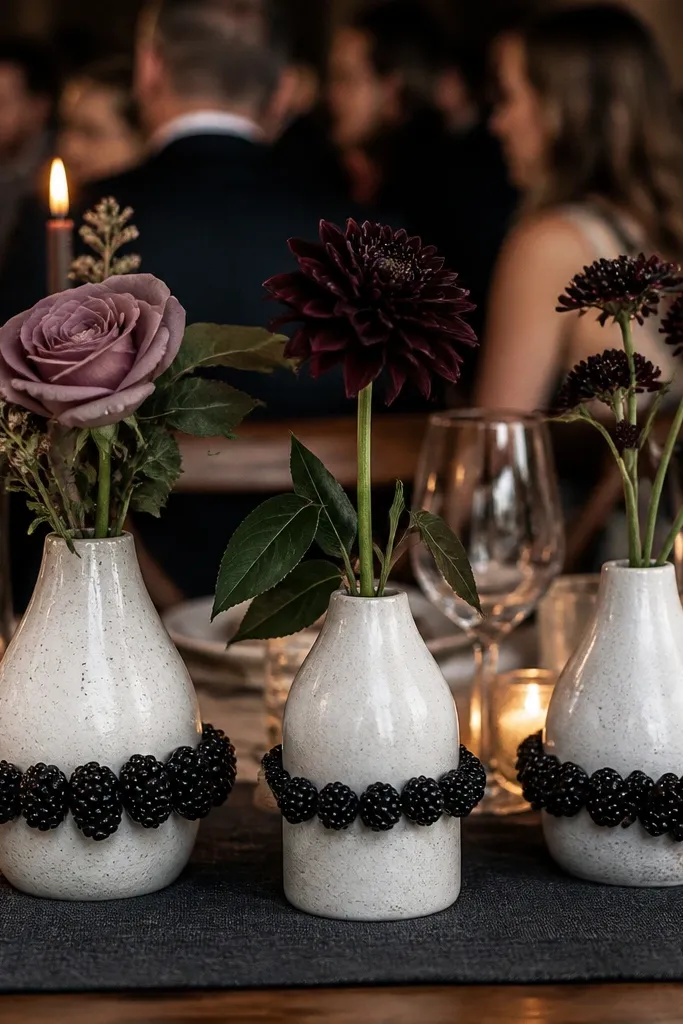
Stoneware reads grounded and modern, and the dark berry accents add drama without building taller heights. This setup looks great for fall weddings and any reception where you want a moody-but-clean palette. It’s also easy to scale because bud vases are consistent and fast to pack. The berries create a focal point that shows up even from across the room.
Start by choosing 8-12 stoneware bud vases in white or off-white; keep the openings similar so flowers look uniform. Then fill with a single filler (white roses, dahlias, or an equivalent) and add 1-2 berry stems per vase. Finally, place vases in a gentle arc down the center, with the berry stems leaning outward toward the aisle.
Quick tipIf you’re transporting berries, wrap stems in damp paper towels and seal in a zip bag to avoid browning.
Skip thisSkip heavy greenery — it turns the berries into background instead of the star.
8. Terrarium-style glass cloches over low greenery + candles
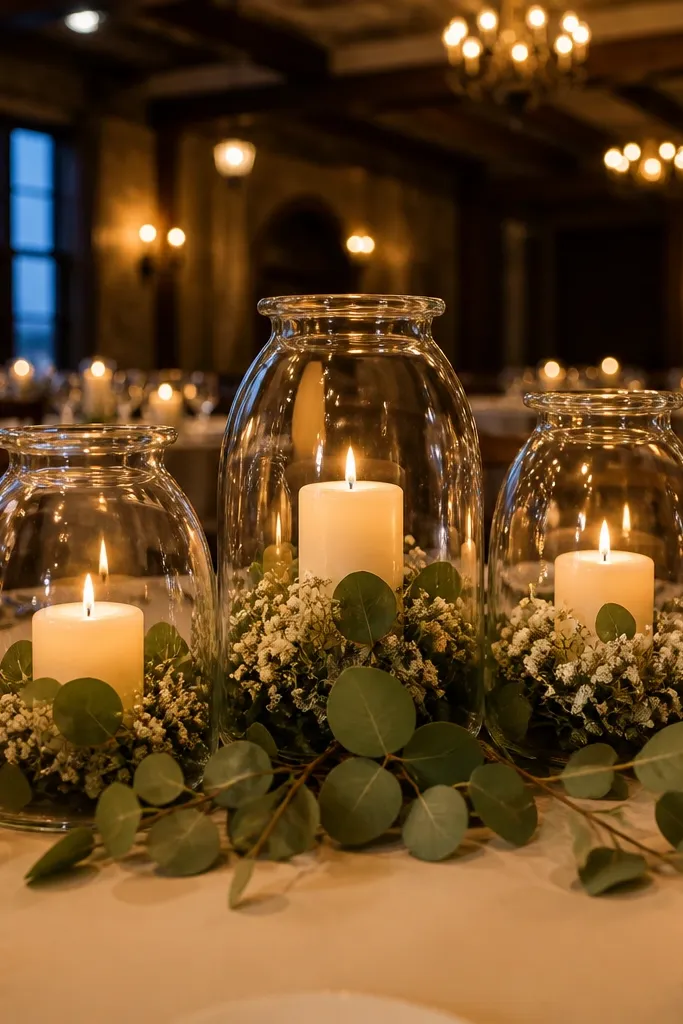
Glass cloches create instant “wow” because they frame the centerpiece like a little scene. You keep the height low while still getting a tall visual shape from the cloche itself. Low greenery inside makes it feel fresh, and the candle glow looks magical in evening receptions. This works best when tables are close enough for guests to notice the details.
Start by choosing cloches with a wide base so they sit stable; set one cloche per table or two smaller ones for longer tables. Then build a low insert: greenery ring plus a candle centered inside, keeping everything at least 2 inches below the glass top. Finally, add a single color accent stem (white bloom or blush rose) and place the cloche on a small wood slice or tray.
Quick tipBring a microfiber cloth for quick glass wiping; smudges show as streaks under warm lights.
Skip thisDon’t use tall, leafy plants inside; they crowd the cloche and block the candle light.
9. Gold rimmed bud vases with warm ivory blooms
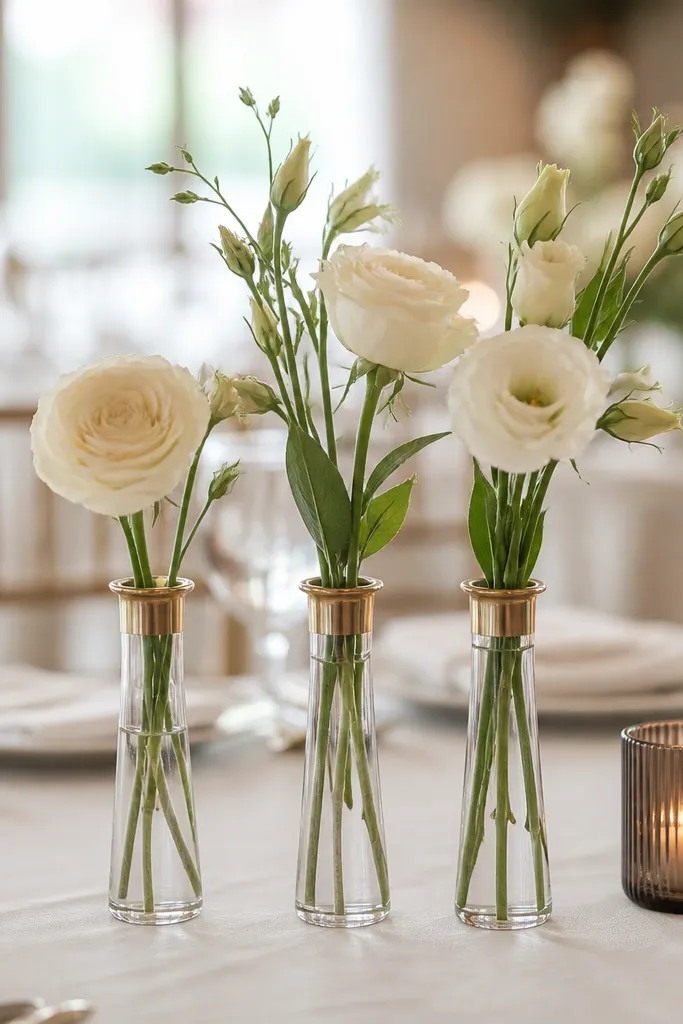
Gold rim details look luxe without needing a full gold table set. Pairing gold-rimmed bud vases with warm ivory blooms keeps the palette classy and photo-friendly. The setup is strong for formal receptions because it reads polished even when the floral quantity is moderate. It also works well with any tableware color because the gold is a bridge.
Start by selecting 10-14 gold-rimmed bud vases so the table looks continuous. Then use one warm ivory bloom type across most vases, and add 2-3 “interrupt” vases with a different texture bloom for interest. Finally, place vases on a narrow runner strip or along the center tape line so spacing stays consistent.
Use shorter vases and stagger heights by only 1-2 inches; big height jumps look messy in group photos.
Avoid cool-toned white flowers with gold; they can look blue under tungsten lighting.
10. Long greenery garland with micro candles along a single center line
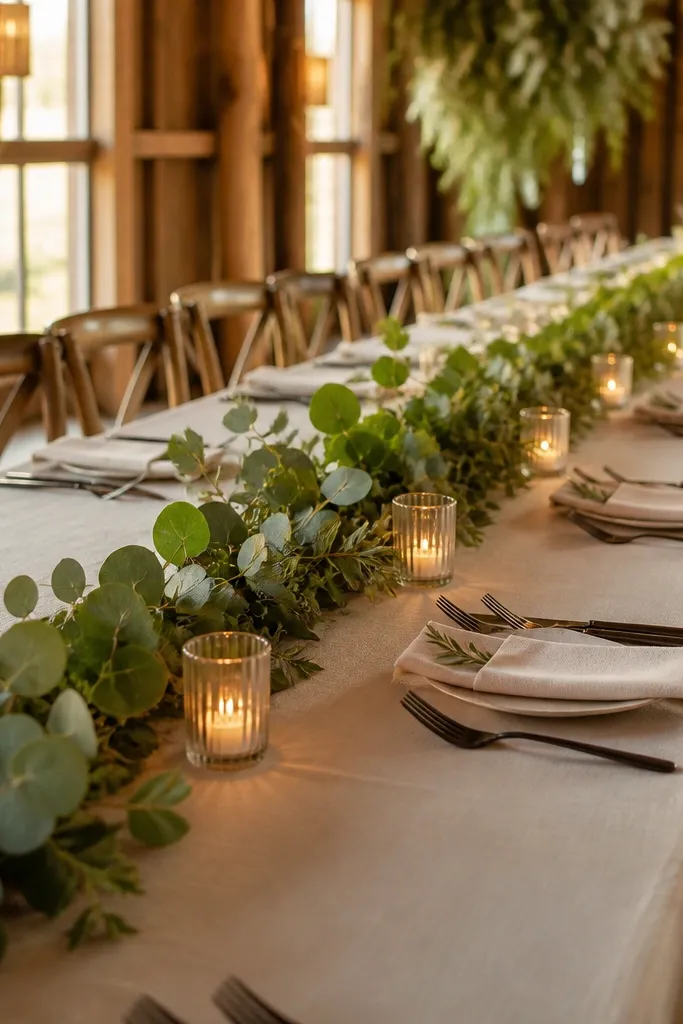
This is the cleanest way to make a table look “finished” without a massive centerpiece. A long greenery garland gives a continuous line, and micro candles create points of light that photograph well. It’s also easy to adjust if your table length changes between tables at the venue. This setup suits rustic venues and modern warehouses alike.
Start by measuring the table length and cutting garland so it sits with equal margins left and right. Then place micro candles (tea lights in holders or small flameless candles) every 10-12 inches along the garland. Finally, tuck in 3-5 white blooms or a small cluster at the midpoint so the table has one focal point.
Quick tipUse battery candles with a timer if you have a long dinner — it saves you from constant replacements.
Skip thisDon’t place candles too close to napkins; wax heat and shadows ruin the look.
11. Macramé runner + taper candle trio
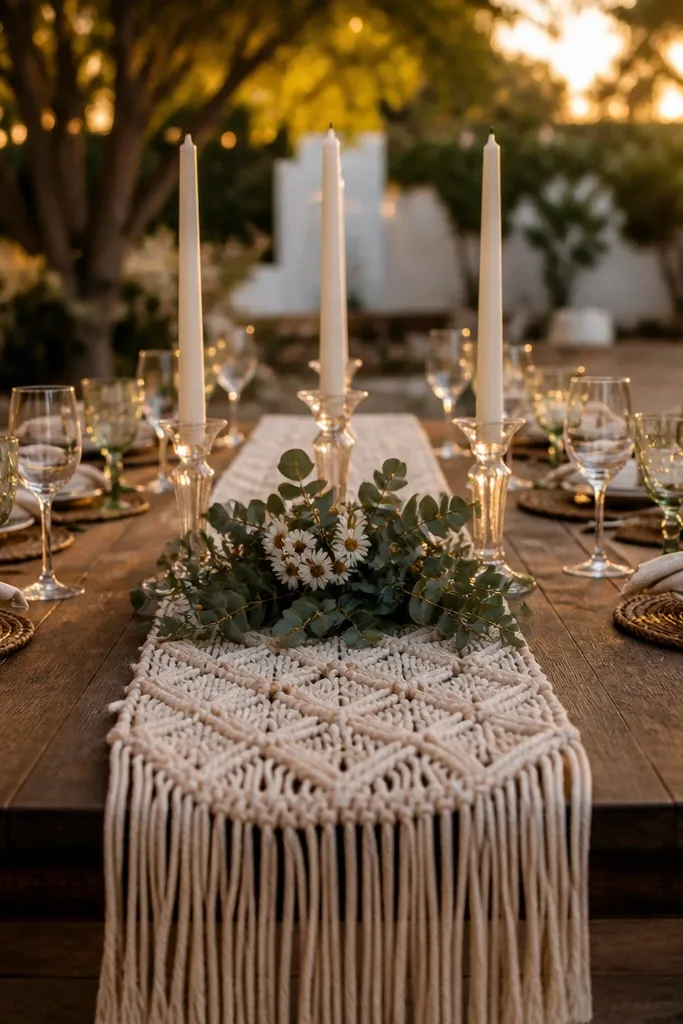
Macramé adds texture you can’t fake with smooth fabric, and it looks amazing in outdoor evening light. The key is keeping the rest simple: a few taper candles and maybe one small floral cluster. This gives you a boho-romantic look that still photographs crisp because macramé has pattern and candles have clean vertical lines. It’s a great choice for beach weekends and terrace receptions.
Start by centering a macramé runner so it doesn’t sag; pin the ends temporarily during setup. Then place a candle holder trio in the middle (or slightly off-center if your table has a display backdrop) with 3 tapers spaced evenly. Finally, add one tight low floral cluster at the base line, keeping blooms under the candle height so the pattern stays visible.
Quick tipBring extra clamps or binder clips to stop the runner from shifting when staff move chairs.
Skip thisAvoid heavy, tall florals on macramé — the texture gets lost.
12. Terra-cotta risers with bud vases in a gradient
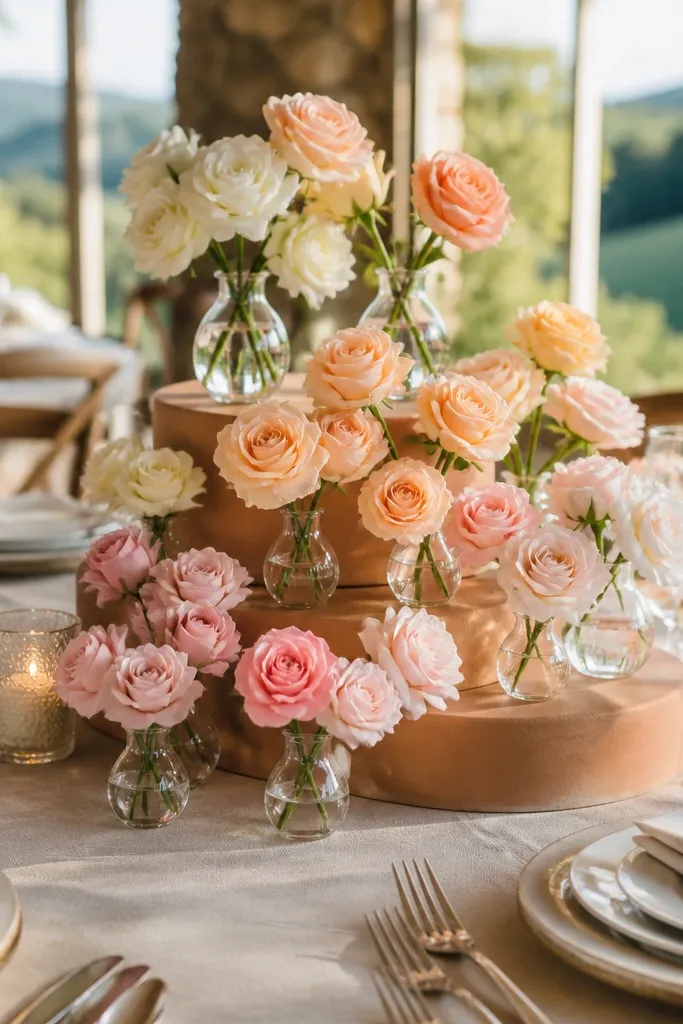
Risers create elevation without building tall centerpieces, so you get dimension in photos. Terracotta looks warm and intentional, and a gradient of bud vase colors (cream to peach to blush) makes the table feel styled even if you use fewer flowers. This is excellent for late-spring to early-fall weddings and for venues with stone or wood textures. It also works if you want a warm editorial look without going full rustic.
Start by choosing 3-5 terracotta risers and placing them along the center line, spaced so each riser sits under a group of vases. Then place bud vases on each riser, using one color per riser group to create a gradient from one end to the other. Finally, add a thin greenery strip at the base of each riser so the vases feel anchored, not floating.
Quick tipIf risers wobble, wrap the bottom with a thin felt strip — it fixes rocking instantly at setup.
Skip thisSkip mixed color gradients; keep it one smooth progression so it reads clean.
13. Black-and-ivory striped table runner with oversized napkin rings
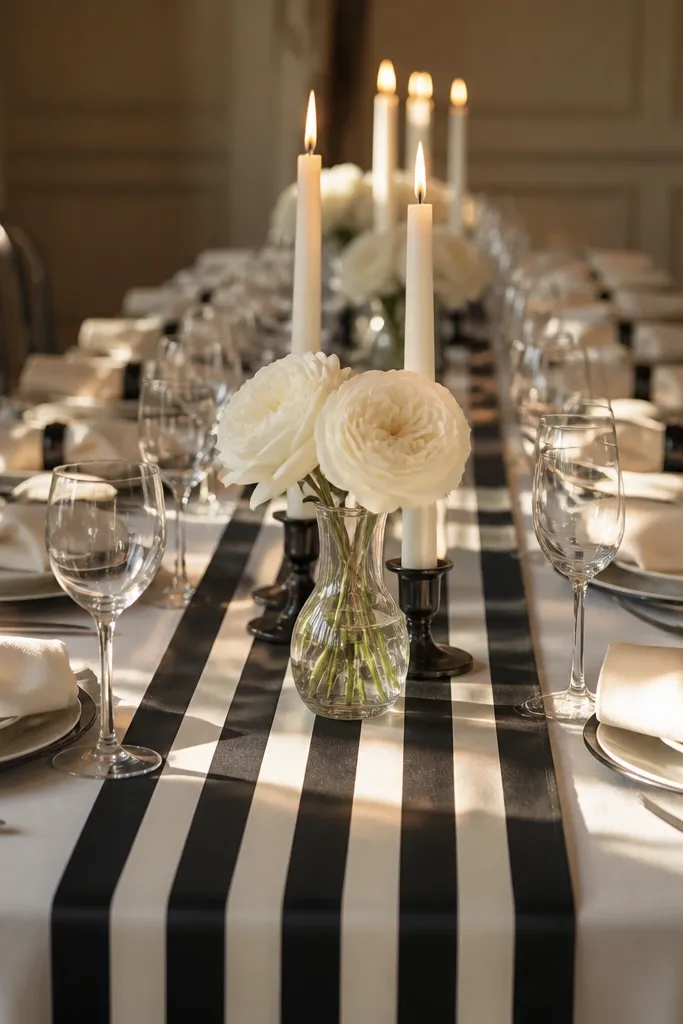
This is a table-decoration strategy, not just a centerpiece idea. A bold striped runner makes the whole table look designed, and oversized napkin rings add the “photo finish” guests notice. Keep the centerpiece low and simple — one small bud vase group or a single candle cluster — so the runner does the heavy lifting. It works for modern receptions and indoor venues where you want contrast and structure.
Start by choosing a runner that’s wide enough to cover the table center without thin edges showing; lay it straight and iron out wrinkles. Then place oversized napkin rings on each napkin in a consistent orientation so they line up visually. Finally, build a low centerpiece in the middle using 3-5 bud vases or a short candle cluster, and stop there.
Use fabric-safe starch on the runner before the event; it keeps stripes crisp under warm lighting.
Don’t add more patterns (like patterned plates) — stripes + patterns can look cluttered.
14. Blue glass bottle cluster with floating candles on a reflective tray
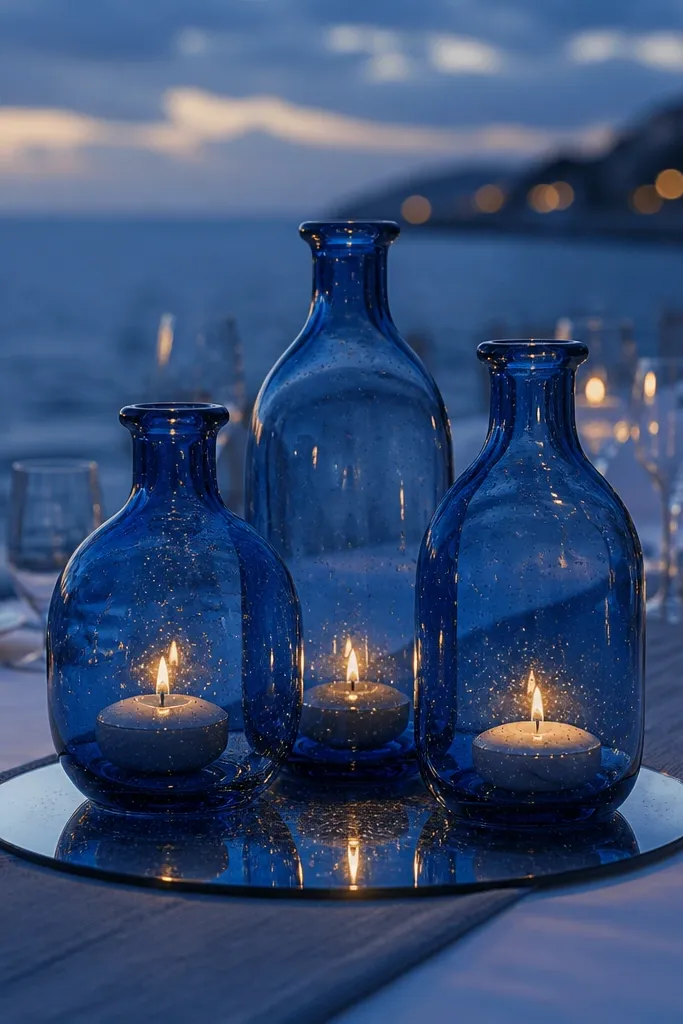
Blue glass bottles bring color that reads beautifully in evening light, and a reflective tray multiplies the sparkle. The cluster looks artsy without needing a full floral build, and floating candles keep it romantic. This setup works especially well for coastal venues, winter weddings with cool tones, and receptions that want a modern twist. It also gives you a strong focal point that stands out in wide table photos.
Start by placing a reflective tray in the center and filling a shallow section with water for floating candles. Then group 3-6 blue bottles around the tray area, using one bottle height as the “tall” bottle and keeping the rest lower. Finally, place 1-3 floating candles on the water surface and add one low greenery stem between bottles.
Quick tipDry bottles thoroughly before placing on the tray so water spots don’t show under flash photos.
Skip thisDon’t use too many bottle sizes; a tight cluster looks intentional, while random heights look accidental.
15. Pearlized votive holders with blush mini bouquets
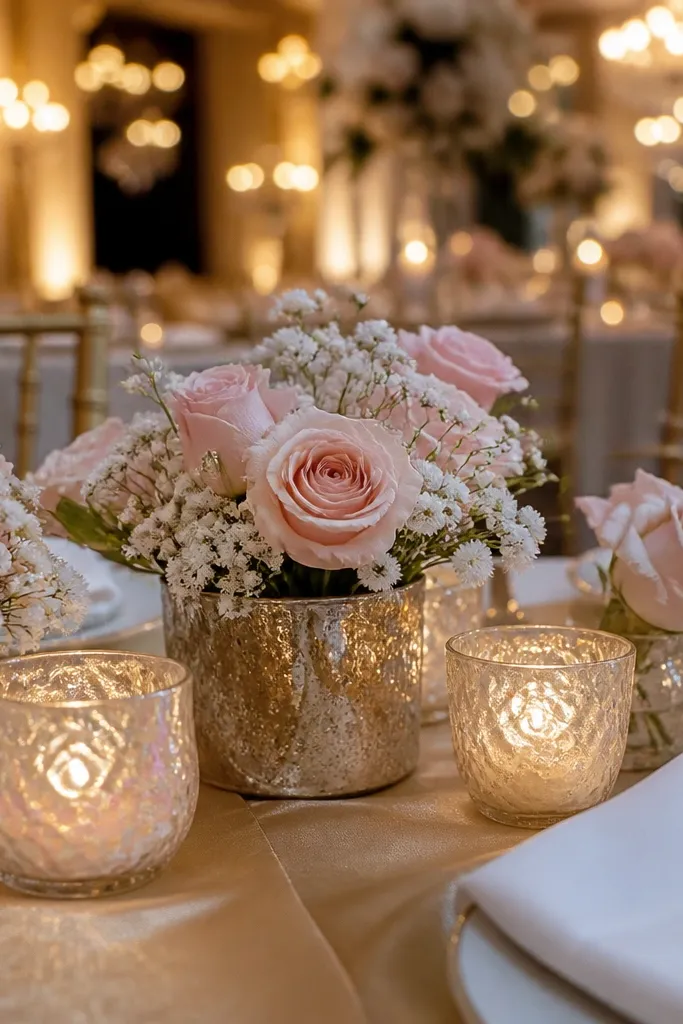
Pearlized votive holders create a soft glow that flatters skin tones in photos, which matters when tables are photographed next to guests. Blush mini bouquets keep the floral portion light and quick to assemble. This is a strong pick for indoor receptions with warm chandeliers or dim lighting because the pearl finish catches light without being shiny-glossy. If you want a romantic look that still feels modern, this is the path.
Start by placing pearlized votive holders in a row down the center, 4-6 per table. Then build mini bouquets in small bud vases or glass cups, keeping them no taller than the votives. Finally, nestle each mini bouquet between votive holders so the table reads as one continuous arrangement.
Quick tipUse warm-white LEDs if you’re using flameless candles; cool LEDs make blush flowers look gray.
Skip thisAvoid large bouquets on this setup; pearl holders look best when the table stays airy.
16. Sculptural pampas grass with a low candle bank
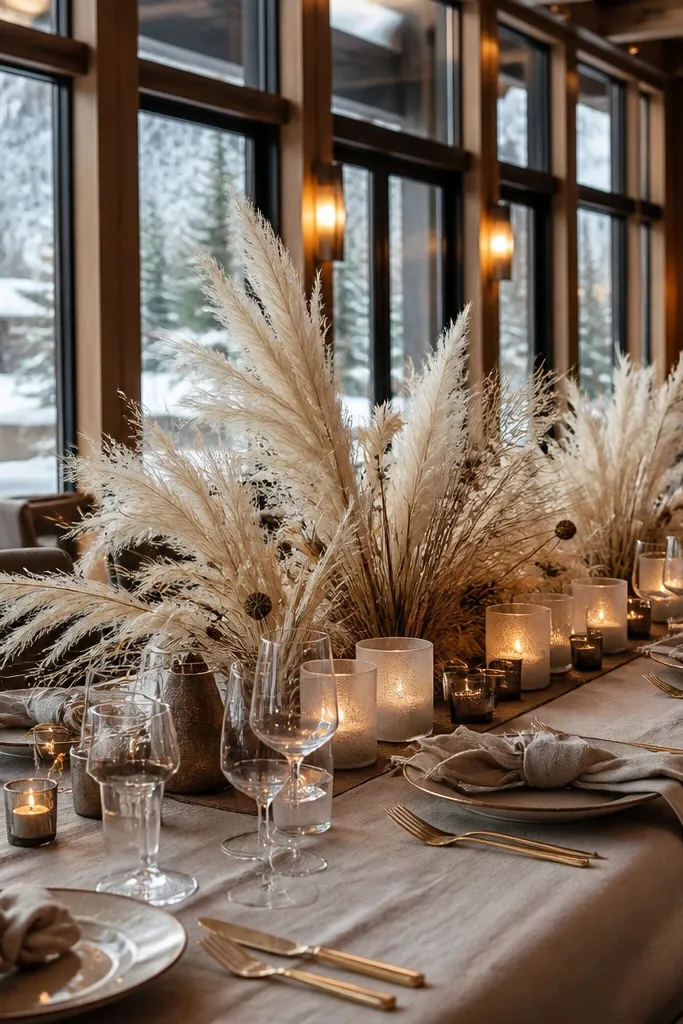
Pampas grass gives you movement and height drama without building full floral arrangements. The trick is pairing it with a low candle bank so the center still looks balanced and doesn’t block conversation. This is a great fit for boho weddings and for winter receptions where you want texture more than fresh blooms. It photographs well because pampas plumes have clear silhouettes.
Start by placing a low candle bank in the center — 5-7 candles in a straight line. Then anchor pampas grass in a weighted base or vase behind the candle line, keeping the plumes leaning outward. Finally, add one small ribbon tie around the base to hide mechanics and keep the look clean from camera height.
Quick tipIf pampas sheds, mist lightly with water and let it dry in a bag for a day; it reduces stray fibers at setup.
Skip thisDon’t pack pampas too tightly; fluffy but airy plumes look better than dense clumps.
17. Crystal bead garland draped over clear acrylic risers
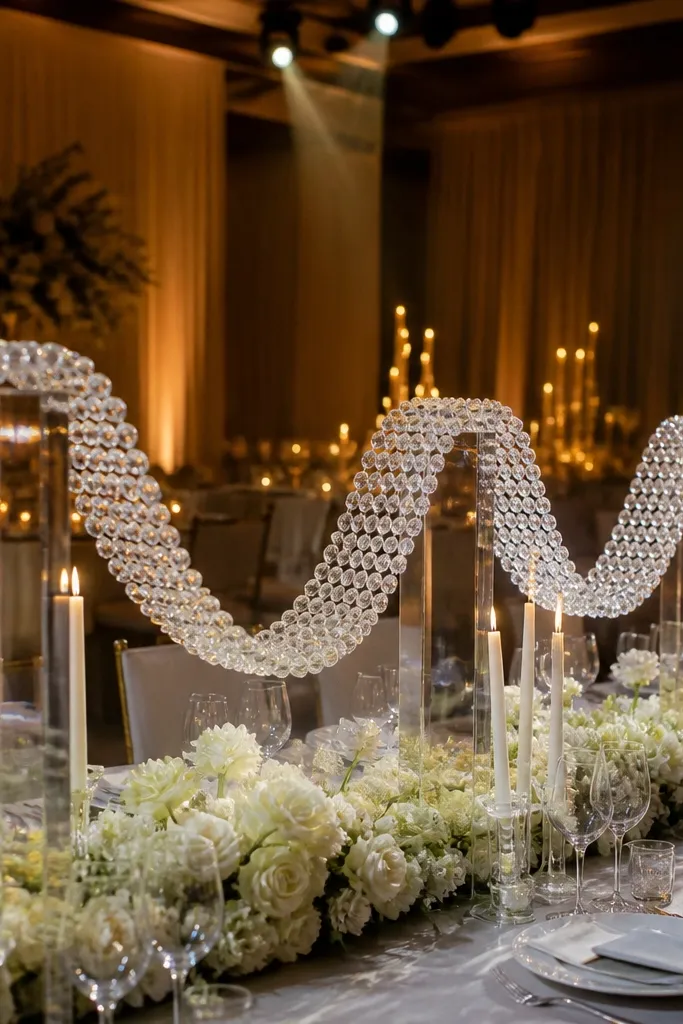
Bead garlands turn a simple centerpiece into something that sparkles on camera, even if you keep flowers minimal. Acrylic risers make the beads look like they’re floating, and the light catches every angle when guests move. This is best for evening receptions and venues with spotlights or strong overhead lighting. It’s also a smart option if you want a glam look but don’t want heavy florals.
Start by placing clear acrylic risers in the center and securing them so they don’t slide on table linens. Then drape a crystal bead garland across the risers in a gentle arc, not a straight line — the arc reads more natural in photos. Finally, add 2-3 low candles or a tiny floral cluster at the lowest point of the arc so the garland has a “home base.”
Quick tipUse a lint-free cloth to wipe acrylic before setup; smudges kill sparkle.
Skip thisSkip thick fabric under acrylic risers; it can create glare and hide the riser edges.
18. Asymmetrical floral runner with mirrored place-card accents
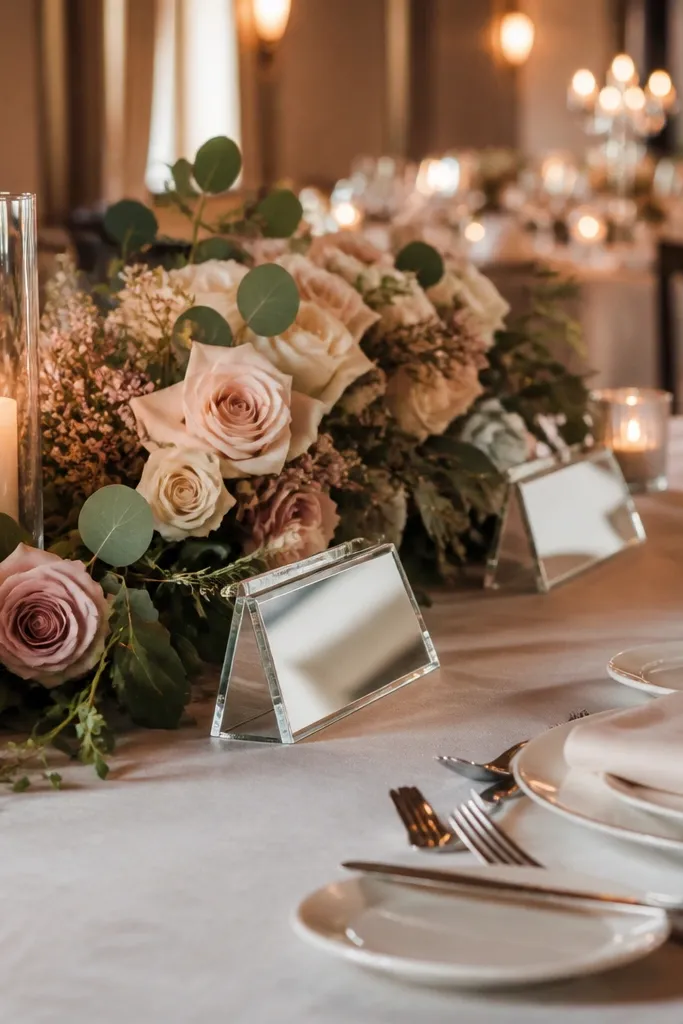
Asymmetry looks modern and keeps the table from feeling like a cookie-cutter lineup. A floral runner that shifts slightly off-center gives photographers something to frame, especially when place cards sit nearby. Mirrored accents add sparkle and make the runner feel intentional, not random. This works well for weddings where you have branded place cards or a clear table design system.
Start by laying a low floral runner across the center but shift it 2-4 inches off-center so it creates a diagonal visual line. Then add small mirrored accents near place cards on both sides, keeping the mirrors at the same height so photos look balanced. Finally, keep the centerpiece itself low — 6-10 inches — so the runner and place cards stay the focus.
Quick tipMark your runner position with painter’s tape on the table — it prevents last-minute skew when chairs move.
Skip thisDon’t add tall items near place cards; it blocks names and looks messy in close photos.
19. Candle lanterns with a low citrus-and-herb scatter
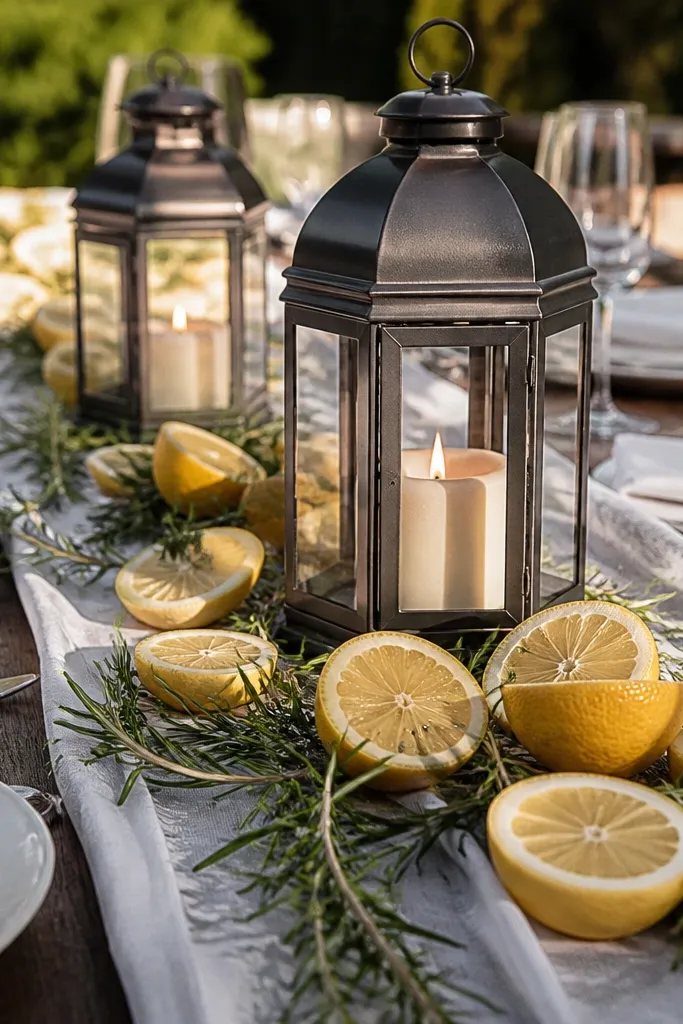
Lantern candles create a warm glow and feel seasonal without requiring heavy florals. Citrus slices and herb sprigs add color and a fresh look that reads clearly in daylight and evening shots. This setup is especially good for late-summer and fall weddings where you want a cozy vibe that still looks clean. It also works for outdoor receptions because lanterns feel intentional outdoors.
Start by placing lanterns along the center line, 2-3 lanterns per table depending on table length. Then scatter citrus slices and herb sprigs around the lantern bases, keeping the scatter low and mostly within 12-16 inches of the center. Finally, add a single low floral stem near one lantern so the decor looks connected, not separate.
Quick tipUse real citrus only if you can set up close to dinner; cut slices dry out fast in warm rooms.
Skip thisAvoid messy, uneven scatter; keep pieces spaced so the tableware remains readable.
20. Rose gold foil confetti in glass vases with feathers
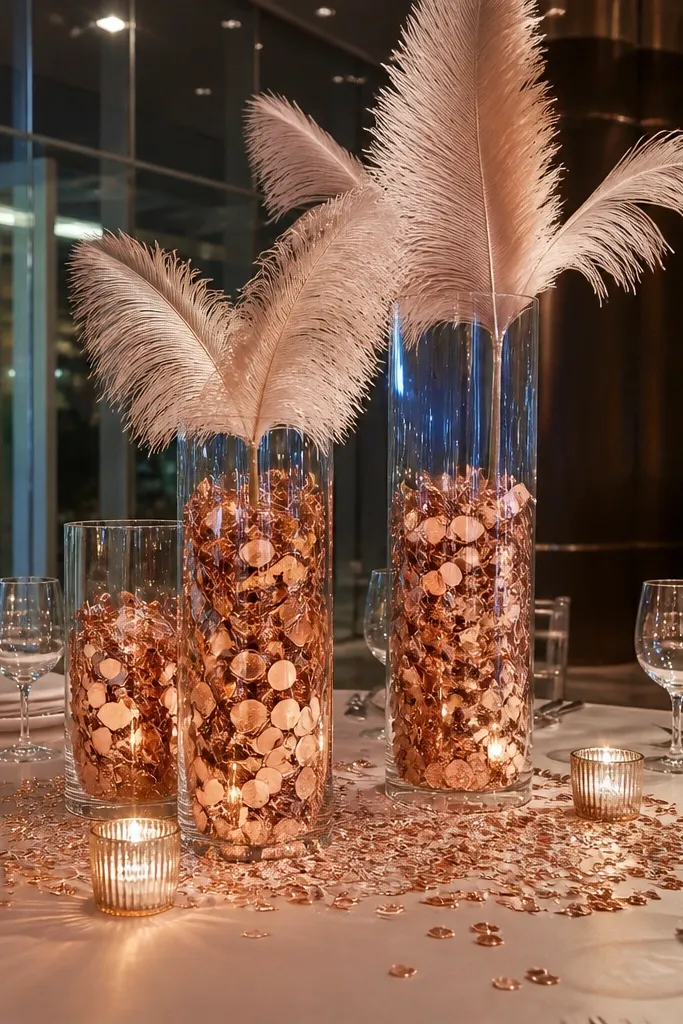
This one is for couples who want a party mood without loud colors. Rose gold foil catches flash and creates sparkle in a way that looks designed, not random. Pairing it with a few feather accents adds softness and keeps the center from looking like craft glitter. It’s best for modern indoor receptions and for winter weddings where you want glam.
Start by filling 4-6 clear glass vases with rose gold confetti; use enough to coat the inside but not so much that it clumps. Then add a few short feathers tied to a small stick and place them so they peek above the confetti line. Finally, group the vases on a tray with 2-3 tea lights and keep everything low so guests can see each other.
Quick tipChoose confetti that’s thin and consistent; chunky pieces look dull and uneven under light.
Skip thisDon’t add heavy florals around the vases — let the sparkle be the centerpiece.
21. Deep green velvet runner with cream taper candles
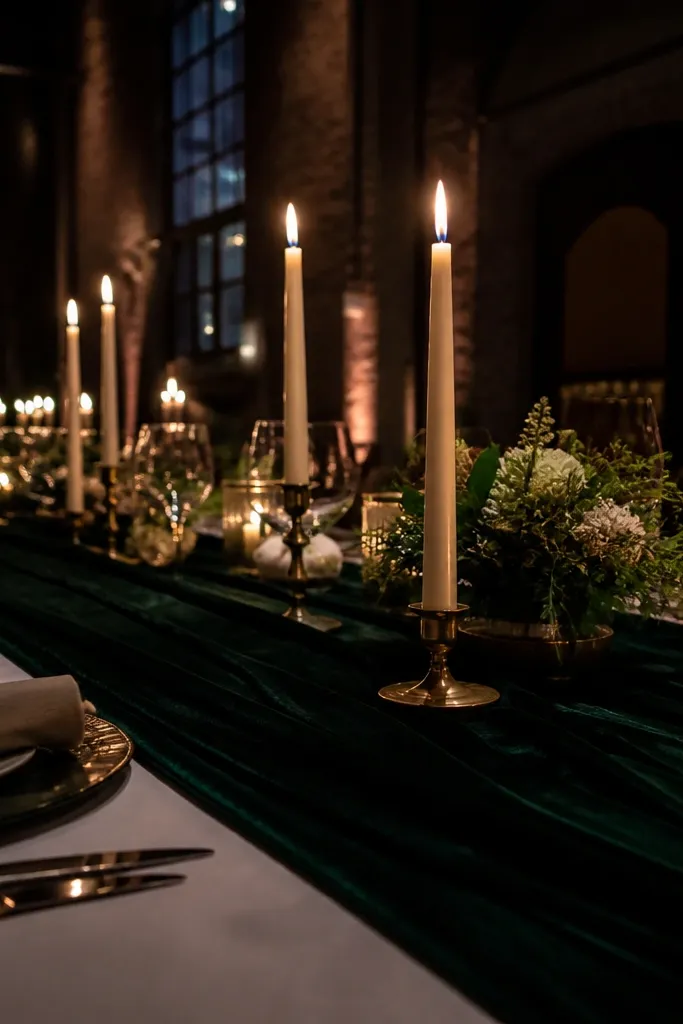
Velvet gives you instant drama because it absorbs light instead of reflecting it. A deep green runner paired with cream tapers looks rich in candlelight and still clean in daytime photos with the right brightness. This is a strong choice for winter and fall receptions, especially if your venue has dark wood or neutral walls. It also makes simple centerpieces look elevated because the runner holds the mood.
Start by laying the velvet runner so it lies flat and doesn’t bunch; smooth it from the center outward. Then set cream taper candles with matching holders in a straight line down the center, spacing them 10-12 inches apart. Finally, keep floral minimal: a couple of greenery sprigs or one small bouquet in the middle so the velvet stays the star.
Use a fabric steamer instead of an iron; velvet shows shine when pressed.
Skip patterned napkins here; velvet + patterns can look heavy and cluttered.
22. White foam-free floral blocks in a low water base
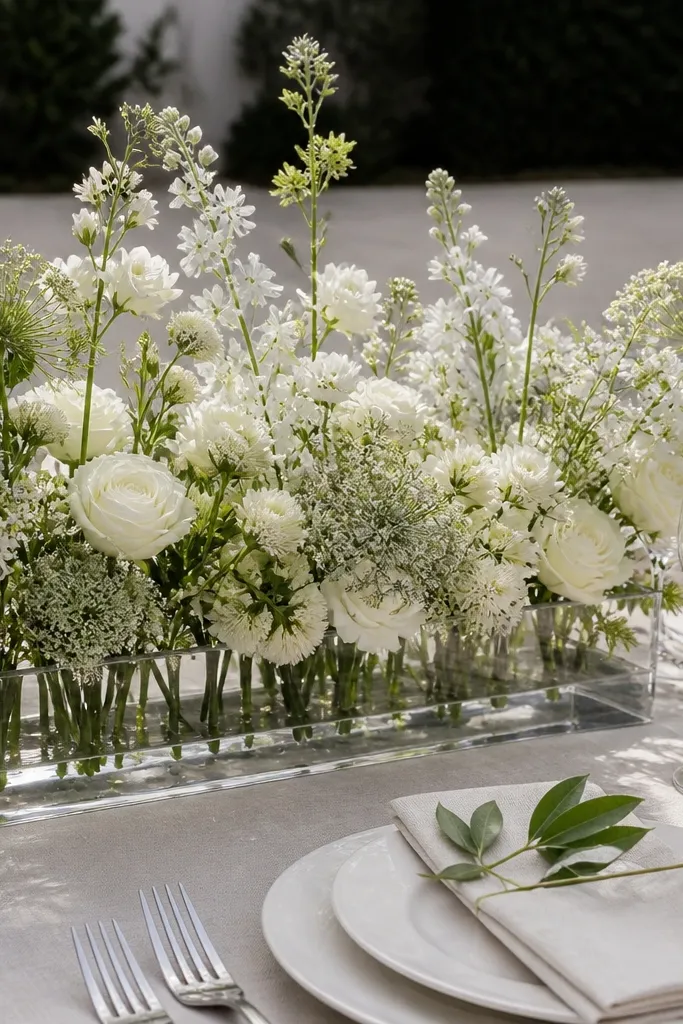
Foam-free floral looks cleaner and more natural when it’s built low and wide. A low water base lets stems sit with support while keeping the texture airy and realistic. White flower blocks create a strong shape that reads well in photos and doesn’t feel chaotic like loose bouquets. This setup is great for modern receptions that want a “designed garden” vibe.
Start by using a shallow tray or wide bowl with a water base and a hidden support grid or frog system. Then arrange white blooms in block-like sections, keeping stems parallel and heights consistent across the tray. Finally, add a small border of greenery around the edges so the block looks intentional from every angle.
Quick tipMist blooms lightly before placement and keep the tray away from direct HVAC vents; petals dry fast.
Skip thisDon’t let stems float too freely; foam-free still needs structure so the block holds its shape.
23. Colored glass votives with a single-tone flower ring
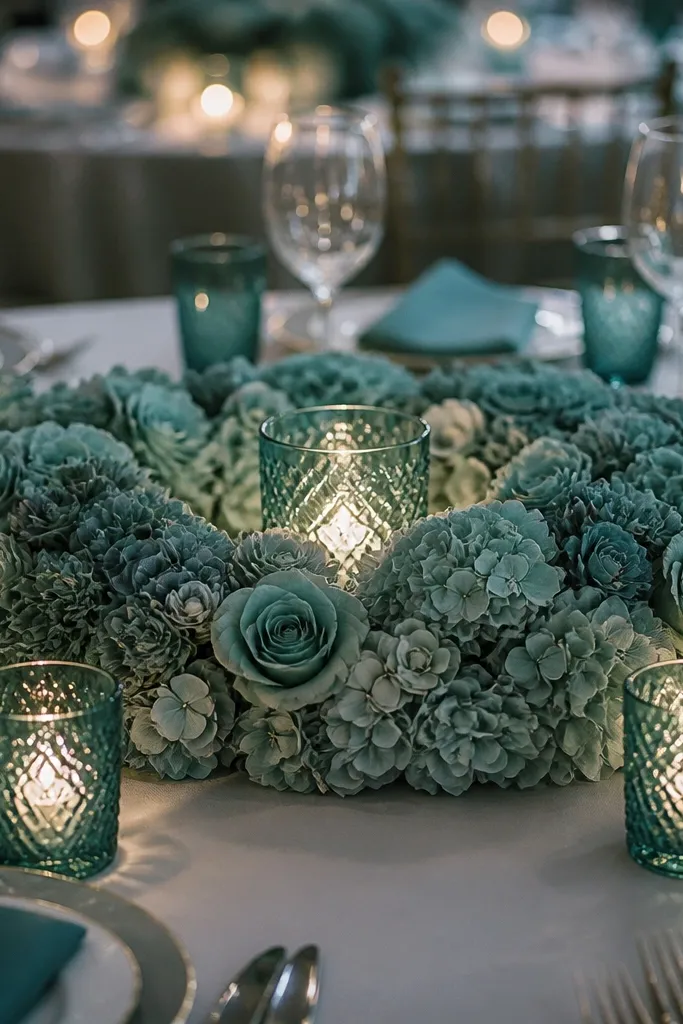
Colored glass votives add color that looks crisp in photos, especially when you keep the flowers in one tone. The flower ring makes the centerpiece feel like a complete design, not a random cluster of candles. This is a great option for brides who want color but don’t want to commit to big floral budgets. It also works across seasons because you can pick colors that match your venue lighting.
Start by choosing one flower tone for the ring (like blush or soft yellow) and select colored votives in 2-3 shades that match it. Then arrange votives in a circle or oval around the base, keeping the top edges at the same height. Finally, place the flower ring inside the votive circle, filling gaps so the ring reads full on camera.
Quick tipUse clear plates or small trays under votives to protect linens from condensation.
Skip thisAvoid mixing too many flower colors; the ring loses impact when the palette gets noisy.
24. Monogrammed acrylic place-card holders with mini candle cups
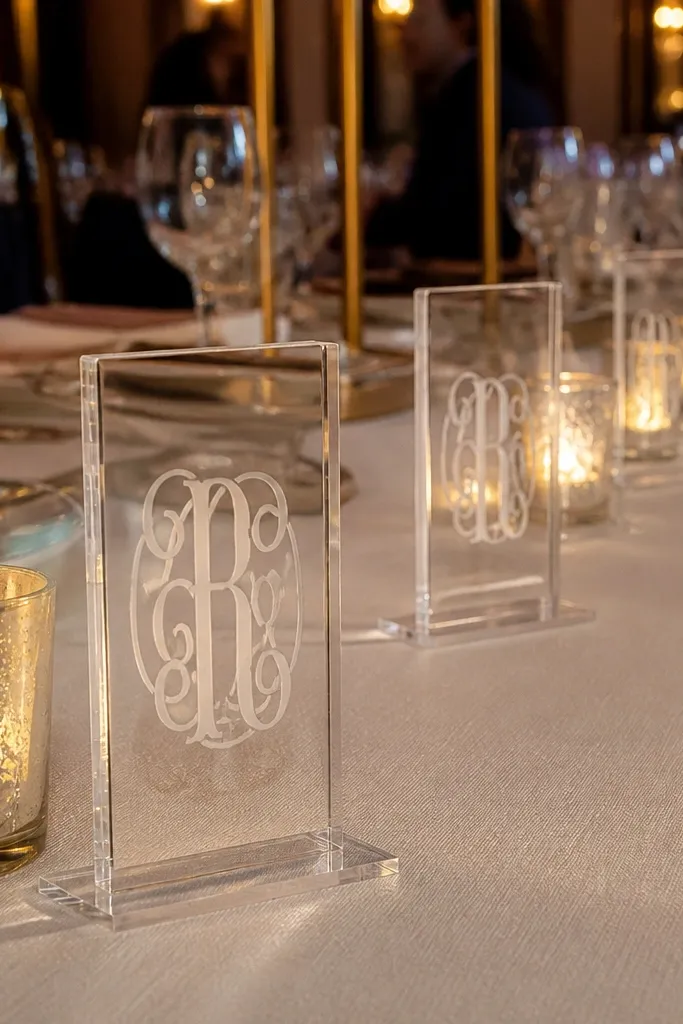
This is a table decoration approach that makes the whole table feel branded. Monogrammed acrylic place-card holders create a clear focal point per guest, and mini candle cups keep the center warm and photo-ready. It’s especially good for couples who want a clean, modern look with minimal florals. The best part is speed: you’re decorating the table while guests are already being assigned seats.
Start by placing acrylic place-card holders so they’re evenly aligned with each place setting. Then set mini candle cups along the center line, using the same cup size and spacing so photos look uniform. Finally, add a small greenery strip or one mini bouquet near the center to connect the place-card design to the centerpiece.
Label the base pieces by table number in advance; acrylic setup is fast when parts don’t get mixed.
Don’t put candles too close to place cards; shadows can hide names in flash photos.
25. Charcoal lanterns with smoke-gray florals and white candles
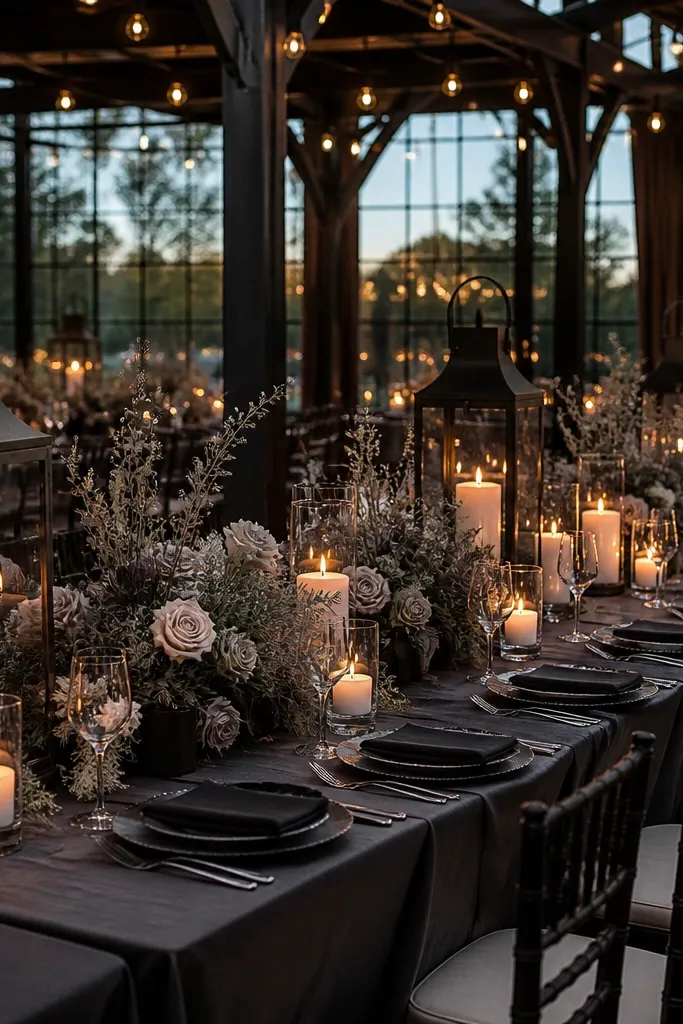
Charcoal lanterns make a reception feel dramatic without going goth. Smoke-gray florals and white candles create a high-contrast palette that looks sharp in evening pictures. This fits modern venues, industrial spaces, and winter weddings where you want cozy lighting. It also works if your wedding colors are neutral and you want something that still reads “designed.”
Start by placing charcoal lanterns in the center, spaced so there’s a lantern every 24-30 inches on longer tables. Then build a low floral base around the lanterns using smoke-gray stems and keep the flowers under the lantern handle line. Finally, add white pillar or taper candles inside or beside lanterns for consistent glow across the table.
Quick tipIf lanterns have glass doors, clean them inside and out — condensation smudges kill the look.
Skip thisAvoid bright neon accents; charcoal + neon reads costume, not reception.



