
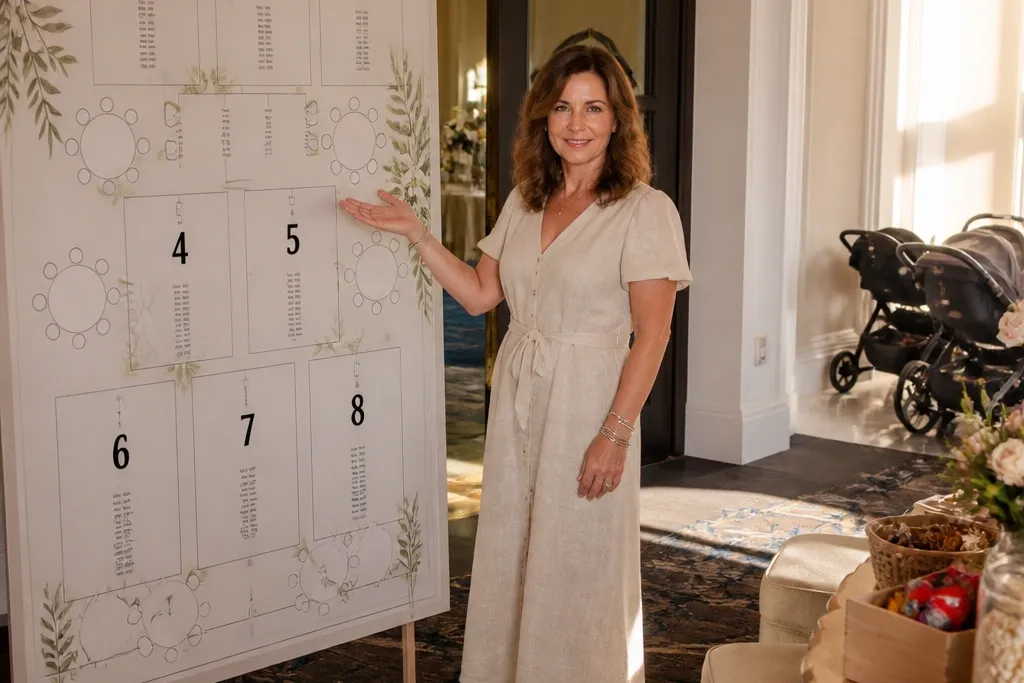
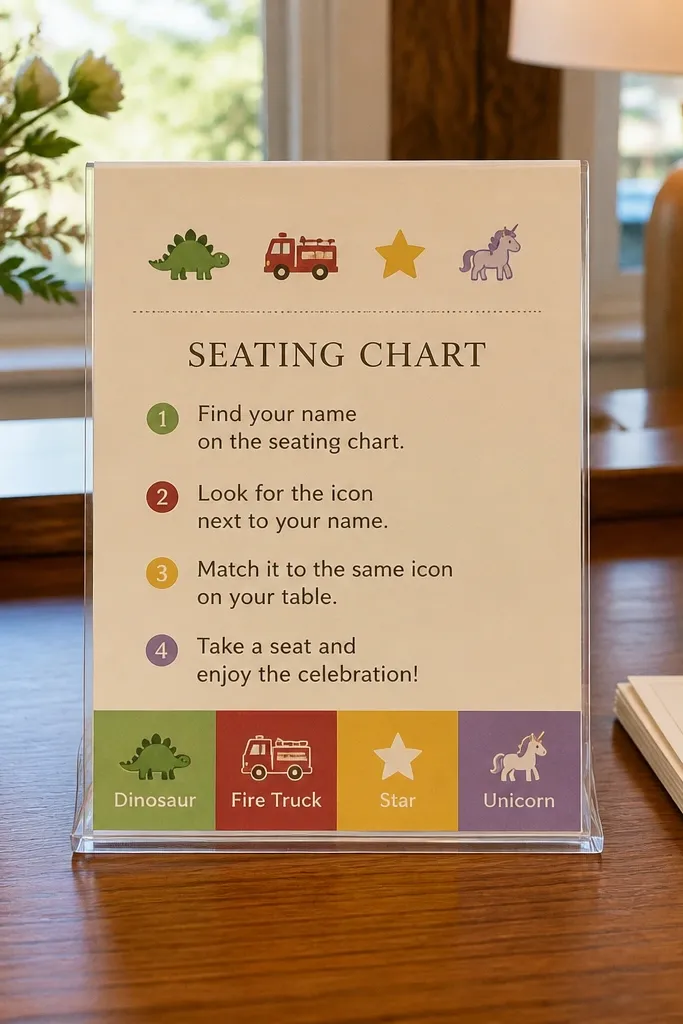
1. Pocket Map Seating Grid with Big Table Numbers
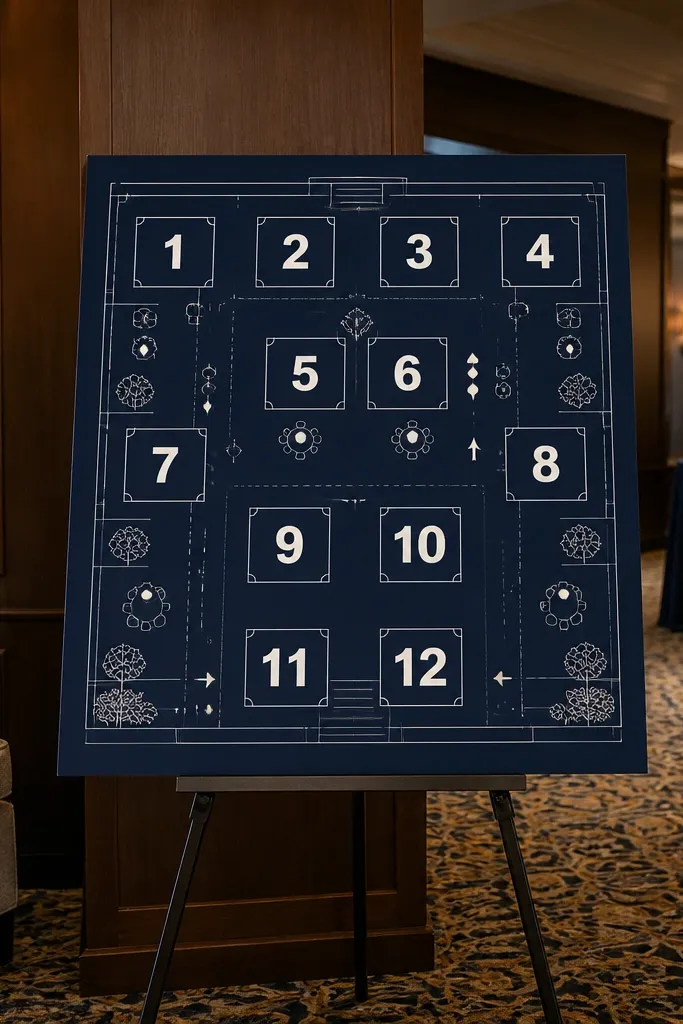
This is a seating chart you can photograph from across the lounge area: a clean grid with table numbers that look like street markers. The trick is using thick, high-contrast numbers and a map-style layout that shows where each family pod sits relative to the room. It works especially well for family-friendly seating chart wedding days because guests find their block quickly without hovering at the chart. Put it near the entrance to the reception so the first wave of guests can locate seats before the room fills up.
Start by sketching a top-down layout of your room and assign each table a number that matches your actual table order. Then create a grid-style chart with big numbers and simple family initials (like “Smiths” or “Garcia” in one short line) so you don’t need long text blocks. Finally, print it on foam board or thick cardstock and mount it at chest height; plan for one person to point and redirect so you don’t get a crowd. Budget-wise, expect $25-60 for printing and mounting, and give yourself 2-3 hours to set it up before doors open.
Test readability by standing 10 feet away and checking if table numbers still pop.
Don’t shrink the numbers to fit more text — that kills both speed and photo clarity.
2. Family Pods Color System on Place Cards
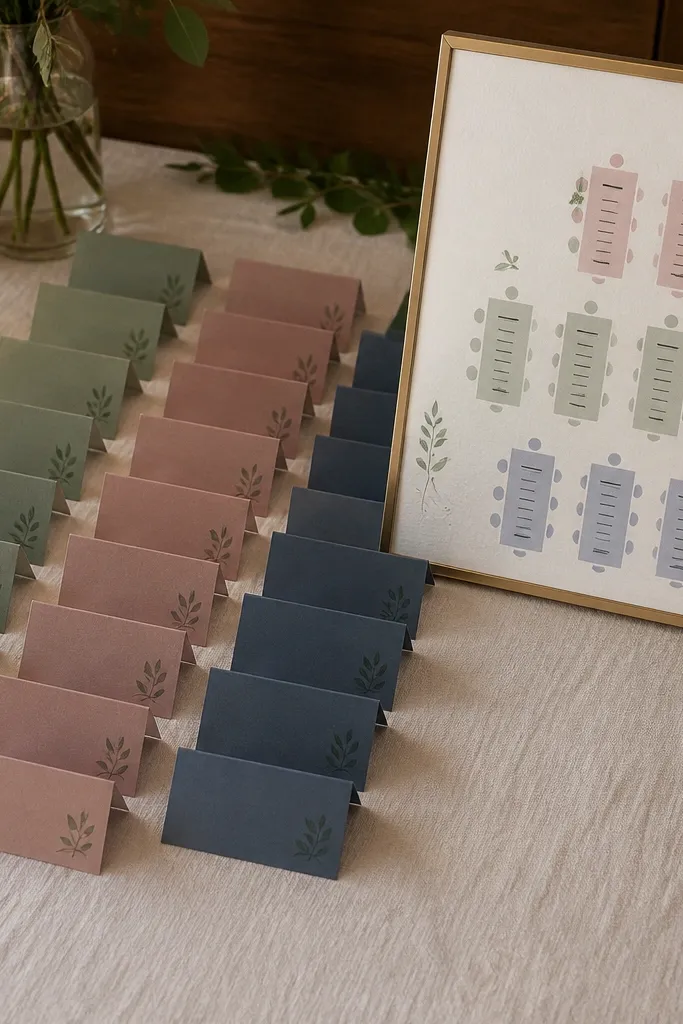
If you want a seating chart wedding look that feels intentionally designed, color is your friend. Use a color system for family pods (one color per household group) and repeat it on the seating chart sign, table numbers, and each place card. The visual payoff is huge: photos look cohesive because every table has a consistent “color language.” This is also practical for a family-friendly seating chart wedding because caregivers can quickly scan for the right pod and kids stay with the people who can actually help manage them.
Start by listing your major pods: immediate family, extended family, and any kid-heavy friend groups. Assign each pod a color and keep it consistent across signage and cards. Then place a small colored dot or stripe on each place card and put the same color legend on the seating chart sign at eye level. For cost, color printers and cardstock run about $40-90 depending on paper and quantity; plan to assemble cards the night before so the morning stays calm.
Use 6-8 colors max. More colors make the chart look messy and guests miss their pod.
Don’t use pastel-on-white cards if your venue lighting is dim — contrast disappears in photos.
3. Mini Frame Photo Seating Chart Legend
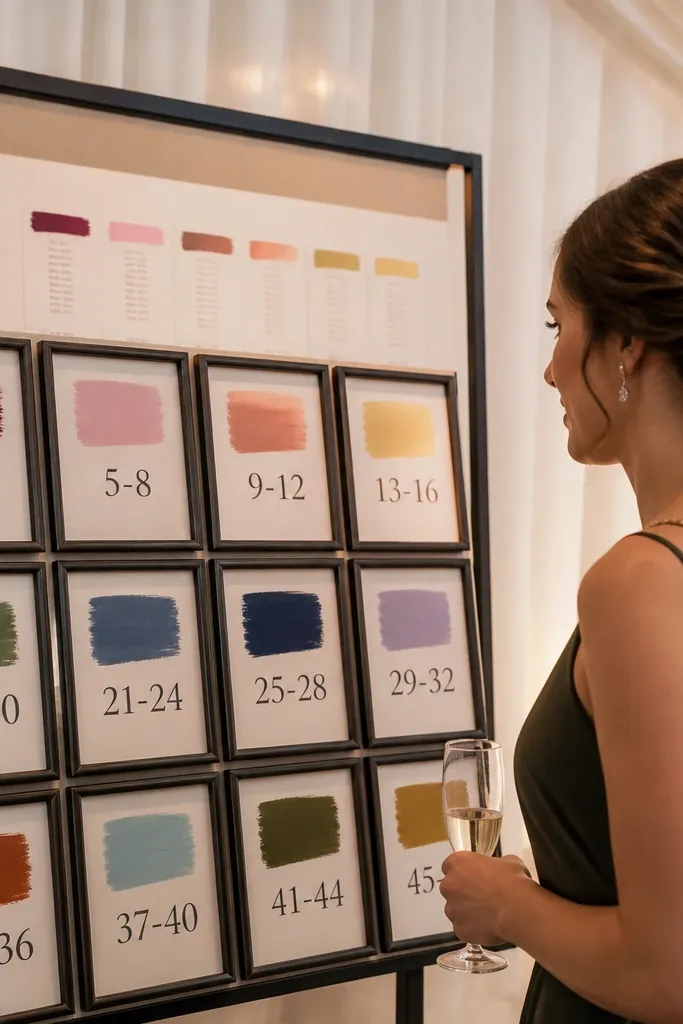
This idea turns a seating chart into decor instead of paperwork. You print a clean legend that lists each family pod with a table number range, then attach it to a board surrounded by mini frames with matching colors or initials. It photographs well because frames create depth and texture, and the chart looks styled rather than “event admin.” It’s a great fit for family-friendly seating chart wedding days because guests can spot their group by a short label instead of reading dense blocks of names.
Start with one large base board and choose a frame size that keeps everything readable (think 4x6 mini frames). Then create a legend strip on the board with pod names and their table numbers, using the same font and color as the place cards. Finally, place the frames around the board in a balanced pattern and mount the whole piece near the coat check or entry table. Expect $60-150 depending on how many frames you buy; allow 2 hours for layout and mounting.
If you’re using initials, keep them to two to three letters. Long surnames look crowded on photos.
Don’t use a busy background behind the legend. Let the board be the clean focal point.
4. Ceremony-to-Reception "Aisle Flow" Seating Blocks
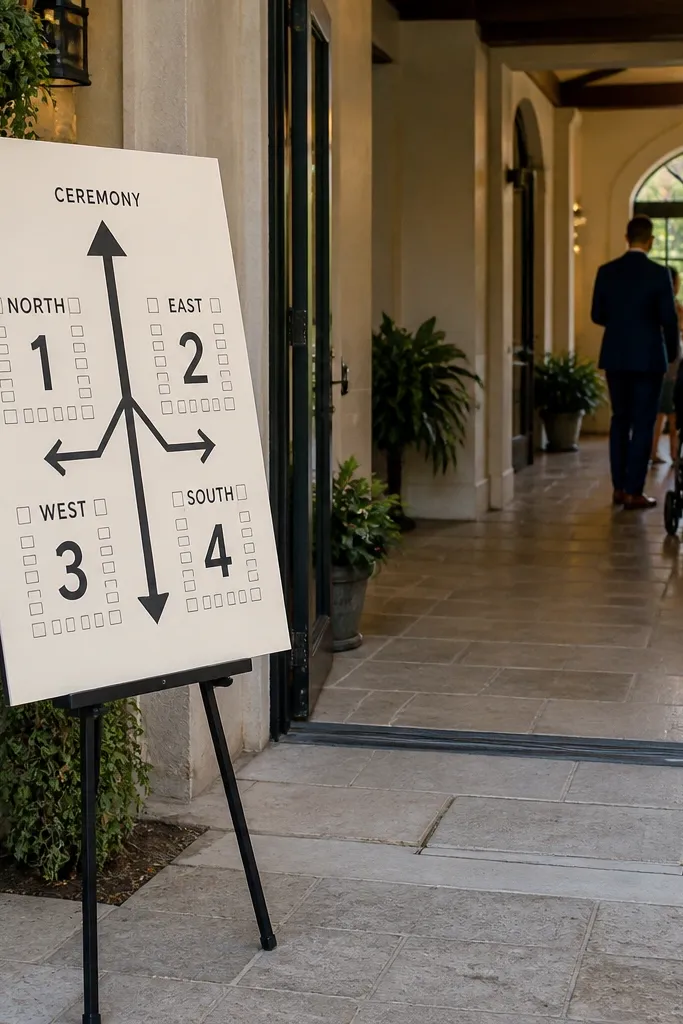
This is for venues where people get lost between ceremony and reception. Your seating chart shows the flow: arrows from the entrance to the nearest table blocks, with table numbers grouped by direction. The look is strong because arrows create a graphic design moment, and guests don’t hover in one spot. For family-friendly seating chart wedding, this also protects kids: you can direct families toward the tables closest to bathrooms, exits, or a kids' snack station.
Start by walking the path from ceremony exit to reception entry and note any pinch points (bar line, stair landing, narrow hallway). Then design your chart with 3-4 arrow sections and label each arrow with a table range, like “Tables 1-6” for the left path. Finally, mount the chart at the reception entrance and place a small sign near the arrow turn so guests don’t backtrack. Printing and mounting runs about $25-80, and setup is quick if you tape down the chart template before you glue anything.
Use arrow colors that match your table number color system so the whole room feels connected.
Don’t put the chart too far from where guests first enter the reception — it defeats the flow.
5. Clear Acrylic Seating Chart with Numbered Stand Blocks
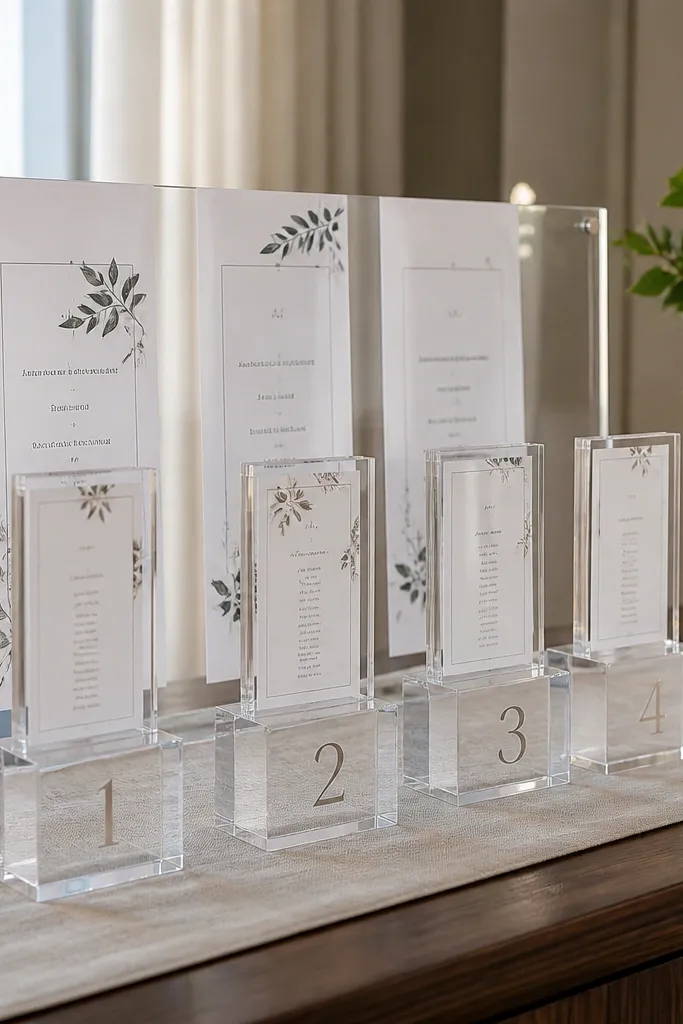
If you want “modern and photogenic,” acrylic does it. Build a seating chart where each table number sits on a stand block (or acrylic pedestal) and the family pod labels are printed on a clean insert behind. When the light hits it, the chart looks polished and doesn’t look like a thrown-together poster. This works well for family-friendly seating chart wedding days because you can keep the pod labels short and readable, and guests don’t need to press close to find their table.
Start by choosing a clear acrylic board size that’s tall enough for quick scanning (18x24 is a common sweet spot). Then print an insert with a simple legend and place numbered acrylic stands in a grid matching your table layout. Finally, hang or place it near the gift table or welcome area so it’s in the same photo frame as the decor. This setup costs more, typically $90-250 depending on materials, but it’s one of the cleanest-looking options in photos.
Quick tipUse matte vinyl for labels. Gloss glare makes numbers disappear at certain angles.
Skip thisDon’t crowd the insert with long sentences. Keep it pod-only.
6. Welcome Sign + Seating Chart Two-Sided Map
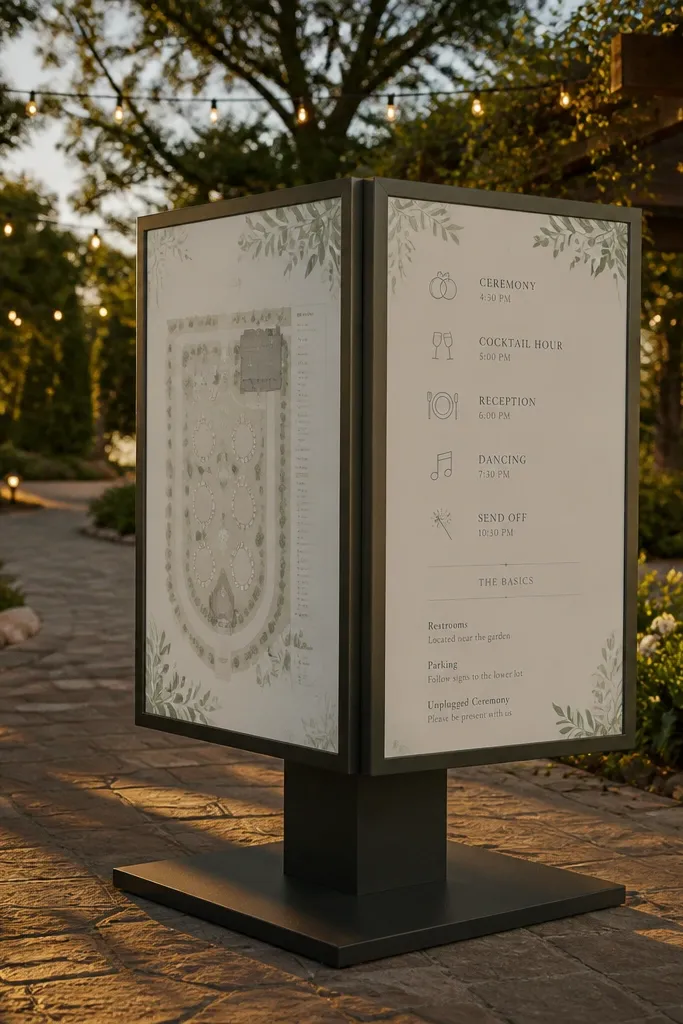
This is a smart way to get seating chart visibility without adding another standalone sign. Your welcome sign has the seating chart on one side and the ceremony/reception basics on the other, so guests always have context. The look is cohesive because it matches your main signage, and it reduces the “paper stack” feeling. For family-friendly seating chart wedding, it also helps caregivers and grandparents because they can read the chart without moving through a crowd.
Start by choosing one main welcome sign board size and decide where the seating chart will live on the back or side. Then design the seating chart section with large table numbers and short pod labels. Finally, place the sign at the entry where it faces the first line of arriving guests, and add a small arrow pointing toward it. Cost is usually $30-120 depending on printing and board type, and you can assemble it in under an hour if you measure your spacing first.
Quick tipPut table numbers at the top half of the sign so guests can find seats without looking down.
Skip thisDon’t split the seating chart across too much width. One clear vertical layout reads faster.
7. Table Number Stair-Step Sign for Easy Scanning
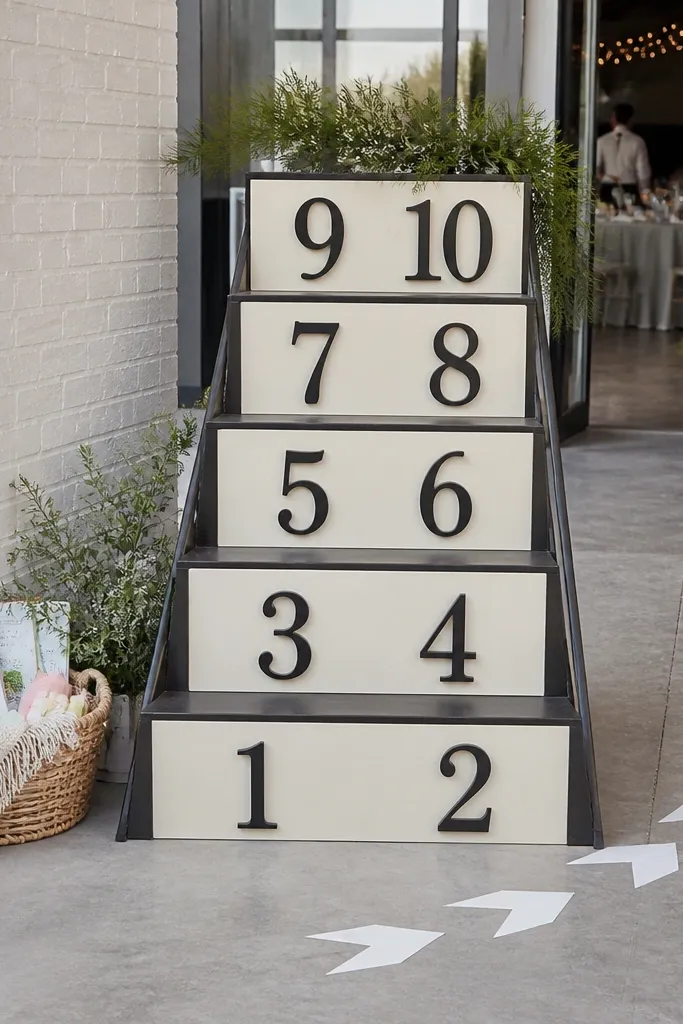
Instead of a flat grid, use a stair-step arrangement so guests' eyes follow a path. It looks intentional and modern in photos, and it’s easier for kids and older guests to scan because the chart has a guided shape. For family-friendly seating chart wedding, it reduces confusion when multiple family pods arrive at once. This design also makes the chart feel like decor, not a spreadsheet.
Start by writing your table numbers in order and arranging them in staggered rows like steps, with pod labels aligned under each number group. Then print the chart onto foam board or mounting board and add a thin frame so it looks finished. Finally, place it where guests can see it without blocking doorways; mount it so the lowest step is still above waist height. Budget is typically $20-70, and setup takes about 45 minutes.
Keep pod labels to one line. Two lines is where scanning slows down.
Don’t use tiny fonts for pod labels. It looks pretty up close and fails from across the room.
8. Seating Chart on a Roll-Up Fabric Banner with Color Legend
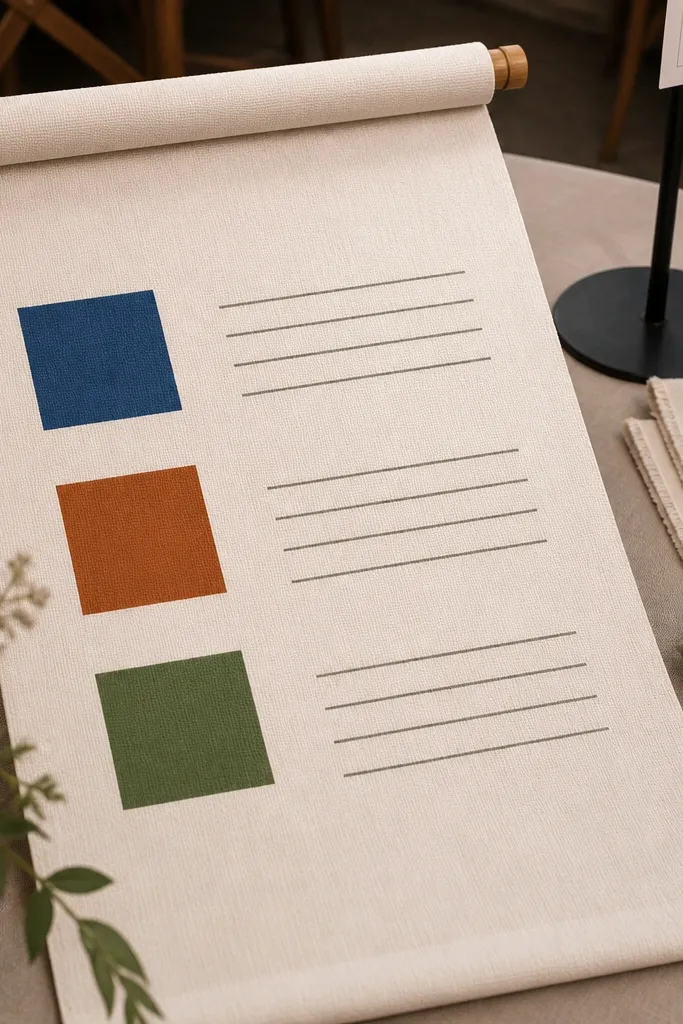
Fabric banners look softer than paper posters and blend into wedding decor. You can print a clean seating chart with a color legend for family pods, then roll it up for storage after the wedding. The look is great for photos because the banner has texture and avoids the “office printer” vibe. This is a strong option for family-friendly seating chart wedding days because you can keep it readable and avoid glare.
Start with a roll-up banner stand and choose a size that reads from a few steps away, like 24x72. Then create the chart with bold table numbers and a simple pod legend using colored squares. Finally, hang it near the welcome table and keep the color legend visible even if guests are standing nearby. Plan for $60-180 depending on banner size and print quality.
Use dark text on light fabric. Avoid white text on light backgrounds in outdoor light.
Don’t choose super-thin fabric prints. They look wrinkly and blur table numbers.
9. Chalkboard Seating Chart with Magnetic Table Number Tiles
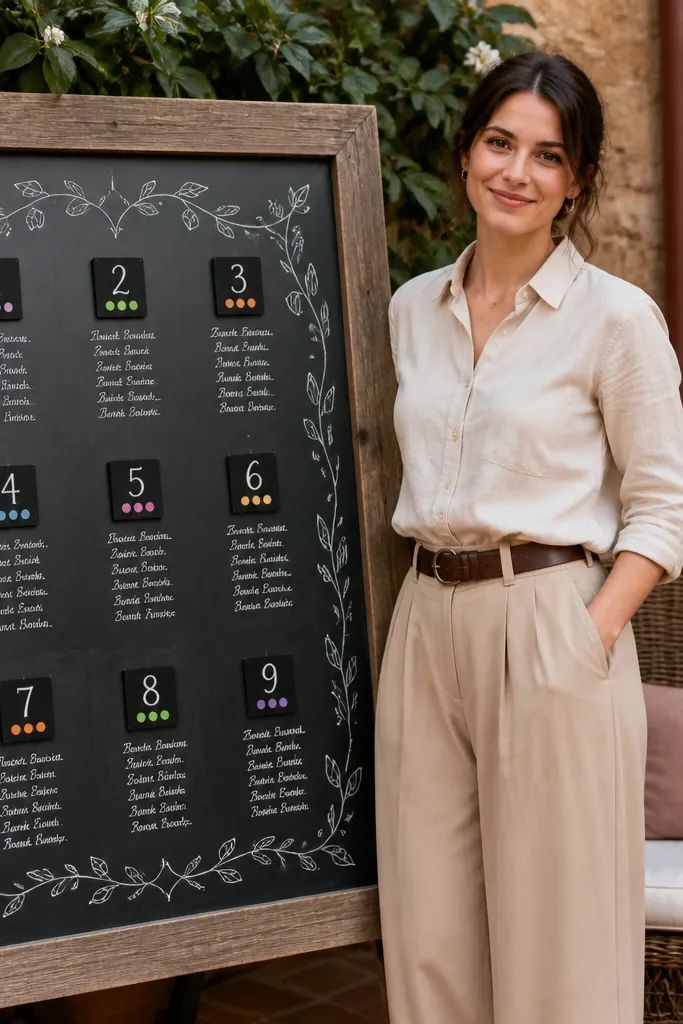
Chalkboard + magnetic tiles gives you a handmade look that still stays organized. The seating chart is written cleanly, then table numbers pop off as tiles so guests can find their section quickly. It photographs with that cozy, warm feeling, and it works for family-friendly seating chart wedding days because you can update a last-minute change by swapping one tile. Keep the pod labels short so the chalk stays readable at distance.
Start by buying a chalkboard large enough to read from 8-10 feet, then plan a layout where each table has a tile and a short pod label list. Write the pod legend in one consistent chalk style, then add magnetic table number tiles. Finally, set the chalkboard on an easel near the entry so it’s part of the welcome photo. Budget is $40-120 for the board and tiles, and setup is about an hour.
Use thick chalk and test the contrast in the venue lighting before the wedding.
Don’t overcrowd the chalk. If you need paragraphs, switch to a printed chart.
10. Family Pod Place Cards in Numbered Catch Trays
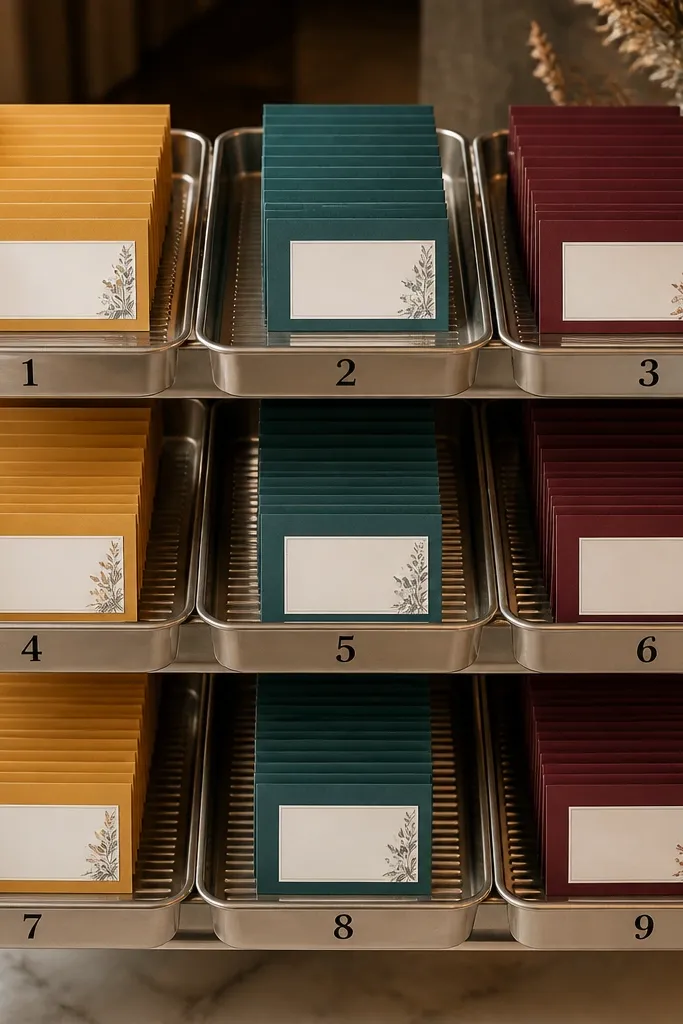
Instead of a single seating chart sign, you make the place cards easy to grab by table. Numbered catch trays keep the cards neat and photogenic because they form a tidy display. For family-friendly seating chart wedding, this reduces crowding at one sign and keeps kids from wandering while guests search. The visual is clean, especially if your trays match your table decor colors or metal finishes.
Start by sorting place cards by table number and placing each table’s cards into a dedicated tray labeled on the front. Then place the trays in order (or grouped by section) near the entry with a simple “Pick your table” instruction card. Finally, add a small family pod legend on the seating chart sign so guests can confirm quickly. Cost is $30-100 depending on how many trays you need; assemble the trays the day before and keep them covered until doors open.
Use clear acrylic dividers inside trays so card edges don’t get messy.
Don’t let people pull cards without a plan. Put someone at the display so it stays tidy for photos.
11. Seating Chart as a Garden Gate with Hanging Tags
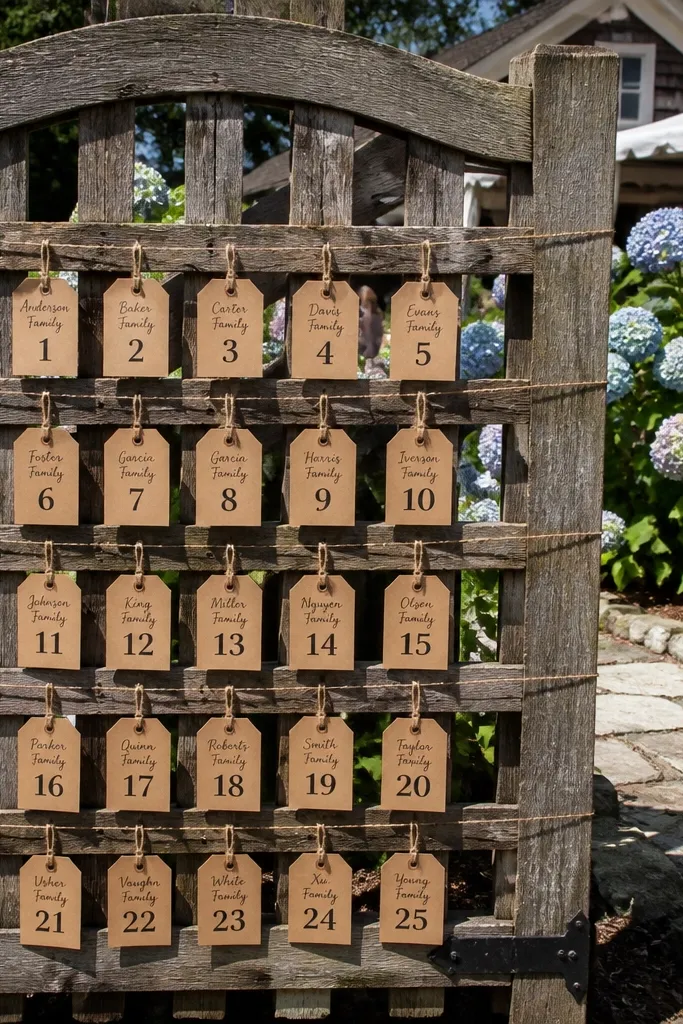
If your wedding has outdoor elements, this looks amazing in daylight. You build a gate frame and hang small tags for each table, with family pod names on the tags. Guests find their table by tag, not by reading a wall of text. It’s perfect for family-friendly seating chart wedding because kids can move around the decor frame without blocking a flat sign, and caregivers can spot their pod tag from a distance.
Start by building or renting a gate-style frame and choosing tag sizes that are readable (small tags look cute but fail from 10 feet). Then write table numbers on the top of each tag and family pods on the bottom in one short line. Finally, mount the frame near the entry and add a small aisle marker so guests stand in a line instead of clustering. Cost is $70-200 depending on frame rental and tag materials; plan a 2-hour build and tag-writing session.
Use waterproof ink if it’s outdoors. Morning dew smears cheap markers fast.
Don’t use thin string that tangles. It ruins the look within an hour.
12. Table Assignment "Sticker Wall" with Color-Coded Labels
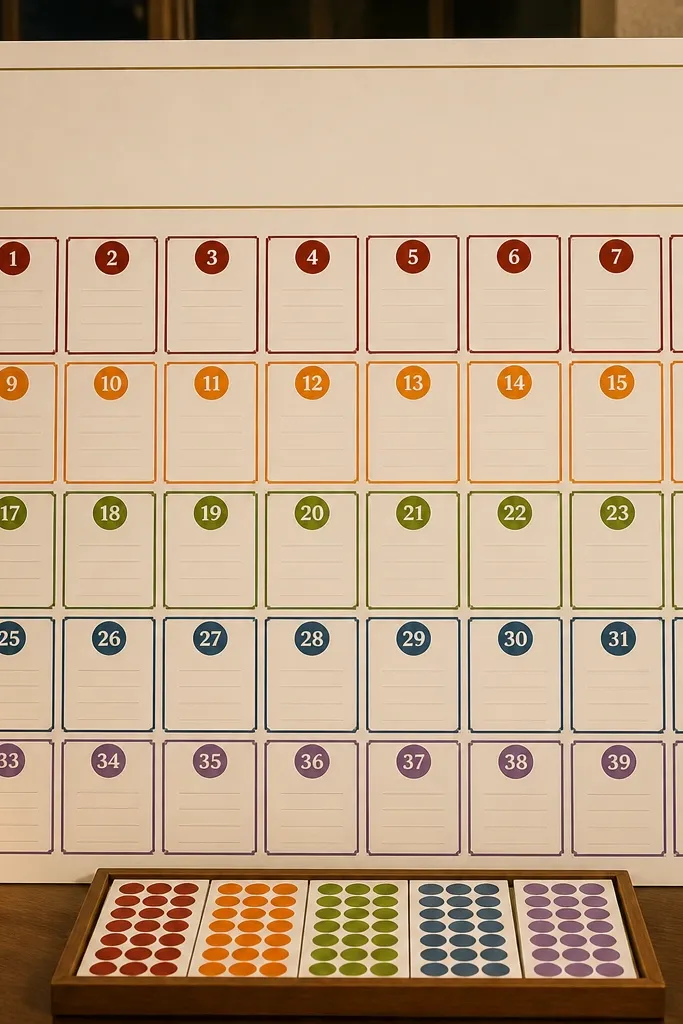
This idea makes guests participate without making it chaotic. You show a large seating chart grid with table numbers, then guests add their own name sticker to the right spot. The look is playful, and photos capture that moment of discovery without a crowd blocking the camera. For family-friendly seating chart wedding, it also keeps the chart from becoming a bottleneck — people move, place a sticker, and go.
Start by preparing a printed chart grid with table numbers and small blank spaces sized for stickers. Then make stickers for each guest with the same color system as your place cards (pods). Finally, set up a sticker station next to the chart with labels sorted by pod color and a few pens or sticker sheets. Budget runs $40-120 for stickers and printing, and you should assemble the station the night before. Give yourself about 30 minutes to set it up and test sticker placement.
Use matte stickers. Glossy ones glare under reception lights.
Don’t make the sticker spaces too tiny. People will hesitate and block the frame.
13. Seating Chart on a Long Runner with Table Path Lines
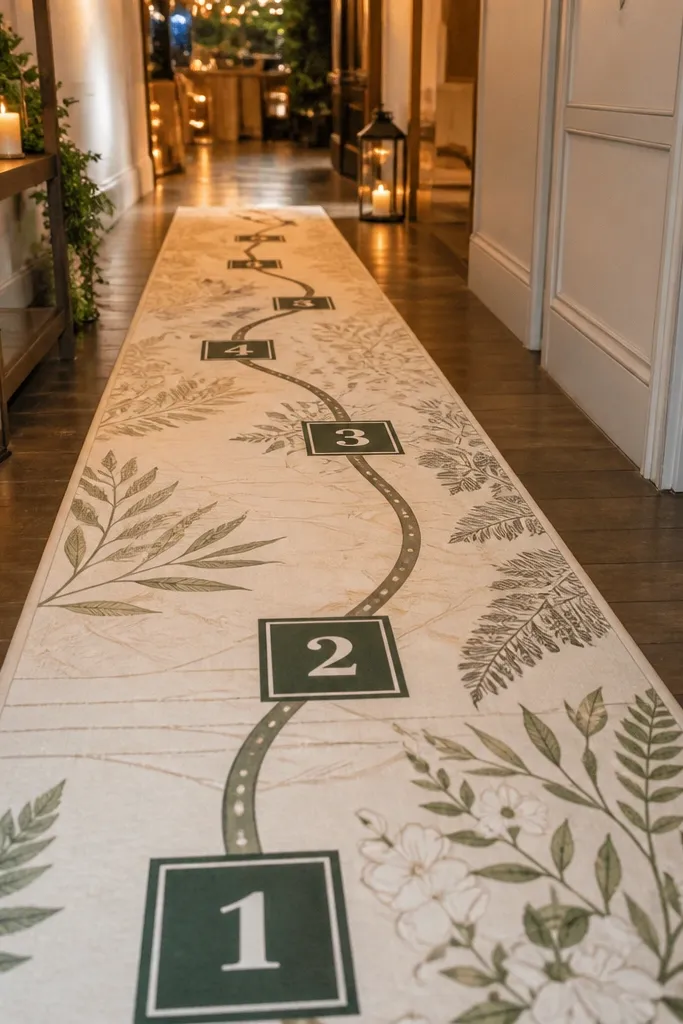
This is a “wow, that’s pretty” setup for receptions with a long entry wall or hallway. You print the seating chart on a runner with table numbers arranged in a path, like a walkway map. It looks styled and makes sense for guests because it mirrors how they’re walking into the party. For family-friendly seating chart wedding, it’s also great because you can block a safe zone around the runner so kids don’t run into the display.
Start by measuring the wall or floor area where the runner will go and choose a runner width that leaves space for people to pass. Then print a chart with table numbers in a linear path and short pod labels under each number group. Finally, add floor-safe adhesive or weights so it doesn’t slide. Cost is usually $50-140 depending on size and print method, and setup is quick if you measure twice.
Quick tipChoose a runner color that matches your linens so it doesn’t look like a random sign.
Skip thisDon’t put the runner in a spot where guests naturally stop to talk. You’ll get crowding.
14. Monogram Initials Seating Chart with Table Number Bands
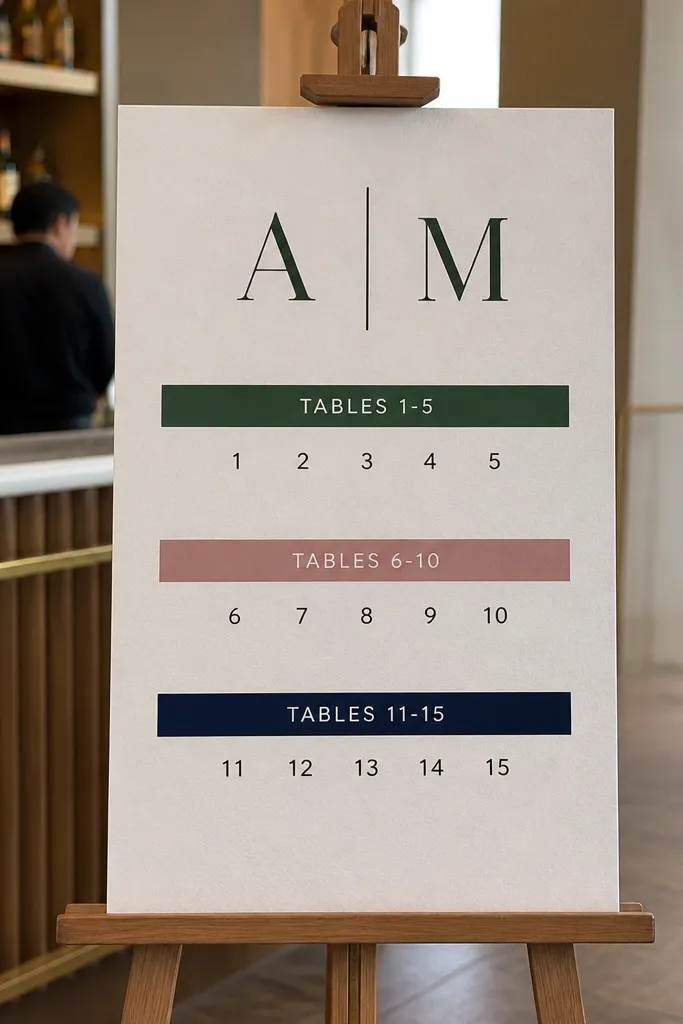
This is the cleanest way to make a seating chart look like brand decor. Put the couple’s monogram or initials large at the top, then list tables in banded sections under it, each band color-matched to your place cards. The photo effect is crisp because the chart has a clear top focal point and tidy bands. For family-friendly seating chart wedding, it’s also practical because bands help guests scan quickly instead of hunting through a dense list.
Start by selecting a monogram style that works in one color (no gradients that blur in photos). Then design table bands with table numbers and pod names in one short line each band. Finally, print on thick matte paper and mount on foam board or a framed board. Budget is $30-100, and assembly is fast if you keep the layout simple and measured.
Quick tipUse one font family for everything. Mixing fonts makes bands look busy.
Skip thisDon’t add long family lists under each band. Keep it pod labels only.
15. Seating Chart with "Crew" Labels for Caregiver Groups
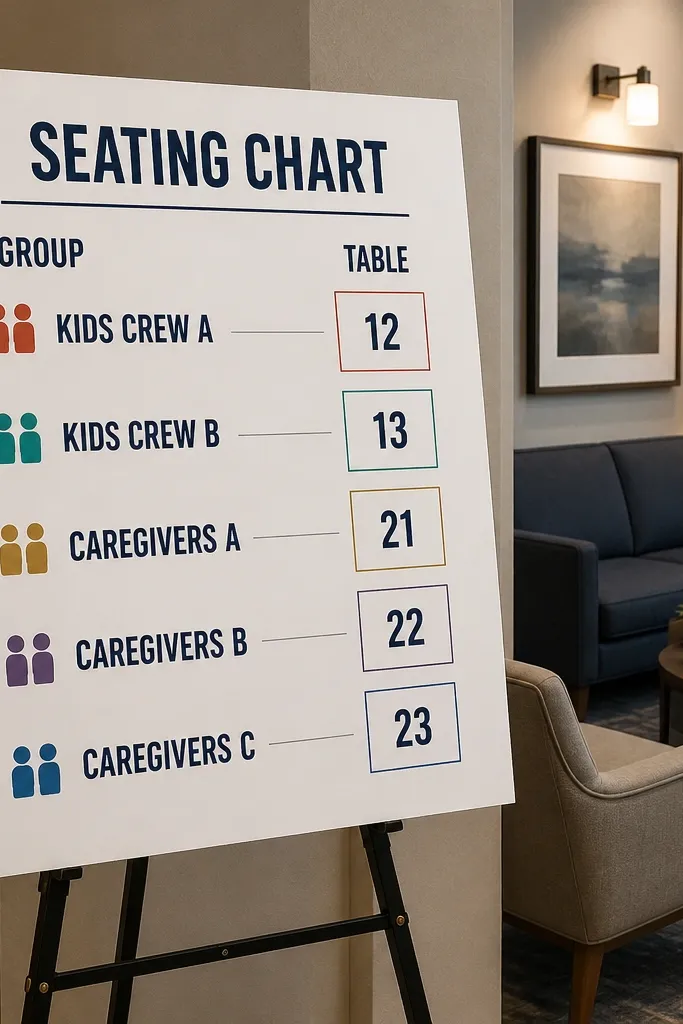
This is the planning-forward idea that looks thoughtful and reduces stress. You label caregiver groups clearly on the chart, like “Kids Crew A” and “Kids Crew B,” then tie them to table numbers. The look is graphic because the labels are short and bold, and photos show a clear system. It helps a family-friendly seating chart wedding when you have kids who need snacks, frequent bathroom trips, or someone who can handle them without interrupting the couple.
Start by identifying which adults will be the go-to helpers for kids at each table cluster. Assign them to two or three “crew” categories based on where they sit and how close they are to the exit/bathroom. Then design the seating chart with crew labels mapped to table numbers and print matching crew labels on place cards. Cost is low ($20-60 for printing), and setup is straightforward — the key is making the labels short enough to read from a few feet away.
Quick tipKeep crew labels to 1-2 words. Long titles look messy on signs.
Skip thisDon’t label kids by age or needs on the chart. Keep it adult-led and discreet.
16. Kids Snack Station Seating Map Combo
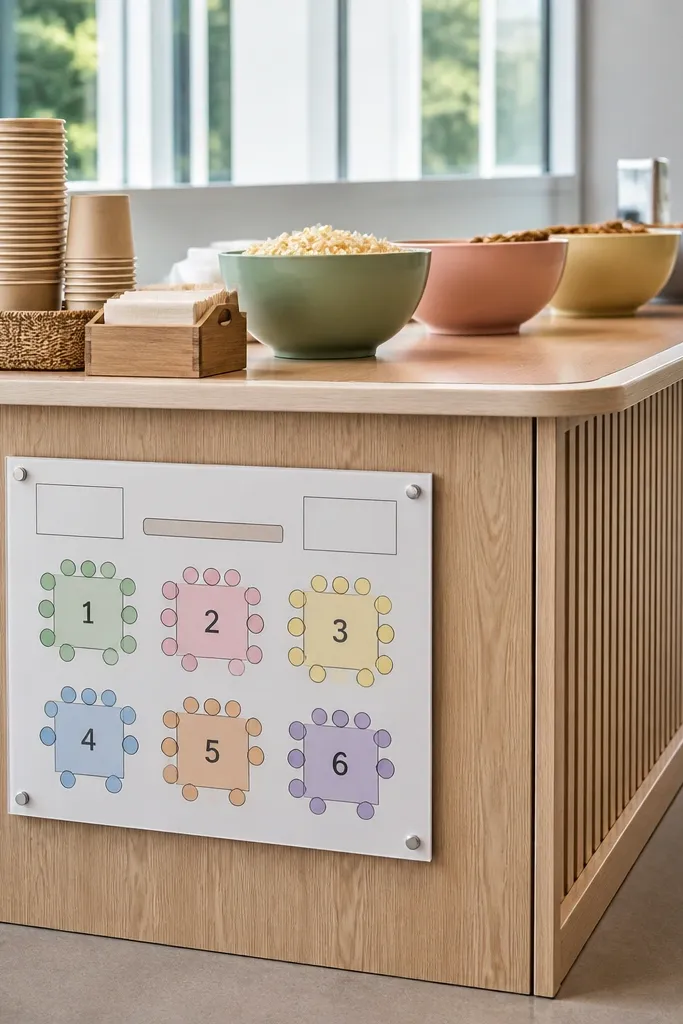
This couples two needs into one photogenic corner: seating info and a kids' snack station. Put a small seating map on the snack station sign so parents can quickly confirm their table while grabbing snacks. The look is modern because it reads like a designed kids area, not a random table of snacks. For family-friendly seating chart wedding, it keeps kids occupied close to caregivers and reduces wandering after the first hour.
Start by setting up the snack station near an accessible path but away from the bar and dance floor. Then print a mini seating chart that lists table numbers and pod names, sized for quick reading. Finally, add a small label showing where the snack station is located so parents connect it to the seating plan. Budget is $25-90 for print and signage, and you can set it up in 30-45 minutes if you pre-assemble the snack bin.
Use sealed snacks and pre-cut fruit. It looks cleaner on camera than open containers.
Don’t place it right next to the loudest speaker. Kids will be restless and the photos will show it.
17. Seating Chart on Oversized Vintage Books with Table Tabs
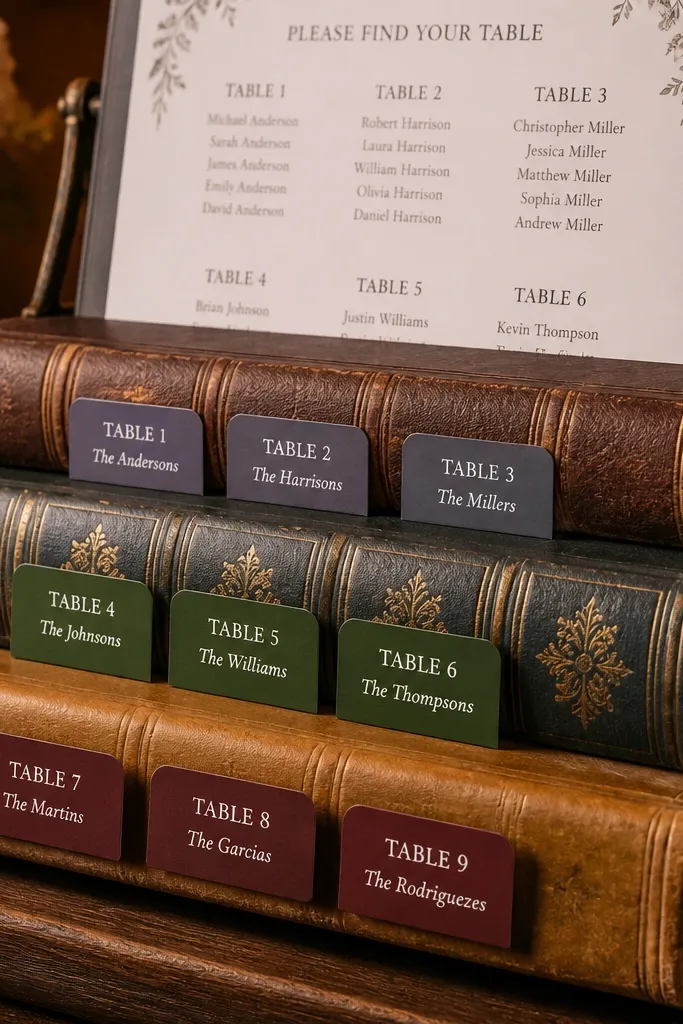
This is a decor-first seating chart that looks like styling, not instructions. You arrange oversized books on a stand, then attach table number tabs on the spines or edges with the family pod labels. Guests scan by table tab, which is visually satisfying and easy to photograph. For family-friendly seating chart wedding, it’s great when you want a cozy feel and you have a calmer entry area where guests can approach slowly without blocking traffic.
Start by choosing book sizes that create height so the tabs are readable. Then attach table number tabs with pod labels, keeping each tab short and bold. Finally, place the book stack near the welcome table and add a simple printed legend card for anyone who prefers reading. Cost is $20-80 if you source books, plus $10-40 for tabs and printing. Setup takes about an hour if you measure tab placement first.
Use one color for all tabs and one font style for pod labels so it looks intentional.
Don’t use handwritten labels. They look charming up close and messy in wide photos.
18. Clipboard Seating Chart with Photo-Style Table Cards
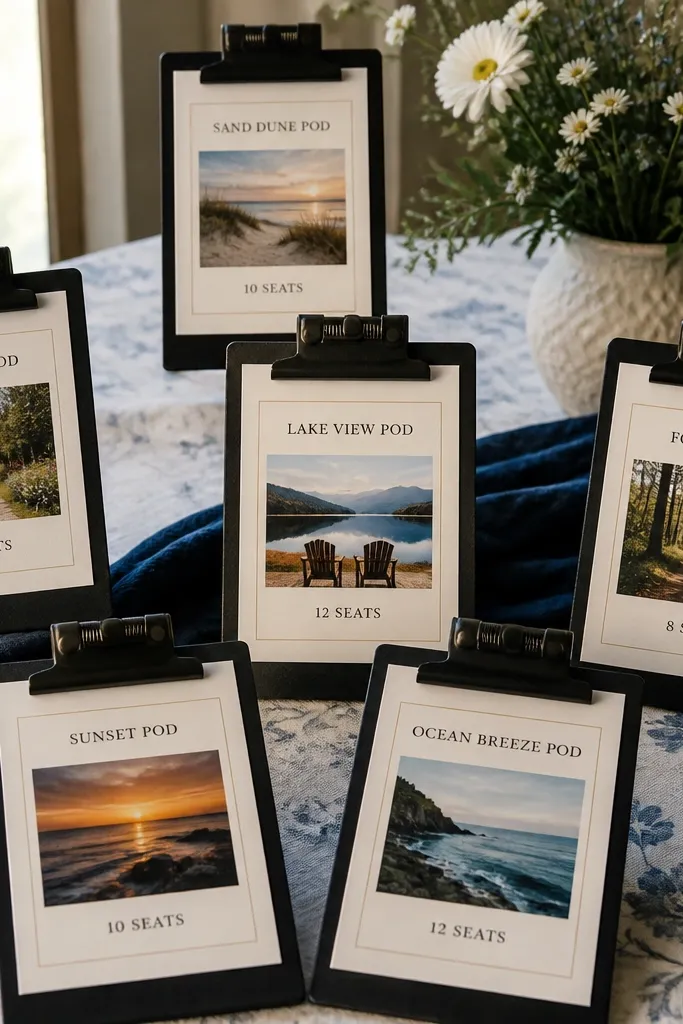
Clipboards look clean and modern, and they’re easy for guests to scan without crowding. You display a set of clipboards, one per table section, with table cards showing pod names and seat counts. The photo look is crisp because clipboards create uniform shapes and lines. This is a strong family-friendly seating chart wedding option when you have multiple families arriving at the same time and you want a system that feels orderly.
Start by printing table cards with big table numbers and pod names, then attach each card to a clipboard. Arrange clipboards in a line or grouped clusters that match your venue layout. Finally, add a short instruction sign telling guests to take a seat card and go rather than waiting around. Budget is $40-140 depending on how many clipboards you rent or buy; setup is 45-90 minutes.
Quick tipUse clipboards with black or walnut frames for contrast against light walls.
Skip thisDon’t use clipboards with flimsy paper clips that slip. You want them stable for photos.
19. Seating Chart Ladder with Hanging Place Cards by Table
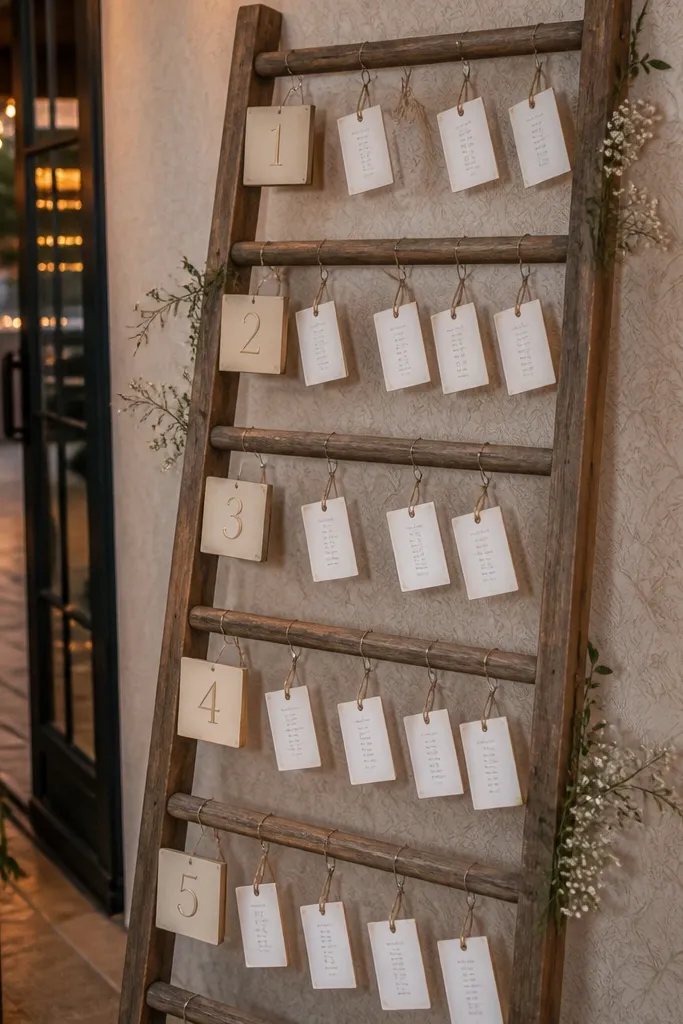
A ladder display turns place cards into decor. Hang small place cards or tag cards by table number on each rung, and label the rung with the table number. It’s photogenic because it creates a vertical rhythm that looks great in wide shots. For family-friendly seating chart wedding, it’s also functional: guests can find their table without reading a huge poster, and the hanging format keeps the display from becoming a pile.
Start by choosing a ladder height and rung spacing so cards hang without overlapping. Then prepare place card tags with table numbers on the top and pod labels underneath (one line). Finally, hang the cards by table number and place the ladder near the entry where it’s visible from the welcome area. Expect $60-200 depending on ladder rental or purchase and how many cards you print; plan 2 hours to attach and hang tags neatly.
Use cardstock tags with a sturdy top hole so they hang flat and don’t curl.
Don’t hang cards too close together. Overlap makes it unreadable fast.
20. Seating Chart as a Table Topper Sign with Sticker Legends
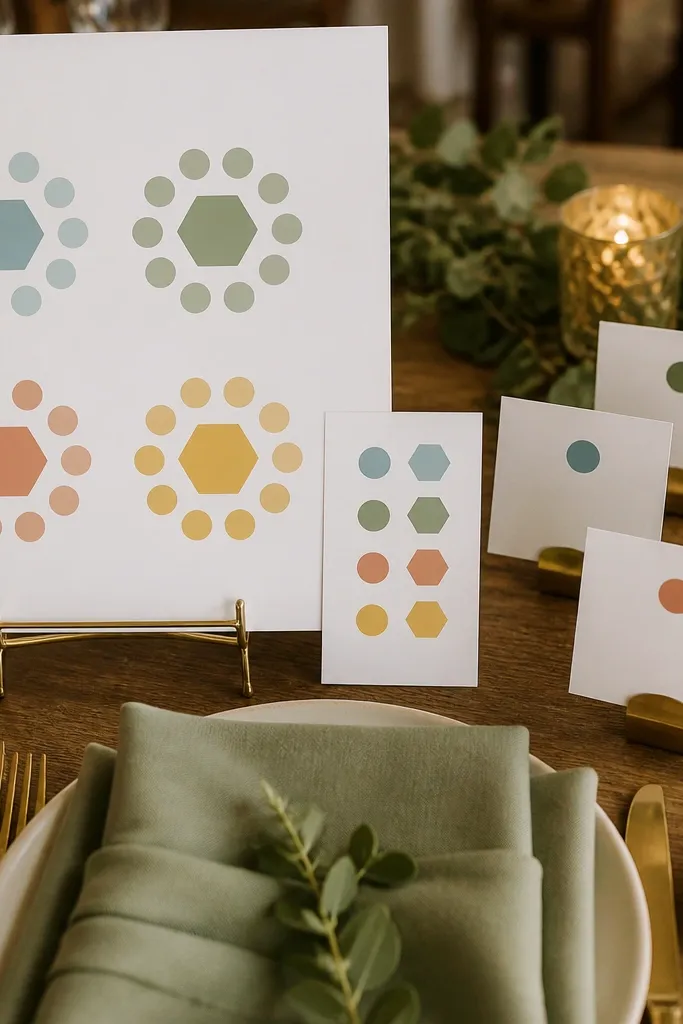
This is a clean, modern approach when you want the seating chart to match the table decor. You create a tabletop sign that shows the seating layout and a sticker legend for pods, then place stickers on each table card or place card for quick matching. The look is tidy, and it photographs well because everything is in the same design family as your centerpieces. For family-friendly seating chart wedding, it keeps guests moving and avoids long lines at a single wall chart.
Start by designing a compact seating chart that lists table numbers and pod labels clearly. Then create a sticker legend using the same colors as your place cards and attach stickers to the tabletop cards. Finally, place the tabletop sign near the entry so guests can match quickly before walking to their seats. Cost is typically $25-80 for printing and stickers, and setup is fast if you pre-sort stickers by color and pod.
Use thick stickers and matte laminate so they don’t peel under venue humidity.
Don’t rely on guests reading tiny serif fonts on place cards. Keep the font bold.
21. Seating Chart with "Quiet Zone" Seating for Older Guests
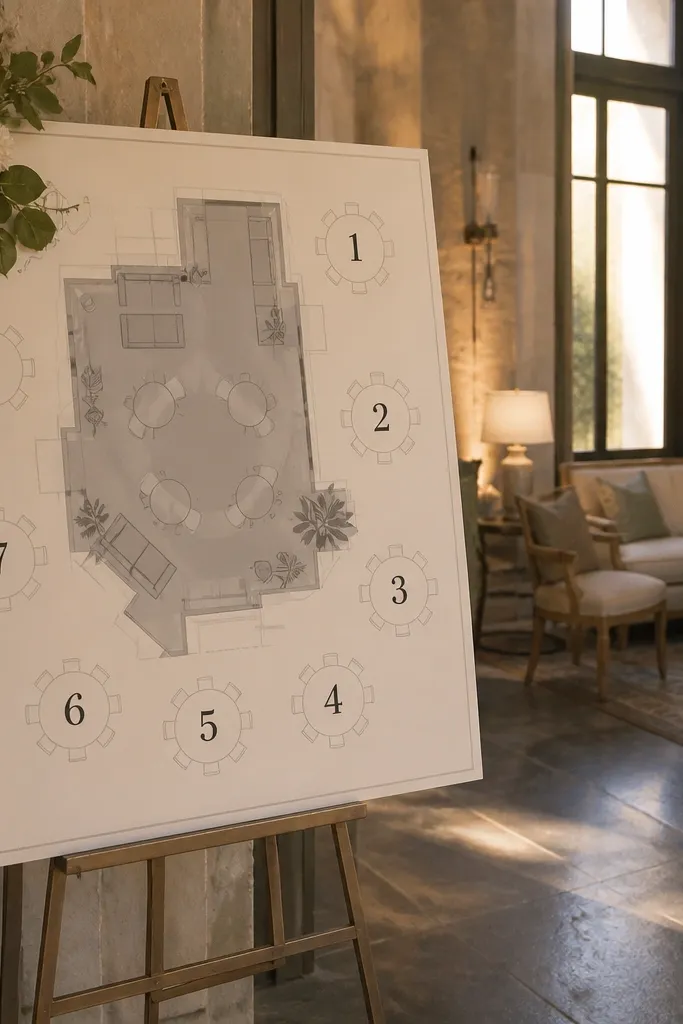
A family-friendly seating chart wedding gets better when you plan for comfort, not just placement. Mark a “Quiet Zone” area on your seating chart for older guests and anyone who wants lower noise, then keep kids and loud tables out of that shaded zone. Visually, shaded zones look like graphic design, not a label, and it adds clarity to the room. Photos will look calmer too because older guests cluster in a consistent area with less foot traffic.
Start by identifying which tables are closest to the dance floor or speakers, then choose 3-6 tables to label as Quiet Zone. Add a shaded block on the seating chart sign and list the pod labels assigned to those tables. Finally, place a small “Quiet Zone” note on place cards for those guests so caregivers know where to guide them. Budget is $20-70 for printing; setup is quick once you finalize table assignments.
Use a soft gray or muted color for the zone shading so it matches wedding palettes.
Don’t label it for “old people” or anything personal. Keep it about noise level and comfort.
22. Escort Cards in a Geometric Acrylic Grid
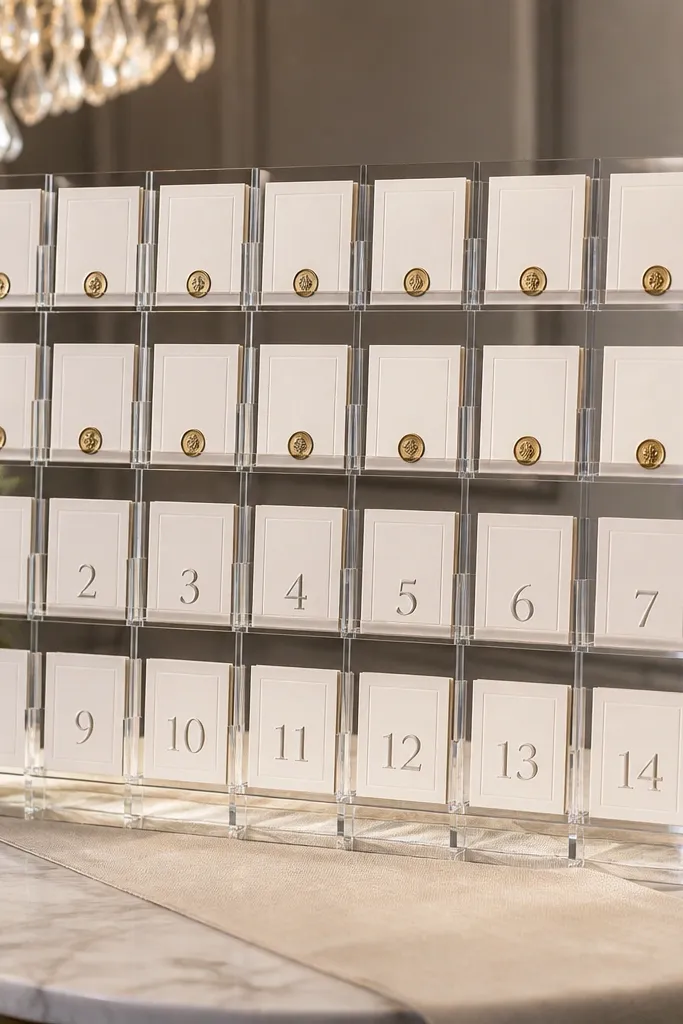
Escort cards already look good, but a geometric acrylic grid makes them look intentional and modern. You arrange each guest’s card in a strict row/column layout that matches table numbers, using consistent spacing. The visual payoff is a clean, camera-friendly structure with repeating shapes. For family-friendly seating chart wedding, it also helps because guests locate their table quickly by row and then find their name without squinting.
Start by buying or renting an acrylic grid display with enough cells for your guest list. Then create escort cards with bold table numbers and large pod initials, and place them in the right grid positions. Finally, add a legend card above or beside the grid explaining the row/column system. Cost is $80-250 depending on display rental and printing; setup is 1-2 hours if you label grid coordinates in advance.
Quick tipUse black or dark navy card stock for table numbers so they pop in both daylight and indoor lighting.
Skip thisDon’t mix card sizes. One size per grid makes it look sharp.
23. Seating Chart Sign with Matching Table-Number Place Tags
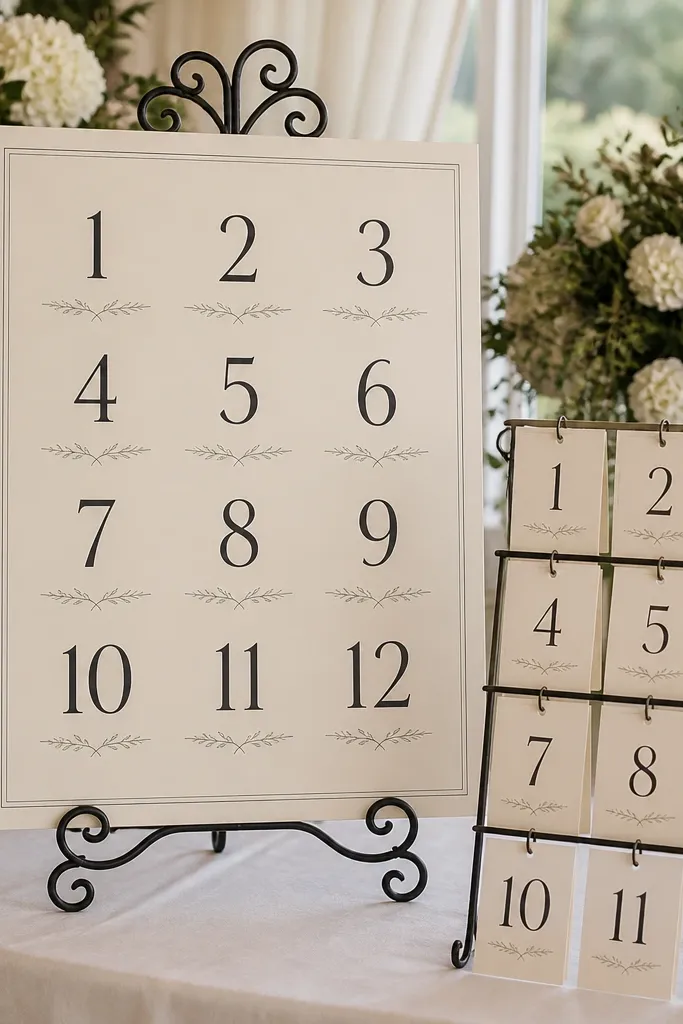
This idea creates a direct visual link between the chart and the tables. You make a seating chart sign with table numbers, then create matching place tags that show the same table number style. Guests see the table number on the sign, then instantly recognize it on their place card or table marker. That makes family-friendly seating chart wedding days feel smoother because parents aren’t asking for help every five minutes. The look is cohesive in photos because the table numbers repeat across multiple touchpoints.
Start by designing one table number style, then use it everywhere — sign, place cards, and table markers. Print place tags with the table number and pod label, then attach them to place cards or tie them to table stems. Finally, mount the seating chart sign near entry so guests can match quickly. Cost is usually $30-100 depending on print type; set aside 2 hours for assembling the tags and mounting the sign.
Quick tipKeep table numbers in one consistent color and font. Repetition makes the room look designed.
Skip thisDon’t change the table number font between sign and place cards.
24. Ceremony Row Seating Map for Big Family Groups
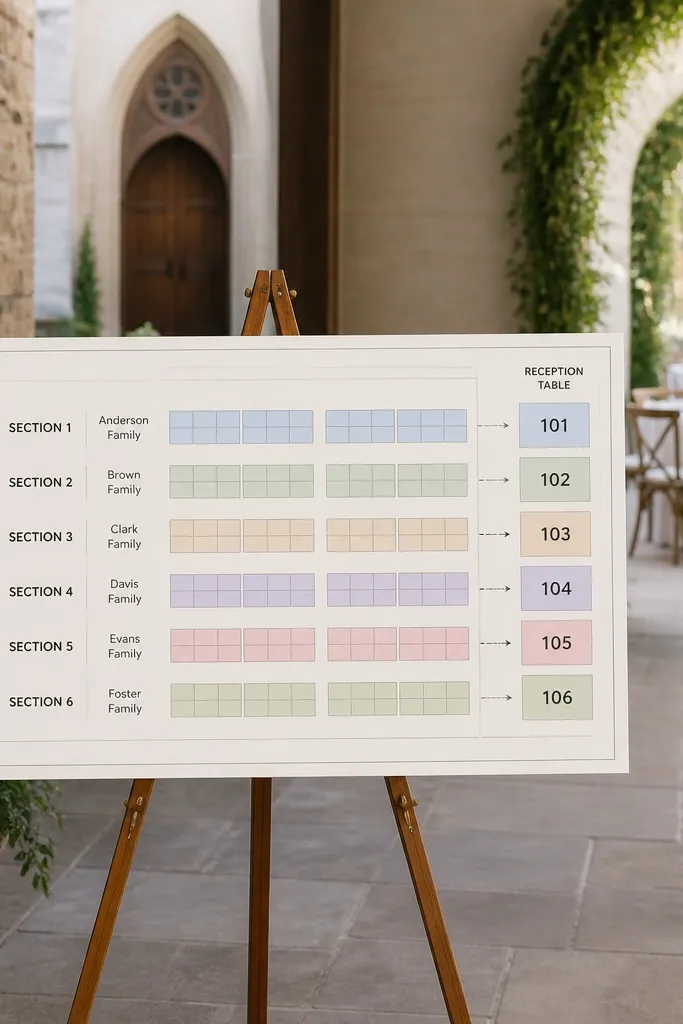
This works when your ceremony seating already has rows and you want the reception to feel consistent. Your seating chart uses the same “row” idea: labels that show which tables correspond to which ceremony sections, so big families feel guided. It photographs well because the lines and row structure look like a graphic system. For family-friendly seating chart wedding, it reduces the mental load for relatives who are already moving from ceremony to reception and helps caregivers locate their group quickly.
Start by mapping ceremony sections to reception tables, then create a chart that shows those sections as row lines leading to table numbers. Print the chart with large row labels and short pod names. Finally, place it near the ceremony exit so guests see it right as they stand up and move. Budget is $25-70 for printing and mounting; setup is fast if you keep the layout simple and aligned.
Quick tipUse the same numbering scheme for ceremony sections and reception tables if you can — it cuts confusion.
Skip thisDon’t add too many pod names per row. If it gets crowded, increase the number of rows.
25. Seasonal Menu Card Seating Chart with Table Assignments
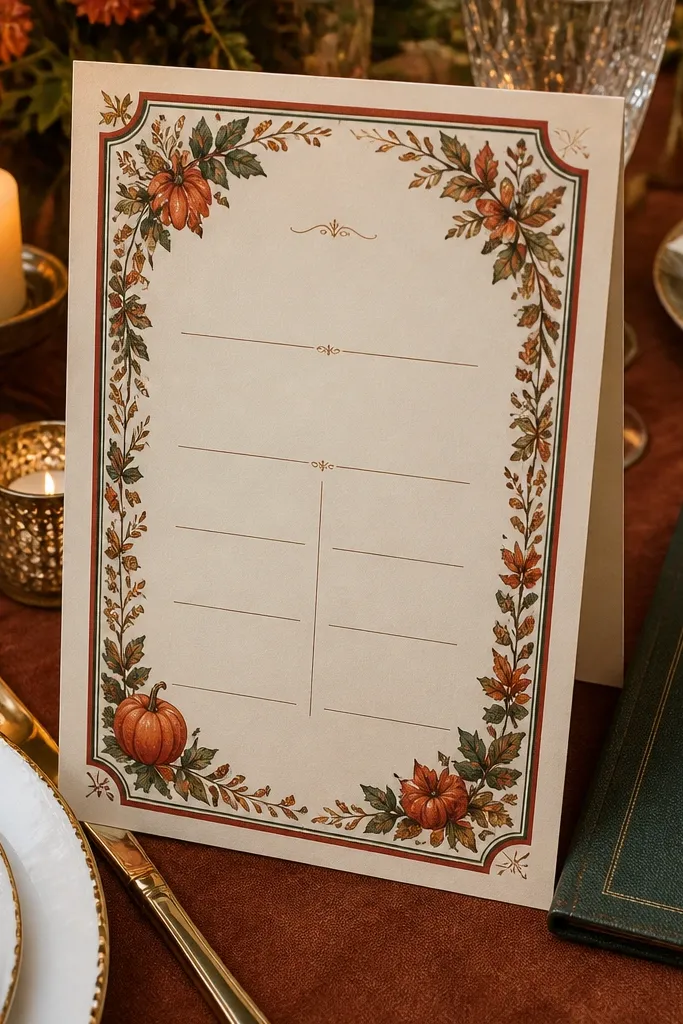
This is a sneaky-good aesthetic move: you present the seating chart like a menu. The sign looks like part of your stationery suite, with decorative borders and a clean “table assignments” section. It’s photogenic because it matches the table setting vibe rather than standing out as a random poster. For family-friendly seating chart wedding, it also helps parents and grandparents because they can sit down and read it quickly if you place it near the first tables or welcome lounge.
Start by designing a menu-style card layout with a bold header and table number blocks, then print it on thick cardstock. Then place one large seating chart menu card at the entry and smaller matching cards at the welcome table. Finally, include a mini pod legend so guests can find their table without scanning long lists. Cost is $20-80 for printing and cardstock; setup is quick because it’s just placement, not assembly.
Use thick paper and matte finish so the text stays readable in mixed lighting.
Don’t put the seating chart menu card too high. It should be readable at standing eye level.



