
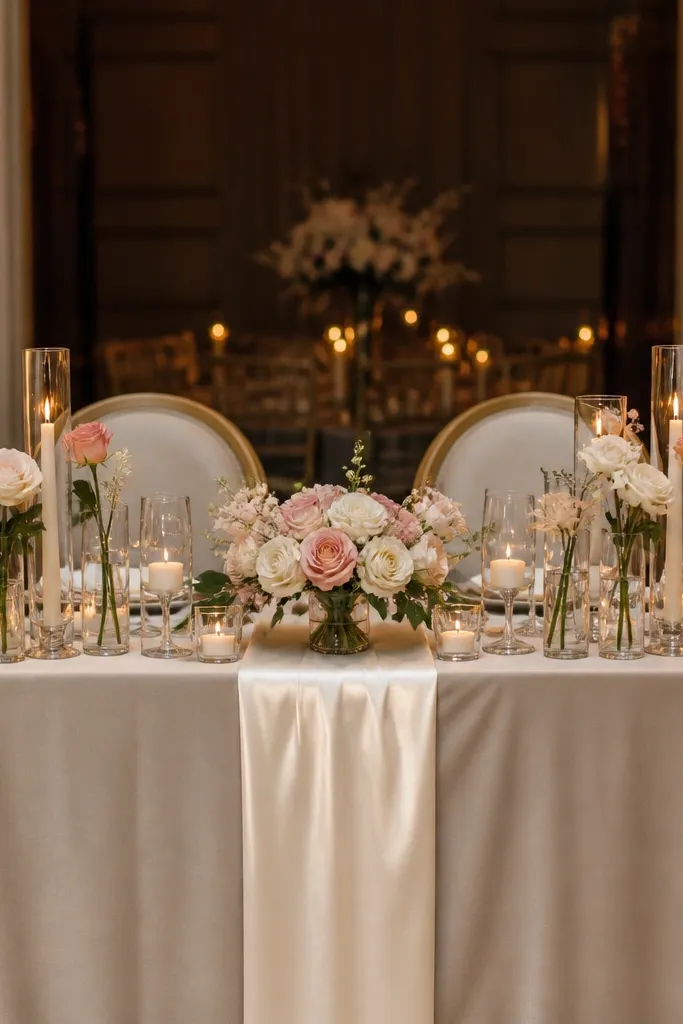
1. Creamy Bud Vase Runner with Blush Sprays
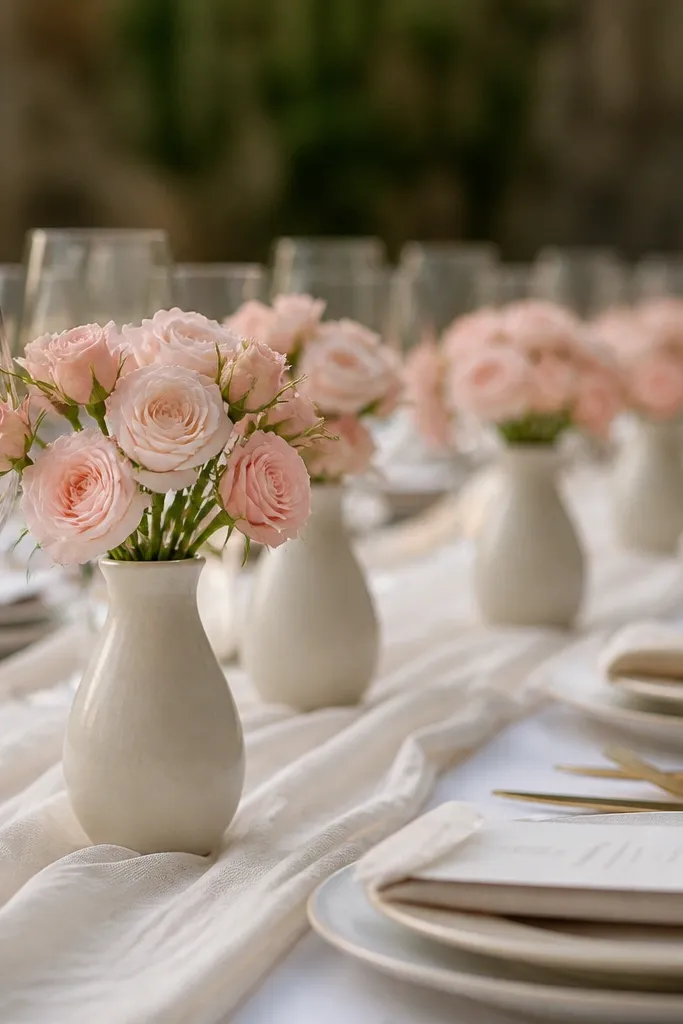
This setup looks expensive because it turns the whole table into a line of light. Use slim bud vases in a repeating rhythm so the flowers read as intentional design, not scattered stems. The blush sprays give softness without adding bulk, which matters when your table has place settings, menus, or a layered backdrop. It’s a great choice for ballroom weddings where you need flowers to stay crisp in strong overhead lighting. The best look comes when the vases are evenly spaced and the stems stay consistent in height.
Start by measuring your table length and divide it into equal spacing for vases, usually 10-14 inches apart. Place vases along the centerline on top of a satin or linen runner that matches your palette. Then add blush sprays so each vase has a similar silhouette — think one main head with a few outward branches, not a messy mix. For cost control, use fewer larger stems for the center and smaller sprays toward the ends. Plan to build the run on the day-of so the stems don’t wilt in a hot room.
Quick tipChoose vases in two finishes only — clear glass and frosted glass — so the runner looks cohesive in photos.
Skip thisDon’t use random vase heights; mixed heights make the table look unplanned.
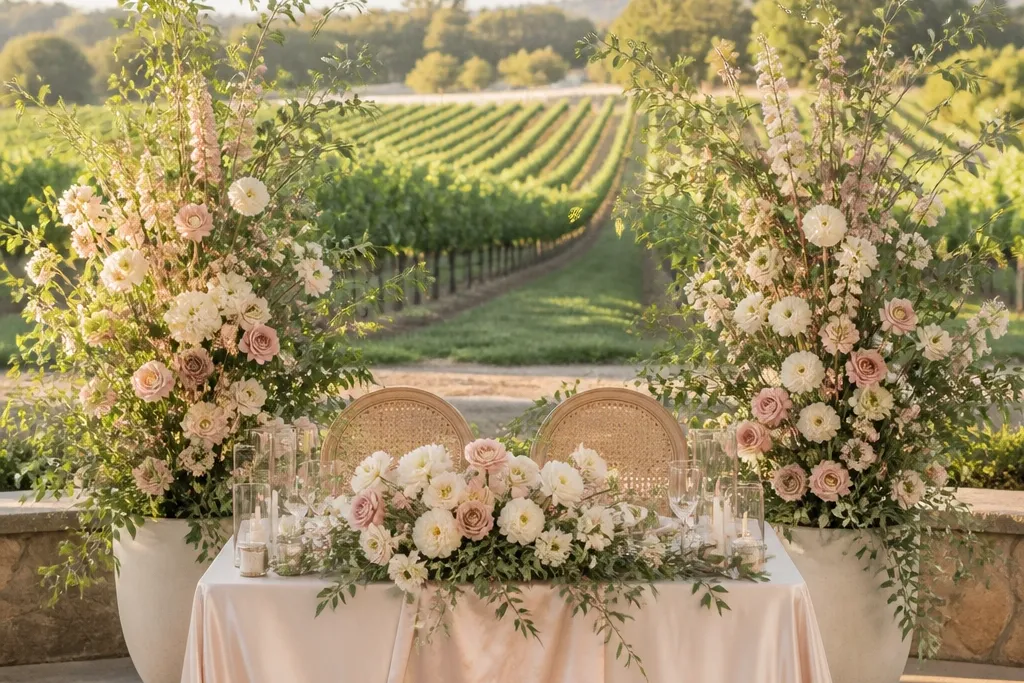
2. Symmetrical Endpiece Towers with Ivory Garden Roses
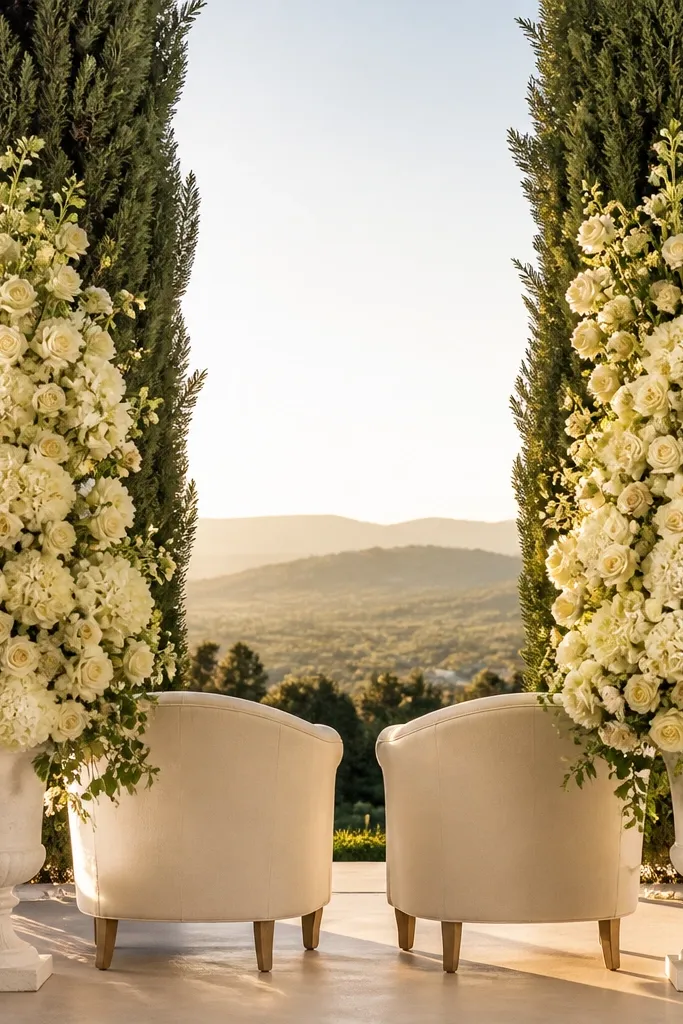
Symmetry reads luxury fast. Two matching tall towers at the ends create a “gate” for the couple, so photos pull focus toward faces instead of the empty middle. Ivory garden roses (or rose-like heads) give that classic romantic softness, while the vertical form fills the space behind chairs. This works especially well when your sweetheart table is set against a plain wall or a simple floral arch — the towers provide the structure. It’s also a strong option for formal venues where you want the arrangement to look designed, not casual.
Start by picking a tower height that clears the couple’s eyeline, usually 18-24 inches above the table surface. Build two identical arrangements with a dense base and a controlled outward bloom spread. Place them at the ends so the inner edges sit about 6-10 inches from the table’s corners, keeping the center open for signage or candles. Then add a light ribbon of greenery between the towers if you want extra polish without clutter. Book enough time for a dry placement test so symmetry is perfect before the final install.
Quick tipUse the same flower head size in both towers; tiny variations show up in wide shots.
Skip thisSkip asymmetrical “almost matching” towers — they look like last-minute fixes.
3. Long Low Garland Over a Satin Table Runner
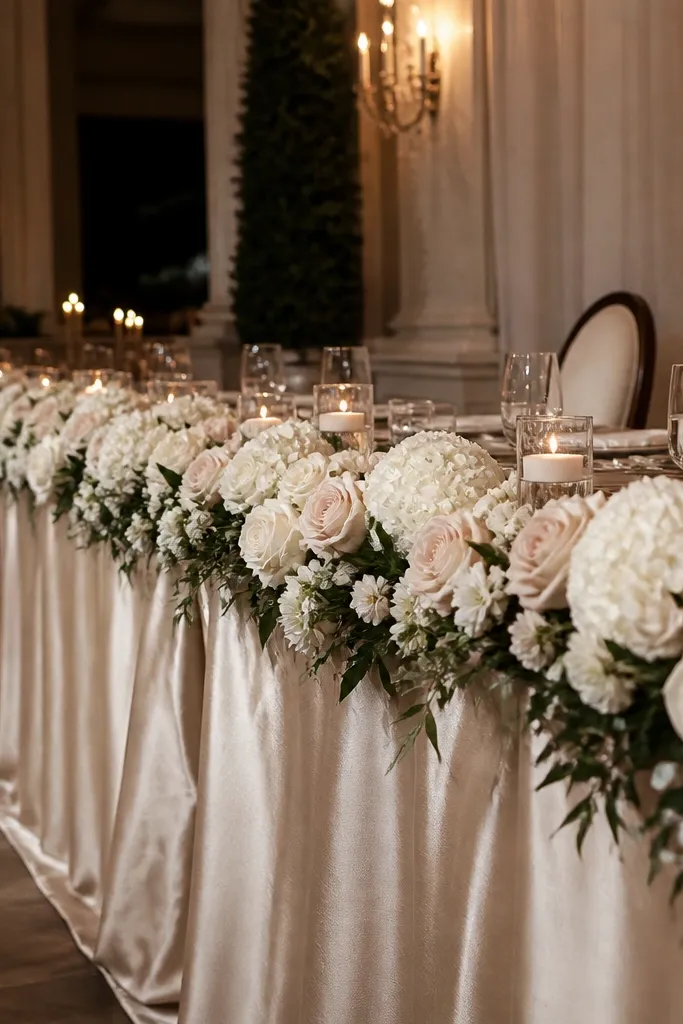
A long low garland is the cleanest way to make a sweetheart table look styled without adding height. It gives a continuous romantic line from one end to the other, which makes the table look fuller even from far away. The satin runner helps the flowers look intentional because the fabric catches light and makes the greenery look darker and richer. This works for both indoor and outdoor weddings since the garland stays stable in most conditions. Choose flowers with good staying power for the season you’re in so it doesn’t droop before dinner.
Start by laying down your satin runner first, then attach a thin strip of floral tape or grid along the centerline. Build the garland in segments so you can adjust length on-site — most tables need 10-14 feet depending on size. Use a mix of small blooms and textured greenery so it reads full without looking like a hedge. Place the garland centered and keep it low enough that it doesn’t interfere with plates and place cards. Finally, add two small candle clusters at the ends for that “photo glow” effect.
Quick tipIf you’re using candles, make sure the garland sits far enough from flames for safety and looks.
Skip thisDon’t hide the garland under a bulky centerpiece; the garland needs to be the centerpiece.
4. Hanging Floral Backdrop with Soft Swag for Sweetheart Chairs
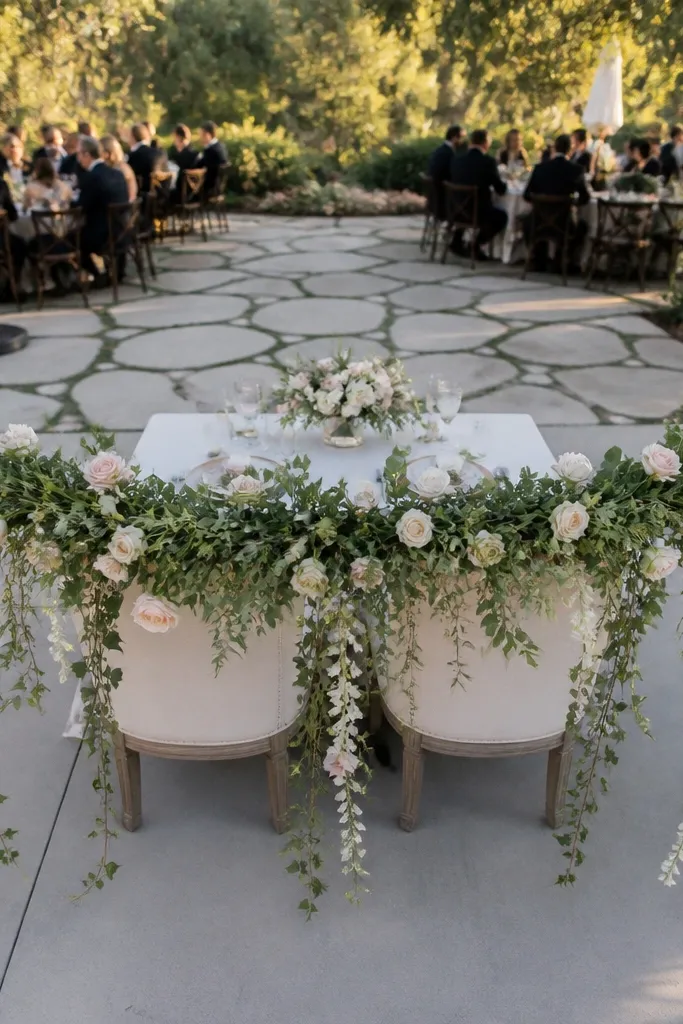
If your sweetheart table photos show mostly your chairs, a hanging swag gives you instant depth. This style creates a vertical backdrop that frames the couple, even when the table itself is simple. The trailing greenery makes the whole scene feel romantic and dimensional, and it hides chair backs so the design looks cohesive. It’s a smart pick for venues with a plain wall or a drab backdrop where you need instant visual interest. The key is keeping the swag soft and airy so it doesn’t look like a heavy curtain.
Start by confirming where the rigging can attach — head-height points or a backdrop frame are common. Build a floral swag that runs from above chair height down to just over the chair back, then keep the table area clear. Use a mix of trailing elements like sweet pea vines or similar greenery textures, plus blush blooms spaced so they catch light. Then add small clusters on each side of the chair backs to balance the drop. Plan to transport it assembled enough to hang quickly, because last-minute rearranging looks messy.
Quick tipBring a few extra bloom heads in your wedding day kit for touch-ups if someone bumps the swag.
Skip thisSkip dense, tightly packed swags; they look heavy and flatten in photos.
5. Floating Candle Halo with White Roses and Greenery
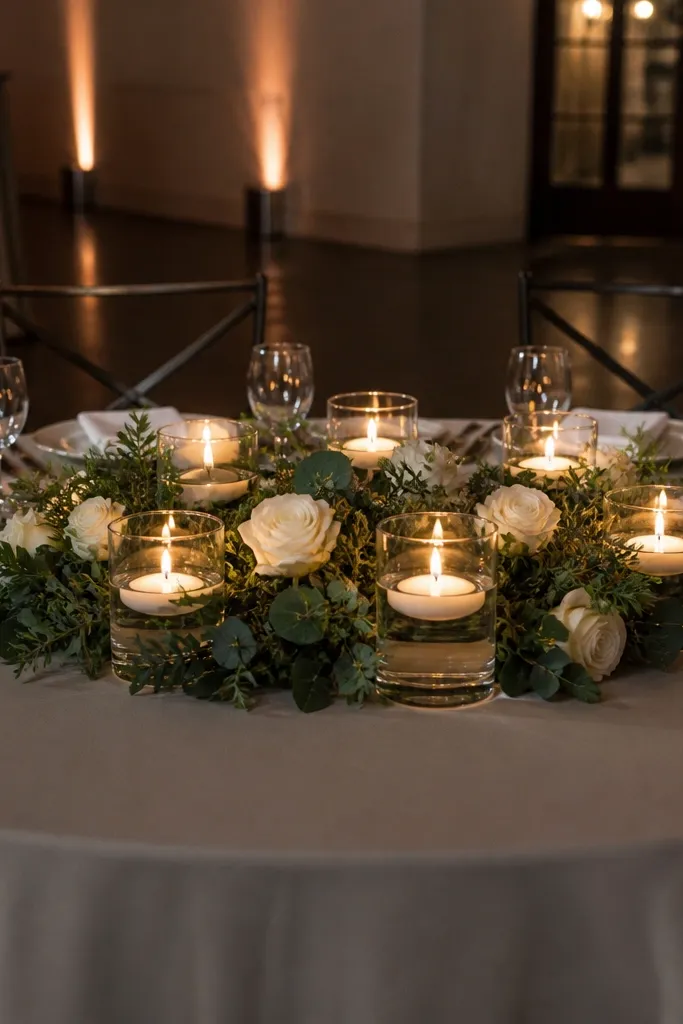
This idea looks expensive because it turns the centerpiece into a light scene. A halo of white blooms around candle vessels gives that dreamy romantic glow, especially at receptions with dim lighting. The “floating” effect is created by placing candles in clear containers or low glass bowls so the light feels suspended. White roses keep it classic and photogenic, and greenery adds shadow depth around the glow. It’s best when you have candles already planned and your table has enough width for a circular composition. The result is intimate and cinematic without needing tall structures.
Start by choosing a candle arrangement method: clear glass bowls or low hurricane-style holders. Arrange the candles in a loose circle or oval on top of a neutral base cloth that matches your linens. Then place white rose heads and small greenery clusters around the candle perimeter, leaving a clean gap near candle flames. Keep the blooms consistent in size so the halo looks symmetrical. Finally, do a quick lighting test at night so you see how the petals and greenery read on camera.
Use larger candle containers if the table is far from the camera; tiny flames look lost in wide shots.
Don’t pack the halo so tightly that it blocks candle light.
6. Matte Black Vase Group with Blush Ranunculus
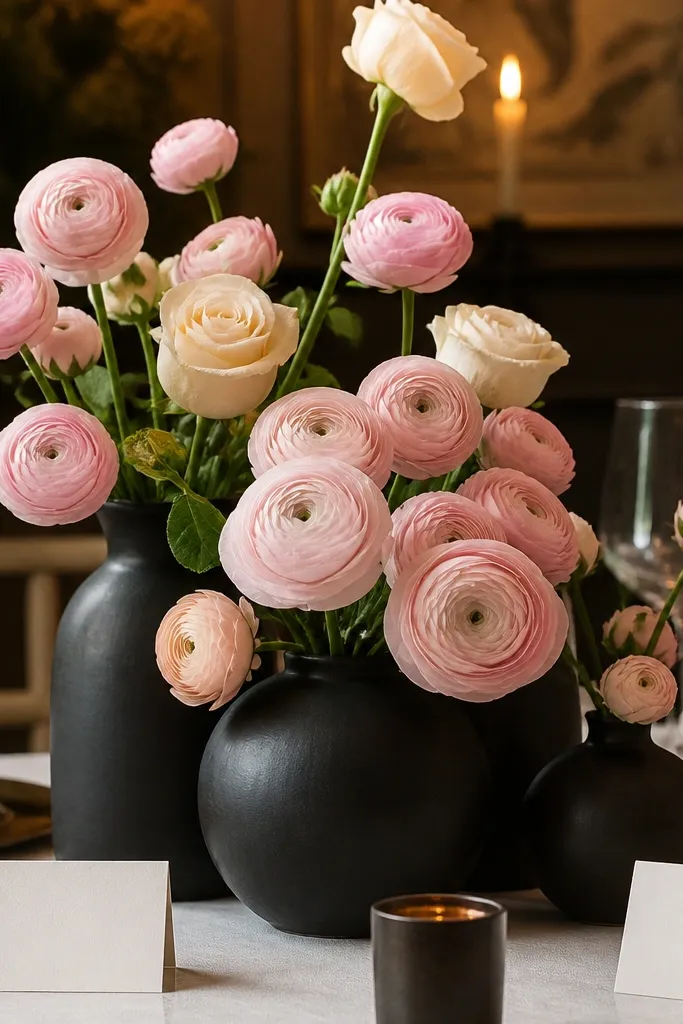
If you want aesthetic Sweetheart Table Wedding photos that look like a magazine shoot, go for contrast. Matte black vases make blush and cream flowers look sharper and more expensive, even in warm indoor lighting. Ranunculus has a layered petal structure that photographs beautifully, giving that “tight bloom” texture that reads luxe. This style works when your linens are light and your overall palette is soft, because the black adds a grounded anchor. It’s also a great option for modern weddings that still want romance.
Start by selecting 3-5 vases in the same height range so the group looks intentional. Place them in a staggered arrangement across the centerline, with the tallest vase at the middle. Add blush ranunculus as the main heads, then fill gaps with cream blooms and a small amount of airy greenery. Keep the stems short so the flowers sit high enough to be seen above plates. For travel and install, wrap stems with damp paper towels and keep vases covered until the venue set time.
Quick tipStick to one black finish and one blush shade family; mixing blacks and blush tones makes it look cluttered.
Skip thisAvoid too much greenery — you want flower texture to be the star.
7. White Peony-Style Center with Micro-Flower Side Clusters
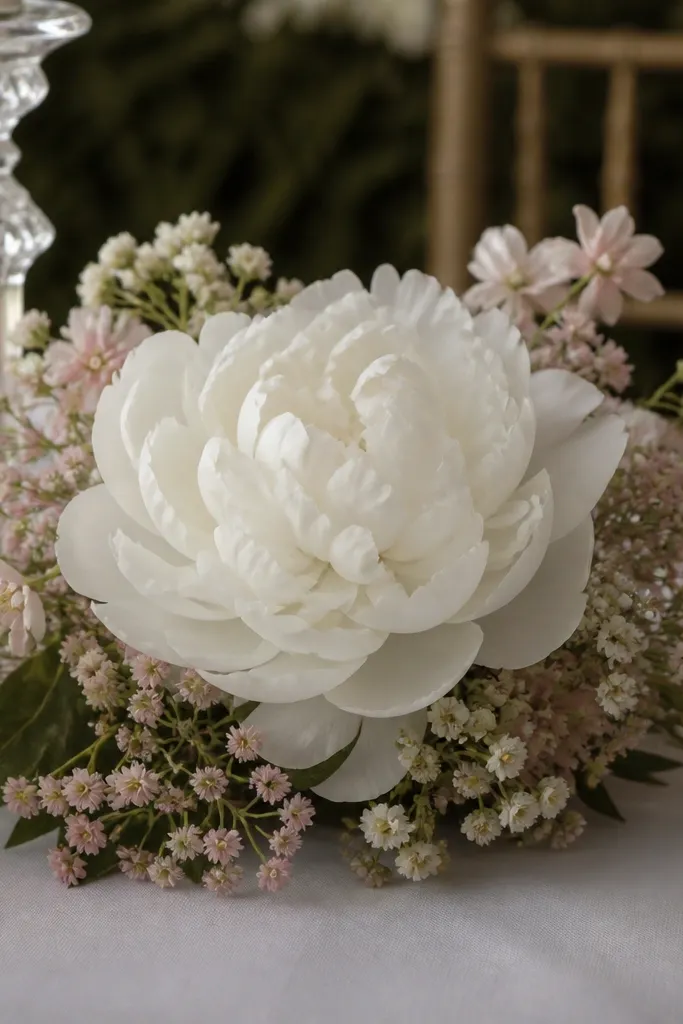
This is a “one hero, two supports” design that looks high-end without requiring a tall installation. A peony-style head in the center gives instant romance, while micro-flower side clusters make the arrangement feel complete from every angle. It’s ideal for narrow tables where you can’t fit long garlands but still want dimension. The white-on-white palette also helps if you’re worried about color mismatch across daylight and indoor lighting. It looks especially good when the couple’s seats are close and the camera captures the table from the front.
Start by choosing one large focal bloom head and placing it in a low, wide vessel so it doesn’t look top-heavy. Then build two smaller clusters at the left and right sides of the centerpiece, using micro-flowers and a little greenery. Keep the cluster sizes balanced so the center hero stays centered in photos. Add a few supporting stems behind the hero head so it looks full from the side. Finally, place a small sprig near the front edge of the table so the arrangement reads even in close-up shots.
Quick tipUse a vessel with a matte interior finish; it makes white petals look brighter on camera.
Skip thisDon’t add three more big heads; it turns into a crowded bouquet instead of a composed centerpiece.
8. Blush Sweet Pea Ladder Along the Table Edge
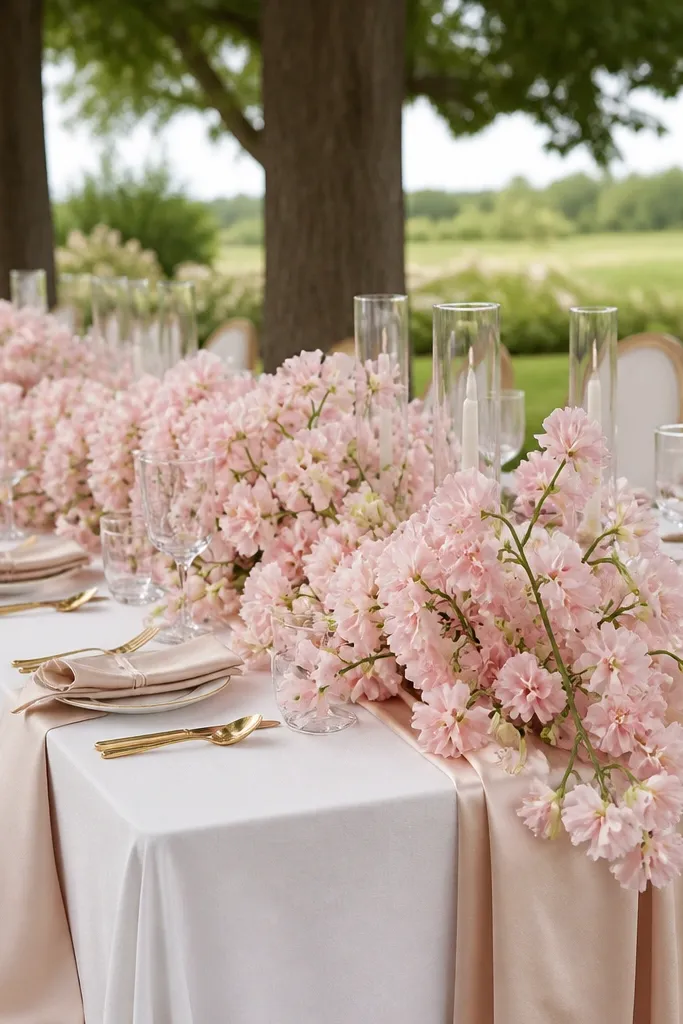
Sweet peas give movement, and movement reads romantic. A ladder-style placement along the table edge makes the flowers look like they’re wrapping the couple’s space, not sitting in one spot. This works beautifully for outdoor dinners and spring weddings because sweet peas look airy and fragrant in real life and delicate in photos. Choose blush with a hint of mauve for that soft, expensive glow. The table edge placement also keeps the main center clear for place cards and any custom signage.
Start by selecting a table edge runner or placing a thin strip of greenery where the sweet peas will sit. Arrange sweet pea stems in repeated “steps” — one small spill, then a slightly taller one beside it. Secure with floral tape to a grid or hidden base so the stems don’t slide when people brush by. Keep the spill length consistent so the ladder line looks even across the table. Finish with a few flower heads tucked toward the center to connect the edge design with the couple.
Quick tipCut stems at an angle and keep them cool during install to prevent drooping.
Skip thisSkip heavy, stiff center bouquets here; the ladder needs lightness.
9. Ivory Rose and Pear Blossom Cluster with Green Glass Vessels
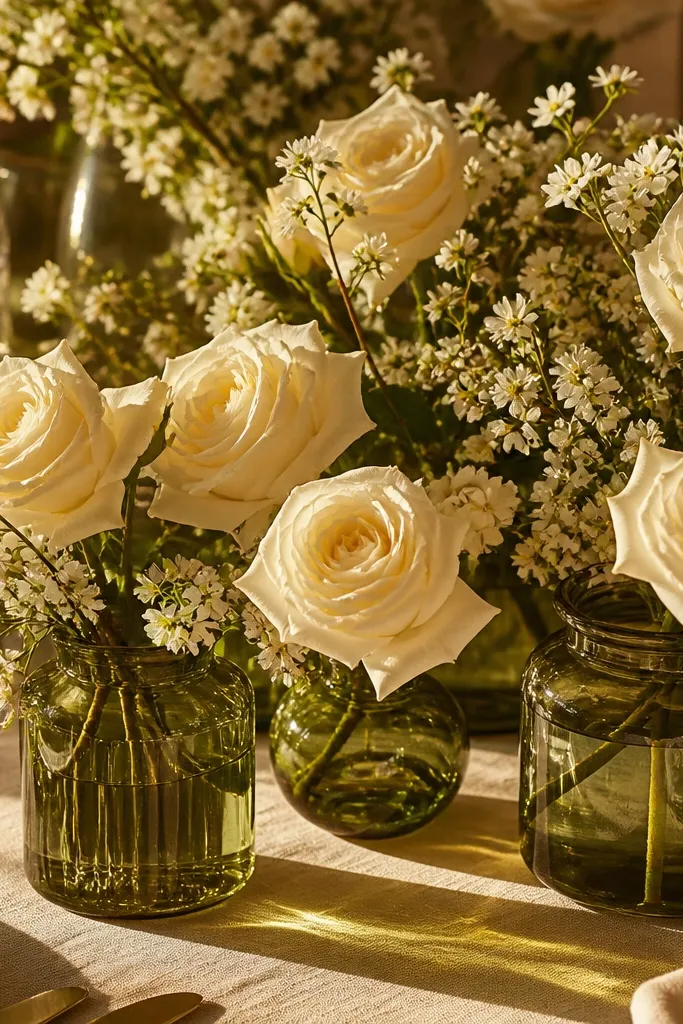
This idea feels expensive because the vessel color adds depth and makes white flowers look dimensional. Green glass vessels create shadow and contrast, so the ivory heads look brighter and more detailed. Adding pear blossom accents (or pear-like small white blooms) gives a delicate, layered look without needing more mass. This works best in venues with natural light or warm candlelight because the green glass catches highlights. Pair it with a neutral table linen so the glass becomes the “jewelry” element of your sweetheart table.
Start by choosing 3 green glass vessels — two medium and one slightly taller — and place them in a shallow triangular cluster. Build each vessel with ivory rose heads as the main structure, then tuck in small pear-blossom style blooms to fill gaps. Add a thin layer of greenery only where it supports the bloom shape, not as a thick filler. Center the whole cluster on the table so it reads as one design even from a distance. Plan for extra glass protection during transport since green glass can chip if it shifts.
If your venue is windy outdoors, use heavier vessels or add hidden filler weight so they don’t tip.
Don’t use bright neon-green glass; muted green looks romantic and photo-friendly.
10. Cream Tablecloth Base with Rose-Scented Foam-Free Ribbon Swag
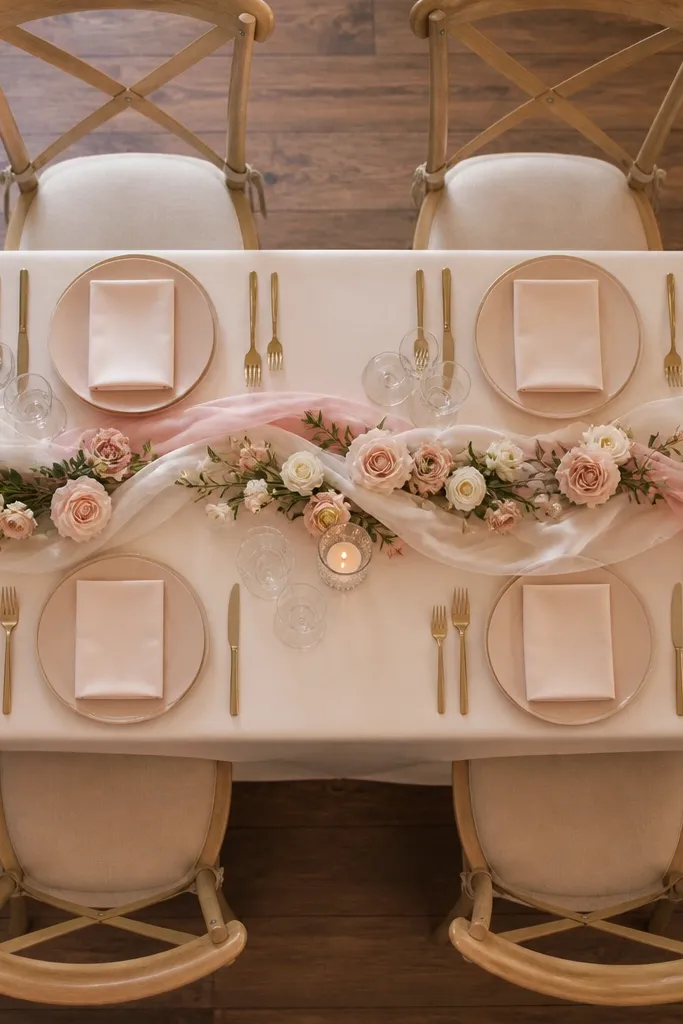
A ribbon swag makes the sweetheart table look styled without a bulky centerpiece footprint. Foam-free designs also photograph cleaner because you avoid blocky, messy interiors in the center. Use cream tablecloth for a smooth background, then drape a floral ribbon-like arrangement across the centerline. The look stays romantic because the flowers move gently and trail naturally. It’s a good choice when you want flowers to match a ceremony aisle theme but keep the table elegant and light. The best version includes small clusters and greenery that drapes evenly.
Start by choosing a ribbon or chiffon strip that matches your palette and can hold light clusters. Arrange small flower heads and greenery along the strip in spaced sections, then secure with discreet floral pins. Place the swag across the table with the ends slightly higher so it looks intentional, not saggy. Keep the heaviest blooms centered, and taper the sides. For install, lay it down, adjust the drape, then only add a few final tucks so it doesn’t look overworked.
Use a slightly longer ribbon than you think; trimming on-site is easier than stretching it back.
Skip thick, heavy foam blocks under the swag; they create uneven lumps.
11. Low Orchid and Candle Trio in a Long Tray
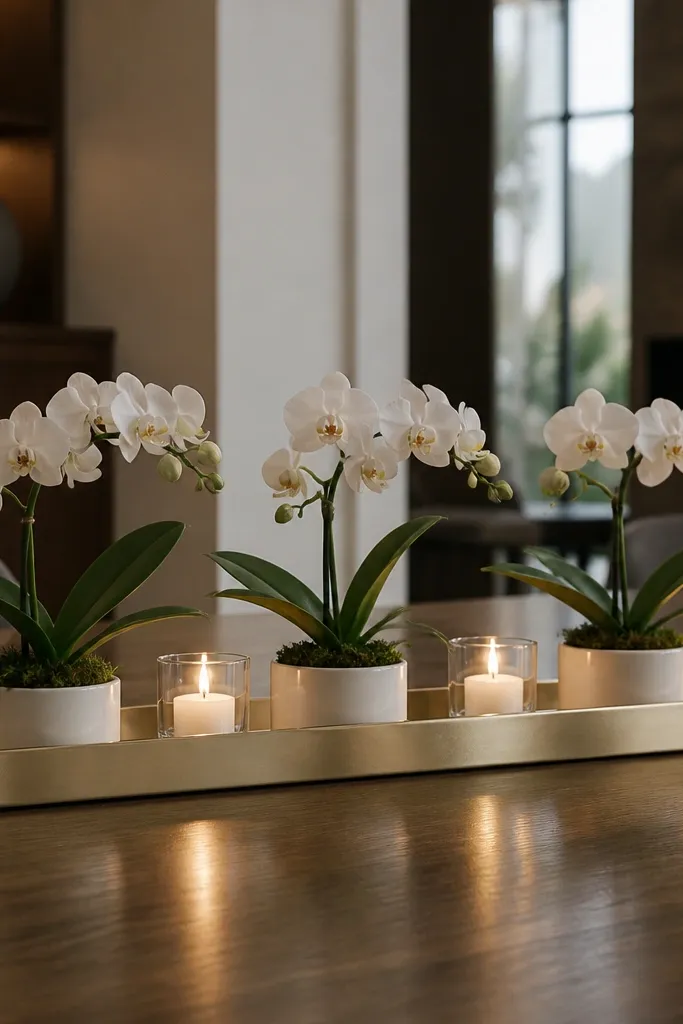
Orchids look expensive because they have clean lines and a premium texture. A low orchid and candle trio in a long tray makes the sweetheart table feel designed from edge to edge, not just in the center. Choose white orchids for a classic romantic look, then mix in candles so the flowers don’t feel too clinical under reception lighting. This works well for winter weddings and venues with darker interiors where you need contrast and clarity. A long tray also helps if you’re trying to keep the couple’s space tidy with minimal visual clutter.
Start with a long low tray that fits your table width — aim for about 70-80% of the table’s center width. Place candles in the tray first, spaced evenly, then set orchid stems so they arch slightly over the candle line. Fill in gaps with small greenery and a few orchid buds so the arrangement looks full. Keep everything low enough that it doesn’t block sightlines. Finally, test the arrangement’s stability by gently nudging the tray — it should not slide when the venue staff moves it.
Quick tipUse candles in frosted or clear glass so the tray doesn’t look empty when lights are dim.
Skip thisDon’t add tall orchid stems; the low tray look depends on clean, low composition.
12. Dusty Rose and Blush Flower Wall Panels Between Chairs
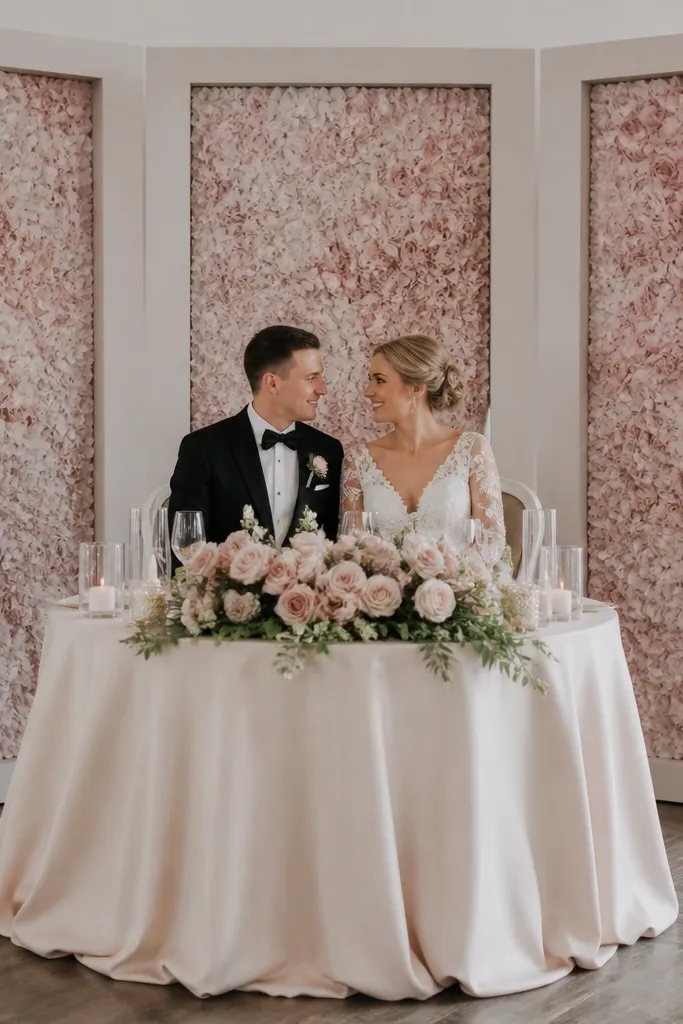
If you’re doing a sweetheart table against a seating backdrop, panels between chairs make it look like you paid for custom design. Dusty rose and blush panels create a soft halo around the couple without needing an enormous full wall. This style is photogenic because it frames faces from multiple angles and gives a clean background for ceremony-to-reception photo transitions. It’s best for weddings where you want the couple centered and the table flowers to support the background, not compete with it. Keep the panel height consistent so the framing looks intentional.
Start by deciding panel size based on chair width, usually 24-30 inches wide per side. Build two panels with the same color palette and similar bloom density, then attach them to a lightweight frame or stand. Place them behind the sweetheart chairs so the couple’s heads sit in the open center. Add a low table garland or a single runner so the table and panels feel connected. Transport panels flat and assemble at the venue to prevent crushed blooms.
Quick tipChoose panel flowers that don’t brown quickly in indoor heat; dense blooms hold up better.
Skip thisSkip a mismatched palette between panels and table; it breaks the frame effect.
13. Mismatched Mini Bud Vases in Two Shades
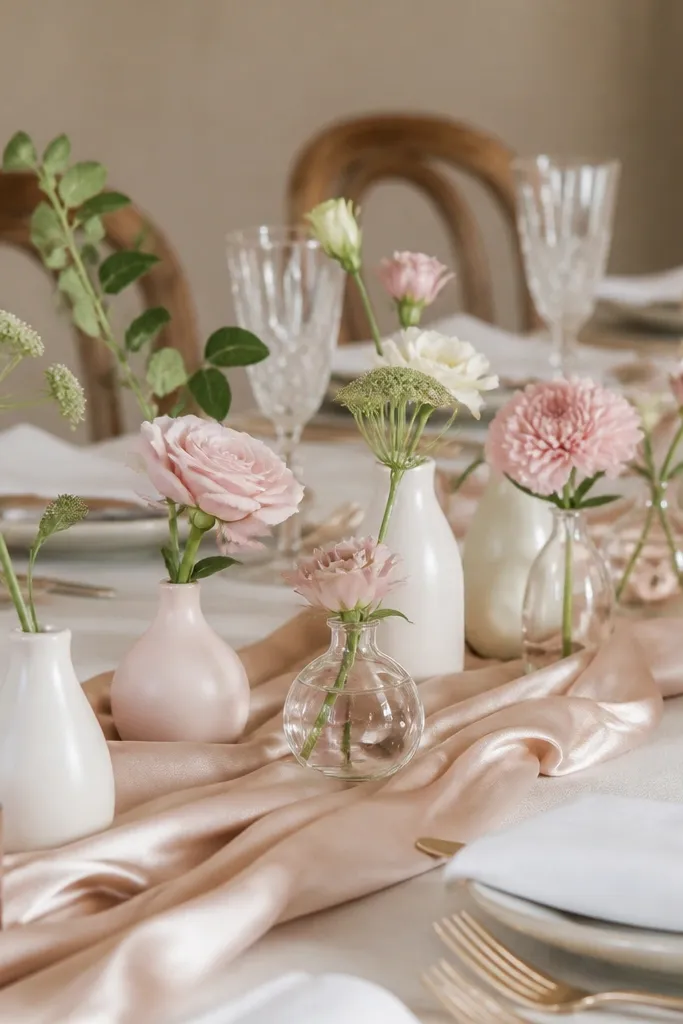
This is the “designed chaos” version that still looks expensive because it’s controlled. Mini bud vases placed in a repeating area create texture, and the slight variation in glass adds visual interest without looking random. Stick to two shades of flower — white and blush — so it reads cohesive even when each vase has different stems. This works when your table has candles, menus, or place cards because the flowers don’t block the action. It’s also great for outdoor weddings because small vases are less likely to topple than tall arrangements.
Start by picking 12-20 mini vases and grouping them in a central band, not all over the table. Choose a consistent spacing so the band looks like a design element, usually 8-10 inches apart. Fill each vase with the same stem palette but vary the exact bloom heads for natural variation. Keep the vase height within 1-2 inches of each other so the band stays even. For install, set all empty vases first, then fill last to keep stems upright.
Quick tipUse frosted glass for the blush stems; it softens the color and looks great under warm lighting.
Skip thisDon’t add third-color flowers; the mix turns pastel-muddy in photos.
14. Blush Rose and Hydrangea Cloud in a Round Cake Stand
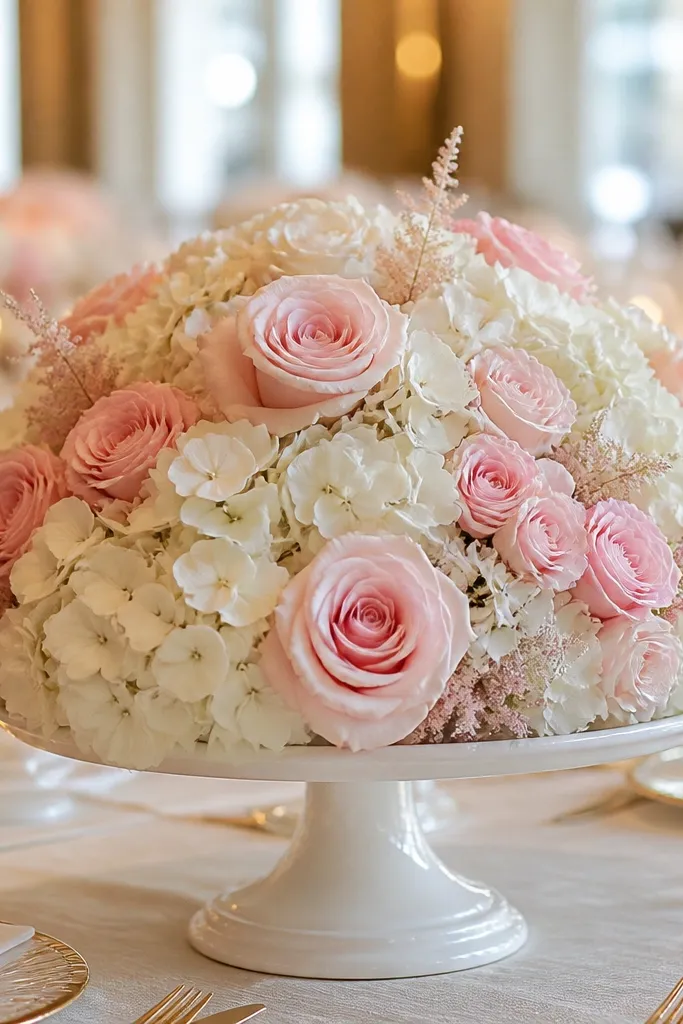
Hydrangea gives volume and softness, which is exactly what sweetheart tables need when the rest of the decor is minimal. A round cake stand pedestal makes the arrangement look like a high-end detail, not a random bouquet placed on the table. The “cloud” shape also photographs well because it creates a full silhouette above the table linen. Choose blush hydrangea with blush roses so the palette stays romantic and cohesive. This is a strong choice for indoor receptions where lighting can flatten delicate flowers.
Start by selecting a pedestal or cake stand with a stable base and a wide top so the blooms spread. Build a cloud by layering hydrangea first for the round volume, then tuck rose heads around the edges for definition. Keep greenery minimal so the hydrangea color stays the focus. Center the pedestal and leave clear space around it so plates and candles still have room. For longevity, prep hydrangea stems with fresh water and keep the pedestal away from direct AC vents.
Quick tipAdd one darker blush rose cluster near the back of the cloud to create depth in photos.
Skip thisDon’t use a tall pedestal with low blooms; the combo looks like it’s floating.
15. Ivory and Mauve Rose Pomanders on the Table Ends
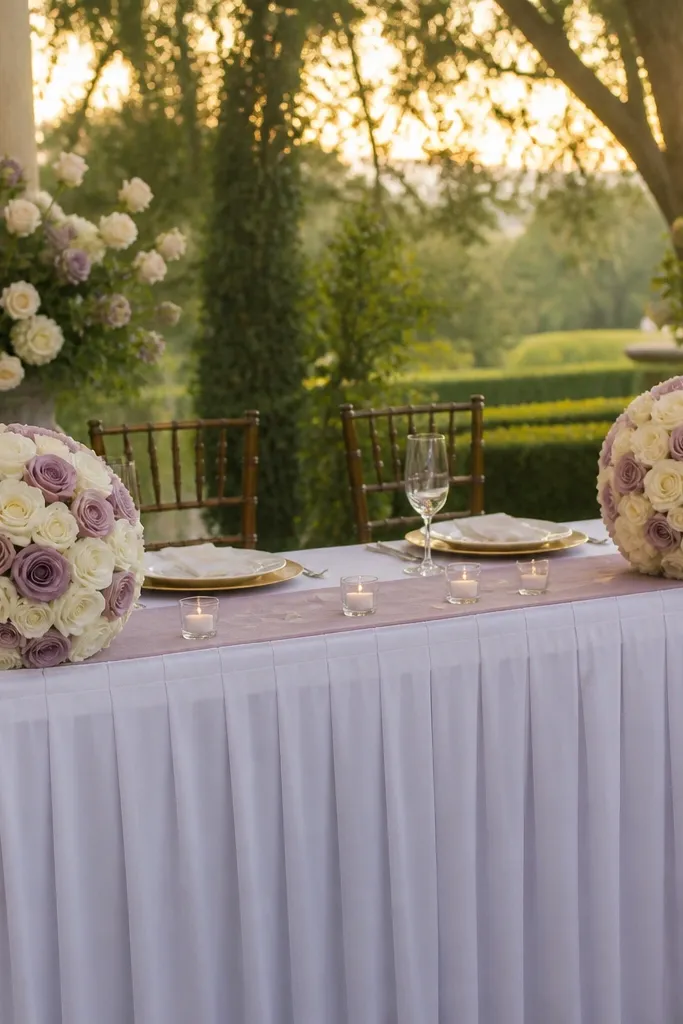
Pomanders look like ceremony-level decor because they’re spherical and structured. Put them at both ends and the sweetheart table instantly feels framed and intentional, even if the table itself is simple. Ivory and mauve roses keep the look romantic, and the rounded shape reads well in wide shots. This is a smart move for venues where you can’t hang decor from above but still want a high-impact floral moment. It also works well when you have a lot of candles because pomanders bring visual mass without adding height in the center.
Start by choosing pomanders sized to your table ends — usually 10-14 inches wide. Place them on sturdy bases or decorative stands so they stay stable. Use a tight palette of ivory and mauve rose heads so the sphere looks cohesive, not patchy. Then add a small greenery ring at the base to hide the stand edges. Finally, check sightlines from the couple’s seat so the pomanders don’t block faces in photos.
Use satin ribbon ties in a matching color for a small polished detail when the pomanders are photographed from the side.
Skip loose, airy pomanders; they look like wilted bouquets instead of designed spheres.
16. Deep Berry Candle Cups with Cream Sprays
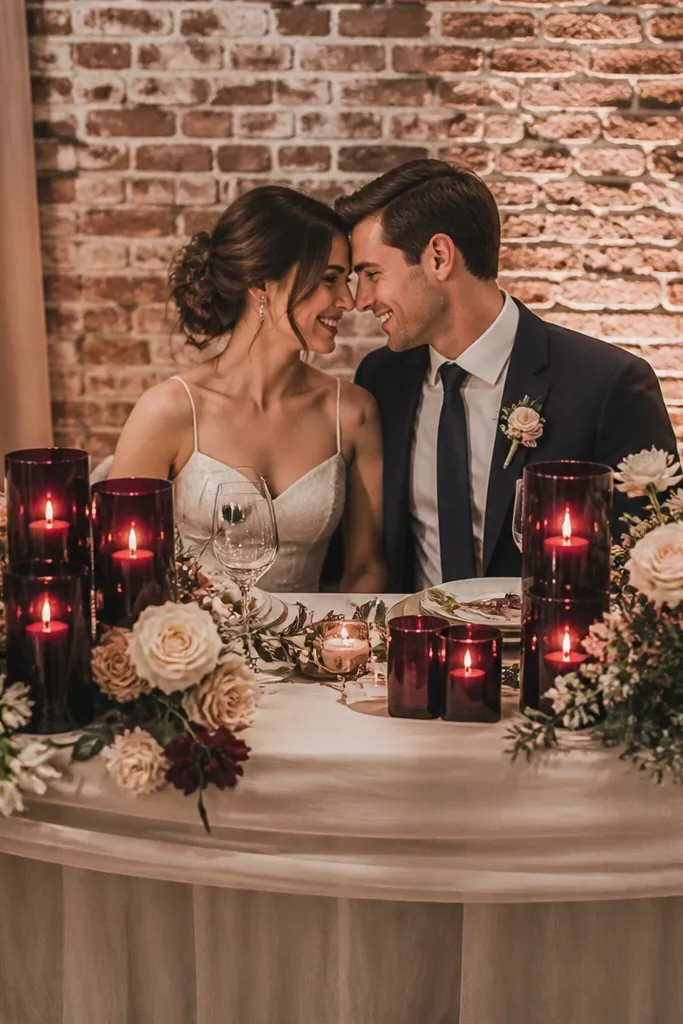
This idea feels romantic because it adds contrast without going dark and heavy. Deep berry candle cups create color that shows in photos, while cream sprays keep the overall look soft. It’s a great fit for fall and winter weddings when you want richer tones but still want the sweetheart table to feel bright and love-forward. The flower arrangement stays low, so it doesn’t interfere with conversation or place cards. Also, candle cups make the setup look cohesive even if you’re using multiple small candle vessels.
Start by choosing 3-7 deep berry candle cups and placing them in a gentle line across the center. Add cream sprays by inserting stems into a small hidden floral frog or foam pad inside each cup. Keep the sprays airy so they fan slightly outward, not straight up. Add a few berry-toned accents in the flowers only if they match the candle color. Finish by wiping any visible floral tape so the cups look clean on camera.
Quick tipIf your venue is warm, swap to LED candles; real flames can dry flowers fast near the heat.
Skip thisDon’t use bright red berries with cream; it reads more holiday than romantic.
17. Garden Rose and Olive Branch Oval Centerpiece
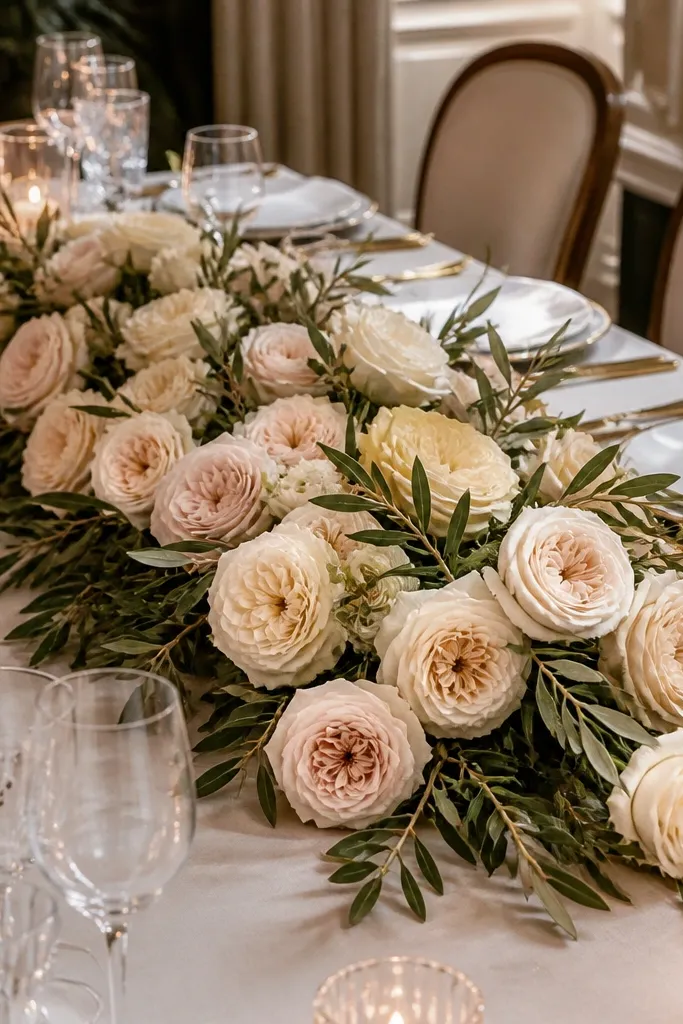
An oval center shape is elegant because it mirrors the visual flow of a table — it guides the eye across the couple. Garden roses give that full petal texture, and olive branches add a muted green that looks expensive under warm lights. This design works when you want one centerpiece that still feels dimensional and not like a single bouquet. It’s also great for medium-to-large tables because the oval shape fills more space without crowding the couple. The olive keeps it from looking too sweet or overly pastel.
Start by choosing an oval vessel or building an oval on a low base tray. Arrange olive branches first to set the oval outline, then tuck garden roses into the center and around the edges for full coverage. Keep the greenery airy so the rose petals stay visible and the arrangement looks light rather than heavy. Place the oval centerpiece centered on the table, with a small gap between it and any candles or signage. For transport, pack roses separately from greenery if possible so you can rebuild the oval shape quickly at the venue.
Quick tipUse slightly darker olive tones if your linens are very light; it creates contrast that reads in photos.
Skip thisDon’t build a tight circle; an oval reads more romantic and less stiff.
18. Blush Tulip and Ivory Rose Mix in Clear Cylinder Vessels
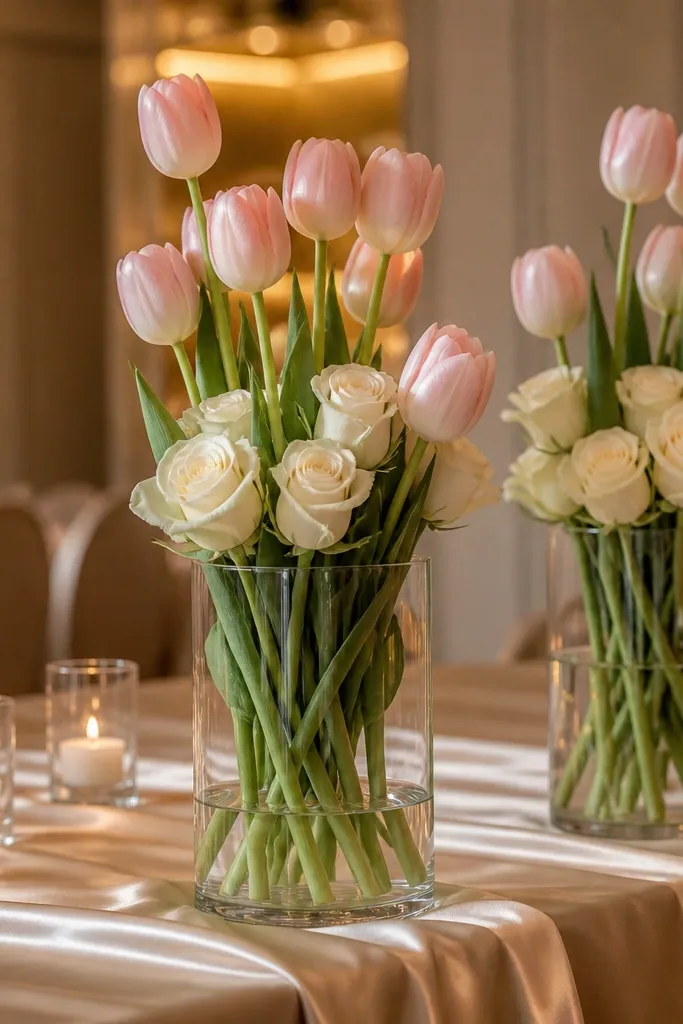
Clear cylinder vases make the arrangement look polished because they show stem structure. A mix of tulips and ivory roses adds two different bloom shapes, which creates visual richness without needing many flower types. Tulips also hold their form better for photos than very delicate petals, so your sweetheart table stays photo-ready from cocktail hour through dinner. This works especially well in spring weddings or any venue where you want a clean, modern romantic look. The key is to keep stem lengths consistent so the cylinders look designed, not random.
Start by selecting 5-7 clear cylinders and deciding on one height level, usually 14-18 inches total. Place the cylinders in a row across the centerline, then fill with water or a hidden liner for stability. Add tulips as the vertical structure, then tuck ivory roses around the tulip heads so the mix looks layered. Keep the greenery minimal inside the cylinders and use a small amount of filler outside only where you need it. Confirm the arrangement doesn’t block table numbers or menus if you have them.
Quick tipTrim stems to match cylinder height; uneven stems show up immediately in clear glass.
Skip thisSkip mixed-height cylinders; clear vases amplify inconsistency.
19. White Spray Rose Cascade in a Low Arch at the Table Front
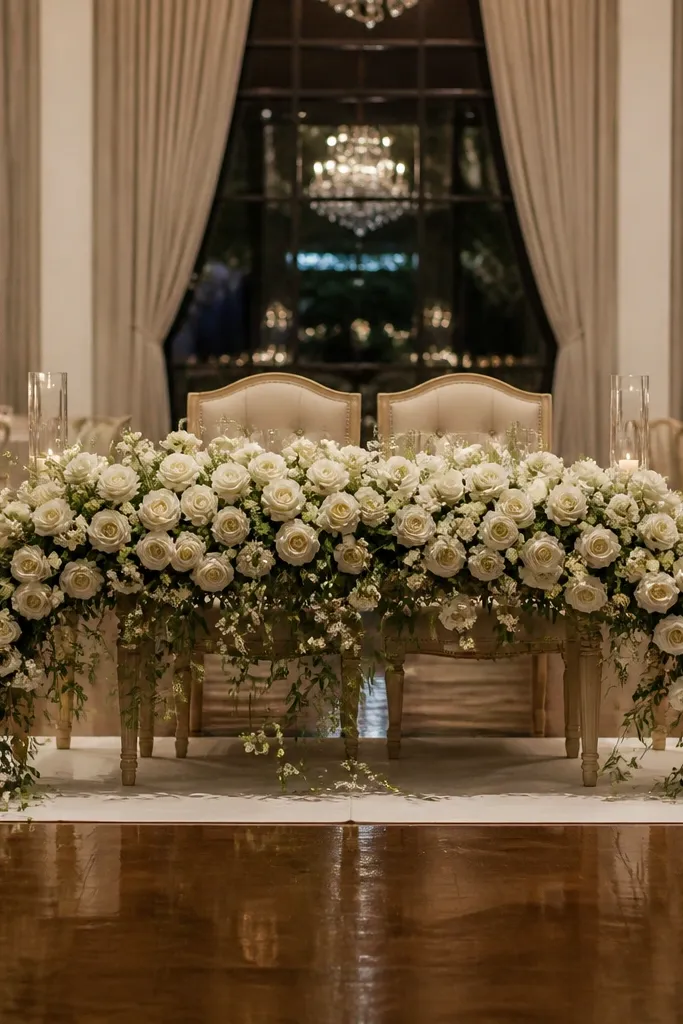
A low arch creates a “stage” effect for the couple’s chair area. White spray roses give a soft cascade that looks romantic and fills space without giant blooms. Placed at the front edge of the table, the cascade adds depth in photos taken from the audience or aisle. This is a strong option for sweetheart tables with chairs that face the crowd, because the arch frames the couple’s lower body area too. The look feels intentional and expensive when the cascade is symmetrical and the greenery is minimal.
Start by building a low arch on a hidden base or floral grid at the front of the table. Use spray roses as the main cascades, attaching them in small bunches that drape evenly left and right. Keep the arch height just below seat-back level so it doesn’t crowd the couple’s heads. Then reinforce with a thin framework of greenery at the base only. Finish by adding two small clusters at the arch ends so the cascade looks finished, not cut off.
Use foam-free attachment when possible so the arch is lighter and easier to position on-site.
Don’t make the cascade too long; if it hangs into plates, it looks messy and unsafe.
20. Blush Peony-Like Heads with Feathered Foliage in a Square Arrangement
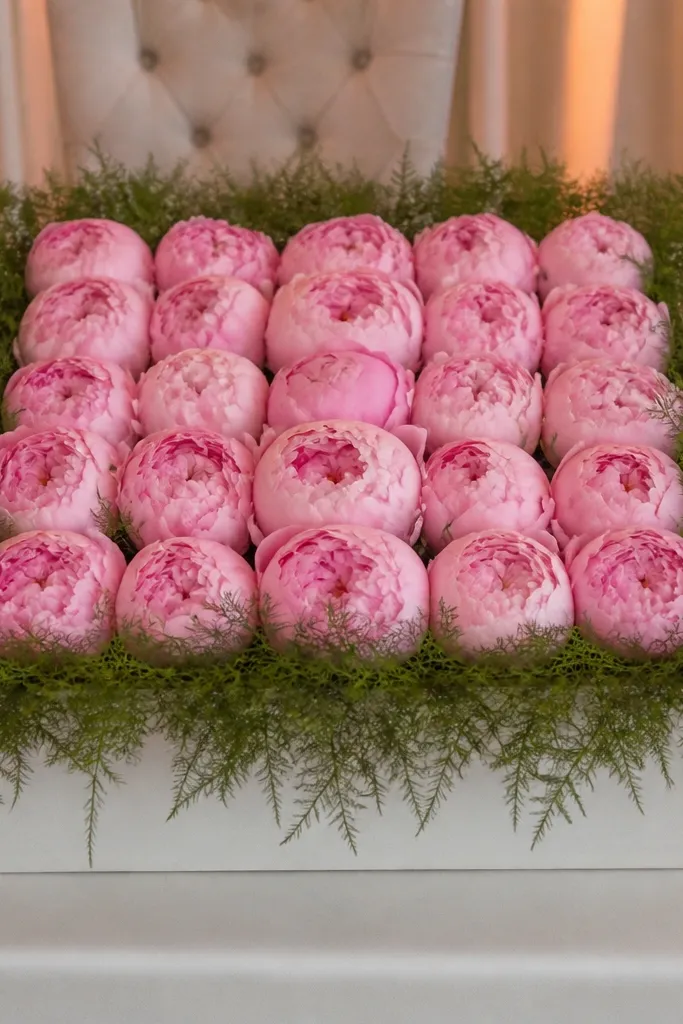
A square arrangement looks designed because it matches modern table styling and gives a clean edge in photos. Blush peony-like heads create romance, while feathered foliage adds that airy texture that keeps the arrangement from looking heavy. This style is perfect when your sweetheart table has a square cake pedestal, a geometric backdrop, or crisp linen folds. It’s also a good choice for venues where you want a structured centerpiece that still feels soft. The square shape helps the flowers read as a single object rather than a bouquet spread out.
Start by choosing a square vessel or building on a square base tray. Arrange blush peony-like heads in a grid-style pattern so each bloom has space and the top surface stays level. Add feathered foliage at the corners and along the sides to create a soft silhouette. Keep greenery low so the top blooms dominate the photo. Place the square centerpiece centered on the table and check from both sides to ensure the shape reads evenly.
Quick tipUse one main bloom size; square arrangements show variation fast if the heads differ a lot.
Skip thisSkip round bouquets in square containers; it looks like it was forced.
21. Ivory Rose and Soft Greenery Dome on a Mirrored Tray
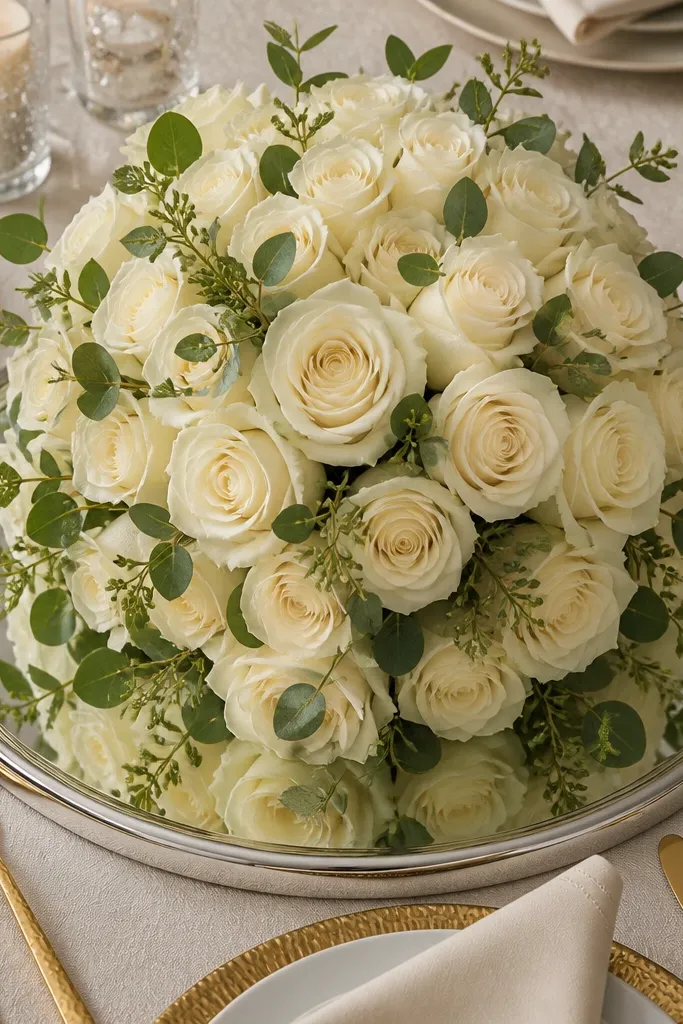
Mirrored trays make everything look pricier because they bounce light back up into the flowers. A dome shape in ivory roses creates a classic romantic centerpiece that reads full even with minimal greenery. This is a great option for couples who want an aesthetic sweetheart table wedding look but don’t want a lot of color. The reflective tray also looks great under candlelight and reception center lighting. Use this when your table design is clean and you want the centerpiece to carry the photo.
Start by placing a mirrored tray centered on the table, then add a low base pad so the dome stays stable. Build the dome by starting with greenery at the base, then layer ivory rose heads upward in a circular pattern. Keep the dome height around 12-16 inches so it’s visible but not tall enough to block faces. Add a few rose heads at the top for a smooth peak. Finally, wipe the mirror edges before install so you don’t get smudges in flash photos.
Quick tipUse LED uplights or candlelight-friendly lighting if you can; mirrors amplify glare if your lighting is harsh.
Skip thisDon’t use a mirrored tray with messy flower stems; the mirror shows every spill.
22. Two-Color Ranunculus Bowl with Floating Petals
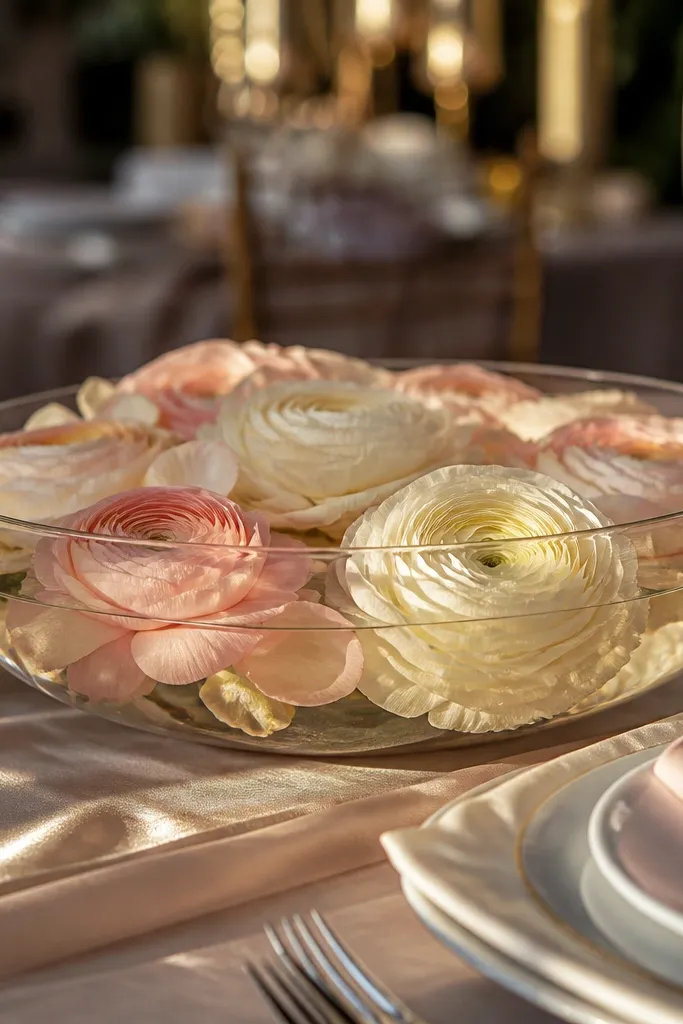
A shallow floral bowl looks playful and romantic at the same time, and it photographs like a detail shot even when you’re not taking close-ups. Ranunculus gives tight petal texture, and the two-color mix creates depth without looking busy. Floating petals add softness and movement when guests walk by or when the table lighting shifts. This works best when you want a centerpiece that feels intimate rather than tall or formal. It’s also ideal for venues with outdoor light because the petals shimmer subtly.
Start by choosing a shallow glass bowl or low vessel and placing it centered in the middle of the table. Add ranunculus stems with a hidden water insert or floral foam alternative so the blooms sit flat and stable. Then place a few floating petals on top in a controlled area — don’t scatter everywhere. Keep the rim clean so the bowl looks polished. For longevity, keep the bowl away from direct heat and refill water if needed.
Quick tipUse petals from the same palette; mismatched petals look like confetti instead of romance.
Skip thisSkip big loose stems in the bowl; they look untamed and clutter the rim.
23. Blush and Ivory Flower-Studded Napkin Rings with Table Center Accents
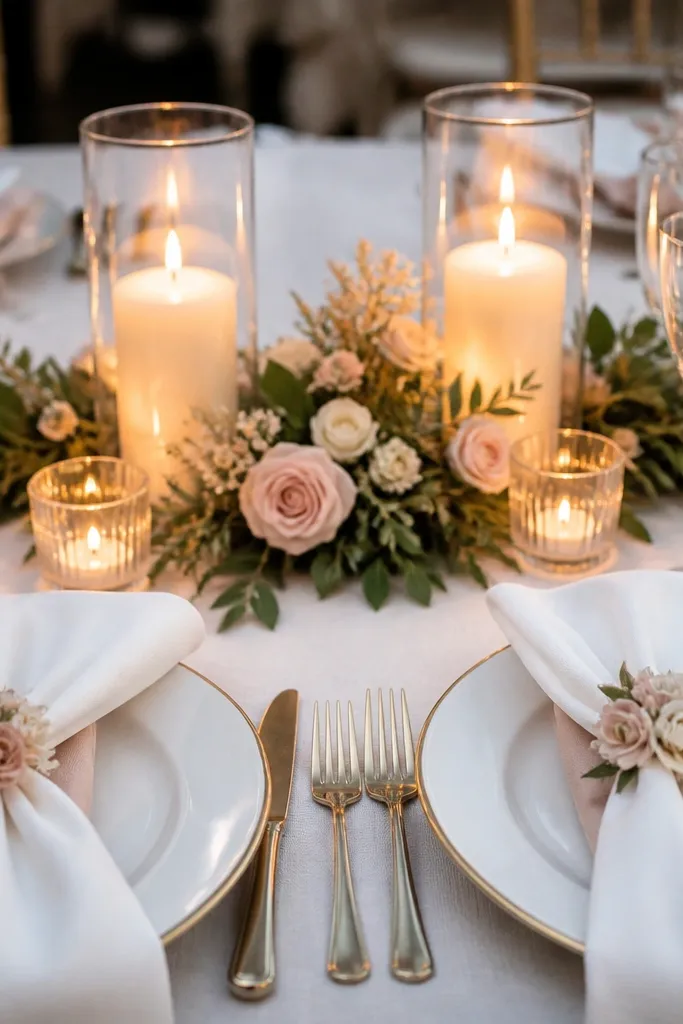
This is a clever way to make the sweetheart table look expensive even if your centerpiece is small. When napkin rings include tiny blush and ivory flower accents, the table looks styled all the way up to the couple’s place settings. Pair that with small center accents like two candle clusters or a short low garland so the flowers connect across the table. It reads romantic because it ties the couple’s personal space to the table decor. This is best when you have a plated dinner with place settings visible in most photos. The detail also helps if your sweetheart table is photographed from close range.
Start by selecting napkin rings that can be secured with floral wire or a small pin, then attach tiny blooms and greenery to each ring. Keep the napkin-ring flowers small — think one or two buds per ring — so they don’t droop. Then build a minimal sweetheart centerpiece: either two low candle clusters with greenery or a short runner segment. Match the same flower types used on the napkin rings so everything looks cohesive. Assign someone to handle napkin rings at setup so they don’t get crushed while staff places dinnerware.
Quick tipUse dried or very sturdy micro blooms for napkin rings if your reception is long.
Skip thisDon’t use large fresh blooms on napkin rings; they wilt fast and look tired by dinner.
24. Ivory Rose and Dusty Plum Micro-Bouquet Pair at the Sweetheart Table Corners
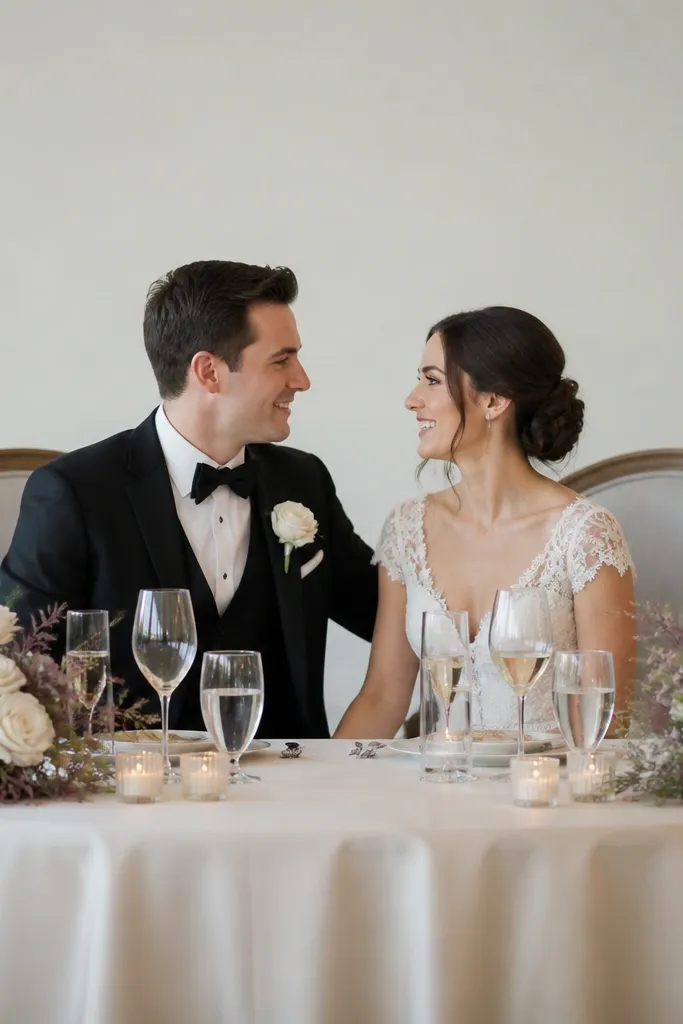
Corner micro-bouquets make the sweetheart table look intentionally styled from wide angles. Instead of putting all the weight in the center, you place two small balanced clusters where cameras naturally look — near the couple’s sides and chair edges. Ivory roses keep it romantic, while dusty plum micro-accents add depth without turning the palette dark. This works well for tables with a lot of visual elements like menus, place cards, or a dessert display. It also helps if you’re trying to keep the center clear for candles and signage.
Start by placing two small clusters at the table corners, about 8-12 inches in from each corner so they don’t look like random add-ons. Use ivory roses as the main heads, then tuck dusty plum accents sparingly for contrast. Build each cluster in a small low vessel or in a hidden base so it stays stable and doesn’t wobble. Keep the height consistent so the clusters don’t compete visually. Finally, add a thin greenery strip along the front edge if you want a subtle connection between corners and the center.
Quick tipChoose one dusty plum flower type and repeat it in both corners so the contrast looks designed.
Skip thisDon’t make one corner bigger; mismatched corners read like an install mistake.
25. Blush Hydrangea and Ivory Rose Double-Height Center with Low Base
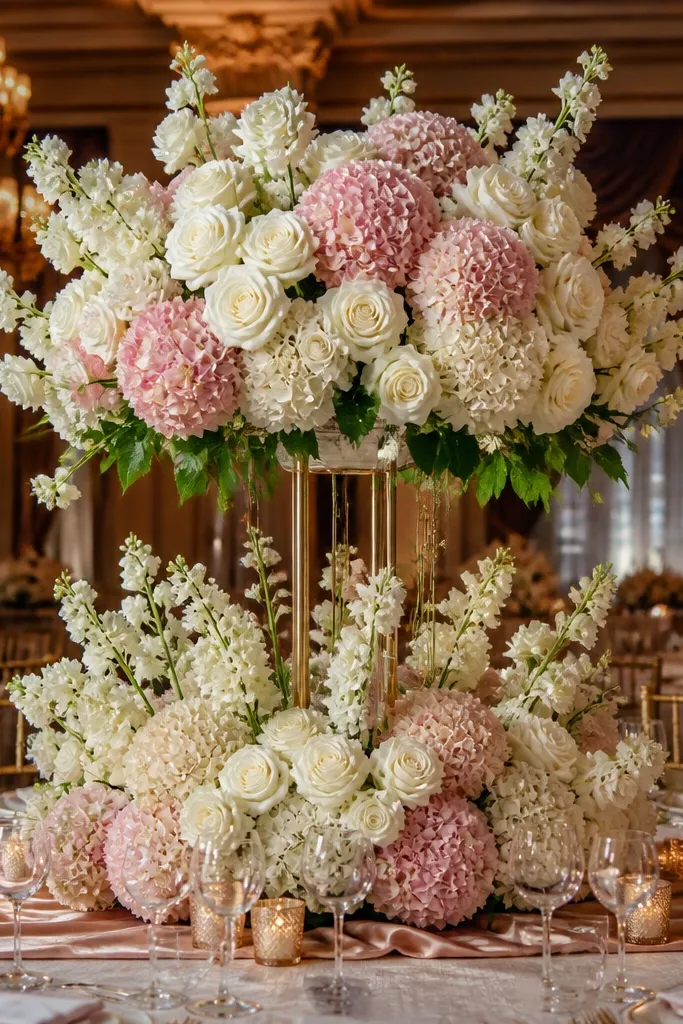
Double-height centers look expensive because they create depth without making the arrangement messy. The low base holds the table look together, while the higher hydrangea-and-rose cluster adds a romantic “lift” that shows in photos. Blush hydrangea brings fullness and softness, and ivory roses add classic contrast. This setup suits sweetheart tables where the couple wants a centerpiece that feels substantial but still keeps sightlines open. It’s also a strong choice if your venue has a lot of negative space behind the table — the center gives presence.
Start by building a low base in a wide vessel or tray, then place a second, slightly taller element on top using a stable floral support. Arrange blush hydrangea to create the main volume, then tuck ivory roses around the edges to define the silhouette. Keep the base greenery minimal so the centerpiece doesn’t look like a hedge. Position it centered and check sightlines from the couple’s seat. For install, assemble the base and top separately so the final stack goes up quickly and stays aligned.
Quick tipUse hydrangea heads of similar size; uneven heads make the double-height look lopsided.
Skip thisDon’t stack two heavy bases; it becomes top-heavy and looks risky on camera.



