
1. Giant White-Gold Arch With Layered Tulle Skirt
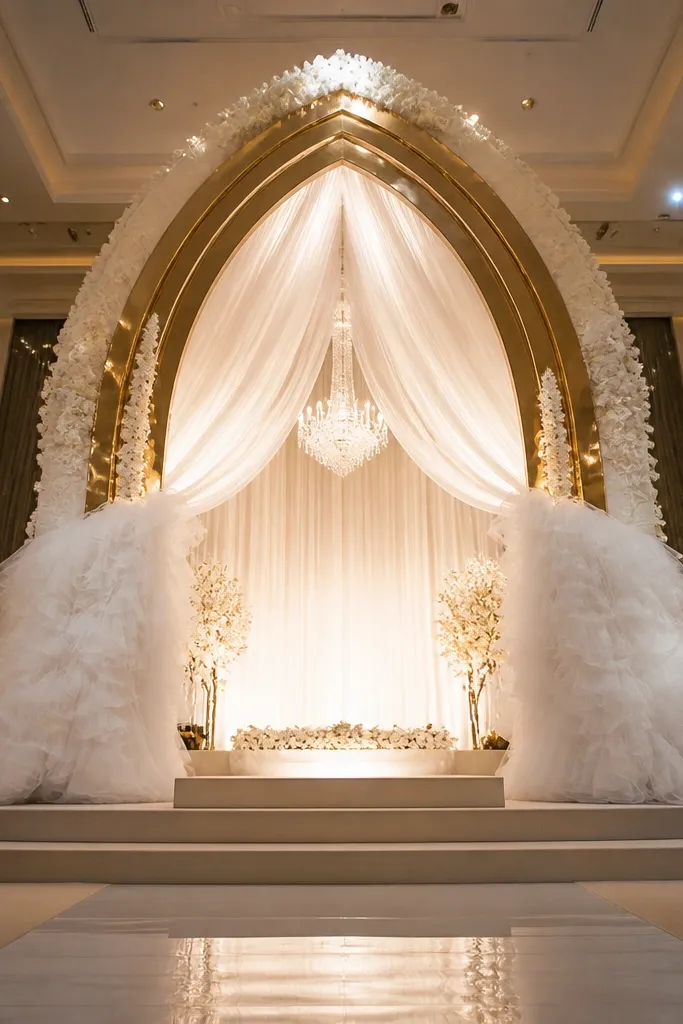
Go for a tall arch that rises above head level and make the center the brightest area. The layered tulle skirt gives you movement when the couple walks, so the backdrop never looks “stuck.” White on white reads clean and royal, and the gold accents add warmth without turning the whole thing yellow in photos. This style works best for indoor receptions where you can control lighting and keep the camera exposure steady. It also flatters everyone because it frames faces instead of competing with them.
Start by building the arch with a rigid frame and attaching tulle in overlapping bands, each band slightly shorter than the one below. Then add a narrow gold trim line along the inner curve so it catches light from both sides. Finally, test from the back of the room with a phone camera and adjust tulle density until the couple’s outlines stay crisp, not fuzzy.
Use white tulle with a soft matte finish, not shiny organza, so highlights don’t blow out your photos.
Don’t overfill the entire arch with florals; too much texture turns the frame into a blur.
2. Ivory Satin Drapes With a Center Knot and Side Sheers
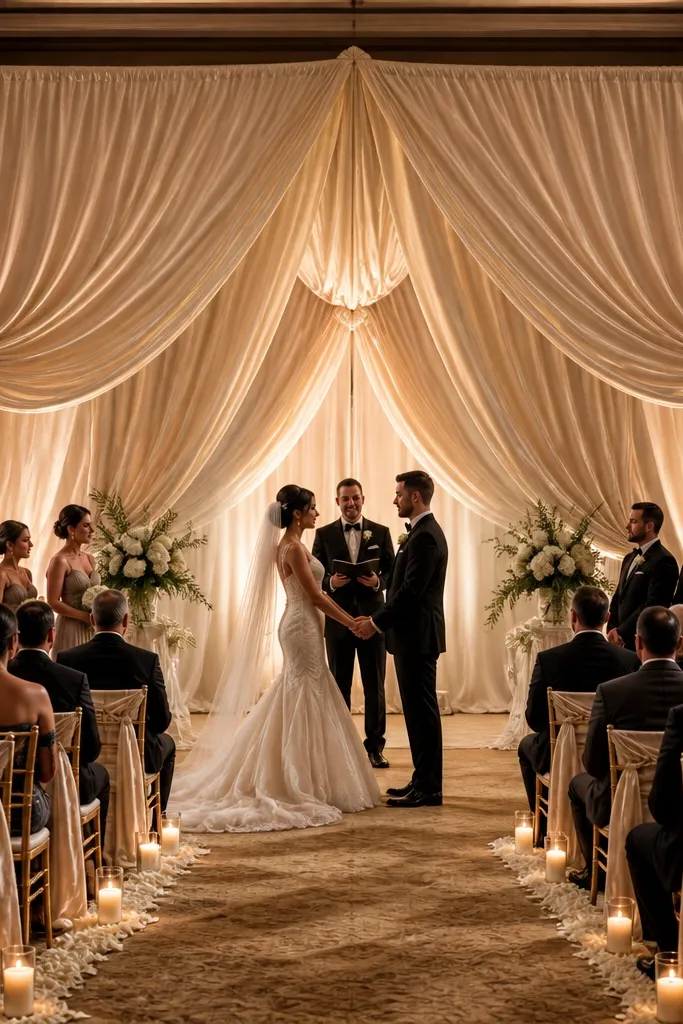
This is the “royal curtain” look that makes a stage feel like a ceremony hall, even in a regular banquet room. The satin gives weight and structure, while the side sheers add lightness and depth. The center knot creates a natural focal point behind the couple, which is what your photos need most. It’s especially flattering for evening weddings because the satin catches warm uplighting beautifully. If you want something that looks expensive without being heavy to install, this is a strong pick.
Hang two tall side panels first, then place the center knot so it sits roughly where the couple’s shoulders will be. Use tension rods or a top track so the fabric doesn’t sag in the middle. Finish by adding a narrow double-layer of sheer over the satin at the edges to create a dimensional frame.
Iron satin before install and pin the seam lines so the folds stay symmetrical in photos.
Skip thin, cheap fabric that wrinkles into random creases; it reads messy on camera.
3. Marble-Effect Panel Backdrop With Gold Letter-Plate Frame
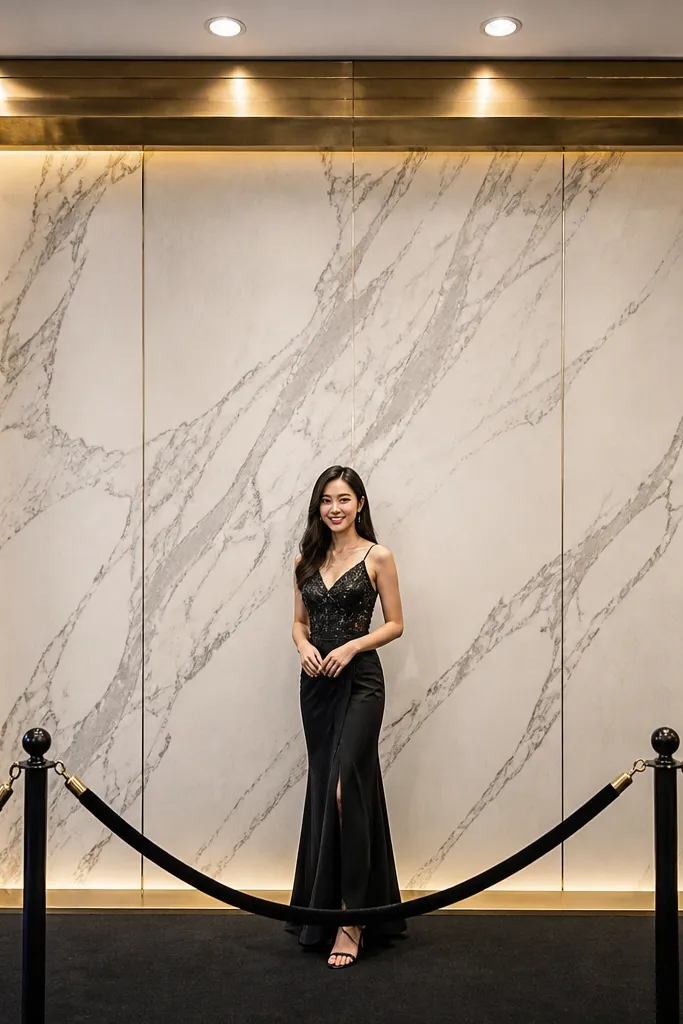
If your venue is modern and you want wedding decor that still looks “royal” without going floral-crazy, pick marble-effect panels. The high-contrast veining gives your photos texture without clutter, and the gold plate frame makes it feel ceremonial. This style is great for couples who want clean luxury that works with neutral outfits and minimal centerpieces. It also holds up under harsh overhead lighting because the pattern stays readable. You’ll get a crisp background for portraits and a strong stage identity.
Start by choosing a panel system wide enough to cover the full stage width with 6-10 inches of overlap on each side. Then install a gold frame element centered behind where the couple stands, leaving a clear gap between frame and panels for depth. Finally, add a thin line of uplight from both sides to make the “veins” pop on camera.
Bring a swatch of the panel material and compare it next to your table linens; you want the undertones to match.
Don’t add heavy florals on top of marble panels; the pattern fights and the stage looks busy.
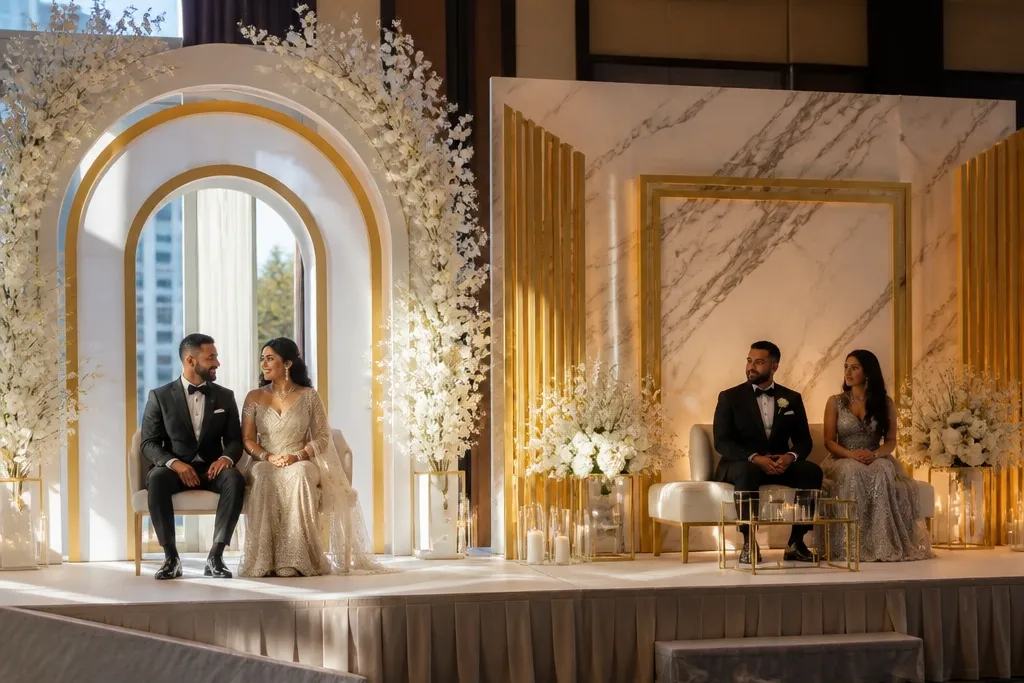
4. Tall Column Candles With Florals in Vertical Strips
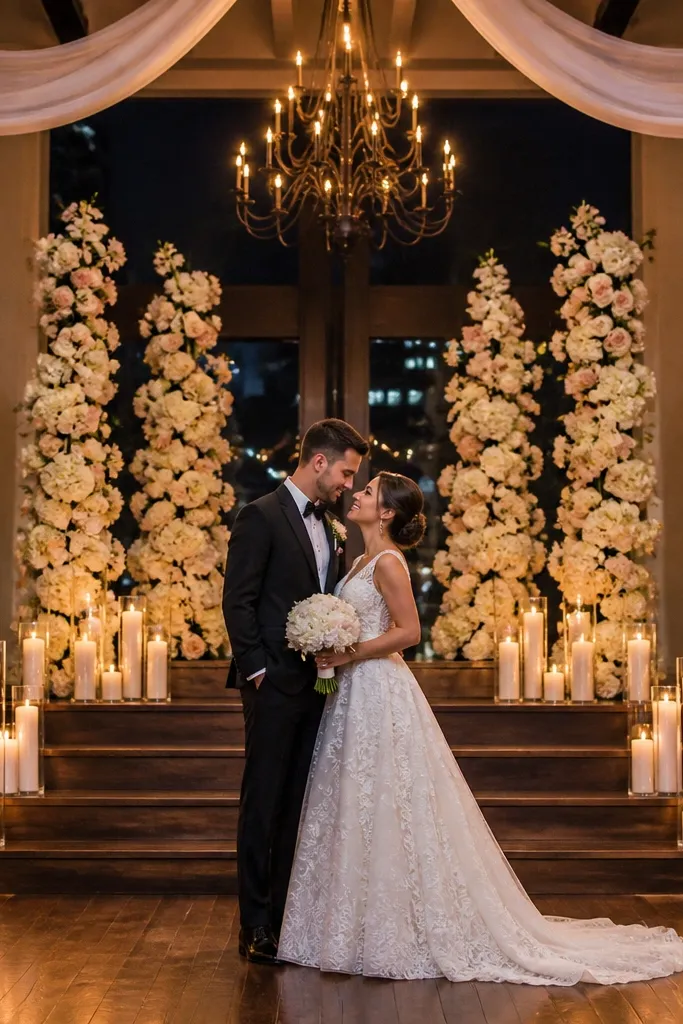
This backdrop reads royal because it’s built on height and symmetry. Candles (real or LED) create a warm glow, while vertical floral strips keep the view clean and tall. The key is spacing: the flowers should form columns, not a thick wall, so the couple stays the visual center. It works beautifully for evening receptions with amber lighting or candle-friendly venues. It also looks great in both wide shots and tight close portraits.
Place two tall base columns at the stage corners first and run vertical floral elements down the center lanes. Use greenery as the “scaffolding” and add blooms only at specific heights so the strips look intentional. Finish by adding warm LED candles or lantern lights so the glow lands behind the couple’s shoulders.
Quick tipUse LED candles if the venue has strict fire rules; choose ones with a flicker mode that isn’t too fast.
Skip thisDon’t crowd the center with flowers; keep a clear vertical lane behind the couple.
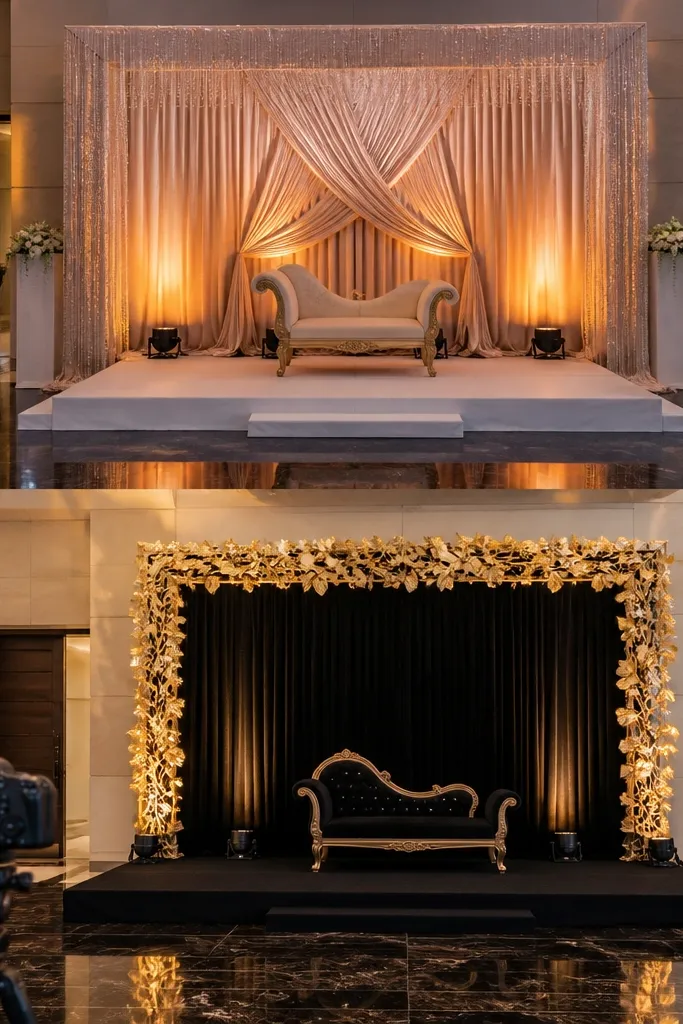
5. Golden Fringe Curtain With a Soft Halo Behind the Couple
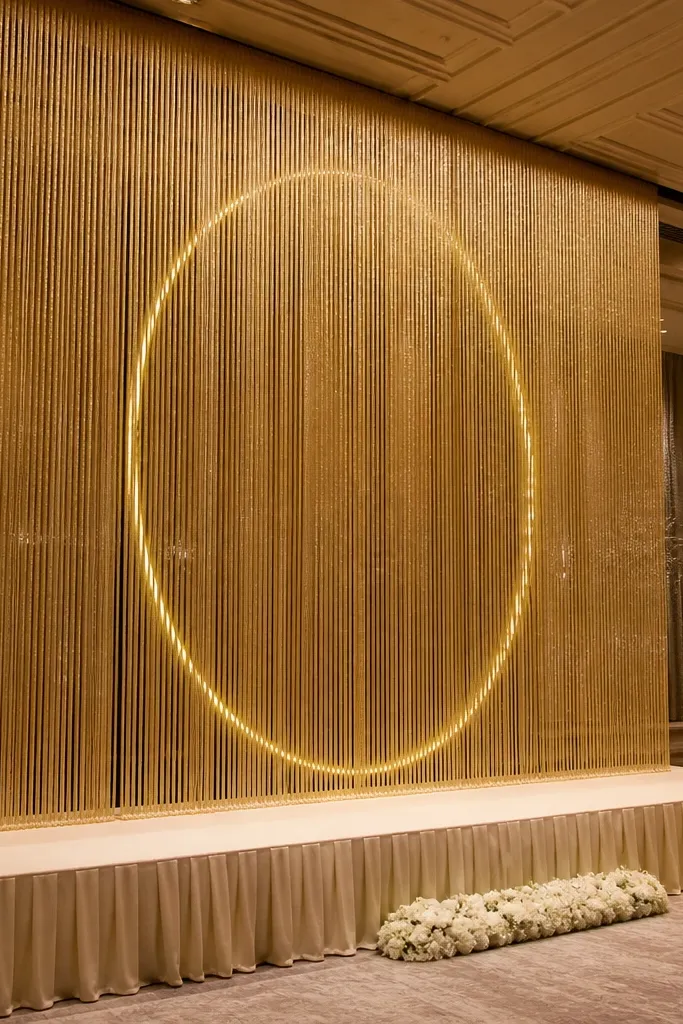
Fringe is one of the fastest ways to make a stage look expensive because it catches light and creates sparkle without needing a huge build. Pair it with a halo behind the couple to control where the eye goes. The fringe should hang in a clean curtain line, not in tangled bunches, so the photos look crisp. This style is ideal for ballroom weddings where you want glam without going full disco. It also flatters movement as fringe shifts when people walk.
Hang a continuous fringe curtain across the main backdrop area, with the top seam perfectly straight. Install a circular halo light behind the center line, keeping it slightly above head height. Then add two small uplights aimed upward at the fringe so it glows rather than just reflects.
Pick gold fringe with a matte backing so it doesn’t look “cheap metallic” in daylight.
Avoid mixing cool silver and warm gold; pick one metal family so the stage color stays consistent.
6. Oversized Peony-and-Rose Wall With Open Negative Space
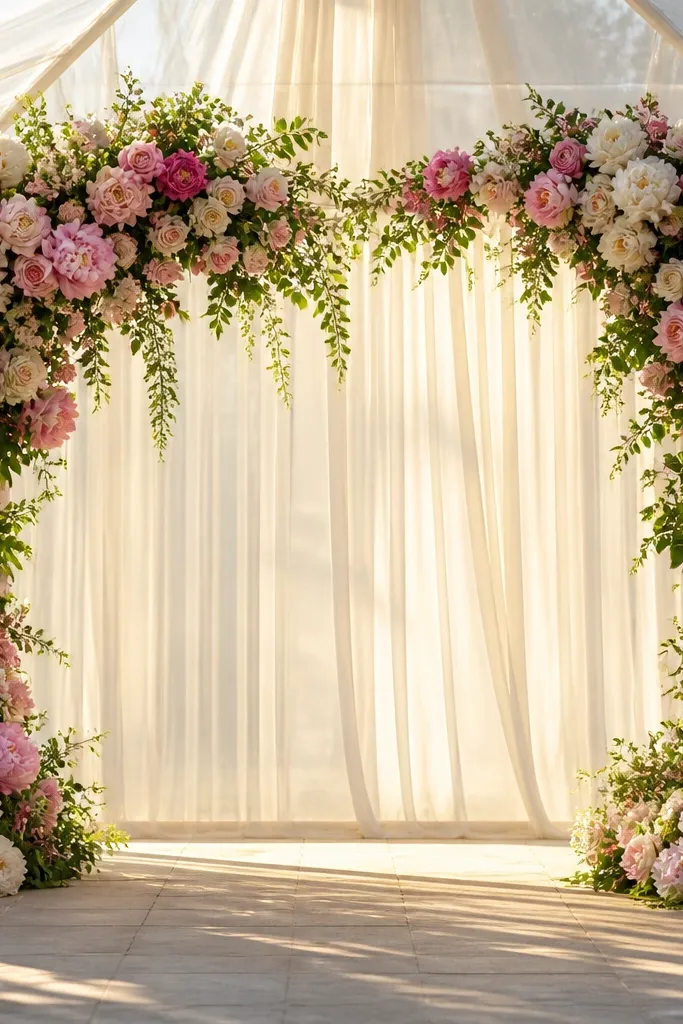
Dense florals look royal when you leave breathing room. The trick is to build a wall that’s thick on the outer edges and lighter in the middle, so the couple’s silhouettes pop. Peonies and roses create soft, rounded texture that reads lush in wide shots. This style is best for venues with good natural or warm lighting where florals can look dimensional. It also pairs well with simple wedding arches and minimal signage because it already does the heavy lifting.
Start by sketching a center “frame” area on your install plan so you know where to leave negative space. Build outer clusters first, then fill toward the center until the couple’s heads stay clearly separated from blooms. Finally, add greenery only along the edges and lower areas so the middle stays clean.
Quick tipUse a mix of matte and satin petals; satin catches light and makes the wall look more expensive.
Skip thisDon’t make the wall equally dense everywhere; that’s how it becomes a flat flower blanket.
7. White Blossom Cascade From a Top Beam
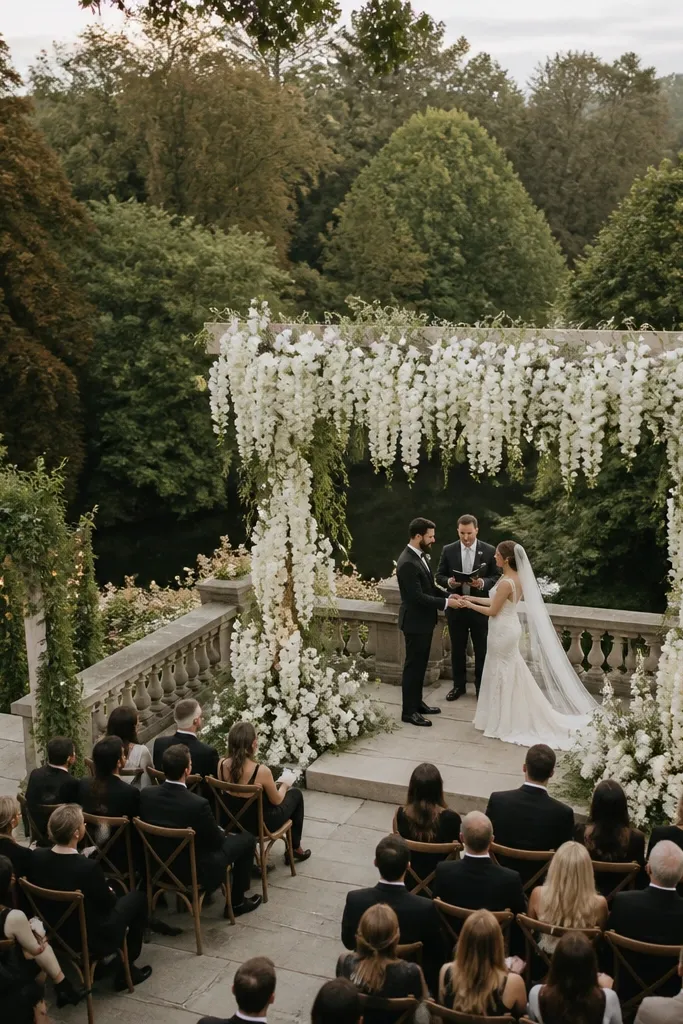
Cascades look royal because they create a top-to-bottom motion line, which makes photos feel taller and more dramatic. Keep the blooms concentrated in clusters as they fall, so it looks intentional rather than messy drips. White blossoms with greenery read clean and classic, and they photograph well in both soft and bright lighting. This style is a great fit for spring weddings or any time you want a “garden waterfall” behind the couple. It also works when your stage is narrow because the cascade fills the vertical space.
Hang a strong top beam or truss first, centered behind where the couple will stand. Then attach cascading floral strands in three or five lanes, with the tallest lane in the center. Finally, add a thin strip of greenery at the bottom edge to hide any wiring and make the cascade look finished.
Quick tipAnchor the top beam to the venue’s structure when possible; free-standing setups can wobble under stage fans.
Skip thisDon’t let cascades tangle across the center; keep lanes separated so faces stay visible.
8. Greenery Frame With White Rose Ballooning Panels
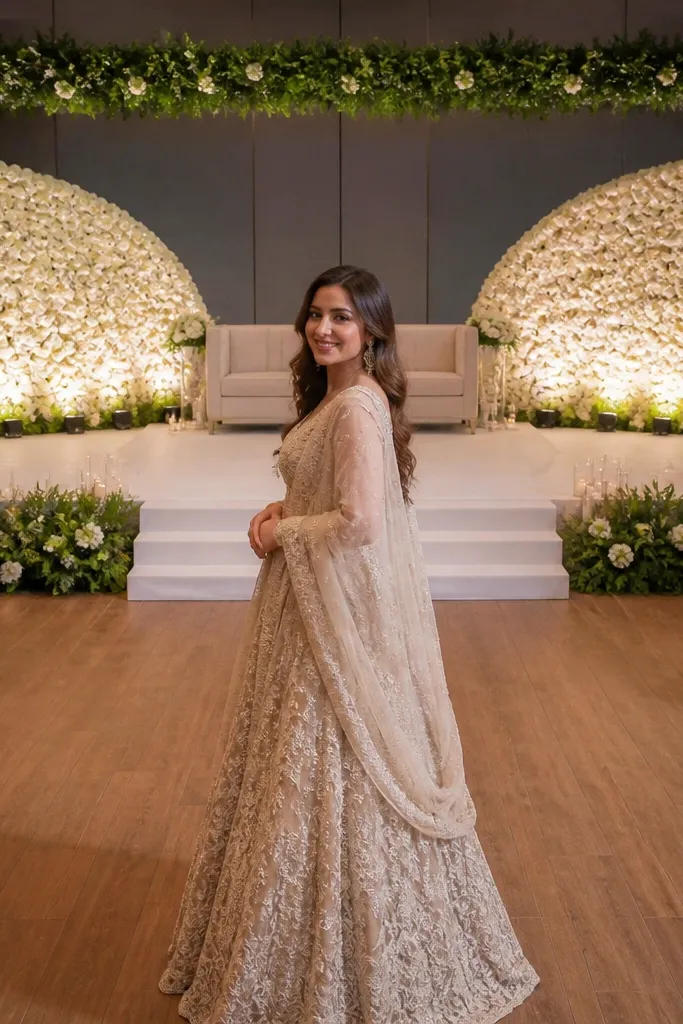
This style is about contrast: crisp greenery frames the stage, and the rose panels look like soft, rounded “balloons” that photograph like a couture backdrop. The greenery adds freshness and texture, while the rose clusters give you the royal, romantic effect. It’s great for couples who want a lush look without going full wall-to-wall florals. The ballooning shape also creates depth because the blooms sit at different distances from the fabric. This is a strong choice for outdoor-to-indoor transitions because it stays photogenic even in mixed light.
Build a rectangular greenery frame first, then mount fabric or mesh panels inside it. Attach rose clusters to the panels in domed shapes, starting larger in the center and smaller toward the edges. Finish by adding a bottom greenery strip and checking camera angles from the sides to ensure the domes don’t look flat.
Quick tipChoose roses with consistent petal color; mixed undertones show up fast in daylight photos.
Skip thisSkip thin, see-through backing under rose panels; it makes the domes look hollow.
9. Satin Fan Backdrop With Center Spotlight
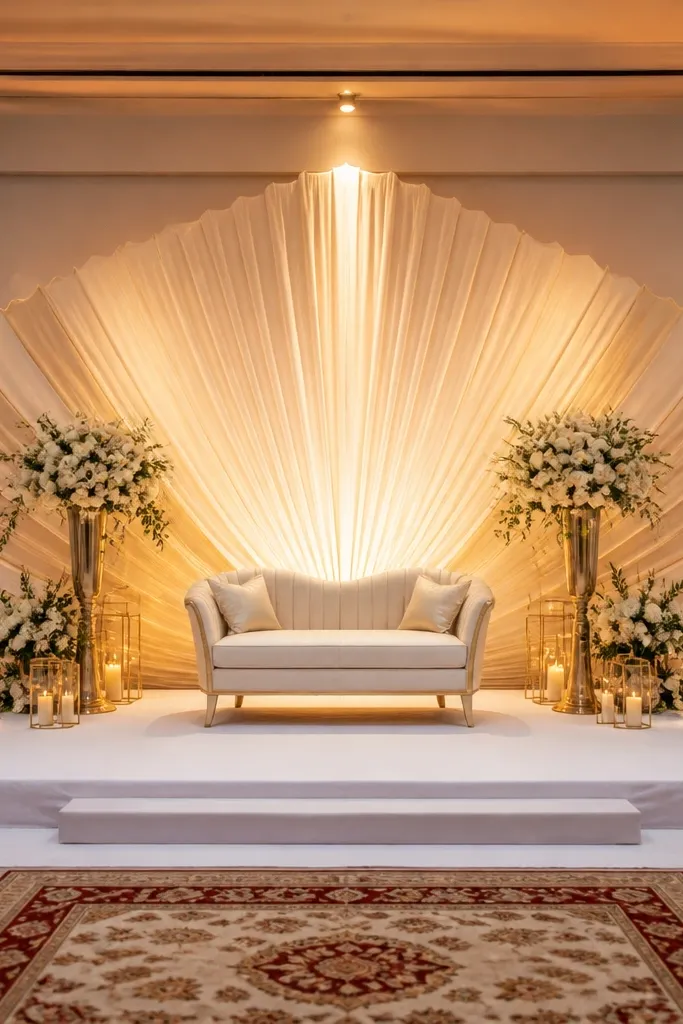
Fan backdrops are a “royal lighting trick” because they guide the eye inward. The satin layers create a subtle gradient effect, and the center spotlight adds a ceremony feel even in a reception hall. This style works especially well when the room has plain walls — it turns the entire stage into a focal point. It also suits modern wedding aesthetics because the look is sculptural, not messy. If you want clean glamour that still photographs with depth, this one does it.
Start by installing a fan-like structure of fabric panels that radiate from a center line. Use a slightly darker shade at the outer edges and a lighter shade toward the center so the spotlight effect feels natural. Then place a spotlight or warm LED ring behind the center to make the fan folds glow on camera.
Use satin that doesn’t crease easily; creases show as harsh lines in bright lighting.
Don’t pick a fan fabric that’s too shiny; it can blow out highlights and flatten the folds.
10. Black Velvet Backdrop With Gold Leaf Frame
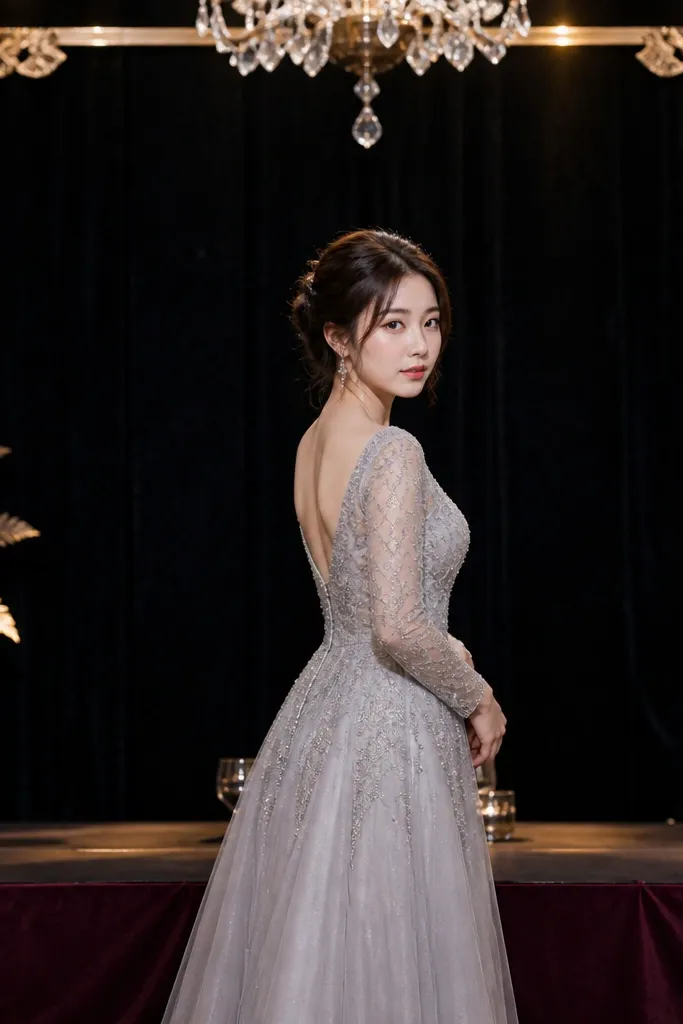
Velvet makes everything look expensive because it absorbs light instead of reflecting it. A black velvet backdrop gives you drama, and a gold leaf frame adds that formal, royal feeling without adding clutter. This is perfect for winter weddings or any time you want bold contrast with white, champagne, or burgundy outfits. It photographs beautifully because the couple pops against the dark background. Keep the rest of your stage decor simple; the velvet and gold do the work.
Stretch velvet fabric across a rigid frame so it stays smooth and wrinkle-free. Add a gold leaf frame element around the center opening, leaving the center area slightly brighter with a warm light. Finally, place two floor uplights angled upward to create gentle highlights on the velvet without glare.
Quick tipUse a matte gold frame, not glossy, so it looks like leaf and not like plastic.
Skip thisSkip high-contrast busy florals directly on velvet; it can look heavy and messy in photos.
11. Blush Tulle Cathedral Arch With Warm Uplighting
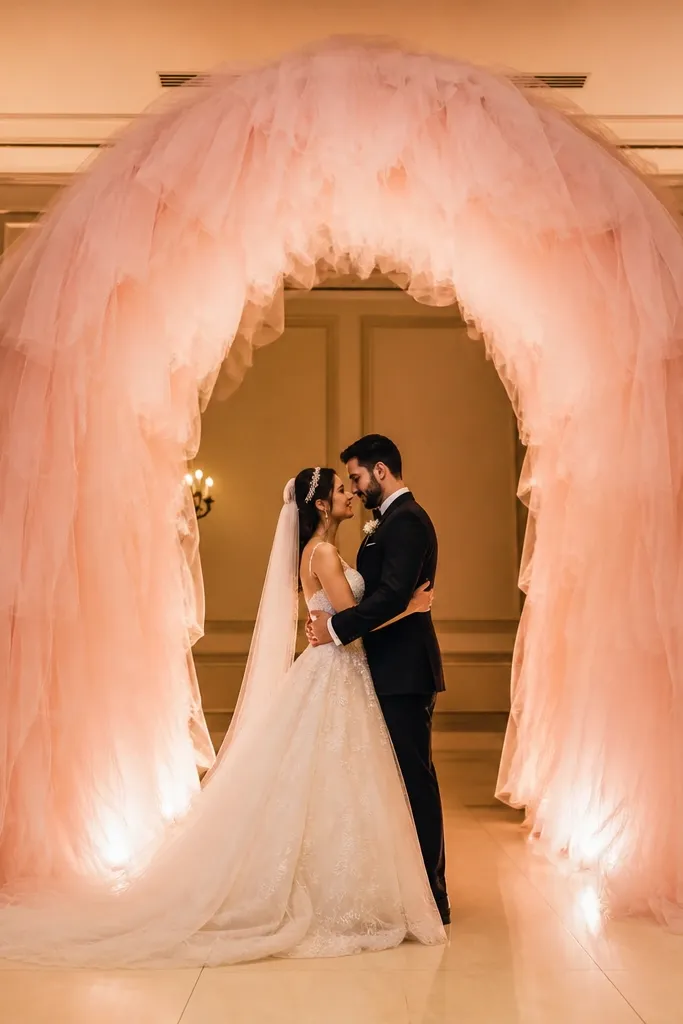
A cathedral arch makes the stage feel ceremonial, and blush tulle gives it a soft, romantic glow. Warm uplighting is what turns tulle into a “light source,” so your backdrop looks alive in photos rather than translucent and flat. This style suits indoor venues with warm lighting or any time you want a gentle color story that works with lots of flower palettes. It also looks amazing in portrait photos because the arch shape creates a natural frame. If your goal is “grand,” this is one of the simplest ways to get there.
Build the arch frame first and then layer blush tulle from the top down in long sections with slight overlap. Add warm uplights at the base aimed upward so the tulle glows from behind. Finally, keep the center opening clear so the couple’s faces sit against the brightest area.
Quick tipChoose blush tulle that matches your bridesmaid dresses or florals; undertone mismatch shows up fast on camera.
Skip thisDon’t add too many different blush shades; it turns into patchy pink instead of a smooth glow.
12. Crystal Bead Curtain With a Center Mirror Strip
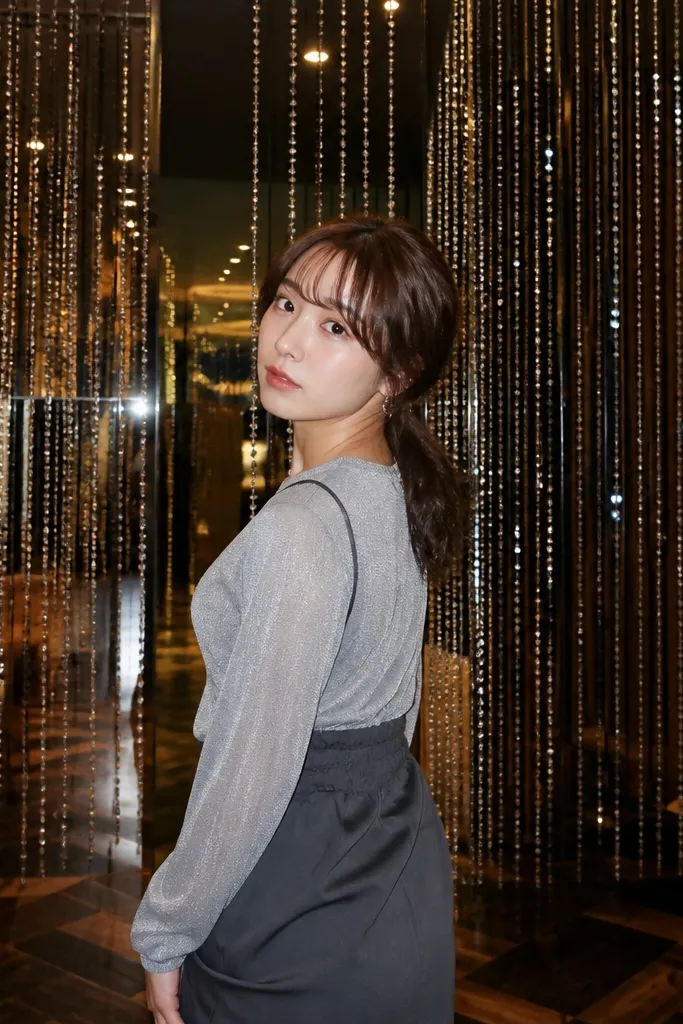
Bead curtains look royal because they throw light in tiny highlights, which cameras love. The center mirror strip adds a “runway” effect and helps the stage read as deeper in photos. This is a glam choice for modern weddings where you want sparkle without building a huge floral wall. It’s also great for nighttime events since the beads react to moving light. Just keep the rest of the stage decor clean so the sparkle stays the hero.
Hang the bead curtain as a single plane across the backdrop width, making sure the top edge is straight. Install a slim reflective strip at the center behind the couple’s line so it catches the same light direction. Then add side lighting at medium angles, not directly overhead, to prevent glare and blown highlights.
Test the bead curtain under the venue’s lighting before the ceremony if you can; glare changes fast between rooms.
Don’t use a mirror strip wider than your couple’s space; it can reflect faces and distract.
13. Carved Wood Panel Backdrop With Fresh Greenery Swags
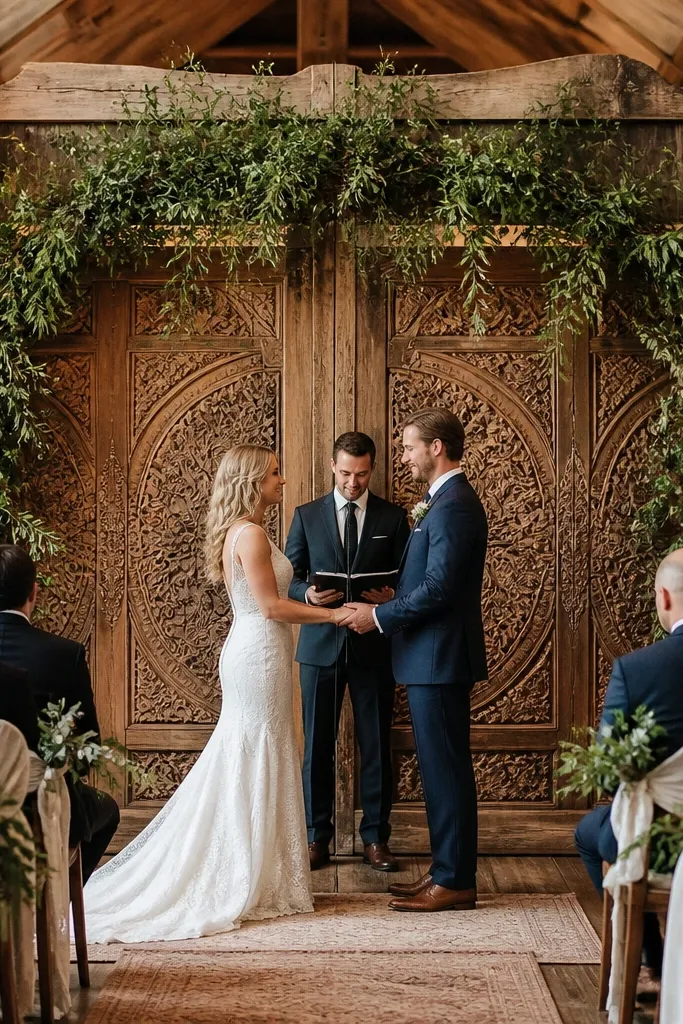
Wood panels add texture and warmth, and carved patterns look expensive when the light hits them. Add fresh greenery swags across the top and sides so the stage feels alive and natural, not static. This style works especially well for fall weddings, rustic glam looks, and venues with warm interior tones. It photographs with depth because the wood carving creates shadow lines. The greenery keeps it from feeling like a set piece.
Mount carved wood panels behind the stage so they sit flat and aligned, with minimal gaps. Then attach greenery swags that arc slightly downward, using the same thickness across the width. Finish with a light mist of warm uplighting to bring out wood grain and keep the greenery from looking flat.
Quick tipUse rosemary or eucalyptus-type greenery for a stronger silhouette; fine-leaf greens can look wispy in photos.
Skip thisSkip thick flower clusters here; wood already brings texture, and extra florals can clutter.
14. Pastel Balloon Arch Backdrop With Soft Floral Toppers
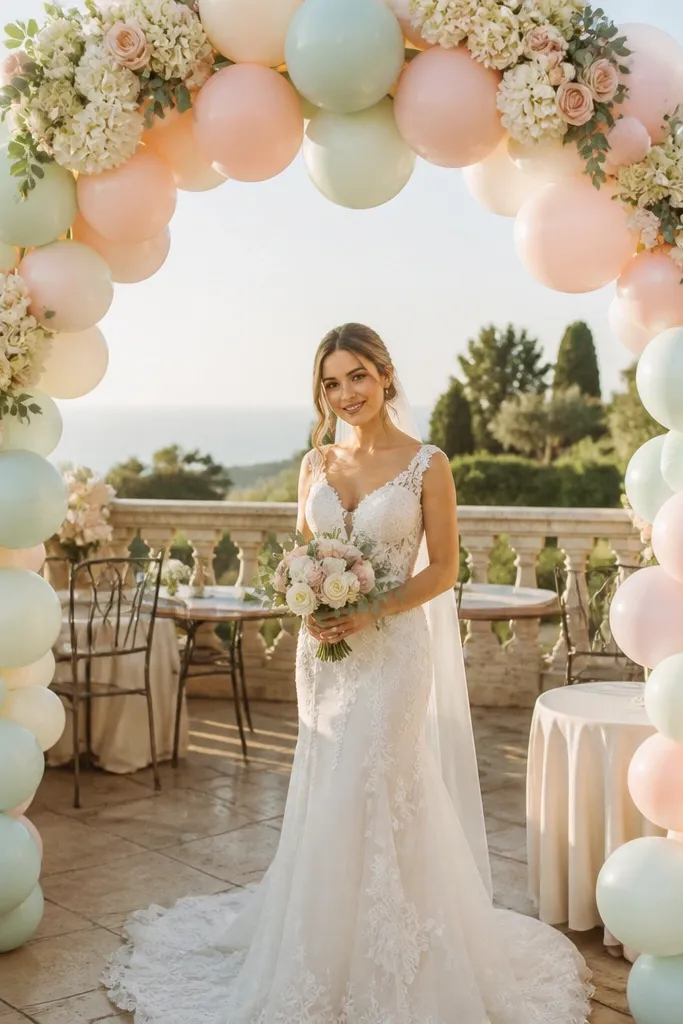
Balloon arches can look surprisingly royal when you choose the right palette and add a clean floral topper. Pastel balloons create a soft gradient background, and the arch gives you a “grand entry” frame behind the couple. This style works best in daytime or early evening because it looks airy rather than heavy. It’s also a good choice if you want a photogenic backdrop that’s easier to transport than large floral walls. Keep the balloons in a limited color set so it doesn’t look like a party background.
Start by selecting two main balloon colors and one neutral (like cream) so the gradient stays controlled. Build the arch frame, then anchor balloons in tight clusters so gaps don’t show. Add small floral toppers at the highest points only, then check the look from straight-on and at a slight side angle to confirm the arch reads clearly.
Quick tipUse balloon sizes with a clear mix (smaller near edges, larger center) to avoid a flat silhouette.
Skip thisDon’t add too many tiny balloon decorations across the entire wall; it turns into visual noise.
15. Tall White Hydrangea Wall With Soft Gray Backing
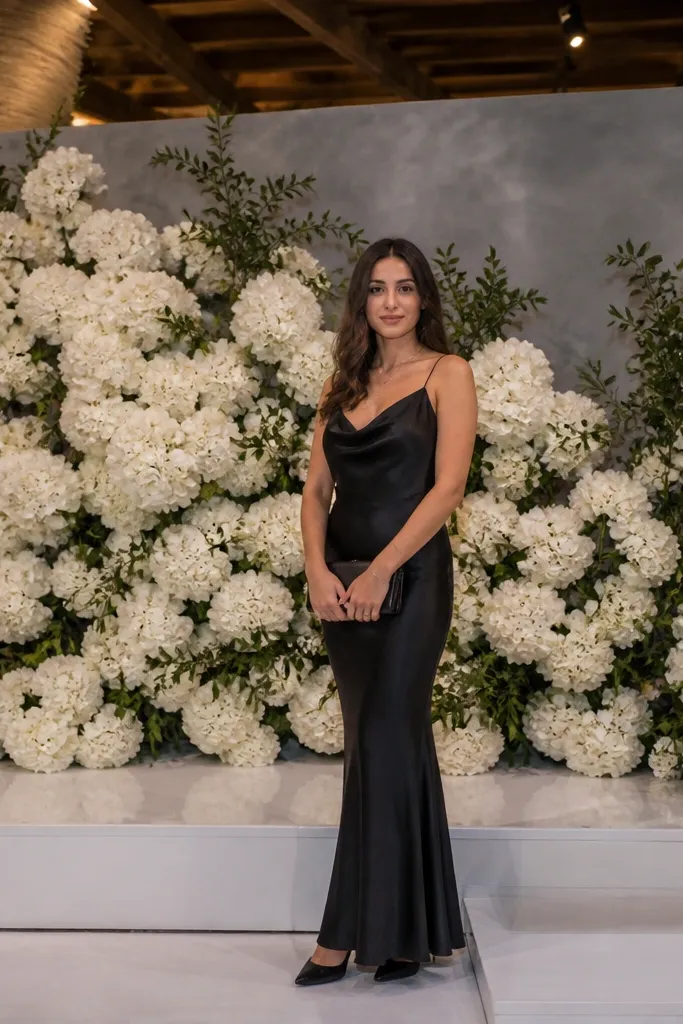
Hydrangeas give you that cloud-like volume that reads royal in photos, and the soft gray backing keeps the white from washing out. The color contrast makes petals look crisp, and the scale feels grand without needing extra props. This works best for indoor receptions with controlled lighting or outdoor evenings with shade. It’s also excellent for couples who want a monochrome look that doesn’t feel boring because hydrangeas have built-in texture. The wall shape is tall, so it photographs like a statement installation.
Start by hanging a gray fabric backing panel wide enough for your full stage width. Then build hydrangea clusters in vertical blocks, leaving narrow gaps so the wall doesn’t become one flat mass. Finally, add a bottom greenery strip to anchor the look and hide mounting points.
Quick tipChoose hydrangea heads with consistent shape; uneven heads show up clearly in photos.
Skip thisSkip pure white backing behind white blooms; it can blend and lose definition.
16. Champagne Silk Backdrop With Beaded Fringe Border
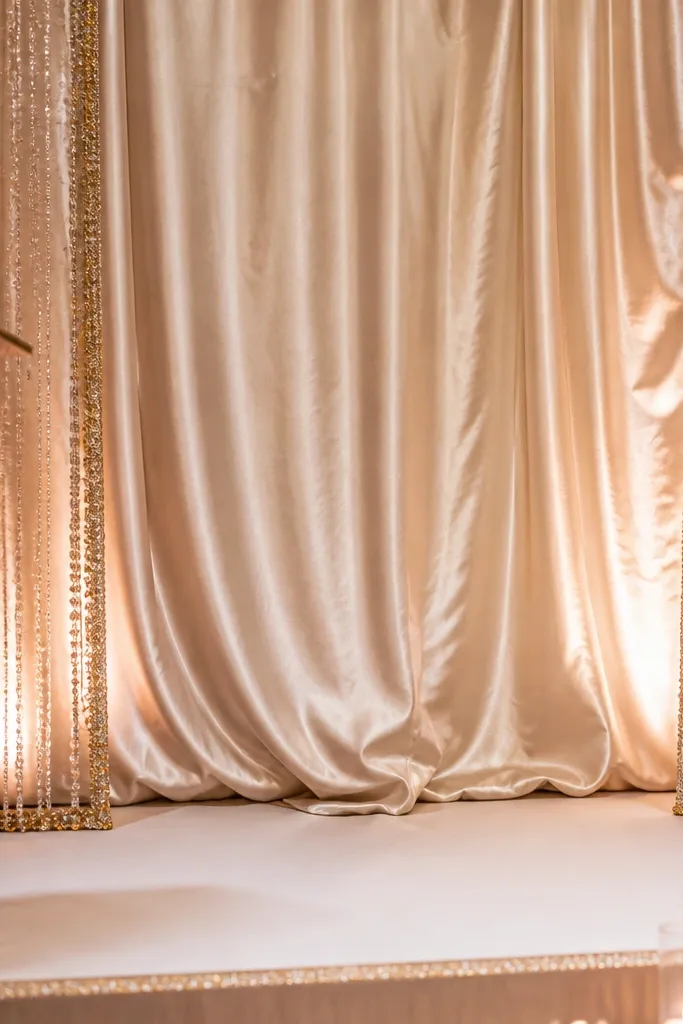
Silk or silk-look fabric gives you a soft sheen that reads luxurious, especially in warm uplighting. The beaded fringe border creates a clear frame around the couple, so the backdrop looks intentional rather than like a drape. Champagne tones flatter a wide range of skin tones and pair well with gold, blush, and ivory florals. This style is great for formal receptions and weddings where you want “royal” without going heavy on flowers. It also keeps the stage looking clean in live video.
Stretch champagne silk across a frame, then hang it with even tension so folds don’t bunch. Add a beaded fringe border along the outer edges, not across the center, so it frames without distracting. Finally, place uplights at the base to bring out silk texture and prevent the fabric from looking flat.
Quick tipUse a slightly darker champagne tone for the border fabric so the frame pops in photos.
Skip thisDon’t use thin fabric with uneven tension; it creates wrinkles that look cheap on camera.
17. Monochrome Floral Stair-Step Backdrop
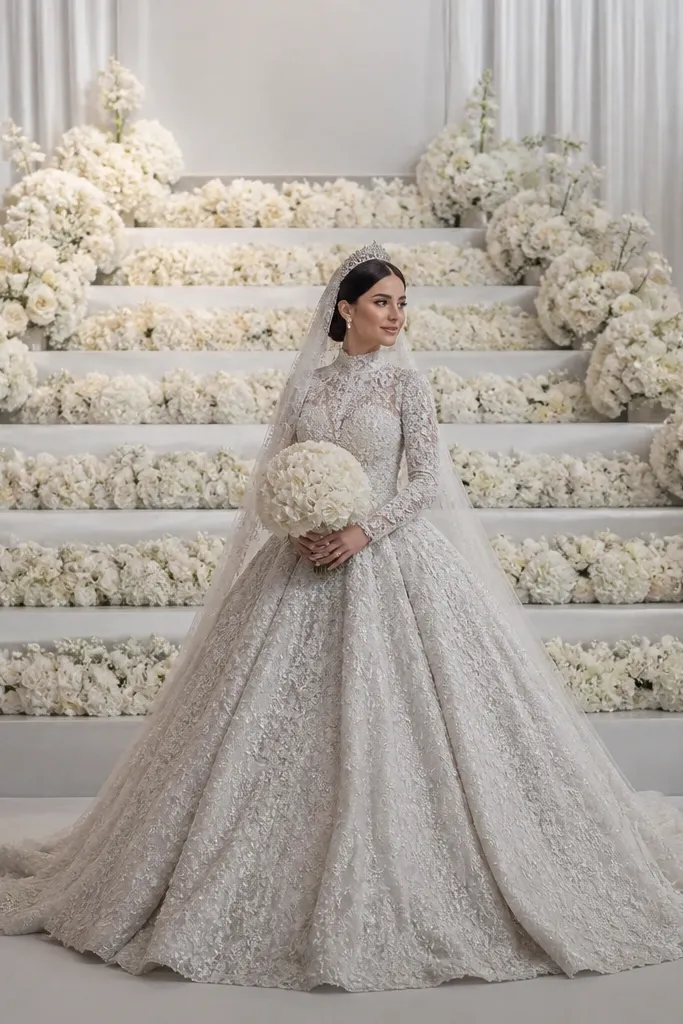
A stair-step floral build creates depth by adding layers at different heights. Monochrome color keeps it royal and controlled, and the step shape draws the eye upward toward the couple. This is a smart choice when you want a floral backdrop but you don’t want it to feel like a full wall. It looks amazing in both wide shots and side angles because the layers cast shadows. Great for modern weddings and for venues with strong ceiling lighting where you need depth cues.
Start by planning three or four layers with decreasing widths as you go up. Build the layers on a stable base so they don’t shift, then attach floral clusters to each step surface. Finish by adding a thin greenery outline to each step edge so the shape stays defined from a distance.
Quick tipKeep the top layer lighter in texture so it doesn’t overpower the couple’s faces.
Skip thisSkip random height differences; sloppy steps read like accidental stacking.
18. Black-and-White Checker Light Panel Frame
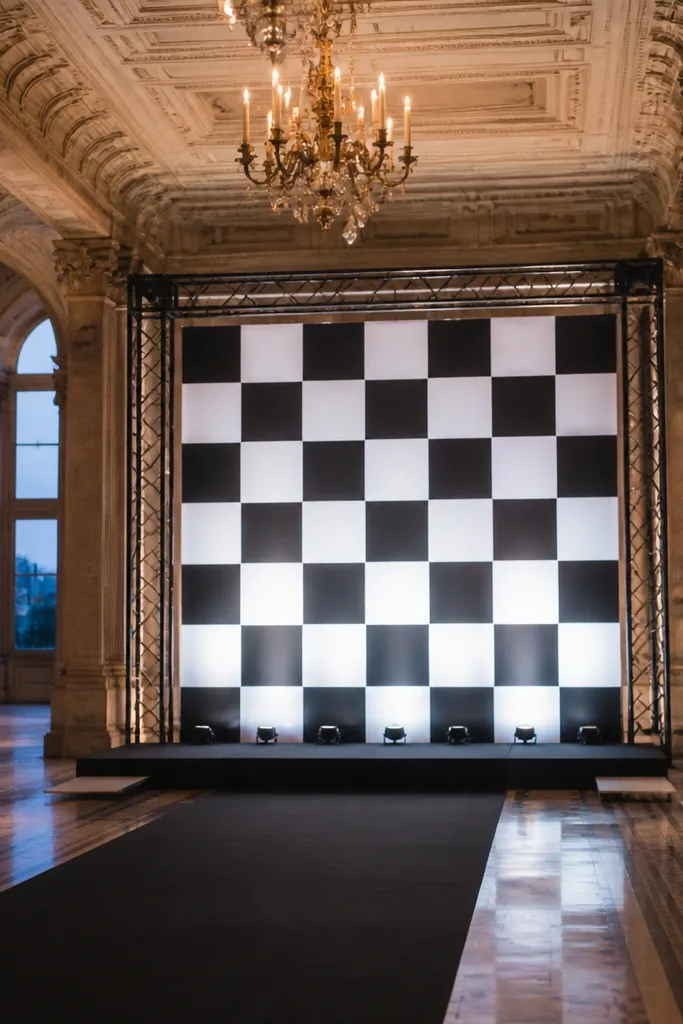
This is a bold option for couples who want a modern royal look. The checker light panel pattern creates graphic energy, and a clean frame keeps it from feeling like a nightclub backdrop. Black-and-white also photographs with sharp contrast, which helps videography a lot. It’s best for venues with controlled lighting where you can dim the room so the panels are the brightest thing behind the couple. If your wedding style is sleek and editorial, this backdrop nails it.
Rent or build a light panel frame sized to your stage width, then set the panel brightness so it’s visible but not blinding. Add a solid black or white border around the outside so the checker pattern stays contained. Finally, test video exposure at the same distance the videographer will stand.
Match your couple’s outfit tones to the background contrast so faces stay readable.
Don’t add busy signage or heavy florals in front; the pattern already does the work.
19. Oversized Golden Woven Reed Fan Backdrop
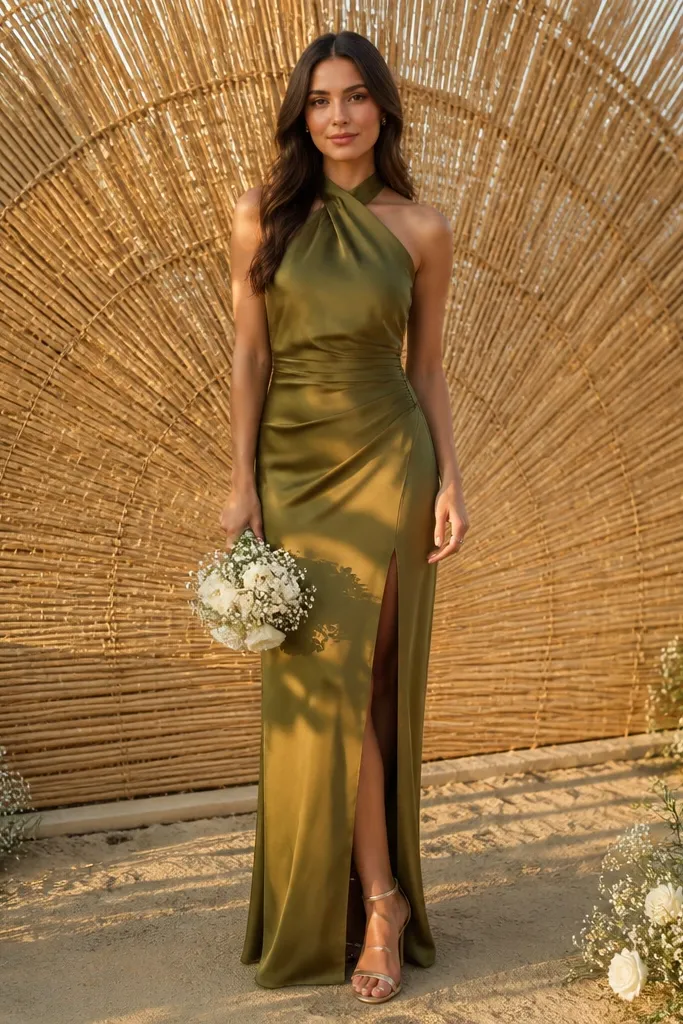
Woven reed fans look royal because they’re sculptural and textured, like a custom art piece. The gold tone warms up skin and makes white bouquets pop. This style works best in daylight or golden-hour lighting, but it still looks good indoors with warm uplighting. It’s a strong pick for beach weddings, desert tones, and modern boho glam where you still want a formal stage frame. The fan shape also creates a natural “halo” effect behind the couple.
Install a stable back fan structure and make sure it’s centered so the fan lines converge behind the couple. Add a thin neutral fabric base behind the reeds so the background doesn’t look patchy. Finish by placing two warm uplights at the sides to highlight texture and reduce flat shadows.
Quick tipKeep the fan tone consistent; mix too many reed colors and it reads as craft, not ceremony.
Skip thisSkip heavy floral overlays; the woven texture needs breathing space.
20. White Orchid and Greenery Twin-Column Backdrop
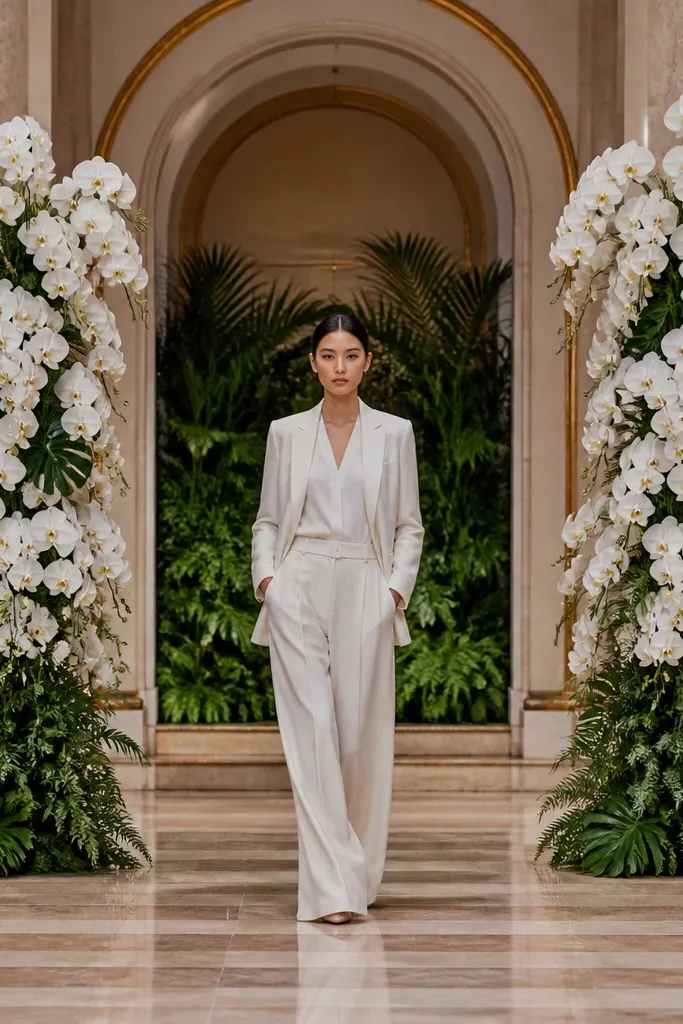
Orchids give you a clean, high-end look because each bloom sits like a sculpture. Twin columns create a symmetrical frame that reads grand without needing a wall of flowers. The greenery between columns adds depth and makes the orchids look fuller. This style is great for elegant indoor venues and winter weddings where you want something crisp and bright. It also works well with minimal color palettes because orchids look intentional in monochrome styling.
Build two tall bases at the stage edges and create vertical orchid stems tied to a support frame. Fill the gap between columns with light greenery so there’s a soft center background. Finally, add a small top arch or light strip so the columns feel connected rather than separate pieces.
Use orchid stems with similar bloom sizes; mixed sizes make the columns look uneven in photos.
Don’t pack orchids too tightly; it can look like a mass of petals instead of tall columns.
21. Beige Linen Backdrop With Oversized Garland Eyebrow
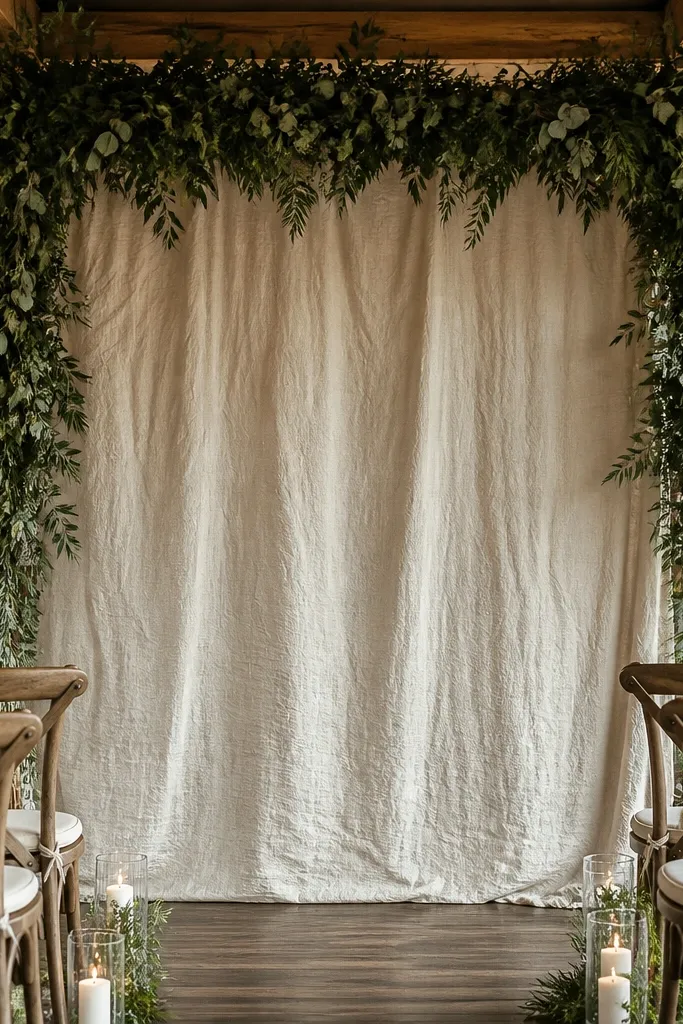
A linen backdrop keeps the look grounded and royal when you add one big, deliberate element on top. The oversized garland eyebrow creates a crown effect that reads beautifully in portraits and ceremony videos. Beige also plays well with gold accents and warm flower palettes like apricot, cream, and soft pink. This is a great option for venues that look plain behind the stage, because linen smooths everything visually. It also keeps the cost lower than a full floral wall while still looking grand.
Hang beige linen across the stage with tension so it drapes smoothly, then build a garland eyebrow on a rigid frame above the couple’s heads. Use one flower type or two at most so the eyebrow looks cohesive. Finally, add a subtle greenery base at the bottom edge to hide hardware and keep the linen from looking like a sheet.
Quick tipChoose linen that’s thick enough to hide the venue wall behind it; thin linen shows seams and texture.
Skip thisDon’t add small random florals across the linen; one hero garland beats scattered decoration.
22. Iridescent Tulle Wall With Soft Rainbow Uplights
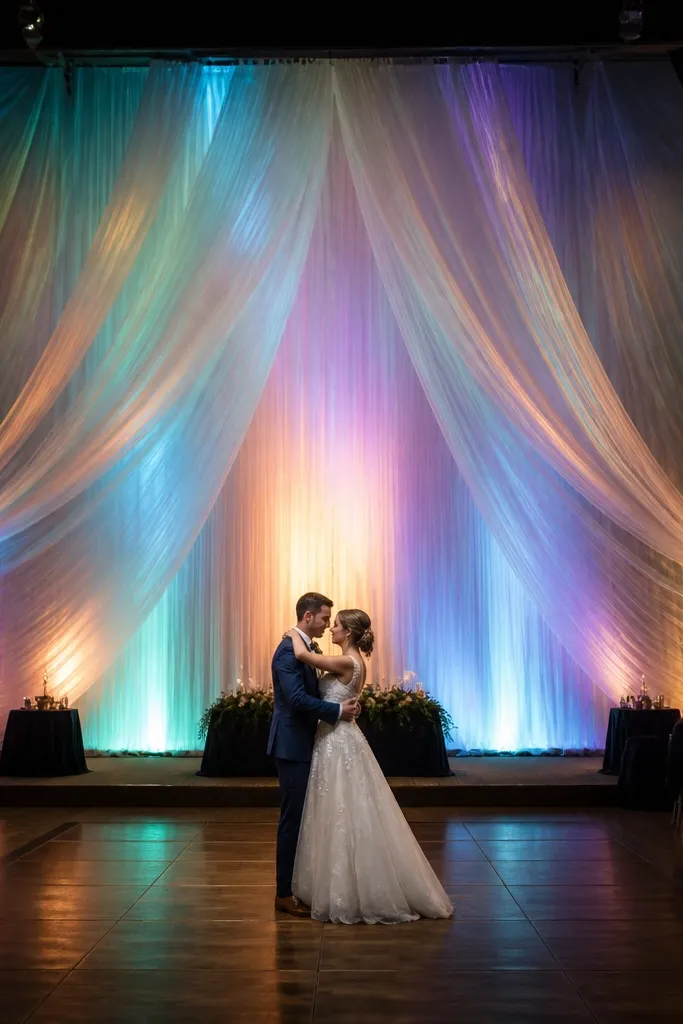
Iridescent tulle is one of the most photogenic fabrics because it shifts color as the camera exposure changes. Add soft rainbow uplights and you get a royal “sky” effect behind the couple without needing heavy florals. This works best when you want a dreamy, modern ceremony vibe and you can control the lighting so the colors land evenly. It’s also perfect for nighttime receptions where you want the backdrop to feel magical on video. Keep the rest of your stage decor simple so the color shift stays the focus.
Hang iridescent tulle as a full wall panel, with seams hidden behind the couple’s center. Place RGB uplights at the base and set them to soft, low saturation colors so skin tones don’t look strange. Then check from the front with video mode on your phone and adjust brightness until the tulle sparkles but faces stay natural.
Avoid strong green and pure blue; they can make skin look washed out on camera.
Don’t add reflective mirror decor near tulle; it can create glare spots.
23. Classic White Hydrangea Halo Frame With Two Side Drapes
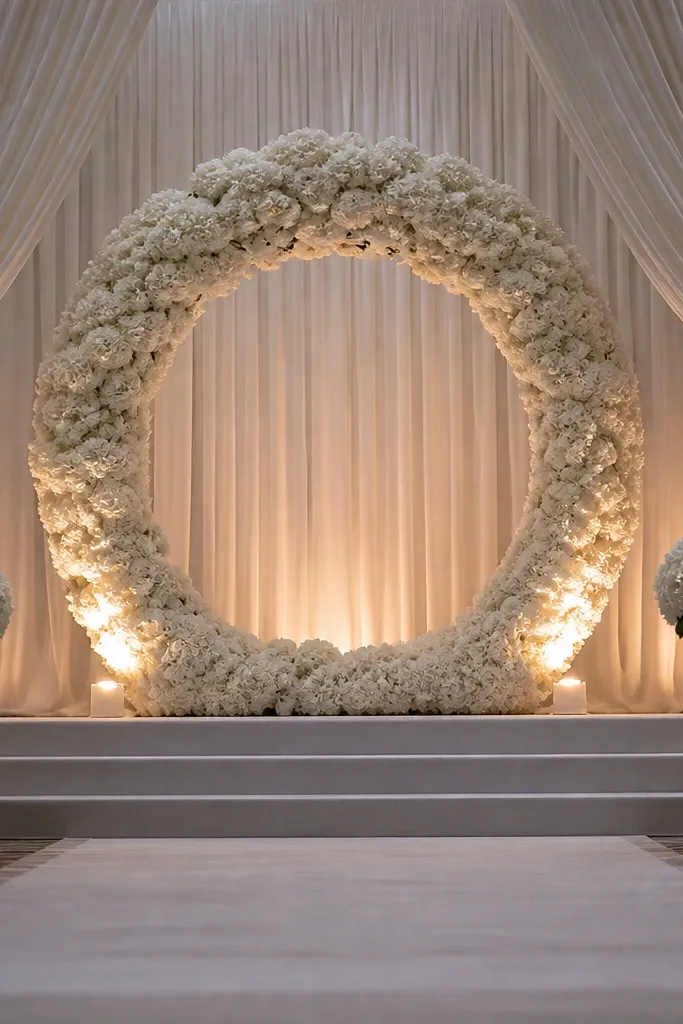
A halo frame is the cleanest way to make your stage look “royal” because it gives a clear circle focus behind the couple. Hydrangeas add volume and soft texture, and the two side drapes make the halo feel grounded and symmetrical. This is a great choice for couples who want a traditional ceremony look without building a full arch. It photographs well because the halo shape creates instant separation from the background. Pair it with simple lighting and you still get a grand result.
Build a circular frame and attach hydrangea clusters evenly around it, keeping the center open. Add two drapes on each side that fall from the same top height as the halo so the composition looks matched. Finally, place warm uplights behind the drapes, not directly behind the halo, to avoid hotspots.
Use a slightly darker greenery backing behind the halo so whites stay crisp.
Don’t overcrowd the halo edge; leave negative space so the circle reads clearly.
24. Tall White Rose Garden Wall With a Gold Botanical Crest
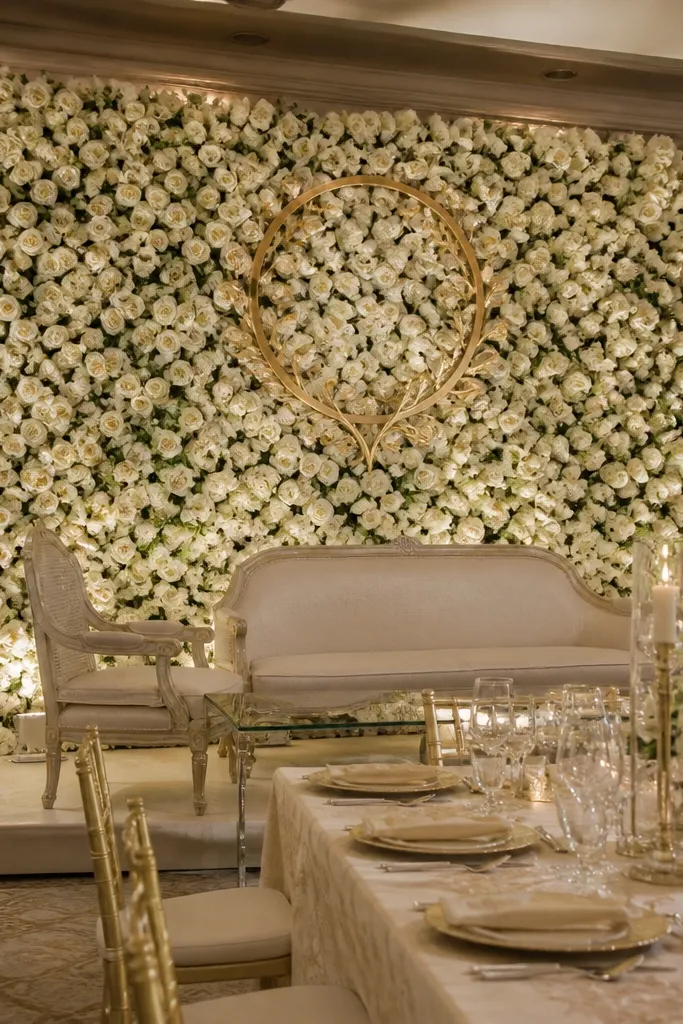
This is classic wedding royalty: a tall rose wall with a gold crest that feels like a formal emblem. The gold crest gives you a focal point above the couple, and the rose wall creates a lush, romantic base. It works well for formal receptions, especially when your theme is white-and-gold or ivory with warm neutrals. The crest also helps photos because it pulls attention to the center instead of letting the wall blur into background. It’s dramatic without needing a massive stage arch.
Start by building the rose wall in vertical sections so it looks tall and structured, not flat. Mount a gold botanical crest centered above the couple’s head line on a separate frame so it reads in layers. Finish by adding greenery only where it enhances shape, then use side lighting to create shadows between rose clusters.
Quick tipChoose a crest size that’s large enough to read at a distance, around shoulder-to-head height for most stages.
Skip thisSkip extra signage or monograms; the crest already acts like the hero message.
25. Sculptural Vine Circle Backdrop With Hanging Lantern Lights
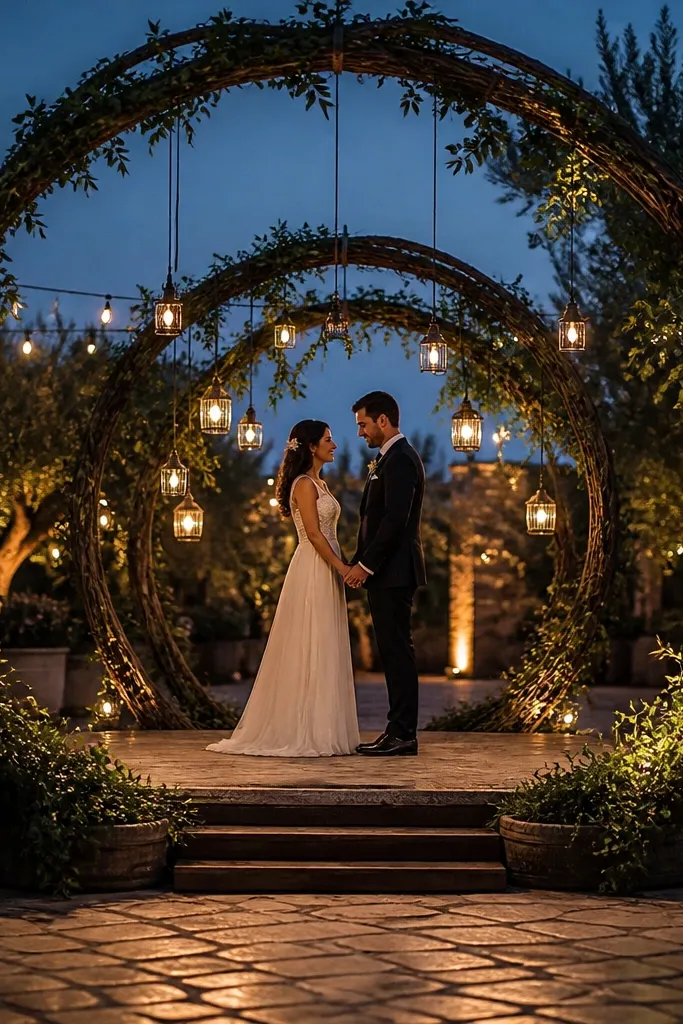
A vine circle is a softer alternative to an arch, and it still reads royal because it’s sculptural. Add hanging lantern lights and you get warm, intimate glow that feels ceremonial rather than decorative. This style looks best when you can add real vertical air space so the lanterns hang at different heights. It’s perfect for outdoor evenings, courtyards, and receptions with string lights already present. The circle shape also makes the couple’s portraits look framed even from the side.
Install a circular vine structure centered behind the couple and tie it securely so it doesn’t swing. Add hanging lantern lights from the top support at staggered heights, keeping the center brighter than the edges. Finally, add small greenery clusters around the circle base to hide the support points and make the circle feel continuous.
Use warm white lanterns around 2700K so skin tones stay flattering on camera.
Don’t hang lanterns all at one height; it looks like a grid instead of a ceremony.



