
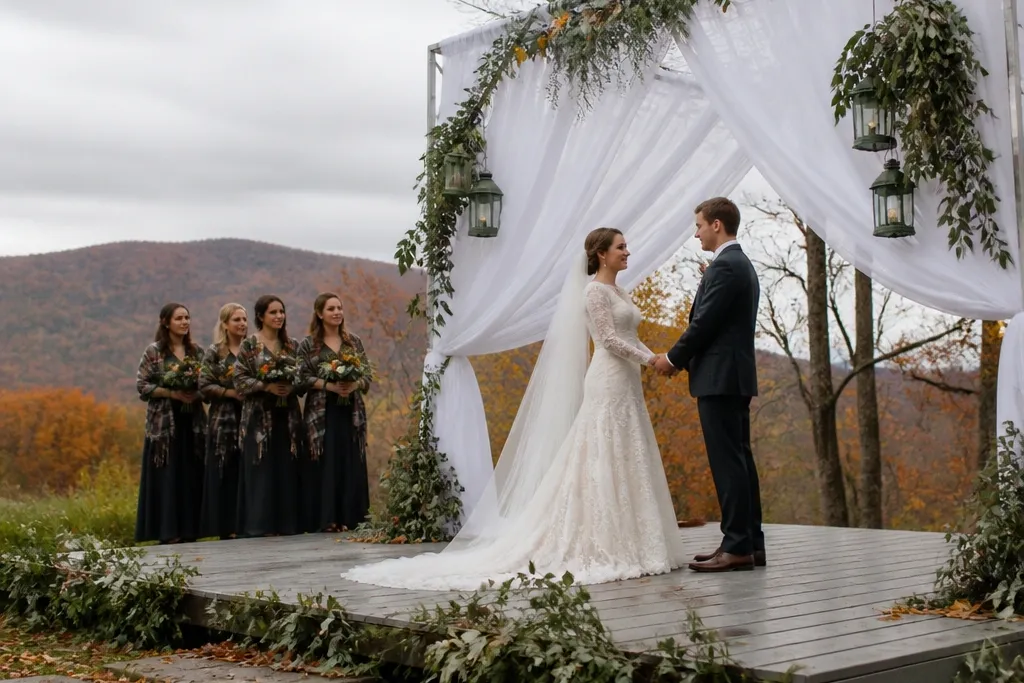
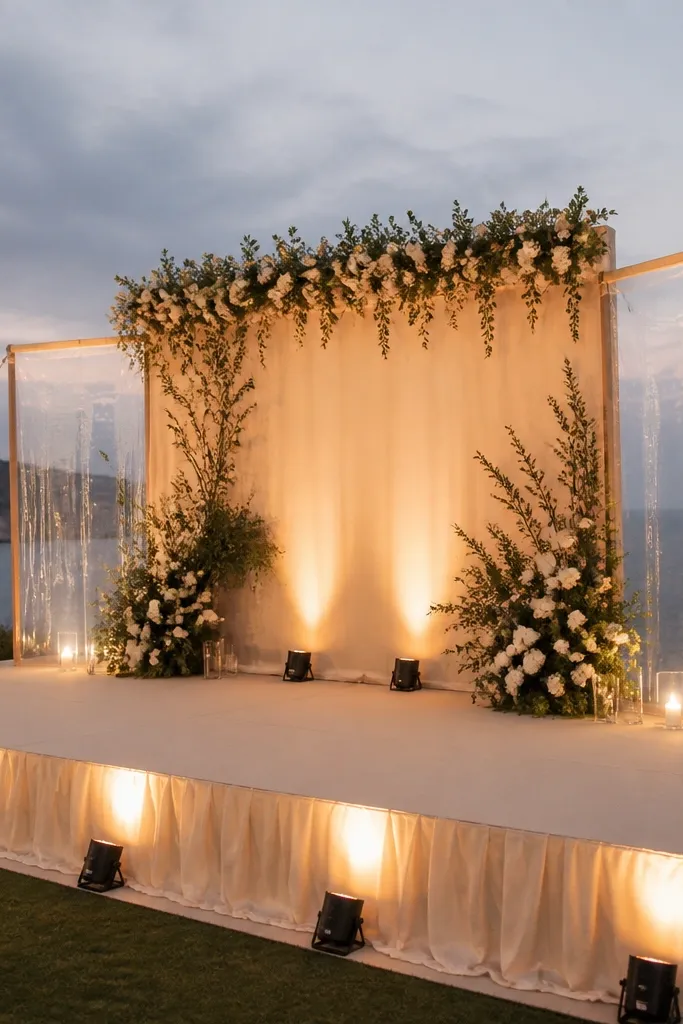
1. Weighted Willow Arch With White Draped Panels
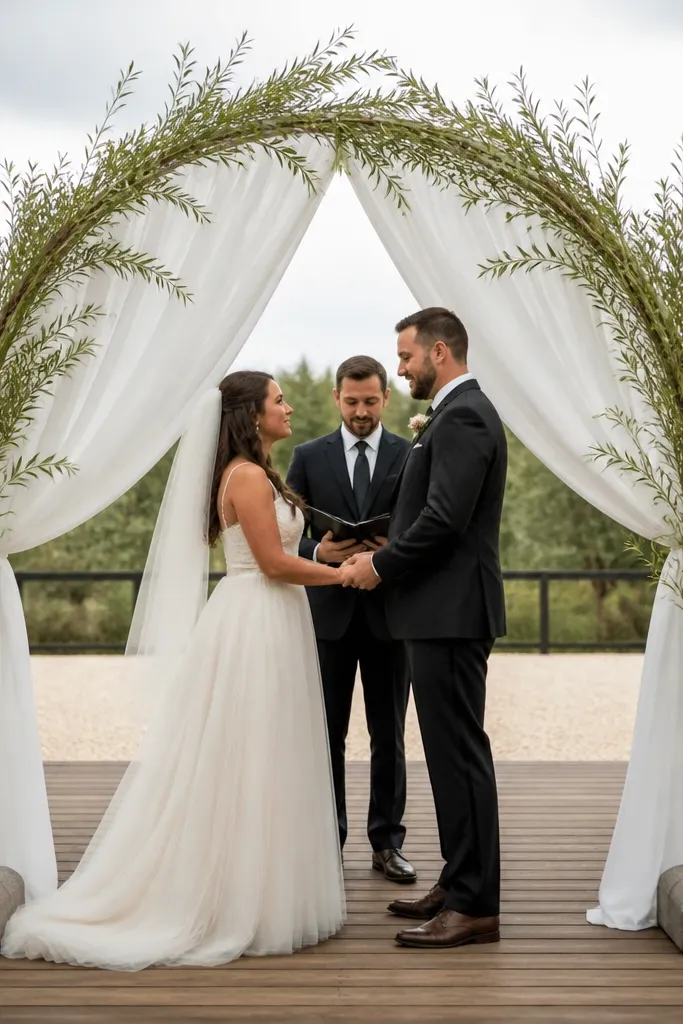
A willow arch reads romantic without needing seasonal blooms. The arch shape gives you instant framing for vows, and the white panels soften harsh daylight so your photos look clean instead of blown out. This is a strong all year choice because willow and white fabric don’t “announce” a specific season. It suits spring ceremonies that need brightness and fall events that need calm, neutral texture. In direct sun, keep the fabric slightly off the ground so it catches light without clinging to the stage edge.
Start by assembling a willow arch or a similar natural-wood frame and attach white panels with carabiners or zip ties at the top rail. Then place two to four water weights inside the base or use sandbags hidden behind stage skirt boards. Finally, add warm string lights behind the arch so the glow shows even after sunset. Budget-wise, a rental arch plus fabric panels is usually cheaper than building a full floral wall. Plan on 45-75 minutes for setup if you pre-cut panel lengths.
Quick tipChoose an off-white fabric that’s slightly matte; it photographs better than bright white satin.
Skip thisDon’t use lightweight chiffon panels that flap — wind makes the arch look messy fast.
2. Terracotta + Olive Lattice Backdrop With Hanging Lanterns
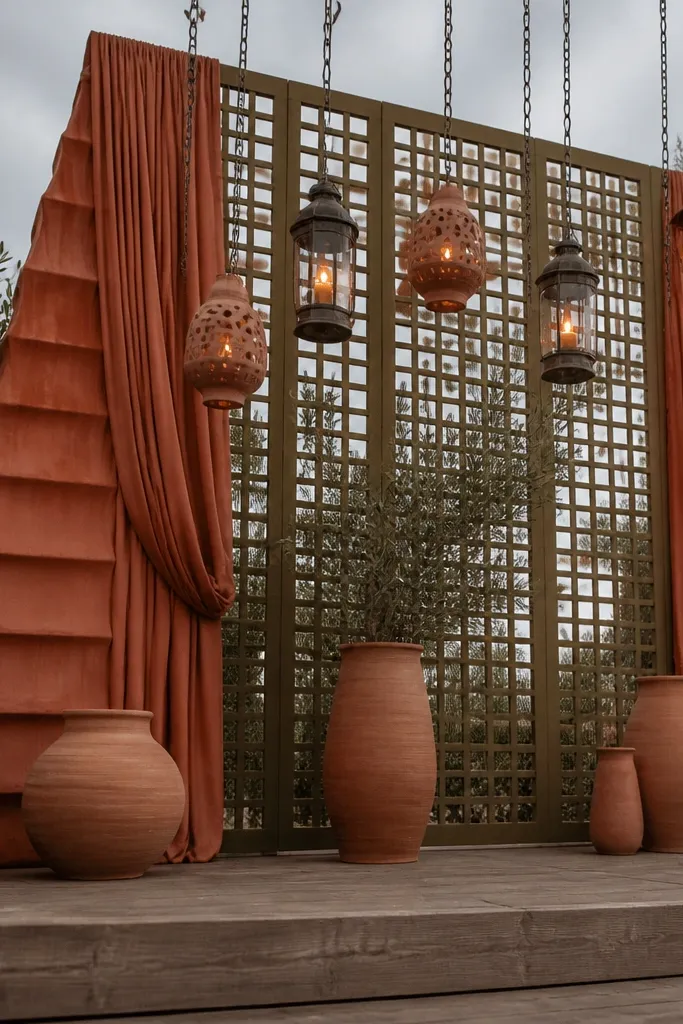
Terracotta and olive make outdoor stages look warm even when the sky is gray. A lattice backdrop gives you a crisp grid pattern that looks great in wide-angle photos, and hanging lanterns add vertical movement without needing tall flowers. This is ideal for late summer into winter because the palette stays flattering under different lighting. It’s especially good for weddings with neutral outfits, since terracotta warms skin tones. The lanterns also give you depth when the stage is far from the camera.
Start by renting or building a lattice panel and securing it to the stage frame with brackets. Then layer olive garland along the lattice edges, keeping the heaviest greenery at the corners so it doesn’t sag. Finally, hang lanterns at staggered heights using S-hooks and make sure cords are tied off so they don’t swing. You’ll spend time anchoring the panel, so plan 60-90 minutes. Cost usually lands in the mid range because the lattice is the main “big ticket” item.
Quick tipUse battery lanterns with a warm 2700K look if you don’t have power on stage.
Skip thisSkip oversized lanterns that block the couple — lantern glass should frame, not crowd.
3. Evergreen Boxwood Panels With Faux Moss Ombre
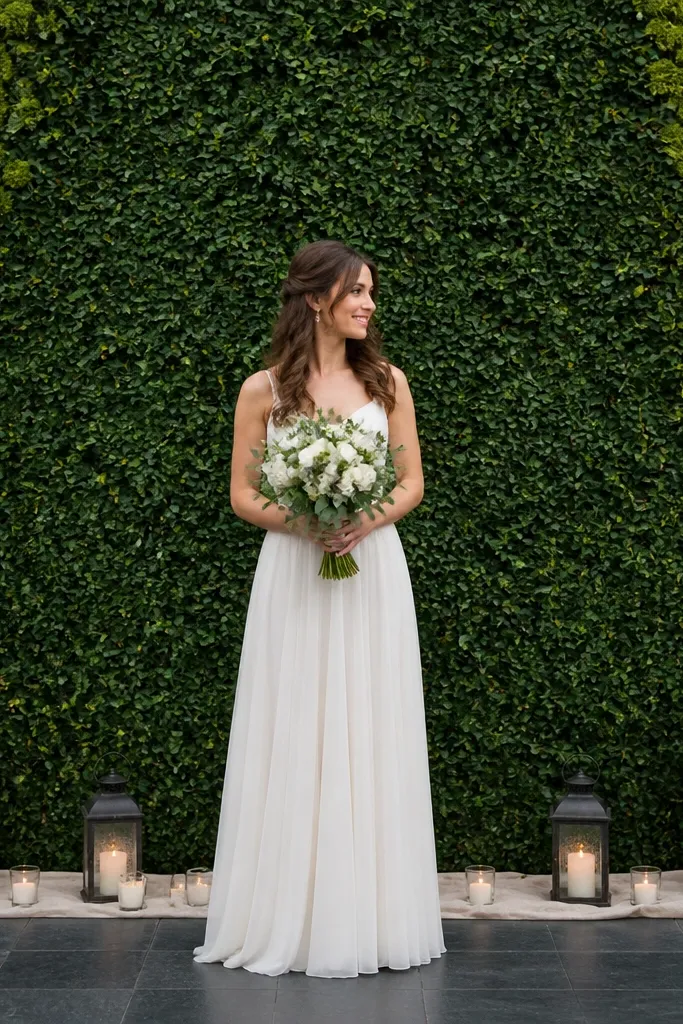
If you want all year wedding stage decorations that look lush in January, go with evergreen-style panels and a mossy gradient. Boxwood panels give you dense coverage that reads “expensive” from a distance, while a moss ombre adds a subtle artistic effect instead of flat green. This setup works for winter ceremonies because it doesn’t rely on seasonal flowers. It also looks strong in spring when you want a calm, garden-like background without white blooms. Keep the gradient smooth so your photos don’t show harsh seams.
Start by buying or renting modular boxwood panels sized to your stage width, then mark attachment points on the stage frame. Next, add faux moss in a gradient by layering darker moss at the bottom and blending upward with lighter tones. Finally, cover any seams with thin garland strips and secure with zip ties. Setup takes about 60 minutes if you have help, and it’s more cost-effective than fresh flowers for repeated events. Expect lower ongoing costs since panels can be reused.
Quick tipCarry a small lint roller and wipe panel surfaces before the ceremony — dust kills the “fresh” look.
Skip thisDon’t mix too many green shades; two greens plus one moss tone looks intentional.
4. Bamboo Screen Stage With Silk Ribbon Wind Lines
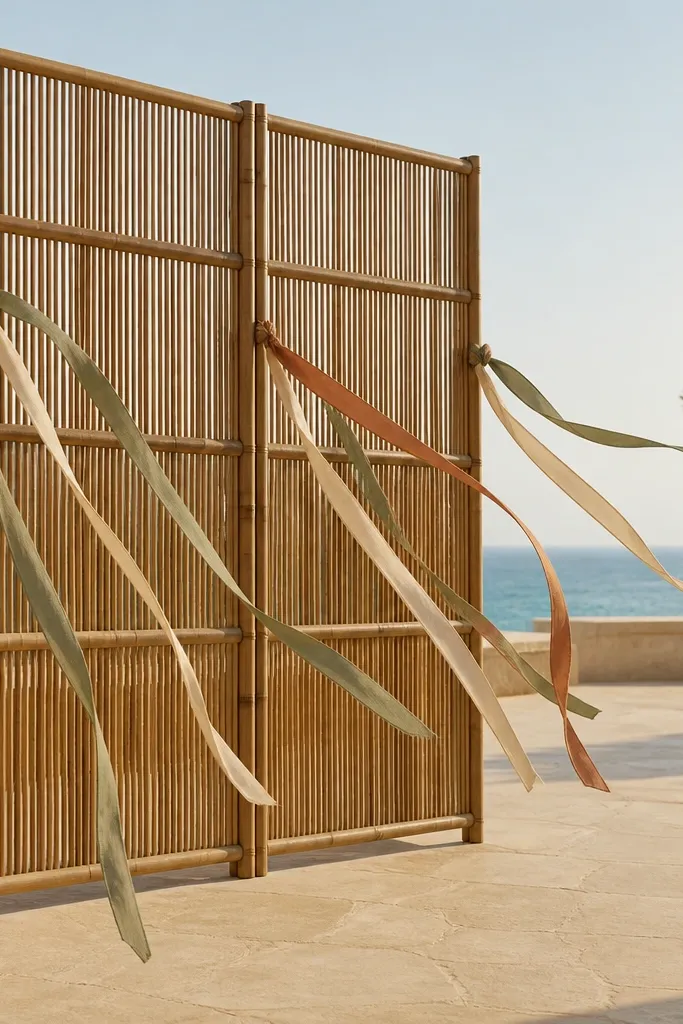
Bamboo screens look clean and modern, and ribbons add motion that photographs beautifully when there’s a light breeze. The key is using thin silk ribbons in a limited palette so they read as elegant lines, not clutter. This is a great all year option because bamboo and ribbon are consistent through seasons. It works especially well for beachy or garden venues where you want airy decor that doesn’t feel heavy. At night, ribbon ends catch lantern light and create soft highlights.
Start by anchoring a bamboo screen behind the stage with weighted bases or clamps to the frame. Then attach silk ribbons to the top beam in bundles, spacing them so each bundle falls in a slightly different line. Finally, secure the ribbon ends with small weights to prevent tangling. Budget is usually lower than full floral walls, but you’ll spend time on spacing. Plan 30-45 minutes for setup if you pre-cut ribbon lengths.
Use ribbon lengths that stop about 6-10 inches above the stage floor so they don’t drag.
Avoid thick satin ribbons — they look bulky and reflect too much light in photos.
5. Black Iron Candelabra Row With White Pillar Candles
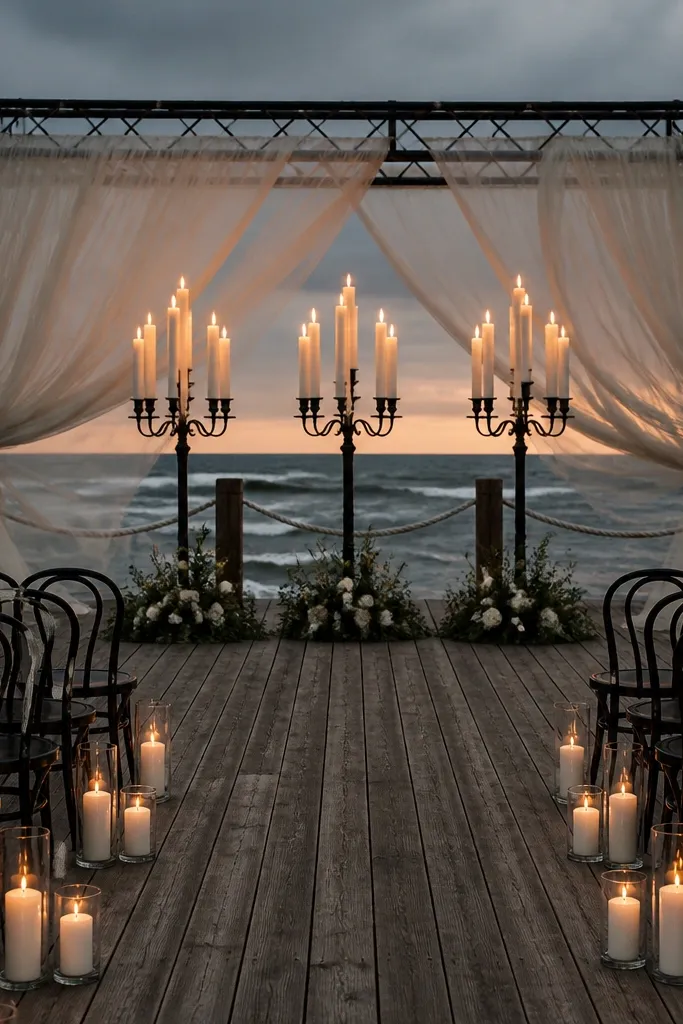
For an outdoor stage that still looks dramatic in flat light, black iron candelabras plus white pillar candles is a dependable formula. The iron adds lines and contrast, and the white candles reflect light without turning your photos gray. It fits all year wedding stage decorations because candles don’t care about season — only the weather plan matters. This setup is perfect for formal ceremonies and for venues where you want a classic look without building a full floral wall. If your stage is wide, a row of candelabras creates symmetry and calm.
Start by placing candelabra bases on non-slip rubber pads and anchor them with weights if the stage is windy. Then set pillar candles in clear acrylic holders so they stay stable. Finally, add a warm uplight behind the candelabras to create depth after sunset. Cost is moderate because you’re buying or renting furniture-like decor, not a huge floral amount. Allow 30-60 minutes to set, plus time for lighting or battery checks.
If you can’t use real flame, pick battery candles with flicker — they read better than static LEDs.
Skip candles that are too short; short pillars look like tabletop decor from the aisle.
6. Rustic Hay Bales With Cream Linen Runner and Wildflower Sprigs
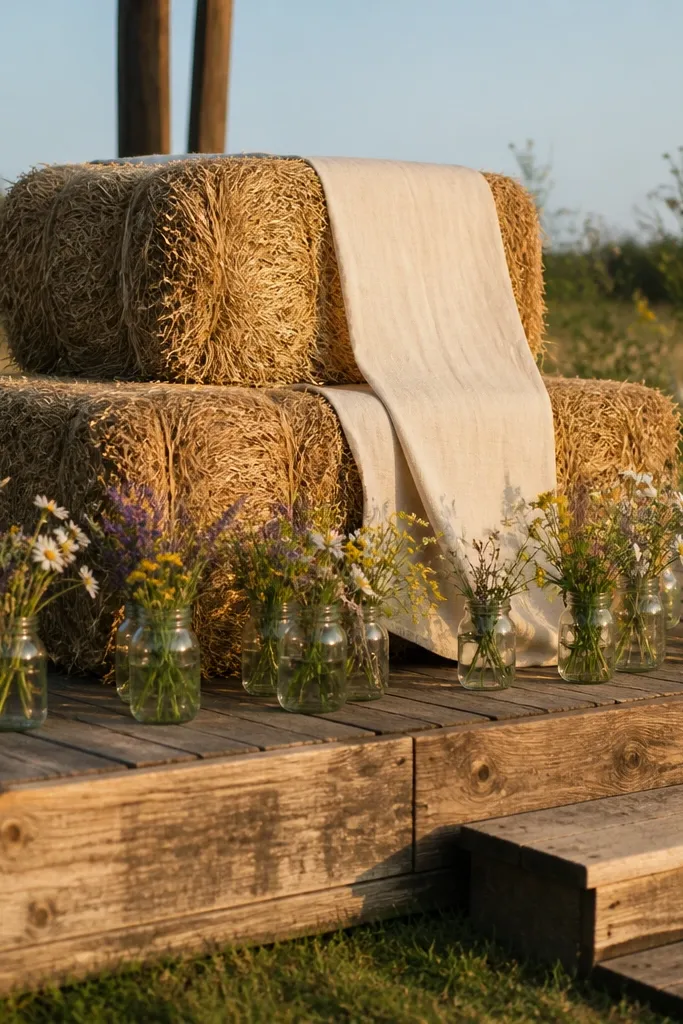
Hay bales give you instant texture and height, and cream linen turns that rustic base into something photo-ready. You don’t need a full flower wall — small wildflower sprigs in jars along the front edge read charming and intentional. This is a strong all year idea because hay texture works in summer and winter, and the linen keeps it clean. It’s especially good for outdoor farms, fields, and ceremonies with a relaxed vibe. The best part is that it looks good in wide shots without expensive build-out.
Start by choosing bales that are clean and dry, then wrap them tightly with cream linen and tie with twine or Velcro straps. Next, lay a long cream runner across the top edge of the stage front for a polished line. Finally, place small jars or bud vases with sprigs every 2-3 feet and secure them with foam or sand inside the jar base. Setup takes about 45-75 minutes depending on bale handling. Budget stays reasonable because you’re using texture materials instead of large floral quantities.
Quick tipBring a small brush to knock off stray hay pieces before photos.
Skip thisDon’t use bright white linen that’s too shiny — it can blow out under direct sun.
7. Terracotta Planter Wall With Brass Sconces and Greenery Veins
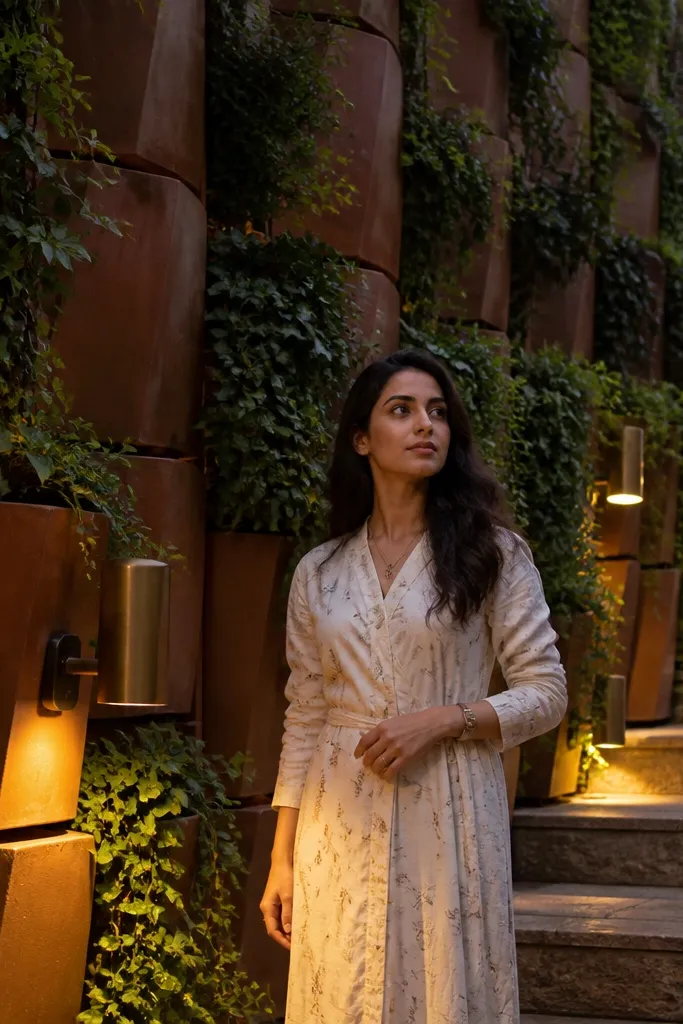
A planter wall is a stage decor cheat code because it looks like a design element even when flowers aren’t blooming. Terracotta planters create a warm, architectural grid, and brass sconces add that “evening glow” people notice in photos. Trailing greenery veins connect the planters so the wall looks cohesive instead of like separate pots. This works year-round because you can swap out plant types while keeping the same planter structure. It’s perfect for fall when you want warmth and for spring when you want texture without heavy florals.
Start by arranging terracotta planters in a tight grid on the stage platform and secure them with non-slip mats. Then run greenery vines along the edges between planters and tuck ends behind the pot rims. Finally, mount or place brass sconces at two height levels so the light hits the greenery, not just the ground. Plan for 60-90 minutes because spacing matters for the look. Costs can be mid-range if you rent sconces, but buying planters is a one-time investment.
Quick tipUse sphagnum moss or coco coir in planters so the greenery stays upright if it’s windy.
Skip thisSkip planters that are too light — they tip easily when guests move around the stage.
8. White Umbrella Canopy With Hanging Dried Herbs
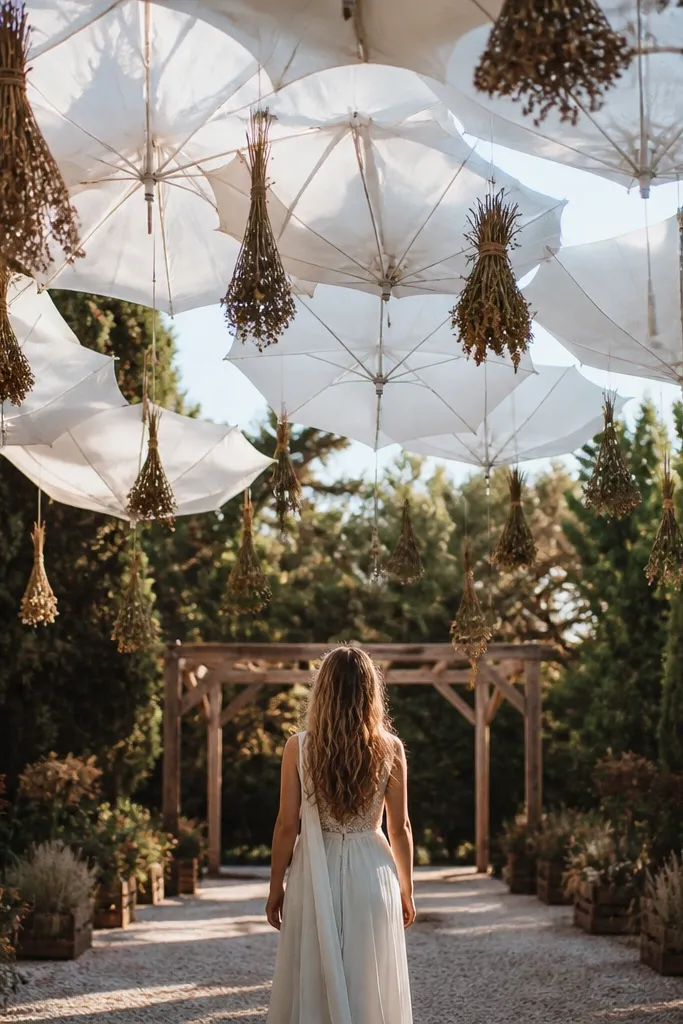
A canopy made of upside-down white umbrellas gives you a sculptural ceiling without building a massive frame. Hanging dried herb bundles add texture and a subtle seasonal nod that still reads clean. This is one of those all year wedding stage decorations that looks intentional even in winter because herbs and umbrellas don’t depend on fresh flowers. It’s great for small stages where you need a strong focal point above the couple. The umbrellas also help with light diffusion, so harsh sun becomes softer.
Start by securing a canopy frame above the stage and attaching umbrella handles with strong wire ties. Then hang dried herb bundles from umbrella ribs using thin twine, keeping bundles spaced so they don’t tangle. Finally, place a warm light source at the front so the herbs catch highlights. Setup takes about 60 minutes if you pre-sort herb bundles by weight. Budget is often lower than floral ceilings because umbrellas can be rented.
Quick tipChoose umbrellas that are off-white and matte to avoid glare.
Skip thisDon’t hang herbs too low — they can swing into the couple’s space.
9. Blue Hydrangea-Look Foam Panels With Silver Hanging Orbs
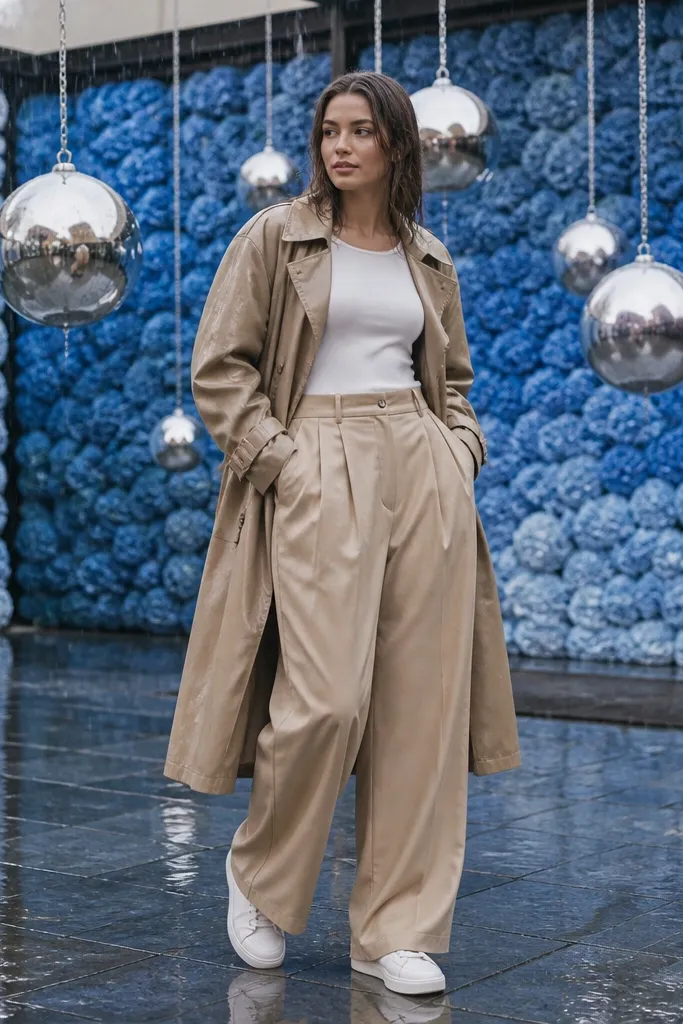
If you want a saturated color wall that stays perfect all year, use foam-style hydrangea panels plus silver hanging orbs. The panels give you bold shape from a distance, and the orbs add sparkle that looks good in both day and night. This setup is especially strong for outdoor ceremonies where you want a consistent look even if actual hydrangeas aren’t available. It’s also ideal for couples who want a dramatic photo backdrop without relying on fragile fresh blooms. Keep the silver accents minimal so the blue remains the hero.
Start by measuring your stage width and renting or buying foam panels in matching sizes. Then attach panels to a lightweight frame with clips or zip ties, making sure seams land behind where you’ll place the couple. Finally, hang silver orbs on fishing line at two heights, and test spacing from the guest seating line. Setup is usually 45-75 minutes. Costs are moderate because the panels are the main purchase.
Pick orbs with a matte silver finish — shiny reflective orbs can blow highlights in photos.
Skip mixing blue tones — one consistent blue reads sharper than a patchwork wall.
10. Sunflower Screen With Fringe Fabric Trim
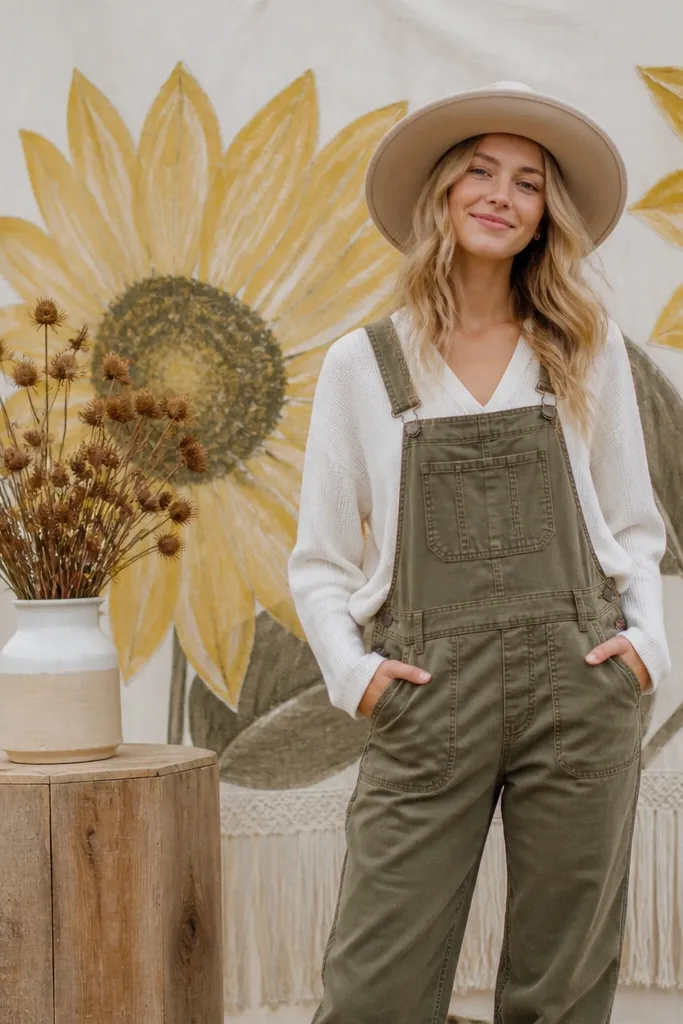
A sunflower-themed screen gives you bright, cheerful stage energy without building a full floral arch. Fringe trim along the bottom edge adds movement and makes the stage look finished in photos. This works across seasons because you’re choosing a theme color and texture, not relying on fresh sunflower bloom. It’s a great pick for late summer and early fall, and it still holds up in spring because the colors brighten flat light. The key is keeping the screen pattern readable from 10-15 feet.
Start by selecting a pre-made sunflower screen or building a frame and attaching sunflower-style panels. Then stitch or clip fringe fabric along the lower edge, using a backing board so fringe hangs evenly. Finally, add two matching statement pieces on the sides — either lanterns or tall stems — so the stage looks symmetrical. Setup takes 30-60 minutes. Budget is usually lower than fresh florals because you’re using panels and fabric.
Quick tipUse a neutral fringe color like cream or light tan so the sunflower pattern stays dominant.
Skip thisDon’t add too many separate props — the screen already does the heavy lifting.
11. White Curtain Wall With Brass Ring Tassel Line
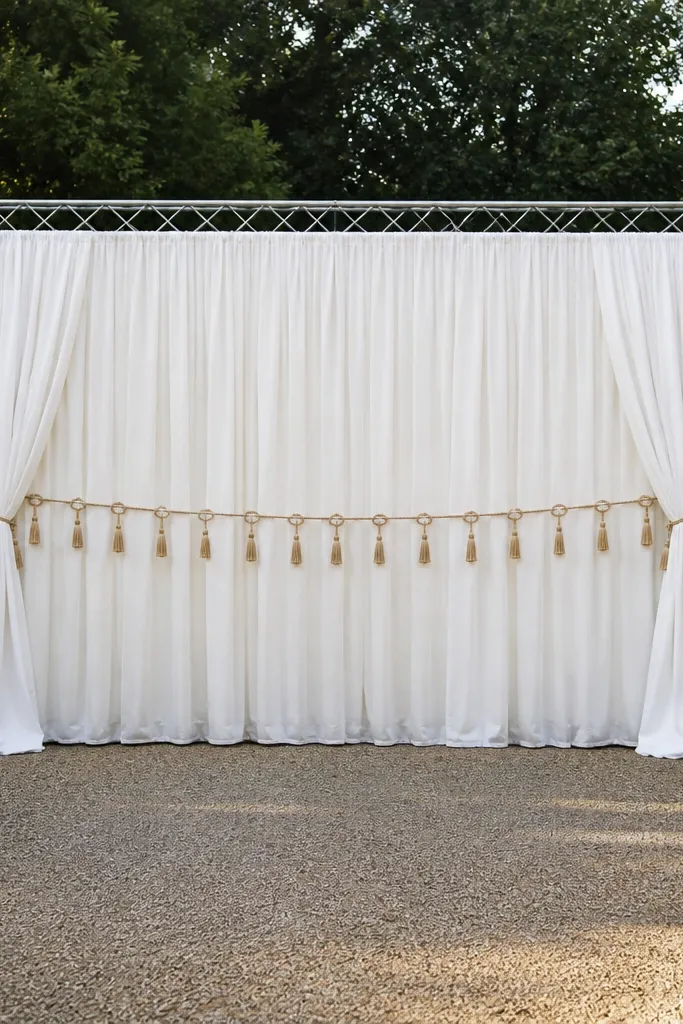
A curtain wall is the easiest way to make an outdoor stage look expensive and polished without a full floral build. The brass ring tassel line adds rhythm and a warm metallic highlight that shows up in photos. This is a strong all year choice because you can keep the curtains and swap tassel colors or thickness for seasonality. It also helps with background distractions like fences or parking lots. Choose white curtains that fall straight and avoid sheer fabrics that flutter too much.
Start by installing a curtain track or tension rods across the stage frame and hang white curtains in full lengths. Then attach brass rings along a center rail and hang tassels in a consistent length, keeping the tassels off the couple’s shoulders. Finally, add warm uplights at the base aimed upward so you get depth through the curtain folds. Setup takes about 45-90 minutes depending on track type. Costs are mid-range because curtain hardware and uplights add up.
Quick tipIron or steam curtains before setup so folds look intentional on camera.
Skip thisDon’t use too many tassel colors — mixed metal and color tassels look messy in daylight.
12. Cedar Branch Backdrop With Twinkle Lights and Clear Glass Vases
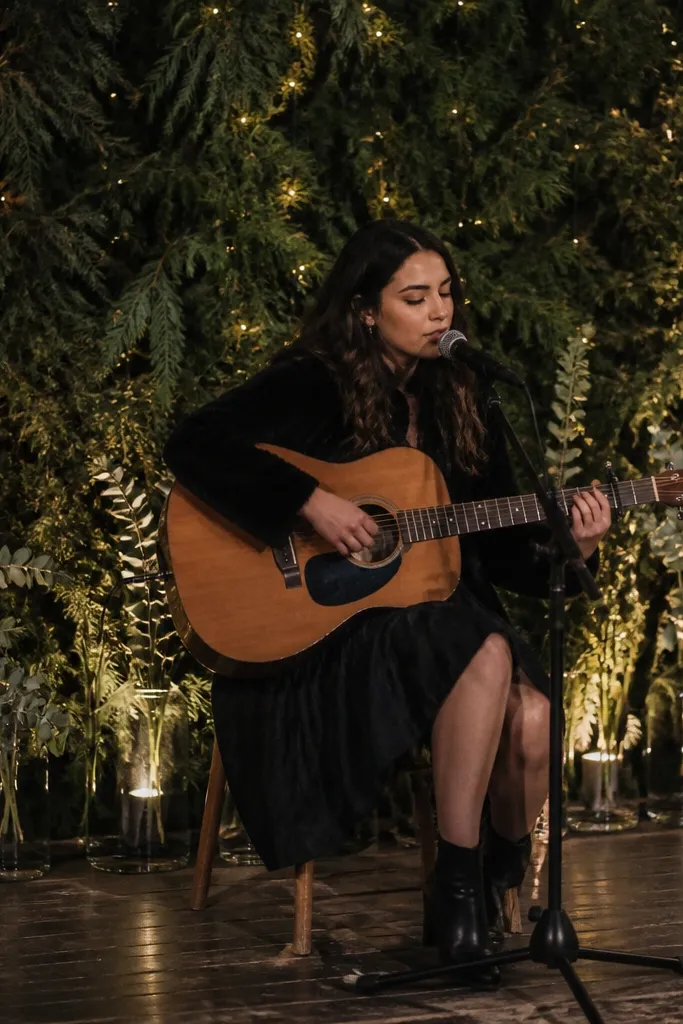
Cedar branches create a textured evergreen backdrop that reads winter-ready without looking like a Christmas set. Add twinkle lights tucked into the branches for a soft bokeh effect, and use clear glass vases so you can add a few stems without crowding. This is ideal for all year wedding stage decorations because cedars are available in many forms and you can keep the stems minimal. It’s especially photogenic at dusk when the branches catch light. The clear vases keep the stage feeling airy even when the background is dense.
Start by building a wire frame or using a panel system and attaching cedar branches with floral wire. Then tuck twinkle lights inside the branch layer, securing with zip ties at the frame points. Finally, place clear glass vases along the front edge and add one or two stem types per vase so it doesn’t look like random bouquets. Setup takes 60-90 minutes because cedar needs careful wire placement. Cost is moderate — the “bulk” is the branches and lights.
Quick tipUse battery twinkle lights with a warm setting if you don’t have reliable power on stage.
Skip thisSkip thick, heavy vases that block sightlines — keep vases slim and spaced.
13. Greenery Rope Swag With Hanging Lanterns Over a Simple Arch
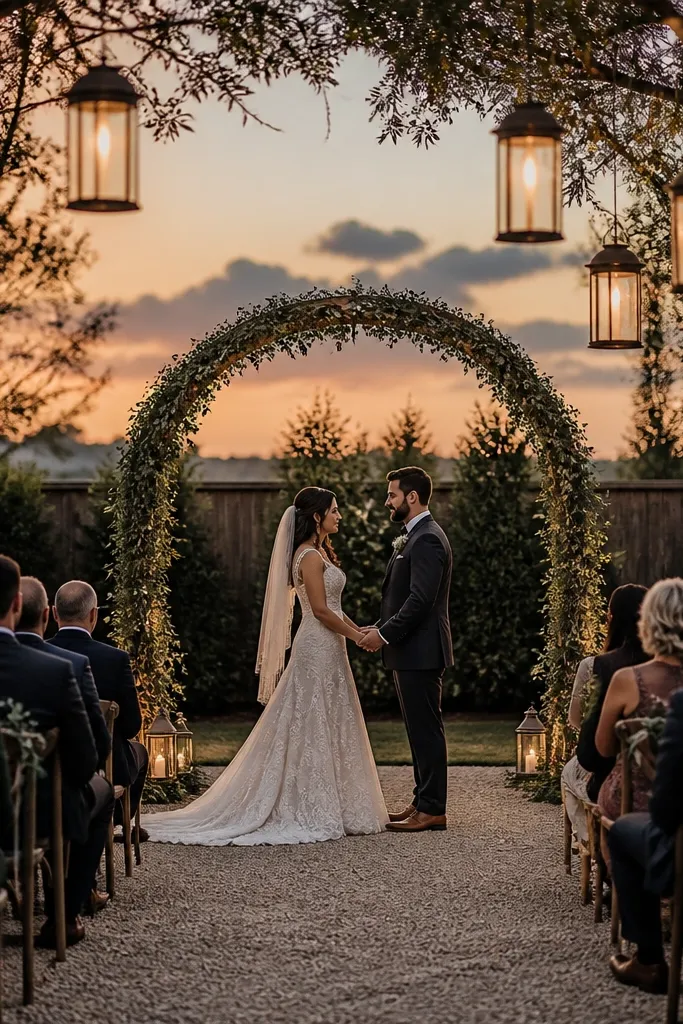
A simple arch plus greenery rope swag is a clean, modern stage that looks full without being overbuilt. The rope swag wraps around the arch and creates a continuous line, so the decor reads as one piece in photos. Hanging lanterns add that “evening ready” glow without needing a huge floral ceiling. This works all year because the arch stays the same and greenery type can shift from bright spring greens to deeper winter tones. It’s also forgiving if your venue has limited build space.
Start with a lightweight arch frame and attach greenery rope (or long garland) around it in a spiral. Then secure the swag with zip ties and add lanterns on hooks spaced evenly across the top. Finally, place a runner or simple drape under the arch so the stage base looks finished in wide shots. Setup takes 30-60 minutes if you pre-plan lantern placement. Costs are usually lower than full floral walls because you’re using long garland rather than many separate stems.
Keep lanterns slightly forward of the arch so they frame the couple, not the background.
Don’t hang lanterns too low — guests will bump them and they’ll swing into photos.
14. Giant Paper Fan Backdrop With Soft Pink and Cream Layers
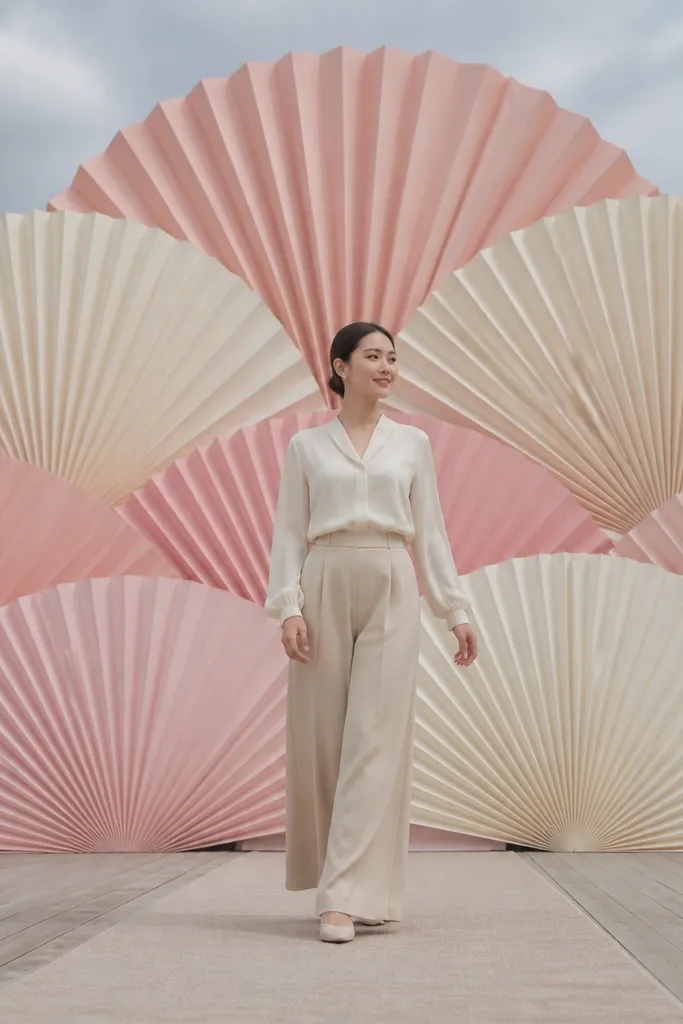
Paper fans look like high-end set design and they read instantly in photos. Soft pink and cream layers give a romantic gradient without the cost of fresh flowers, and paper stays consistent across seasons. This idea is great for outdoor stages because you can keep the fans lightweight while still making them stable with proper anchoring. It’s also ideal if you want a “clean” look with strong shapes behind the couple. The fans create a sense of motion even when the wind is calm.
Start by building a fan wall on a rigid backing board or using freestanding fan panels with feet. Then anchor the backing to stage rails with clamps so the fans can’t tip. Finally, add a simple line of greenery at the bottom edge for texture contrast and place uplighting behind the fans to make the layers pop. Setup takes 45-75 minutes. Cost is moderate because you’re buying/printing fan panels and backing materials.
Use matte paper if you can — glossy paper shows glare in direct sun.
Skip flimsy foam fans without reinforcement; they bow and look uneven on camera.
15. Mismatched Terracotta Steps With Color-Blocked Vessels
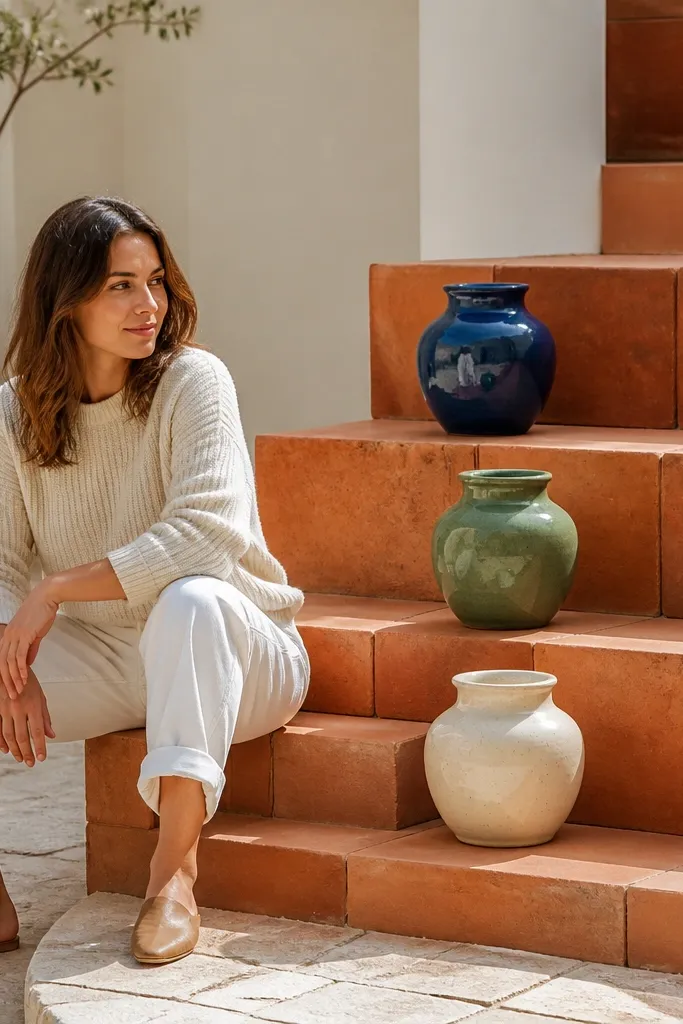
Instead of one flat stage look, build height with terracotta steps and decorate the risers with color-blocked vessels. Terracotta steps look grounded and warm, and mismatched sizes add an artistic feel that still reads intentional. This is a strong all year approach because it doesn’t depend on a specific flower season — you can keep the vessels and swap the stems. It’s especially good for outdoor venues with open sky backgrounds where you need a strong foreground. In photos, the steps help separate the couple from the background.
Start by stacking terracotta planters or rental steps to create 2-3 levels on the stage platform and secure them with non-slip pads. Then place tall vessels on corners and medium vessels on the center line, keeping colors limited to two neutrals plus one accent shade. Finally, add a thin runner fabric along the sides to hide gaps and make the platform look finished. Setup takes 60 minutes because stacking needs level checking. Cost is usually low-to-mid if you already have vessels or can rent steps.
Quick tipMeasure your couple’s stance and place the tallest vessels behind where they’ll stand so the heads stay clear.
Skip thisDon’t overfill every step — negative space makes the color-blocking look designed.
16. Olive Branch Wreath Ceiling Over the Aisle Entrance
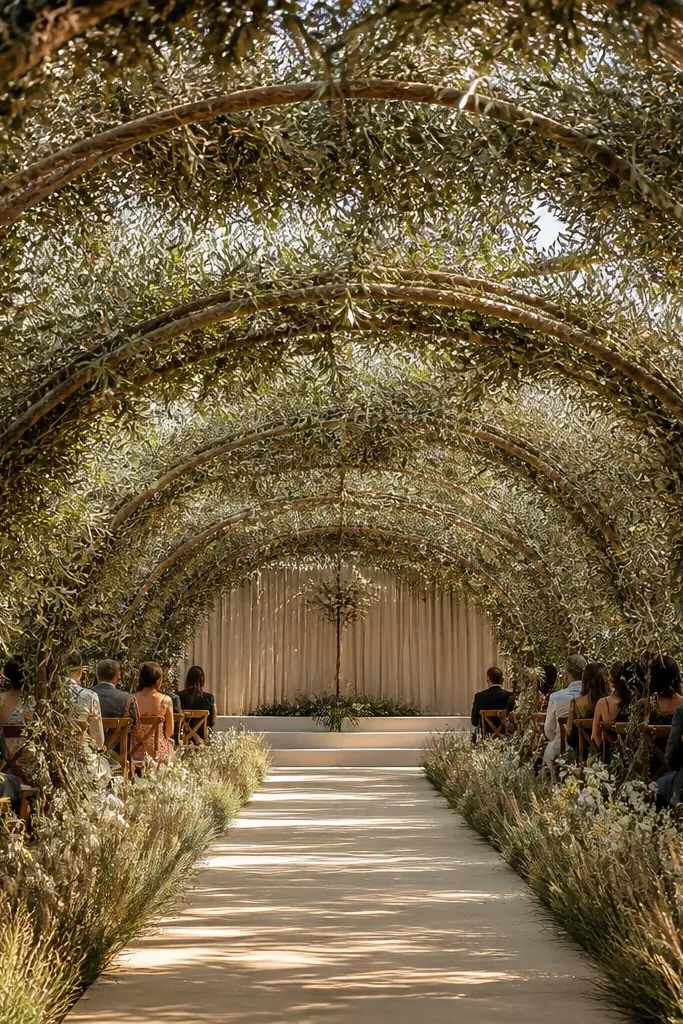
A wreath ceiling framed above the stage entrance creates a “tunnel” effect that looks incredible in ceremony photos. Olive branches give you a calm, Mediterranean look that works in every season — summer feels fresh, winter feels grounded. The ceiling also makes your stage feel bigger without building extra walls. This is best for stages with an entry point where the couple walks through or stands just inside the frame. If you’re worried about wind, use thicker branches and anchor points that prevent sagging.
Start by installing a top frame above the stage entrance using steel or rental truss points. Then build a wreath ceiling with olive branches in sections, wiring each section to the frame so it can’t slip. Finally, hang small lanterns or battery fairy lights inside the wreath gaps for depth. Setup takes 90 minutes if it’s your first time working with branch wiring. Costs are moderate because the frame matters, but you’ll reuse the concept for other events.
Quick tipUse branch sections of similar thickness so the ceiling hangs evenly.
Skip thisSkip thin, flimsy greens — they twist and make the ceiling look lopsided by sunset.
17. Black-and-White Stripe Backdrop With Greenery Corner Clusters
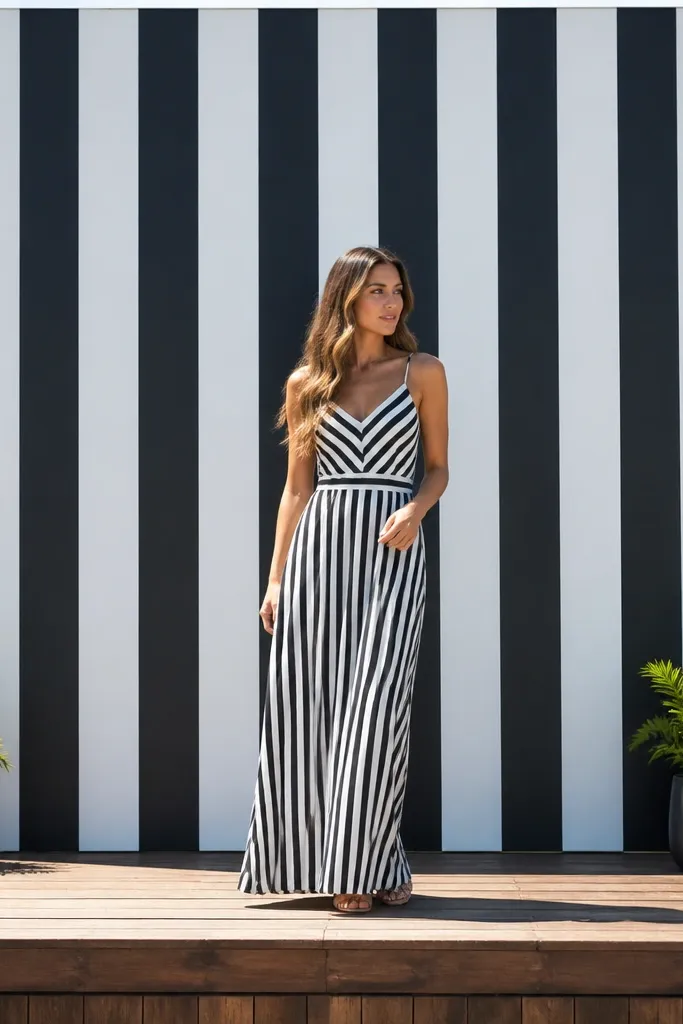
A black-and-white striped backdrop is high-contrast and reads clearly even in bright noon light. It’s an all year winner because stripes don’t signal a season, and you can keep greenery minimal in the corners. Corner clusters make the stage feel intentional without blocking the couple. This works for modern ceremonies and for venues with distracting backgrounds like trees or fencing. The striped pattern also makes stage photos look styled even when your flower budget is small.
Start by hanging a black-and-white striped outdoor backdrop fabric on a tension frame or portable truss. Then add greenery corner clusters on both sides using two long garlands per corner so the clusters don’t sag. Finally, place two simple planters at the base corners to ground the backdrop visually. Setup takes 45-75 minutes and costs are usually lower than floral walls. Make sure the backdrop is taut so stripes don’t ripple.
Quick tipChoose a fabric that’s matte and wind-resistant; shiny stripes glare in photos.
Skip thisDon’t add many small props — the stripes already create the visual punch.
18. Long-Table Runner Stage With Floating Candle Line
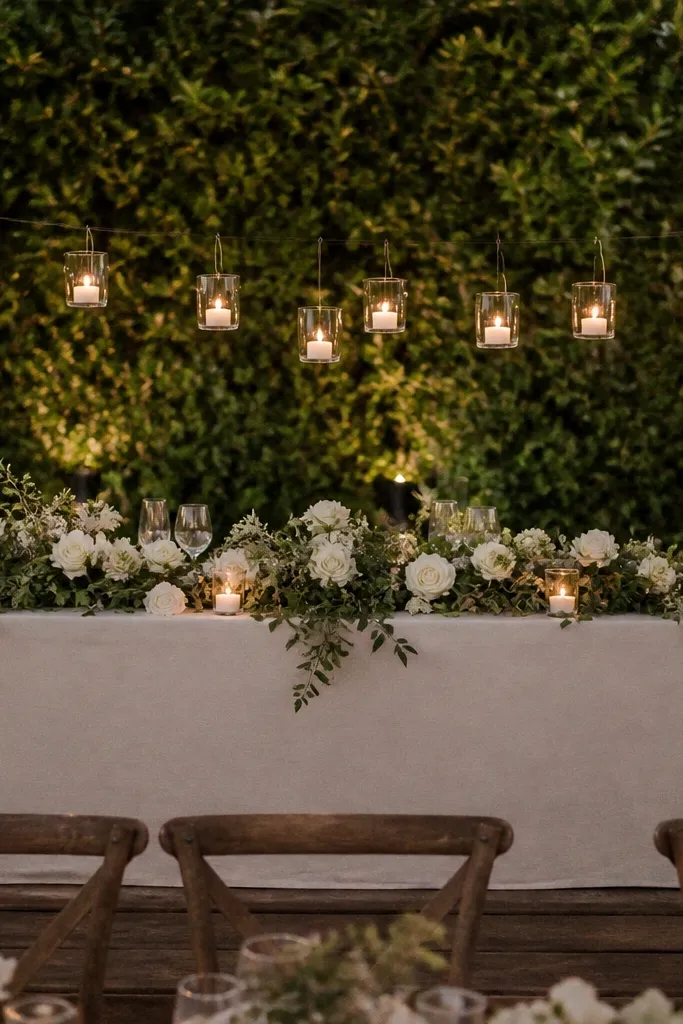
For a stage that needs to look elegant from the audience, run a long linen runner across the stage and build a floating candle line in glass. The runner gives you a clean base, while the candles create a gentle sparkle that reads even in low light. This is a great all year option because it’s about texture and light, not seasonal flowers. It’s ideal for ceremonies where the couple stands at the center and you don’t want bulky decor blocking sightlines. The candle line also frames the couple’s lower body in photos.
Start by measuring the stage depth and choosing a runner width that leaves 6-12 inches of visible stage on each side. Then place glass candle holders in a straight line, anchoring holders with removable putty so they don’t slide. Finally, add warm uplighting or string lights behind the runner to make the glass catch light. Setup takes 30-45 minutes if you pre-plan the candle spacing. Cost is moderate and tends to be lower than large floral builds.
Quick tipUse candle holders with frosted glass to soften reflections on camera.
Skip thisSkip uneven spacing; a crooked candle line looks wrong immediately in wide photos.
19. Seasonless White Flowerless Foam Panels With Gold Frames
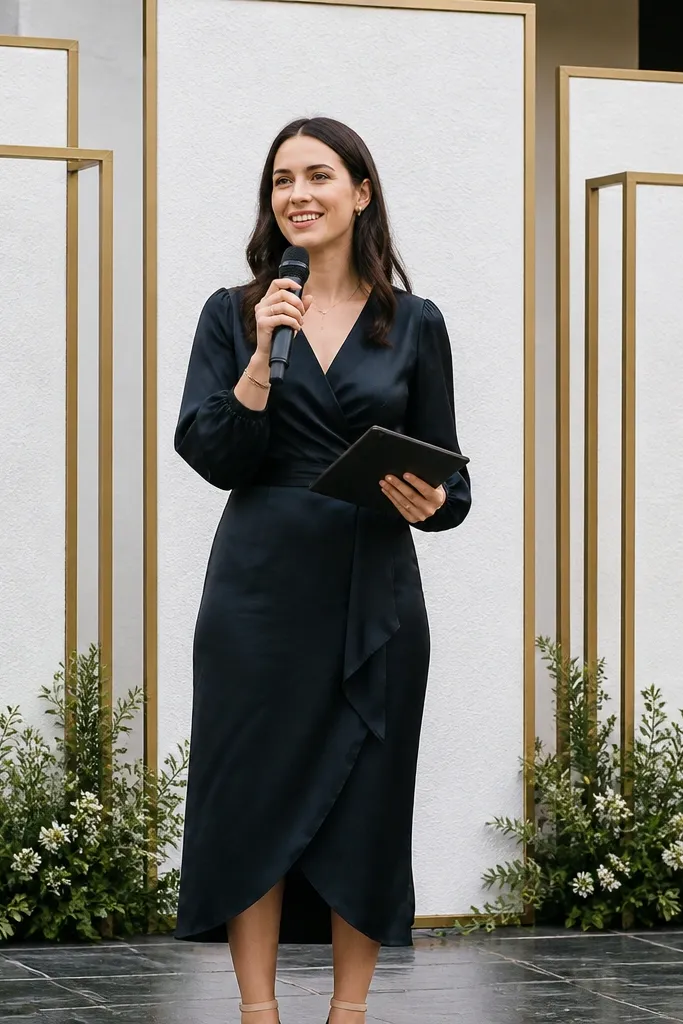
White foam-style panels framed in gold look luxe without needing fresh flowers. The gold frames add structure and a warm highlight that still works in winter and summer. This is one of the most reliable all year wedding stage decorations because it stays bright without being seasonal. It’s also a good choice for venues where you want a clean, gallery-like stage background. Keep greenery accents minimal so the white remains crisp in photos.
Start by selecting panel sizes that match your stage width and placing gold frames around them with secure mounting clips. Then attach the framed panels to the stage using brackets or a modular backing. Finally, add two or three small greenery sprigs at the bottom corners only, so the frame reads clean. Setup takes 60-75 minutes because framed panels need alignment. Cost is higher than simple drapes, but it’s consistent and reusable.
Quick tipPick a warm white panel, not blue-white; it looks better under outdoor daylight.
Skip thisDon’t add a second white texture that’s too different; mixed whites can look patchy.
20. Copper Pipe Stage Frame With Hanging Seed Pods
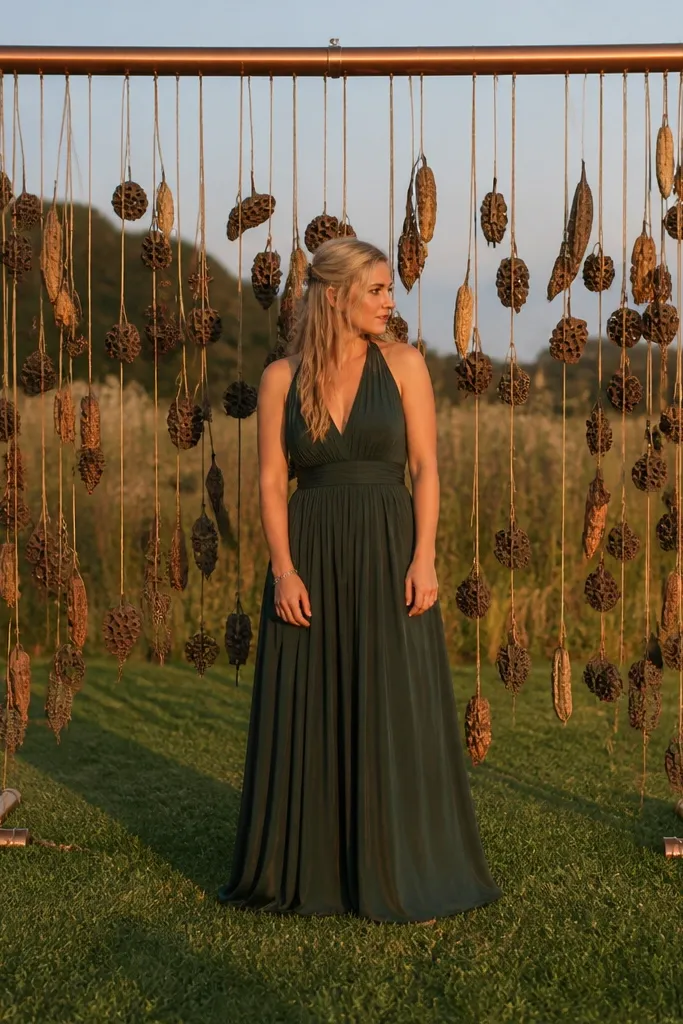
A copper pipe frame is bold and modern, and hanging seed pods add texture that reads like a design choice. This setup works in every season because copper and seed pods aren’t tied to a specific bloom. It’s particularly photogenic at golden hour when copper warms the scene. If your wedding palette is earthy, this stage decor will match without extra work. It’s also perfect for smaller stages because it creates a strong visual shape without huge volume.
Start by building or renting a copper pipe frame sized to your stage width and height, then anchor it with weighted feet or clamps. Next, attach seed pods on thin wire at staggered lengths, keeping them centered so they don’t drift into the couple’s faces. Finally, add tiny warm lights inside the frame for a soft glow. Setup takes 60 minutes and requires careful spacing. Cost is moderate if you buy a frame once and reuse it.
Use thin wire, not string, for seed pods so they hang straight under light wind.
Skip heavy seed pod clusters; they swing and blur in photos.
21. Pastel Lantern Wall With White Steps and Sage Garlands
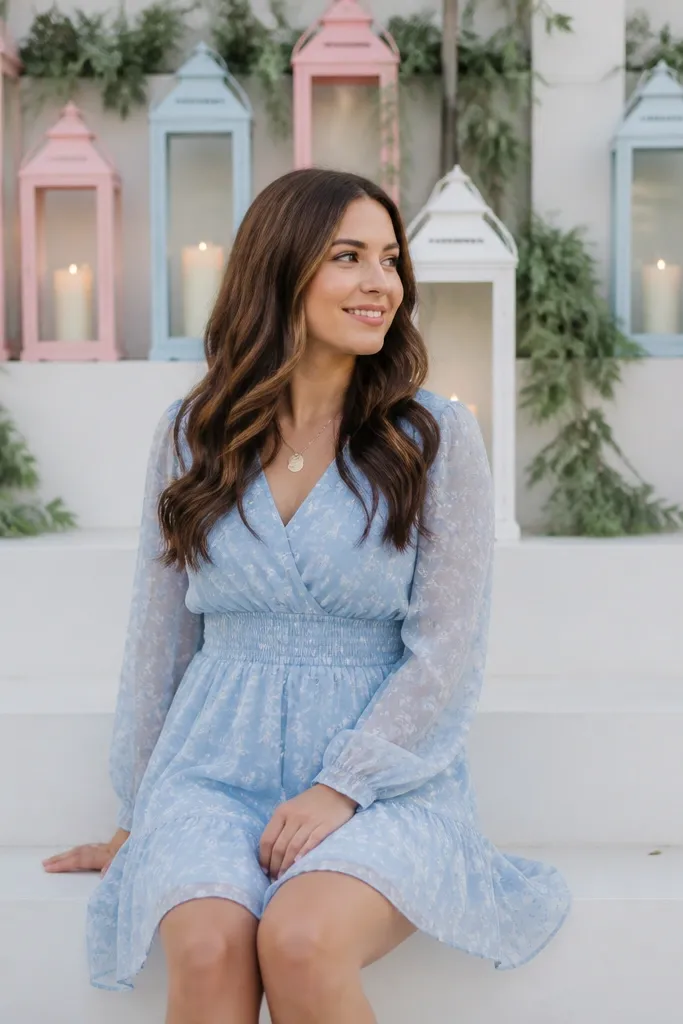
A pastel lantern wall gives you a soft, colorful background that still looks refined. White steps make the lantern colors pop, and sage garlands tie everything together without overdoing florals. This is a strong all year option because lanterns and sage are stable year-round materials. It’s especially good for spring and summer, but it also works in fall when you want gentle color against the sky. The lantern wall gives you photo depth and a “set” look without a huge build.
Start by placing white steps or a white platform on stage and securing them with non-slip pads. Then mount lanterns on a back lattice or light frame, spacing them evenly so the wall reads as one block. Finally, tuck sage garlands along the bottom edge and corners to connect the steps to the lantern wall. Setup takes 60-90 minutes and costs are mid-range depending on lantern rental. Plan battery checks the night before.
Quick tipMatch lantern glass colors to your bridesmaid bouquets or groomsmen ties for a coherent look.
Skip thisDon’t use too many lantern colors; three pastels max keeps it photogenic.
22. Emerald Velvet Drapes With Twisted Twine Knot Lines
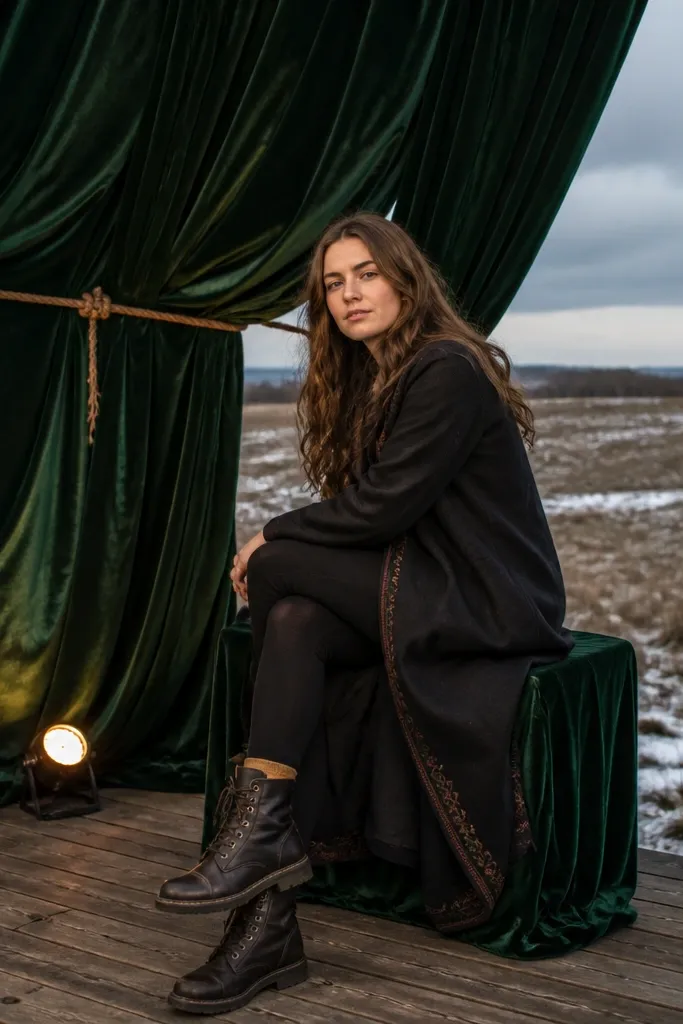
Emerald velvet drapes add drama and depth that looks great outdoors when the background is plain. The twisted twine knot lines give the drape structure so it looks styled, not just hung. This is an excellent all year choice because velvet reads rich in winter and still feels bold in summer evenings. It’s ideal for formal weddings where you want the stage to feel like a focal installation. Use the drapes to frame the couple rather than covering the entire stage face.
Start by hanging emerald velvet panels on a stage frame using curtain rings or clips, leaving a gap so the couple’s silhouette is clear. Then tie twisted twine lines across the drapes at two heights, anchoring ends to the frame so knots don’t slide. Finally, add a warm light source at the base aimed upward to bring out velvet texture. Setup takes 45-75 minutes. Cost depends on fabric rental, but it’s usually cheaper than full floral coverage.
Choose velvet with a consistent pile direction; random pile direction can look patchy on camera.
Avoid thin velvet that looks shiny; shiny fabric turns into glare in outdoor light.
23. Terracotta Arch With Dried Pampas Feathers and Copper Wire
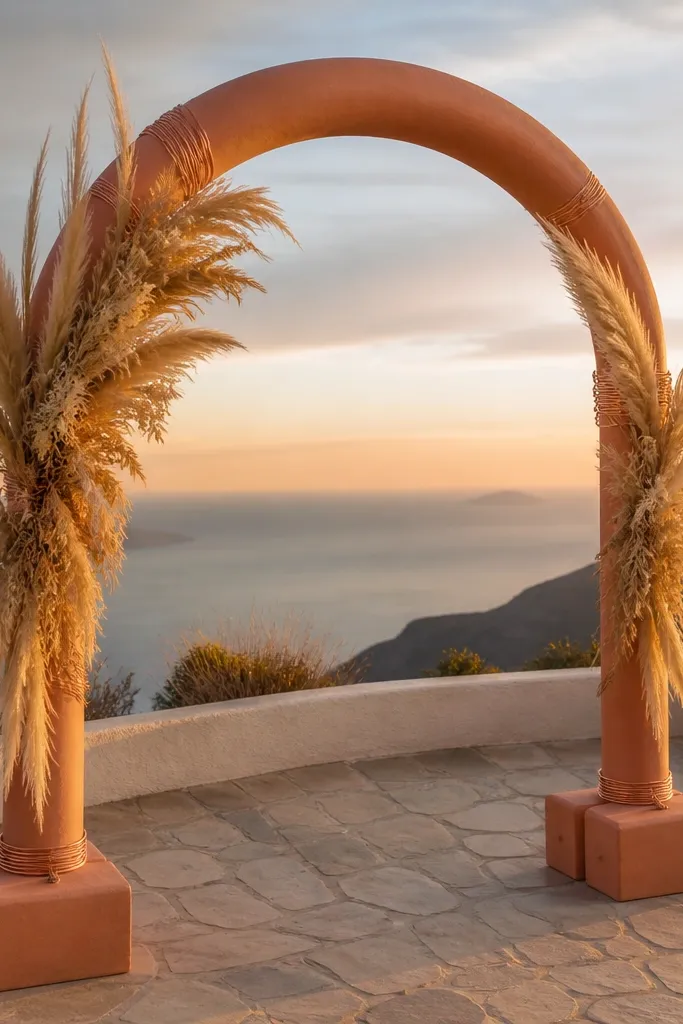
A terracotta arch plus dried pampas feathers gives you a warm, sculptural stage that looks good in both bright sun and moody sunset. Pampas adds height and softness, while copper wire details make it feel designed rather than “found.” This is a solid all year wedding stage decorations idea because pampas is available year-round in many tones. It’s especially strong for fall weddings, but it still looks clean in spring when you keep the palette warm and minimal. Keep the pampas concentrated near the arch so it doesn’t look scattered.
Start by securing a terracotta arch or terracotta-colored frame to the stage with weighted bases. Then bundle pampas feathers and attach them to the arch using copper wire, keeping clusters on both sides at matching heights. Finally, add small copper wire loops near the top to echo the arch curve. Setup takes 60 minutes because pampas needs careful placement. Costs are usually moderate — you’re buying dried materials once or renting them.
Quick tipUse hairspray lightly on pampas clusters before setup to reduce shedding during photos.
Skip thisDon’t overfill the arch; too many pampas heads look chaotic and hide the couple.
24. White Balloon-Garden Wall With Clear Stems and LED Uplights
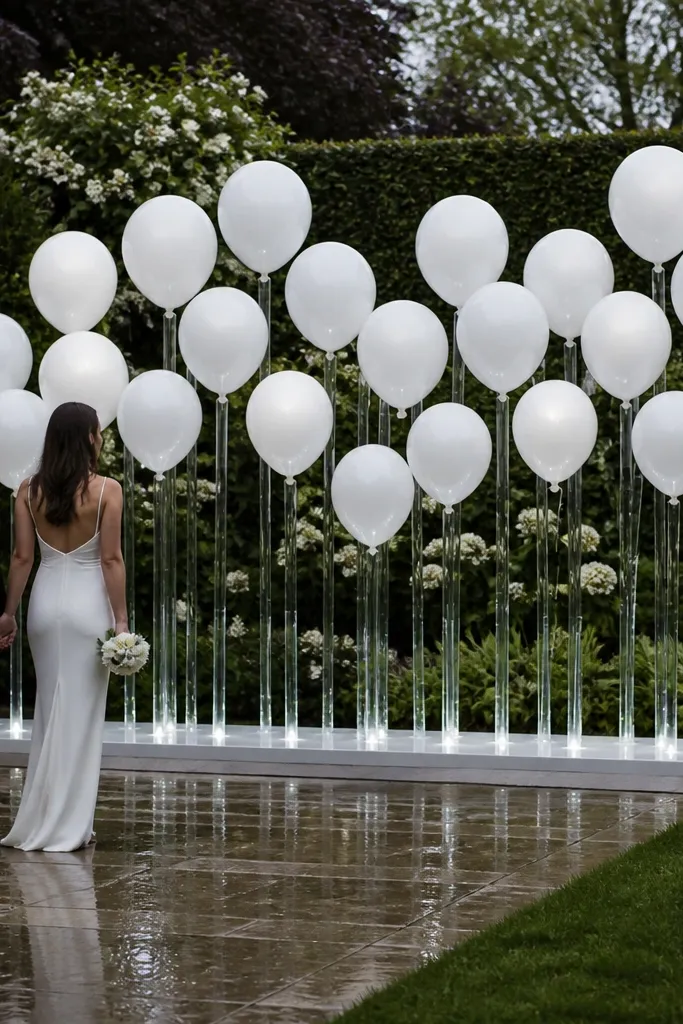
A white balloon-garden wall can look surprisingly high-end when you use clear stems and LED uplights. The balloons create a soft cloud background that works in every season, and the clear stems keep the setup from looking heavy. This is ideal for outdoor ceremonies where you want a clean, modern backdrop without fresh flowers. It’s also great when you need something that survives heat — balloons don’t wilt. For photos, the key is using warm uplights so the white background doesn’t turn gray.
Start by building a balloon anchor grid behind the stage and using clear stems to attach balloon clusters at consistent spacing. Then add LED uplights at the base aimed up into the balloon wall for glow. Finally, secure the entire arrangement to stage rails so it can’t drift with wind. Setup takes 60-90 minutes because spacing matters. Cost is usually mid-range when you factor in lights and anchor materials.
Quick tipUse matte white balloons if you can; glossy ones throw glare.
Skip thisAvoid mixing balloon sizes randomly — it looks like an event backdrop, not a stage design.
25. Linen Canopy With Macrame Side Panels and Warm String Lights
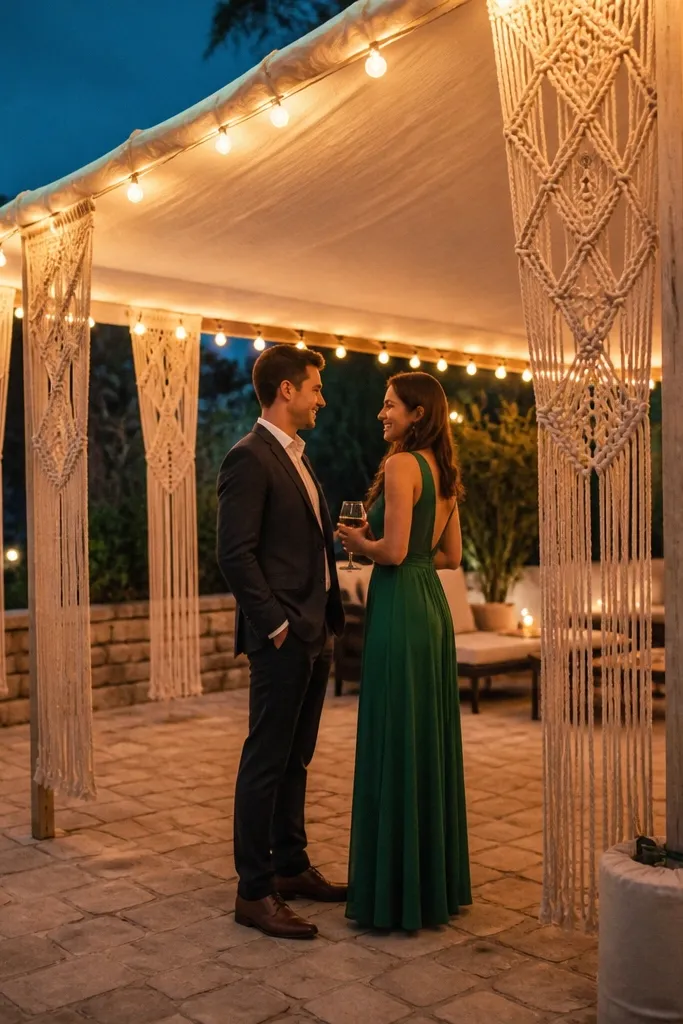
A linen canopy gives you a soft roofline that makes the stage feel intentional, and macrame side panels add texture without heavy floral work. Warm string lights tucked along the canopy edge create a gentle glow that flatters outdoor skin tones. This is a strong all year choice because linen and macrame are seasonal-proof — you can keep the look while changing the color accents. It’s perfect for garden venues and ceremonies with a relaxed elegance. It also photographs well because the canopy creates a “frame within a frame.”
Start by installing a canopy frame above the stage and draping linen panels so they fall in wide folds. Then hang macrame side panels on either side using hooks attached to the canopy frame. Finally, string warm lights along the canopy edge and test the brightness so it doesn’t blow out highlights. Setup takes 60-90 minutes depending on frame type. Cost is moderate because you’re renting the canopy hardware and buying macrame panels.
Quick tipUse cable ties to keep light strings secured along edges — loose cords catch wind and ruin the look.
Skip thisSkip sheer linen that clings; it shows wrinkles and reads messy in photos.



