
1. Linen Table Runner with Black Napkins (Modern Contrast)
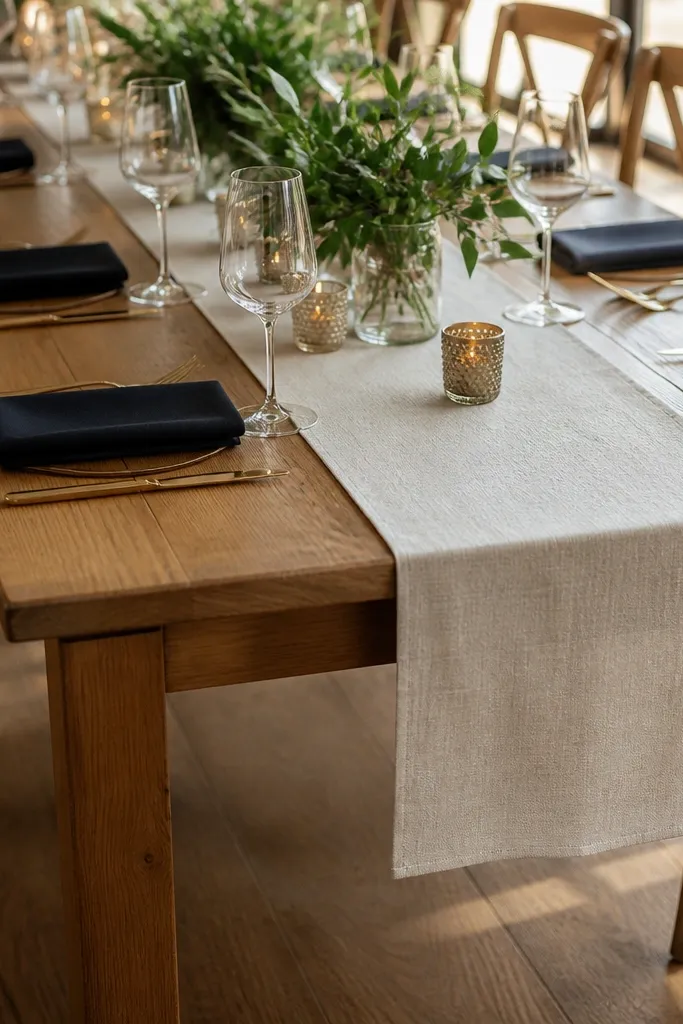
This combo makes rustic feel modern because linen gives you the soft, natural texture and black adds sharp contrast that reads well on camera. The runner also anchors the table so your centerpieces don’t look like random objects placed on bare wood. Choose a runner that hangs 3-5 inches past the table edge so it photographs “intentional” instead of accidental. It suits venues with warm wood floors or barn interiors where everything else already has texture.
Start by buying or packing one linen runner per table, then measure the table width and aim for 14-18 inches of overhang on each side. Then roll the runner tightly around a cardboard tube so it arrives with fewer wrinkles. Finally, pack black napkins stacked with a rubber band around each stack so you can set place settings fast at the venue.
Quick tipUse a fabric steamer and hang the runner in the bathroom with hot water running for 10 minutes to knock out wrinkles.
Skip thisDon’t mix multiple dark fabrics like charcoal and navy — the shade jump shows up in photos.
2. Two-Tier Candle Stand in Brushed Gold with Rust Glass
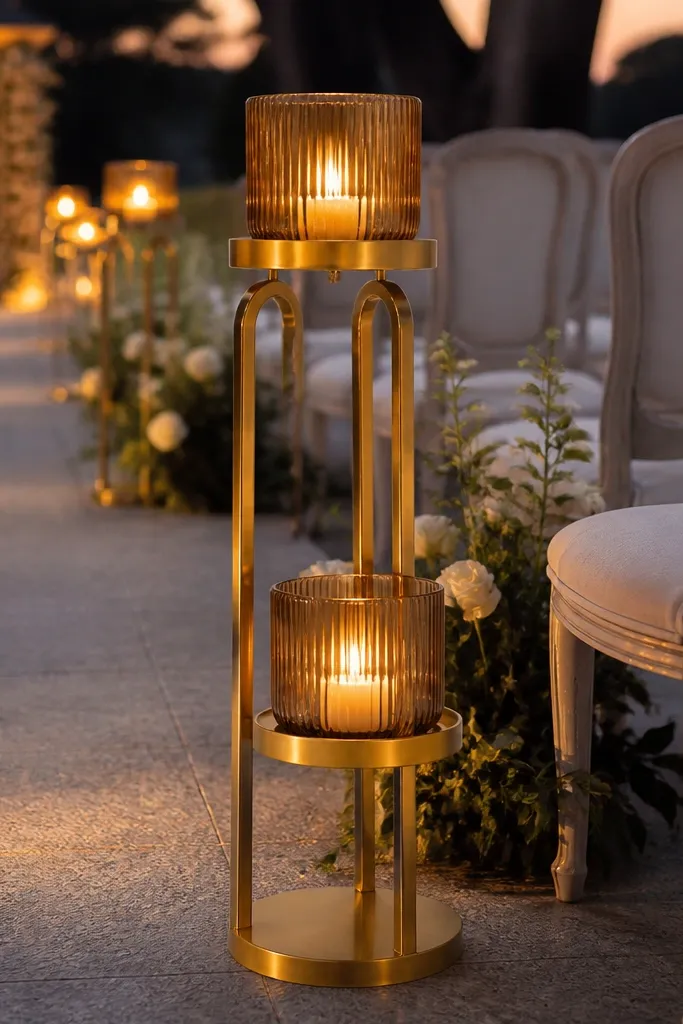
A two-tier stand adds height without clutter, and brushed gold keeps the look clean rather than overly farmhouse. Rust-tinted glass makes the candle glow warm, which matters for evening photos when everything can go gray. This setup looks best along a ceremony aisle or flanking the head table where you want vertical rhythm. It suits couples who want rustic warmth but don’t want everything to look like the same wood-and-jute theme.
Start by packing the stand base and tiers separately so you can wrap each section in tissue or clothing. Then bring unscented candles in a sealed bag so wax mess stays contained during travel. Finally, arrange votives by height at home so you can place them quickly in a straight line at the venue.
Carry a small pack of spare votives — one chipped glass piece can ruin the whole look.
Avoid tall stands placed too close to guests' eye level — you want candles, not blocked faces.
3. Clear Acrylic Sign Holder with Brown Cardstock Menus
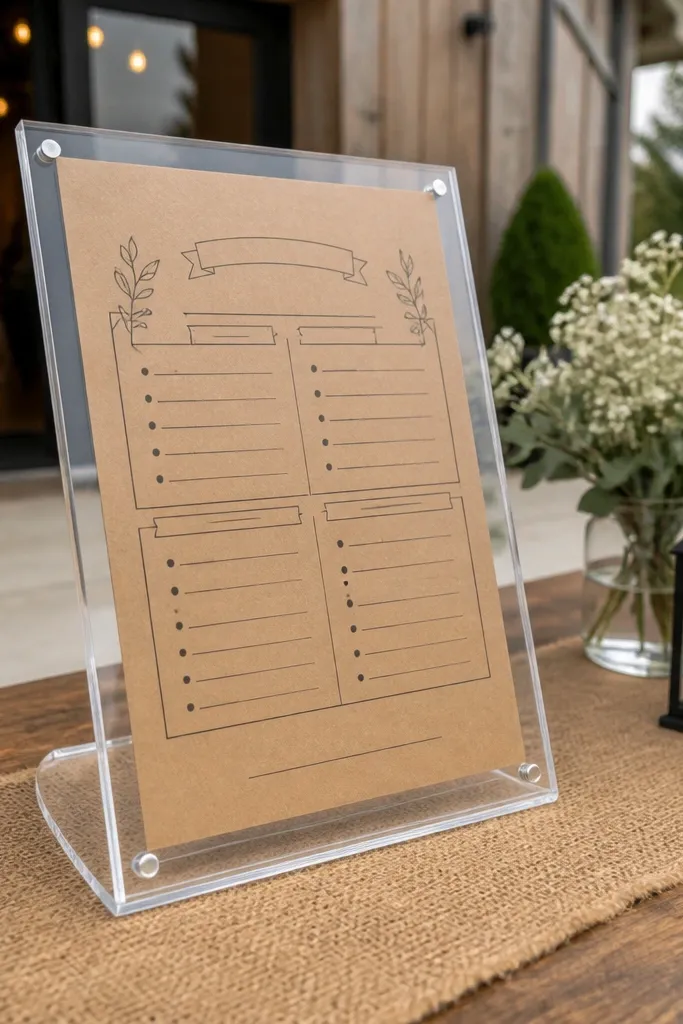
Clear acrylic is the modern move because it disappears in photos, letting the rustic paper do the talking. Brown cardstock gives you that warm, handcrafted vibe without the messy look of wrinkled kraft paper. Use this for welcome signage, menu cards, or seating charts so the “rustic” element is controlled and legible. It works especially well in barns where the background is busy and you need readable signage.
Start by choosing cardstock in a single shade (cocoa, saddle, or clay) and print with dark ink for contrast. Then pack printed signs flat in a folder inside a hard-sided tote to prevent corner bends. Finally, assemble the acrylic holders at the venue and place them near natural light so the clear edges don’t glare.
Use a matte spray on cardstock if you’re shooting in direct sun; it cuts glare and keeps text crisp.
Don’t use glossy paper — the reflection turns signs into streaks in daylight photos.
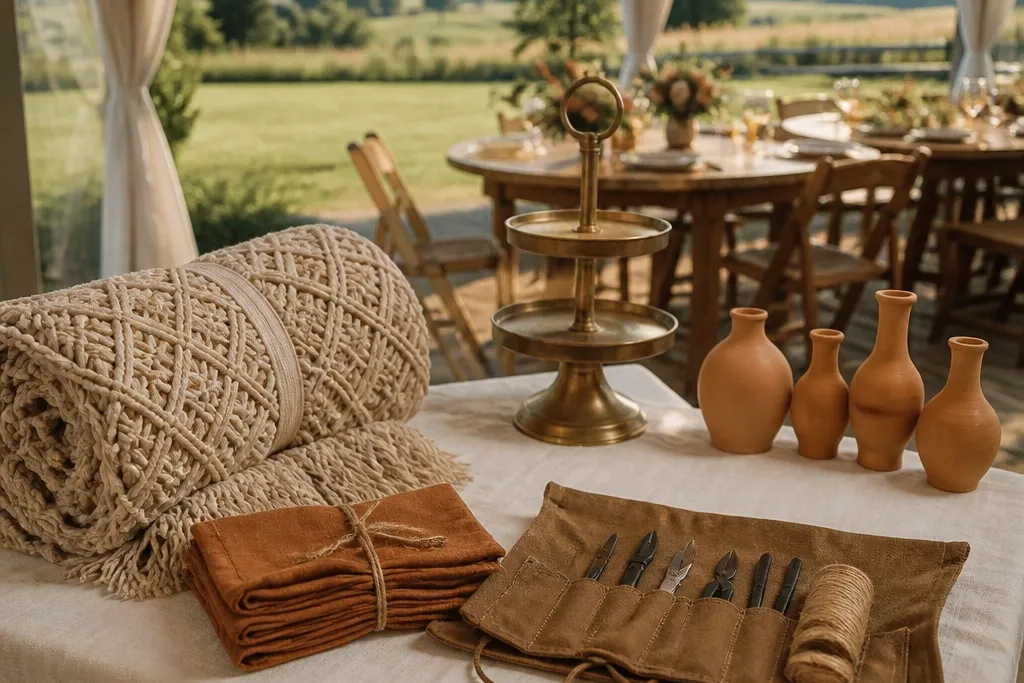
4. Macramé-Style Runner in Oatmeal (No Fringe Tangling)
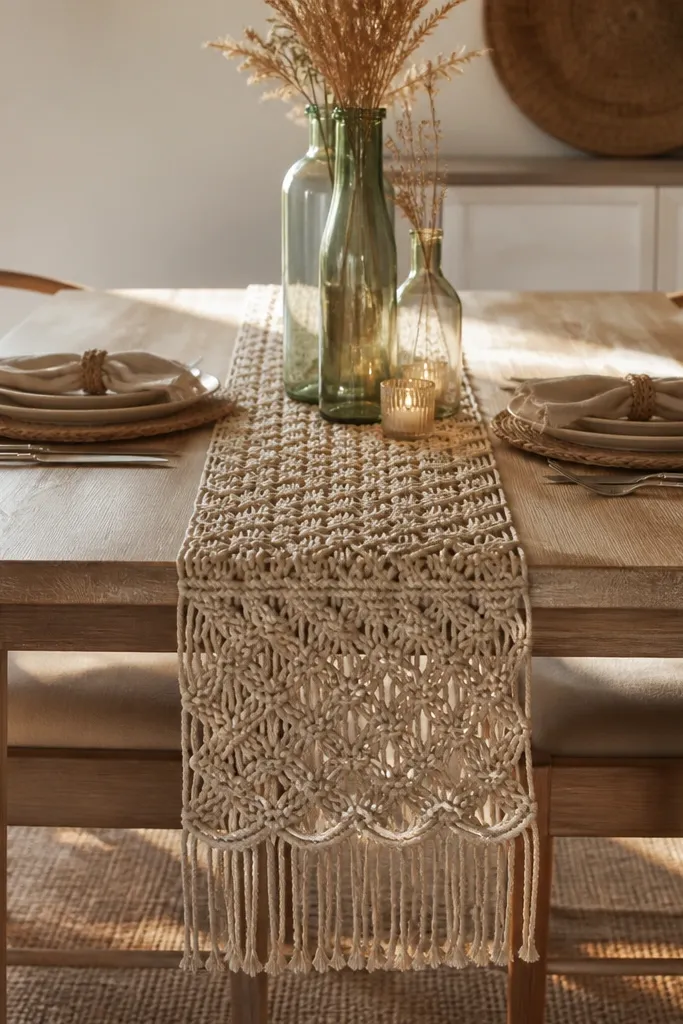
A macramé-style runner brings texture that reads “boho rustic” without needing bulky greenery. Keep fringe minimal or secured so it doesn’t tangle during travel, and your photos stay clean. This works great on sweetheart tables, ceremony benches, or lounge seating where you want cozy texture but not a full backdrop. Choose oatmeal because it blends with wood and cream florals instead of fighting them.
Start by folding the runner in thirds with tissue paper between layers to stop snagging. Then roll it around a pool noodle or cardboard tube to keep the weave from creasing. Finally, store it in a garment bag so it stays protected from dust and wrinkling.
Quick tipPack a small lint roller — woven pieces show pet hair and lint fast on arrival.
Skip thisSkip super-long fringe — it looks charming in person and messy in photos.
5. Mini Terracotta Bud Vases in a Straight Row
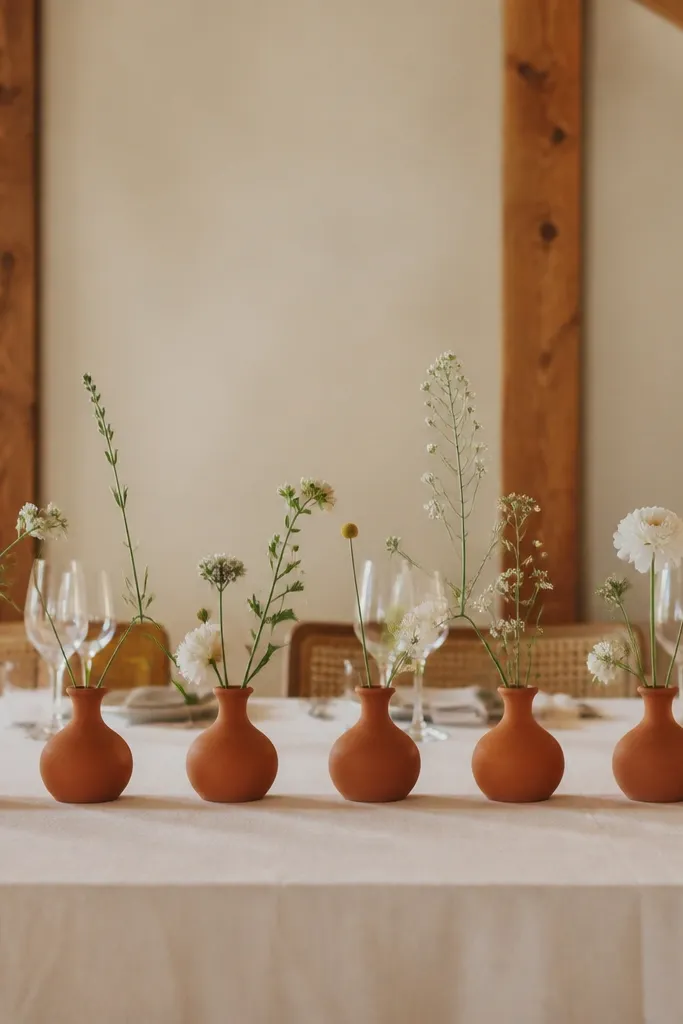
Bud vases are the modern rustic sweet spot: they look styled, but they’re light and easy to set. A straight row creates a clean line that camera lenses love, especially for head table or dessert table photos. Terracotta adds the rust note without turning everything red. Keep stems simple — 1-2 stems per vase — so the arrangement stays airy.
Start by packing vases in bubble wrap and grouping them by size in separate pockets of a moving box insert. Then prep stems at home and store them upright in a shallow cooler or water container. Finally, line vases up with painter’s tape marks on the table so you place them evenly within 10 minutes.
Quick tipUse a clear tape dot under each vase base so it won’t slide on smooth table surfaces.
Skip thisDon’t overfill — a crowded bud vase row looks messy in close-up shots.
6. Rustic Wood Frame with White Dried Florals
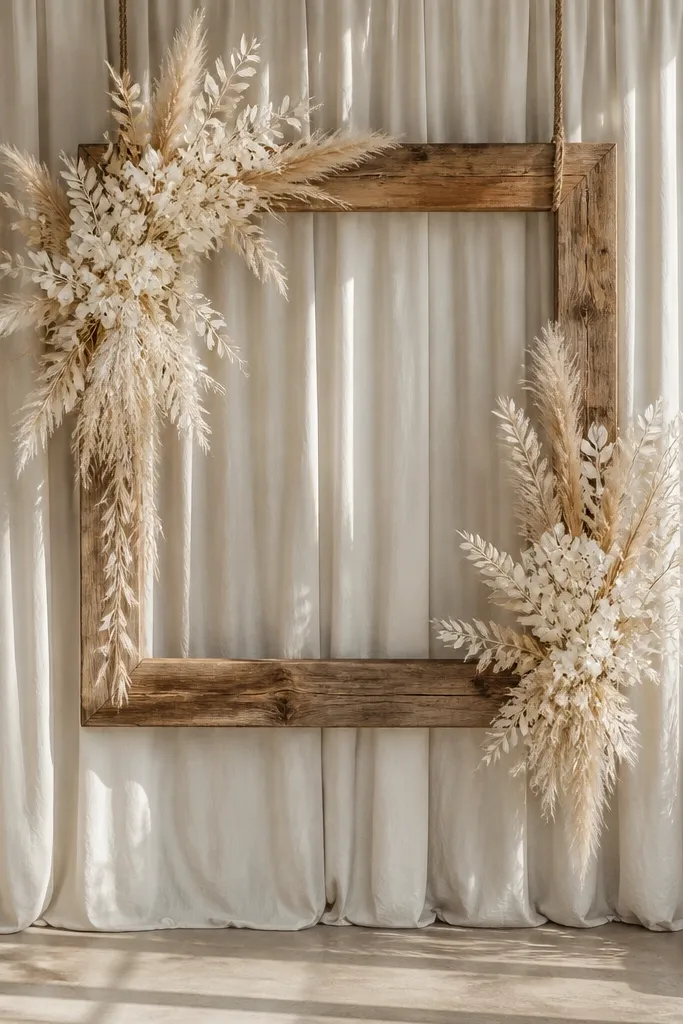
A wood frame gives you structure and a “designed” look that feels modern when paired with white dried florals. This is a great alternative to a full arch because it packs smaller and still reads as a focal piece. Dried florals also handle travel better than fresh bouquets. Hang it at the ceremony focal wall or use it behind the sweetheart table for a clean, photogenic backdrop.
Start by choosing a frame with a backing you can safely remove so stems can be placed securely. Then transport the frame face-down in a blanket and keep dried florals in a separate bag to avoid crushing. Finally, assemble on-site by wiring stems into the frame backing and spacing them evenly from the center outward.
Quick tipBring extra floral wire — a bent wire can ruin the symmetry fast.
Skip thisAvoid frames that are too ornate — heavy carvings fight modern rustic styling in photos.
7. Olive Green + Burnt Orange Guirlande on a Neutral Backdrop
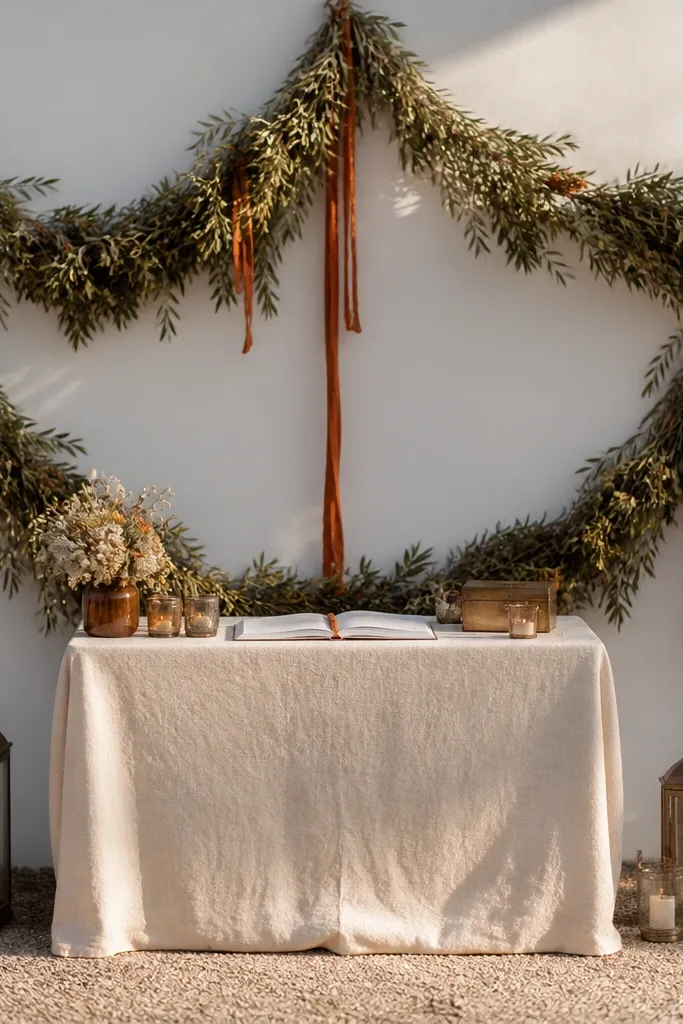
A guirlande adds movement and soft drape, but the modern part is the restraint. Pair olive greenery with burnt orange accents instead of adding every color you own. Use it on a simple backdrop like a plain curtain, wood slats, or a white wall where it can stand out. It photographs well because the greens create depth while the orange pops at key points.
Start by laying out your garland pieces on a table and marking where the orange accents will land (every 18-24 inches). Then roll the garland loosely and secure it with two large twist ties so it doesn’t kink. Finally, attach to the backdrop using zip ties over a thin dowel or using hooks spaced 12-18 inches apart.
Quick tipIf you’re using fresh greenery, mist lightly and keep it shaded in a cooler until setup.
Skip thisDon’t attach with random tape — it peels and leaves residue that ruins venue photos.
8. Large-Scale Eucalyptus-Style Greenery in Matte Black Planters
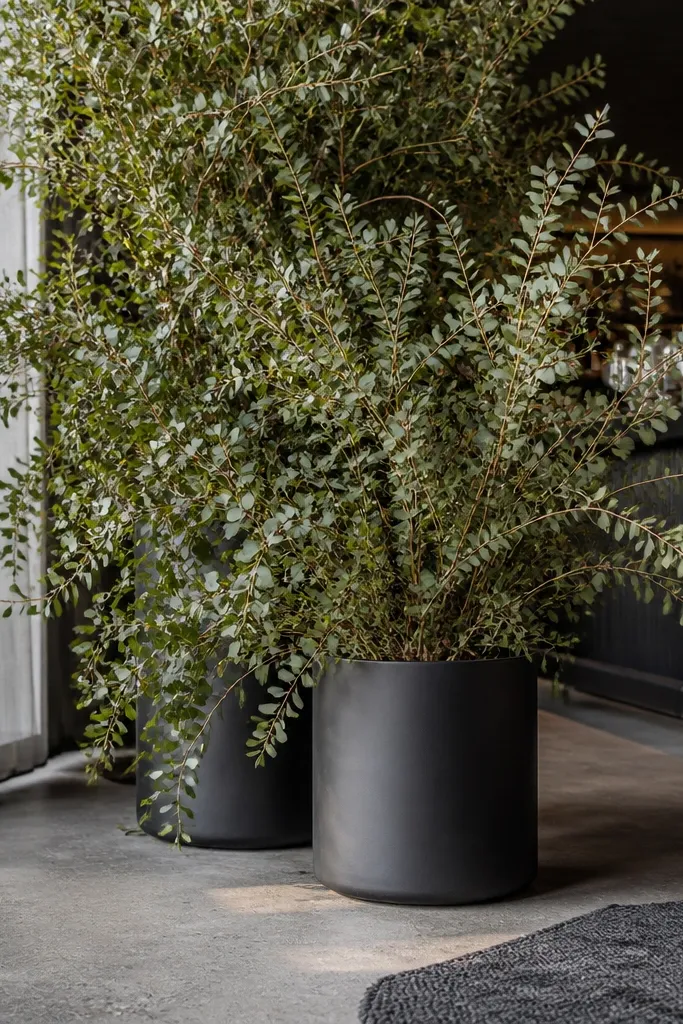
Big greenery in matte black planters gives rustic volume with a modern finish. The black base grounds the greenery and stops the scene from looking like a pile of leaves. This is ideal for entrances, aisle sides, and the corners of lounges where you want “wow” without building a huge structure. Choose eucalyptus-style greenery for a silvery-green look that reads clean in daylight.
Start by packing planters in dish towels and checking the drainage holes with tape so soil doesn’t spill. Then pack greenery stems in a bucket with water sealed in a liner or in a cooler if it’s fresh. Finally, set planters first, then tuck stems inward so the top has a rounded shape and doesn’t sprawl.
Quick tipBring heavy-duty gloves — planting stems into planters is quicker and cleaner.
Skip thisSkip glossy planters — reflections grab attention away from the flowers.
9. Rust Cloth Napkins Folded into a Simple Triangle
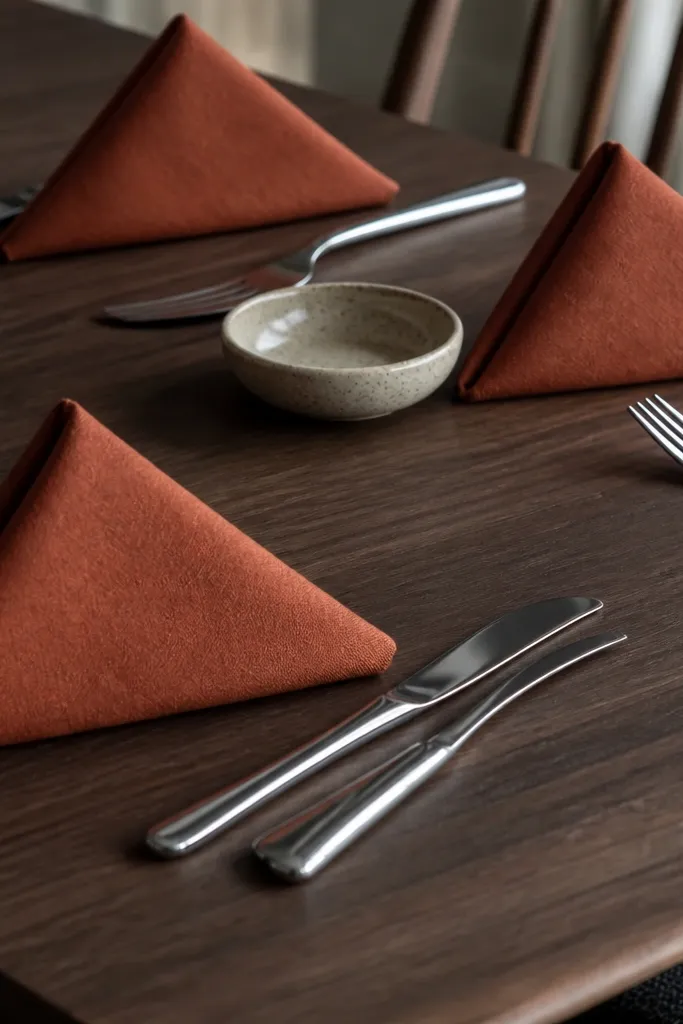
Napkin styling is one of the fastest ways to make rustic decor look intentional, and it’s cheap. A rust cloth napkin in a clean triangle fold gives you a defined shape that shows up in food and table photos. The triangle also makes place settings look uniform even if your guests bump a few settings. This works best with cream plates or stoneware bowls.
Start by ironing or steaming napkins before travel, then fold them into triangles and wrap each stack with a band. Then pack stacks flat in a rigid container so corners don’t bend. Finally, set napkins right before guests arrive so they don’t slump or crease from handling.
Use a light starch spray on linen so the fold holds for the whole event.
Avoid thick napkins that won’t crisp — they collapse and make tables look slouchy.
10. Sage + Cream Floral Clusters on Clear Glass Bottles
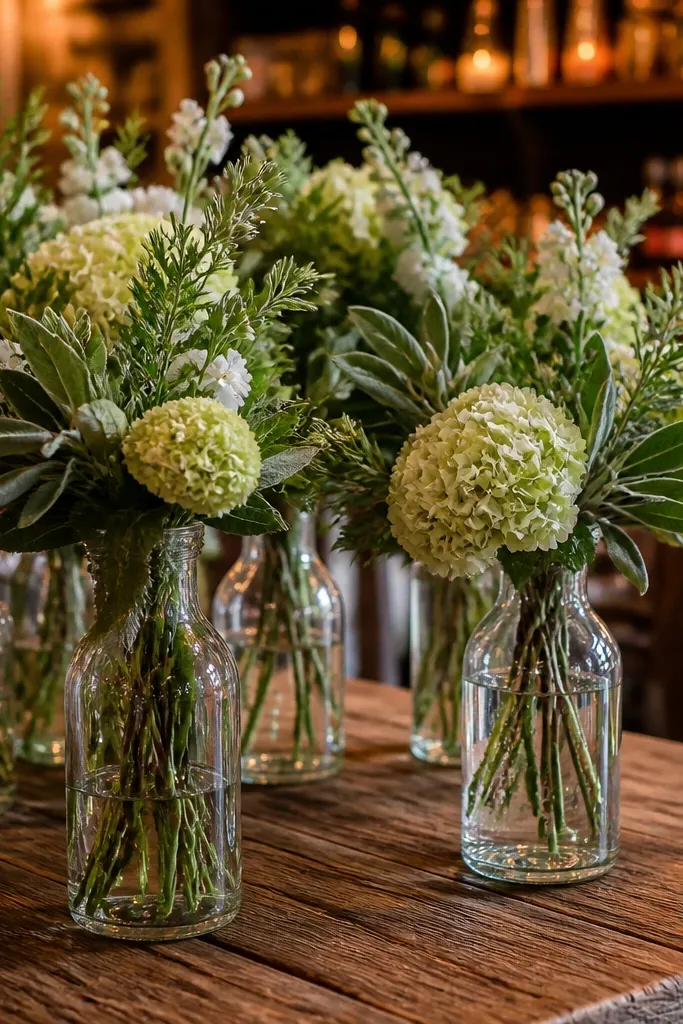
Clear glass bottles keep the arrangement airy, and the sage-cream palette keeps it modern rustic instead of orange-heavy. Clustered florals look curated because each bottle reads like a mini centerpiece. This style is perfect for cocktail tables and smaller tables where you want something pretty but not towering. It also plays well with candlelight because glass catches warm reflections.
Start by collecting bottles by height so you can build a gentle gradient across the table. Then pack bottles upright in a snug box with foam or towels to stop clinking. Finally, assemble clusters by wiring stems into a small oasis or using floral tape around stems so they don’t drift.
Quick tipLabel bottles with painter’s tape so you place them in the right order without guessing.
Skip thisDon’t use too many different flower types — the photo turns into a blur of texture.
11. Wood Slice Place Card Holders with Burnt Orange Ink
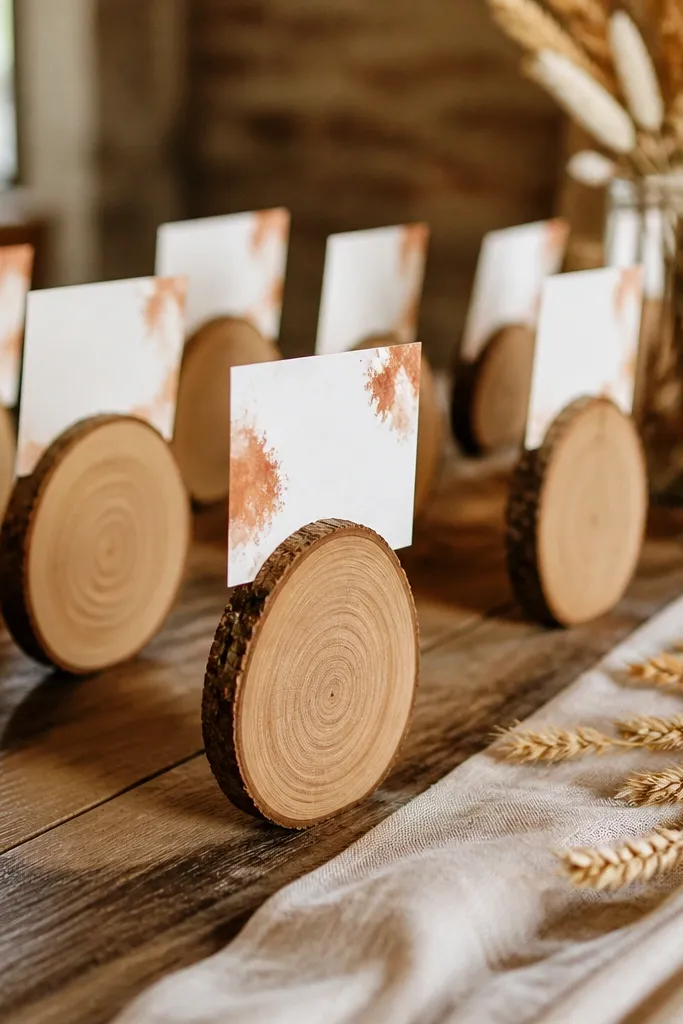
Wood slices are photogenic because they show grain texture, and the place card makes them feel functional, not random. Burnt orange ink adds a modern rust accent while still reading warm. This setup works for escort cards, table numbers, or seat cards because each piece is small and easy to place. It suits venues where you want rustic elements but not bulky decor.
Start by choosing slices with flat backs and drilling a small hole or using a mini clip for cards. Then print names in burnt orange and cut cards to a consistent size so they sit straight. Finally, pack them in a box with dividers so slices don’t chip, and label the box by table number for faster placement.
Quick tipBring a fine-tip marker for last-minute spelling fixes — it saves stress on venue day.
Skip thisAvoid slices with thick bark edges — they snag tablecloths and catch on clothing.
12. Terracotta + Cream Balloon Garland with Matte Finish
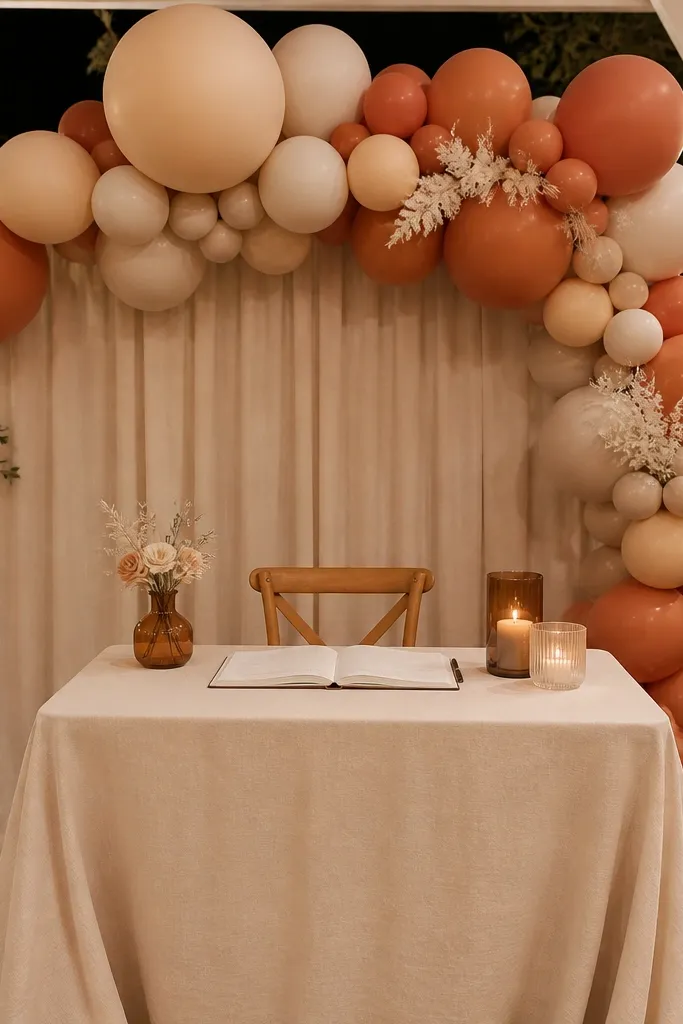
Balloon garlands can look modern when the colors are controlled and the finish is matte. Terracotta and cream keep the palette rustic without drifting into candy-store vibes. Use this for a photo corner behind the guest book or dessert table where you want a clean, elevated background. It photographs well because balloons create a soft blur and fill empty wall space quickly.
Start by buying matte balloons in two sizes and one connector color so it looks intentional. Then inflate in the order you plan to hang them and keep them in a cooler room so they don’t overheat. Finally, tie the garland to a backdrop frame or curtain rod with fishing line and secure knots behind the fabric.
Quick tipAnchor the bottom with weights or a tied-down base so it stays straight in photos.
Skip thisSkip glossy balloons — they reflect overhead lights and create harsh highlights.
13. Ceremony Aisle Runner in Oatmeal Linen with White Stenciled Edge
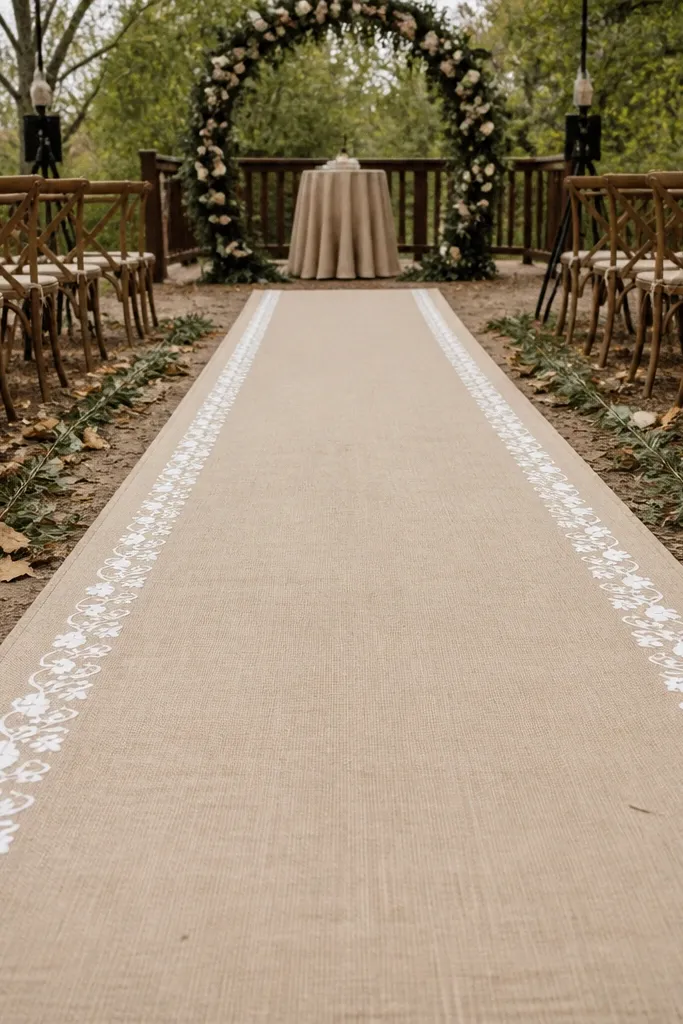
A linen aisle runner instantly makes a rustic ceremony feel designed, not improvised. The white stenciled edge gives a crisp line that reads modern on camera while still staying warm. This idea works best in outdoor ceremonies or venues with neutral flooring where the runner can define a path. It also helps photos because the aisle becomes a leading line from entry to altar.
Start by measuring the aisle length and width and plan for 2-4 inches of coverage on each side so it doesn’t look narrow. Then roll the runner around a tube and keep it in a garment bag to reduce creases. Finally, lay it out early and secure with stakes or weighted tape pads so it doesn’t shift when guests walk by.
Quick tipBring extra stake bags or sandbags if the venue has soft ground.
Skip thisDon’t use a slippery fabric — guests' shoes slide and it looks chaotic in candids.
14. Rustic Lanterns with Linen Wrap Around the Middle
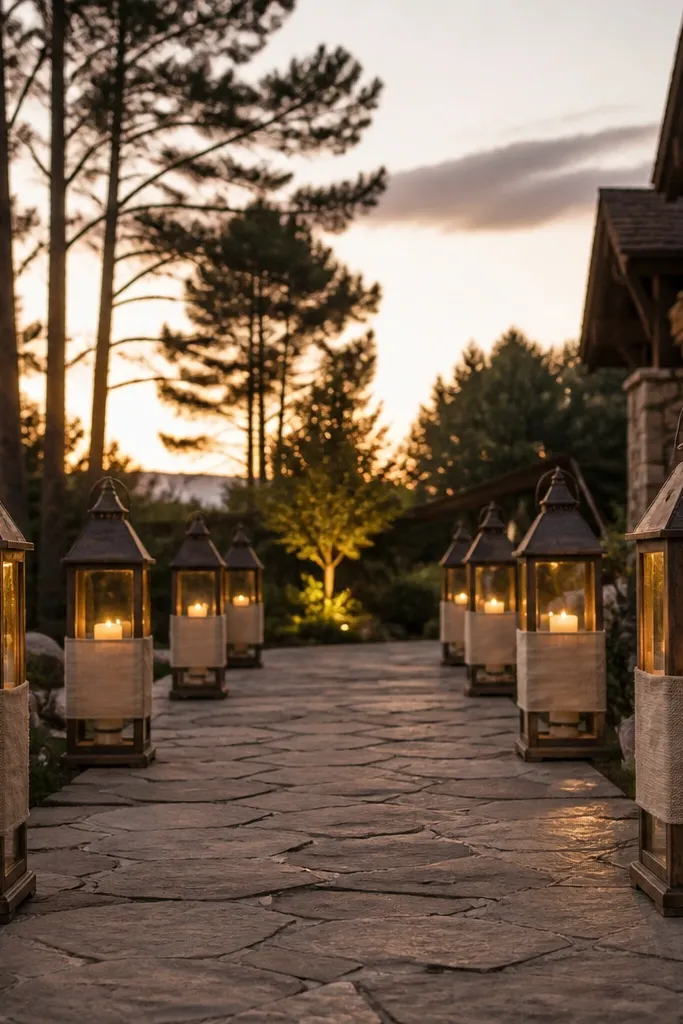
Lanterns are classic rustic, but the linen wrap modernizes them by adding a clean, uniform texture. The wrap also hides any scuffs from travel and makes all lanterns look like a set. Use them in pairs along the aisle or clustered near the bar for a warm, cozy glow. This is a strong choice for evening because lantern light adds contrast against dark wood and shadows.
Start by packing lanterns nested in towels so metal edges don’t chip glass. Then wrap lantern mids with pre-cut linen strips and tie with twine so you can remove and re-tie quickly if needed. Finally, add tea lights at the venue after you confirm wind conditions and safe placement rules.
Use flameless LED candles if the venue restricts open flame — you still get warm light.
Avoid lanterns with missing handles — carrying them on-site is slower and riskier.
15. Wood Ladder with Hanging Terracotta Planters
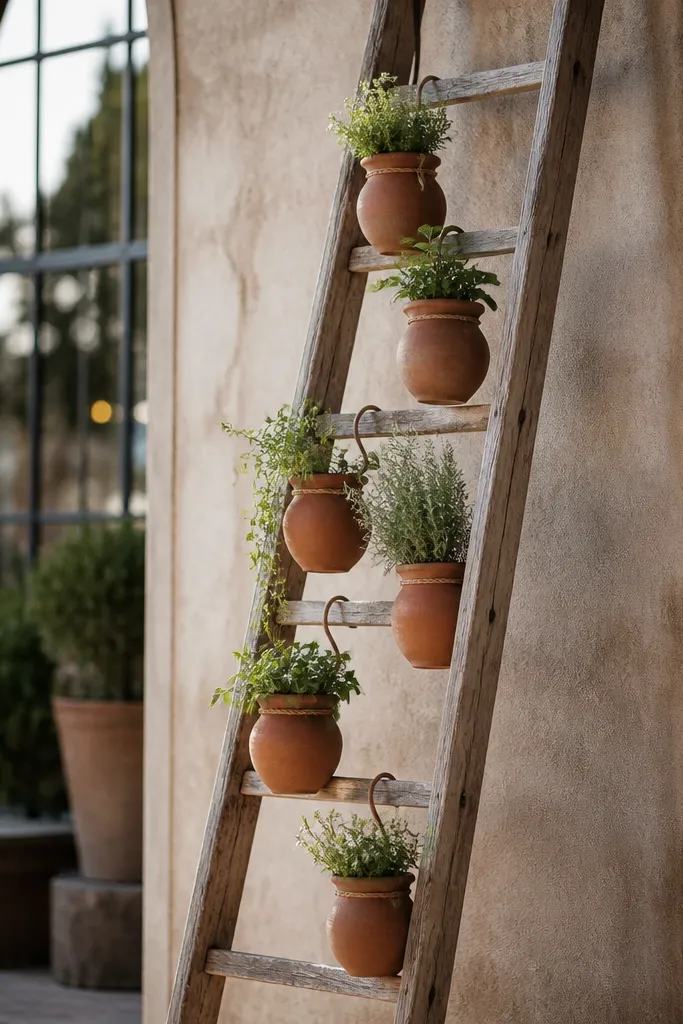
A wood ladder gives height and a sculptural look, and hanging terracotta planters keep it airy instead of heavy. This reads modern rustic because the ladder is straight and architectural, while the terracotta adds warmth. Put it near the entrance, behind the bar, or along a lounge wall where it can frame a photo. It also works well for dried stems and low-maintenance greenery.
Start by choosing a ladder with rungs spaced wide enough for your planters to hang without touching. Then pack planters in bubble wrap and keep ladder legs protected with moving blankets. Finally, assemble at the venue and secure the ladder with a strap or weights so it doesn’t wobble when people pass.
Quick tipPlan for wind — if outdoors, use heavier planters or add discreet weights at the base.
Skip thisDon’t overload — too many planters make the ladder look messy and unstable.
16. Whitewashed Bar Cart with Rust Jam Jars and Sprigs
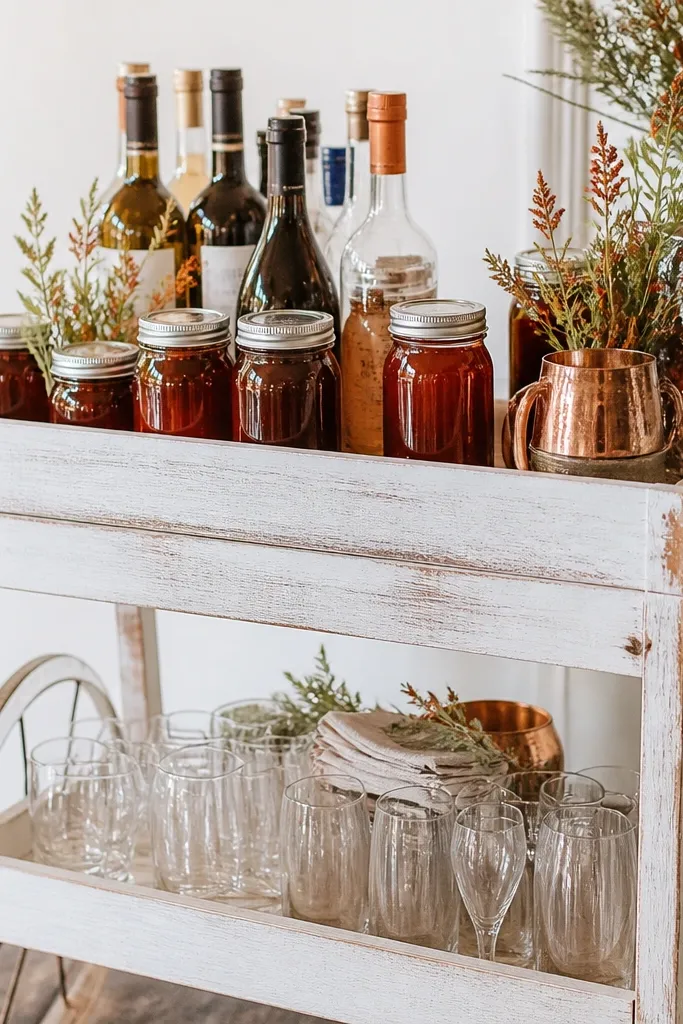
A whitewashed bar cart keeps the rustic vibe light and photo-friendly, and the jam jars add that rust accent without needing big florals. Small sprigs in jars look neat and intentional, especially on a bar cart where your guests want to see drinks. This works for indoor receptions and covered patios where the cart becomes a focal point. Choose a clean cart finish so the scene doesn’t look dingy.
Start by cleaning and drying jam jars completely so labels don’t peel and lids sit tight. Then pack jars in a box with towels and keep lids separate if they’re loose. Finally, set up the cart first, then place jars and sprigs in a consistent pattern — taller jars at the back, shorter at the front.
Quick tipUse the same sprig type across all jars so the cart looks coordinated in every photo.
Skip thisAvoid mixing jar sizes with random spacing — it turns into clutter when shot from above.
17. Stoneware Bowls Filled with Burnt Orange Dried Wheat
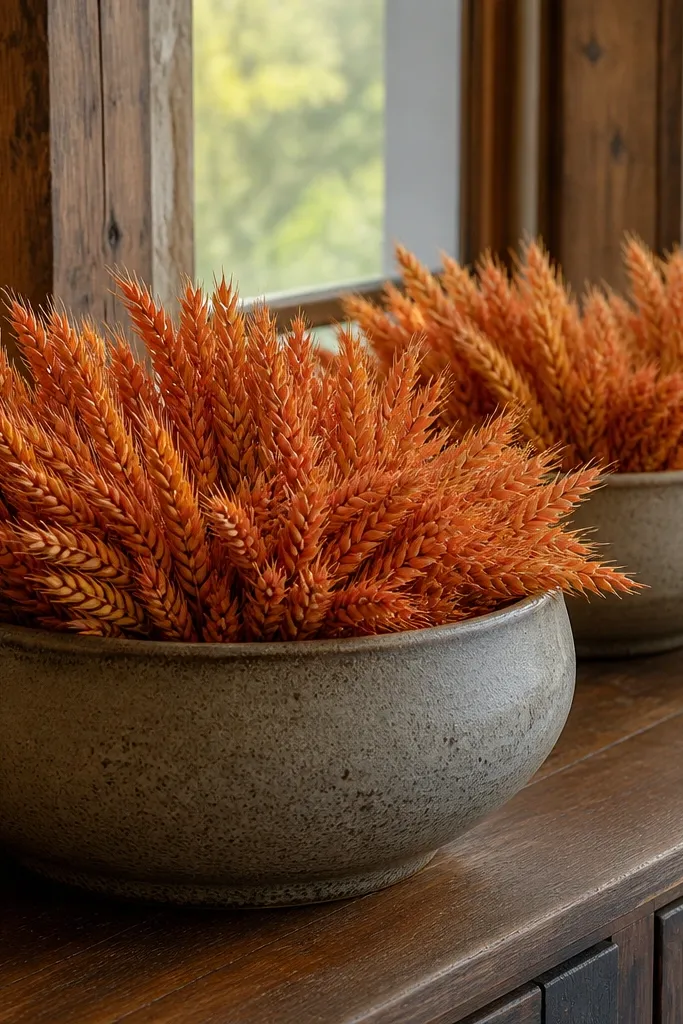
Dried wheat in stoneware bowls looks rustic, but the modern part is the color restraint. Burnt orange dried wheat gives warmth without the bright, fresh-flower look that can feel too “spring.” Stoneware bowls are heavy and grounded, so the scene stays stable and photogenic. Use this on the buffet, mantle, or as part of a low centerpiece cluster where people can walk around it.
Start by packing bowls in towels and placing a soft layer between stacked items. Then store wheat bundles in a flat box so stems don’t snap. Finally, fill bowls on-site and fan the wheat out from the center so it rises evenly instead of leaning.
If wheat sheds, place a sheet under the setup area — it keeps cleanup easy and avoids dusty floors.
Don’t add lots of different dried grasses — it gets visually noisy fast.
18. Acrylic Seating Chart Frame with Wood Peg Border
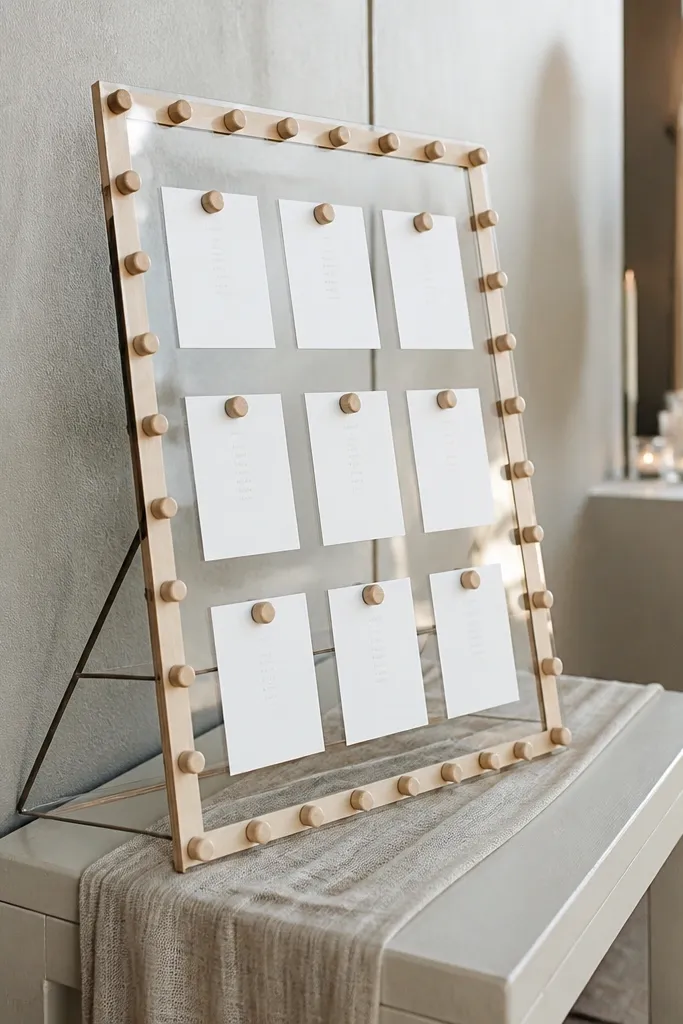
This is a modern rustic signage move that looks designed from every angle. Acrylic keeps the text readable and clean, while the wood peg border adds texture without turning the sign into a craft project. It’s ideal for entrances where guests line up and need quick clarity. Printed table names with dark ink make it legible in both bright daylight and shaded barn corners.
Start by selecting a seating chart layout with large headings and simple names that fit on one page per board. Then print on thick paper and use magnets or clips inside the acrylic so pages don’t curl. Finally, attach the frame to a stand or wall using hardware that matches the venue’s rules, then check glare from overhead lights.
Quick tipBring a microfiber cloth and wipe the acrylic right before guests arrive.
Skip thisSkip tiny fonts — rustic decor is photogenic, but unreadable signage is a fail.
19. Ceremony Backdrop Curtain in Cream with Rust Garter Tiebacks
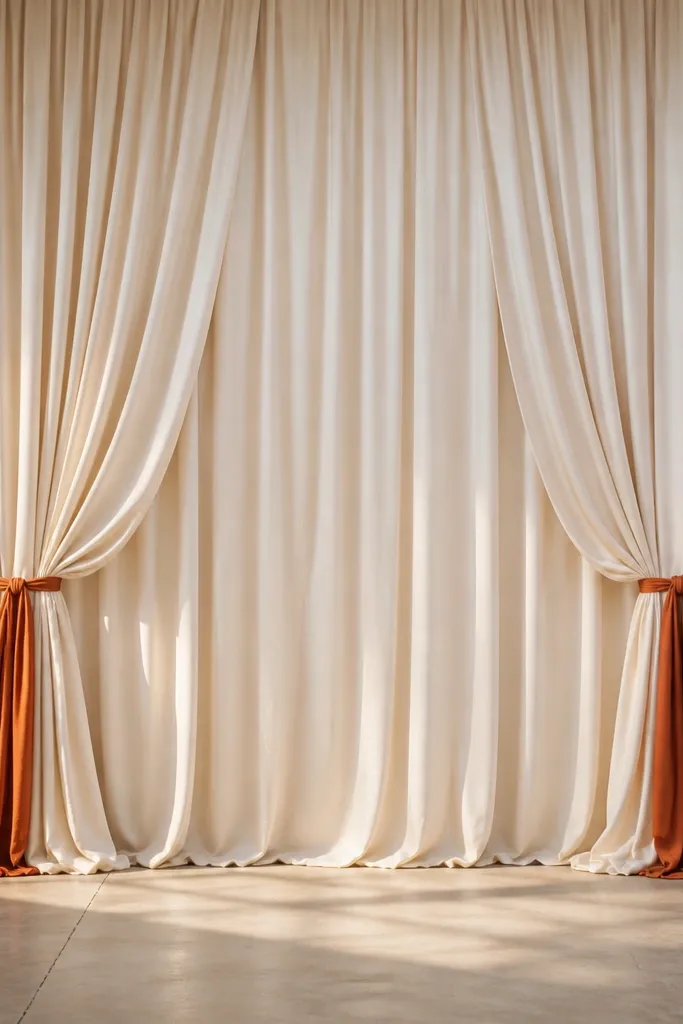
Curtains do the work of a backdrop without building a structure, and they photograph beautifully when they fall in soft vertical folds. Rust garter tiebacks add a controlled accent and keep the curtain from looking like plain fabric draped awkwardly. This is a strong choice for venues where you want modern rustic but the wall behind you is busy. It also frames the couple and makes center photos look clean.
Start by selecting a curtain fabric with weight so it hangs well, not thin and clingy. Then pack curtains on a rod or hang in a garment bag to avoid deep creases. Finally, tie tiebacks at two heights using pre-measured spacing so both sides look symmetrical in photos.
Steam the curtain in the same room you shoot in; the humidity helps the fabric settle.
Avoid lightweight sheers — they cling and wrinkle and show shadows behind them.
20. Rustic Bar Sign on Slate with White Chalk Lettering
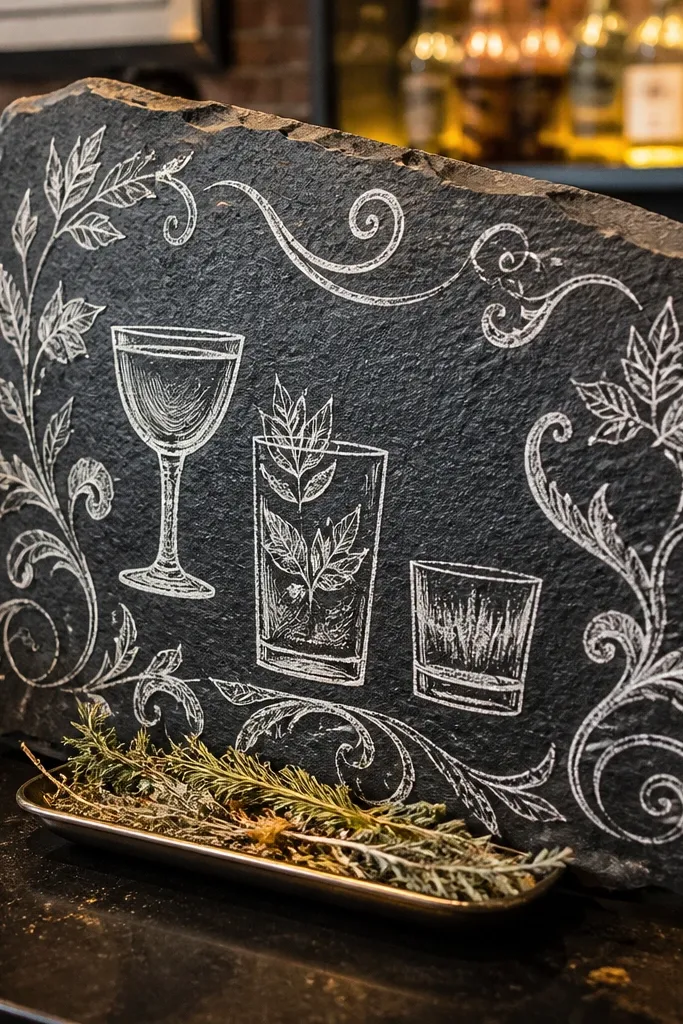
Slate is one of the few rustic materials that looks modern because it has a clean, dark surface and natural edge texture. White chalk lettering pops hard in photos and looks classic without needing extra decor. Add a tiny dried herb sprig tray at the bottom for texture and to keep the sign from looking flat. This works best for bars, drink stations, and late-night snacks where people gather and take pictures.
Start by writing on slate with a consistent lettering size and spacing so it looks professional in close-ups. Then pack slate in a rigid box with bubble wrap and keep chalk in a separate small pouch. Finally, place the sign on an easel under soft light so chalk doesn’t smear from glare or hands.
Quick tipUse chalk markers if you want cleaner lines and less dust on camera.
Skip thisAvoid greasy slates — fingerprints and smudges show up instantly in flash photos.
21. Wood Box Centerpiece with Candle and One Statement Flower
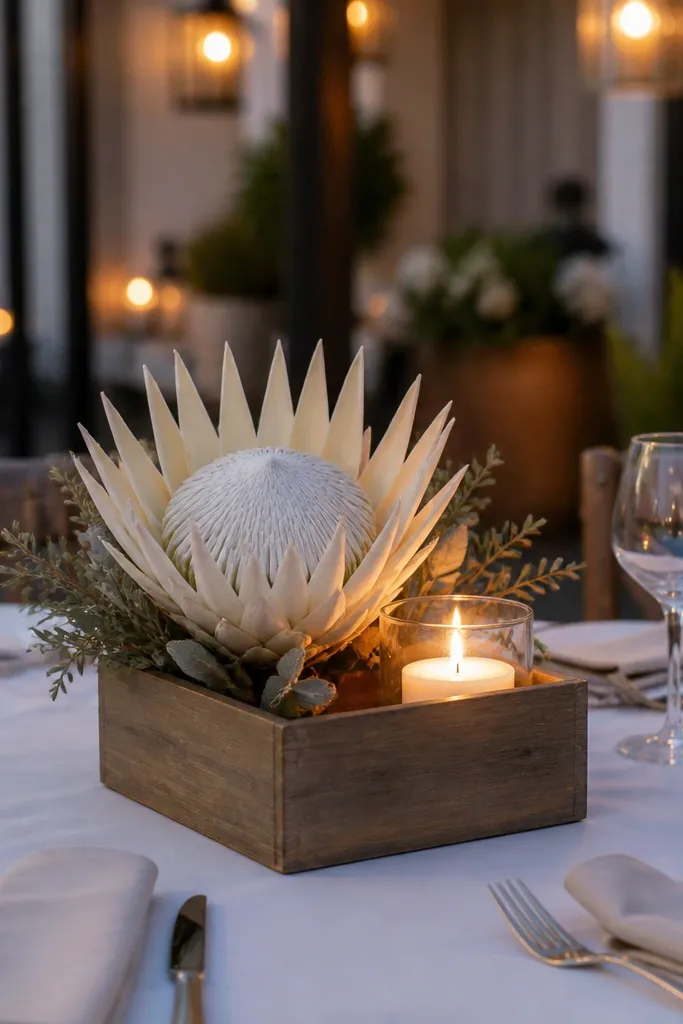
This centerpiece formula looks expensive because it limits the number of focal elements. One statement flower in the center creates a clear subject, while a candle adds glow and height without extra bulk. Use a wooden box with clean edges so it reads modern rustic rather than messy crates. It’s perfect for round tables where you need something photogenic from above and not too tall.
Start by selecting a box size that fits the table spacing — aim for about 12-14 inches long for most round tables. Then pack the box empty, and bring the candle and flower separately in padded containers. Finally, assemble on-site by securing the flower stem in floral foam or a small insert and centering it exactly over the candle.
Quick tipMark the box center with a tiny piece of tape so the flower placement stays dead-center.
Skip thisSkip mixed heights of multiple flowers — it creates a busy mound that looks uneven in overhead shots.
22. Modern Rustic Welcome Table with Black Metal Frame and Burlap Back
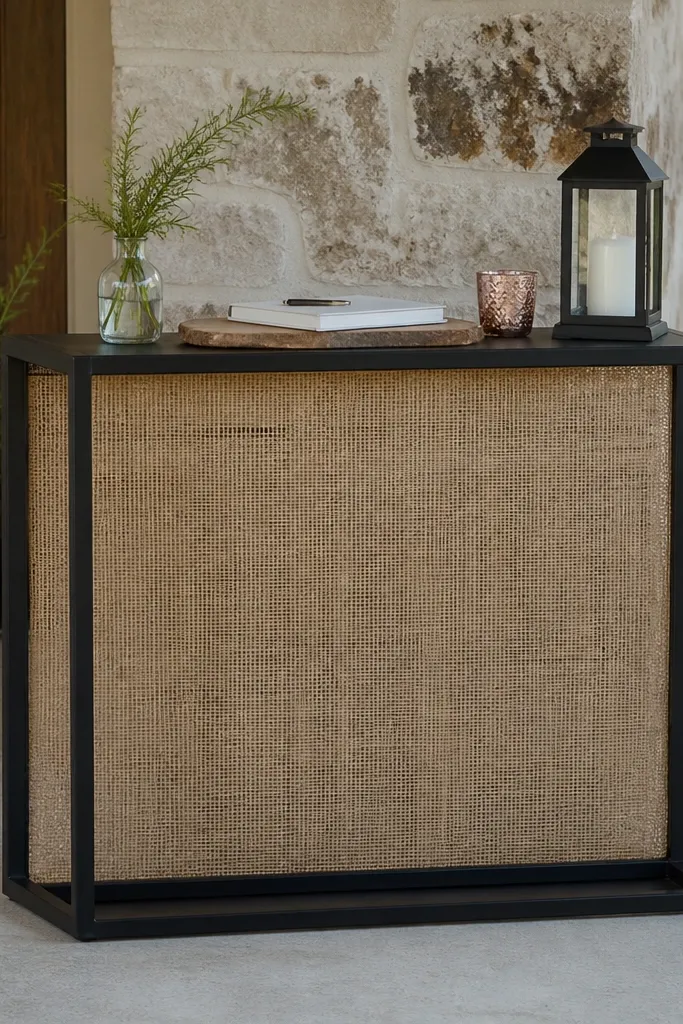
A black metal frame makes burlap look intentional instead of costume-level farmhouse. The frame gives straight lines for modern contrast, and the burlap adds texture that feels rustic in close photos. This setup is ideal for guest books, card boxes, and small welcome displays where you need a background that won’t blend into the venue. It’s especially photogenic against light walls and barn doors.
Start by choosing a black frame size that matches your table width and leaves room for a guest book and a pen holder. Then pack the burlap backing flat in a folder and assemble the frame first at the venue. Finally, attach burlap with clips or zip ties so it stays taut and doesn’t sag in photos.
Use a lint roller on burlap before assembly; it shows fibers under flash.
Don’t pin burlap randomly — wrinkles and loose corners show up in every guest photo.
23. Stacked Vintage Books with Rust Ribbon and Dried Stem Topper
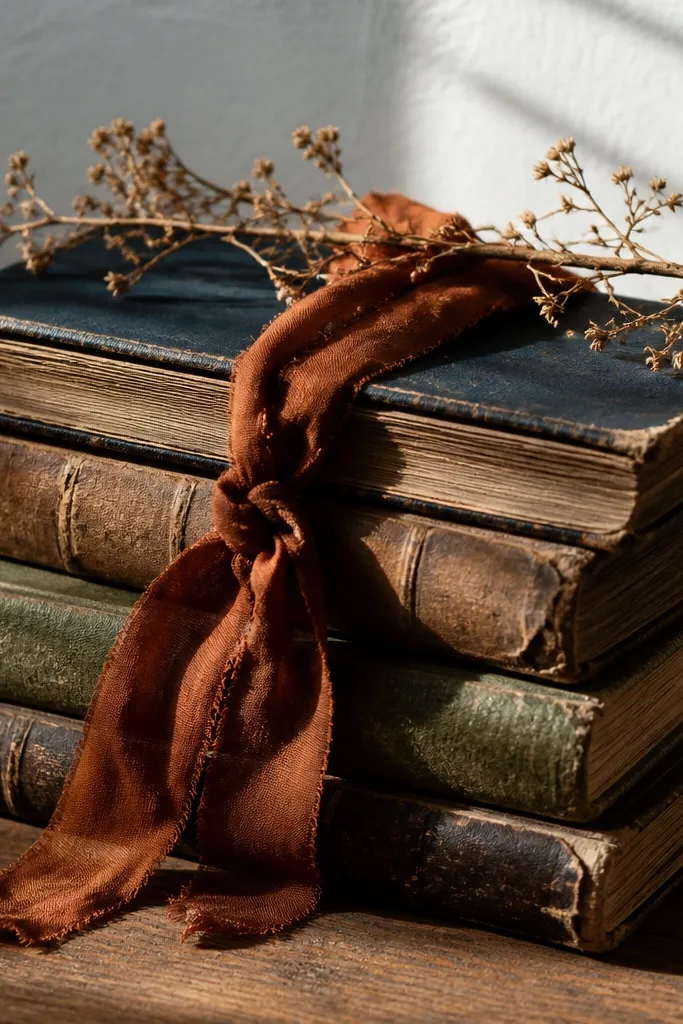
This is a small decor move that makes tables look styled without adding height everywhere. Stacked books create a gentle lift, and a rust ribbon ties the palette together with the rest of your wedding. Add one dried stem topper so the scene looks like it has a focal point. It suits dessert tables, gift tables, and side tables where you want photo detail but don’t want bulky centerpieces.
Start by selecting book spines in neutral tones (cream, tan, faded brown) and checking they’re stable when stacked. Then wrap books in tissue and pack them in a flat box so corners don’t get crushed. Finally, assemble on-site by tying the ribbon first and then placing the dried stem in a small vase or taped holder on top.
Quick tipUse a thin clear tape strip under the ribbon ends so they don’t slip when guests bump the table.
Skip thisAvoid bright modern book covers — they fight the rustic palette and look out of place.
24. Charcoal Metal Candle Wall with Cream Votive Ledge
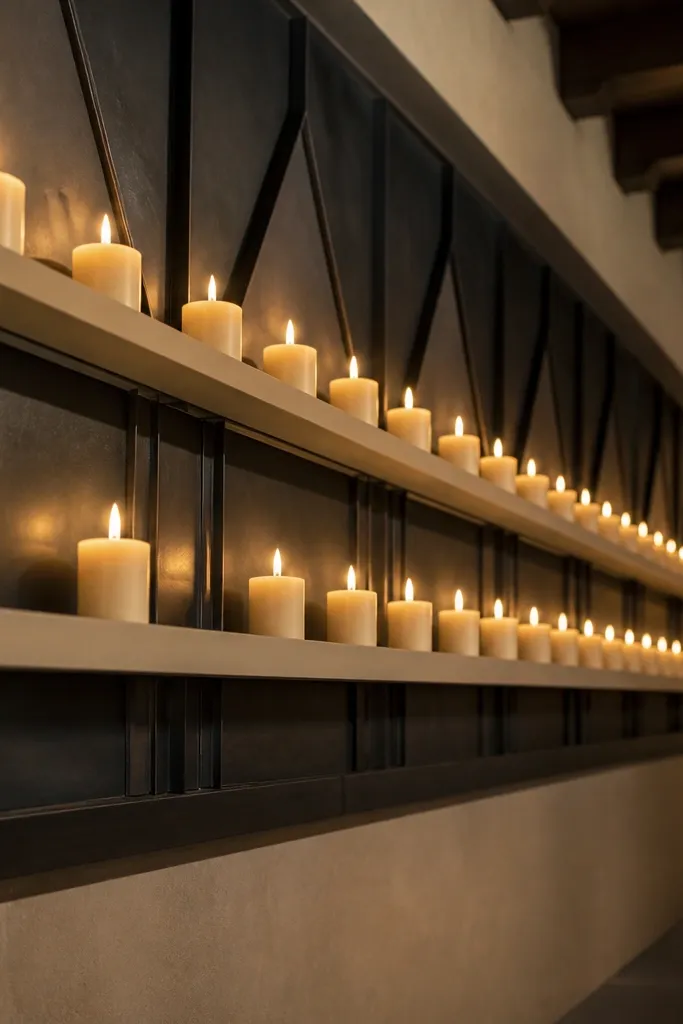
This decor turns rustic into something architectural. A charcoal metal candle wall with a shallow ledge makes the whole area look intentional, not “extra stuff on a table.” Cream votives throw warm light up the metal, so photos look soft even when the venue is bright. It also works for people who want rustic but do not want fake-looking florals everywhere. This is especially good for fall and winter weddings when you want the space to feel cozy from the first photo.
First, pick a candle wall size that matches the space behind it. For a standard ceremony photo, aim for a piece about 24-36 inches wide and 18-24 inches tall, then place it 3-6 feet from the main seating so it doesn’t block faces. Next, style the votives with cream glass, then keep the rest of the backdrop plain — think cream curtain or bare wood paneling. For travel planning, budget about $120-$250 to rent or buy the candle wall and $25-$60 for votives if you’re not using your own. If you’re booking a venue, reserve the candle wall pickup or delivery window early because many rental companies won’t guarantee last-minute timing.
Quick tipBring a small pack of extra votives and spare wick tabs. If one candle looks cloudy, swapping it takes 30 seconds and saves a bad photo.
Skip thisDon’t mix too many candle colors — charcoal + cream needs restraint or it turns cluttered fast.
25. Terracotta + Cream Tabletop Terrarium Lanterns
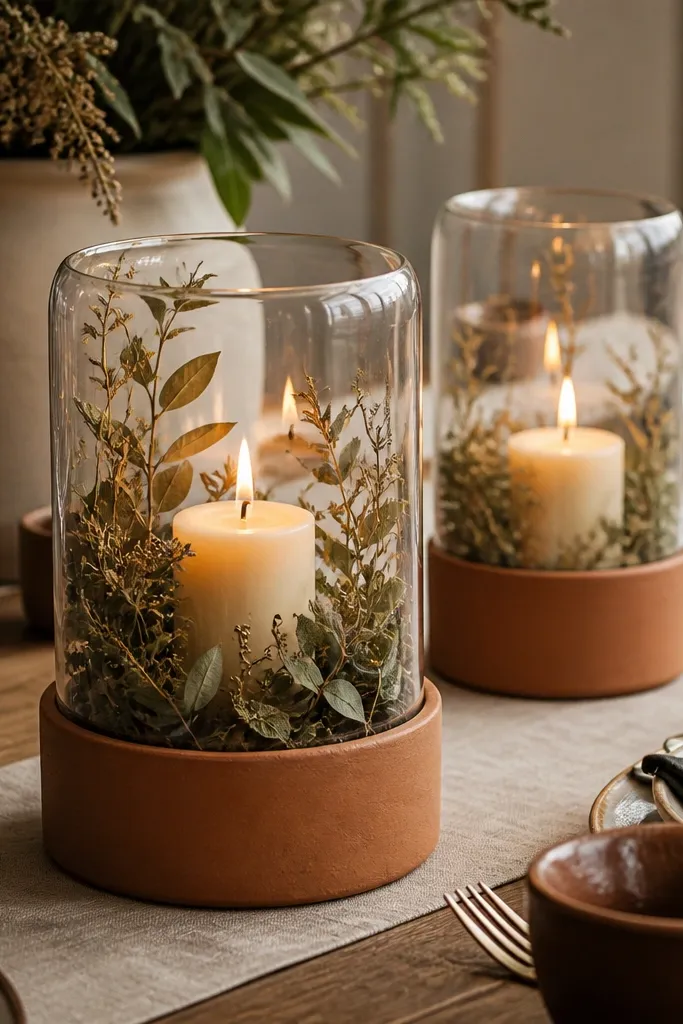
These look like modern rustic terrariums, not generic lanterns. A terracotta base lantern with a clear top lets you see the candle and dried greenery, so the centerpieces read clearly from across the table. The cream candle glow makes the terracotta look warmer in photos, which is the whole point for “modern rustic” styling. It’s a strong choice when you want décor that’s easy to place and still feels designed. Late summer through early fall is the sweet spot because dried stems and warm tones photograph best with natural daylight.
Start by choosing lanterns in two heights so the tablescape has rhythm. Aim for 4-6 lanterns per long table, with taller ones at the ends and the shorter ones spaced evenly down the middle. Next, fill each lantern with a simple “inside layer” — dried eucalyptus-style sprigs or wheat, then a cream candle centered on top of the stems. Travel-wise, plan on about $80-$180 for lanterns depending on size and whether you rent or buy; add $20-$50 for candle refills. Book rentals or purchase supplies at least 3-4 weeks ahead so you can match heights and color, and transport them flat if you’re driving — lanterns with detachable tops are easier to pack.
Quick tipIf you’re flying, skip glass-heavy lanterns and go for terracotta frames with a removable inner candle holder. It’s lighter and reduces break risk during baggage handling.
Skip thisDon’t overfill the lanterns with loose stems — they fall into the candle zone and look messy in photos.



