
1. Ivory Bud Vase Row With Dusty Rose Mini Blooms
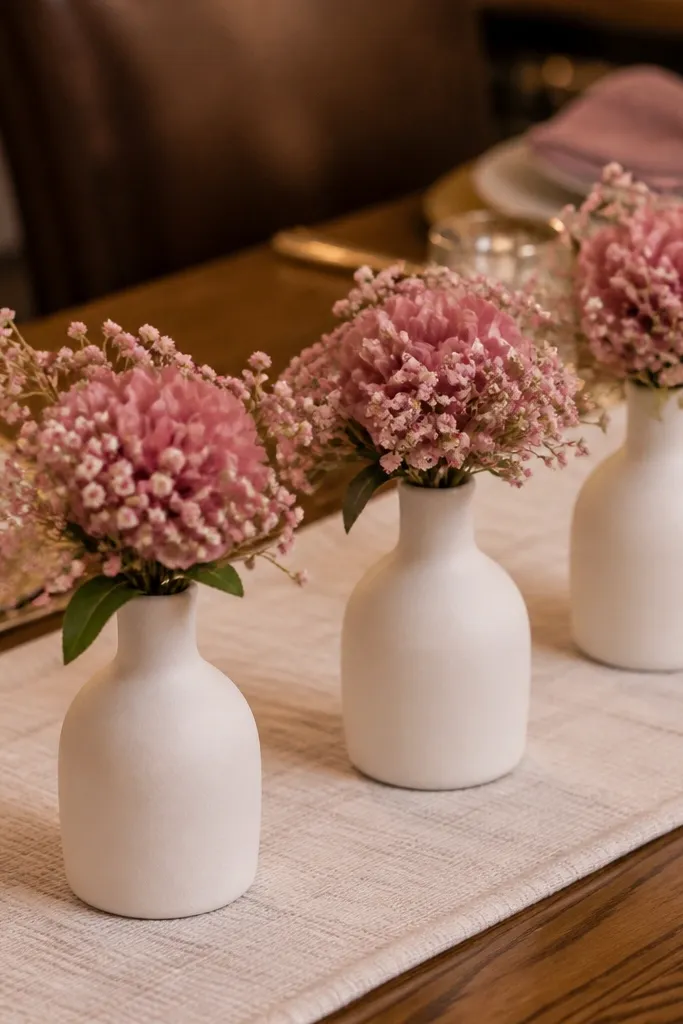
This one reads expensive because it’s clean, tall enough to show shape, and it repeats the same container three times. Use mini blooms like baby’s breath, small roses, or faux peonies cut into short stems so the table doesn’t look overgrown. The ivory vases soften the whole table in photos, especially under warm overhead lighting. It suits bridal dinners, micro-weddings, and any venue where you want decor that doesn’t block conversation.
Quick tipCut stems so the tallest vase is only about halfway up the napkin holder height — it keeps photos flattering and guests comfortable.
Start by laying a cream or ivory runner down the center so the vases have a matching base. Then fill three bud vases with water (or a floral foam insert wrapped in plastic) and arrange 5-7 stems per vase, keeping the height within 2-3 inches of each other. Finally, add a thin strip of gold ribbon tied around each vase neck, or skip ribbon and use a gold-painted vase if you find one cheap at a thrift store. Budget tip: mix real filler flowers for scent and faux for the main blooms so you spend less.
Skip thisDon’t use mixed whites like bright white and eggshell — it makes the whole row look mismatched.
2. Gold Candle Cluster on a Mirrored Tray
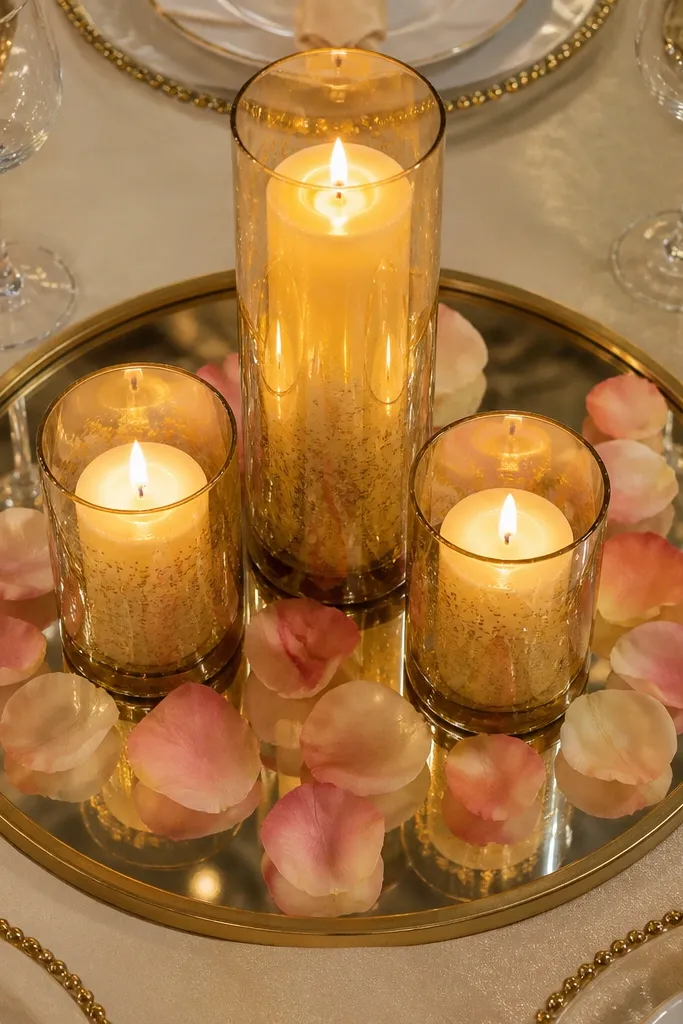
Candles instantly make a budget table look planned, and a mirrored tray makes the whole cluster look bigger in photos. Go for three heights: one tall candle, two shorter ones, all in warm gold glass or gold-painted holders. Scatter a small amount of rose petals (real or faux) around the base so the candle light catches texture. This works best for evening receptions, but it’s also great indoors because the mirror bounces warm light across the table.
Quick tipUse warm white LEDs if you need safety — cool white looks harsh on skin in photos.
Start by buying a mirrored tray the size of your center space, usually 12-18 inches wide for a standard round table. Then place the tall candle in the center and set two shorter candles at 4-6 inches away, adjusting until the cluster looks balanced. Finally, add a thin ring of petals and place a single small bud vase with one stem at the edge if you want more height. If you’re using LED candles, put them in real glass holders so they read like the real thing.
Skip thisDon’t overload the tray with too many candles; five-plus makes it look cluttered and cheap fast.
3. Clear Jar Buds With Floating Tea Lights
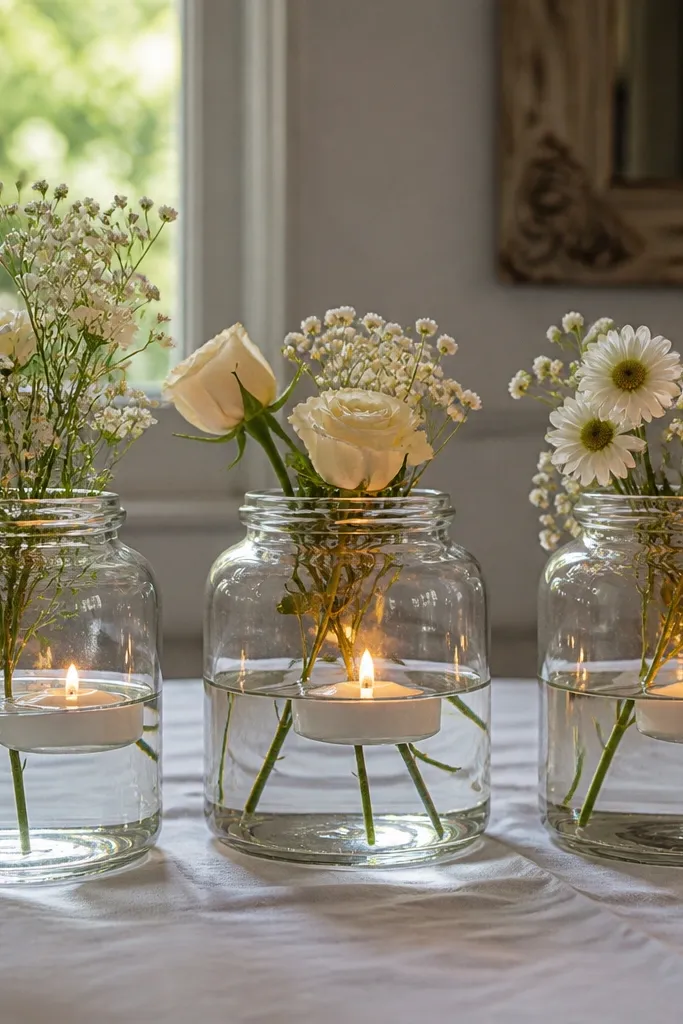
Clear jars are a budget hack because they look sleek and let the candle glow show through. The floating tea light effect is what makes it photogenic: you get a warm circle of light inside the jar, not a candle sitting on top. Fill with water and keep stems short so they don’t tangle, then add one or two flower types for a clean look. This is perfect for spring and summer weddings because it feels airy and light-reflective.
Quick tipUse a jar filler like clear glass beads or Epsom salt for a frosty look if you don’t want petals.
Start by choosing jars with similar shapes, ideally 3-5 jars per table depending on your table size. Then cut stems to 3-5 inches and place them in water so the flowers sit above the tea light level. Finally, add a floating tea light (real or LED) and secure a thin ribbon around the jar neck if you want a finishing touch. If you’re traveling with these, drain and re-fill at the venue to prevent spills.
Skip thisDon’t use tall stems — they make the jars look messy and can tip when guests bump the table.
4. Linen Napkin Wraps as a Mini Bouquet Centerpiece
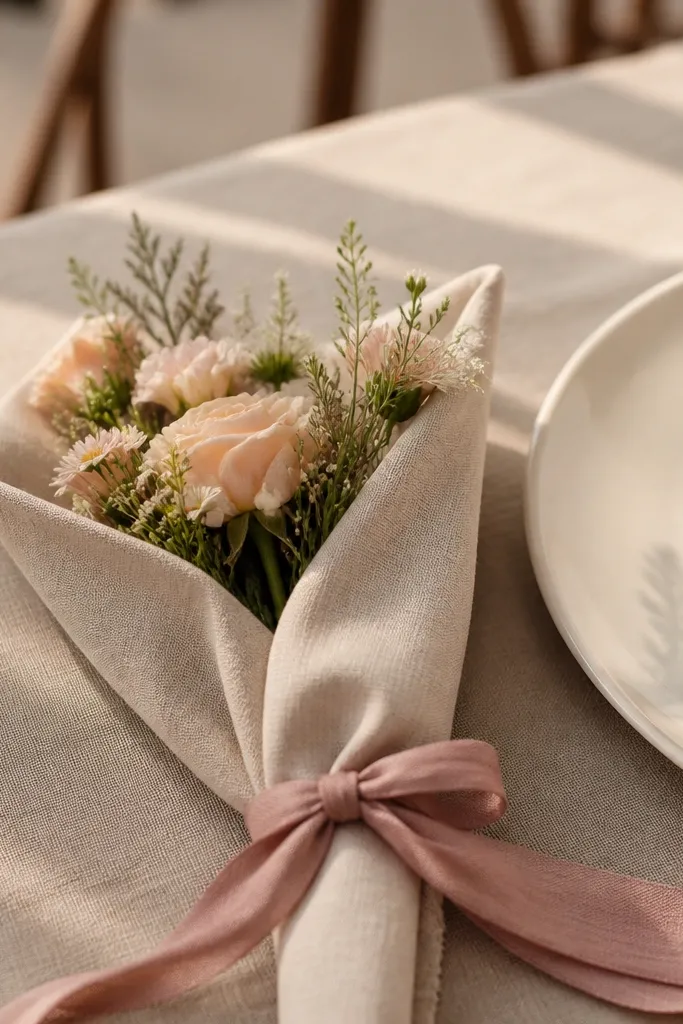
This is one of the cleanest “wedding” looks you can do on a budget because it doubles as both decor and a place setting accessory. Wrap a small bunch of flowers (or faux stems) inside a linen napkin, then secure with a ribbon that matches your palette. The folded fabric creates soft shadows in photos, and it keeps the flowers from spreading out. It suits rustic-chic, boho-lite, and garden weddings where you want decor that looks handmade but still polished.
Quick tipPick ribbon widths 1-1.5 inches for that “bride table” look; thin ribbon reads more casual in photos.
Start by ironing or steaming napkins so the folds look crisp, then lay a napkin flat and place 3-5 stems in the center. Roll or fold the napkin around the stems and tie with ribbon, keeping the knot at the top third. Finally, position each mini bouquet at the center of the table or at each place setting for a coordinated look. Budget move: buy one bunch of greenery and use it across all bouquets, then add small accent blooms on top.
Skip thisDon’t tie too tight — squashed stems look tired and cheap.
5. Sage Green Runner With White Pillar Candle Lines
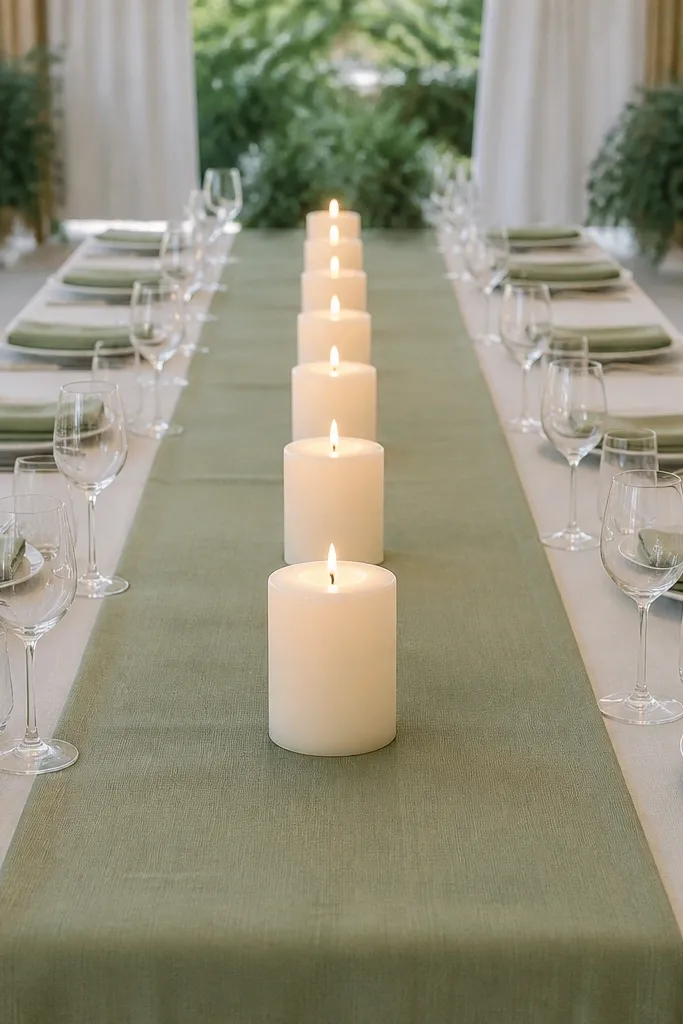
A runner plus candle line makes the table look styled because it creates straight visual structure. Sage green is forgiving — it hides small imperfections in the table surface and looks great with cream candles. Pillar candles in white or ivory give you that classic wedding vibe without needing expensive florals. This works especially well for indoor venues with dim lighting or outdoor receptions where you want decor that doesn’t blow around.
Quick tipChoose candle heights between 3-5 inches; taller ones block faces in photos at guest height.
Start by placing a sage runner across the center length of the table, leaving equal margins on both sides. Then set three pillar candles along the runner, spacing about 8-10 inches apart depending on table size. Finally, add one low greenery wreath or a strip of faux eucalyptus along the runner edges to frame the candles. If you’re using real candles, keep them in holders that won’t melt into the runner.
Skip thisDon’t mix candle colors like white and beige — pick one shade family for a clean look.
6. Champagne Glass Votive Row With One Rose Per Jar
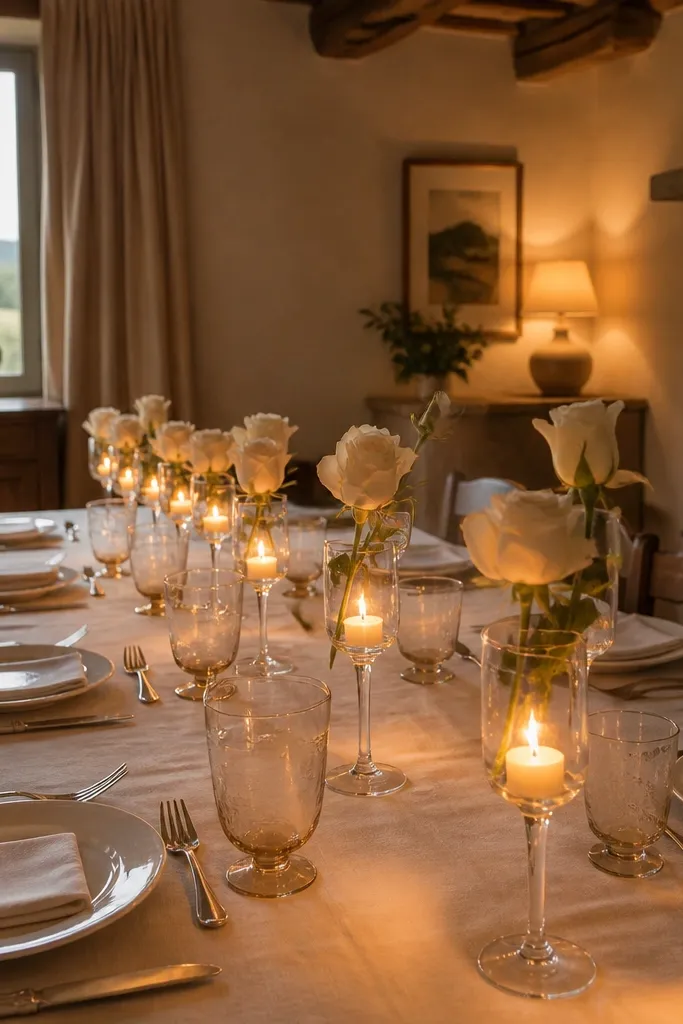
This idea is minimal but still looks intentional because each votive has a single bloom. Champagne glass has a warm tint that flatters skin and makes the table glow in photos. The “one rose per jar” rule keeps the decor from looking cluttered and stops you from overbuying flowers. It’s ideal for smaller tables, sweetheart tables, and venues where you want the decor to frame the couple without stealing attention.
Quick tipUse rose stems at 2-3 inches above the rim so they look like they’re floating, not drooping.
Start by lining up 6-10 votive glasses evenly down the center, spaced 3-4 inches apart. Then place a short rose stem (or faux rose) in each glass and add a tea light or LED candle beneath or inside depending on the glass design. Finally, tie a thin piece of gold twine around a few jars only, so the look stays airy. Budget tip: buy one bag of foam roses and cut them down to single-stem height.
Skip thisDon’t add extra filler flowers to every jar — that’s where minimal turns messy.
7. Thrift Teacup Centerpieces With One-Color Flower Clusters
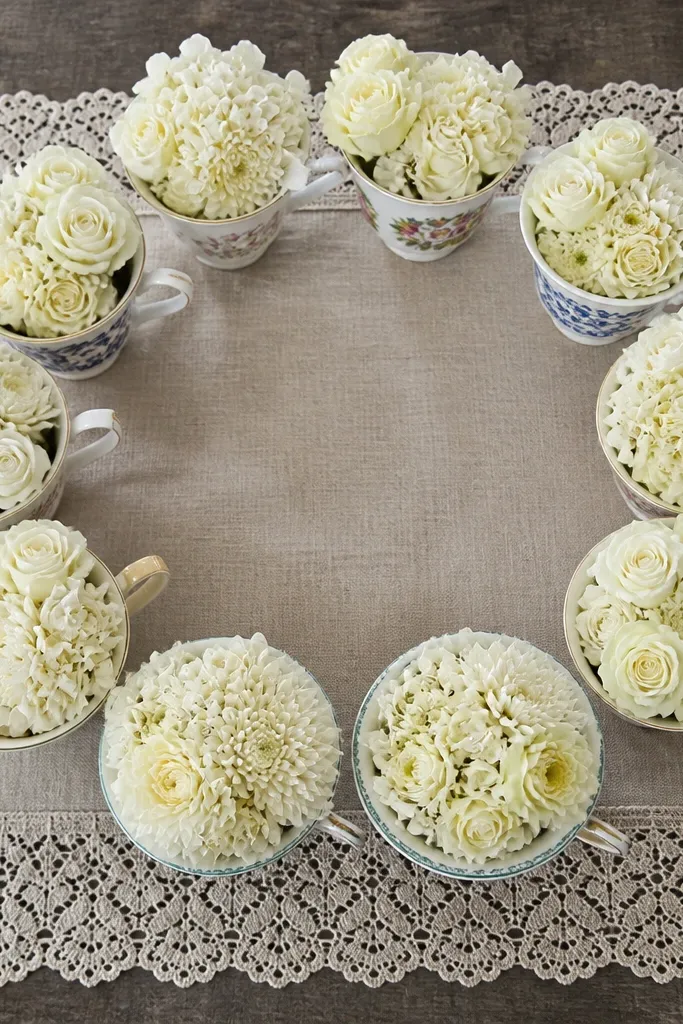
Thrift teacups look charming in photos because they add shape, history, and detail without costing much. To keep it elegant, you match only one flower color across cups and let the cup styles do the variety. The key is using cups that can hold water safely or using a small foam insert wrapped in plastic. This suits brunch receptions, garden venues, and any wedding that leans vintage.
Start by collecting 6-12 teacups in one color family (cream, white, or pale gold) even if the patterns vary. Then insert a small foam chunk inside a plastic bag, secure stems, and keep the height around 4-6 inches. Finally, place cups on a tray or directly on the table with a consistent spacing so photos look planned. Budget move: skip buying new saucers and use only the cups if you’re short on time.
Add a tiny gold spoon or a folded napkin under each cup to make the styling read intentional.
Don’t mix too many flower colors — it kills the teacup charm by making the table look random.
8. Transparent Ombre Balloons as Table Height Accents
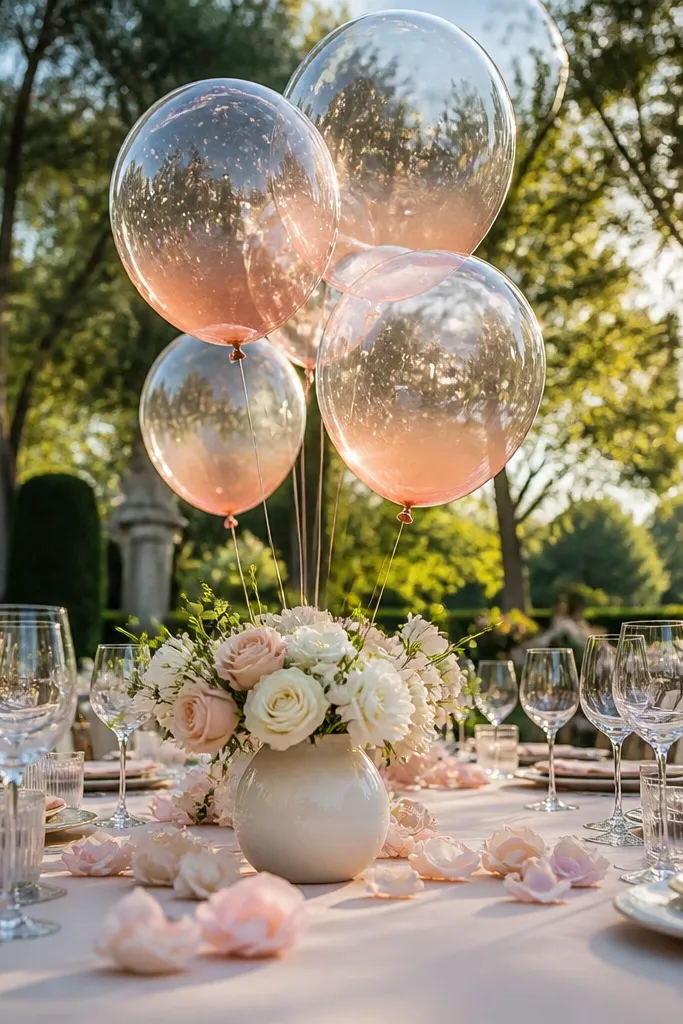
Balloons might sound like a party move, but clear balloons with soft tint look gorgeous in wedding table photos because they catch light and add height without bulk. Pair them with a low centerpiece so the table stays open for guests. Choose an ombre like clear to blush or clear to champagne — it blends with florals instead of fighting them. This works best for indoor venues with good overhead lighting and for evening receptions where balloons reflect warm tones.
Quick tipUse matte ribbons, not shiny ones, so reflections don’t look harsh in photos.
Start by choosing 2-4 balloon clusters per table, tied to small weighted bases you can hide under a runner. Then place the low centerpiece in the center and anchor balloon strings to the table or chair backs so they don’t drift. Finally, keep balloon height around 12-18 inches above the centerpiece so it frames photos without blocking faces. Budget tip: buy a mix pack with a few colors and use only one tint family per table.
Skip thisDon’t tie balloons too low — they bounce and ruin table symmetry in pictures.
9. Mini Terrarium Center With Moss and One Flower Stem
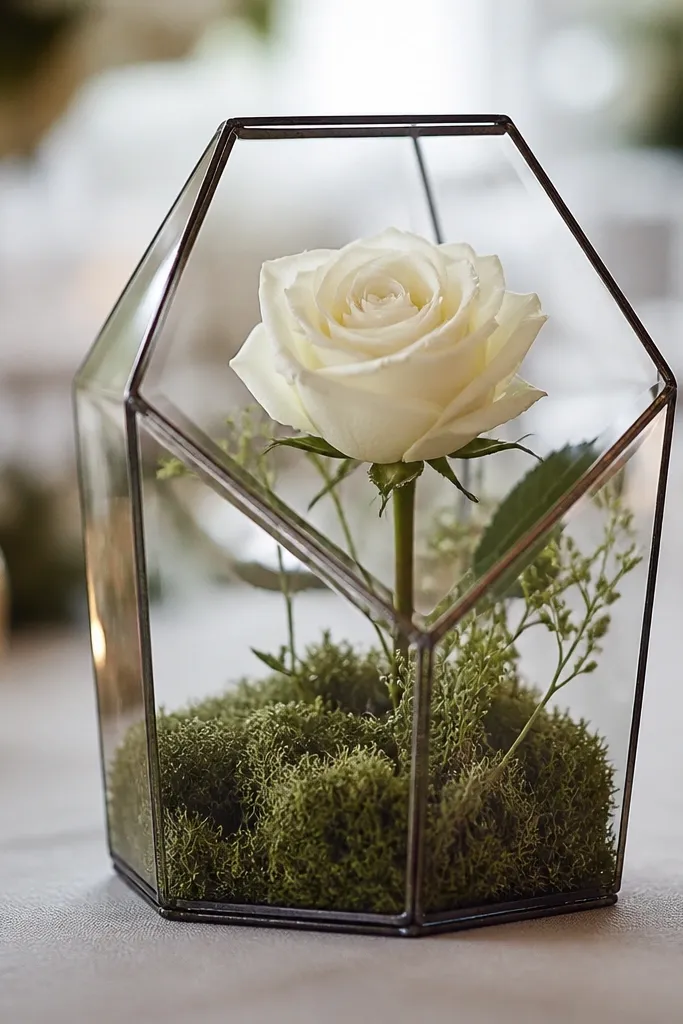
Terrariums look high-end because glass + greenery gives instant depth. The budget-friendly version is simple: moss base, one flower stem, and a clean background. Photos love the contained shape, and the moss hides messy foam. This works for spring, winter, and indoor venues where you want something calm and sculptural. It’s also easier than full centerpieces because you’re not building height with many stems.
Quick tipPlace terrariums near the light source, not in the darkest corner, so glass glare doesn’t hide the flower.
Start by grabbing small glass containers or jars, then line the bottom with a thin layer of moss and a hidden foam plug. Next, insert one flower stem (like a single rose, calla, or faux peony) so it sits centered and slightly angled. Finally, add a pinch of decorative stones on top if you want sparkle and wipe the glass so fingerprints don’t show. Budget move: buy moss from craft stores and reuse it across multiple containers.
Skip thisDon’t overfill with stones and extra plants — it looks like craft clutter.
10. Citrus Slice Candles With Orange Peel Garnish
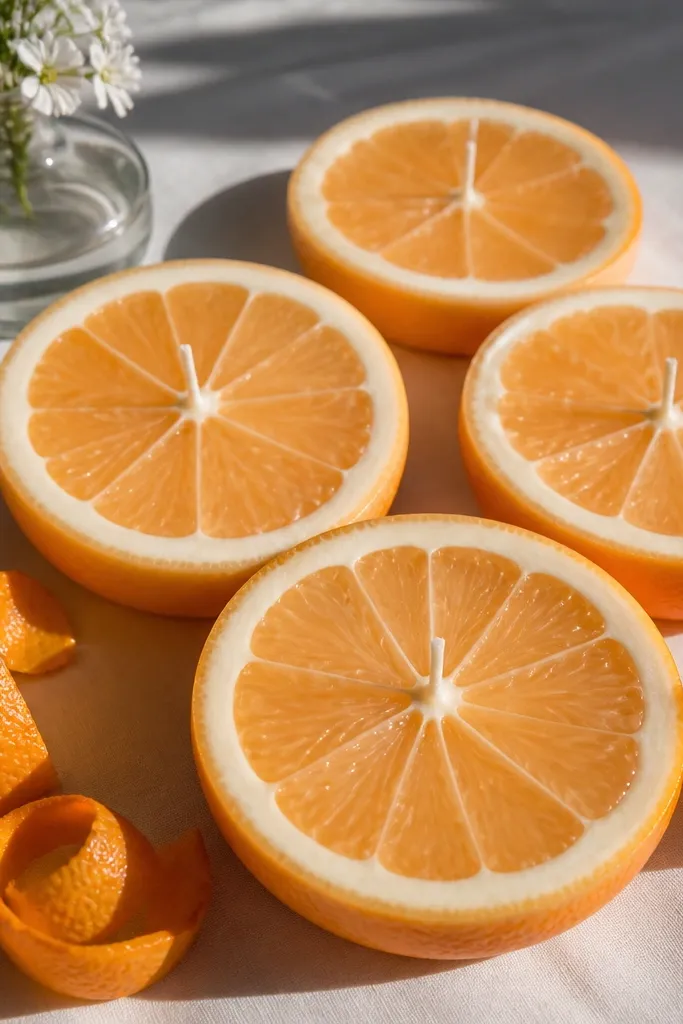
If you want “pretty and different” without spending on florals, citrus does it. Citrus slice candles and orange peel garnish create a warm, summery look that reads clean in photos. The color is controlled: bright orange against cream or white feels intentional. This idea fits summer weddings, brunch receptions, and destination dinners where you want decor that feels local and fresh.
Quick tipUse LED candles instead of real ones if you’re in a hot venue — citrus oils and heat are a hassle.
Start by using white pillar candles or tealights in clear holders, then place citrus slices (dried orange wheels) around the base. Add orange peel curls or cinnamon sticks if you’re going for a cozy look, but keep it minimal. Finally, wipe the tabletop and keep the garnish in a tight ring so it doesn’t look scattered. Budget tip: dried citrus and peels are cheap in bulk and last for multiple tables.
Skip thisDon’t add too many scents at once; strong potpourri can smell like a craft store.
11. White Paper Fan Center With Soft Pink Peonies
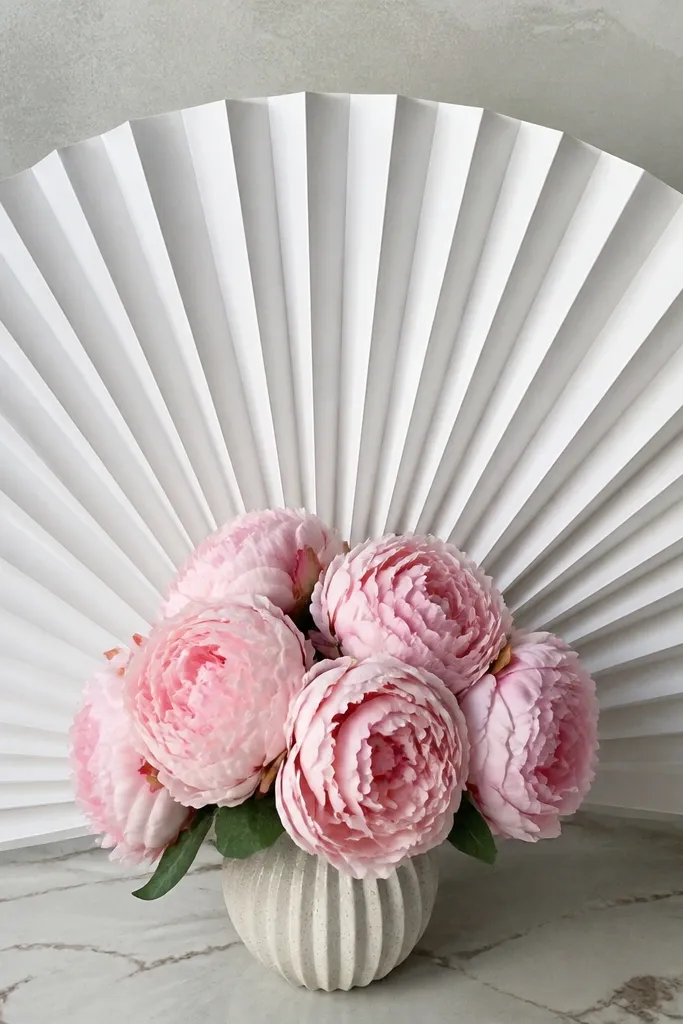
Paper fans are a cheap way to create a “photo wall” effect right on the table. It looks elegant when the fan is white or ivory and the flowers are one soft color like blush pink. The fan gives you a crisp backdrop that makes the flowers stand out, even if the arrangement is small. This suits indoor receptions, bridal showers, and any table where the venue backdrop is plain.
Quick tipMatch the fan color to your tablecloth, not to your flower — the fan should disappear and let flowers pop.
Start by making a fan from thick cardstock or buying pre-made paper fans, then secure it upright on a foam board base. Place a small bud vase or low floral foam insert in front of the fan so the flowers reach the fan’s lower third. Finally, add one ribbon tie around the fan base and keep the rest of the table decor simple. Budget move: make 2-3 fans and reuse them across tables if your seating layout repeats.
Skip thisDon’t use thin tissue paper fans; they wrinkle and look flimsy in photos.
12. Monochrome Black Bud Vases With Cream Flowers
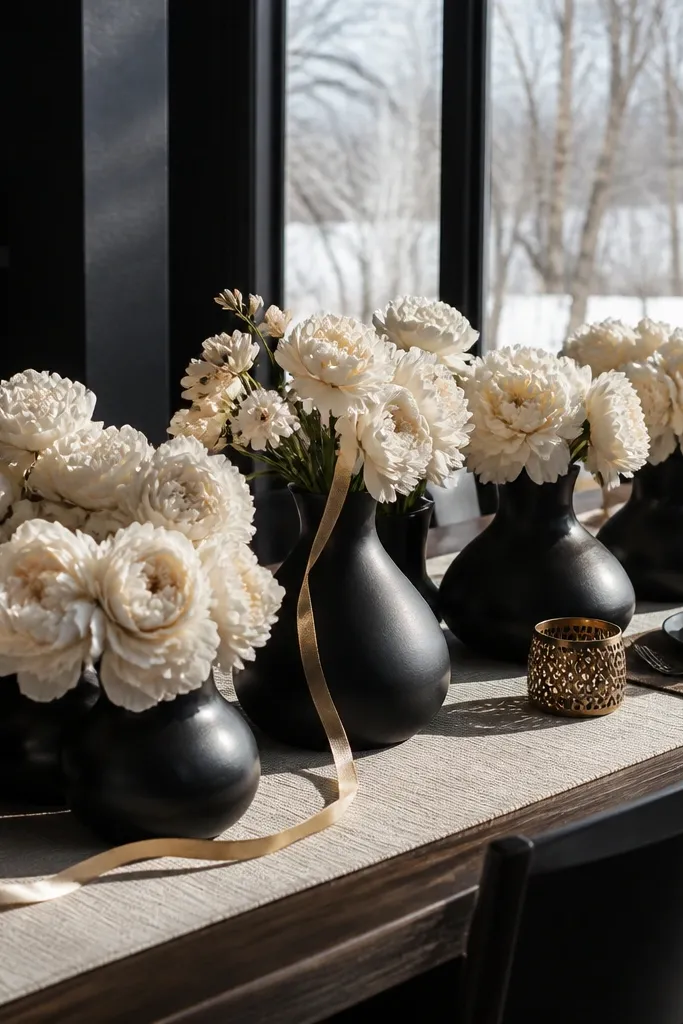
Monochrome black vases give you instant drama and make cream flowers look brighter. It’s the fastest way to get an elegant, modern wedding table without expensive materials. Keep the flower palette tight: cream, ivory, and maybe one hint of gold. This works for winter weddings, city venues, and anyone who wants photos that look bold instead of soft.
Start by choosing 3-5 black bud vases or small glass bottles in similar sizes. Then arrange 4-6 cream stems per vase, focusing on one flower type plus greenery. Finally, add a black runner or black charger plate underneath the tallest vase area so the whole look reads intentional. Budget tip: use matte black spray paint on thrift glass bottles after cleaning and drying.
Use faux flowers with realistic leaves; black vases show cheap stems more clearly.
Don’t mix glossy and matte black — pick one finish for a clean look.
13. Gold Foil Leaf Place Setting Accent That Doubles as Center
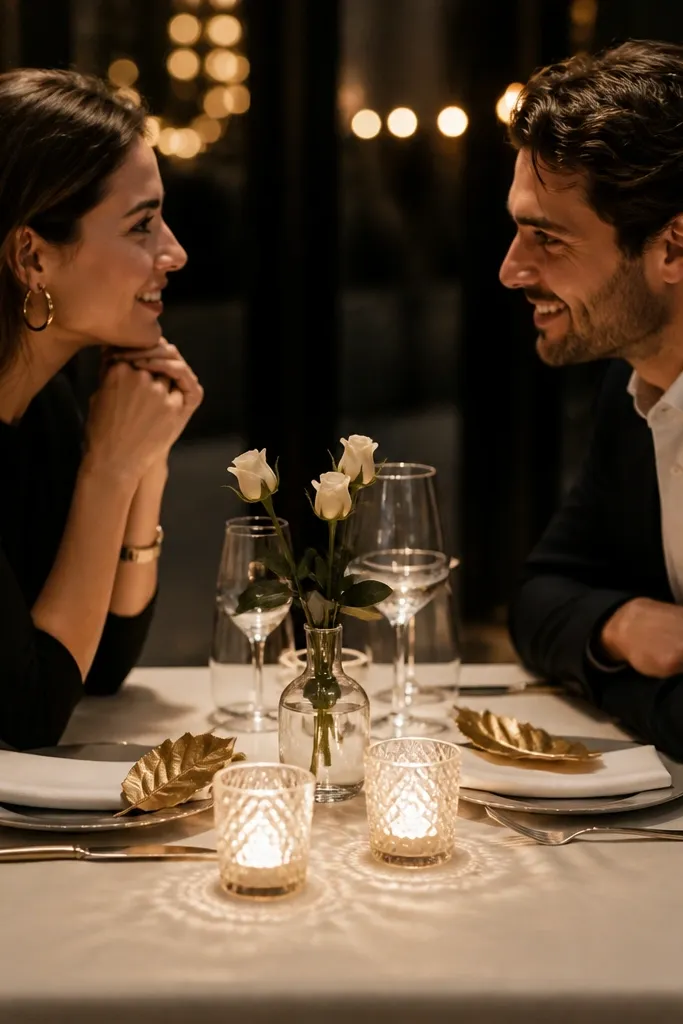
This is a smart way to make the table look decorated even when you keep the centerpiece low. Gold foil leaf accents catch light and give you that “designed” feeling without buying tons of flowers. You can place one leaf near each napkin or around the base of one small vase in the center. It’s especially good for minimalist venues where the table surface needs a little sparkle.
Quick tipKeep the number of accents even across the table for symmetry in pictures.
Start by buying gold foil leaf picks or faux leaf garland, then cut pieces so they’re 2-4 inches long. Then place a small bud vase or jar in the center with 1-2 stems. Finally, tuck foil leaf pieces around the vase base and near place settings so the table feels connected in photos. Budget tip: reuse the same leaf picks across multiple tables by keeping them in a small labeled bag.
Skip thisDon’t scatter foil leaves randomly; cluster them around one focal point.
14. Blush Blown Glass Bud Vases With Clear Water Sparkle
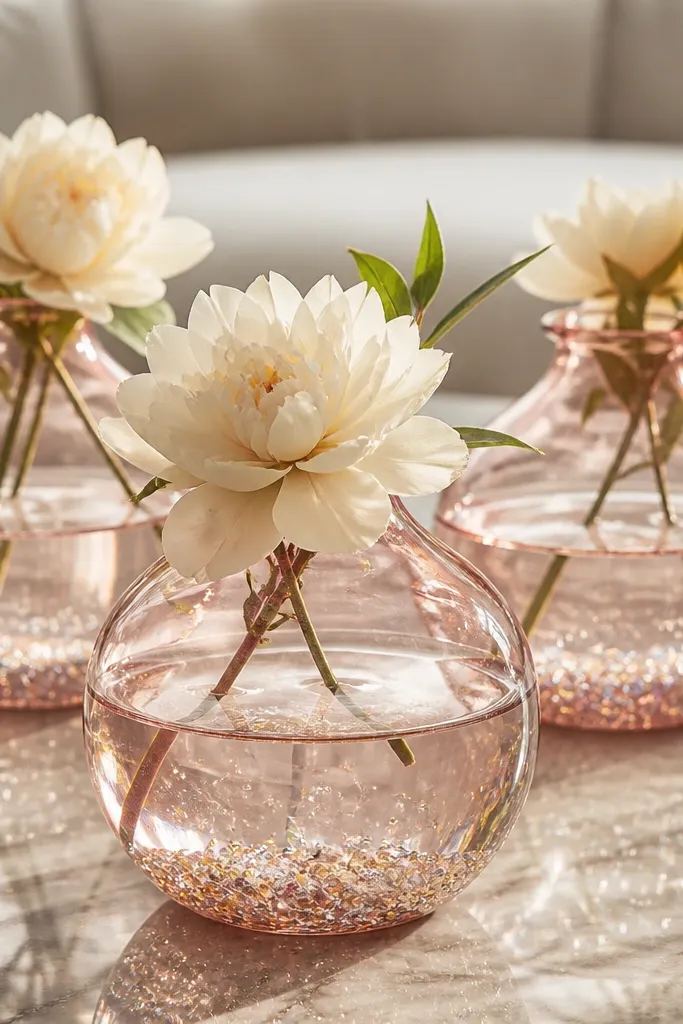
Blown glass looks pricey because the surface catches light in uneven highlights. Even if you’re using faux flowers, the vase texture does the heavy lifting. Fill with clear water and add a tiny amount of craft glitter or glass bead mix so the light sparkles in photos. This suits spring weddings and indoor receptions where you want a soft, feminine glow.
Quick tipWipe the outside of each vase with a microfiber cloth right before guests arrive.
Start by choosing 3-6 bud vases in blush or pale pink tint, ideally with irregular glass texture. Then arrange short stems so the flowers sit above the waterline by 2-3 inches. Finally, add a small pinch of clear bead glitter mix to the water so it catches light without looking messy. Budget move: buy one pack of beads and spread them across all vases.
Skip thisDon’t overdo glitter; too much looks like craft supplies, not wedding decor.
15. Candle Lanterns With One Long Eucalyptus Stem
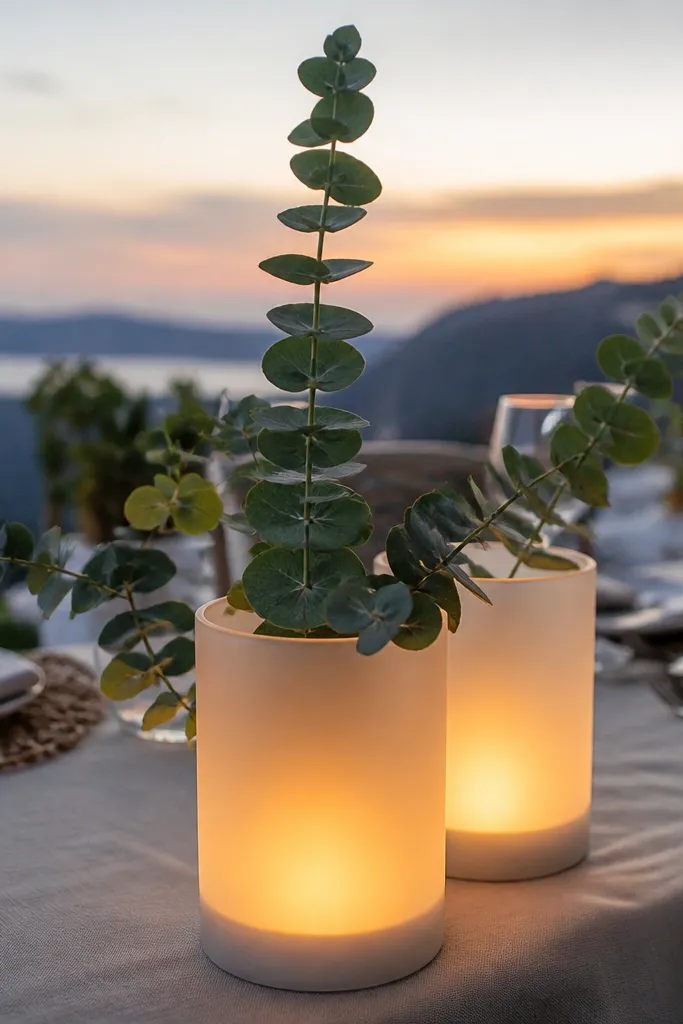
Lanterns create a framed glow, and adding one long stem makes the arrangement look intentional rather than empty. Use white lanterns with frosted glass for soft photos, then place an LED candle inside. Add a single eucalyptus stem that reaches above the lantern top by a few inches — it gives height without crowding. This works well for outdoor receptions because lanterns help control wind compared to open candles.
Quick tipIf the venue is breezy, weigh the lantern base with a small bag of sand hidden under the runner.
Start by choosing 2-4 lanterns and placing them evenly along the table runner. Then insert an LED candle and tuck the eucalyptus stem through the lantern opening or behind the handle so it doesn’t flop. Finally, add a small grouping of faux berries or none at all to keep the look clean. Budget tip: eucalyptus is often sold in cheap bunches; one bunch can cover multiple lanterns.
Skip thisDon’t stack lanterns too close; they look like a pile instead of a styled line.
16. Low Floral Foam Blocks Wrapped in Fabric
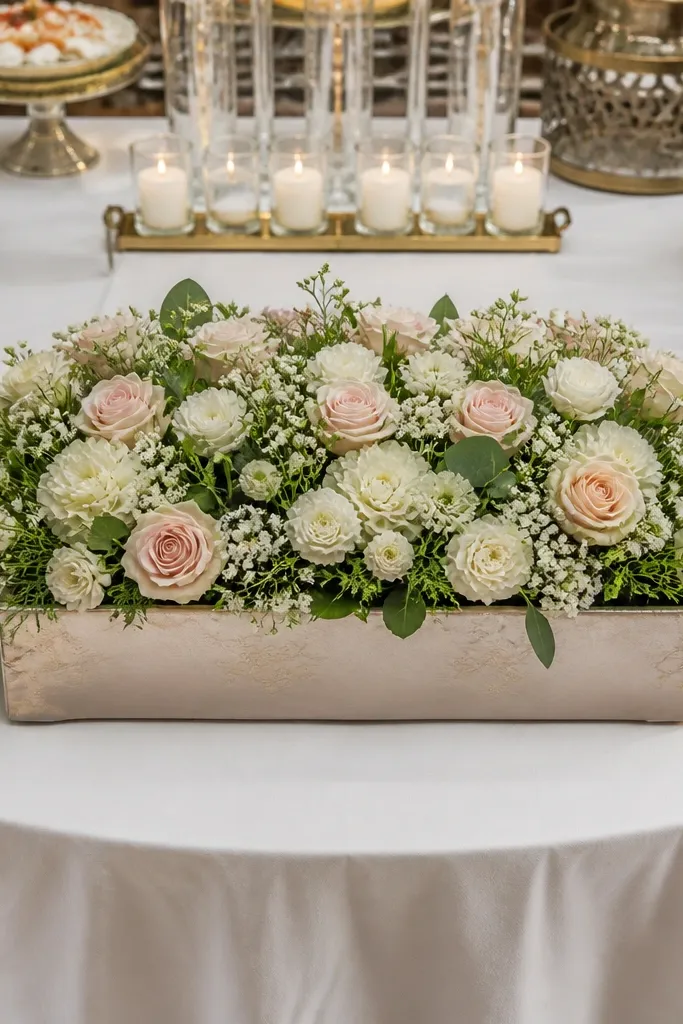
Low foam blocks look polished when they’re wrapped in fabric, because the sides look finished instead of showing foam. You get a wide, centered shape that photographs well from above. Use small flowers and greenery so the block looks full but not tall. This suits buffet tables, long banquet tables, and venues where you need decor that doesn’t block sightlines.
Quick tipMake the block slightly higher in the center than the edges so photos don’t flatten it.
Start by cutting floral foam into a long rectangle that fits your table center — aim for about 10-14 inches long. Wrap the foam in white or blush fabric and pin it so it doesn’t slip. Then insert stems in a grid pattern, keeping the top 2 inches covered and the sides tidy. Finally, add a thin ribbon border around the base for a clean finish. Budget move: use faux greenery for volume and real flowers only as accents if you want scent.
Skip thisDon’t use uncovered foam; the side texture shows in every photo.
17. Milk Glass With Peony-Style Faux Flowers
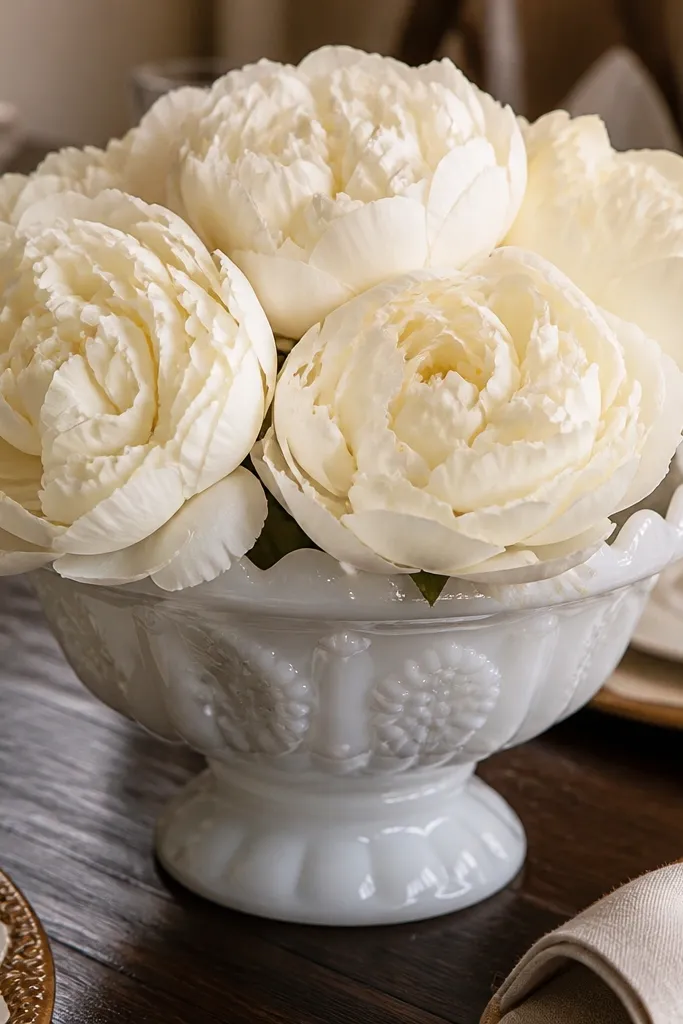
Milk glass gives you instant softness and a vintage wedding look. Pair it with peony-style faux flowers, because their layered petals read realistic even from a distance. This idea works great when you want a full centerpiece but don’t want tall arrangements. The milk glass also hides small imperfections in flower stems and makes the whole table feel cohesive.
Start by picking milk glass jars or vases in 2-3 sizes so the arrangement looks layered. Then cut stems and place them so the flowers fill the jar opening, keeping the overall height under 10 inches. Finally, add a small amount of greenery around the base so it looks natural. Budget tip: look for milk glass at thrift stores and clean it with warm water and dish soap.
Stick to one flower color family so the milk glass stays the background, not the competing star.
Don’t mix milk glass with shiny chrome candle holders; keep metals warm or vintage.
18. Rainbow-Free Palette: One Color Balloon Backdrop at Table Edge
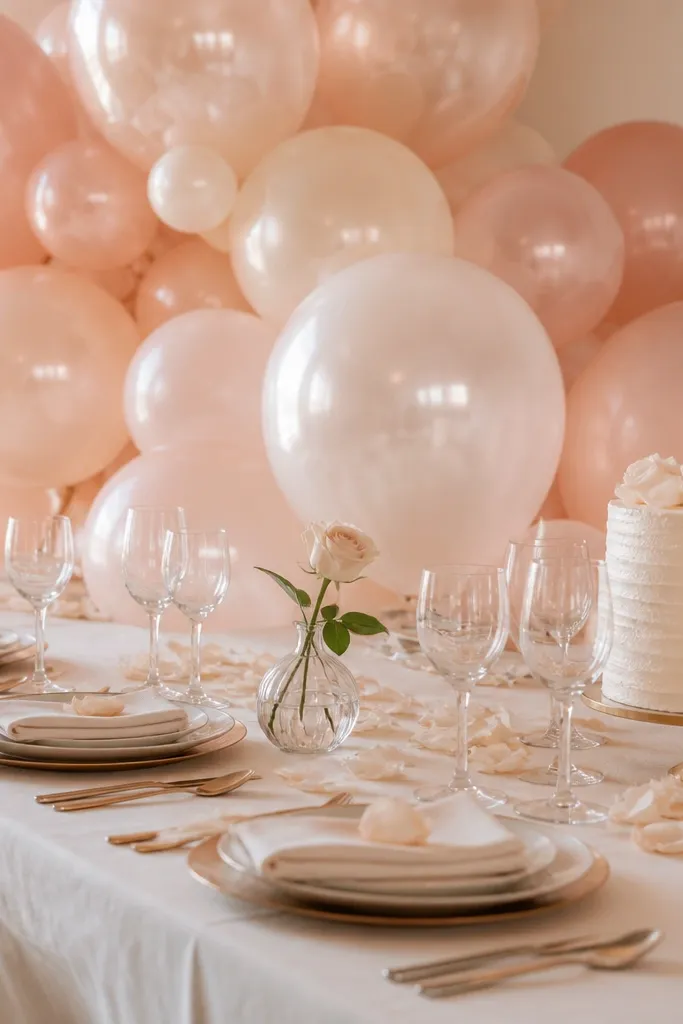
A balloon backdrop at the edge of the table can make your decor look styled even if the centerpiece is simple. Choose one color family that matches your palette — blush, champagne, or sage — and keep the centerpiece low. The balloons create a soft background for photos of place settings and cake, and they add height without building expensive structures. This is a smart move for destination weddings where you want impact with lightweight items.
Quick tipMatch balloon color to your napkin color, not your flowers, for a calmer look in photos.
Start by placing a small balloon cluster near the table corner or backdrop area, not dead-center. Then keep your centerpieces low so guests can see each other and the balloons become the photo background. Finally, use ribbon in the same color as your flowers and tie it to table legs or a weighted stand. Budget move: buy one balloon kit and reuse the same color across the reception if your layout allows.
Skip thisDon’t mix multiple balloon colors; it makes the table feel like a generic event.
19. Taper Candles in Paper Sleeve Holders
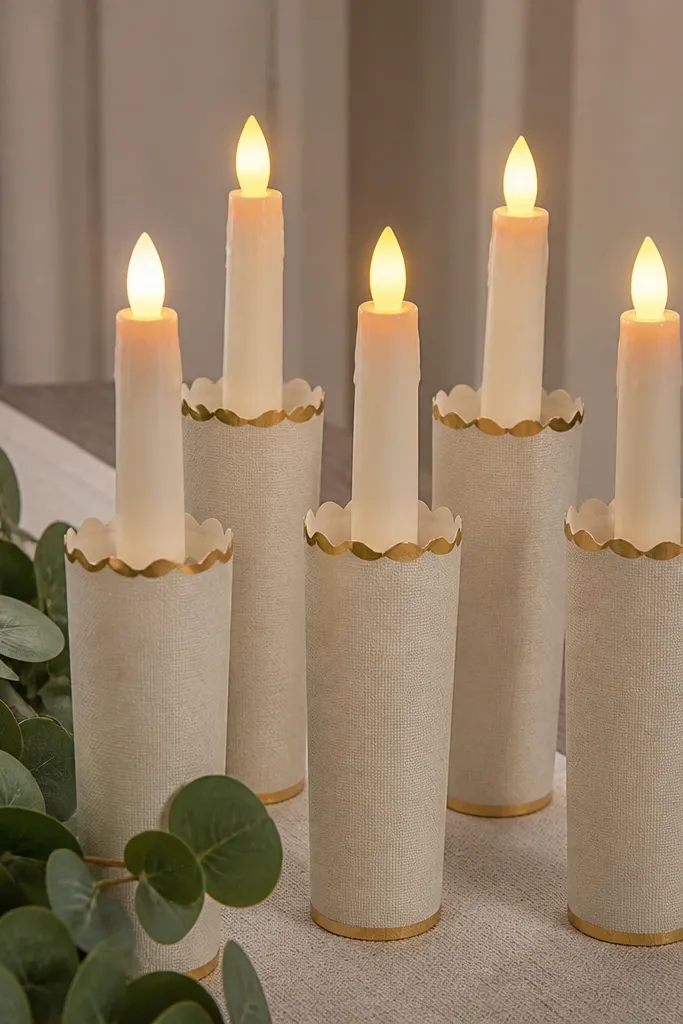
Paper sleeve candle holders look expensive because they create a custom finish around standard candles. If you choose sleeves in ivory linen-look paper or kraft with gold trim, the table looks styled fast. Add a thin strip of greenery or faux eucalyptus along one side of the candle group to soften the paper. This works for winter and fall weddings where you want cozy lighting and clean lines.
Start by buying taper candles and separate paper sleeve holders or making sleeves from thick cardstock wrapped tightly. Then set two candles in the center area of the table with a small greenery strip beside them. Finally, add a single gold element like a mini gold leaf pick or a tiny ribbon tie. Budget tip: make sleeves in bulk from cardstock and reuse them across events if you store them flat.
Use LED tapers if your venue has rules; the sleeve look still photographs the same.
Don’t use patterned sleeves with busy florals; keep them solid so the candles stay elegant.
20. One Bottle, Many Buds: Themed Green Bottle Cluster
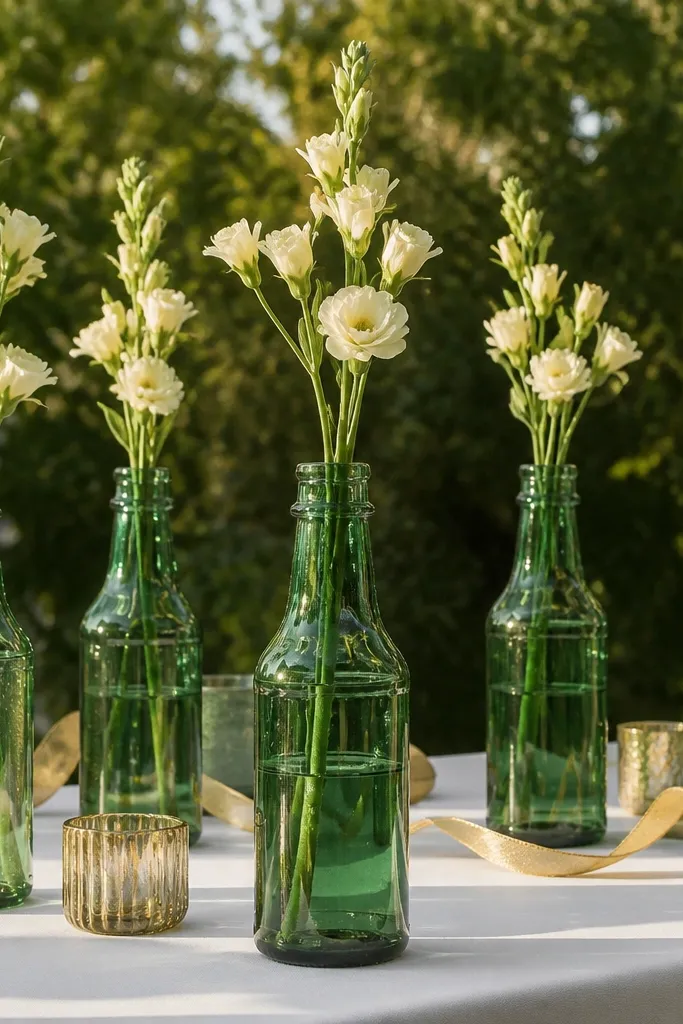
A bottle cluster looks curated when you keep the bottles in one glass tone and repeat bud flowers across them. Green bottles add depth and look great with cream flowers and warm gold accents. The key is spacing: leave a little air between bottles so the cluster reads intentional, not crowded. This suits garden weddings, rustic venues, and outdoor dinners where you want decor that feels natural.
Start by finding 6-10 small green bottles, either thrifted or bought as inexpensive glass decor. Then place them in a staggered pattern on a runner or charger plate group. Finally, fill each bottle with 2-4 short stems, keeping the flower heights within 3 inches. Budget move: buy one bunch of filler greenery and use it as the base across bottles.
If your bottles vary wildly in height, set them on small folded napkin pads so the cluster evens out in photos.
Don’t mix green bottle tones like emerald and clear; it looks careless.
21. Pearl Bead Rim Tray With One Center Vase
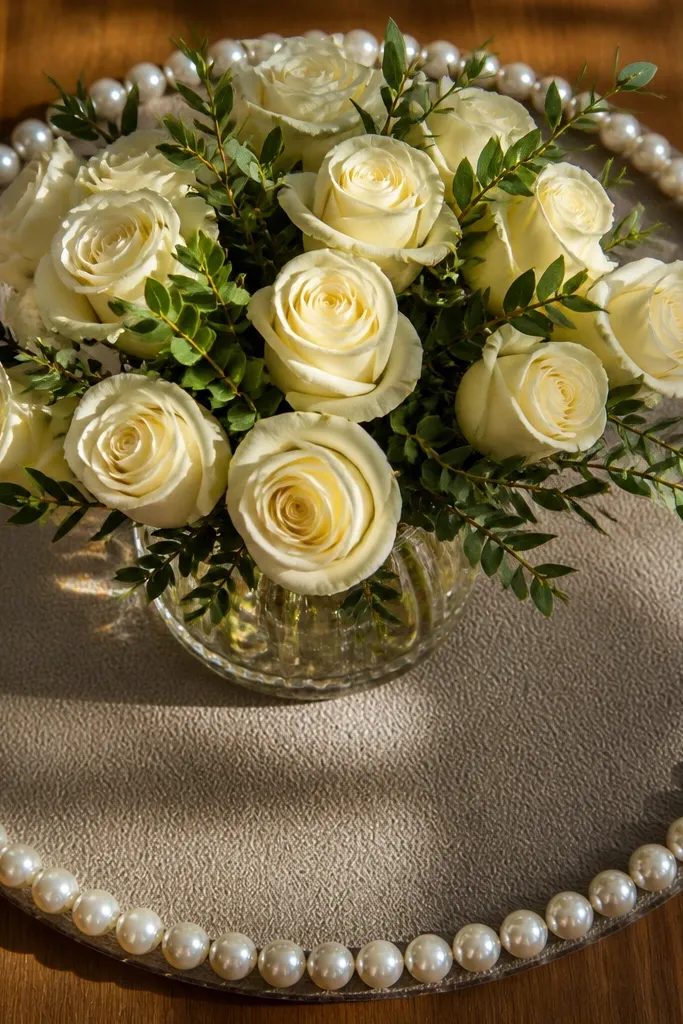
This idea makes a single vase look like a centerpiece by framing it with sparkle. A tray rimmed with pearls, bead garland, or faux pearl strings creates a soft halo effect in photos. Keep the centerpiece simple: one vase, one flower color, and one greenery line. It looks elegant at sweetheart tables and cake tables, and it’s easy to set up quickly.
Start by placing a small tray at the center of the table, usually 10-14 inches wide. Then create a rim by gluing or arranging pearl bead garland around the edge, leaving the middle clear. Finally, place a small vase or jar in the tray center and add a tight bouquet of 6-8 stems. Budget tip: buy pearl garland in bulk and cut to length for multiple tables.
Use unscented candles nearby instead of fragranced ones; strong scent fights with floral photos and venue smells.
Don’t add multiple vases to the tray; that turns it into clutter.
22. Monogram Candle Labels With Matching Font Style
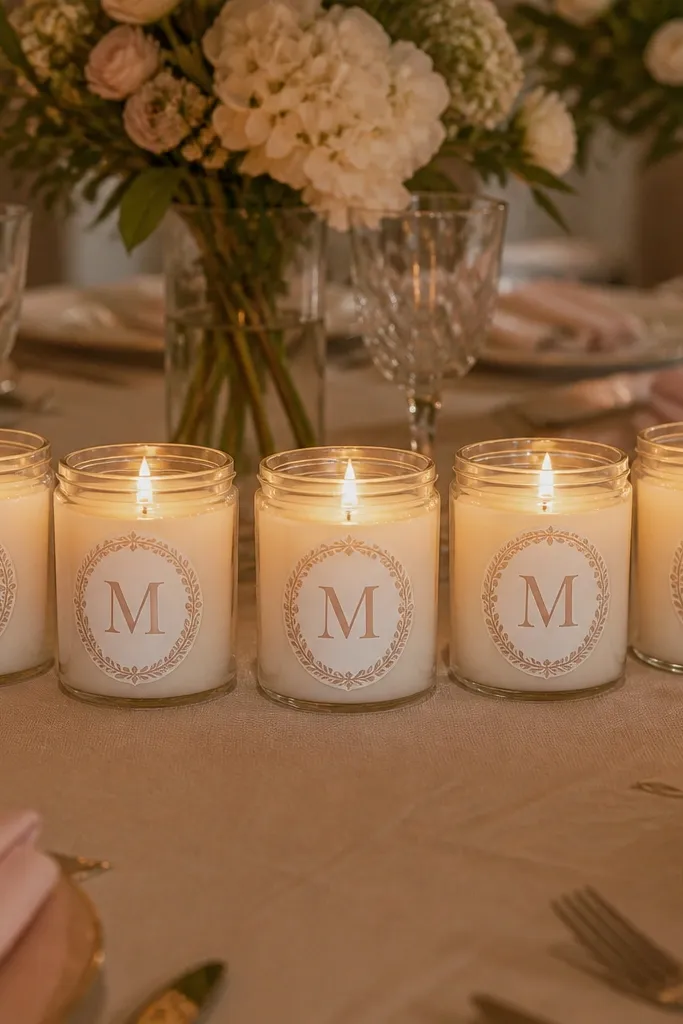
Personalization can look high-end even on a budget when you control the design. Use monogram stickers or printed labels on candle jars, and keep the font style consistent across the set. The candle glow makes the label readable in photos without needing expensive signage. This works for bridal showers and destination weddings where you want the table to feel “you” without building a big decor budget.
Quick tipPosition labels at the same height on each jar so your photos look uniform.
Start by choosing 6-10 small candle jars and printing labels with the same font, usually just initials or a single letter. Then apply labels to the jar side and insert an LED candle or tea light inside. Finally, add one small accent flower stem per jar or skip flowers entirely if the labels and candle light are enough. Budget move: print labels at home on sticker paper and cut with a craft knife.
Skip thisDon’t use multiple fonts or mixed label sizes; it looks like a last-minute craft project.
23. Floating Rose Petal Bowls With One Candle Center
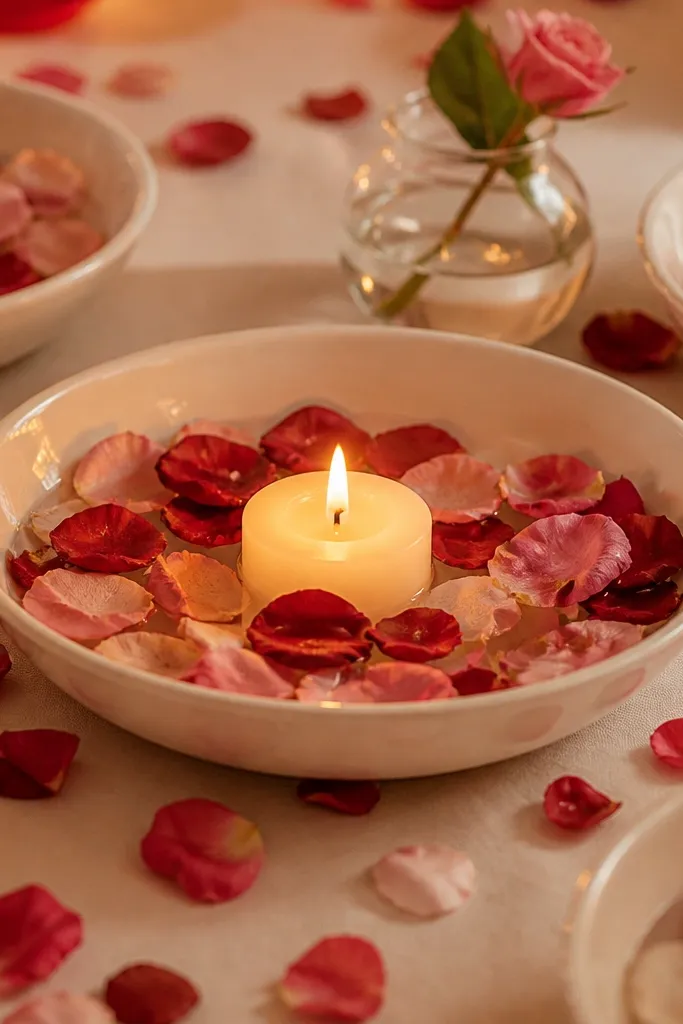
Floating petals are pure photogenic magic because they create motion and a soft, romantic look without building height. Use shallow bowls filled with water and scatter a handful of rose petals so they drift slightly. Place one candle or LED candle in the center bowl, and keep the rest of the table decor minimal. This is best for indoor evening receptions and for venues where you can keep bowls stable and away from kids and pets.
Start by using shallow glass bowls or votive dishes, usually 6-10 inches wide. Then fill with water and add 10-20 petals per bowl, depending on the bowl size. Finally, place one candle or LED in the center bowl and keep other bowls petal-only for a clean look. Budget tip: faux rose petals are reusable if you store them dry after the event.
Use a non-slip mat under bowls so they don’t slide if someone bumps the table.
Don’t put bowls on glossy table linens; reflections can hide the petals in photos.
24. Cake Table Reuse: One Arrangement, Three Heights
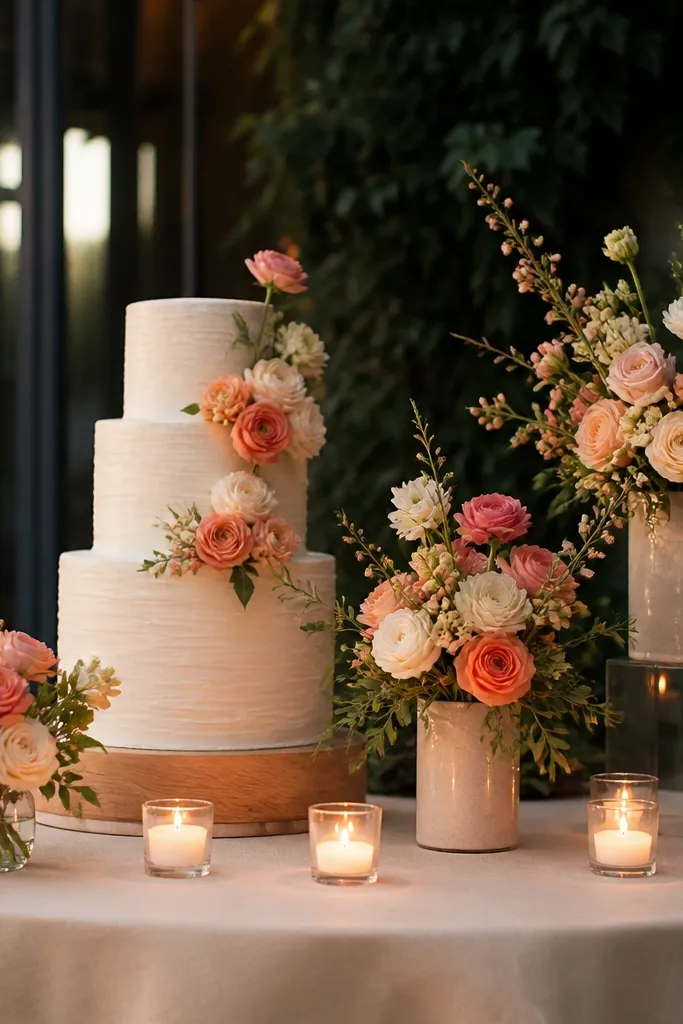
This is the money-saving layout trick: build one flower set and stage it in three heights across the table so it looks abundant. Use the same flower types in every vessel, so photos read cohesive instead of “random.” The three-height setup creates depth and makes the table feel full even with fewer stems. This works for reception tables near the cake, sweetheart tables, and any spot where your photos will be close.
Start by buying one main flower type and one greenery type, then plan three vessel heights: low jar (4-6 inches), medium vase (7-9 inches), and tall bud vase (10-14 inches). Then arrange the same stems across each vessel so the color density matches. Finally, keep the vessels spaced evenly and add one ribbon or one metal accent line across all of them. Budget move: use the same flowers across multiple tables if your layout allows it.
If you’re short on stems, keep the tallest vessel tighter and the low vessels fuller — it balances the look.
Don’t use different flower colors in each height; it makes the table look like separate purchases.
25. Ivory Candle + Greenery Frame on Long Banquet Tables
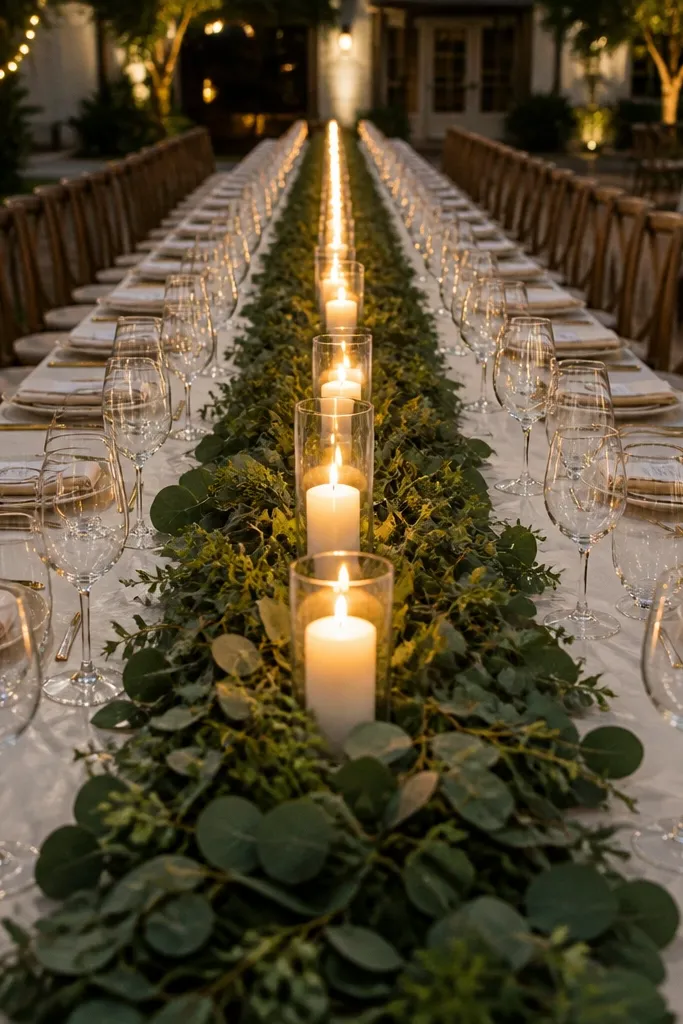
Long tables need decor that reads from far away. A continuous greenery strip with evenly spaced ivory candles creates a frame effect that looks designed even when you’re using budget candles. The greenery strip makes the center line feel intentional, while the candles add warmth and photo glow. This works for banquet halls and outdoor dining where the table length is the star in wide shots.
Quick tipKeep candle holders identical so the line looks uniform in wide-angle photos.
Start by measuring your table length and cutting a continuous faux eucalyptus garland to fit, usually 6-8 feet for a standard long table. Then place the garland along the center and space ivory candles every 10-14 inches. Finally, add a few small bud vases at the ends only, so the middle stays clean. Budget tip: buy one garland and stretch it across tables by adjusting candle spacing.
Skip thisDon’t add too many flower clusters along the whole runner; it breaks the clean frame.



