
1. Sea-Glass Window Paper Fan Cluster
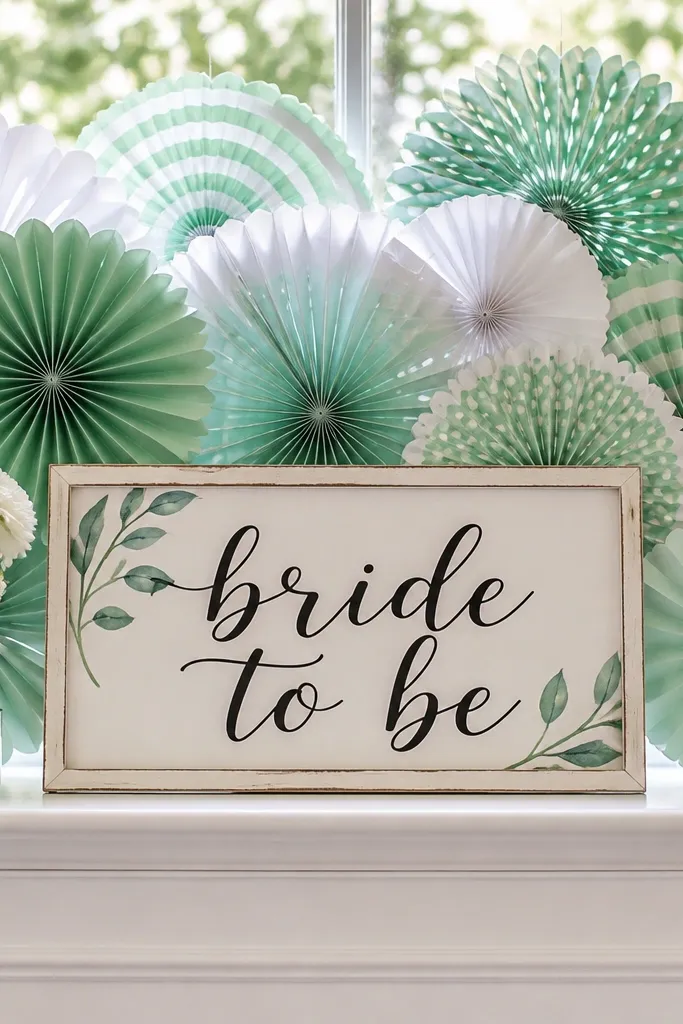
Take one window or wall panel and make it your photo backdrop. Paper fans in sea-green and white create that beachy “breeze” look without needing any craft tools. The fans add height, so your bride-to-be sign reads clearly in pictures. Keep the cluster tight — about 12-18 inches wide — so it looks styled, not scattered. This works best in rooms with natural light, because the paper texture shows up in photos.
Start by measuring the space above a dresser, chair, or window so the fans sit at eye level. Then use removable adhesive hooks or a Command strip with a small string to hang two fans side-by-side and one centered below. Finally, tie a short length of white ribbon around the bottom of the cluster so the whole thing looks finished. Expect to spend about 5-7 minutes if you already have the fans and ribbon cut.
Use white paper fans as the middle layer so sea-green pops more in daylight.
Skip mixing bright turquoise with neon pink — it reads like party craft, not coastal.
2. Bride-to-Be Door Garland With Jute Bow
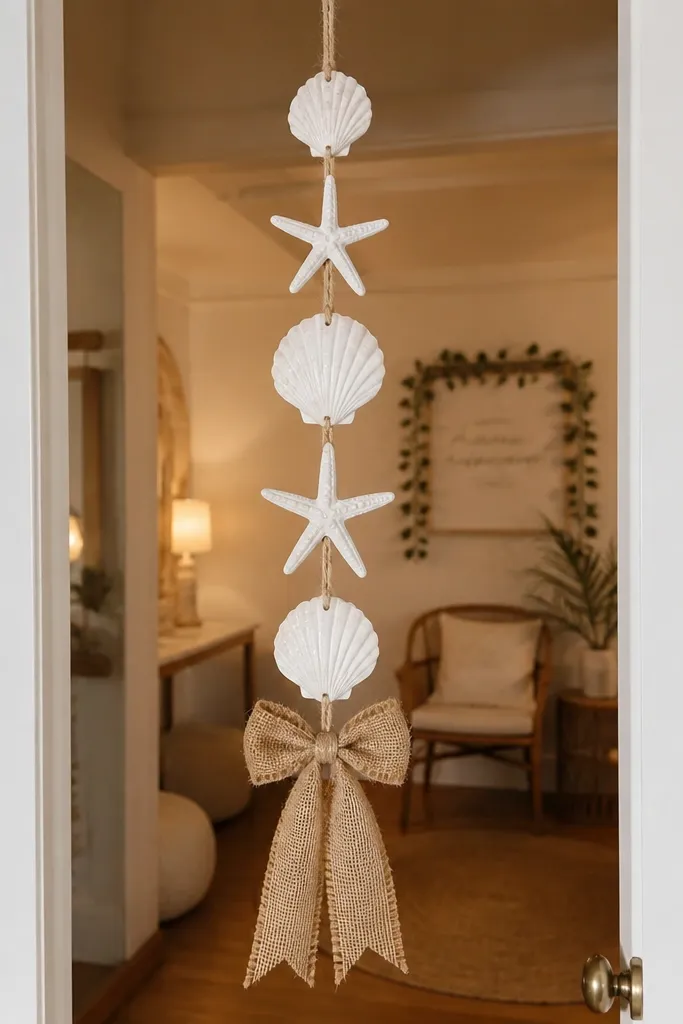
A door garland makes your room feel instantly themed, and it’s easy to photograph because doors create a natural frame. Choose a short strand with white accents like shell cutouts or starfish shapes, then finish it with a jute bow for texture. Jute looks grounded and beachy, and it balances the clean white pieces. Keep it centered at chest height so it shows in hallway photos too. This is ideal for hotel rooms where you can’t decorate the walls heavily.
Start by attaching two removable hooks on either side of the door frame (or one hook at the top if the garland has a loop). Then hang the garland so it sits about 4-6 inches below the top edge of the door. Finally, tie the jute bow at the center and tuck the ends so it lays flat. You’re done in 5 minutes if you use hooks instead of tape.
Use a thin ribbon tie to adjust the height fast without re-hanging.
Skip heavy glue or tape on painted door trim — it’s the fastest way to ruin the finish.
3. Shell Tray Centerpiece With Floating Candle Cups
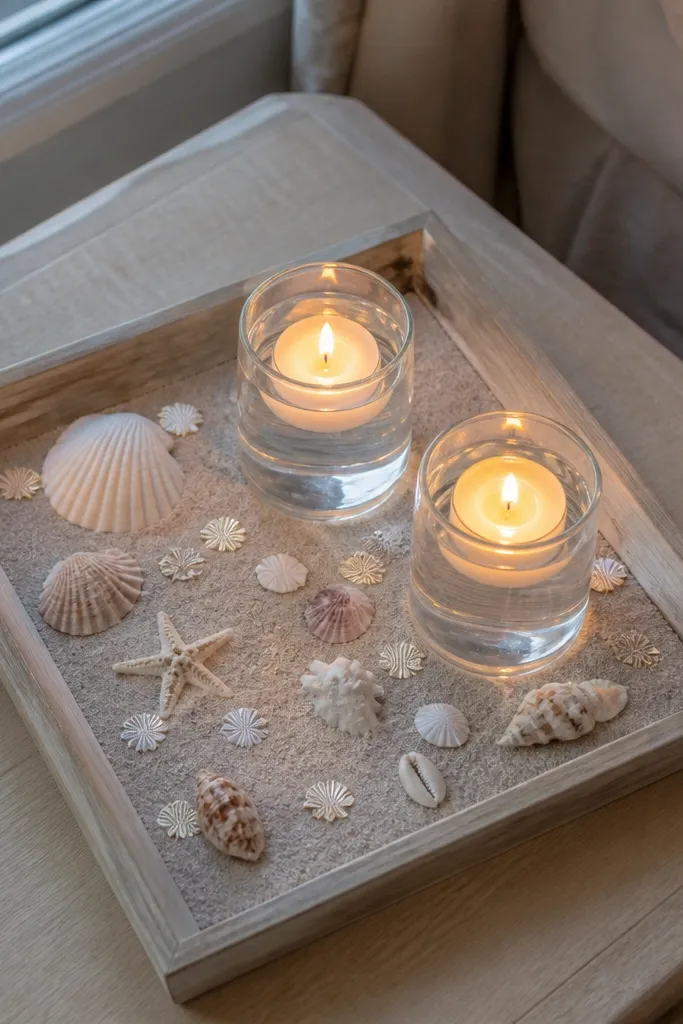
Start by filling the tray with a thin layer of sand-colored filler or shredded paper for uniform texture. Then arrange shells in a loose triangle and add 2-3 candle cups spaced evenly. Finally, adjust the candle height so the tallest cup sits near the back edge for depth in photos. Keep it to one tray so you don’t spend time building multiple small pieces.
A tray centerpiece gives you a clean, styled look that reads well from across the room. Use a shallow tray in white or light wood, then add a scatter of shells or shell-shaped confetti. Finish with two or three floating candle cups (or small battery candles in clear cups) so the light glows in photos. The mix of matte shells and warm light feels coastal without looking childish. Place it on a dresser or nightstand so it anchors your bride-to-be corner.
Skip thisAvoid real wax candles in hotel rooms unless you have a safe, flat surface and ventilation.
Quick tipUse battery candles with warm white settings for a consistent glow.
4. Linen Tulle Bed Runner With Coastal Color Pop
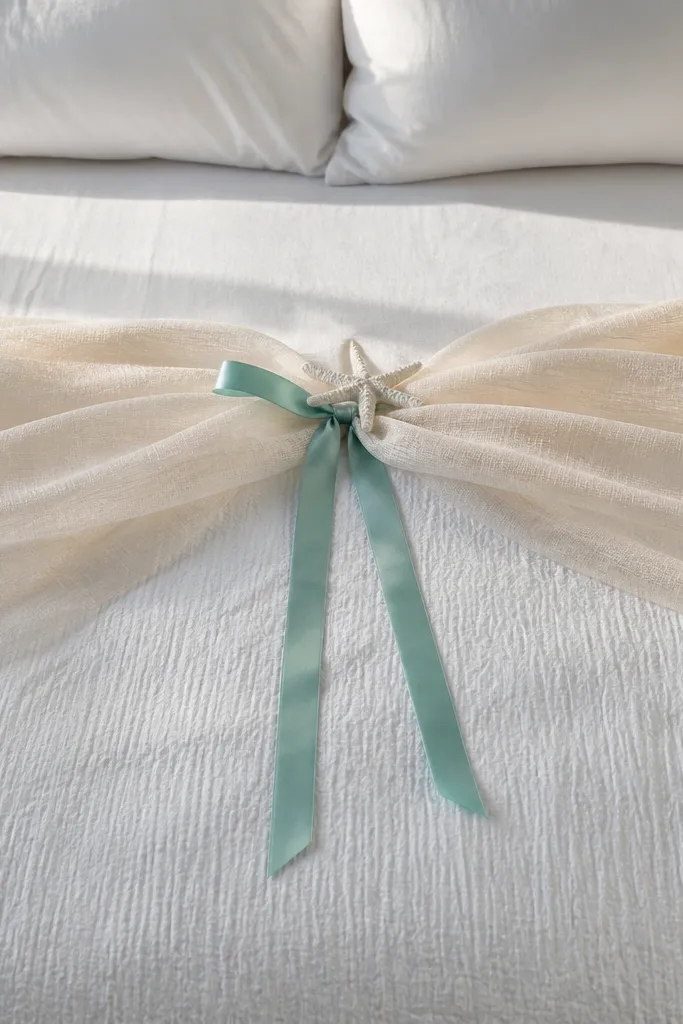
Start by pulling the top sheet taut and draping the tulle so it falls in gentle folds, not tight lines. Then tie the sea-green ribbon at the center (or near one corner) using a simple bow. Finally, tuck the ends under a pillow so it stays put when you move around. You’ll be done in 5 minutes because there’s no measuring beyond centering.
Beds are the easiest place to create a “bride room” vibe because the background fills the frame. A linen or gauzy tulle runner draped across the top sheet makes everything look softer and more romantic. Add one coastal pop — a sea-green ribbon, a small strand of faux pearls, or a single starfish ornament. The texture catches light and makes your photos feel more styled than a flat sign alone. This works best when your bedspread is neutral so the tulle shows contrast.
Skip thisSkip thick, stiff fabric — it looks like a tablecloth on a bed.
Quick tipUse a fabric clip at the back edge if the tulle keeps slipping.
5. Rope-Wrapped Vase With One White Branch
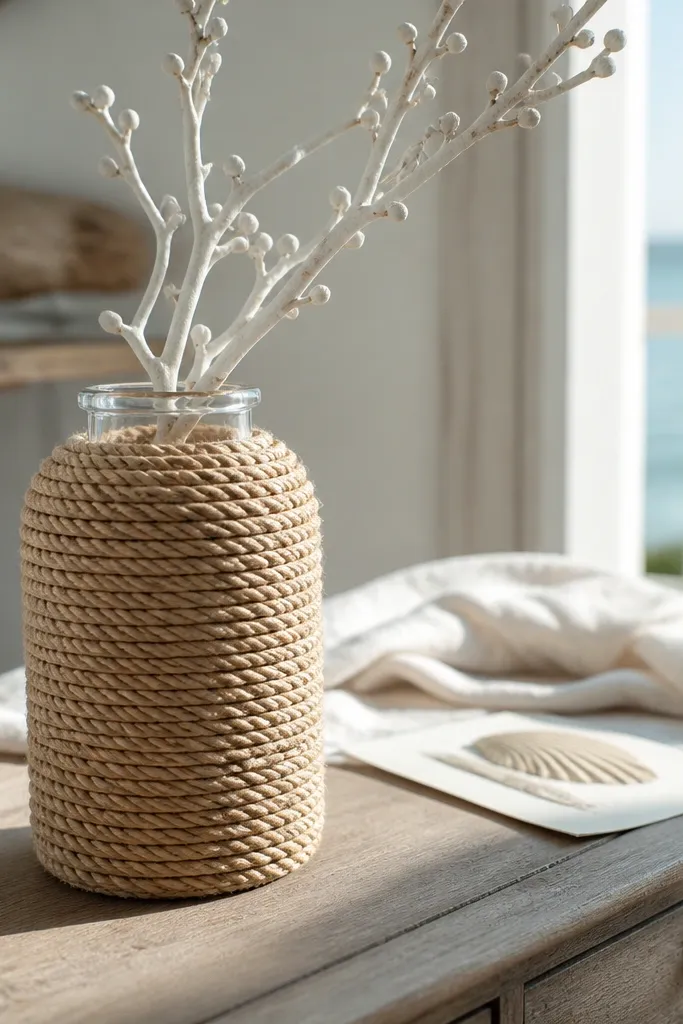
Start by trimming rope length so it covers the vase from top to just above the widest point. Then wrap tightly and secure with hot glue or clear tape hidden under a band. Finally, add one stem arrangement and fill with water or floral foam if you brought it. If you’re using a pre-packed faux stem, it’s faster because you skip water setup.
A wrapped vase looks intentional and costs less than it looks. Rope around a plain glass or ceramic vase adds that coastal texture instantly, and a single white branch keeps the look clean. Choose a branch with small buds or leaves, or use dried white stems if you have them. This decor looks great in close-ups — the rope texture shows up sharply. Put it next to your bride-to-be sign or on a bedside table for a polished photo corner.
Skip thisAvoid wrapping over labels or glossy stickers — they wrinkle and ruin the clean look.
Quick tipPick a vase with a narrow neck; rope wrap looks neater and more “designed.”
6. Peel-and-Stick Starfish Confetti Wall Stripe
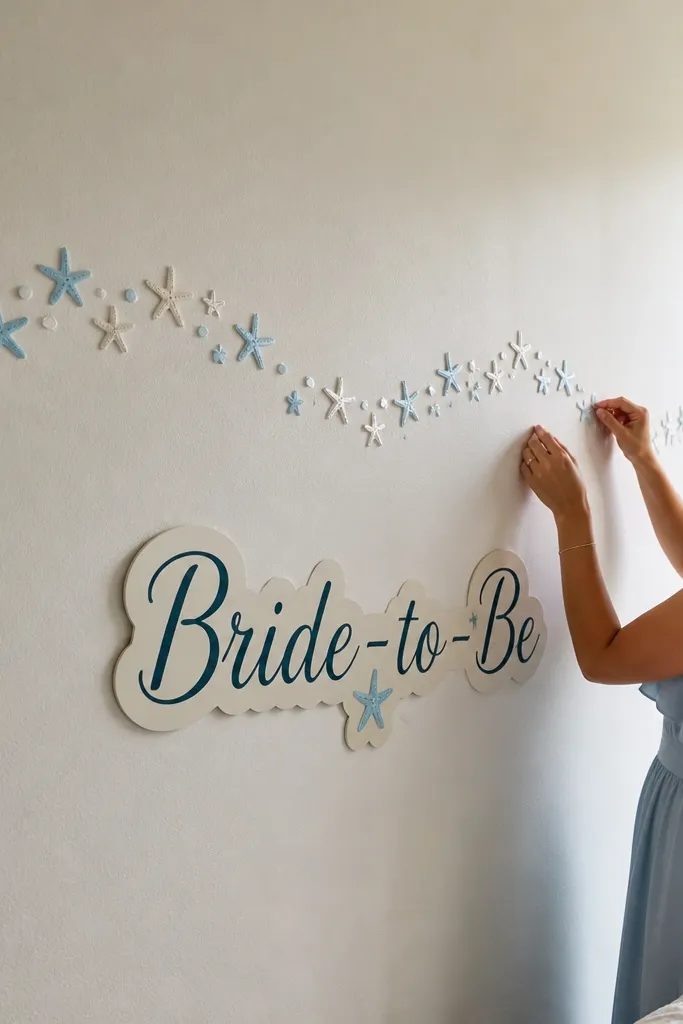
A wall stripe of starfish decals makes a tiny room look like it has a theme without taking over the space. The trick is placement: keep it diagonal or slightly curved so it looks like motion, like waves. Use white starfish with pale blue accents so it stays coastal and not carnival. This is perfect for rooms where you can’t hang anything but you can apply removable decals. It’s also great for bride-to-be photos because it frames your body without blocking the whole wall.
Start by marking a light pencil guide line at about 45 degrees from shoulder height. Then place starfish decals along the line, spacing them 2-4 inches apart and alternating sizes. Finally, add one larger starfish near the center so the stripe has a focal point. Use removable adhesive decals so you can remove them after photos.
Shoot photos from 6-8 feet away so the stripe reads as a design, not random stickers.
Skip placing decals too low — it makes photos look cluttered at waist level.
7. Sea-Blue Balloon Trio With Ribbon Weight
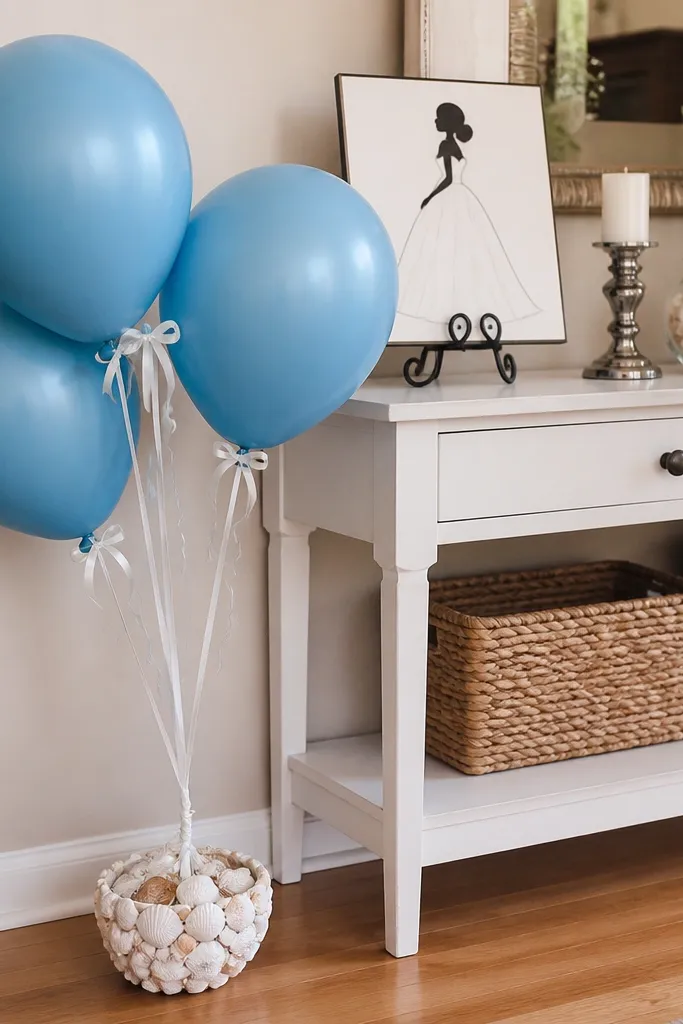
Start by choosing three balloons: one deep sea-blue, one pale sea-green, and one white or clear with blue dots. Then tie them together with white ribbon and attach a small weight so the cluster hangs at your preferred height (about face level for most photos). Finally, tape the ribbon weight to a small hook or place it in a basket near your photo spot. Plan for 10 minutes if you need to inflate balloons, 5 minutes if they’re pre-inflated.
Balloons can look cheap if they’re all one color and left floating. A trio in sea-blue tones with white ribbon looks beachy, especially if you add a small ribbon weight so they hang neatly. Tie them to a white tassel or a small basket weight so they don’t drift and block your background. This is fast and photogenic because balloons create instant height and a soft “celebration” frame. Use them near a doorway, bed corner, or dresser where you want a bright focal point.
Skip thisDon’t mix in metallic gold — it shifts the theme away from coastal.
Quick tipUse matte balloon shades; glossy balloons can glare in hotel lighting.
8. Coastal Photo Corner With Mini Clip String Lights
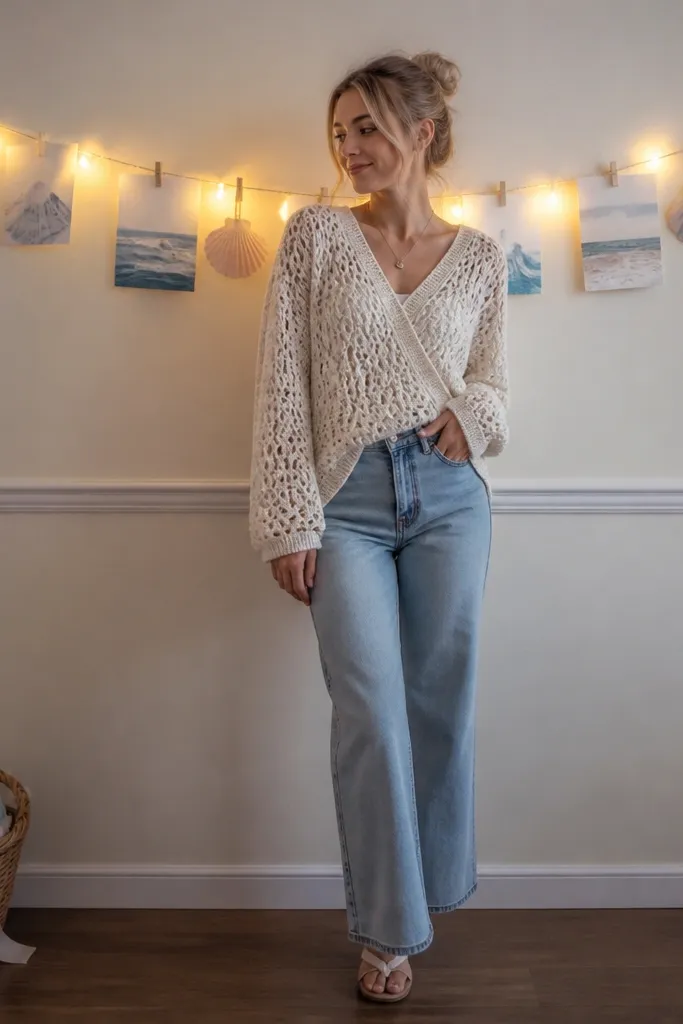
Start by installing removable hooks along the wall in a gentle curve, keeping the top hook higher than your eye line. Then clip 6-10 small cards onto the string so they sit evenly spaced. Finally, plug in and adjust the string until it frames the area where you’ll stand. This is a 5-10 minute setup if you use battery lights.
If your room has one blank wall, string lights + clips makes it instantly “photo corner” ready. Use tiny warm white lights and attach small coastal cards — shells, waves, or simple white paper messages. The clips add movement and texture, and the lights help when you’re taking photos at dusk. Keep the string short — around 4-6 feet — so the look is tight and aesthetic. This works especially well if your bride-to-be sign is on the same wall.
Skip thisSkip bulky clothespins — they look industrial and ruin the soft coastal vibe.
Quick tipChoose simple white cards with pale blue accents; they photograph cleanly.
9. Starfish Napkin Rings On Dresser Stack
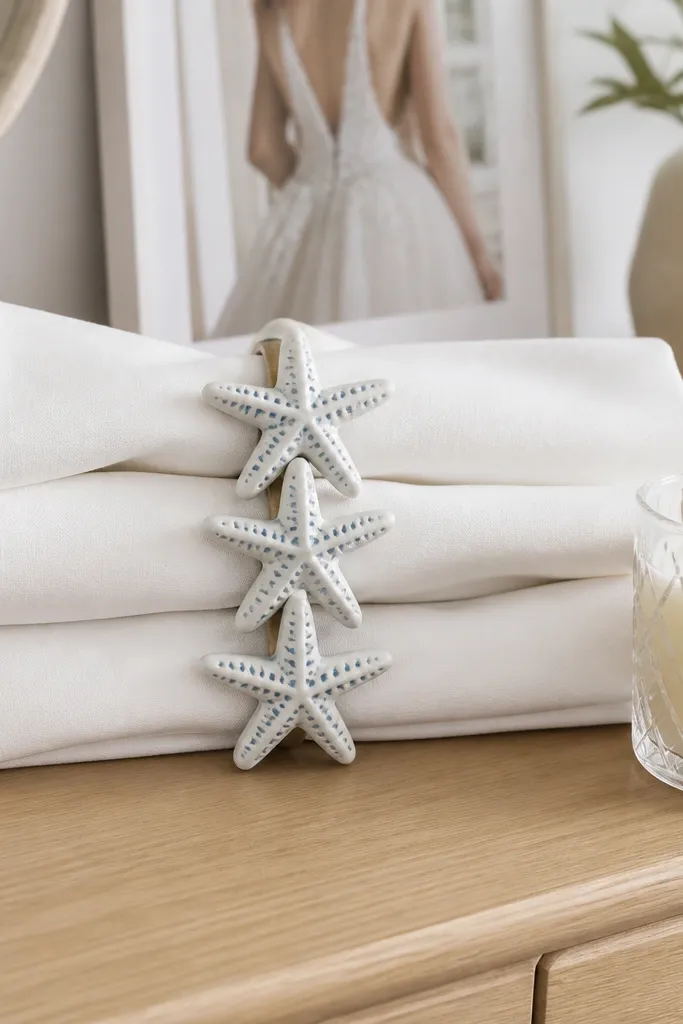
This is a sneaky way to make your room look styled without adding a single new wall decoration. Use starfish-themed napkin rings on a folded stack of white napkins or tissue paper. The rings create a vertical accent and a clear coastal motif that reads well in photos of your tray, gifts, or sign. It’s clean, small, and looks intentional when arranged in a neat column. Put it on a dresser tray so you get a photogenic “bride room” corner quickly.
Start by folding 3-4 napkins into slim rectangles so the stack looks tall, not wide. Then slip starfish napkin rings around the middle of the stack or around each folded section. Finally, place the stack on a tray with one small shell scatter around the base. It takes 5 minutes because you’re using what you already can carry and set down.
Use matte white napkins; glossy paper catches flash glare.
Don’t overload with too many rings — two looks designed, four looks busy.
10. Coastal Wreath Substitute Using Paper Leaves
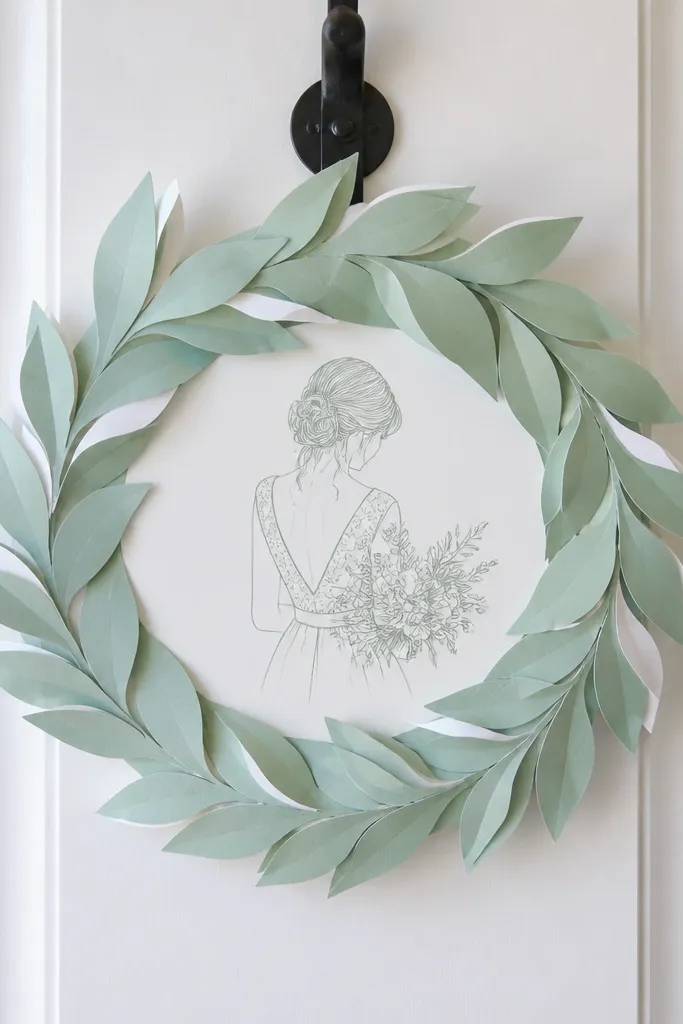
Start by hanging the wreath at about 60 inches from the floor, centered on the door or wall. Then add a white ribbon bow at the top or side to pull the palette together. Finally, place your bride-to-be sign directly below it so the wreath reads like a header. If you buy a pre-made paper wreath, you can do the whole thing in 5 minutes.
A wreath is usually slow to build, but paper-leaf wreath kits are fast and look good on camera. Choose pale sea-green leaves with white backing and hang it on a door or wall hook. The shape creates a frame for your bride-to-be sign or for photos when you stand in front. This gives “beach house” energy without needing real greenery that wilts. It’s best for rooms where you want one statement piece and nothing else complicated.
Skip thisSkip dark green wreaths — they read pine, not coastal.
Quick tipPick a wreath with a flat back so it sits flush against the door.
11. Beach Sand and White Candles in Glass Jar Group
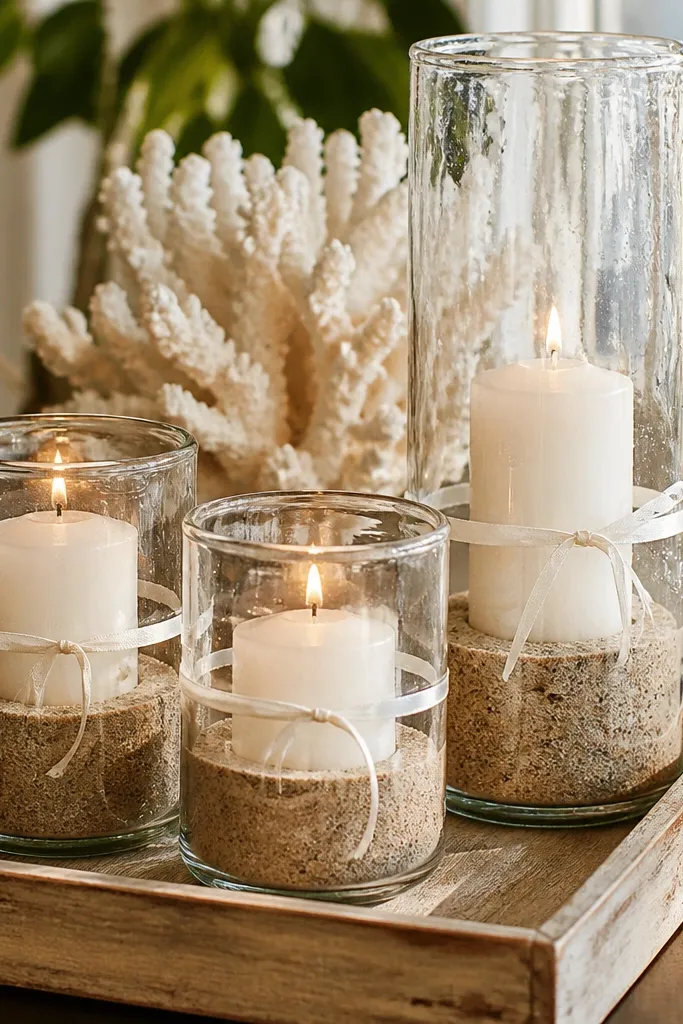
Glass jars with sand look like a beach souvenir, but they’re also very photogenic. Use three jars in different heights so the composition has rhythm. Put a thin layer of sand in each and add a white pillar candle or a battery candle wrapped in thin white ribbon. The sand texture makes the scene feel real and coastal even if you’re not near the beach in that moment. Place the jar group on a tray so it stays tidy in photos.
Start by choosing jars that look similar in shape but different in height, ideally clear glass. Then fill with sand to about one-third and insert candles so the top sits above the jar opening. Finally, arrange on a tray with a few shell accents around the base. You can do this in 5-8 minutes depending on how many candles you have.
If you’re using battery candles, choose warm white for the most natural glow.
Avoid too much sand — a thick mound looks messy and spills in photos.
12. Coastal Message Sign Backed by Linen Fabric
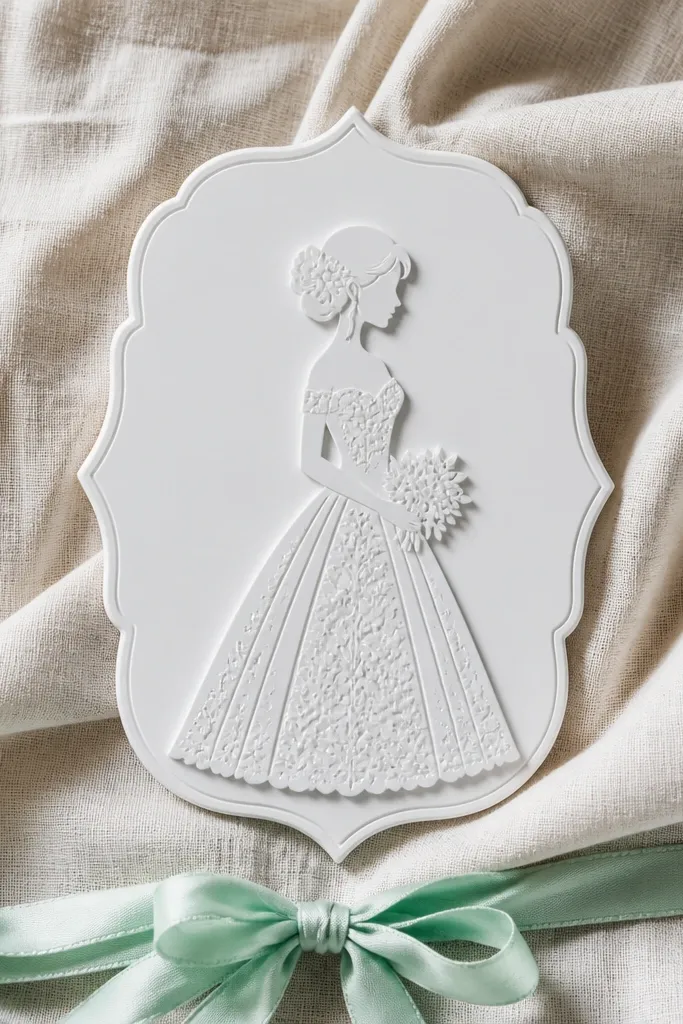
Start by laying fabric over a chair back, dresser, or against the wall with a removable hook at the top. Then place the sign centered so it sits about 4-6 inches above the fabric fold. Finally, tie the ribbon at the bottom so the background looks finished. Do this in 5 minutes by using a lightweight fabric you can reposition.
Signs are great, but they look flat unless you give them a textured background. Drape a piece of linen-look fabric behind your bride-to-be sign, then tie a sea-green ribbon along the bottom edge. The fabric creates depth so the sign pops in photos without extra decorations. Keep the sign centered and the fabric edges slightly visible for that styled look. This is one of the fastest ways to make a room feel “put together.”
Skip thisSkip busy patterns — stripes and florals compete with the coastal theme.
Quick tipUse white or off-white fabric; sea-green fabric backgrounds can skew the whole photo.
13. Mini Driftwood-Style Branch On A Bedside Table
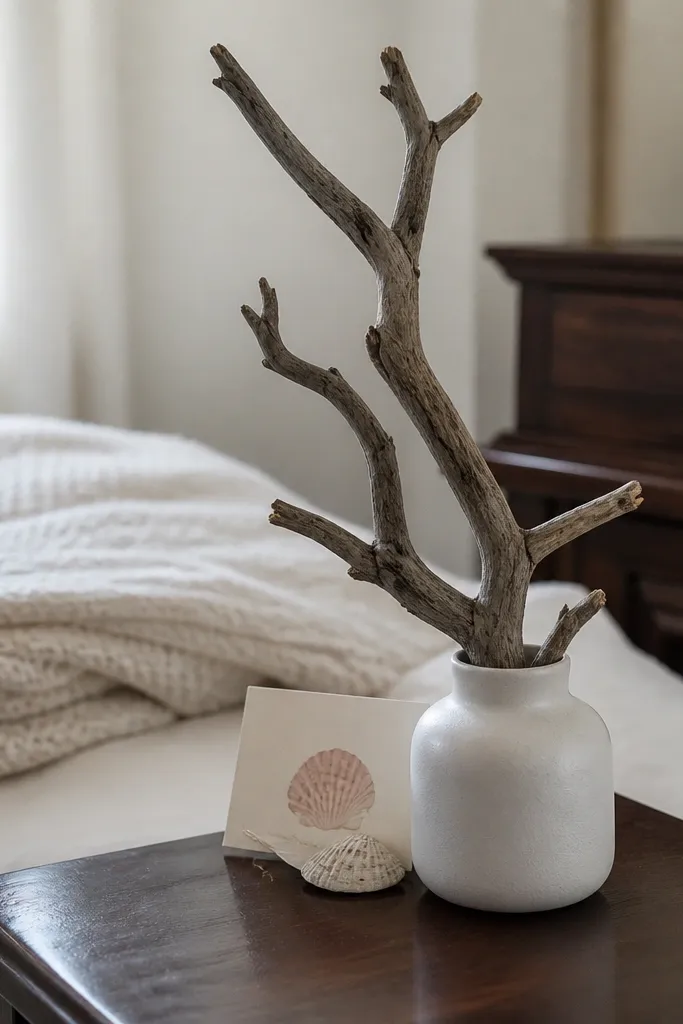
Start by placing a small vase on your bedside table or dresser and adding a thin base of sand or pebbles. Then insert the branch so it leans slightly backward for a natural shape. Finally, tuck one seashell ornament or card near the vase front so it’s visible in photos. The setup takes 5 minutes if the branch is already dry and ready.
You don’t need a full driftwood log to get that beach-house look. A small driftwood-style branch in a simple vase makes your bedside table look styled and intentional. Add one or two seashell cards or a tiny starfish ornament for the bride-to-be vibe. This works because the branch has natural lines that pull the eye upward. It’s also easy to move around if you’re changing photo angles.
Skip thisAvoid bright white painted driftwood — it looks like a store prop, not coastal charm.
Quick tipChoose branches with a gray-brown tone; they match sand and sea colors without clashing.
14. Woven Jute Coaster Stack With Shell Confetti
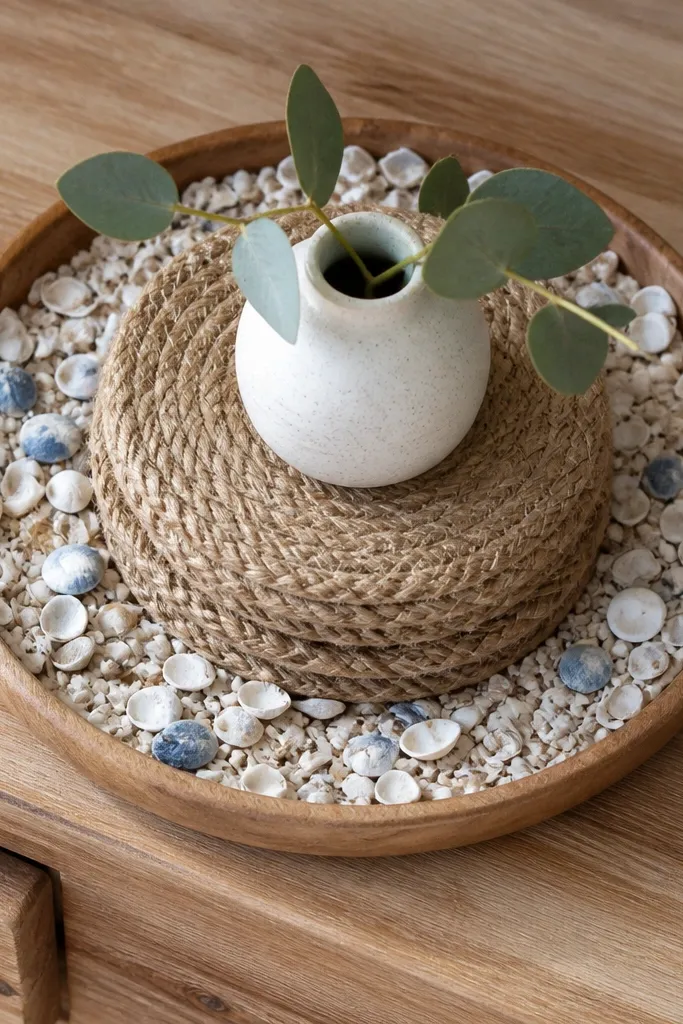
Start by placing 2-3 jute coasters in a tight stack or staggered pattern on the tray base. Then sprinkle shell confetti in a light ring around the center, not a full layer. Finally, set your bride-to-be sign or candle in the middle so the confetti frames it. This setup is 5 minutes because you’re arranging flat items.
This is a texture-first decor trick that reads expensive in photos. Stack woven jute coasters under a small tray, then add a scatter of shell confetti around the edges. The jute gives you that beach basket look, and the shell bits add coastal detail without needing a big centerpiece. It’s perfect for small dresser surfaces where you don’t want a bulky arrangement. Keep the colors to sand, white, and pale blue so your camera doesn’t pick up weird tones.
Skip thisSkip glitter confetti — it shines in flash and looks out of place.
Quick tipUse a small lint roller on the coaster surface before styling; it makes a big visual difference.
15. Coastal Balloon Weight With Seashell Basket
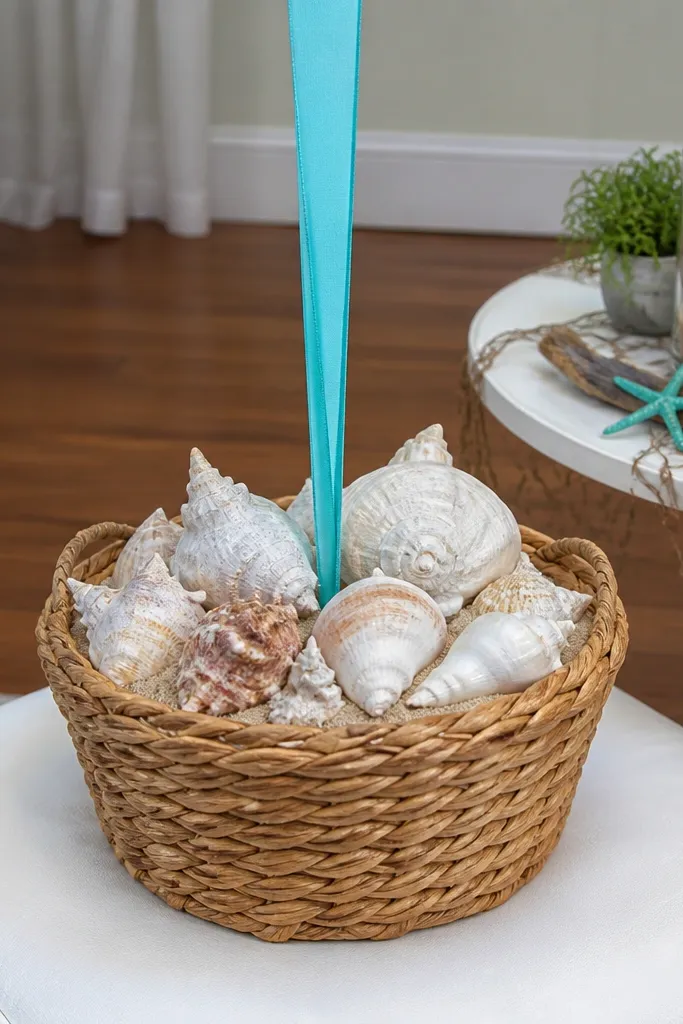
Start by choosing a small basket or decorative bowl and filling it with shells or sand to hold ribbon weight. Then tie balloon ribbons to a single point in the center so the cluster hangs evenly. Finally, place the basket in your photo corner and adjust balloon height to sit at about eye level. If balloons are ready, it’s a 5-minute job.
Most balloon setups look messy because the weight is ugly or the cluster drifts. Tie your balloon ribbon to a small basket, then fill the basket with shells or sand so the “base” looks beachy. That turns a party balloon into a styled decor piece. It also keeps the cluster positioned for photos, especially when you stand near the bed. This works best when your room has a corner where you can place the basket without blocking passage.
Skip thisAvoid metal weights exposed — they look like hardware, not coastal decor.
Quick tipUse clear balloon tape to secure ribbon ends so they don’t unravel.
16. Starfish Cutout Table Runner On Bedside
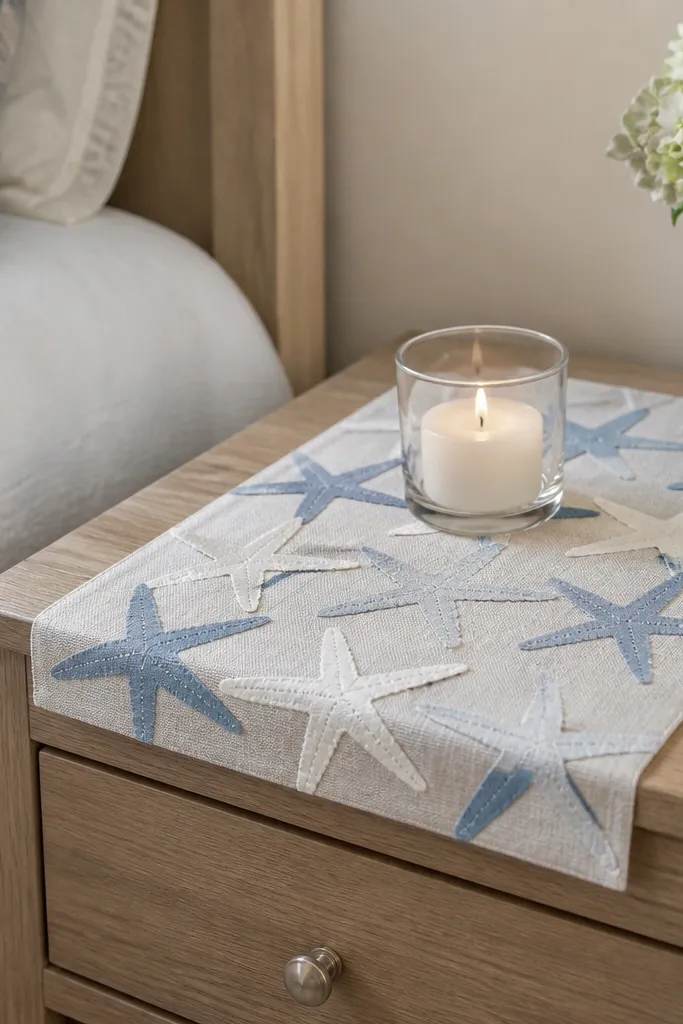
Start by placing the runner centered on the bedside table or dresser, leaving equal space at both ends. Then set one centerpiece item on top — a small candle jar or mini vase. Finally, add 2-3 small shells along one edge of the runner for a finished look. The whole thing takes 5 minutes because it’s mostly placement.
A short table runner keeps your bride-to-be corner from looking random. Use a runner with starfish cutouts or wave patterns in white and pale blue, then layer it under a small candle or vase. The cutouts add shape you can see in photos, even if your lighting is dim. This is great when you want coastal charm but you don’t want to hang anything. Keep the runner length short so it fits a bedside table or dresser without crowding.
Skip thisSkip dark runners — they swallow light and make the room feel smaller.
Quick tipUse battery candles to avoid heat and to keep photos consistent.
17. Sea-Spray Paper Garland Above the Bed
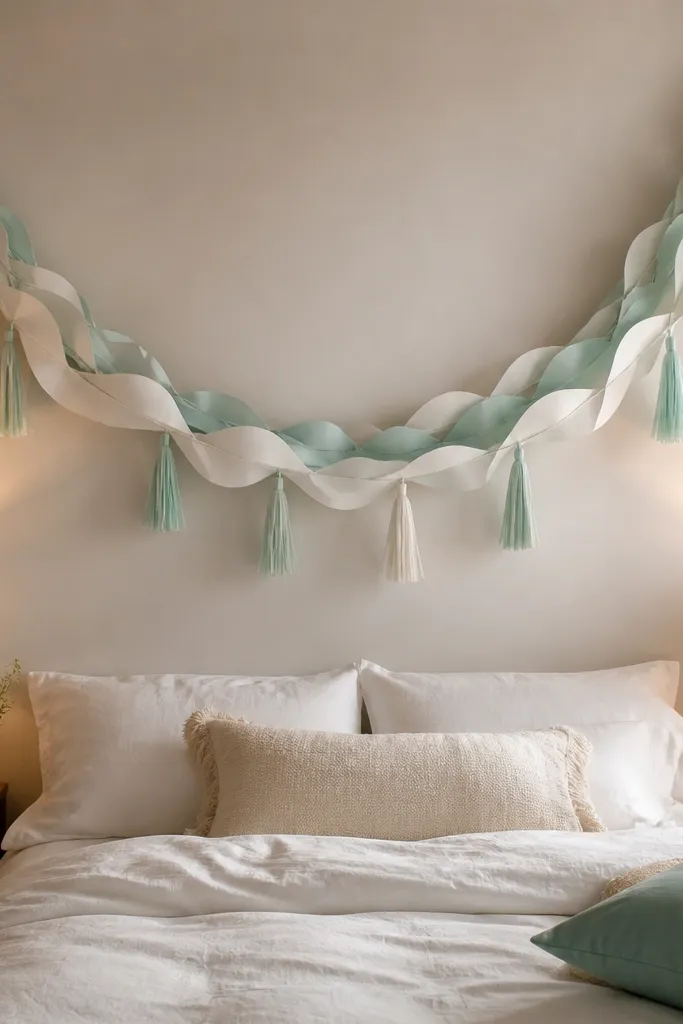
Start by locating a safe hanging point above the bed using two removable hooks. Then string the garland across and adjust so the center sits above the pillow area. Finally, tuck the ends so they don’t sag and add one extra tassel at the center if your garland allows it. With pre-made garlands, you can do it in 5 minutes.
Garlands make a bed wall look like a backdrop, and paper wave garlands are fast. Choose a design with soft wave shapes in white and sea-green, plus a few tassels for movement. Hang it above the bed so it frames your head in photos. This looks extra good with warm lighting because the paper edges catch light. It’s also easy to remove before you leave.
Skip thisAvoid heavy fabric garlands that droop — paper keeps its shape for photos.
Quick tipKeep the garland 6-10 inches above the pillow line so it doesn’t look cluttered.
18. Coastal Mason Jar Bud Vases With One Flower Type
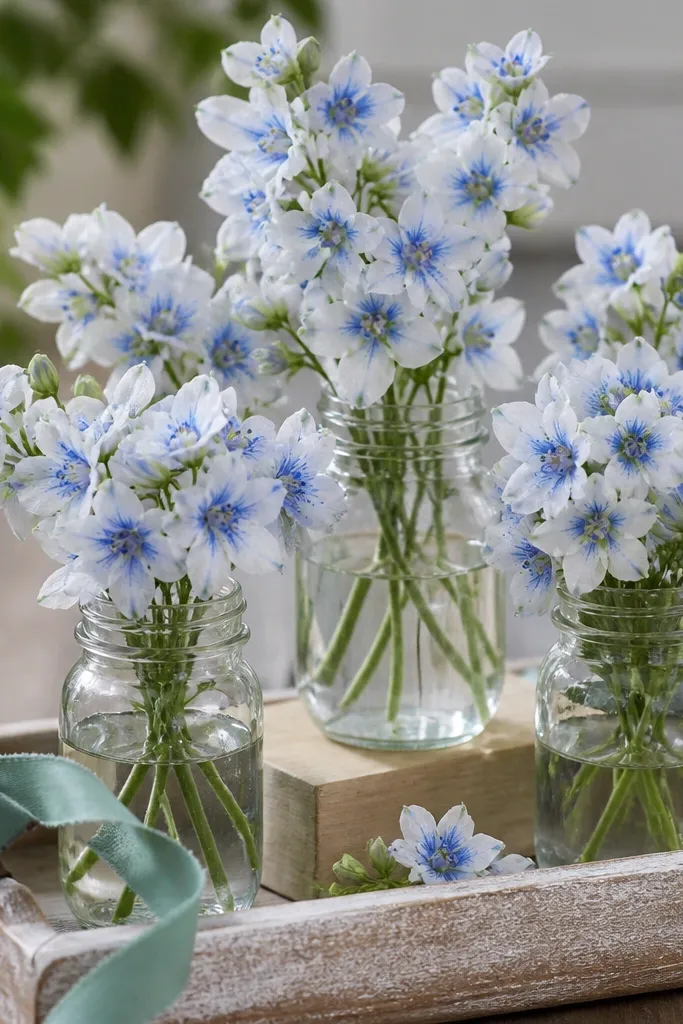
A bud-vase cluster looks curated when you keep the flower type consistent. Use small mason jars or clear cups and fill them with water, then add one flower variety in white and pale blue tones. You get height, color harmony, and a clean coastal feeling without building a big bouquet. Place the cluster on a tray or along a dresser edge so the line looks intentional. This works best for beach trips because the jars feel like “collected” decor.
Start by filling jars with water and trimming stems to different heights — aim for 2-3 inches difference between jars. Then place them in a row on a tray, with the tallest jar centered. Finally, add one ribbon tie around the tray handle or jar neck in sea-green. It’s fast because you’re arranging three items, not designing a full centerpiece.
Choose flowers with small heads, not huge blooms; they read better in close-up photos.
Skip mixed colors like hot pink and purple — it breaks the coastal palette.
19. Peel-and-Stick Wave Border Behind Bride-to-Be Sign
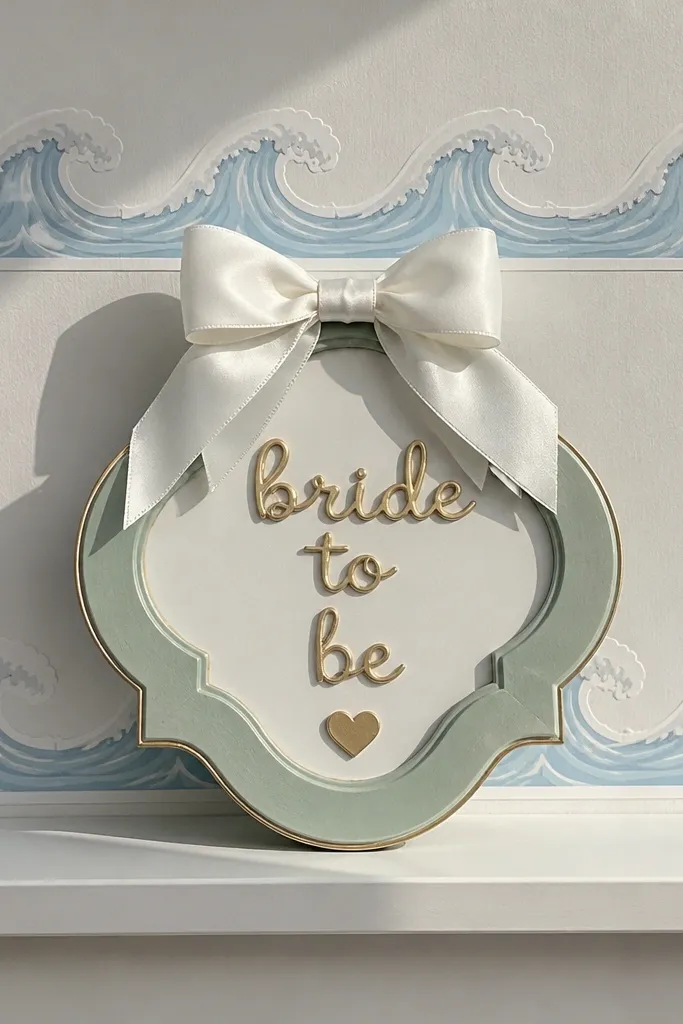
Start by cleaning the wall spot with a dry cloth so the adhesive sticks. Then apply the wave border at sign height, aligning the top edge so it’s level. Finally, place the sign directly in front and add a small ribbon bow at the bottom. You can do it in 5-6 minutes if you measure quickly and press firmly along the edges.
A wave border behind your sign makes it look like it belongs in a beach photo booth. Peel-and-stick borders are quick, and the repeating pattern adds texture without clutter. Choose a border in white with pale blue waves, then position it so it sits behind the sign like a framed backdrop. This gives you a clean background even if the rest of the room is simple. It’s ideal for hotels where you want removable decor only.
Skip thisAvoid applying on textured wallpaper; the edges lift and look sloppy.
Quick tipUse a level app on your phone for straight lines; it shows in photos.
20. White Shell Garland Across Dresser Edge
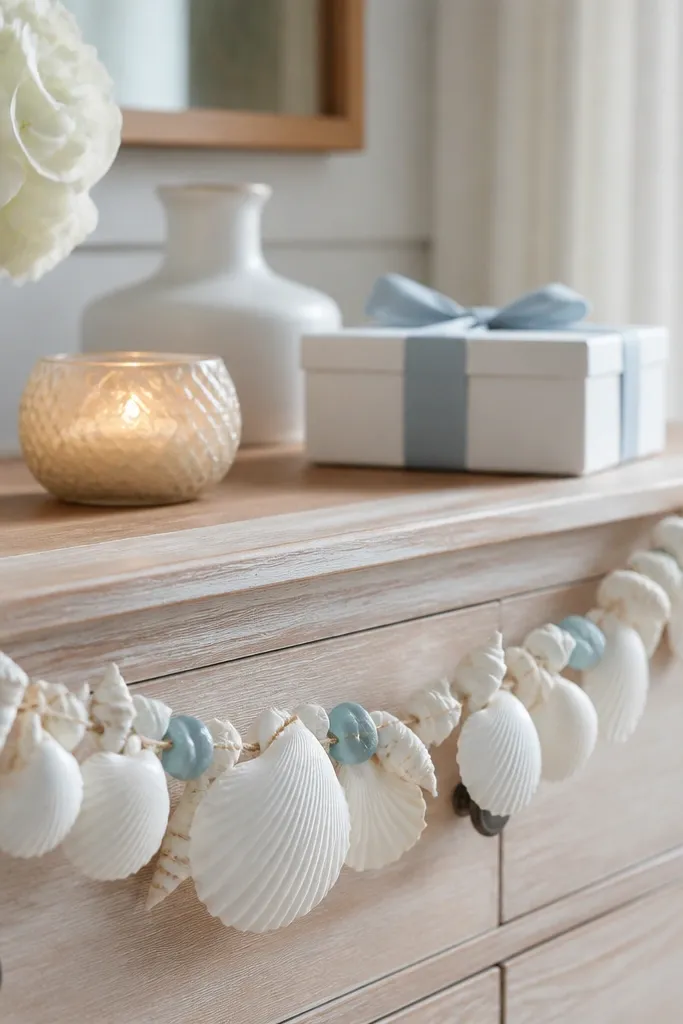
Start by laying the garland along the dresser edge and adjusting until it fits without bunching. Then secure the ends with removable adhesive dots or a small clear hook. Finally, place your bride-to-be sign at the center so the garland frames it like a border. The whole setup is 5 minutes because it’s one linear placement.
Draping a shell garland along a dresser edge creates an instant “coastal mantel” look. It’s photogenic because it adds texture at the exact height where you’ll place gifts, a sign, or a candle. Choose a garland with mostly white pieces and a few pale blue accents so the palette stays calm. The key is to keep the garland straight and anchored — no droopy sag in the middle. This is best when your dresser has a blank top and you want a quick styled line.
Skip thisSkip long garlands that spill off the dresser — it looks untidy in wide shots.
Quick tipPress adhesive dots for 10 seconds each so they stay put during photos.
21. Coastal Ribbon Curtain On A Corner Wall
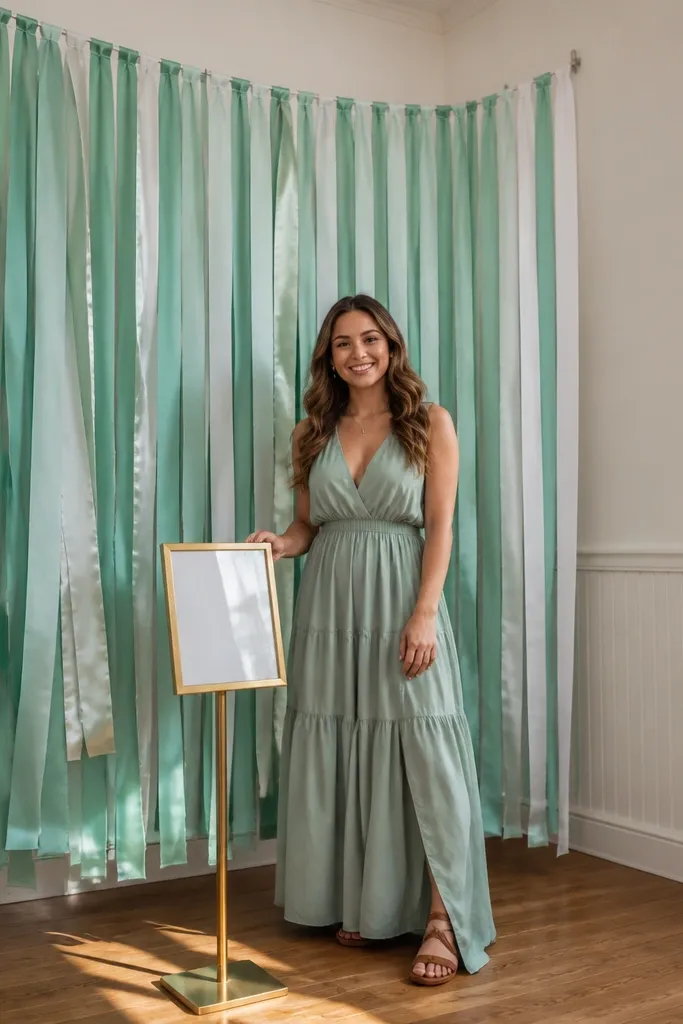
A ribbon curtain gives you movement and a soft beach vibe without taking up floor space. It looks great in photos because ribbons create layers and highlights, especially in natural light. Use sea-green and white ribbons in different widths so it looks intentional. Hang it in a corner where you’ll stand for pictures, and it becomes your background instantly. This is one of the fastest decor options because it’s basically hanging strips.
Start by attaching a removable hook or tension rod at the top of the corner area. Then hang 8-12 ribbon strips, cutting them to different lengths so the curtain forms a gentle cascade. Finally, tie a small white bow at the center to make it feel finished. With pre-cut ribbons, it’s a 5-minute setup.
Use satin ribbons sparingly; matte ribbons photograph smoother in hotel lighting.
Avoid too many colors — keep it to white plus one ocean shade.
22. Sea Salt Spray Bottle Vase Trick
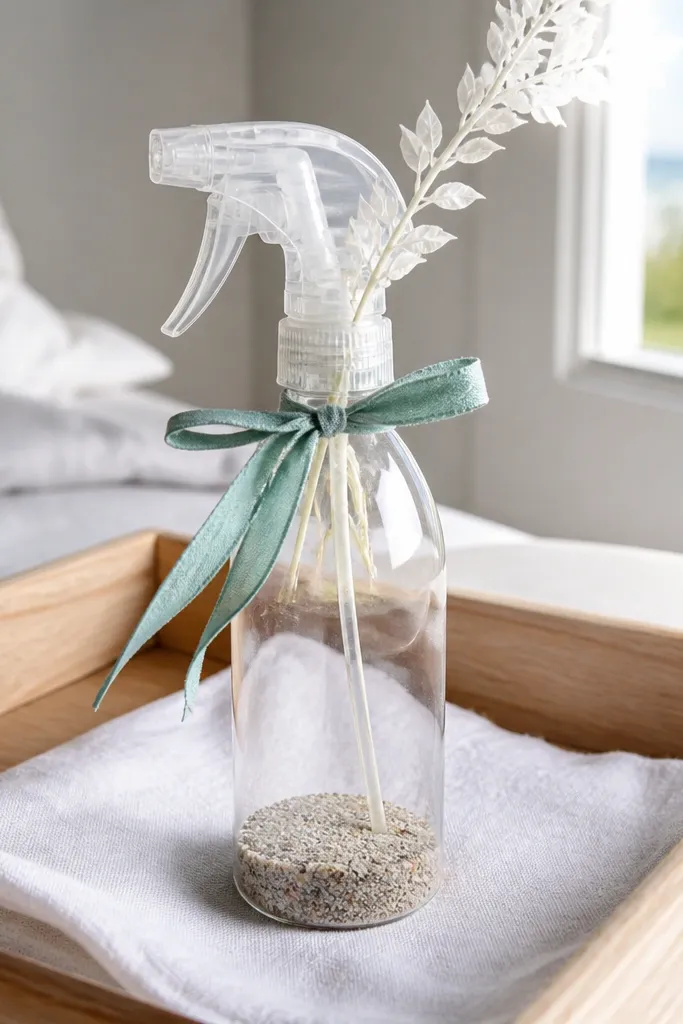
Start by filling the bottom of the clear bottle with sand to cover the base evenly. Then insert one stem and adjust height so the flower sits above the bottle label area. Finally, tie a sea-green ribbon around the neck and place the bottle on a tray with two shells for balance. It takes 5 minutes if you already have sand and a stem.
A clear spray bottle can look like a random item until you turn it into a vase. Put a thin layer of sand in the bottom, then insert a single white stem or dried grass and cap it with a ribbon. The bottle shape adds a modern coastal feel, and the sand gives texture you can see clearly. This looks good on a tray and in close-up photos because the materials are simple and clean. It suits bride-to-be rooms where you want coastal charm without hanging decor.
Skip thisSkip messy sand clumps — wipe the bottle sides so it looks clean in photos.
Quick tipUse a ribbon that matches your palette so the bottle reads as decor, not storage.
23. Coastal Balloon Garland Strip Behind Bed Photos

Start by tying a thin ribbon or string across two removable hooks above the bed. Then attach small balloons to the string using balloon ties or ribbon loops, keeping spacing even. Finally, add a small cluster of white balloons at the center for a focal point. If balloons are ready, plan 5-10 minutes depending on how many you attach.
A balloon garland strip behind the bed gives you a styled background without covering the whole wall. Use small balloons in sea-green, pale blue, and white, arranged in a shallow arc. The arc matters — it frames your head and shoulders instead of looking like a random cluster. Keep it short and focused so it doesn’t crowd the room. This works best for bridal mornings when you want quick, flattering photo backgrounds.
Skip thisAvoid giant balloons — they block your backdrop and make the room look smaller.
Quick tipUse a mix of matte and semi-matte colors to reduce glare in flash.
24. Dresser Photo Frame With Beach Map Border
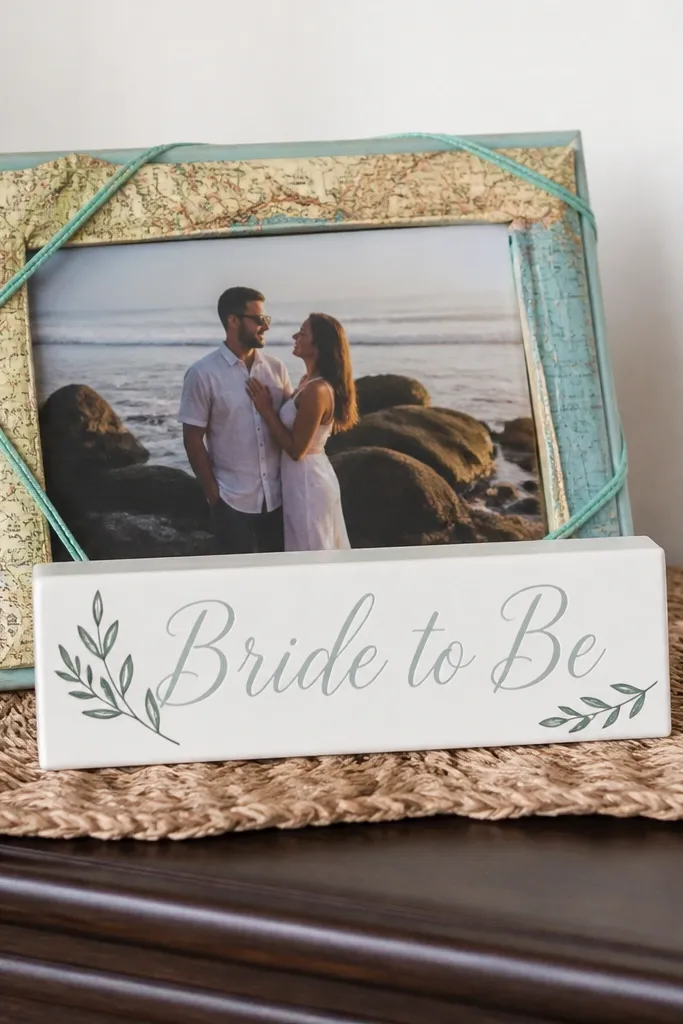
Start by inserting a print or cutout map strip into the frame so it sits centered. Then wrap a narrow sea-green ribbon around the frame front and secure with tape on the back. Finally, place the frame upright and angle it slightly toward the bed so it catches light. This takes 5 minutes if you have a frame ready and the print is cut.
A framed beach map border makes your room feel coastal without adding clutter. Use a simple photo frame and swap in a printed beach map strip, then add a small sea-green ribbon around the frame edge. The map lines act like texture, and the white border keeps it clean for photos. Place it behind your bride-to-be sign or next to a candle tray. This is a smart choice when you want “beach charm” that doesn’t look like a party kit.
Skip thisAvoid frames with heavy gold trim — it shifts the vibe away from coastal.
Quick tipChoose a map with light blues and beige paper tones; dark maps look busy.
25. Mini Shell and Ribbon Shadow Box
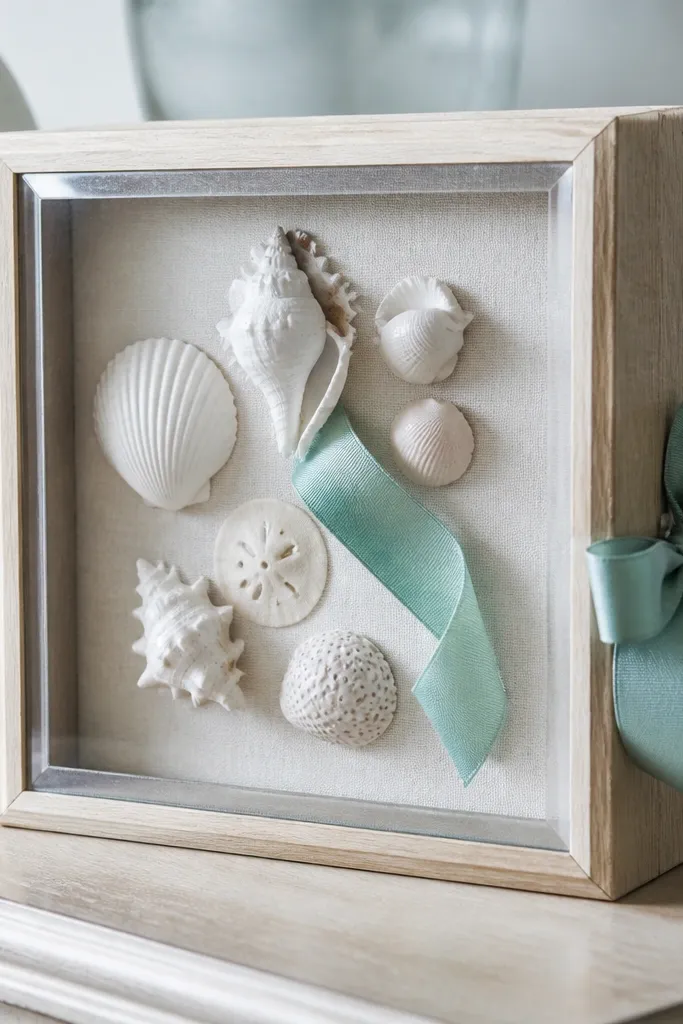
Start by cleaning the shadow box glass and placing shells in a loose pattern on the bottom. Then add one ribbon strip as a diagonal accent so the composition has movement. Finally, secure the lid and place it on a tray beside a candle or sign. With pre-cut shells, it’s a 5-minute setup.
A mini shadow box adds depth and looks intentional in close-ups. Use a small clear-front shadow box, place shells and a short ribbon strip inside, and keep the background white or sand-colored. The glass edge catches light, giving your decor a polished look even in a simple room. This works well for bride-to-be setups because it creates a focal point on a dresser without needing wall space. Place it where you’ll take flat-lay photos of your gifts and accessories.
Skip thisSkip too many tiny pieces — it looks cluttered when viewed through glass.
Quick tipUse larger shells at the back and smaller shells at the front for depth in photos.



