1. Headboard Arch With Fabric + Faux Florals
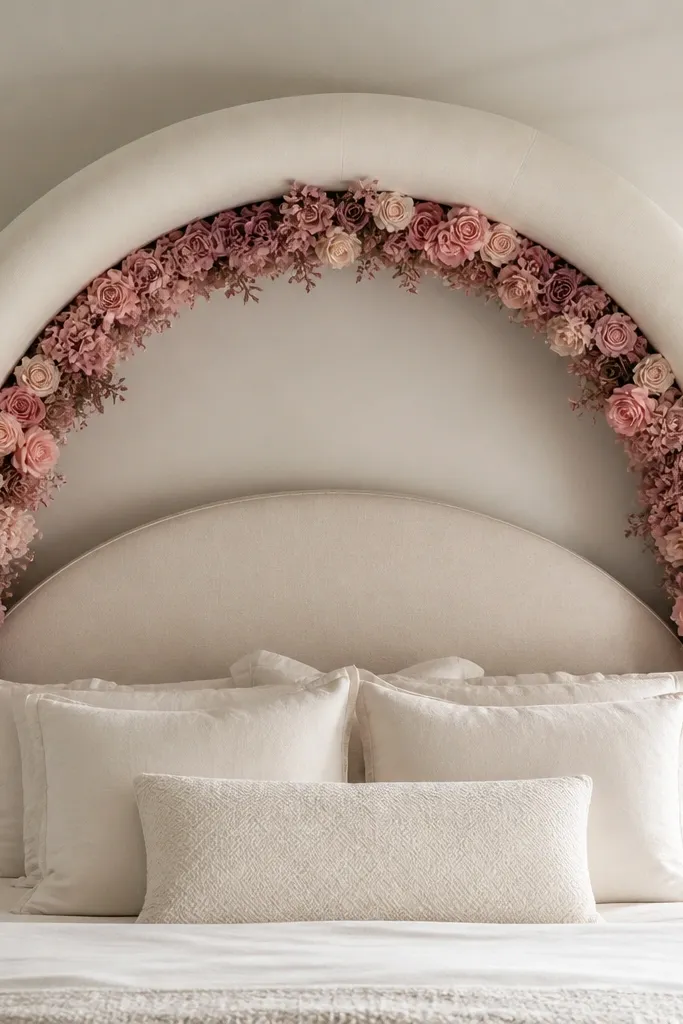
This is the room’s photo anchor. A fabric arch above the bed instantly turns a standard headboard into a ceremony-style moment, and it frames your face in portraits. Choose ivory or soft cream fabric for a clean look, then add faux florals in blush and dusty rose so the colors pop without looking too loud. It works best when your bed is against a wall and you have enough ceiling height for the fabric to drape smoothly. For best results, keep the arch symmetrical so it looks styled even from the side.
Quick tipUse sheer fabric plus florals — the fabric makes the arch look bigger than it is.
Start by measuring the headboard width and ceiling height so the arch lands centered. Drape a single long strip of ivory tulle or chiffon from left to right using clear hooks or a lightweight tension rod, then gather the center slightly for a sculpted curve. Add faux florals with zip ties or floral wire, spacing larger blooms near the center and smaller ones toward the edges. Finally, secure the ends so the fabric doesn’t slide during movement or photos.
Skip thisDon’t use dark fabric behind light florals — it makes the whole setup look muddy in photos.
2. Mirror Frame Glow With Warm String Lights
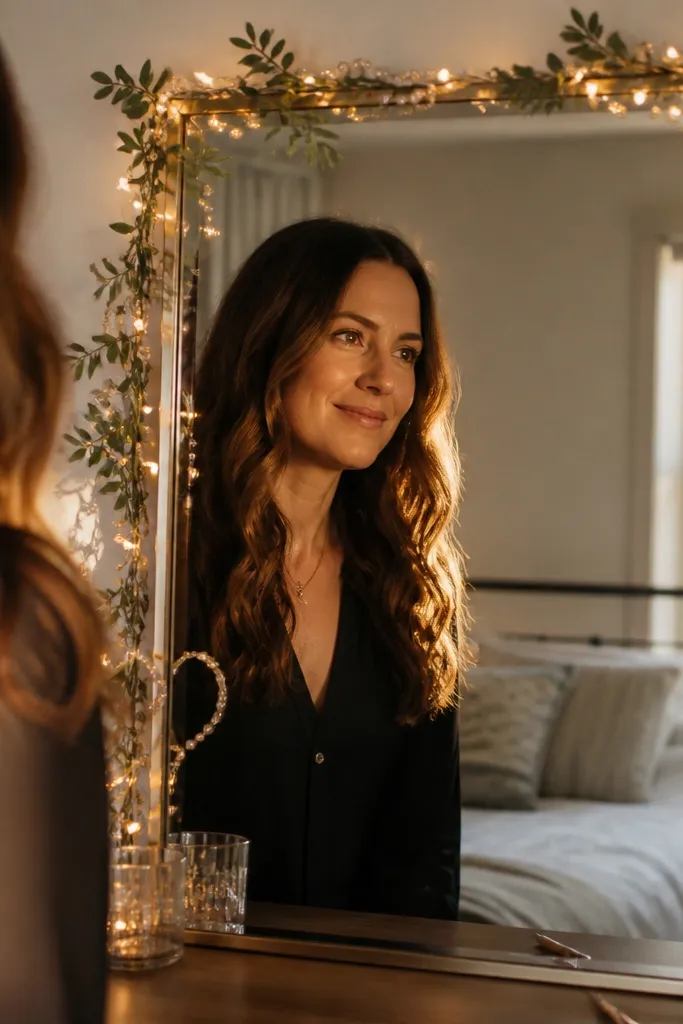
If you want the “bride room” look in seconds, decorate the mirror. Mirrors are where most getting-ready photos happen, and light around the frame makes everything look softer and more flattering. Wrap warm white string lights around the mirror edge or frame, then tuck small greenery or faux pearl strands into the gaps. Keep the lights warm (not icy white) so skin tones look natural. This idea suits hotel rooms and rentals because it works without drilling.
Quick tipTest the mirror glow before you style your hair — the angle changes how bright it looks.
Start by cleaning the mirror frame area so adhesive hooks hold. Attach small clear hooks or removable adhesive clips around the perimeter, then weave string lights in a loose oval shape. Add greenery or pearl accents with hot glue only to freestanding pieces (or use twist ties if you’re staying removable). Finish by turning lights on and checking for hot spots — adjust so the glow is even across the mirror.
Skip thisSkip cool blue bulbs — they make the mirror area look harsh and unflattering.
3. Layered Bedside Vignettes in Three Heights
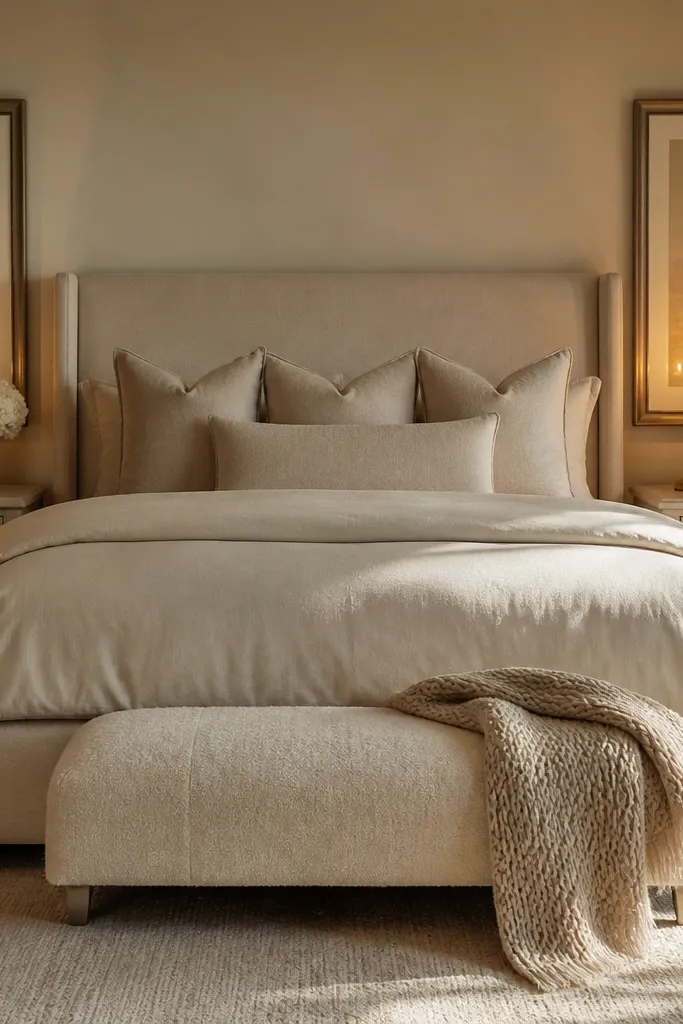
A room can look high-end even without big installations if the bedside styling is intentional. The key is height layering: tall, medium, and low pieces on each side of the bed so photos have depth and balance. Use warm candles, a small floral bud vase, and a tray for jewelry or perfume. Stick to one material direction like satin ribbons, glass, and soft florals. This idea is perfect when you have limited wall access or you want decor that’s easy to move.
Quick tipUse one ribbon color across both sides so the room looks coordinated.
Start by choosing two identical trays or small stands so the sides match. Place a tall element first — a slim vase or candle holder — then add a medium bud vase with 3-5 stems. Finish with a low tray holding a ribbon-wrapped box, a small bouquet charm, or a perfume bottle. Keep items grouped within a 12-14 inch area on each table so it reads clean in photos.
Skip thisDon’t scatter items across the whole tabletop — it makes the bedside look messy fast.
4. Cloud-Soft Tulle Canopy Over Bed
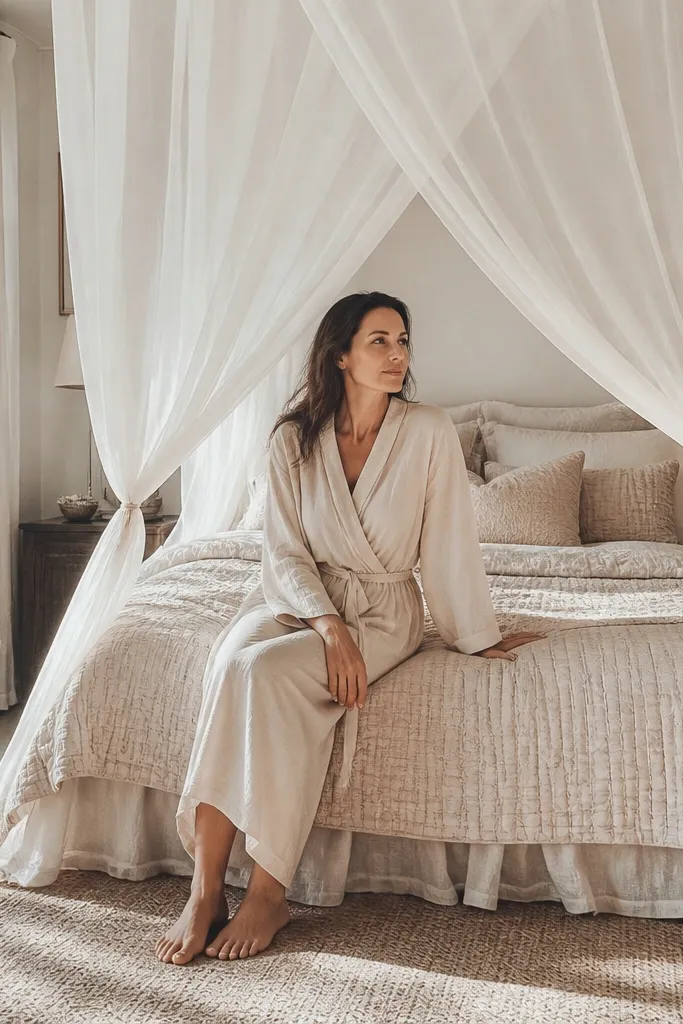
This gives you that dreamy, airy bridal look without needing real floral volume. Tulle canopy draping creates soft shadows and makes the bed feel like a photo set. Choose white tulle with a slightly textured weave so it holds shape rather than collapsing flat. It’s especially photogenic in rooms with natural light from the window. If your bed is centered under a light fixture or near a ceiling corner, the canopy frames the space beautifully.
Quick tipPick tulle that’s slightly stiff — it drapes in shape instead of looking limp.
Start with four mounting points using removable hooks or adhesive ceiling clips. Attach tulle panels to each corner and adjust length so the canopy falls 6-10 inches above the floor line you want. Gather the center so the canopy forms a gentle mound, then add one small faux flower cluster or a satin bow at the top center. Finally, check how it looks from the doorway and from the mirror to ensure the folds read well.
Skip thisDon’t use tulle that’s too transparent — it disappears in bright hotel lighting.
5. Floating Floral Ceiling Line With Fishing Line
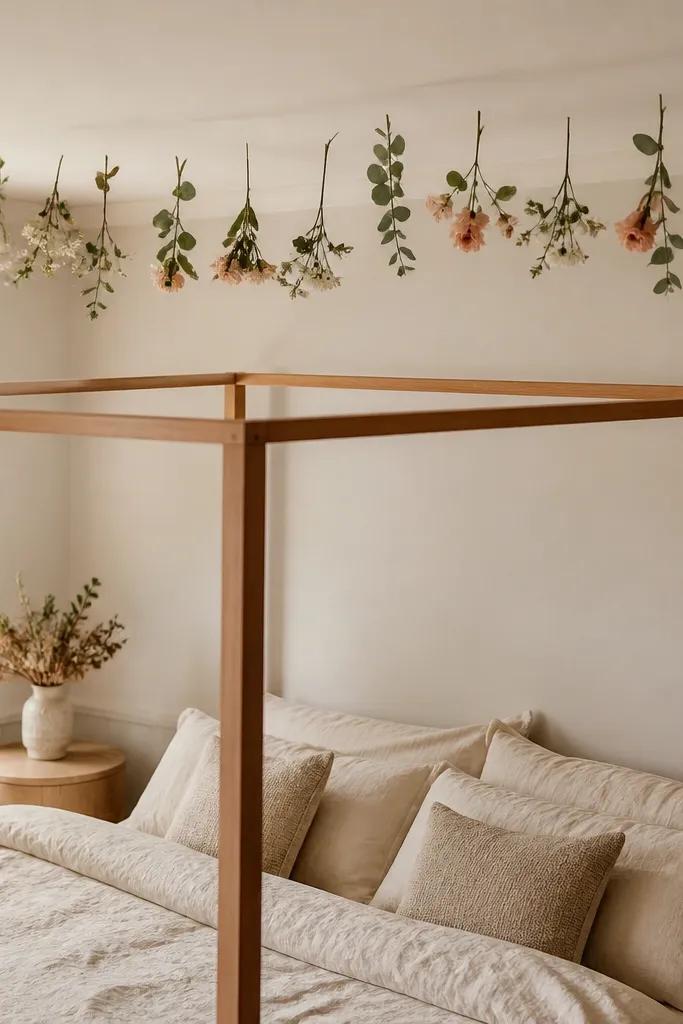
Height makes a room feel bigger, and a floating line of florals reads incredibly well in overhead or side photos. This is a smart move for three-day timelines because you can install it quickly and remove it easily. Use small faux blooms, greenery, or even silk flower buds spaced evenly along a line above the bed or photo corner. Keep the line thin and light so it doesn’t look heavy. The result feels whimsical, not cluttered.
Quick tipUse matte faux greenery — it hides the line better than shiny pieces.
Start by marking two points on the ceiling or upper wall where you can anchor a line. Use clear fishing line and tie it securely with a knot, then hang small clusters spaced every 10-16 inches. Add one slightly larger cluster in the center for a focal point. Finally, adjust the heights so the lowest flowers sit about 12-18 inches above your headboard or the photo area.
Skip thisDon’t hang florals too low — they cast shadows across faces and look distracting.
6. Dresser Mirror Bouquet Vines
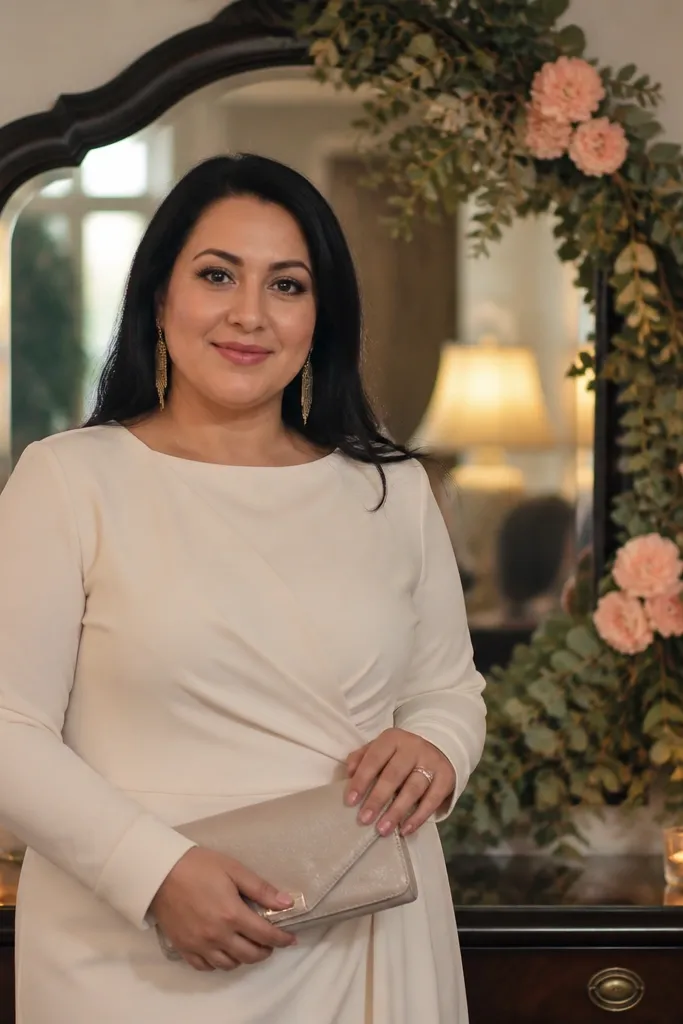
A dresser mirror is where the “bride detail” photos happen, and vines make it look styled without taking up floor space. The trick is to run the vine diagonally or in an S-curve so it feels natural and not pasted-on. Choose greenery with soft texture, then add blush blossoms in small clusters. This looks best when your mirror frame is simple, like black, gold, or wood, because the vine becomes the focus. It also pairs well with hair tools and a ring dish so the whole getting-ready area looks cohesive.
Quick tipKeep blossoms to one color family so the mirror area doesn’t look busy.
Start by laying the vine on the floor to plan the curve. Use removable adhesive hooks to anchor each bend point, then press the vine into place so it follows the mirror shape. Add blossoms using floral wire, placing 2-3 clusters near the top and one cluster near eye level. Finish by tucking the vine ends slightly behind the mirror frame for a cleaner edge.
Skip thisSkip thick, chunky florals on a mirror frame — they block the reflection.
7. Satin Ribbon Backdrop on a Freestanding Stand
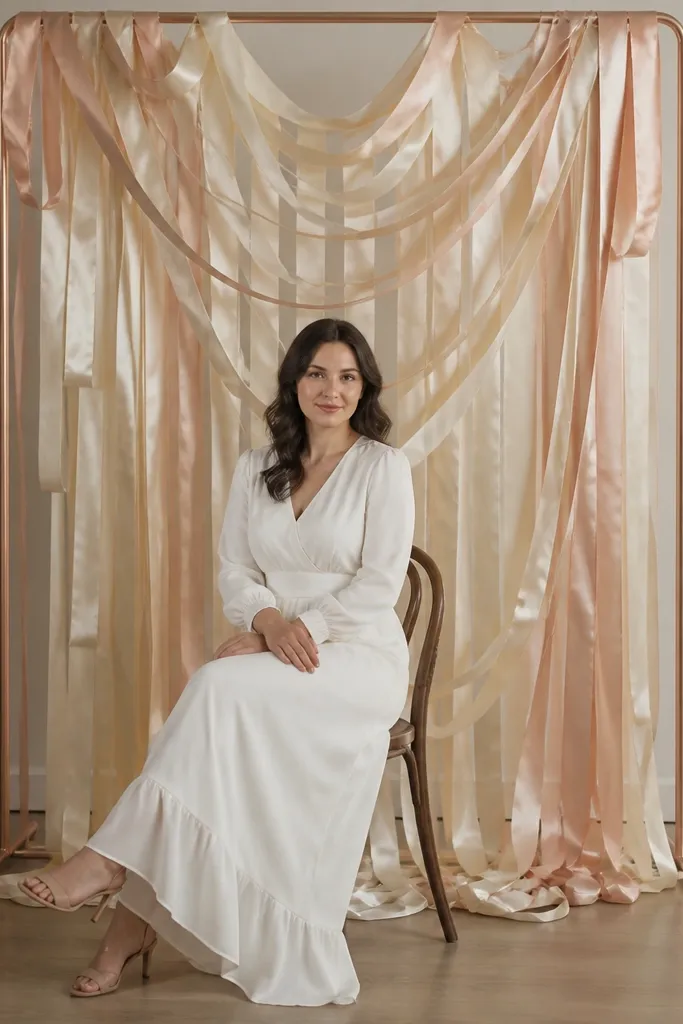
If you want a photo spot that works in almost any rental, use a freestanding backdrop. Satin ribbons create movement in photos and look expensive even in small spaces. Choose ivory ribbons with blush or champagne accents, then layer them at different lengths so the background has texture. This works especially well if your room has a blank corner and no permission for wall mounting. It’s also easy to reposition for different photo angles across the three days.
Quick tipPhotograph against the backdrop in the evening — satin catches warm light beautifully.
Start with a lightweight backdrop frame or even a tall garment rack designed for parties. Attach ribbons in bundles, alternating colors every 2-3 inches so it looks planned, not random. Vary lengths by trimming some ribbons 6-10 inches shorter than the longest ones. Finally, add one small floral cluster at the top center using zip ties or wire for a focal point.
Skip thisDon’t use slippery satin only — it can slide down in humidity and look uneven.
8. Statement Floral Vase Cluster on the Entry Table
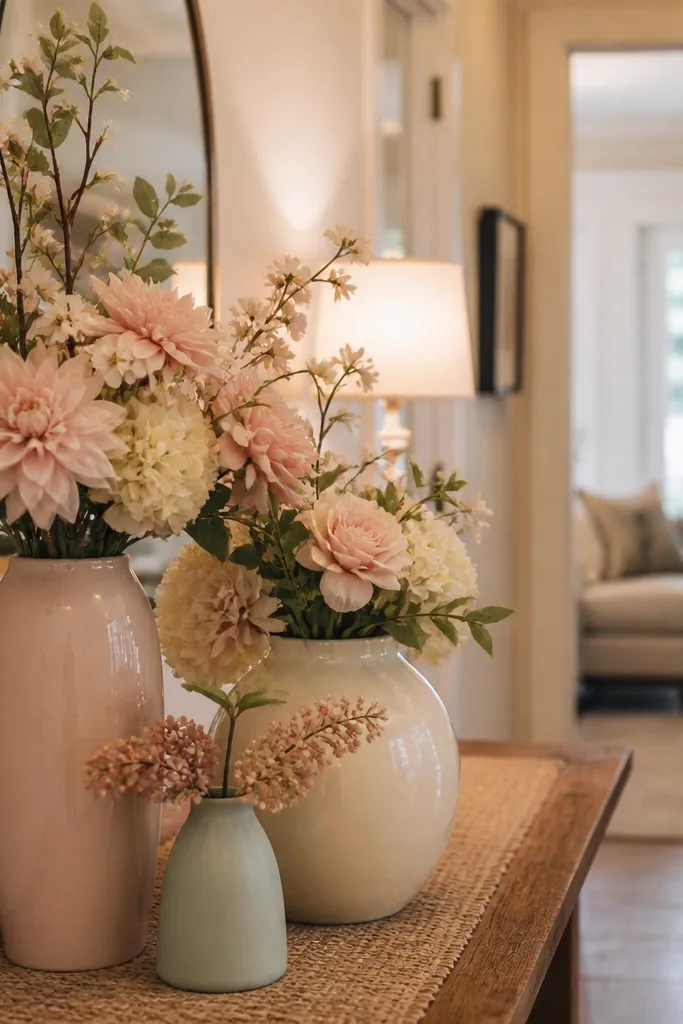
Entry areas are where guests and photographers naturally start, and a grouped vase cluster makes the room feel ready before anyone even sits down. The best version uses three containers with different shapes so it looks styled, not like a single bouquet plopped on a surface. Use blush, cream, and a touch of soft green for realism. Place it on a console, dresser, or sideboard — anywhere near the doorway. It’s photogenic from wide shots and gives you a “welcome” look.
Start by choosing three vase sizes: one tall, one medium, one low. Fill with faux stems or real water-friendly stems if your venue allows it. Arrange so tallest vase sits slightly behind the medium, and the low vase anchors the front. Add a small ribbon tie around one vase neck to unify the look with the rest of your decor.
Keep vase openings visible — stacked bouquets that hide the vase shapes look flat.
Don’t crowd the table with candles, frames, and snacks — the cluster needs visual breathing room.
9. Floating Candle Steps With LED Tea Lights
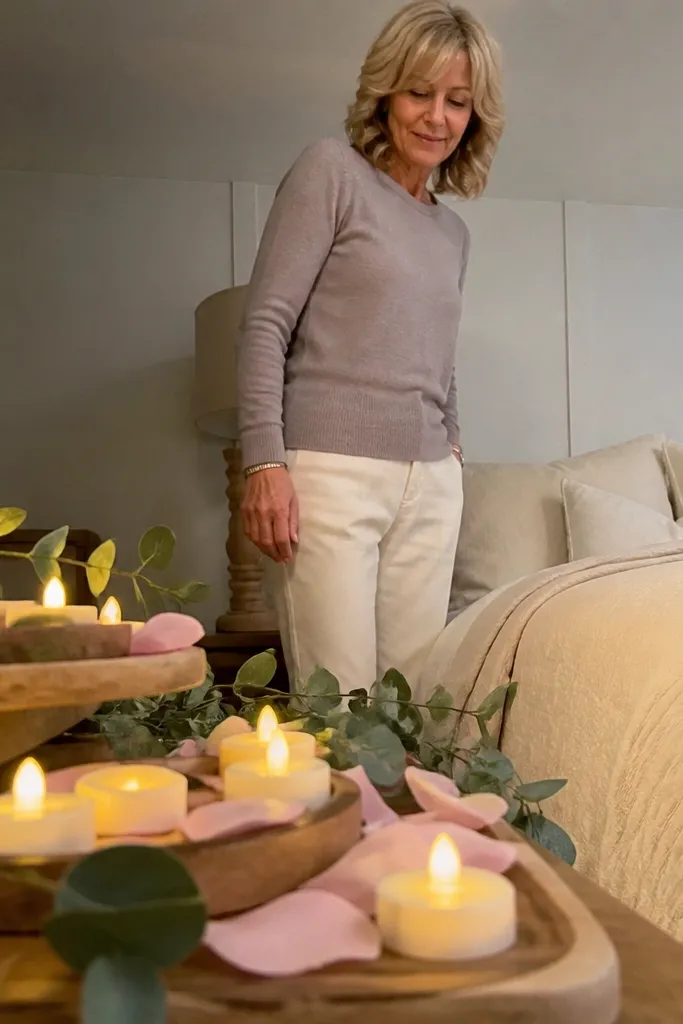
You can create a “soft glow” bridal mood without using open flames. LED tea lights on layered trays look romantic in photos and read as a deliberate lighting plan. Place them along the bedside edge or in a small path toward your photo corner. Choose warm white LEDs so the glow matches skin tones. This idea works year-round and is especially effective for evening touch-ups on day three.
Quick tipUse warm white LEDs with a timer so you don’t have to manage switches during photos.
Start with two or three shallow trays in different sizes, plus a few pillar holders if you have them. Arrange trays in a staircase pattern so the light rises toward the camera. Put LED tea lights in the top tray and fewer lights in the lower trays to avoid an over-bright wall. Finally, dim the room lighting for photos and adjust tray spacing until the glow looks even.
Skip thisSkip flicker-heavy LEDs — they can look distracting on camera.
10. Wall Photo Grid With Polaroid-Style Cards
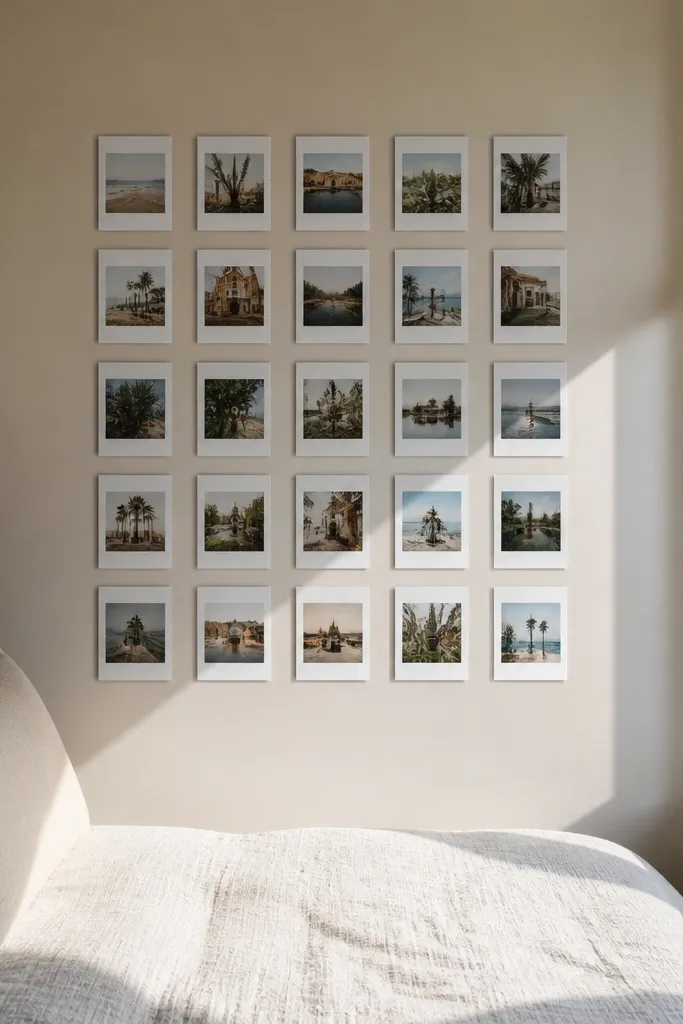
If your room has boring wall space, a photo grid instantly adds personality and gives photographers a textured background. Use thick card stock with Polaroid-style borders so it looks cohesive even when the room is small. Keep the grid tight and symmetrical so it reads as intentional decor, not a random collage. This is great for brides who want personal touches without heavy floral costs. It also pairs well with a simple palette like cream and blush.
Start by choosing 12-16 photos or print cards in one size. Arrange them on the floor first in a grid with equal spacing so the layout matches the wall. Use removable poster putty or small double-sided tape squares for each card corner. Finish by adding one larger “hero” card in the center above the bed or dresser so the wall has a clear focal point.
Use matte card stock — glossy prints catch glare from hotel lights.
Don’t mix sizes and border colors — it looks like a last-minute pinboard.
11. Mini Floral Wreath Hung at Bedside Height
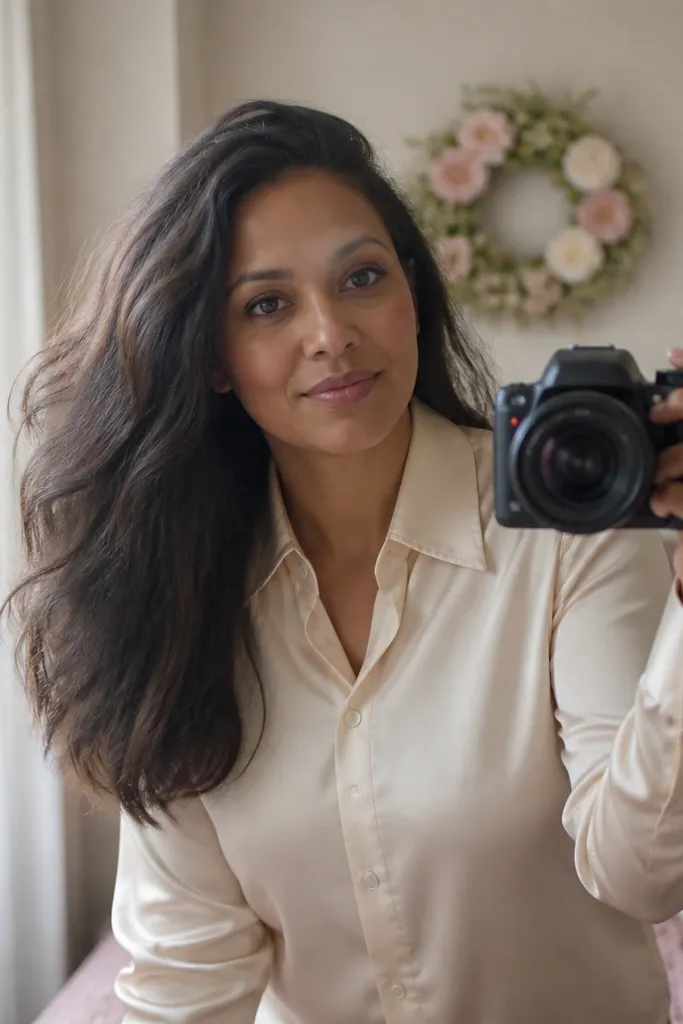
A wreath at bedside height is a simple way to add softness without covering a whole wall. It frames portraits and gives you a clean circular shape behind your shoulders. Choose a mini wreath with blush and cream flowers plus a little greenery for texture. Hang it where it will appear behind you in mirror selfies, not behind your head where it can look blocked. This works in both hotels and apartments because it uses a single mounting point.
Start by measuring the space beside the bed so the wreath sits about at upper torso height. Use a command hook or adhesive hook rated for the wreath weight. Hang the wreath slightly tilted toward the room center for a more natural look. Add one small ribbon bow at the bottom to match your wedding color scheme.
Use the same ribbon color you plan to use later for bouquet wrapping or signage.
Don’t hang it too high — it can cut off your head in photos.
12. Flower Petal Rug Runner for Photo Anchors
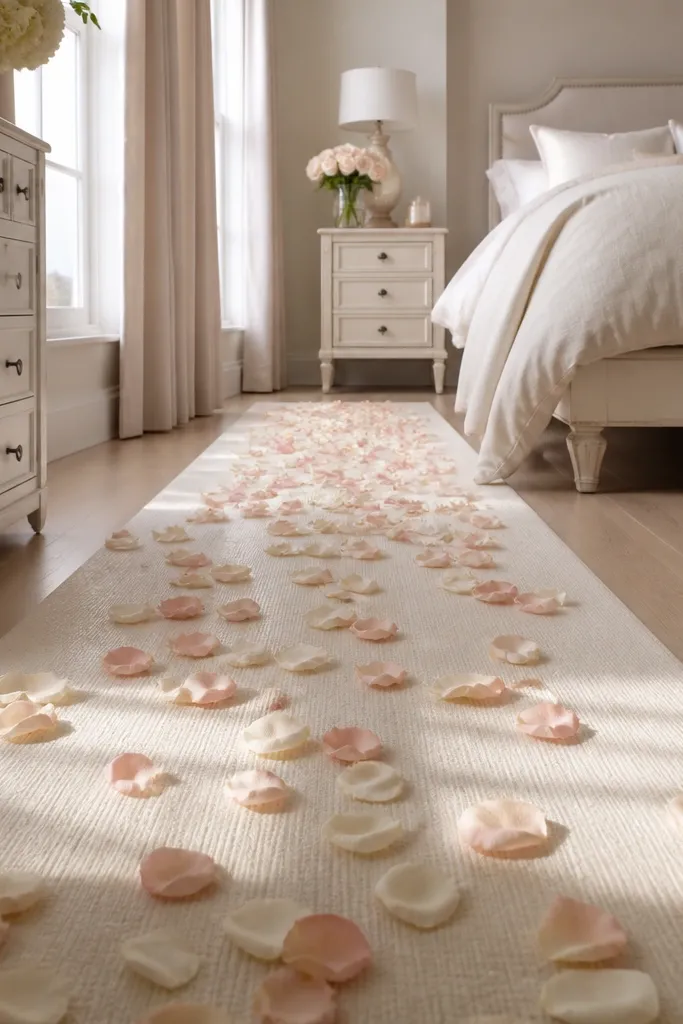
Petals are one of the fastest ways to make the room look wedding-ready. A petal runner creates a clear path for photos and adds texture underfoot, especially in morning light. Use faux petals or real petals if you can clean up quickly and your venue allows it. Stick to cream and blush tones so it looks classy, not chaotic. This idea is best when you have a hallway-to-bed view or a small open strip where you can place a runner.
Quick tipUse a lint roller afterward — petals cling to fabric and show up in unwanted areas.
Start with a lightweight cream rug runner or even a narrow fabric runner you can roll up. Place it where you’ll take photos, then scatter petals lightly so they don’t look clumped. Add a small cluster of petals near the bed edge and one cluster near a chair or mirror for visual repetition. Finally, secure the runner corners with tape or non-slip pads if the floor is slippery.
Skip thisSkip heavy red petals — they steal attention from your face and dress.
13. Blush Balloon Cluster With Ribbon Tail Placement
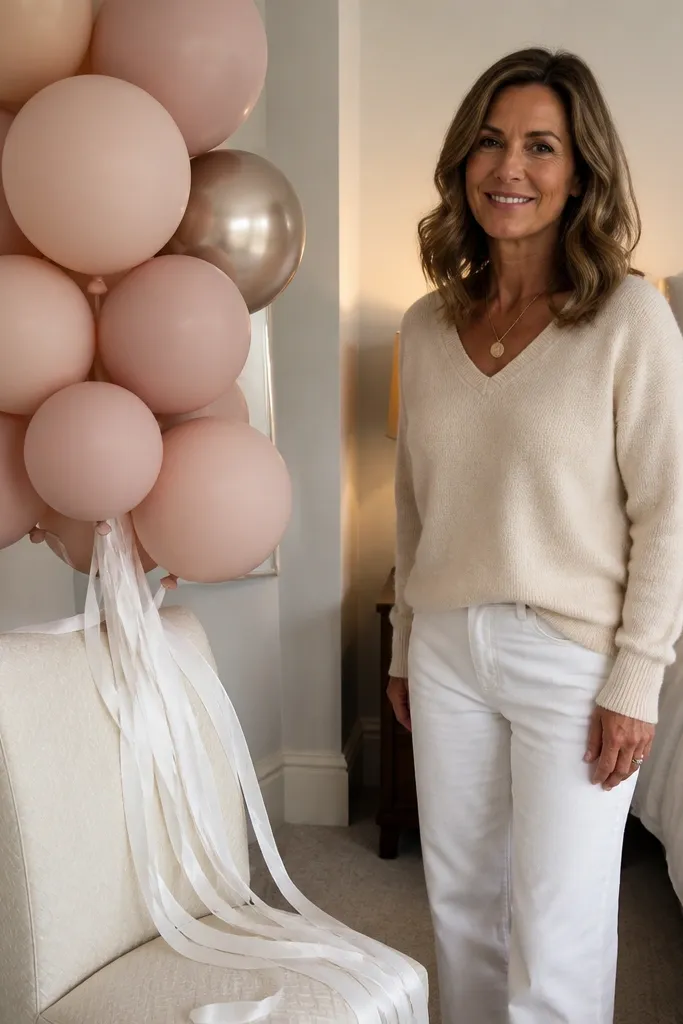
Balloons can look cheap fast, but placed correctly they look like a styled photo prop. A blush balloon cluster with long white ribbon tails creates movement and a soft color pop that reads well on camera. Choose matte balloons in blush and cream, then add one metallic champagne balloon for a subtle highlight. Put the cluster near the window or a clean wall so it doesn’t fight with busy decor. This is a strong option for day two when you want quick impact without building structures.
Quick tipUse matte balloons — they photograph softer than glossy ones.
Start by choosing a cluster size: 6-10 balloons looks best in a room shot, not 20. Tie balloons to a weighted base or ribbon anchors so the cluster stays upright. Add long ribbon tails and let them fall toward the floor, but keep them off the bed so photos don’t tangle. Finally, adjust the cluster height so it sits around mid-chest to shoulder level in your selfies.
Skip thisDon’t place balloons behind dark furniture — the contrast makes the cluster look harsh.
14. Draped Taper Candle Wall on the Side of the Bed
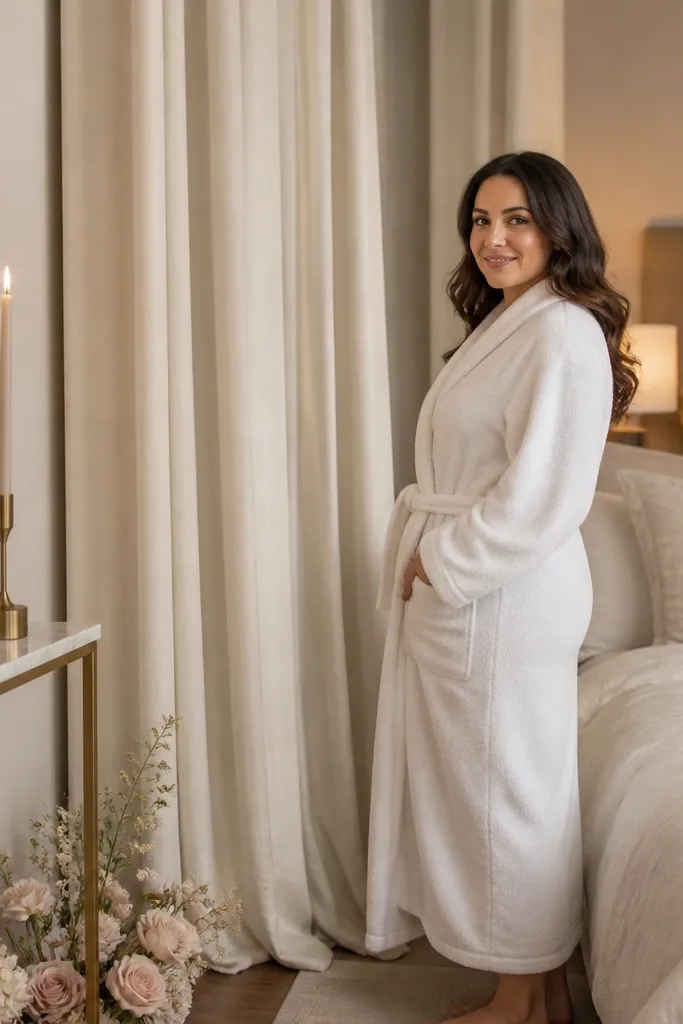
This gives you a “ceremony at the room” feel using vertical lines. A cream drape panel beside the bed plus taper candles in a row creates a clean backdrop for photos and makes the corner feel intentional. Use candle holders that match your palette — gold, bronze, or clear glass. Keep the candle count to 3-5 so it looks styled, not like a buffet. This works great if you have a blank side wall and want something dramatic without covering everything.
Quick tipChoose holders with a matte finish — glossy metal reflects harsh points of light.
Start by hanging a single drape panel using removable hooks so it falls straight. Place candle holders along the base line with equal spacing, then align them to the camera angle (the side closest to the photographer). Use battery tapers if you’re in a hotel or if you want an easy setup. Add one small floral sprig between holders to soften the lines.
Skip thisSkip tall decor that blocks the bed — you want candles beside the bed, not in front of it.
15. Tabletop Bridal Spa Corner With Mini Tray Set
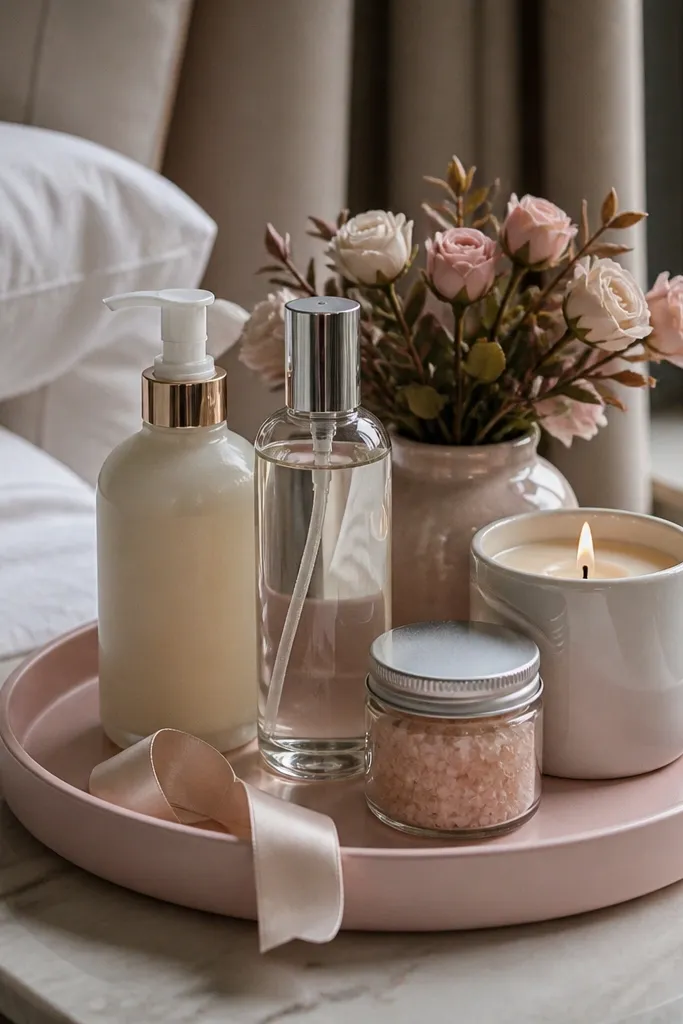
A spa corner looks adorable in candid prep photos and it makes the room feel like a retreat. Build it around a small tray set: a lotion bottle, a face mist, a bath salt jar, and a candle. Add one strip of satin ribbon and a small faux flower bud arrangement so it matches your bridal palette. This idea suits brides who want “dreamy details” more than big wall installs. It also gives you a practical place to set things down during the 3-day rush.
Quick tipUse one floral scent-free option if you’re sensitive to fragrances — photos still look beautiful without strong smell.
Start by picking a tray size that fits on a chair side table or dresser — around 10-14 inches wide. Arrange items by height: candle or jar in back, bottles in the middle, small dish in front. Tie a ribbon around the tray handle or anchor it under one corner for a consistent look. Finish by adding a few rose petals around the tray base so it looks styled, not scattered.
Skip thisDon’t mix too many bottle colors — stick to white, blush, or clear glass.
16. Chair Back Flower Collar for a Clean Photo Spot
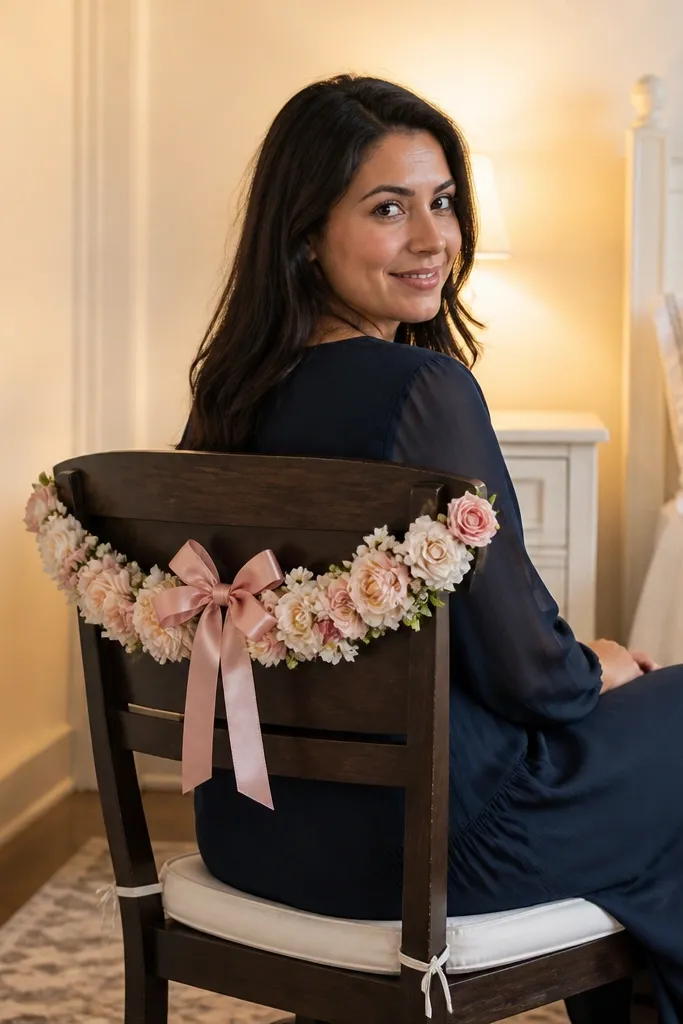
A chair back collar is a tiny install that makes a room look styled instantly. Photographers love chairs because you can sit for photos without cluttering the bed area. Use a blush floral garland or ring around the chair back, then tie a satin ribbon bow at the center. This works in hotels because it doesn’t need wall mounting, and it’s easy to move to wherever you’re shooting that day. Pick a chair with a simple back shape so the collar looks intentional.
Quick tipMatch ribbon width to the chair size — 1 inch ribbon looks right on most hotel chairs.
Start by choosing a chair and measuring the back width. Wrap a thin floral garland or pre-made wreath collar around the chair back and secure with zip ties or twist ties that won’t scratch. Add a satin ribbon at the center and let the tails hang to the seat height. Place the chair near a wall with neutral tones so the chair becomes the focal point.
Skip thisDon’t cover the whole chair with flowers — a collar reads cleaner in photos.
17. Curtain Rod Garland With Greeneries and Lights
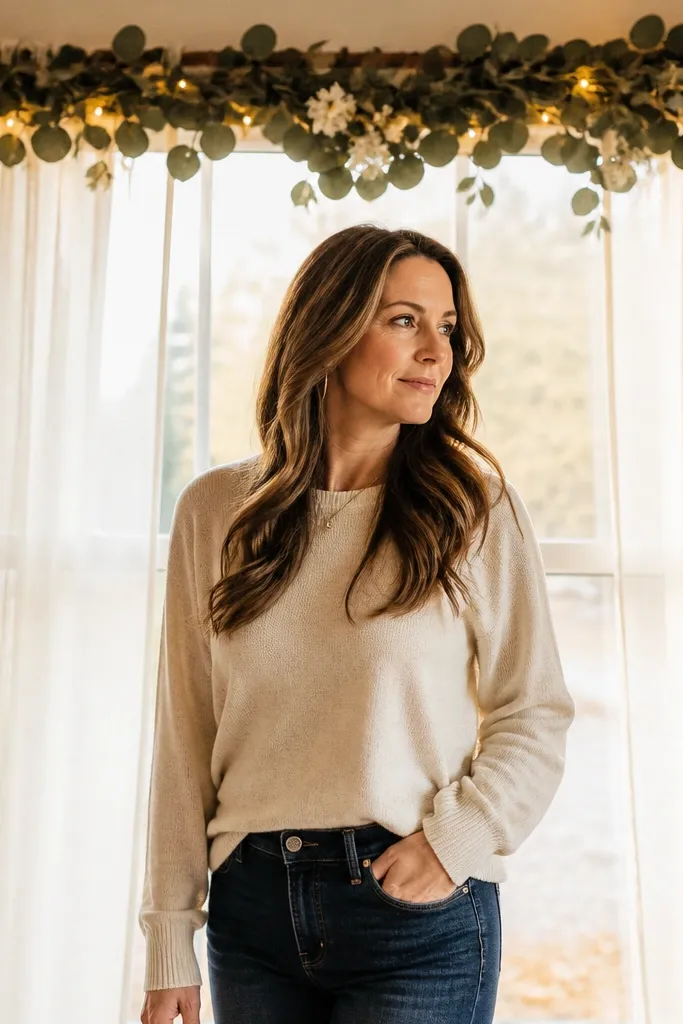
If your room has curtains, decorating the rod is the smartest wall-free way to add romance. A garland with greenery and tiny warm lights makes the window area look like a set, and it gives you a soft glow behind you. Choose eucalyptus-style greenery (matte leaves) and add small cream flowers sparingly. This idea is great for brides who want a photogenic background that doesn’t take floor space. It also makes morning light photos feel more “styled” because the window has depth.
Quick tipUse a warm dimmer or plug with brightness control if your outlet allows it.
Start by securing a lightweight garland to the curtain rod with removable clips. Add warm micro lights along the garland, keeping the light spacing even. Tuck small faux blooms into the greenery at 3-5 points so the flowers don’t look random. Finally, test the window light by taking a quick selfie from where you’ll stand most.
Skip thisSkip big chunky garlands on thin curtains — they sag and look uneven.
18. Floating Photo Shelf With Frames and Mini Flowers
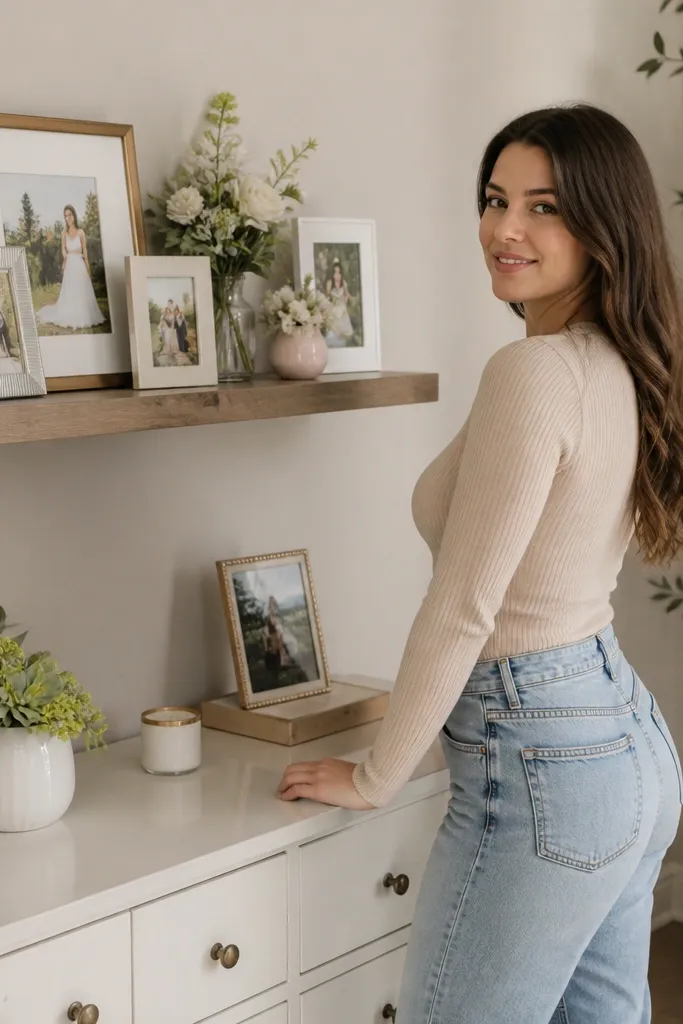
A small shelf above a dresser adds height and a “designed” look without heavy installations. Frames and mini flowers create a layered background that looks great in mirror photos and when you’re standing near the dresser. Use a consistent frame color like gold or white so it blends with your palette. Keep the shelf styling tight: 2-3 frames plus one small floral element is enough. This is ideal for brides who want personal detail but still want the room to feel clean and airy.
Quick tipUse picture frames that already match your wedding colors so you don’t need extra decor.
Start by choosing a shelf size that matches your dresser width — around 18-24 inches. Install with removable shelf brackets if the rental allows, or use a freestanding shelf if not. Place frames first in a slight stagger, then add a small bud vase or mini bouquet in the center. Finish by adding one ribbon-wrapped box or a small candle so the shelf doesn’t look empty.
Skip thisDon’t put too many small items — shelves look cluttered faster than walls.
19. Monogram Balloon Backdrop on a Small Wall
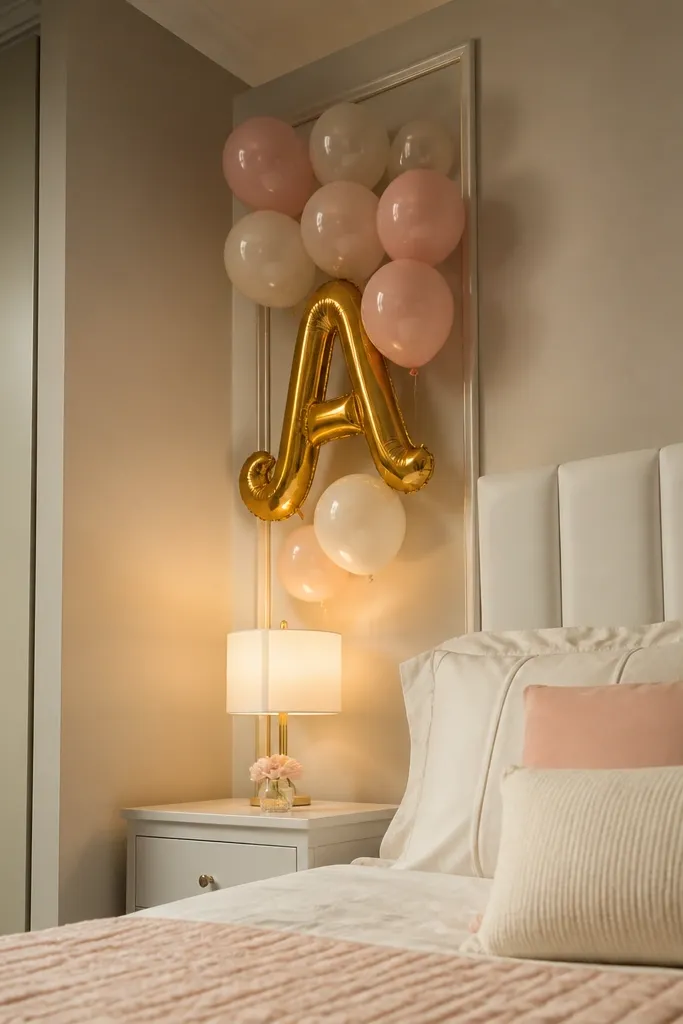
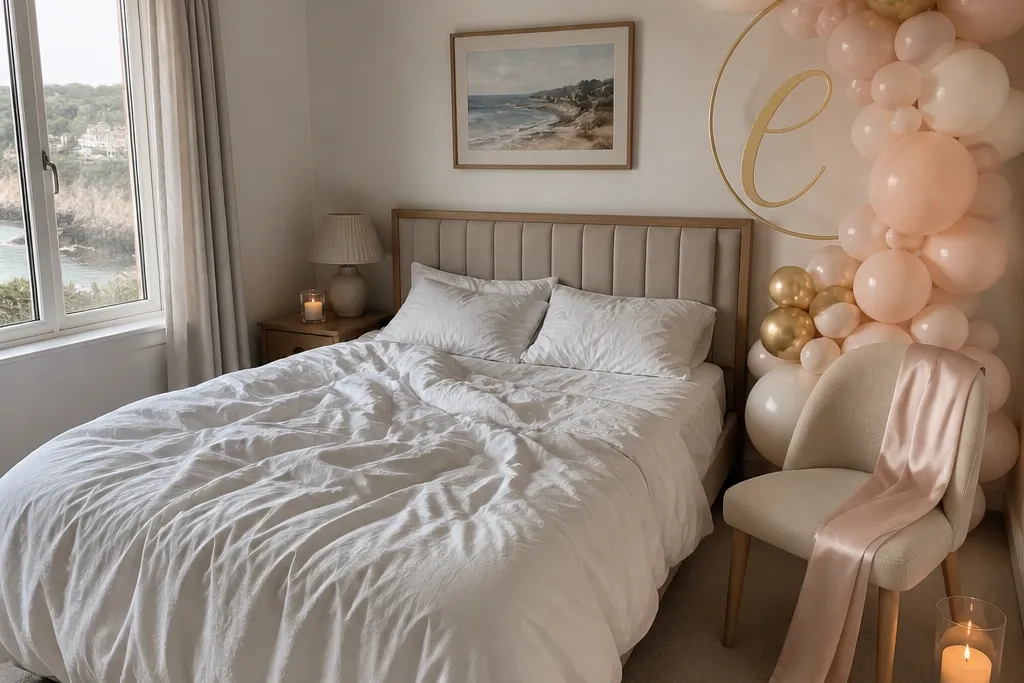
A monogram balloon backdrop gives you a clear brand-like focal point for photos. The look works when you keep the rest of the room simple and let the monogram do the heavy lifting. Choose a gold or champagne monogram letter, then surround it with 6-8 blush and cream balloons. Position it near the bed or a clean wall so it doesn’t compete with other patterns. This is a strong day-two or day-three add-on when you want instant impact.
Quick tipKeep the wall behind it plain — patterns and art prints make balloons look messy.
Start by selecting the monogram letter size — 18-24 inches is plenty for a room photo. Anchor balloons to a weighted base or a balloon strip so they stay upright and centered. Place the cluster so the monogram sits at head height when you stand for photos. Finally, add one small ribbon tail to tie the balloon colors into your overall palette.
Skip thisSkip multi-color balloon mixes — they make the monogram look less polished.
20. Bedside Ledge With a Single Long Flower Runner
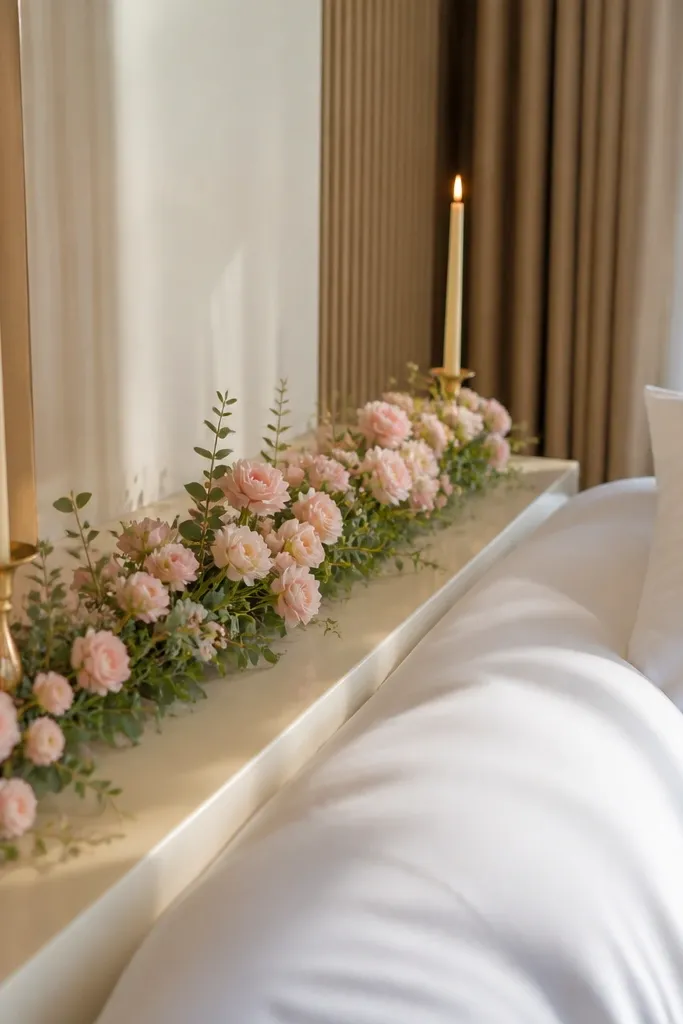
A long runner-style floral arrangement is a clean alternative to bouquets everywhere. It adds softness along the bed line and looks organized in wide shots. Choose faux flowers in one main color and one greenery tone, then keep the stems slim so the runner doesn’t look bulky. Add two slim candles at the ends so the runner frames the photo. This works best when you have a ledge, shelf, or narrow table adjacent to the bed.
Start by laying the runner on the surface to check length — aim for about 70% of the bed width. Arrange greenery first, then place flowers along the top edge so the runner has a defined silhouette. Add candles at both ends and keep them the same height. Finally, check the runner from the doorway angle — if it looks lopsided, adjust spacing before you lock it in with wire or tape.
Use floral foam only if removal is easy — wire and tape-backed stems are faster for rentals.
Don’t mix too many flower types — it turns into a messy bouquet instead of a runner.
21. Satin Bow Doorway Tie With Garland Edge
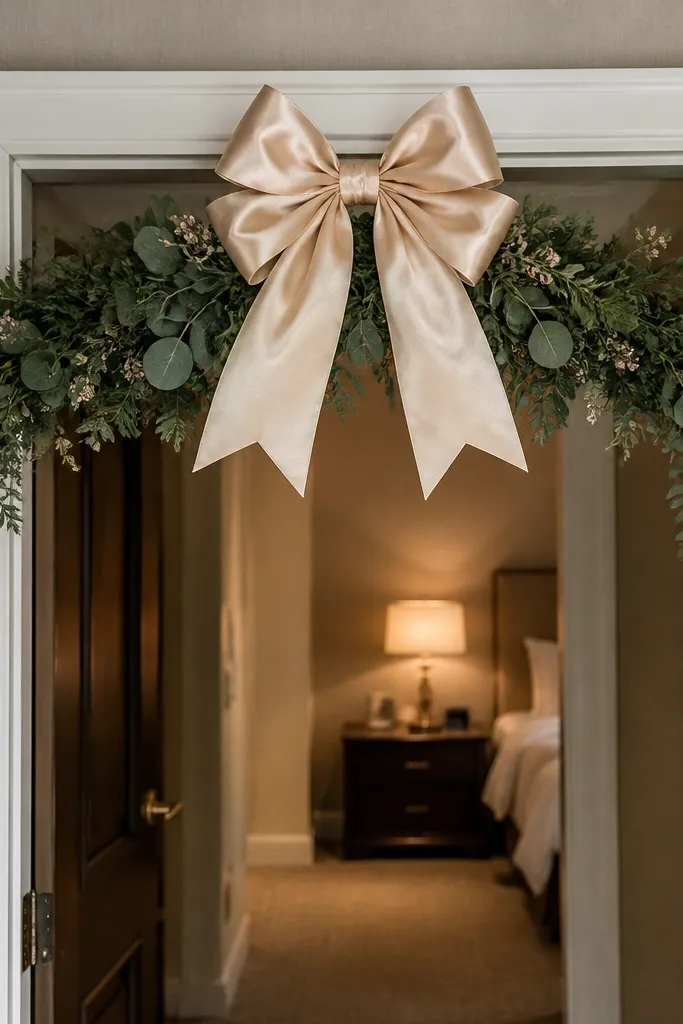
Your doorway is the first thing people see, and it’s also great for quick “getting ready” photos. A satin bow at the top of the door with a small greenery edge looks crisp and bridal without needing a big backdrop. Choose a ribbon width around 2-3 inches for visibility in photos. This works in hotels because you can use removable hooks or command adhesive. It also gives you a consistent visual theme when you’re taking pics from the hallway.
Quick tipUse a heat-sealable ribbon edge so tails stay straight all day.
Start by measuring door width so the bow sits centered. Attach two small removable hooks on either side of the top panel, then drape a thin garland between them. Add a large satin bow in the center using zip ties through the ribbon loops or a ribbon-wrapped wire. Finish by smoothing ribbon tails so they hang evenly and don’t twist.
Skip thisDon’t attach heavy garland to the door handle — it pulls and looks crooked.
22. Window Flower Box on a Board for Rental-Friendly Backdrop
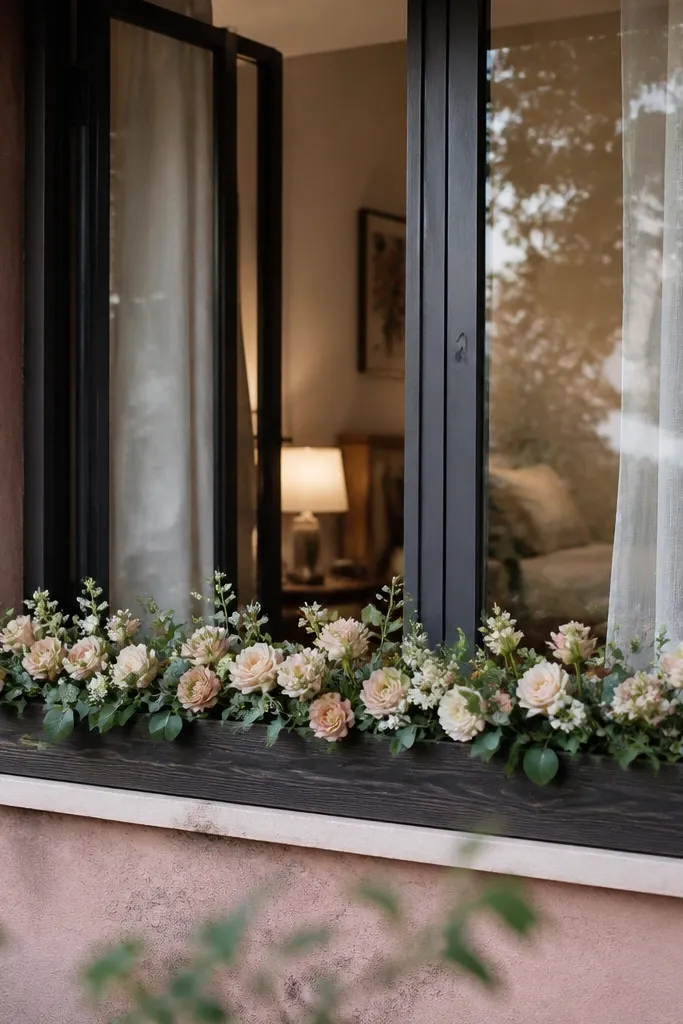
Real flower boxes can be messy, but a rental-friendly version is clean and photogenic. Put a long board or shallow tray in front of the window to create a styled backdrop. Add blush flowers and greenery in a controlled arrangement so it looks intentional from both inside and outside the room. This works well for brides who want a pretty background without hanging anything. It also makes morning photos glow because the window light passes through the greenery.
Start by choosing a board or tray length that spans about half the window width. Lay greenery first, then place larger blooms near the center and smaller ones toward the edges. Secure stems with floral tape on the board so it doesn’t shift when you move the piece. Place the board on a stable surface or against the window sill, then add a ribbon tie at one end for color cohesion.
Keep flowers slightly above the base line — low arrangements look flat in bright window light.
Don’t use uneven stem heights — it reads sloppy in every photo angle.
23. Floating Floral Candle Lanterns on a Side Table
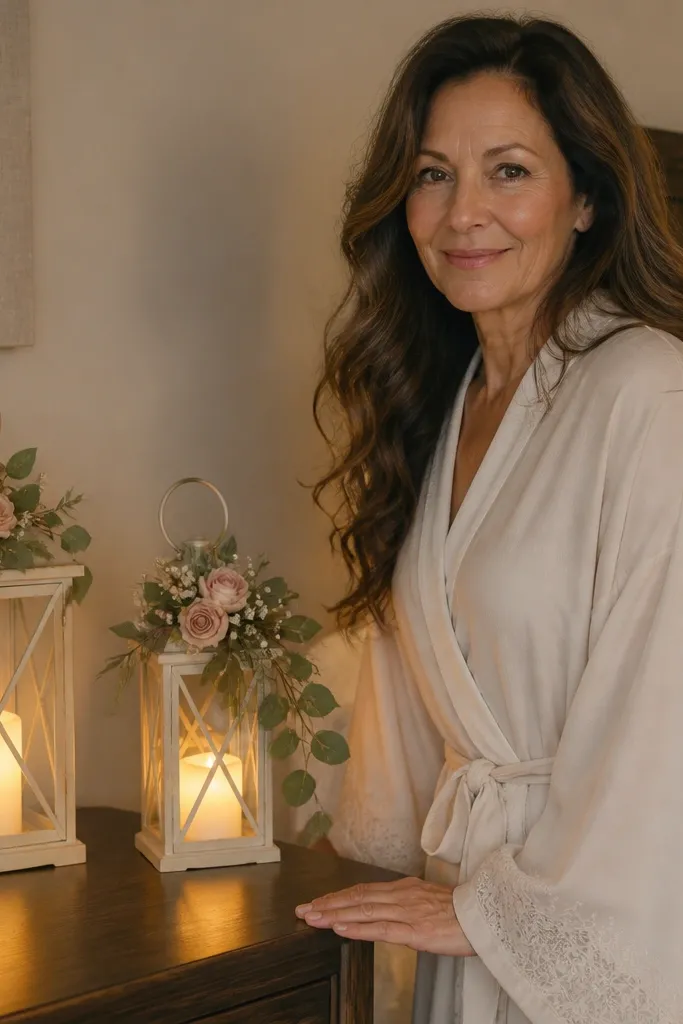
Lanterns add a “soft story” to bride room photos because they create warm frames of light. Use small lanterns on a side table, then tuck tiny floral sprays around the handle or base. Choose warm LED bulbs inside so the glow is steady and camera-friendly. This looks best when the room has neutral walls and you want a cozy vibe for evening portraits. It’s also practical: lanterns look good even when you only have a small surface to decorate.
Quick tipUse lanterns with frosted glass — it softens the light and looks flattering in photos.
Start by placing two lanterns on a side table with space between them. Add LED candles or warm LED bulbs inside the lanterns and test brightness before you decorate outside. Tie tiny floral accents with ribbon or floral wire at the lantern corners. Finally, add one small catch-all tray beneath so any stems or ribbon ends don’t fall onto the table.
Skip thisSkip bright white LEDs — they look clinical next to bridal makeup.
24. Blush Rose Petal Wall Corner With Fabric Overlay
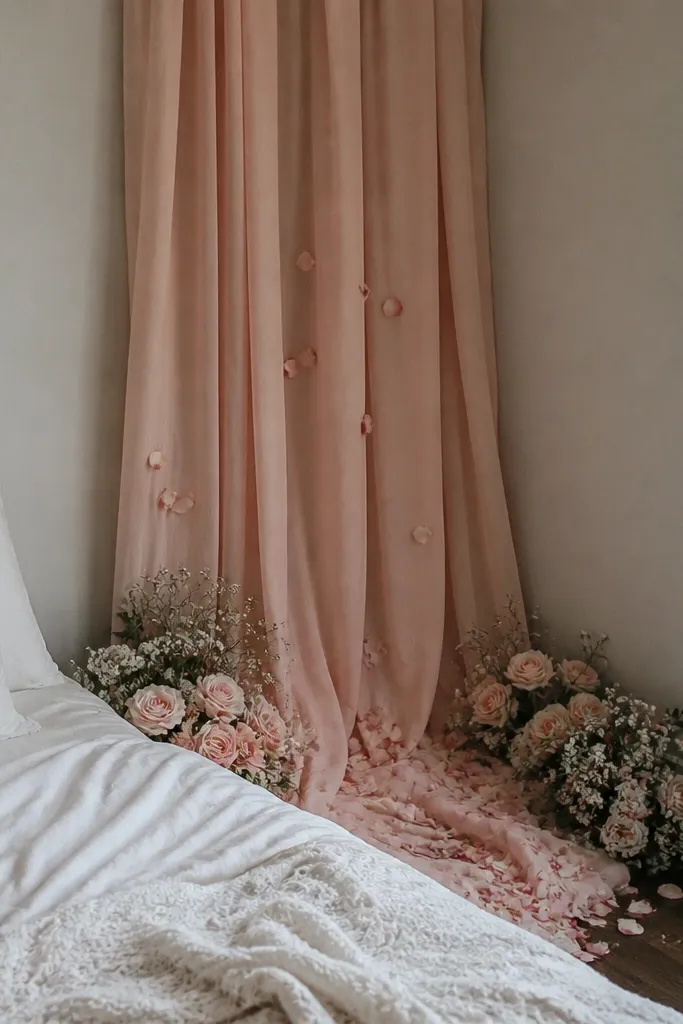
Corners are tricky, but they’re also where dreamy backgrounds hide. A blush fabric overlay in the corner gives you vertical softness, then adding rose petals and small floral clusters makes it look like a styled set. This idea is perfect if you want a “photo corner” without a full wall installation. Keep the fabric tone close to your petals so the texture blends instead of separating. It’s photogenic from both seated and standing angles.
Quick tipUse faux petals — they don’t stick to carpet and they keep their shape.
Start by hanging a blush fabric panel in the corner using removable hooks. Add a second lighter sheer layer if you want more depth. Place a small floral cluster at the top and another cluster at mid-height, then scatter faux rose petals lightly along the bottom edge of the fabric. Finally, check the corner from the bed and from the doorway — you want it to read as one unified background, not two separate pieces.
Skip thisDon’t spread petals across the whole floor — it looks untidy and hard to clean.
25. Satin Ring Dish + Jewelry Setup Styling on a Tray
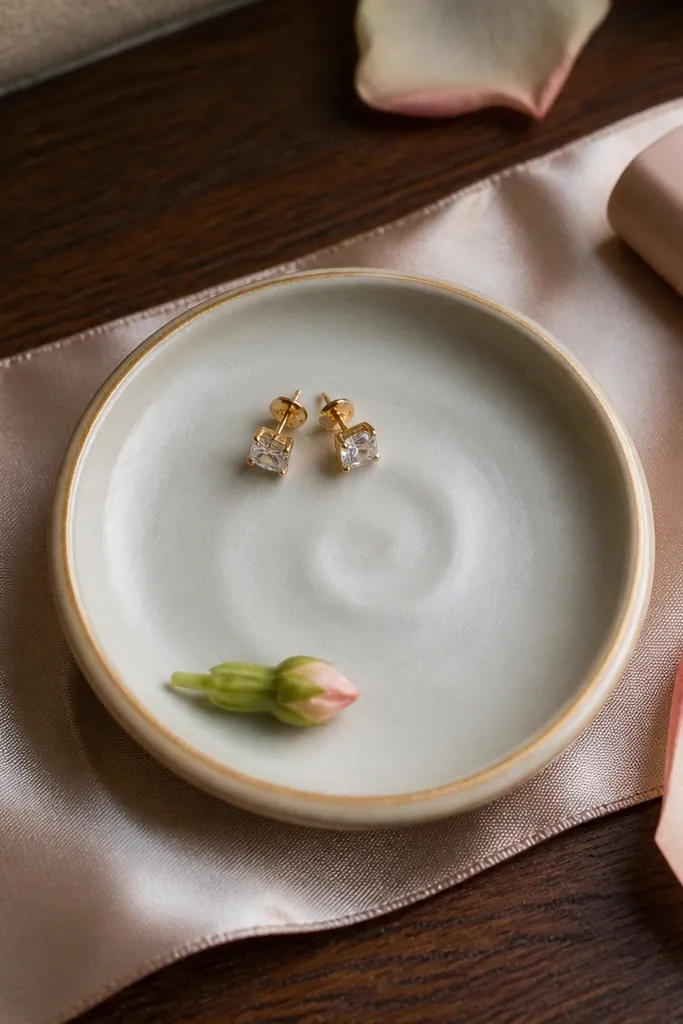
This is a small detail that photographs like a big moment. When you style your ring dish and jewelry on one tray, it looks intentional in close-ups and in flat-lays. Use a satin ribbon as the base, then place a ring dish, earrings, and a small perfume or lip balm bottle. Add one tiny flower bud and a few petals around the tray edges so it matches the room theme. It’s best for brides who want “dreamy details” even if the room decor is minimal.
Quick tipShoot flat-lays near a window — satin highlights look smoother in natural light.
Start by choosing a shallow tray in cream, champagne, or soft gold. Lay a folded strip of satin ribbon across the tray, then place the ring dish in the center. Arrange jewelry in a simple arc, with one focal item closest to the camera side. Add one mini floral bud and a light scatter of petals only near the corners so the center stays clean.
Skip thisSkip random jewelry piles — separate pieces look curated, piles look messy.