
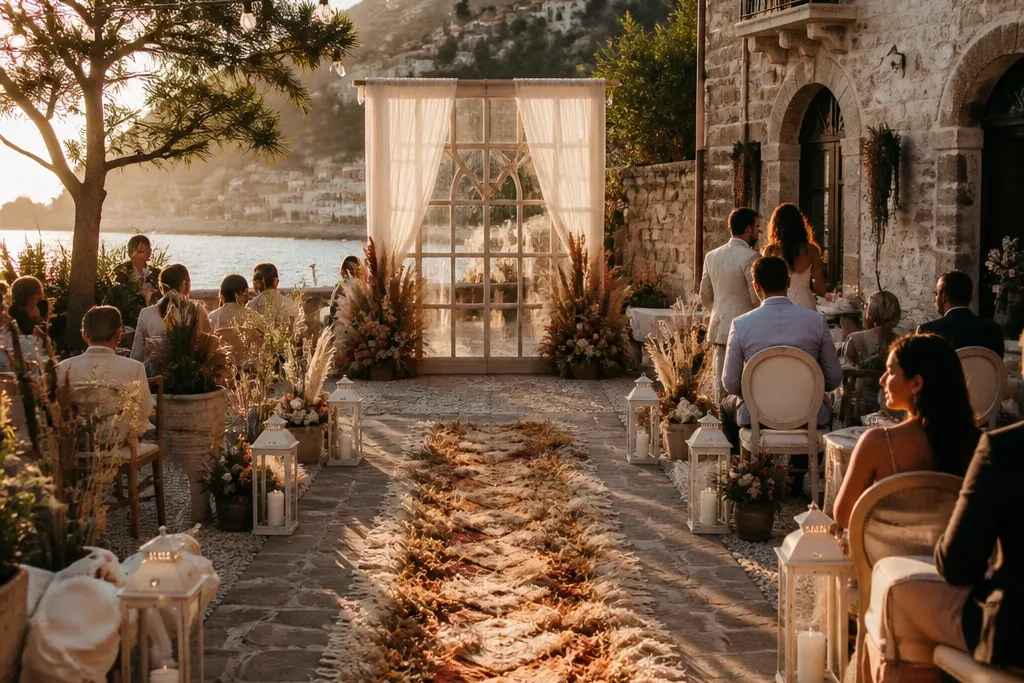
1. Window-Frame Tulle Curtain Backdrop
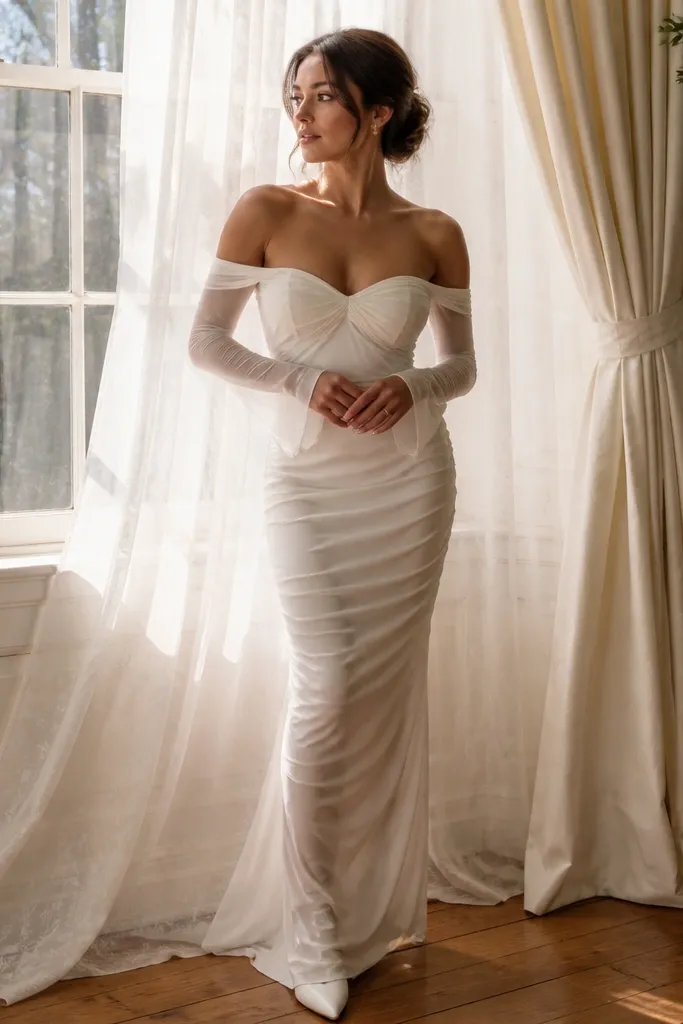
A window-frame tulle curtain looks like a magazine moment because it uses the building’s shape as the frame. The tulle catches light in tiny highlights, which makes your ceremony photos glow without needing a huge floral wall. This works best in venues with real windows, like boutique hotels, old houses, or restored chapels. Choose warm white lights if the room lighting is yellow, and choose cool white if the venue is bright and modern. It’s a great choice for Bride To Be Decoration Ideas when you want “romantic” without heavy installations.
First, measure the window opening width and height and buy or rent tulle panels that cover with 6-10 inches of overlap. Then hang the panels using clear hooks or removable adhesive strips rated for the surface so you don’t damage paint or trim. Finally, add two warm white light strands behind the tulle so the glow comes through the fabric, not from the front. Budget for $20-60 for tulle depending on fabric weight, plus $15-35 for lights. Spend 30-60 minutes on setup when you pre-plan where the hooks go.
Quick tipBring painter’s tape to mark hook positions before you stick anything.
Skip thisDon’t use thick blackout curtains — they kill the soft light effect that makes this look photogenic.
2. Terracotta & Cream Dried Flower Table Runner
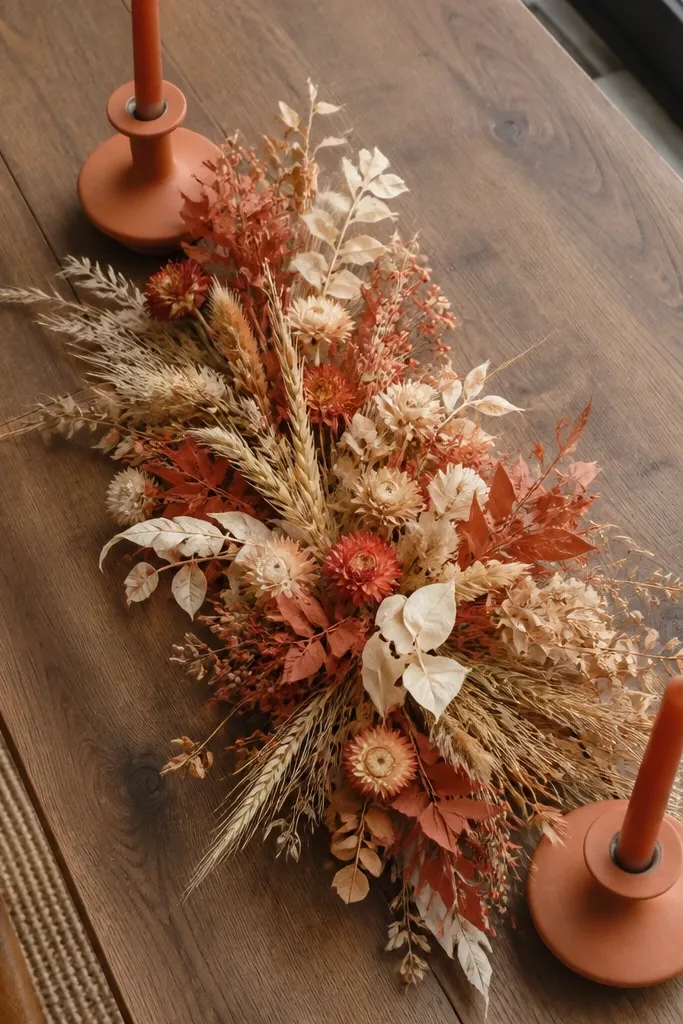
This runner reads warm and intentional in photos because dried flowers add texture without looking fragile. Terracotta + cream gives you a sunset palette that looks good in daylight and still holds up indoors. It’s ideal for rustic venues, desert backyards, and Mediterranean-style spaces. The key is keeping the runner low enough that guests' faces stay visible over it. If you’re planning a celebration with earthy tones, this one detail ties everything together.
Start with a cream linen runner long enough to hang 2-4 inches at each end of the table. Then arrange dried stems in a loose line down the center, using floral tape to secure bundles and keep the silhouette straight in photos. Finally, place 3-5 low candles at the ends and one small candle in the middle so the runner doesn’t look empty when the lights go on. For cost, plan $40-120 depending on how many stems you use and whether you buy in bulk. Allow 45-75 minutes to prep and pack the stems so they don’t crush.
Quick tipSpritz stems with a matte floral sealant to reduce shedding during transport.
Skip thisSkip bright neon dried flowers — they look fake under venue lighting.
3. Lantern Row Aisle Markers with Linen Ribbons
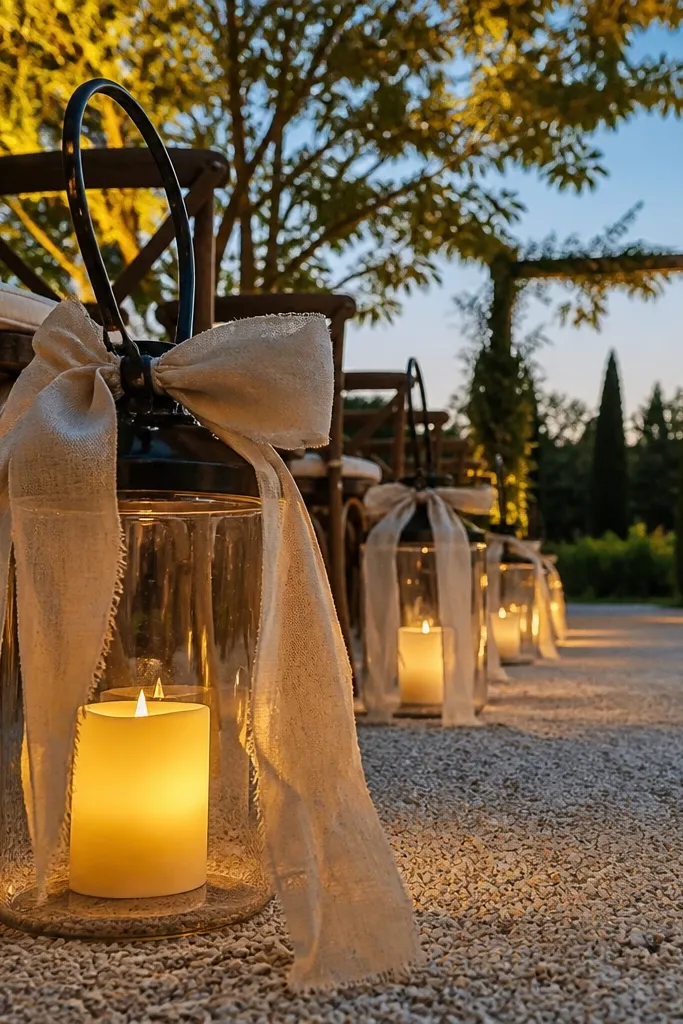
Aisle decor is where photos catch movement, and lantern rows look beautiful because they create a repeating pattern. The linen ribbons add softness and keep the scene from feeling too “themed.” This works well in outdoor ceremonies, courtyards, and garden venues where you have a clear aisle line. Choose unscented LED lanterns if you’re near fabric or wind — the look stays clean and safe. It’s a strong Bride To Be Decoration Ideas pick when you want something romantic but not overly floral-heavy.
First, decide on spacing — 3-4 feet apart is a good starting point for most walkways. Then fill each lantern with LED tealights and tie a 10-14 inch strip of linen ribbon to the handle or base. Finally, place the lantern row so it aligns with the ceremony camera angle, not the entrance — corners often look better from the seating side. Budget $25-70 for lanterns if you buy affordable LED sets, or less if the venue provides them. Plan 60 minutes to set them up because you’ll want the spacing even.
Quick tipUse the same knot style on every ribbon so your photos look consistent.
Skip thisDon’t place lanterns randomly near chairs — a straight repeating row photographs best.
4. Stone Wall Candle Clusters with Olive Branches
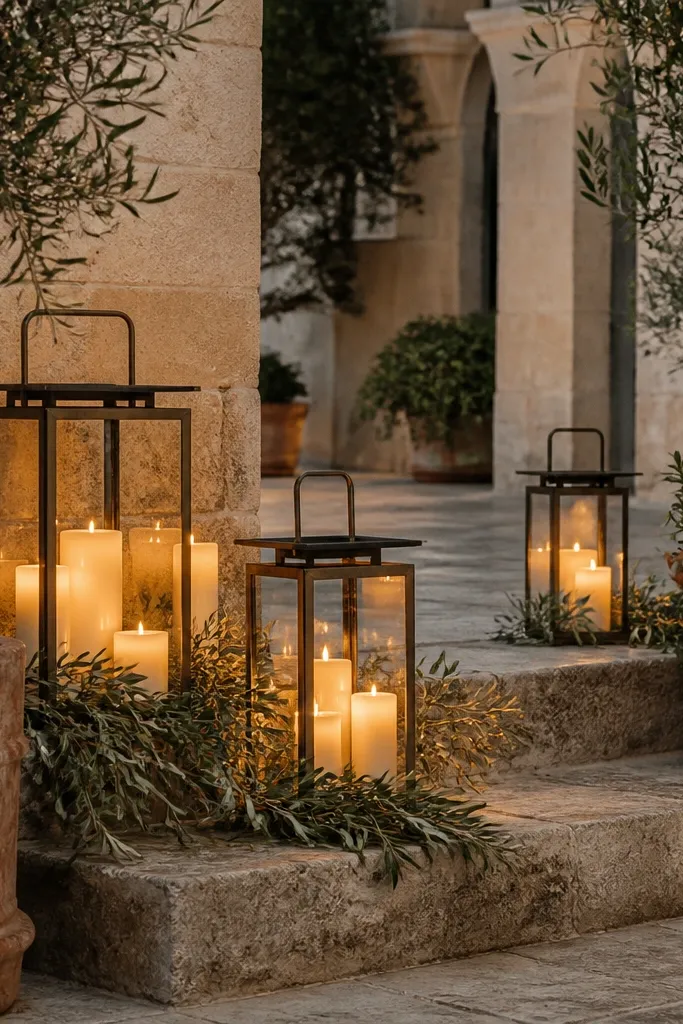
Stone walls make candle clusters look instantly high-end because the texture frames the glow. Olive branches add a subtle green that reads classy without turning the whole scene into “forest wedding.” This is perfect for venues with natural stone steps, patios, or cave-like rooms. Keep the candle colors to white, cream, or soft ivory so the wall stays the star. It’s one of the Hidden Gems Bride Decoration Ideas that looks expensive even with minimal floral waste.
Start by selecting 6-12 clusters based on the wall length, with 2-3 candles per cluster. Then add olive branches in short sprays behind the candles so they fan outward toward the light. Finally, drape a thin cream fabric strip at the base of each cluster so the candles don’t look like they’re floating. Expect $60-180 total depending on candle count and whether you use real taper candles or battery ones. Give yourself 45-90 minutes so placement looks symmetrical from the guest viewpoint.
Put heavier candles on the outside of clusters so they don’t tip when people walk by.
Avoid tall candles that block faces in photos from the front row.
5. Coastal Sea-Glass Bud Vases on a Driftwood Tray
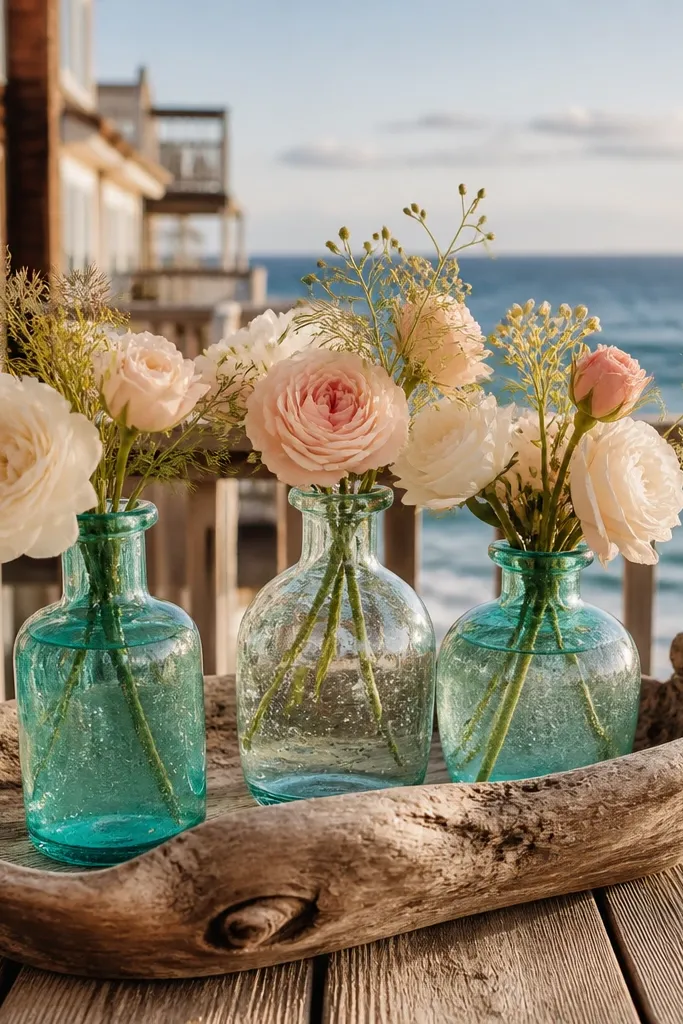
Sea-glass bud vases look photogenic because they reflect light in small, cool highlights. Pairing them with a driftwood tray makes it feel like the venue’s coastal environment designed the decor. This works at beach houses, boardwalk hotels, and lakeside resorts. Keep the flowers light — think white, blush, and pale blue — so the glass color stays visible. It’s a great choice when you want Hidden Gems Bride Decoration Ideas that feel specific to the trip, not generic beach wedding decor.
First, pick a driftwood tray size that fits your table width, leaving 6-10 inches of clear space at the ends. Then arrange 5-9 bud vases in a staggered line and fill them with thin-stem flowers so the height stays consistent. Finally, add a few glass pebbles or sand-colored stones around the base for texture. Budget $50-160 depending on how many vases you use and whether you rent the tray pieces. Spend about 30-45 minutes on placement once you’ve lined up the vases.
Use clear rubber pads under the tray to stop it sliding on smooth tabletops.
Skip dark flower palettes here — they fight the sea-glass reflections.
6. Hanging Macramé Planter Backdrop for Ceremony
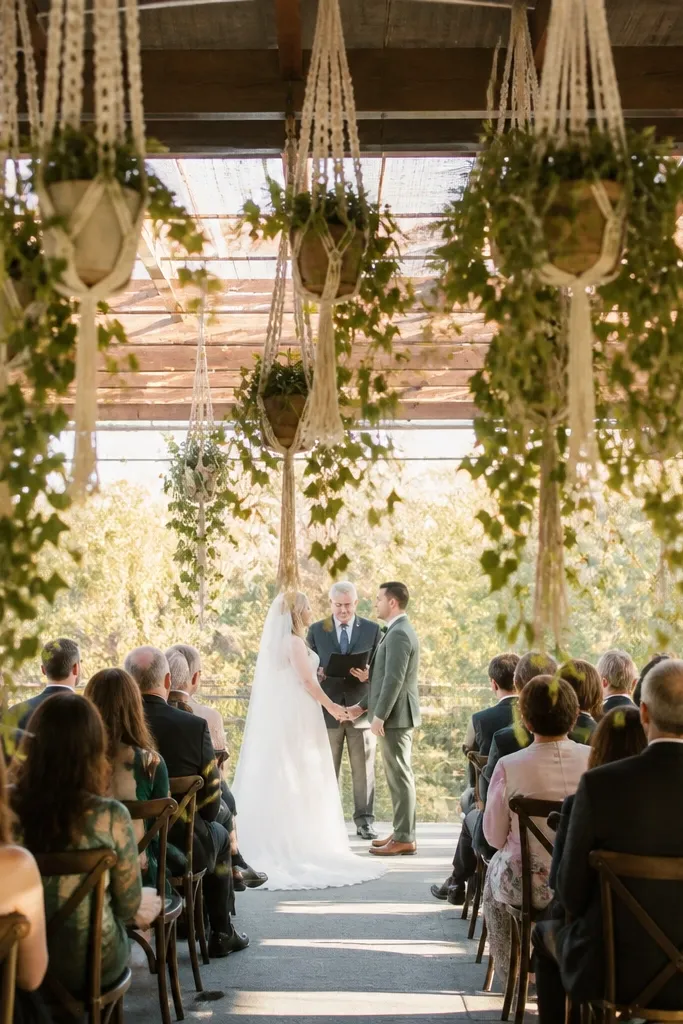
Macramé hanging planters create a layered backdrop without blocking sightlines. The knots and cords show texture up close, and the hanging plants give movement in photos. This looks especially good in indoor-outdoor venues with open rafters or covered patios. Choose trailing greenery like ivy or faux trailing vines to avoid the “flat” look. It’s a Hidden Gems Bride Decoration Ideas option when you want a boho vibe that still looks clean and modern.
First, confirm you can hang from the ceiling or beams; if not, use free-standing display frames. Then space 5-7 macramé planters so the center is slightly higher and the sides taper down for a flattering triangle shape behind the couple. Finally, fill the planters with either small potted greenery or faux stems, and keep the trailing length consistent across pieces. Typical cost is $80-250 depending on planter size and number, plus any rental hanging hardware. Plan 60-120 minutes to get the height right because small differences show in photos.
Quick tipBring a measuring tape and mark the ceiling tie points before you start hanging anything heavy.
Skip thisDon’t mix too many plant types — three textures is enough for a cohesive look.
7. Linen Napkin Folds in a Color-Blocked Pattern
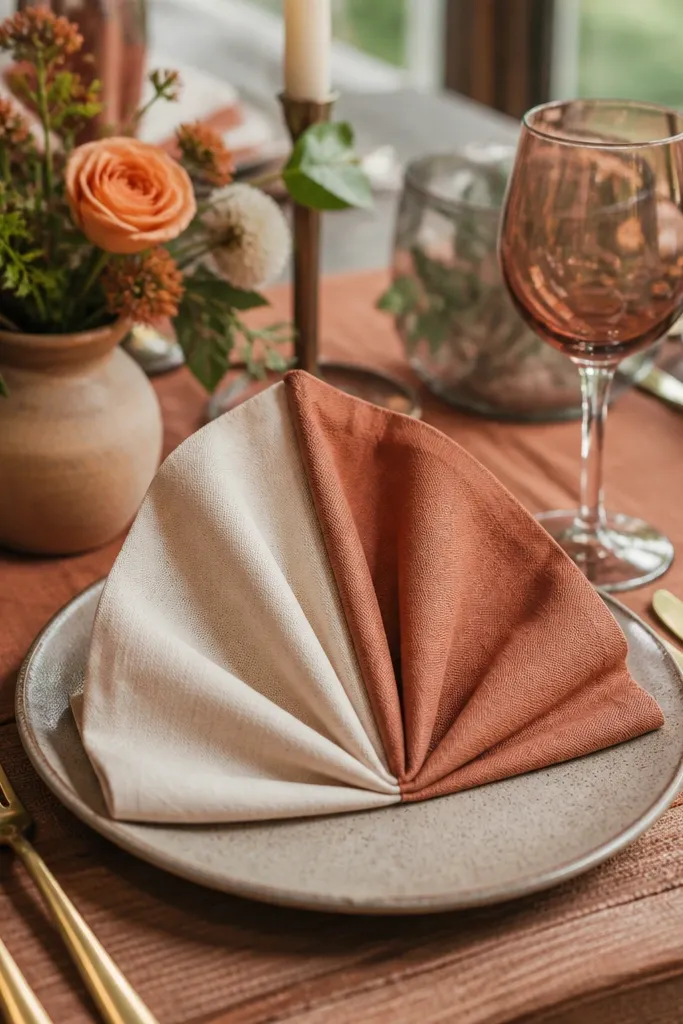
Napkins are the easiest place to make your wedding photos look styled, and color-blocking is what makes it look intentional instead of random. A two-tone linen set — beige and clay, or ivory and sage — creates clean lines across the table. Choose a fold that shows shape, like a simple fan or a rectangle tuck, so it photographs well from above. This is perfect for reception tables where you want the most impact without building an entire floral wall. It’s one of the Hidden Gems Bride Decoration Ideas that reads “thoughtful” instantly.
Start by buying 2 linen colors in the same fabric weight so they drape similarly. Then fold every napkin the same way and alternate colors in rows, not scattered. Finally, place a small menu card or name tag on each setting so the napkin color aligns with the card color for a clean grid. Budget $60-200 depending on your guest count and whether you rent linens. Allow 30-60 minutes for folding at the venue so you don’t rush under stress.
Quick tipIron the napkins with steam right before you set them out; creases show in overhead photos.
Skip thisAvoid paper-thin napkins — they look flimsy on camera.
8. Mirror-Base Seating Card Display with Dried Pampas
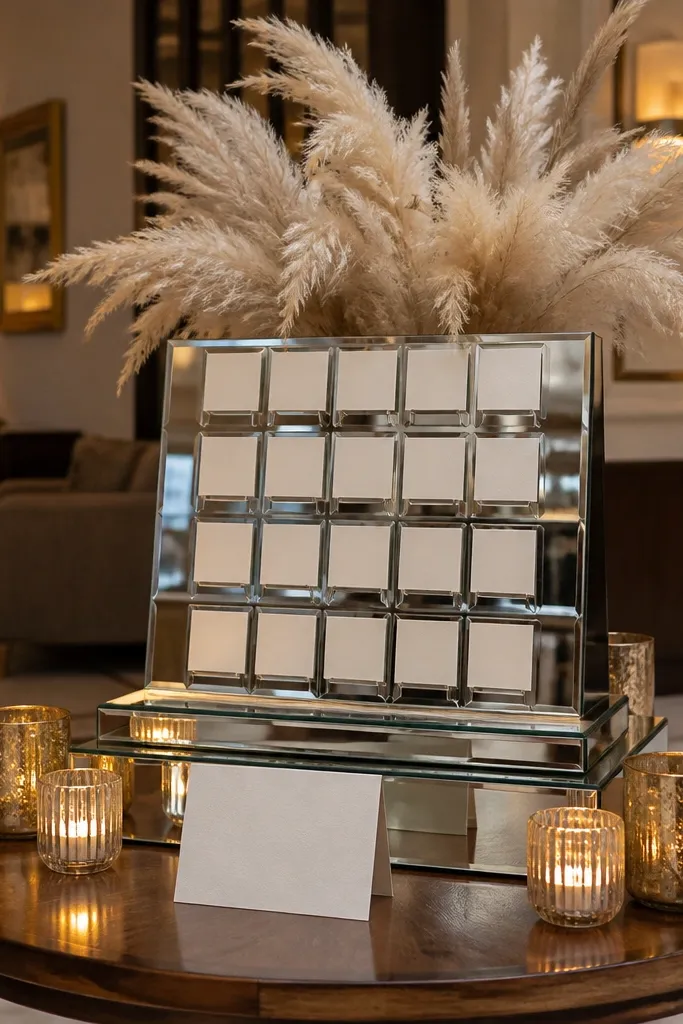
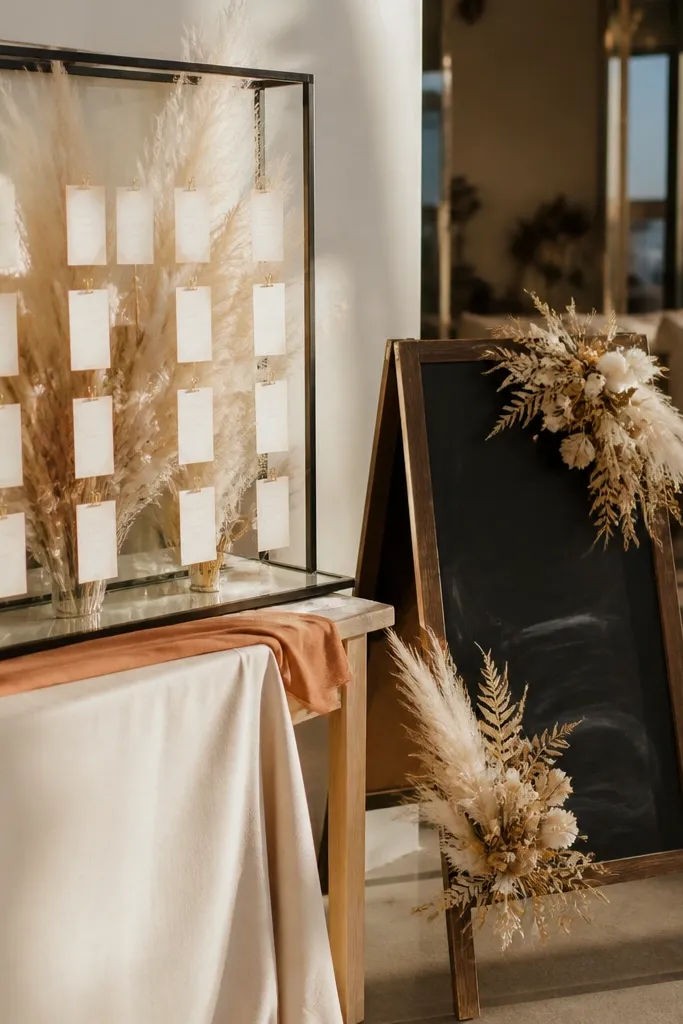
A mirror-base display looks like a “designer detail” because it reflects candlelight and makes the cards look brighter. Pampas adds height and softness without taking over the table plan. This is best for a welcome area or head table side where you want a photo-friendly focal point behind the sign. Keep the seating cards in one font style and use thick cardstock so the reflection doesn’t blur the edges. It’s a Hidden Gems Bride Decoration Ideas pick when you want your paper goods to look like decor.
First, choose a round or rectangular mirrored tray and secure it on a stable surface so it won’t wobble. Then place 3-6 seating cards upright in a staggered height using small card holders or folded cardstock stands. Finally, tuck dried pampas into the back so it frames the sign area without covering text. Expect $40-120 for the tray and $20-60 for card stands and stems. Give yourself 20-35 minutes so the layout stays crisp and symmetrical.
Wipe the mirror with a microfiber cloth right before guests arrive to remove fingerprints.
Don’t use thin acetate holders; they catch glare and make photos look washed out.
9. Florals-Free Backdrop Using Sheer Ribbon Strands
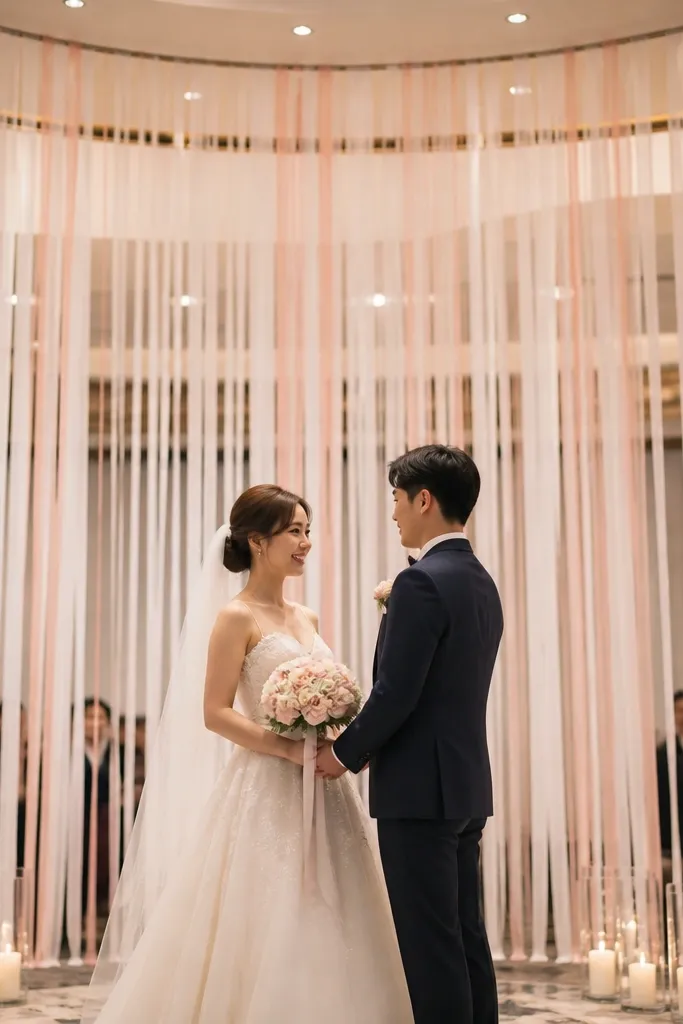
If you want a clean, airy photo backdrop without dealing with heavy flower logistics, sheer ribbon strands do the job. They create a soft curtain effect that moves in photos and doesn’t look flat. This works in modern venues where you want the decor to feel light and tailored rather than rustic. Use ivory with blush or champagne ribbons so the color stays warm under mixed lighting. It’s a Hidden Gems Bride Decoration Ideas approach that looks “wedding editor” without being complicated.
First, anchor ribbons to a lightweight frame or existing arch using clear fishing line so they hang evenly. Then cut ribbon lengths to stagger — one set at shoulder height, another slightly longer — for depth. Finally, keep the backdrop centered and leave space on both sides so the couple isn’t visually boxed in. Budget $30-90 for ribbon depending on length and thickness, plus $20-60 for hardware or rental frame. Plan 45-90 minutes for hanging so the strand lengths match across the whole width.
Quick tipUse a lint roller on ribbon before hanging; dust shows under bright lights.
Skip thisSkip satin-heavy ribbons — they reflect harshly and can look shiny instead of soft.
10. Color-Matched Candleholders on a Slatted Wood Table
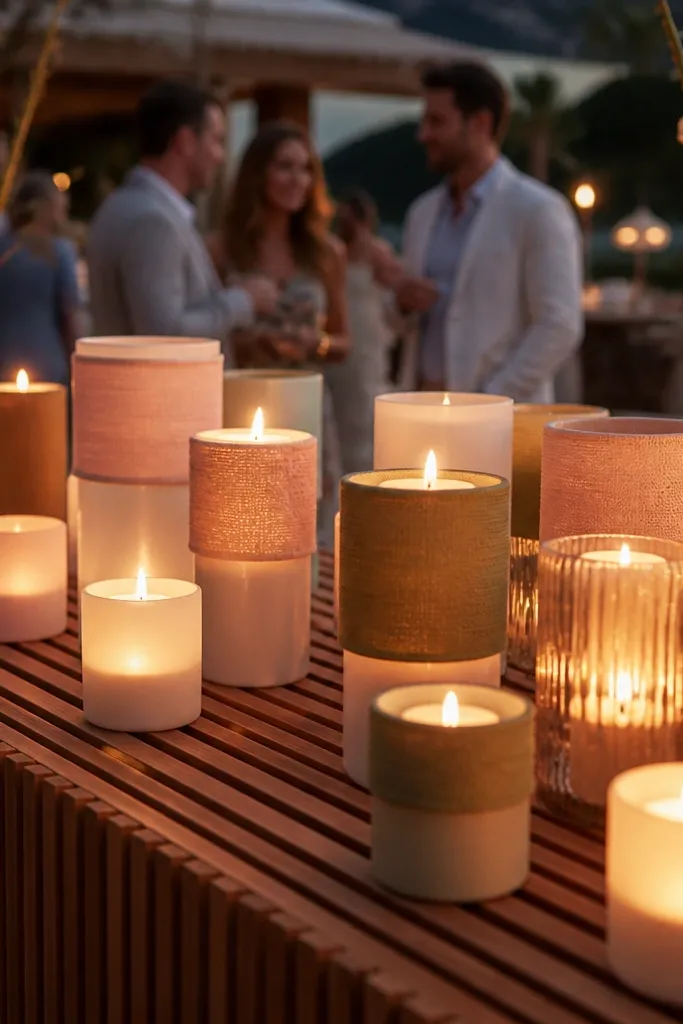
Candleholders look best when the table already has texture. A slatted wood surface (or a wooden folding table) gives you a natural pattern so you don’t need a thick floral centerpiece. Match candleholder colors to your palette — ivory glass with blush linen, or matte white with sage accents. This is ideal for receptions in cabins, patios, and farm venues where the wood tones are already photogenic. The result is a calm, warm scene that reads cohesive in both daytime and evening photos.
Start by laying a thin runner or strip of fabric across the slats so candles sit on a clean base. Then place 7-11 candleholders in a gentle line along the center so the camera sees a rhythm of light. Finally, add one small accent cluster at one end — like eucalyptus sprigs or a single dried bouquet — to keep the table from looking too symmetrical. Budget $50-150 depending on candleholders and whether you use LED candles. Allow 30-60 minutes to set because spacing matters for that “designed” look.
Use LED candles with flicker for outdoor venues — they look better than steady light in wind.
Don’t put candles too close together; overlapping flames and reflections look messy.
11. Chalkboard Menu Sign with Dried Flower Corners
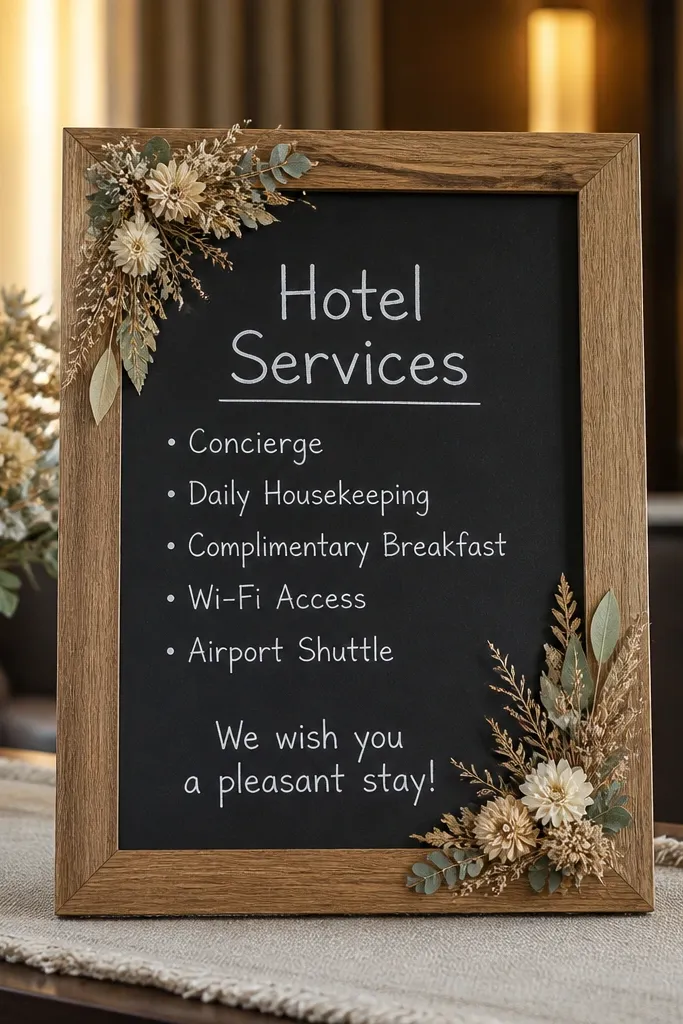
A chalkboard menu sign is photogenic because it adds a handmade texture to the table scene. The trick is adding dried flower corners so the sign doesn’t look like a random purchase. Choose a chalkboard with a natural wood frame and write your menu in clean, legible lettering. Pair it with neutral dried flowers like bunny tails, oats, or small pampas so the sign looks cohesive with your overall palette. This is a strong Hidden Gems Bride Decoration Ideas pick for welcome tables and reception dining.
First, use a chalkboard size that fills the space without swallowing it, like 12x18 inches for most tables. Then tie small dried bundles at each corner with thin twine so they sit flat for transport. Finally, place the menu sign on a small wooden riser or a stack of books wrapped in brown paper for height. Budget $25-80 for the chalkboard plus $15-50 for dried corners. Plan 20-30 minutes for writing and final placement.
Quick tipTest your chalk on the venue lighting — some chalk colors fade under warm bulbs.
Skip thisAvoid overcrowding the board with tiny text; it turns into a blur in photos.
12. Pampas + Fabric Fan Wall Behind the Head Table
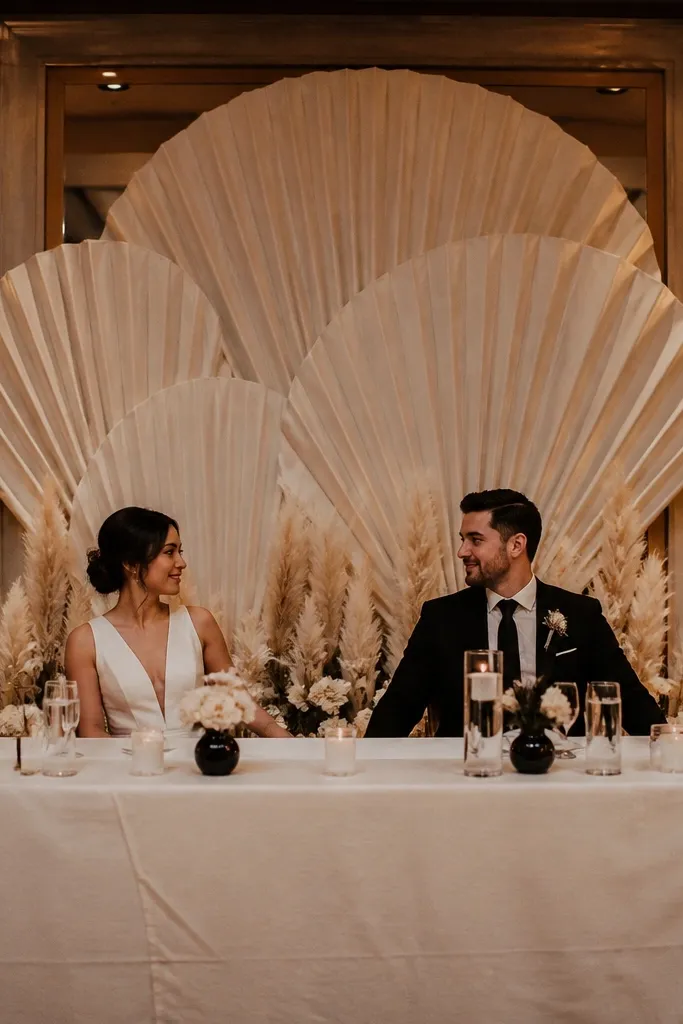
A fabric fan wall behind the head table looks amazing because it creates a graphic pattern that stands out even when flowers are minimal. Pampas plumes soften the straight lines so the backdrop feels romantic, not like a party photo booth. This works in hotels, restaurants, and indoor venues where you can attach fabric to a wall or stand. Choose a neutral palette — cream, sand, and taupe — so the couple’s outfits remain the focus. It’s a Hidden Gems Bride Decoration Ideas option when you want a big impact without a full floral budget.
First, decide on the fan layout: 6-9 fans across the width of your table, with the center fans slightly larger. Then attach fans to a backdrop board or hang fabric panels from a tension rod so they don’t sag. Finally, place pampas bundles behind the fans in three height levels — short, medium, tall — so the plumes peek through. Budget $120-300 depending on fan materials and pampas volume. Allow 90-150 minutes for assembly because the symmetry matters here.
Use a level on the first fan — once the pattern is straight, the rest looks intentional.
Skip bright-colored fans; they steal attention from the couple.
13. Rosemary & White Flower Crown for Aisle Stanchions
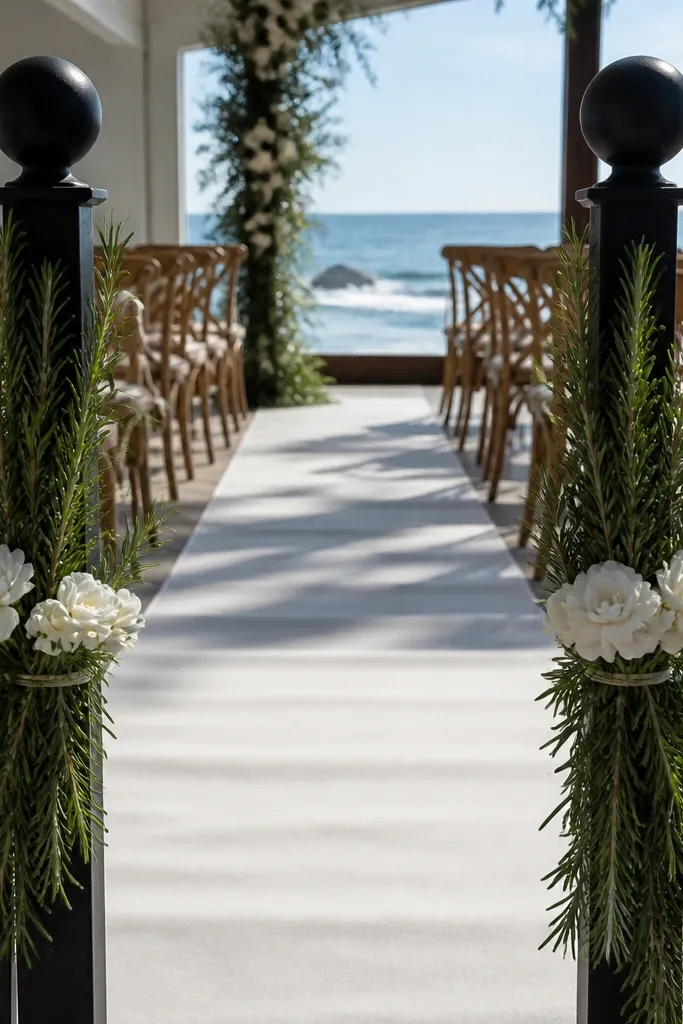
Instead of a full arch, you can crown aisle stanchions with rosemary and small white blooms for a clean, botanical look. It photographs well because it’s focused at eye level and repeats across the aisle. This works in venues that already have stanchions, chairs, or simple ceremony seating. The rosemary reads fresh and fragrant, and the white flowers keep the palette light. It’s one of those Hidden Gems Bride Decoration Ideas that looks polished without building a huge structure.
First, identify the stanchions you’ll use and measure the top diameter so your greenery bundle fits without falling. Then wrap rosemary sprigs around the top and secure with floral wire or zip ties hidden underneath. Finally, add 2-4 small white flower clusters on top of the rosemary so each stanchion has a defined crown. Budget $30-90 for greenery and small blooms depending on how many stanchions you have. Plan 45-75 minutes to build and attach each crown before guests arrive.
Keep greenery ends trimmed short so it doesn’t scratch guests' hands or snag clothing.
Don’t use big bouquets — the crown needs to stay compact for the stanchion shape.
14. Vintage Suitcase Card Display with Soft Linen Lining
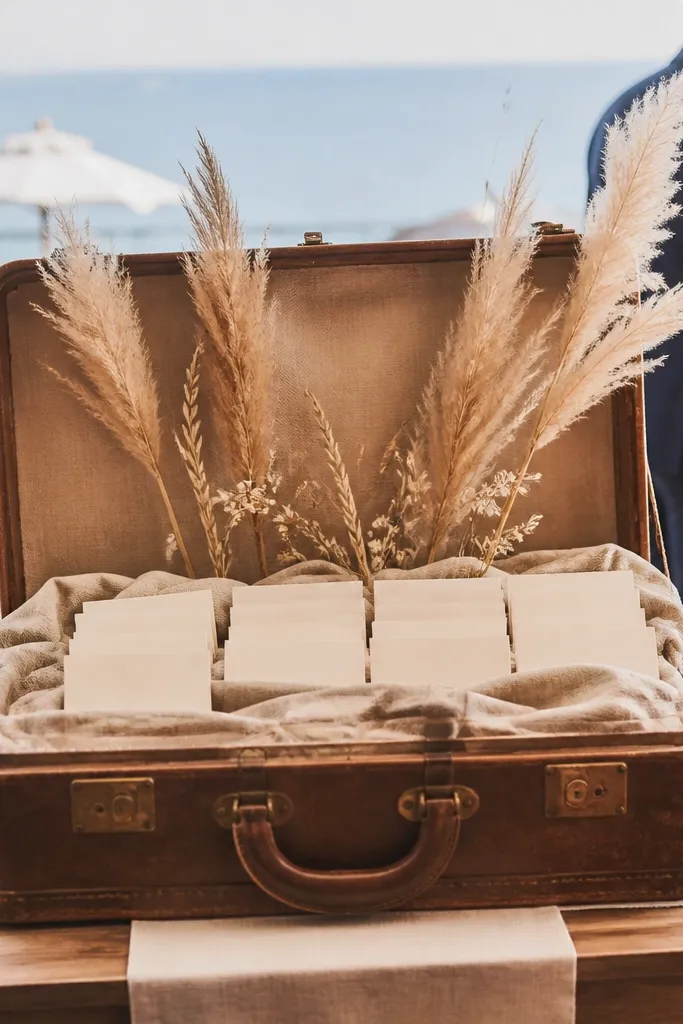
This is a clever decor moment because it turns your paper goods into a styled travel vignette. Vintage suitcases bring texture and a sense of story, and linen lining makes it look intentional instead of cluttered. It’s perfect for destination weddings where your theme is travel, old-world, or cozy. Keep the card layout neat so it reads as design, not messy storage. For Bride To Be Decoration Ideas, this one works in welcome areas and near the gift table.
First, pick suitcases that are stable when open and clean — scuffs are fine, but broken hinges aren’t. Then line the open lid with linen and set small card stands or folded cardstock dividers inside. Finally, add one small dried stem bundle in a corner so the suitcases look styled from every angle. Budget $40-160 depending on whether you buy or borrow vintage pieces. Allow 20-40 minutes to set up because the key is straight dividers.
Use clear labels on the back of dividers so you can place cards quickly after setup.
Avoid overcrowding the suitcase — leave breathing room so photos don’t look busy.
15. Wood Beam Swag with Sheer Gauze and Tiny Lights
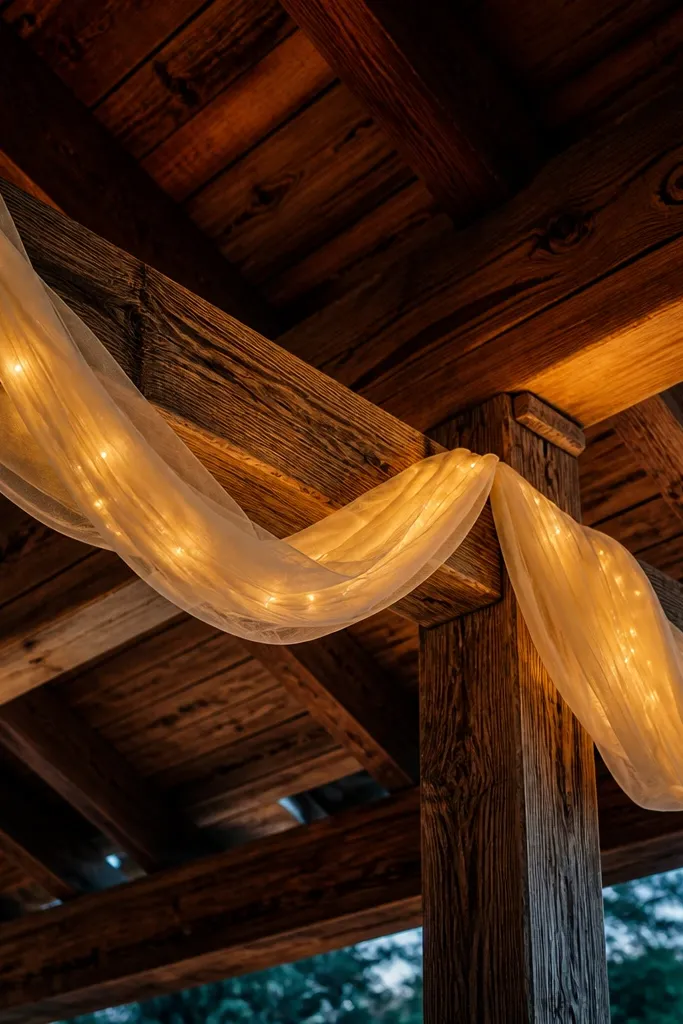
A wood beam swag looks gorgeous because it turns architecture into decor. Gauze adds softness and a light, floating look, while tiny lights give depth without a heavy chandelier vibe. This works in cabins, barns, and covered outdoor patios where you have beams to tie into. Keep the color palette restrained — ivory gauze with warm white lights — so it photographs cleanly. It’s a Hidden Gems Bride Decoration Ideas pick when you want a romantic ceiling-level moment without building an arch.
First, measure the beam span and cut gauze lengths with extra for drape — usually 2.5-3 times the beam width. Then tie gauze to the beam in three points (left, center, right) so the center hangs lower for a flattering arc. Finally, tuck fairy lights behind the gauze, not on top, so the glow comes through the fabric. Budget $25-90 for gauze and $15-40 for lights. Plan 60-120 minutes depending on how many beam sections you cover.
Use battery fairy lights if you don’t have easy outlets — extension cords ruin the clean look.
Don’t use thick fabric swags; they look heavy and block the light effect.
16. Hanging Floral Tassel Pom-Poms on a Tension Rod
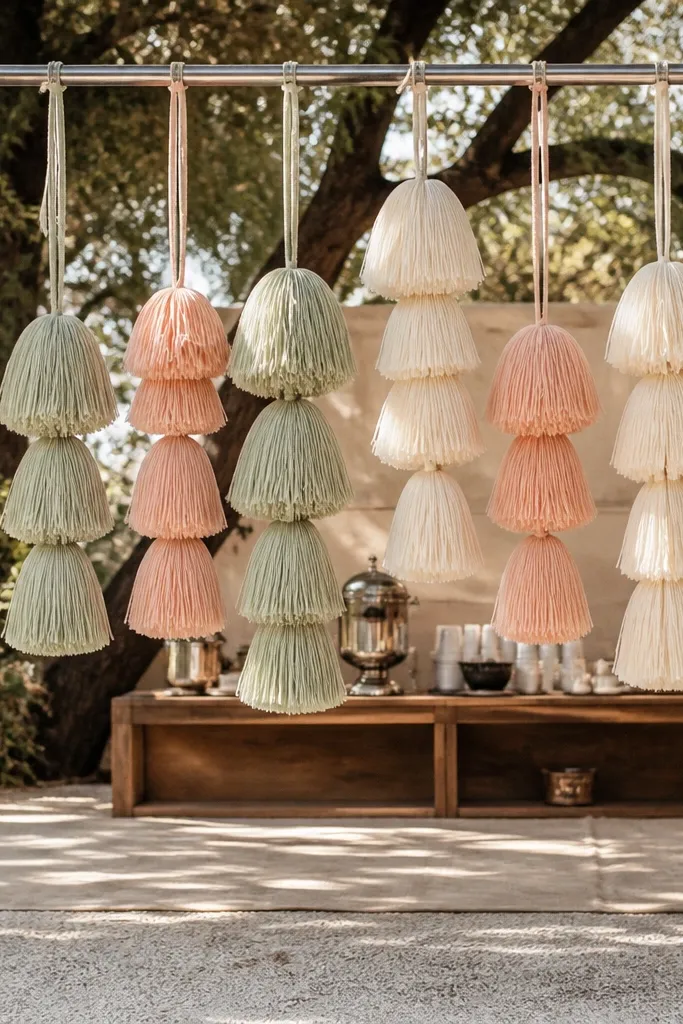
Tassel pom-poms look playful and high-contrast in photos, especially against dark walls or shaded outdoor areas. Hanging them from a tension rod keeps the setup contained and avoids building a full frame. Choose tassels in ivory, blush, and a whisper of sage so the color stays soft. This works best behind ceremony chairs, photo corners, or the head table. It’s a Hidden Gems Bride Decoration Ideas choice when you want something fun that still looks styled and intentional.
First, find a spot with a straight line behind seating where a tension rod can fit — doorways and window alcoves work. Then attach pom-pom tassels at equal intervals, with the center piece slightly larger for balance. Finally, adjust the hanging height so tassels sit around head level, not too low where they block faces. Budget $60-200 depending on how many tassels you buy or rent. Allow 30-60 minutes to hang and space them evenly.
Quick tipUse clear thread for hanging so the tassels look like they float in photos.
Skip thisSkip loud primary colors; they look childish under wedding lighting.
17. Table Centerpiece with Floating Candles in Glass Bowls
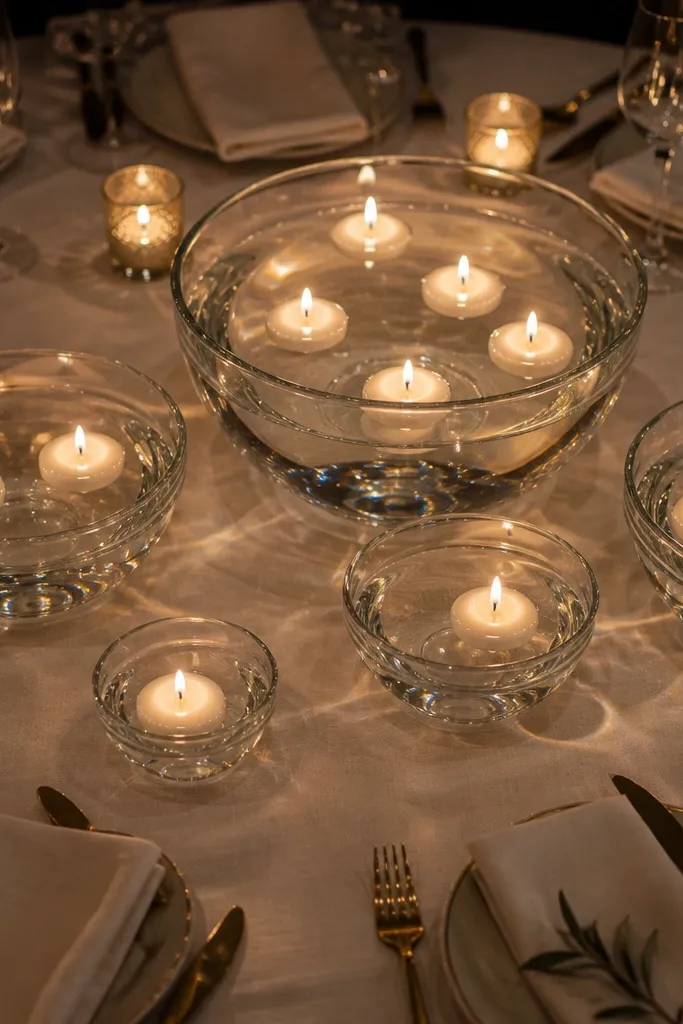
Floating candles give you instant sparkle because the flame reflects across the water surface. Glass bowls look clean and modern, and they photograph beautifully from above and from across the table. This centerpiece is especially good for evening receptions where warm lighting makes the reflections pop. Keep the bowls consistent in size and use a simple runner so the center doesn’t look cluttered. It’s one of the Hidden Gems Bride Decoration Ideas that creates a “wow” effect without heavy flower labor.
First, choose shallow glass bowls that fit your table space and set them in a line or cluster of 3-5. Then add a small amount of water and place floating LED or real tea lights designed for water — never regular candles. Finally, time your setup: place them 20-40 minutes before dinner so they look fresh and the surface stays clear. Budget $40-140 depending on bowl count and whether you use LED. Plan 30-45 minutes to fill and place, and keep a towel nearby for spills.
Quick tipUse distilled water if your venue has hard water — it reduces film on the glass.
Skip thisDon’t set them hours early; dust and reflections look dull in long wait times.
18. Cream Cable-Knit Throws on Chair Backs
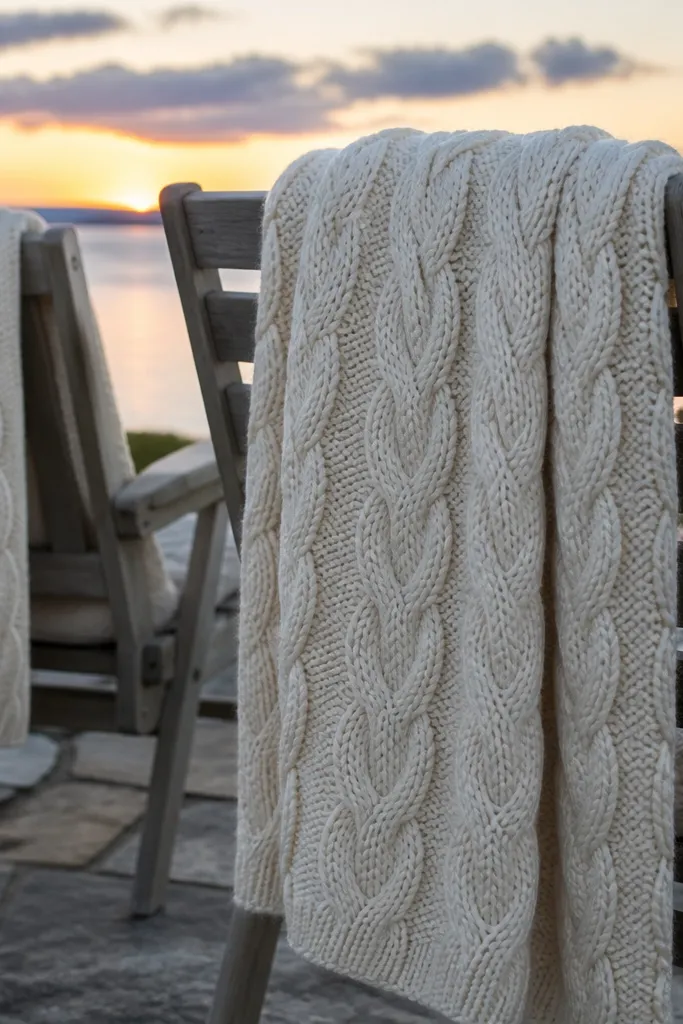
Throws are an underrated decor tool because they add texture that reads instantly in photos. Cable-knit fabric creates visible pattern even from a distance, and cream tones keep the look bridal. This works best at outdoor ceremonies in cooler months, mountain lodges, and waterfront venues during sunset. It also makes the seating look “styled” even if there are no flowers around. For Bride To Be Decoration Ideas, it’s a smart way to get warmth and coziness without building complicated installs.
First, pick throws in cream or soft ivory and check their size — you want enough fabric to drape down 10-16 inches. Then drape one throw per chair back, folding the excess so the front edge is neat and consistent. Finally, keep the color palette tight and add one small accent, like a single rosemary sprig tied at the chair side. Budget $60-200 depending on whether you rent or buy and how many chairs you cover. Plan 45-90 minutes for draping based on chair count.
Use fabric pins or hidden clips so the throw doesn’t slide when guests sit down.
Don’t use throw patterns that clash with your palette; small stripes can look busy on camera.
19. Hanging Paper Lanterns with Linen Tassels
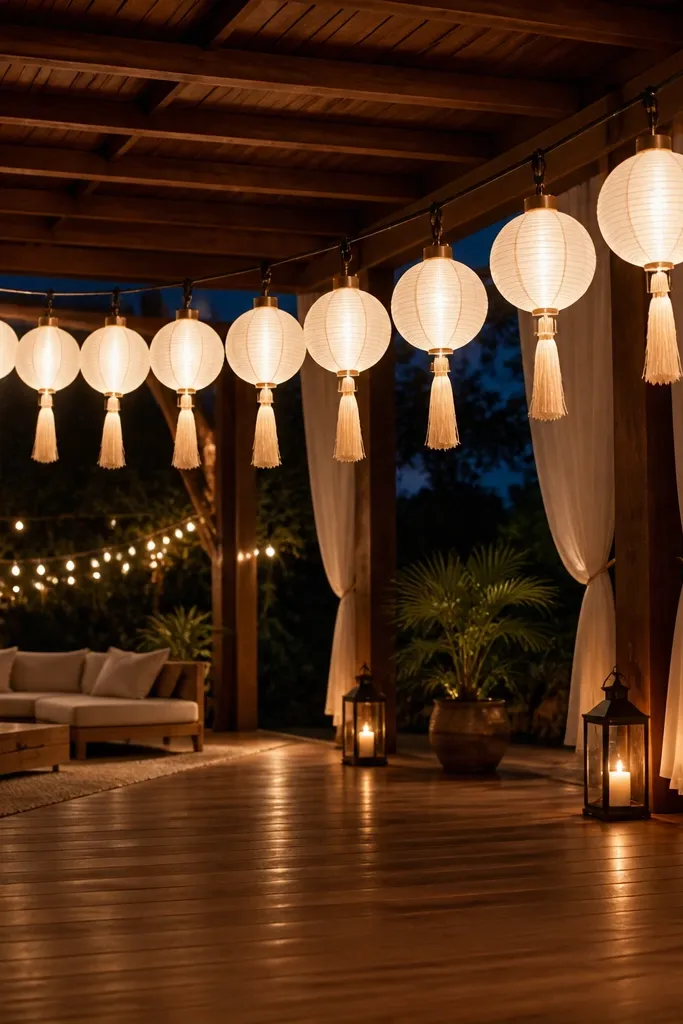
Paper lanterns are photogenic because they create soft, diffused light and a clear repeating shape. Adding linen tassels makes them feel more bridal and less like a generic party decoration. This works in covered patios, indoor ballrooms with high ceilings, and outdoor receptions with calm wind. Choose warm white lanterns and keep tassels in one neutral shade. It’s a Hidden Gems Bride Decoration Ideas option when you want a light-filled look without heavy floral costs.
First, decide on height: hang lanterns so they sit above head level, usually 7-9 feet depending on ceiling height. Then attach linen tassels to the bottom rings or handles so they sway slightly in photos. Finally, space lanterns in a staggered grid — 2-3 feet apart — so the background looks full. Budget $50-160 depending on lantern size and count, plus $10-40 for hanging hardware. Allow 60-120 minutes for spacing and tying, especially if you’re doing a large area.
Quick tipUse LED lanterns or keep the tassel attachments away from any heat source.
Skip thisAvoid overcrowding the ceiling; too many lanterns can make photos feel cluttered.
20. Ceremony Aisle Fabric Swags on Existing Railings
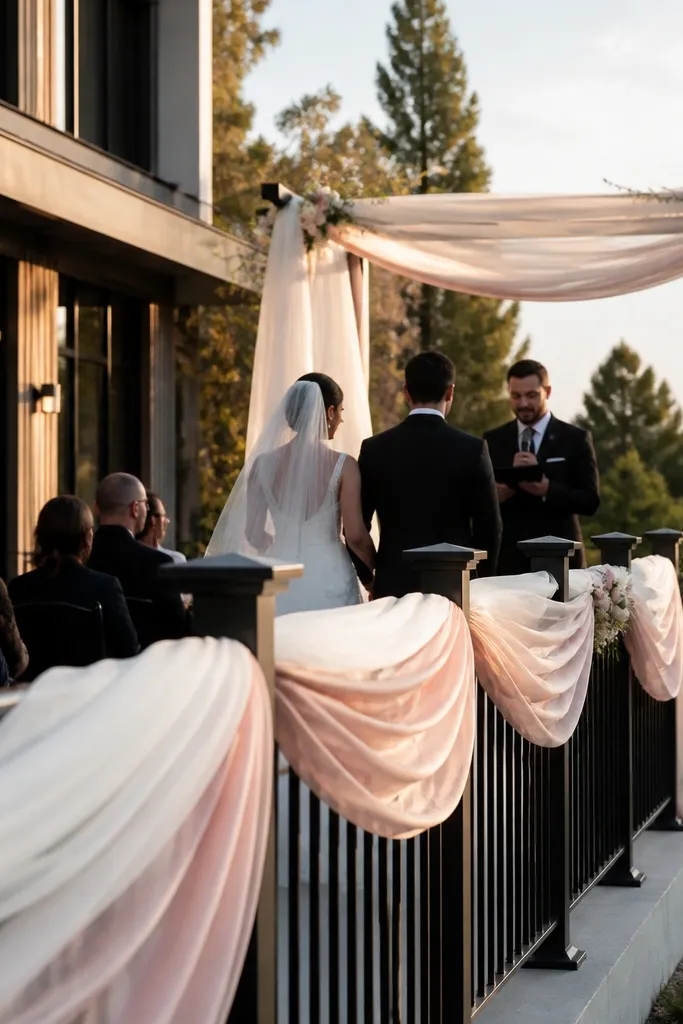
Fabric swags look expensive because they create soft motion lines that lead the eye toward the couple. The best hidden gem is tying them to existing railings — you get the structure without building a frame. This works on balconies, garden terraces, and stair railings where the venue already has a linear shape. Use sheer ivory fabric and a ribbon tie so the swags don’t look like random cloth. It’s ideal for Bride To Be Decoration Ideas when you want a ceremony background that feels airy and elevated.
First, measure the railing length and plan swags every 4-6 feet so the spacing looks even in photos. Then use removable ties or clips to attach fabric loops, keeping knots hidden behind the railing post. Finally, adjust each swag height so the center swags hang slightly lower than the ends. Budget $20-80 for sheer fabric and ribbon depending on length. Plan 60-120 minutes depending on how many railing sections you cover.
Quick tipPre-cut ribbon ties and label them by length so you don’t waste time at the venue.
Skip thisDon’t use heavy velvet fabric; it looks bulky and blocks the airy effect.
21. Gallery Wall Photo Corner with Linen Borders
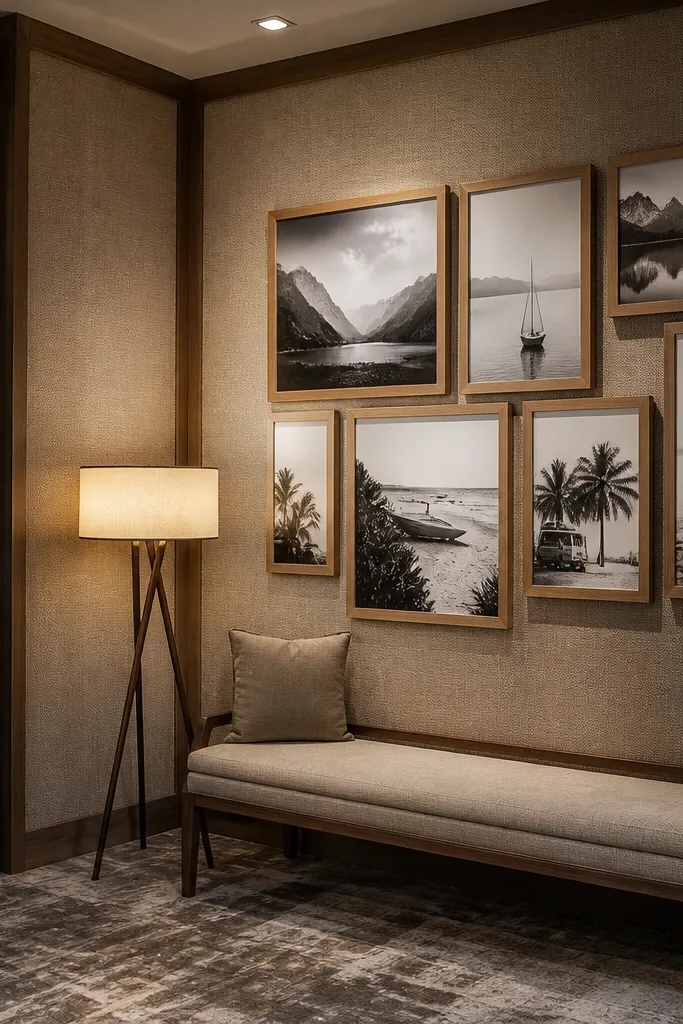
A photo corner needs a border, not just frames. Linen borders make it feel intentional and bridal, and they soften the background so guests stand out. This works in hotels, event rooms, and lounges with plain walls where you want a styled “destination” moment. Keep frames in one finish — black, white, or natural wood — so it doesn’t look mixed. It’s a Hidden Gems Bride Decoration Ideas pick when you want guests to take photos that look cohesive with your wedding color palette.
First, choose a wall area about 6-8 feet wide and arrange 6-10 frames in a balanced grid. Then add linen borders behind the frames or as a margin around the whole cluster using fabric pinned to a backing board. Finally, place a small prop basket at the bottom with neutral accessories like silk ribbons or dried sprigs. Budget $70-250 depending on frame rentals and whether you already have prints. Allow 60-90 minutes to hang so the grid looks straight and centered.
Quick tipUse a level and measure from a fixed ceiling point so the top row is perfectly aligned.
Skip thisAvoid mixing too many frame sizes; it makes the corner look cluttered in wide photos.
22. Dried Flower Menu Stand on a Marble Slice
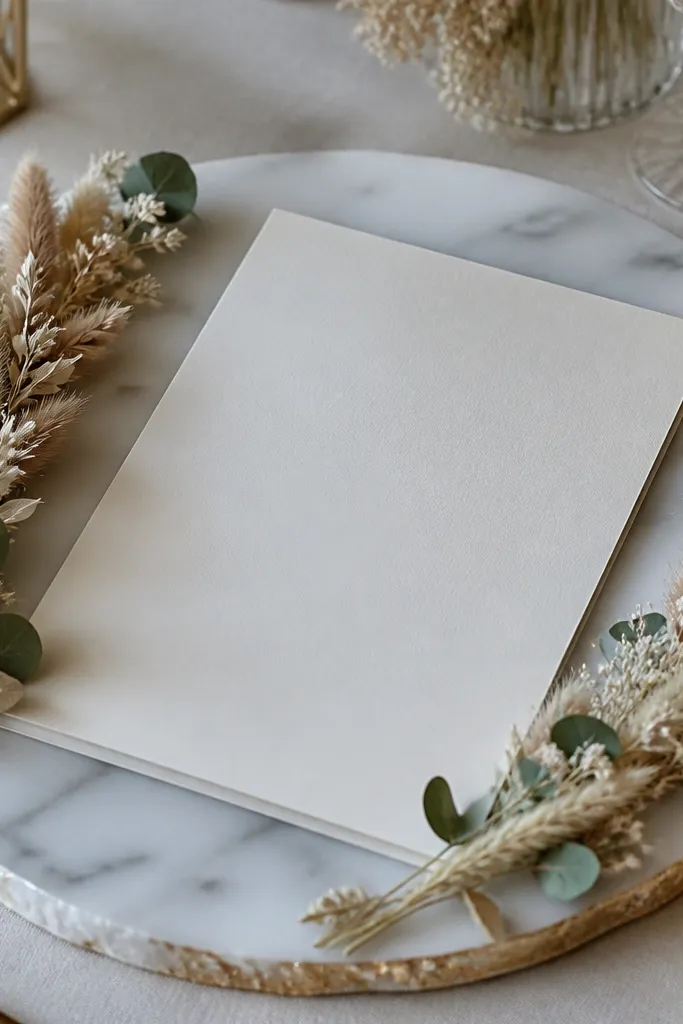
Marble slices look luxurious in photos even when the decor is simple. Put a menu card on top and add dried sprigs along the edge so the stone texture frames the paper. This works in modern venues, upscale hotels, and reception spaces with clean tables. Choose dried flowers in muted tones — cream, tan, and soft green — so the marble stays the star. It’s a Hidden Gems Bride Decoration Ideas choice when you want a polished look without building a centerpiece.
First, buy or rent a marble slice base that’s stable and heavy enough not to tip, then clean it so it doesn’t look dusty. Then secure the menu card with a small acrylic stand or a folded cardstock holder that keeps it upright. Finally, tuck 2-3 dried stems into a tiny groove or behind the card for a neat edge line. Budget $30-120 depending on marble size and whether you rent props. Plan 15-25 minutes per stand if you’re placing multiple around the reception.
Use a microfiber cloth right before guests arrive; marble shows smudges fast.
Skip bright-colored flowers on marble; they look like a craft project next to stone.
23. Rope & Linen Signage on a Wooden Easel
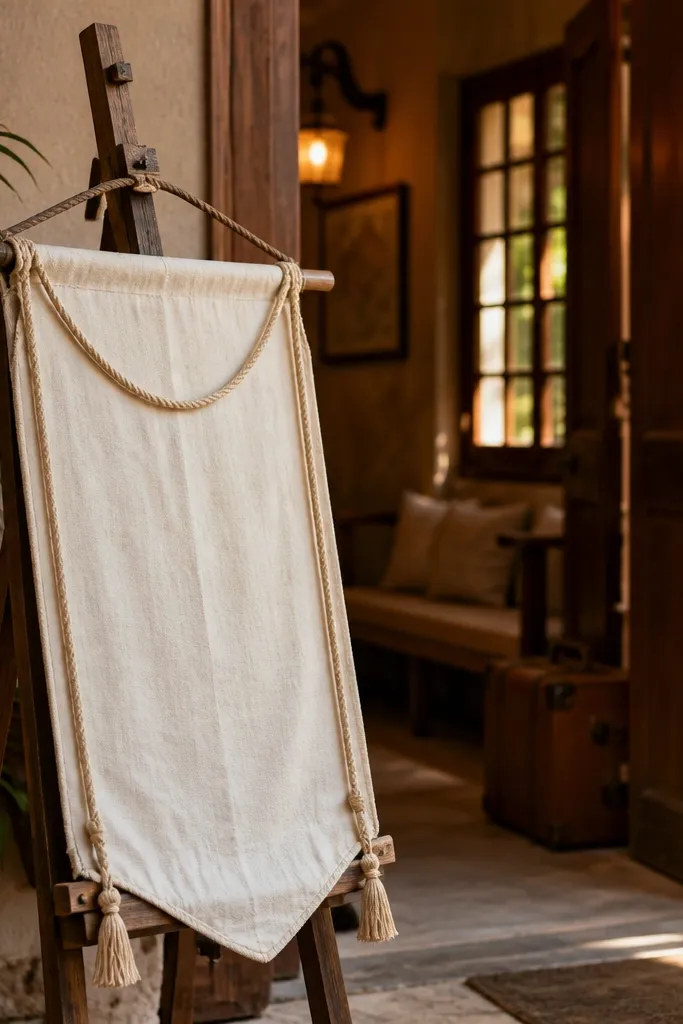
Easels are a reliable way to make signage look like decor, and rope + linen makes it feel travel-appropriate. The linen softens the message and photographs well because it has texture that doesn’t glare like glossy paper. This setup works in welcome areas, near the bar, and as a ceremony entrance sign. Keep typography simple and large so it’s readable in photos and in person. It’s a Hidden Gems Bride Decoration Ideas pick when you want your “welcome” and “schedule” signs to look elevated.
First, choose a wooden easel that matches your venue vibe — dark wood for rustic, light wood for coastal or modern. Then mount your linen sign on a board using fabric glue or removable adhesive so it stays flat. Finally, add rope ties or a rope border around the edges for a framed look. Budget $40-150 depending on easel rental and linen quality. Allow 20-30 minutes to assemble and place so the sign faces the main walkway.
Place the easel where it catches indirect light; direct sun makes linen shadows hard to read.
Avoid tiny lettering — signs that are pretty but unreadable fail in real photos.
24. Fresh Greenery Garland Around a Staircase Landing
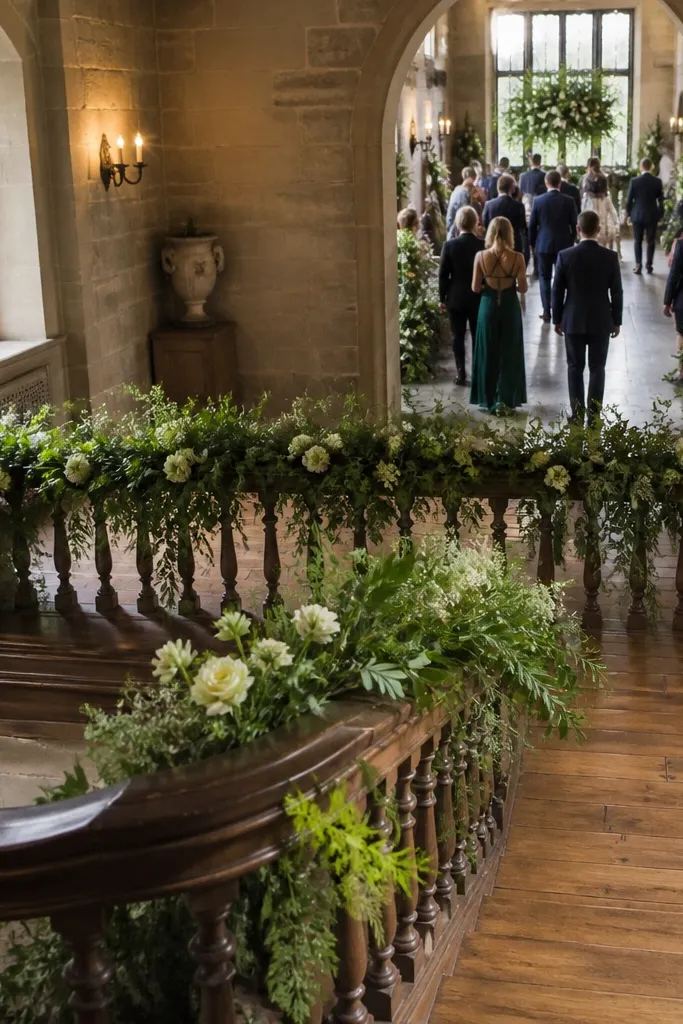
Staircases are photo magnets, and a greenery garland turns them into a ceremony-and-reception connector. The landing becomes a natural backdrop for candid bride shots and guest arrivals. Use fresh or faux greenery depending on your travel logistics, and keep blooms small if you want it to look built-in. This works in hotels, historic homes, and venues with indoor staircases. It’s a Hidden Gems Bride Decoration Ideas that adds “wow” without requiring a full backdrop wall.
First, measure the staircase landing perimeter and pick garland length that wraps without stretching. Then secure greenery with zip ties at hidden points so it holds shape and doesn’t sag. Finally, add a few cream blooms or berries at spaced intervals to create focal points for photos. Budget $50-180 depending on fresh vs faux and garland length. Plan 60-120 minutes because stairs take longer to wrap neatly.
Quick tipUse a mix of thick and thin greenery strands so the garland doesn’t look flat.
Skip thisDon’t wrap garlands too tightly; it can look compressed and unnatural in photos.
25. White Balloon Cluster with Dried Pampas at the Base
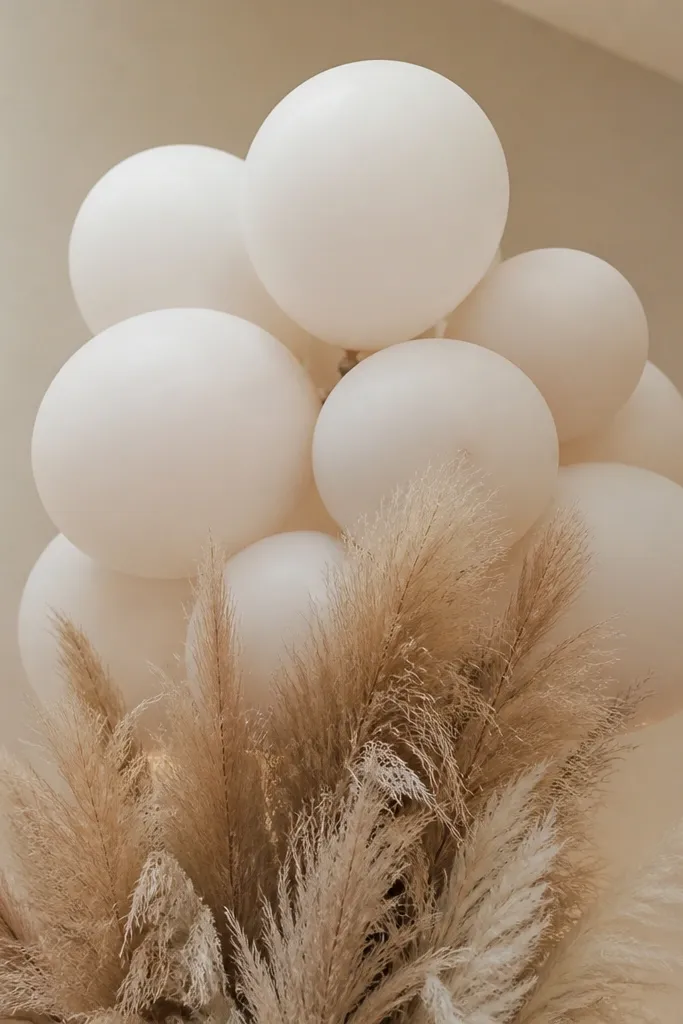
Balloon clusters photograph well because they create a soft, airy shape and a clean background pop — especially in indoor venues with plain walls. Adding dried pampas at the base keeps it bridal and prevents the look from feeling like a birthday setup. Choose matte white or off-white balloons so they don’t glare under overhead lights. This is a Hidden Gems Bride Decoration Ideas pick for photo corners, gift tables, and entrance moments. It’s also great when you want height without building a structure.
First, use a cluster of 6-10 off-white balloons with one slightly larger balloon as the top focal point. Then tie the cluster ribbons to a weighted base or a small stand so it stays upright and doesn’t drift. Finally, tuck pampas into the base wrapping so the dried texture frames the bottom of the balloons. Budget $40-140 depending on balloon size and whether you use helium. Allow 20-40 minutes for assembly, and keep it sheltered from wind if you’re outdoors.
Quick tipUse satin ribbon in a single neutral shade and cut ends clean so the cluster looks polished.
Skip thisAvoid glossy balloons — reflections can blow out highlights in photos.



