
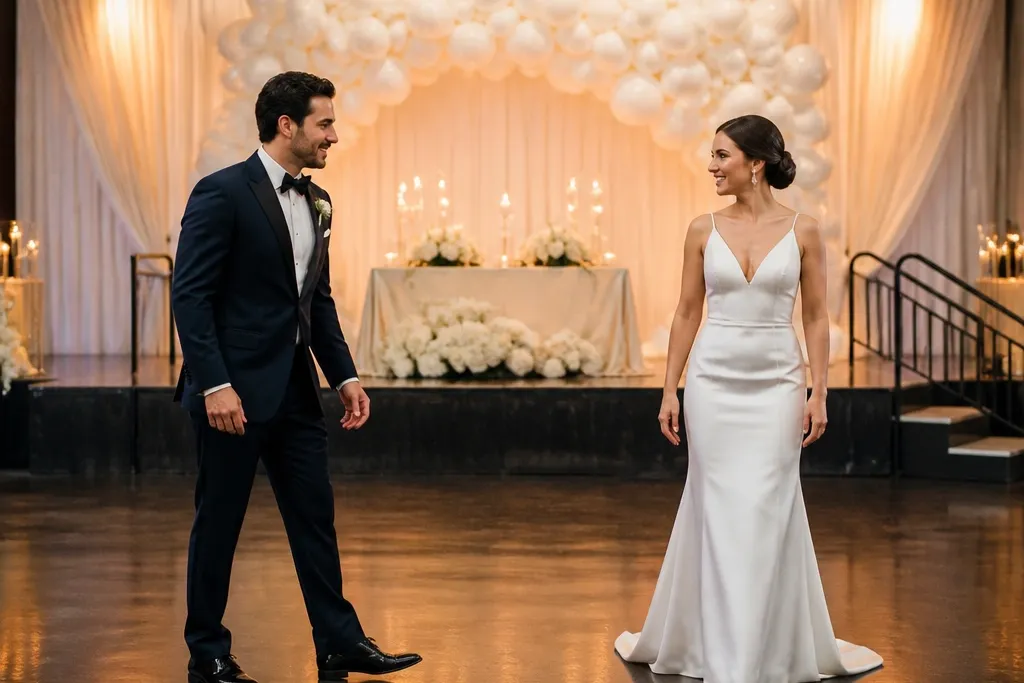
1. White balloon cloud with a single gold ribbon tail
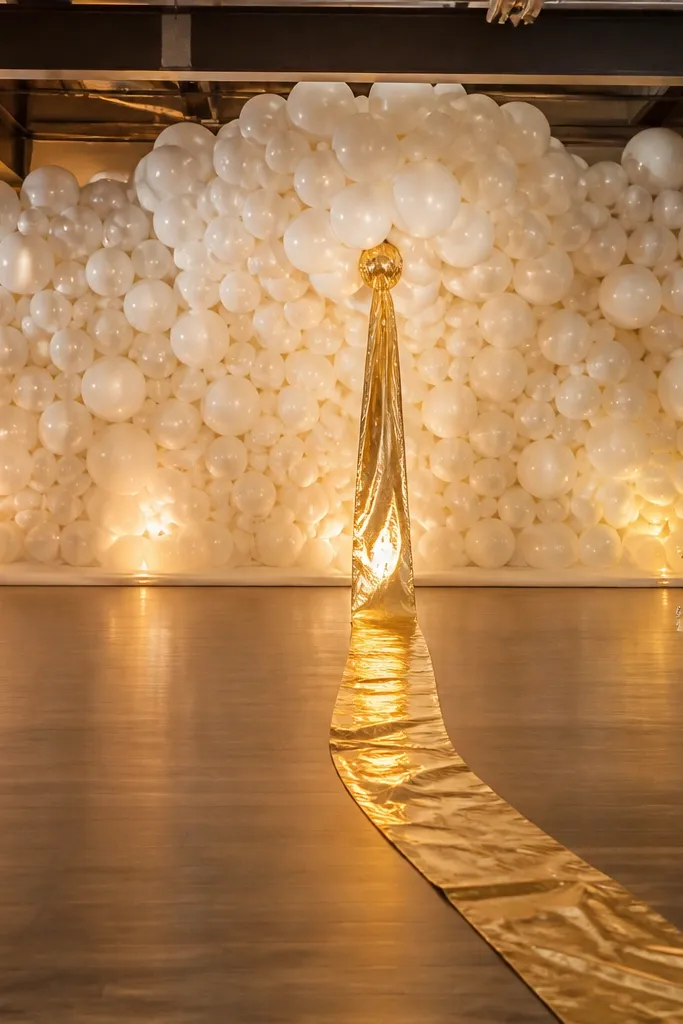
This setup gives you a soft, airy wall of texture without looking heavy. The balloon cloud reads as a bright backdrop on camera, and the one gold ribbon tail adds a “direction” line that makes the couple look centered. It suits indoor receptions with warm lighting because the white stays luminous instead of becoming muddy. It also works well for smaller stages because you can build it at the right width without taking over the whole floor. If you want stunning energy that still feels clean and modern, this is a strong choice.
Start by choosing balloon size mix — use mostly 11-inch and 16-inch balloons, plus a few 5-inch accents to keep the texture from looking flat. Then anchor a 6- to 8-foot wide balloon cluster to a lightweight backdrop frame or a stand with a secure base, and attach one long gold ribbon (about 6-10 feet) that trails down toward the center. Finally, keep the stage floor clear except for one matching low element like a short pedestal or a single lantern so the ribbon becomes the visual guide.
Use foil number balloons only if they match your gold accent; otherwise skip them so the stage doesn’t look like a party kit.
Avoid mixing too many balloon colors — it makes the backdrop look busy and kills the clean center framing.
2. Oversized rose-and-ivy drape curtain with warm amber uplights
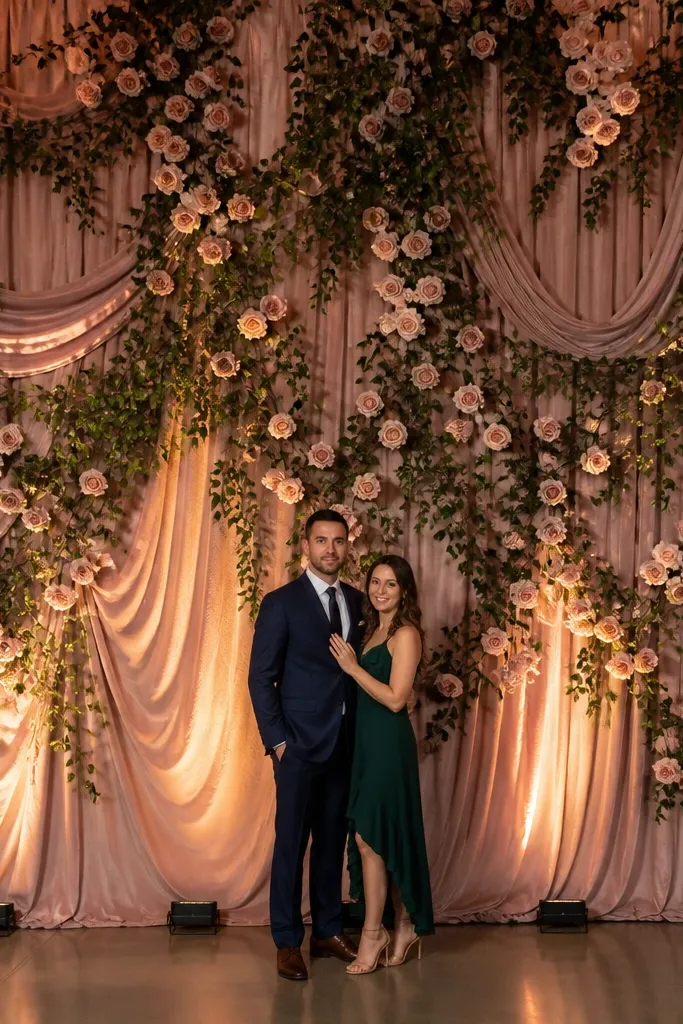
A drape curtain gives you that “event magazine” look because it fills the vertical space and creates a smooth background for moving bodies. Rose petals and ivy leaves add depth — you get layered shadows instead of a flat wall. Pair this with warm amber uplights and the florals look romantic rather than washed out. This setup is great for weddings that want a classic stage feel but still want photos that pop. It’s also forgiving on uneven venue walls because the fabric smooths the background.
Start by buying a fabric drape base in ivory or cream (sheer-to-semi-sheer) and plan for at least 10-12 feet of vertical height. Then attach pre-made garland sections or silk rose clusters in a vertical rhythm — denser in the center, lighter toward the edges. Finally, place uplights at floor level facing upward behind the drape so the leaves catch glow; test from the guest seating angle before the ceremony so you don’t get harsh highlights.
Quick tipIf your venue has strong overhead lights, use a darker fabric base like champagne instead of bright white.
Skip thisAvoid placing the uplights too close to the center — it creates a bright hotspot that blows out photos.
3. Asymmetrical mirror panels with a single pampas plume cluster
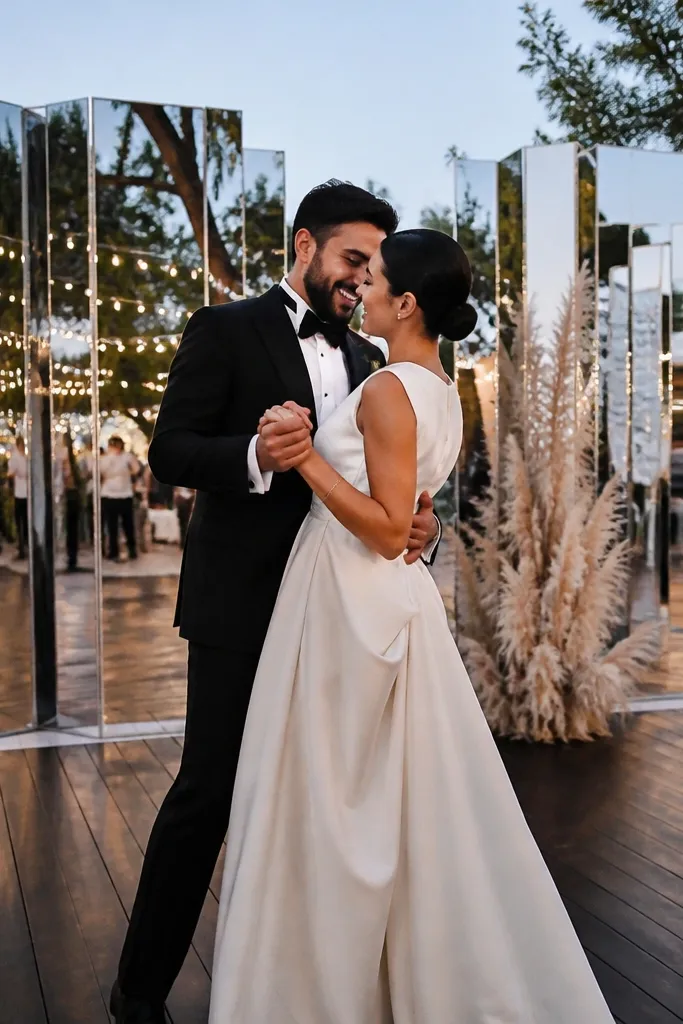
Mirrors make the stage feel bigger and brighter because they reflect the dance floor lights and multiply sparkle. Keep it asymmetrical so it looks intentional, not like a generic photo booth wall. Pampas plumes add soft texture that contrasts with the hard mirror edges, and that contrast reads beautifully in motion photos. This setup fits modern, neutral weddings and looks great in evening receptions where lighting is designed for ambiance. If you want stunning energy that doesn’t rely on heavy florals, this is it.
Start by choosing two to three mirror panels and arranging them in an offset pattern that leaves one side more open for movement. Then place a pampas plume cluster on a low pedestal or stand so the plumes reach about chest to head height. Finally, add two small floor uplights aimed at the mirror edges, not the center, so the reflections scatter across the stage without glaring.
Quick tipUse warm-white bulbs (2700K) for the uplights to keep the mirror reflections flattering.
Skip thisAvoid crowding the mirror with lots of decor — it turns into clutter and creates distracting reflections.
4. Neon script sign + trailing chiffon streamers
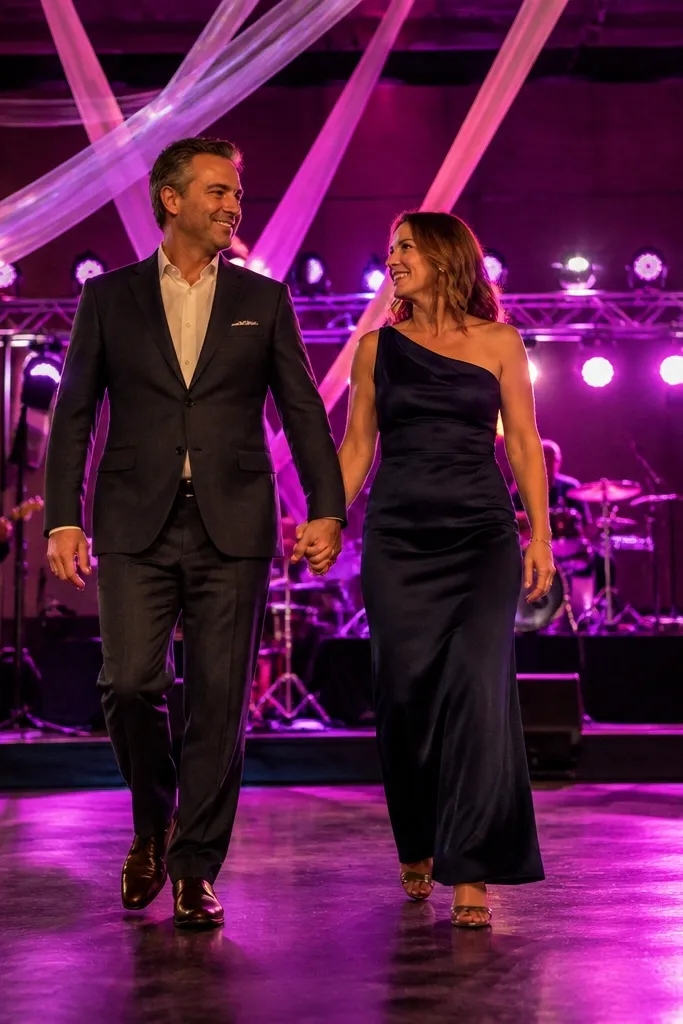
A neon script sign gives you instant focus. It’s the cleanest way to create a strong “center read” in photos because the glow stands out even when the room is dark. Chiffon streamers add movement — they catch air when people dance, which makes the stage feel alive instead of static. This works best for evening receptions with controlled lighting because the neon glow becomes part of the photo look. It’s also a great choice for couples who want a modern vibe without building a massive floral wall.
Start by selecting a neon sign size that spans roughly the center third of your stage width (around 3-4 feet wide for small stages). Then mount it on a stand or wall-safe backdrop so the bottom sits about 4-5 feet from the floor. Finally, hang chiffon streamers from the top frame — use 6-10 strands per side, cut to different lengths (about 4-7 feet) so the motion looks natural.
Quick tipPick chiffon in a color that matches your neon — blush with pink neon, champagne with warm white neon, and black chiffon with white neon.
Skip thisAvoid placing the neon sign too low — it gets blocked by guests' heads and looks cropped in photos.
5. Macramé ladder backdrop with cascading greenery
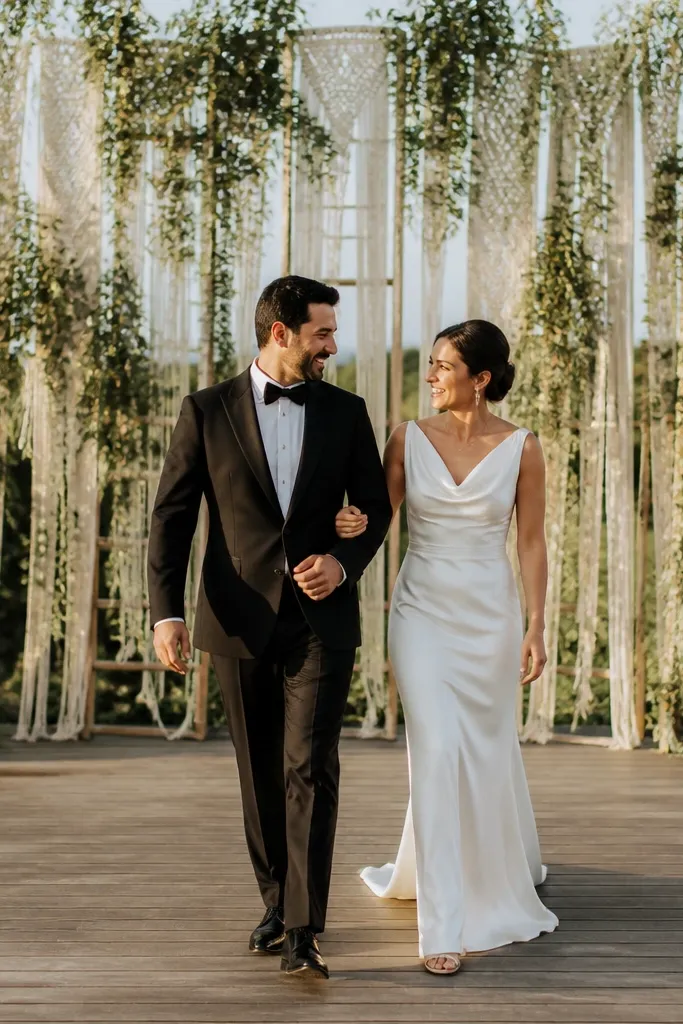
Macramé gives you texture that’s photogenic even when the lighting is soft. A ladder layout creates height without a bulky wall, and cascading greenery adds the “energy” through layered movement. This is ideal for outdoor receptions or venues that want boho-modern without going full rustic. The best part is how it frames the center — the ladder lines pull your eyes upward and inward. It also pairs well with simple florals on the floor, keeping the stage elegant instead of crowded.
Start by renting or building a macramé ladder panel about 6-8 feet tall and wide enough to cover the center of your dance floor (roughly 8-10 feet wide). Then attach cascading greenery strands from the ladder rungs — use 3-5 long strands per side so they don’t tangle. Finally, add two small uplights at the base aimed upward to make the rope texture visible in photos.
If you’re indoors, choose greenery with a mix of leaf sizes so the backdrop doesn’t look like one flat green sheet.
Avoid using greenery that’s too wet-looking — it reflects light and can look shiny in pictures.
6. Flowerless stage: tall candle lantern cluster with silk ribbon wraps
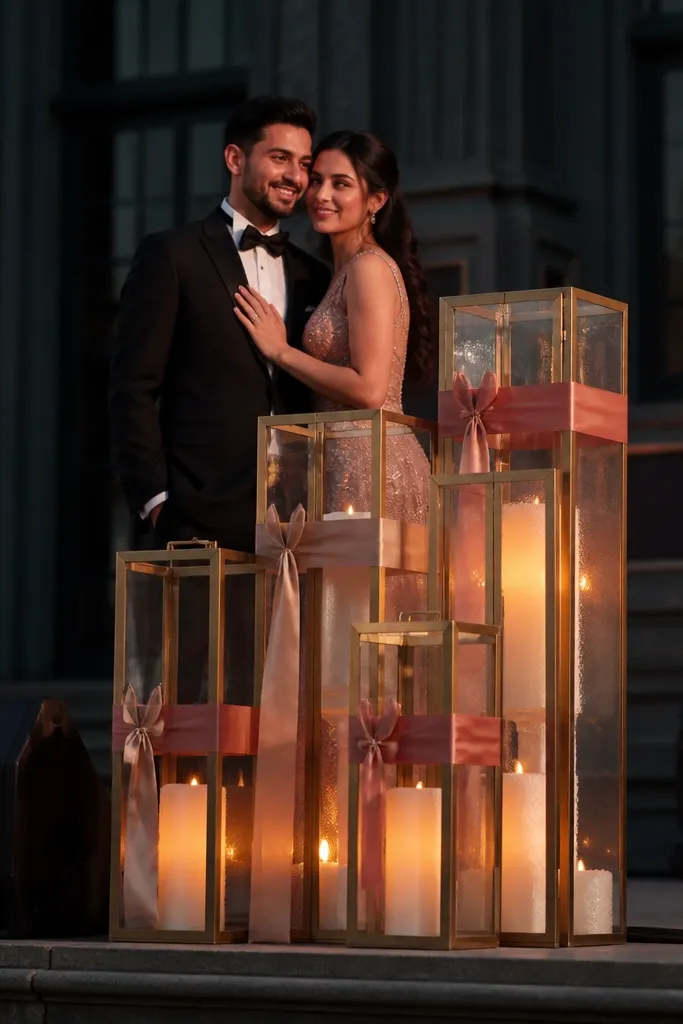
This is a stage decor move when you want dramatic atmosphere without a wall of florals. Tall lanterns create vertical points of light, and silk ribbon wraps add color that shows up even from far away. It looks especially good at night because the candle glow (or LED equivalent) turns the stage into a warm focal area. This setup suits venues with limited space or couples who want a clean, editorial look. It also works well for second weddings or city venues where florals can feel too heavy.
Start by choosing 6-10 lanterns of similar height, aiming for a cluster that spans about 60-70% of your stage width. Then wrap lantern frames with ribbon in two tones (for example, blush and champagne) so the color reads without looking chaotic. Finally, place the lanterns on risers or crates so the top line sits near head height, and add a matching ribbon runner across the floor behind the couple’s path.
Use LED flicker candles if your venue has any fire restrictions — the look stays consistent for the whole night.
Avoid lanterns that are all the same height and shape — it makes the stage look like a row of props.
7. Tiered fabric canopy with layered organza and fairy light halos
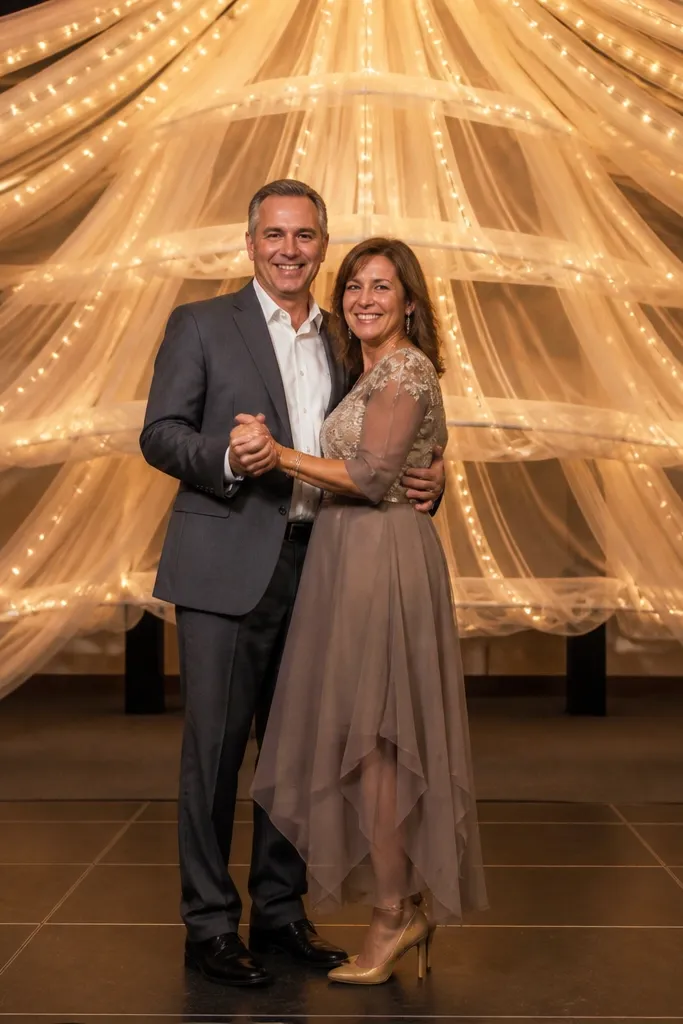
A tiered canopy gives you that “wow” effect when the couple steps into the center. Organza layers create a translucent look, and fairy light halos add a soft glow edge that reads in both wide shots and close shots. This is one of the best choices for stages where you can’t use a tall arch but still want height. It’s photogenic because it frames faces and silhouettes, so the dance movement shows clearly. The vibe is dreamy without turning into a generic wedding tent look.
Start by building a simple overhead frame or renting a canopy structure that allows two to three tiers of fabric. Then layer organza panels in decreasing widths — for example, 10 feet wide at the bottom tier, 7 feet in the middle, and 4-5 feet at the top. Finally, add fairy light halos around each tier edge using warm-white LEDs, and test the brightness from the dance floor so it doesn’t blow out faces.
Choose organza that’s slightly off-white (champagne) if your venue lighting is cool.
Avoid using thick blackout fabric — it kills the glow and makes the canopy feel heavy.
8. Tall floral columns on both sides with a clean center aisle runner
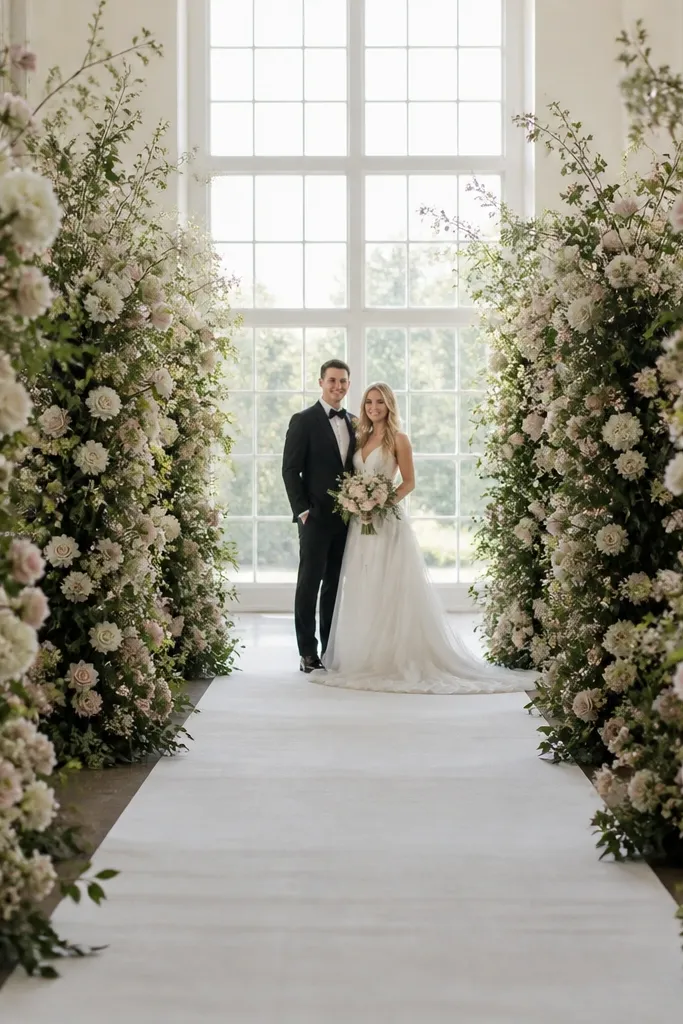
This is a smart stage design when you want the couple to stand out. Floral columns on the sides create a framing effect, while a clean center runner keeps the middle open for movement and camera composition. The columns add height and color, and the negative space makes the stage feel intentional instead of packed. It’s great for indoor ballrooms because the center stays readable even under overhead lighting. If your venue has a busy wall behind the stage, this design keeps attention on the dance action.
Start by placing two tall arrangements about 3-5 feet from the center line, sized so their outer edges match your stage width. Then keep the center aisle runner simple — a satin ribbon runner or a narrow floral-free strip — so it looks sleek in photos. Finally, connect the sides visually with a light garland line or a single overhead ribbon strip so the stage reads as one cohesive frame.
Quick tipUse the same flower family in both columns so the stage looks symmetrical from far away.
Skip thisAvoid filling the entire stage width with flowers — it blocks movement and makes photos look cluttered.
9. Oversized tulle bows on a metal truss arch
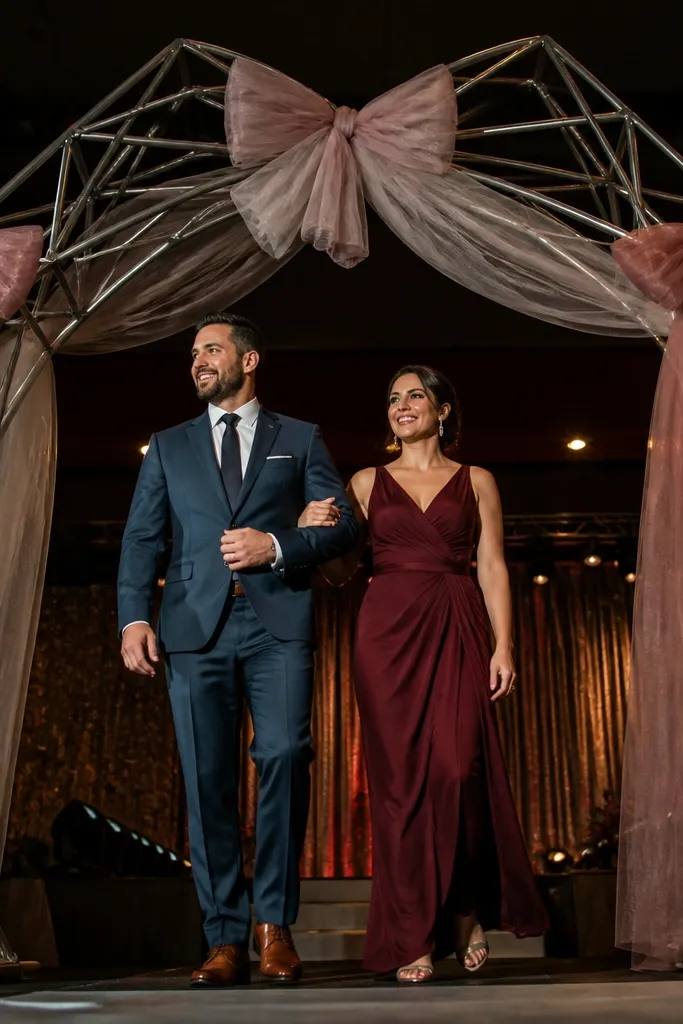
A truss arch gives you clean geometry. Then oversized tulle bows turn that structure into something soft and romantic without needing a full floral wall. This setup is great for dance stages because the arch creates a clear frame for entrances and the bow volume looks great in motion. It’s also friendly for venues with neutral walls — the arch is visible, and the tulle brings color and texture. Pick a bow color that matches your bridesmaid dresses or wedding palette for a cohesive look.
Start by renting a metal truss arch sized to your stage width, usually around 10-14 feet wide depending on space. Then attach tulle in long strips so you can shape two to three oversized bows at the center and upper corners. Finally, add 6-10 uplights along the base aimed upward to give the tulle a glow instead of flat lighting.
Use tulle in 3 widths (narrow, medium, wide) so the bow has layers and doesn’t look like one flat sheet.
Avoid cheap tulle that looks shiny — it creates glare under stage lighting.
10. Giant paper fan wall with metallic confetti edge
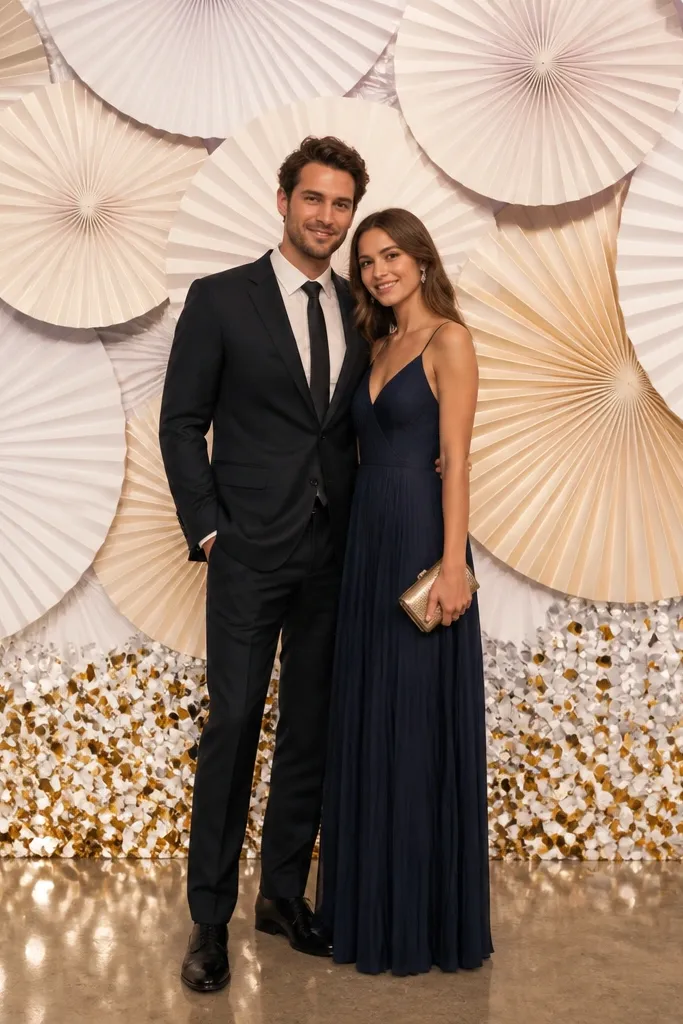
Paper fans are one of the fastest ways to get bold stage energy. They create a graphic backdrop with strong lines, which makes photos look styled even in a simple venue. Add a metallic confetti edge along the bottom and you get that party sparkle without covering the whole wall. This works best for budget-conscious couples who still want high visual impact. It’s also a great choice for a dance stage because the fans don’t block sightlines and they look good from multiple angles.
Start by building a fan wall that’s at least 8 feet wide, using mostly large fans (about 2-3 feet wide) plus a few smaller ones for depth. Then attach fans to a lightweight backing board or frame so they sit at a slight angle toward the dance floor. Finally, glue a metallic fringe or confetti strip along the bottom edge and keep the rest of the stage clean so the fans remain the hero.
Choose matte metallic (champagne gold) instead of bright silver if your venue lighting is warm.
Avoid glossy fans — they reflect overhead lights and can look washed out in photos.
11. Floating floral spheres with hanging clear ribbon strands
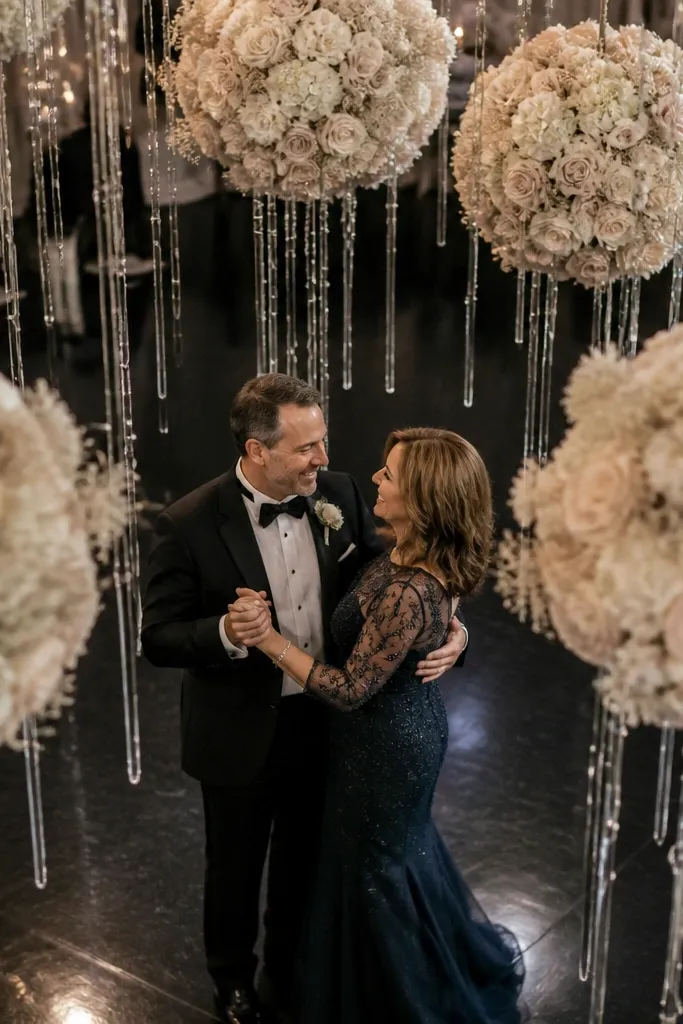
Hanging spheres make the stage feel like it has dimension above the dance floor. They also solve a common problem: flat backdrops that look great in still photos but disappear when people move. Clear ribbon strands add motion and catch light, creating that “sparkly energy” feeling without adding clutter. This setup is ideal for venues with ceiling height (at least 12 feet) where you can safely suspend decor. It gives you a modern, fashion-forward look that still feels romantic.
Start by choosing 2-4 floral spheres and confirming your ceiling clearance so the lowest point stays above head height (usually 7-8 feet). Then hang them on a stable rig or rental truss line using clear line so the ribbons become the visual. Finally, add clear ribbon strands from each sphere down toward the center line so the movement stays centered when the couple dances.
Quick tipUse fewer spheres but bigger ones — 2 large spheres can look more expensive than 6 small ones.
Skip thisAvoid hanging decor too low — it creates safety issues and blocks faces in photos.
12. Sunburst fringe backdrop with champagne satin fringe
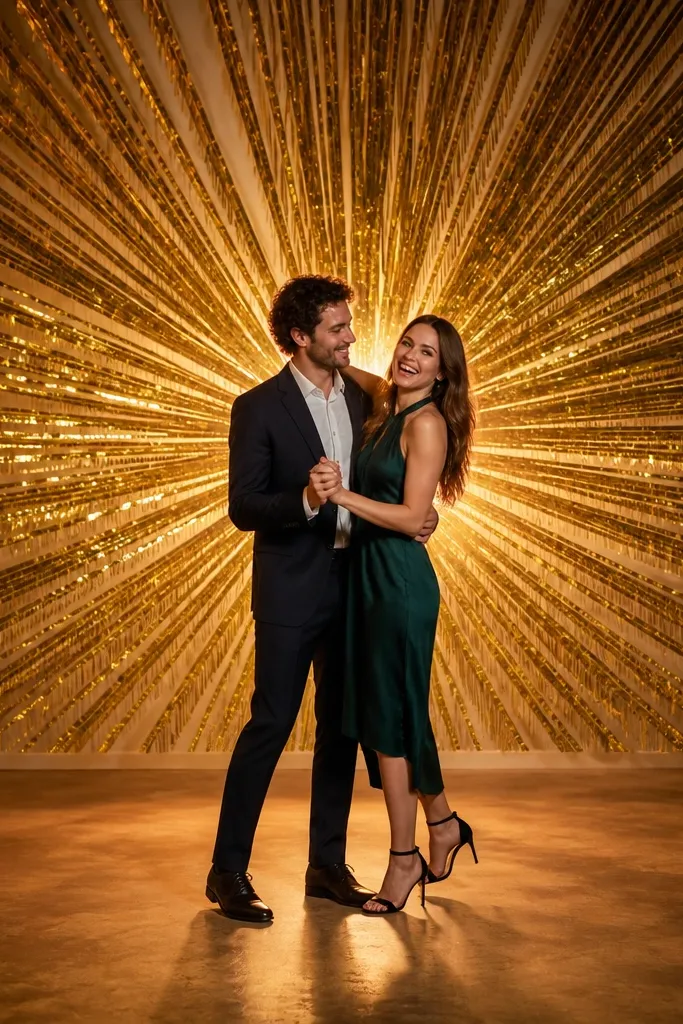
A sunburst fringe backdrop is pure dance-floor drama. The fan-like shape points attention toward the center, and satin fringe reflects light in a way that looks lively in motion. Champagne satin keeps it classy, not costume-y, and the fringe texture gives you depth even from a distance. This is a strong pick for receptions that want bold energy without heavy floral costs. It also photographs well in both wide and mid shots because the rays create a clear pattern behind movement.
Start by building a sunburst frame with spokes — you can use a lightweight backing board and attach fabric strips to each spoke. Then cut satin fringe strips about 24-30 inches long so they sway when people move. Finally, place a warm-white uplight from both sides of the stage so the fringe catches glow without creating glare in the center.
Quick tipTest one strip length in the venue — too long looks messy; too short looks flat.
Skip thisAvoid silver fringe in warm lighting — it can turn gray and look cheap.
13. Draped sequin backdrop panel with matte fabric edges
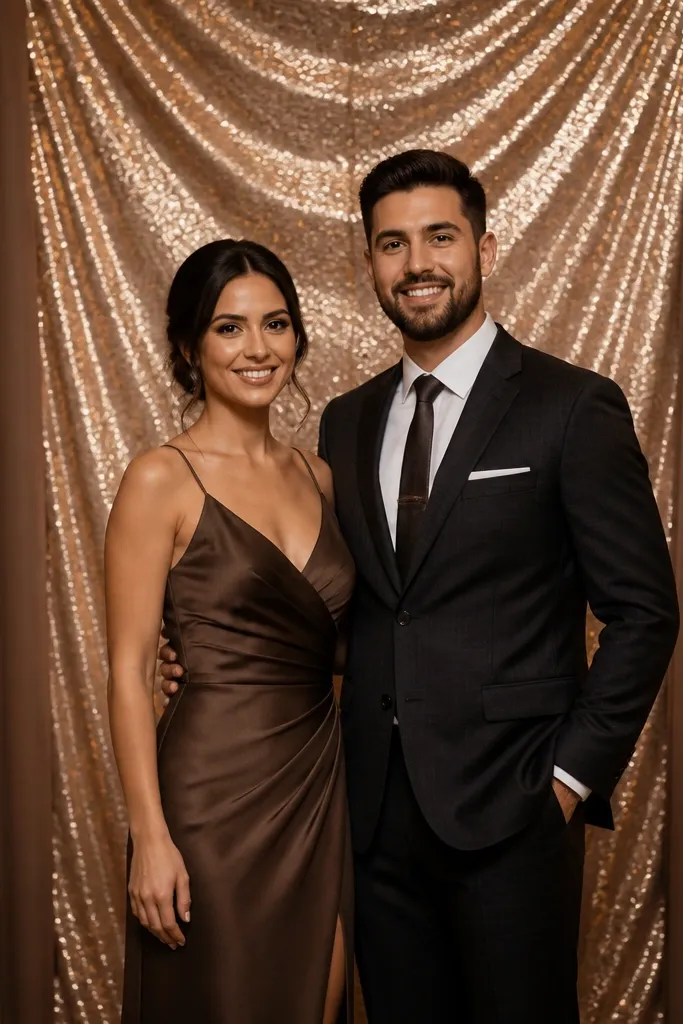
Sequins look expensive when they’re controlled. Use a sequin backdrop panel as the center focal area, then frame it with matte fabric edges so you get sparkle without visual chaos. This setup gives you a glamorous “party energy” that still looks clean in photos because the matte sides prevent the sequins from swallowing the whole frame. It suits evening receptions and venues with neutral walls. If you want the stage to feel like the main event, this is a reliable way to do it.
Start by choosing a sequin panel sized to the center third of your stage width — for example, 6-8 feet wide depending on your space. Then drape matte fabric (ivory or taupe) on both sides so the sequin panel looks framed. Finally, add two floor lights aimed at the sequin edges at an angle, not straight-on, so the sparkle scatters instead of blinding the camera.
Quick tipIf your photographer uses flash a lot, angle the lights slightly off-center to reduce glare.
Skip thisAvoid wrapping sequins around the entire stage — it turns into visual noise and kills contrast.
14. Tall pampas and dried grass with a black velvet backdrop
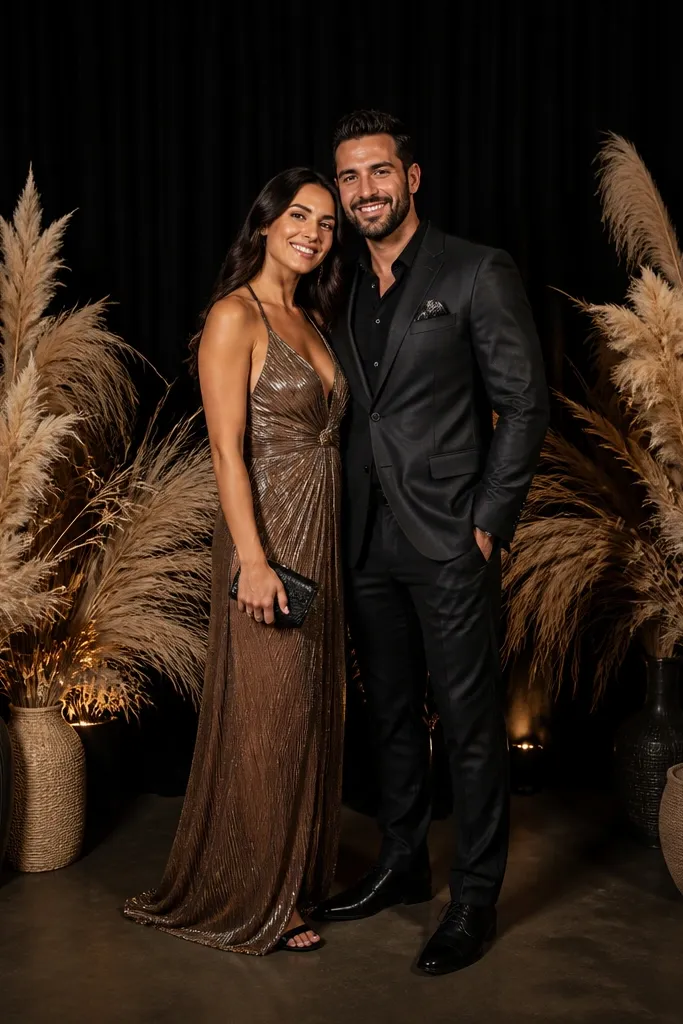
Black velvet makes neutrals look expensive. Pampas and dried grass bring height and texture, and the contrast helps the couple pop in photos. This is a strong choice for modern weddings because it feels intentional and editorial. It also works in rooms with busy walls since velvet absorbs light instead of reflecting it. If you want stunning energy that looks grounded and not overly romantic, this is the move.
Start by hanging black velvet fabric as a smooth backdrop panel, sized to your stage width (usually 8-12 feet). Then place 3-5 tall pampas bundles on stands or risers — keep them clustered in a U-shape around the center so the middle stays open. Finally, add two small warm uplights at the base aimed upward so the stems cast soft shadows on the velvet.
Choose pampas with warm beige tones — cool gray pampas can look flat against black velvet.
Avoid mixing too many dried textures — it looks messy instead of styled.
15. Color-block fabric panels with a single oversized floral accent
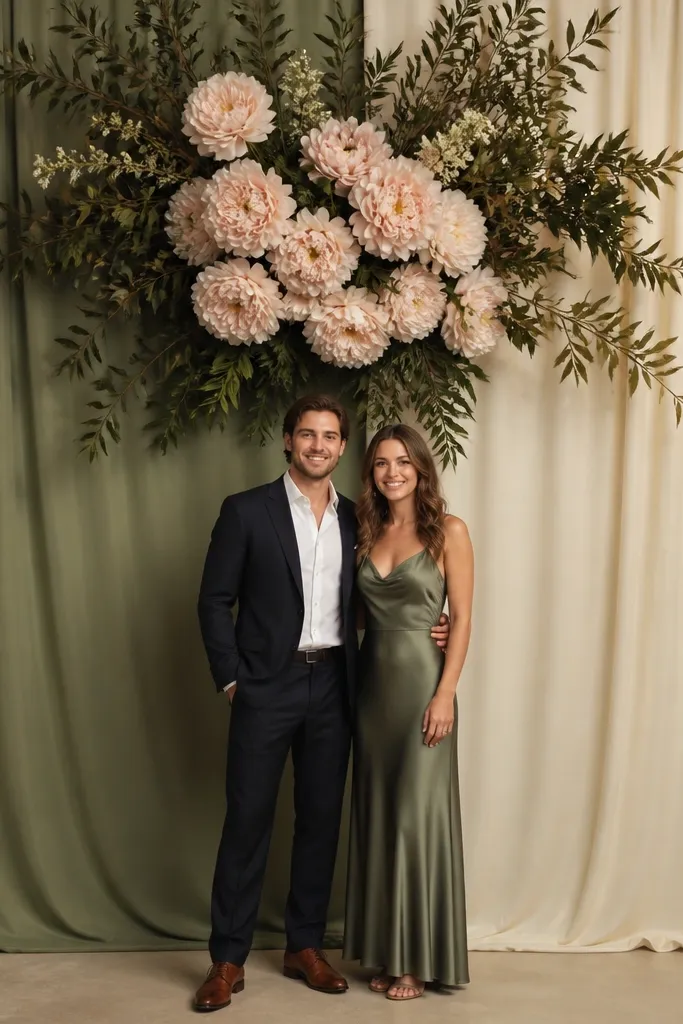
Color-blocking is a fast way to make the stage look modern and graphic. Use two or three fabric panels in your wedding colors and keep the center clean so your main floral accent has room to read. This setup is great for couples who want their palette to look intentional on camera. The single oversized accent gives you a focal point without building a full floral wall. It also pairs well with live bands and DJ setups because the background stays visually strong while people move.
Start by selecting three fabric colors and cutting panels so they stack vertically with a clean edge — think 3-foot wide sections for a 9-10 foot stage. Then attach the panels to a backdrop frame using tension rods or clips so they hang wrinkle-free. Finally, add one oversized floral accent at the center — use silk flowers if you need it to survive warm room lighting — and keep the floor decor minimal.
Quick tipPick one color that’s darker than your wall so the edges show up in photos.
Skip thisAvoid a multi-floral scatter across the whole backdrop — it turns graphic into clutter.
16. LED curtain of warm lights with pearl garland border
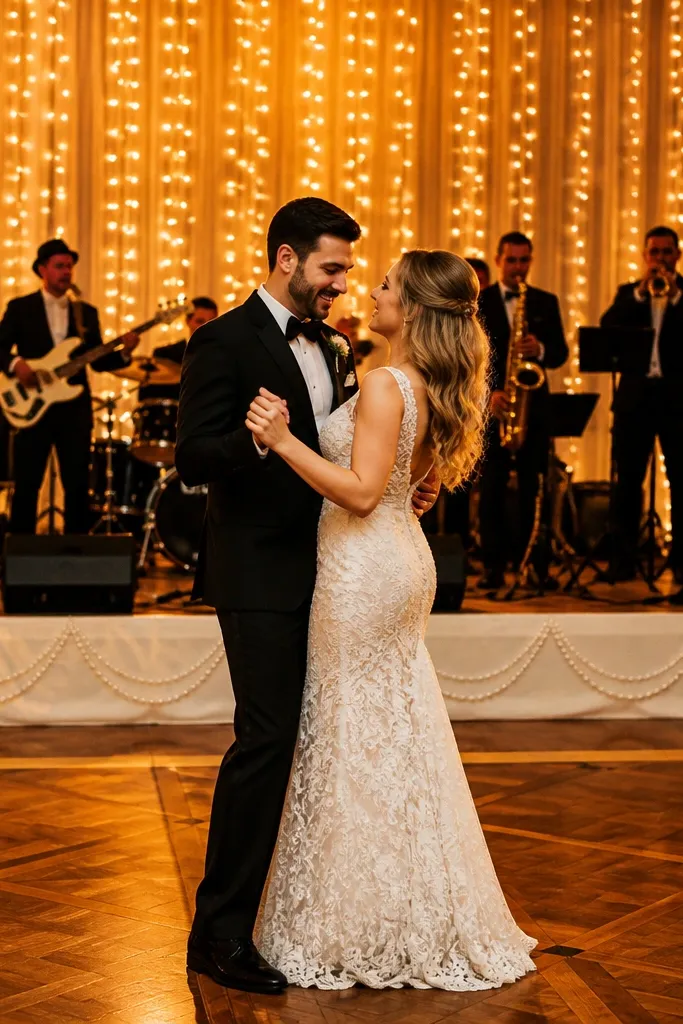
An LED curtain adds depth because it looks like light moving through layers. Warm lights make faces look flattering, and the pearl garland border gives you a polished finish that reads like formal decor. This setup works well for both indoor and covered outdoor venues because the curtain creates a consistent glow behind the couple. It also helps with a common problem: plain walls that look boring in photos. If you want stunning energy without heavy construction, this is one of the easiest wins.
Start by hanging an LED curtain on a frame or sturdy stand so it forms a full backdrop panel about 8-10 feet wide. Then add a pearl garland border around the outer edges — keep it thin so it doesn’t look like a beaded curtain room divider. Finally, place two uplights or floor spotlights to catch the border so it doesn’t disappear in the glow.
Use warm-white LEDs (around 2700K) and avoid cool LEDs that make skin look gray.
Avoid placing the curtain too close to a textured wall — you lose the smooth glow effect.
17. Sculptural rose ring arch with hanging ribbon fringe
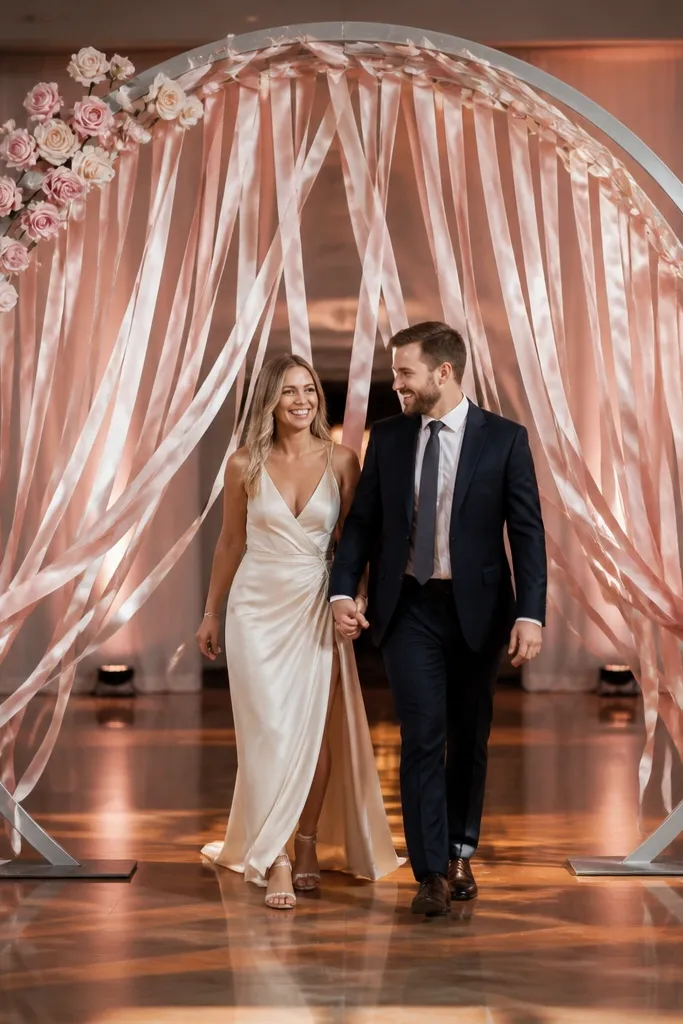
A ring arch gives you a clean “halo” frame, and it photographs beautifully when the couple turns and moves inside the circle. Add hanging ribbon fringe and you get a soft flutter effect that reads as energy. Roses keep it romantic, but the ring shape keeps it modern so it doesn’t feel like a traditional garden wall. This is ideal for stages where you want a focal point that doesn’t require a massive backdrop. It also gives your photographer a simple composition: center the ring, then capture movement through it.
Start by choosing a ring arch frame about 7-9 feet tall and sized so the ring diameter fits the couple’s stance and movement (usually 4-6 feet wide). Then attach rose clusters around the ring evenly, thicker in the center top for visual balance. Finally, hang ribbon fringe from the lower half of the ring — use 30-50 strands cut to different lengths so the fringe sways naturally.
Quick tipIf you’re indoors, use satin ribbon rather than sheer — it reads better in warm stage lighting.
Skip thisAvoid overly long fringe — it can tangle with dresses and looks messy in motion.
18. Tall framed photo-style floral panels for a band/DJ center stage
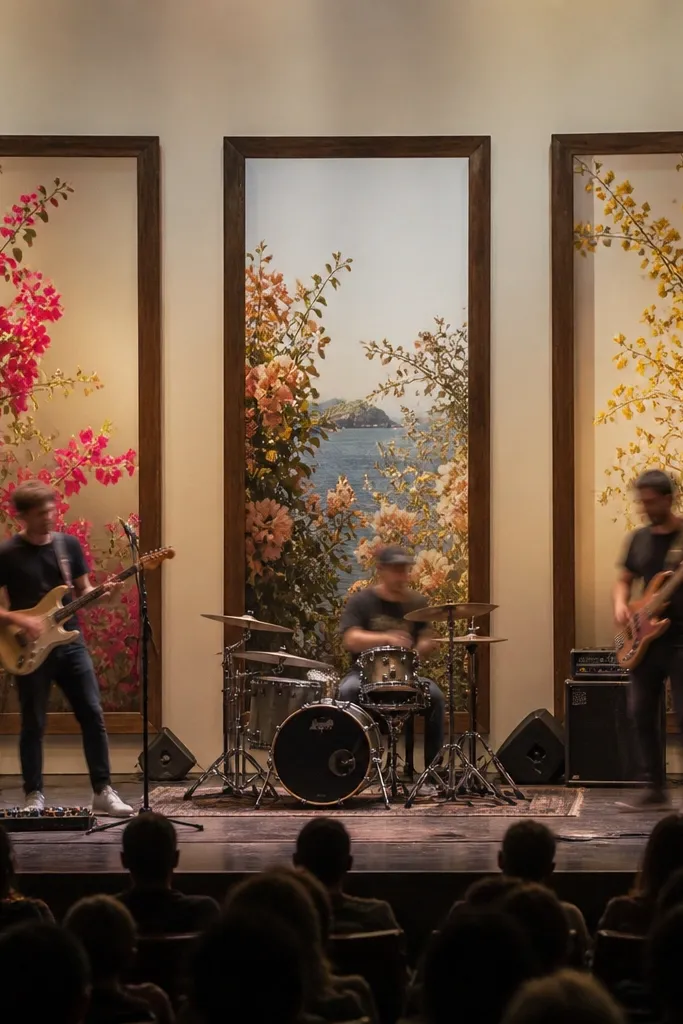
Framed panels give you a photo-ready look that stays sharp even when the band/DJ is active. This is not a full backdrop wall; it’s a set of structured “windows” that make the stage feel designed. Use floral panels on the center and sides so the couple stays visually centered while the performance continues. It’s a great solution when you have a stage with equipment like speakers or a DJ booth and you need decor that doesn’t interfere. The result feels polished and intentional from multiple angles.
Start by building or buying three framed panels — one center panel and two smaller side panels — so together they cover about 70-80% of your stage width. Then attach floral clusters to each panel with a consistent density so the look stays even in photos. Finally, mount the panels on stands or a lightweight frame behind the DJ line and keep the floor clear so the couple’s movement stays unobstructed.
Quick tipUse a consistent frame finish across all panels (black, gold, or wood) so the stage reads cohesive.
Skip thisAvoid mixing frame sizes randomly — it creates a cluttered “craft table” feel.
19. Tulle tunnel entry behind the dance floor
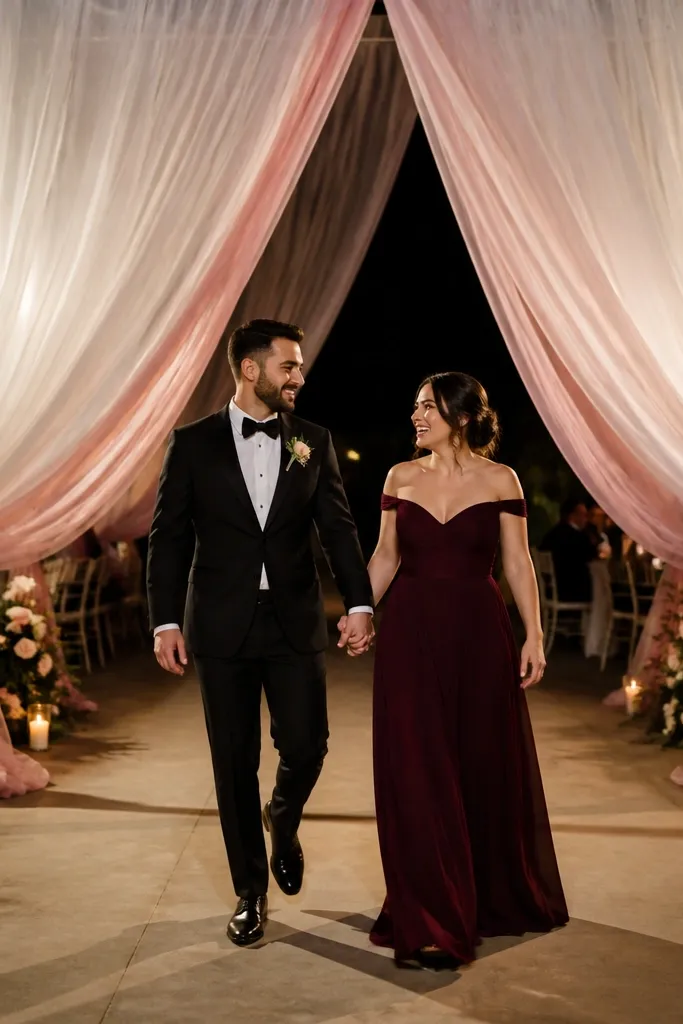
A tulle tunnel creates instant energy because it guides bodies forward. Even when people aren’t doing a formal entrance, the tunnel shape makes the dance area feel like a destination. Choose a gradient or single color tulle and let it drape from tall stands to the floor line. This setup is perfect for weddings where the couple has a first dance moment and you want that moment to look cinematic. It also works well in outdoor venues with open space because the tunnel gives the photos a clear shape.
Start by setting up two rows of tall stands with a spacing that matches your dance floor width, usually 6-10 feet apart. Then attach tulle panels to create a tunnel shape — use long lengths that reach near the floor but don’t pile so they don’t trip heels. Finally, add two warm floor lights pointing toward the tunnel so the tulle glows from within.
Quick tipUse tulle in a single color family with your table linens or napkins so the whole event looks coordinated.
Skip thisAvoid too much tulle piled at the bottom — it looks messy and can catch on shoes.
20. Confetti backdrop with a subtle satin wave behind the couple
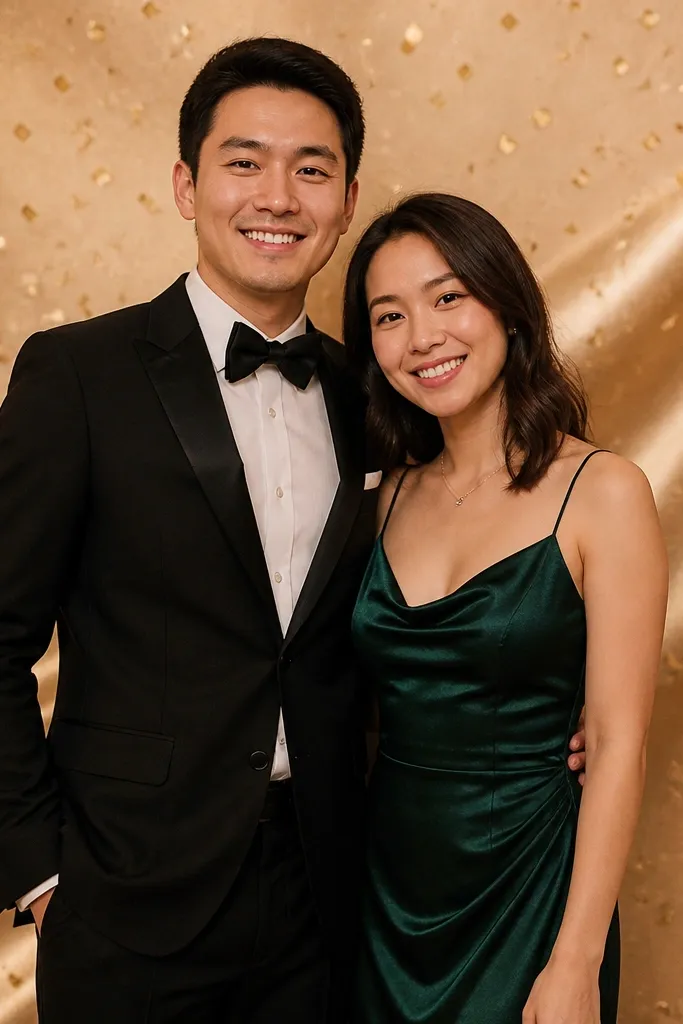
Confetti-style texture gives you celebratory energy without the mess of actual confetti. The satin wave behind the couple adds motion and soft highlights, which makes photos feel dynamic even when the room is still. This setup is great for weddings that want fun, modern energy but don’t want to build a huge floral wall. It also photographs well because the wave creates a smooth gradient and the confetti texture adds spark. Keep the stage palette tight so it doesn’t look like a party store background.
Start by creating a satin wave panel using a drape fabric attached to a frame, with the wave centered and slightly higher at the edges. Then add a confetti texture element in a controlled area — use metallic confetti vinyl or a pre-made confetti backdrop panel behind the center. Finally, place small spotlights at the top corners so the satin wave reflects light and the confetti texture stays crisp.
Quick tipIf your venue has a lot of ambient daylight, use darker satin like champagne or blush to prevent glare.
Skip thisAvoid using real confetti on the backdrop — it looks uneven and can fall onto the floor before photos.



