
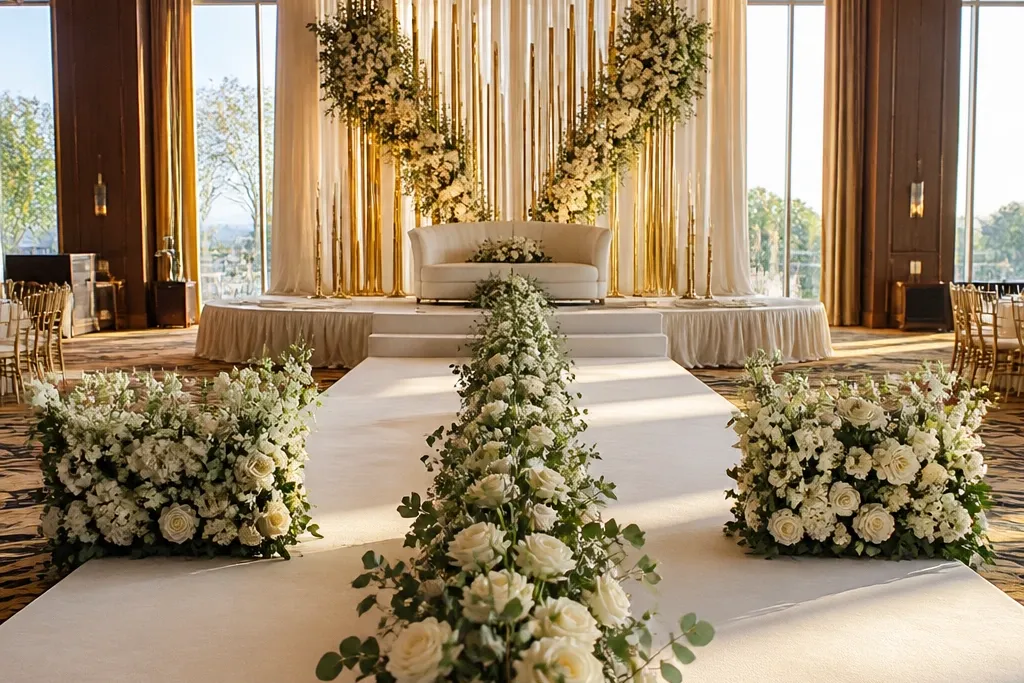
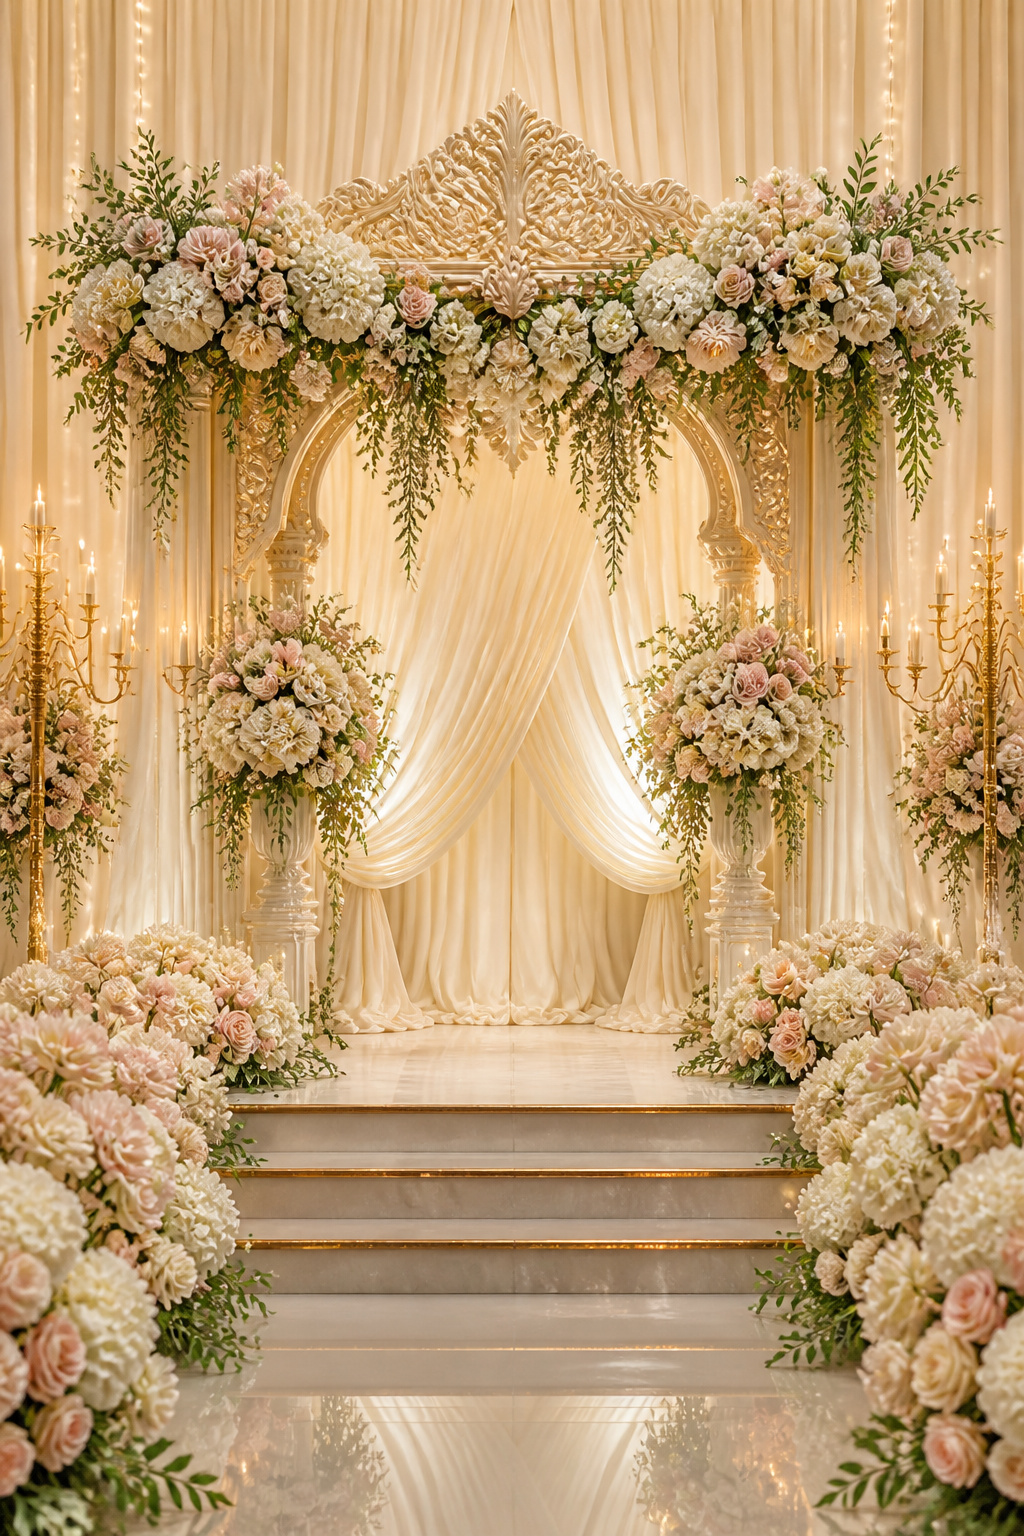
1. White Fabric Drape Backdrop With Center Floral Urn
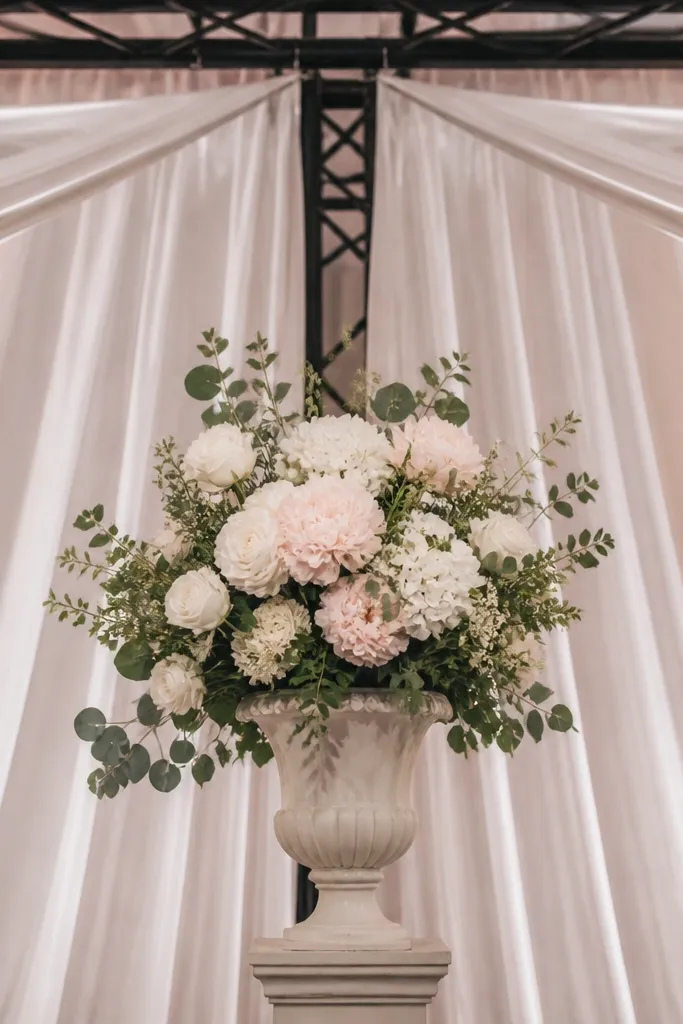
This setup is the “easy traditional” option because the fabric does most of the heavy lifting visually. Cream or white drape creates soft texture that reads expensive even when the flowers are simple. Put one prominent floral urn in the center so the couple has a clear focal point at eye level. It works beautifully for classic churches, hotel ballrooms, and outdoor tents because it adapts to different wall colors and stage widths. For photos, the drape gives you a clean background that doesn’t compete with the bouquet.
Start by hanging a wide fabric panel behind the stage using ceiling hooks or a pipe-and-drape kit. Aim for gentle folds and a drape height that reaches about shoulder level when the couple stands center. Then place one tall floral urn centered on the stage, and keep side decor minimal so the composition stays traditional. Budget-wise, drape rental is often cheaper than building a full floral wall, and setup time is usually 1-2 hours with help. Schedule it early so you can adjust fold spacing before the lighting goes in.
Choose cream drape with a slight sheen; it photographs warmer than flat white.
Avoid mixing multiple fabrics with different weights — the wrinkles can show up harshly in photos.
2. Classic Gold Frame With White Roses and Greenery
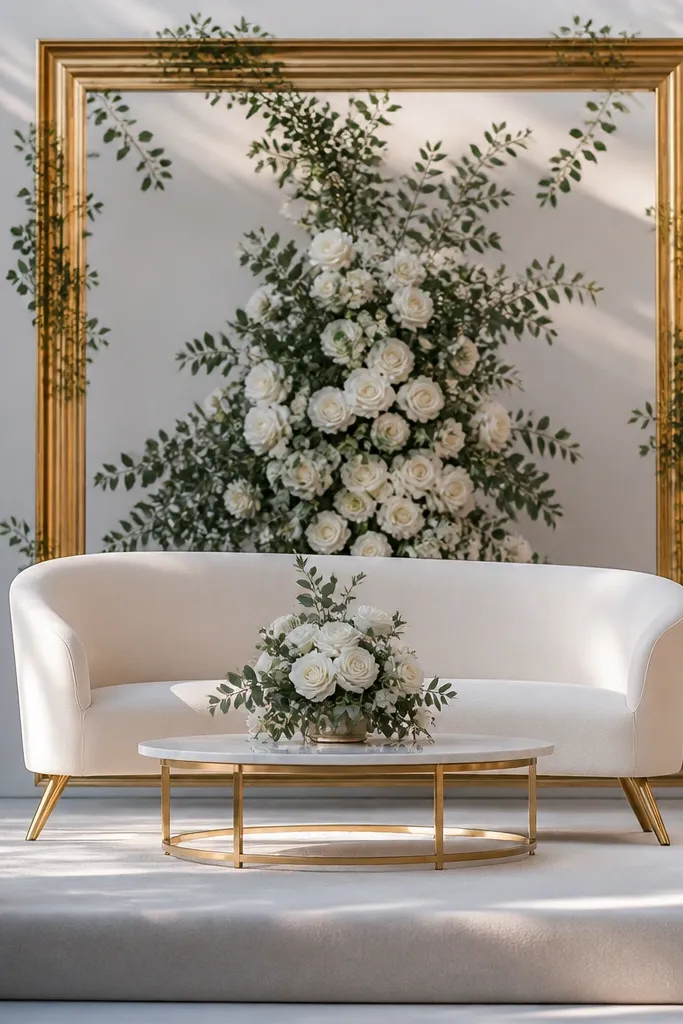
Start by renting or buying a tall gold metal frame in a width that matches your stage (a common range is 6-8 feet wide). Attach it securely to the stage base or use weighted stands so it doesn’t wobble. Then add a garland strip across the inner top and two symmetrical clusters on the sides, leaving a clean center for the couple. Finally, fill the base with greenery and a few white rose heads so it looks full from both sides. Plan for about 2-3 hours to assemble if you’re working with pre-arranged stems.
A gold frame backdrop is traditional in a very specific way: it looks like formal portrait styling. The frame edges create an automatic border behind the couple, and the white roses bring classic romance without needing heavy color work. Keep the floral design mostly inside the frame and around the center line so the stage doesn’t feel busy. This is a strong choice for indoor venues because the gold reads crisp against walls and lighting. It’s also forgiving for beginners because you can build it like a picture: place flowers, then let the structure do the organizing.
Skip thisDon’t add extra vines curling in random directions; keep the greenery shape controlled.
Quick tipUse consistent rose sizes on both sides — mismatched blooms look “off” in wedding photos.
3. Greenery Arch With White Candle Lantern Pair
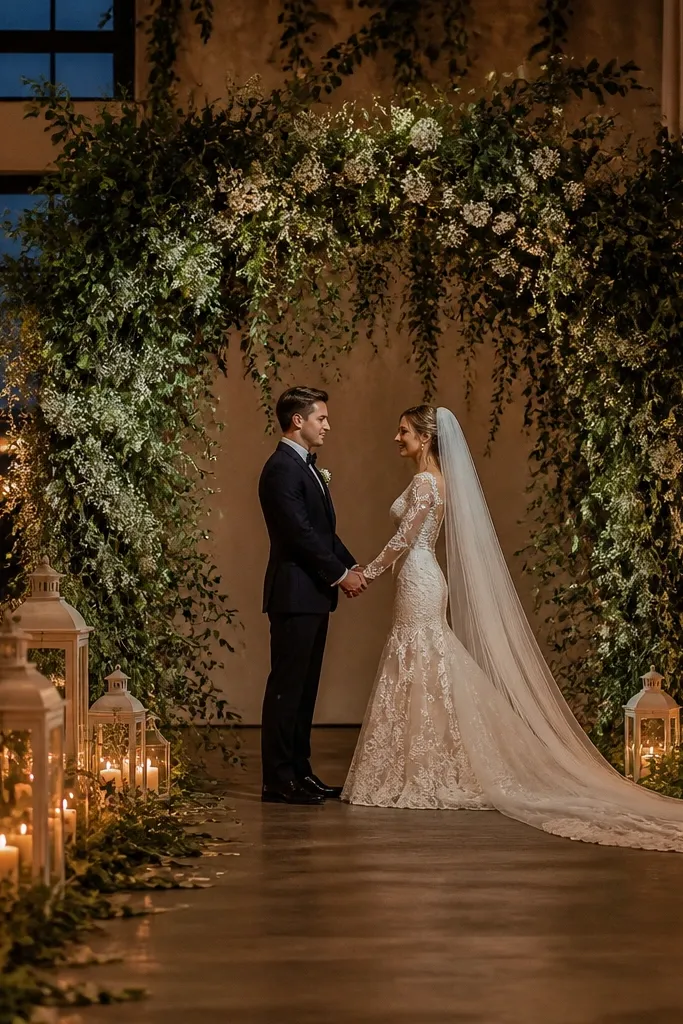
A greenery arch is traditional because it feels like a garden entrance, even when it’s indoors. The key is keeping the arch mostly green with a restrained amount of white flowers so the look stays timeless. Add a pair of white candle lanterns on both sides to give the stage depth and a classic glow. This combo photographs well because the arch creates a vertical line and the lanterns balance the frame horizontally. It’s perfect for spring and early fall weddings where you want “soft natural” without going full rustic.
Start by choosing an arch size that sits above the couple’s heads with 6-10 inches of clearance on top. Build the arch with dense greenery first, then add a few white flower clusters at shoulder height. After that, place lanterns on matching pedestals or directly on the stage edges, keeping the lantern handles facing inward. Use warm white LED candles if the venue has lighting limits; they still look like traditional candles. Allocate 2 hours for assembly and lantern placement, and do the lantern positioning last so you don’t block floral sightlines.
Face lantern fronts inward — it makes the symmetry obvious in wide shots.
Avoid black lanterns with heavy shadows; they can look too harsh under overhead lighting.
4. White and Blush Floral Stair-Step Backdrop
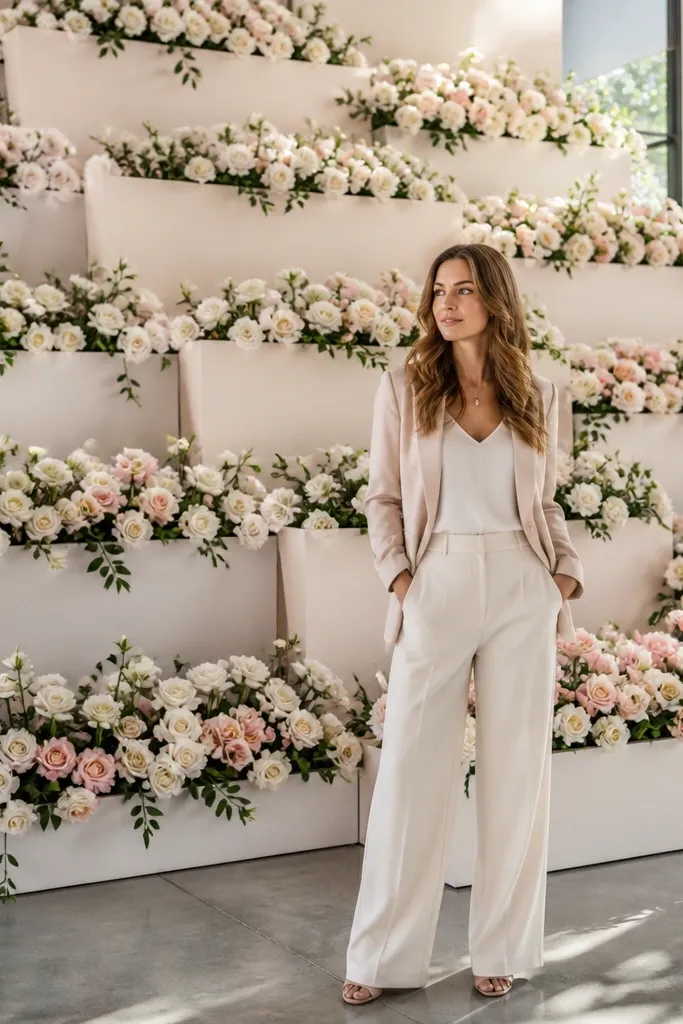
Start by deciding your backdrop width and marking three vertical zones: left, center, right. Build the base layer with greenery and white blooms, then add a second layer with blush clusters slightly higher and set back. Finally, add a third, lighter layer at the top center for a clean focal point. Keep the biggest flowers in the center and let sides taper down. Plan 3-4 hours for a beginner setup if you’re using foam-free stem arrangements or pre-made bundles.
This is traditional decor with a gentle twist: a stepped arrangement that creates depth. Instead of one flat wall of flowers, you stagger flower clusters so the backdrop has layers. White and blush keep it classic and soft, and the stair-step layout helps the stage read well even if the camera angle is slightly off-center. It’s especially good for stages that are deeper than they are wide. You’ll get a “professional florist” look without building an entire floral wall.
Skip thisAvoid placing the biggest blooms on the sides; it breaks the “center focus” rule.
Quick tipUse the same blush tone across all tiers to avoid a patchy look in photos.
5. Tall White Rose and Eucalyptus Centerline With Two Side Bases
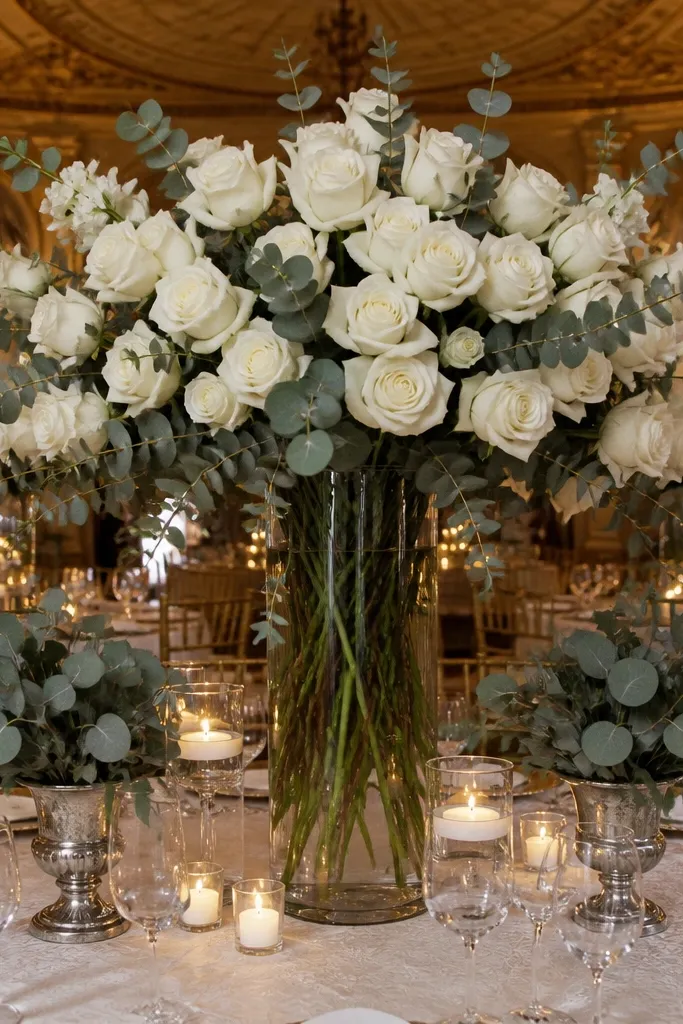
Start by placing three bases or planters across the stage: one centered tall base and two matching bases near the corners. Build the center using tall white roses or rose heads with eucalyptus stems for vertical movement. Add smaller, lower arrangements on the sides to mirror each other in height and width. Keep the centerline arrangement slightly taller than the couple’s shoulder line so it reads in wide shots. Give yourself 2-3 hours and do a photo test from where guests sit.
This design is traditional but structured, like a classic ballroom centerpiece scaled up for the stage. A tall centerline arrangement gives you height, while two matching side bases keep the composition balanced. The eucalyptus adds a classic green texture that looks good in both warm and cool lighting. This setup works well when you want a stage that feels formal without a full floral wall. It’s also a good choice for venues where you can’t hang heavy drape or build a frame.
Skip thisAvoid mixing tall stems with short, dense clumps on the sides; it looks top-heavy.
Quick tipMirror the side arrangements by measuring width — eye-balling is where beginners get uneven symmetry.
6. Hydrangea-Inspired Blue White Frame Panels
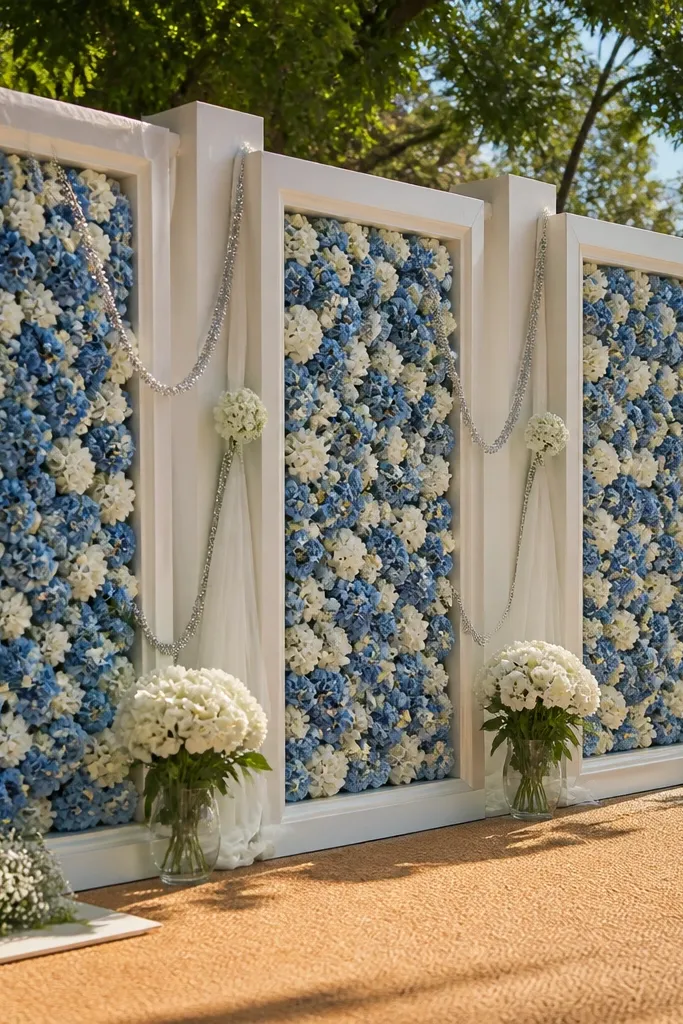
Start by building two vertical floral panels using foam blocks or a frame backing, sized to match your stage height. Add white blooms in the center band and blue blooms in the outer zones so the panels read as a unit. Then place the panels behind the couple and add a small center garland across the top if there’s space. Keep the panel edges neat — straight lines make the design look intentional. Plan 3-5 hours depending on whether you’re assembling from stems or using pre-made clusters.
If you want traditional without going fully white, blue-and-white hydrangea styling is a classic wedding look. Use it in a framed-panels approach so it still feels formal and tidy. The blue adds softness, while white keeps it clean and timeless. This works best in daylight or warm indoor lighting because hydrangea-like clusters look fluffy and romantic instead of flat. It’s a strong choice for outdoor ceremonies where you want the stage to stand out without feeling heavy.
Skip thisAvoid loose, uneven panel edges; messy borders read amateur in wide photos.
Quick tipPick one blue tone and stick to it; multiple blues look muddy on camera.
7. Single Statement Rose Wall With Center Monogram Frame
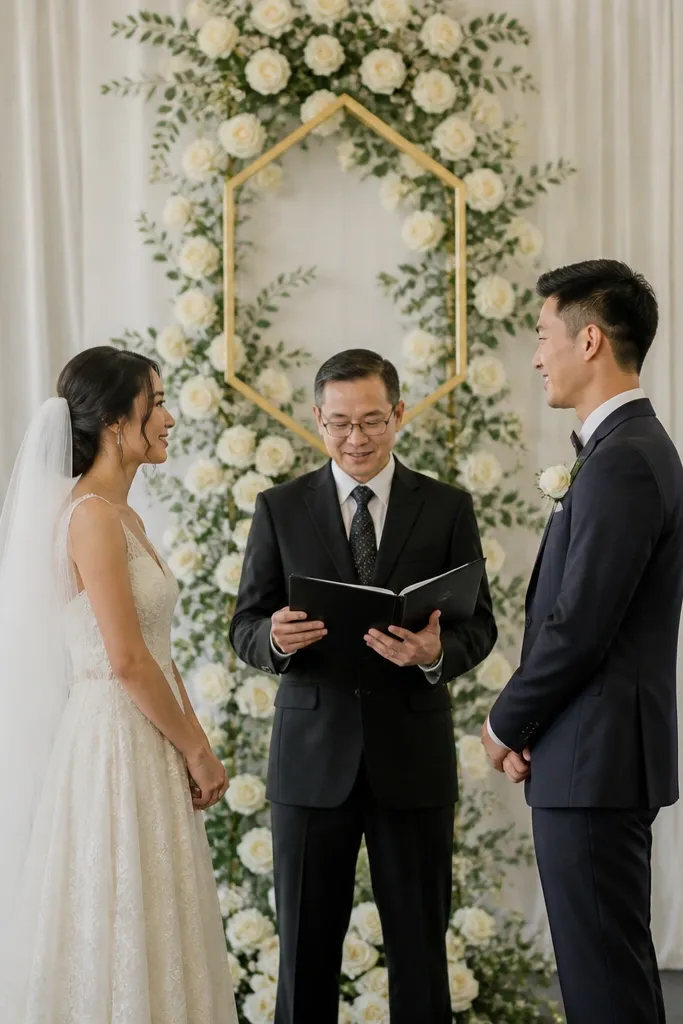
Start by measuring the center area behind the couple and building a wall section roughly 5-7 feet wide. Place greenery first, then pack roses into a smooth center field with a slightly lighter top edge. Add the monogram frame centered and anchored to the wall or stage base so it doesn’t float. Finally, add two small side accents at the base corners to connect the wall to the stage floor. Plan about 4 hours for assembly if you’re packing from stems.
A rose wall sounds complex, but beginners can make it look traditional by keeping it narrow and centered. Choose one statement rose wall strip behind the couple and add a simple monogram frame in the middle. The monogram keeps the design classy and photo-ready without turning it into a themed party. Stick to white roses or classic cream roses with greenery so it reads timeless. This setup is ideal for modern ballrooms that already have statement architecture — you’re adding softness, not fighting the room.
Skip thisAvoid covering the entire stage width — too much wall makes the couple look swallowed.
Quick tipUse a matte monogram finish; shiny letters can glare under spotlights.
8. Classic White Balloon Columns With Floral Swags
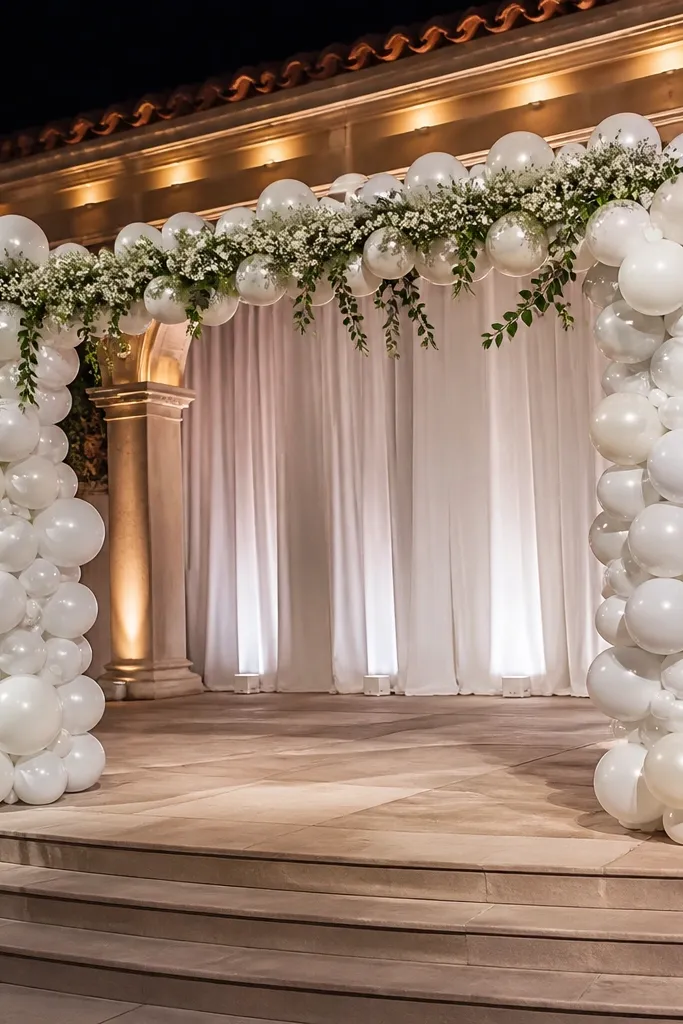
Start by selecting balloon columns sized to your stage height, typically around 6-8 feet tall for ballroom stages. Tie the columns into place and reinforce with weighted bases so they stay steady. Then add floral swags between the columns at shoulder level, keeping the swags identical left and right. Finally, leave a clear center strip for the couple so the photo doesn’t look stuffed. Plan 2-3 hours and do balloon placement before you open flower boxes.
Balloon columns aren’t for everyone, but traditional styling is real when you keep them white and add classic swags. The balloons create height and a clean, celebratory background that still looks formal with the right flowers. Use white balloons with greenery and small white blooms in swags across the top third. This is great for beginners because the columns are symmetrical by design. It also works well in venues where you can’t hang heavy drape or build large arches.
Skip thisAvoid adding colored balloons; white-only looks traditional and photographs cleaner.
Quick tipKeep swags at the same height across both sides — that’s what keeps it looking “designed.”
9. Candle-Heavy Ivory Runner Stage With Two Low Flower Blocks
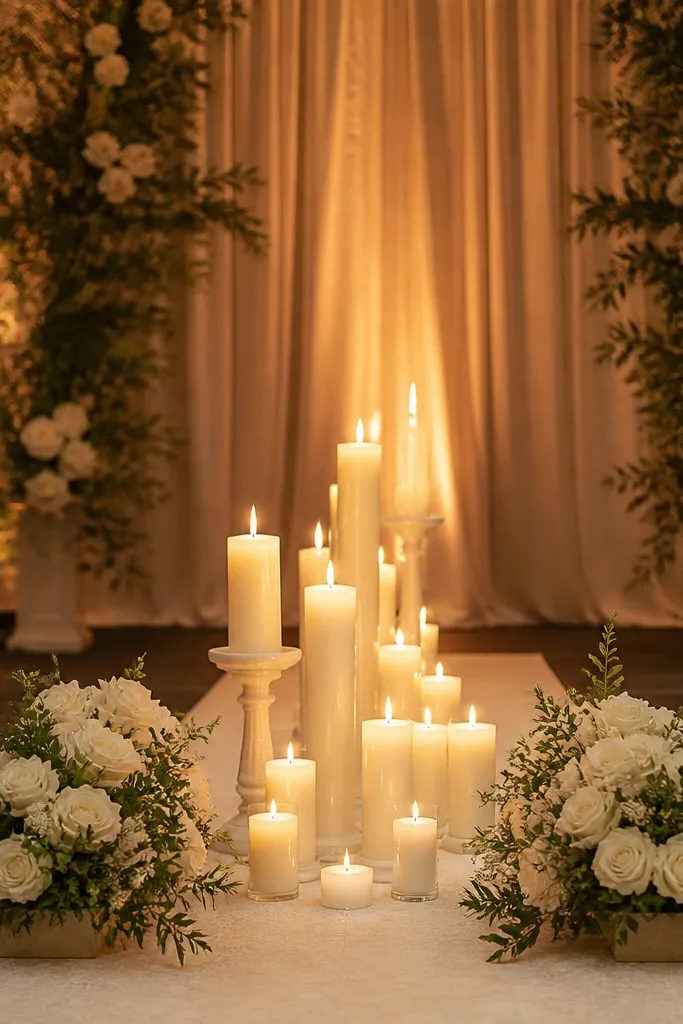
Start by laying an ivory runner down the center line and smoothing it so it doesn’t bunch at the edges. Place candle clusters in three heights on each side, spacing them so guests can’t bump them during setup. Add two low flower blocks at the front third of the stage, one left and one right, keeping them low enough for the couple’s legs to show. Use warm LED candles if your venue has fire restrictions. Budget your candles by counting per side; you’ll want about 6-10 per side for a full look.
This is traditional in a grounded way: it looks like a classic dinner setting scaled up. An ivory runner creates a soft base and keeps everything from looking like random decor on a bare platform. Candles in graduated heights add warmth and a ceremonial feel, while two low flower blocks keep the stage from looking top-heavy. It’s a great choice when your venue has a beautiful backdrop wall and you don’t need a huge floral structure. The stage reads elegant in both day and night lighting.
Skip thisAvoid placing candles too close together; overlapping flames create a messy glow in photos.
Quick tipMeasure candle spacing with painter’s tape so the pattern stays even.
10. Ivory Tablecloth Draped Pedestals With Small Rose Sprigs
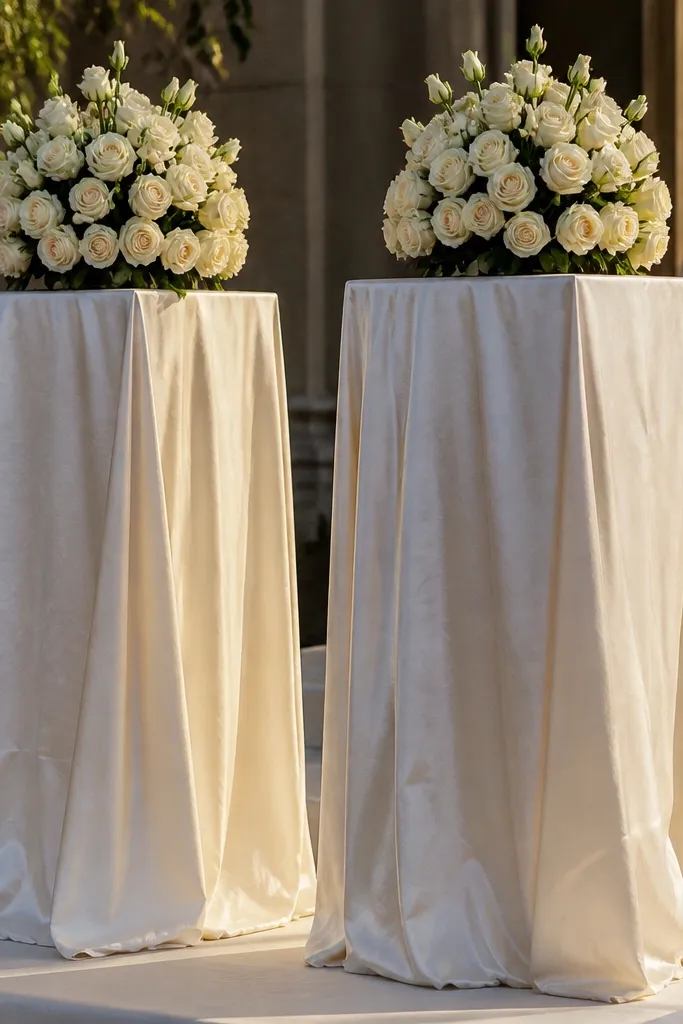
Pedestals make traditional stage decor feel formal fast, and tablecloth drape is the beginner-friendly shortcut. The ivory cloth softens the pedestal shape and adds movement in photos. Keep the floral styling small and neat on top: rose sprigs, a short garland, or a compact bud arrangement. This looks especially good in venues with neutral walls where you want texture at the edges. It also works for intimate ceremonies where a full backdrop might feel too heavy.
Start with two to four pedestals and cover each with an ivory tablecloth or drape cloth, tying it so the folds fall straight. Place a small floral base at the top center of each pedestal, then add rose sprigs symmetrically around the front. Keep the flower count consistent across pedestals so it looks intentional. Add one small greenery line along the pedestal front edge to connect it visually to the stage. Give yourself 2-3 hours and use pre-cut floral foam or secure holders so stems don’t shift.
Use the same cloth fabric for all pedestals; mixed textures can look random.
Avoid oversized flowers on small pedestals; scale mismatch is where the look breaks.
11. Mirror Tray Center With Rose-Tea Light Reflection
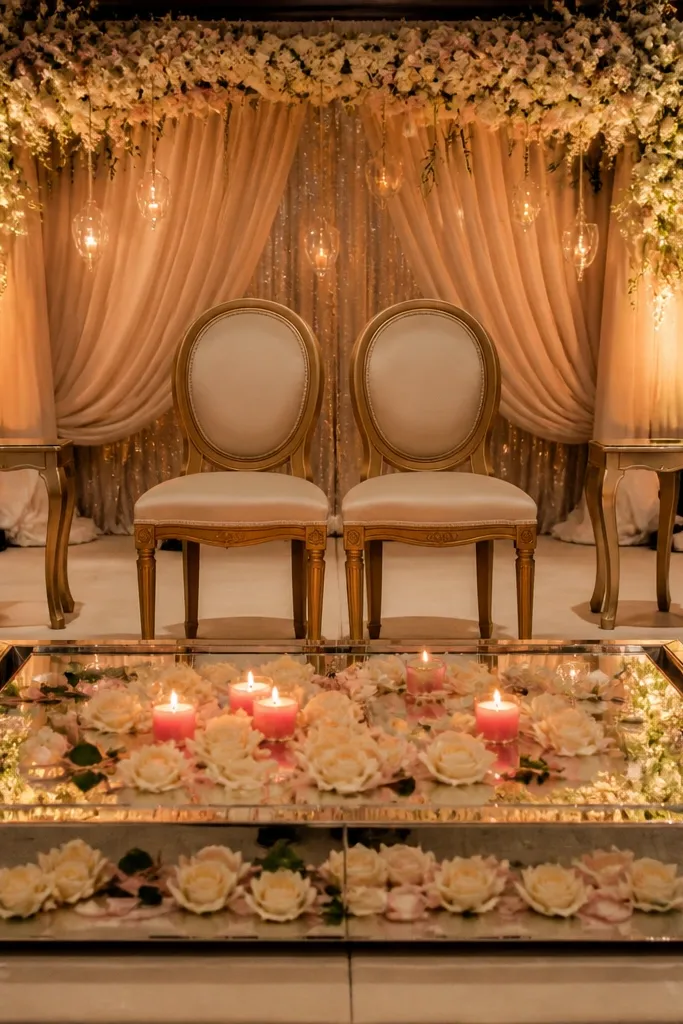
Start by choosing a mirror tray sized to your center space, usually around 24-36 inches wide. Add a shallow bed of greenery or rose petals, then arrange small rose clusters in a ring so the center stays open. Place tea lights evenly around the ring, using LED tea lights if needed. Finally, position the tray so it faces the main camera angle. Plan 45-90 minutes and keep the mirror clean — fingerprints show in photos.
A mirror tray gives traditional decor an elegant photo effect without changing the theme. Place a mirror tray centered behind the couple’s chairs or on the stage floor, then build a shallow floral arrangement and tea lights on top. The reflection doubles the candle glow and makes the center look fuller in wide shots. This works best in evening receptions and venues with controlled lighting. It’s a strong beginner option because the design is simple and the mirror does the “wow” work.
Skip thisAvoid cluttering the tray; too many stems hide the reflection effect.
Quick tipWipe the mirror with microfiber cloth right before the ceremony.
12. Classic White Rose and Pearl Garland Across the Top
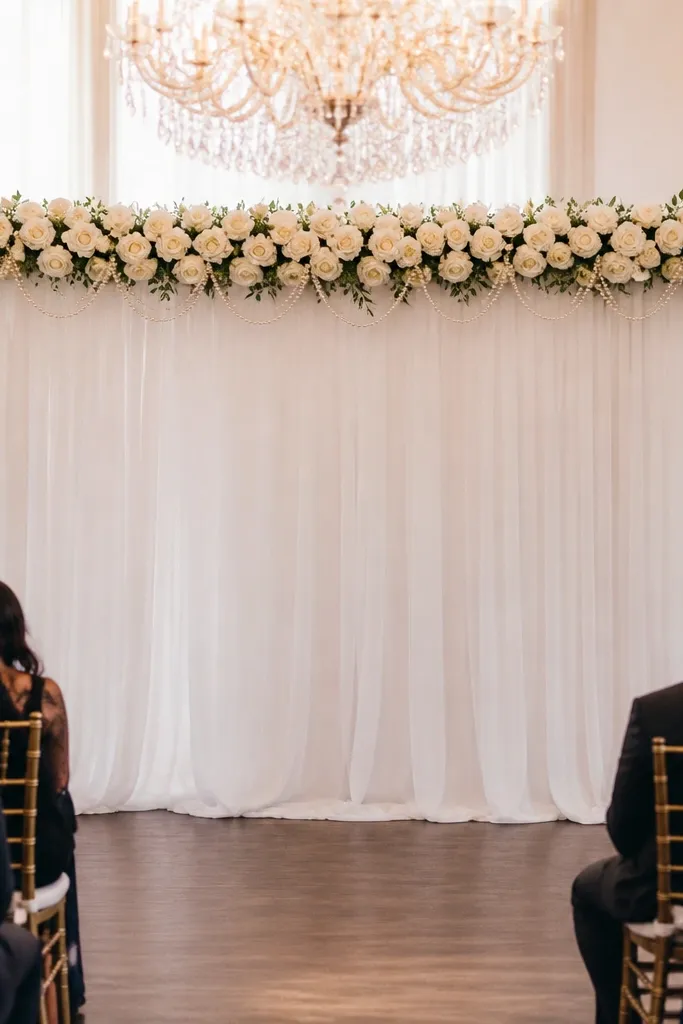
Start by measuring the width of your backdrop and cutting your garland line to fit, leaving a little margin on both ends. Attach the garland securely using zip ties or floral wire to the frame supports so it stays level. Add pearl strands lightly at the center and taper outward, keeping pearls spaced rather than clustered. Then place two smaller matching side bouquets or candle jars below the garland to connect the layers. Plan 1-2 hours and do a quick level check with a tape measure.
A top garland is traditional because it frames the couple like a formal mantel. Add white roses and subtle pearl accents to keep the look classic instead of trendy. The key is placement: a straight line across the top third of the stage backdrop, not a messy fringe. This design works when you already have a simple backdrop wall, drape, or frame and want to elevate it without building a full floral wall. It photographs clean because the garland creates a horizontal boundary.
Skip thisAvoid letting the garland sag in the middle; sagging reads sloppy in photos.
Quick tipUse pearls sparingly; one or two accents per side looks more expensive than a full scatter.
13. Traditional Lantern Hedge With White Florals at the Base
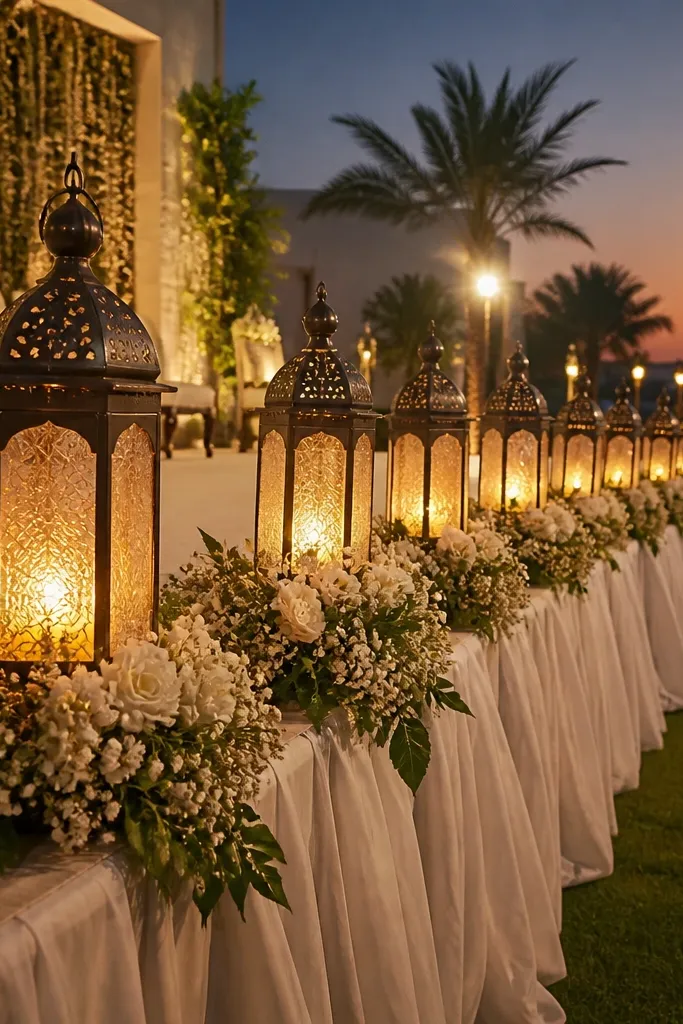
Start by choosing lanterns in one style and one finish, then line them in a straight row on both sides of the stage. Place them on matching bases so the bottoms align. Add a low bed of greenery with white blooms at the lantern bases, keeping the floral clusters identical left and right. Use warm LED lantern lights if open flame isn’t allowed. Plan 2-3 hours and measure spacing so the line looks straight from the guest seating angle.
A lantern hedge is traditional when you keep it orderly and use white florals at the base. It creates a long, welcoming line that guides the eye toward the couple. Lanterns also help in photos because the glow adds warmth without needing heavy floral volume. This setup looks great for outdoor receptions and venues with a clear walkway to the stage. It’s a beginner-friendly way to create “stage impact” while keeping the center uncluttered.
Skip thisAvoid mixing lantern heights; uneven lines look accidental.
Quick tipDo a quick test photo from the back — if the row looks crooked, fix it before flowers go in.
14. Classic Chapel-Style Floral Corners With Tall Greenery
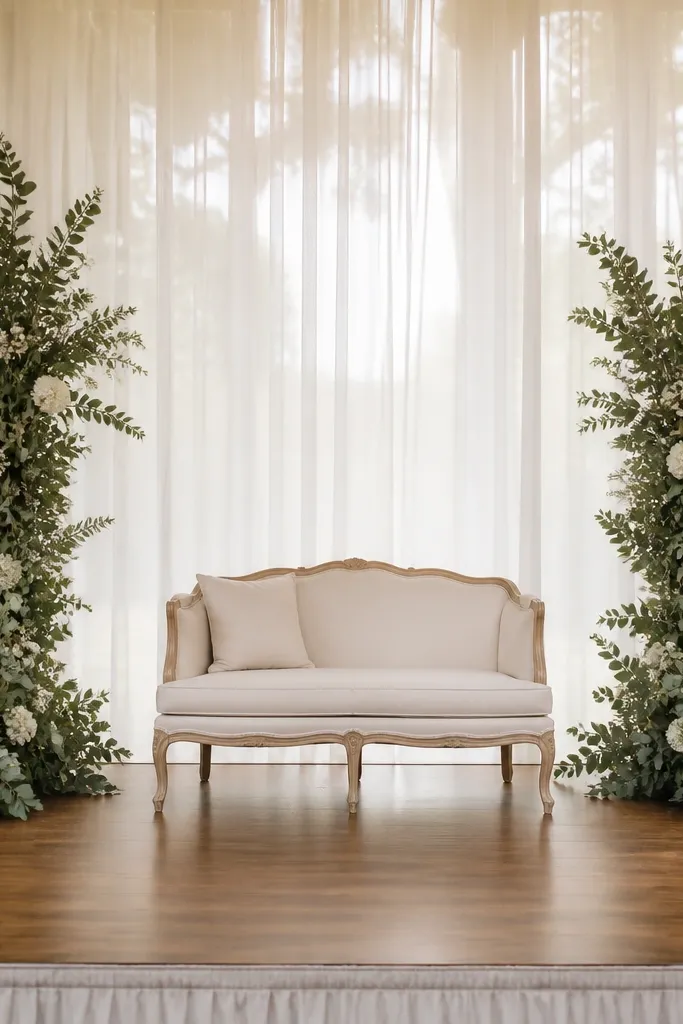
Start by placing four tall greenery bundles at the stage corners, two per side, using weighted bases. Add white flower accents at two consistent heights so the corners look designed, not random. Then connect the corners visually with a short garland or a slim greenery line along the back edge behind the couple. Keep the center open — no big bouquets in the middle. Allow 2-4 hours depending on how tall your greenery bundles are and whether you’re assembling from stems.
Chapel-style corner decor makes the stage feel anchored and traditional without covering the entire backdrop. Tall greenery corners frame the space like a doorway, and small white flower accents keep it romantic. This is a great choice for stages where you want a clean center for the couple and a balanced look from both sides. It photographs well because corners create depth and guide the camera toward the middle. It’s also easier to transport and set up than large full-backdrop installations.
Skip thisAvoid placing corner greenery too close to the couple’s chair line; it can block sightlines.
Quick tipChoose eucalyptus or similar textured greenery for corners; it looks full even with fewer flowers.
15. Traditional White Hydrangea Ball Cluster at Stage Center
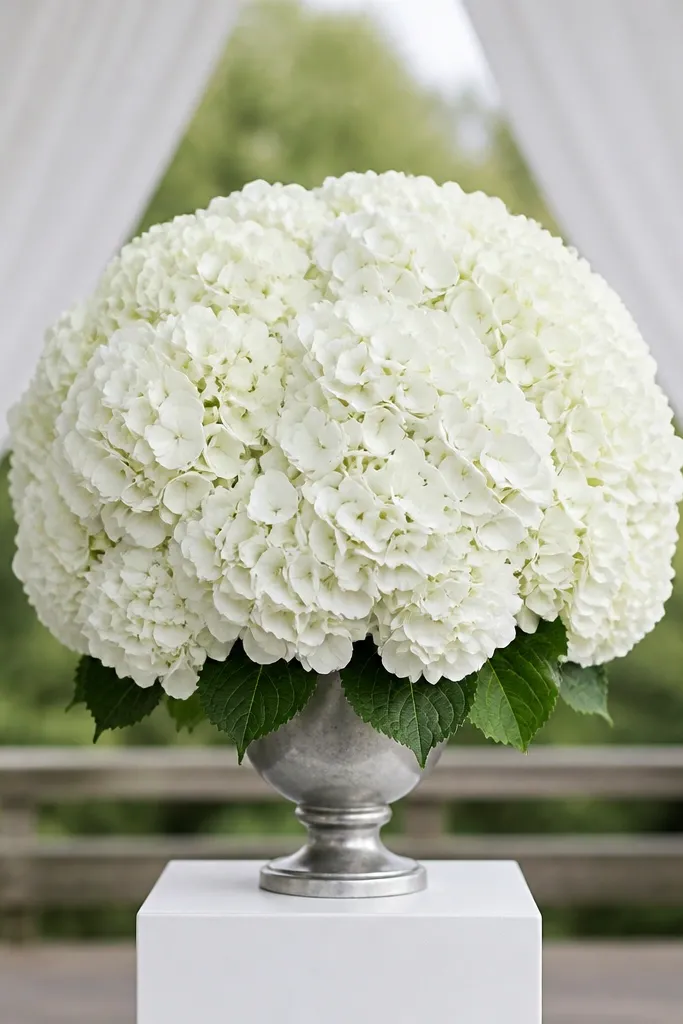
A center hydrangea ball cluster is traditional, clean, and incredibly photogenic. It reads like a classic garden bouquet scaled up, and the rounded shape looks balanced in wide shots. Use white hydrangea-style blooms with green foliage at the base for a neat silhouette. This works best for ceremonies with a simple backdrop because the cluster becomes the main focal point. It’s also good for beginners because you’re styling one hero piece, not building a wall from scratch.
Start by selecting a hydrangea ball cluster size that fits your stage — aim for 18-26 inches wide for most standard stages. Place it on a pedestal or a stable base at center, then build a low greenery ring around the base. Add two small matching greenery stems on either side of the cluster to help it sit visually on the stage. If you’re using real flowers, keep them hydrated and plan placement close to ceremony time. Budget 1-2 hours for styling and make sure the cluster is centered using painter’s tape.
Keep the base low and tidy; the top ball does the work.
Avoid mixing too many bloom types in the ball; keep it hydrangea-dominant for a classic look.
16. Neutral Linen Backdrop With Stacked Candles and Small Bud Vases
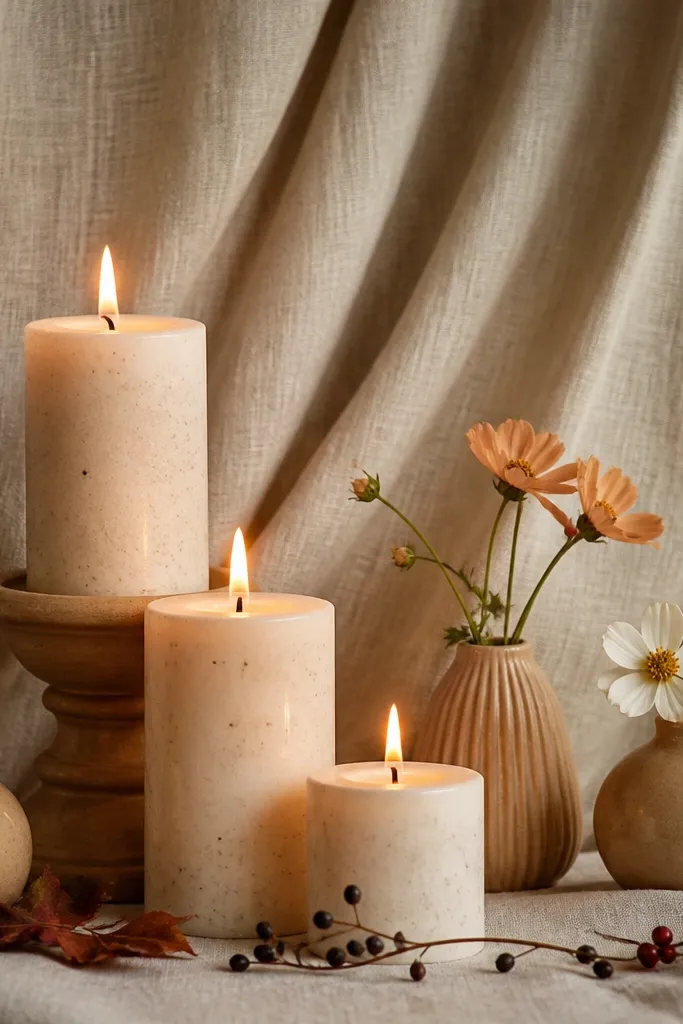
Neutral linen gives traditional stage decor a soft, tailored look. Pair it with stacked candles and small bud vases, and you get height plus delicate detail without heavy floral volume. This design works beautifully for fall and winter weddings because the linens read warm and the candlelight makes everything look cozy. It’s also forgiving in photos because linen texture hides minor wrinkles better than thin satin drapes. The result is classic and calm, not chaotic.
Start by hanging neutral linen behind the couple with a few vertical folds for texture. Place stacked candles in graduated heights along the front edge of the stage, keeping them spaced evenly. Add small bud vases between candles with one or two stems each, using white or cream flowers for a timeless palette. Turn on warm lights (2700K) before final placement so you can see how the linen and candles read. Plan 2-3 hours and keep candle placement symmetrical by measuring distances from the center line.
Use bud vases of the same shape; mixed shapes can look like random centerpieces.
Avoid tall flower arrangements on the front edge; they can block the couple in photos.
17. Gold Candelabra With White Rose Garlands on the Sides
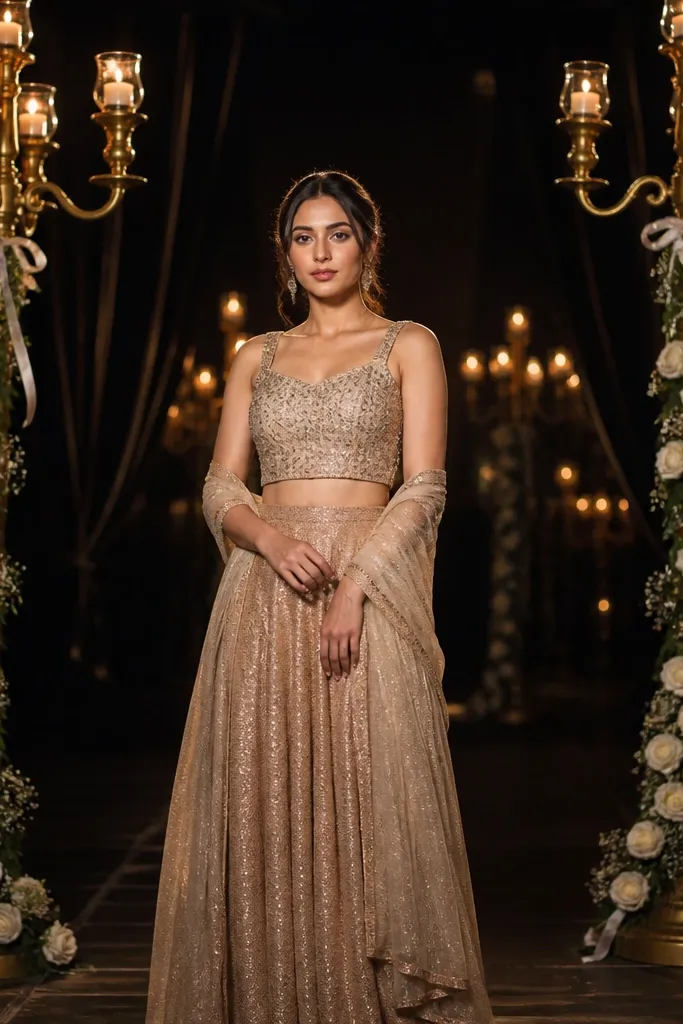
Start by placing two gold candelabras at the stage corners or just inside the corners on matching bases. Then drape white rose garlands along the inner side edges, keeping the garland height consistent on both sides. Add a small amount of greenery to connect the garlands to the candelabras so it doesn’t look like separate decor. Use LED candles if the venue requires it. Plan 1-2 hours for placement and adjust garland slack so it hangs in smooth curves.
Gold candelabras are traditional by nature, and they instantly make a stage feel formal. The trick for beginners is to keep the floral styling on the sides as garlands, not full bouquets. White rose garlands create a continuous, elegant line that looks intentional in wide shots. This is a good option for winter, evening receptions, and hotel ballrooms where warm lighting is part of the vibe. The gold and white combo also pairs cleanly with classic wedding palettes like blush, champagne, and ivory.
Skip thisAvoid heavy blooms directly in front of the candelabra; it blocks the gold silhouette.
Quick tipKeep garlands tight at the top and slightly looser at the bottom for a natural fall.
18. Two-Tier Pedestal Floral With Soft Green and Ivory Roses
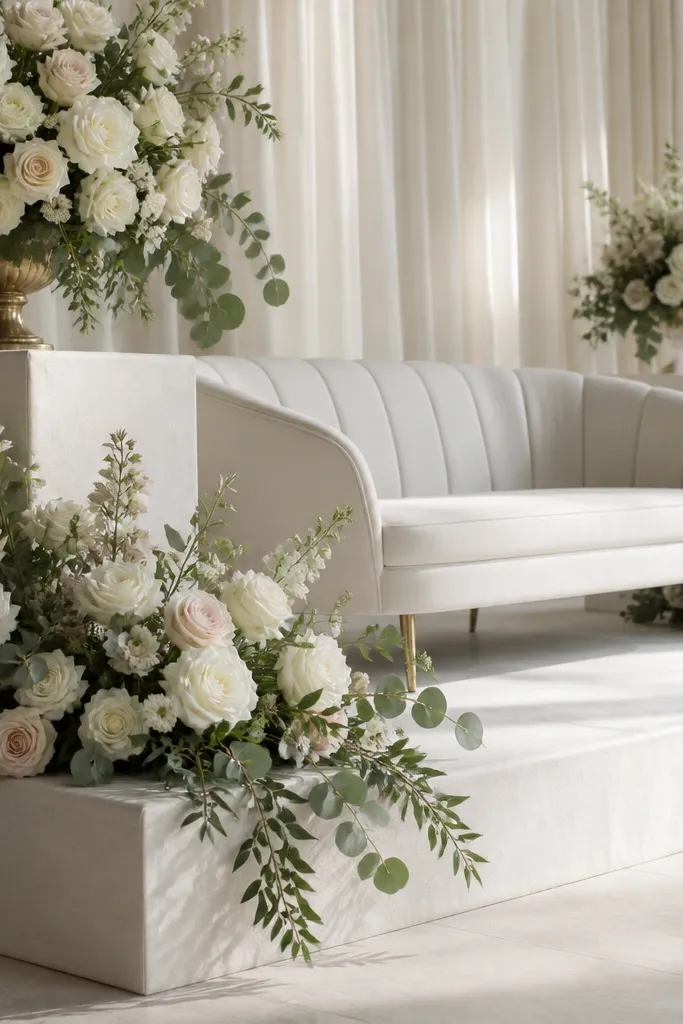
Start by using two matching pedestal stands, one left and one right, with enough height so flowers sit above the couple’s shoulder line. Build the lower tier with greenery and a few ivory rose clusters, then add the upper tier with more clustered blooms for shape. Keep the tiers mirrored by using the same number of rose heads per side. Place the pedestals at equal distances from the center line so symmetry reads in photos. Give yourself 2-4 hours depending on whether you’re assembling from stems or using pre-built tiers.
Two-tier pedestals make traditional stage decor look like a designed floral installation without a full backdrop wall. The lower tier anchors the composition, while the upper tier adds height and a “wow” shape behind the couple. Soft green and ivory roses keep it timeless and flattering in almost any venue lighting. This is a strong beginner choice when you want a symmetrical look but don’t want to manage hanging fabric. It also works well for receptions where the stage has a clear background you don’t want to cover.
Skip thisAvoid making the upper tier wider than the lower tier — it looks unstable and less formal.
Quick tipUse floral foam or a secure vessel for the upper tier so it doesn’t shift when people move around.
19. Traditional Wedding Stage With Framed Wreath and Two Matching Side Bouquets
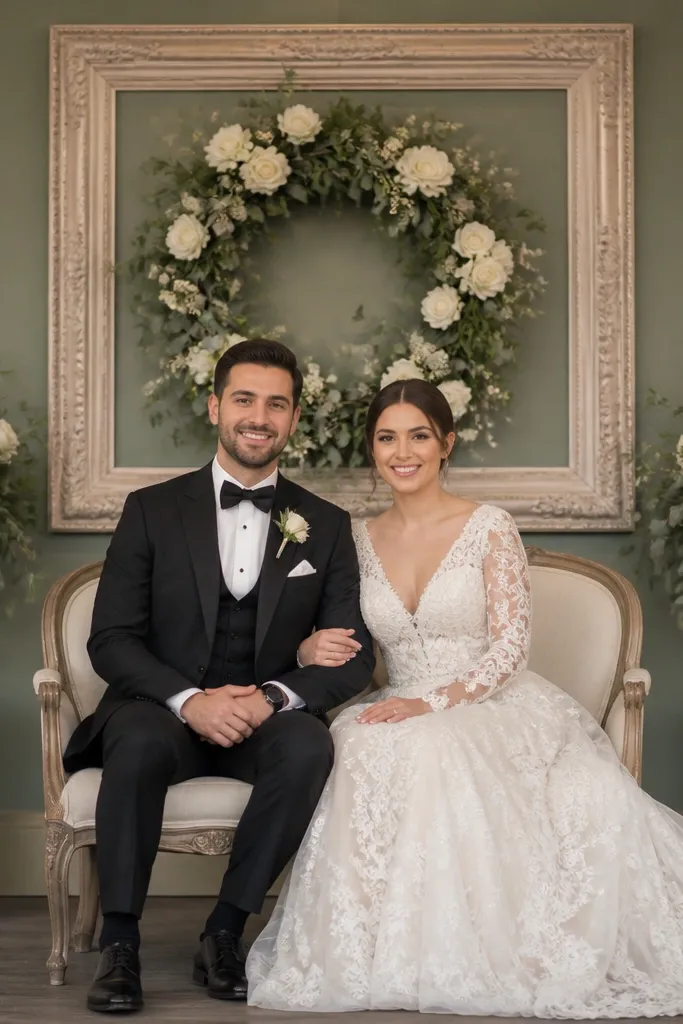
Start by choosing a wreath diameter that fills the center backdrop area, usually around 24-36 inches wide. Secure it inside a simple frame or use a framed wreath stand so it stays upright. Place two side bouquets on the stage edges at the same height, using identical flower types and similar stem counts. Add a slim greenery base line beneath the wreath if there’s space to tie it to the stage floor. Plan 1-2 hours for assembly and do a quick straight-on photo check to confirm the wreath is centered.
A framed wreath is classic and instantly recognizable in wedding photos. It gives you a traditional circular focal point, and the frame makes it feel intentional and formal. Keep the wreath in greenery with white blooms for the most timeless look. Then add two matching side bouquets at equal heights to balance the circle. This setup works in both indoor and outdoor venues because it doesn’t require heavy hanging — it sits cleanly on a stand. It’s a beginner-friendly design because it’s basically three elements: the center wreath and two side supporters.
Skip thisAvoid placing side bouquets at different heights; the whole look loses its traditional balance.
Quick tipUse the same greenery in the wreath and side bouquets so the color reads unified.
20. Vintage Window Frame Backdrop With White Roses and Hanging Candle Sconces
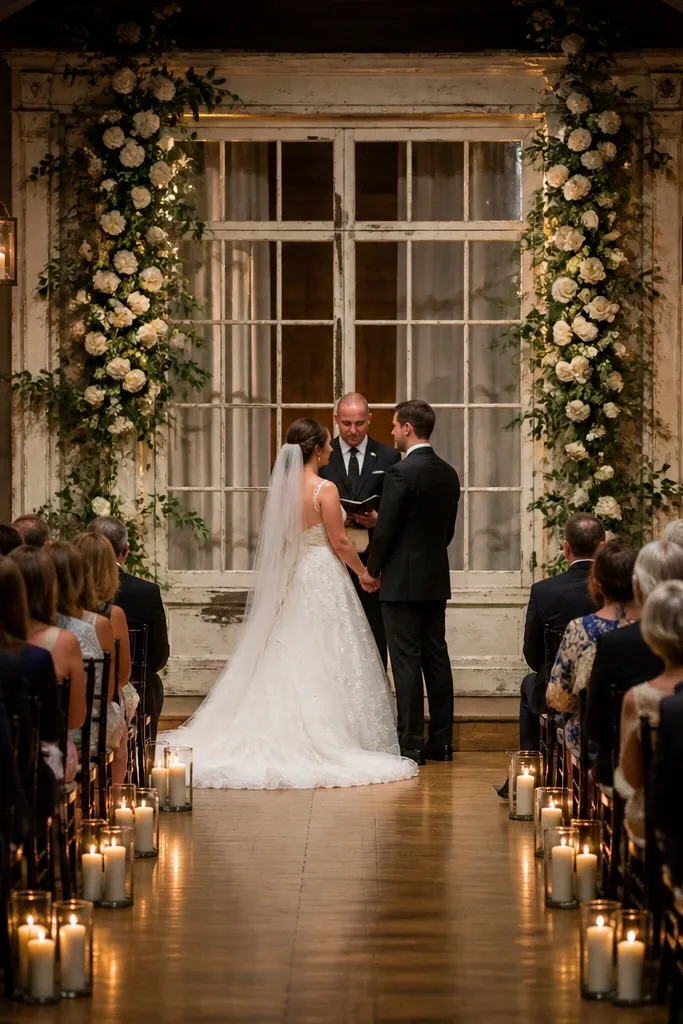
Step 1 — get the frame and build the base: pick a window frame about 7-9 feet tall and 4-6 feet wide, then anchor it to the stage wall or a rented stand so it cannot sway. Step 2 — add florals and lighting: attach white roses with green filler around the frame rails, then hang 3-5 small candle sconces or hurricane lanterns from the top crossbar so they sit at eye level for photos. Step 3 — plan travel and timing: if you are traveling for a venue, book the frame rental and the florist 6-10 weeks ahead, and schedule a decor drop-off window that matches your venue’s load-in times to avoid rush fees. Expect to spend roughly $250-$600 for the frame rental and $400-$900 for florals and candle holders, and plan 2-3 hours for setup with two people.
This setup makes the stage feel like a countryside church window — tall, airy, and instantly photogenic from any angle. Use a real vintage-style window frame (wood or powder-coated white) and let white roses and soft greenery climb around the edges so it reads as one clean composition, not scattered decor. Hanging candle sconces give you movement and height without adding a bulky arch, which is great for venues with low ceilings or tight stage widths. It suits beginners because the layout is basically one big focal point — center the frame, build the flowers around it, and hang the candles in a symmetrical line. The look is especially gorgeous in spring and early fall when white florals photograph crisp against natural stone or warm wood walls.
Skip thisSkip mixing too many flower types on the frame — keep it mostly white roses plus greenery or it turns into a busy collage instead of a window moment.
Quick tipIf you want this to look expensive without spending like it, use faux greenery for the “climb” sections and reserve real white roses for the visible face of the frame.



