
1. Brass tray + 3 amber votives in a tight row
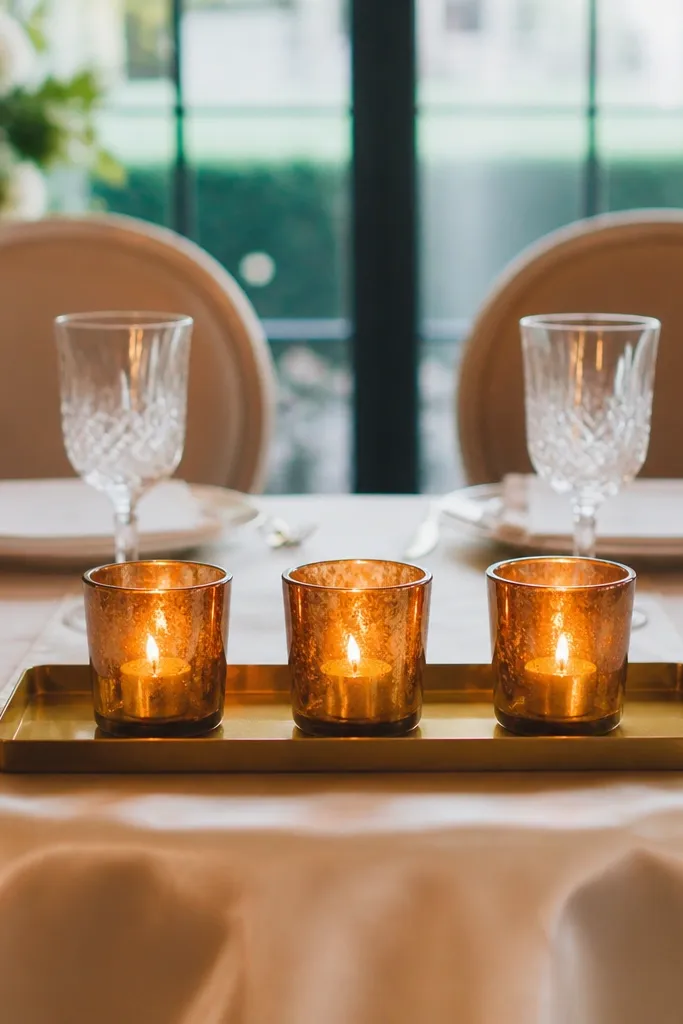
This setup is the “cozy glow” answer because it gives you a clean baseline of light without scatter. The amber tint warms up photos instantly, especially if your linens are white, cream, or warm gray. A brass tray keeps the candles in one plane so the table looks styled, not accidental. It suits small sweetheart tables where you need impact without extra bulk. Best for fall and winter receptions, but it works year-round if you keep the palette warm.
Start by centering a rectangular brass tray on the sweetheart table, leaving equal space on both sides of your centerpiece. Then place three glass votives in a straight line with 1-2 inches between them so flames don’t overlap visually. Finally, add a low filler behind the line, like a strip of dried eucalyptus or plain greenery, so the light has a background instead of bare tablecloth. If you’re using real candles, keep wicks trimmed to about 1/4 inch for a steadier flame.
Quick tipChoose amber glass votives over clear — they reduce the harsh “white light” look in indoor venues.
Skip thisDon’t spread votives too far apart or the table will look underlit in photos.
2. Hurricane lantern backlight with a single taper
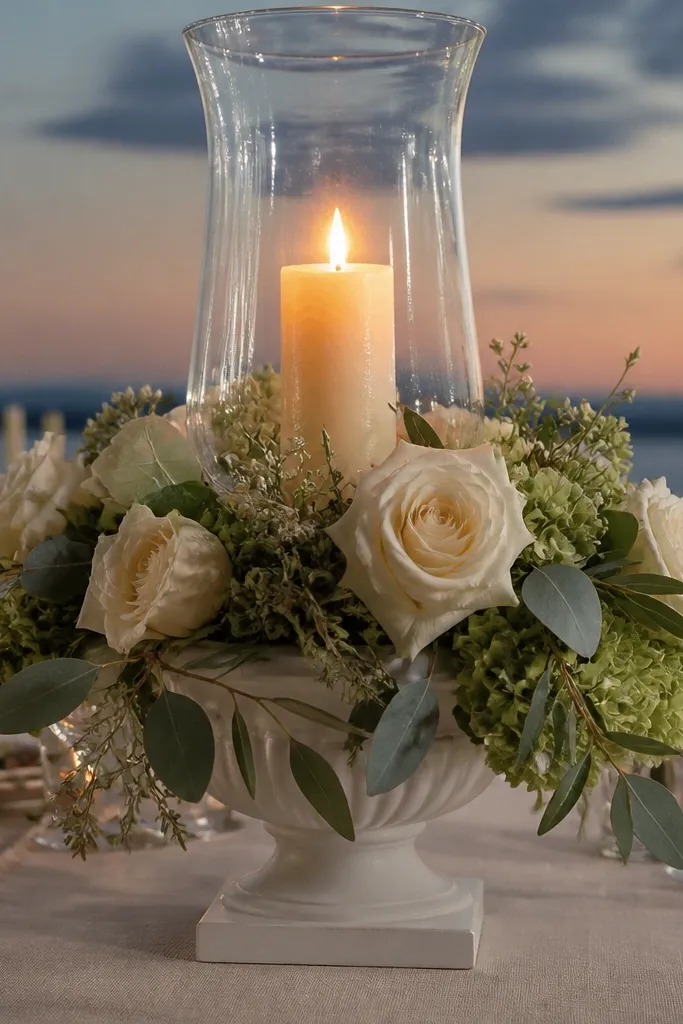
A hurricane lantern makes your candlelight feel intentional because it creates a glowing frame. Put it behind the sweetheart centerpiece so the light reads as depth rather than just brightness. The glass also softens flicker, which helps with camera blur when guests move around. This idea fits romantic, garden, and classic styles because it looks like a “real moment,” not a craft project. It’s especially flattering when the table has a backdrop like draping or a floral arrangement.
Start by placing the hurricane lantern at the back center of the sweetheart table, about 3-6 inches behind where your main floral sits. Then insert a taper inside (or a taper-style LED insert if flames are restricted) so the glow comes upward. Finally, anchor the lantern with greenery or a thin garland so it doesn’t look floating. For travel-friendly setup, pick a lantern with a wide base so it’s stable during transport.
Use frosted or lightly tinted glass if your venue lighting is dim — it smooths out hot spots.
Skip lanterns with heavy metal mesh if you want clean, bright photos — the shadows can get messy.
3. Cluster of 5 micro candles on a mirrored charger
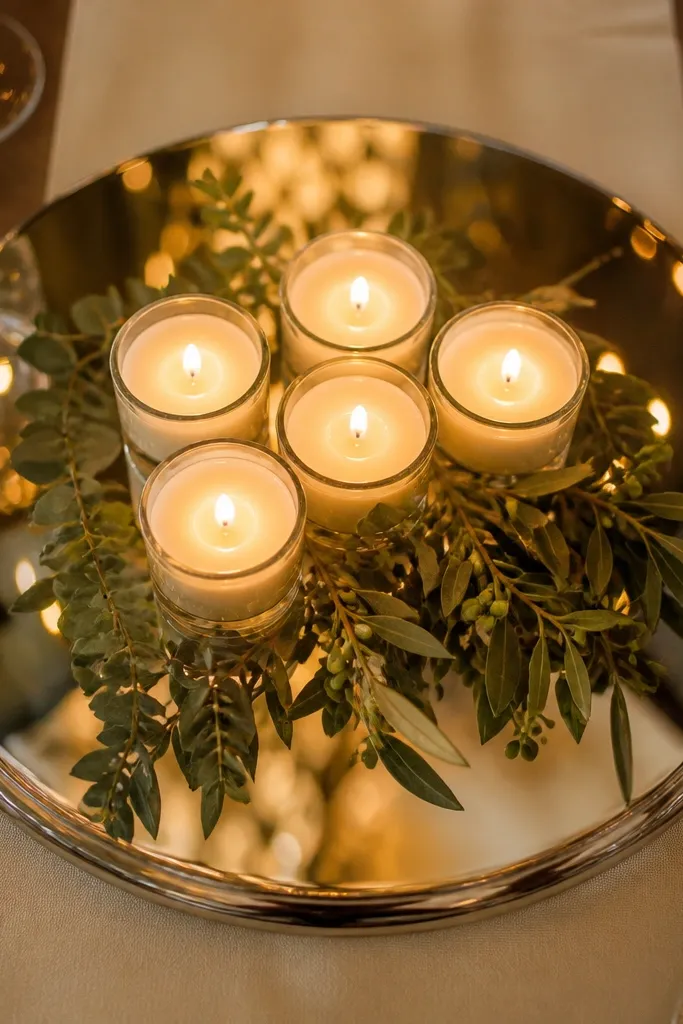
If your sweetheart table photos look flat, mirrors fix it. A mirrored charger catches the candle glow and multiplies it across the table surface, which makes the scene feel fuller without adding more candles. Use five micro candles to keep the look airy rather than crowded. This works best with modern-romantic decor and neutral palettes because the reflection adds sparkle. It’s a great choice for spring and evening receptions when you want light to look soft and lively.
Start by placing a round mirrored charger slightly in front of your centerpiece so reflections land on the tablecloth, not only on the base. Then arrange five micro candles like a small flower: one in the center and four around it, keeping spacing about the width of your finger. Finally, keep the rest of the table clean so the candle cluster is the focal point. If you’re using real candles, keep the charger dry and stable — melted wax can smear if the surface shifts.
Bring a small microfiber cloth to wipe the charger before ceremony — fingerprints show up fast in flash.
Don’t pair mirrored surfaces with heavy confetti decor — reflections will make clutter look chaotic.
4. Three-tier candle stand with alternating ivory tapers
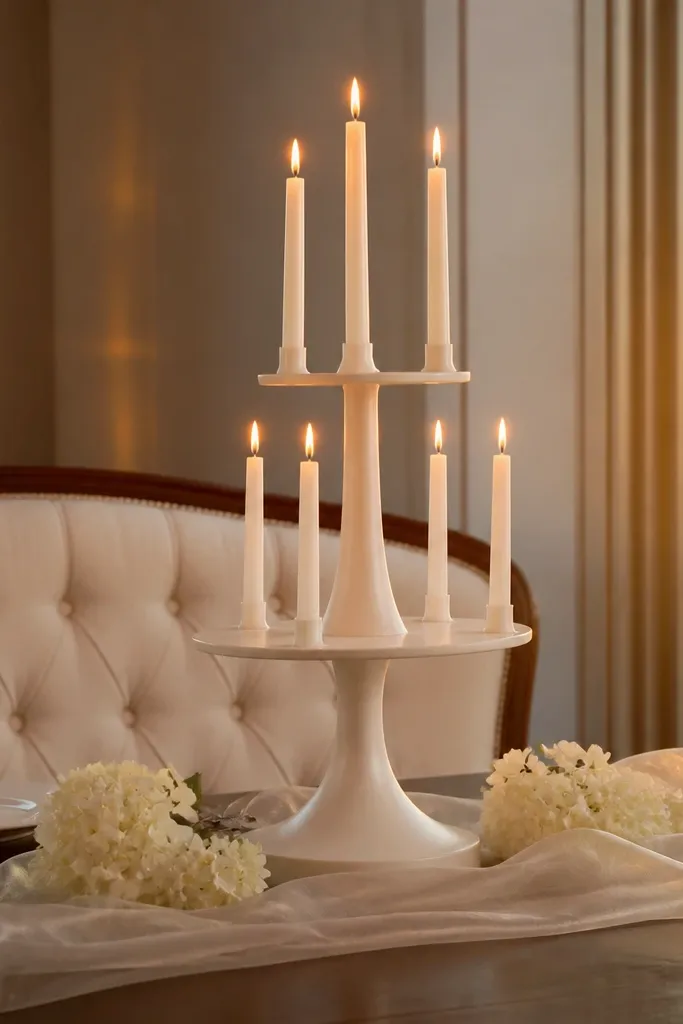
A three-tier stand gives you the height plan automatically, which is why it’s perfect for beginners. Alternate ivory taper candles so the top tier and bottom tier don’t look like a single block of light. The tiering also keeps flames away from table linens and flowers, which matters for safety and for not melting fabric. This style fits classic sweetheart tables, winter weddings, and venues with lots of empty wall space behind the table. It photographs like a focal sculpture, not just “candles on a table.”
Start by measuring your table width and placing the stand so it leaves at least 8-10 inches for the couple seating area. Then insert tapers at each tier, alternating left and right positions so the tiers look balanced, not symmetrical and flat. Finally, add a short base ring of greenery or neutral ribbon around the stand base. Choose a stand with a sturdy center column so it doesn’t wobble during setup.
If tapers are banned, use LED taper candles that match the height of your tier holes.
Don’t stack tapers too close to floral — shadows cut across flowers and look messy in photos.
5. River rock base with tea lights in a shallow tray
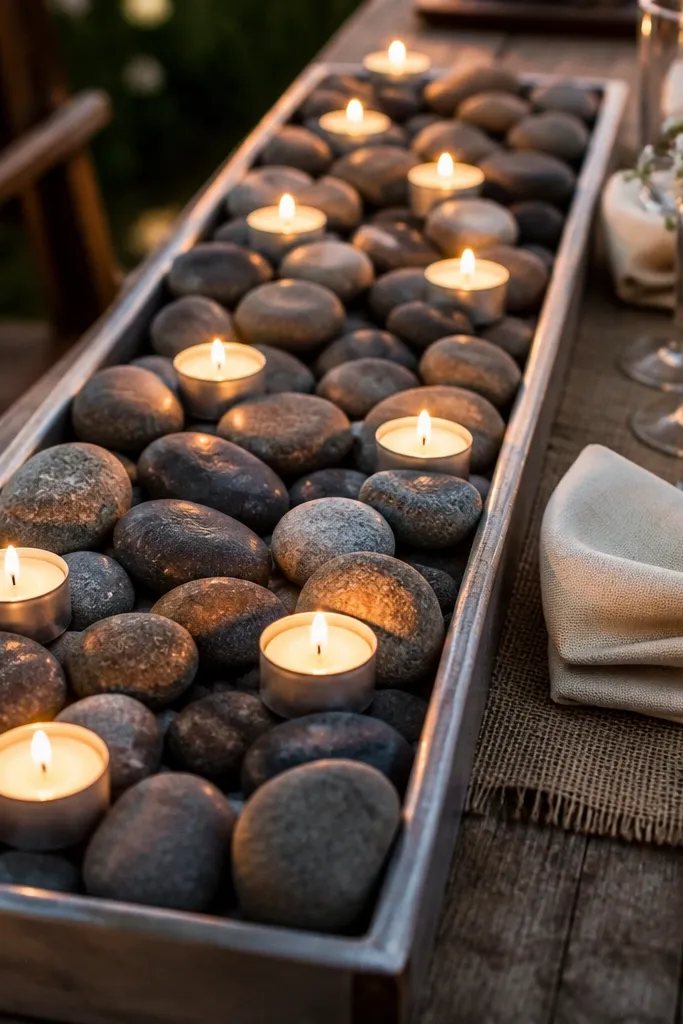
This idea looks like a cozy scene from a lodge because the rocks add texture and dimension. Tea lights are low and forgiving, which makes them beginner-friendly and easy to arrange evenly. The rocks also act like a “visual diffuser,” so the light spreads rather than pooling in one spot. It suits rustic, mountain, and beach-adjacent weddings with warm neutrals. Best for outdoor receptions that get evening shade — it reads warm and grounded.
Start by using a shallow rectangular tray and lining it with a thin layer of river rocks (no sharp edges sticking up). Then place tea lights evenly across the tray, keeping a 1-inch gap between each for consistent glow. Finally, cover any gaps with a few extra rocks so you don’t see the tray bottom. If you’re traveling, pack rocks in a separate bag and assemble on-site to avoid shifting.
Choose matte tea light holders so the light looks soft instead of mirror-bright.
Skip glossy rocks — they flash in photos and can look like random bright spots.
6. Clear glass cylinder vases with floating candles
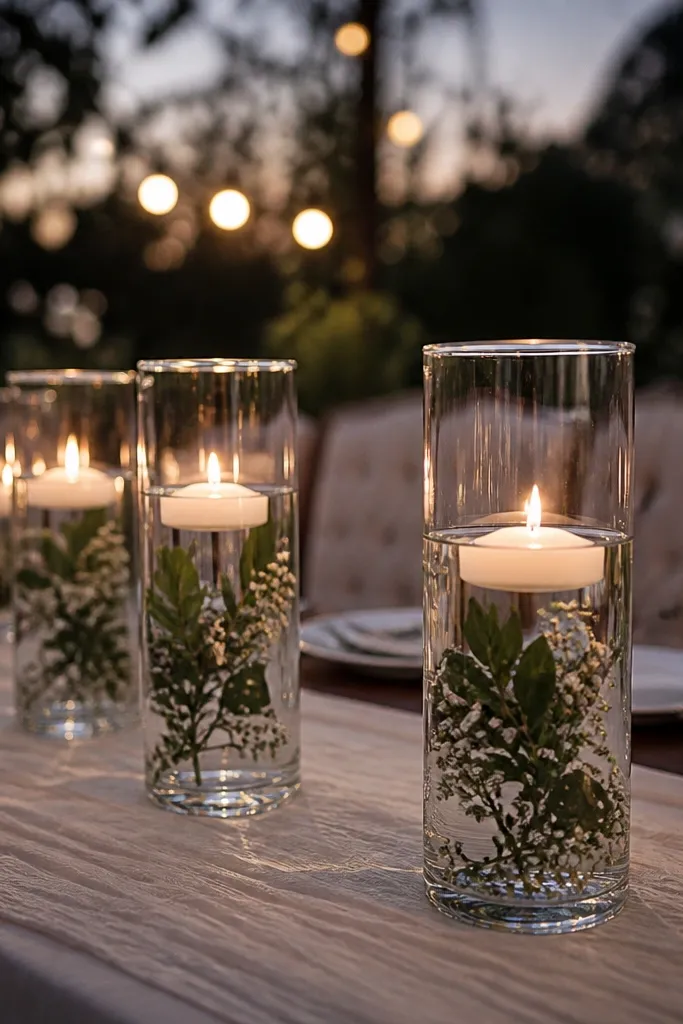
Floating candles inside clear cylinders create calm, even light that looks expensive without being complicated. The cylinder shape frames the flame and makes it look like a contained glow, which is what you want on a sweetheart table. Add a little greenery or baby’s breath at the base so the light has a natural background. This works for beach weddings, garden weddings, and any venue where you want a clean, airy look. It’s stunning in dusk photos because the glow looks like it’s floating.
Start by filling each cylinder only halfway so the candle sits safely and doesn’t splash water into wiring or floral. Then add floating candles (or LED floating candles if flames are restricted) and place one cylinder at each side of the centerpiece or in a small cluster behind it. Finally, top with a few stems submerged lightly so they don’t drift. Use a non-slip mat under the cylinders so they don’t slide on smooth linens.
Use LED floating candles for indoor venues — less mess and no wick smoke near guests.
Don’t overfill cylinders — water sloshing ruins the look fast.
7. Black ceramic candle cups with warm amber LED tealights
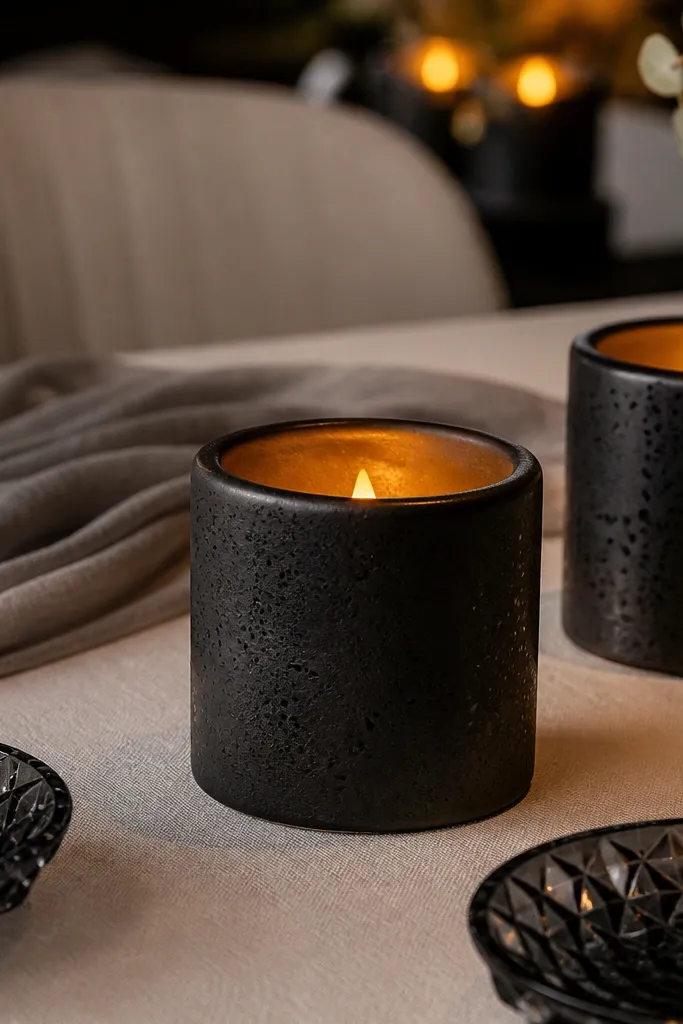
Black ceramic cups make candlelight look modern and intentional. The contrast is what makes photos pop: warm amber glow against dark holders reads sharp, even in low light. This is a strong option if your sweetheart table decor is minimalist or you have black accents in the wedding palette. It also helps you control the flame size visually. The look is cozy, not harsh, because the ceramic absorbs extra brightness.
Start by lining up 6-8 black cups in a gentle arc behind the centerpiece, leaving the center clear for flowers or a runner. Then place amber LED tealights inside each cup so every flame looks the same height. Finally, add a thin layer of textured filler like dried grass or neutral moss at the base of the cups. Keep cups spaced about 4-6 inches so the glow doesn’t merge into one dark blob.
Choose LED candles with a steady flicker — some cheap ones pulse and look distracting in video.
Don’t use clear glass holders with black cups unless you want reflections that can look messy.
8. Milk glass bud vases turned into candle holders
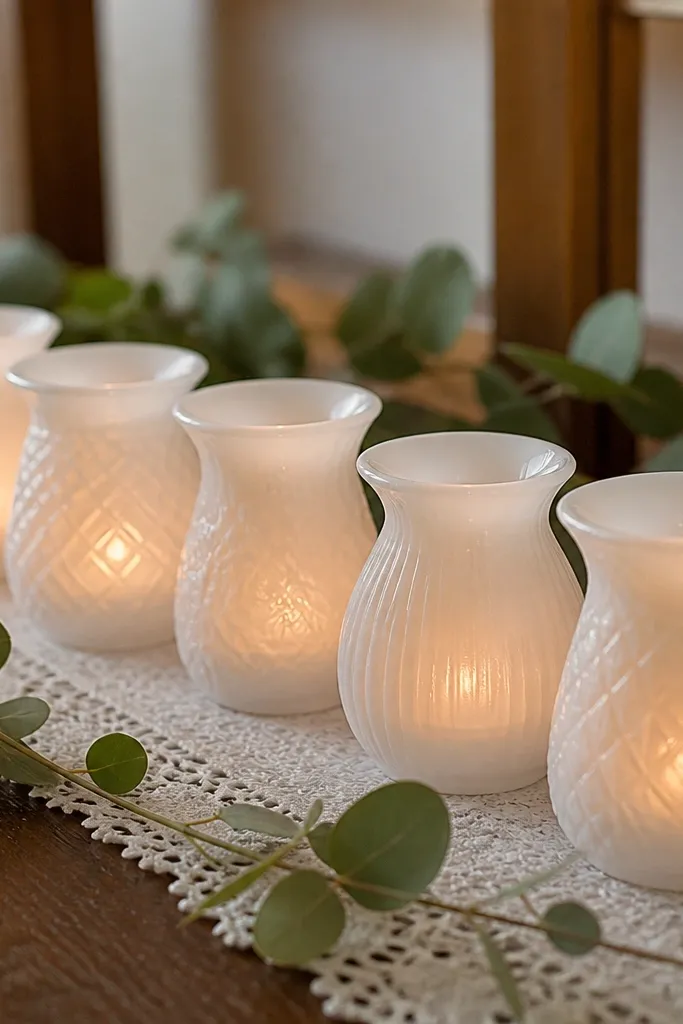
Milk glass is a cheat code for cozy wedding photos. It diffuses the candlelight and gives a soft halo around each flame, which makes the whole table look gentle and romantic. Use small bud vases with candles sized to fit snugly so they don’t wobble. This idea is great for beginners because it’s easy to place and hard to mess up. It suits vintage, cottage, and shabby-chic styles, especially with ivory linens and pastel florals. Best in indoor evening receptions where the milk glass glow shows up clearly.
Start by selecting bud vases with openings wide enough for a tealight or a small LED candle. Then place one vase at each end of the centerpiece and fill the middle with 3-5 more, keeping spacing even. Finally, add a single sprig of greenery in a couple of vases so the table doesn’t look like candles-only. If you’re using real candles, line the inside with a small heat-safe insert to protect the glass from direct contact.
Quick tipWarm the vases slightly before setup if they came from a cooler car — cold glass can fog.
Skip thisSkip vases with thick glossy rims; they can cause bright glare around the flame.
9. Long runner of taper candles on a fabric-covered tray
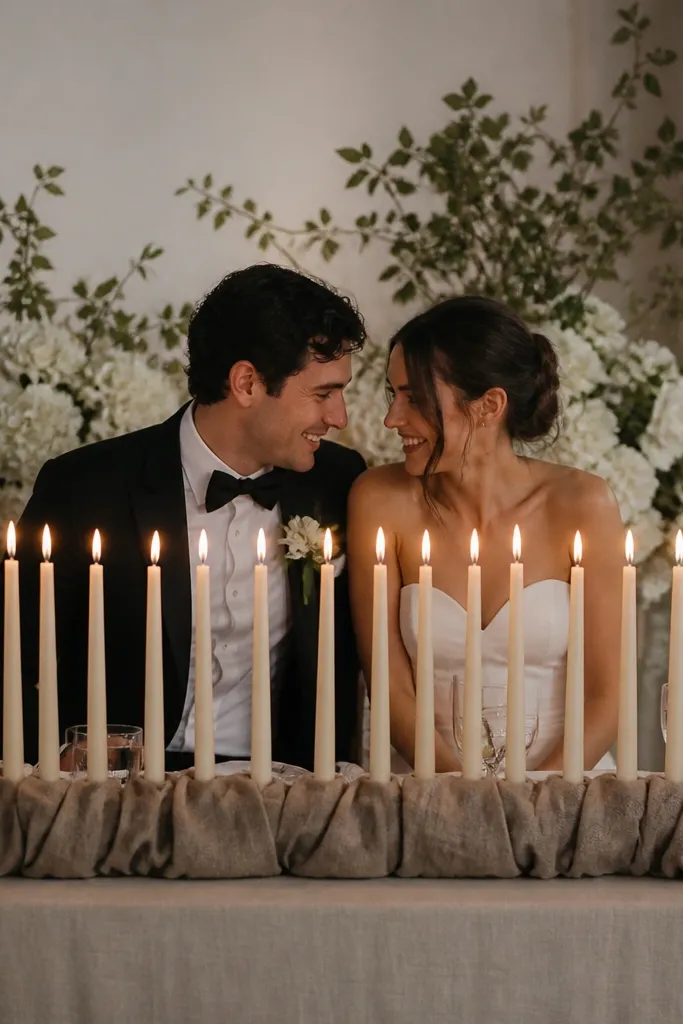
A long taper line gives you a clean, romantic “cathedral” glow across the sweetheart table. Fabric-covered trays make the setup look finished because the base disappears under the linens. This is the best candle idea when you want a symmetrical look without building a tall centerpiece. It flatters modern setups with minimal florals, and it also works with heavy floral because the glow ties everything together. Choose this for spring and winter when you want crisp light and a structured layout.
Start by covering a long tray with a neutral fabric runner, like ivory linen or taupe burlap, pulled tight and pinned if needed. Then place slim taper candles in holders along the tray, spacing about 3 inches apart so each flame reads separately. Finally, tuck low greenery or dried flowers along the sides of the tray to hide the edges. If the venue allows only low candles, switch to LED tapers in the same holders.
Quick tipUse candle holders with a wide base — skinny holders tip easier on banquet tables.
Skip thisDon’t put tapers directly on bare wood or polished metal — heat marks show up.
10. Candle-filled glass jars with dried citrus slices
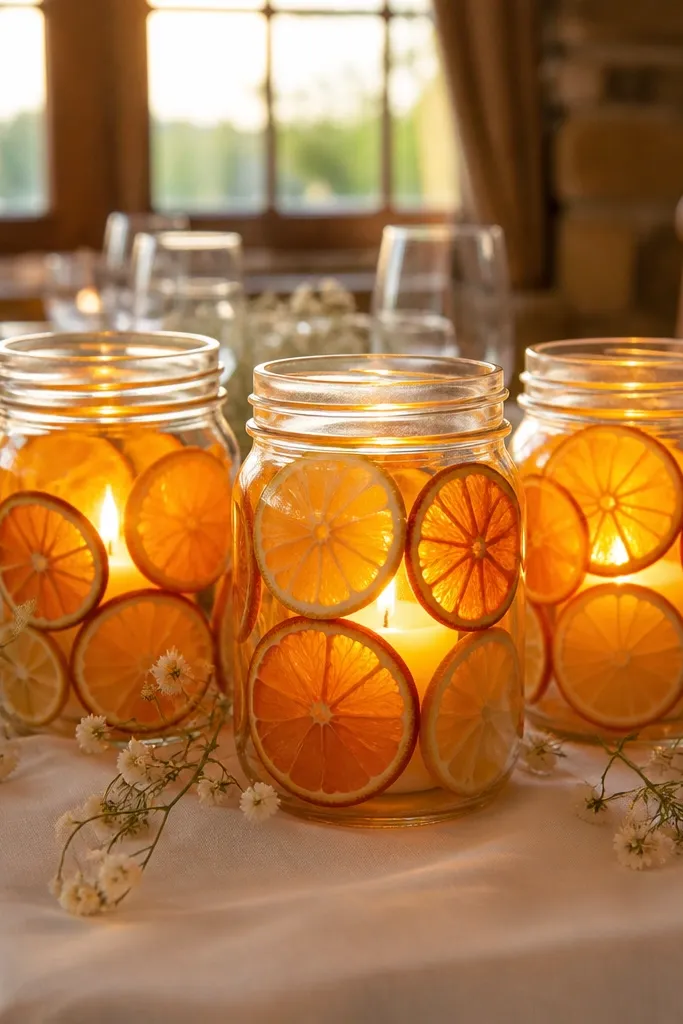
This gives you cozy glow plus a photo-friendly color pop. Dried citrus slices (orange, lemon) catch warm candlelight and make the jar look alive, even if your florals are simple. It’s a beginner-friendly option because the jar shape controls placement — you pour the candles in and stop there. The scent can be nice too, but keep it light if you’re using real flames with scented wax. This fits fall weddings, winter holidays, and rustic tables with warm neutrals.
Start by placing dried citrus slices around the inside edge of clear or amber glass jars so they’re visible from the front. Then add tea lights or LED candles in the center, keeping the flame position consistent across jars. Finally, group 3-5 jars in a staggered line along the sweetheart table, with the biggest jar closest to the couple. Use jars with flat bases so they don’t wobble on tablecloth.
Use real citrus slices only if you’re sure they won’t crumble — LED candles reduce mess if they do.
Don’t overstuff jars; if slices crowd the candle, the light looks blocked.
11. White pillar candles in staggered heights with faux greenery
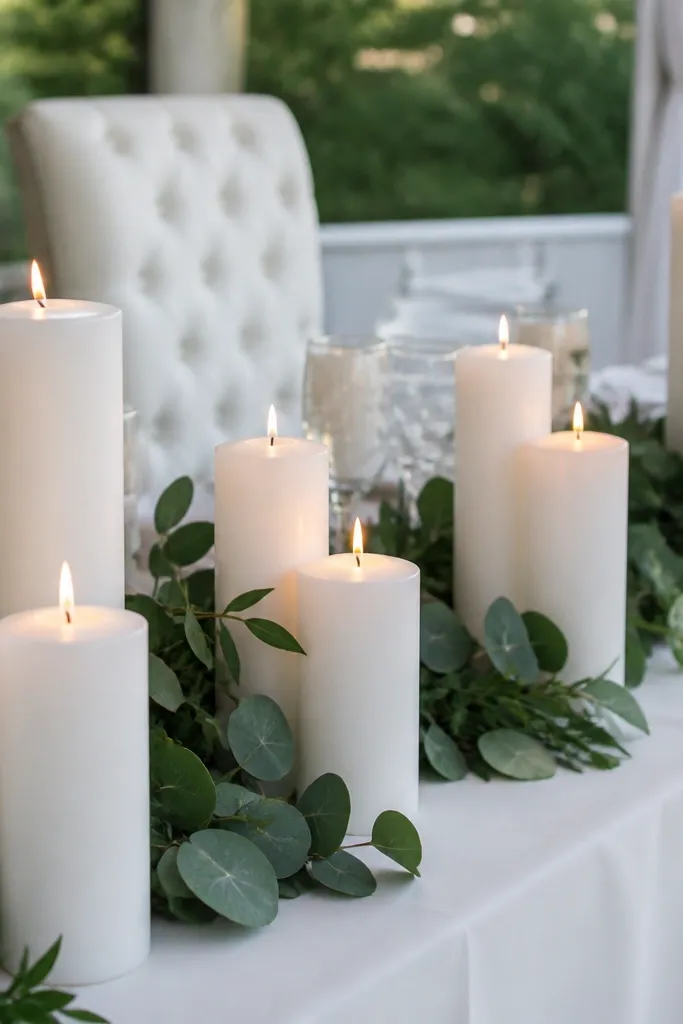
Staggered pillars make the sweetheart table look styled even if you have minimal flowers. White pillars reflect light softly and keep the glow consistent across the whole setup. Faux greenery is a smart choice for beginners because it holds its shape and saves you from wilting on a hot travel day. This idea suits classic and modern weddings, especially if your palette is white, cream, and soft greens. It’s strongest in evening photos where the pillars create a clean vertical rhythm.
Start by choosing three pillar heights, like 4-inch, 6-inch, and 8-inch, so your table has depth. Then arrange them in a staggered triangle — one tall in the back, one medium in front of it, one shorter on the side. Finally, surround the base with faux greenery leaves or a short garland so the candles don’t look floating. If the venue is strict about open flames, use LED pillars with warm white bulbs.
Pick pillars with a matte finish — glossy ones can create distracting glare.
Don’t stack pillars directly on a slick table cover without a non-slip pad.
12. Jam jar lanterns with lace ribbon ties and LED tapers
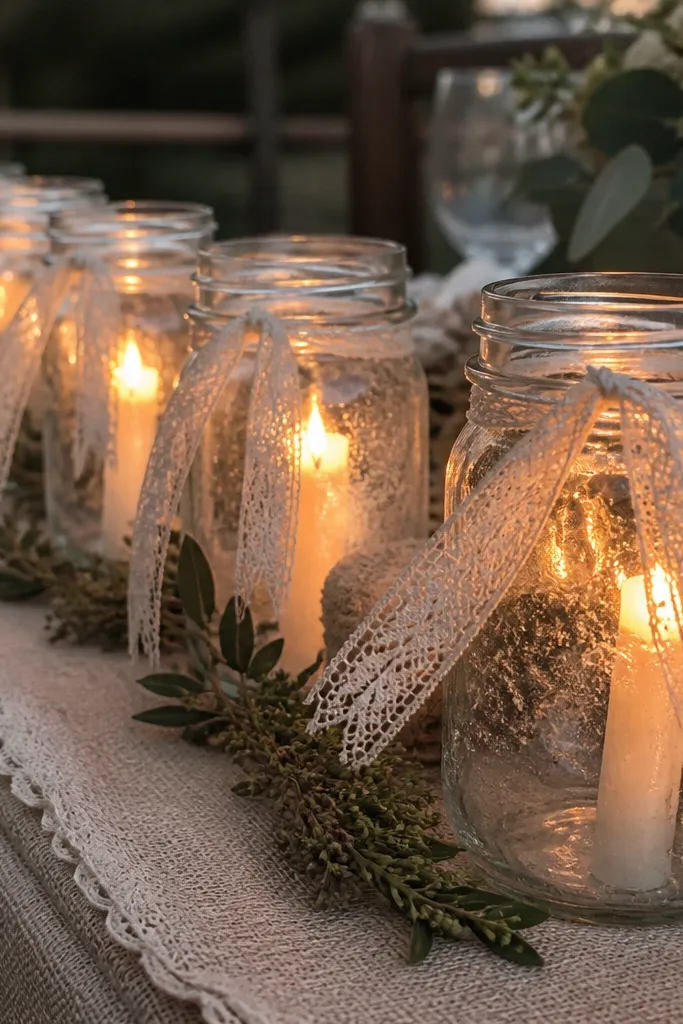
Jam jar lanterns look handmade in the best way, and lace ties add softness that reads beautifully in close-ups. LED tapers keep the look safe and consistent, which matters if you’re setting up near florals and table runners. The jar glass creates a gentle glow, and the lace gives a delicate texture that catches warm light. This is a great option for cottage weddings and sweetheart tables that need a romantic, not fussy, feel. It shines in spring and summer evenings where the table looks airy.
Start by filling jam jars with LED tapers that fit snugly so the flame sits centered. Then tie lace ribbon around the jar neck, keeping the knot at the front so it’s visible in photos. Finally, place three jars across the sweetheart table — one center behind the centerpiece and two closer to the edges. Use a small piece of foam or filler at the jar bottom to stabilize the taper if it wiggles.
Use warm white LED tapers, not cool white — the glow should look golden, not bluish.
Skip thick ribbon that blocks the jar — you want light coming through the glass.
13. Sage green glass votives with clear ribbon bows
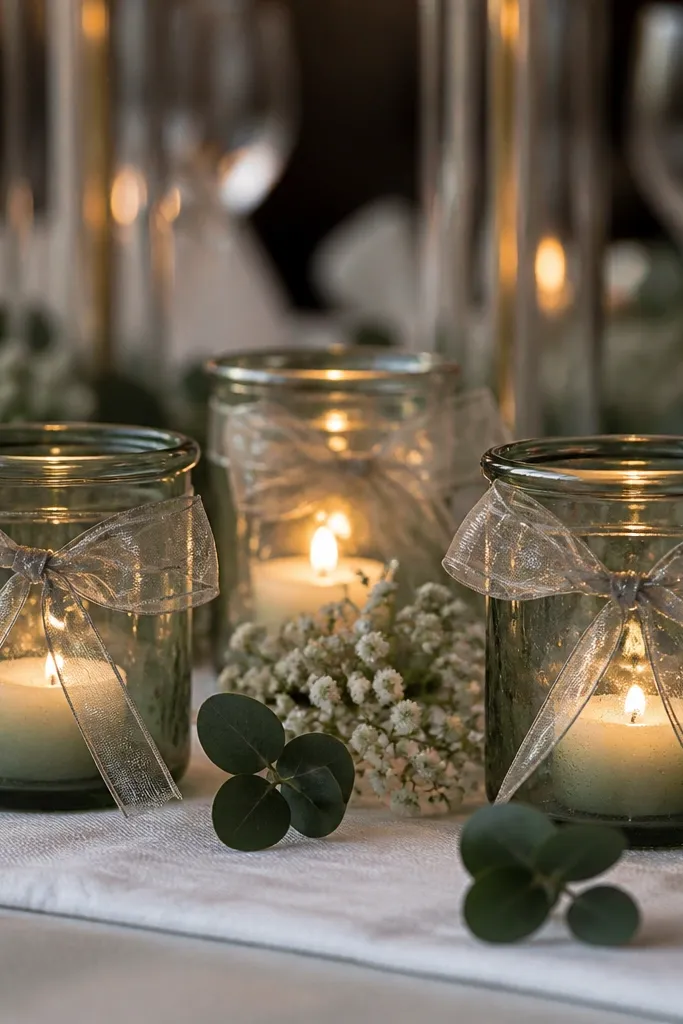
Sage green votives give you a calm, cozy glow that looks good with greenery-forward sweetheart tables. The tint makes the candlelight feel softer than amber-only, and it pairs well with white florals and neutral linens. Adding a simple clear ribbon bow around the votive neck makes the setup look styled without covering the glow. This works well for garden weddings and indoor receptions where the background is mostly neutral. It’s also a smart choice if you want something pretty but not overly romantic.
Start by placing sage votives in a straight line behind the centerpiece, spacing them 2-3 inches apart. Then tie small clear ribbon bows around each votive neck, keeping bows identical so the line looks intentional. Finally, add a low strip of greenery along the table edge to connect the candles visually to the florals. If using real candles, choose unscented and keep the wick trimmed to avoid soot on the glass.
Quick tipChoose votives with thick glass walls; thin glass can look cheap and uneven in flash photos.
Skip thisDon’t mix too many glass colors — two tones max looks clean on camera.
14. Floating candle line in a shallow mirror tray
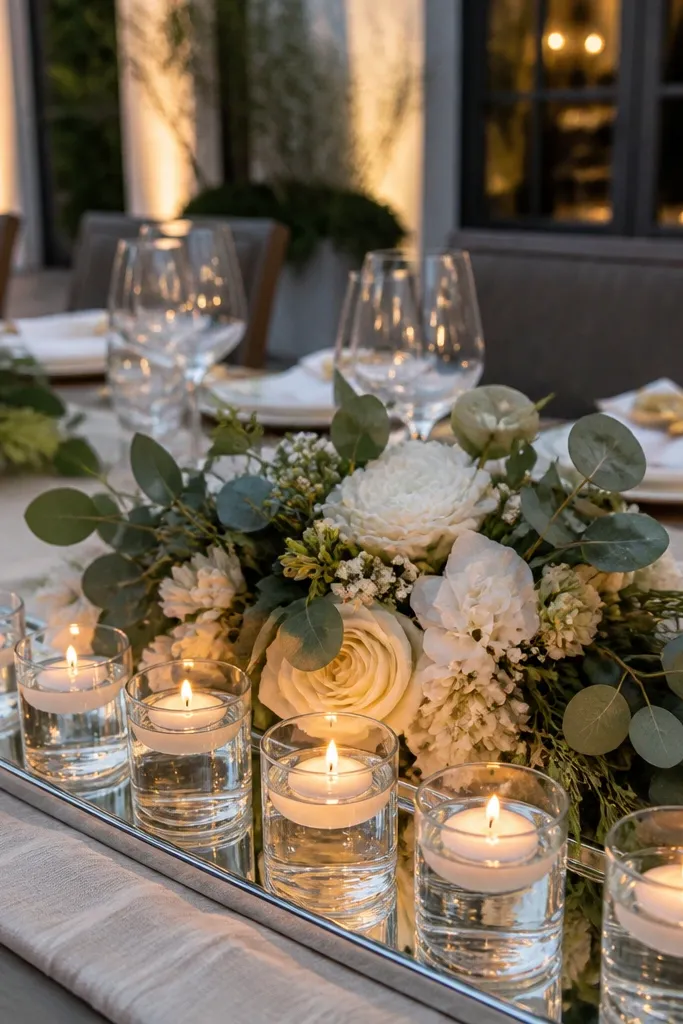
This one is pure photo magic because you get a mirror reflection plus a calm floating effect. A line of floating candles reads like a soft horizon behind the sweetheart table centerpiece. Use LED floating candles to avoid water spills and smoke near guests. The mirrored tray makes the light look longer, which helps if your table is narrow. This fits modern-romantic weddings, beach venues, and minimal florals where you want a visual anchor without extra height.
Start by choosing a shallow mirror tray and adding a thin water layer only deep enough for the floating candles to sit stable. Then place 7-9 LED floating candles in a straight line, centered behind the sweetheart centerpiece. Finally, add one minimal filler element like a few white petals or a thin greenery strip on the tray edges. Keep the tray centered so reflections don’t cut off in photos from the side.
Test the tray in the room lighting before guests arrive — mirror glare can shift depending on overhead fixtures.
Don’t use too many floating candles; crowded reflections look messy fast.
15. Wood slab base with tealights in a grid cutout
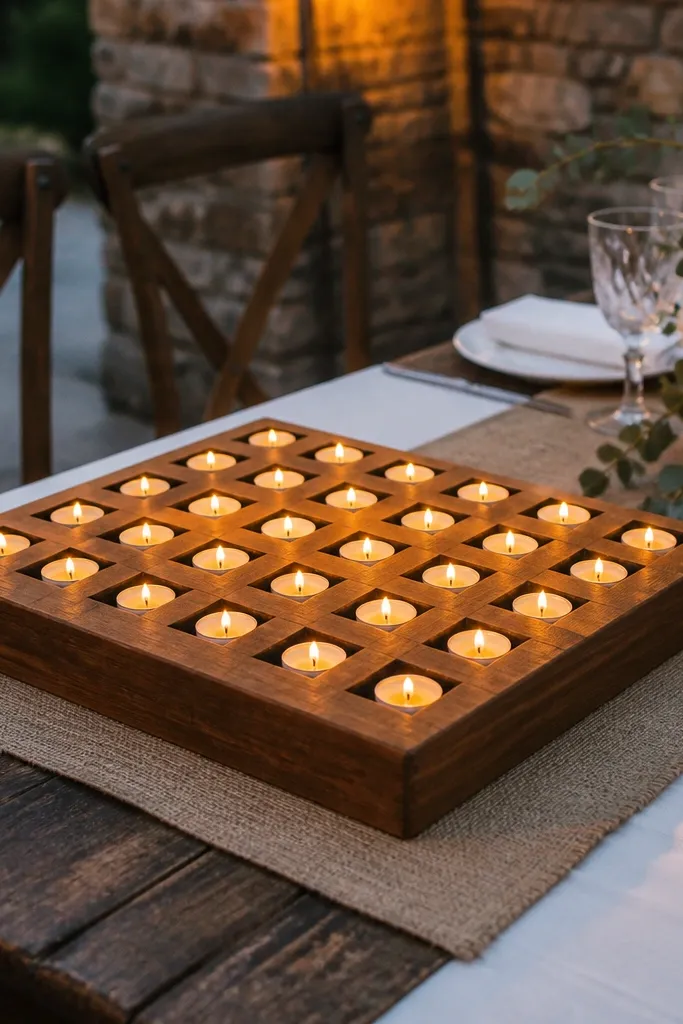
A wood slab base makes candlelight feel cozy and grounded, and the grid pattern keeps it from looking random. Tealights in a structured layout are beginner-friendly because you can follow spacing rules and get a consistent look. The wood tone warms the scene and balances bright whites in your linens. This suits rustic, farmhouse, and woodland weddings, especially when you have natural textures like linen, burlap, or dried grass. Best for daytime-to-evening receptions where you want the table to look like a styled set.
Start by measuring your sweetheart table and cutting your visual footprint in your mind: a slab that’s wide enough to read but not so wide it hides your centerpiece. Then place tealights into a pre-made grid insert or create shallow wells in a removable tray insert. Finally, center the slab and surround it with minimal greenery so the grid stays the star. For travel, bring the slab and the candle insert separately to prevent shifting.
If you’re using real tea lights, choose holders with straight sides so wax doesn’t seep into the wood.
Skip crooked spacing — a wonky grid reads sloppy in close photos.
16. Rose gold candelabra with 5 tapered LED candles
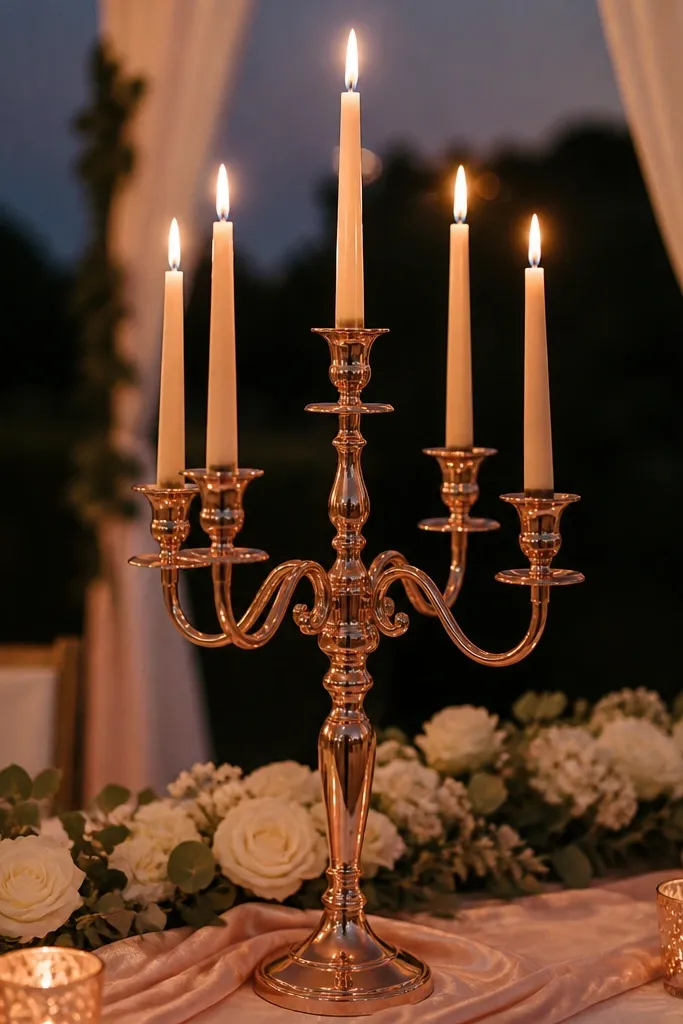
A rose gold candelabra gives you that “big moment” look without needing tall floral. Five tapered candles create a classic silhouette that frames the sweetheart table center. LED tapers keep the look consistent and safe, and the rose gold finish adds warmth without going too yellow. This works for glam-romantic weddings, blush palettes, and venues with soft lighting. It’s especially photogenic when the couple sits centered, because the candelabra creates a symmetrical glow behind them.
Start by positioning the candelabra behind the centerpiece so it doesn’t block guests' sightlines. Then place five warm LED tapers into the arms, keeping spacing even across the structure. Finally, add a thin greenery garland at the base, no more than 4-6 inches tall, so the candelabra stays the main shape. Choose a candelabra with a weighted base so it doesn’t wobble on tablecloth.
Use warm white LED tapers with a flicker that looks gentle, not fast.
Don’t add extra candle clusters near the candelabra — it will compete and look cluttered.
17. Candle holders made from hollow books with LED candles
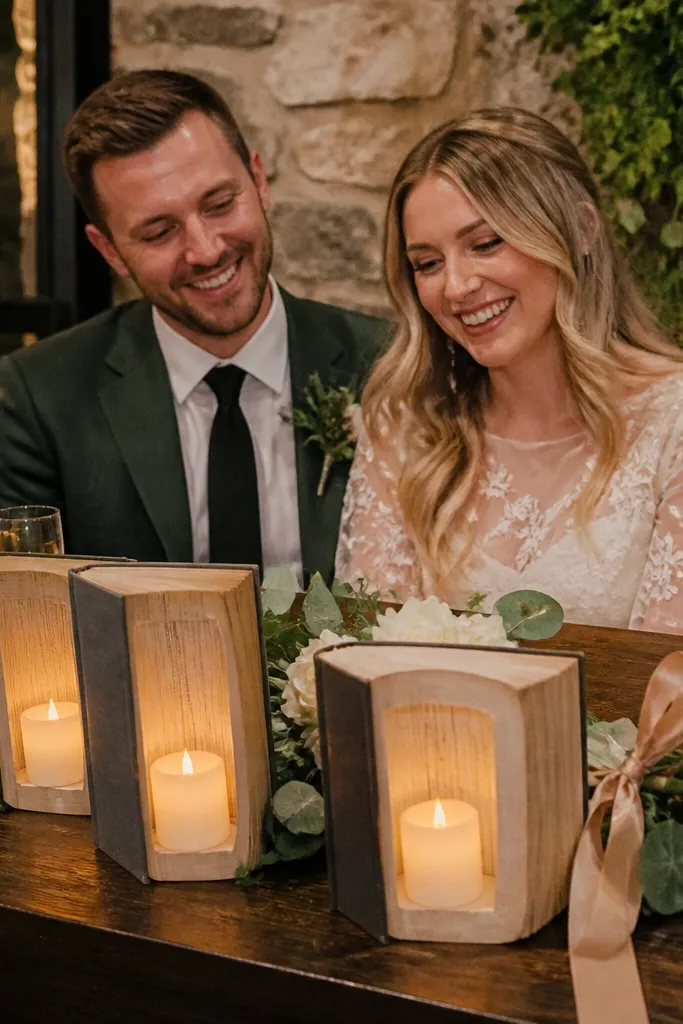
This is for couples who want cozy and a little whimsical without using flowers to fill space. Hollow-book candle holders create vertical texture, and LED candles keep it safe and clean. The white or cream book covers also reflect candlelight, so the glow looks soft and layered. It’s a fun match for vintage weddings, library themes, or sweetheart tables with a storybook vibe. Best for indoor venues where you control background clutter and can focus on close-up decor.
Start by placing the book candle holders along the sweetheart table behind the centerpiece, spacing them 6-8 inches apart. Then insert LED candles sized to fit inside so the light sits behind the front cover opening. Finally, tie a simple ribbon or small greenery sprig to the top of two book holders so the set looks intentional. Keep the rest of the table clean so the candle “columns” show up in photos.
Pick matte book covers so the candlelight doesn’t create glare streaks on glossy pages.
Don’t use tall holders if your sweetheart setup already has a tall floral arrangement.
18. Candle lantern walkway style behind the sweetheart table
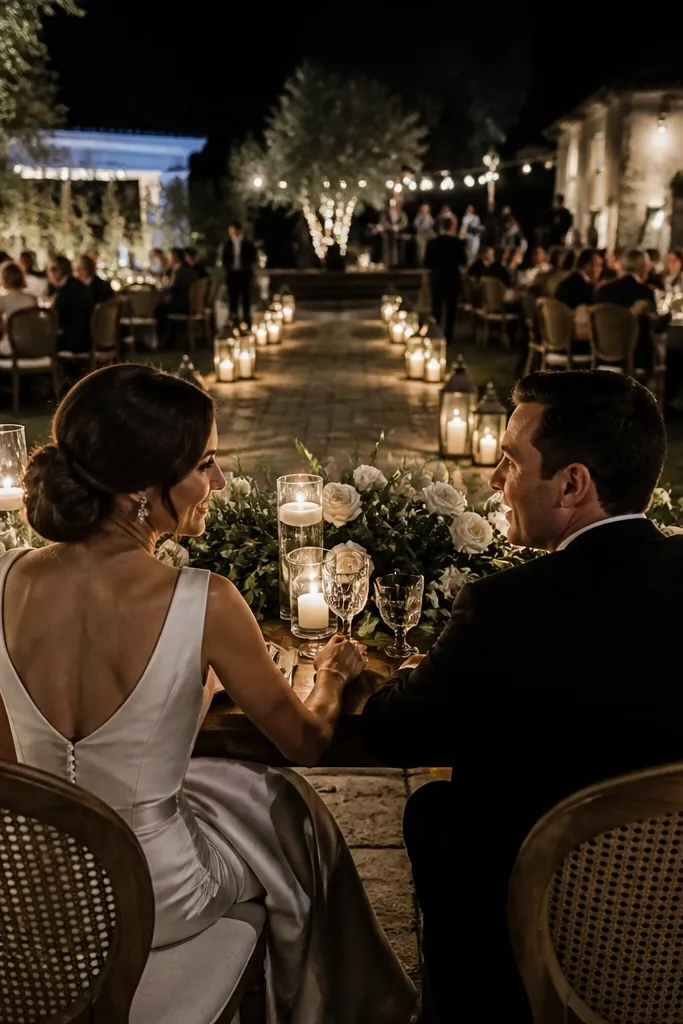
This idea creates depth by lighting the space behind the couple, which makes the sweetheart table look bigger in photos. Use smaller lanterns instead of one giant lantern so you get a cozy, dotted glow. It’s beginner-friendly because it’s easy to repeat a pattern: place, fill, and stop. This suits venues with a backdrop wall, a draped arch, or any area where candles can be seen from the audience. It works especially well for evening receptions because the lanterns read as a soft pathway.
Start by placing 5-7 small lanterns in a gentle arc behind the sweetheart table centerpiece, keeping the center lantern slightly taller or closer to the table. Then fill each lantern with a warm LED candle so the glow stays consistent and doesn’t smoke. Finally, secure lantern bases with non-slip pads so they don’t shift when staff move chairs. For travel, keep lanterns in one tote with bubble wrap and assemble on-site.
If you have outlet access, use LED candles with a timer so you don’t deal with manual switches mid-event.
Skip placing lanterns too close to the couple’s chairs — it blocks faces in photos.
19. Ivy garland wrapped around candle pillars with LED inserts
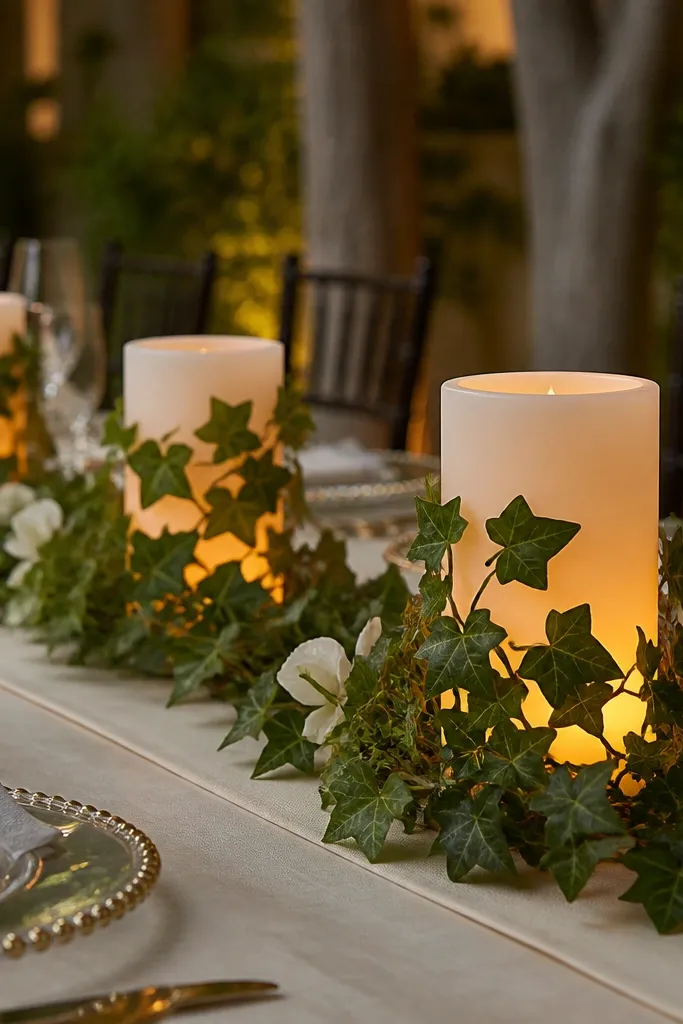
Wrapping candle pillars with ivy garland makes the candlelight feel like part of the greenery, not separate decor. The glow travels through the candle base and makes the garland look softly lit, which is exactly what you want for cozy photos. Using LED inserts keeps the garland from drying out or getting too close to flames. This fits garden themes, spring weddings, and sweetheart tables with lots of green already. It’s photogenic because the ivy creates a frame around the candle shapes.
Start by selecting three LED pillar candles in cream or white, then wrap ivy garland lightly around each pillar without covering the front. Then place the pillars in a cluster on either side of the centerpiece so the greenery frames the couple. Finally, tuck a few extra ivy sprigs at the base so the cluster looks rooted. Keep garland ends trimmed and tucked so they don’t snag on chair backs.
Quick tipUse faux ivy that holds shape; it looks cleaner in close-up than thin real vines.
Skip thisDon’t wrap too tightly — heavy garland can hide the candle glow.
20. Candle cups on a macrame runner with warm amber LEDs
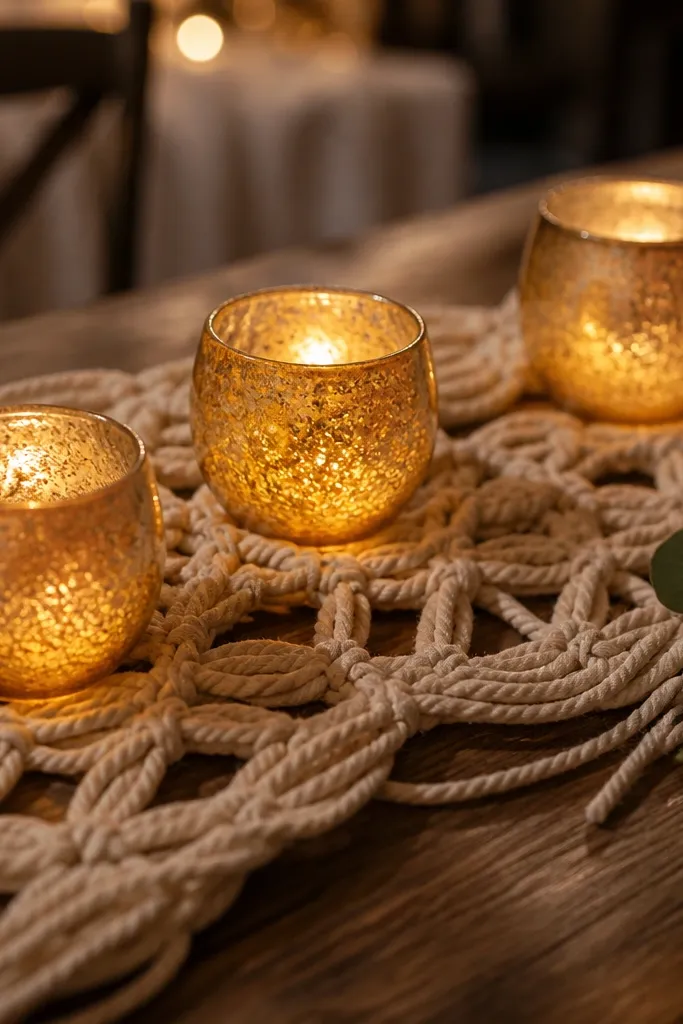
Macrame adds texture that looks great in candlelight photos because it creates soft shadows and depth. Candle cups placed on a macrame runner look intentional and cozy, especially when your sweetheart table decor is otherwise simple. Choose amber LEDs so the glow stays warm against the neutral fibers. This idea suits boho-romantic weddings, desert tones, and beach weddings with natural textures. Best for indoor receptions where you can control lighting and avoid windy outdoor issues.
Start by laying a macrame runner across the sweetheart table and smoothing it flat so the knots don’t wrinkle. Then place 6-10 candle cups evenly spaced along the runner, keeping the center line aligned with the couple. Finally, add one small floral sprig at each end of the runner so the setup reads complete from the front. Use LED tealights inside cups to avoid heat on fabric.
Quick tipBring a small lint roller — macrame fibers grab dust and show up in flash.
Skip thisSkip real open flames on macrame — it’s too close to fabric.



