
1. Fabric table runner with crisp napkin folds
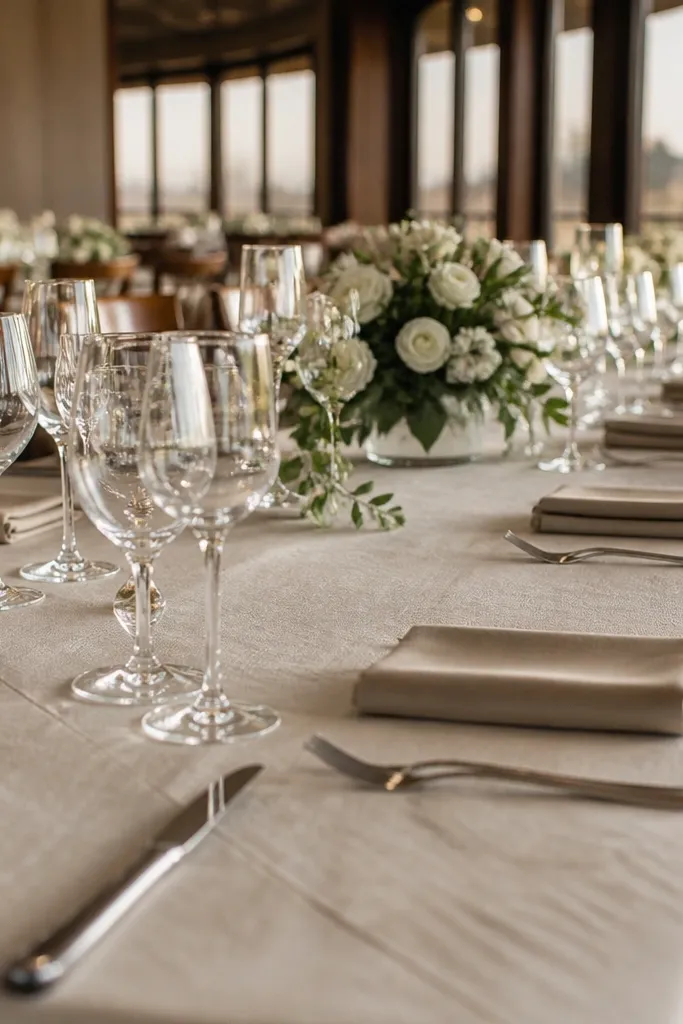
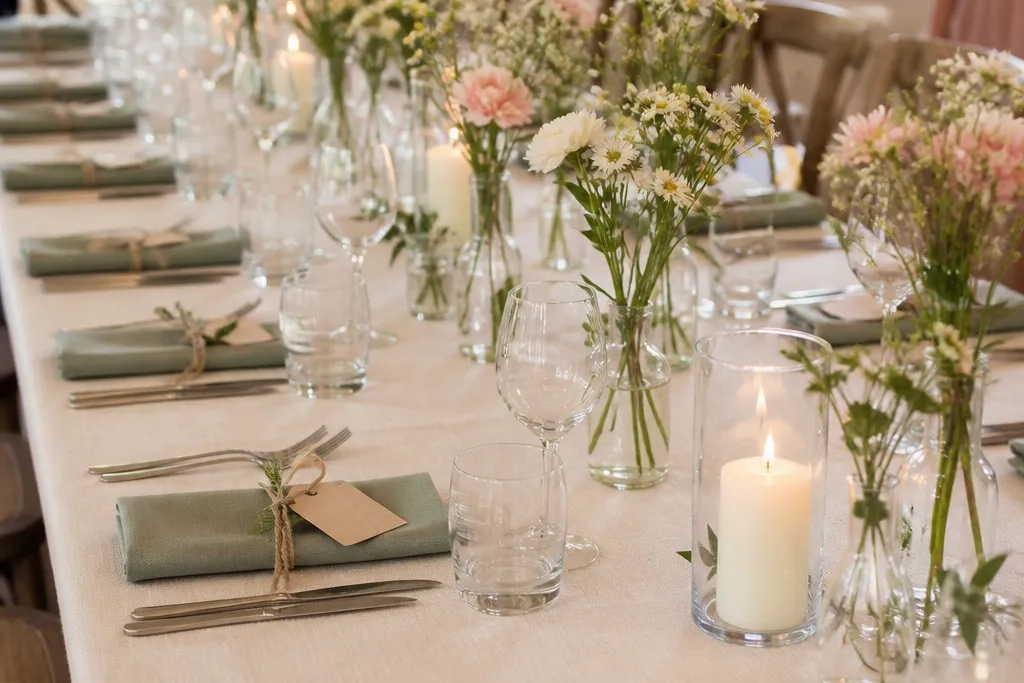
A fabric table runner instantly makes a reception look styled, and it’s way more kid-proof than anything that’s glassy or fragile. Pick a linen blend in ivory, oat, or soft gray so it holds shape without looking stiff. Then fold napkins into a clean, repeatable shape like a simple rectangle fold or a half-fold with the corner pointed up. In photos, this creates a strong base color and a tidy rhythm across every table.
Start by measuring your table length and choose a runner that leaves 8-12 inches of table space at each end. Lay it centered, then steam or press the napkins so the folds look sharp. Next, set each place setting with the same napkin fold and keep the rest of the table minimal, using just one small centerpiece per table.
Steam the runner right before setup — wrinkles show up hard in wedding photos.
Avoid sheer runners that shift and bunch when kids brush past chairs.
2. Mini bud vases grouped in a straight line
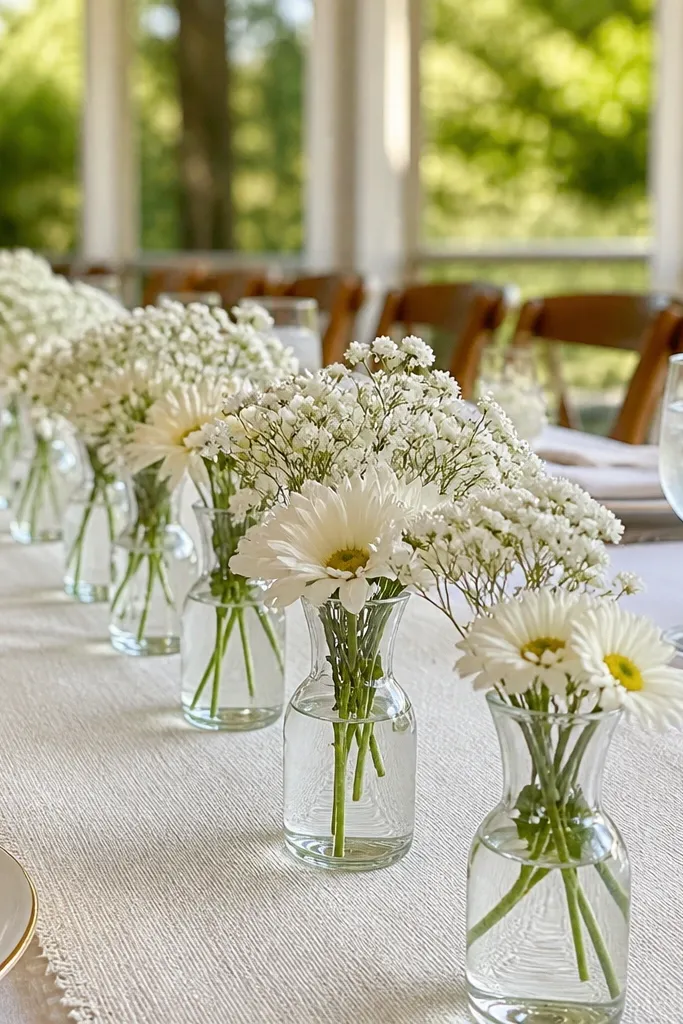
Start with 5-7 bud vases per table, depending on table length, and arrange them in a straight line down the center. Fill each vase with the same flower type and keep the height within 6-8 inches. Then secure the stems with floral tape if using faux, or add a small amount of water if using fresh and swap when needed.
Instead of one tall centerpiece, go for a row of mini bud vases. This looks intentional, gives you height in short bursts, and keeps the center of the table clear for plates and drinks. Use simple stems like baby’s breath, small daisies, or single-color faux florals. For a family friendly with kids wedding, mini vases are easier to place low and stable, so you’re not dealing with a towering arrangement that gets bumped.
Skip thisSkip tall blooms that reach above eye level — they block guests in photos.
Quick tipUse painter’s tape under the vases during setup so the line stays straight when people pass.
3. LED pillar candles in matching hurricane sleeves
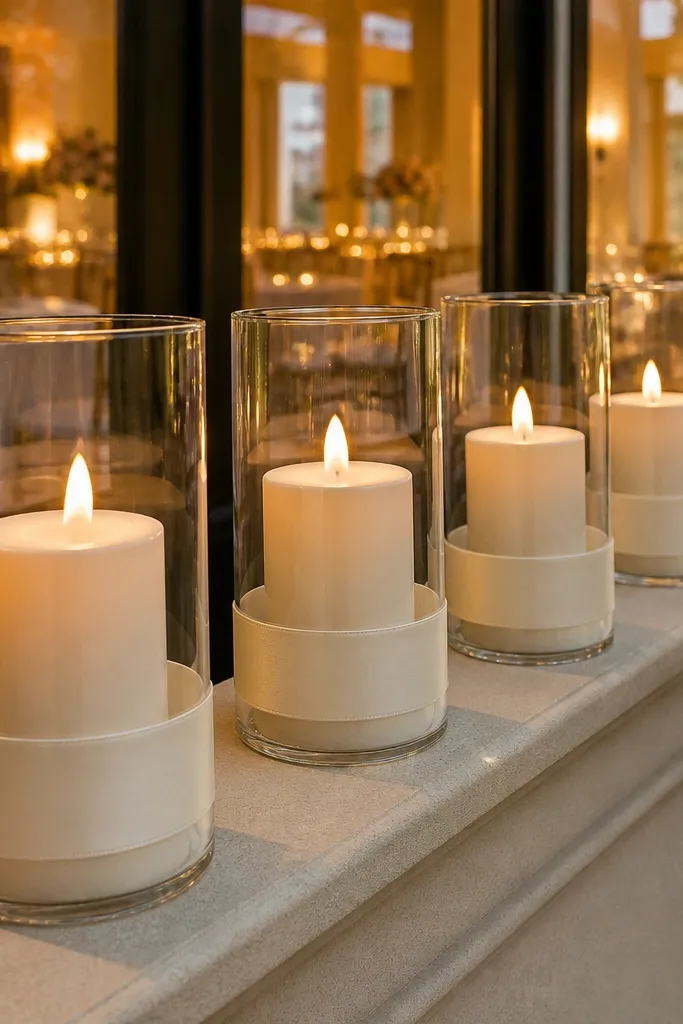
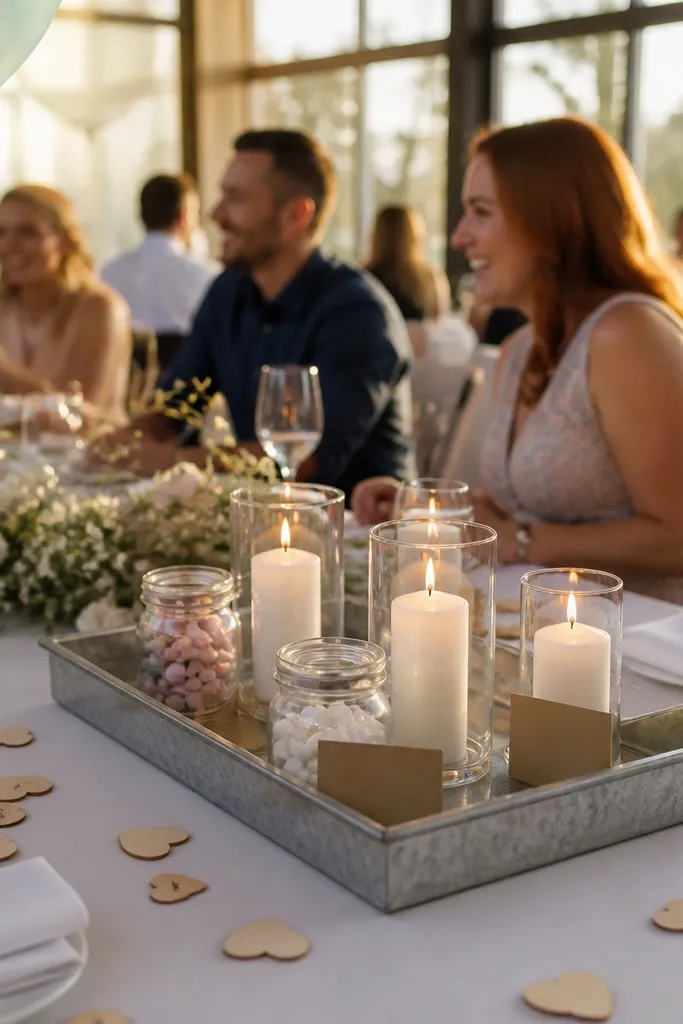
Start by placing 3-4 candle groupings per table, spacing them evenly along the runner. Put each LED candle inside a hurricane sleeve so it looks uniform from every angle. Finally, keep the tallest candle under 12 inches so it doesn’t crowd the center and obstruct kids' views and guest conversations.
Candles make weddings look warm fast, but real candles are a hassle with kids and busy servers. LED pillar candles inside hurricane sleeves give you the same glow effect without the flame risk. Choose unscented LED candles with a realistic flicker so photos don’t look flat. This style reads classic and elevated, and the hurricane sleeve also keeps the candle visually contained.
Skip thisDon’t use thin glassware for the sleeves that can chip easily during clean-up.
Quick tipTest the LED candles at the venue before the event — some flicker modes look too intense under strong lighting.
4. Greenery garland with chunky candle clusters
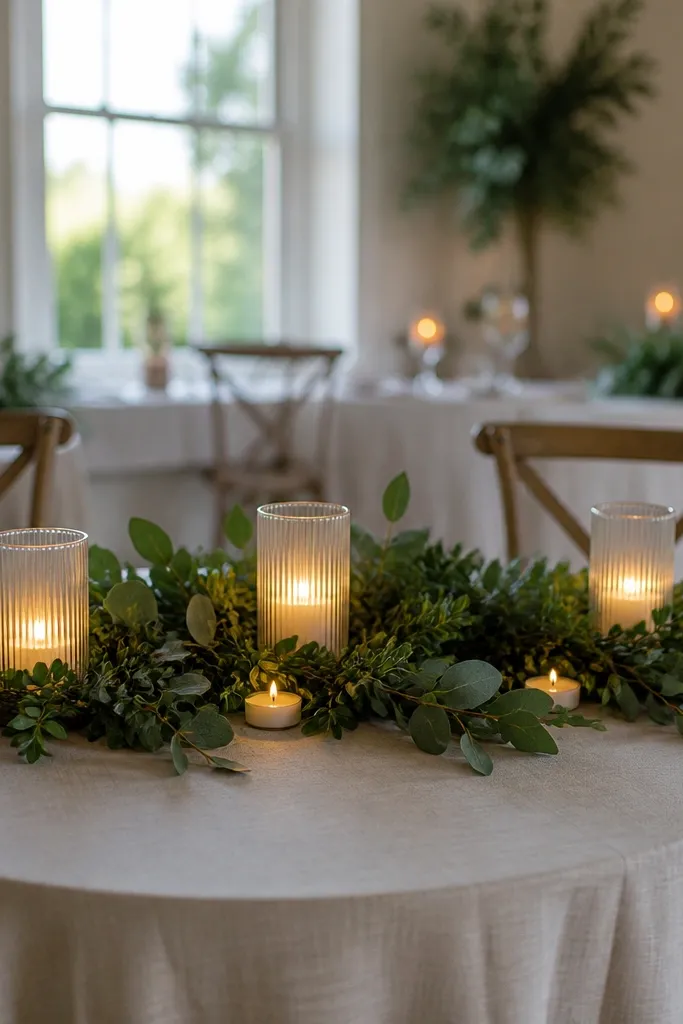
Start by cutting the garland to match the table length, leaving 6-10 inches of space at each end. Lay it centered on top of the runner or tablecloth and tuck the edges down with floral wire. Then add 3-5 candles across the garland at equal intervals, keeping candle height under 10-12 inches.
A low greenery garland is the easiest way to make a table look styled without building a complicated centerpiece. Choose boxwood, eucalyptus, or faux mixed greenery and keep it tight to the tabletop so it doesn’t snag sleeves or get pulled by curious hands. Pair it with chunky candles or LED candles in a few spots so the garland has focal points. The result is a clean, photo-friendly line that makes every table look cohesive.
Skip thisAvoid long trailing greenery that extends past the runner width.
Quick tipUse zip ties to secure faux garland ends — they stay put when the room gets crowded.
5. Paper fan backdrops behind place settings
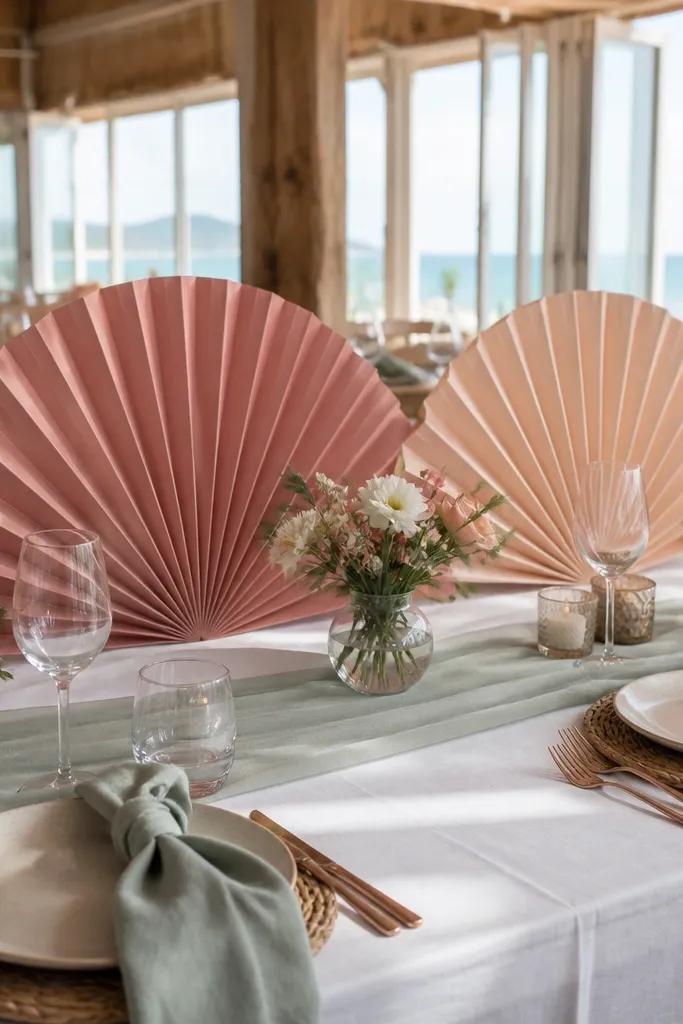
Start by choosing fan colors that match your napkins and table runner. Fold and assemble fans, then attach them to a simple card backing with double-sided tape. Place them behind each seat so they don’t sit in the eating zone, then set place cards at the base to help stabilize the look.
If you want photos that look fun without fragile decor, paper fans are the move. Put one fan behind each place setting or behind every other seat, then let the color do the work. Pick fan colors that match your palette — dusty rose, soft peach, or sage — and keep the fan size consistent. This creates a strong visual background for kids' high-chair photos and for family shots where faces line up with the table.
Skip thisDon’t place fans in the center of the table where servers and kids will reach.
Quick tipMake fans from 65-120 lb cardstock for clean edges that don’t sag.
6. Fruit-and-flower bud vase center line
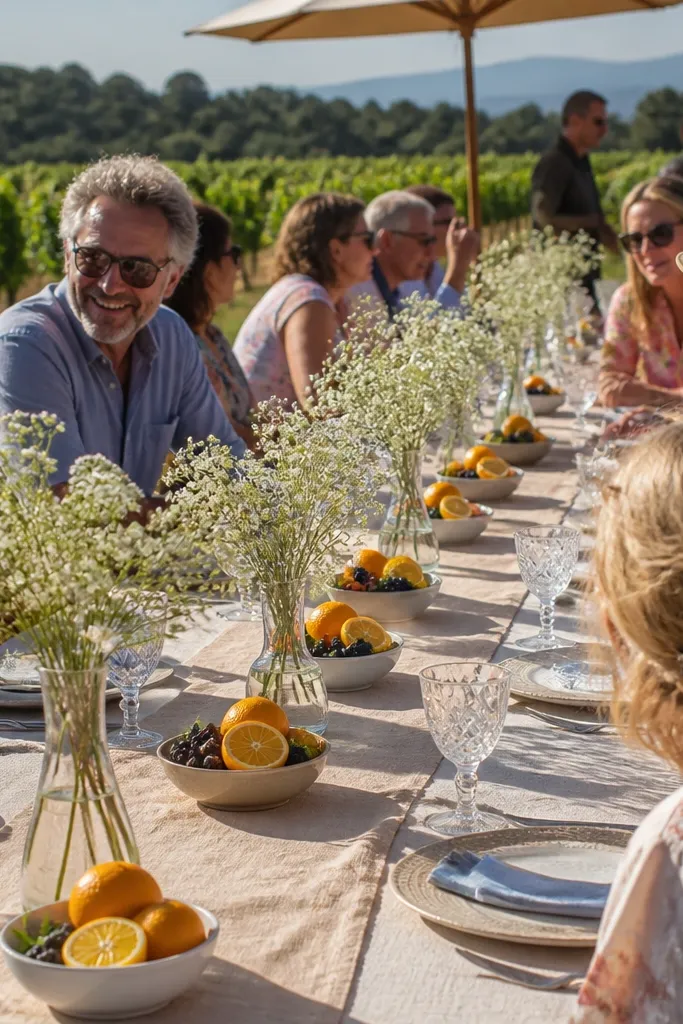
Fruit makes table decor feel bright, kid-friendly, and real. Pair small bud vases with fruit clusters like lemons, oranges, or berries in shallow bowls. This looks gorgeous in daylight and gives guests something to notice that’s not breakable. For a family friendly with kids wedding, it also reduces the “don’t touch” tension because fruit is meant to be handled and eaten later.
Start by placing 2-3 shallow bowls along the center runner area, then add 3-5 bud vases between them. Use a consistent fruit type so the table doesn’t look crowded — lemons are the easiest visual. Finally, tuck tiny filler florals around the fruit bowls and keep everything below 8 inches tall.
Wash fruit the day of and keep bowls covered until serving so it stays photo-ready.
Avoid sticky fruit toppings or drippy arrangements that attract bugs.
7. Chalkboard menu cards with mini greenery clips
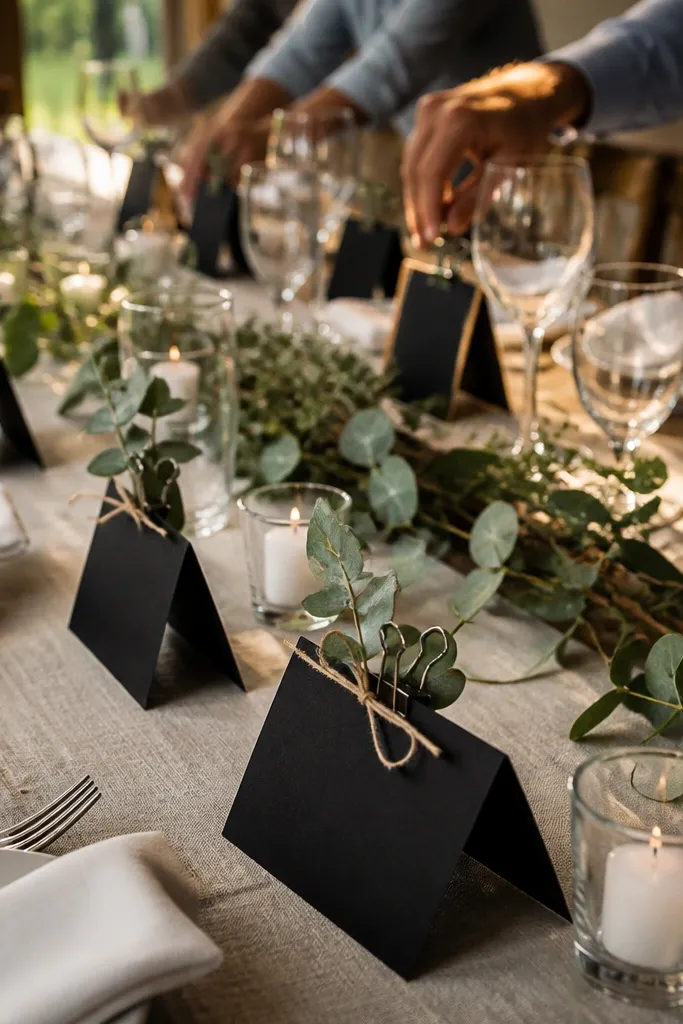
Start by writing the menu or place names with thick chalk markers so text is readable on camera. Clip a short greenery piece — about 2-3 inches — to each card using small clothespins or mini binder clips. Place cards at the seat so they don’t sit in the center, then repeat the same design across the table for a clean look.
Chalkboard place cards and menu cards give you a handmade look without heavy decor. Add a tiny sprig of greenery clipped at the top to tie everything into your floral theme. This is perfect for family friendly with kids wedding because cards stay flat and sturdy, and they give kids something visual to point at. In photos, chalk writing reads well when it’s bold and simple.
Skip thisDon’t use thin, light-colored chalk that fades in photos.
Quick tipUse dark green or black chalk for legibility under indoor lighting.
8. Monochrome bud vase heights with one statement color
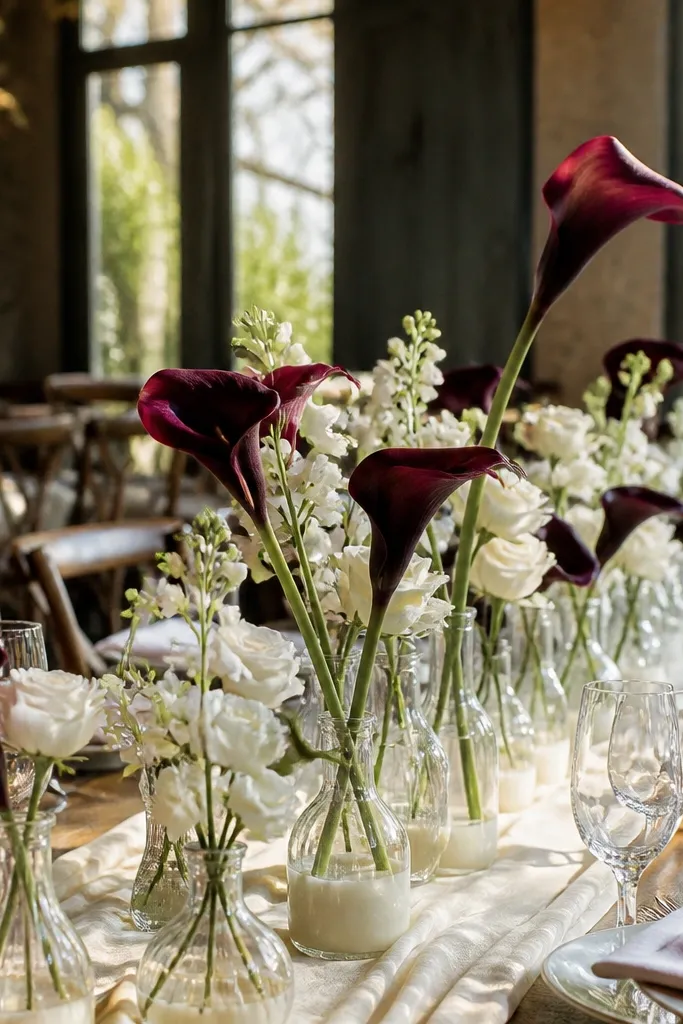
This is a fast way to look intentional without adding more items. Use one base color across vases and stems — like white flowers in cream or clear vases — then add a single statement color stem throughout, such as deep burgundy or navy. The contrast reads in photos and keeps the table from looking washed out. It also works for family friendly with kids wedding because the decor stays low and doesn’t require tall structures.
Start by choosing 6-9 bud vases in one finish — clear glass, matte white, or ceramic. Fill all vases with the same main flower color and add one accent stem in every 2-3 vases. Keep the tallest vase at 8-10 inches and place vases in a loose grid so it looks styled, not scattered.
Trim stems to equal lengths — uneven heights look messy on camera.
Skip multiple accent colors on the same table. It makes the centerpiece feel chaotic.
9. Lanterns with LED tea lights on the outer table edges
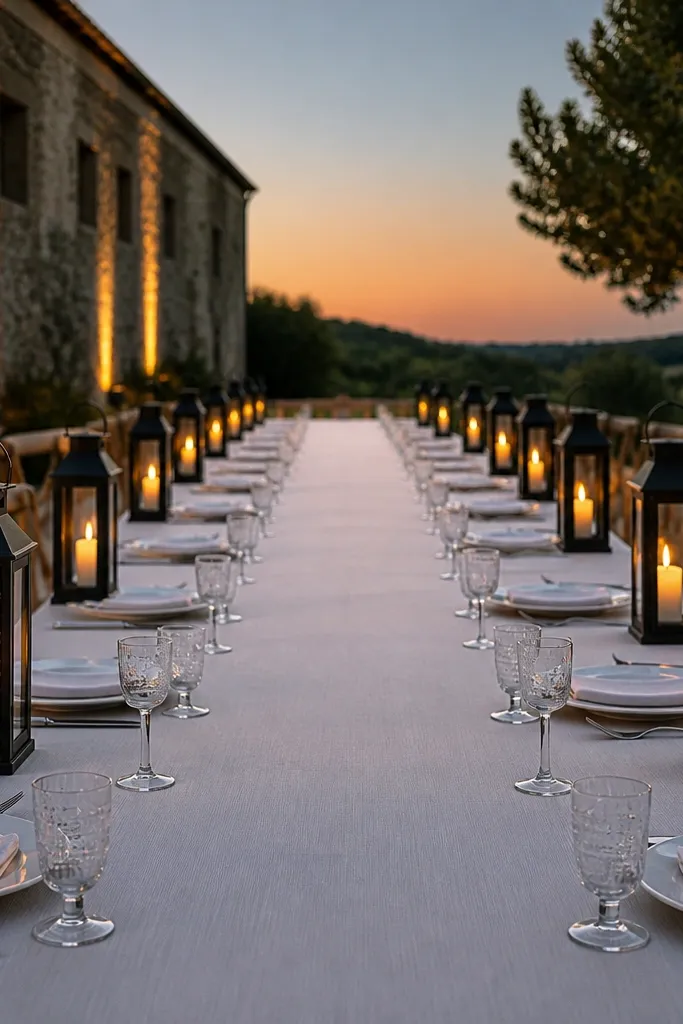
Lanterns frame the table without taking up the middle. Put them on the outer edges, not in the center, so kids have clear space to eat and move. Choose lanterns in black metal or warm bronze, then use LED tea lights inside for that cozy glow. This style photographs well because lanterns create a repeating light pattern around the table.
Start by placing 2-4 lanterns per table depending on length, positioned near the ends. Put LED tea lights inside and keep the light level consistent across all lanterns. Then add a simple runner or greenery strip in the center so the table still looks complete, even with lanterns on the sides.
Use battery packs with fresh batteries the same day — dim lanterns kill the photo vibe.
Don’t place lanterns where kids' hands can reach them during dinner.
10. Tablecloth color block with a thin contrasting runner
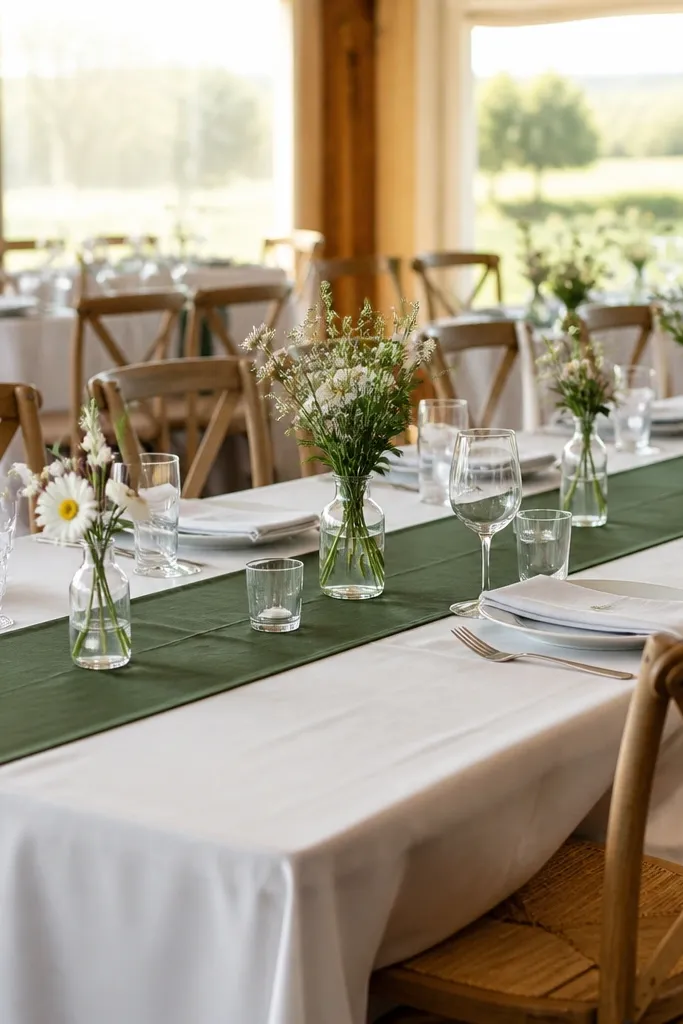
Start by selecting a tablecloth color that matches your palette — white or cream is the easiest. Add a thin runner down the exact center using a fabric that doesn’t slip. Place only one centerpiece type in the middle section so the runner and centerpiece don’t compete for attention.
If you want a clean, modern look with minimal effort, use color blocks. A white tablecloth plus a thin contrasting runner — black, navy, or deep green — makes the table look designed even with plain centerpieces. This also helps with family friendly with kids wedding because it hides small mess and keeps the table visually organized. The contrast reads well in group photos where kids and adults sit close together.
Skip thisAvoid thick, overlapping runners. They look bulky and get wrinkled fast.
Quick tipIron the runner and use non-slip grip under it if the venue floor is humid.
11. Floating candles in shallow water trays
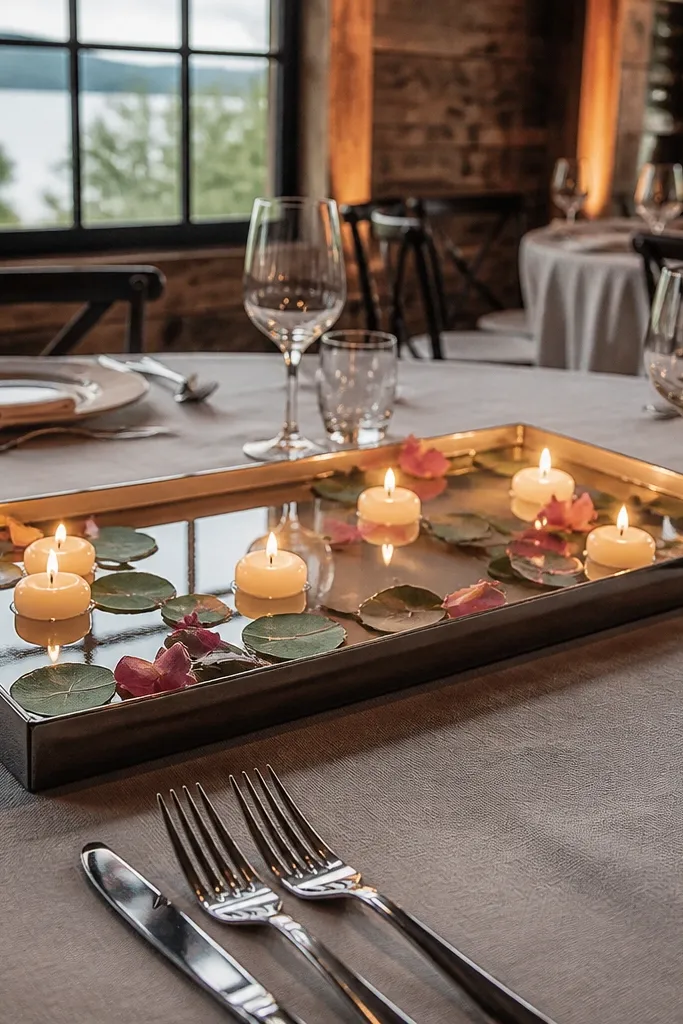
Shallow water trays look magical in photos and feel special without building a tall centerpiece. Use LED floating candles (not real flames) for safety with kids. Add petals in a matching color or a few floating greenery leaves for texture. Since everything stays low and contained in one tray, it’s easier for staff to manage and less likely to be knocked over than tall arrangements.
Start by choosing a shallow tray size that fits the center of the table without blocking plates — 12-16 inches is a good range. Fill with a small amount of water, add petals or greenery, and place LED floating candles on top. Keep the tray weight stable and place it on the runner so it doesn’t slide.
Bring extra trays or back-up LEDs. One dead battery can ruin the look in a dark room.
Don’t overfill the tray. Water spills ruin tablecloths and napkins.
12. Single-stem statement bud vase per table
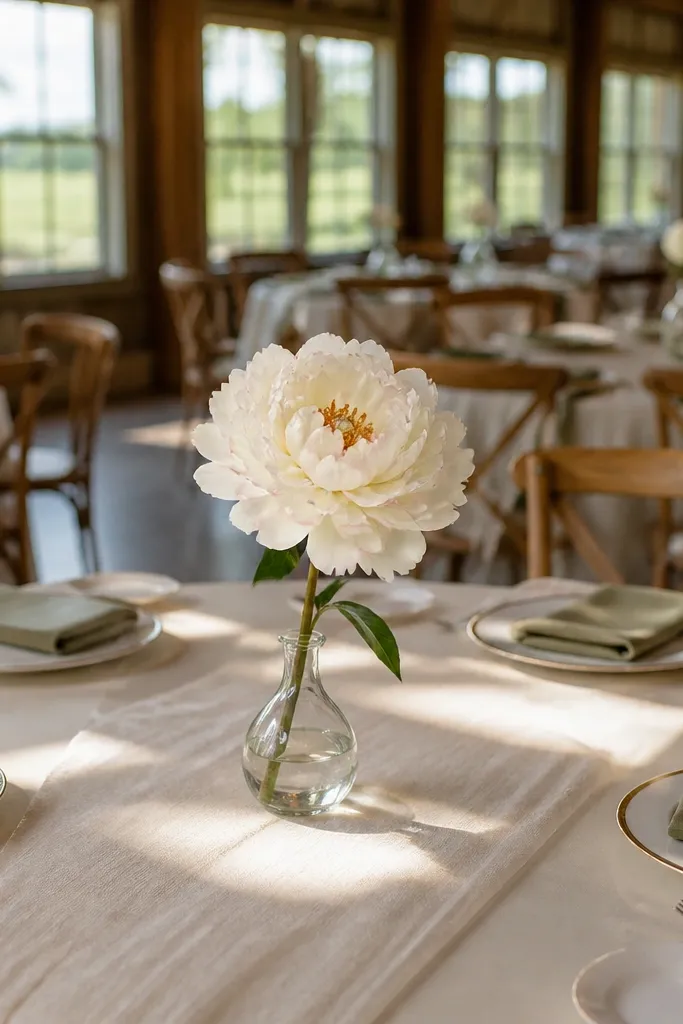
Start by choosing one vase finish per table — clear, ceramic, or matte metal. Fill it with one statement stem and keep the height around 10-14 inches. Place the vase centered on the runner and skip extra florals so the stem stays the hero.
This is the simplest centerpiece that still looks styled: one statement stem in a small vase. Think a single rose, a peony-like faux bloom, or a long branch with blossoms. It looks intentional because it creates one clean focal point instead of a cluttered cluster. For a family friendly with kids wedding, it keeps the center low and reduces the number of objects kids might touch.
Skip thisAvoid multiple stems in one vase. It stops looking minimal and starts looking messy.
Quick tipUse a heavier vase base so it stays stable when chairs scrape nearby.
13. Mini terrarium centerpieces with moss and faux florals
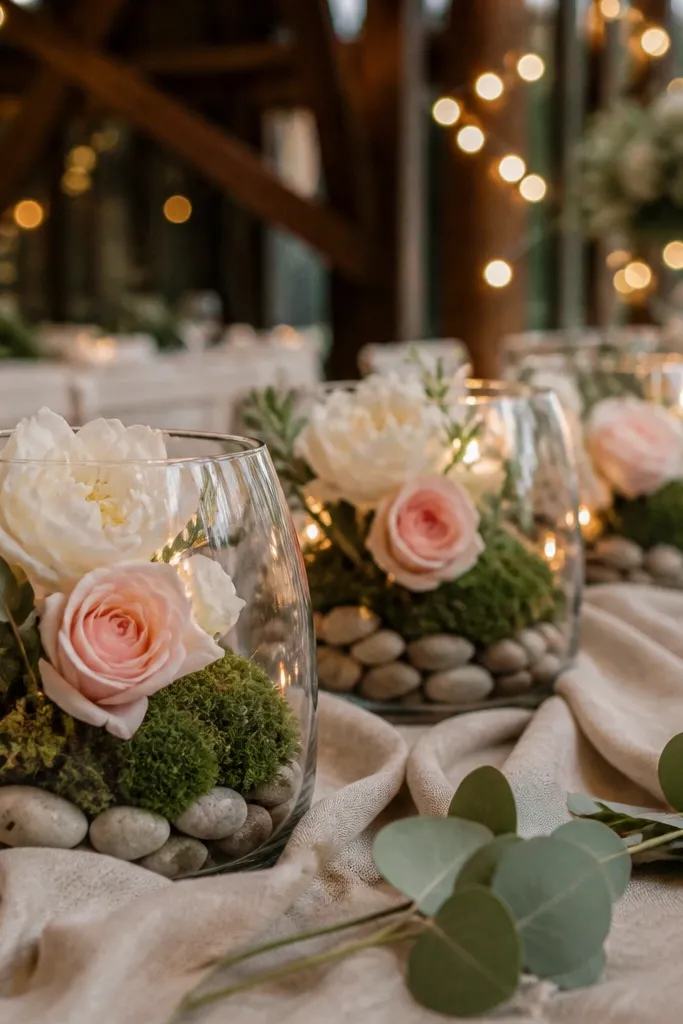
Mini terrariums look adorable and keep decor contained. They’re also easy to style because you’re working within a small, defined footprint. Use moss and faux florals so nothing wilts mid-reception. In photos, terrariums catch light and add texture without tall height. For family friendly with kids wedding, they’re generally less fragile than tall glass centerpieces because you’re using compact pieces designed to hold shape.
Start by placing 1 terrarium per table on the center runner area. Arrange faux greenery and tiny blooms so the terrarium looks full but not messy at the edges. Then add one matching accent outside the terrarium — like a small candle or a fruit bowl — so the table isn’t empty.
Wipe terrarium glass with a microfiber cloth right before guests arrive.
Skip terrariums with lots of loose stones that can shift and look uneven.
14. Rolled napkin stacks with ribbon ties
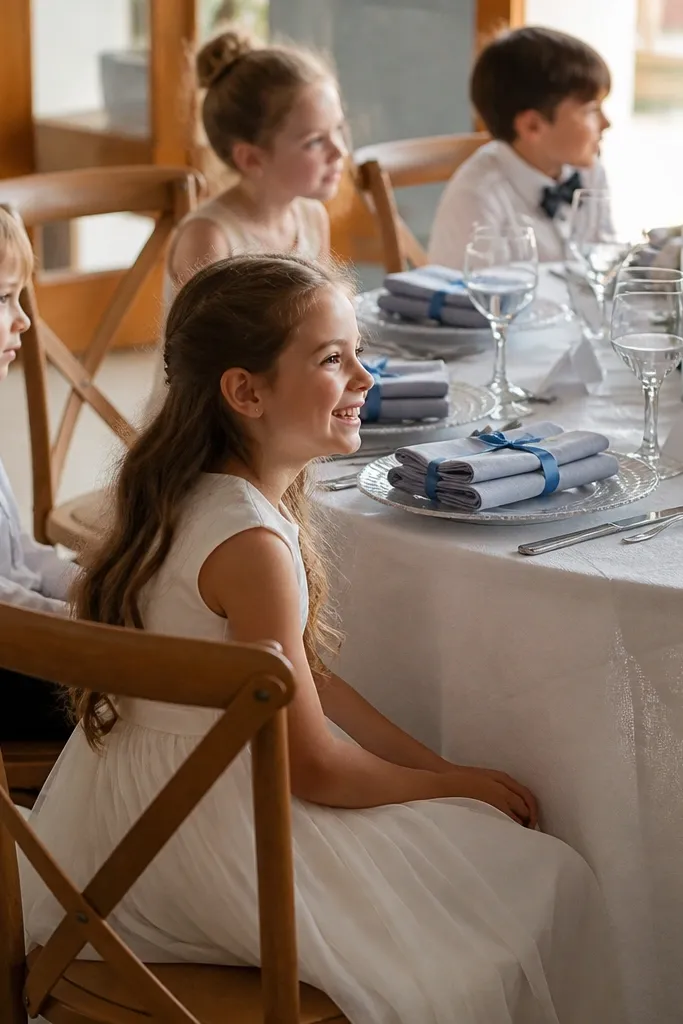
Napkins are free visual real estate. Rolled napkins tied with a thin ribbon look tidy, feel intentional, and photograph cleanly even when kids are seated right next to each other. Choose fabric napkins in one color, then use ribbon in your accent shade — like dusty blue, terracotta, or gold. This approach also lets you control height at the place setting so the center table stays uncluttered.
Start by rolling napkins tightly and evenly so they match across seats. Tie each roll with ribbon that’s about 6-8 inches long, using a small knot that sits flat. Place tied napkins on top of the dinner plate or beside it, then keep centerpieces low so the place setting becomes the main detail.
Use satin ribbon for photos, but keep it thin so it doesn’t look bulky at the table.
Don’t tie bows that stick up high — they get bumped and look messy quickly.
15. Clear acrylic place card holders with colored back cards
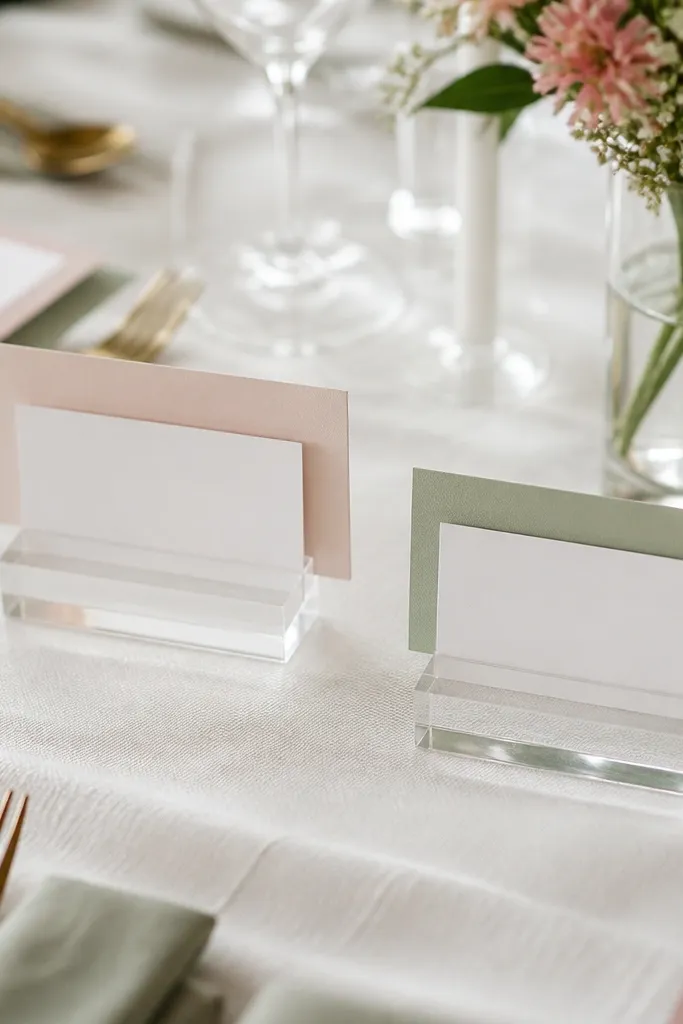
Place cards are often overlooked, but they can make the whole table look polished. Clear acrylic holders keep the card visible from every angle, and colored back cards add a pop that ties into your palette. This is great for family friendly with kids wedding because the card itself is flat and sturdy, and you’re not adding fragile decor in the center. In photos, it gives a neat, repeating pattern across the table.
Start by picking a back card color that matches your napkins or runner. Print place names in a bold font and trim cards so they fit the holder cleanly. Then place one holder at each seat so the card lines up, and keep the centerpiece minimal to avoid visual overload.
Add a thin strip of matching washi tape to the back to reduce glare on camera.
Avoid holders that wobble. A wobbly card looks sloppy in every shot.
16. Low succulent clusters in matching planters
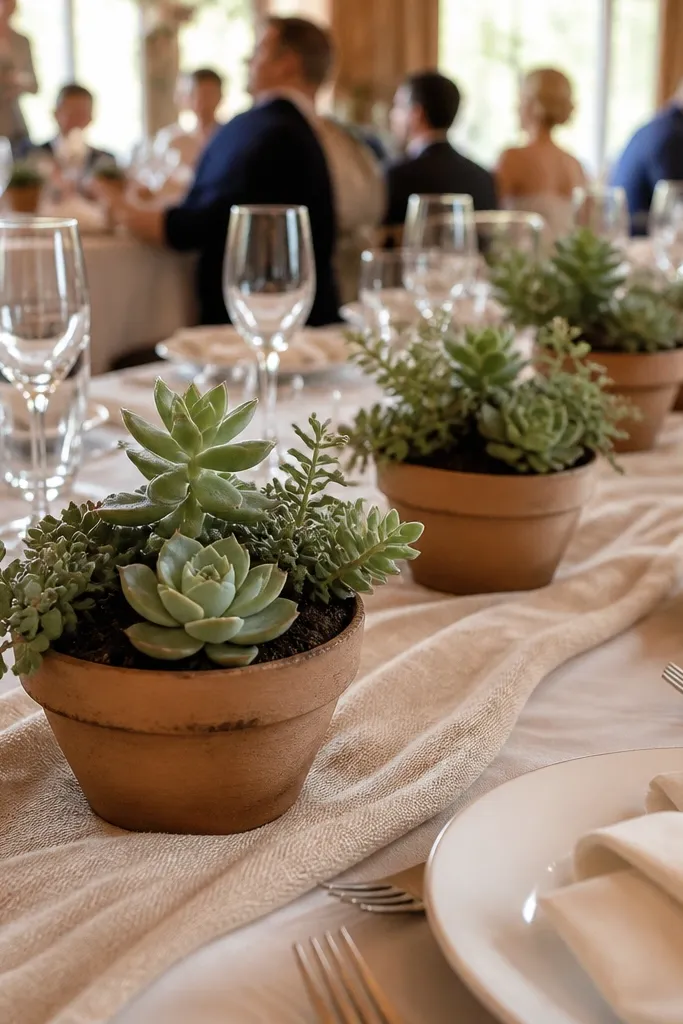
Succulents feel modern and last through the event, which matters when you’re planning for a family friendly with kids wedding. Use small planters grouped low along the center so they don’t obstruct plates or conversation. Pick one planter color finish — white, terracotta, or black — and keep the succulent types consistent. The texture reads well in photos because it’s not just color; it’s shape.
Start by choosing 1 planter style and sizing — planters around 4-6 inches across work well. Place 3-5 planters per table in a row, then fill the center with the same succulent mix. Keep planters on a tray or runner section so they don’t slide when chairs shift.
Mist succulents lightly before setup so they look fresh under indoor lighting.
Skip tall pots. Height creates bump risk and blocks faces in pictures.
17. Paper garland triangles along the table runner edge
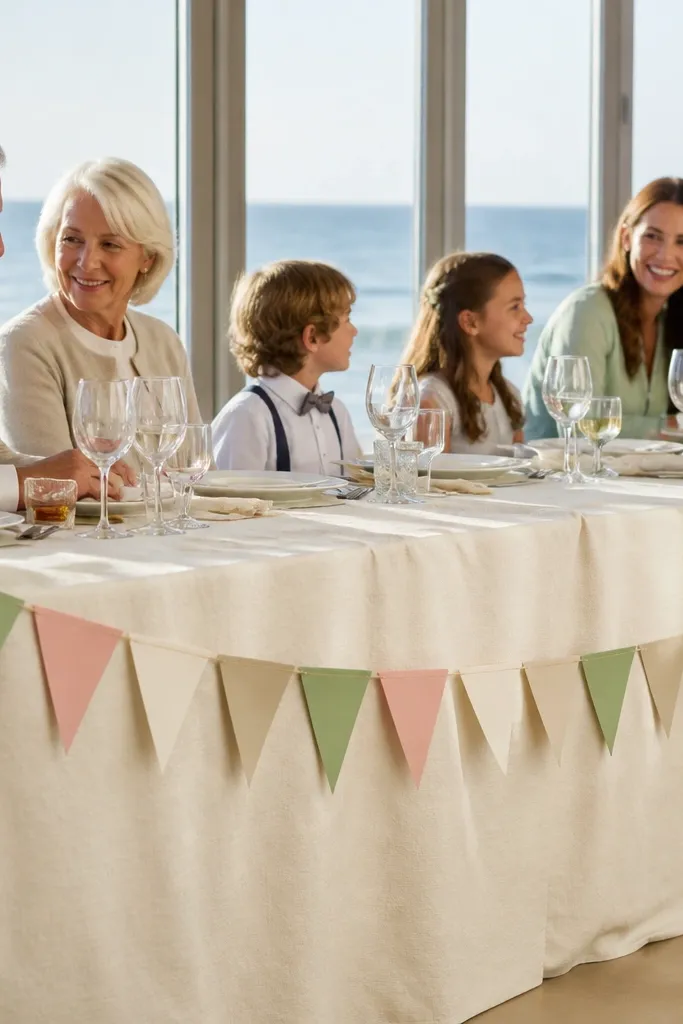
Garlands add a playful, photo-friendly line without taking up the center. Use triangle paper garlands in your palette and drape them along the runner edge so the table looks styled from the front and sides. This is a nice fit for a family friendly with kids wedding because it’s light, cheap, and you can replace a strand if it gets crumpled. The triangle pattern also frames the place settings, which makes group photos look intentional.
Start by cutting or purchasing triangle garlands sized to the table length. Drape along the outer edge of the runner and secure with small dots of double-sided tape. Then keep the center centerpiece low and simple so the garland is the visual line.
Use matte paper in soft colors. Gloss paper reflects harsh light in reception photos.
Don’t attach garlands across the middle. Kids reach there, and it gets messy fast.
18. Mini chalk-painted wooden blocks with table numbers
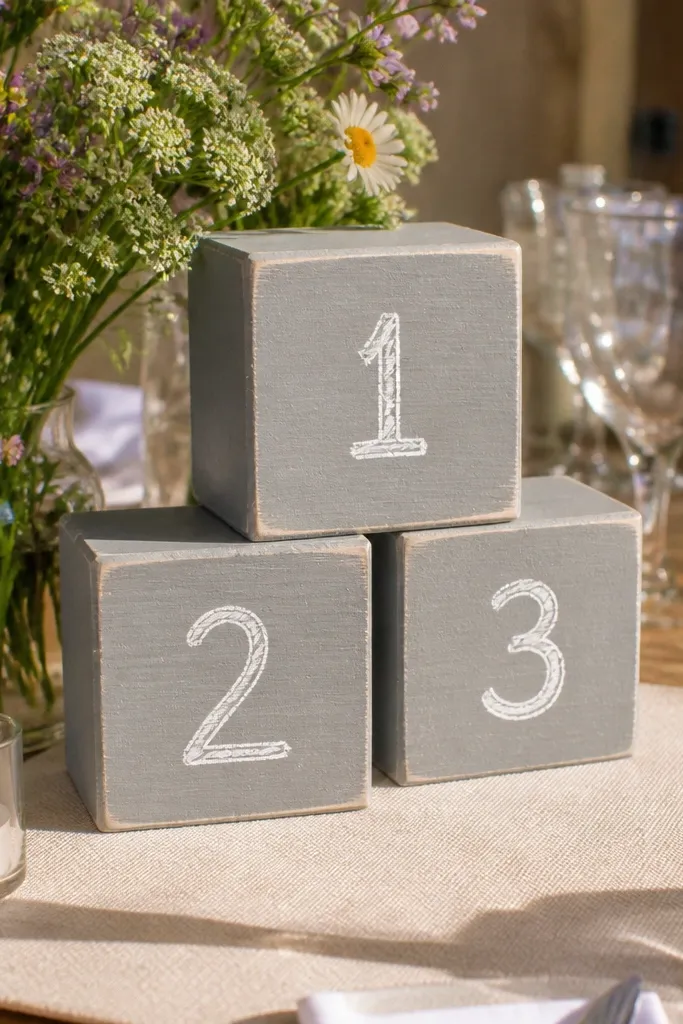
This is a practical table decoration that also looks charming. Chalk-painted wooden blocks add height in a controlled way because they’re small and stable. Use them as table numbers on the runner or near the centerpiece so the table looks organized instantly. For family friendly with kids wedding, wooden blocks are less breakable than glass and they don’t create sharp hazards. In photos, the handwriting style gives a personal, warm vibe.
Start by painting small wood blocks with chalkboard paint and letting them cure fully. Write table numbers in thick chalk marker or chalk script and seal lightly if needed so it doesn’t smear. Place one block per table at the front edge of the runner, then keep the centerpiece low so the number remains readable.
Make numbers large — about 2.5-3 inches tall — so they’re visible from across the room.
Avoid tiny numbers. They look cute up close and useless in photos.
19. Monogram napkin rings with fabric flowers
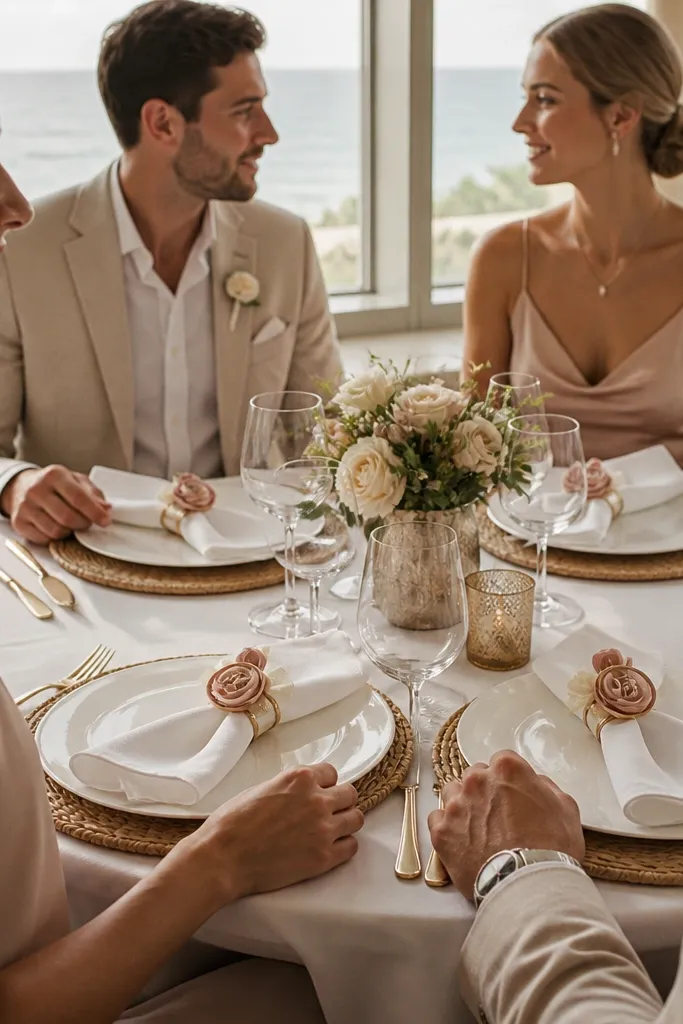
Napkin rings are a small detail that makes the whole table feel designed. Add a fabric flower to each ring in a matching color and keep the monogram simple and centered. This gives you a repeatable, consistent look across tables without adding center clutter. It’s also friendly for a family friendly with kids wedding because napkin rings don’t require glassware and they don’t sit in the middle where kids reach.
Start by choosing napkin rings that fit your napkin thickness and stay snug. Attach a small fabric flower to the ring with hot glue or a secure stitch so it won’t loosen during the event. Then set one ring per place setting and keep centerpieces minimal so the rings show up in close-up photos.
Use fabric flowers with flat backs. Bulky backs cast shadows on camera.
Don’t use rings that slide off. A slipping ring makes the place setting look unfinished.
20. Tray of tea lights with colored glass stones
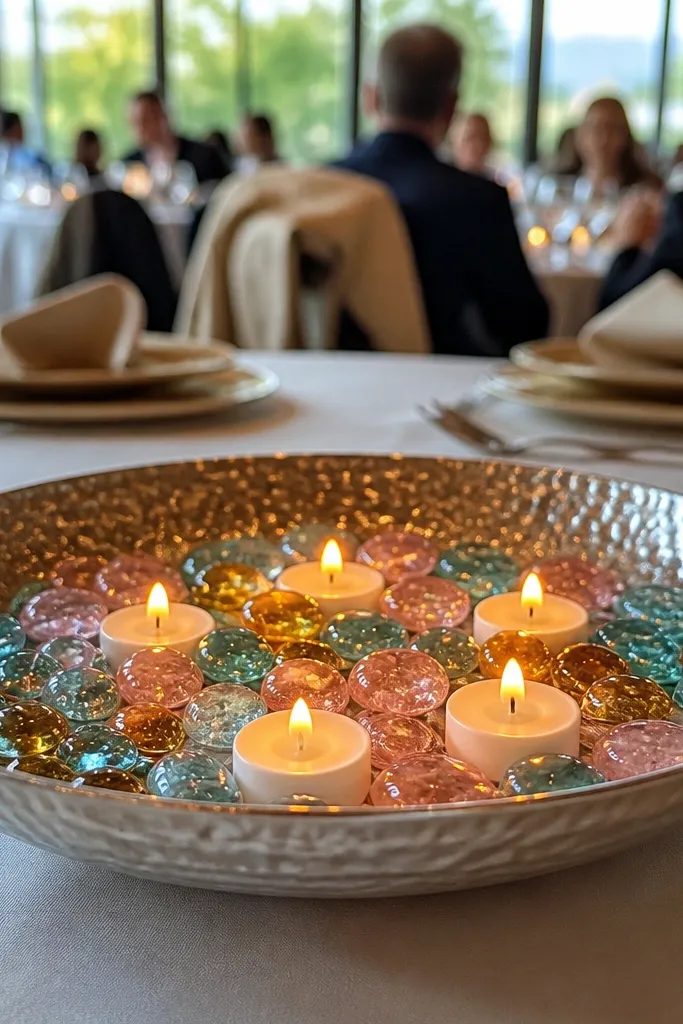
Start by choosing a tray size that fits the center runner area and won’t block plates — 16-20 inches works for many tables. Add a thin layer of stones, place LED tea lights in a few spots, and keep the rest open so it doesn’t look crowded. Then anchor the tray on the runner with a non-slip liner so it doesn’t slide when chairs move.
A tray arrangement gives you a “designed centerpiece” look while keeping everything contained. Use a shallow tray, LED tea lights, and colored glass stones or smooth acrylic beads in your palette. The stones add sparkle in photos without fragile flowers or tall structures. For family friendly with kids wedding, trays keep the light sources in one area, and LED tea lights remove the flame concern.
Skip thisAvoid real glass stones that are too sharp if they chip.
Quick tipPick one stone color family. Mixed stone colors look busy under warm venue lighting.



