
1. Cream Gauze Backdrop With Warm String Lights
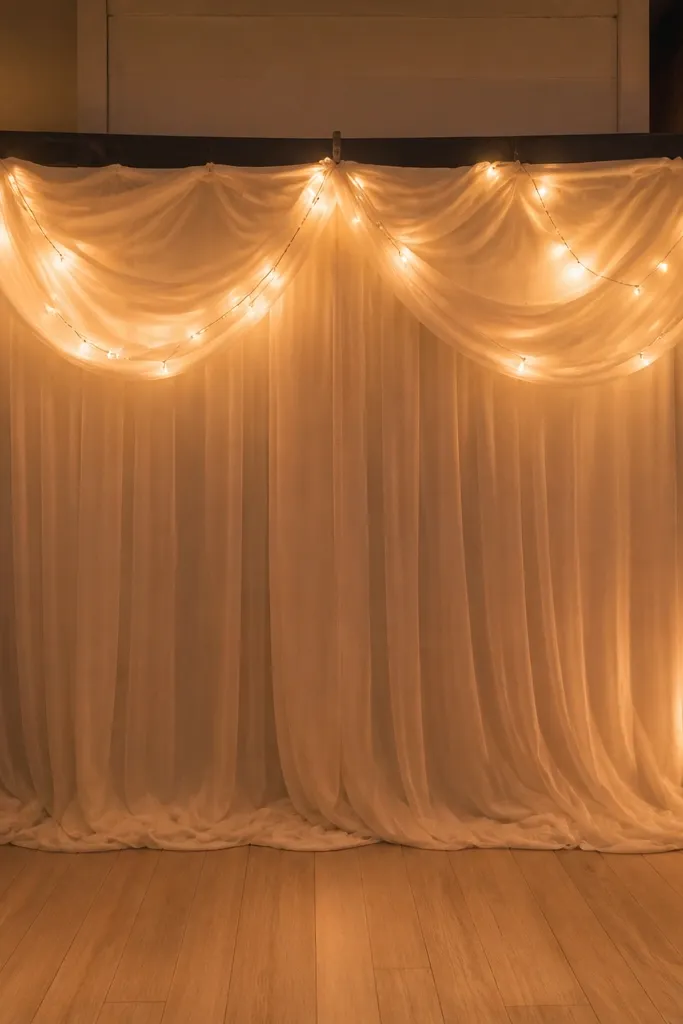
Start by measuring the wall width and ceiling height, then buy enough gauze to cover the area plus extra for folds. Hang it on command hooks or a simple tension rod at the top, letting it pool slightly at the bottom for softness. Then weave warm white string lights behind the gauze and secure the cord to a frame or wall edge. Keep the light strand hidden so the glow looks natural, and test a photo from the back row before you finalize the drape.
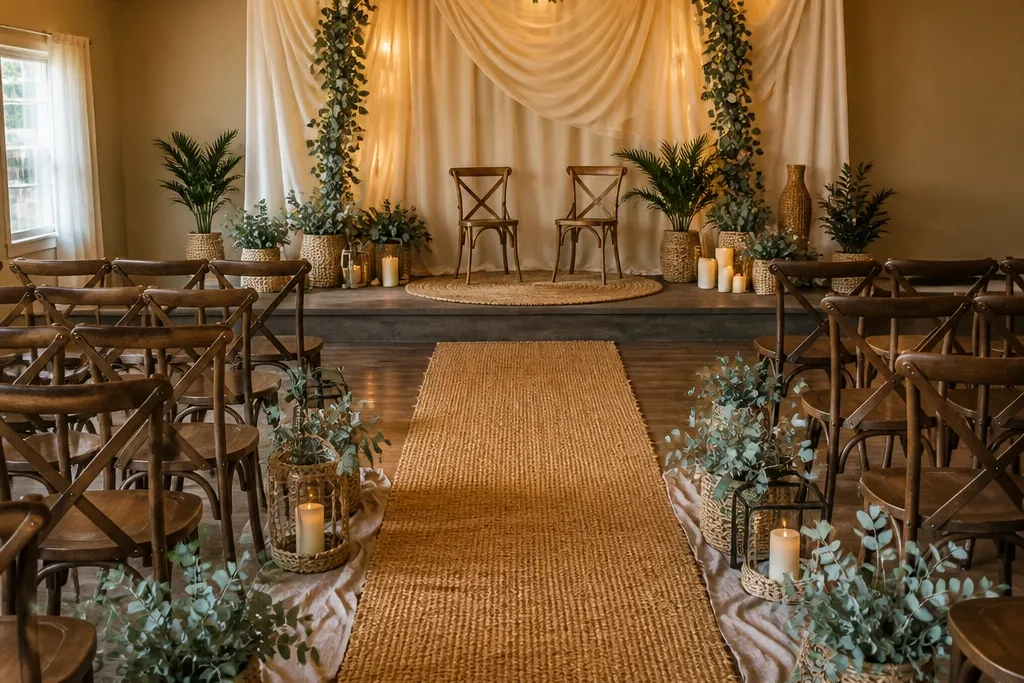
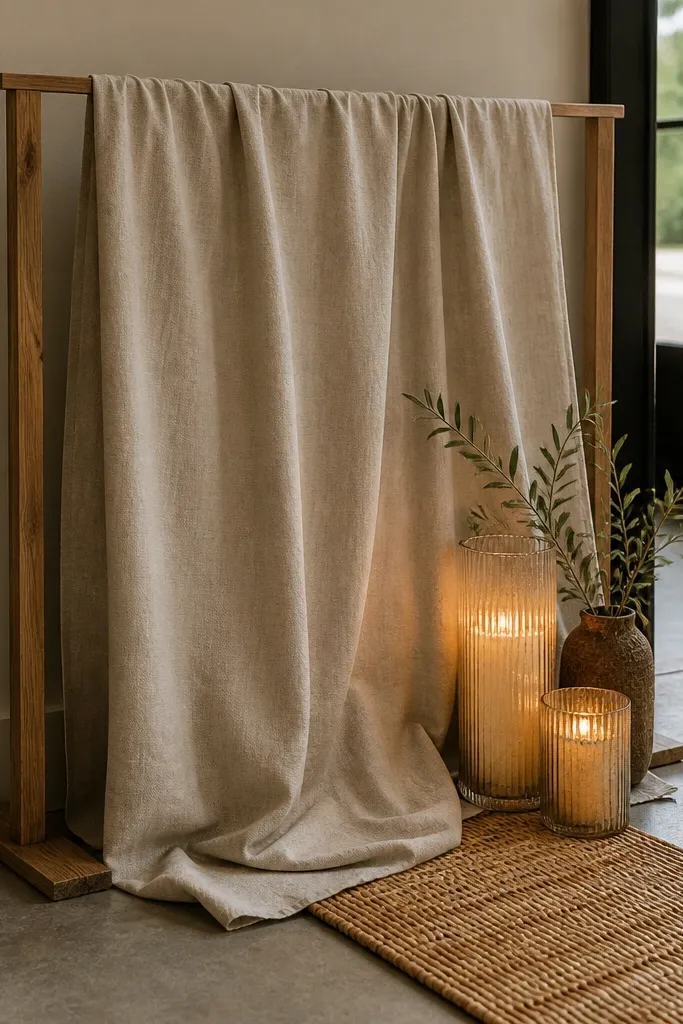
This is the quickest way to make a blank wall feel like a ceremony set. Gauze hangs softly and catches light without looking shiny, so it reads cozy even in dim indoor venues. Add warm string lights along the top edge and lightly through the drape so photos have a glow behind the couple, not just on the floor. Choose a gauze width that covers the wall area fully; gaps make the whole setup look improvised. It suits venues with plain walls, low ceilings, or venues that don’t allow big structures.
Skip thisDon’t use bright white fabric or cool blue LED lights — they ruin the cozy feel.
Quick tipUse warm white lights (2700K if you can find it) — daylight bulbs make gauze look cold.
2. Tulle Curtain Panels Framed by Two Tall Candle Stands
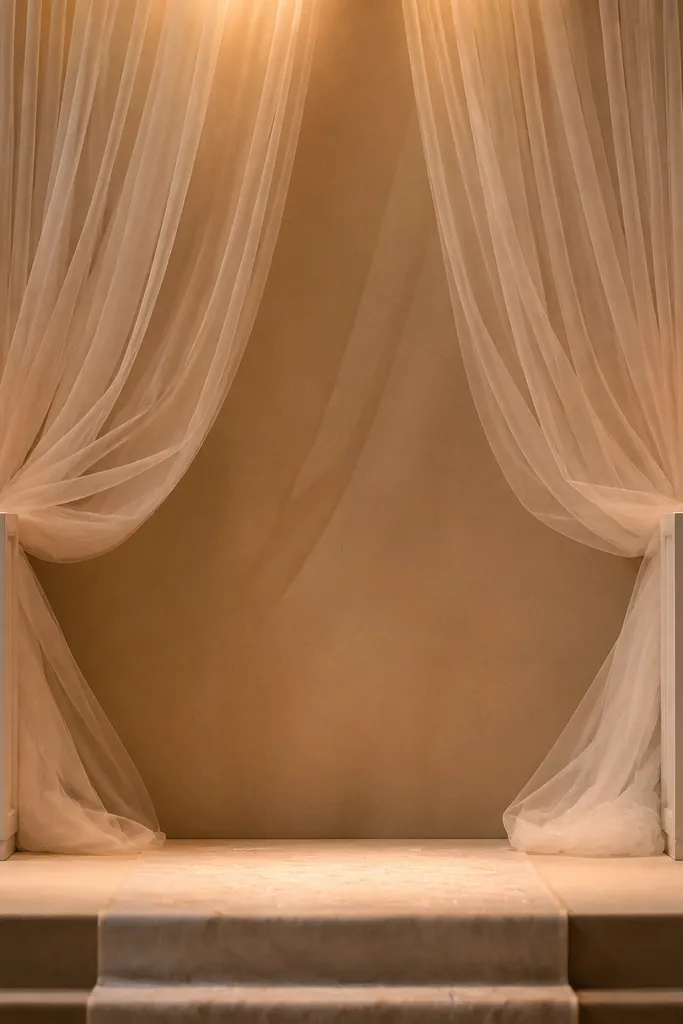
Start by hanging two or three vertical tulle panels centered behind the couple, leaving a small gap so faces stay bright in photos. Place one tall stand on each side at about shoulder height of the couple’s seated or standing position. Then add LED candles and keep the flame look turned toward the center for symmetry. Finally, adjust the tulle so it doesn’t wrap over the candle stands — you want clean lines, not tangles.
Tulle panels create instant softness and give you that “wedding stage” look without floral budgets. The trick is framing: two tall candle stands or pedestal lanterns pull the eye upward and make the backdrop feel intentional. Use LED candles with a warm flicker so the stage looks romantic even for evening ceremonies. This works especially well for small stages where you can’t build a wide arch. It also photographs beautifully because the candle height forms a vertical shape around the couple.
Skip thisSkip tiny LED tea lights — they look flat in stage photos.
Quick tipChoose candle stands in matte black, brushed gold, or white so they don’t clash with your wall.
3. Rattan Reed Runner Down the Center With Linen Side Drape
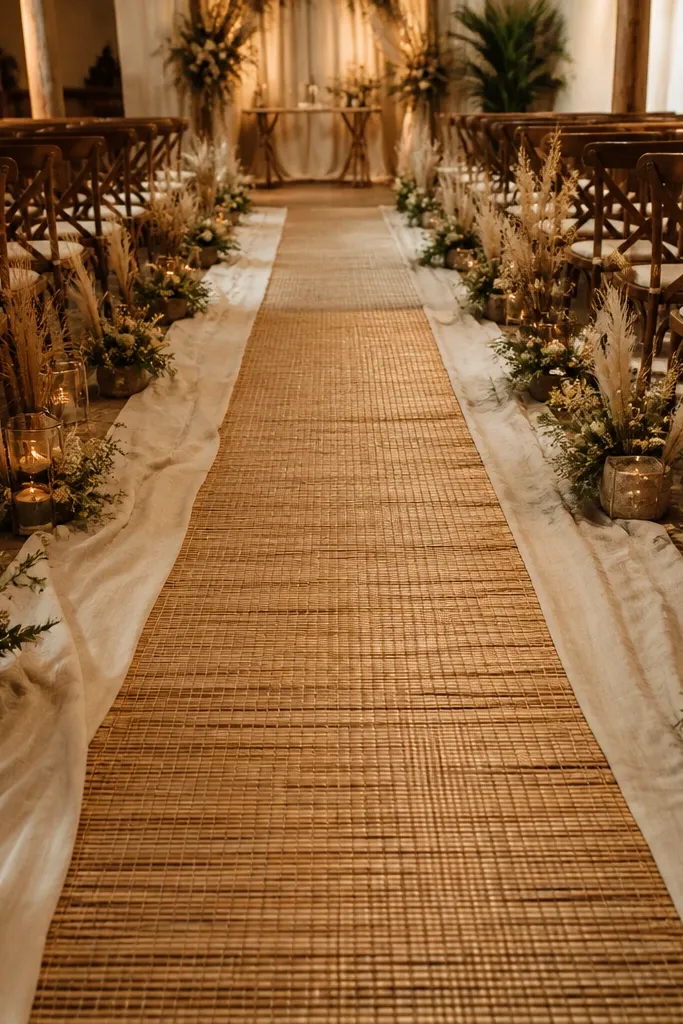
Start by measuring the stage floor and cutting or trimming the runner so it sits centered with 6-10 inches of margin on each side. Lay the runner first and tape the edges if it’s slippery. Then drape linen pieces along each side so they fall naturally and cover the floor transition. Finish with two small clusters of LED candles or bud vases at the front corners to anchor the look visually.
This is a cozy trick for stages where you don’t have room for a full backdrop. A rattan reed runner gives texture and direction, so your photos have a clear path leading the eye toward the couple. Pair it with two lengths of linen or muslin along the sides to soften the floor and hide scuffed areas. The runner also helps when your stage is on a carpet — it creates a clean, photo-ready surface. It’s a good fit for small banquet rooms and winter weddings where you want warmth without greenery everywhere.
Skip thisDon’t use a shiny satin floor drape — it reflects overhead lights and looks harsh.
Quick tipUse double-sided carpet tape under the runner edges to stop shifting during the ceremony.
4. Wood Slat Frame With Faux Eucalyptus Garlands
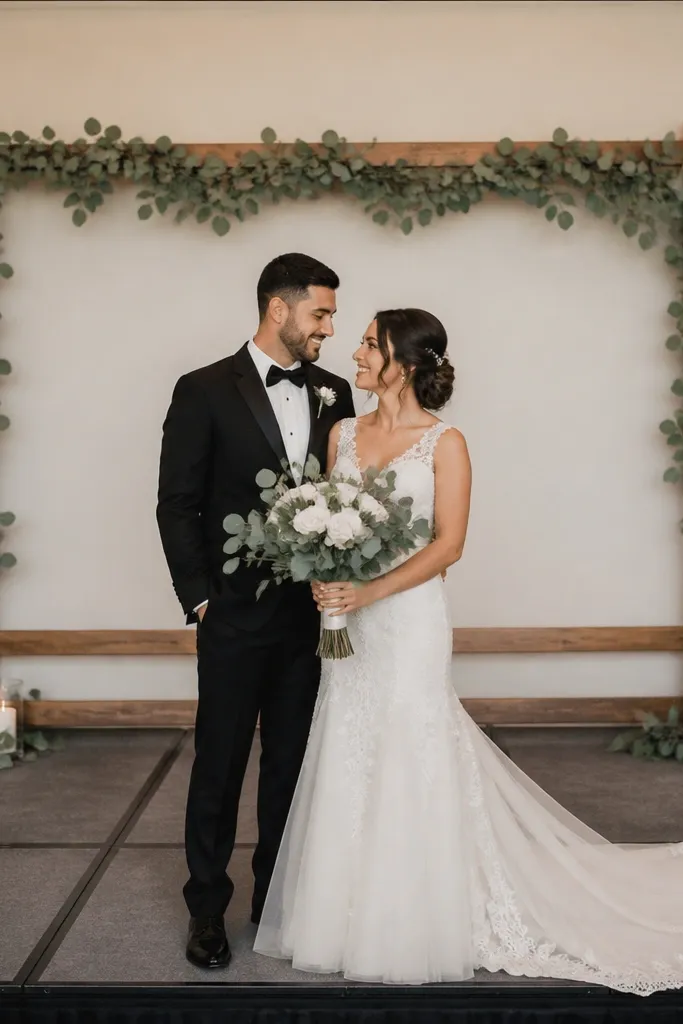
Start by buying a lightweight slat screen or making one with plywood strips and brackets, sized to your wall width. Attach faux eucalyptus garlands to the frame using zip ties at the back so the front looks natural. Then add a single warm accent ribbon loop at the top corners for color without clutter. Finally, place two matching lanterns or candle clusters at the bottom corners to complete the frame.
A simple wood slat frame makes any indoor wall look designed, and eucalyptus garlands add cozy green without expensive floral ordering. The slats create a built-in grid that reads clean in photos, even if your venue décor is plain. This setup is especially flattering for couples who want a natural, airy look rather than heavy blooms. Keep the garlands light and let them hang in soft curves so the frame doesn’t look crowded. It works well for ceremonies, vow renewals, and small receptions where you still want height.
Skip thisDon’t pack the garlands tight — sparse, draped greenery looks more expensive.
Quick tipUse zip ties for the garlands and hide them behind slats so you don’t see plastic flashes in photos.
5. Macramé Wall Hanging as the Focal Backdrop
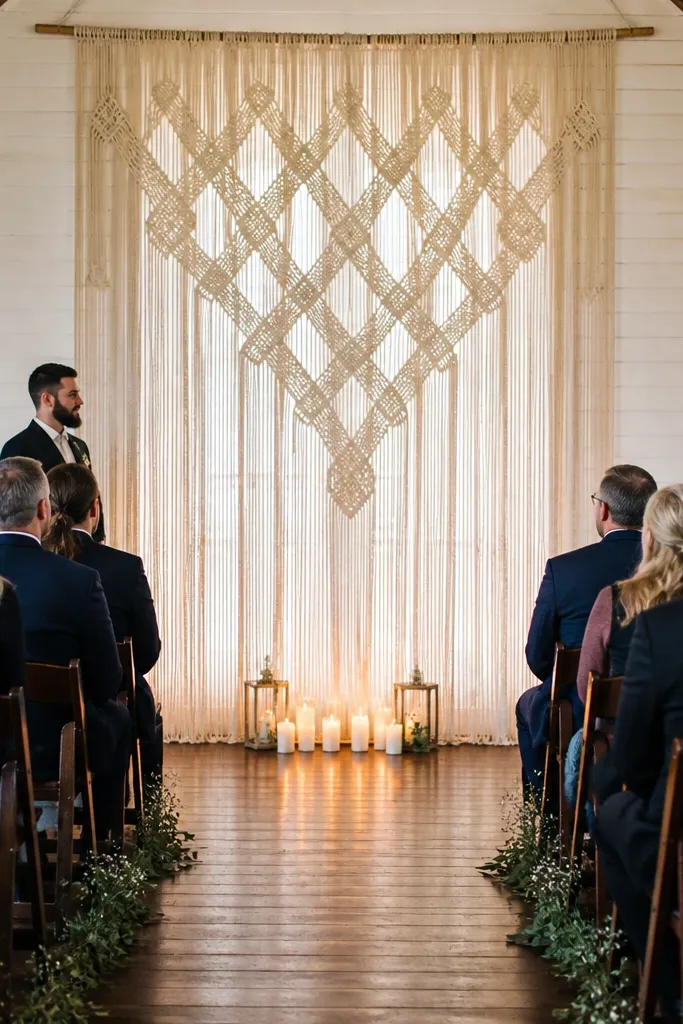
Macramé looks handcrafted and cozy, and it instantly gives texture that reads well on camera. Choose a large piece with an open pattern so the couple’s area stays bright and not blocked by heavy knots. This is a great option for indoor venues where you can’t hang a full curtain or where you want a boho-meets-cozy vibe. It also works for both day and evening because warm lighting complements the fiber texture. Keep the rest of the stage minimal so the macramé stays the star.
Start by placing the macramé at the exact center of your stage at eye level relative to the couple’s heads — measure from floor to where you want the bottom edge to sit. Hang it using a sturdy wall hook or a ceiling mount point, then check stability before the day of. Add warm LED string lights behind or around the macramé edges so the fiber glows softly. Then add two small floor candle clusters at the base, spaced symmetrically.
Pick macramé in natural cream or light tan — it matches most wedding palettes.
Skip white-on-white if your venue is bright; it can wash out in overhead lighting.
6. Paper Fan Backdrop in Dusty Rose and Cream
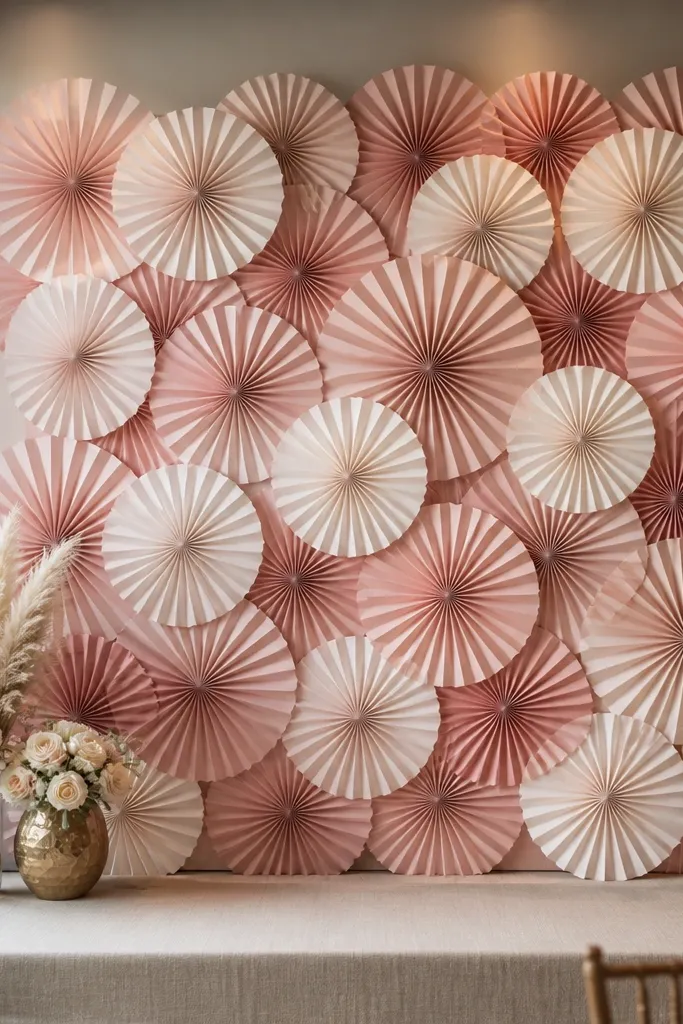
Paper fans are cheap wedding stage decorations that look designed because they create a pattern you can’t get from plain fabric. Use dusty rose and cream fans to keep it cozy and romantic rather than loud. This backdrop is great for indoor rooms with lots of light because the fans add structure and shadow play. Keep the couple area clear by using fans more densely behind them and less toward the edges. It’s ideal for budget-friendly wedding stage setups where you want a big impact without heavy rentals.
Start by measuring your backdrop width and buying fans in two sizes so you can stagger them. Mount a simple grid — like a lightweight board or curtain rod — and attach fans with zip ties or fishing line. Arrange the largest fans at center height and smaller fans toward the sides to create depth. Finally, place two matching balloon-free side arrangements using fabric ribbons and LED candles to tie the colors together.
Use matte fans, not glossy — glossy reflects flash and looks cheap on camera.
Don’t use more than two colors or it turns into confetti instead of a cozy backdrop.
7. Velvet Ribbon Garland Across a Simple Backdrop Stand
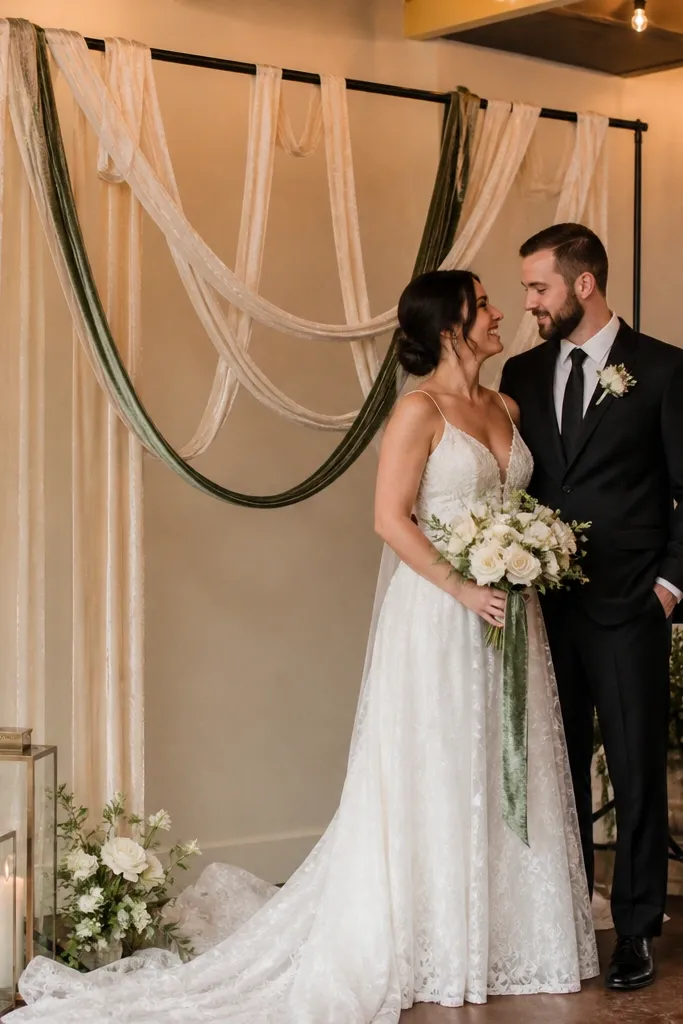
Velvet ribbon gives warmth and an expensive-looking texture even when the stage is simple. Drape ribbon in loose arcs across a basic backdrop frame or tension rod — you get movement without needing florals. Choose a warm neutral base like ivory or oat and add one ribbon accent like terracotta or deep sage. This works well when your venue has a plain wall and you don’t want a big curtain. It photographs like a styled installation because the ribbon catches light in soft highlights.
Start by setting up a basic backdrop support — tension rod, light frame, or even a step-and-repeat wall stand — sized to your stage. Then thread velvet ribbon through the frame points in staggered heights so it forms a gentle wave, not a straight line. Secure the ends behind the frame so you don’t see tape in photos. Finish by adding two small floor vases filled with faux eucalyptus or dried pampas-style stems.
Cut ribbon ends on a diagonal so they don’t look blunt when they hang.
Skip thin satin ribbon — it looks flat and slippery under overhead lights.
8. Matte Black Lantern Cluster With Faux Greenery
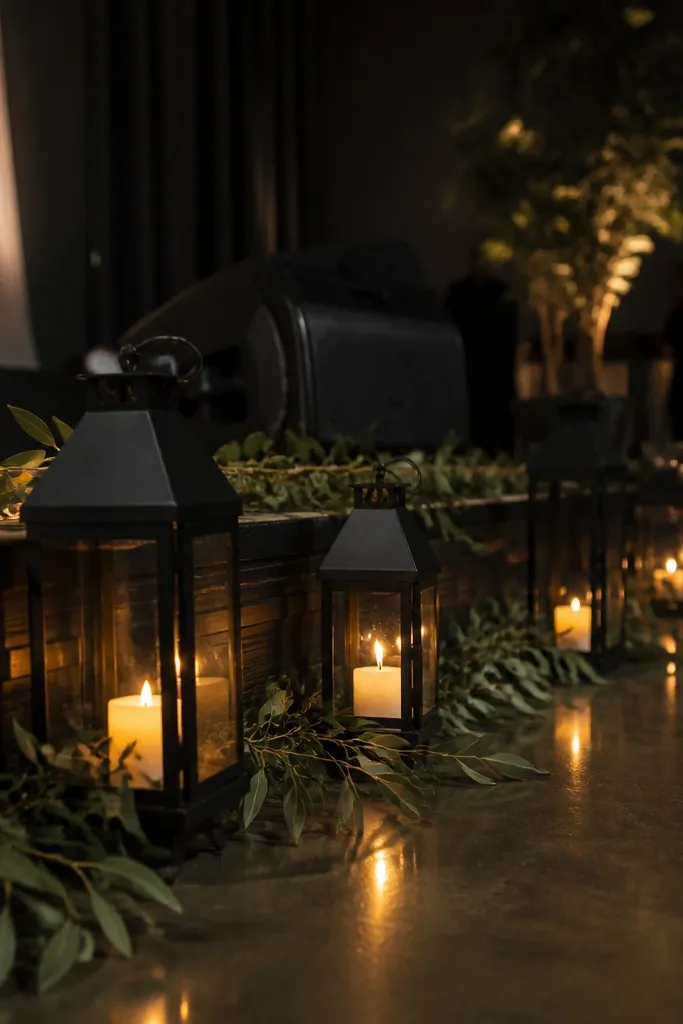
Start by placing two larger lanterns behind the front line and two smaller ones closer to the stage edge, spaced evenly. Add faux greenery stems tucked behind lanterns so the greenery disappears into the cluster. Put LED flameless candles inside each lantern and ensure the brightness is consistent across all units. Finally, step back and adjust spacing so the lanterns form a rectangle around the couple, not a scattered pile.
Lantern clusters make the stage feel cozy because they add warm light and a sense of “gathered” space. Matte black lanterns look grounded and modern, while faux greenery adds softness without taking over. You don’t need a full backdrop; place lanterns along the base line and around the couple’s sides to frame them. This is a strong choice for evening weddings or venues with dim corners where warmth is needed. The lantern glass also makes the background feel layered in photos.
Skip thisDon’t mix random lantern sizes without a plan — it reads messy in wide shots.
Quick tipUse the same lantern size on each side so photos look symmetrical.
9. Muslin Side Drapes With a Single Center Fabric Knot
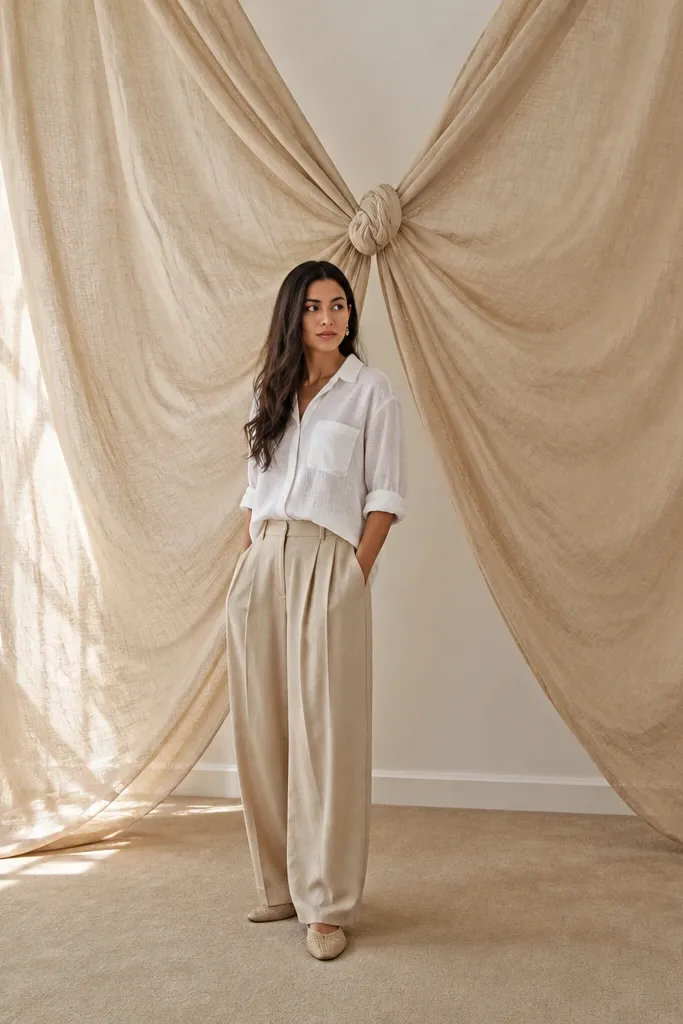
Muslin side drapes look soft, airy, and cozy without requiring a full backdrop wall. The center knot creates a clear focal point so you don’t need flowers or a big structure. This setup works when you want a minimal stage that still feels warm in photos. Choose muslin in oat or sand; it harmonizes with wood, beige carpet, and warm indoor lighting. If you’re doing a courthouse-style venue or a small reception room, this is one of the cleanest budget stage looks.
Start by hanging two long muslin pieces from a tension rod or hooks so they fall down the sides. Bring the center sections together behind where the couple stands and tie a single knot at the same height each time. Spread the fabric so it fans out slightly and doesn’t twist. Then place one low floral substitute — like eucalyptus in a simple vase — directly under the knot to anchor the center.
Press the muslin with steam before hanging so folds look intentional, not wrinkled.
Avoid tying multiple knots — it looks busy and breaks the cozy symmetry.
10. Neutral Balloonless Arch With Dried Palm Fronds
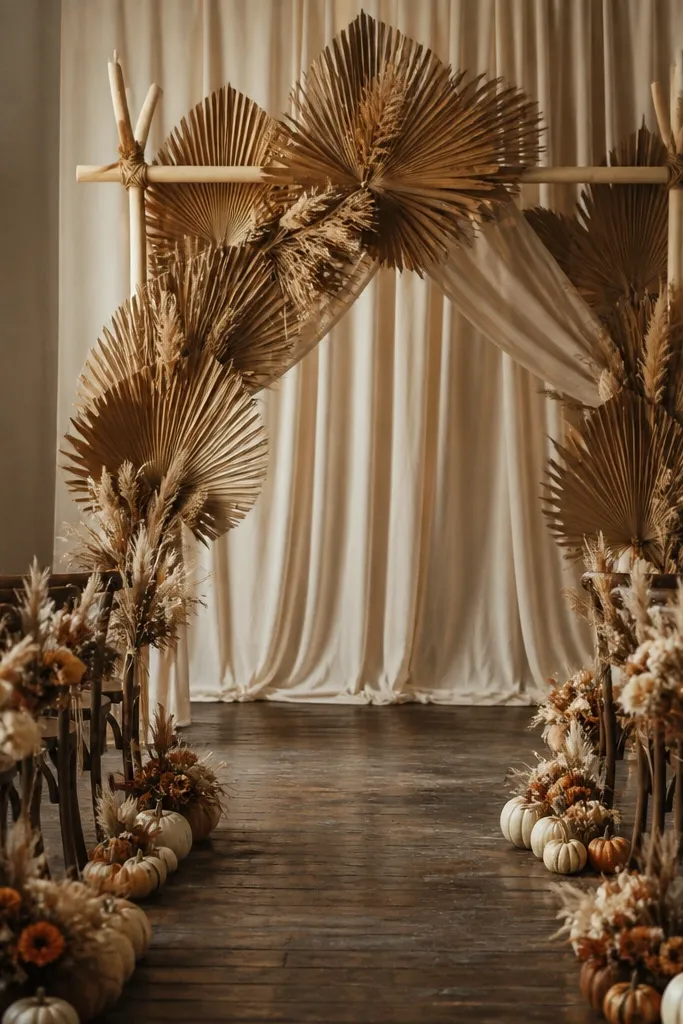
Start by choosing a lightweight arch frame, then wrap dried palm fronds around the outer edges first to form a border. Tie the fronds with twine at the back so you don’t see knots in photos. Add a few fronds at the top crossbar for height, then leave a clear center gap so faces stay bright. Finally, place two small baskets with dried stems or LED candles at the base corners.
A balloonless arch keeps the look classy and still makes the stage feel like a destination. Dried palm fronds add texture and warmth that reads great in indoor light, especially when you keep the palette neutral. You get height for portraits and a clear frame behind the couple. This is a smart option for fall weddings or anyone who wants a natural, not-too-sweet aesthetic. It’s also easy to build because dried fronds are light and don’t need constant re-styling like thick florals.
Skip thisSkip glossy “preserved” foliage if it’s too shiny — it can look plastic under stage lights.
Quick tipIf fronds shed, mist them lightly with a light fabric spray and let them dry before the ceremony.
11. Burlap Runner With Lace Tablecloth Overlay
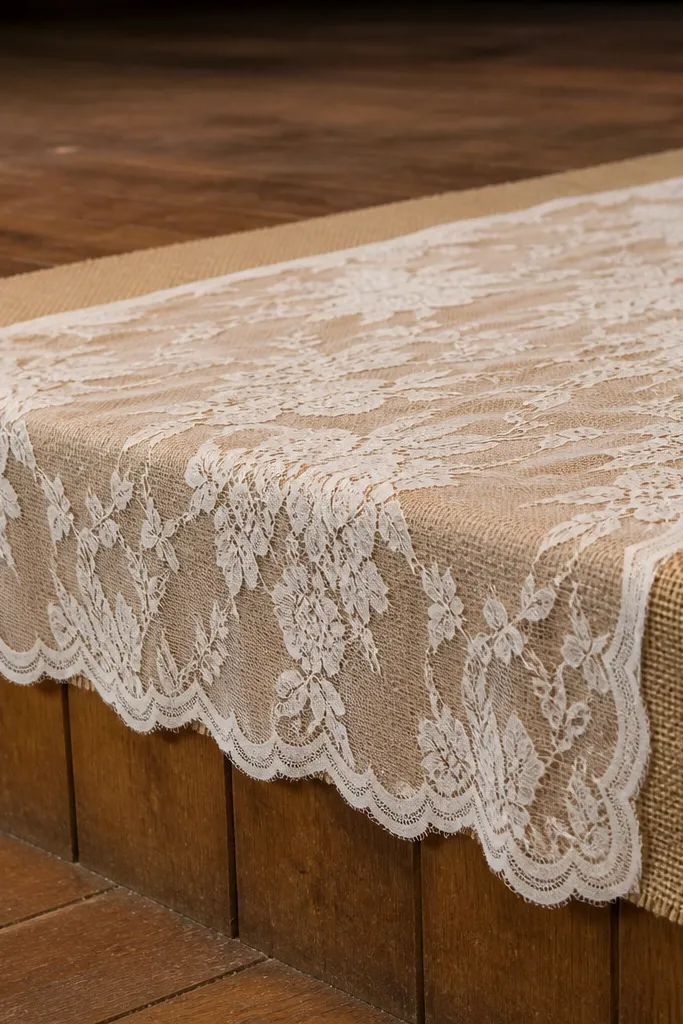
This combo looks cozy because it mixes rough texture (burlap) with soft detail (lace). The runner gives you a grounded base, while the lace overlay adds a romantic pattern that shows up clearly in photos. It works best on plain floors or when you need to hide the transition between stage and room carpet. Keep the overlay centered so the look stays neat. This is a budget-friendly stage decor approach when you don’t want to rent a full floral carpet.
Start by cutting burlap into a centered runner width that fits your stage and won’t bunch at the edges. Lay it flat, then place a lace tablecloth panel or lace fabric strip on top, aligned to the center. Secure the lace with hidden clips or double-sided fabric tape so it doesn’t slide. Add two small candle holders at the front corners so the lace pattern doesn’t feel like it floats alone.
Use lace with a simple border — busy lace patterns fight with wedding fonts and signage.
Don’t use lace that’s too thin; it wrinkles and looks sloppy in wide shots.
12. Vintage Picture Frames as a Stage Backdrop Grid
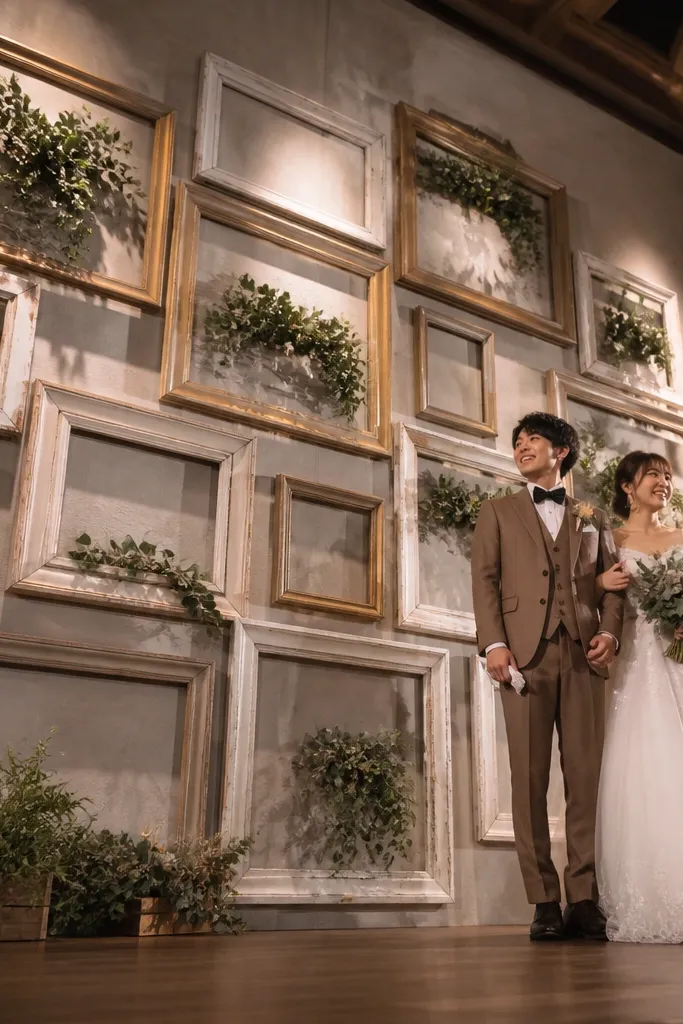
Picture frames create a built-in design without buying florals. Use empty frames or ones filled with simple greenery — either way, the frame edges give structure and make the stage look curated. This is a great option when your venue allows freestanding décor and you want a cozy, slightly nostalgic vibe. Paint frames in matte cream or leave them in warm wood tones. The grid shape photographs well because it creates strong lines behind the couple.
Start by collecting frames in two sizes and keeping the color consistent. Arrange them in a grid behind the couple, leaning against a lightweight backdrop board or using a freestanding frame rack. Keep gaps small enough that the wall looks covered, but not so tight that the couple’s head gets blocked. Then insert a few faux eucalyptus sprigs into select frames for depth and hide the stems with the back supports.
Use foam board behind the frames if the wall is patterned — it keeps photos clean.
Skip mismatched colors — mixed finishes look cluttered fast.
13. Dried Pampas Grass Bundles With Warm Candle Heights
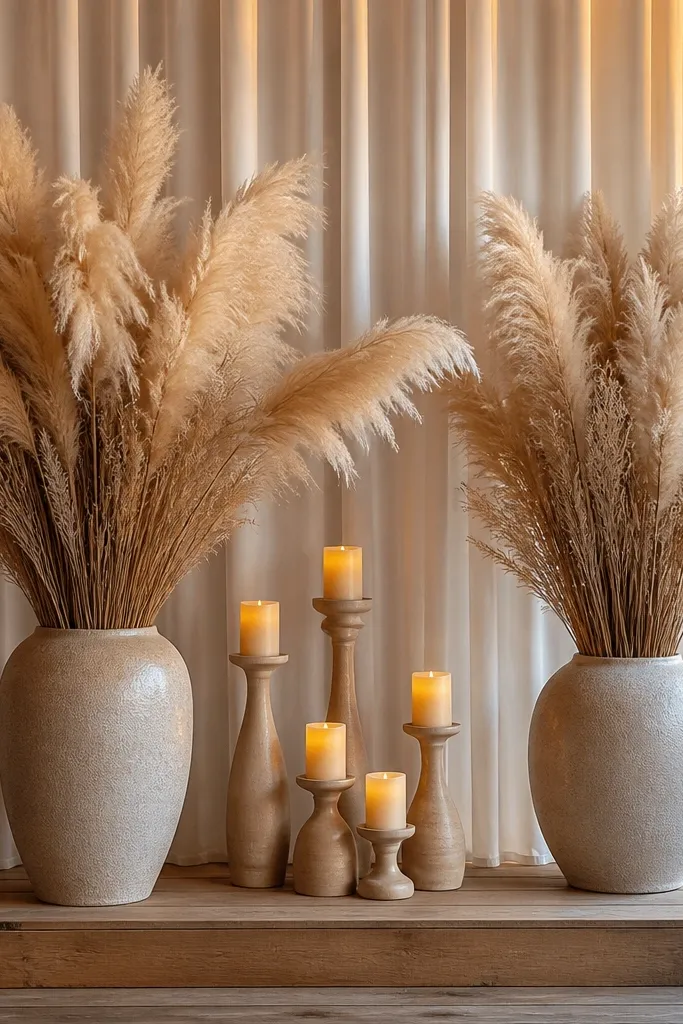
Dried pampas grass reads cozy because it adds feathery texture and height without the cost of full florals. Pair it with warm candle heights and you get a stage that looks styled even if the room is plain. Use tall vases or floor planters so the pampas rises above the couple’s shoulders in photos. Keep the colors neutral — natural beige and cream — then add a single warm accent like rust ribbon or a terracotta candle holder. This works for indoor fall and winter weddings and also for summer weddings that want a calmer, less colorful stage.
Start by buying 4-6 bundles of pampas and cutting them down if they’re too tall for your ceiling height. Place them in tall vases or buckets covered with fabric so the base doesn’t show. Position two larger vases behind and slightly outside the couple’s space, then add two smaller ones at the front corners. Finish by placing LED candles at different heights so the stage has levels.
Use a lint roller on pampas before set-up — fibers can cling to clothing and tablecloths.
Don’t overfill the stage with pampas — a few tall bundles look better than many short ones.
14. IKEA-Style White Panel Backdrop With Draped Fabric Strips
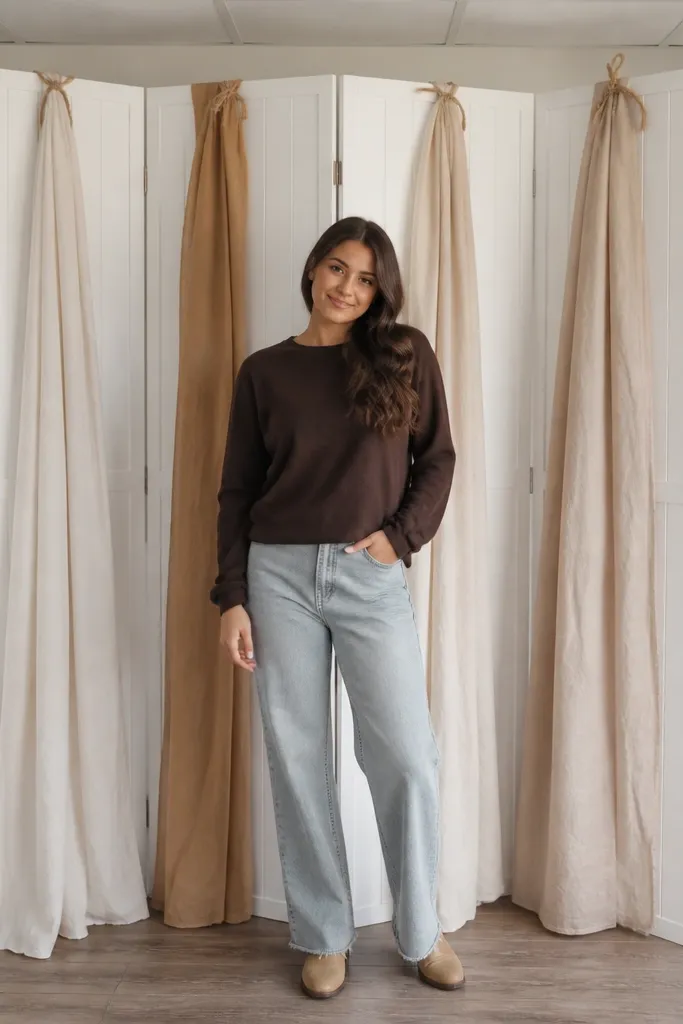
Start by choosing a panel width that covers the center area behind the couple, then place it centered on stage. Drape 3-5 fabric strips across the panel at different heights, securing the top edges with clips so the fabric falls naturally. Keep strip widths varied — one wide strip, then narrower ones — so the texture looks layered. Add one small greenery garland along the bottom edge of the panel to ground the look.
A simple white panel backdrop makes your wedding stage look clean and photo-ready, and fabric strips add cozy movement. It’s a budget method that works because panels create a consistent background, which makes everything else look intentional. Draped strips in cream, tan, or light beige soften the panel and prevent it from looking like a rental screen. This is ideal for indoor rooms where the wall behind the stage is ugly, busy, or too far from the couple. It also makes lighting look smoother in photos.
Skip thisDon’t crowd the panel with too many thin strips — it looks messy and reduces the cozy effect.
Quick tipPress fabric strips to remove wrinkles; the panel makes creases look sharper in photos.
15. Single-Line Greenery Garland on a Tension Rod
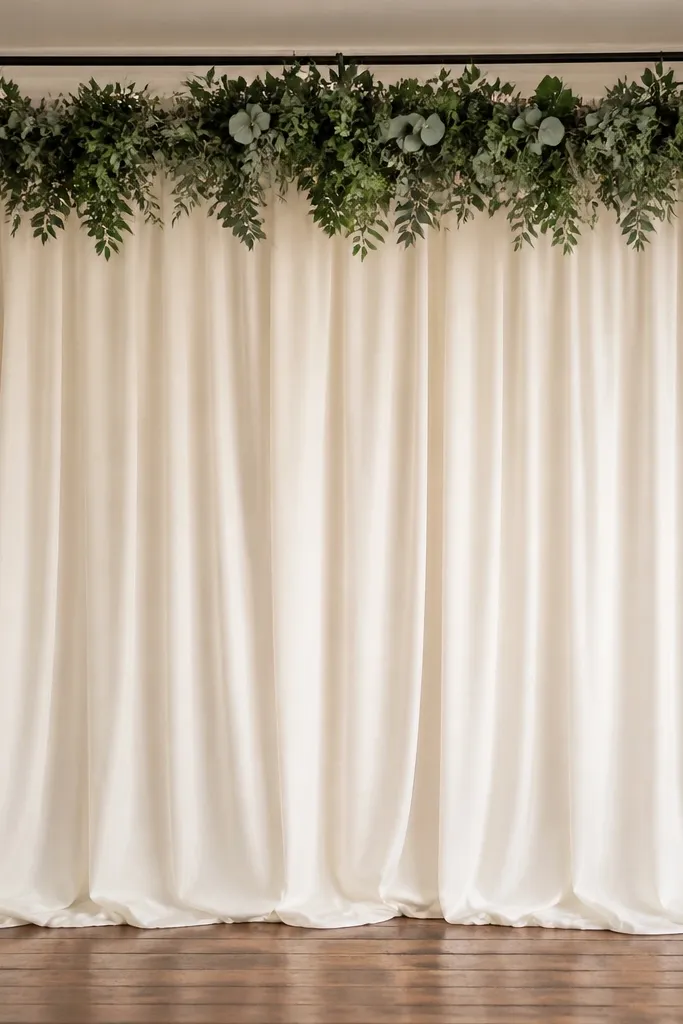
If you want cheap wedding stage decorations that look polished, a single-line greenery garland is the cleanest approach. It frames the couple without taking over the entire wall, and it looks great with a simple fabric backdrop. The garland creates a “ceiling line” effect that makes indoor stages feel taller. Choose a garland with matte leaves so it doesn’t shine under overhead lights. This setup works for venues that already have decent décor but need a focal point behind the couple.
Start by mounting a tension rod at the top of your stage area, wide enough to cover the couple’s space. Hang your greenery garland centered and let it drape slightly in the middle for a natural curve. Then add two small fabric panels or a gauze curtain behind the garland so the greenery has something soft to sit on. Finish with one grounded element — like a low basket of greenery or a cluster of LED candles — at the front corners.
Use zip ties to secure the garland to the rod so it doesn’t shift during the ceremony.
Skip glossy garlands — they reflect lights and look cheap in photos.
16. Sunburst Backdrop Using Cardboard Panels and Linen
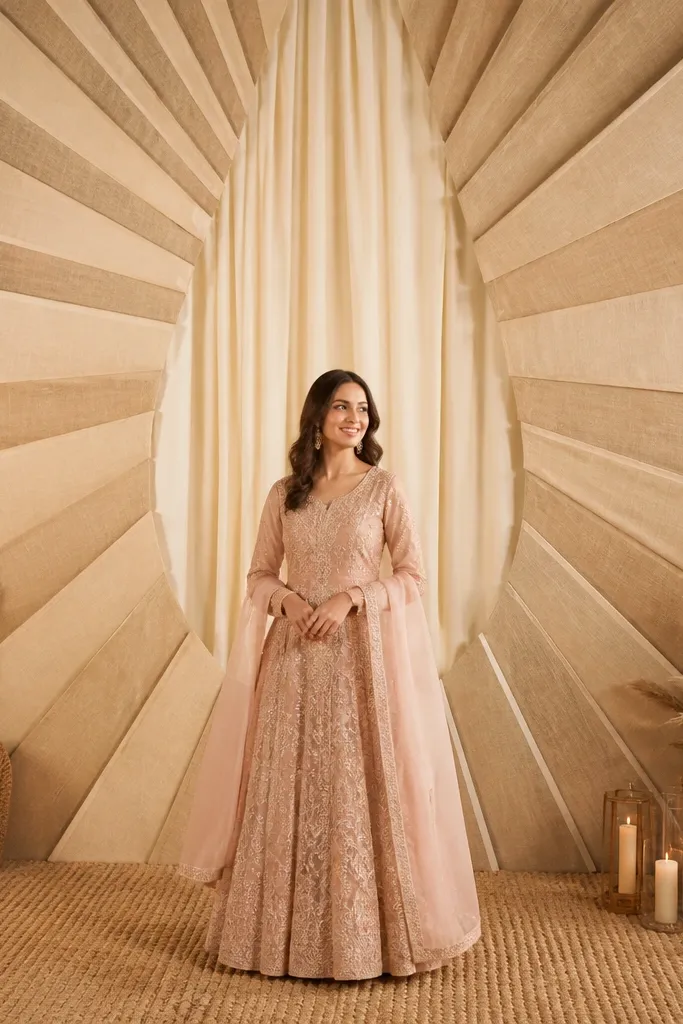
Start by building or buying sunburst cardboard panels in a size that fills the wall behind the couple. Cover the rays with linen or muslin using spray adhesive or staple edges on the back. Place the sunburst on a freestanding board or lean it against a backdrop stand, centered at head height. Then add two matching side candle clusters to frame the lower portion so photos look balanced.
A sunburst backdrop creates instant visual interest and makes a stage feel festive without heavy florals. Linen rays keep it cozy and warm, and the sunburst shape gives you depth even in a small indoor venue. Use a soft neutral palette so it doesn’t overpower the couple. This works best when you want a clear “wow” behind the ceremony spot but your budget won’t allow a full installation. The radiating pattern photographs cleanly and reads well from multiple angles.
Skip thisDon’t use bright white linen — it can look stark under warm bulbs.
Quick tipKeep the center opening clear so faces don’t blend into the backdrop pattern.
17. Cream Table Runner Backdrop With Layered Fabric Ruffles
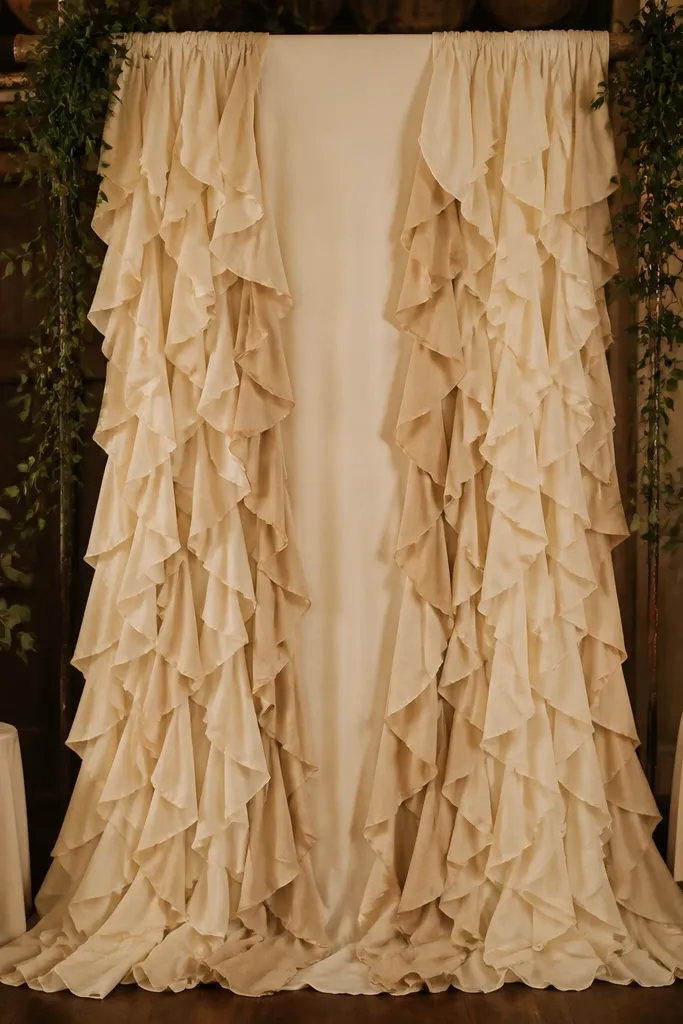
Start by hanging a long cream fabric panel behind the stage with clips at the top. Then sew or pin fabric ruffles along the panel in two or three horizontal bands, spacing them so each band shows a distinct layer. Add one vertical accent strip at center to guide the eye. Finally, place a simple low candle arrangement at the bottom so the ruffles don’t float without grounding.
Layered ruffles on a cream base look cozy because they add soft volume and a gentle “wedding dress” feel. Instead of covering a whole wall, you can hang a runner or long fabric panel and attach ruffles in bands. This creates a backdrop that feels romantic and photogenic without needing floral arrangements. It’s great for intimate ceremonies where you want a close-up-friendly look. Keep the ruffles in one or two tones so the texture reads intentional.
Skip thisAvoid ruffles that are too thin — they collapse and look flat in photos.
Quick tipUse fabric glue dots instead of lots of pins if the venue has limited prep time.
18. Framed Fabric Circle Backdrop With LED Candle Shelf
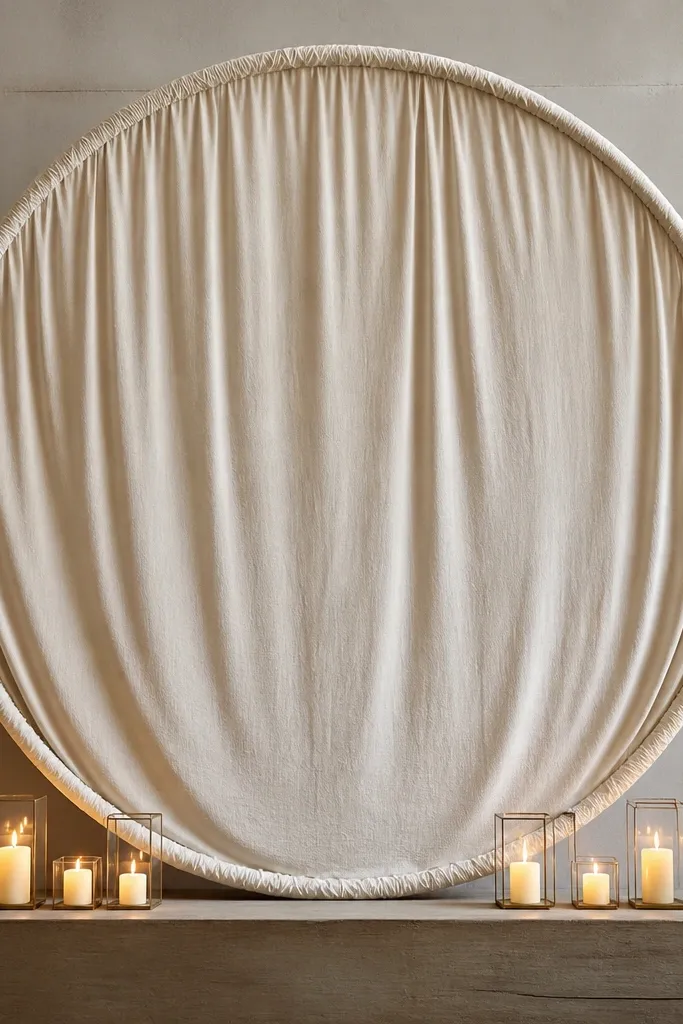
A fabric circle backdrop gives you a defined focal shape that looks intentional even with simple styling. It also helps when you want to keep the stage minimal but still make the couple stand out. Use a large circle frame covered in cream or oat fabric, then add a small shelf or tray below with LED candles for warmth. The circle shape is flattering in photos because it frames faces and reduces visual clutter around the edges. This works well for indoor ceremonies with limited wall space.
Start by creating a lightweight circle frame using foam board or a hula hoop and covering it with muslin or thick fabric. Hang the circle centered behind where the couple stands, with the bottom edge around chest height for seated photos. Then build a small candle shelf using a simple stand or tray placed at the front edge of the stage. Add LED candles in staggered heights so the glow looks layered, not uniform.
Choose fabric with a matte finish so the circle doesn’t glare under spotlights.
Skip shiny satin fabric on the circle — it reflects and flattens the look.
19. Woven Wall Baskets as a Cozy Gallery Backdrop
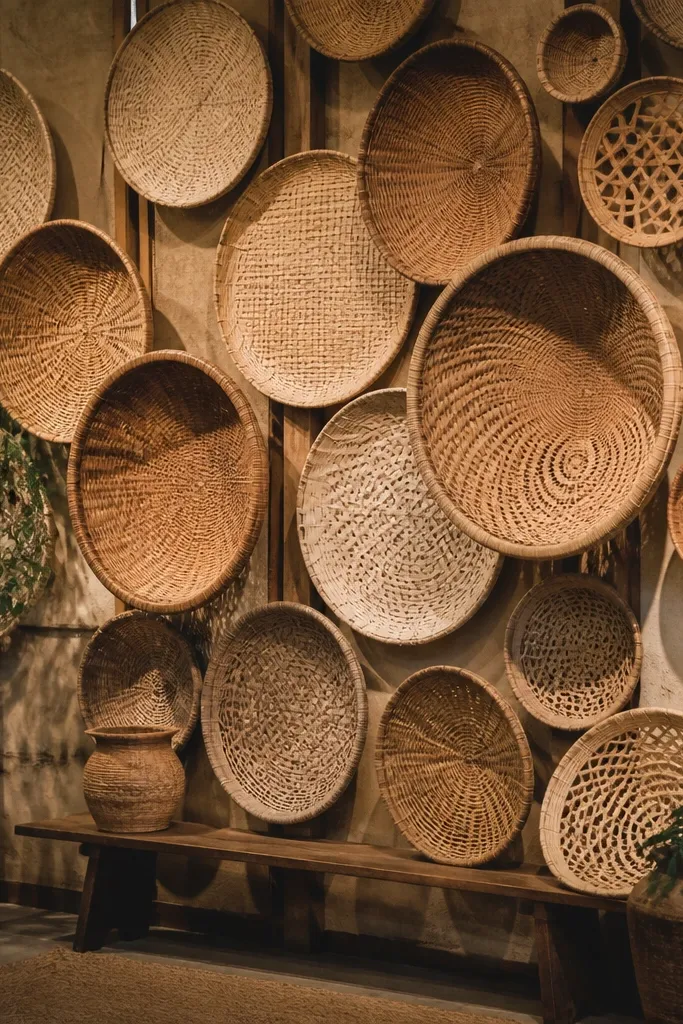
Start by choosing baskets that are similar in color, then plan a staggered layout with 6-10 baskets behind the stage area. Mount them on a lightweight grid board or use a freestanding backing board so the baskets sit at different heights. Add one small greenery garland tucked between baskets if you want a little green. Place LED candles or a small vase cluster at the bottom so the lower part of the photos looks finished.
Woven baskets add warmth and texture that feels homey, which is exactly what you want for cozy wedding stage photos. They also let you skip florals if your venue is already decorated. Arrange baskets in a staggered pattern so the wall looks layered. Use mostly natural tones — tan, cream, light brown — and keep the basket sizes varied but not chaotic. This works great for indoor venues with plain walls or for couples who want a rustic-cozy vibe without the mess of live plants.
Skip thisDon’t leave large empty gaps — it looks like a storage wall, not a designed backdrop.
Quick tipUse picture-hanging hooks with strong anchors if you’re mounting baskets — don’t rely on thin adhesive strips.
20. Fabric Pom Garland in One Warm Color Story
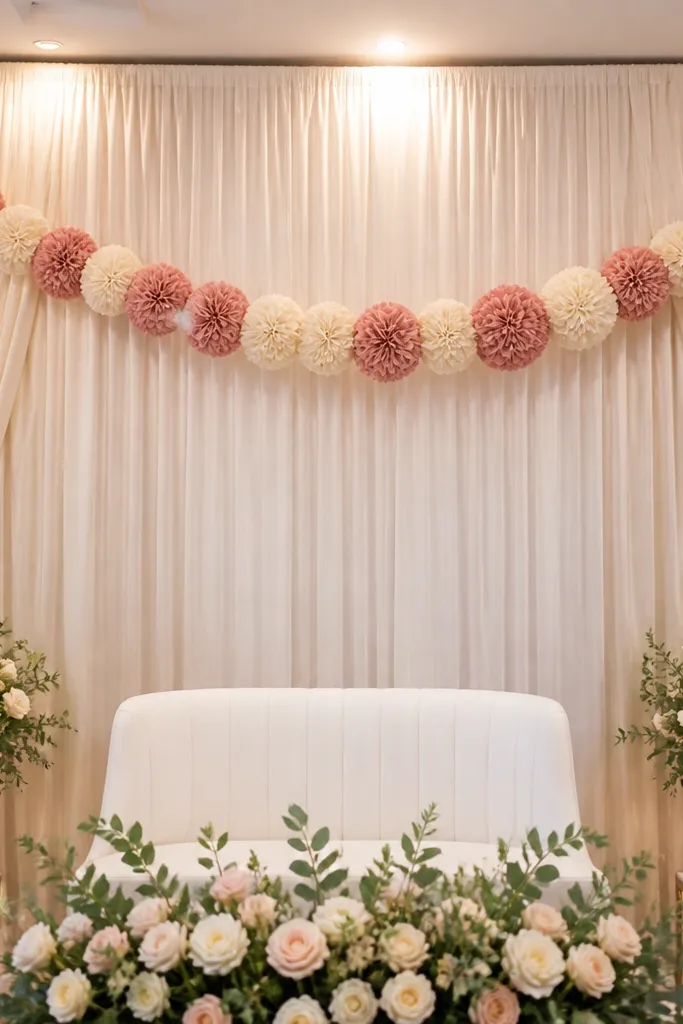
Start by choosing a garland length that spans the width behind the couple, then plan a center-high arc so the poms don’t sag. Hang it from a tension rod or ceiling hooks, using clips so the shape stays consistent. Then add two matching fabric bundles at the base corners using the same warm color. Finish by placing one small sign or floral substitute in the center so the garland doesn’t feel like the only element.
Fabric pom garlands add a cozy, playful texture that still looks classy when you keep the color story tight. Choose one warm color (like dusty rose, terracotta, or sage) and mix it with cream so the garland looks soft instead of childish. Hang it in an arc above the couple or across the top third of the stage so it frames the ceremony spot. This idea is good for indoor venues where you can’t install heavy structures. It’s also easy to transport and set up quickly.
Skip thisSkip multi-color garlands — they read festive but not cozy in formal stage shots.
Quick tipKeep poms away from the couple’s direct line of sight so faces stay unobstructed in photos.



