
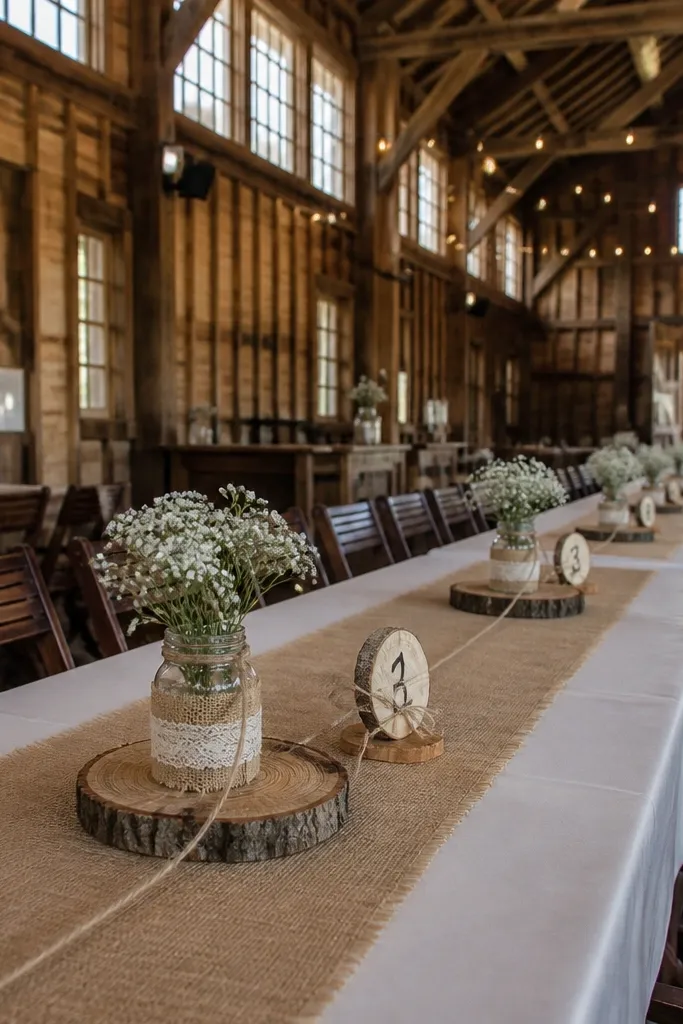
1. Rustic Wooden Round Aisle Markers With Numbered Ties
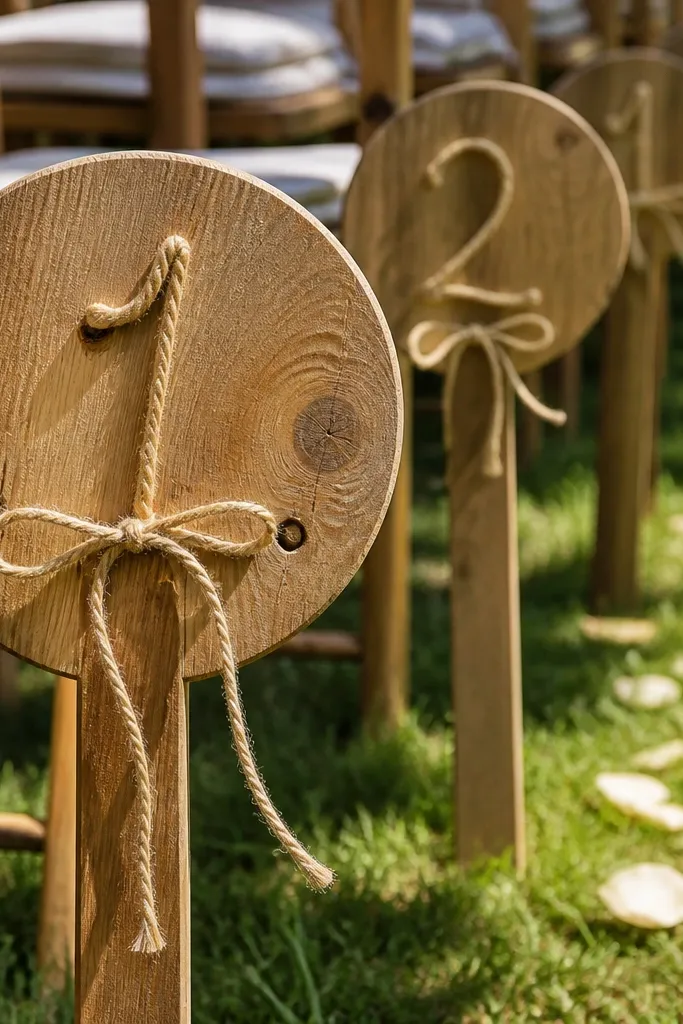
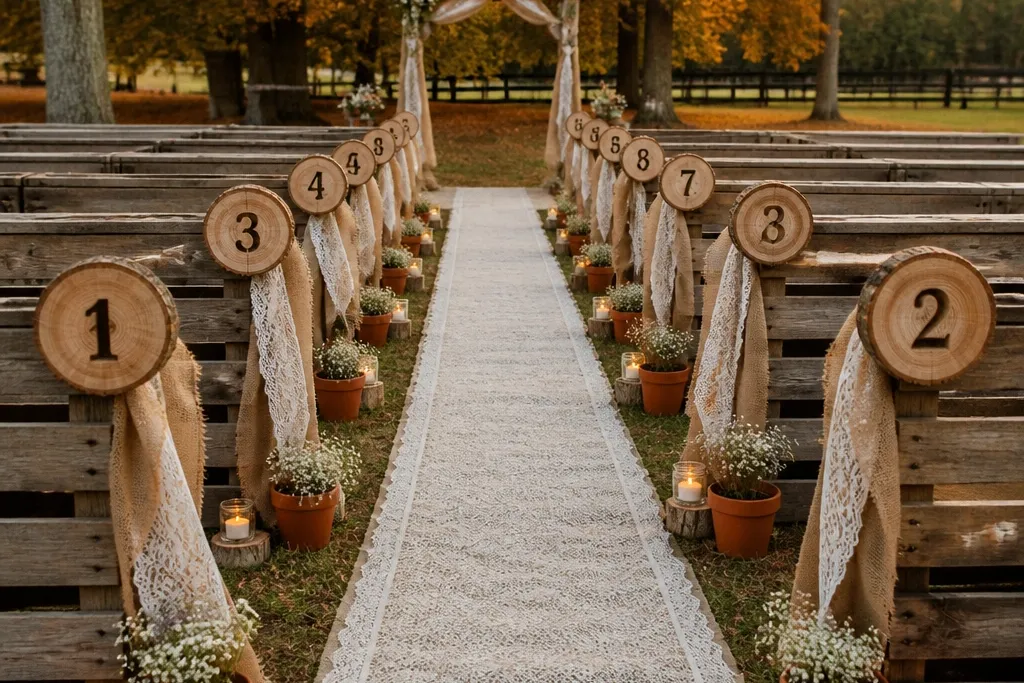
Wood rounds look “real rustic” because they have texture and natural variation, not printed patterns. For aisle photos, they also create a clean rhythm along the edges, especially if you place them at consistent intervals. Add a simple numbered tie (table numbers or row numbers) so guests feel guided and the aisle looks intentional. This setup suits outdoor ceremonies on grass and indoor venues with a runner, because the rounds sit stable and don’t require tall structures.
Start by cutting or buying 2-3 inch wooden rounds (or purchasing pre-cut ones) and drilling two small holes on each side. Tie them to lightweight stakes or ribbon loops so they sit at about knee height and line up with the aisle edge. Then space them every 3-4 feet and keep the numbers in one font style using printed kraft tags. For a budget, use thrifted frames or small craft wood scraps as backup pieces so you can cover gaps without buying more.
If your aisle is on a slope, keep the marker height consistent by using different stake lengths instead of forcing the placement.
Skip glossy “wood” plaques with fake grain — they read plastic in bright sunlight.
2. Burlap Ribbon + Twine Aisle Runner Line
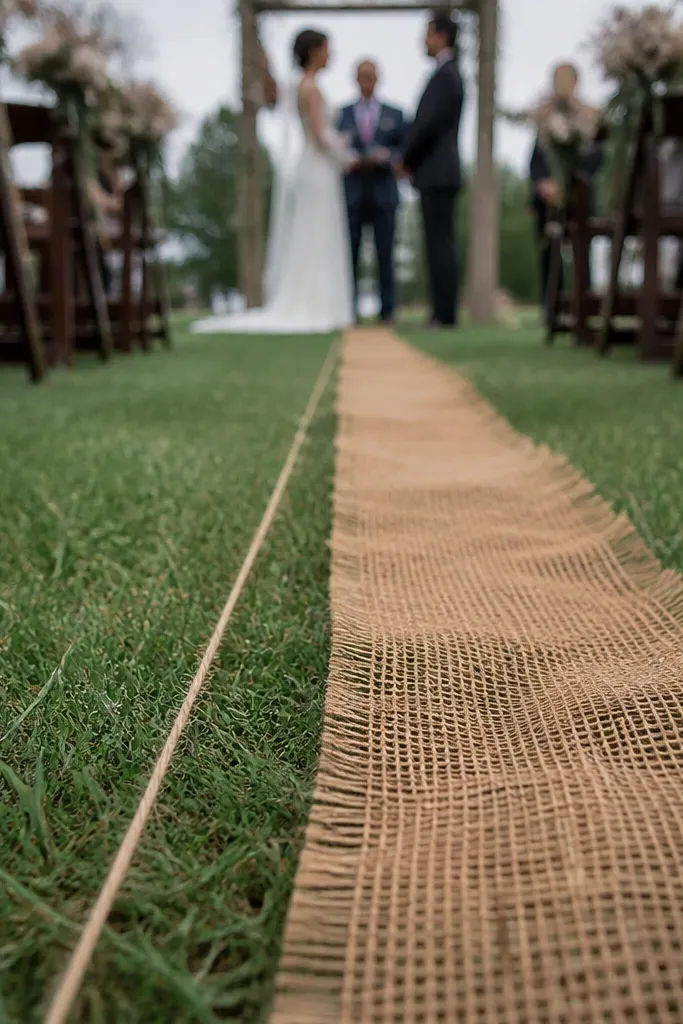
A single straight line of burlap ribbon and twine gives you that rustic aisle structure without building anything tall. It photographs clean because the eye follows a continuous edge, and the texture shows up even when bouquets are in the frame. You can keep it subtle for a church or make it dramatic outdoors by adding small knots at intervals. This is a great option for rustic wedding decor on a budget cheap because fabric is inexpensive and the effect is high.
Start by measuring the aisle length and buying enough burlap ribbon to run both sides or one center line. Lay out the ribbon on the ground and mark knot points every 4 feet with chalk or painter’s tape. Then secure the ends using tent stakes and tie the middle points with twine so it stays taut. Finally, add 1-2 small fabric bows at the entrance and near the ceremony arch area to create a focal point.
Quick tipUse a hot glue tack inside each bow tail to stop fraying from loosening during setup.
Skip thisDon’t stretch burlap too tight — it puckers and looks messy in photos.
3. Thrifted Crate Planters With Faux Moss and Mini Candles
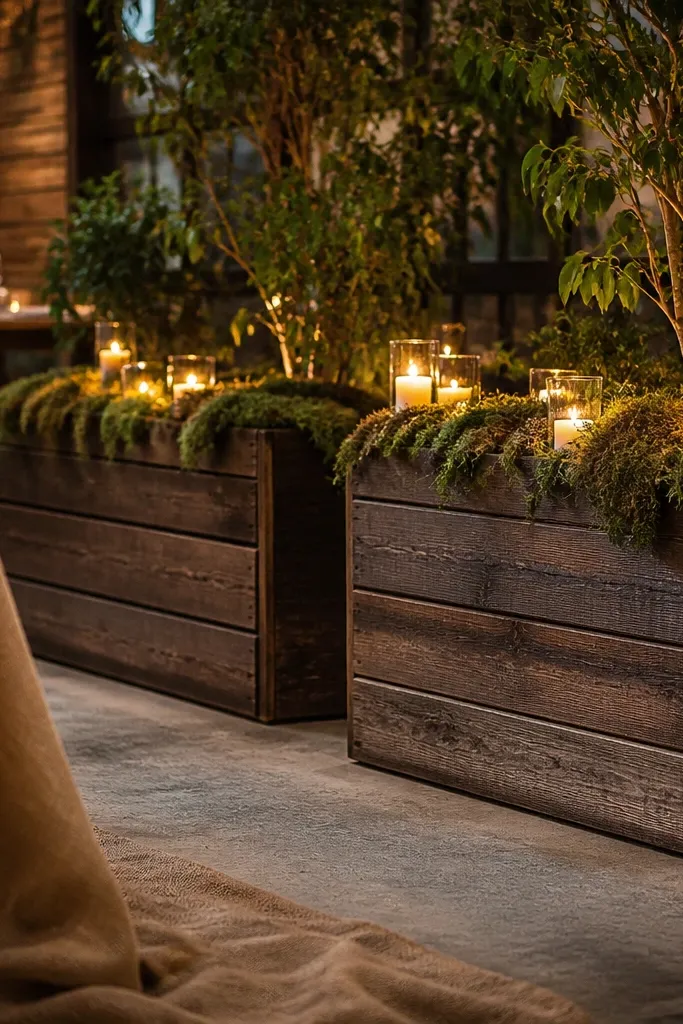
Crates make aisle decor feel grounded because they’re boxy and sturdy, and they create instant rustic height at both sides. Fill them with faux moss to cover gaps and add mini candles for warm light in evening photos. The photo advantage is contrast: dark green moss against wood and burlap looks rich without spending on big florals. This works especially well when you have a runner or you’re able to place planters near the aisle edges.
Start by buying wooden crates from thrift stores or discount home stores, then check that each crate can sit flat without wobble. Line the inside with plastic or a thin liner, then pack faux moss and greenery in a way that hides the liner edges. Place 3-4 mini candles per side in a repeating pattern, leaving space for guests to pass. Then set crate spacing at 6-8 feet so the aisle looks continuous without overcrowding.
Quick tipUse flameless LED candles if your venue has any open-flame restrictions to avoid last-minute changes.
Skip thisSkip real soil in crates unless you’re sure about watering and cleanup — it can turn into a mess fast.
4. Lantern Clusters With Brown Paper Liner Glow
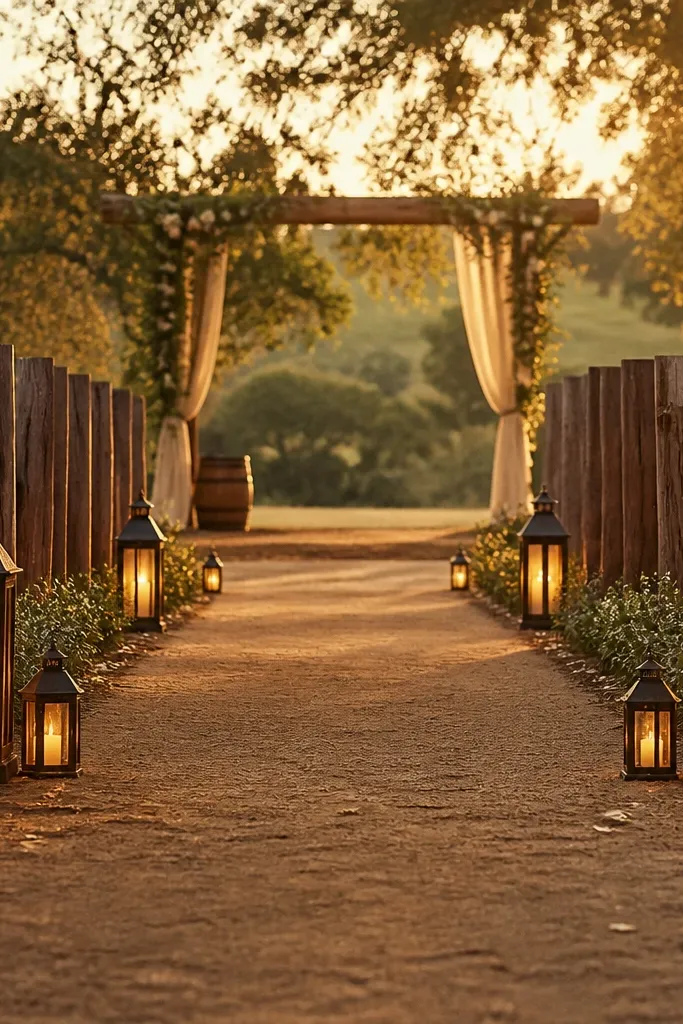
Lantern clusters are one of the best rustic wedding decor on a budget cheap because they look styled even with minimal flowers. The trick is adding a brown paper liner inside the lantern to make the light look warmer and more “cabin” than plain white. Cluster three lanterns per side — one tall, two smaller — so you get height variation that reads in photos. This works year-round and shines in fall or winter when you have natural low light.
Start by choosing lanterns in two sizes, ideally metal in black or dark bronze. Place them on weighted bases or on stepping stones so they don’t tip on grass. Add brown kraft paper or parchment inside the lantern to tint the glow, then insert flameless candles. Finally, cluster at the aisle entrance and repeat every 10-12 feet so the aisle has rhythm instead of random points.
Quick tipIf you’re using LED candles, test the brightness in the venue at dusk so the glow looks soft, not harsh.
Skip thisDon’t use identical lanterns in a straight line — it looks like a store display, not a designed aisle.
5. Muslin Chair-Back Aisle Swags Repeated Every Row
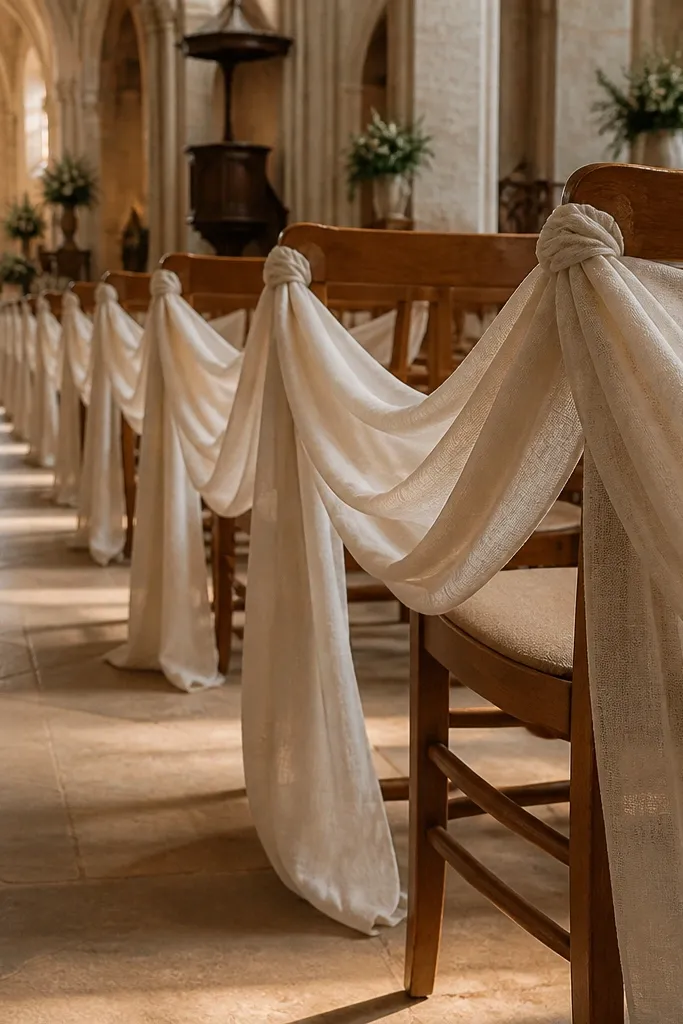
Muslin swags tied to chair backs give you that rustic fabric movement without buying a big arch or expensive garlands. The fabric drapes lightly and catches light in a way that looks romantic in aisle photos. Repeating the swags every row creates a steady pattern, so even a cheap fabric aisle upgrade looks planned. This is best for indoor venues with chairs where you can tie without damaging surfaces.
Start by buying muslin yardage in a natural cream or warm white and cutting strips about 12-18 inches wide. Tie one swag per chair using twine or satin ribbon, keeping the knot consistent so the drape looks uniform. Repeat every row for the first 10-12 rows, then stop so the aisle doesn’t get cluttered. Finally, tuck a small sprig of greenery (real or faux) into each knot to unify the texture.
Quick tipUse the same knot style on every chair — it’s the detail that stops the look from feeling random.
Skip thisSkip thick burlap swags here — they weigh down chairs and look bulky in photos.
6. Cotton Lace Table Runners Hung as Aisle Side Banners
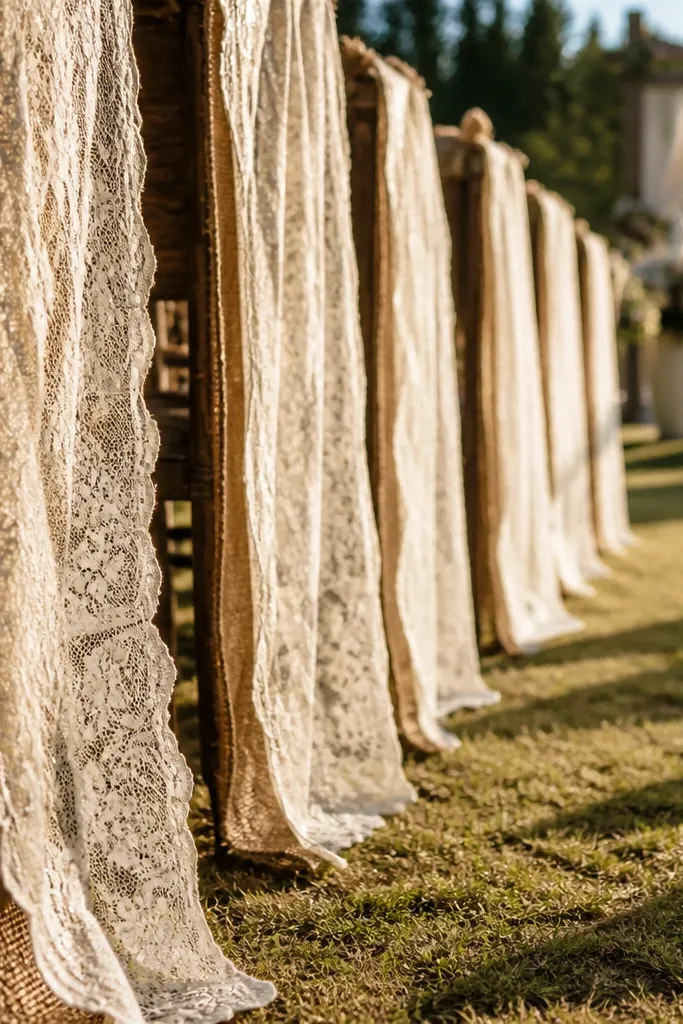
Lace runners hung like side banners add a soft rustic-meets-romantic look without full-on floral spending. The lace gives visual texture when guests walk down the aisle, and it photographs better than flat fabric strips because it creates vertical lines. Keep the lace natural and slightly imperfect — it should look handmade, not crisp and stiff. This works well for rustic wedding decor on a budget cheap when you’re pairing lace with wood accents like lanterns or barrels.
Start by finding cotton lace runners at thrift stores or discount tableware sections and selecting ones with similar width. Build two simple freestanding stands using wood stakes or weighted stands, then hang runners from the top using twine loops. Space the side banners every 6 feet and keep the bottom edge about 3-4 inches above the floor or runner. Then add one small wooden element per section, like a mini clothespin frame or a wood slice tag.
Iron the lace lightly with steam and keep it slightly wrinkled — too-straight lace looks costume-like.
Don’t mix lace widths wildly — the photos will show a patchwork look.
7. Pinecone + Burlap Bow Aisle Edge Bundles
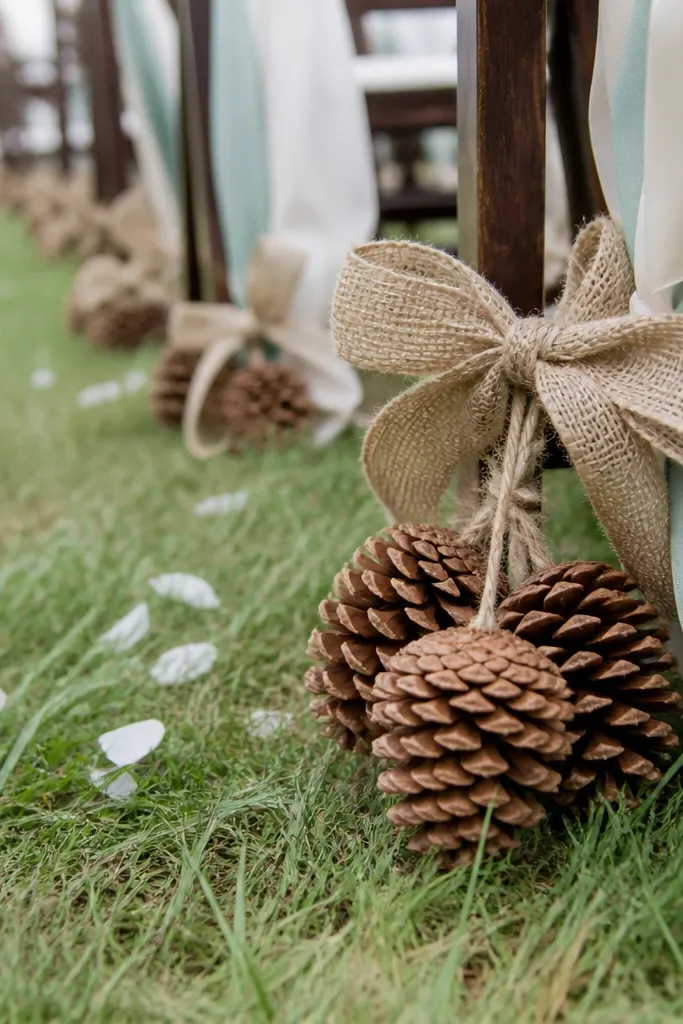
Pinecones are the fastest way to make rustic decor look seasonal and intentional. Bundle them with burlap bows and a short length of twine so each cluster looks “finished,” not tossed on. Place bundles at the aisle edges and keep them small enough that guests can pass easily. This idea is budget friendly because pinecones are cheap or free and burlap bows are quick to make, but the overall look still reads premium in fall and winter.
Start by collecting pinecones (or buying a bag) and tying 2-3 pinecones together with twine around a tight burlap bow. Use a hot glue dot to secure bow tails so they don’t flop. Then attach bundles to stakes or place them on weighted small buckets at consistent intervals every 5-6 feet. Finally, repeat the same bow color and twine thickness so the aisle looks uniform.
Seal pinecones with a light spray of clear matte if they shed dust on your floor runner.
Skip glitter pinecones — they look cheap in photos and can shed.
8. Wood Slice Candle Votive Line on a Runner
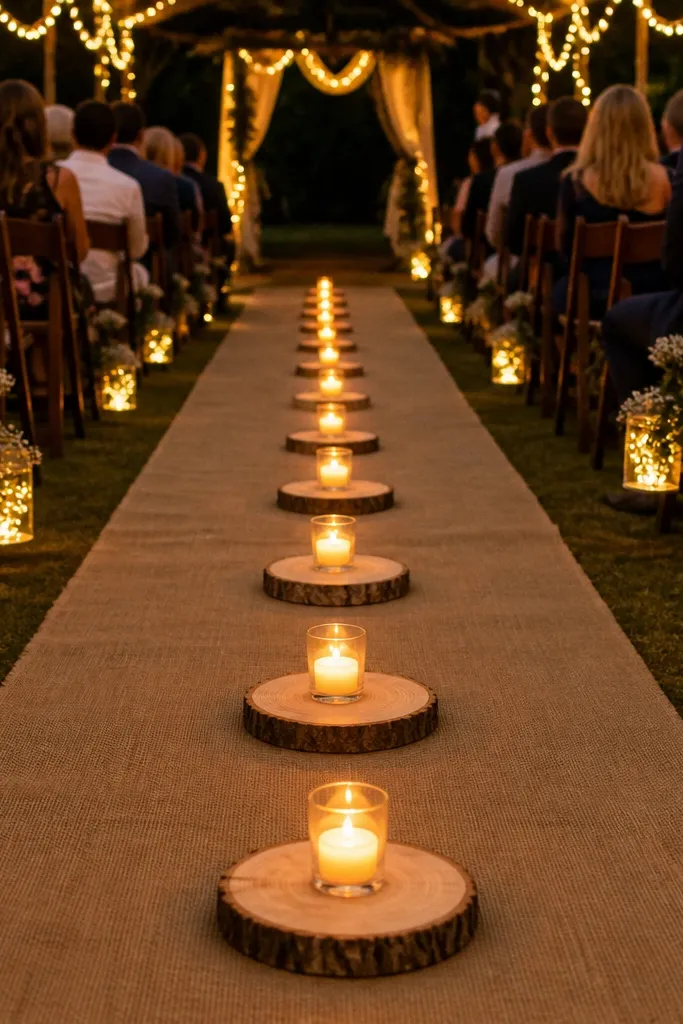
Wood slices under votives create a clean, rustic aisle “trail” that looks great from the front and in guest photos. It’s a smart cheap move because you’re using one base material (wood) and repeating it, which reads designed. Candles add warmth without needing big floral arrangements. This works best when you have a runner or a smooth surface, because wood slices need flat placement to look neat.
Start by buying 2-3 inch wood slices (or cutting from logs if you have the tools) and choosing flameless LED votives if the venue is strict. Lay a runner or protective mat in the aisle center and place wood slices evenly along the length. Use a spacing of 18-24 inches between slices so the line looks like a continuous path. Then add one larger wood slice at the aisle entrance with a burlap wrap around it for a focal point.
Quick tipUse a painter’s tape grid on the floor so spacing stays straight while you set each votive.
Skip thisDon’t crowd the line — dense candles make the aisle look messy instead of elegant.
9. Rustic Fabric Garland Made From Cut Muslin Strips
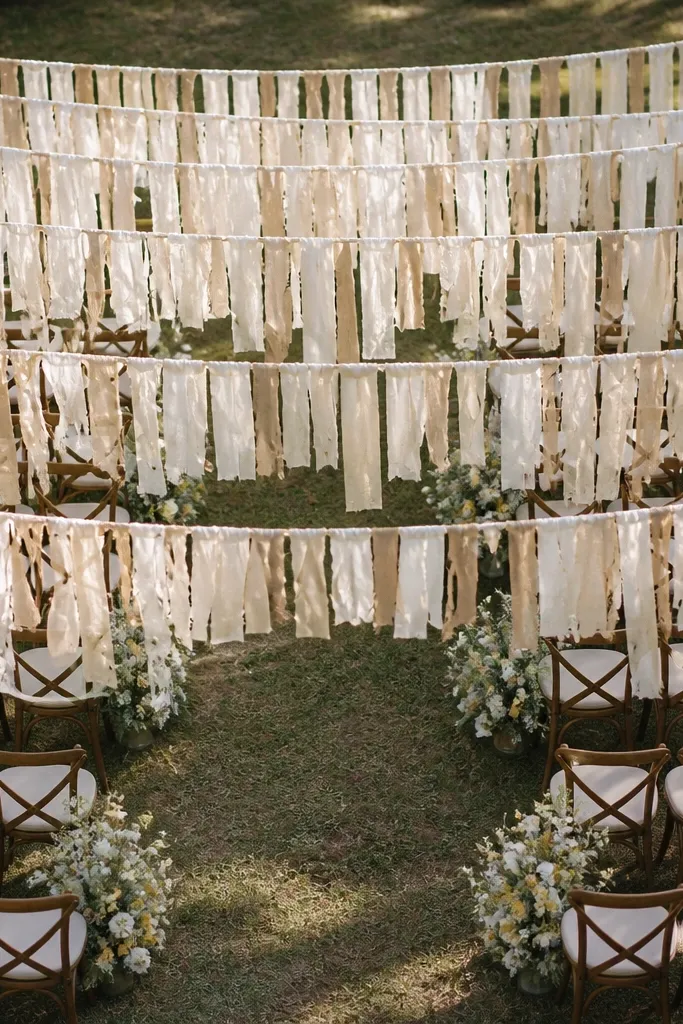
A fabric garland is where rustic decor on a budget cheap can look genuinely styled, because movement and texture beat expensive flowers. Cut muslin strips into uneven lengths so the garland looks hand-tied, not factory-made. Hang it at two side stands or from a simple archless frame so it creates a clear aisle “ceiling” line. In photos, the garland frames the couple’s path and makes the aisle look finished even with minimal florals.
Start by cutting muslin into strips about 2-3 inches wide, in 10-12 different lengths for natural variation. Tie strips onto jute twine using double knots, leaving one knot every 4-5 inches. Hang the garland along both sides of the aisle or just the center line at about chest height for guests. Then add one accent every 6-8 feet using a small burlap bow or a tiny pinecone cluster on the twine.
Quick tipUse clear fishing line to attach to stands so the garland stays visually clean from the audience angle.
Skip thisSkip stiff fabric — it doesn’t drape and looks flat in photos.
10. Thick Twine + Dried Flower Buds on Aisle Posts
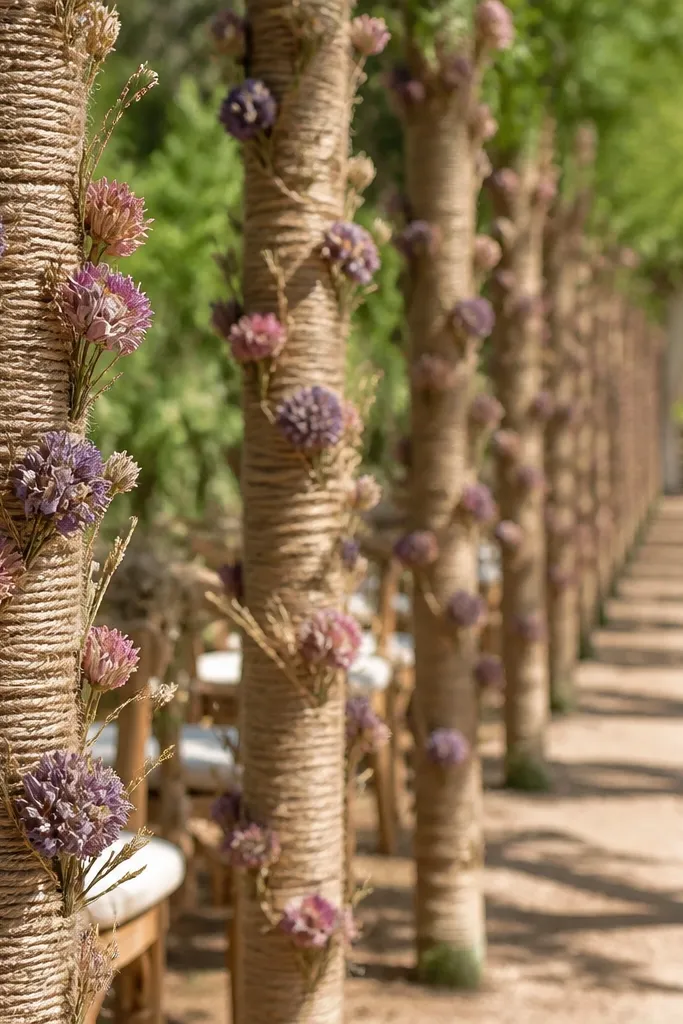
Twine-wrapped posts look rustic in a way that fake “farmhouse” signs can’t. Dried flower buds add color that doesn’t require fresh floral budgets, and they keep their shape for photos. This setup works especially well when you have a long aisle, because the posts create a consistent vertical rhythm that guides the eye. Choose dried stems in one palette — like wheat, tan, and rust — so the aisle looks cohesive instead of mixed.
Start by wrapping posts or tall stakes with thick twine in overlapping lines, securing every 6-8 inches with a small hot glue dot. Attach small dried bud clusters with twine or zip ties so they face the aisle. Place posts every 8-10 feet along both sides, or only one side if you want a more minimal look. Finally, tie one larger dried cluster near the aisle entrance for a strong first impression.
Quick tipWear gloves when handling dried stems — they snap and leave dust on fabric if you don’t.
Skip thisDon’t use bright dyed dried flowers — they look plastic and ruin the rustic tone.
11. Secondhand Frame Rows With Burlap Backing
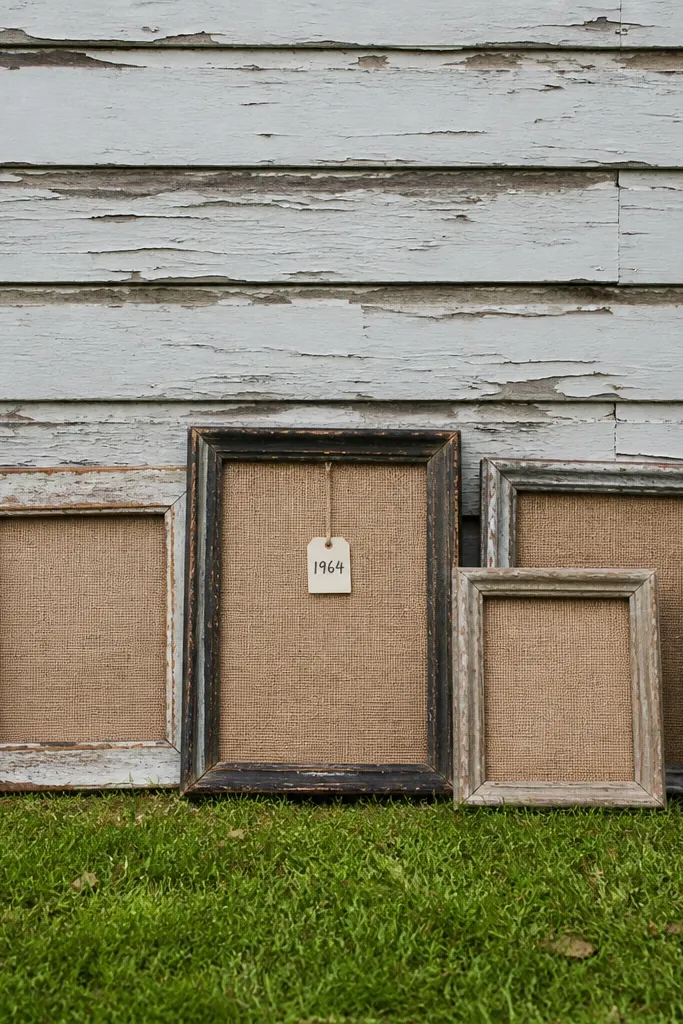
Old frames bring instant “story” to rustic decor without spending on new signage. Back them with burlap and leave the center blank or add a simple date tag so the aisle looks styled, not cluttered. Frames also create a strong visual grid in photos, which makes cheap decor look intentional. This works best on a lawn aisle or a venue with a runner where you can place freestanding stands safely.
Start by sourcing 8-12 matching-or-compatible frames from thrift stores, aiming for similar wood tones. Add burlap backing inside each frame using a staple gun or glue, then attach a small kraft tag with a date or word like “Love” in consistent font. Place frames on weighted stands or crates every 6 feet along the aisle edges. Keep them at about 3-4 feet tall so they show up in aisle photos without blocking guests.
Use the same burlap width and burlap weave across all frames; mismatched burlap reads sloppy.
Skip frames with glass reflections unless you can position them to avoid direct sun glare.
12. Rustic Hay Bale Side Tables With Lanterns
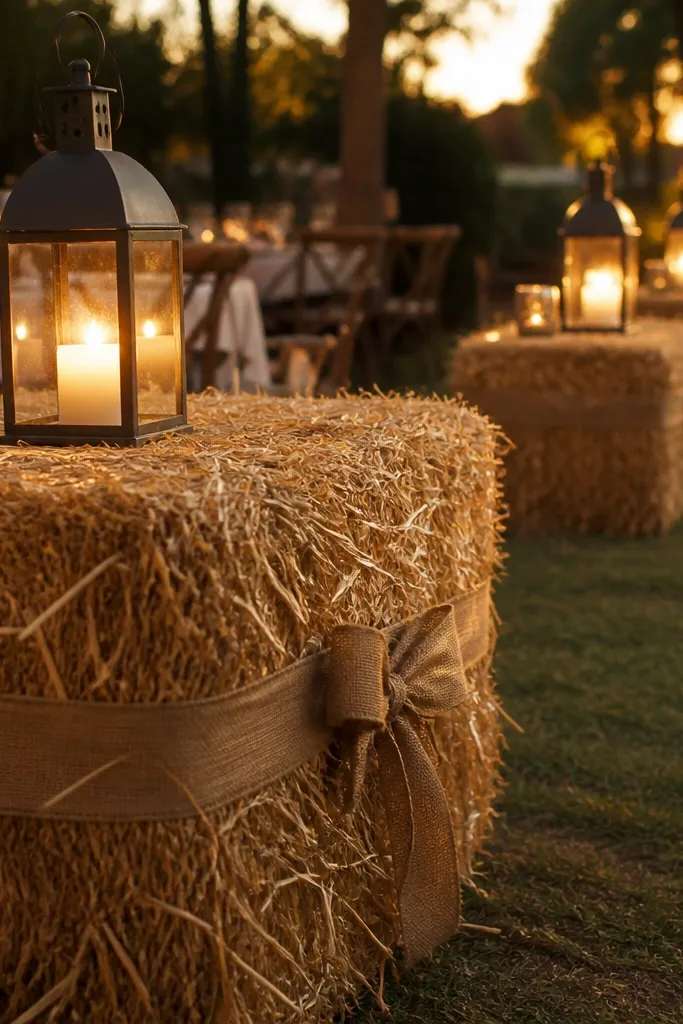
Hay bales are the fastest way to make an aisle feel like a rustic farm moment without buying a full set of big decor. Top them with lanterns or small candle holders, and you get height plus texture that shows up in every photo. This is especially good for rustic wedding decor on a budget cheap when you’re outdoors and the venue already has a farm vibe. Use them on the aisle edges only — one row — so the center stays clear for walking.
Start by checking with the venue about hay bale rules and cleanup, then source bales in a consistent color (golden, not green). Place them at the aisle edges and cover any dusty tops with a thin fabric sheet so they don’t shed. Set lanterns or votives centered on each bale and keep the flame-free option if needed. Space bales every 8-10 feet so the aisle looks structured, not random.
Cover hay with a cheap drop cloth under lantern bases to protect the bale surface.
Don’t use hay bales as the only decor — lanterns or candles are what makes them photogenic.
13. Barrel Planter With Burlap Wrap and Greenery Tips
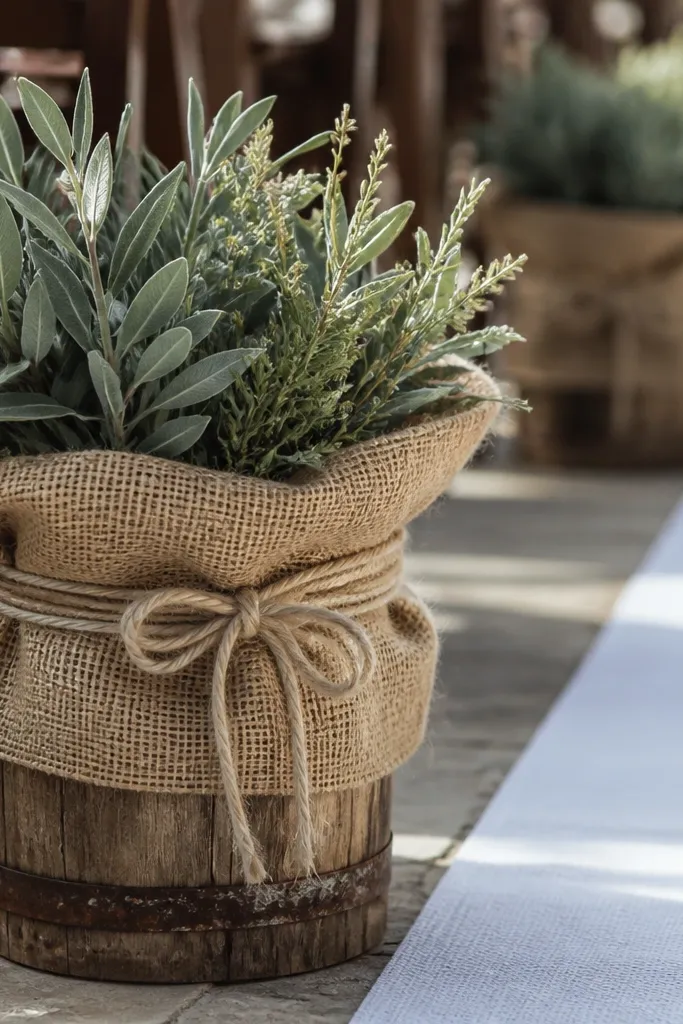
Small barrels read rustic instantly, and burlap wrap makes them look styled instead of utilitarian. Add greenery tips or faux stems sticking out so the barrel looks alive in photos. This idea works for aisle corners, near the ceremony entrance, and as side anchors along the first stretch of the aisle. It’s a strong budget move because you can use inexpensive faux greenery and still get a high-end look.
Start by buying small barrels or barrel planters, then wrap them in burlap strips overlapping slightly. Secure the wrap with twine or a staple at the back so it stays tight. Add faux greenery by inserting stems into foam or a liner so the “tips” face outward toward the aisle. Then place barrels at the aisle entrance and add 2-3 more along the sides spaced about 12-15 feet apart.
Quick tipChoose greenery in two shades only — olive and deep green — so it looks purposeful in photos.
Skip thisSkip bare barrels with no greenery — they look like storage items in pictures.
14. Terracotta Clay Pot Pairs With Candles
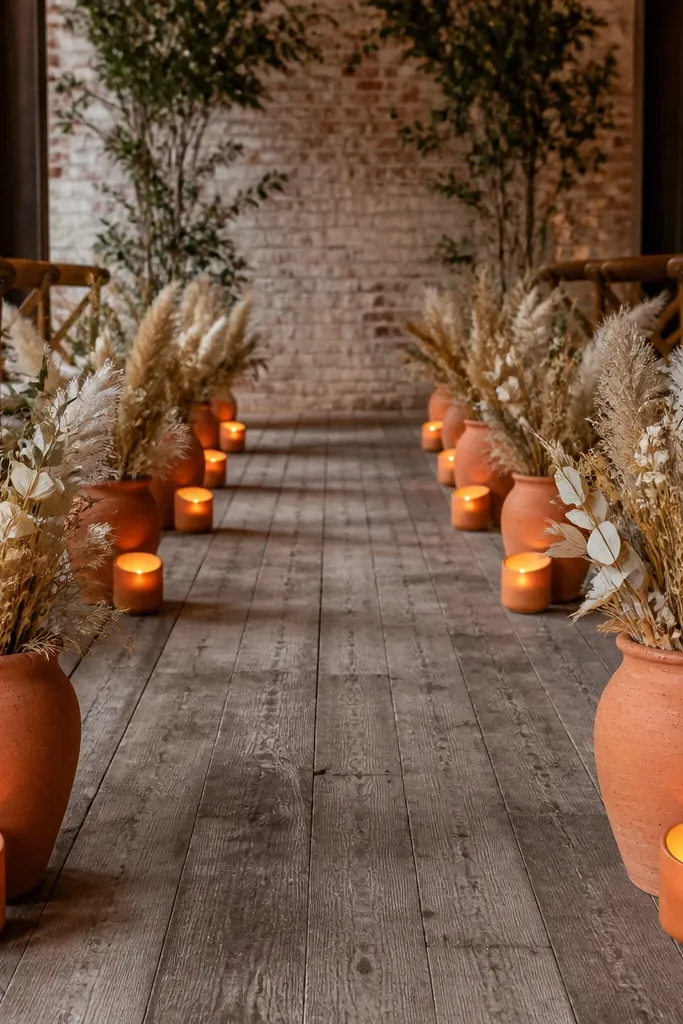
Terracotta clay pots bring rustic color that reads warm on camera, even with minimal flowers. Pair pots in twos so the aisle side looks balanced and intentional. Add either flameless candles or a single dried bouquet in each pot to keep the look cohesive. This works incredibly well for rustic wedding decor on a budget cheap because pots can be found cheaply and they don’t require expensive installs.
Start by buying small terracotta pots in one or two sizes, then check they have drainage holes that you can cover with a saucer or liner. Add a liner and place either LED candles or a small foam block for dried greenery. Set the pot pairs at the aisle edges every 6-8 feet, keeping the height consistent. Finally, tie a burlap ribbon around each pot for a unified look across the aisle.
Use a thin layer of sand or stones in the pot base to keep it stable and prevent tipping.
Skip random candle colors — stick to one warm tone so the aisle doesn’t look mismatched.
15. Bamboo Poles With Fabric Rosettes at Intervals
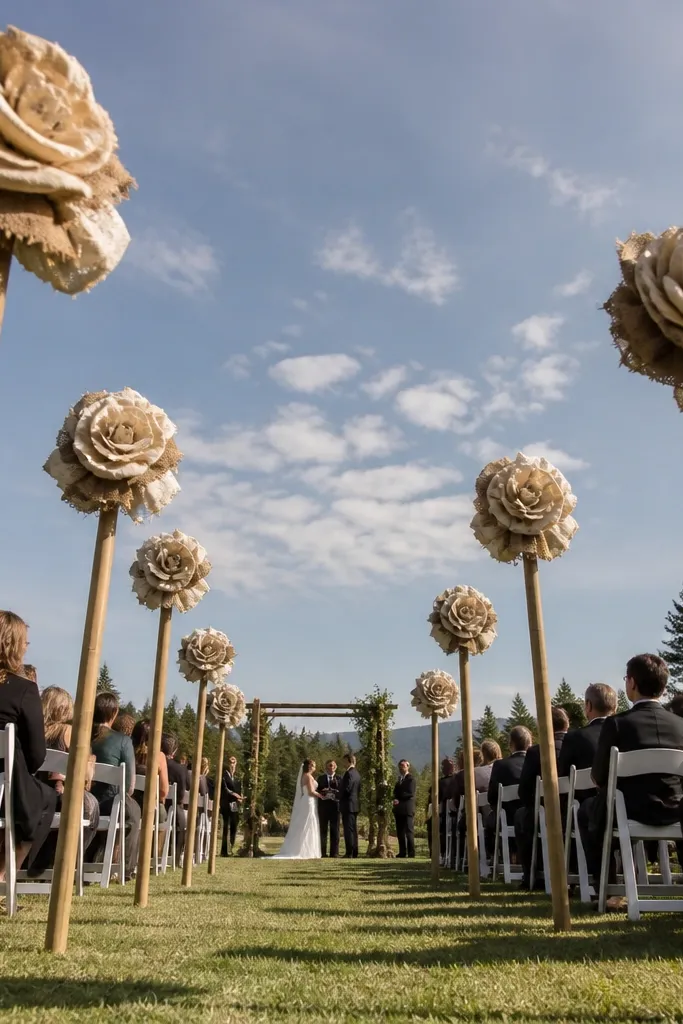
Bamboo poles give you straight, tall structure without the cost of formal arches. Add fabric rosettes made from burlap or muslin scraps to keep it rustic and photogenic. The rosettes catch light and add a soft focal point at guest eye level. This approach is great when you want rustic wedding decor on a budget cheap but still need visible “wow” from the back of the aisle.
Start by buying bamboo poles or renting them from party supply stores, then cut to a consistent height about 6-7 feet. Secure poles using weighted bases or stakes depending on the venue surface. Tie small fabric rosettes around the poles at eye level, then repeat every 10-12 feet so spacing stays consistent. Use the same fabric color for all rosettes and one accent ribbon color for a clean look.
Pre-make rosettes the night before and store them in tissue paper so they don’t crush.
Don’t make rosettes too large — big rosettes block faces and look cluttered in photos.
16. Rustic Folding Screen Aisle Entrance With Burlap Panels
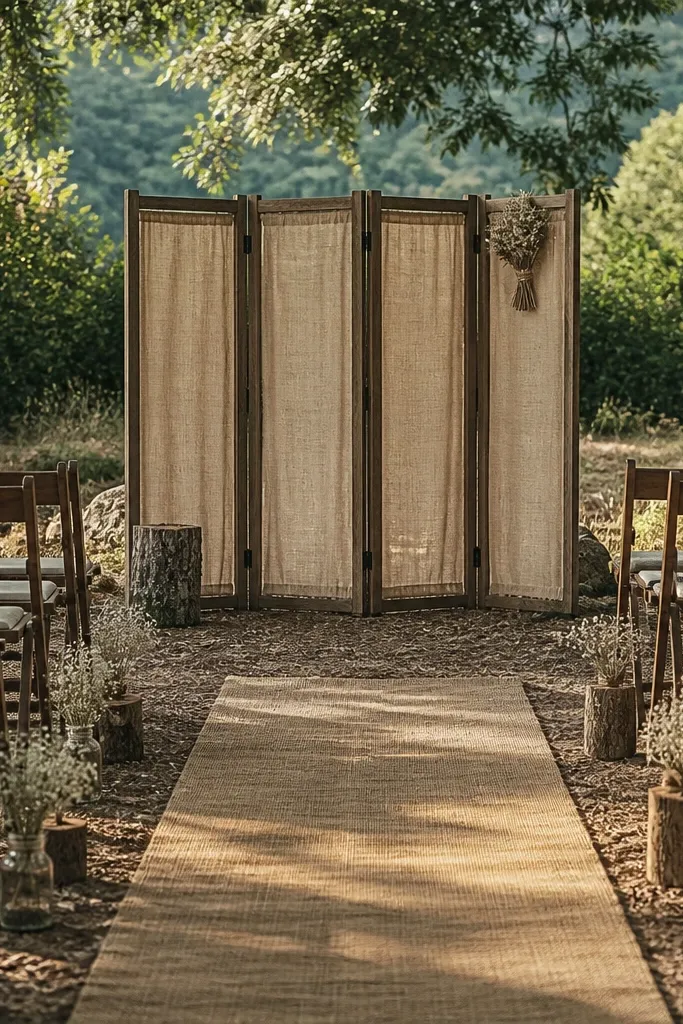
A folding screen at the aisle entrance creates a defined background for ceremony photos without building an arch. Burlap panels keep the rustic tone, and you can add a simple dried flower sprig in one corner for detail. This is one of the easiest ways to make an aisle feel designed when your budget can’t cover full aisle decor. It also works well for venues with rules against stakes or open flame.
Start by buying a used folding screen in wood or dark metal, then sand or wipe it if it looks dusty. Attach burlap panels to the screen with staples or removable clips, keeping panel edges straight. Add dried flower sprigs or a small twine bow at one consistent height across the panels. Place the screen just inside the aisle so it frames the couple’s walk and adds depth to photos.
Use removable clips instead of glue so you can adjust the panel tension quickly on setup day.
Skip busy patterns on burlap or printed fabric — it fights the rustic look.
17. Pallet Wood Slat Aisle Backdrop Behind Ceremony Chairs
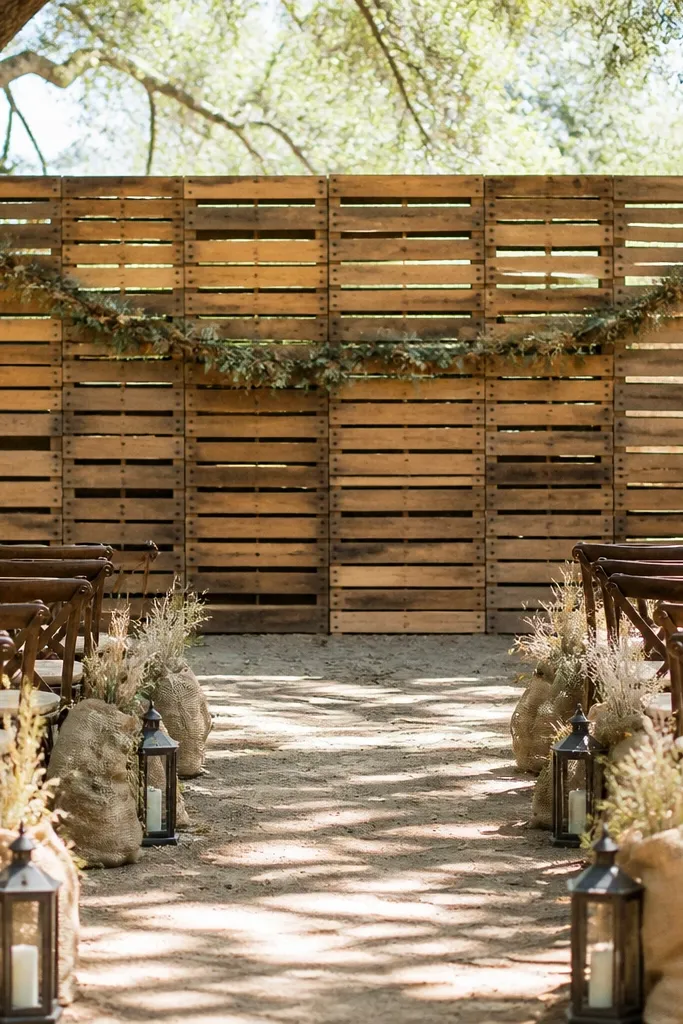
Pallet wood slats look rustic and architectural, and they give your ceremony area a strong photo background even if the aisle itself stays simple. Add a garland or two, then keep the aisle decor concentrated at the sides so you don’t overstuff. This is a smart budget play because pallets are often cheap or free, and the slats create texture without needing expensive florals. It’s best when you have a clear view from the aisle to the ceremony seating.
Start by getting pallet slats and cleaning them thoroughly, then lightly sand rough edges. Arrange them into a panel behind the ceremony chairs and secure with brackets or screws. Add one simple element like a line of muslin strips or a small dried flower garland across the top third. Keep aisle edge decor to stakes, lanterns, or wood slice markers so the background and aisle don’t fight each other.
If the venue is indoor, wipe slats with a tack cloth so dust doesn’t land on guests' clothes.
Don’t leave pallets unsealed if you have indoor carpet — they can stain.
18. Rustic Mason Jar Bud Vase Line on Aisle Tables
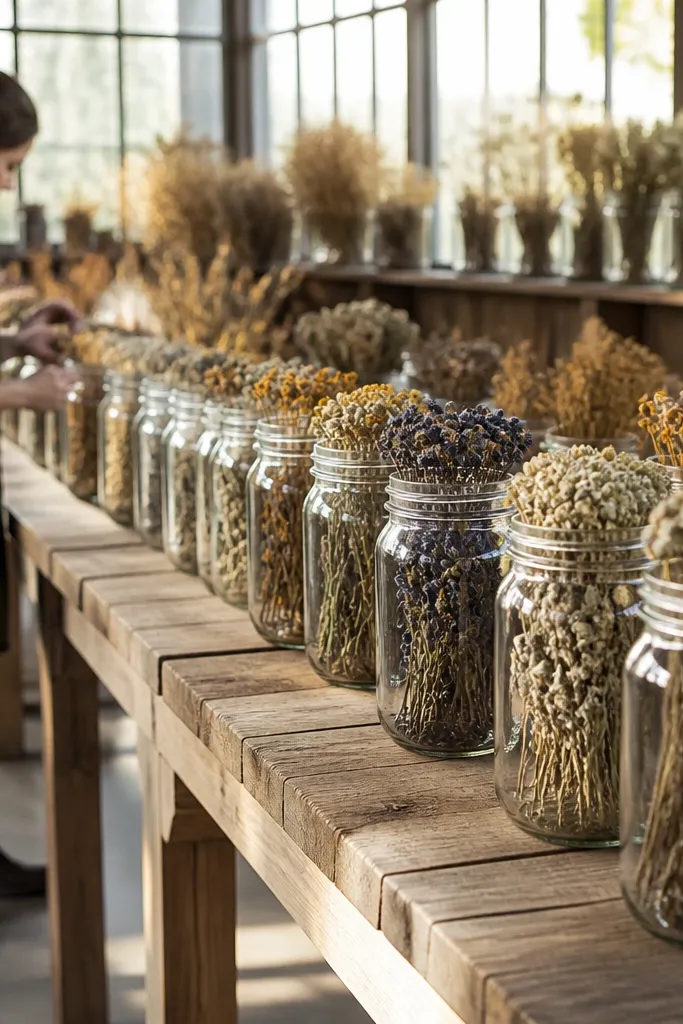
Mason jars are a classic rustic base, but the trick is using them as a line of bud vases, not scattered centerpieces. Small dried flowers in identical jar sizes create a repeating look that reads clean in aisle photos. This works well for rustic wedding decor on a budget cheap because jars are inexpensive and dried stems cost less than fresh. Place jars on folding tables or on crates at consistent heights so the aisle side looks styled from multiple angles.
Start by picking 8-14 mason jars in one size and cleaning them so they look uniform. Add a foam insert or floral tape to hold short dried stems upright. Place jars on narrow tables or crates along both sides of the aisle entrance, then keep the line going for 20-30 feet. Space jars about 12-18 inches apart on the table so the arrangement looks deliberate, not crowded.
Tie burlap around the table legs or use burlap runners under the jars to hide table clutter.
Skip mixed jar colors — clear and amber together can look accidental in photos.
19. Burlap and Cotton Flower Pom-Pom Clusters on Stakes
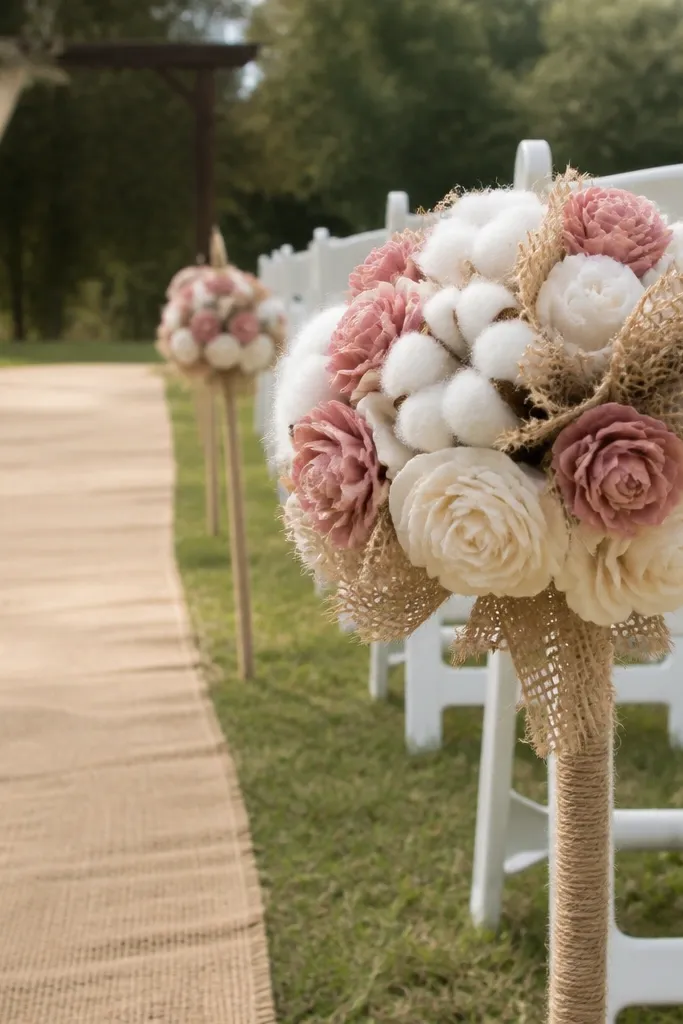
Pom-pom clusters made from burlap and cotton create big visual texture without real petals. The aesthetic is rustic and playful, and it photographs well because the clusters have shape. Put them on stakes at the aisle edges so they’re visible from the back without blocking guests. This is one of the best rustic wedding decor on a budget cheap options when you want “pretty” but you do not want to pay for full floral installations.
Start by buying or making pom-poms in two sizes, keeping the colors limited to cream, tan, and rust. Attach each cluster to the top of a stake using zip ties so it stays secure. Place stakes every 7-9 feet along the aisle edges and keep the pom-poms at about chest height. Then add one larger cluster at the aisle entrance to anchor the look.
Quick tipIf your venue is windy, add a weighted base or use longer stakes so clusters don’t sway on camera.
Skip thisDon’t hang pom-poms too low — they look like decorations on the ground instead of aisle markers.
20. Weathered Window Frame Aisle Columns With Dried Lavender Vines
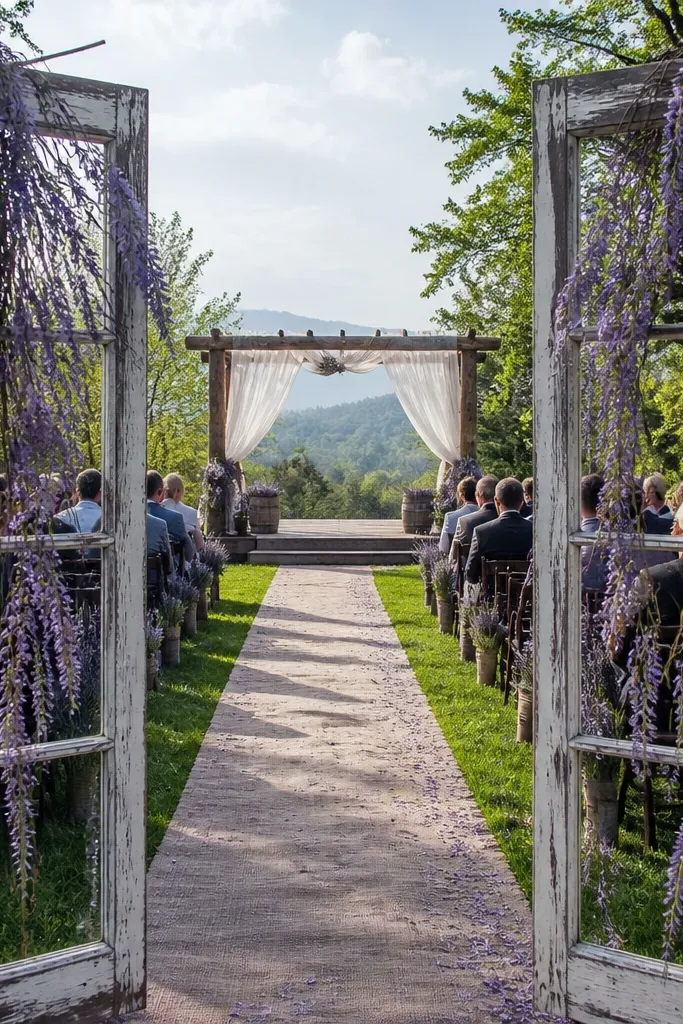
Use old window frames as aisle columns and dress them with dried lavender vines so the decor looks intentional from 10 feet away. It reads rustic without needing expensive greenery — lavender is cheap, smells good, and photographs with that soft purple streak. This works best for outdoor ceremonies in late spring through early fall because the light catches the weathered wood and the dried stems hold their shape. It suits budget weddings where you want high-impact aisle markers but you do not want to pay for full-length garlands. The frames also give you a clean vertical line, so the aisle feels longer and more “designed” even on a tight budget.
Step 1: Source two to four window frames from salvage yards or Facebook Marketplace, aiming for frames about 24 to 36 inches tall and 3/4 inch thick wood. Step 2: Tie dried lavender bunches (or lavender sprigs) to the frame with jute twine, then add a small burlap bow at the bottom corner of each frame so the base looks finished. Step 3: Place each frame at chair-row breaks or along the aisle edge, then anchor the bottom with landscape stakes or zip ties to a weighted stake so wind does not pull them sideways. Step 4: Plan for $15 to $35 per frame if you find them secondhand, plus $10 to $25 for lavender bundles; spend 45 to 75 minutes assembling and another 30 minutes installing. Step 5: Book a salvage yard pickup time or message sellers the week before, because the best frames go fast during wedding season.
Pick frames with glass panes already missing or removed — you get cleaner photos and you can hide the twine knots behind the empty frame edges.
Do not hang fresh flowers on window frames — they wilt fast and look messy when the sun hits.



