
1. Terracotta + Cream Linen Table Runner Stack
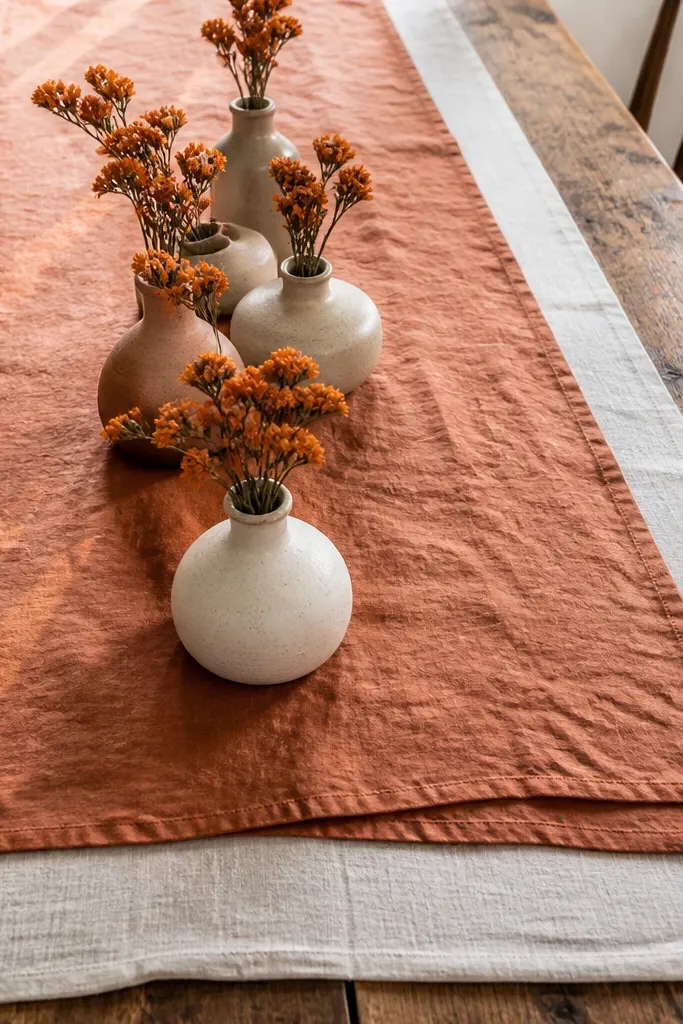
Use a terracotta linen runner as the anchor and layer it with a cream runner underneath so the orange looks warm, not flat. The top linen should be slightly wrinkled or textured; that texture breaks up the light and reads more expensive than a smooth fabric. Add a staggered row of low bud vases in cream and clay tones so the orange stays the hero. This works best for long farmhouse tables and venues with warm wood — the runner ties everything together visually.
Start by measuring your table length and choosing a runner that leaves 10-14 inches of table showing at each end. Then layer a cream runner underneath and place terracotta napkin folds at the same spacing as the runner’s folds. Finally, set three to five bud vases along the runner line, not across the whole table, so photos show a clean stripe of orange warmth.
Quick tipChoose linen with a visible weave; it photographs softer under overhead bulbs.
Skip thisSkip bright orange fabric that looks glossy or perfectly smooth.
2. Burnt Tangerine Napkins with Charcoal Folded Contrast
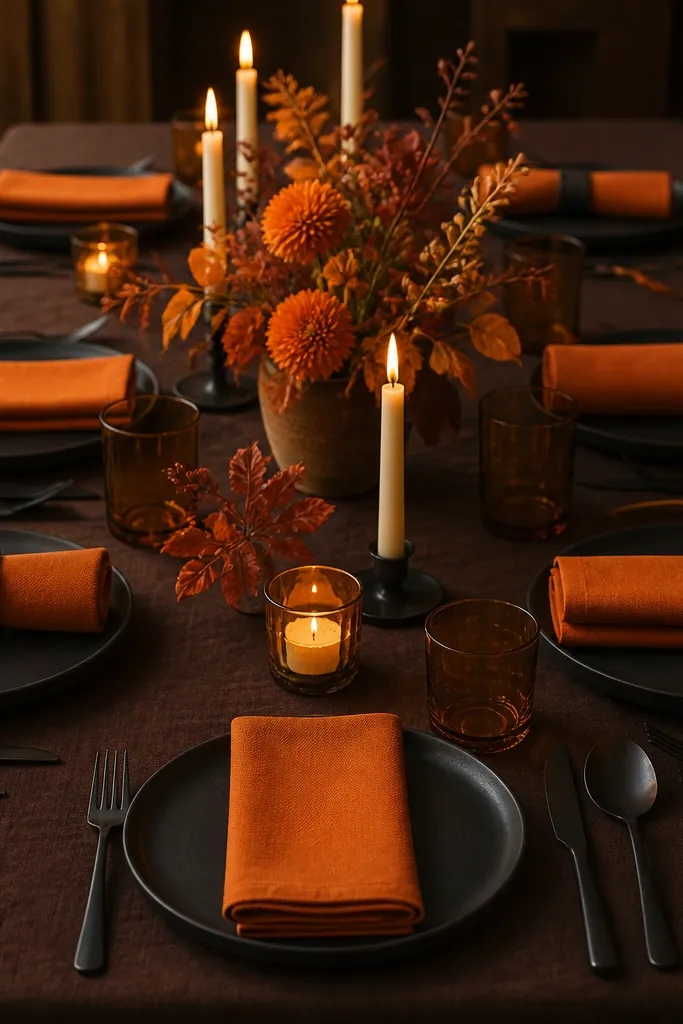
Burnt tangerine napkins look luxury rustic when they sit on a dark base. Use charcoal or deep cocoa tablecloths (matte, not shiny) so the orange glows. Fold the napkins in a structured way like a classic rectangle fold or a simple roll, so the orange reads as intentional shape in photos. This setup is especially flattering for venues with tan stone, weathered wood, or outdoor evening lighting.
Start with charcoal plates or a charcoal charger underneath each guest setting. Then place burnt tangerine napkins and fold them so the orange edge stays visible above the plate by about 2-3 inches. Finally, keep centerpieces low and let the napkins do the color work — you’re building bold warmth without clutter.
If string lights are warm, go slightly deeper with your tangerine so it doesn’t look too close to yellow.
Don’t use orange napkins over a beige tablecloth; it turns the whole scene washed-out.
3. Clay Bud Vases in a Graduated Height Line
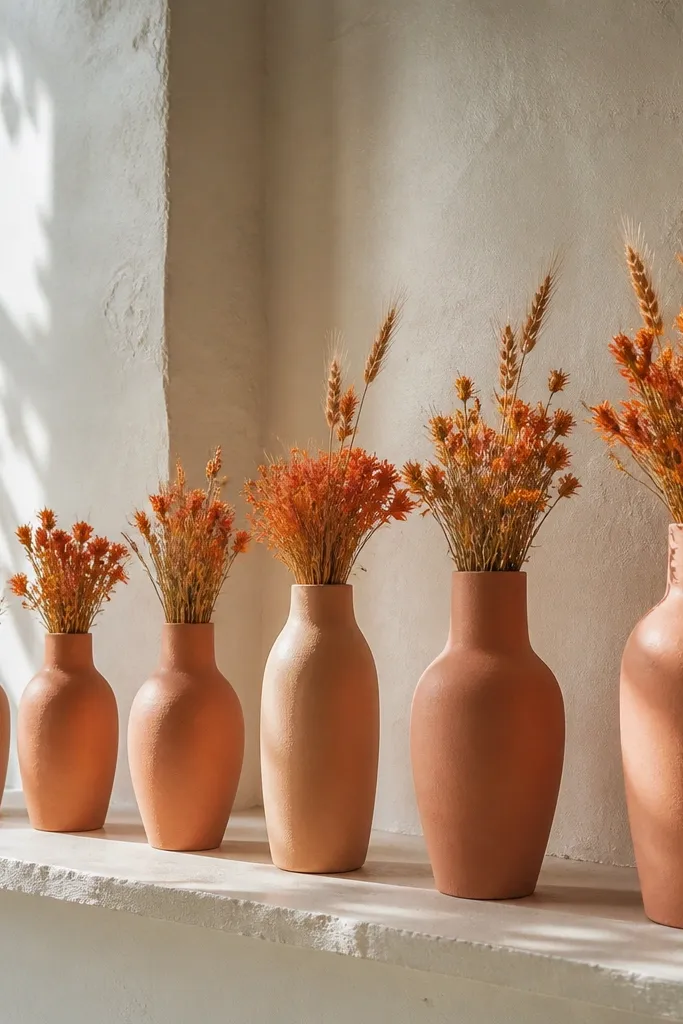
A line of clay bud vases makes orange look hand-crafted without needing huge floral budgets. The clay gives you matte warmth, and the graduated heights add a “designed” rhythm that reads well in wide shots. Use dried orange statice, dried marigold tones, or orange-tinted wheat heads for long-lasting shape. This is perfect for rustic venues where you want decor to feel grounded and not overly lush.
Start by grouping vases into three heights: short, medium, and tall, with a spacing of 8-12 inches between each. Then fill with dried botanicals so stems are visible and the tops form a gentle arc. Finally, keep the color repeat consistent: 60% orange tones, 40% cream or wheat beige across the line.
Quick tipBring a damp cloth and wipe vase rims; dust makes clay look dull in photos.
Skip thisSkip mixed glossy vases; they reflect and cheapen the color.
4. Aged Wood Escort Card Display with Orange Ribbon Tie
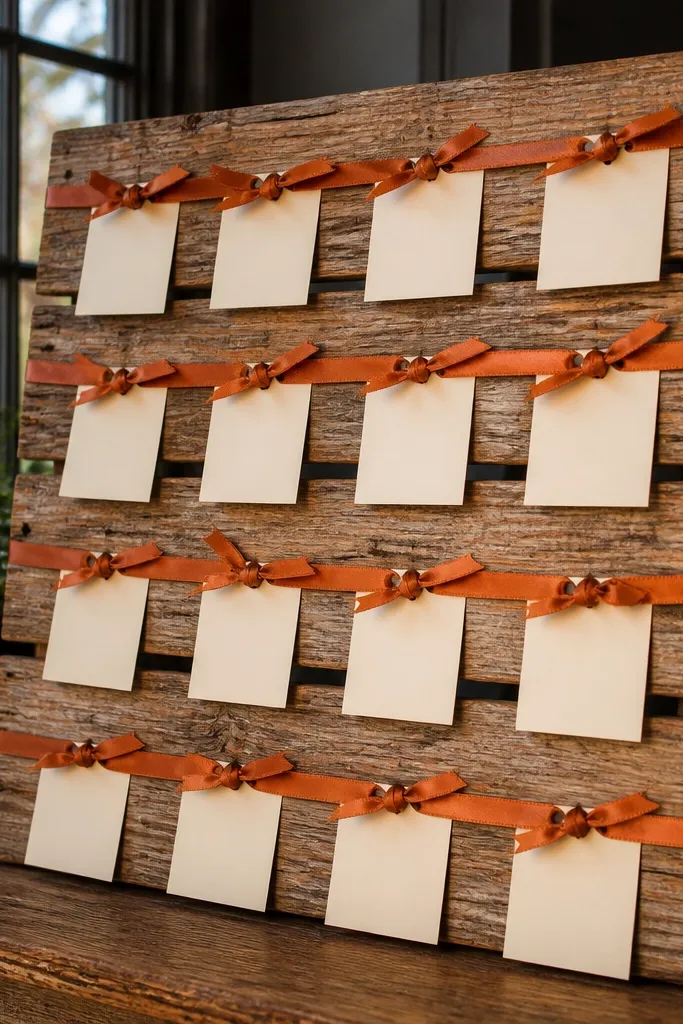
Escort cards are a small moment that people photograph constantly, so make it count. Mount cream cards on an aged wood board or slatted pallet, then attach each card with orange ribbon ties. The orange reads as a warm accent against the wood grain, and the consistent tie method makes the whole display look cohesive. It’s a strong choice for barns, cabins, and outdoor venues with rustic textures.
Start by cutting a slatted board or using a pre-made wood frame and add small hooks or twine lines across it. Then attach cards with 6-8 inch orange ribbon strips tied in the same knot style each time. Finally, add a single orange label sign at the top using a simple typeface and matte paper so the station looks styled, not random.
Use identical ribbon widths (like 1 inch) so the photos show a uniform orange pattern.
Avoid using clothespins or random clips that create uneven shapes across the board.
5. Rust Orange Dried Floral Aisle Runner in Loops
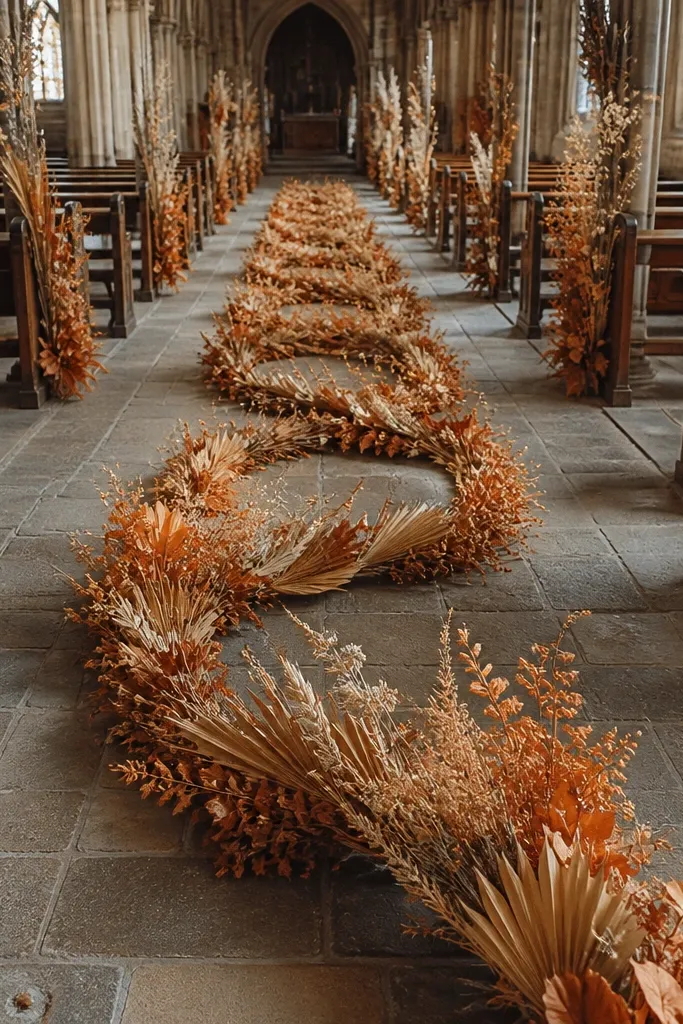
For bold warmth, an aisle runner needs to look intentional from the end of the aisle. A rust orange dried arrangement built in repeated loops gives you that “designed” effect without requiring fresh flowers. Use dried palms, wheat, statice, and orange-tinted leaves so the texture reads in photos even when the lighting is low. This works best for outdoor ceremonies and barn aisles where you want movement and warmth, not a thick floral wall.
Start by laying a neutral runner fabric (cream or natural jute) down the centerline. Then build loop clusters and secure them to the runner with hidden zip ties or floral wire through the back. Finally, keep clusters spaced so the aisle path stays visible — aim for one loop every 16-20 inches.
Add amber glass votives at the aisle ends to echo the runner color in evening photos.
Skip dense fresh bouquets on the ground; they flatten and look messy by mid-ceremony.
6. Orange and Black Iron Unity Candle Stand
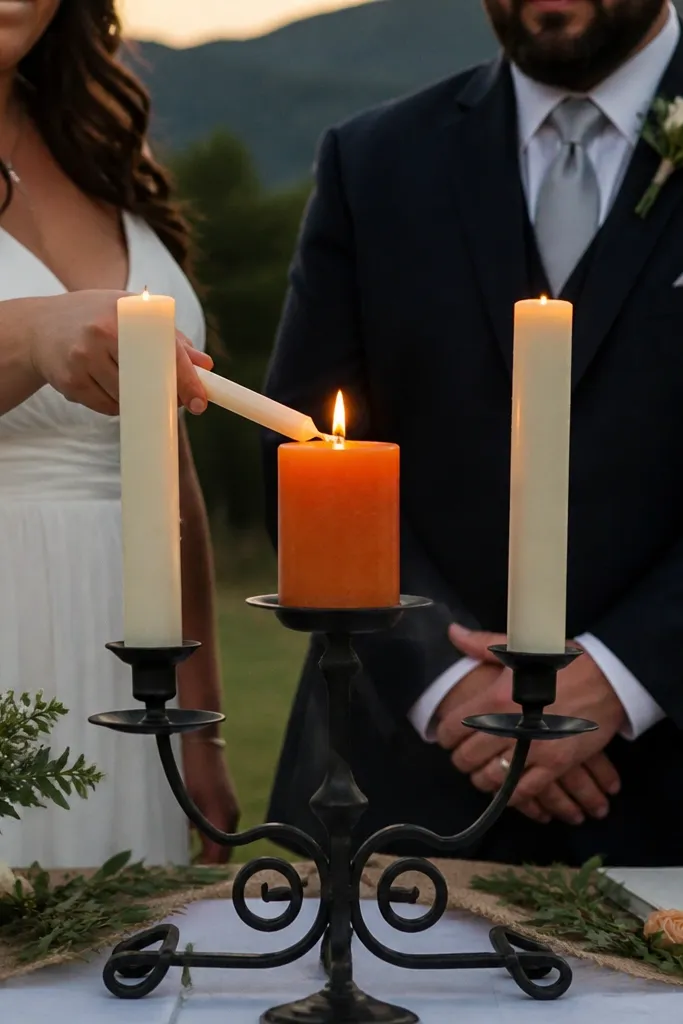
Black iron instantly makes rustic decor feel more expensive, and orange candles give you the warmth. Use a black metal unity stand with two or three candles: one main orange candle and surrounding cream tapers. The matte orange wax looks rich in photos, especially against dark metal. This is a great choice if your ceremony space has light walls or lots of bright daylight — the contrast gives structure.
Start by choosing a unity stand with open space between candle holders so flame shapes are visible. Then place one burnt orange pillar or taper as the hero and add cream tapers on the sides. Finally, add small orange accents like a short ribbon wrap on the candle bases or a single orange dried sprig tucked into the stand.
Stick to matte wax colors; shiny candles blow out highlights under overhead lighting.
Avoid orange candles with heavy glitter or reflective finishes.
7. Terracotta + Smoke Glass Centerpieces
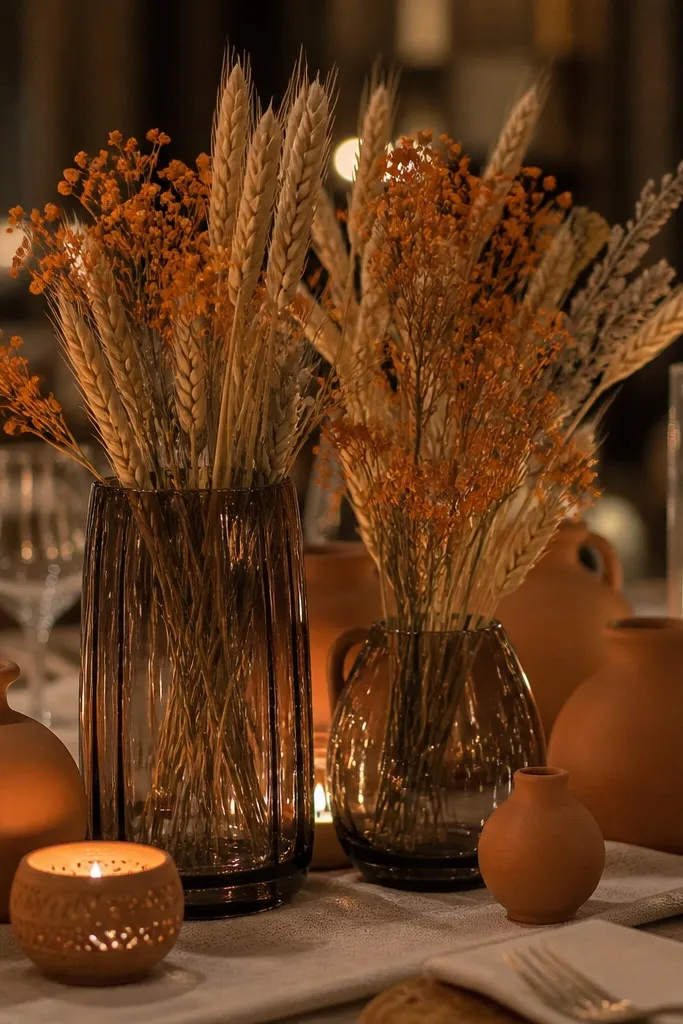
Smoke gray glass is the easiest way to make orange look luxury rustic because it adds cool contrast. Pair terracotta-toned ceramics with smoke glass vases and insert orange dried stems so the color looks intentional, not random. The glass also adds depth — it darkens the background and makes the orange pop without needing more florals. This centerpiece style photographs beautifully on dark tabletops and also works on light wood if you add a dark runner underneath.
Start with a dark base: a charcoal runner or dark tablecloth panel under each centerpiece group. Then place one smoke glass vase as the main container and flank it with two smaller terracotta pieces. Finally, arrange orange stems so they rise to one consistent height across the table, creating a uniform band in photos.
Use the same orange stem type across all tables for a clean repeat pattern.
Don’t mix too many glass colors; clear + amber + orange can look chaotic.
8. Rust Orange Velvet Chair Sashes with Natural Twine Bows
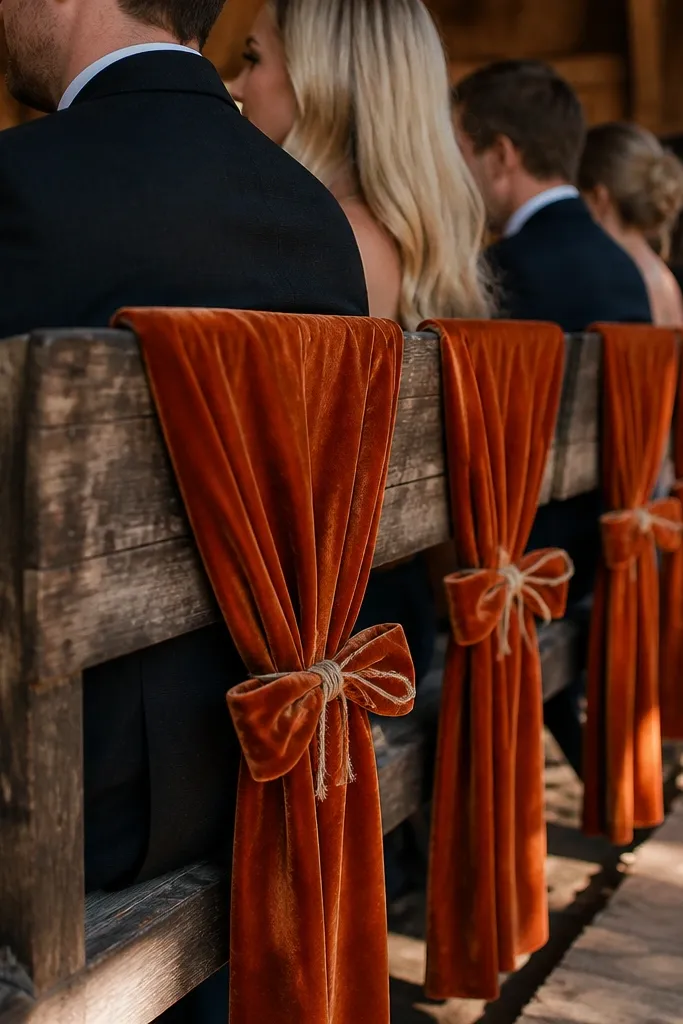
Velvet chair sashes bring the luxury part fast. Choose rust orange velvet (not bright orange) and tie it with natural twine bows so the look stays rustic, not formal. The velvet catches light softly, and the twine adds a handmade texture that matches wood and stone. Use this for ceremony seating, sweetheart photo areas, or any chair row that shows in group shots.
Start by measuring chair backs and cutting velvet sashes so they hang 10-12 inches down the chair back. Then tie a small twine bow at the center, not the side, so the orange stays symmetrical in photos. Finally, keep the number of sashes consistent across rows so the seating area looks planned rather than sprinkled.
Steam velvet lightly before tying to reduce creases and keep the color smooth.
Skip satin chair sashes; they reflect and look shinier than you want.
9. Orange Terracotta Balloon Clusters for a Rustic Photo Corner
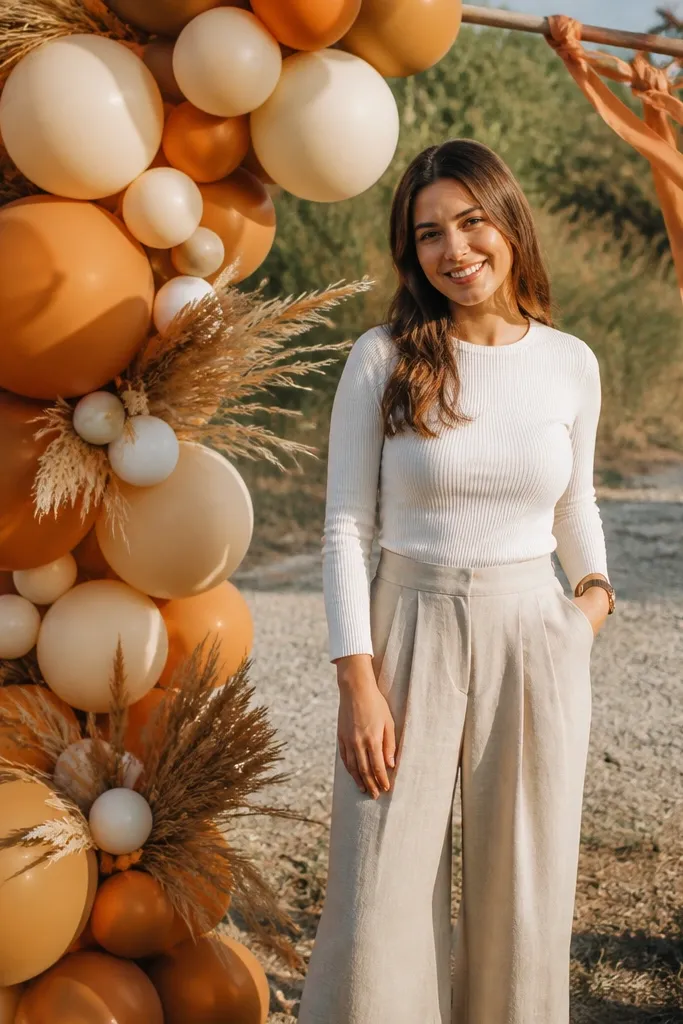
Yes, balloons can fit luxury rustic if you control color and texture. Use terracotta-toned balloons and pair them with cream balloons plus dried wheat or barley sprigs. Add orange ribbon streamers so the color repeats with your other decor. This is a strong move for outdoor weddings with a simple background where you need a photogenic focal point.
Start by choosing a photo corner wall or fence line and mark where the clusters will sit, about 5-6 feet off the ground. Then build clusters with 2-3 terracotta balloons and fill gaps with cream, tying them with orange ribbon. Finally, anchor the cluster with weight or a stand and add dried wheat at the base so it looks intentional, not floating.
Use matte balloon finishes; glossy balloons reflect sky colors and shift the orange.
Avoid bright metallic orange balloons; they read party, not rustic.
10. Burnt Tangerine Floral Foam-Free Garlands on a Barn Door
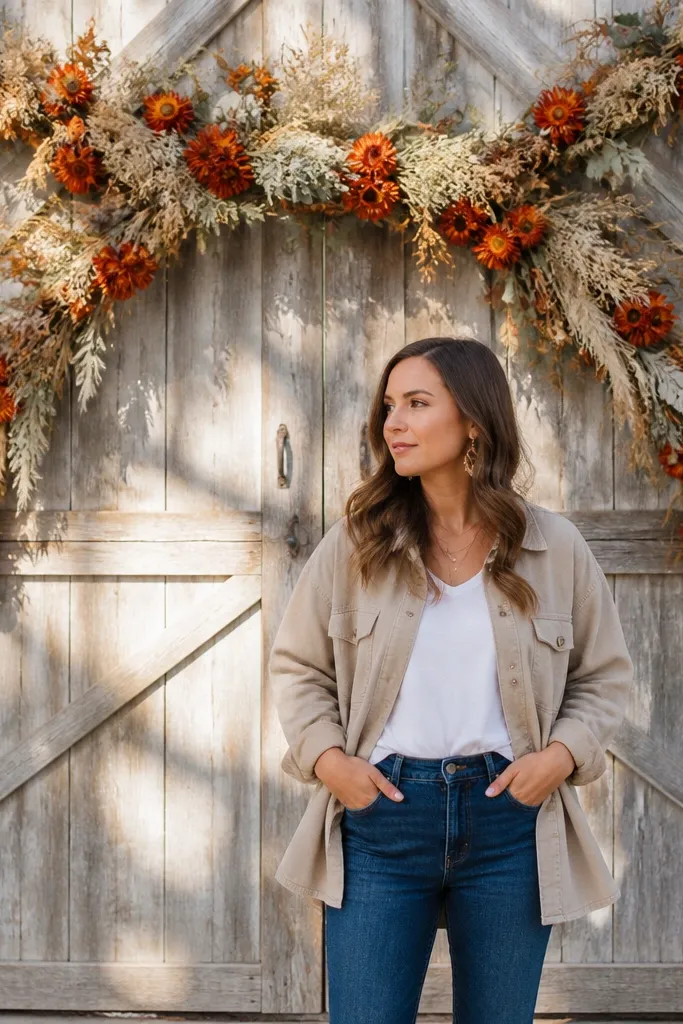
A barn door backdrop looks instantly high-end when garlands are arranged in clean arcs. Foam-free matters because it keeps the look airy and natural; the stems sit with visible structure. Use burnt tangerine dried blooms, cream wheat, and small touches of greenery in muted tones. This backdrop is perfect for sweetheart photos and ceremony entrances where the door is already a strong shape.
Start by measuring the door width and planning an arc so the garland spans edge to edge with a slight dip in the center. Then secure stems with wire and zip ties to hidden anchor points behind the door hardware. Finally, add small orange ribbon loops at two or three points across the garland so the color repeats even if the stems sway.
Quick tipKeep greenery muted (sage or dusty green) so orange stays dominant.
Skip thisDon’t overstuff the garland; thick piles look heavy and flat in photos.
11. Orange Candle Lanterns on Jute Runners
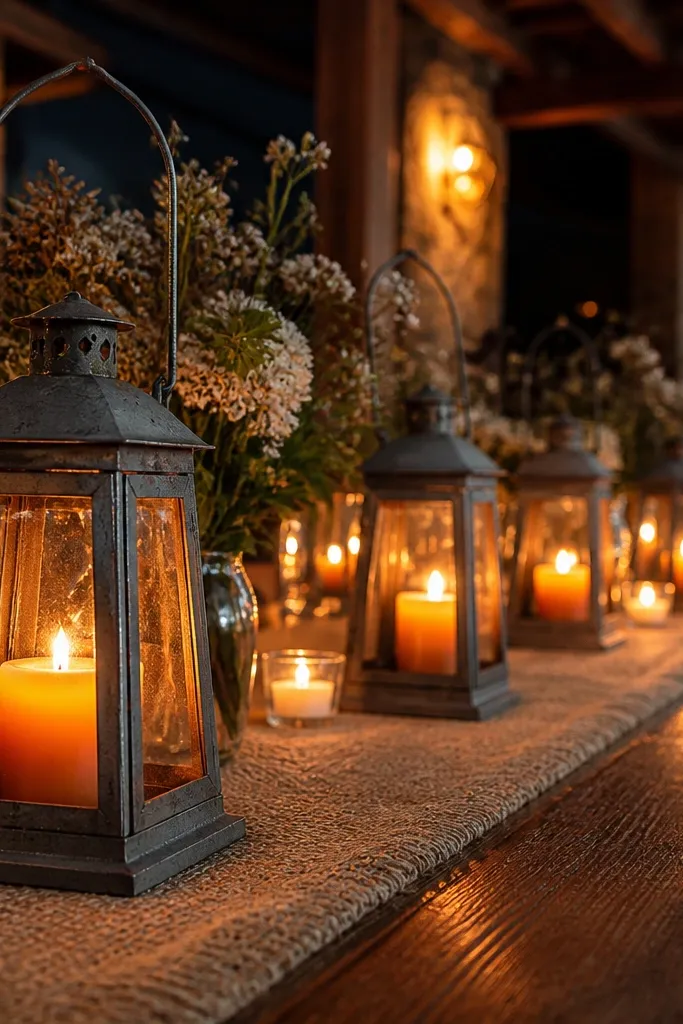
Lanterns create that warm, luxury rustic glow even when your floral budget is smaller. Put orange candles inside simple metal lanterns and line them along a jute runner for texture. The jute keeps the scene grounded, while the lanterns add height and a clean repeat pattern. This works great for cocktail hour, sweetheart table edges, and pathways to the ceremony.
Start by placing a jute runner in a straight line with enough width for stability of lantern bases. Then set lanterns at 24-30 inch intervals and use orange flameless candles if you need safety indoors. Finally, add one cream lantern or one cream candle among the orange to keep the scene from going too monochrome.
Choose lanterns with open sides so the warm light spreads, not blocks.
Skip bulky lanterns that crowd the runner; spacing matters for photos.
12. Terracotta Macrame Backdrop with Orange Tied Sprigs
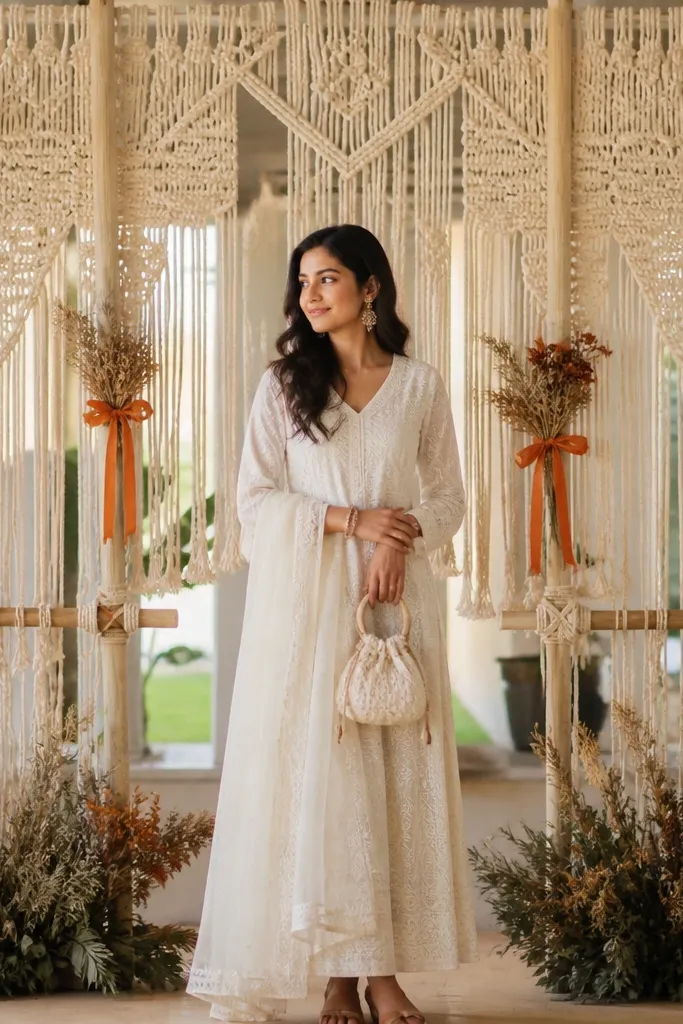
Macrame brings soft structure, and orange tied sprigs add warmth without overwhelming the backdrop. Use a neutral macrame base in cream or natural rope, then weave in terracotta ribbons or tie orange dried sprigs at measured intervals. The result looks handmade and photogenic because it has depth — shadows, knots, and texture. This is best for indoor venues, covered patios, and ceremony corners with a clear wall behind.
Start by choosing a macrame panel size that matches your photo space, typically 6-8 feet wide for a sweet spot photo. Then tie orange dried sprigs or ribbon loops into the lower third so they show in pictures. Finally, place two matching side candles or lanterns at the base to echo the orange and balance the frame.
Keep orange accents in the bottom third; it anchors the color where cameras capture it.
Don’t place orange ties all over; it turns into clutter against the rope texture.
13. Rust Orange Table Skirting with Cream Ruffle Overlay
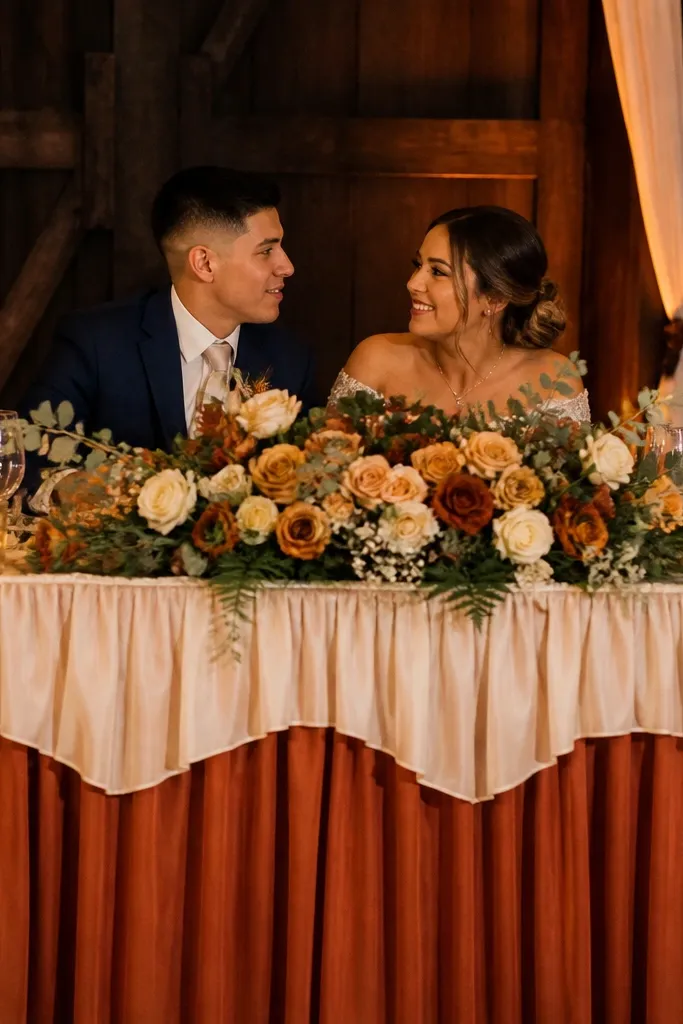
Table skirting is where luxury rustic often wins or fails because it frames everything. Use rust orange skirting as the base and add a cream ruffle overlay near the top edge so the orange looks dimensional. This combination reads warm in daylight and looks rich at night because the ruffles catch light softly. It’s ideal for head tables, cake tables, and bar backdrops where the table is a photo magnet.
Start by measuring table height and choosing skirting length so it hits 1-2 inches above the floor for a clean line. Then add the cream ruffle overlay centered along the top edge of the skirt, not throughout. Finally, keep centerpieces low and let the skirt frame the orange warmth underneath candles and signage.
Quick tipUse matte fabric for the rust base; it prevents orange from looking shiny in venue lighting.
Skip thisAvoid full-length orange overlays with no cream contrast; it flattens the look.
14. Orange Citrus + Dried Herb Cake Table Styling
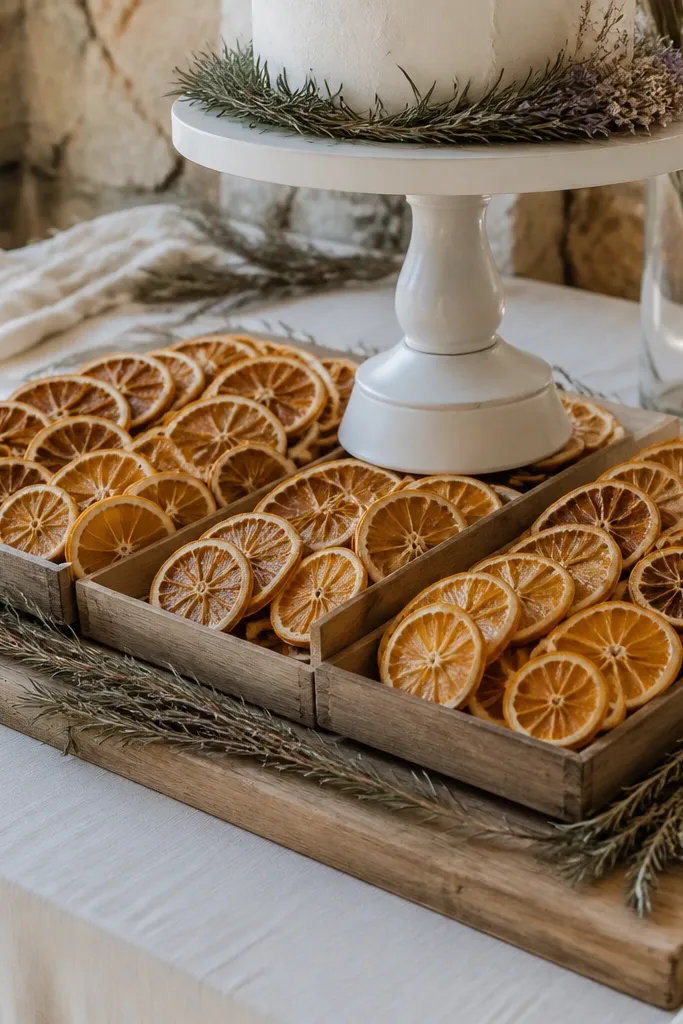
Citrus gives you instant color and a fresh scent, and dried herbs keep the rustic feel. Style a cake table with orange slices placed in shallow trays or on a base board, then add dried rosemary, wheat, and cream linens around the cake stand. The orange reads bright but still natural because it’s organic and varied in tone. This is a strong choice for daytime weddings and venues with a neutral background where the table needs color.
Start by building a base board with a neutral covering (linen or kraft paper) so citrus sits cleanly and doesn’t stain the table. Then arrange orange slices in a single layer and tuck dried herbs between the slices and the cake stand. Finally, add small orange ribbon tags to the herb bundles so the color repeats even when slices shift slightly.
Quick tipUse thin slices and replace them if they dry out; dry citrus looks brown in photos.
Skip thisSkip watery trays that leak — citrus juice makes sticky reflections on camera.
15. Rust Orange Balloon-Backed Welcome Sign with Aged Wood Frame
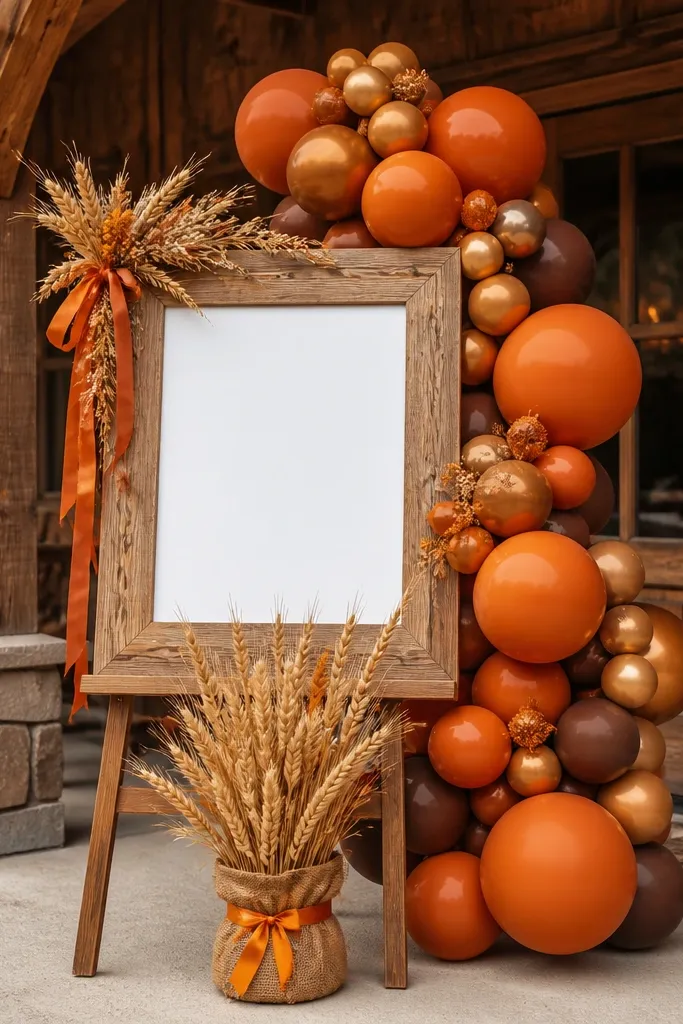
Make the welcome moment feel designed by combining an aged wood frame with a controlled orange backdrop. Put a rust orange balloon cluster behind the sign, then anchor the bottom with dried wheat or a jute wrap. The aged wood keeps it rustic, while the balloon cluster adds a warm pop that stands out in wide shots. This works especially well for outdoor receptions where guests arrive in daylight and take photos immediately.
Start by choosing an aged wood sign frame and placing it at eye level, around 4-5 feet from the ground. Then position a tight cluster of rust balloons directly behind the sign so it forms a halo effect. Finally, tie a jute ribbon around the frame bottom and add a single orange dried sprig to echo your palette.
Quick tipKeep balloons in matte finishes so the orange stays consistent across photos.
Skip thisDon’t stack the sign too high; the orange halo should frame faces, not dominate them.
16. Orange and Cream Floral Tablecloth Panels on Farm Tables
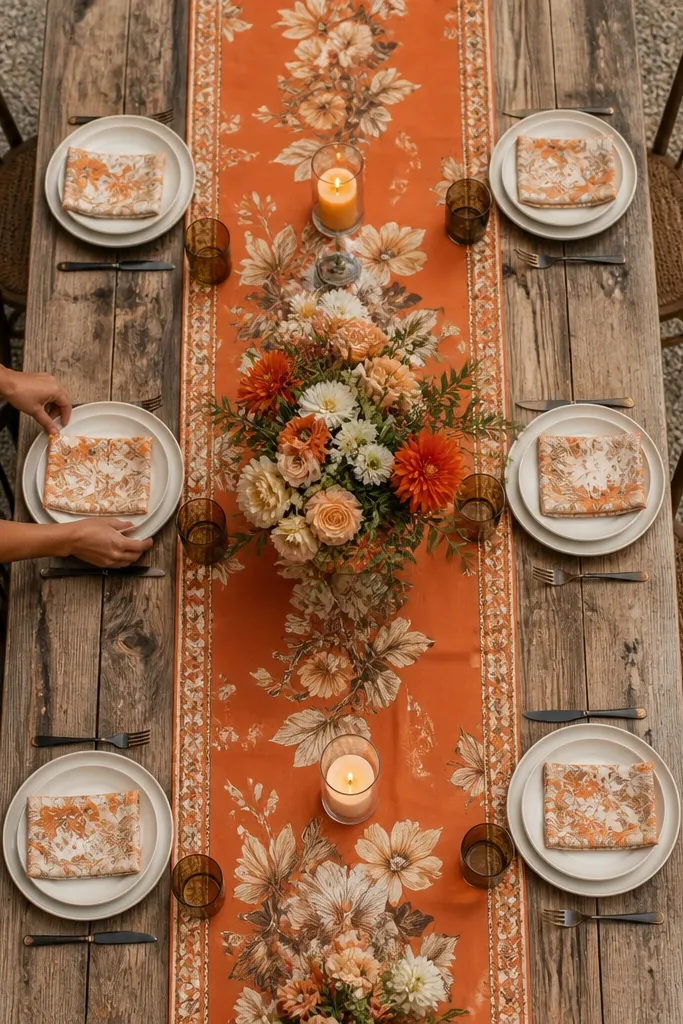
Instead of one plain tablecloth, use patterned panels in orange and cream to create warmth without needing heavy centerpieces. Pick a rustic floral or botanical print that includes cream and muted brown, not bright modern colors. Lay the panels lengthwise so the pattern reads as a stripe in photos. This is a great choice when you want luxury rustic wedding decor but you don’t want to build elaborate floral arrangements.
Start by draping panels so they overlap slightly in the middle and hang evenly on both sides. Then set candles and bud vases in the center with stems kept low so the print stays visible. Finally, match napkin color to one of the print’s orange tones and keep everything else neutral.
Quick tipTest the print from the guest chair height; you want the pattern to read as warm stripe, not busy noise.
Skip thisAvoid prints with multiple bright oranges; it clashes with terracotta and makes the palette unstable.
17. Rust Orange Ribbon + Black Iron Bottle Bud Vase Wall
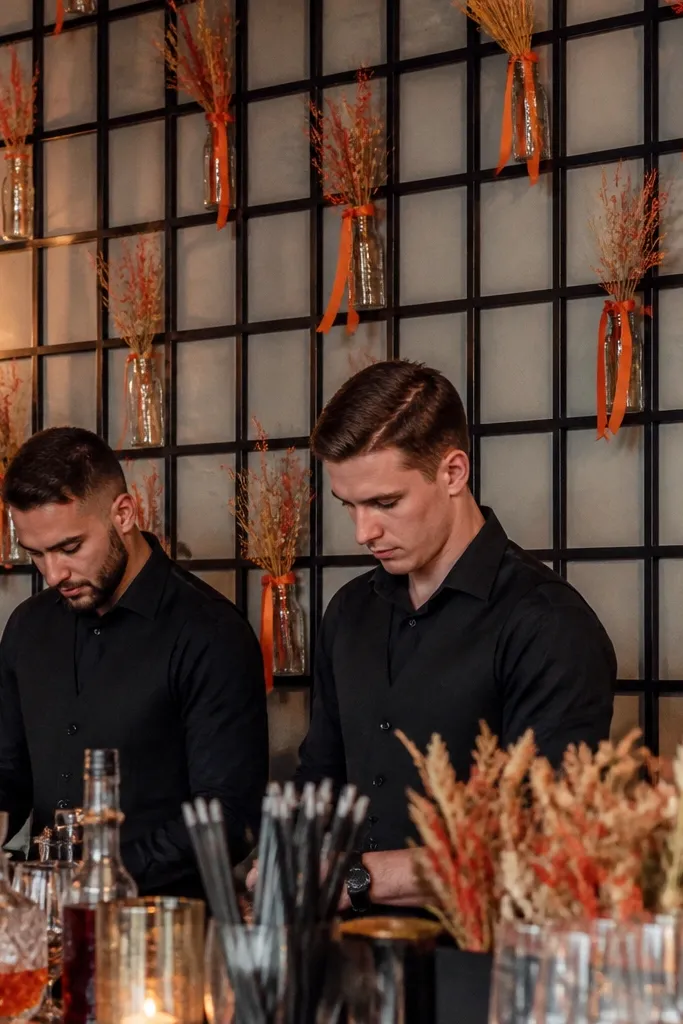
A bottle bud vase wall looks modern-rustic when you use black iron and repeat orange ribbon. Fill small glass bottles with orange dried stems and mount them on a black iron grid or wall rack. Tie rust orange ribbon around select bottles so the orange shows even from far away. This is ideal for cocktail hour behind the bar or near the dance floor, where people keep walking past and photographing.
Start by choosing a grid size that fits your wall space, then mark bottle positions so spacing is even. Then mount the bottles securely and add orange stems with consistent height — aim for 10-14 inches above the bottle rim. Finally, tie short lengths of rust ribbon around every third bottle to create a repeating orange cue.
Use the same bottle shapes; mixed bottles read messy and cheap in close photos.
Skip clear bottles with no ribbon — the orange loses impact when stems shift.
18. Terracotta + Amber Glass Hanging Candle Moments
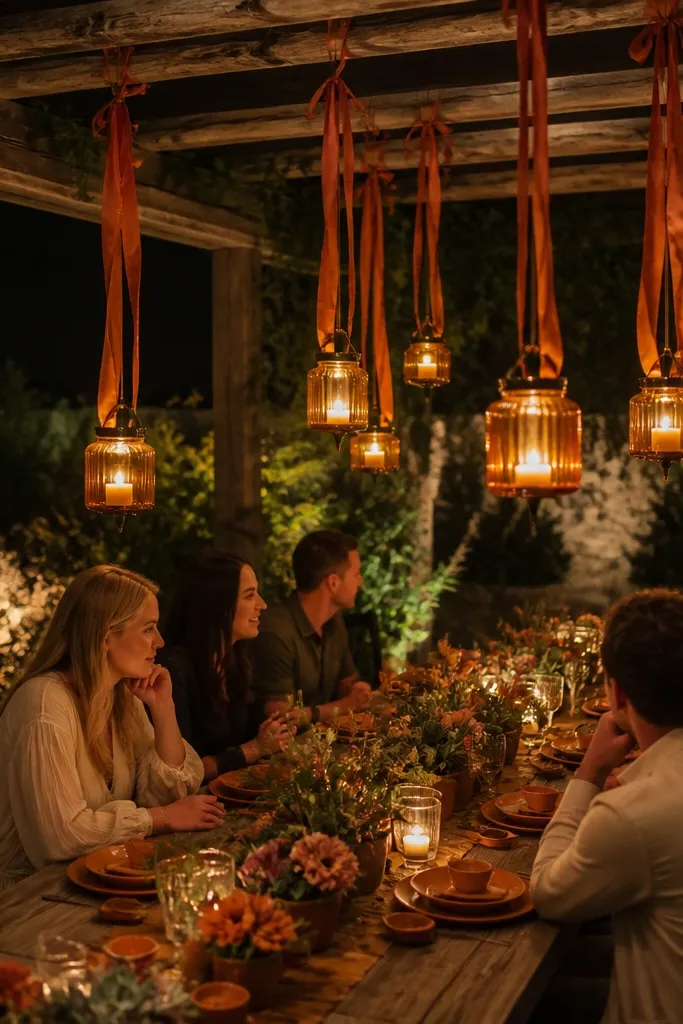
Hanging candle moments add luxury because they create vertical warmth. Use amber glass holders or amber-toned lanterns suspended at different heights, then tie terracotta ribbon loops around the suspension points. The amber glow plays well with rustic venues because it feels like lantern light, not overhead lighting. This works best under a barn ceiling, pergola, or covered outdoor tent where you have headroom.
Start by measuring ceiling height and hanging candles so the lowest points are at least 7 feet from the ground. Then suspend amber glass holders in a staggered pattern with 2-3 feet spacing between clusters. Finally, add terracotta ribbon wraps at the hanging knots and keep table linens neutral so the candles become the hero.
Quick tipUse warm white bulbs or flame-safe options; cool lighting makes amber look orange-red instead of golden.
Skip thisDon’t hang candles too low; they block guest faces and ruin photos.
19. Orange Terracotta Arch Backdrop with Minimal Greenery
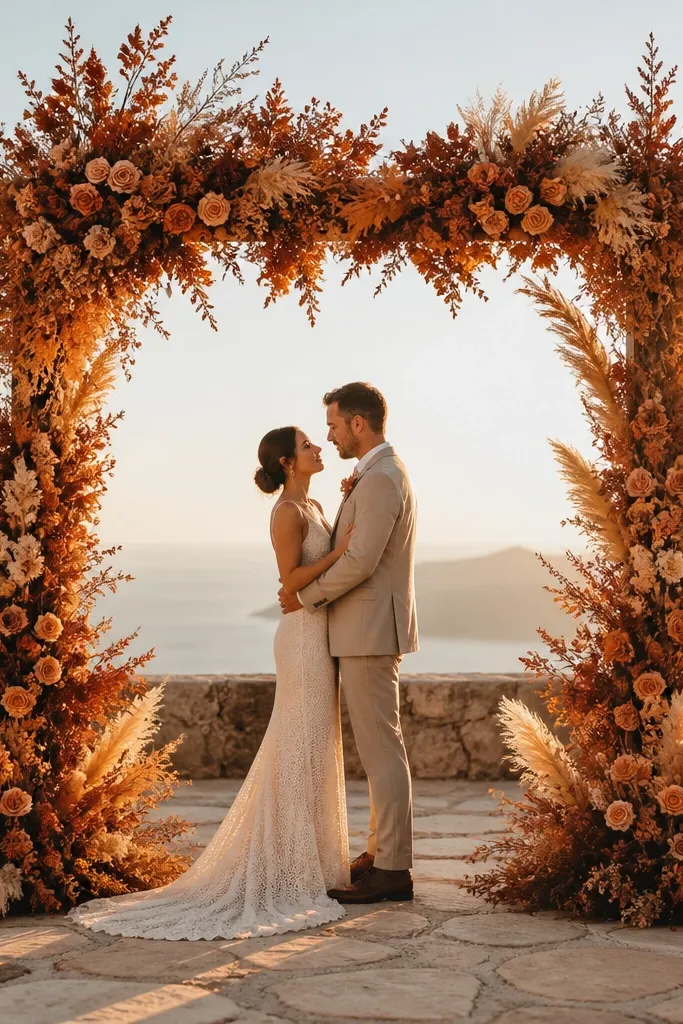
A ceremony arch is where your rustic orange palette needs to hit hard. Build the arch with terracotta and burnt tangerine dried florals as the main mass, then keep greenery minimal so the orange reads clearly. The best look is structured — a defined outer frame with lighter interior texture. This works for outdoor photos against a sky or a light wall because the arch creates a strong color block.
Start by selecting an arch frame and wrapping it in neutral backing fabric so the orange doesn’t look patchy. Then add dried stems in a dense outer ring and a lighter inner layer, keeping the center slightly open for the couple. Finally, tie orange ribbon accents along the arch base at three points to repeat the color at foot level.
Quick tipChoose dried stems that hold shape (statice, wheat, marigold-toned blooms) so the arch stays photogenic through the ceremony.
Skip thisSkip heavy greenery-heavy builds; they turn orange into background color.
20. Rust Orange Place Card Folds on Kraft Paper with Wax Seal
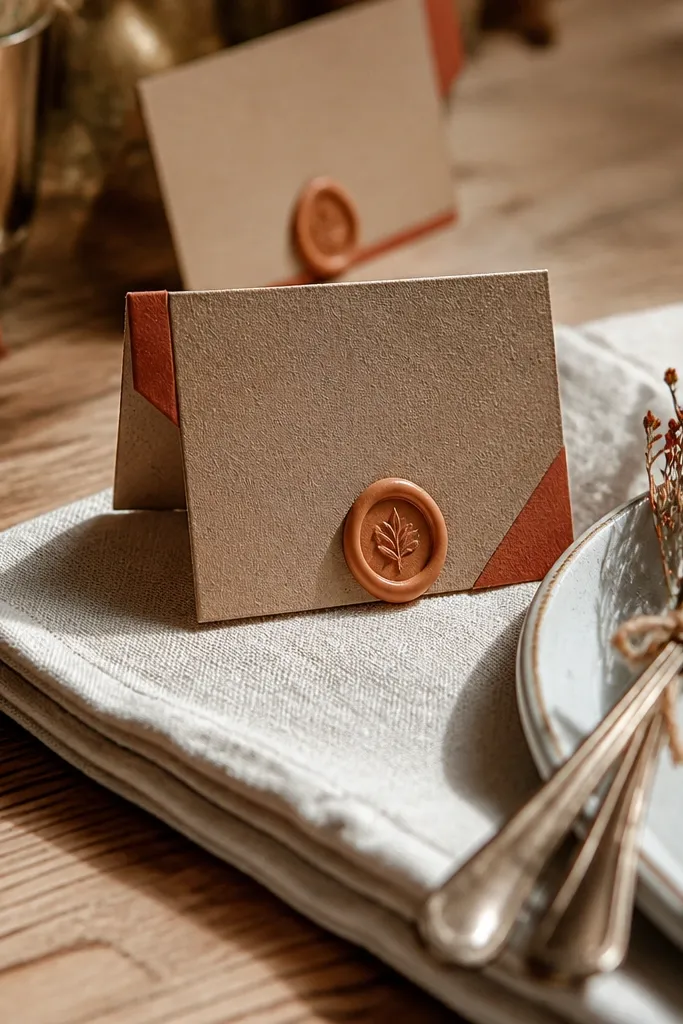
Place cards are tiny, but they photograph at close range and they add real luxury when the materials feel tactile. Use kraft paper with rust orange folded corners, and finish each card with a small wax seal in a warm brown or muted orange. The kraft keeps the rustic tone, while the sealed corner adds a premium look without needing more decor. This fits weddings where you want luxury rustic wedding decor to feel intentional even in small details.
Start by cutting place card stock in a size that stands well on a table, then print guest names in a simple serif or typewriter-style font. Fold the corner so rust orange shows as a clean triangle. Finally, press a wax seal onto the front near the fold and place cards in a consistent spot at each setting, aligned with napkin placement.
Quick tipUse matte ink and matte paper; shiny finishes reflect harsh light on camera.
Skip thisAvoid bulky embellishments that make cards wobble in windy outdoor photos.



