
1. Reclaimed wood + linen runners
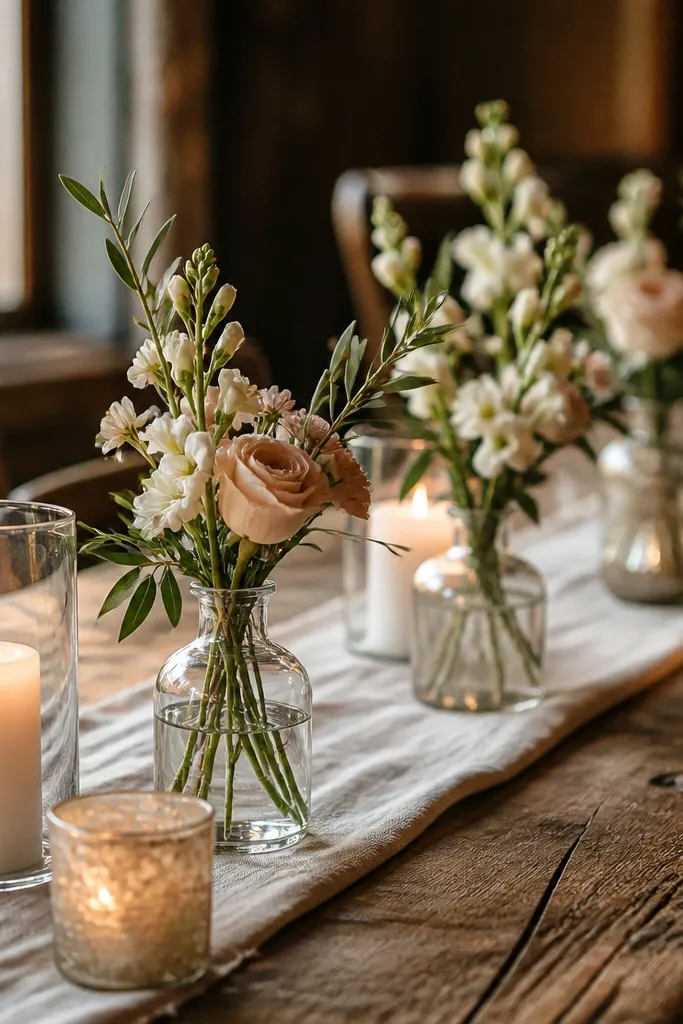
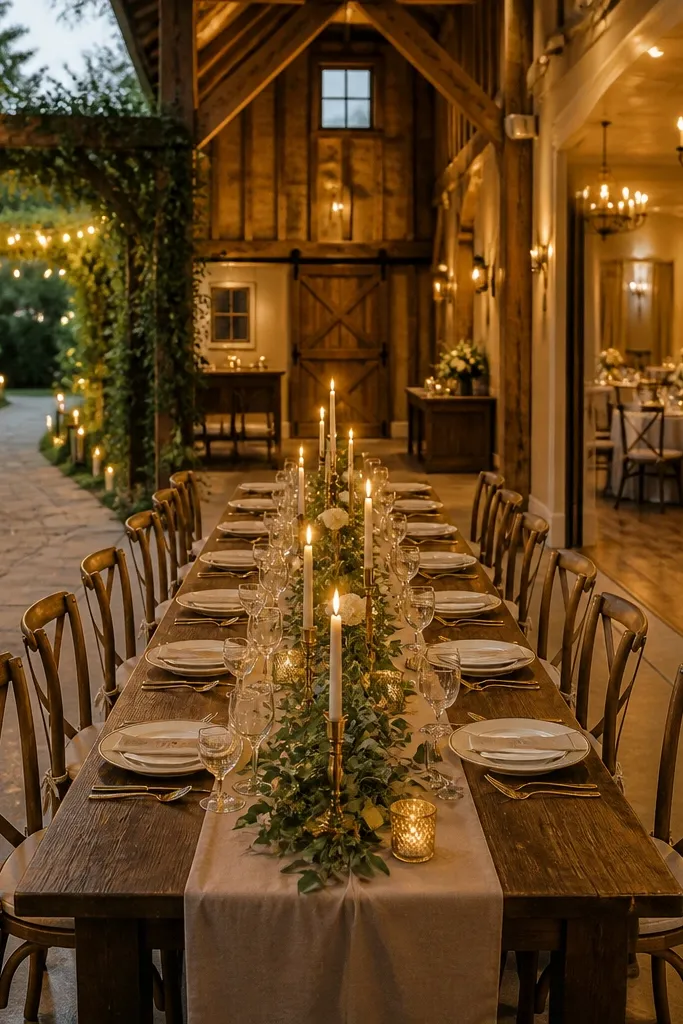
This style makes rustic chic feel grounded instead of themed. You get warm, honest texture from reclaimed wood and a clean visual line from linen, so the tables look intentional even when the florals are simple. It also handles mixed lighting well — candlelight warms the wood and linen stays bright without looking shiny. It’s a strong choice for barns, lodges, and farmhouses where beams and floors already do the heavy lifting.
Start by choosing one linen color: off-white, oatmeal, or warm cream — avoid bright white if the room is dark. Then build a centerpiece that sits low and wide using a single reclaimed plank or two staggered wood slabs, with 3-7 bud vases across the top. Finally, anchor the runner with a repeated detail like a small strip of burlap-jute along the runner edge or a single black iron candle holder at each end.
Quick tipUse wood that looks consistent in undertone (both oak-leaning or both walnut-leaning). Mixed tones can read “thrift pile” on camera.
Skip thisDon’t add tall candelabras on top of low wood slabs — it blocks sightlines and makes the table look top-heavy.
2. Brushed brass candle clusters
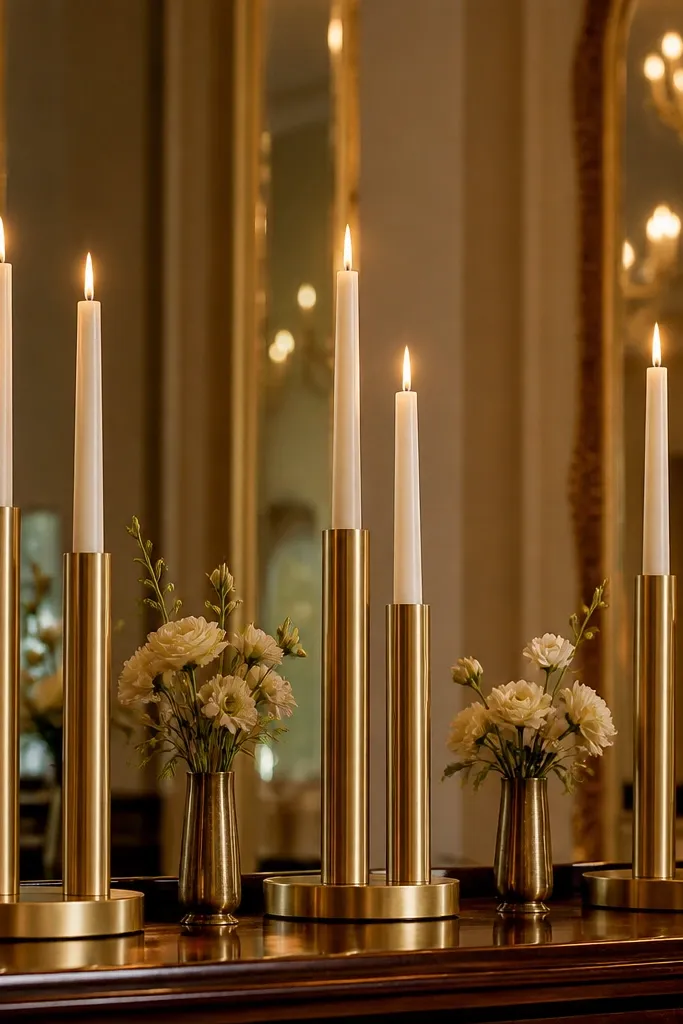
Brushed brass turns rustic chic into something you can wear in a ballroom without it looking like a costume. The finish is warm, so it plays well with honey lighting and candle glow, and it photographs without looking icy. This style shines when your venue has gold tones or warm chandeliers already. It’s also a good fix if your florals are limited — candles and brass do a lot of visual work.
Start by picking taper candle height based on table type: 10-12 inches for centerpieces on dinner tables, 14-18 inches only for aisle or elevated displays. Then group 3-5 holders per cluster, mixing one larger brass piece with smaller ones so the cluster has a clear shape. Finally, add greenery sparingly — one narrow garland strip or a few olive branches tucked behind the holders keeps it airy.
Quick tipIf you’re renting, ask for brass holders that are the same finish across sizes. Mixed brass tones can look accidental.
Skip thisSkip silver candle holders in warm rooms — they pull the look cool and separate it from the rustic elements.
3. Black iron + micro greenery
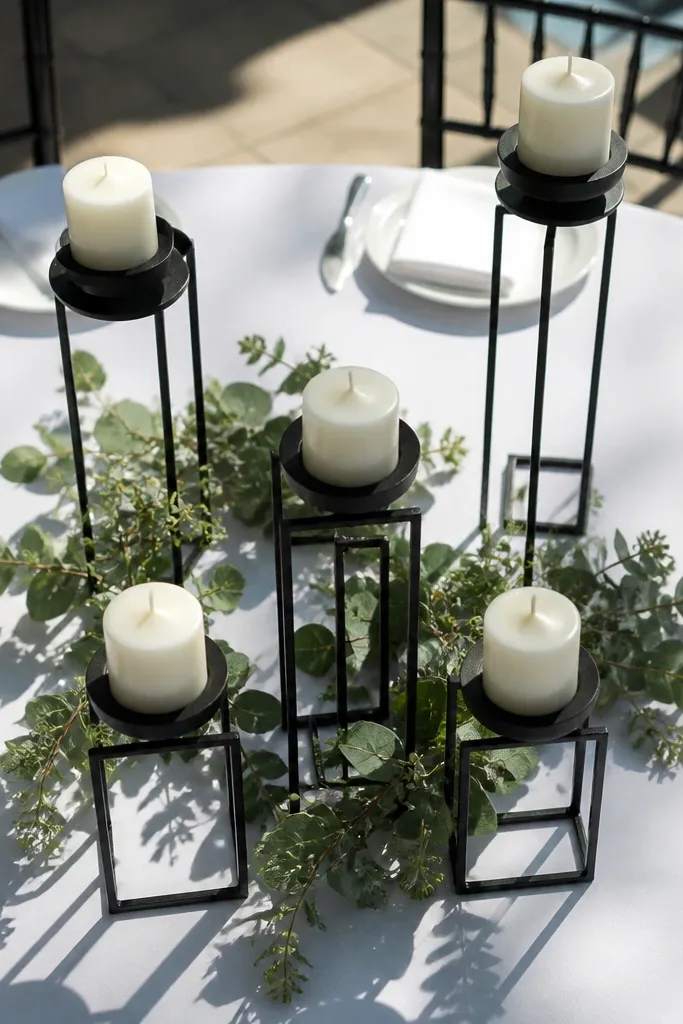
Black iron makes rustic chic look crisp instead of messy. It creates a clear frame around candles and bud vases, so the decor reads intentional even when your venue is bright or minimal. Micro greenery keeps everything delicate and close to the table plane, which helps it look classy in wide shots. This is a strong pick for modern barns, white-walled venues, and gardens with clean architecture.
Start with black iron candle sticks in a tight size range — pick one height for tapers and one height for votives. Then place them in a staggered line across the table or in small clusters of 2-3, leaving open space between to prevent a heavy look. Finally, add micro greenery like olive sprigs or eucalyptus tips in small bunches tucked behind candles rather than spread across the entire centerpiece.
Use matte black, not glossy black. Matte reads softer with rustic textures.
Don’t mix black iron with too many different metals. If you use brass elsewhere, keep it to napkin rings or one small accent, not everywhere.
4. Ceramic + meadow florals
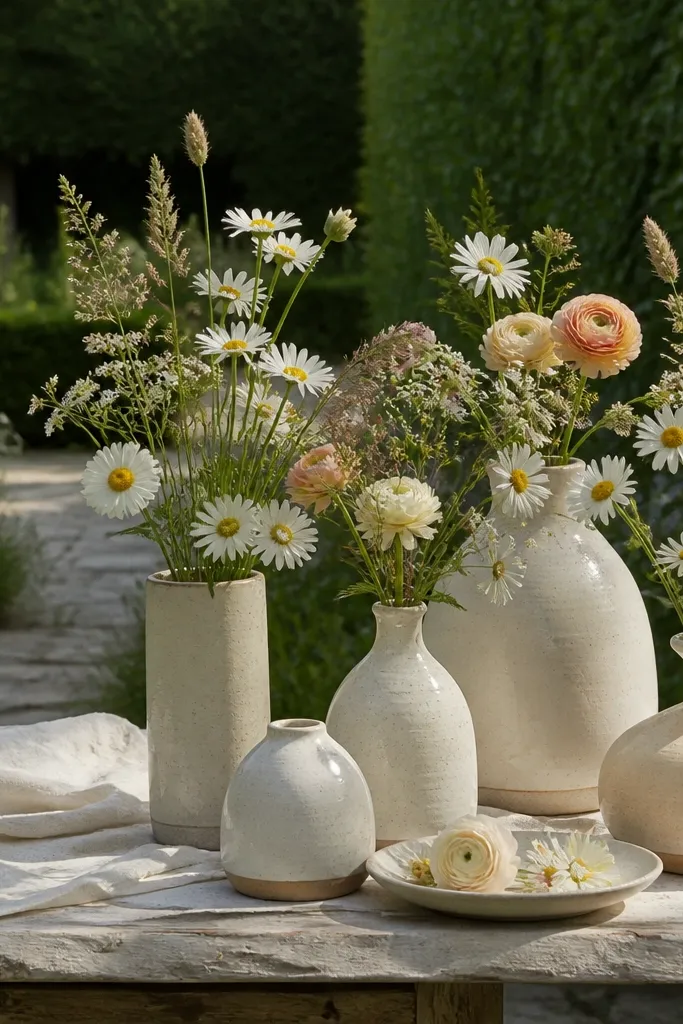
Ceramics give rustic chic a calm, artisanal look without needing heavy wood or lots of props. Meadow-style florals add movement and a lived-in feel, but the real win is how ceramics keep the color palette controlled. This style works especially well outdoors in natural light because ceramics don’t flare like some glass. It’s also a lifesaver for venues where you can’t bring bulky decor.
Start by choosing 2-3 ceramic shapes: one tall vase, one medium, one low dish or bottle — keep them in the same glaze family (cream, warm gray, or stone). Then place 1-2 stems per vase with a meadow approach: airy greens plus a few larger flower heads so it looks intentional, not sparse. Finally, repeat the same color accents across the place settings with small napkin ties or a single flower at each seat.
Quick tipPick one signature flower head and repeat it. It makes the whole table look designed even with “wild” stems.
Skip thisDon’t go full “overgrown.” If the florals spill past the vase rim too dramatically, it reads sloppy in photos.
5. Lantern rows + tapers
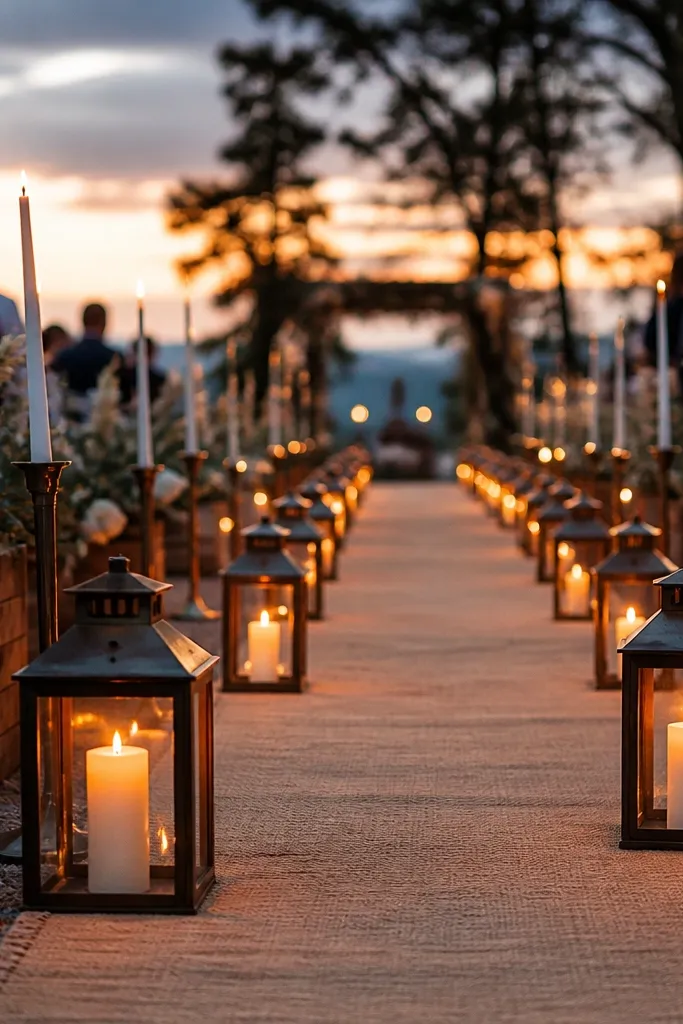
Lantern rows create instant ceremony impact and they look good from a distance, especially when the sun drops. Rustic chic works best here because lanterns bring warmth while tapers add clean vertical lines. This style also gives you a clear path for guests, which matters in outdoor venues where people wander. It’s great for dusk receptions, garden ceremonies, and outdoor spaces with limited built-in décor.
Start by deciding where the lanterns live: aisle path, entry walkway, or the perimeter around the ceremony area. Then choose lantern size and spacing based on the walkway width — for a standard aisle, set lanterns about 4-6 feet apart so the line reads continuous. Finally, use real tapers inside lanterns or pair lanterns with external tapers at the base — keep candle height consistent so the row looks even.
Quick tipPlan your lantern placement around wind. Use weighted bases or cover openings so flames stay stable.
Skip thisDon’t put lanterns too close together. Dense lantern rows look cluttered and block guests' sightlines.
6. Woven jute + neutral florals
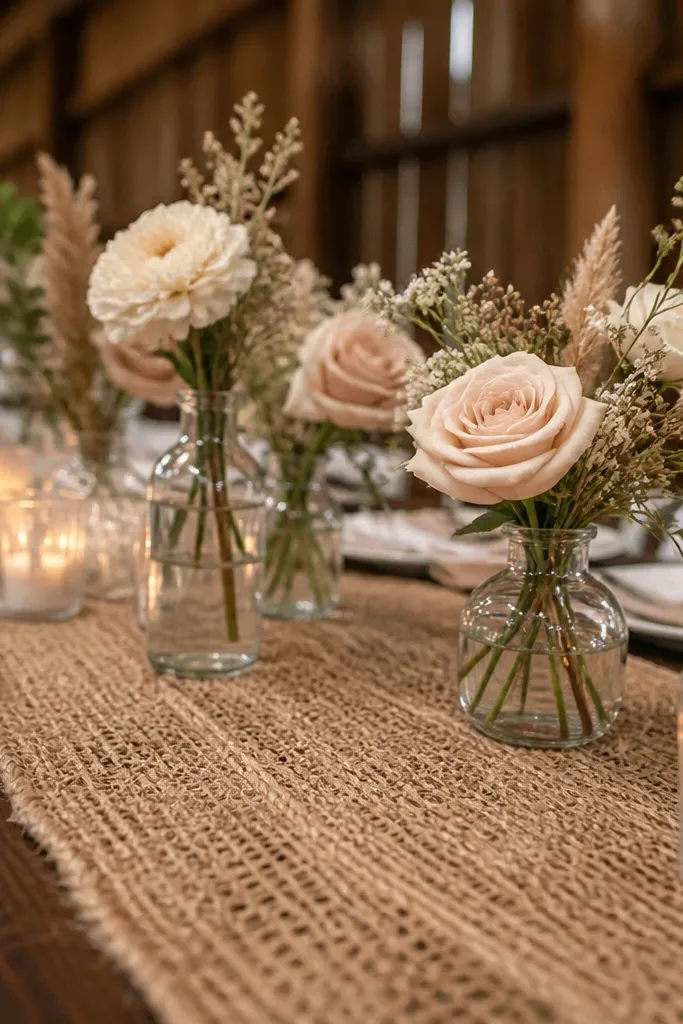
Woven jute adds texture without making the decor look like a themed barn party. When paired with neutral florals (cream, blush, dusty tan), it reads modern rustic instead of rough-and-ready. This style is also budget-friendly because jute can replace bulk fabric and you can keep flowers minimal. It’s a good match for rustic venues that already have charm and just need polish.
Start by using jute as a runner or napkin tie, not as the entire table covering. Then keep flower arrangements low and clustered so they don’t fight the coarse texture. Finally, add one smooth element to balance jute — a ceramic tray, matte white plates, or linen napkins — so the look doesn’t feel scratchy.
Quick tipSteam jute lightly before setup if it’s wrinkled. Wrinkles make it look cheap fast.
Skip thisSkip bright red and neon colors with jute. The texture amplifies harsh tones.
7. Wood slab + low bud vases
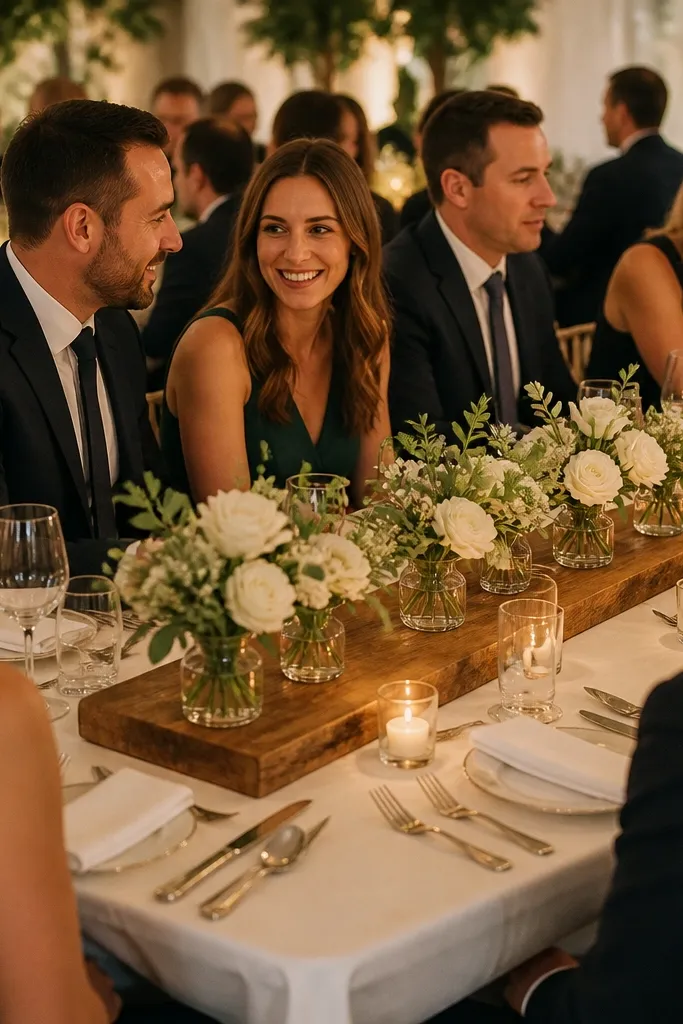
This style is clean, scalable, and easy to photograph. A wood slab gives you a strong base shape, and low bud vases keep conversations open at dinner. It looks especially good in venues with long tables or banquet setups because it repeats naturally across the room. If you want rustic chic without a million components, this is the one.
Start by cutting your centerpiece layout to table length: plan one slab per 4-6 feet of table width, depending on how wide your runner is. Then line up 5-9 bud vases spaced evenly, with 1-2 small candle holders tucked between vases for glow. Finally, keep florals short: think 4-7 inches above the slab so the arrangement stays low and neat.
Quick tipBring a tape measure for vase spacing. Small spacing mistakes show up immediately in wide banquet photos.
Skip thisDon’t stack bud vases at different heights. Visual unevenness makes the slab look cluttered.
8. Birch logs + wildflower mixes
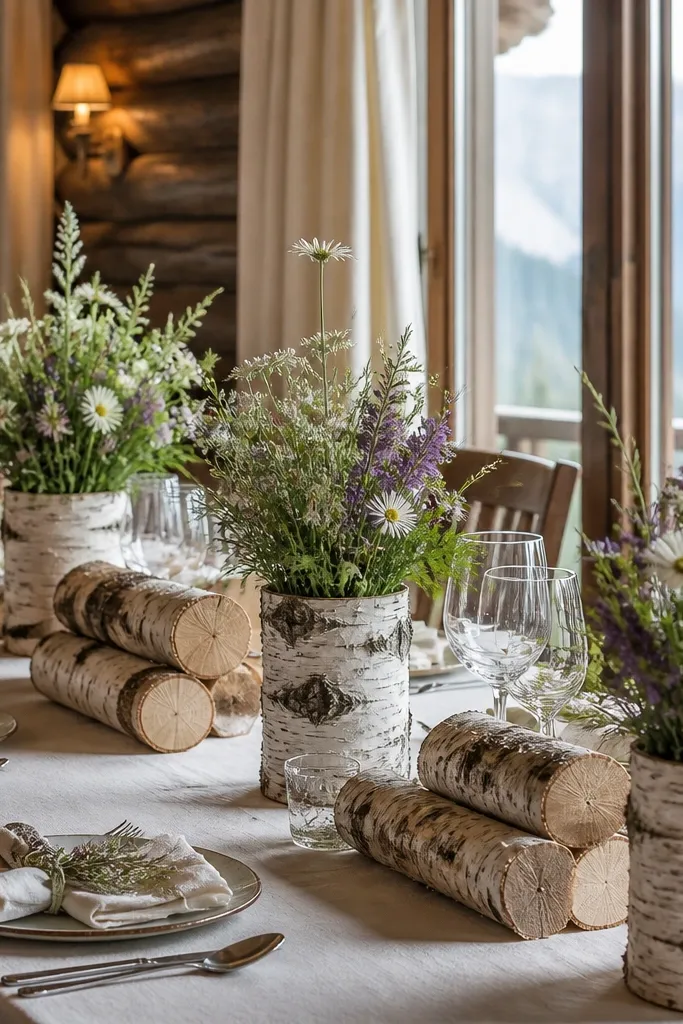
Birch brings a lighter, brighter rustic look than darker reclaimed wood. The pale bark contrast helps neutral florals feel airy, which is why it works in cabins and mountain venues where the space is already heavy with trees. Wildflower mixes give you texture and movement, but birch keeps it from turning into a theme. This style is great for outdoor paths, woodland ceremonies, and cozy indoor receptions with warm lighting.
Start by using birch logs as holders or bases, not as full table coverings. Then choose a wildflower palette with 2-3 colors max — cream, pale yellow, soft mauve works well — and keep stems varied but not chaotic. Finally, add 1-2 candle points per arrangement, using short votives so the flame doesn’t compete with the flower heads.
Quick tipIf you’re using real birch, check the surface for peeling bark and seal it lightly so it doesn’t shed on guests.
Skip thisSkip dark, saturated florals with birch. They can look too heavy against the pale texture.
9. Copper accents + warm candlelight
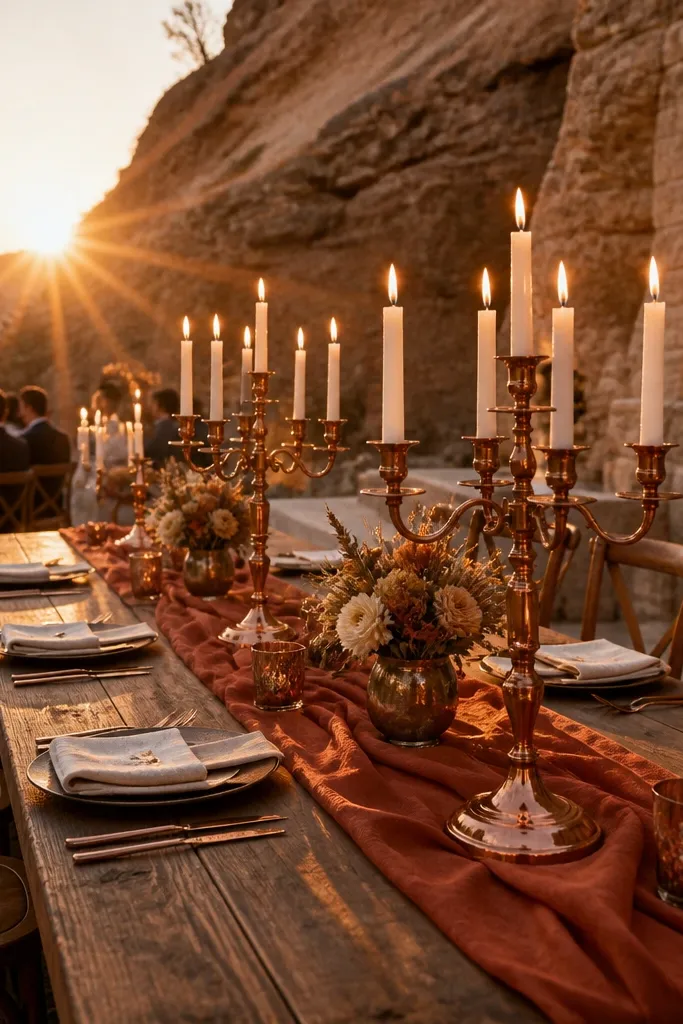
Copper adds a sunset-like warmth that makes rustic chic feel intentional in outdoor venues. It looks especially good when the ceremony happens near golden hour because copper catches the light without looking shiny like polished gold. This style also pairs well with desert tones and stone venues where the palette already runs warm. Keep it restrained — copper is a statement metal, so it works best when the rest of the decor is neutral.
Start by choosing copper items you can repeat: small vases, bud holders, or a few candlesticks. Then anchor the table with neutral ceramics and linen so copper doesn’t dominate every surface. Finally, use amber or cream tapers and place them at staggered points rather than lining them up perfectly — it reads more natural and less staged.
Avoid mixing copper with bright silver. If you’re going copper, keep other metals muted or black.
Don’t add copper everywhere. Too many copper pieces make the look feel like a craft fair.
10. Macramé + dried florals
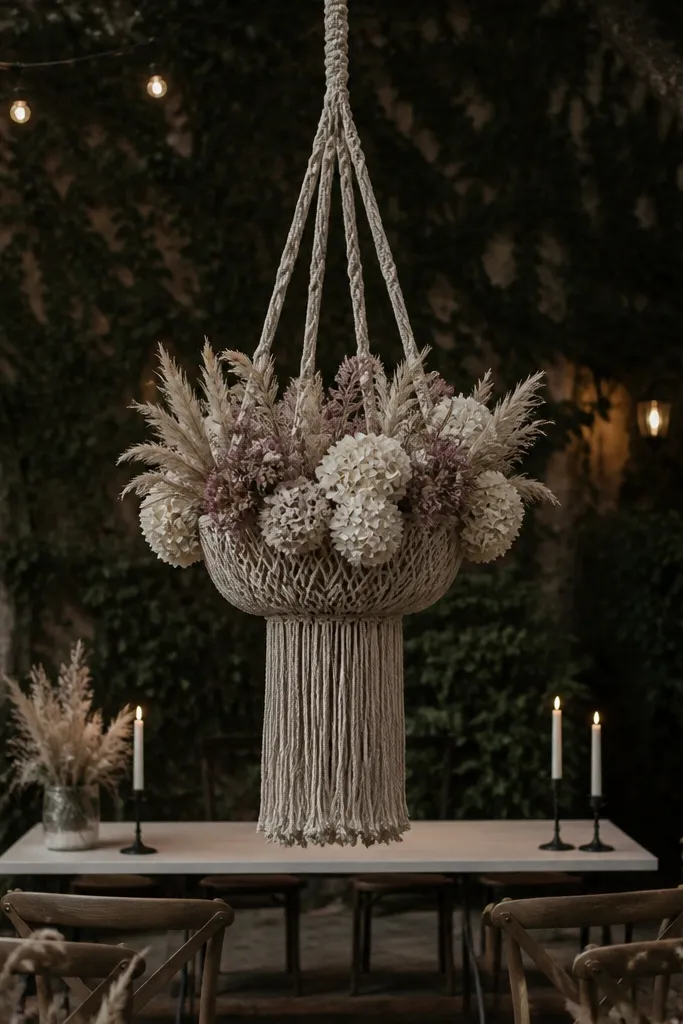
Macramé brings height and softness, while dried florals add texture that lasts through the entire event. This style reads boho-rustic chic, but it becomes wedding-appropriate when you keep the palette neutral and the shapes intentional. It’s best for outdoor courtyards, shaded garden receptions, and venues where you can hang or position wall décor. In bright sun, dried textures look great because they hold shape and shadow.
Start by picking a macramé placement: either behind the head table or as a ceremony photo backdrop. Then choose dried florals with a consistent base — pampas, rabbit tail, and preserved eucalyptus — and avoid mixing too many different textures. Finally, keep tables simple: one small dried arrangement per table plus a few hanging or backdrop pieces so the room doesn’t feel crowded.
Quick tipPlan for wind. Secure hangings with weights or extra ties so the backdrop doesn’t swing during photos.
Skip thisDon’t use bright dyed dried florals. Natural tones keep the look chic.
11. Hay bale "stage" styling
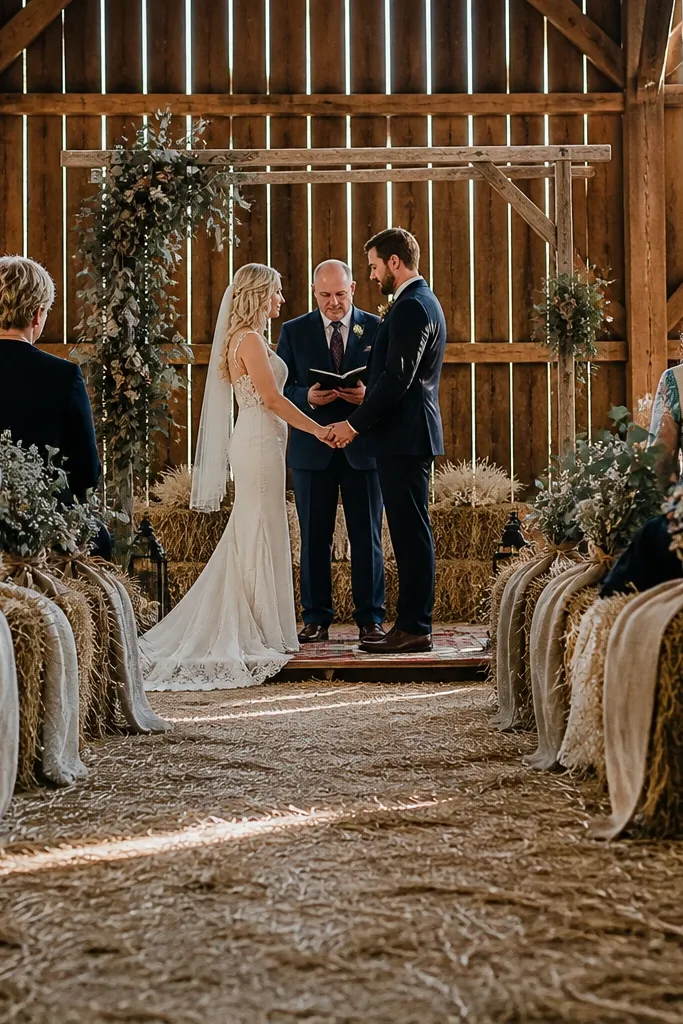
Hay bale styling is one of the fastest ways to make a rustic venue feel designed, especially when you need a focal area for the ceremony or a photo moment. It works best when the venue is already barn-like and the ceiling is high enough to support the visual weight. The trick for rustic chic is to soften the hay with clean cushions, neutral fabrics, and controlled lighting. This is a great option when you want a tactile, practical set piece without building an arch.
Start by selecting hay bales that look uniform in color and tightly packed; loose, uneven bales look messy. Then add a layer on top for guests and photos — a cream cushion or a neutral blanket — and place lanterns or low candle holders at the edges. Finally, build height with one or two simple elements like a small wooden frame or a short greenery arrangement so the hay doesn’t become the only texture.
Quick tipUse a protective liner under any fabric that touches hay if the venue is dusty.
Skip thisSkip bright patterned cushions. The hay already brings texture; loud patterns fight it.
12. Vintage glass bottles + mixed greens
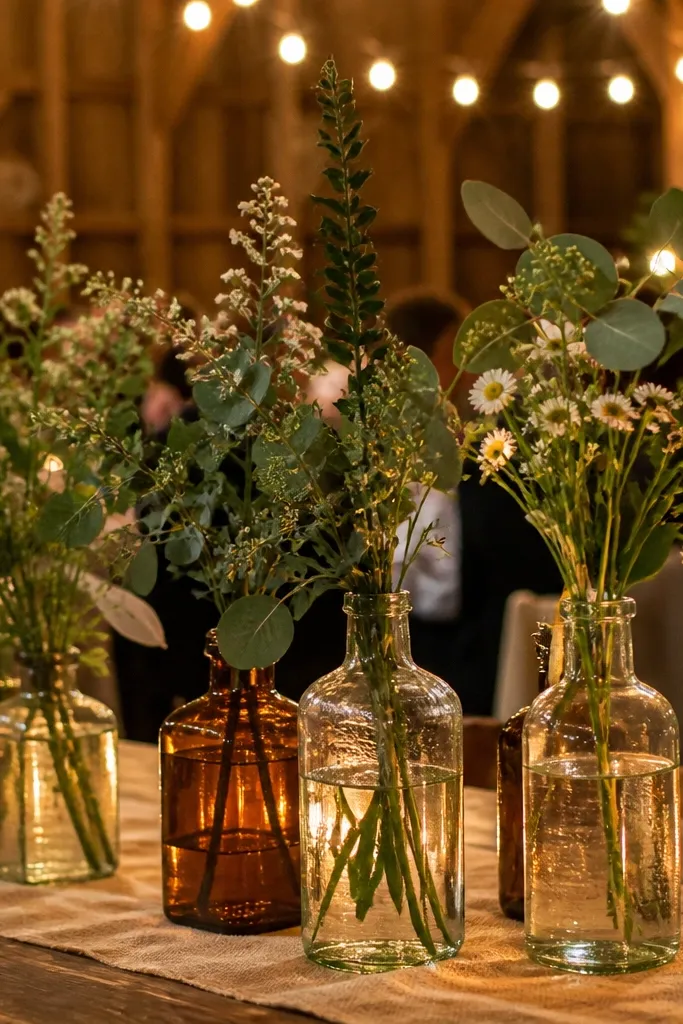
Vintage glass bottles give rustic chic a “collected over time” look without needing heavy props. Mixed greens keep everything cohesive even when bottle shapes vary, and the glass adds sparkle from candlelight and overhead bulbs. This style fits garden weddings, farmhouse venues, and casual receptions where guests want a lived-in feel. It also scales well for larger guest counts because bottles are easy to distribute across tables.
Start by sorting bottles into 2-3 height groups: tall, medium, and short. Then fill with water and arrange greens first — one main green type with a few accents — so the table looks full even if flowers are minimal. Finally, place one bottle cluster per table section and add a single candle point for glow rather than trying to decorate every inch.
Quick tipUse consistent bottle colors for a cleaner look. Too many random hues read messy.
Skip thisDon’t mix heavy flowers with bottle variety. If bottles vary a lot, keep flower heads simple.
13. Stoneware plates + single-stem centerpieces
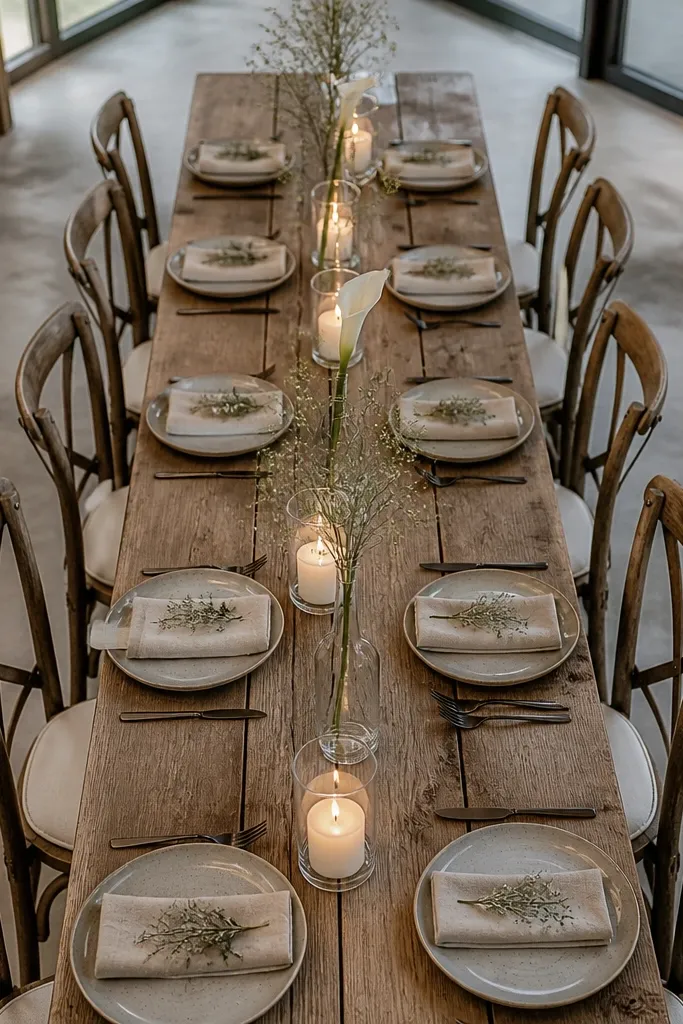
This style leans minimal rustic chic and it looks expensive when the rest of the table is clean. Stoneware plates add weight and texture, while single-stem centerpieces keep the arrangements airy. It’s a smart choice for venues with strong architecture because it doesn’t compete with the space. If you’re worried about decor feeling “too much,” this is a safe, stylish direction.
Start by choosing stoneware in one tone family: speckled gray, warm cream, or light clay. Then place one single-stem vase per table setting or per small cluster of two settings, keeping stems tall but controlled so they don’t hit guests' eyelines. Finally, add short candle votives in matte holders so the lighting looks soft, not harsh.
Quick tipPick flowers with strong structure for single stems: delphinium, gladiolus, or tall ranunculus heads.
Skip thisSkip crowded centerpieces. Single-stem looks best when you leave air around it.
14. Branch arch + sheer fabric
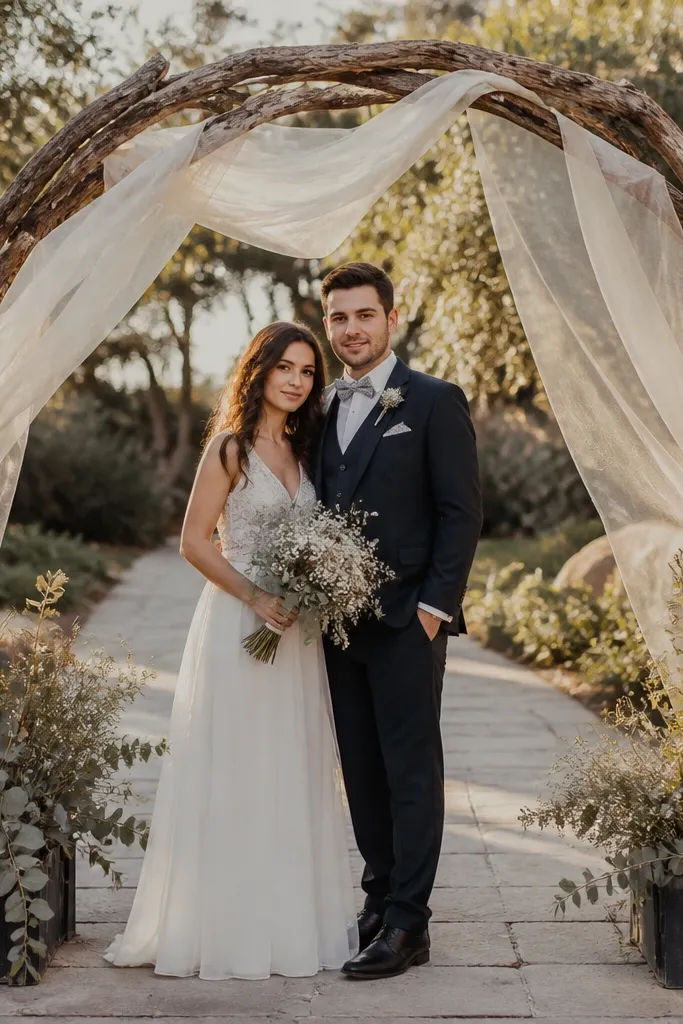
A branch arch creates a clear ceremony focal point without needing a big floral budget. Sheer fabric softens the branches so it reads romantic instead of rustic-only. This style works well in open outdoor spaces, gardens, and barns where you want a defined “frame” for photos. It also makes rustic chic look intentional because the arch shape does the work that scattered table decor can’t.
Start by building the arch shape around a stable frame and anchoring it to the ground or a platform if outdoors. Then attach sheer fabric panels in 2-3 sections so it drapes naturally, not like a curtain rod. Finally, add small clusters of flowers at the top and sides only — one cluster per side is enough — and keep the rest greenery sparse so the arch stays light.
Quick tipPlan for wind — sheer fabric should be weighted at the bottom or it will whip during the ceremony.
Skip thisDon’t overload the arch with thick florals. It turns into a heavy structure and loses the airy rustic chic effect.
15. Statement chandelier candles
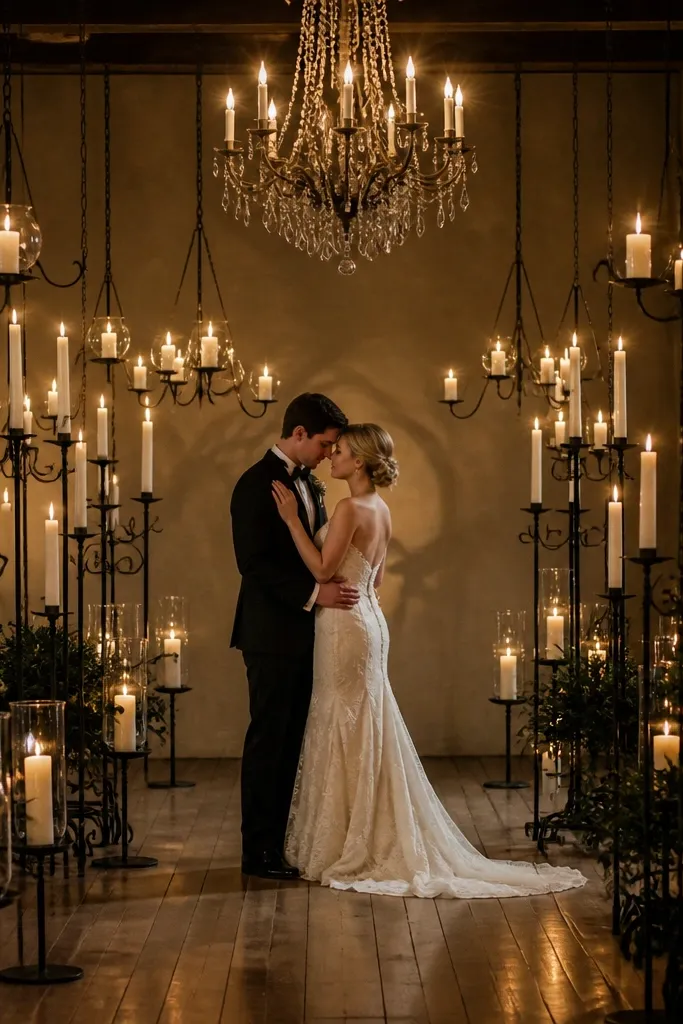
If your venue has a chandelier or overhead feature, use it. Statement candle styling under existing overhead lighting gives you a high-impact look without building extra backdrops. Rustic chic works here because candlelight creates warmth and the candles bring vertical rhythm to a room that might otherwise feel flat. This style is best for winter weddings and indoor receptions where you want photos to look soft and romantic.
Start by confirming where you can safely hang or place candle clusters. Then choose candle heights that sit below the chandelier’s lowest decorative points so nothing looks crowded overhead. Finally, keep table decor simpler — one low centerpiece per table and let the overhead candles carry the mood.
Quick tipUse unscented candles if your venue is enclosed. Strong scents can feel overpowering in tight spaces.
Skip thisDon’t pair chandelier candles with tall centerpieces. The room ends up competing visually.
16. Farm table runner + oversized blooms
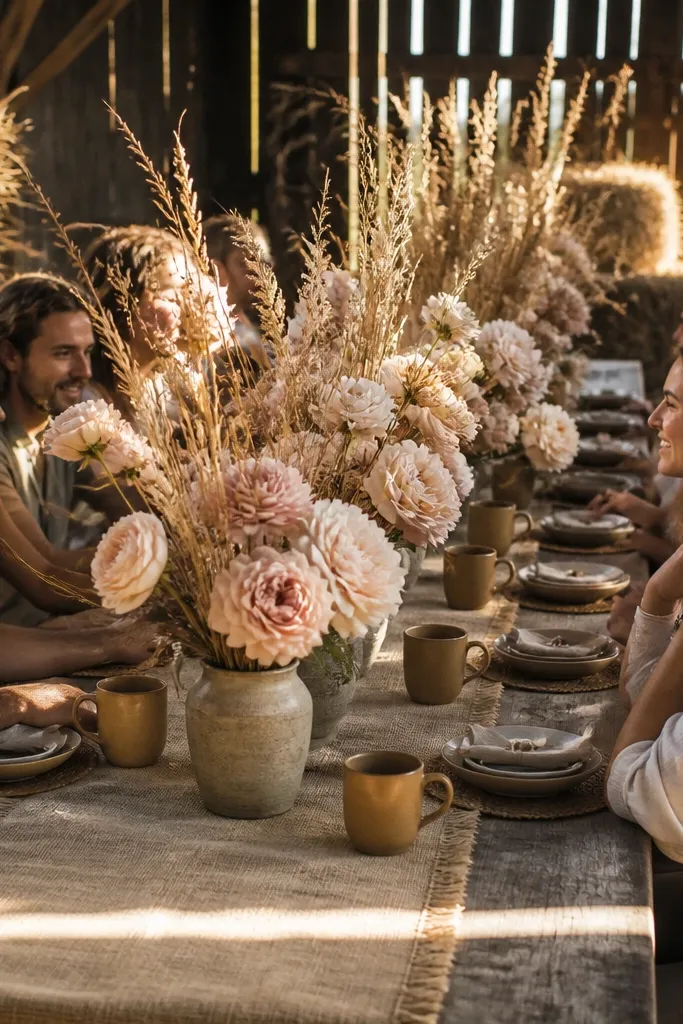
This is rustic chic with a little drama. A farm table runner gives you the horizontal base, and oversized blooms make the centerpieces the main event without needing elaborate props. It works best for communal seating and venues where tables are the visual anchor, like barns with long banquet layouts. If you want photos that look lush but still grounded, this is a good balance.
Start by choosing runner width that covers the center line — usually 14-18 inches — so the table looks dressed but not swallowed. Then place oversized blooms in low containers so the flower mass sits just above the runner, not at head height. Finally, keep the vase count low per table section — 2-3 containers across a long table usually looks better than lots of tiny ones.
Quick tipPick one bloom family for the oversized effect. Too many flower types makes the centerpieces look busy.
Skip thisSkip tiny bud vases on top of oversized blooms. The mix of scales looks unplanned.
17. Garden hedge backdrop + lanterns
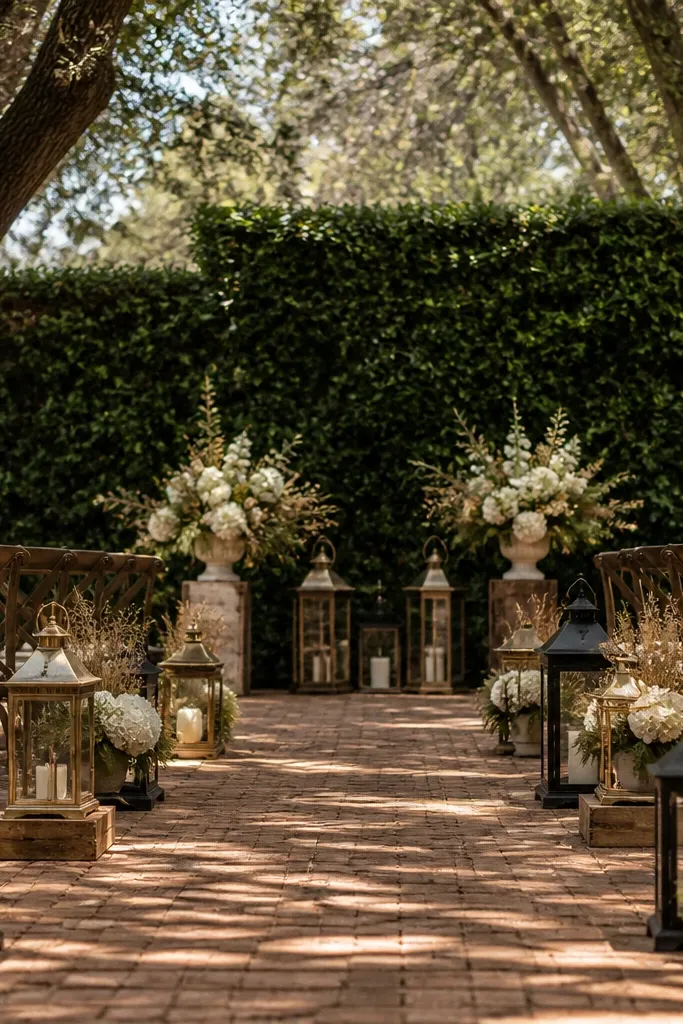
Using a real hedge or garden wall as the backdrop is smart because it gives depth without DIY building. Lanterns add warmth and movement, and neutral florals keep the look rustic chic instead of “festival.” This style works especially well when your venue has natural greenery that already frames the ceremony. It also makes guest photos look layered — hedge behind, lanterns around, and flowers in front.
Start by positioning your ceremony line so the hedge sits straight behind the couple and doesn’t get blocked by seating. Then place lanterns along the aisle edges or in a staggered line at each side, keeping spacing consistent from front to back. Finally, add small greenery clusters on the lantern bases and keep centerpieces simple so the ceremony backdrop stays the hero.
Quick tipBring a few extra lanterns for the sides. Side coverage looks better in photos than a single straight row.
Skip thisDon’t add a second artificial backdrop behind the hedge. It makes the space feel crowded.
18. Neutral wool felt + sculptural candles
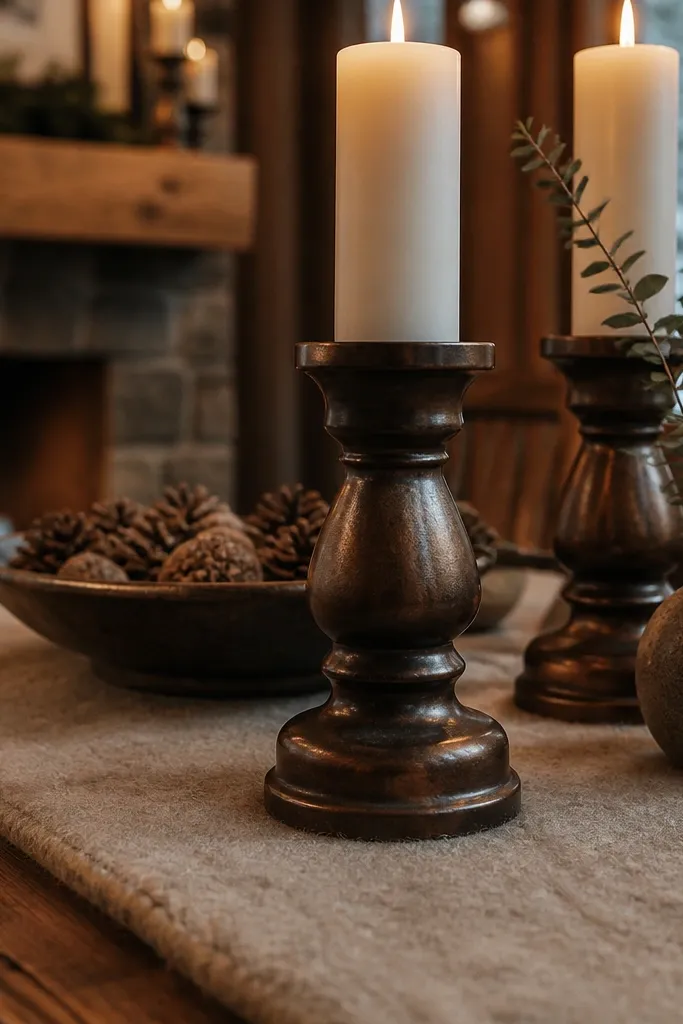
This is winter rustic chic that looks soft, not heavy. Wool felt adds a muted texture that feels cozy under indoor lighting, and sculptural candle holders give you shape even with minimal florals. It’s a great choice for mountain lodges and indoor receptions where you want calm, warm photos. The look is especially good when the color palette is limited — creams, taupes, and deep browns.
Start by rolling out wool felt runners in sections so you can control wrinkles and keep edges clean. Then build centerpieces around candle clusters in sculptural holders, with only a few dried stems or small greenery accents. Finally, keep tableware simple and matte — stoneware or matte ceramics — so felt texture shows up clearly.
Test felt color in venue lighting. Some taupes go gray under overhead LEDs.
Skip shiny satin table runners. Felt needs matte companions to read luxurious.
19. Modern rustic greenery garland
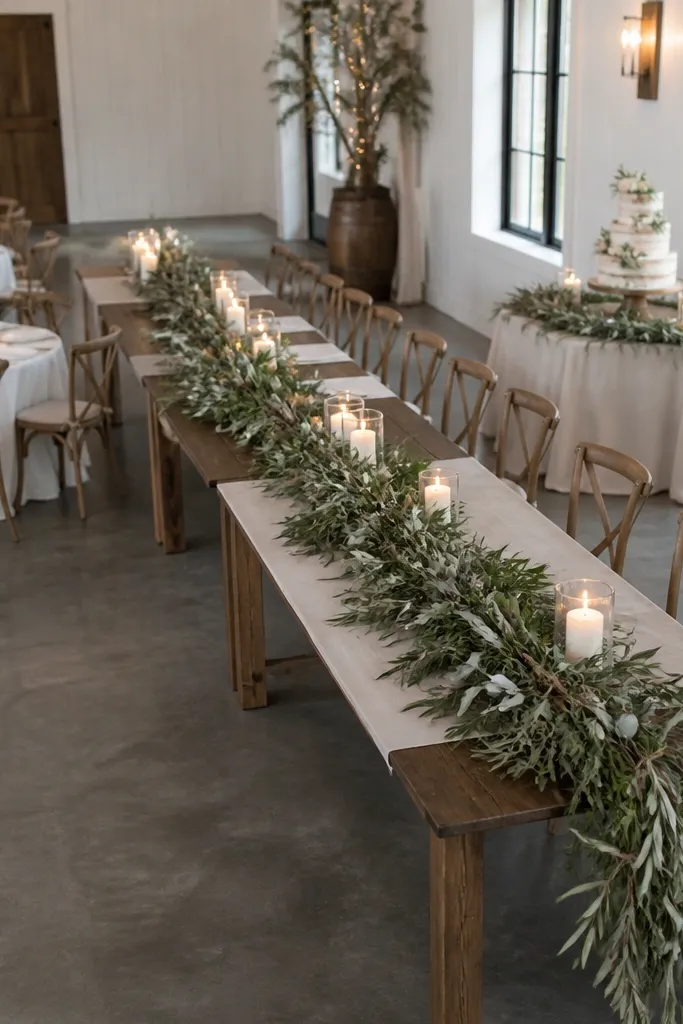
Modern rustic greenery garland keeps rustic chic clean and repeatable. It’s a strong option for venues with clean lines because it doesn’t add bulky props, but it still brings texture and softness. The garland also helps your decor look connected across the room — ceremony, head table, and cake area can share the same greenery. This style is ideal when you want a polished look without heavy construction.
Start by choosing one greenery type as the base, like olive or eucalyptus, so the garland looks uniform. Then place it low and straight along the table edge or across the head table front, securing with floral wire or zip ties behind the table. Finally, add candles in a consistent size and keep bud vases spaced so the garland reads as the main line, not a background blur.
Quick tipUse a single ribbon color for tying garland segments. It adds order without extra clutter.
Skip thisDon’t mix too many greenery textures in one garland. It turns patchy instead of lush.



