
1. Terracotta Gauze Canopy Over the Welcome Table
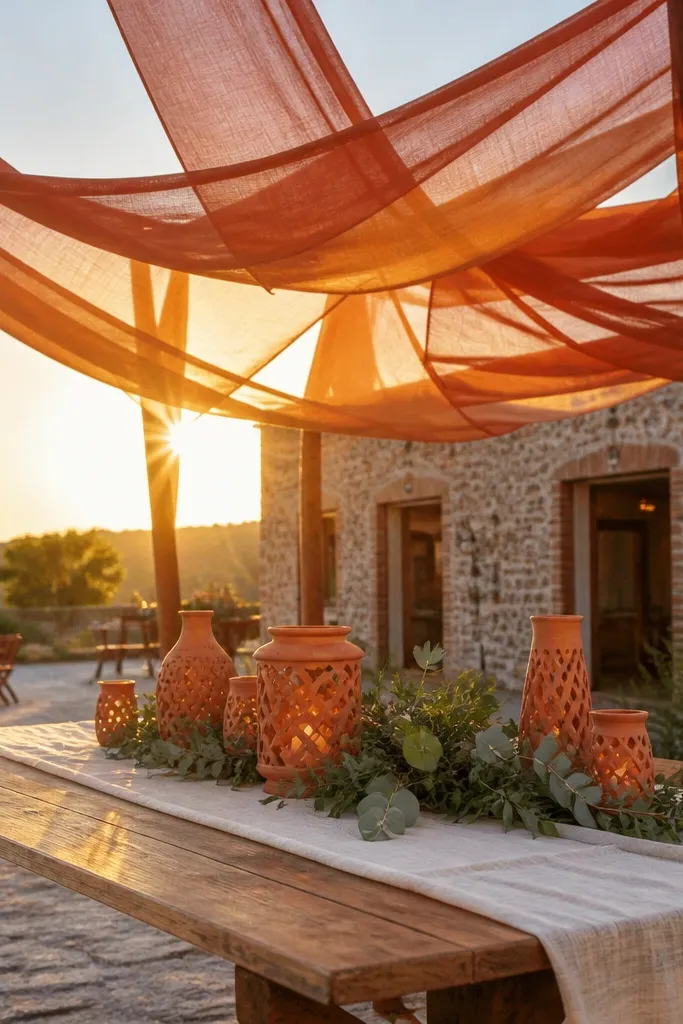
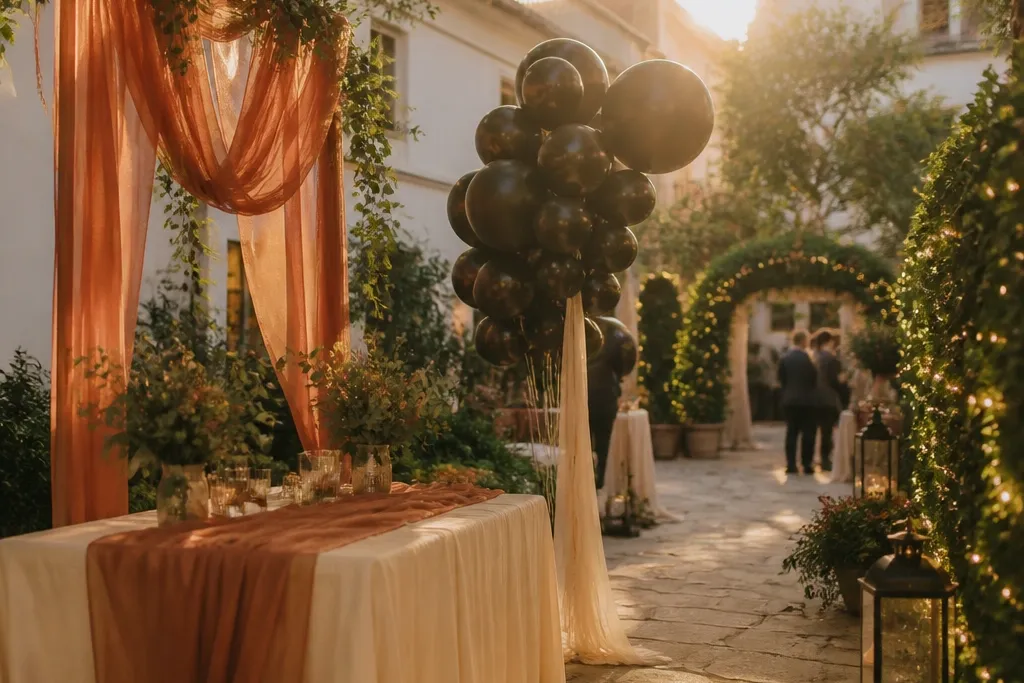
This is one of the easiest ways to get that “styled” look without a complicated build. A gauze canopy adds movement in the breeze, softens hard outdoor lighting, and gives photographers a clean, warm focal point right when guests arrive. Terracotta and warm cream read well in late-day sun and don’t turn chalky like bright white can. It suits brunchy daytime showers and early-evening parties because the fabric catches string-light glow later. Keep the rest of the table simple so the drape stays the star.
Start by choosing a canopy structure that’s already stable — a portable frame stand, or a simple tension pole with weighted base. Lay gauze in two layers so it looks full, then pin the folds high enough that it still clears chairs and traffic. Then set the table with one height variation item (tall candle or vase) and two low items (trays or cards) so the canopy doesn’t look empty underneath. For cost, plan around $60-150 for gauze fabric and supplies, or $120-250 if you rent a frame kit.
Bring 6-10 extra straight pins and use them to tame fabric corners before guests arrive.
Skipping a second fabric layer makes the canopy look see-through in harsh sun.
2. Ink-Black Balloon Cluster With Warm Cream Ribbon
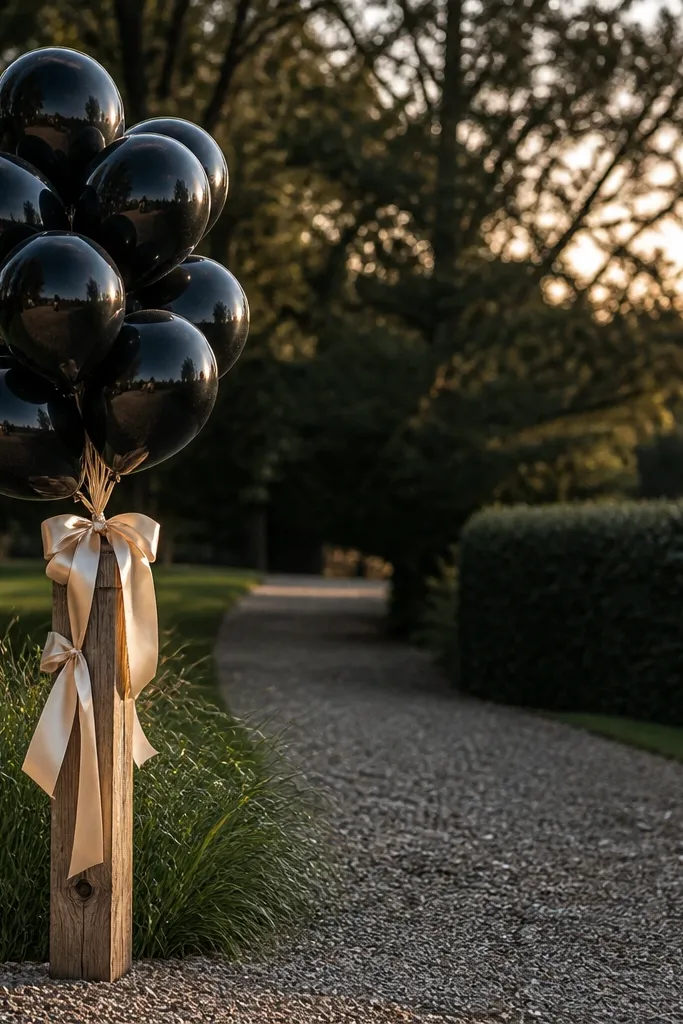
Balloon clusters look best outdoors when they’re styled like a graphic element, not a random pile. Ink-black balloons create strong contrast against grass and skin tones, while warm cream ribbon keeps it soft instead of goth. This works for entrance photos because it frames bodies without needing a full arch. It also photographs well at golden hour because the ribbon catches light and the balloons stay visually crisp. Pair it with one matching sign color so the cluster feels intentional.
Start by buying a balloon kit with pre-made sizes (you want at least 3 sizes so it doesn’t look flat). Tie warm cream ribbon loops to the cluster anchor and let the loops hang to about knee height for a natural look in photos. Place the cluster near a straight line — a walkway edge or fence — so it reads as a designed moment. If you’re doing this DIY, plan 45-75 minutes and budget $35-90 for balloons plus ribbon.
Use helium only for the top balloons; keep the bottom ones weighted so the cluster doesn’t drift.
Using all one balloon size makes the cluster look like a party decoration instead of a photo prop.
3. Mini Flower Wall on a Roll-Up Backdrop Stand
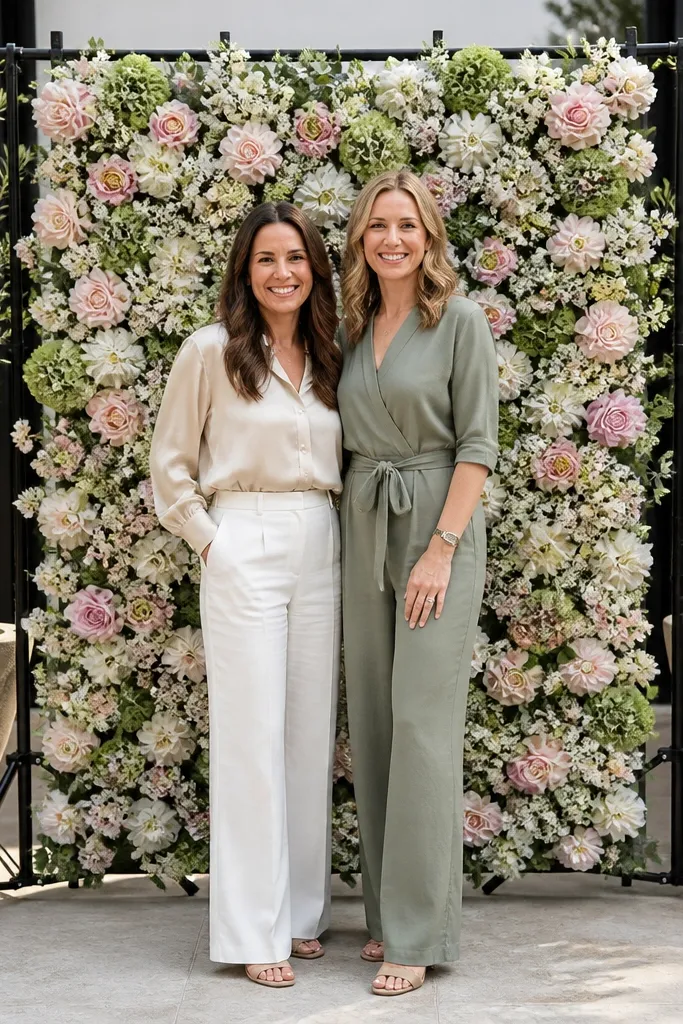
A mini flower wall gives you the “wow” without forcing you to build a full-size installation. The key is that it’s scaled for outdoors and for real groups: it frames a couple of people standing side-by-side, not just one face. Blush and sage flowers look clean in daylight and don’t clash with skin tones. This idea suits photo stations for showers because guests can step in front of it while you keep the rest of the party moving. It also works when your venue has limited space.
Start by renting or buying a roll-up backdrop stand sized around 5x6 ft so it fits on a patio or lawn corner. Choose a faux flower mix with at least two greens and one neutral filler so it reads full from a distance. Then anchor it with sandbags or weights if it’s on grass, and place it 4-6 ft from the main seating area to avoid foot traffic. Budget $100-350 for rental options, or $120-300 to buy a faux kit and stand.
Quick tipAdd one statement accent (a large bow or a single balloon “B” style letter) so the wall has a clear focal point.
Skip thisPutting the wall too close to people makes it look cropped in photos.
4. Rustic Arch With Fabric Swags and One Big Floral Dome
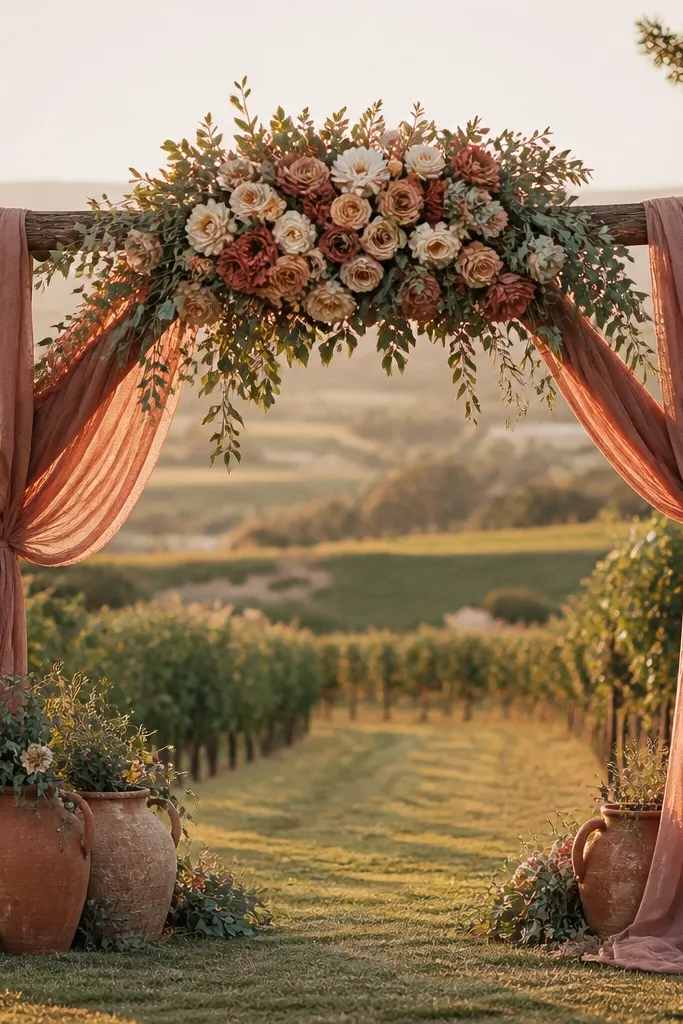
If you want a true outdoor “moment,” build it around an arch, but keep the floral simple. Fabric swags create volume even when flowers are minimal, and a single big floral dome gives the photo a clear centerpiece. Earthy tones like terracotta, dusty rose, and eucalyptus green look grounded against outdoor backgrounds. This works best for a ceremony-style toast, a vow-adjacent blessing, or a photo moment where everyone gathers. The arch also helps you control composition since guests naturally face forward.
Start by choosing a rental arch kit and fabric in two shades that blend — warm cream plus dusty rose works well. Drape the fabric in long vertical lengths so it frames the inside of the arch, then add the floral dome at eye level. Place the arch so the sun isn’t blasting directly behind it; aim for side lighting. Expect $250-700 for a rental setup depending on size and florals.
Quick tipTie fabric ends with discreet ribbon loops so they don’t flutter unpredictably.
Skip thisUsing too many different flower colors makes the arch look busy instead of styled.
5. Lantern Tree Line With Warm White Micro Lights
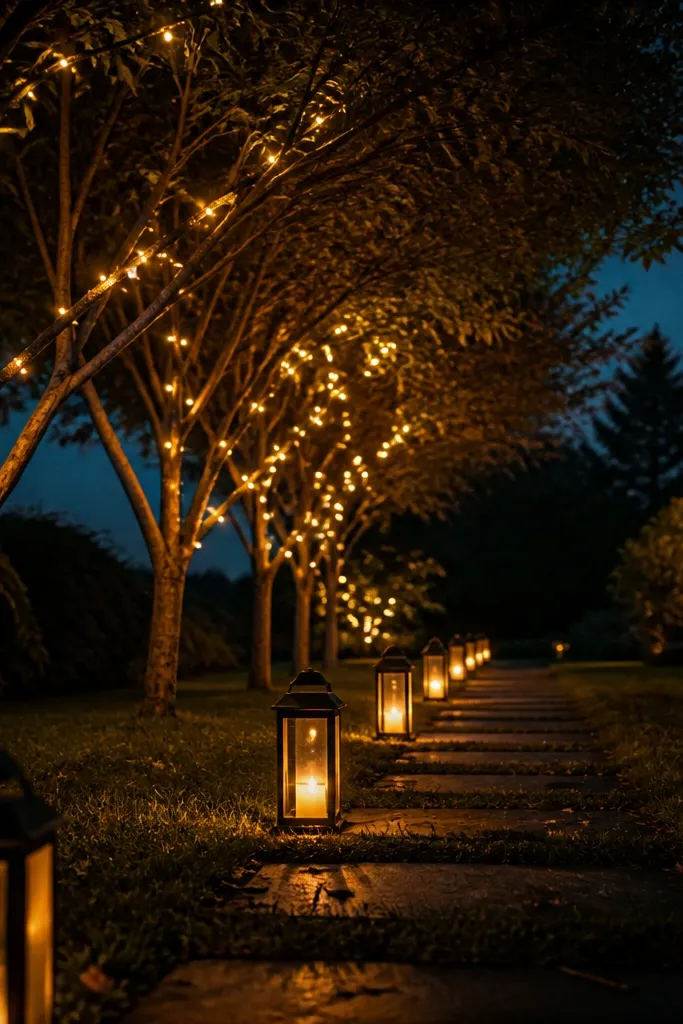
Outdoor decor looks premium when it’s layered with light. A lantern line along a tree edge creates depth and a walkable path, which makes photos feel cinematic even in a simple yard. Warm white micro lights keep the palette soft and flattering, especially for evening photos. This idea suits backyard showers, garden venues, and any space with a natural boundary like trees, hedges, or a fence line. Keep lantern sizes consistent so it reads as a designed installation.
Start by spacing lanterns 6-10 ft apart along a straight line, then stagger heights slightly so it doesn’t look like a grid. Use battery or plug-in micro lights depending on where your power source is; plan extension cords early. Then add one matching accent color by tying ribbon around a few lantern handles. Budget $80-220 for lanterns and lights, plus $10-25 for extension cords and timers.
Quick tipUse a timer so the lights turn on automatically 30-45 minutes before photos start.
Skip thisMixing cool white and warm white bulbs makes the whole color story look off.
6. Terracotta and Cream Ribbon Wands for Bride-To-Be Guests
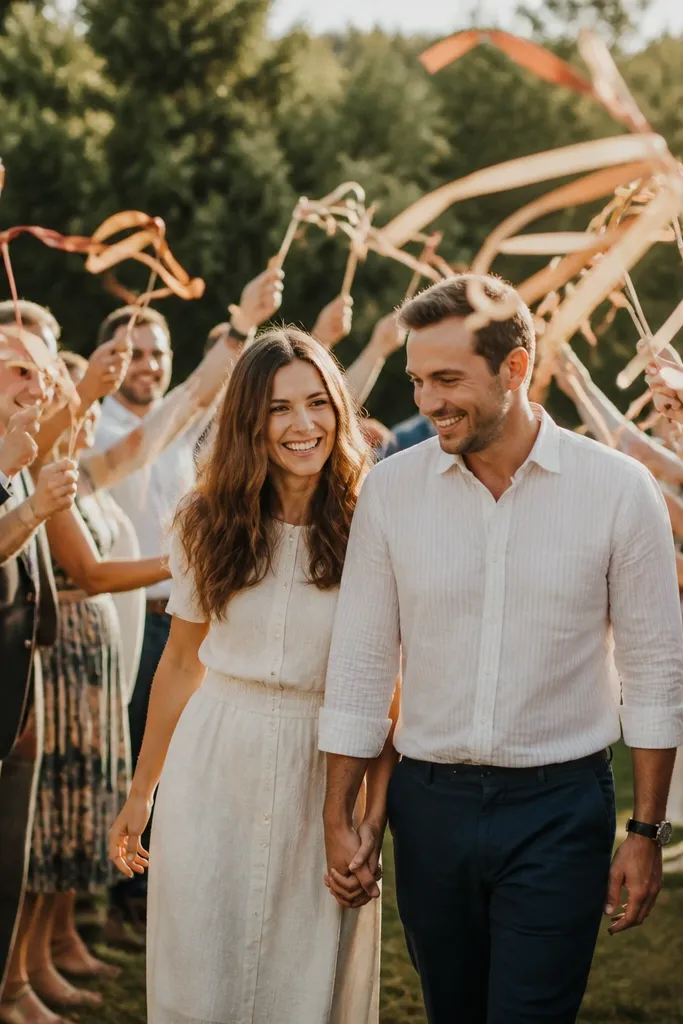
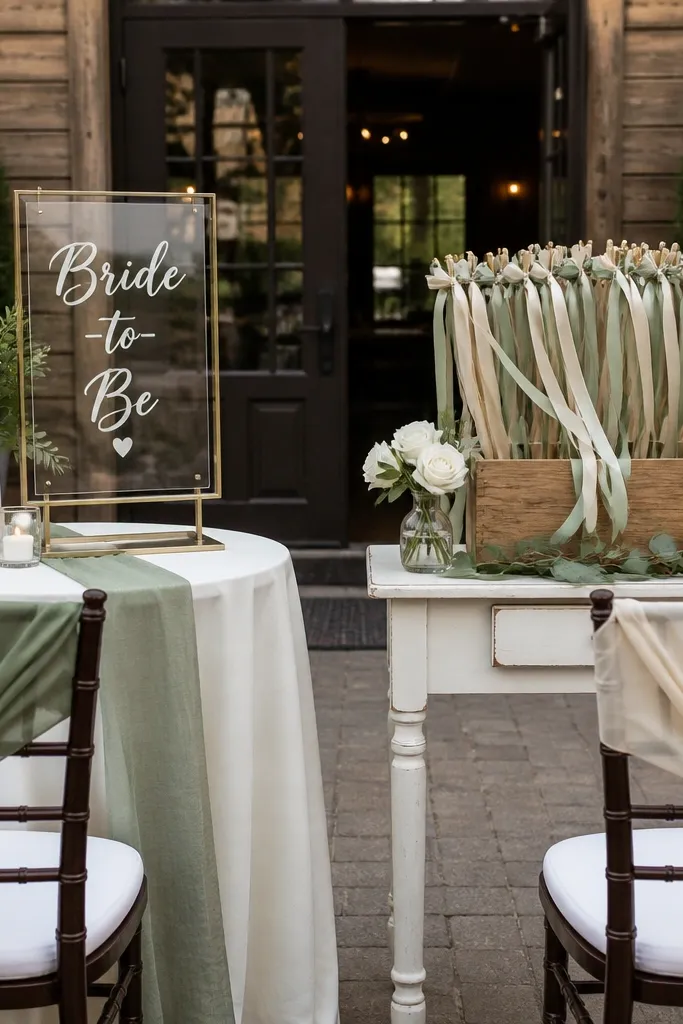
Ribbon wands are one of the few decor ideas that actively improves photos while guests hold them. They move in the air, so your pictures get motion blur that looks intentional, not messy. Terracotta and cream are photo-friendly outdoors because they don’t glare in sun the way bright white can. This works for a “send-off” moment, a group toast, or a playful dance break during a shower. It also reduces the need for extra props because the guests become part of the decor.
Start by buying ribbon in two widths (one 1-inch and one 0.5-inch) and cutting lengths about 18-24 inches long. Tie multiple strips to a lightweight stick or dowel, then add a small fabric knot so the bundle looks neat. Set them in a basket at the entrance or near the dessert table so guests grab them naturally. Budget $25-60 depending on ribbon yardage and the number of guests.
Keep one ribbon color set for photos and one set for “party time” so you can control the look.
Using thin, flimsy ribbon that tangles makes the motion look chaotic.
7. One-Color Flower Table Runner With Floating Candle Cups
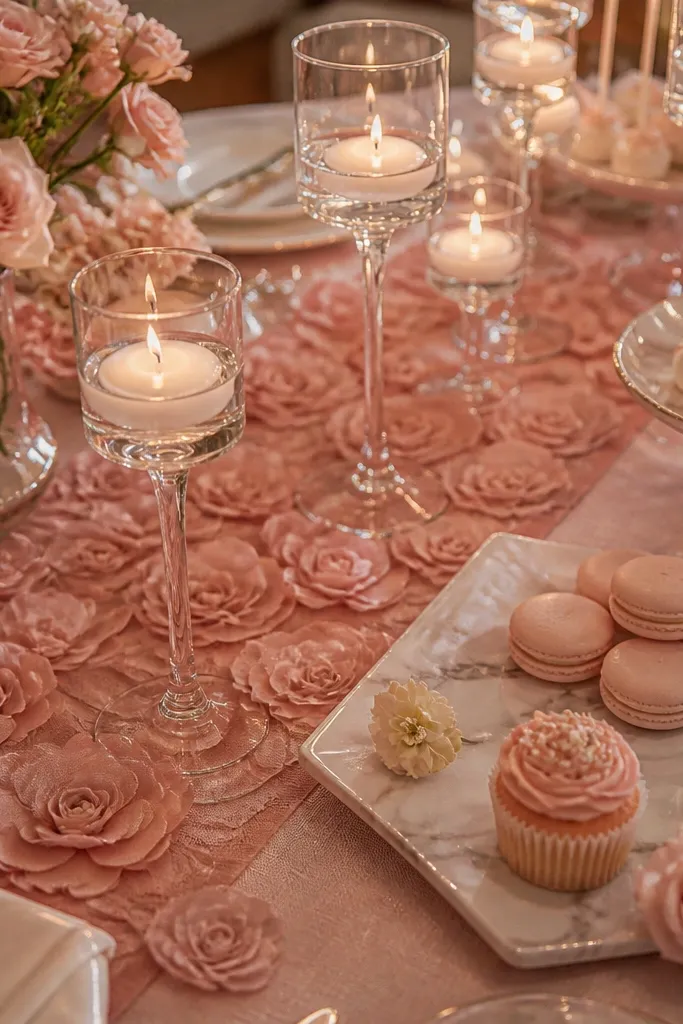
Tables look like a magazine spread when the runner is cohesive and the candles add height. Choose one flower color family — blush or deep sage — and repeat it across the runner and small accents. Floating candle cups in glass holders add shimmer that reads beautifully on outdoor tables. This idea suits dessert spreads and gift tables where guests linger. It also helps the bride-to-be look like the centerpiece because the table becomes the background for most close-ups.
Start by laying a fabric runner first (linen or gauze) and then placing flower clusters at regular intervals along the length. Put candle cups in the gaps between clusters so the table has breathing room. Then add two height levels: one tall vase at one end and low trays at the other. Budget $60-180 for flowers, candles, and glassware, depending on whether you use faux or fresh.
Quick tipUse clear or frosted glass candle holders so wind doesn’t blow flames out as easily.
Skip thisOverstuffing the center — it blocks sightlines and makes photos look crowded.
8. White Linen Chair Sashes With Sage Tie Bows
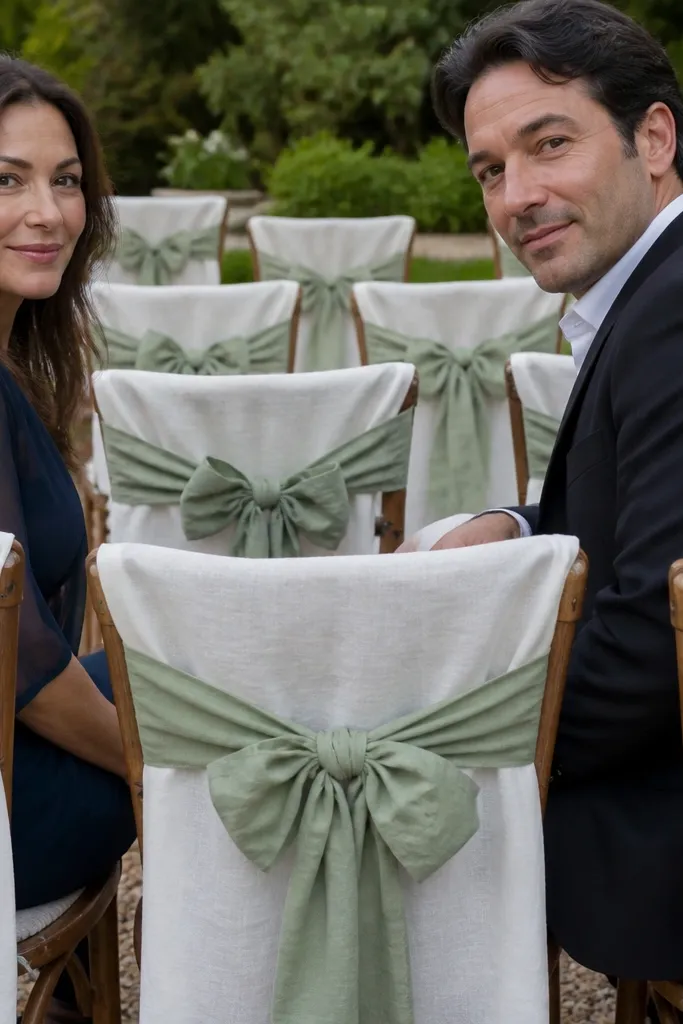
Chair sashes are small, but they change the whole photo because they create a repeating pattern across the seating. White linen reads clean in daylight, and sage tie bows keep it grounded instead of sterile. This is a great option when your venue already has chairs and you don’t want to cover the entire space with big installations. It suits garden showers and outdoor brunches where people sit for a while. Also, it’s a practical decor because you can remove them quickly after photos.
Start by buying linen sashes in bulk or renting them in a width that covers the backrest without sagging. Tie a sage bow at the center of each chair back and keep the tails the same length so the pattern looks even. Then choose one matching sign color and place it near the seating to complete the look. Budget $1-5 per chair for rental or DIY materials, depending on how many chairs you need.
Measure one chair back height and cut all sashes to match so you don’t get uneven folds.
Using satin instead of linen — it reflects harsh sunlight and can look shiny in photos.
9. Personalized Acrylic "Bride-to-Be" Table Top Sign on a Stand
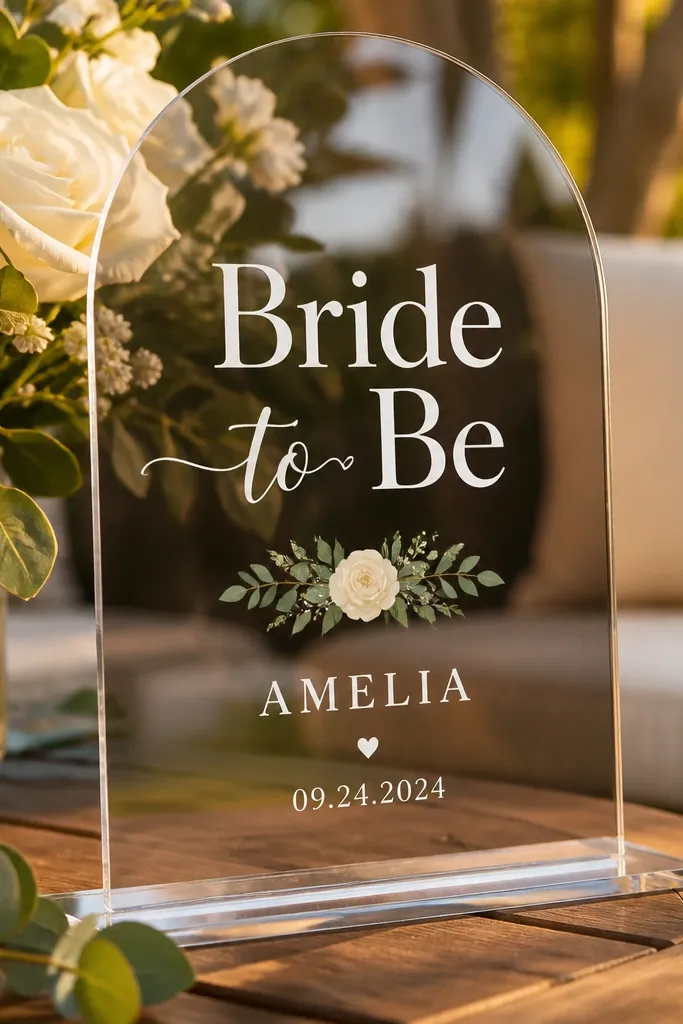
A crisp table sign makes the whole setup look intentional, especially when everything else is natural textures. Acrylic signs read clean in outdoor light, and the stand keeps it upright so it doesn’t get knocked over. Use a font style that looks like real typography, not a script font that turns messy when printed small. This works best on the dessert table, gift table, or welcome table where close-ups happen. Keep the sign design to one accent color so it doesn’t compete with florals.
Start by designing the sign with a limited palette — one main color plus one neutral — and print or order it in acrylic. Place it on a weighted stand or a small easel base so it stays stable on grass. Then position it slightly forward of the main centerpiece so it shows in photos even when people lean in. Budget $25-80 depending on size and whether you add personalization.
Quick tipPut the sign on a tray with a thin layer of faux moss or linen so it looks styled even when candles flicker.
Skip thisUsing a too-small sign — if it’s under 8 inches wide, it disappears in outdoor photos.
10. Hanging Glass Terrariums With White Florals and Green Vines
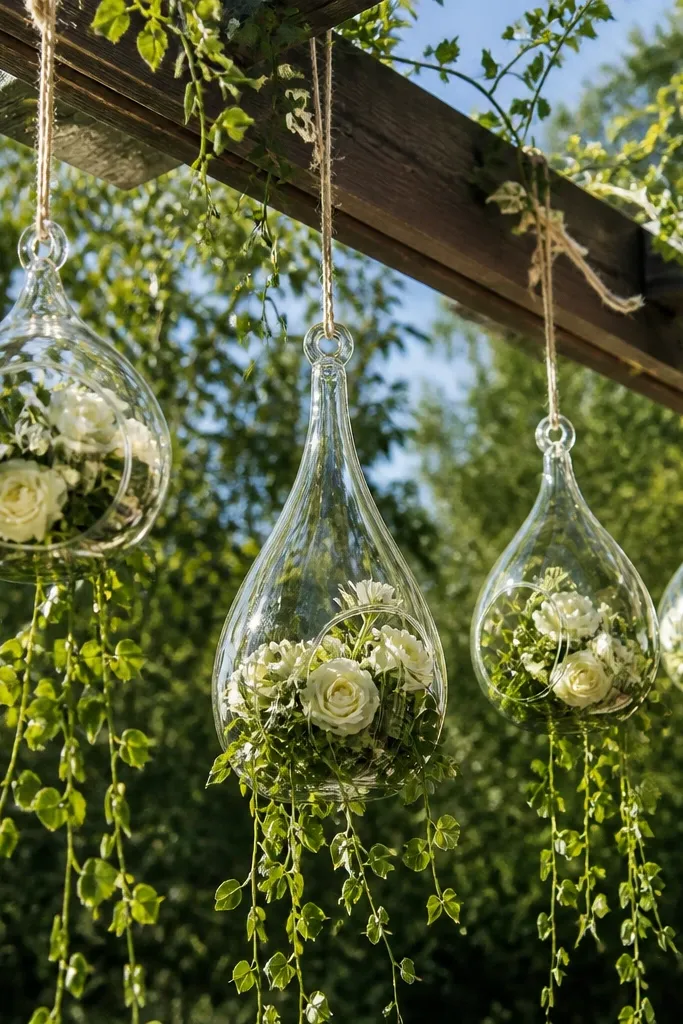
Hanging terrariums add height without making a big mess on the ground. Glass catches light, so you get sparkle and depth, and white florals stay readable against outdoor greens. This idea suits patios and pergolas where you have something to hook into — even a simple beam or stand can work. It’s great for bride-to-be photos because it frames faces from above and gives the background texture. Keep the terrariums spaced so guests can still move comfortably.
Start by choosing terrariums sized around 6-10 inches and fill them with faux white blooms and long green vines. Hang them at two heights so the photo has layers, using clear fishing line or thin cord. Then secure the hooks and check wind — if it’s breezy, hang them lower and use more stable mounts. Budget $60-200 depending on number of terrariums and whether you buy faux florals.
Quick tipUse warm light string bulbs above the seating so the glass looks golden, not icy.
Skip thisOvercrowding the hang points — it turns into a cluttered ceiling in photos.
11. Garden Gate Photo Frame With a Painted Wreath Center
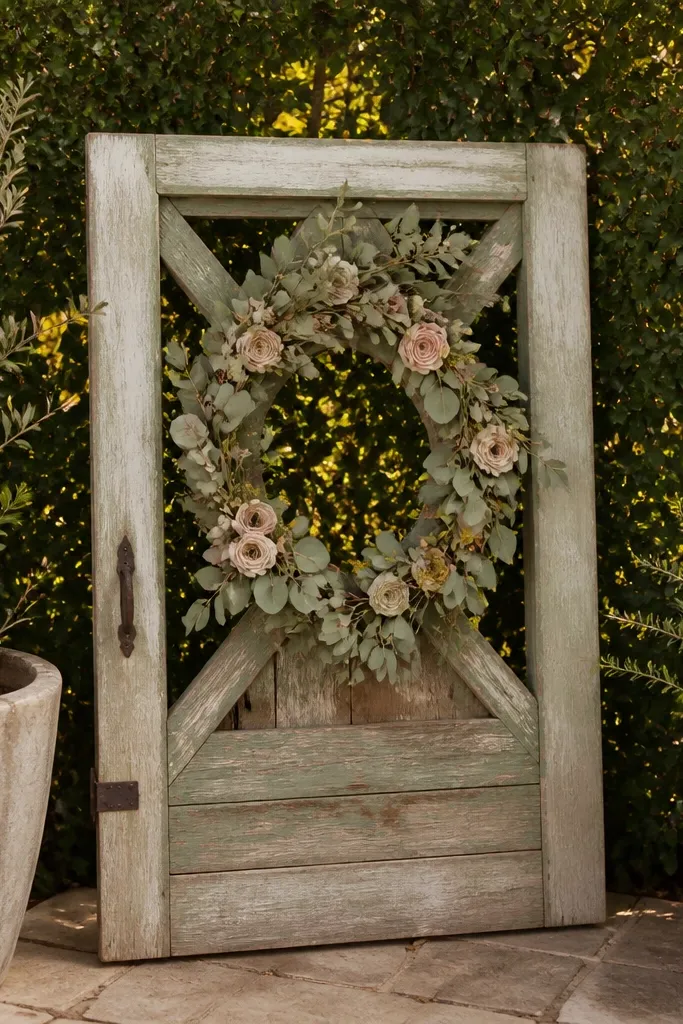
A photo frame makes guests step into the exact spot you want, which is how you get consistent, flattering shots. A garden gate look gives you instant outdoor credibility, and a painted wreath center adds a clean, graphic focal point. Choose a wreath in eucalyptus green or a neutral blush so it blends with surrounding plants. This suits showers where you want a dedicated “stand here” moment without a full backdrop wall. It also works well for smaller yards because it’s freestanding.
Start by renting a freestanding photo frame or buying a lightweight prop made for events, then check it fits through your venue entrance. Add a wreath center using a faux wreath secured with zip ties so it doesn’t wobble. Place the frame on flat ground and angle it so the background has depth — trees, fence, or hedge. Budget $120-400 depending on rental or purchase and the wreath materials.
Mark the ground with painter’s tape under the frame so the bride-to-be stands in the same spot every time.
Placing it against a plain wall — it removes depth and makes the frame look pasted on.
12. Candle-Lit Dessert Table With a Marble-Effect Tray Layer
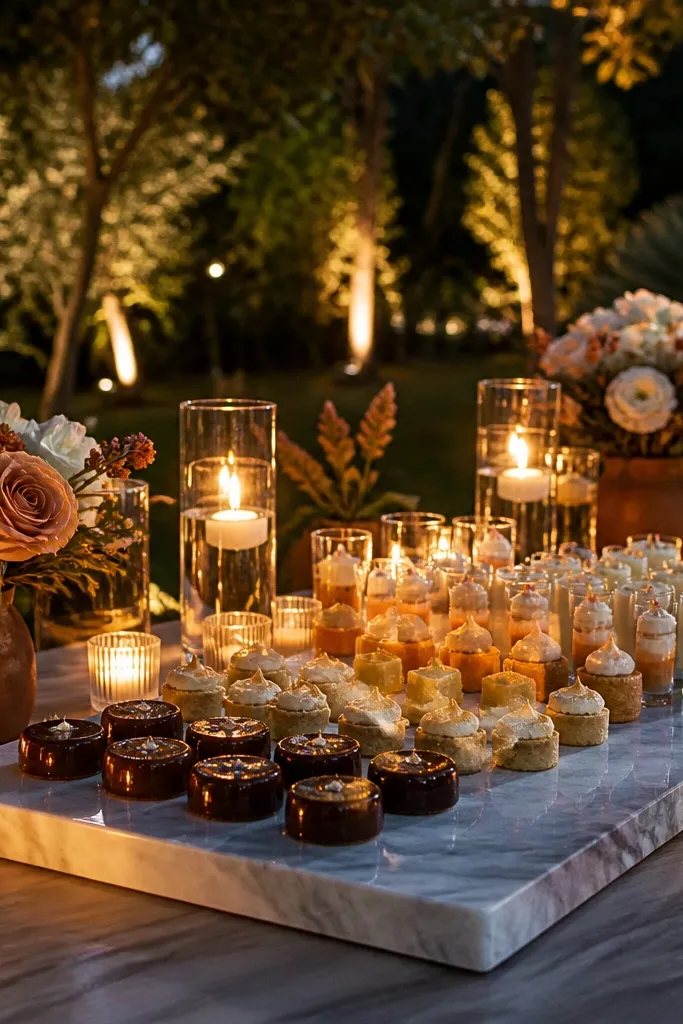
Dessert tables photograph best when you add shine and height. Marble-effect trays bring a clean, upscale surface that contrasts with outdoor textures like wood and grass, while small candles add warm flicker. This is a strong choice for a bride-to-be shower because guests cluster around the sweets and you get lots of close-ups. It also helps the table look styled even if you keep the dessert spread modest. Choose cream, gold, and soft pink tones so the candles don’t clash.
Start by laying a runner in neutral cream, then add marble-effect trays in two sizes — one large at the back, one smaller at the front. Place candles in the negative spaces between desserts so you get glow without blocking the food. Then add one tall element — a cake stand or vase — so the table has an obvious top line. Budget $70-220 for trays, candles, and stands.
Use LED candles if you’re on grass or near wind — you still get the look without constant flame management.
Putting candles directly beside delicate desserts — wax heat and drips ruin the presentation.
13. Sunflower and Sage Entry Garland on a Rope Line
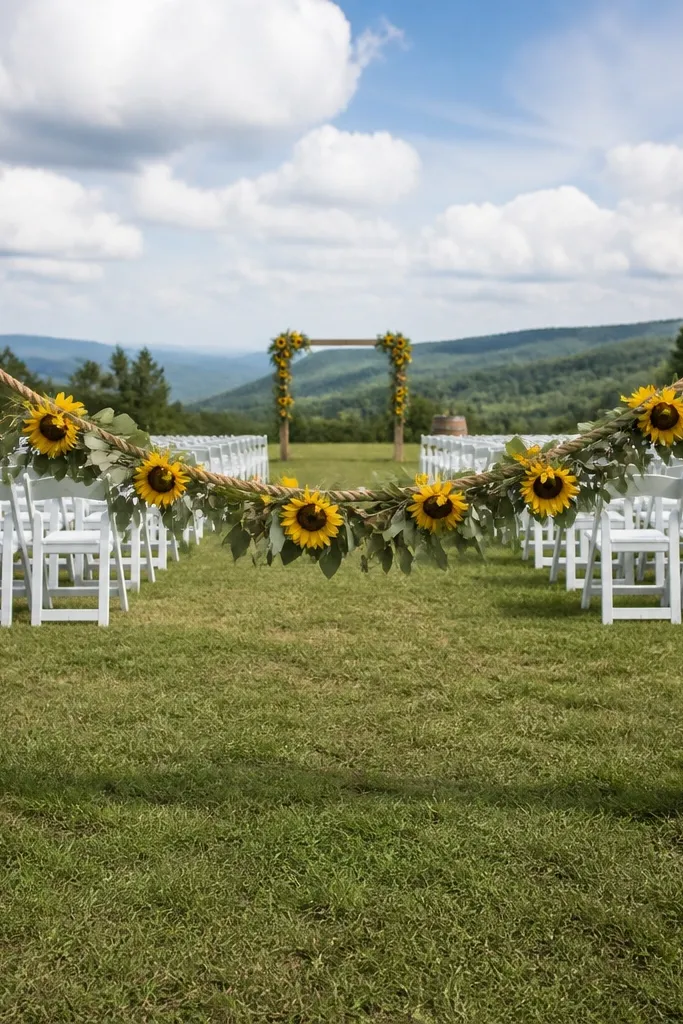
A rope-line garland creates a “welcome corridor” look without taking over the whole yard. Sunflower and sage reads bright and cheerful in daylight, and it holds up better than pastel florals in hot sun. This style works for outdoor showers where guests walk in a straight path. It’s also easy to photograph because it leads the eye toward the main table or arch. Keep the garland length matched to your entrance distance for clean framing.
Start by measuring the entrance length and choosing a garland with enough segments to maintain even spacing. Attach it to rope or light cord, then secure the ends with stakes or weights. Then add two “anchor points” — one heavier floral cluster in the middle and one at each end — so it looks designed rather than stretched. Budget $90-250 depending on garland size and whether flowers are faux.
Quick tipUse stakes with reflective tape on them if it’s near dark — you avoid tripping and it still looks neat in photos.
Skip thisLetting the garland sag unevenly — it reads sloppy in every picture.
14. Blush Tulle Backdrop With a Single Large Letter Balloon

Tulle backdrops are photogenic because they soften backgrounds and make skin tones look smooth in daylight. The trick is to keep it minimal: one big letter balloon gives you a clear headline, and the rest stays airy. Blush tulle pairs well with warm cream signs and terracotta accents, so you get a cohesive look without trying to match every flower. This idea is great for quick photo sessions where you want guests in front of something pretty without a full wall. It also works in smaller spaces because it takes up less footprint.
Start by setting up a backdrop stand or using a simple frame you can anchor. Drape blush tulle in layered curtains, then add the large letter balloon centered at about head height. Keep the balloon’s base weight on the ground so it doesn’t swing into faces. Budget $80-220 for tulle and stand rental, plus $25-70 for the balloon.
Choose tulle that’s at least 54 inches wide per panel so it doesn’t look thin when stretched.
Using multiple letter balloons — it turns into clutter and steals attention from the bride-to-be.
15. Gold Frame Mirrors for Dessert Table Reflection Shots
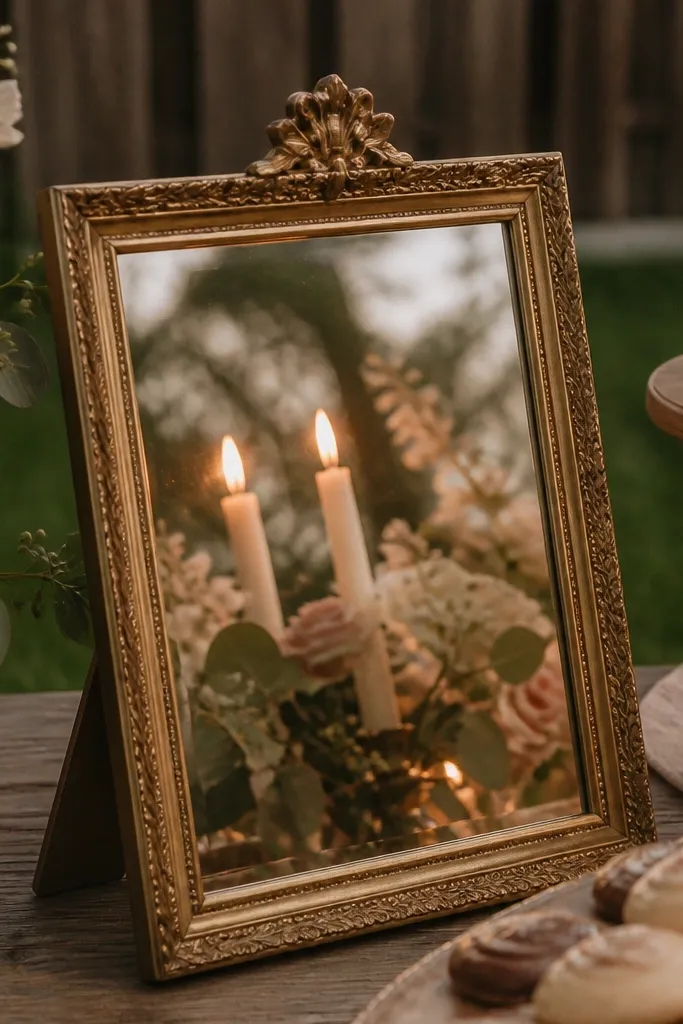
Mirrors are a cheat code for outdoor decor photos when your background is busy. A small gold frame mirror near the dessert table creates reflections of candles and florals, so your images look layered even if your yard is simple. It also makes the table look bigger and more styled. This idea suits evening showers where candle glow is visible. Use mirrors sparingly so it doesn’t feel like a vanity setup.
Start by placing one mirror on each side of the dessert table, angled slightly inward. Use weighted stands or stable bases so the mirror doesn’t tip on uneven ground. Then add candle cups and a small floral arrangement in front of the mirror so you get a reflection, not just glass. Budget $40-160 for mirrors depending on size and whether you buy or rent event mirrors.
Quick tipWipe the mirror with a microfiber cloth right before photos — outdoor dust shows up fast.
Skip thisAngling mirrors toward the sun — it creates harsh glare and washes out faces.
16. Terracotta and Cream Picnic Blanket Photo Corner
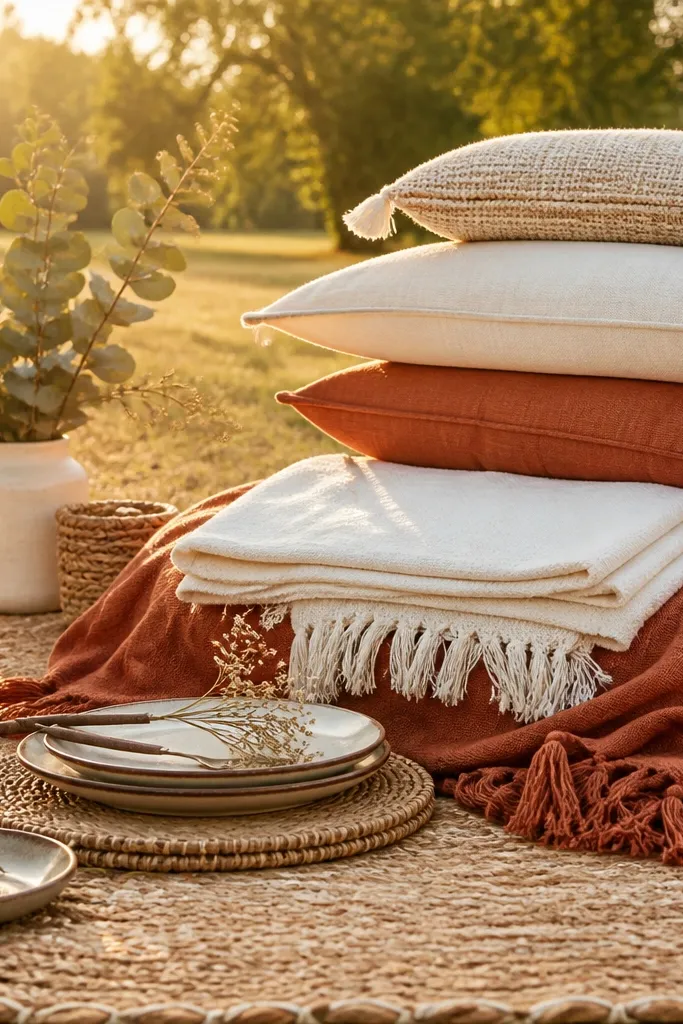
A picnic corner looks cozy and expensive when the textiles match and the props are limited. Terracotta and cream blankets create a warm base that reads well in outdoor photography, and stacked pillows add height for portraits. This is a smart choice for bride-to-be decoration when you want casual photos that still look styled. It also gives you a place for gift opening or a relaxed “bride-to-be” seat. Keep the centerpiece small and intentional so the blanket stays the star.
Start by laying a large blanket on flat ground and adding two to three pillow pieces in matching tones. Then place a low centerpiece — a small vase, a candle cup, and a tray for cards — so it doesn’t block faces. Set a sign or small garland behind the corner for background structure. Budget $60-200 depending on blanket quality and pillow count.
Quick tipBring a foldable ground sheet under the blanket to stop grass stains and keep photos clean.
Skip thisMixing too many patterns — one bold pattern maximum looks best.
17. Breezy Ribbon Backdrop for Gift Opening Photos
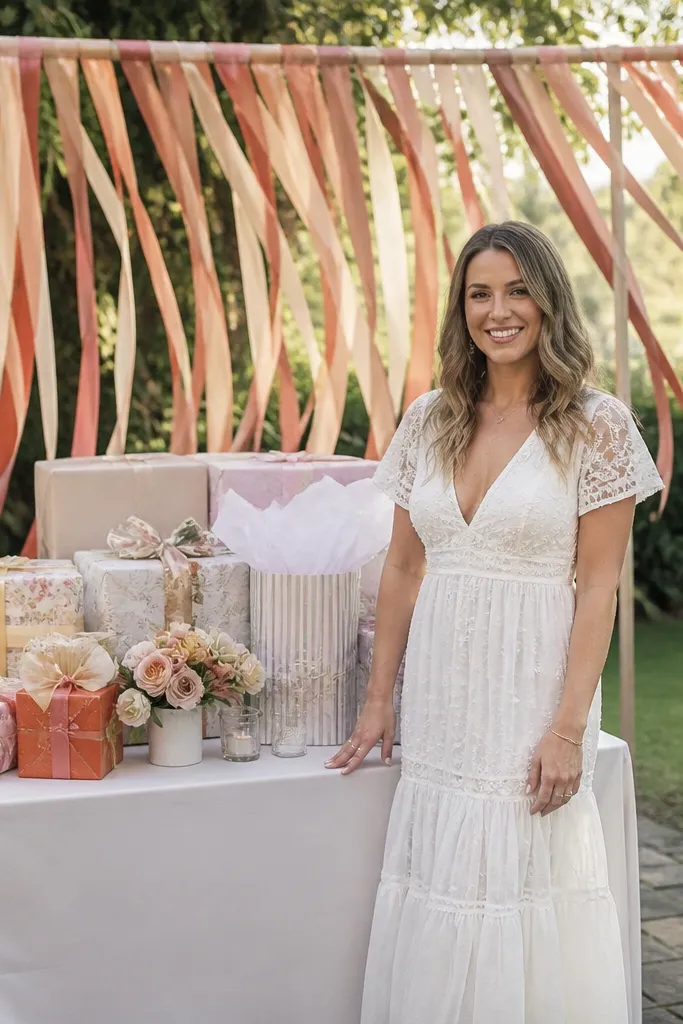
Ribbon strands create a moving background that looks great in outdoor wind without needing a full flower wall. The effect is airy and celebratory, and photos show motion behind the bride-to-be instead of empty trees. Choose a ribbon set that matches your other decor — terracotta, blush, and warm cream — so it ties the whole event together. This works especially well for gift opening because the bride-to-be stays framed while guests stand close. It’s also easy to move if you need to switch photo spots.
Start by stretching a lightweight cord line behind the gift table at two heights. Tie ribbon strands in consistent lengths — about 20-28 inches — and secure the top ends with knots so they hang evenly. Then place a clean sign or monogram at the front so the backdrop has a focal point. Budget $20-70 for ribbon and cord if you DIY, or $80-180 if you buy a pre-made ribbon backdrop kit.
Use heavier ribbon for the bottom half so it doesn’t whip and tangle in gusty wind.
Letting ribbons vary wildly in length — it reads messy in close-ups.
18. Floral Cupcake Tower With Sage Leaves and Warm Cream Wrappers
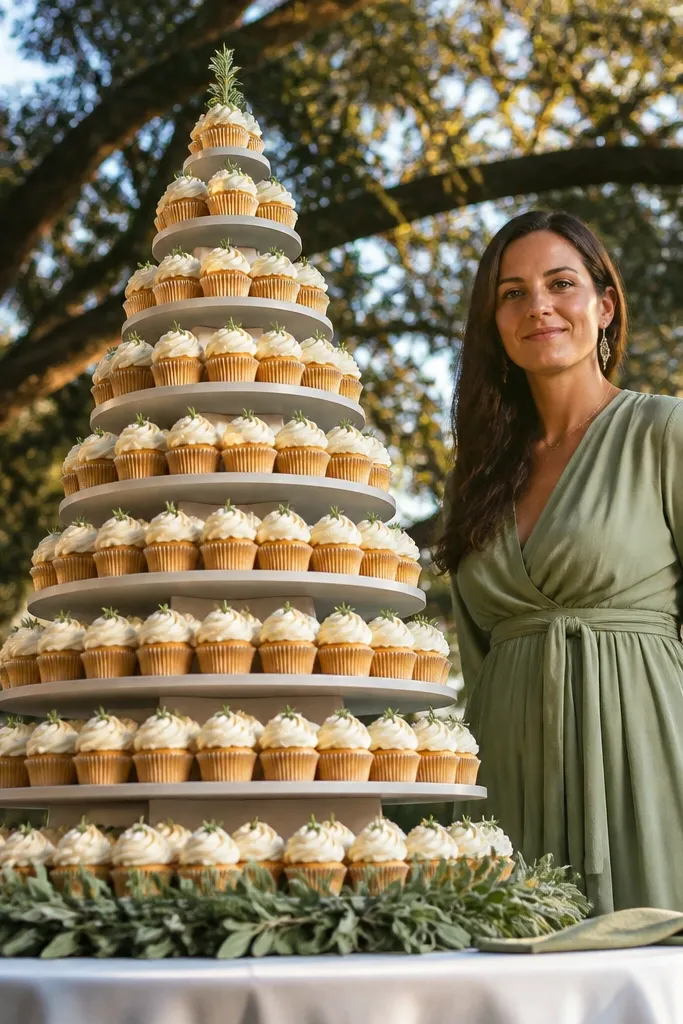
A cupcake tower is a decor moment because it’s tall, symmetrical, and naturally photogenic. Sage leaves and warm cream wrappers keep it looking fresh and cohesive, and they photograph well in both bright and golden light. This suits bride-to-be events where you want a dessert focal point that also works as a backdrop for photos. It’s especially good for outdoor parties because the structure keeps desserts off the ground and reduces mess. The tower also makes it easy to keep the rest of the table uncluttered.
Start by choosing a tiered cupcake stand with a stable base and add neutral liners to unify the look. Then place sage leaf accents around the tiers, using small faux greens to avoid wilting. Put one statement topper at the top — a small bouquet cluster or monogram topper — so the tower has a clear “top line.” Budget $60-200 depending on whether you buy a stand and how many tiers you use.
Set the tower on a tray or cake board so you can move it without disturbing the accents.
Overloading the tiers with loose florals — it looks messy and can shift during wind.
19. Outdoor Neon Warm White Sign for Evening Glow
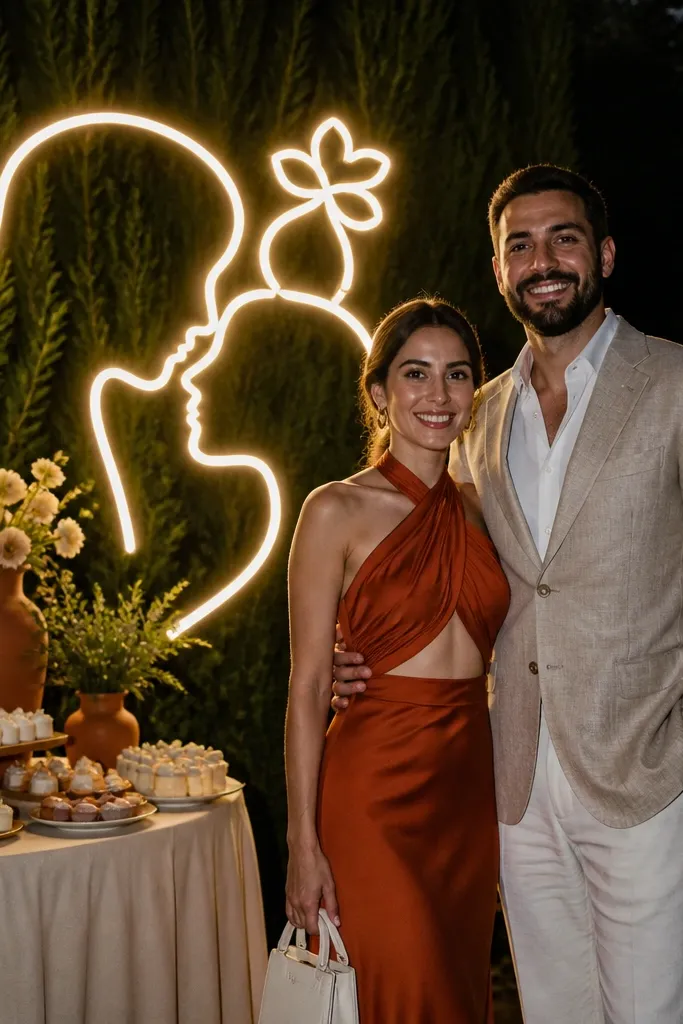
Neon signs look best outdoors when the color is warm and the background has greens or shadows. Warm white neon reads classy next to terracotta, blush, and cream, and it gives you instant evening atmosphere without a complicated setup. This is great for bride-to-be photos because it creates a readable message behind the subject, even when the yard is dark. Pair it with minimal florals so the sign remains the focal point. It also works for both day and night if you dim the area slightly for photos.
Start by selecting a warm white neon sign with a simple message like “Bride-to-Be” or the bride’s first name. Place it on a weighted base or hang it from a stand so wind doesn’t tip it. Then position it so the light hits the subject from an angle, not straight on, to avoid glare. Budget $120-350 depending on sign size and whether it’s battery-powered.
Bring extra batteries or a power bank if it’s battery-run; a dead sign ruins the photo window.
Choosing a bright blue neon — it turns skin tones cold in outdoor photos.
20. DIY-Resistant Welcome Sign Wall With Two Chalkboards
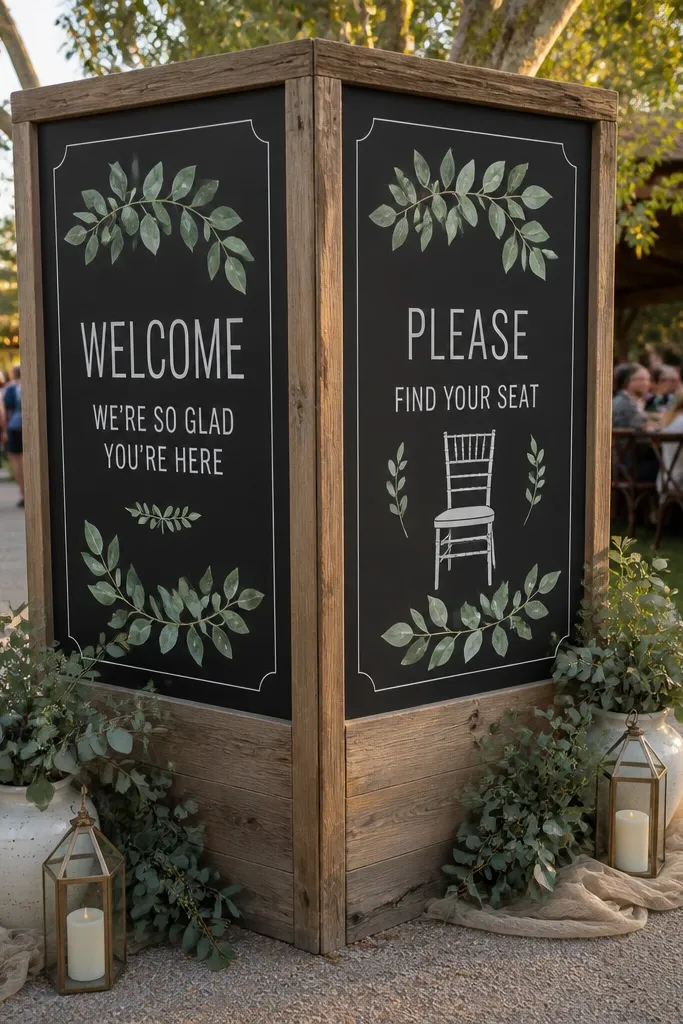
Chalkboard signage looks charming, but outdoor wind and lighting can ruin handwriting. The smarter move is to use two chalkboards with printed designs or stencil lettering that stays clean from a distance. This gives you the DIY aesthetic without the messy “chalk that smears” problem. Place one board at the entrance and the second near the dessert table so guests get direction and photo backdrop points. It’s perfect for outdoor showers where you need both guidance and style.
Start by buying two chalkboard signs sized around 16x20 inches and plan a simple layout: heading on top, short bullets or arrows underneath. Use stencils or printed vinyl lettering to keep lines straight, then add tiny floral stickers or a ribbon border. Stake the boards or place them on weighted bases on grass. Budget $40-120 for signs plus $10-30 for lettering supplies.
Quick tipUse a matte protective spray on finished vinyl or stencil letters so they don’t smear when humidity hits.
Skip thisFreehanding tiny script text — it becomes unreadable in photos.



