
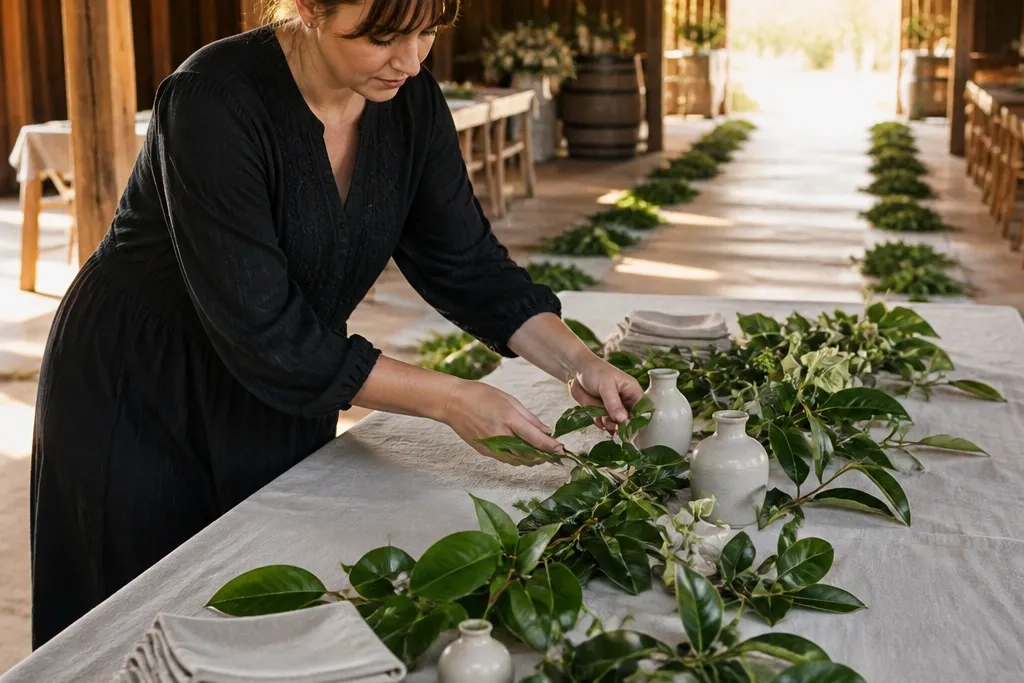
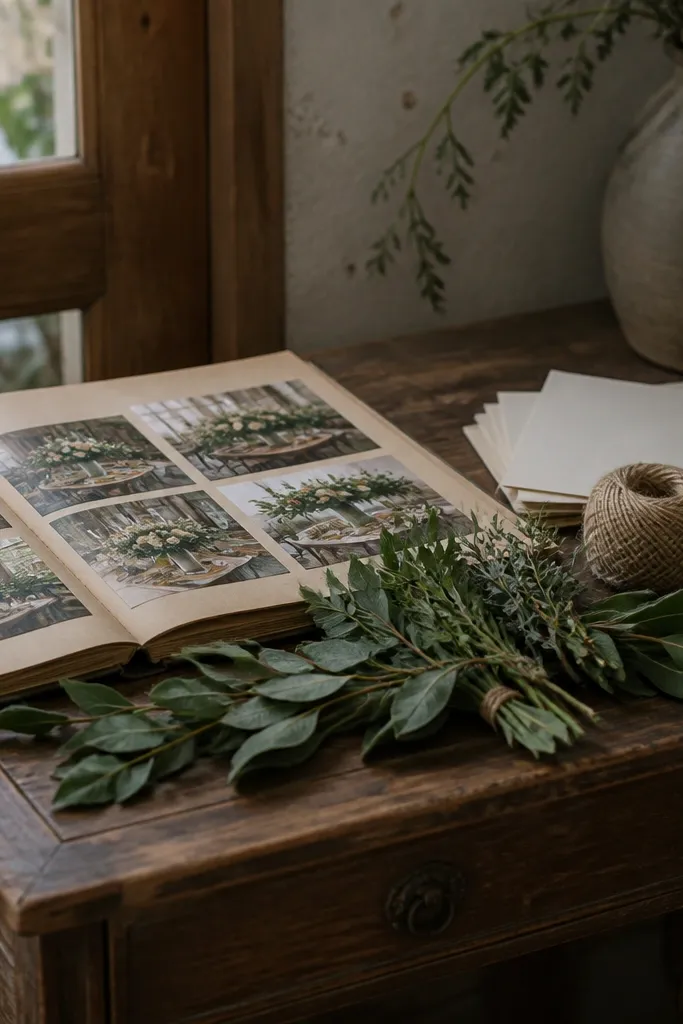
1. Table Runner of Mixed Leaf Cuttings with a Linen Base
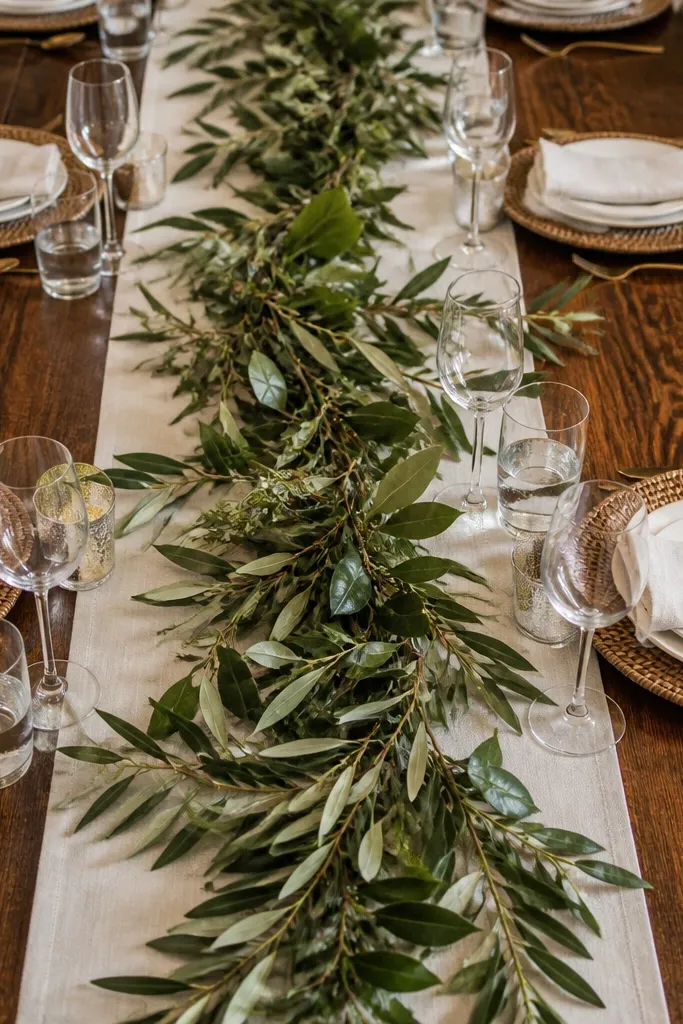
This is the easiest way to make tables look lush without covering everything. Start with an off-white or oatmeal linen runner, then layer leaf cuttings in an organic scatter pattern that follows the table’s centerline. The linen keeps the look airy, while the leaf texture adds depth you can see even from across the room. It suits outdoor weddings, casual receptions, and any venue where you want “grown-in” rather than “covered.” The best time to style it is morning or early afternoon so leaves look fresh before guests arrive.
First, buy or prep leaf cuttings in two to three types with different shapes (for example, one broad leaf, one narrow leaf, one fern-like texture). Then place them lightly on the runner — don’t pin every piece down, just anchor clusters at the center and at both ends. Finally, add a few stems in the negative space so you get gaps that look intentional, not sparse. For travel logistics, pack leaf cuttings in a shallow box with tissue paper between layers and assemble on-site the day before the reception.
Quick tipUse matte tape underneath the runner edges so you can remove it quickly during setup and keep the linen smooth.
Skip thisAvoid fully covering the runner edge to edge — it turns leaf decor into a flat sticker look.
2. Ceremony Aisle Leaf Trail with Tied Sheaves
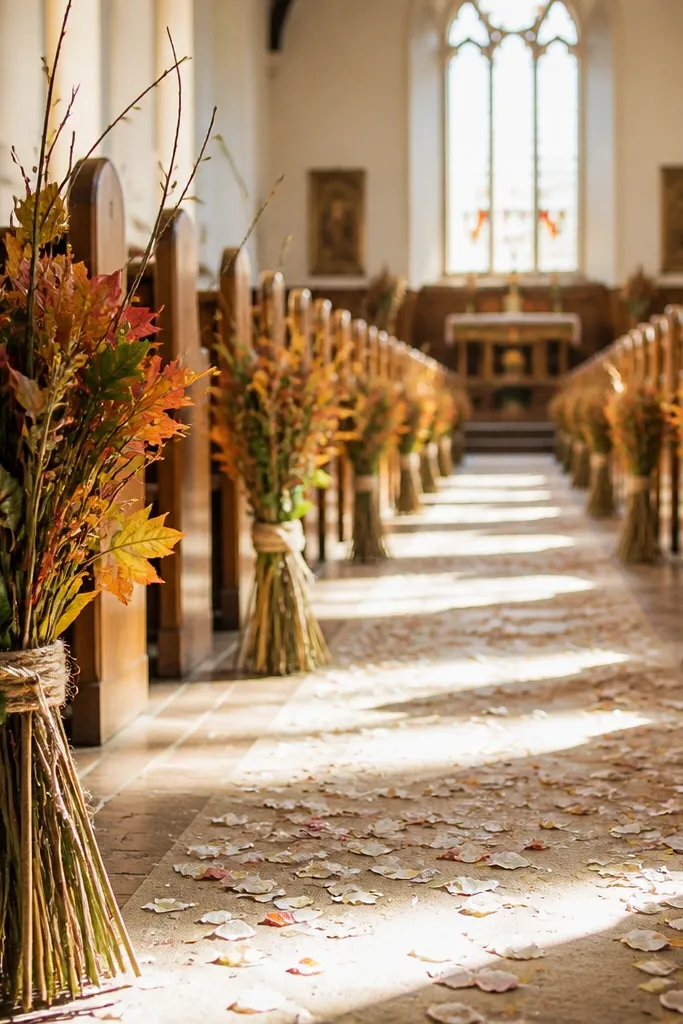
A leaf trail reads natural because it mimics how plants spread along the ground. Use small tied sheaves every few feet so the aisle looks like it’s guiding movement, not cluttering it. Choose leaves with visible veins and varied widths so the trail looks dimensional from the front row and in overhead photos. This works best for outdoor ceremonies, garden venues, and venues with a clear aisle photo angle. For timing, set the trail the morning of the ceremony so it doesn’t dry out or get stepped on.
First, measure your aisle length and decide the spacing — aim for a bundle every 4-6 feet so it’s visible without looking like a line of props. Then tie each sheaf with natural twine and secure it to the runner fabric or a thin fabric strip using hidden clips. Finally, do a quick walk-through from both sides to check that the trail doesn’t block sightlines at the altar. If the venue is strict about adhesives, bring fabric strips and clips instead of tape.
Quick tipBring two extra sheaves per side — aisle traffic always shifts a few pieces.
Skip thisDon’t use the same exact bundle size every time; uniformity reads staged.
3. Arch Backdrop with Layered Leaf Panels and Soft Gaps
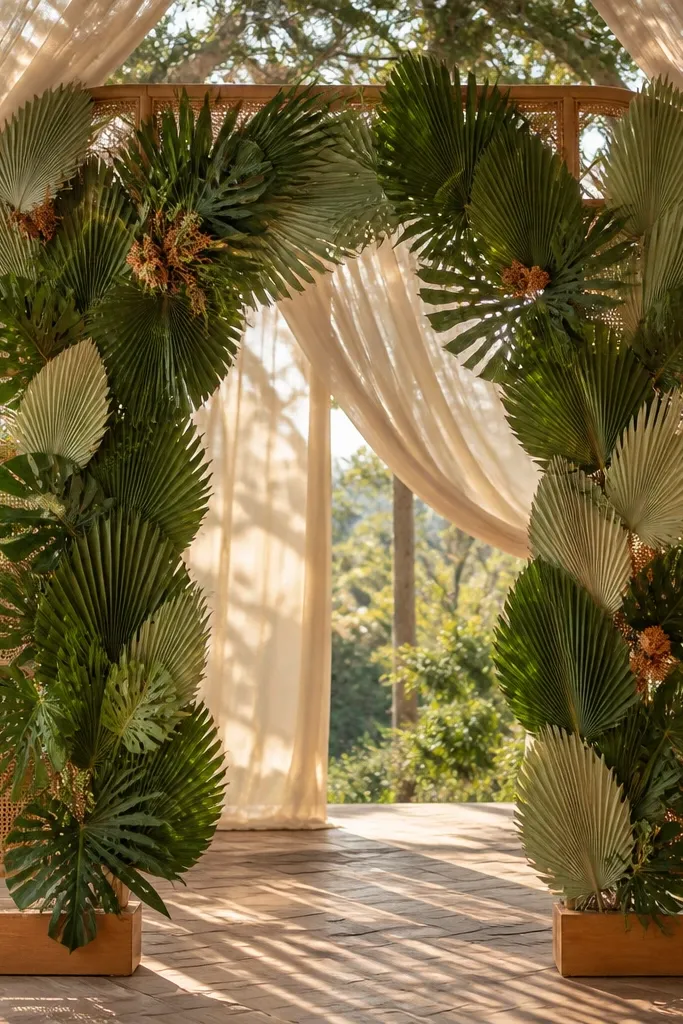
Leaf arches can look fake fast if they’re packed solid. The natural look comes from layered panels with intentional gaps that let the background show through. Use a base of neutral structure (wood, rattan, or simple metal) then add leaf clusters in vertical bands so the arch looks grown rather than glued on. This is a high-impact moment for ceremony photos and works in both indoor and outdoor spaces. If you have wind, this design is still manageable because the gaps reduce lift and the layers hold shape better.
First, build the arch in sections and attach leaf clusters to panel frames so you can assemble quickly. Then add leaves in bands from top to bottom, leaving 2-6 inch gaps between clusters so the background light comes through. Finally, finish with a few longer stems at the center to create a focal drape. Pack your panels flat in a wardrobe box and attach them on Day 1, then do final tightening on Day 2 morning.
Quick tipUse twine to tie a few “loose” stems so they fall naturally instead of hanging straight down.
Skip thisAvoid one continuous mat of greenery — it reads like a single flat sheet.
4. Head Table Greenery with a Low Horizontal Line
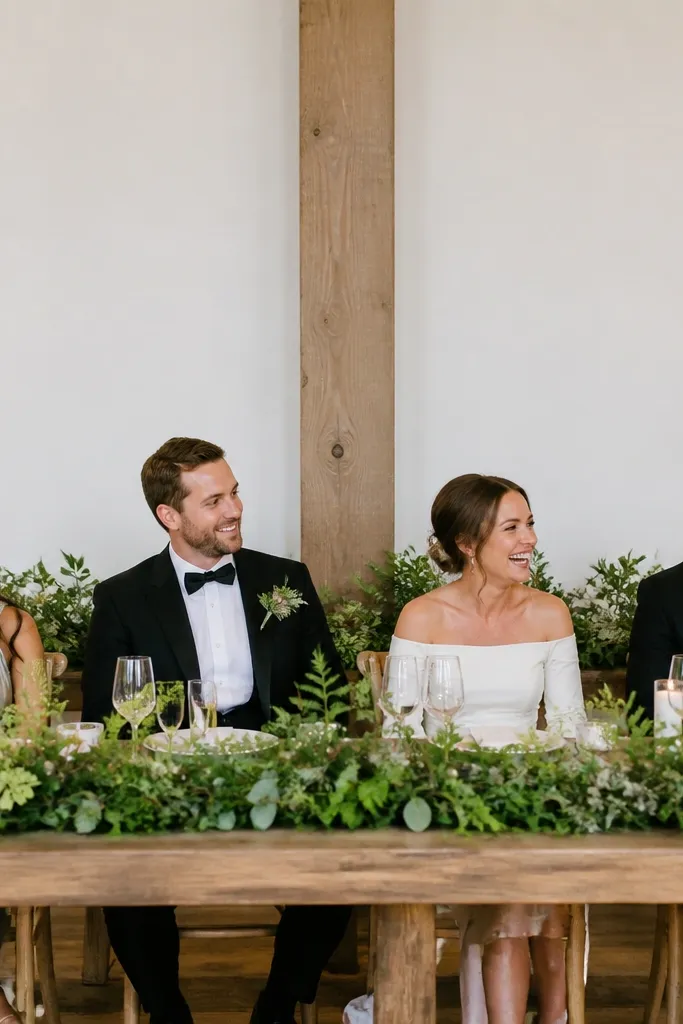
A low horizontal leaf line keeps the head table feeling grounded and natural. It also gives photographers a clean focal band without blocking faces or chairs. Choose leaves that vary in tone from light to deep green so the band has depth instead of looking like one color wash. This suits weddings where the head table is long, because you can repeat the band rhythm along the length. The look works especially well in venues with textured walls or warm wood, since the greens echo the background.
First, measure the head table length and plan a band that spans about 70-80% of it, leaving a little space at each end. Then place a base runner of greenery across the centerline and add small clusters at 3-5 points along the band. Finally, anchor with floral pins or hidden ties to table runners, not to the chairs. For a 3 day itinerary, build the band on Day 1 and only add fresh clusters on Day 3 if any pieces look tired under lighting.
Quick tipKeep leaf height under the seated eye line — aim for 6-10 inches tall at the highest point.
Skip thisDon’t stack tall stems directly behind place settings; it blocks the tabletop details.
5. Cocktail Hour Leaf Garlands on Bar Fronts
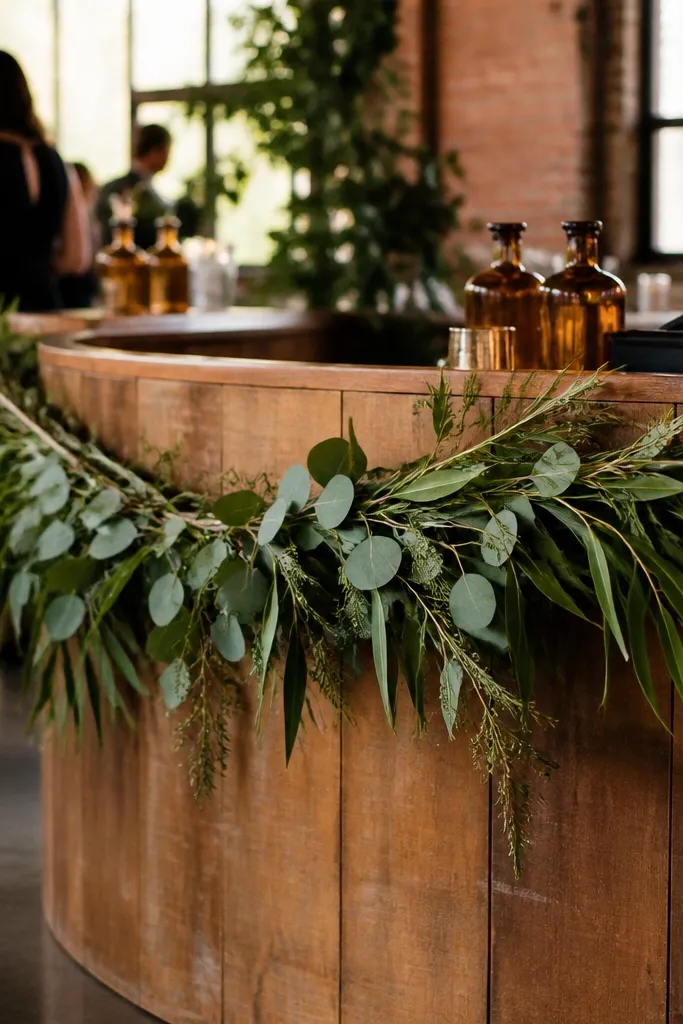
Bar garlands photograph beautifully because they sit at guest eye level during mingling. For a natural look, drape the garland in a gentle curve and keep the spacing loose so you can see the bar’s shape. Use a mix of narrow and broad leaves to create rhythm — narrow leaves fill gaps, broad leaves make focal points. This is perfect for outdoor bars, wood-heavy interiors, and venues where the bar is the main guest hangout. It also gives you a place to add small warm accents like dried seed pods without making the whole room feel themed.
First, measure the bar front and cut garlands to length with extra slack for a natural drape. Then attach at two points on each side using zip ties or hidden hooks so the garland hangs evenly. Finally, add small clusters near the bar’s corners and along the center, then step back to check symmetry from the entry angle. If the bar is high, use shorter garlands and repeat them in sections instead of one long piece.
Quick tipUse clear fishing line to tame a few unruly stems — it disappears on camera.
Skip thisAvoid straight-line placement; flat garlands read like store props.
6. Place Card Stakes with Fern-Style Leaves
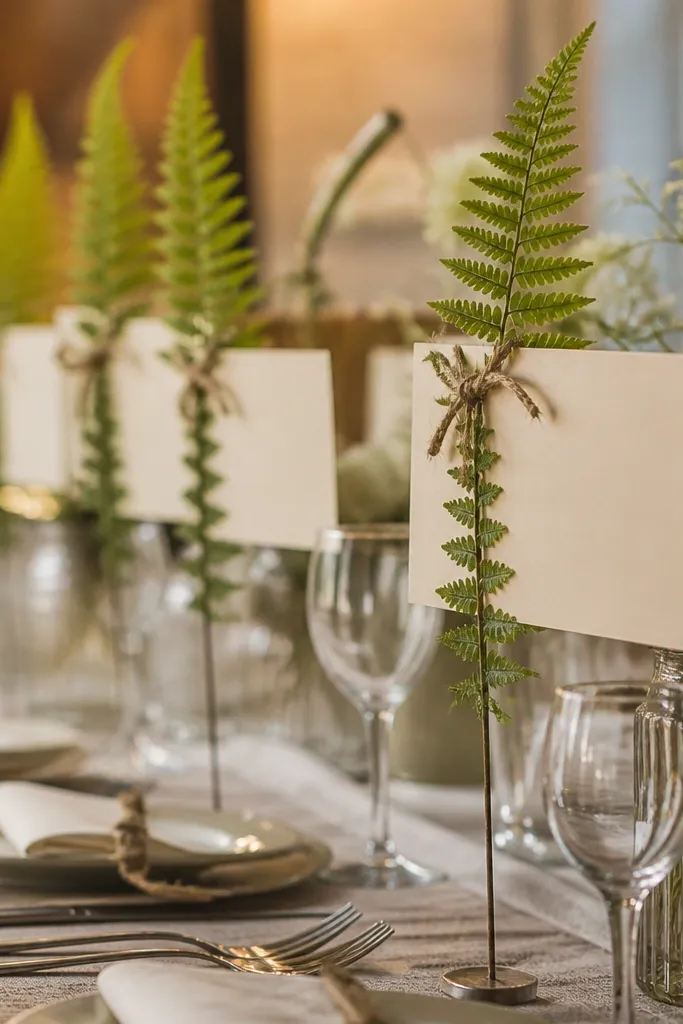
Leaf stakes make table details look intentional and photogenic without covering the entire table. Fern-style leaves have fine texture that reads well in close-ups, and stakes keep them upright even when guests brush past. This works best with simple place cards on cream cardstock and a natural twine tie. It’s a strong choice for seated dinners, especially if your table centerpieces are minimal and you want detail near the camera. The look also holds up well for a 3 day itinerary because you can keep stakes assembled and only replace individual pieces.
First, pick leaves with a natural stem you can secure to — faux fern stems or preserved fern sprigs both work. Then attach each place card to the stake using a small loop of twine or a discreet wire tie. Finally, place stakes at each setting slightly off-center so they create a gentle wave across the table. Pack stakes in a sleeve or shallow box so leaves don’t bend during transport.
If using real leaves, spray lightly with floral sealant 24 hours before to reduce browning.
Skip glossy leaves; they reflect flash and look plastic under indoor lighting.
7. Napkin Rings Made from Twine-Wrapped Leaf Stems
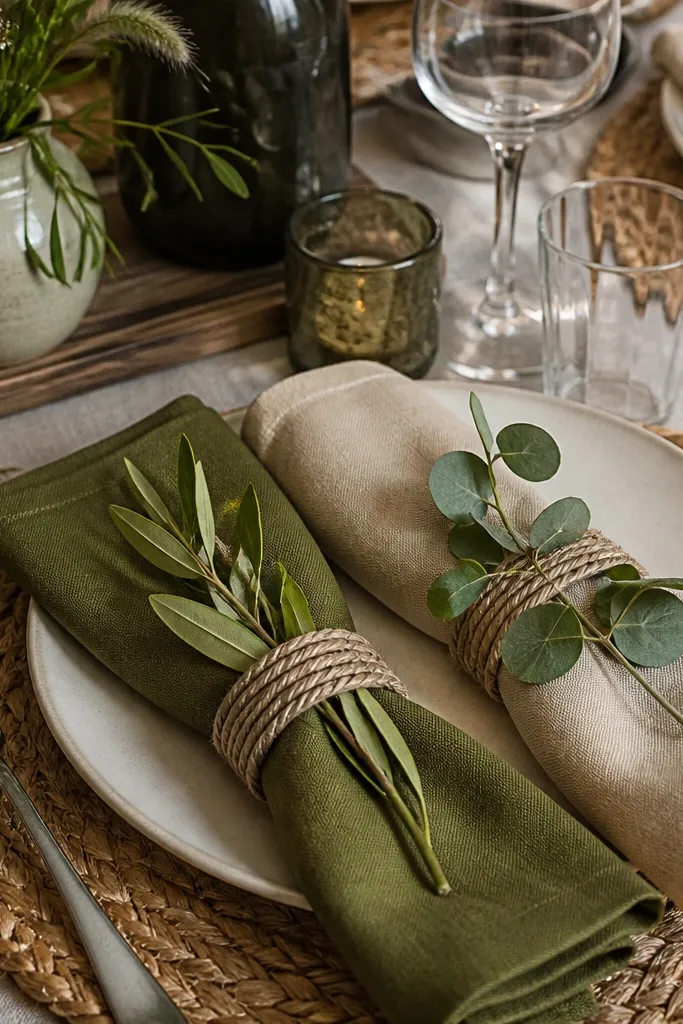
This idea makes leaf decor feel personal and functional at the same time. Twine-wrapped leaf stems look handmade and natural, and they don’t take over the table like a full centerpiece. Use one leaf type per napkin ring for consistency, then vary the leaf size across the table so it still feels organic. It’s especially good for brunch-style weddings and receptions with simple plates and linens. In photos, the napkin rings catch light on the table surface and create a repeating detail across the room.
First, wrap a short strip of twine around the napkin fold, then anchor a leaf stem bundle on top with a second wrap. Then trim stems so they sit at a height that won’t snag table linens or guests. Finally, attach rings after linens are set, ideally on Day 2, so the leaves don’t get crushed in packing. Keep a small repair kit — extra twine and wire — because one broken stem is easy to fix.
Quick tipMatch twine color to your wood tones or stationery so the rings blend, not contrast.
Skip thisDon’t use thick, chunky stems on napkins; they make the napkin bulky and awkward to photograph.
8. Dried Palm or Broad Leaf Fan Wall Behind the Sweetheart Table
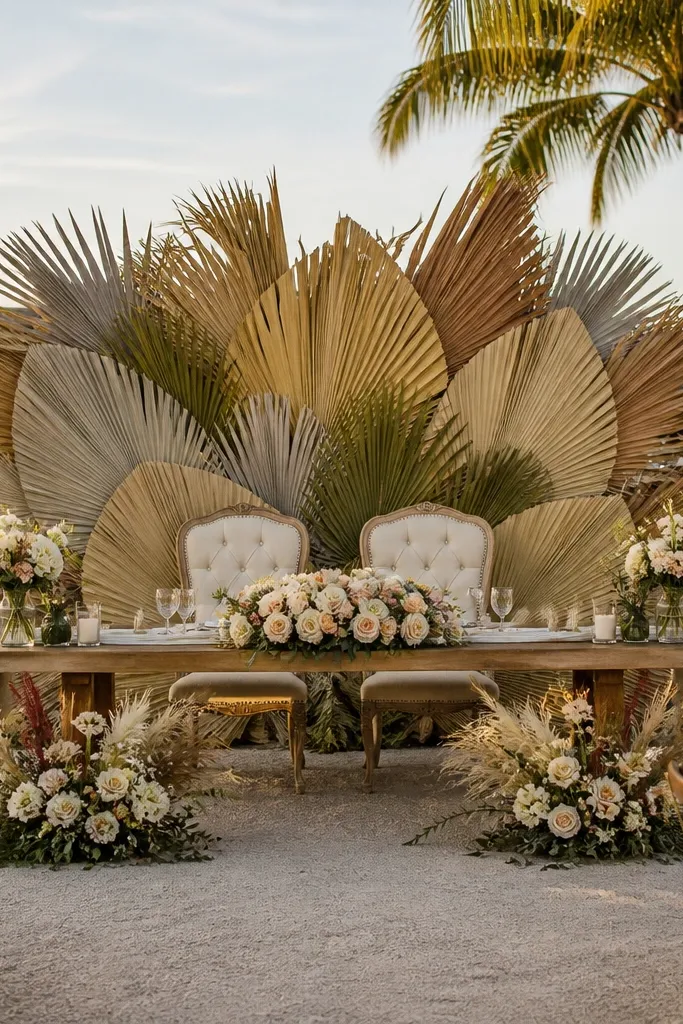
A fan wall gives you a natural, botanical backdrop that reads intentional even from far away. Dried palm or broad leaf fans create movement and texture without needing a full dense greenery installation. The background works well with warm lighting because the leaves cast soft shadows, which makes photos look dimensional. This suits sweetheart setups, head table corners, and any venue where you want a clean focal wall without a complicated arch. It’s also practical for a 3 day itinerary because you can assemble it in one block and adjust only the top row.
First, choose one dried leaf type with consistent color and cut them into fan heights that match your table height. Then mount them to a lightweight backing board or grid using zip ties, spacing them 1-3 inches apart. Finally, attach the board to a stand or wall mount and test the view from the photographer’s angle. Transport the fan pieces flat and assemble on Day 1 so they don’t shift during setup.
Quick tipUse a neutral backing board in the same shade as your stationery so the wall doesn’t steal attention.
Skip thisAvoid mixing dried colors with fresh green — it reads like two separate decor themes.
9. Leaf Cluster Centerpiece in a Clear Cylinder Vase
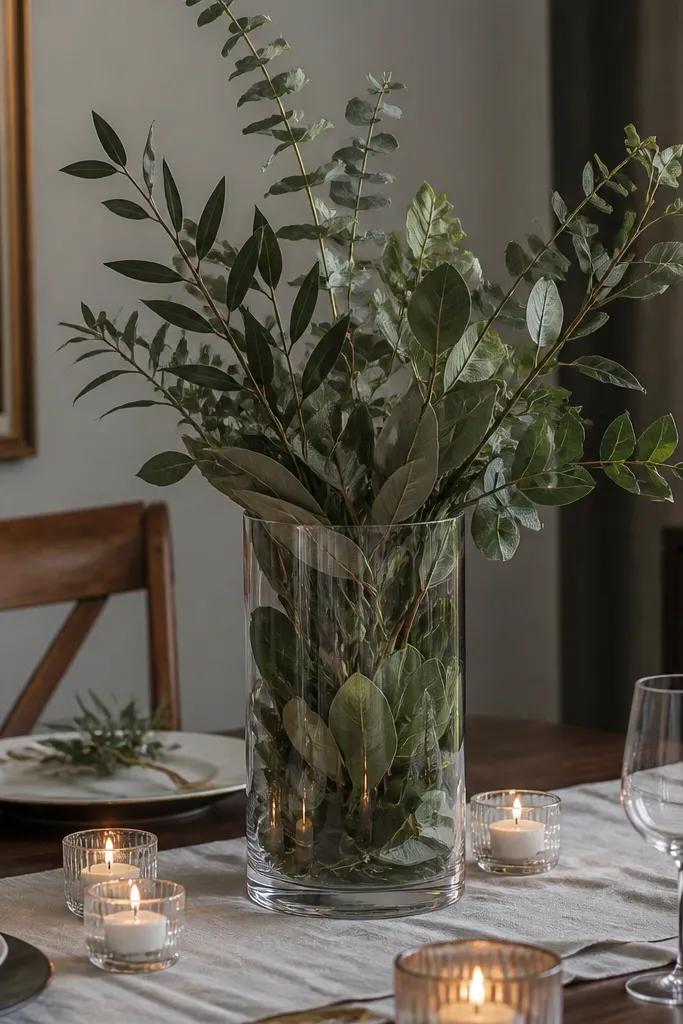
Clear cylinder vases make leaf decor look crisp and airy. Put leaf clusters at different heights inside the vase so you get a layered look without adding bulky bulk. This design is great when you want table height that stays low but still has a photo-worthy centerpiece. It works for indoor receptions, especially with candlelight or string lights, because the glass amplifies reflections. Choose leaves with varied textures so the vase doesn’t look like one flat bundle.
First, select vases with a consistent diameter and clean them so they don’t show smudges in photos. Then place a small base of filler (sand-free floral foam or pebbles) and arrange stems so they form a loose spiral. Finally, add water or a floral preservative if using real stems, and keep the vase centered on the table runner. For Day 1-3 planning, set these on Day 2 so guests don’t bump them during earlier events.
Wipe vase exteriors with a microfiber cloth right before the photographer arrives.
Skip opaque containers; they hide the layering that makes this look natural.
10. Leaf-Accented Candle Hurricane with Matte Greens
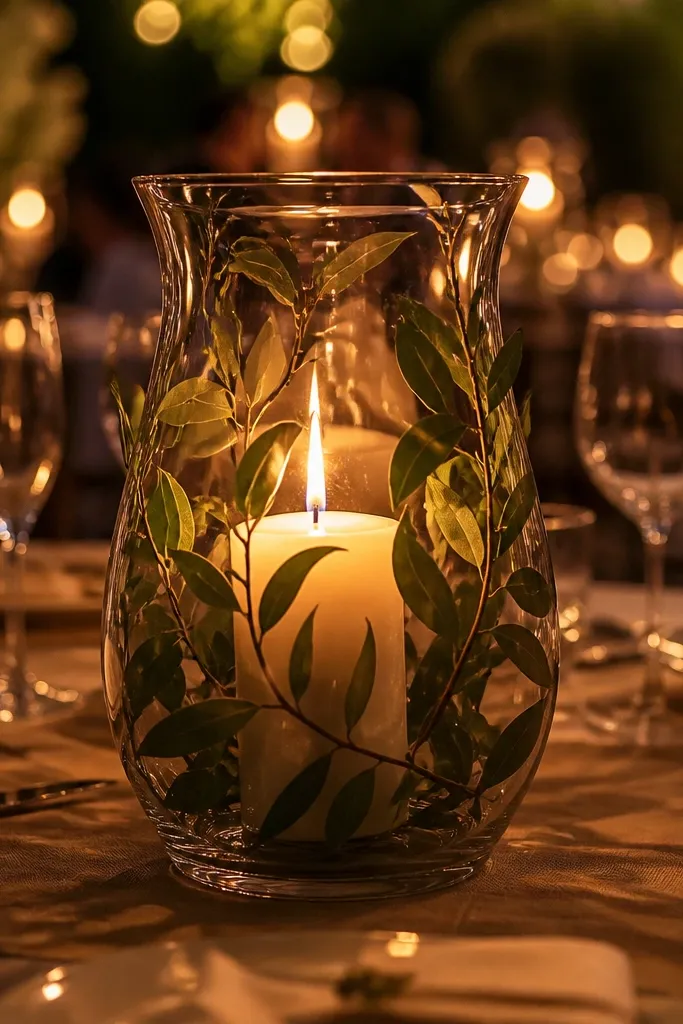
If your venue lighting is dim, candle hurricanes with leaf accents look incredible because the leaves glow around the flame. Matte greens prevent harsh glare and keep the scene soft. The key is to attach leaves lightly around the hurricane so they don’t crush and flatten — you want natural curves. This is a strong choice for evening receptions, especially when you have a lounge area or sweetheart backdrop. It also creates a repeated motif for photos without needing a full greenery wall.
First, wrap a thin base of twine around the hurricane so you have attachment points. Then tuck small leaf sprigs under the twine at three to five points, keeping the leaves loose enough to curve outward. Finally, place the hurricane on a tray and add two extra stems at the tray edges so the candle looks integrated into the table. Prepare hurricanes on Day 2 and keep them covered until the room is set for photos.
Keep leaves away from direct flame — use LED candles if you want zero risk and consistent photos.
Avoid glossy leaves; they shine and look artificial around candlelight.
11. Charger Plates with Leaf-Tinted Placemats and Varying Leaf Sprigs
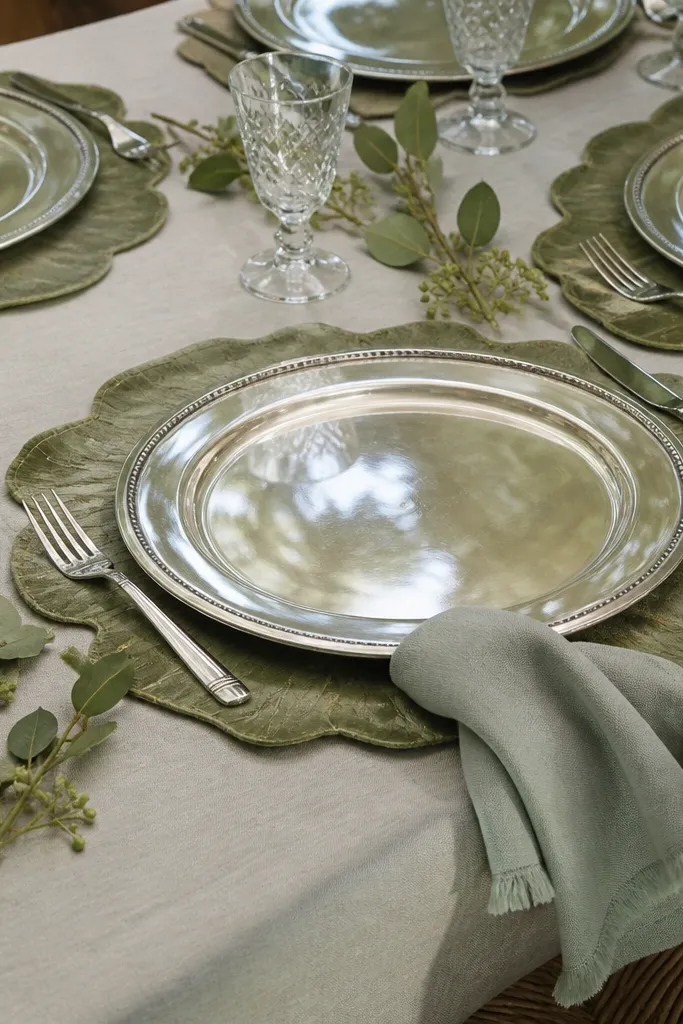
This is a styling approach that makes leaf decor look natural because it blends into the table design instead of sitting on top. Use leaf-tinted placemats or linen in olive, sage, or moss tones, then add small sprigs beside each charger for a subtle botanical cue. Varying leaf sprig sizes keeps it from looking like a uniform craft project. It’s a great option for venues with strong tableware — simple plates, gold flatware, and clean linens. Photos look cohesive because the leaf tones repeat across the entire table area.
First, pick one placemat base color and keep it consistent across the table — don’t mix multiple green shades. Then choose sprigs that match that undertone and place one sprig at each setting, angled slightly toward the center. Finally, use a matching twine color for any ties so the detail looks intentional. Set placemats and sprigs on Day 2 so the room looks fresh for dinner service.
Quick tipBring a few extra sprigs in a darker tone for the tables closest to the stage — they read better under stage lighting.
Skip thisAvoid placing sprigs directly on the plate; it blocks food presentation and looks cluttered.
12. Greenery Photo Frame with Leaf Edges, Not a Full Green Border

Photo frames often look heavy when they’re fully bordered in greenery. This version uses leaf edges only — a half-border or corner clusters — so the center stays open for faces and signs. It still reads botanical because the viewer’s eye hits the leaf texture at the edges first. This works for both indoor lounges and outdoor check-in areas where guests line up for pictures. The natural look comes from spacing and negative space, not from maximum greenery.
First, build a simple frame in rattan or wood and attach leaf clusters only at the corners or along one side. Then add a few long stems that extend inward 3-6 inches so the frame feels organic. Finally, place the frame where it catches soft light — not directly under harsh overhead glare. For a 3 day itinerary, assemble on Day 1 and do a quick leaf-tuck on Day 3 if any corners sag.
Use a matte spray on faux leaves only if they look shiny in your venue lighting.
Avoid full borders; they turn the frame into a wall of green that hides faces.
13. Table Centerpiece Bowl with Leaf Layering and Floating Stems
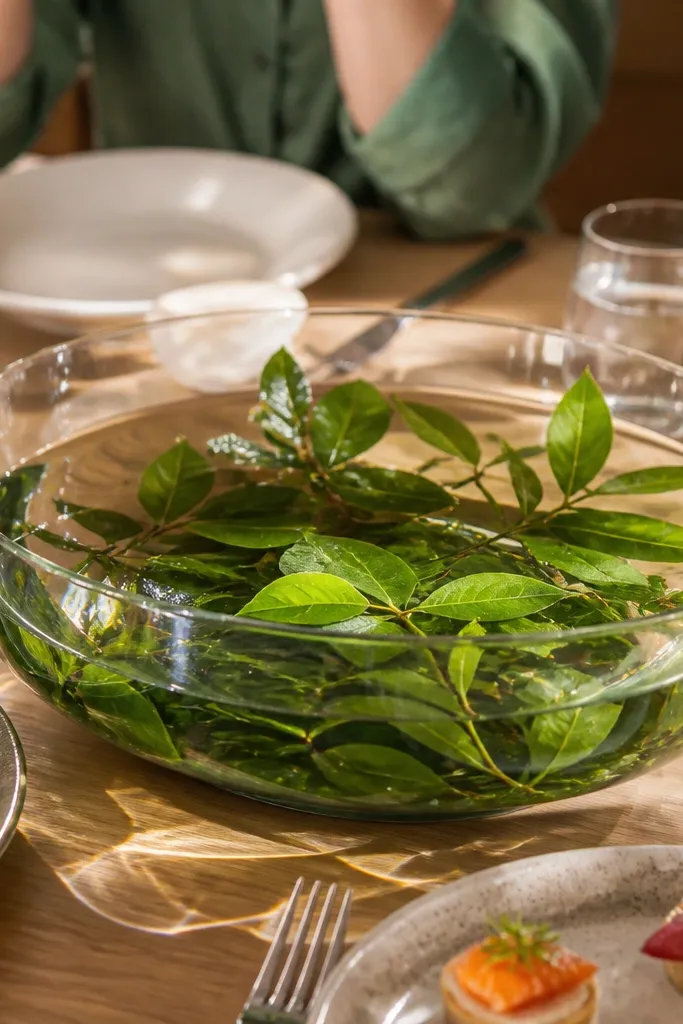
A shallow bowl centerpiece gives you a natural, “found in the garden” look. Layer leaves along the bowl base, then float a few stems on top for gentle movement in indoor air. This looks especially good with clear bowls and warm lighting because reflections make the leaves look more dimensional. It suits cocktail tables, sweetheart rounds, and any setup where you want a centerpiece without tall height. It also photographs well from above during overhead shots or drone-style angles.
First, choose a shallow bowl with a wide opening and set a stable base inside using floral foam or water-free filler. Then arrange leaves in concentric layers so the top surface stays textured, not flat. Finally, float 2-4 stems on top and keep the rest tucked into the layers so it looks intentional. Do this on Day 2 so the bowl looks fresh and doesn’t get bumped during guest traffic.
If using real leaves, keep them dry until the room is ready, then add water right before service to reduce browning.
Avoid adding too many floating stems; it turns into a messy “leaf soup” look.
14. Lanterns with Leaf Ties and One Warm Accent Flower
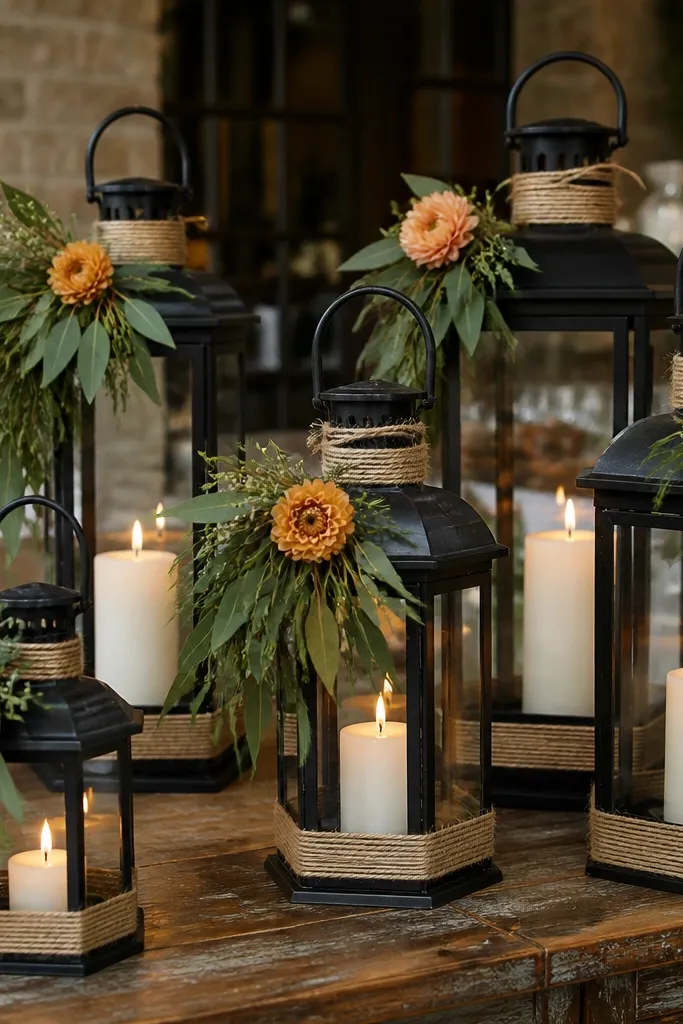
Lantern clusters are photogenic because they combine light, shape, and texture. Tie leaf bundles around the lantern handles or near the glass base, then add one warm accent flower per lantern to keep the natural look from turning monochrome. The leaf ties create a handmade feel, and the single accent flower gives the photo a focal pop without going full “bouquet.” This works for reception entrances, dinner rows, and lounge areas. It’s also a great solution for a 3 day itinerary because you can move lanterns between spaces for different photo setups.
First, pick lanterns in matching metal finishes and choose leaf bundles in one or two tones. Then tie the leaf bundles with twine in a consistent height so the cluster looks balanced. Finally, add one accent flower at the base of each lantern using a short stem pinned behind the leaves. Place lanterns on Day 1 for time to test lighting, then refresh flower accents on Day 3 if they wilt.
Bring spare twine and floral pins in the same color so repairs match instantly.
Avoid tying leaves too high; it covers the lantern light source in photos.
15. Ceiling or Hanging Leaf Swags Over the Dance Floor
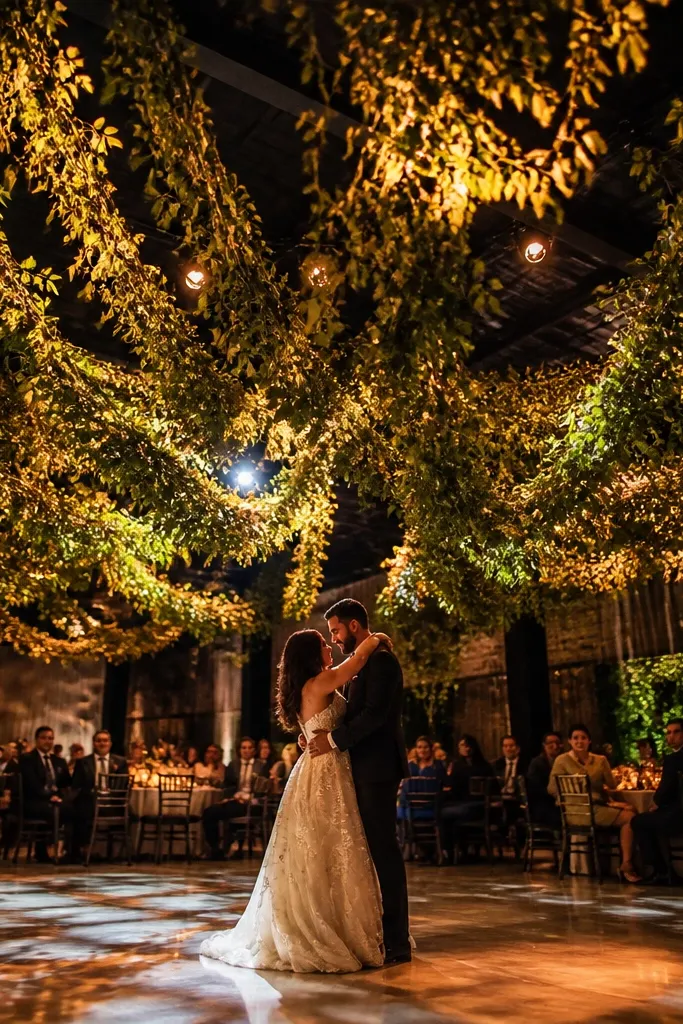
Hanging leaf swags are one of the best ways to make a reception feel like a garden without stacking more decor on tables. The natural look comes from a soft drape and uneven lengths, so the leaves fall like they were placed by wind. Use a few anchor points and let the swag breathe with gaps — dense all-over coverage looks heavy. This works in venues with ceiling clearance and open air above the dance floor. It’s also perfect for evening photos, because the leaves catch light and create a moving backdrop during dancing.
First, decide the swag width based on the dance floor and leave 18-24 inches of clearance around the edges for sightlines. Then hang using discrete clear cords attached to a lightweight frame or directly to ceiling points if allowed by the venue. Finally, attach leaf clusters along the cord in uneven intervals so you get a layered fall. Do this on Day 1 so you can adjust the height safely before guests arrive.
Quick tipUse a tape measure and mark cord lengths before you attach anything — ceiling heights vary by venue section.
Skip thisAvoid full ceiling coverage; it turns into a ceiling mural instead of a natural canopy.
16. Staircase or Pathway Leaf Garland with Uneven Rhythm
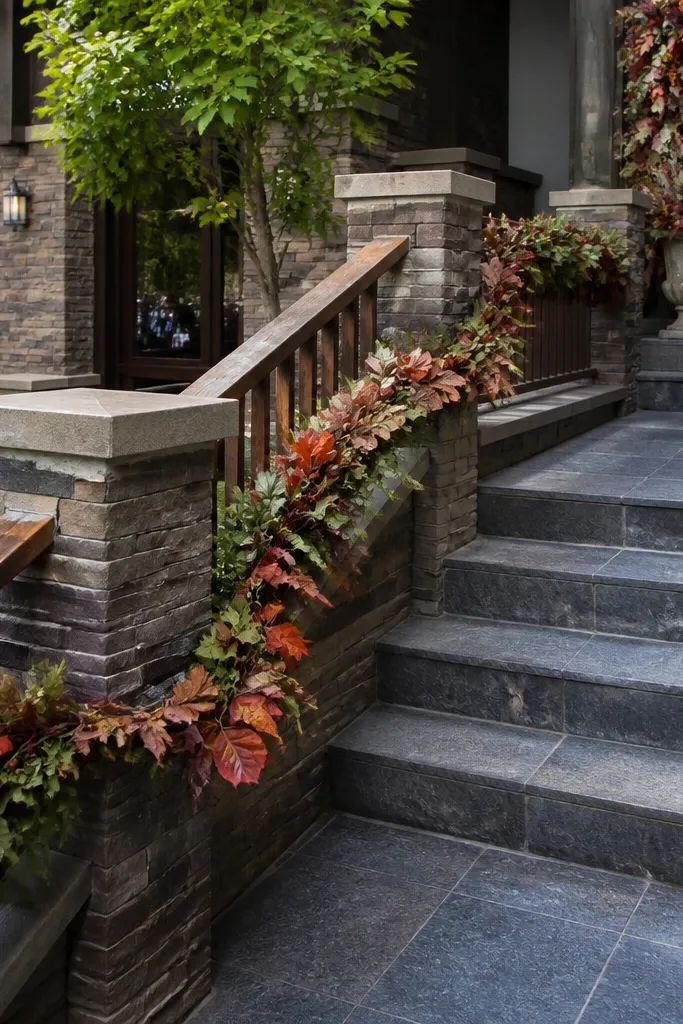
If your venue has stairs or a clear pathway, leaf garlands there look like a natural guide through the weekend. The trick is uneven rhythm — clusters close together near photo angles and more spacing where guests walk. This makes the decor feel placed by nature rather than arranged like a straight holiday chain. It’s great for hotels, multi-level venues, and outdoor pathways leading from ceremony to cocktail hour. In photos, the garland creates a leading line that pulls you toward the couple.
First, measure the pathway length and pick garlands long enough to drape without stretching tight. Then attach at two points and let the middle sag slightly so it looks organic. Finally, add extra leaf clusters at turning points and near landings so guests get a photo moment from multiple angles. Plan this for Day 1 because you need time to test the drape and ensure it doesn’t snag shoes.
Quick tipUse heat-safe zip ties for faux greenery — they hold better than tape on textured rails.
Skip thisAvoid perfectly even spacing; straight repetition reads manufactured.
17. Green Leaf and Candle Row on Low Wooden Planks
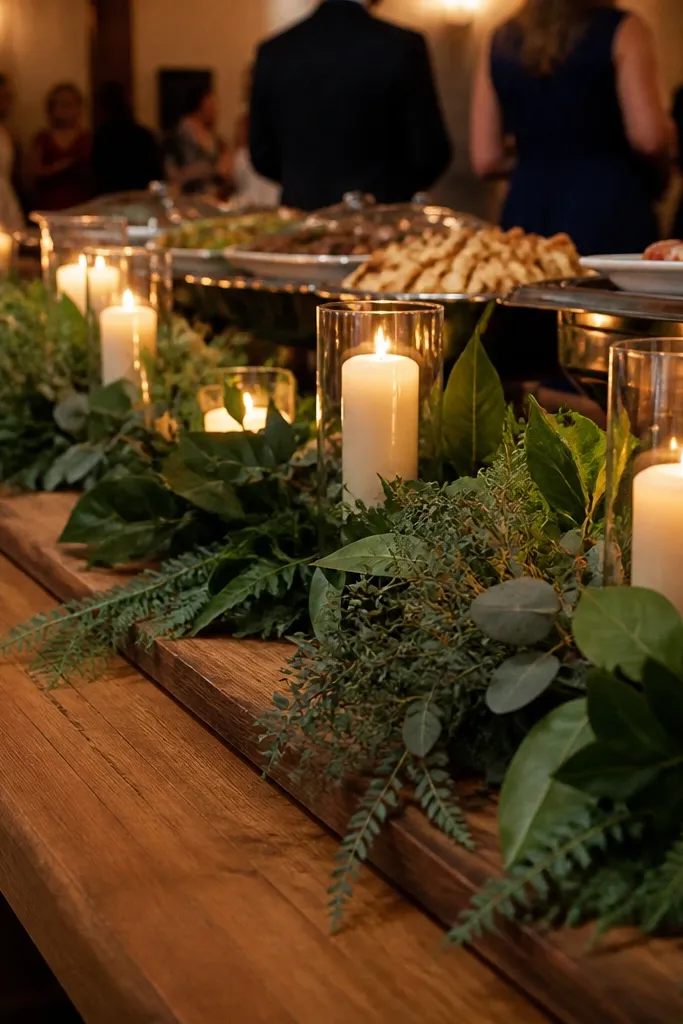
Low plank styling gives you a natural, grounded look and keeps candles at a safe, consistent height. Place leaf clusters along the plank in staggered points, then add candles in groupings of two or three. The leaves create texture between candle flames, so the row looks full without being tall. This is perfect for buffet tables, dessert stations, and ceremony-to-reception transition areas where guests walk close. It also photographs well because the candlelight makes the leaves feel alive, not flat.
First, choose wooden planks in a warm neutral finish and clean them so they look intentional. Then place leaf clusters along the plank edge and center in a staggered pattern, leaving negative space between clusters. Finally, set candles in small groupings — keep spacing even so the row looks designed. Build this on Day 2 right before the stations open, so it doesn’t get disturbed.
Use unscented LED candles if you’re worried about heat or wind near outdoor venues.
Avoid placing candles directly against dense leaf mats; it can look like a candle is “stuck” to greenery.
18. Leaf Confetti Tablescatter for Guest Seating Rows
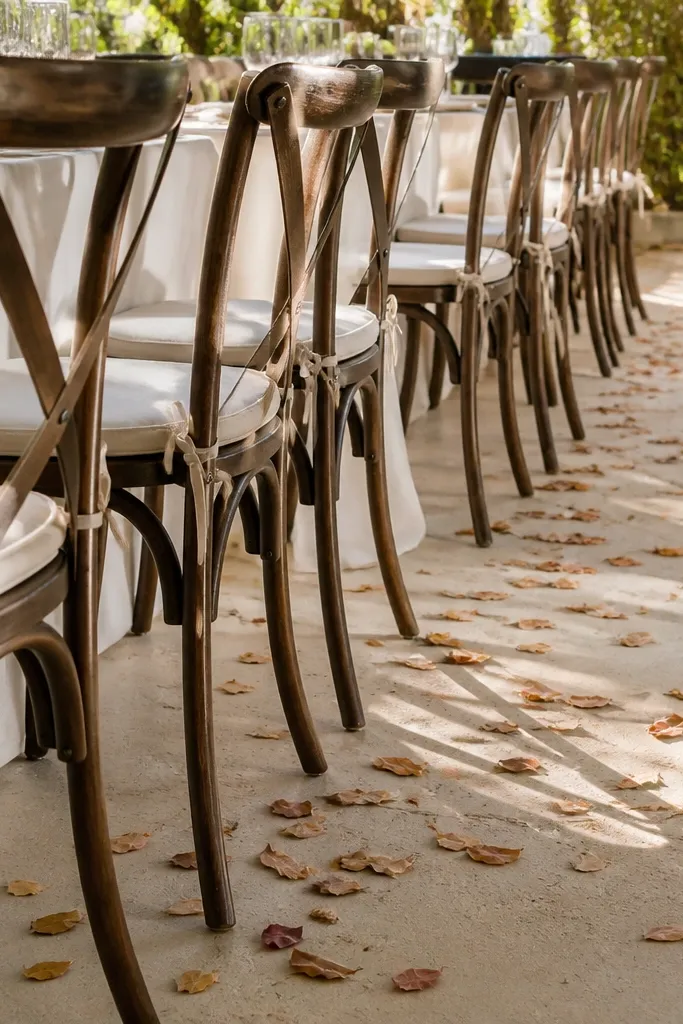
Tablescatter is one of the most effective ways to make a reception feel styled without building big structures. Use dried leaf confetti in matte tones, then scatter it lightly along the aisle side of guest seating rows or around cocktail tables. The natural look comes from low density and varied sizes, so you get texture but not a pile. This works for outdoor weddings and indoor venues with wood floors or neutral carpeting. Photographers love it because it adds detail at ground level that shows up in candid shots.
First, choose confetti in two tones — one main green and one muted tan or deep olive for contrast. Then scatter by hand in small clusters rather than an even layer, focusing near the ends of rows for better visibility. Finally, set the scatter on Day 2 after heavy setup is done so it doesn’t get swept away. Bring a small bin for cleanup and a few extra handfuls for touch-ups.
Quick tipDo a quick test photo from standing height before you commit; ground-level scatter looks different under flash.
Skip thisAvoid bright dyed confetti; it reads like party decor instead of natural leaf texture.
19. Draped Leaf Garland on Buffet Mirrors with Loose Ends
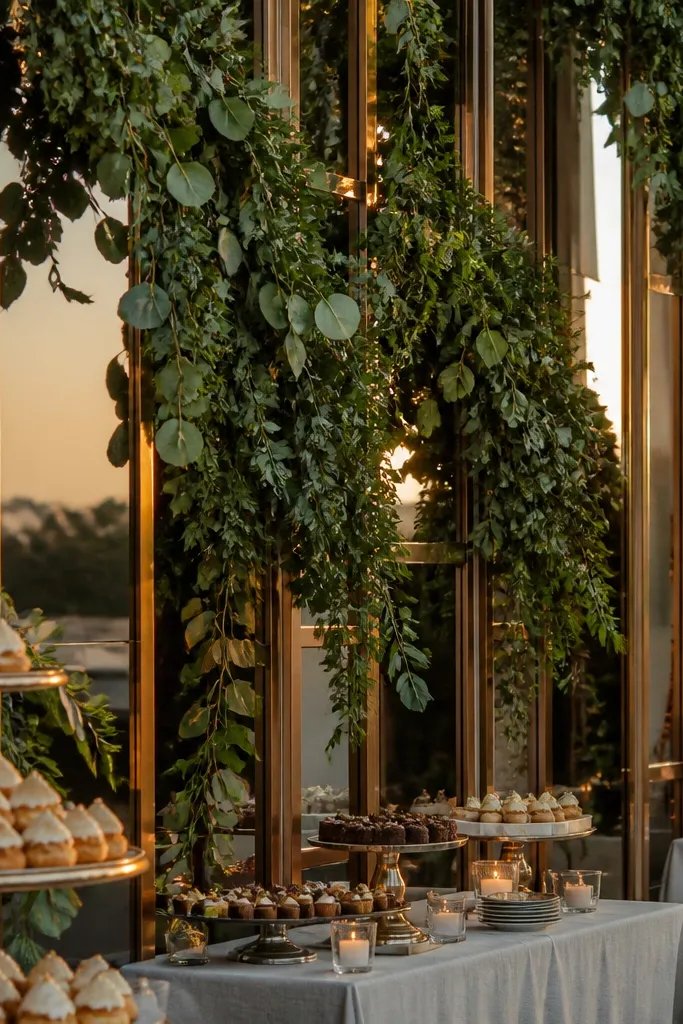
Mirrors amplify light and make leaf decor look bigger without adding more volume. Draped garlands with loose ends look natural because they fall and overlap instead of sitting flat. Use leaf clusters that vary in width so the mirror reflections show texture, not a repeating pattern. This is a smart choice for dessert and cocktail buffets where you want a photo backdrop behind the food. It’s also useful for a 3 day itinerary because mirrors and garlands can be reused across events if you move them carefully.
First, clean the mirror thoroughly so smudges don’t show in flash. Then drape garlands across the mirror in an S-shape and secure only the top points so the ends hang naturally. Finally, add one thicker cluster at the center for a focal point and keep the rest lighter. Set this on Day 1 so you can adjust the drape, then do a quick tug on Day 3 if the garland shifts.
Quick tipUse clear command-style hooks only if the venue allows — otherwise bring freestanding mirror stands.
Skip thisAvoid tying the garland too tight; tight lines look like decals.
20. Leafy Table Numbers on Stakes with Thin Branch Frame
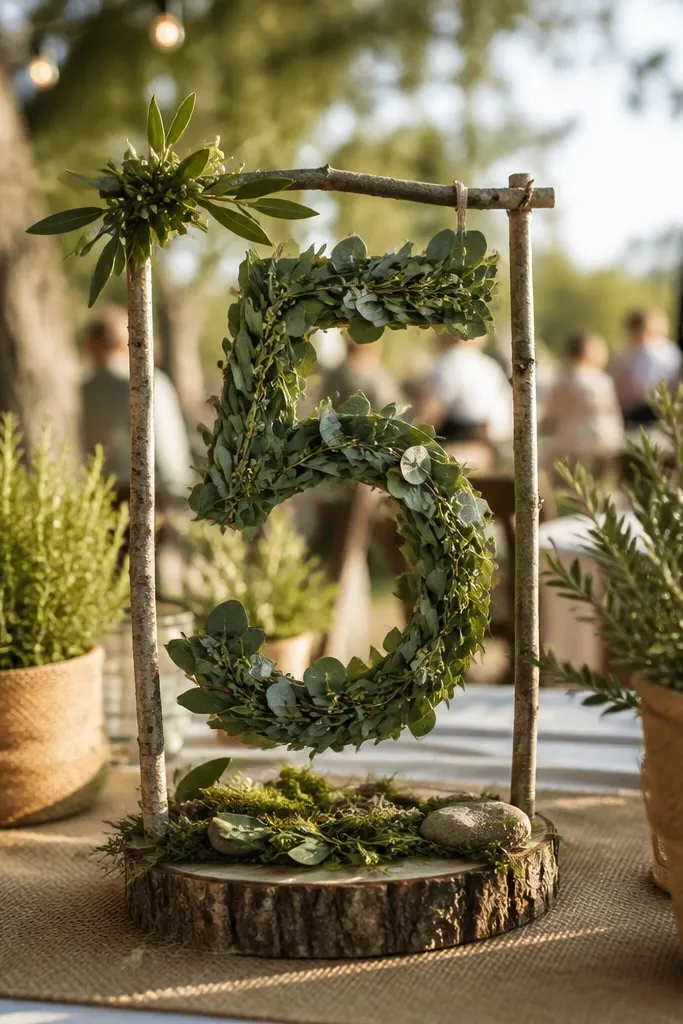
Table numbers are where people look during reception flow, and leafy stakes make them feel botanical rather than purely functional. Use a thin branch frame so the number looks airy, then attach small leaf accents at the top and around the number edges. This keeps the natural look consistent with your other leaf moments while giving each table a distinct mini focal point. It suits weddings with assigned seating and venues with open sightlines. In photos, the stakes also create vertical texture that balances low centerpieces.
First, choose table numbers in a simple font on matte board and cut them to a readable size (about 6-8 inches tall). Then attach each number to a thin branch stake and add two to four leaf sprigs around the frame. Finally, place stakes on Day 2 after the room is otherwise set so guests can find tables easily. For transport, wrap each stake in paper and keep leaves in a separate sleeve to prevent crushing.
Quick tipIf you have outdoor wind, anchor stakes into a weighted base or use heavier planters.
Skip thisAvoid stacking leaf sprigs directly behind the number; it reduces legibility in photos.



