
1. Velvet Crown Backdrop With Antler-Gold Frame
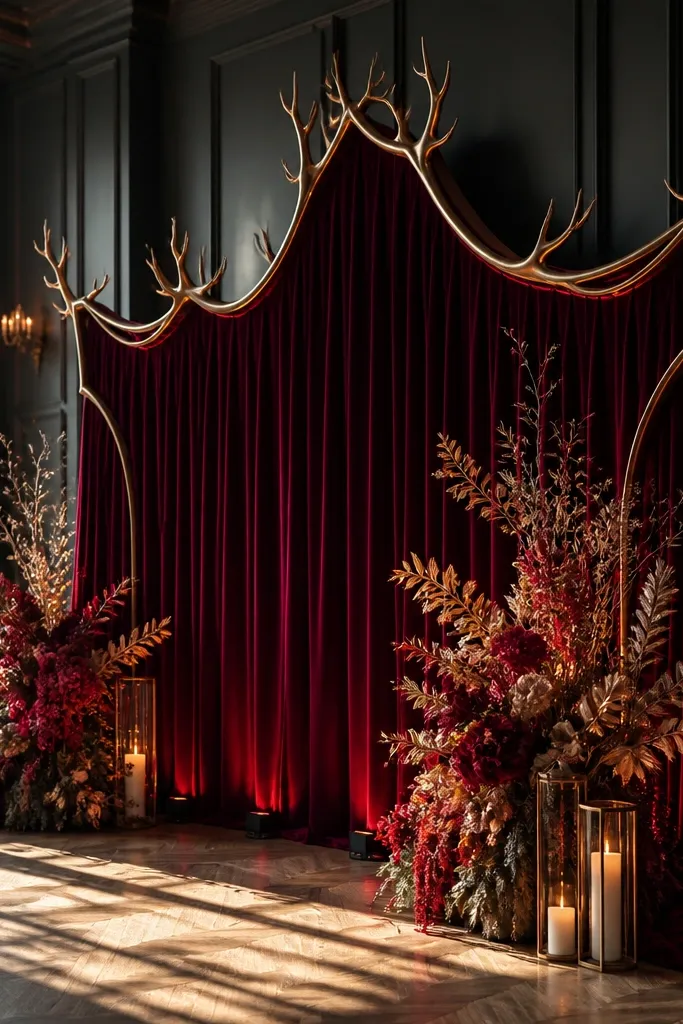
This look turns a flat backdrop into a royal focal point by stacking a crown shape over heavy velvet. The burgundy or plum velvet gives deep shadows in photos, while the antique-brass frame adds warm highlights that don’t look neon under event lighting. It’s best when your stage has enough height for the crown to sit above head level and still read as “crown” from the front row. If your venue has neutral walls, the velvet will do the heavy lifting and keep the stage from looking empty.
Step 1 — Measure the stage width and mark the center point where the couple stands. Step 2 — Ask the shop to build the crown frame to match your center width, then choose velvet color and pile direction so folds fall toward the audience. Step 3 — Visit during a production window 6-10 weeks out so they can adjust frame height before fabric is finalized.
Quick tipBring a photo of your venue stage from the guest perspective to confirm the crown reads, not just the velvet.
Skip thisDon’t pick a velvet shade that’s too close to your bridesmaid palette — the backdrop can blend into the room.
2. Champagne Satin Drapes With Rope Tassel Corners
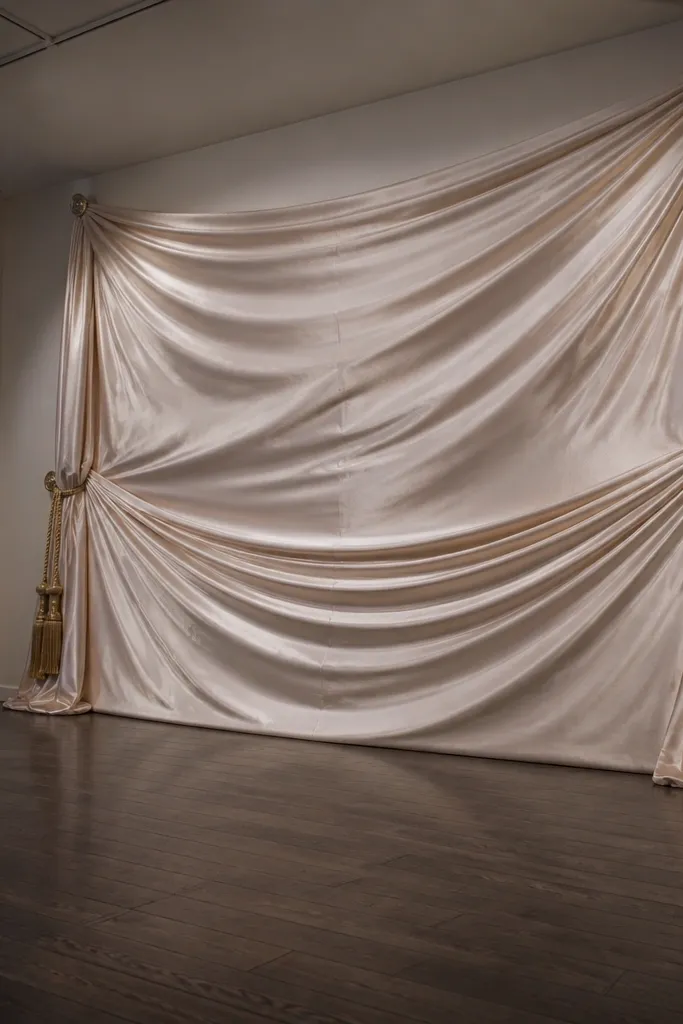
Champagne satin drapes look expensive because they catch light in thin highlights, and the rope tassels make it feel styled rather than plain. The trick is tension: the drape should pull into gentle arcs, not hang straight like a shower curtain. Place tassels at the corners of the backdrop so they frame the couple without crowding the center. This works especially well for ballroom venues with overhead lighting that already has warm tones.
Step 1 — Choose a backdrop width that is 1.2x your stage width so the satin has room to billow. Step 2 — Ask for rope tassels in antique gold and confirm tassel length against your stage height so they don’t hit chair backs. Step 3 — Plan a shop visit 8-12 weeks out if you want tassel length changes; later visits usually lock in what’s already in production.
Request a swatch test under the venue’s lighting color temperature if the shop can do it.
Skip polyester-look satin that wrinkles into flat creases — it kills the “royal drape” effect.
3. Gilded Mirror Panel Backdrop With Soft Floral Spill
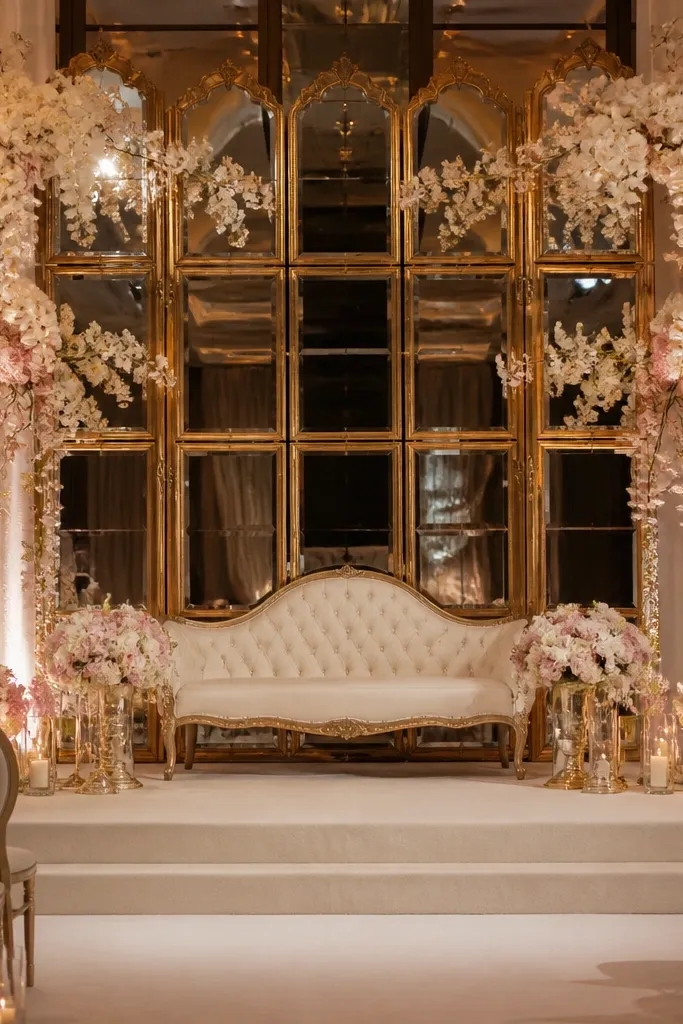
Gilded mirror panels create instant depth, which makes stage photos feel bigger without adding clutter. Use them behind the couple so reflections enhance the hero area instead of bouncing light across the entire room. The floral spill should be soft and controlled — think a gentle “cascade” from the top corners toward the center rather than a full wall of flowers. This is a great option for shops that can deliver panels already assembled, so the stage goes up fast on install day.
Step 1 — Confirm the mirror panel dimensions fit your stage and don’t block the couple’s line of sight to the aisle. Step 2 — Choose a gilded finish like antique gold rather than bright chrome so it looks cohesive with candlelight. Step 3 — Book the panel install pieces first, then schedule your floral workshop visit 2-3 weeks after so you can tweak spill volume.
Ask if the mirrors are tempered and edge-finished; you want safe handling for install.
Don’t place mirrors too close to warm spotlights that reflect directly into guest eyes.
4. Royal Monogram Medallion With Gold Fringe Halo
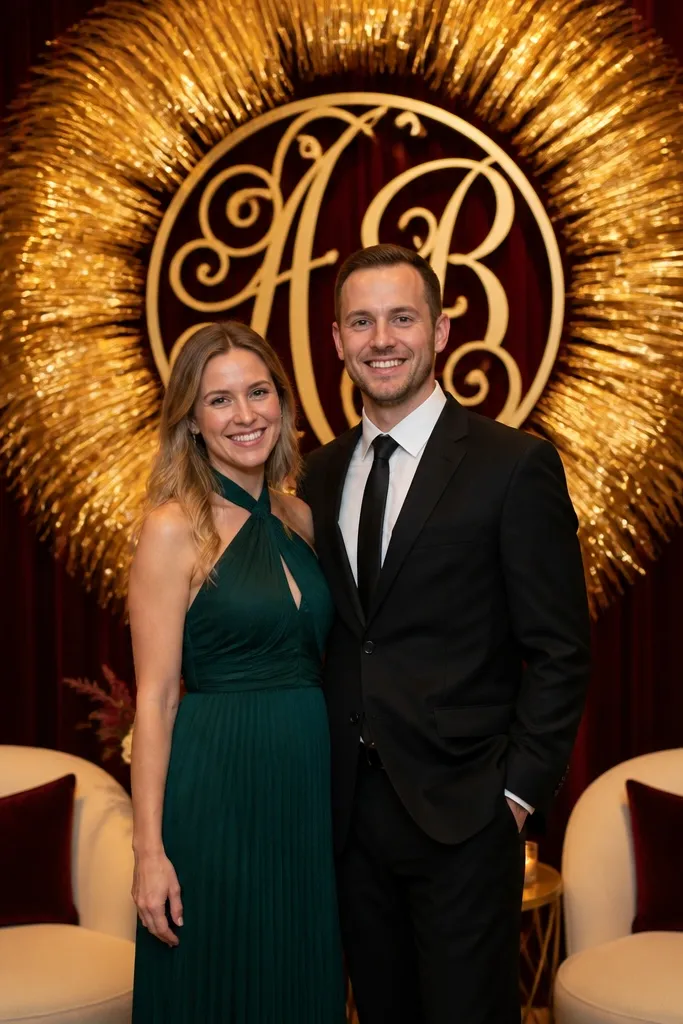
A monogram medallion gives you a clear identity in photos, and the gold fringe halo reads like a crown’s glow. This looks best when the medallion sits at eye level behind the couple and the fringe is long enough to create motion blur in flash photos. Pick letters or initials that are readable at a distance — thin script fonts disappear in stage shots. If your stage is already decorated, this keeps the composition clean and royal.
Step 1 — Measure the couple’s center height and place the medallion so the top sits just above head level. Step 2 — Choose fringe length based on your stage height: shorter for low ceilings, longer for taller rooms so it frames properly. Step 3 — Visit 6-8 weeks out for the medallion cut and fringe attachment; later visits can limit font and size options.
Bring your monogram font reference printed; shops match best when you show a sample.
Skip tiny monograms — they look like random decor instead of a royal focal point.
5. Antique Brass Chandelier Frame With Candle Rings
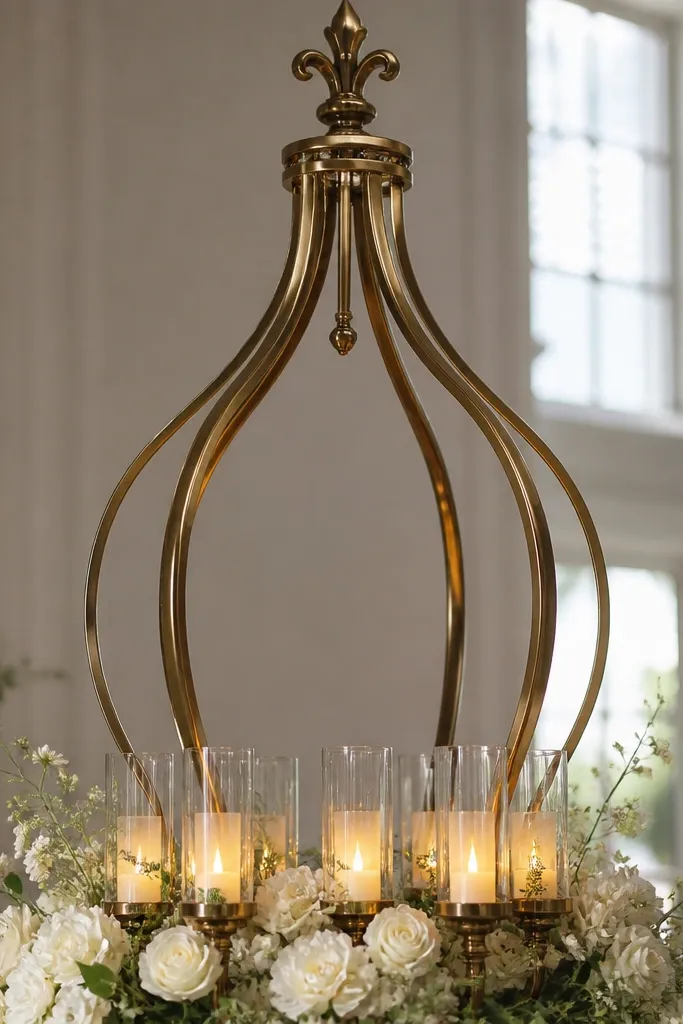
This is royal without being heavy. An antique brass chandelier frame creates a vertical “crown” shape, while candle rings add a soft glow that reads well even in daylight. The candle rings should be grouped around the central base, not spread across the entire stage, so photos stay focused. Choose glass candle sleeves that look clear with a hint of gold tint to keep the reflectivity classy.
Step 1 — Ask the shop to show the metal finish in daylight and under warm lighting; antique brass should look golden, not yellow-painted. Step 2 — Confirm whether you’re using real candles or LED candles; plan the power or candle placement before install day. Step 3 — Book 8-10 weeks out and schedule a lighting check visit 1-2 weeks later if the venue has dimmer controls.
Quick tipChoose LED candles with a flicker mode that’s subtle; the too-fast flicker looks cheap on camera.
Skip thisDon’t overload the frame with too many hanging elements — it becomes busy and loses the crown shape.
6. Royal Arch With Silk Peony Clusters and Pearl Strands
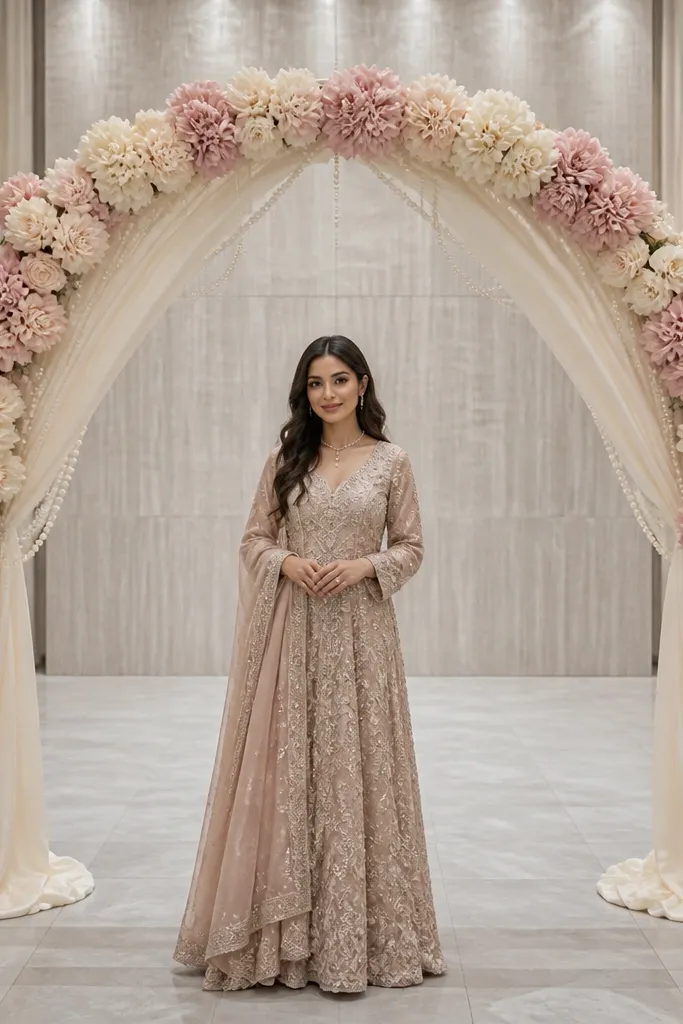
A royal arch behind the couple looks like a ceremony portal, and silk peony clusters give the fullness you want without relying on fragile blooms. Pearl strands add a bridal-luxe detail that reads clearly in photos because pearls catch specular light. This works best for indoor ceremonies and venues with a clean floor line so the arch doesn’t get swallowed by other decor. If your aisle is long, an arch also helps the couple stay visually centered from farther back.
Step 1 — Tell the shop the exact arch width you can fit through side staging and ask for a 10% clearance on each side. Step 2 — Choose pearl strand length by checking whether it will land above the couple’s shoulders or down to waist level. Step 3 — Visit 10-12 weeks out so they can source the peony color and assemble the pearl strand clusters in their production schedule.
Ask for a removable pearl strand section so transport and install are easier.
Skip mixed flower colors if the venue has busy wall patterns — keep the arch color tight.
7. King-and-Queen Pedestals With Velvet Plinths
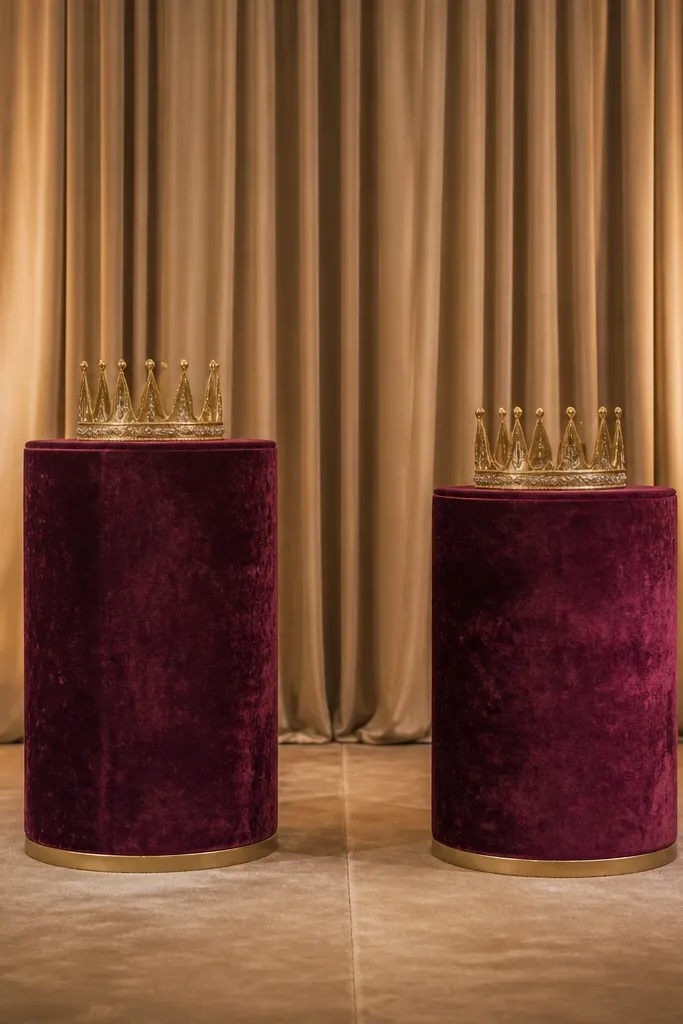
Pedestals make the stage feel like a royal throne setup, even if you’re not using actual thrones. Velvet plinths give a controlled, plush look and hide scuffs that happen during install. Place one pedestal slightly higher than the other if your couple will stand closer to one side; it balances the photo. Styling works best with one item per pedestal: a tall candle, a sculptural vase, or a crown lantern.
Step 1 — Measure the distance between where the couple will stand and where guests will sit so the pedestals don’t block sightlines. Step 2 — Ask for velvet plinth sizing that matches your centerpiece height, then choose a plinth color that contrasts the backdrop (burgundy vs champagne, navy vs silver). Step 3 — Book 6-8 weeks out because pedestal covers are made in batches and color swaps are harder late.
Use LED uplights under the pedestals so velvet texture shows in photos.
Don’t put two bulky items on one pedestal — it makes the stage look crowded.
8. Royal Feather Fan Backdrop With Gold Vein Accents
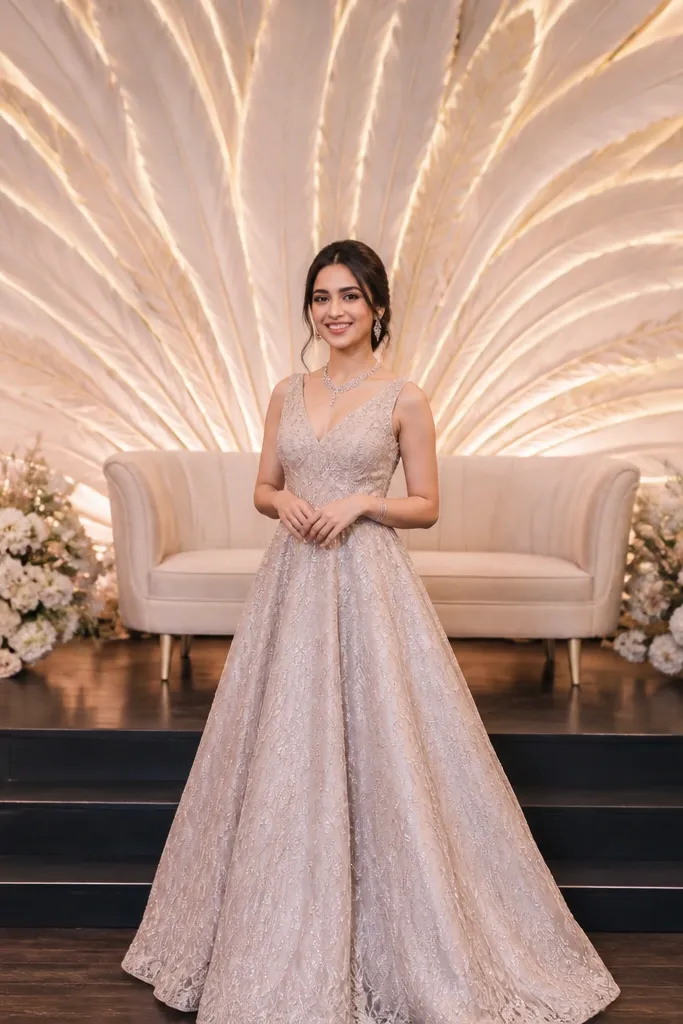
A fan-shaped backdrop reads like couture because it creates sweeping lines behind the couple. Feather-like textures add dimension without needing heavy floral walls, and gold vein accents keep it royal rather than costume-y. This is a strong choice for modern venues with clean lines, where you want the decor to look graphic on camera. It’s also a smart pick for shops that can deliver lightweight backdrops — easier transport, less install time.
Step 1 — Confirm the backdrop height so the fan peak sits above the couple’s head line in photos. Step 2 — Choose gold accents that are subtle and matte, not shiny chrome; you want warm reflections, not glare. Step 3 — Visit 4-6 weeks out if the shop has this design in stock; if it’s custom, go closer to 8-10 weeks.
Quick tipAsk how it looks from the sides; feather textures can shift visually depending on viewing angle.
Skip thisAvoid high-contrast black-and-neon gold combinations that read nightclub on camera.
9. Antique White Floral Wall With Gold Frame Outline
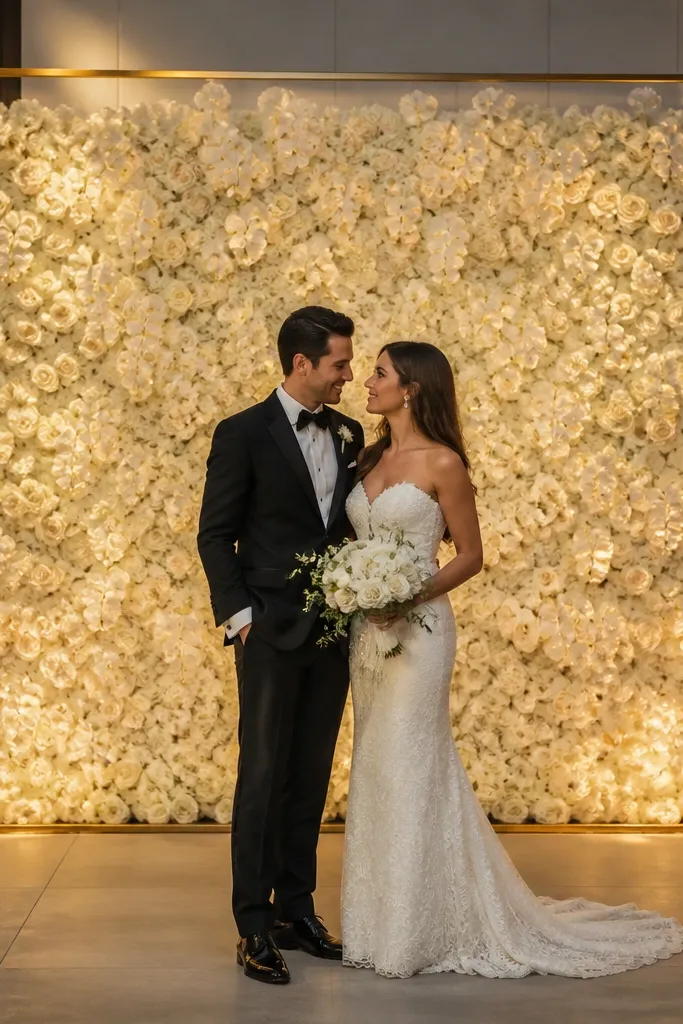
A white-on-white floral wall looks royal when it’s framed, not when it’s just flowers everywhere. The gold outline gives the stage a clean border that helps your eye find the couple instantly. Keep the floral palette antique white with a hint of warm cream so it doesn’t look like plain wedding filler. This works for venues with lots of natural light because the gold frame adds definition even when flowers flatten in brightness.
Step 1 — Ask for a frame thickness that matches your stage scale; thin frames look best for narrow stages, wider frames for broader backdrops. Step 2 — Choose flower density so it covers the couple’s height but leaves negative space at the top corners for depth. Step 3 — Visit 8-12 weeks out for frame fabrication and to confirm the gold finish color in real light.
Bring a fabric swatch from your dress or theme so the white tone matches instead of fighting the room.
Skip a frame that’s too bright yellow — it can clash with warm white flowers.
10. Royal Draped Side Panels With Crystal Drop Chains
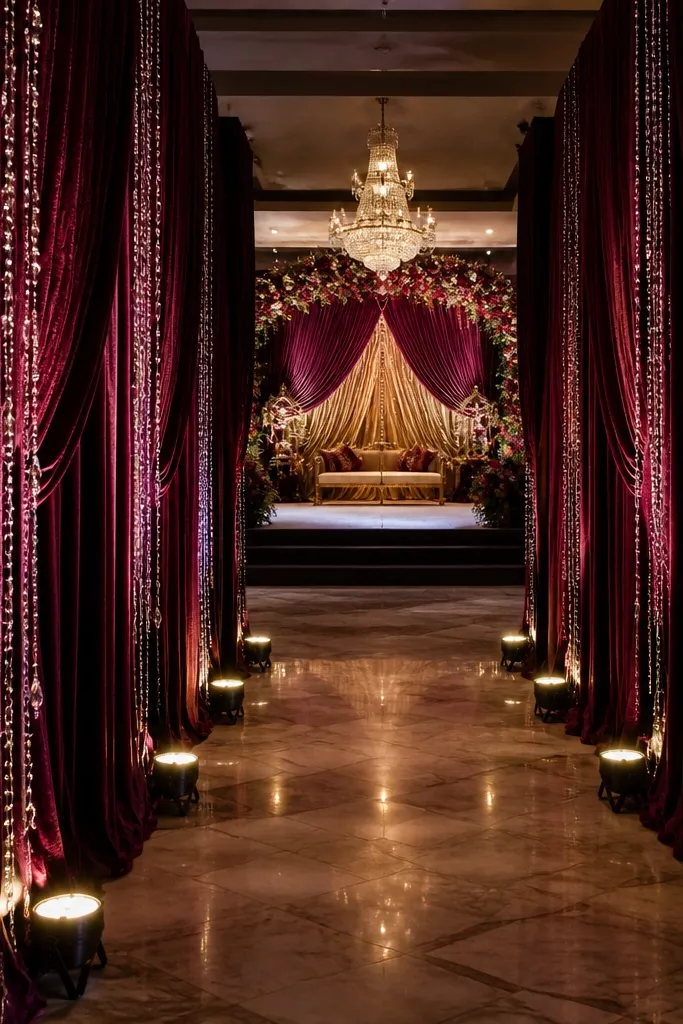
Side panels make photos look more “designed” because they add depth beyond a single backdrop. Draped fabric on both sides creates a royal corridor effect, and crystal drop chains add sparkle that reads even when the main lights dim. Choose fabric in a deep jewel tone so the chain reflections show without needing strong spotlights. This look is best for stages with enough side space for panels to breathe.
Step 1 — Measure the stage depth and confirm the side panels won’t block camera angles from the guest seating. Step 2 — Ask the shop to hang the crystal drops so they fall in vertical lines, not tangled clusters. Step 3 — Book 10-12 weeks out if the chains are custom length; standard lengths can still work if your stage height is average.
Quick tipIf the venue has strong air vents, ask for heavier chain clips so drops don’t sway on camera.
Skip thisAvoid clear chains with no tint — they can look icy and cheap under warm lights.
11. Gold Lattice Backdrop With Velvet Center Panel
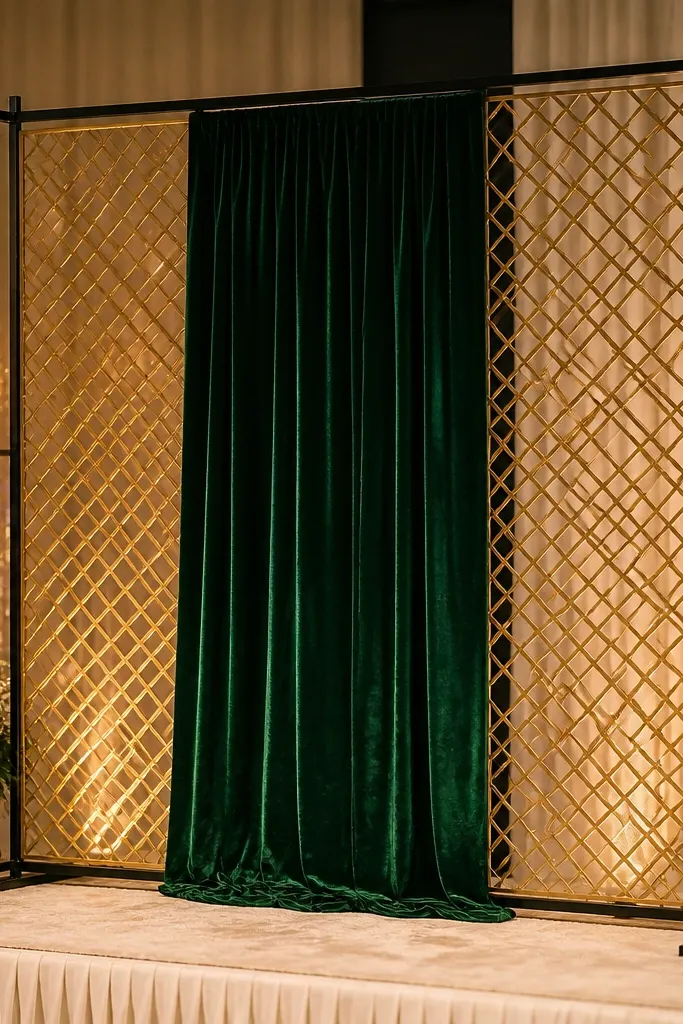
A gold lattice backdrop gives you structure and a clear royal pattern, then the velvet center panel keeps the composition soft. This is excellent when you want the stage to look styled even if your floral budget is smaller. The lattice catches light as a grid, while the velvet provides the “royal weight” behind the couple. Choose a center velvet color that contrasts the lattice finish for a clean photo read.
Step 1 — Ask for a lattice size that matches your stage width; too small and it looks like a screen, too big and it overwhelms. Step 2 — Confirm the velvet center panel is removable so you can swap colors without redoing the lattice. Step 3 — Visit 6-10 weeks out so you can choose velvet color while the shop still has inventory.
If you’re doing uplighting, request warm white LEDs (not cool white) so the lattice doesn’t look gray.
Don’t pair bright yellow gold lattice with cool-toned gray velvet — it looks mismatched.
12. Royal Tabletop Throne Mini Set On Stage
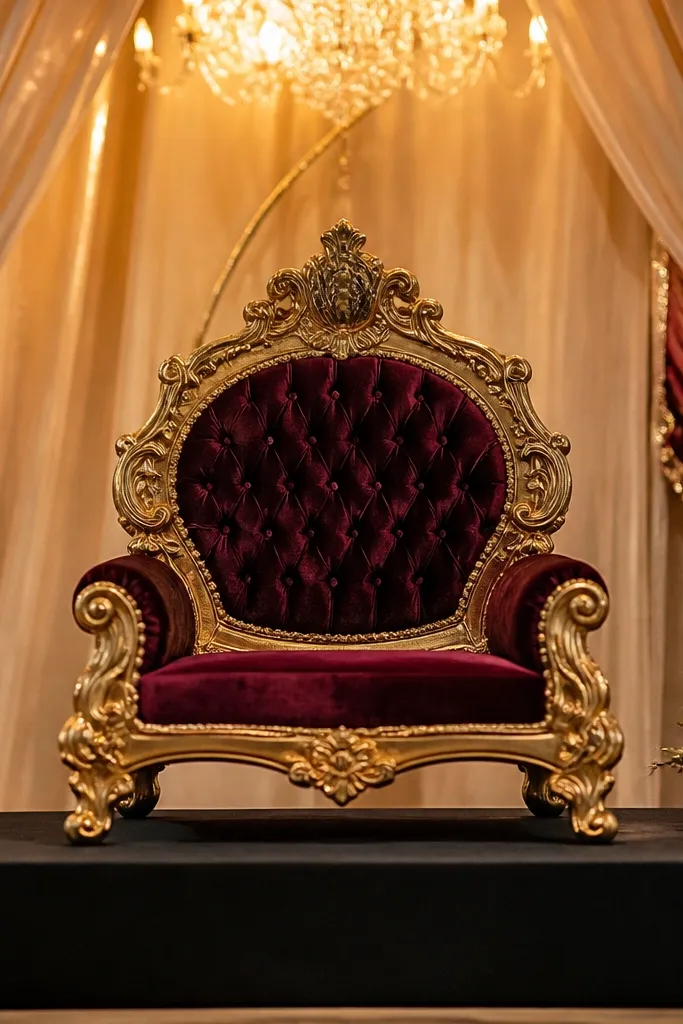
Mini throne props add a royal story without the hassle of full-size seating on stage. Think a compact throne sculpture or throne-style chair back placed on a platform with a velvet base. It reads well in group photos because it’s distinct and centered, and it gives your stage a personality beyond drapes and flowers. This is best for couples who want a strong “royal” theme but still want mobility and simple installs.
Step 1 — Choose a platform size that keeps the throne prop within the camera frame without blocking the couple’s legs. Step 2 — Ask for a velvet base cover with clean edges so the platform doesn’t look homemade. Step 3 — Book 4-6 weeks out if it’s rental stock; for custom gold detailing, go 8-10 weeks and confirm finish compatibility with your other brass pieces.
Use one hero prop only. If you add too many throne-like items, the stage looks like a prop store.
Skip cheap plastic throne props; the gold finish flakes under stage lighting.
13. Gold Fringe Curtain Drop Behind the Couple
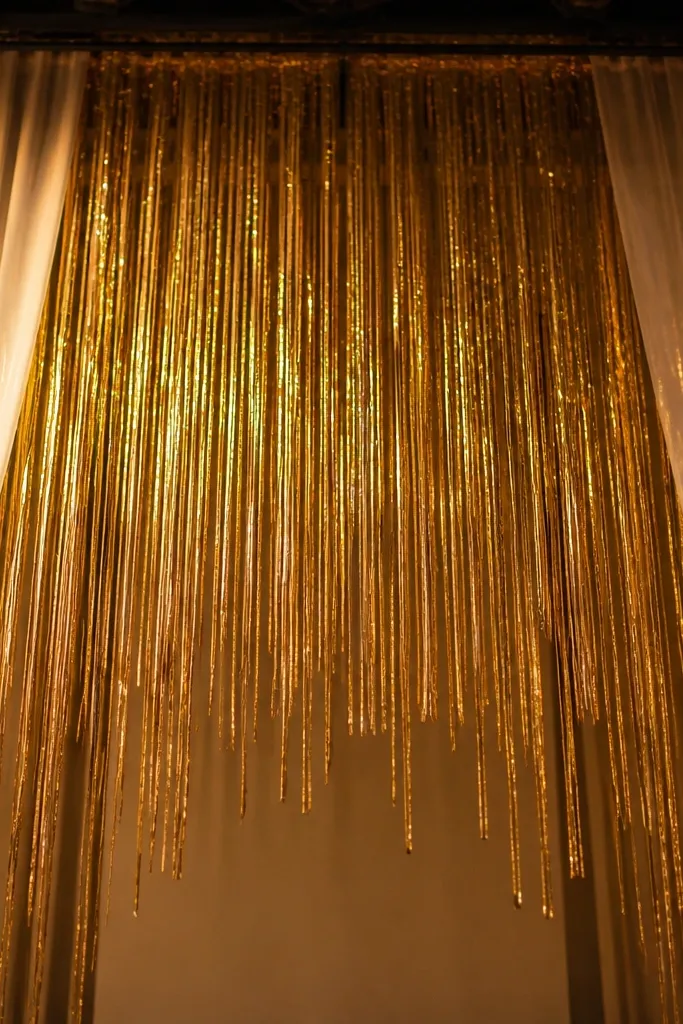
A fringe curtain drop is the fastest way to get royal movement in photos. It shimmers softly when lights hit, and it frames the couple without needing a full floral wall. Keep the fringe density balanced: too thin looks wispy, too thick looks heavy and messy. This style works best when the couple stands still and the lighting is consistent, like a ballroom with fixed spotlights.
Step 1 — Confirm the curtain width is wider than the couple’s stance so the fringe doesn’t show gaps. Step 2 — Choose fringe length based on stage height: above shoulder for a clean look, lower only if your camera angle is high. Step 3 — Visit 6-8 weeks out because fringe sets get booked for multiple weekends and color swaps are limited.
Quick tipAsk for a blackout backing behind the fringe so the room behind doesn’t show through.
Skip thisDon’t hang fringe too close to the couple’s hairline; it can tangle and ruin the photos.
14. Crystal Candle Ladder With Gold Side Rails
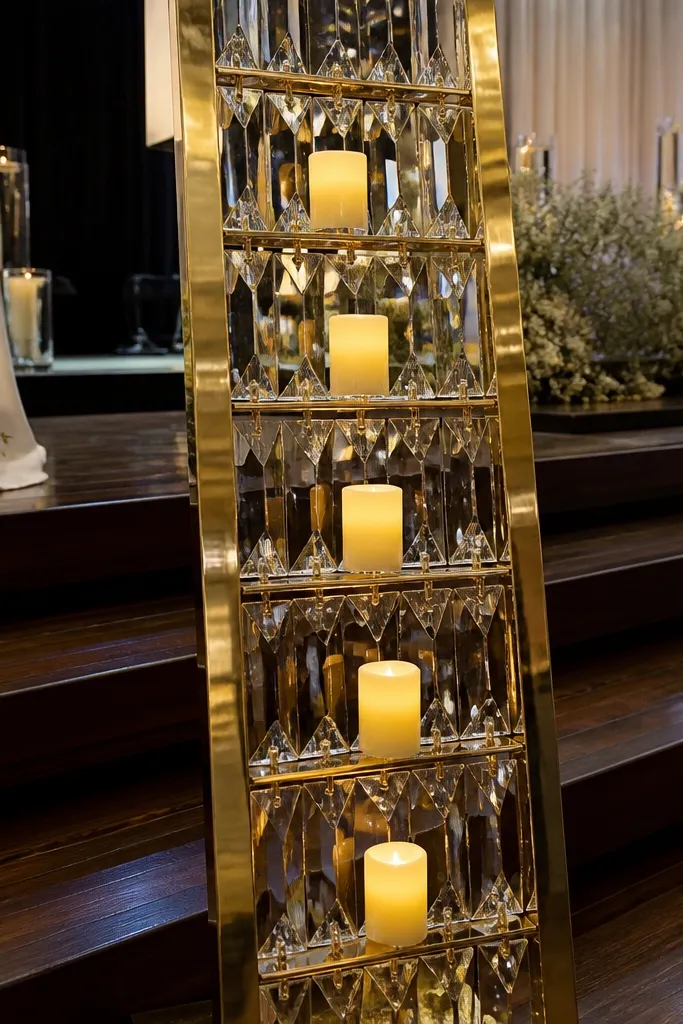
A crystal candle ladder turns lighting into a vertical design element, which reads “royal” in a way that low centerpieces can’t. The gold side rails give structure and help the ladder look intentional from the front and sides. Use LED candles with warm glow so the crystals don’t look washed out. This works best for stages that want height without building a tall arch.
Step 1 — Measure the stage width and decide whether the ladder should sit center or slightly offset to match the couple’s stance. Step 2 — Ask the shop to confirm ladder height so it doesn’t block the backdrop crown or monogram. Step 3 — Book 6-10 weeks out and lock the candle type early; LED models sell out and substitutions can change the color temperature.
Request crystals with a warm tint instead of perfectly clear so they look flattering on camera.
Skip super tall ladders in low-ceiling venues — they clip the top of your photo.
15. Royal Silk Flower Cascade On a Gold Frame Base
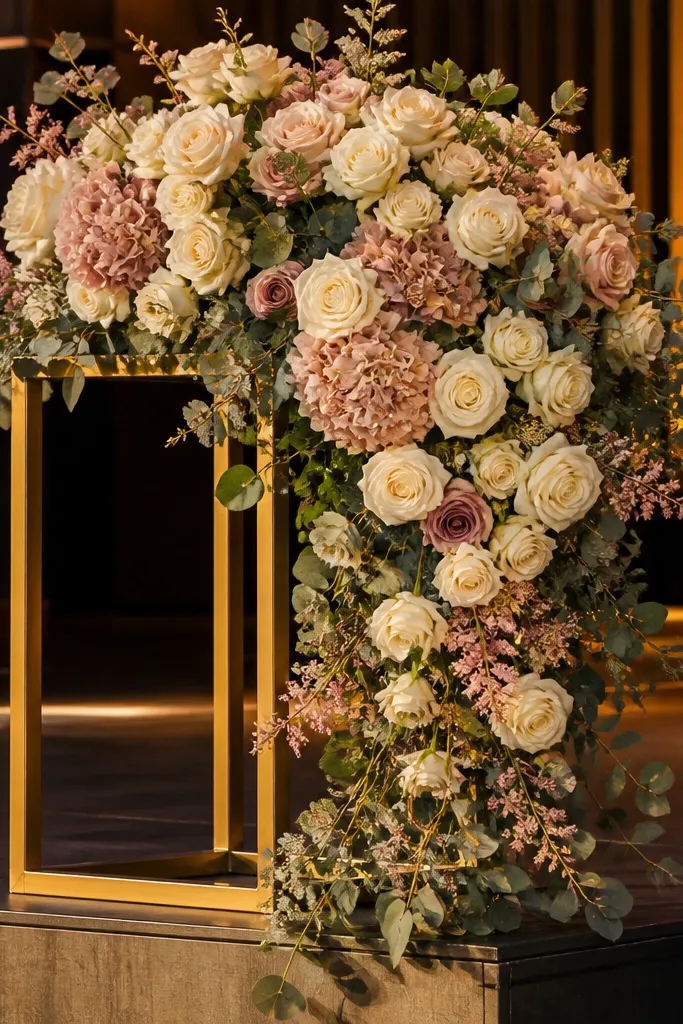
This look uses a gold frame base so your flowers land with a defined shape instead of spilling randomly. A silk cascade gives consistent fullness and stays photogenic through long event hours. Choose flowers that match your palette but keep the cascade concentrated toward center so the couple stays the hero. It’s ideal for shops that can assemble floral mechanics quickly and deliver ready-to-install bases.
Step 1 — Decide how much of the stage you want to cover and ask for a base width that leaves negative space around the couple’s feet. Step 2 — Pick gold frame finish that matches your other brass elements so everything looks like one set. Step 3 — Visit 8-12 weeks out for silk color selection; later visits risk being stuck with what’s already staged for other bookings.
Ask if they can waterproof the base padding so cleaning is easy if candles or drinks are near.
Don’t pick a cascade that starts too low — it can make the stage look shorter in photos.
16. Gilded Column Pair With Draped Sashes
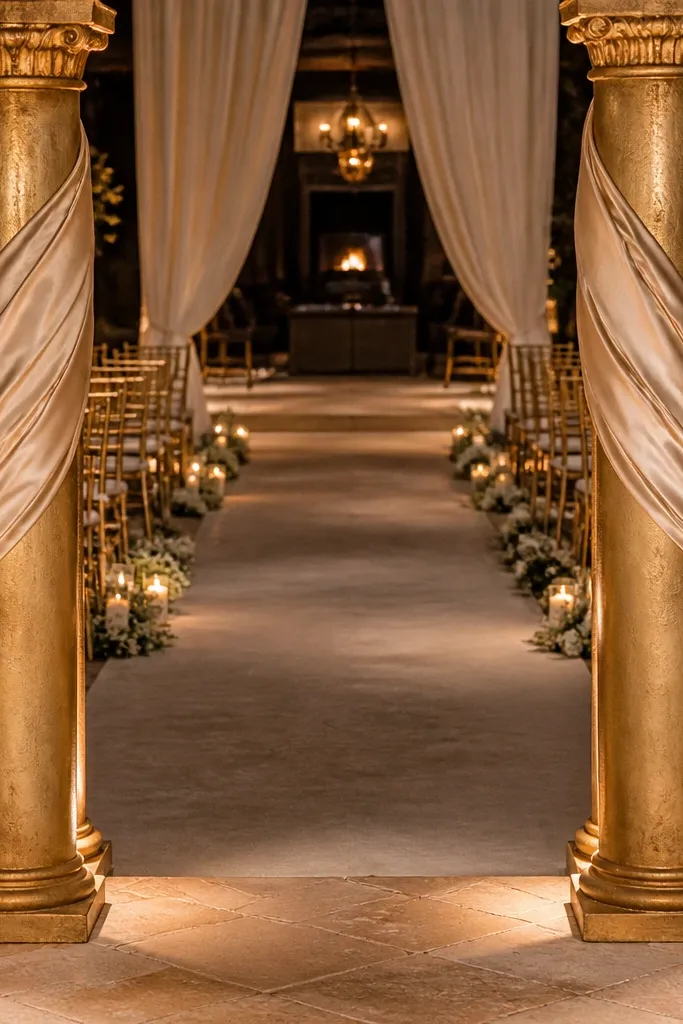
Two gilded columns instantly add royal symmetry, and draped sashes soften the structure so it doesn’t look like a photo booth prop. Choose sashes in a slightly different tone than your main backdrop so the layers show. This works when your stage has a clear center aisle line because symmetry reads strongly in camera shots. If your venue has tall columns or arches, this decor also harmonizes without looking like a mismatch theme.
Step 1 — Measure the distance between columns so they don’t crowd the couple’s walking path. Step 2 — Ask for sash length that falls just below the couple’s shoulder line for a clean frame. Step 3 — Visit 6-10 weeks out and confirm column base weights or stabilizers so install is safe and fast.
Quick tipChoose antique gold columns if the venue has warm wood or beige — bright gold can look harsh.
Skip thisAvoid columns that are too tall for your stage — they can dominate the photo and hide your backdrop.
17. Royal Lighting Shelf With Gold Trim and LED Uplight
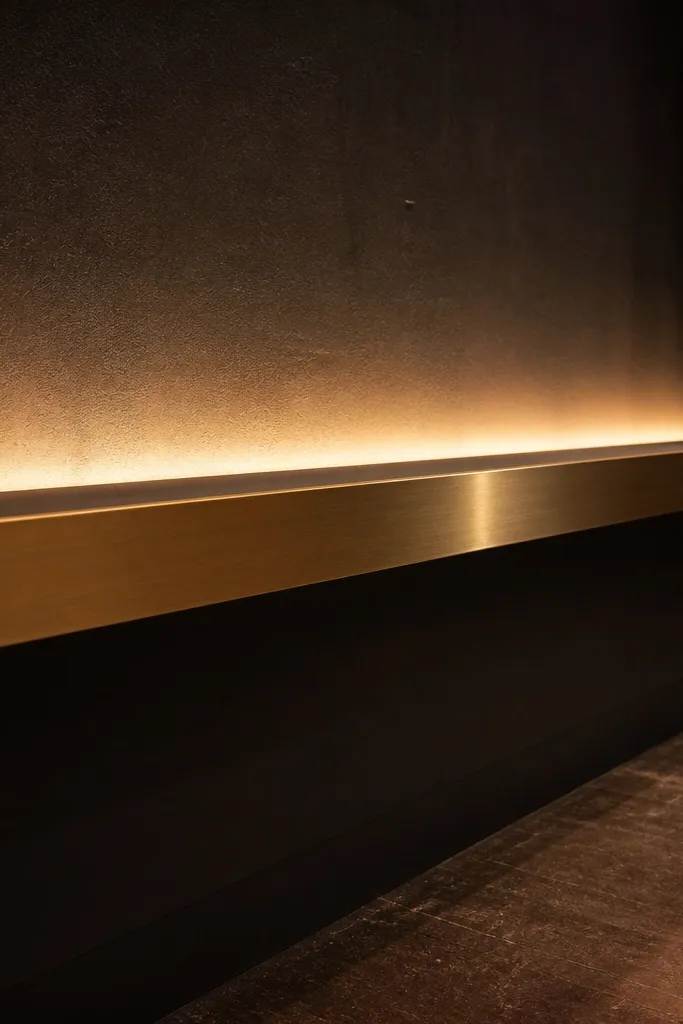
A lighting shelf is an underrated way to make stage decor look expensive because it creates a glowing edge behind the main backdrop. Gold trim makes the glow feel intentional, not like a random light source. This is especially useful if your venue lighting is flat or if the stage walls are plain and absorb light. The royal win here is contrast: dark drape in front, warm glow behind.
Step 1 — Ask the shop to build the shelf to your backdrop height so the glow sits behind the main hero element. Step 2 — Choose warm LED uplight settings and ask if they can match the venue dimmer behavior. Step 3 — Book lighting components first, 10-12 weeks out, because LED systems get reserved quickly during peak weekends.
Quick tipRequest a quick test photo in the shop using their lighting if they can — you’re checking glow color, not just brightness.
Skip thisDon’t use cool white LEDs; the whole stage turns gray in photos.
18. Crowned Floral Frame With Gold Thread Border
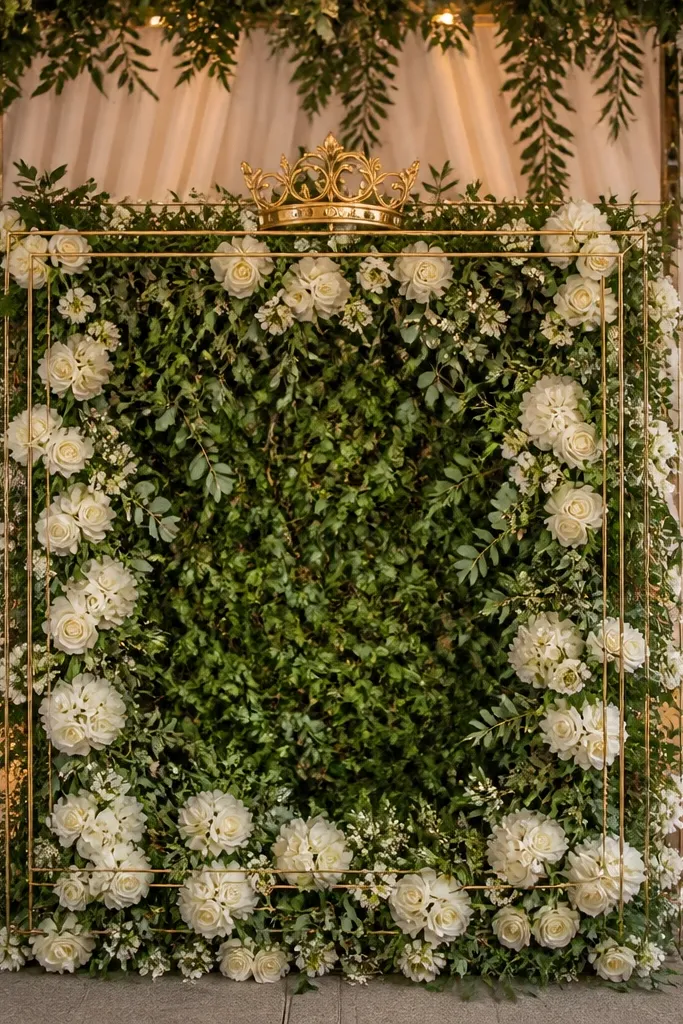
A crowned floral frame gives you the royal signature without the bulk of a full arch. Gold thread border lines make the frame pop and keep it sharp in photos, especially when you’re using dense greenery. Place the crown at the top center and let flowers fill the inside like a picture frame. This is ideal when you want floral impact but don’t want to manage a huge wall installation.
Step 1 — Give the shop your stage width and ask for a frame that covers most of the center area while leaving space for your couple to stand comfortably. Step 2 — Choose crown size so it reads from the front row; ask for a mock layout on the floor if they can. Step 3 — Visit 8-10 weeks out for the border thread and crown build, since custom border lines take longer to match color and tension.
Ask whether the gold thread is matte or shiny; matte reads more royal under warm lighting.
Skip overly thin borders — they disappear in bright venues.
19. Royal Balloon Arch Alternative With Fabric Panels and Crown Lights
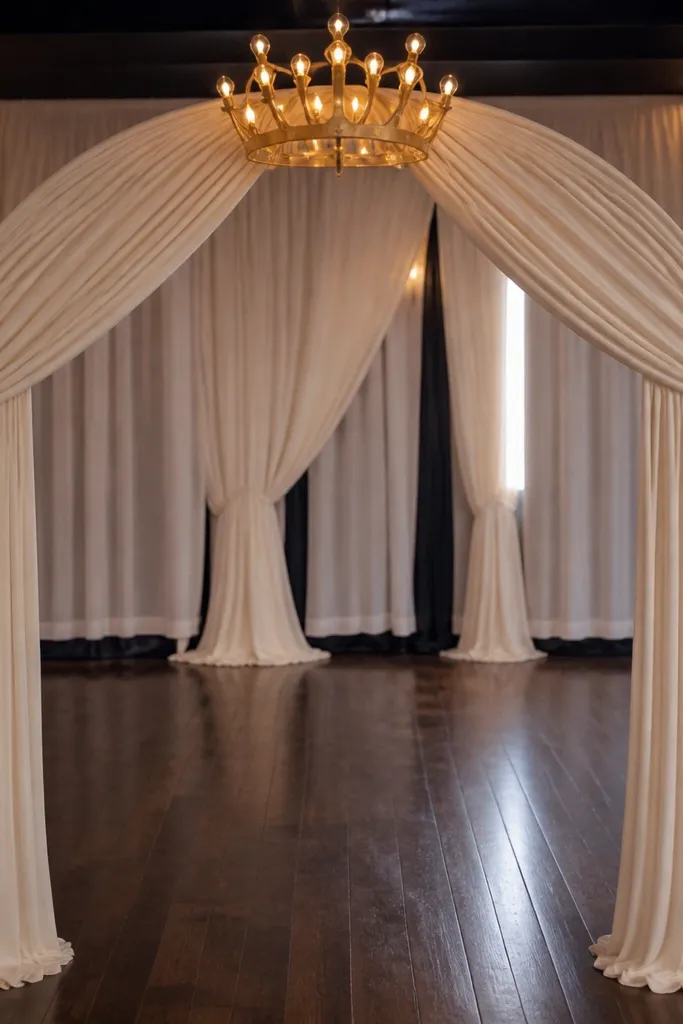
If you want the wow factor of an arch but hate balloon chaos, use fabric panels shaped like an arch plus crown lights for the royal cue. The fabric gives clean lines, and crown lights add a clear theme signal in both daylight and at night. This look is photogenic because the arch shape naturally frames the couple’s faces and upper body. It’s also cleaner for venues with strict rules against balloons.
Step 1 — Confirm the venue rules on light fixtures and power access before you pick this. Step 2 — Ask for fabric panel thickness so the arch holds shape and doesn’t collapse like thin drape. Step 3 — Book 10-12 weeks out if the crown light design is custom; if it’s stock crown lights, 6-8 weeks is enough.
Quick tipBring a short phone video from the venue stage showing where power outlets are; it speeds up planning.
Skip thisAvoid fabric that’s too sheer; it can look washed out when spotlights hit.
20. Gold Geometric Floor Mirror Tiles At Stage Base
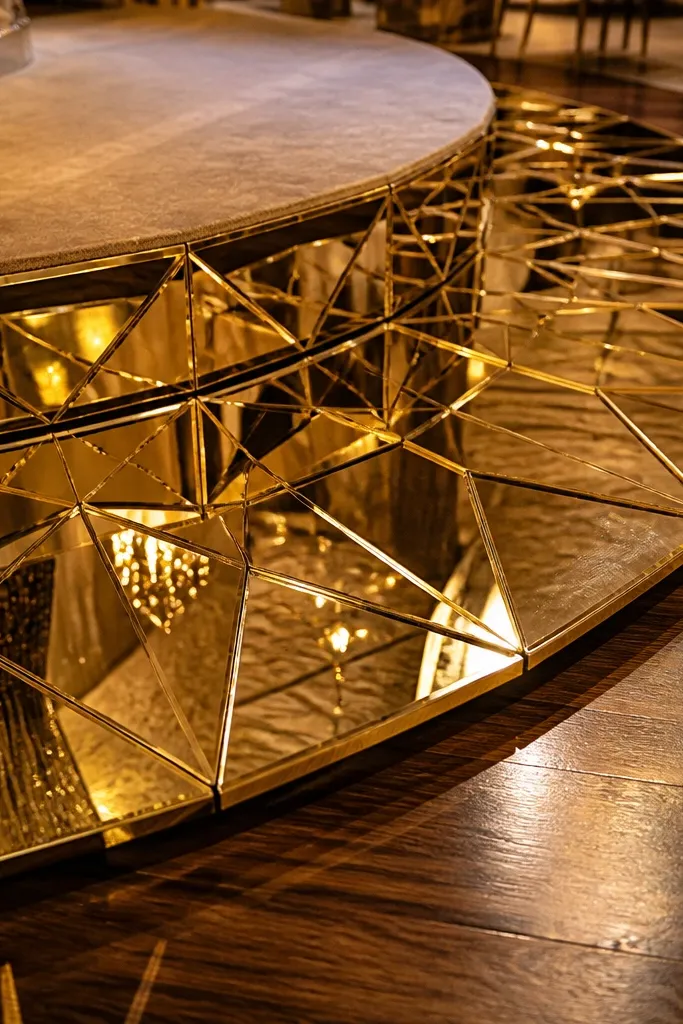
Floor details are the secret sauce for royal stage photos because they add sparkle at the bottom of the frame, where most decor ignores. Geometric mirror tiles in gold create a patterned glow around the center area without covering the entire stage. Keep the tile footprint tight so your couple still feels grounded and not surrounded by clutter. This look works best when the stage floor is plain or slightly dark, so the gold tiles lift it.
Step 1 — Measure the stage center zone and plan a tile layout that sits under or near where the couple stands, not near the edges where it gets stepped on. Step 2 — Ask for non-slip backing and confirm how long install takes so you don’t rush. Step 3 — Visit 6-10 weeks out and lock tile pattern choices early because shops reorder popular sizes during peak weddings.
Quick tipIf the venue has bright overhead spots, test tile glare so it doesn’t blow out in photos.
Skip thisDon’t cover the whole stage — too much mirror makes the scene look noisy.



