
1. Champagne Paper Fan Backdrop Behind the Bed
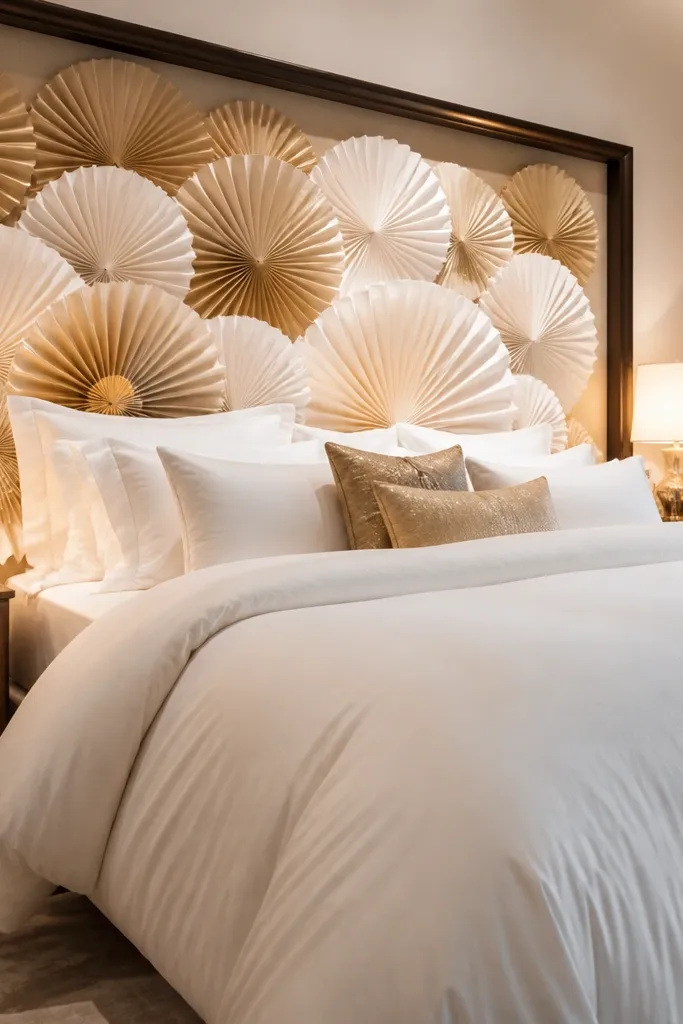
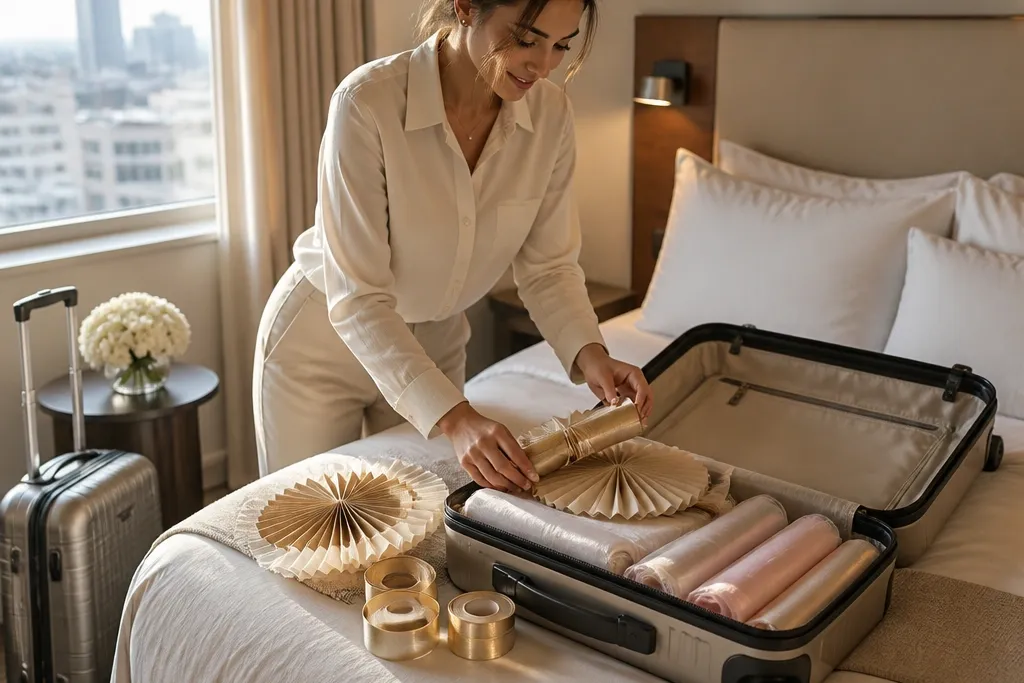
This is the fastest way to make a hotel bed area look styled. Paper fans create real volume, and they photograph beautifully because the folds catch light and make the background look textured instead of blank. Use champagne and soft white fans so the backdrop reads warm in both daylight and indoor lighting. It suits brides who want a clean, modern bridal look without spending time on floral arranging. It also works great when the room has an awkward wall because you can mount it to the headboard area and keep it centered for photos.
Start by measuring the space behind the bed and cut a fan template that’s about 12-16 inches tall for a strong backdrop. Pack pre-cut fan sheets or bring cardstock and assemble fans at your destination using a simple accordion fold. Then mount a thin line of removable hooks on the wall or use painter’s tape to hold a string, and attach the fans with tape or zip ties to that string so everything stays aligned. Finally, step back and adjust the spacing so fans don’t look bunched on the edges.
Quick tipPack a small ruler and a craft knife. Straight cuts make the fans look intentional in photos.
Skip thisAvoid using bright white fans only; they can look harsh under warm hotel bulbs.
2. Removable Mirror Bloom Frame with Faux Petals
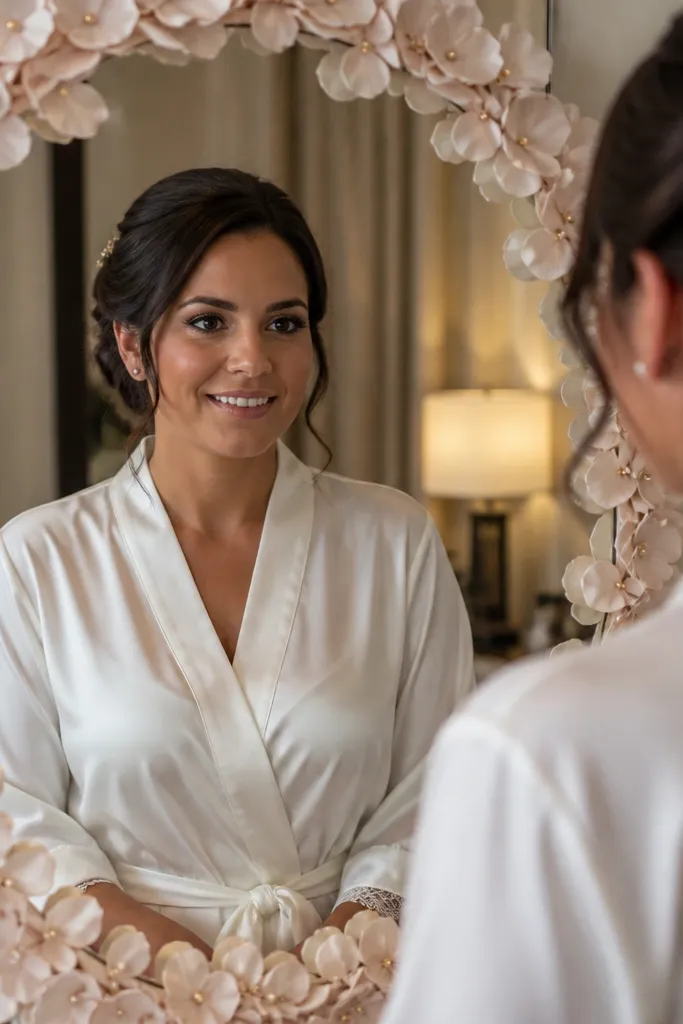
A mirror frame turns a plain room into a photo-ready prep station. The trick is to create a wreath-like border that sits around your face in selfies and makes your reflection look styled. Faux petals are lightweight and forgiving, and gold pin details add a bridal sparkle without needing real flowers. This suits brides who will do hair and makeup in the room and want the mirror to look curated even when you’re not taking “wedding wall” photos.
Start by cleaning the mirror frame area and plan a border size that leaves a clear center for your head and shoulders. Then attach a thin garland ring or loop of lightweight wire to the mirror frame using removable adhesive dots. Add faux petals in small clusters, layering from the outer edge inward so the center stays airy and bright. Finally, tuck tiny gold picks or metallic ribbon pieces between petal clusters for a finished look.
Quick tipUse removable adhesive dots instead of tape directly on the mirror frame paint.
Skip thisSkip heavy globs of glue. They peel paint and ruin the look when you remove it.
3. LED Rose String Lights Curtain for Instant Romance
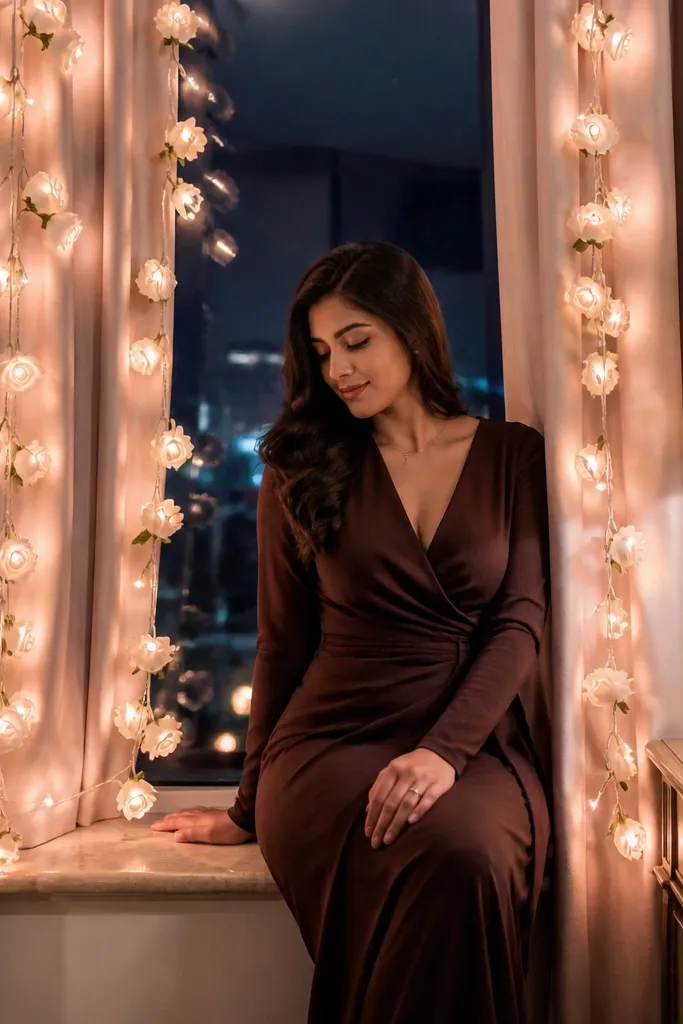
String lights solve the lighting problem that makes hotel rooms look flat in photos. When you drape them vertically in a curtain shape, you get a soft glow that flatters skin and makes your decor look more expensive. Choose warm white LEDs and pair them with small faux rose clusters or paper rosettes spaced along the line. This is ideal for brides who want a romantic vibe at night and still want a clean, uncluttered background. It also works well in rooms with limited wall space because you can hang the lights from a curtain rod, a hook, or a chair back.
Start by selecting a hanging point: curtain rod, wardrobe hook, or two wall hooks with a line between them. Then drape warm white LED strings and secure slack with zip ties or small tape tabs so the curtain shape stays even. Attach faux rose clusters with thin wire or zip ties at intervals, keeping the densest section around the center where you’ll stand. Finally, test the glow by turning them on and taking one quick test photo at doorway height.
Pack extra batteries or a compact power bank with a long cable so you’re not stuck hunting outlets.
Avoid cool blue LEDs. They make petals look gray and skin tones look off.
4. Soft Tulle Swag Over a Chair with Pearl Clips
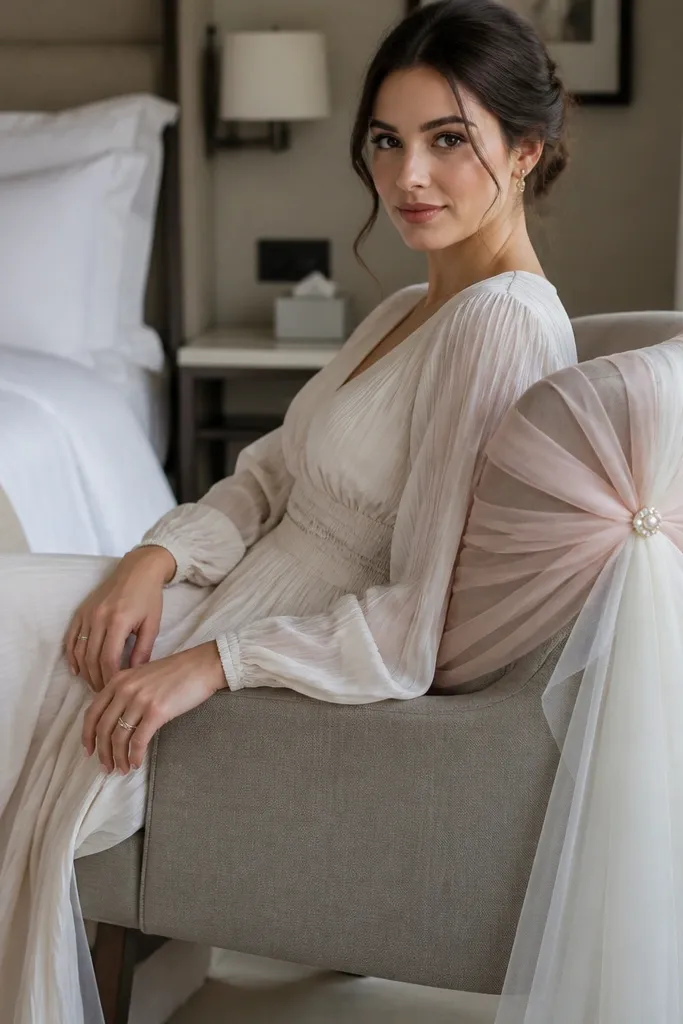
A chair swag is a photo hack because chairs sit in the background of so many shots. Tulle drapes in a way that reads airy and bridal, and pearl-like clips add a subtle “jewelry” effect without bulk. Use pale blush or ivory tulle so it blends with most hotel bedding. This suits brides who want a simple, feminine setup for ring shots, robe photos, or a bouquet resting area. You can also make it work in any season because tulle feels light and romantic year-round.
Start by cutting tulle into two lengths: one long panel for the center and one shorter panel for side drape. Then attach the top edge to a chair back using removable clips or tape tabs that won’t snag fabric. Gather the tulle slightly at the front and secure with a small pearl clip cluster at the center seam. Finally, fluff the fabric by hand and check it from the angle you’ll shoot most — usually from across the room.
Quick tipBring 6-8 small binder clips. They’re cheap, reusable, and hotel-safe for quick holding.
Skip thisSkip thick glitter fabrics. They catch harsh light and look messy on camera.
5. Hanging "Bride" Paper Banner with Layered Frames
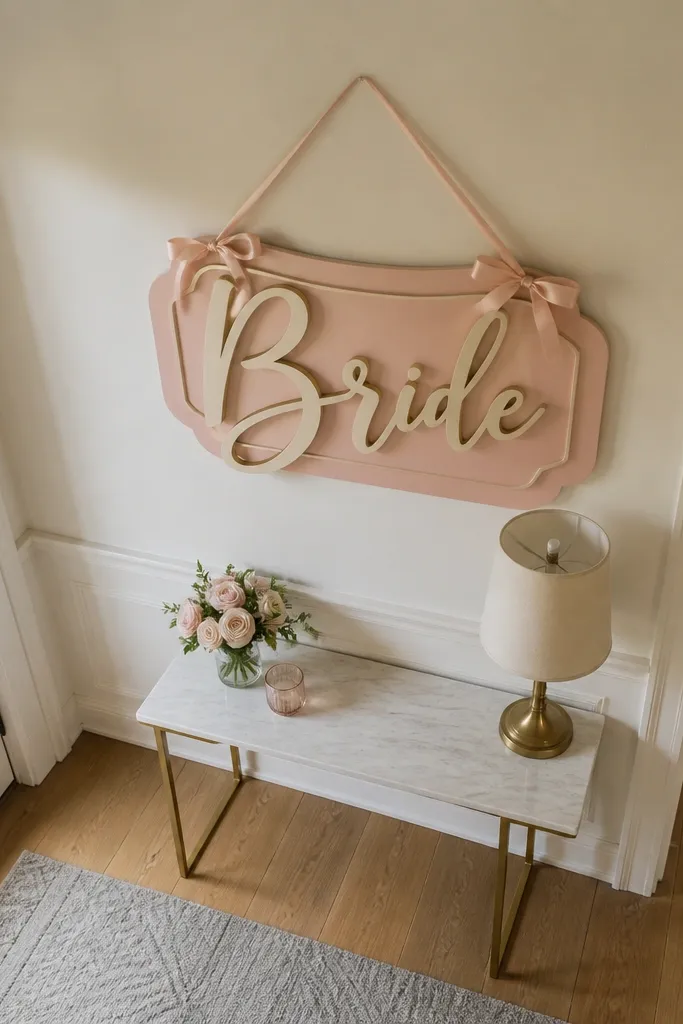
A banner gives you an instant branded moment without needing a big wall. The layered frame look makes the letters pop and adds depth so it doesn’t look flat in photos. Choose a script-style “Bride” cutout layered over a rounded frame in champagne or blush cardstock. This suits brides who want something clearly themed but still light enough for packing. It also photographs well in entryways and hall mirrors because the banner creates a vertical focal line.
Start by cutting letter shapes from thick cardstock and making a second layer behind each letter in a slightly bigger size for the frame effect. Pack letters flat in a folder so they don’t crease. At your destination, hang a thin string line between two removable hooks, then attach letters with tape tabs or small zip ties. Finally, space the letters evenly so the banner doesn’t sag and look crooked in selfies.
Quick tipPre-label the order of letters with tiny pencil marks so you don’t waste time at the wall.
Skip thisAvoid thin printer paper. It curls and looks flimsy under hotel lighting.
6. Tabletop "Ring Garden" with Mini Terracotta Pots
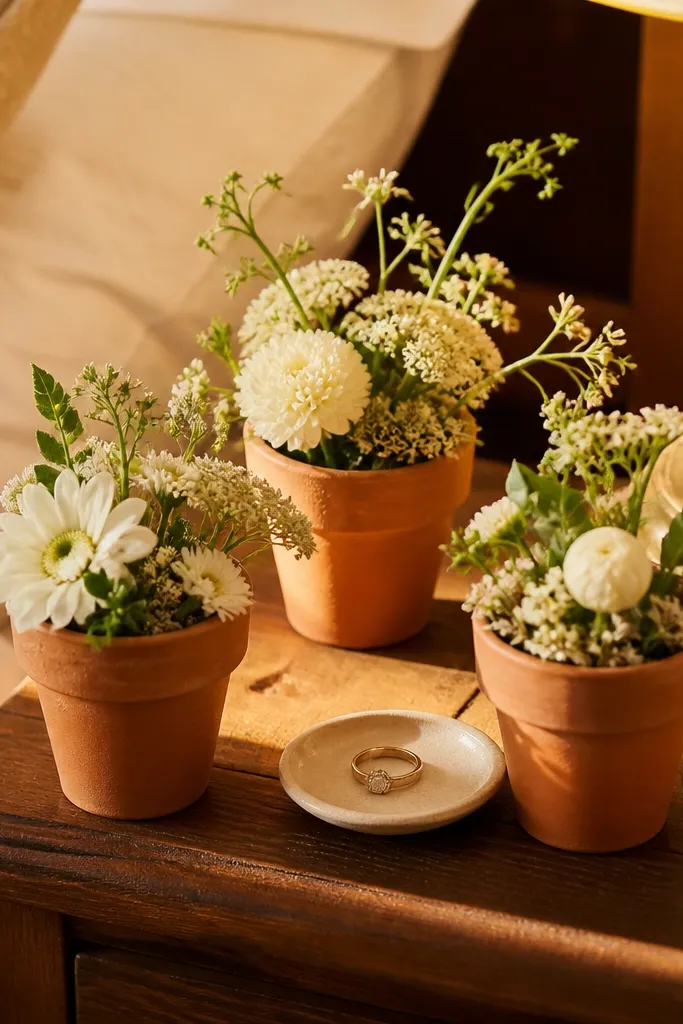
A tabletop ring garden turns small details into a styled story. Mini terracotta pots add warmth and structure, and you can tuck in white faux blooms, greenery sprigs, and a small ring dish so every close-up looks intentional. This is perfect for brides who will take ring photos near a lamp or window. The terracotta also grounds the palette, so your whites don’t look too sterile. It works in any room size because it stays low and doesn’t crowd the bed area.
Start by packing 2-3 mini pots (or using travel-sized plant pots) and a small ring dish with a lid if possible. Then fill pots with floral foam or crumpled tissue wrapped in plastic so you can insert stems securely. Add faux flowers in a triangle arrangement: one tall bloom, two smaller blooms, and a bit of greenery. Finally, place the ring dish slightly forward of the pots so it catches light and stays the main focus.
Quick tipUse a warm lamp nearby. The ring shots look better with light from the side, not overhead.
Skip thisSkip glass-only props. They reflect lights and can blow out highlights in photos.
7. Fabric Balloon Garland with Blush and Ivory Fabric Squares
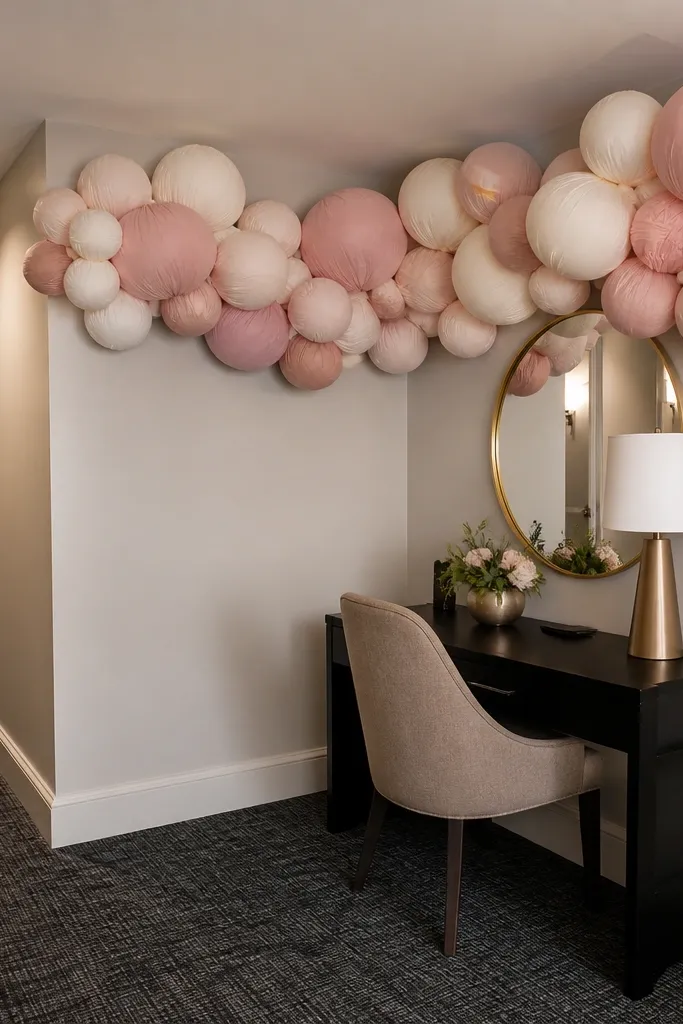
Fabric balloon garlands look like balloons but pack easier and look softer on camera. Tie blush and ivory fabric squares into rounded clusters and hang them in a vertical line above a chair, desk, or bed corner. The fabric texture creates a gentle, upscale look that doesn’t have the shiny glare of real balloons. This suits brides who want a playful-but-classy vibe and care about photos more than party loudness. It also works well for rooms where you can’t hang heavy items because it stays lightweight.
Start by cutting fabric squares in two sizes, like 10x10 inches and 14x14 inches, and gather matching thread or thin elastic. Then tie each square into a rounded cluster around a small knot so the shape holds. Finally, string clusters onto a thin line with knots between each one and hang from two removable hooks. Adjust spacing until the garland looks balanced from across the room.
Bring fabric in a single color family. Mixed fabrics with different sheens look uneven on camera.
Avoid slippery satin without texture. It collapses and loses the balloon shape.
8. Champagne Ribbon Wall Bow with Threaded Loops
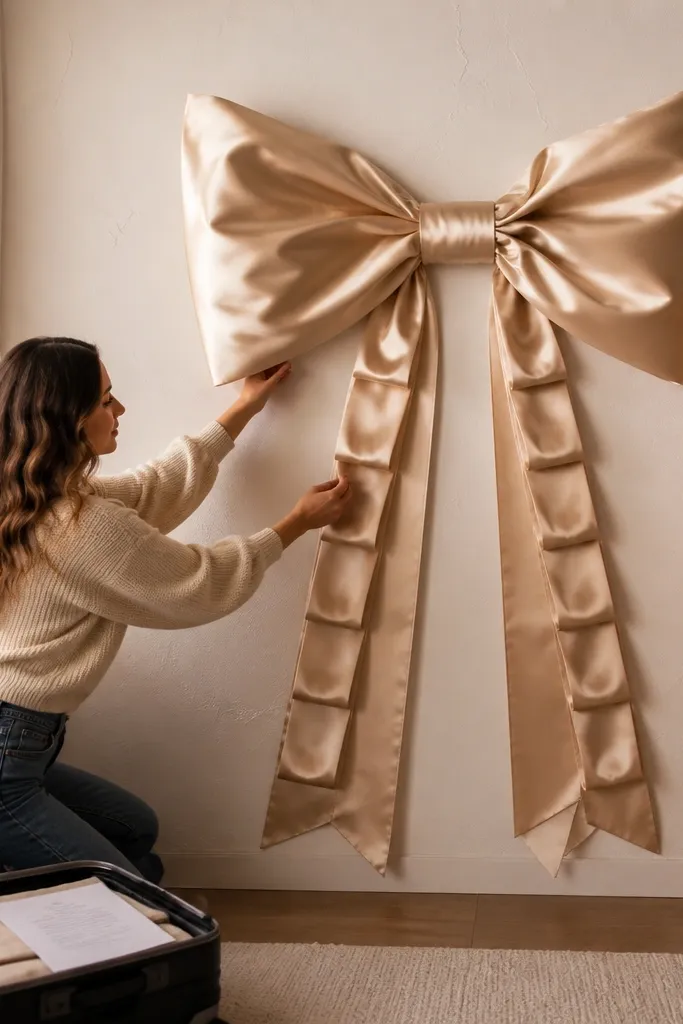
A big wall bow is the easiest “wow” element that still travels. Ribbon tails create movement in photos, and the bow gives you a clear focal point behind you when you’re standing near the wall. Use wired ribbon so you can shape loops and keep the bow looking crisp. Champagne ribbon looks luxurious without being too bright, especially under indoor hotel lighting. This suits brides who want a clean, classic look with one statement piece instead of lots of small decor.
Start by using wired ribbon, cut into loop lengths around 18-24 inches for a noticeable bow size. Then form the bow by making multiple loops and tying the center with thin wire or thread. Pack the loops flat in tissue paper so they don’t tangle. At the hotel, mount a small removable adhesive anchor on the wall and attach the center knot with tape or a hook, then fan out the tails to hide the mounting point.
Quick tipPack one extra length of ribbon. You’ll need it to adjust tail length after mounting.
Skip thisSkip non-wired ribbon. It collapses and looks flat in photos.
9. Window Sheer Curtain Frame with Paper Snowflakes (Wedding Version)
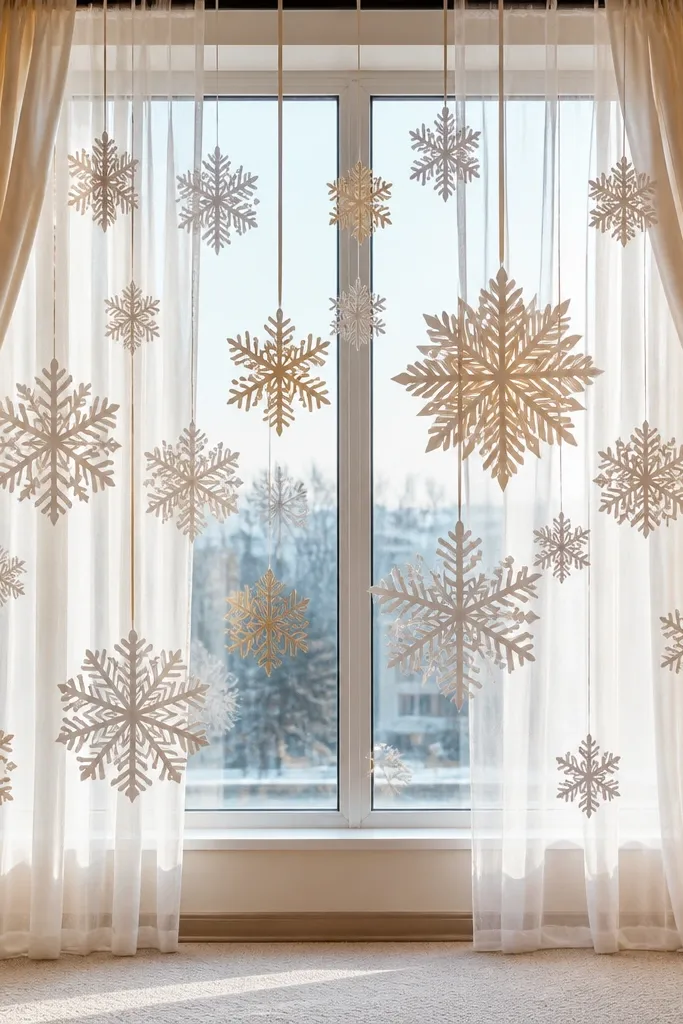
Window framing is underrated because windows naturally create depth in photos. Use sheer fabric panels as a soft frame and hang paper star or snowflake-style cutouts in a wedding color palette. The cutouts add sparkle without real glitter, and sheer fabric makes everything look airy. Choose white and champagne so it reads bridal, not winter. This suits brides staying at places with nice natural light and wants their room to look styled even during the day.
Start by cutting star or snowflake shapes from thick white paper or cardstock and punching a small hole at the top. Then hang sheer fabric panels on a tension rod or with removable hooks so they frame the window. Thread paper cutouts onto thin fishing line or clear thread and attach at different heights for a layered look. Finally, step back and adjust spacing so the cutouts don’t overlap your face in photos.
Quick tipUse clear thread instead of string. It disappears in photos and keeps attention on the decorations.
Skip thisAvoid heavy paper that droops. It looks uneven against the sheer fabric.
10. Floral-Style Backdrop Using Tinted Tissue Paper Pom-Poms
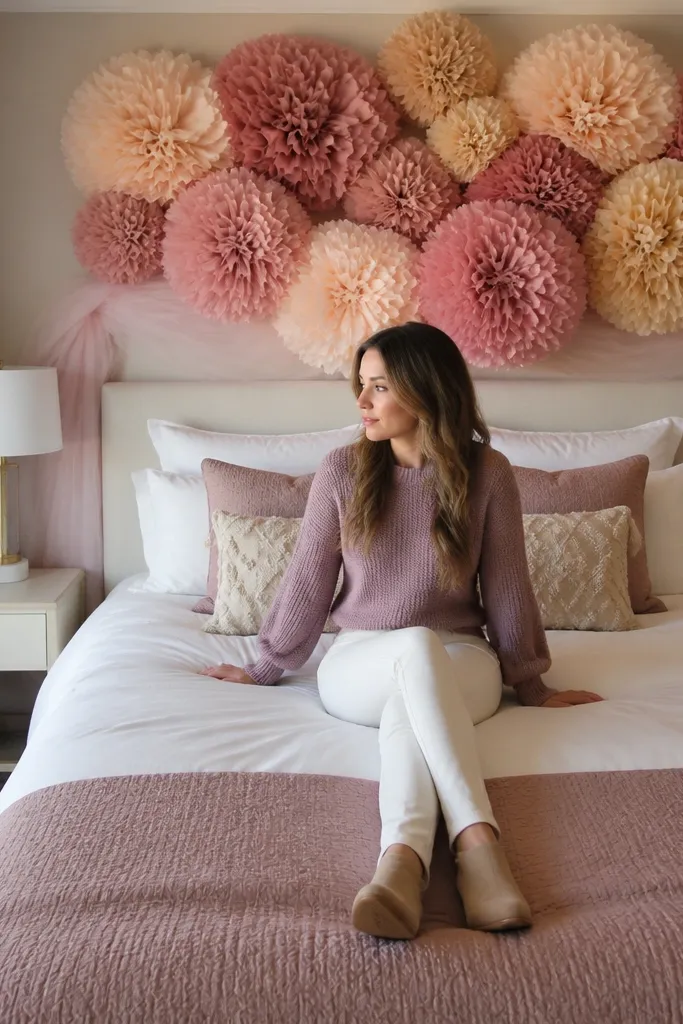
Tissue pom-poms look like flowers from a distance, and they’re light enough to pack in a suitcase. You get a playful, romantic backdrop that still photographs clean when you keep the palette tight. Make them in blush, dusty rose, and champagne, and cluster them behind the bed or near a dresser for a “photo wall” feel. This works best for brides who want color without committing to real blooms. It also makes the room feel festive quickly — no complicated assembly.
Start by buying tissue paper sheets in a single brand thickness and make pom-poms by accordion-folding, tying the center, and fanning layers. Pack finished pom-poms flat in a box or roll them carefully with tissue to prevent crushed edges. Then mount a vertical string line with removable hooks and attach pom-poms with fishing line or zip ties. Finally, cluster larger pom-poms at the center and smaller ones on the sides so the composition feels intentional.
Quick tipUse a box for packing tissue pom-poms. Rolling them in a bag crushes the layers and ruins the fluff.
Skip thisSkip mixed-size randomness. Even spacing looks better than a messy cluster.
11. Bride Photo Corner with Fabric Panel + Ledge Shelf
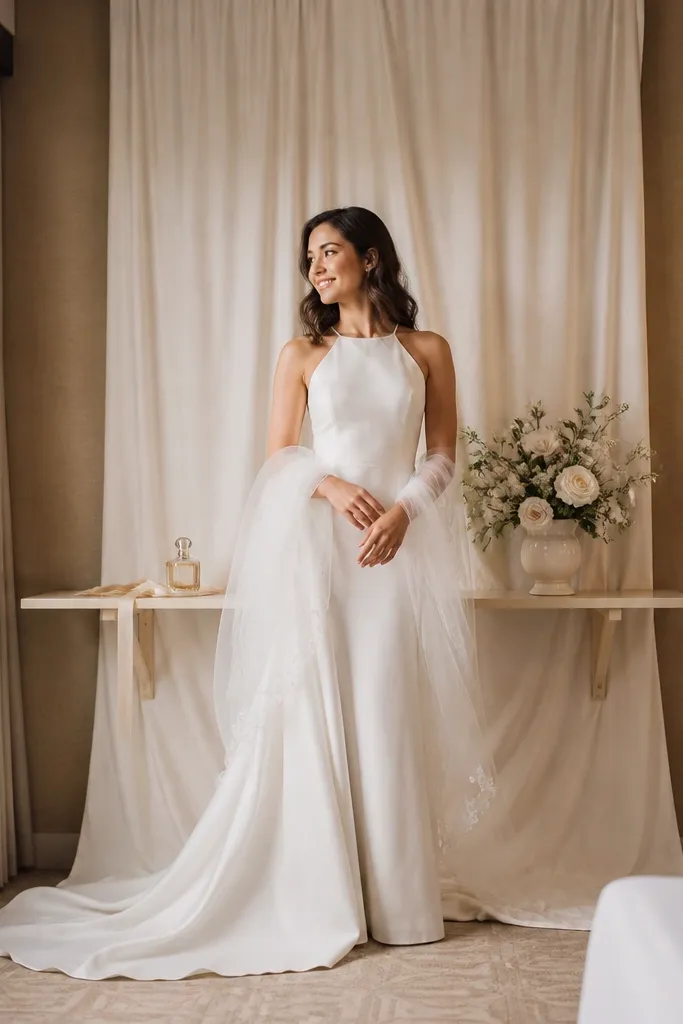
A photo corner gives you a dedicated spot for robe photos, perfume shots, and bouquet placement. Use a fabric panel as the backdrop and add a small ledge shelf or folding table surface so your props have a clean base. Fabric hides hotel imperfections and makes the background look smooth and premium. This suits brides with a little space near a window or wall where you can create one “set.” It also helps when you’re taking photos over multiple days because the corner stays consistent.
Start by choosing a fabric panel that hangs straight, like a lightweight cotton or chiffon blend, in ivory or blush. Then mount the panel with two removable hooks at the top and let it fall to about mid-wall height. Place a small shelf or tray on a nearby surface and pre-plan your props: one candle, one mini vase, and one framed photo or sign. Finally, test the corner by placing your phone at standing height and checking that the fabric panel covers the messy parts of the room.
Pack a small lint roller. Fabric panel backdrops look better when they’re clean and smooth.
Avoid patterned fabric. Busy prints fight with your face and bouquet in photos.
12. Mini Champagne Florals in Acrylic Cup Centerpiece
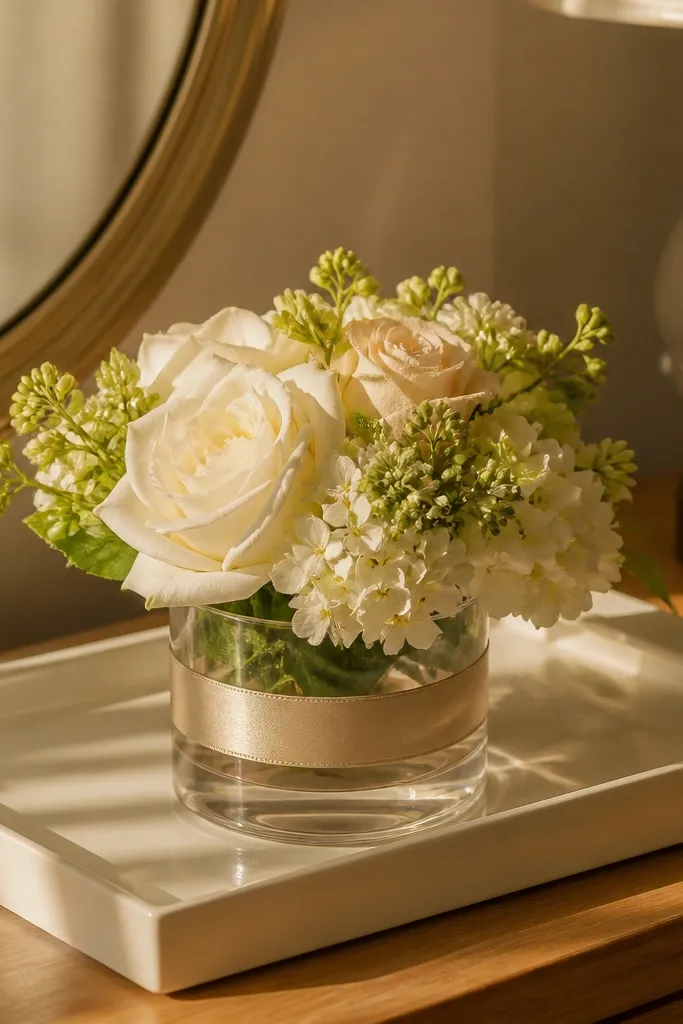
If you want the room to feel expensive without a huge setup, use acrylic cups and mini florals. Clear cups catch light and make the arrangement look crisp, while mini stems keep the bouquet shape tight for small hotel surfaces. Choose white and champagne faux flowers, add a thin ribbon around the cup, and place it near a lamp for warm glow. This suits brides who plan close-up shots on bedside tables and want their room to look styled even in the background of wider shots. It’s also easy to pack and quick to set up.
Start by selecting 2-3 acrylic cups or clear tumblers that fit in a suitcase side pocket. Then fill with water beads or floral foam wrapped in plastic so faux stems stay secure. Insert mini stems in a tight cluster — one center bloom and two side blooms. Finally, tie a small champagne ribbon around the cup and place it next to a candle or lamp so the light hits the clear surface.
Quick tipWrap cups in a microfiber cloth and keep them in a separate pouch to prevent scratches.
Skip thisSkip overcrowded arrangements. Too many stems make the cup look messy in close-ups.
13. Velvet Ribbon Table Runner with Tucked Faux Petals
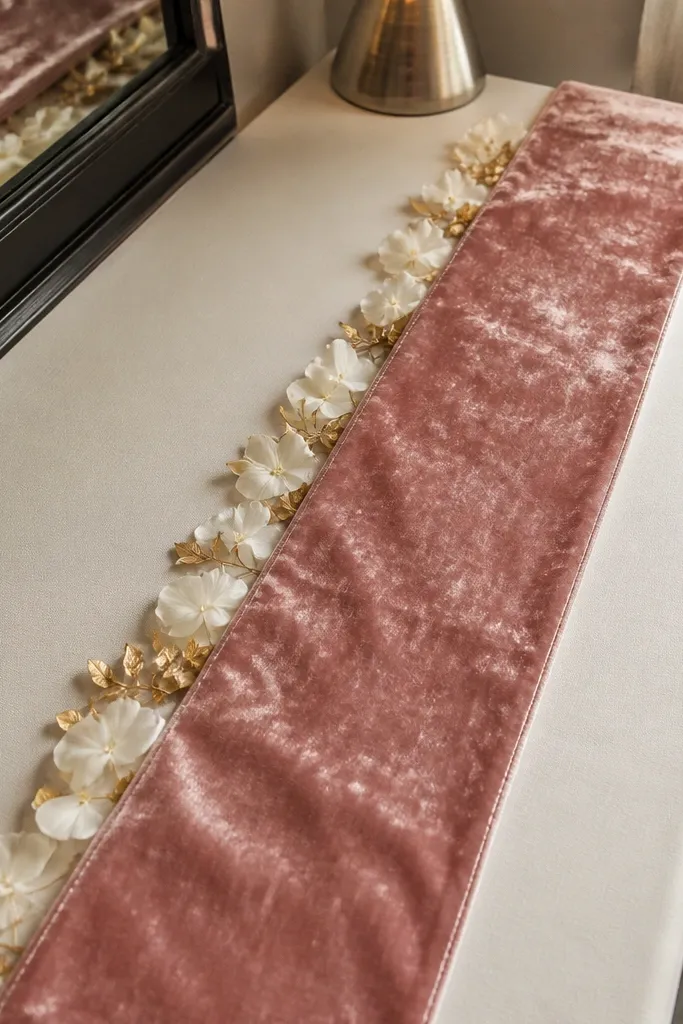
A runner changes the whole look of a dresser or desk. Velvet ribbon reads luxe on camera, and when you tuck faux petals along the edge, it looks like a floral moment without building a full arrangement. Choose blush velvet ribbon about 2-3 inches wide and pair with a few white petals and tiny gold accents like leaf confetti. This suits brides who want a clean horizontal design that shows up in flat-lay photos and mirror reflections. It also gives you a “home base” for perfume, ring tray, and a small card display.
Start by measuring your dresser or desk length and cut velvet ribbon to leave 2-3 inches of overhang at both ends. Then lay ribbon centered and pin-tuck petals into small folds using double-sided fabric tape. Place one taller item in the middle, like a mini vase or candle, so the runner has a focal point. Finally, take one test photo from above and from across the room to confirm the runner shows clearly.
Use fabric tape, not regular double-sided tape. It grips velvet without leaving hard shine spots.
Avoid loose petals scattered everywhere. Tucked petals read intentional instead of random.
14. Photo-Friendly Curtain Rod Garlands with Removable Clips
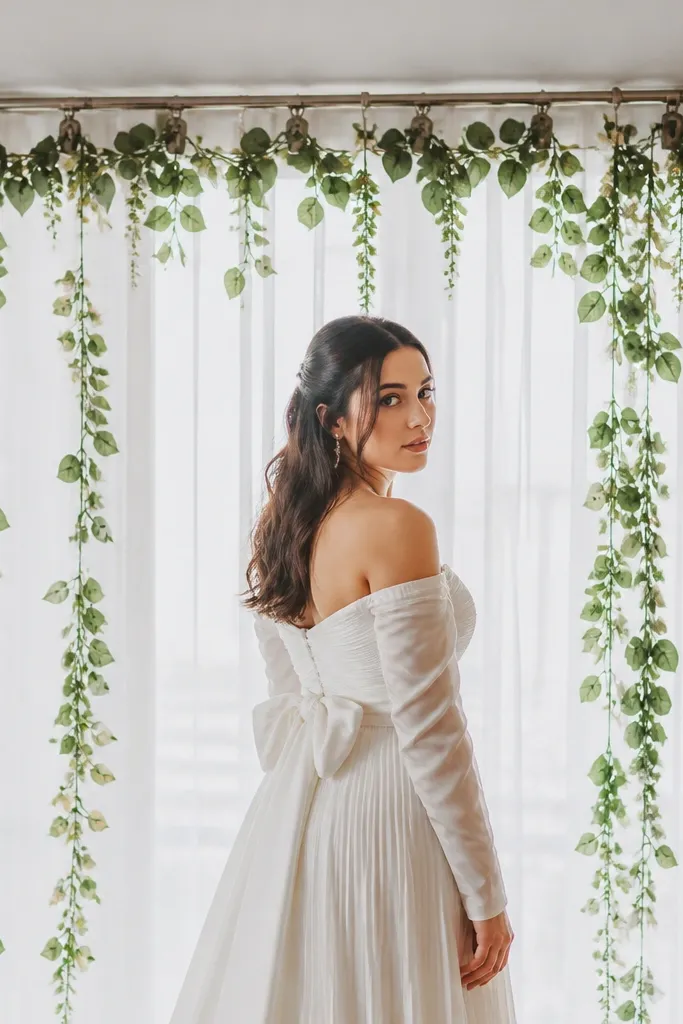
Curtain rod garlands are the smartest way to use vertical space in a hotel room. When the garland sits across the rod at eye level, it frames your photos and gives the room depth behind you. Use lightweight faux greenery or paper leaf garlands, and add a few white blooms for a bridal cue. This suits brides who want decor that looks good even if they’re moving around the room — it stays in the background consistently. It’s also great for rooms with plain walls because you’re dressing the architectural lines.
Start by packing a lightweight garland strand and a small bag of removable curtain clips or mini binder clips. Then attach the garland to the curtain rod using the clips so it hangs evenly. Add a few white faux blooms by wiring stems to the garland strand, placing them in a center cluster for symmetry. Finally, adjust height so the garland sits just above your head level for selfies, not at forehead height.
Quick tipBring a black zip-tie and a white zip-tie. One disappears against dark rods, one against light rods.
Skip thisSkip heavy floral stems. They sag and look uneven on camera.
15. Gold Foil Starburst Photo Backdrop (Printable + Foam Board)
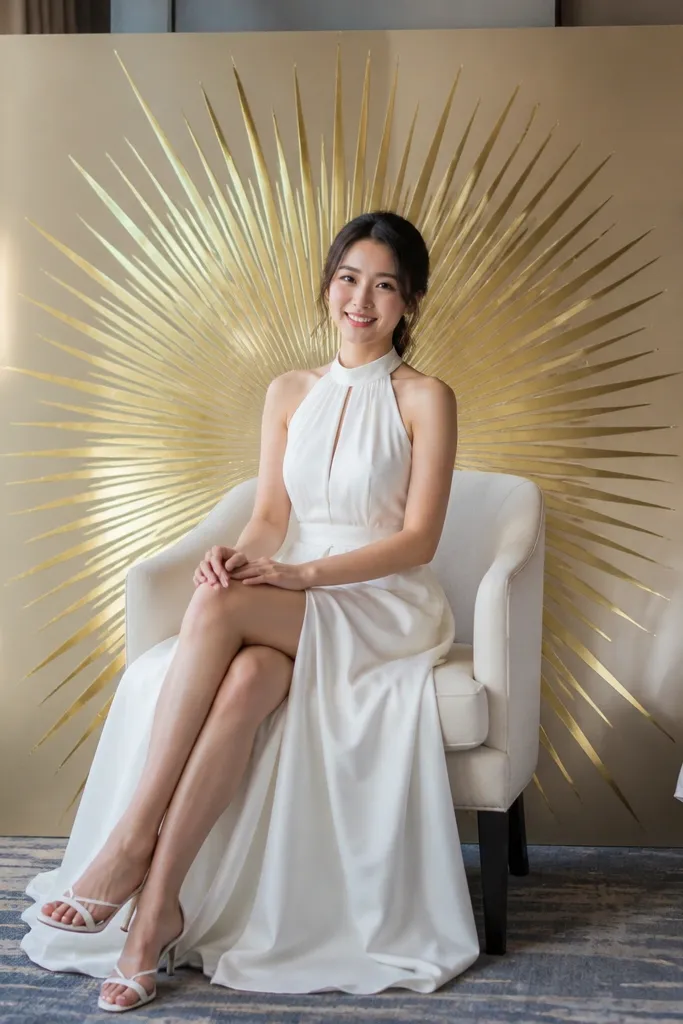
A starburst backdrop gives you that clean, graphic “bride moment” look. The gold foil effect catches light and makes your photos pop without needing real metallic balloons. Foam board keeps it sturdy in transit, and you can mount it behind the bed or on a stand near a wall. This suits brides who like modern, crisp styling and want a background that works for both portraits and flat-lay shots. It also helps when you’re in a small room because it’s one statement piece, not lots of clutter.
Start by printing starburst shapes on thick paper or using cardstock and trace onto foam board for strength. Pack the starburst flat in a folder and bring a small glue stick or double-sided foam mounting tape. At the hotel, position it behind the bed or near a photo corner and secure the edges with removable tape. Finally, add a few faux pearl pins or mini gold dots to tie it into your jewelry palette.
Use matte gold accents, not reflective mirror foil. Matte reads smoother under hotel lighting.
Avoid glossy backgrounds that cause glare. They can blow out highlights behind your face.
16. Garden-Style Table Backdrop with Cane Weave Panel
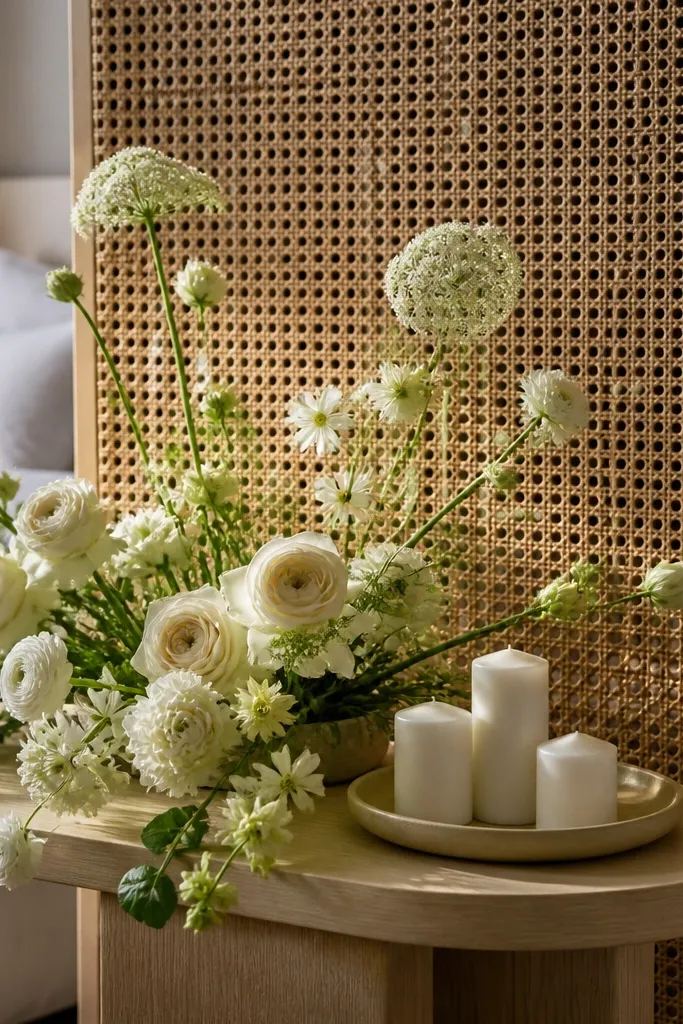
A cane weave panel makes a room look like it has “texture walls,” even if the hotel wall is plain. It frames your tabletop arrangement and adds depth behind bouquets, flat-lay menus, and ring shots. Pair it with white and cream faux florals and a small candle cluster for a soft, garden feel. This suits brides who want a natural aesthetic without real greenery upkeep. It’s also practical: the panel folds or rolls depending on the style, and you can set it up in minutes.
Start by choosing a lightweight cane weave panel or folding rattan-style backdrop that fits your suitcase. Then stand it behind a table or dresser using a small clamp or removable stand, and center it so your props sit in the middle. Arrange faux white florals and greenery in a loose arc, keeping height highest at the center. Finally, place a candle or lantern on the front edge so the texture glows in photos.
Quick tipBring a small pack of clear command-style hooks if your room has no stable placement for the panel.
Skip thisSkip heavy props in front. They block the weave texture and make the backdrop look flat.
17. Tulle Hoop Wreath for Doorway Photos
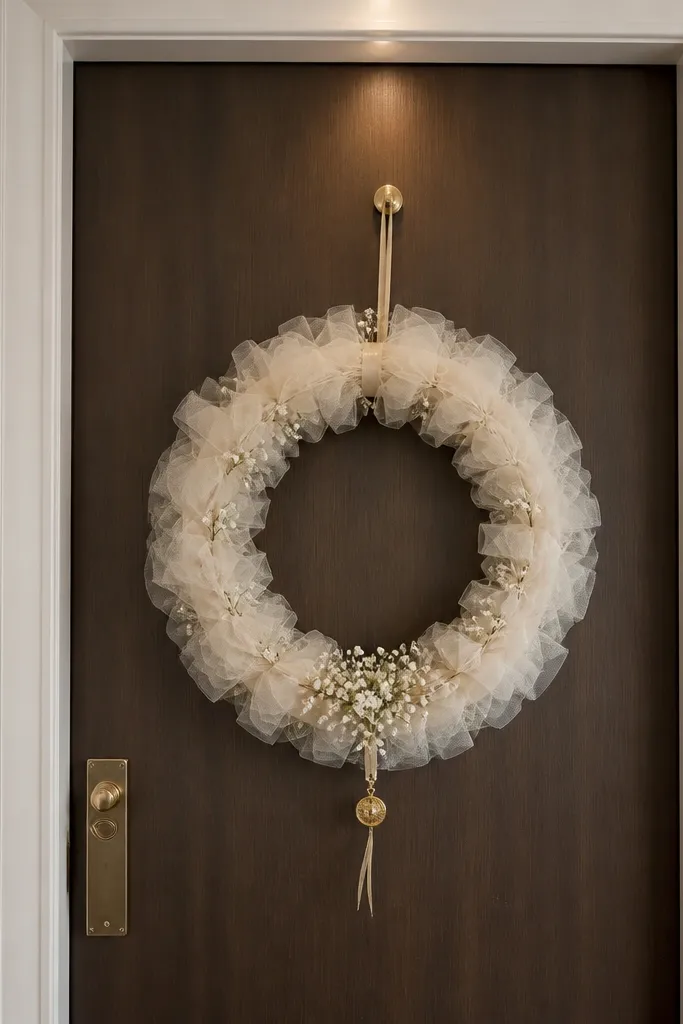
Doorway photos are some of the most memorable wedding-day room shots, and a wreath makes them instantly pretty. A tulle hoop wreath looks soft, bridal, and clean, and it frames your body in the doorway without taking up floor space. Add tiny white blooms and a small gold charm for a delicate finish. This suits brides who want a consistent look across multiple photos — stepping in, stepping out, and robe check-ins. It’s also a smart packing choice because a hoop wreath can be flattened for travel.
Start by using a lightweight embroidery hoop or flexible hoop and cutting tulle strips about 8-10 inches long. Then tie tulle strips around the hoop in even rows until the hoop disappears. Pack the wreath in a garment bag so it doesn’t snag, and at the hotel hang it with a removable over-door hook. Add small faux blooms with thin wire between tulle layers, keeping the densest part centered for symmetry.
Quick tipUse an over-door hook rated for light items so you can remove it cleanly after pictures.
Skip thisAvoid bulky ribbon bows on the wreath. They look heavy and hide the tulle texture.
18. Blush Balloon-Style Paper Lanterns on a String
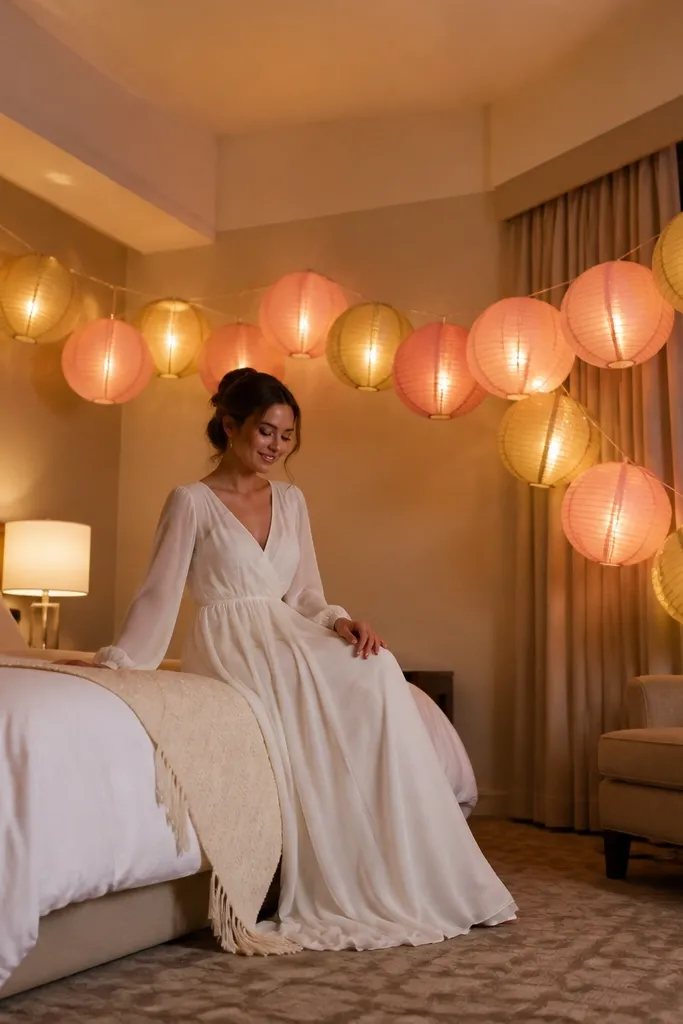
Paper lanterns give you that celebratory balloon vibe with far less risk than actual balloons. They look round and full in photos, and they create a soft glow when paired with battery LED candles inside. Blush and champagne reads sweet and bridal, especially next to white bedding. This suits brides who want a festive look without worrying about helium or balloon popping. It also works in rooms with corners because you can stretch the string diagonally for a dynamic photo background.
Start by buying or assembling lightweight paper lanterns and packing them flat in a box. Then string them onto clear fishing line and secure both ends to removable hooks or tape anchors. If you use LEDs, place battery fairy lights inside the lanterns, not candles, so it stays safe and hotel-friendly. Finally, adjust the string height so lanterns sit just above shoulder height for portraits.
Quick tipUse LEDs with a warm tone and dim setting if available. Dim prevents blown-out highlights.
Skip thisSkip lanterns that are too thin. They crumple and look uneven in close-ups.
19. Vintage-Look Photo Clips on a Linen Line with Bride Notes
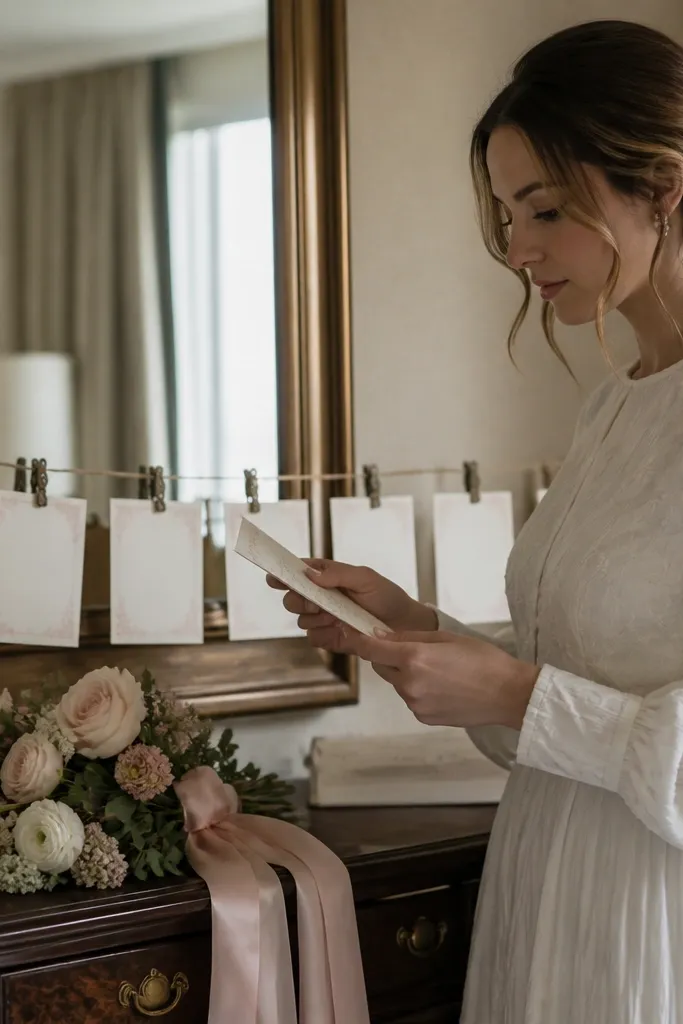
A linen line with photo clips adds personality and makes your room feel lived-in and intentional. It’s photogenic because the clips create repeating shapes and the cards add color blocking behind you. Use small bride-themed cards — vows text, date, or “to me” prompts — in cream cardstock with blush ink. This suits brides who want a sentimental touch without heavy decor. It also works well for suites or rooms with a little more space because the line needs a clear span to look good.
Start by cutting a linen strip or thin fabric cord and tying it between two removable hooks at chest-to-eye height. Then clip small cards or mini photos using mini clothespins or metal photo clips. Keep the spacing even, and place the most important card at the center so it draws the eye in photos. Finally, tuck one tiny faux flower or ribbon tab under the center clip to tie it to your bouquet palette.
Use pencil for light sketches on cardstock before writing. You can erase and keep the look clean.
Avoid long paragraphs on the cards. Short lines read better in photos.
20. Mini Candle Lantern Trio with Faux Ivory Florals
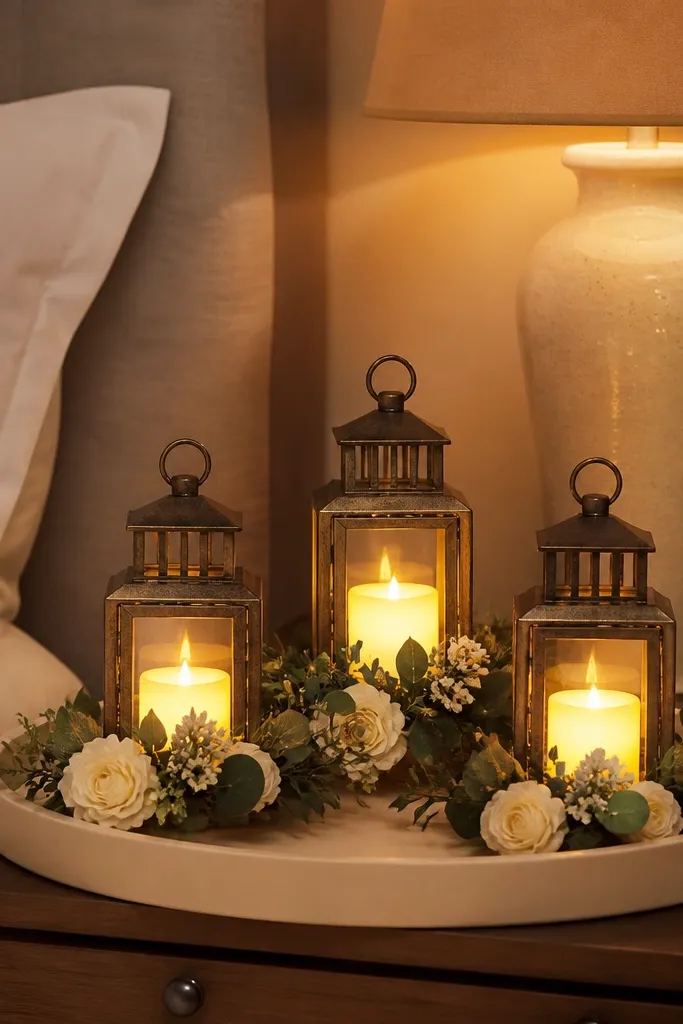
Lantern groupings create a warm, bridal glow that makes hotel rooms feel calmer and more romantic. A trio looks balanced and reads clearly in both wide and close shots. Use battery LED candles inside lanterns to keep it safe, and wrap the lantern bases with a few ivory faux florals or eucalyptus-style greenery. This suits brides who will photograph in the evening and want the room to feel cozy, not bare. It also works on small tables because lanterns are vertical and take up less surface width.
Start by packing three matching mini lanterns or using one lantern style with different heights. Then place battery LED candles inside and test the brightness so it’s warm, not harsh. Add faux florals around the lantern bases with thin wire, keeping flowers low so they don’t block the candle glow. Finally, arrange the trio in a shallow triangle on a dresser or table — one at the center, two slightly behind — for depth.
Quick tipBring a small roll of painter’s tape to secure any wire ends so they don’t poke through fabric.
Skip thisSkip oversized lanterns. They dominate the frame and make the room look cluttered.



