
1. Honeycomb Welcome Sign With Black Stripe Frame
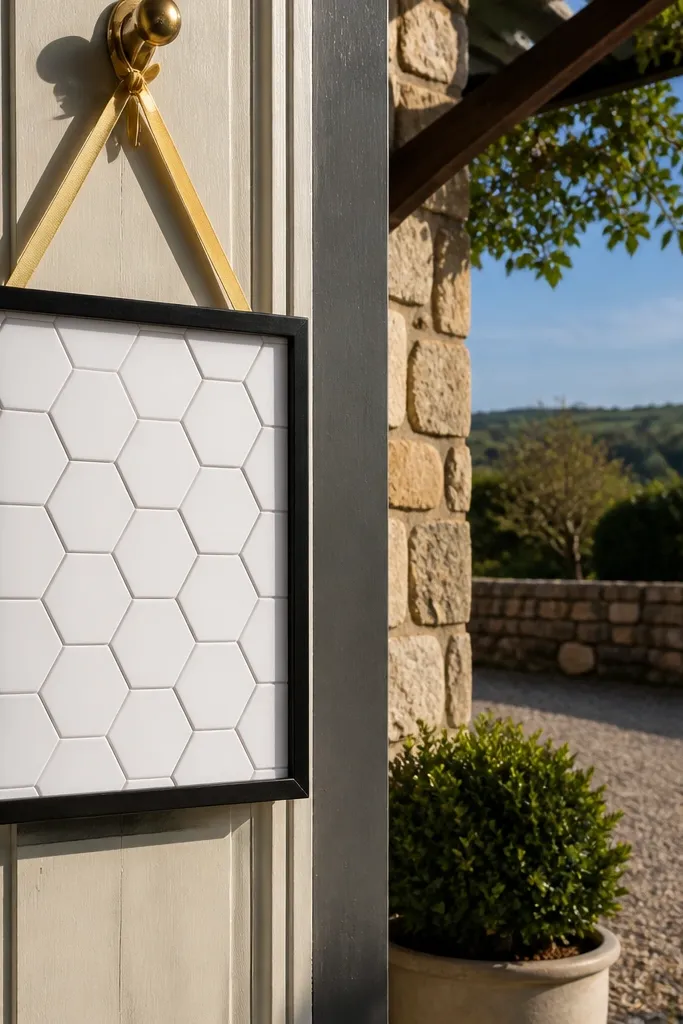
Put your theme’s “yellow” on the first thing guests see. A honeycomb sign in thick white paper or foam board looks crisp in daylight, and a black stripe frame gives it that bee vibe without adding clutter. This setup photographs well because the hex pattern creates a repeating texture that stays sharp even when the background is busy. Choose a font style that stays simple and bold so yellow doesn’t feel like a sticker collage. It works best at the main entrance or right beside the check-in table, where people stop and take photos.
Start by building a honeycomb panel that’s about 24-30 inches wide, then mount it onto a black foam board frame. Next, add your text with black vinyl or printed lettering so the edges stay clean on camera. Finally, place it on an easel or stand so it faces the flow of arrivals, not the side wall. For booking, you can print and assemble in one afternoon if you already have your venue name and date text ready. Tip: keep the background behind the sign simple — solid wall, plain drape, or greenery only — so the yellow reads clearly.
Quick tipUse a matte finish for the yellow paper so it doesn’t glare under flash.
Skip thisSkip glossy honeycomb paper, since it creates glare and makes the yellow look cheap in photos.
2. Lemon Sunburst Photo Backdrop Behind the Bride
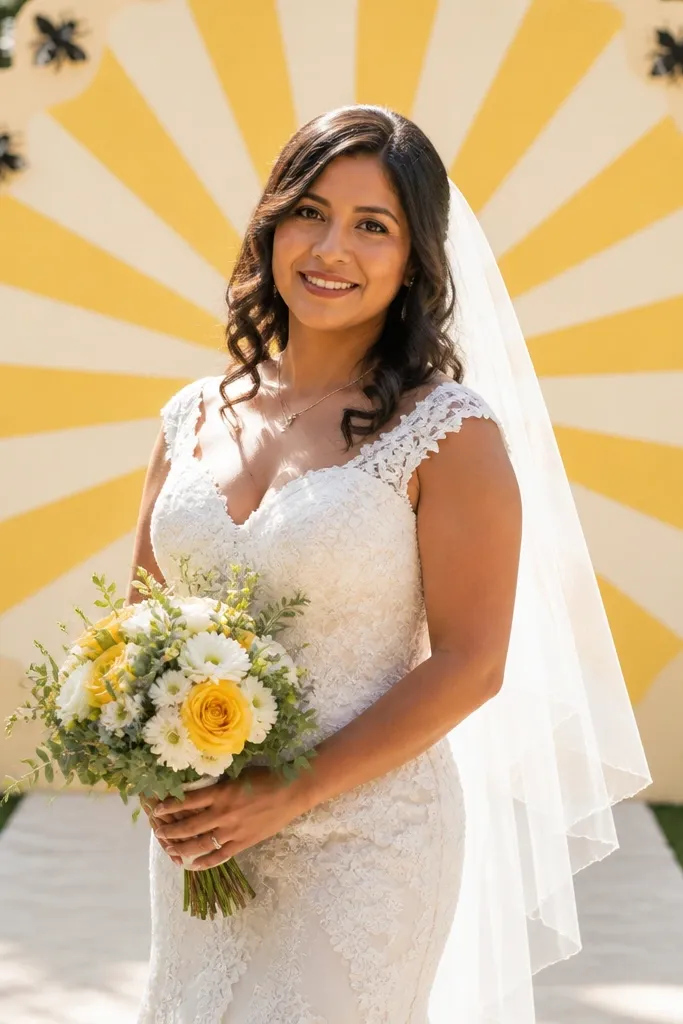
A sunburst is the fastest way to make “sweet yellow” look intentional in pictures. Use alternating rays in lemon and pale cream, then add tiny black bee decals or die-cut shapes at the outer edge so it stays playful, not busy. This backdrop is worth it because it gives you instant framing; the rays pull attention toward the center where the bride stands. In bright outdoor light, the rays look crisp and cheerful. In indoor venues, it still works if you place it near a window or under even overhead lighting.
First, choose a size that matches your group photos — aim for 6x4 feet for bride-and-party shots. Then assemble the rays using cardstock or fabric panels, and attach them to a flat board or lightweight frame. Finally, add a few black bee accents spaced evenly and hang the backdrop at chest height for the bride so faces aren’t blocked. Plan for 2-3 hours to cut and mount rays if you’re using pre-cut templates. Budget stays low if you do paper rays and only add bees as decals or vinyl.
Quick tipShoot with the backdrop centered and your subject 2-3 feet in front to keep the rays sharp.
Skip thisDon’t crowd the center with text; let the sunburst do the work.
3. Sweetheart Table Runner in Honeycomb Fabric + Black Napkin Rings
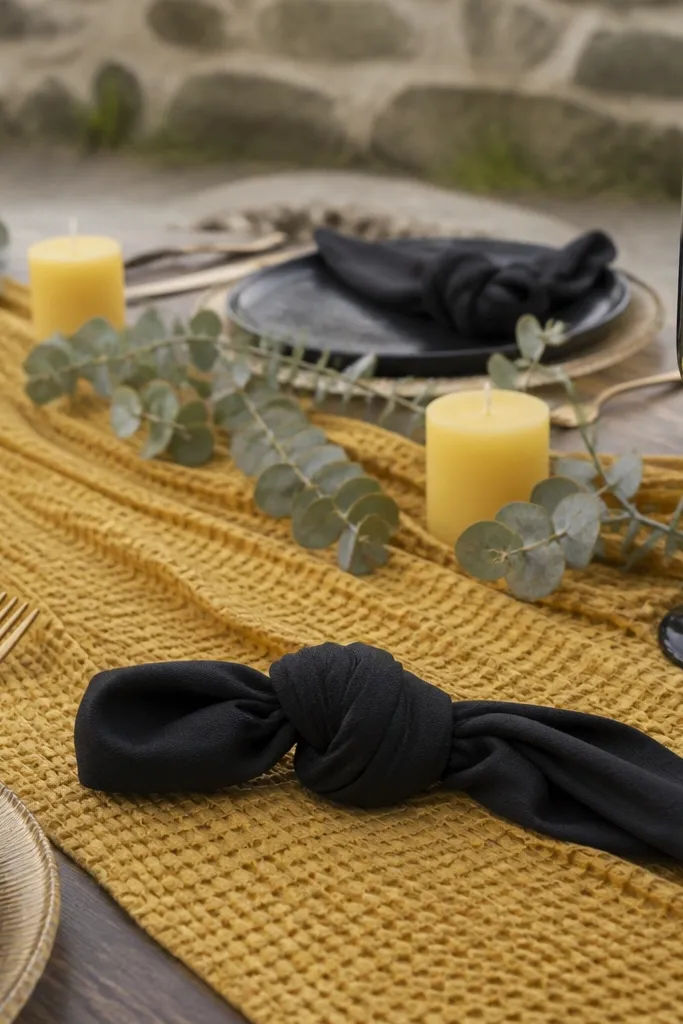
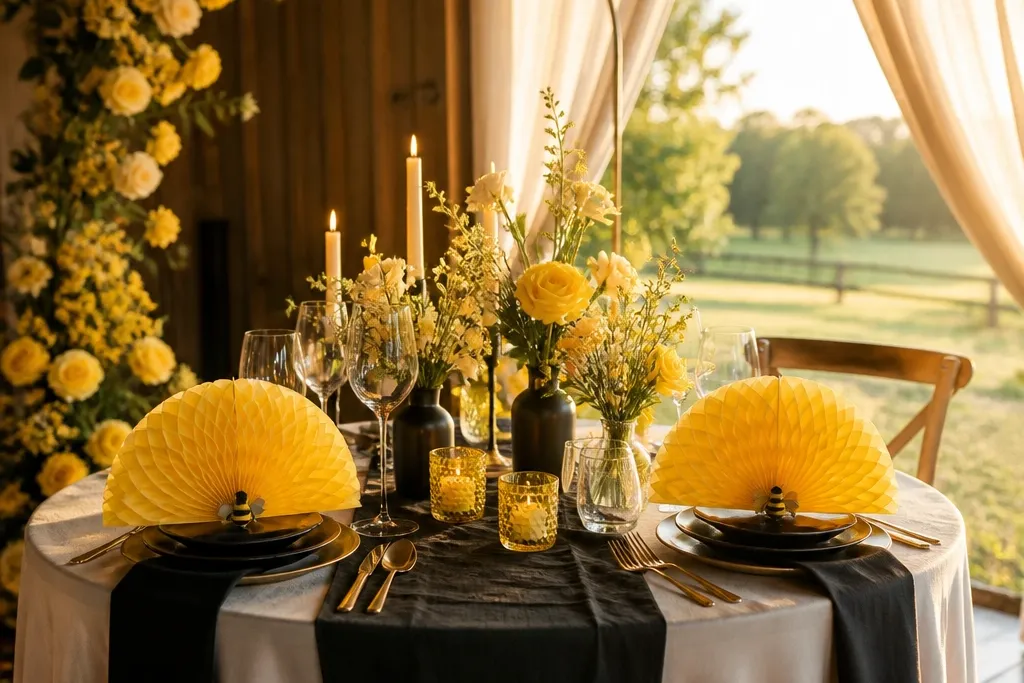
This is where yellow can look expensive instead of costume-y. A honeycomb-textured fabric runner in warm yellow gives depth you can feel with your eyes, and black napkin rings add the bee contrast. Place small sprigs of greenery or dried eucalyptus around the runner so the yellow has breathing room. This setup photographs beautifully because the runner creates a strong horizontal line that anchors the table in every wide shot. It suits venues with neutral walls, wood tones, or white linens where yellow needs a focal point.
Start by measuring your table width and choosing a runner that covers the center strip plus a little overhang — usually 14-20 inches wide. Then lay it over your base tablecloth and secure it with discreet tape or clips so it doesn’t slide in photos. Finally, add black napkin rings and fold napkins in a simple rectangle fold so the rings show. Spend 30-45 minutes arranging the greenery in a light scatter rather than a thick garland. If you’re renting linens, ask if a textured honeycomb runner is available; otherwise, use a patterned runner and keep everything else plain.
Quick tipMatch the black rings to your chair ties or signage so the black feels like one design language.
Skip thisAvoid mixing three different yellow shades on the table; keep the runner as the only yellow hero.
4. Bee Stripe Chair Sashes With Tulle Ties
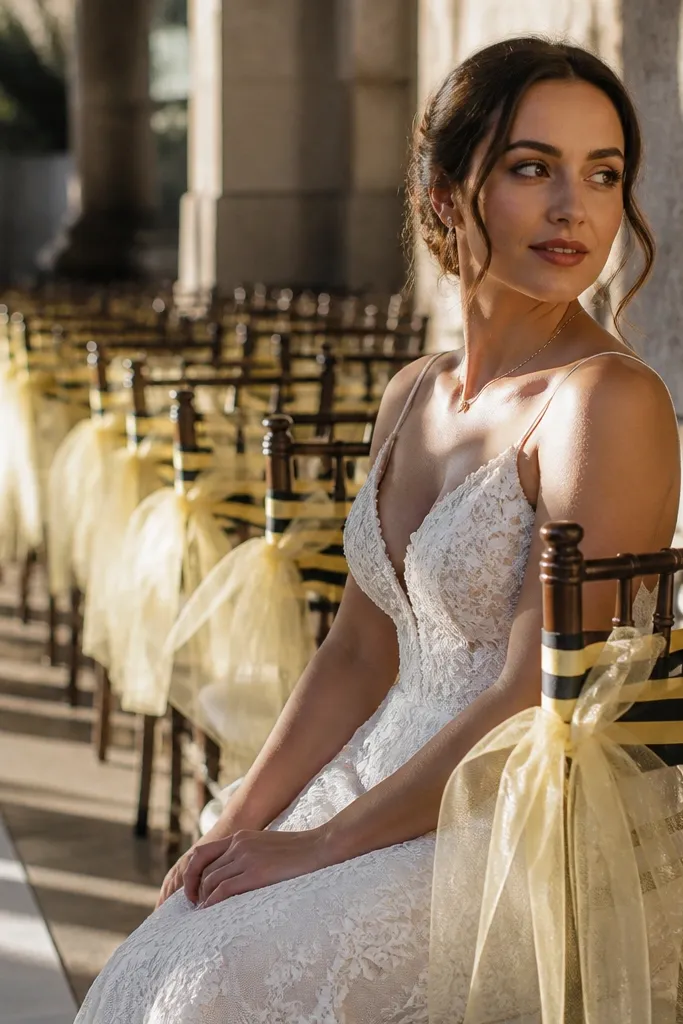
Chair decor is a photo magnet because it repeats down the aisle and makes the venue look styled from every angle. Use narrow yellow-and-black striped ribbon as the sash, then tie it with soft tulle so it looks airy rather than harsh. The bee stripes read clearly even from far away, which matters for wide congregation shots. This idea also gives you an easy “theme proof” without covering every surface. It works best when your chairs are similar in color and you can keep the arrangement consistent.
First, cut ribbon strips about 18-22 inches long so they wrap and still leave a visible stripe panel. Then attach them to the chair back with a simple knot and add a small tulle bow on top. Finally, keep the bow position consistent across chairs so photos don’t look messy. Plan on 45-60 minutes for a small section and longer for full coverage; do it in batches with a helper if you can. Budget is reasonable because ribbon is cheap and you’re not buying big props.
Quick tipUse the same stripe width everywhere; inconsistency makes the aisle look uneven in photos.
Skip thisSkip bulky bows that hide the stripes — they blur the bee pattern on camera.
5. Honeycomb Candle Sleeves on Clear Glass Votives
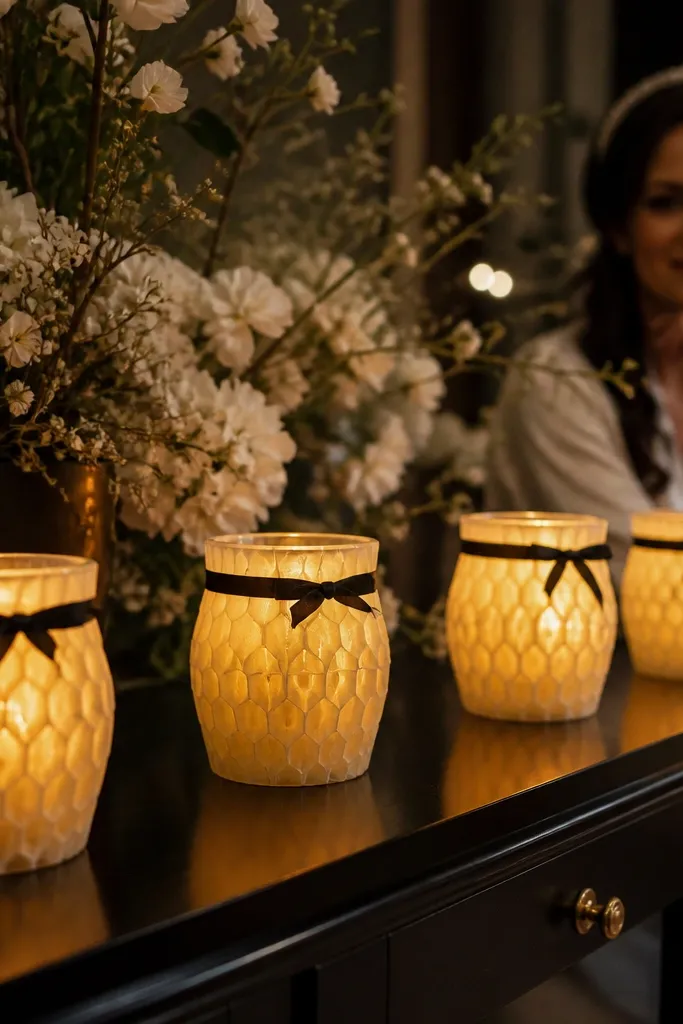
Candles make yellow look warm, even when the event is inside. Wrap clear glass votives with honeycomb paper sleeves in soft yellow, then add black ribbon bands at the top for the bee contrast. The reason this works is simple: candlelight makes the yellow glow, and the honeycomb texture catches it instead of flattening it. Place them along the aisle edge or behind the sweetheart table for depth in photos. This setup is especially good for evening receptions because the glow adds a cozy mood without extra décor.
Start by choosing votives that are about 3-4 inches wide so the sleeves fit snugly. Then measure the circumference and cut honeycomb paper strips with a slight overlap, secured with double-sided tape. Finally, tie a thin black ribbon around the top so the sleeve looks finished. Allow about 20-30 minutes to wrap 20-30 candles. If you’re nervous about fire safety, use flameless LED candles and still keep the sleeves — the look stays the same in photos.
Add a few candles on mirrors or glossy trays so you get light reflections in wide shots.
Don’t use bright neon yellow; it looks harsh next to flame light.
6. Mini Honey Jar Place Card Holders With Yellow Twine
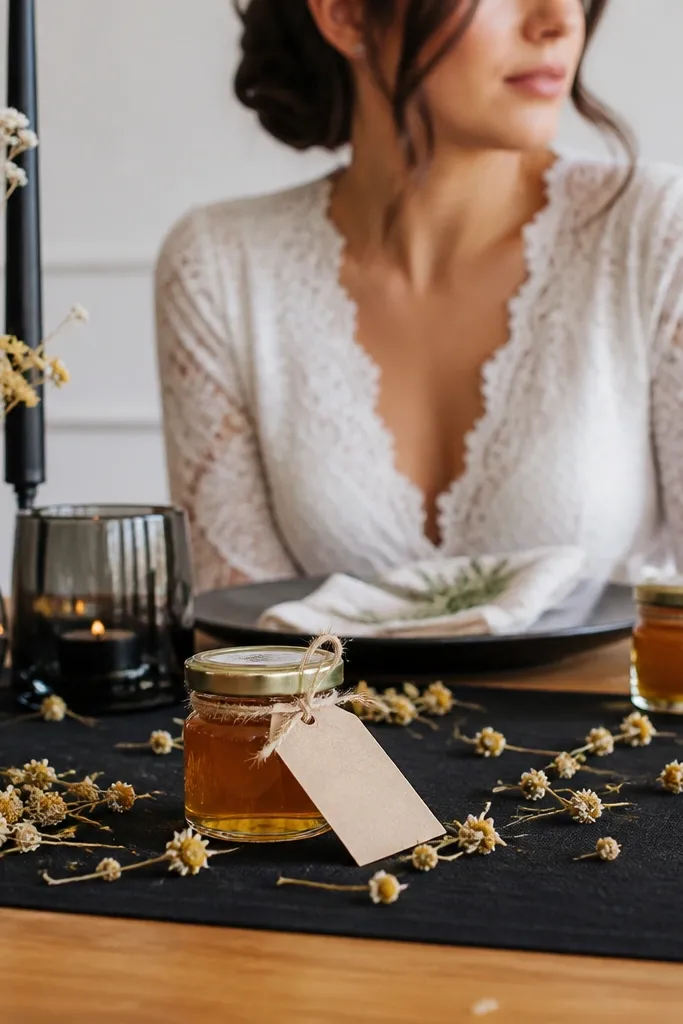
Place cards don’t have to be boring. Mini honey jars give you a real, tactile “bee” element, and yellow twine ties keep everything in the same sweet color story. Put each guest’s name on a small cream tag so it reads cleanly next to the yellow. This idea is worth it because it turns table management into décor — every seat has a detail the camera can catch in close-ups. It suits both rustic venues and clean modern spaces because the jar shape is universal.
First, source uniform mini jars and clean the labels so your tags look crisp. Then write names on cream cardstock tags and punch a hole for twine, tying the tag to the jar neck. Finally, cluster the jars along a table runner or on a tray so guests can find them quickly. Plan for 1-2 hours for a medium guest count if you’re handwriting tags. Keep your twine consistent — one knot style and one length — so the table looks styled, not improvised.
Quick tipUse a black fine-tip marker for names; it stays readable in photos even under warm lighting.
Skip thisSkip mixed jar sizes; different heights make the place card grid look messy.
7. Yellow Tulle Aisle Swags With Black Ribbon Tie-Backs
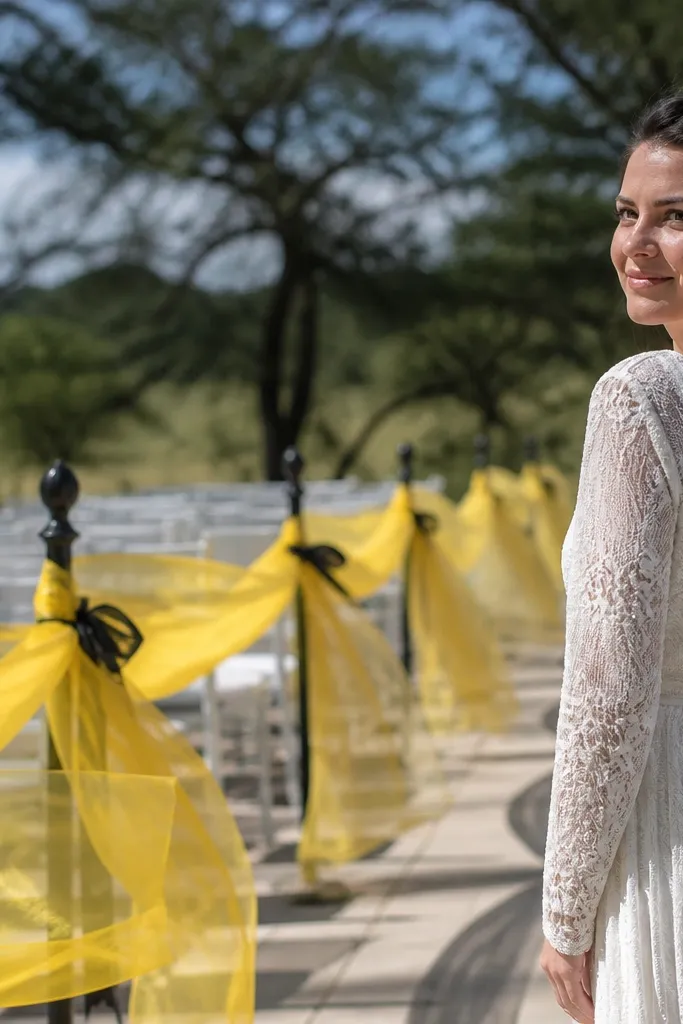
Aisle fabric is one of the most photogenic ways to show the theme without blocking guests. Yellow tulle swags create movement in photos, and black ribbon tie-backs add the bee contrast in a clean way. This works especially well for outdoor ceremonies with a breeze, where the tulle ripples and looks alive. In indoor venues, it still photographs well if you keep the swags spaced evenly so the line looks intentional. It suits ceremonies where the aisle already has some structure like chairs or a clear walkway.
Start by measuring the aisle length and deciding spacing — 6-8 feet between anchor points is a good target. Then hang tulle swags so they sit about 5-6 feet off the ground, tied back with black ribbon loops. Finally, step down the aisle and check symmetry from the back row, adjusting ties before you lock everything. Budget stays manageable because tulle is inexpensive and you’re not buying a full-length drape. Give yourself 2-3 hours for setup if you’re doing it the day before.
Quick tipUse lightweight tulle that drapes — stiff tulle looks flat and cheap in photos.
Skip thisDon’t hang swags too low; people’s heads block the view and the yellow disappears.
8. Bee-Themed Cake Stand With Honeycomb Cake Topper
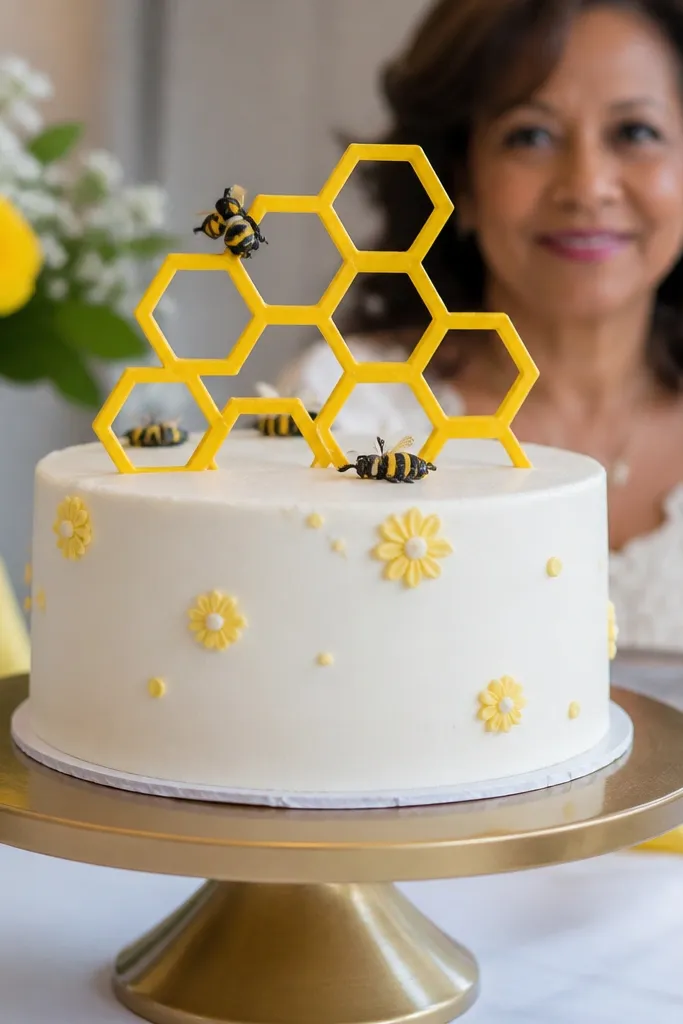
The cake is a default photo stop, so make yellow look purposeful there. Use a cake stand with a warm metallic finish or simple white base, then put a honeycomb cake topper in yellow with tiny black bee accents. Keep the cake styling minimal: a few piped yellow flowers or lemon buttercream accents plus one honeycomb element. This setup looks good because it gives the camera a clear focal point, and honeycomb texture reads well even when the background is busy. It suits both buttercream cakes and fondant cakes since the topper anchors the theme.
First, choose a topper size that matches your cake — around 6-10 inches wide is enough for a standard wedding cake section. Then coordinate colors: yellow topper + black bee details, plus white or cream icing to keep contrast clean. Finally, place the cake on a backdrop panel in plain white or soft greenery so the yellow stands out. Plan for the topper to arrive early so you can test placement and remove it for transport if needed. If you’re ordering, confirm the topper is food-safe if it touches the cake directly.
Add one small black ribbon around the cake stand edge for continuity with chair sashes.
Avoid covering the whole cake in heavy honeycomb patterns; it makes the cake look busy.
9. Yellow Blossom Table Centerpieces With Black Bee Picks
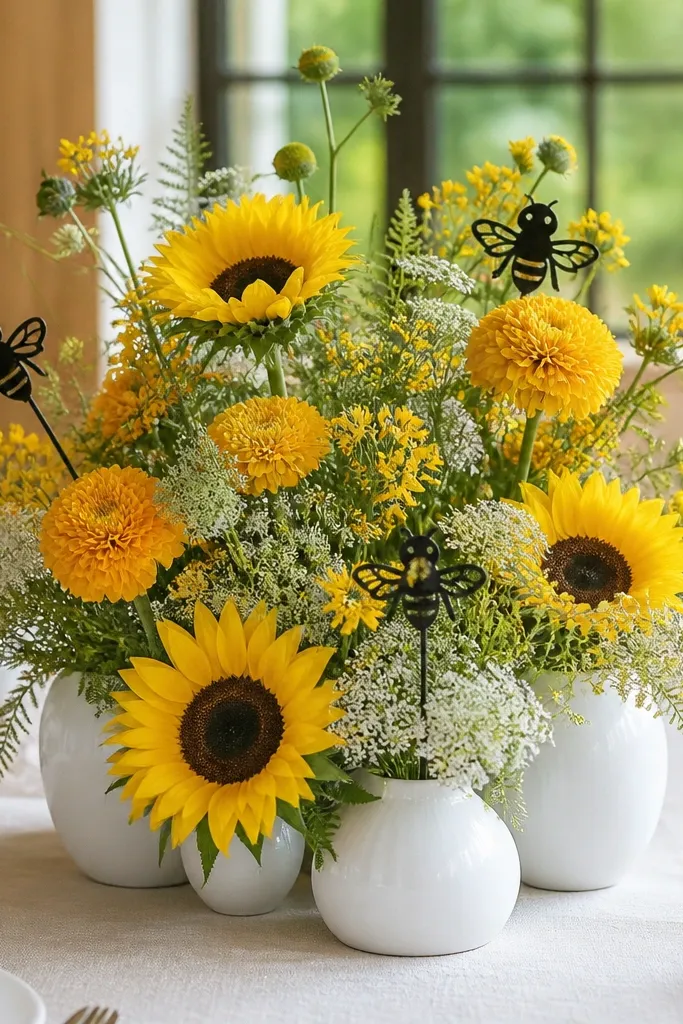
You want centerpieces that look like they belong in the same color family as your invites and signage. Use yellow blossoms — think sunflower-style blooms, marigold tones, or simple yellow daisies — in clear or matte white vases. Add black bee picks sparingly so they read as a theme note, not a gimmick. This works in photos because yellow flowers create a natural gradient and the black picks give crisp contrast. It suits daylight receptions and golden-hour shots when the petals catch light.
First, pick vase shapes that match your table setting — cylinder glass looks clean with modern linens. Then build each centerpiece with 3-5 stem lengths so the arrangement height stays consistent, usually 10-14 inches total. Finally, insert 1-2 black bee picks per arrangement and keep them facing outward toward the camera side. Budget is lower if you use seasonal flowers from a local supplier and add bee picks separately. Plan 2 hours for cutting and placing if you’re assembling yourself.
Quick tipChoose flowers with varied shades of yellow, not just one — it adds depth in photos.
Skip thisSkip tall centerpieces that block faces; keep height under 16 inches.
10. Honeycomb Balloon Cluster With Matte Yellow + Black Stripes
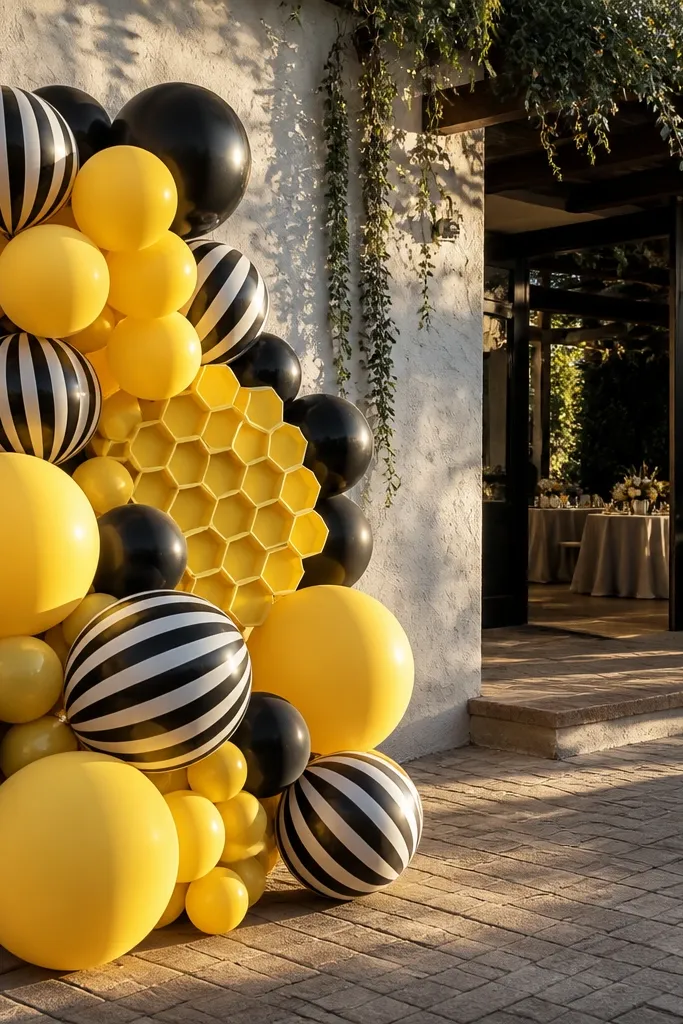
Balloon clusters are the fastest way to make yellow look big in photos. Go matte yellow balloons for a soft, sweet look, then mix in black striped balloons and one or two honeycomb-textured balloons. This delivers because balloons create volume and a clean color block that stands out in wide shots. Place the cluster near the entrance or behind the sweetheart table for instant framing. It works best in venues with enough wall or open space to keep the balloons from blending into the background.
First, decide cluster placement and clear space — you want it to be the background, not tangled in people. Then select balloon sizes: a mix of 16-inch and 12-inch balloons looks balanced without overpowering. Finally, add honeycomb accents sparingly and tie the cluster to a stand or anchor point. If you’re hiring a balloon artist, ask for matte finishes and confirm the black stripe pattern stays consistent. Plan for setup at least 2 hours before guests arrive so it settles and looks tidy.
Quick tipUse a balloon glue dot or ribbon to secure the cluster so it doesn’t rotate and show mixed angles in photos.
Skip thisAvoid shiny gold balloons; they reflect lights and wash out yellow detail.
11. Yellow Ribbon Ceiling Drops Over the Ceremony Aisle
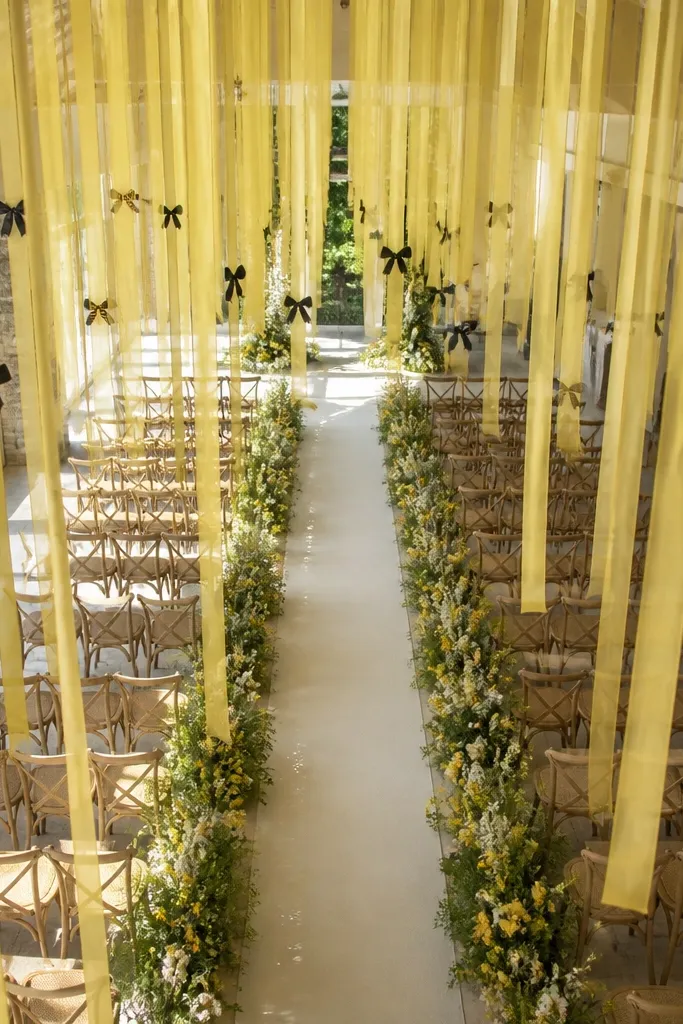
Ceiling drops are the kind of detail that makes photos look like a real production, even when the ceremony space is plain. Use long strips of sheer yellow ribbon hanging in parallel lines, then add occasional black ribbon knots or bee charms. The “sweet” part comes from how the ribbons catch light and create soft movement. This setup is worth it when your venue has a high ceiling or open overhead space where guests look upward. It’s also great for outdoor pergolas where you can tie ribbon ends to beams.
First, measure the span above the aisle so ribbons hang at about shoulder height when people stand. Then attach ribbon ends to beam ties or ceiling hooks with matching black thread for strength. Finally, space ribbons about 10-14 inches apart so the aisle looks patterned, not random. Budget is low because ribbon is inexpensive, but plan 2-3 hours for measuring and tying. Use heat-seal on ribbon ends if it frays.
Quick tipHang ribbons in groups of 3-5 with black knots at consistent intervals for a repeating pattern.
Skip thisDon’t hang ribbons too low; they tangle with hair and block ceremony photos.
12. Bee-Themed Welcome Table With Yellow Rolled Fabric + Hex Trays
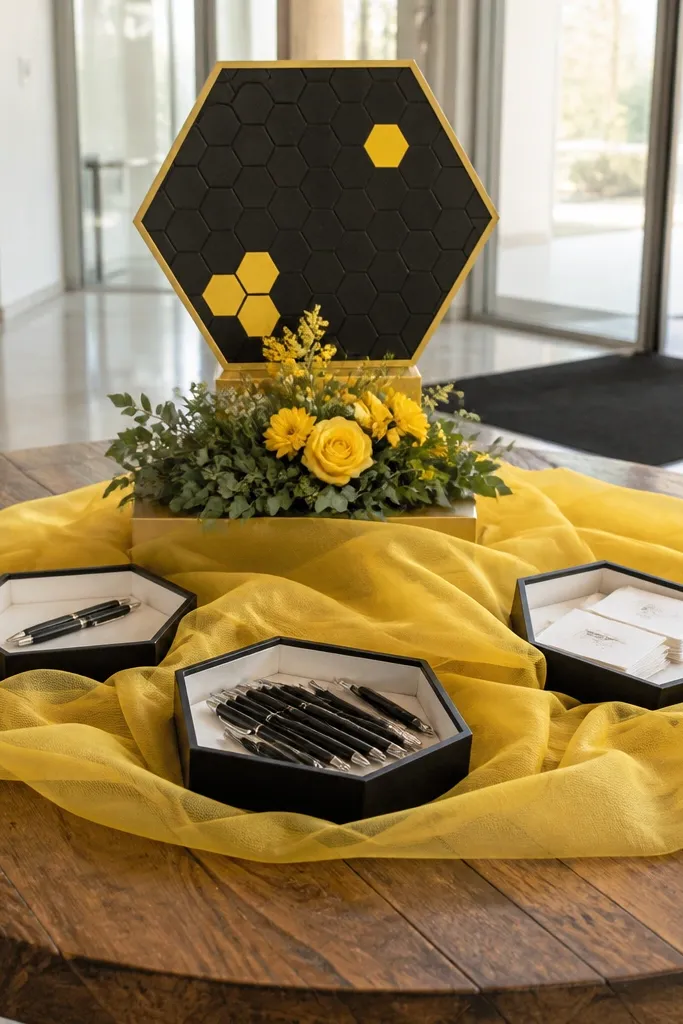
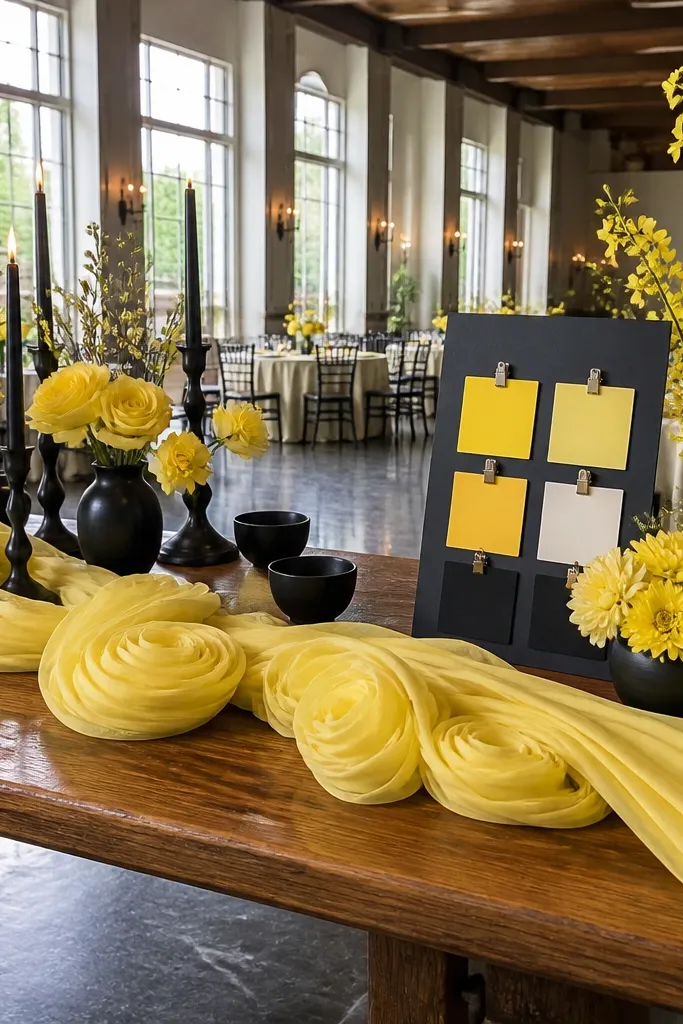
Your welcome table can look like a styled set, not a drop-off spot. Use rolled yellow fabric as the base — think soft tulle or chiffon — then place hex-shaped trays for cards, pens, and guest info. Add a black-and-yellow small sign and keep the rest clean so the yellow stays readable. This works because the hex tray shape echoes the honeycomb theme and gives your decor a consistent geometry. It suits venues where the welcome area is visible from the main entrance and needs a photogenic anchor.
First, cover the table with a neutral cloth, then roll yellow fabric into a layered fan pattern across the front. Next, place hex trays on top and add your signage behind them so the composition forms a triangle. Finally, add a small bee detail — like a black ribbon bow or bee sticker — only once per layer. Expect 45-60 minutes to set up a welcome table if you already have trays and signage printed. Keep pens and small items inside trays so the surface stays tidy in photos.
Quick tipChoose one pen color, either black or honey-yellow, so the table looks coordinated.
Skip thisSkip loose paper stacks on the table; they look messy and ruin the yellow look.
13. Lemon Confetti Table Scatter With Black Candle Bases
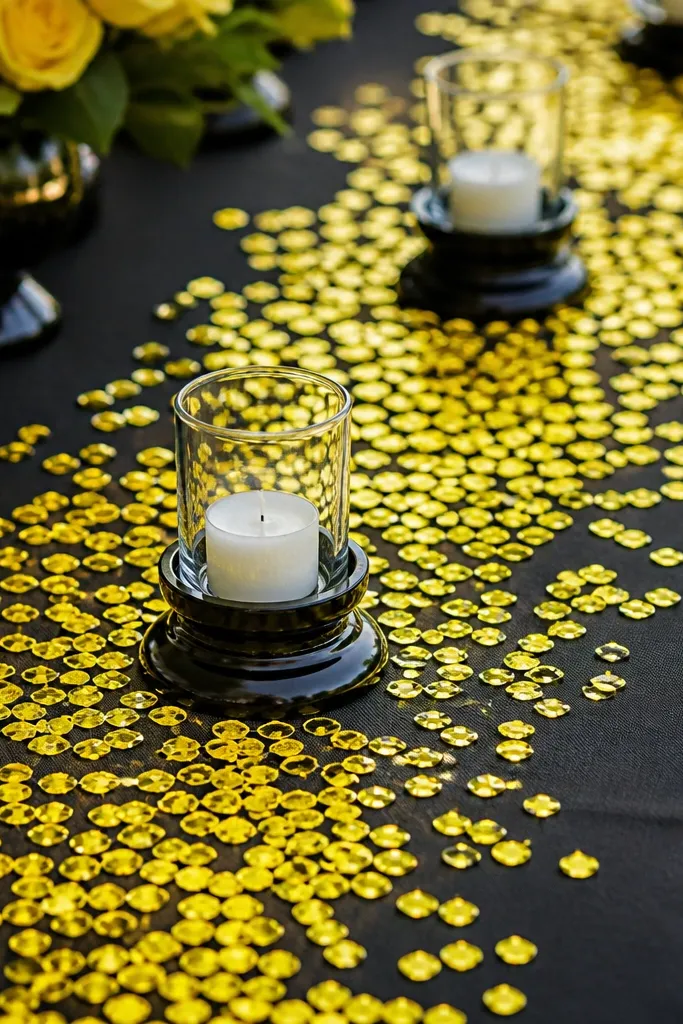
If you want sweet yellow that still feels modern, use confetti scatter instead of heavy centerpieces. Layer lemon-yellow confetti across a table runner and pair it with black candle bases or simple black votive holders. The yellow reads as sparkle in photos, and the black keeps it grounded. This idea works best when your tablecloth is neutral white or cream, because the confetti has contrast. It also suits evening receptions when the candlelight makes the confetti look like tiny reflections.
First, choose a table base color — cream or white — and lay a simple runner so confetti doesn’t look chaotic. Then scatter confetti in one controlled zone, about the length of the runner, not across the whole table. Finally, place candles or bud vases on top of the confetti so the yellow doesn’t cover place settings. Budget is low, and setup takes 10-15 minutes per table. For cleanup, use a small broom or lint roller after the party.
Use biodegradable paper confetti if your venue has waste rules.
Don’t use glitter confetti; it looks messy on camera and can get everywhere.
14. Bee-Knot Napkin Rings on Yellow Napkins
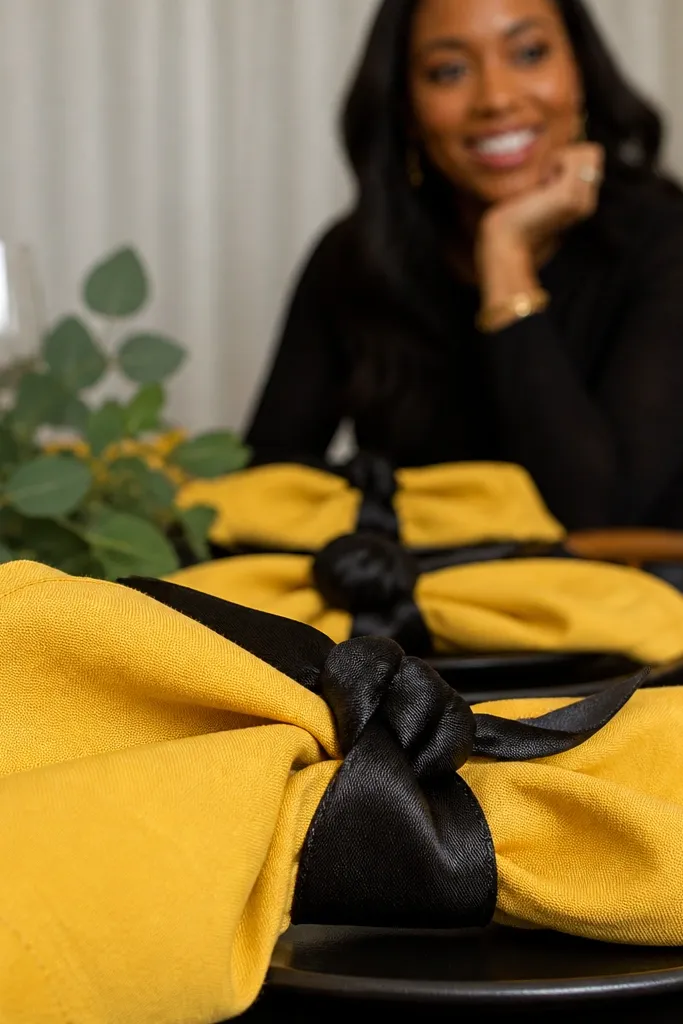
This is the kind of detail that shows up in close-ups and makes the whole table look intentional. Use yellow napkins in a shade that matches your signage, then add black ribbon napkin rings tied in a simple bee-knot style. The black knot gives a crisp focal point, and the yellow fabric reads soft instead of plastic. This setup works for both rustic and modern tables because the napkin ring is the hero. It’s strongest when you keep plate settings minimal so the color doesn’t compete.
First, pick napkin size and fold — a classic rectangle fold works best for showing the ring clearly. Then create ribbon rings in black — about 1 inch wide — and tie a consistent knot style for every seat. Finally, place napkins the same way at every setting so the camera sees repetition. Plan 30-45 minutes for a full table since each knot needs to look neat. Budget stays reasonable because ribbon is cheap and you’re not adding extra props.
Quick tipUse fabric napkins over paper; they photograph smoother and feel more wedding-like.
Skip thisSkip overly thick ribbon; it makes the knot bulky and hides the napkin fold.
15. Yellow and Black Balloon Arch Panel With Honeycomb Insert
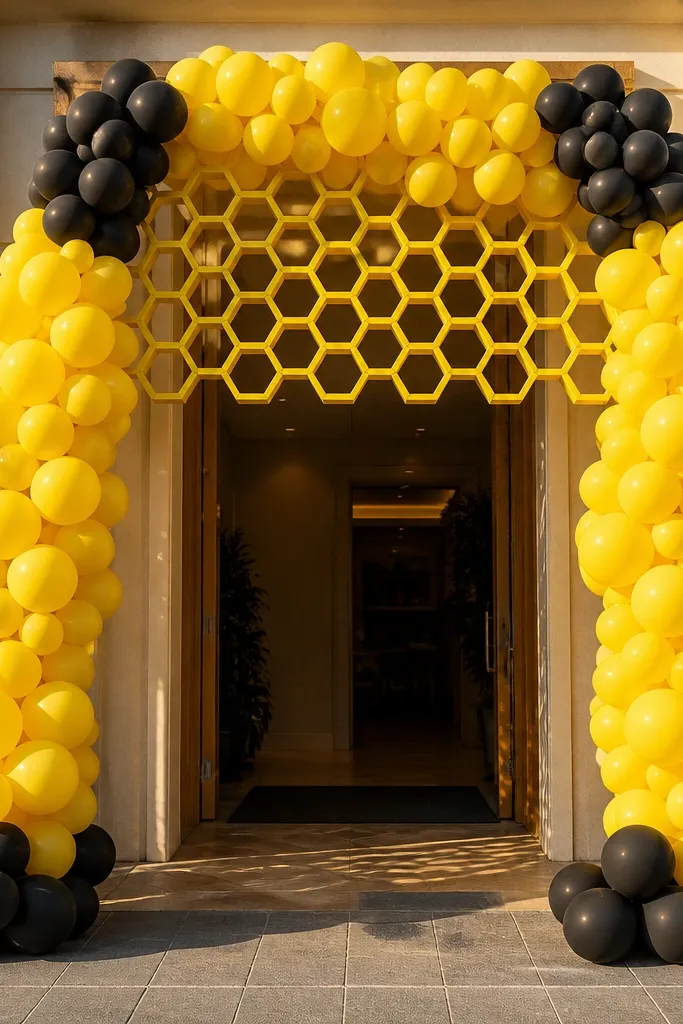
A balloon arch is a statement, but the honeycomb insert makes it feel like a themed decor piece instead of generic balloons. Build a mostly matte yellow arch, add black balloon clusters at the corners, and include a honeycomb panel in the center for a graphic “bee” moment. This setup is worth it because arches frame the couple and look great from both sides during photos. It’s best at entrances, cocktail hour, or behind the sweetheart table so you get repeated photo angles. Choose a size that matches your space so it doesn’t swallow the room.
First, measure the space width and aim for an arch that leaves at least 3 feet of clearance on each side. Then design panels: yellow base, black corner accents, and one honeycomb insert panel at eye level. Finally, anchor the arch properly so it doesn’t sag; check it once before guests arrive. If you’re renting an arch, ask for matte finishes and confirm the honeycomb insert is included. Plan 1-2 hours for installation depending on whether it’s a prefab structure.
Quick tipKeep the arch height around 8-10 feet so it frames faces without blocking overhead lighting.
Skip thisDon’t add too many different patterns — yellow, black stripes, and honeycomb is enough.
16. Bee-Themed Bar Sign With Lemonade Color Wash
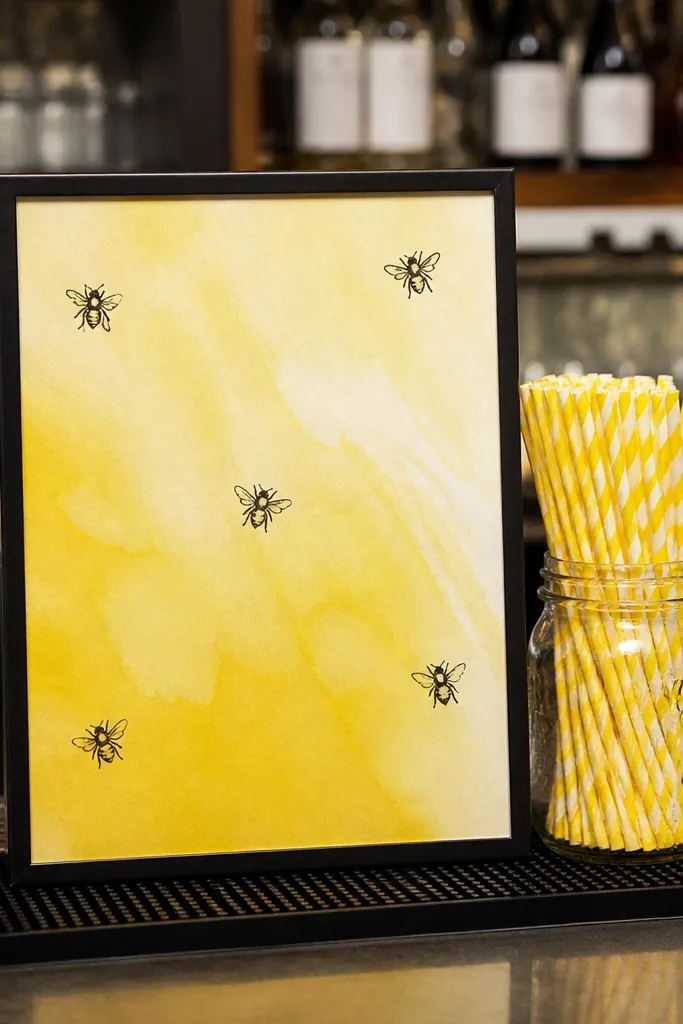
Food and drink photos are a big part of wedding albums, so treat your bar like a decor moment. Create a bar sign with a lemon-yellow wash background and small black bee icons around it. Then echo the yellow with a lemonade-style color on the bar setup — like yellow straws in a jar and black stir sticks. This idea works because it turns a functional area into a consistent theme shot. It’s especially good for receptions with a visible bar in the main photo path.
First, design a sign that fits one camera frame — around 18-24 inches wide for most bars. Then place it at eye height and add a small tray or jar of yellow items underneath so the sign doesn’t float alone. Finally, coordinate drink accessories: yellow labels, black stir sticks, and a simple honey jar for garnish. Budget is low if you print the sign and buy accessories in bulk. Plan to set it up 30-60 minutes before guests arrive so it doesn’t look rushed.
Use black chalk marker on cream labels for a hand-lettered look that reads well on camera.
Skip busy typography; keep the sign short so yellow stays the visual focus.
17. Yellow Flower Wall With Honeycomb Panel Cutout
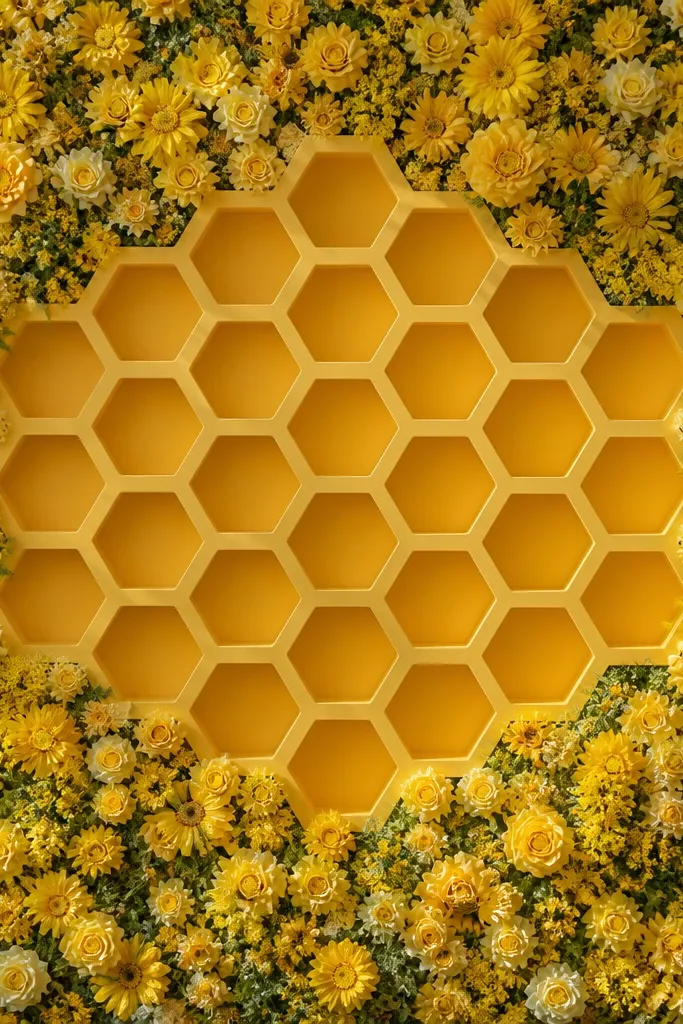
A flower wall becomes more “Bride to Bee” when you add a honeycomb graphic cutout inside the design. Build a wall using yellow blooms in varied tones, then place a honeycomb panel cutout behind the center so it creates a layered look. The honeycomb shape gives structure, and flowers give softness. This is the best option when you want one big wow photo spot that still feels on-theme. It works for indoor halls, garden courtyards, and any venue where you can control lighting.
First, decide size — 6-8 feet wide is a good range for couple photos. Then build the honeycomb panel first and place it behind or within the floral arrangement so it’s visible from the front. Finally, keep the flower colors mostly yellow with a little greenery and one black accent at the edges, like a bee decal or black ribbon. Budget is higher than paper decor, but you can reduce cost by using artificial greenery and real yellow focal blooms. Plan for installation time — 3-4 hours — and protect the wall from wind if it’s outdoors.
Quick tipAdd one black-and-yellow ribbon bow near the honeycomb cutout so the theme is readable even in low light.
Skip thisDon’t use too many white flowers; they wash out the yellow wall in photos.
18. Honeycomb Table Number Cards on Black Easels
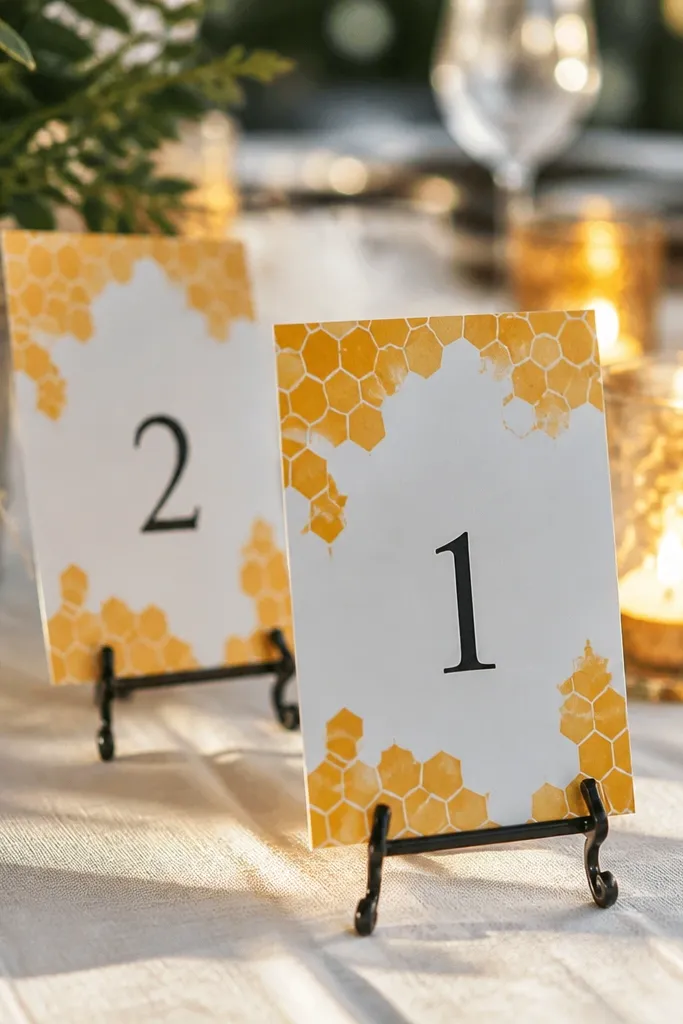
Table numbers are small, but they show in guest photos and help your decor look designed end-to-end. Make table number cards with a honeycomb pattern in yellow, then mount them on black easels for contrast. The black makes the yellow pop and keeps the look from blending into white table linens. This setup works best when your tables are already decorated with greenery or simple centerpieces. It also suits receptions where guests take photos at each table when they find their seat.
First, create cards about 5x7 inches so the number is readable from a distance. Then print or cut honeycomb patterns and place the table number in bold black lettering. Finally, set each card on a black easel and position it so it faces the center aisle. Plan to assemble all cards at once to keep spacing consistent. If you’re renting easels, confirm they match black matte so they don’t reflect light.
Quick tipUse the same font family for table numbers as your welcome sign for a consistent look.
Skip thisAvoid tiny numbers; if people squint, the photo looks off.
19. Yellow Macaron-Style Dessert Labels With Bee Stickers
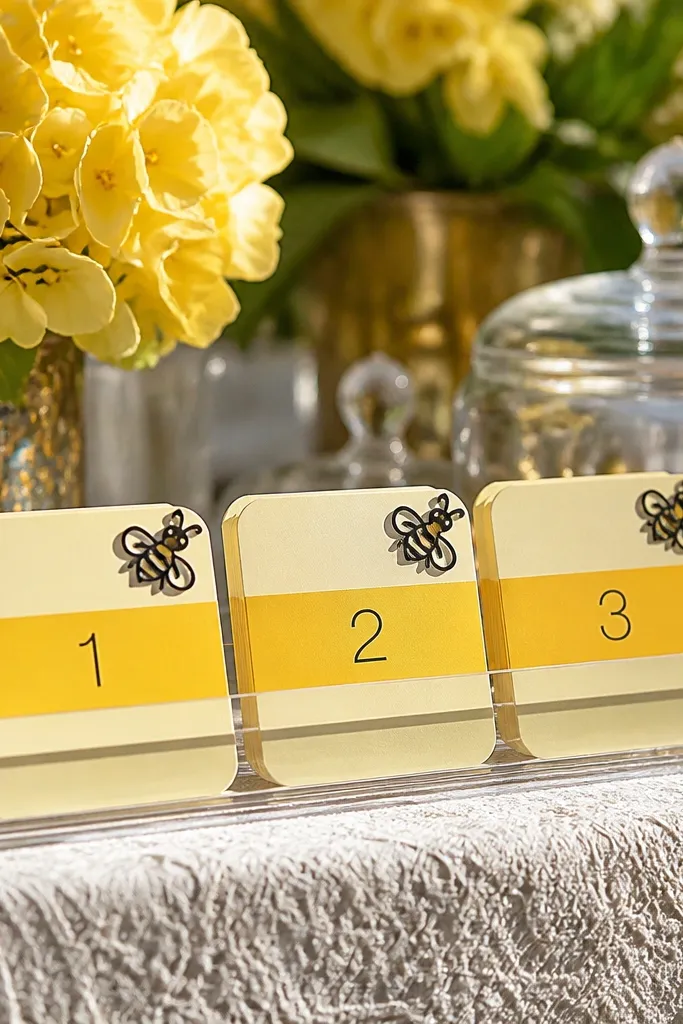
Dessert tables get close-up photos, and labels are part of the aesthetic. Use yellow label cards styled like macaron colors — pale cream with a yellow band — then add small black bee stickers on the corner. Keep the label text short and readable so it doesn’t look like a menu wall. This delivers because the yellow ties into your theme without needing big props, and the bee sticker gives that “Bride to Bee” wink. It works for dessert bars, candy buffets, and plated dessert stations with a photo backdrop.
First, cut label cards into consistent sizes, around 3-4 inches wide, and print dessert names in black. Then add a yellow band or border and place one bee sticker per label. Finally, anchor labels in a small clear stand or clip them onto the dessert trays so they stay upright. Plan for 30-60 minutes depending on how many items you have. Budget is low because the labels are simple and you’re only adding stickers as accents.
If the dessert table is warm-toned, use cream labels instead of bright white so yellow doesn’t clash.
Skip multiple sticker types; one bee sticker per label keeps it clean.
20. Mustard Ombre Table Skirt With Black Lace Trim
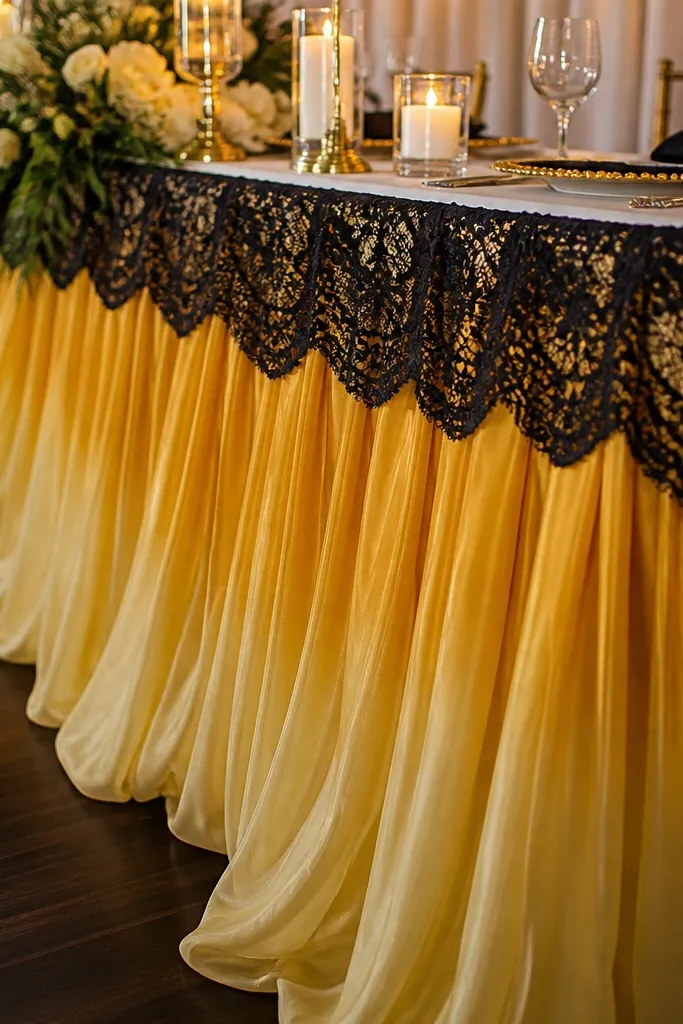
If you want sweet yellow that looks grown-up, go ombre with a black trim. A mustard-to-lemon ombre table skirt adds depth, and black lace trim brings the bee contrast in a way that feels intentional. This setup is especially good for sweetheart tables, cake tables, or head tables where you want one strong background. It photographs well because the gradient creates a smooth color shift rather than flat blocks. It suits evening receptions and venues with darker floors or wood accents.
First, measure the table drop length and choose a skirt height that reaches the floor cleanly without dragging. Then attach the skirt so the lighter yellow is toward the top where cameras capture it — around chest height for guests seated across. Finally, add black lace trim along the front edge only, not everywhere, so the trim reads as a border. Expect 1-2 hours to drape and pin the skirt neatly. If you’re renting, request a fabric that doesn’t cling too tightly — clingy fabric wrinkles show in photos.
Use a simple centerpiece so the ombre stays the hero.
Avoid adding black and yellow garlands on top of the ombre; it gets visually loud fast.



