
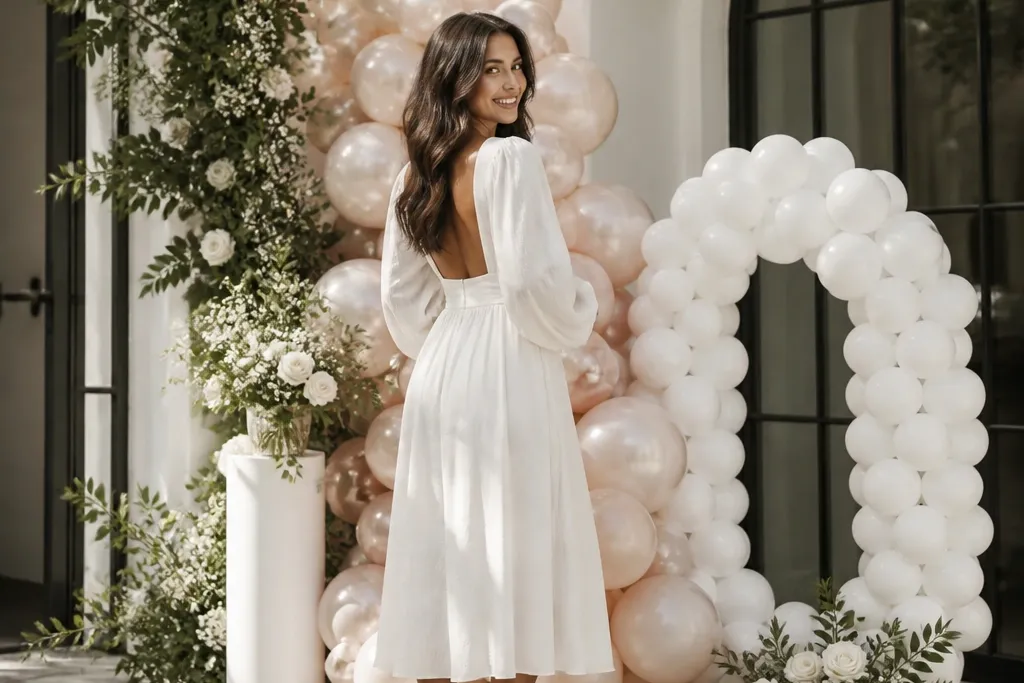
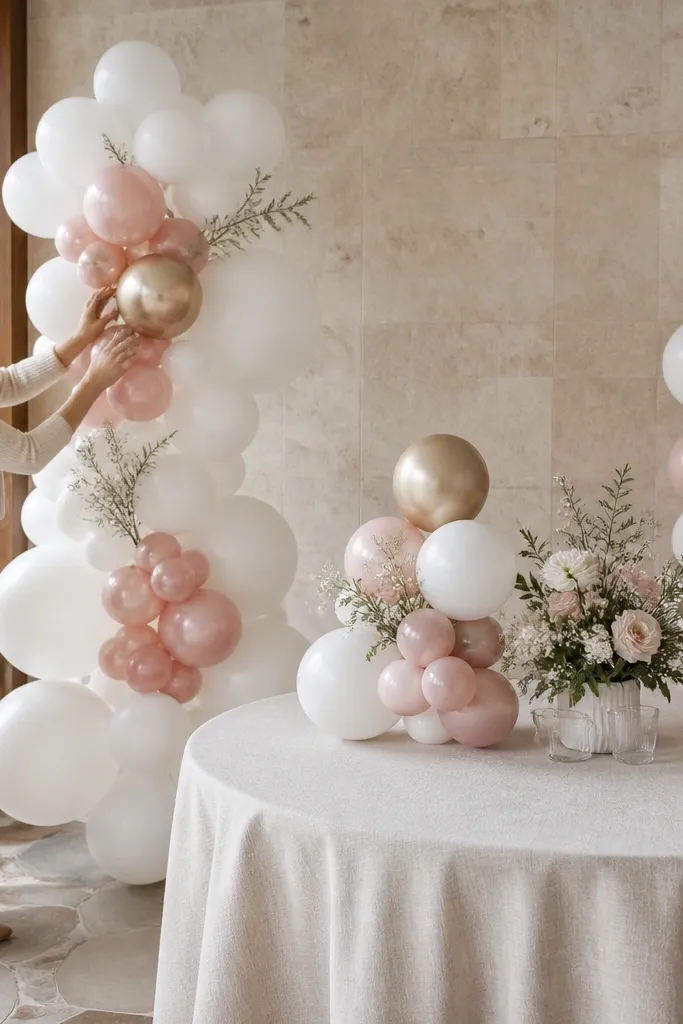
1. Blush Pearl Balloon Bouquet With a Gold Ribbon Tie
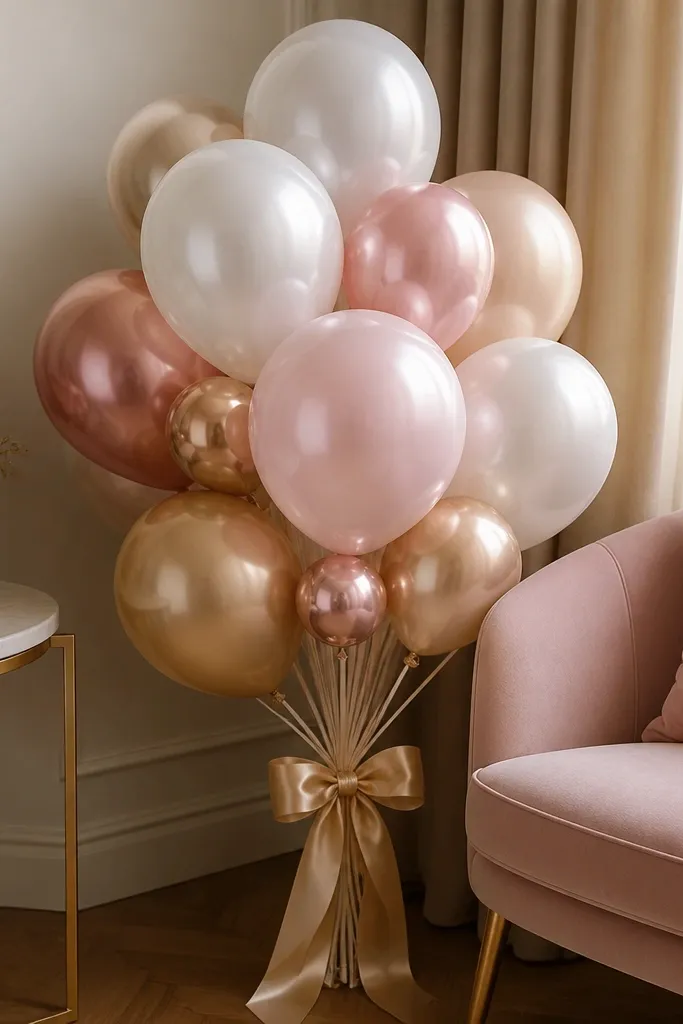
This one reads as “intentional” even when you only have a small space, because the pearl finish gives the balloons soft highlights instead of harsh shine. Build it like a bouquet: tight at the center, looser at the edges, so it looks full from the front and still pretty from the side. It’s a strong choice for spring and summer baby showers, bridal brunches, and hotel lobbies where the background is busy. In fall and winter, the blush turns romantic next to warm lighting, especially with champagne and gold accents.
Start with a bouquet base: use a small 3D cluster sleeve or a balloon weight with a hidden ribbon tail. Then assemble 3 sizes of pearl latex (8-inch, 10-inch, 12-inch) around one foil focal balloon in blush or champagne. Finish by tying a real satin ribbon through the cluster knot and letting it drape down just 6-8 inches so it shows in photos.
Choose pearl or matte balloons for the main cluster and save chrome for one small accent balloon.
Don’t mix five colors in the bouquet; it turns into a party pile in pictures.
2. Champagne + White Number 2 Balloon Frame With Halo Backdrop
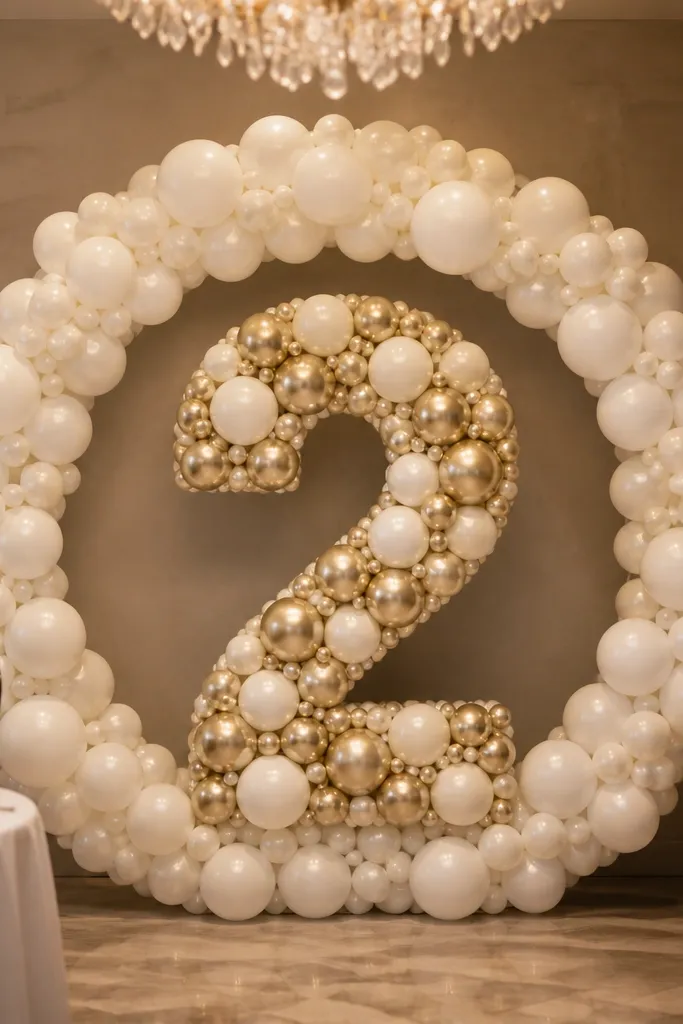
A number balloon frame looks styled because it adds structure, but the halo backdrop is what makes it photo-ready. The halo creates a clean circular composition that pulls the eye to the bride-to-be and makes the balloons look fuller without adding more chaos. This works especially well at dinner venues with plain walls or near a doorway where you can place the halo at chest height. It photographs beautifully year-round because champagne and white hold up in both warm and cool lighting.
First, place the number balloons on a flat base or stand that sits at about waist-to-chest height, depending on your height. Next, add a thin halo ring behind it using a balloon garland strip or a pre-made ring kit in white — keep the ring centered and leave a small gap so the number stays crisp. Finally, add one warm LED light inside the ring, then step back and check that the halo edges are visible in the frame.
Use LED lights with a warm setting (2700K) so the champagne doesn’t look gray.
Skip multicolor tassels behind the number; they clutter the halo silhouette.
3. Matte White Arch With One Blush Chrome Step-Back Column
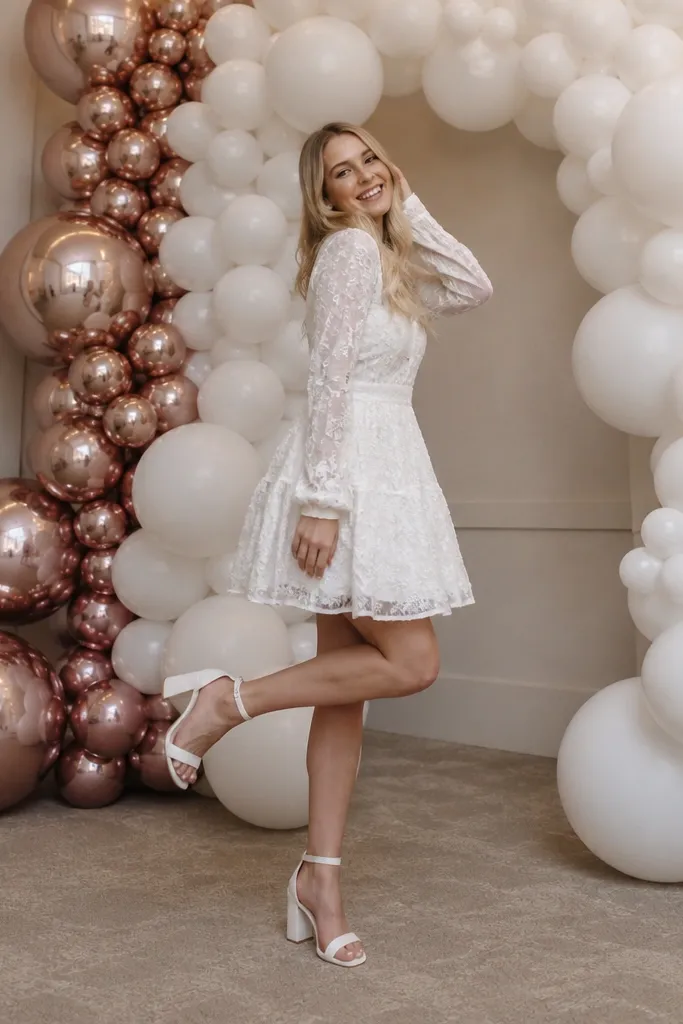
A matte white arch is the cleanest backdrop look because it doesn’t glare and it makes skin tones look better in photos. The trick is the step-back column: one blush chrome balloon column placed slightly behind the arch so it creates depth, not a flat wall. This is a great option for indoor venues, photo booths, and hotel corridors where you want a “wow” background without heavy theming. It works across seasons because the base is neutral and the chrome adds the glow.
Start by building the arch in matte white using two balloon sizes (11-inch and 5-inch) and keep the curve tight. Then create the step-back column: place 5-7 chrome balloons in a vertical line behind the arch at a 6-12 inch offset. Finally, add a small garland at the bottom edge in white to hide the stand and give you a clean floor-to-arch line.
Keep the arch at least 6 feet wide so it doesn’t feel cramped in wide shots.
Don’t use only glossy balloons in the arch; glare makes faces look shiny in photos.
4. Iridescent Confetti Cluster With a Center Foil "Bride to Be" Bubble
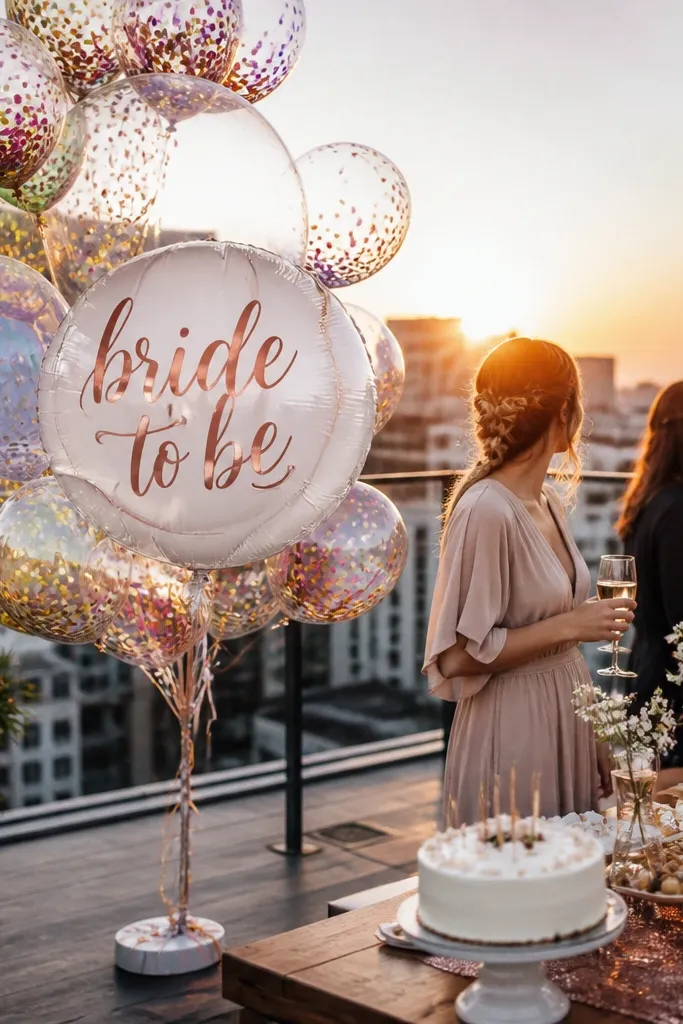
Confetti balloons add movement and catch light differently as people walk past, which makes photos look alive instead of posed. Pair the confetti cluster with a central foil bubble that reads clearly, and you get both fun and legibility. This setup is perfect for outdoor garden events and rooftop dinners where you’ll have natural light and a bit of breeze. It still looks strong in winter because the iridescent finish warms up under string lights.
First, choose a foil bubble balloon that says “Bride to Be” and place it at the exact center of your cluster. Next, surround it with 10-14 iridescent confetti balloons in 8-inch and 10-inch sizes, mixing in 2-3 solid pale pink or white balloons to control the noise. Finally, attach the cluster to a base weight or a hidden stand so it stays upright for photos.
Add one matte white balloon near the bottom of the cluster to anchor the look visually.
Don’t overfill the cluster; leave small gaps so the center text stays readable.
5. Pastel Ombre Balloon Garland Strip on a Photo Frame Stand
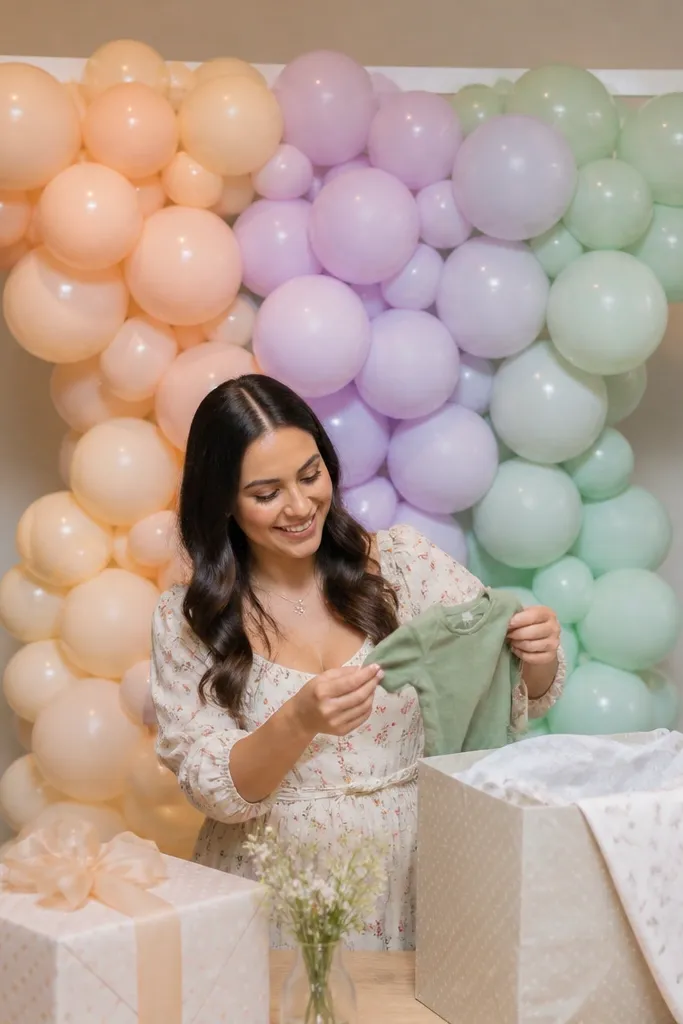
Start by setting up a slim frame stand or backdrop pole at shoulder height. Then build the garland strip using 5-7 colors in a pastel order, but keep the main balloons in two sizes (11-inch and 6-inch) so it looks intentional. Finally, add a few foil accents near the corners only, then step back to confirm the bride-to-be’s head fits cleanly inside the frame.
A balloon garland strip is the underrated travel-friendly option that still looks luxe in photos. Ombre works because it creates a gradient that mimics soft lighting, especially when the background is plain. Use it as a “photo frame” behind where the bride-to-be stands, not as a full wall. This suits indoor receptions, bridal showers in rented halls, and small hotel rooms where you can’t fit an arch.
Skip thisSkip bright neon balloons in an ombre — they break the gradient and look harsh in daylight.
Quick tipUse matte pastel balloons for the strip and keep the foil to under 20% of the balloons.
6. White + Blush Balloon Taper Column for a Doorway Entrance
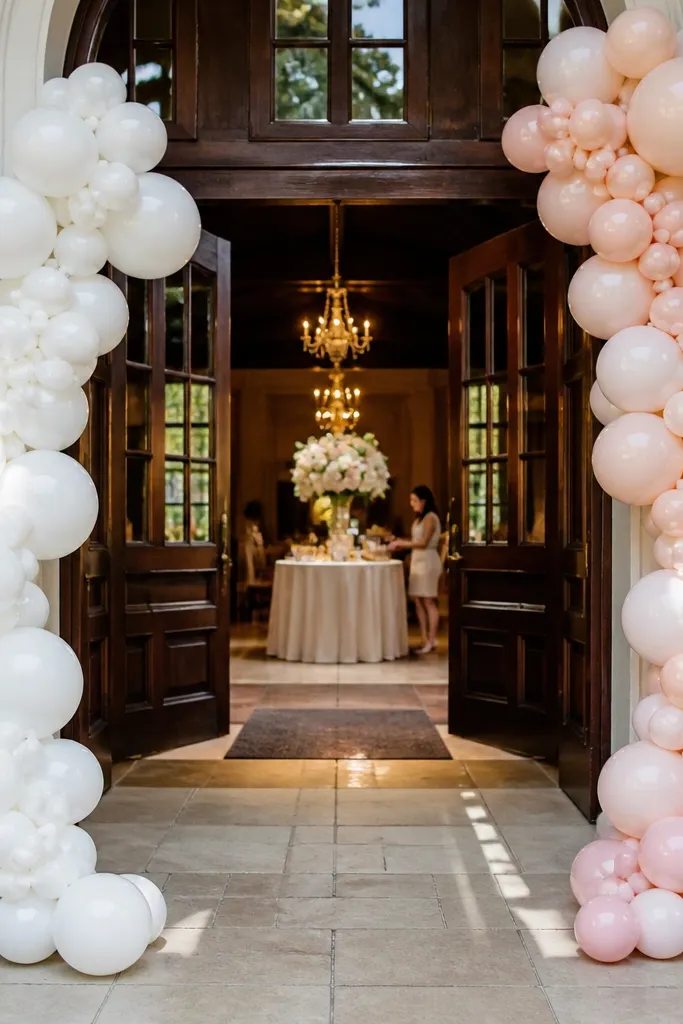
Doorway decor is all about framing, and a taper column gives you a clean vertical line that looks great in both portrait and wide shots. The taper means it’s denser at the top and lighter toward the bottom, so the bride-to-be stands out instead of getting swallowed by balloons. This idea works year-round because white and blush sit well in any interior — from winter weddings with warm lamps to summer events with bright daylight. It’s also practical for venues where you can’t drill into walls.
First, measure your doorway width and plan for two columns with a 4-6 inch gap between them. Then build each column with a balloon strip base and stack balloons from largest at the top to smaller at the bottom. Finally, add a small ribbon bow or a single foil balloon centered at head height so it reads in photos.
Anchor the base with a water-filled weight if the venue has polished floors that slide.
Don’t build columns with the same balloon size end-to-end; it looks like a sausage line.
7. Gold Chrome + White Balloon Beam for a Step-and-Repeat Wall

Start with a long balloon strip or thin frame beam that matches the width of your photo sign. Then alternate white balloons with gold chrome in a repeating pattern, using two sizes so the beam has rhythm. Finally, add a small cluster at each end to make the beam look finished rather than like a line.
If you’re doing a branded moment like a shower sign or a guest photo wall, a balloon beam creates a premium edge without taking over the whole background. Gold chrome adds that reflective “party flash” in photos, but pairing it with white keeps the look soft and readable. This is best for indoor venues, especially those with a step-and-repeat area where people stand close to the wall. It’s also easy to match across seasons since gold works from winter warm lighting to summer daylight.
Skip thisDon’t place chrome directly at face level across the whole beam; it can cause glare.
Quick tipKeep the beam at about 2/3 of the subject’s height so it frames without covering faces.
8. Rose Gold Pearl Balloon Arch With a Single Clear Bubble Panel
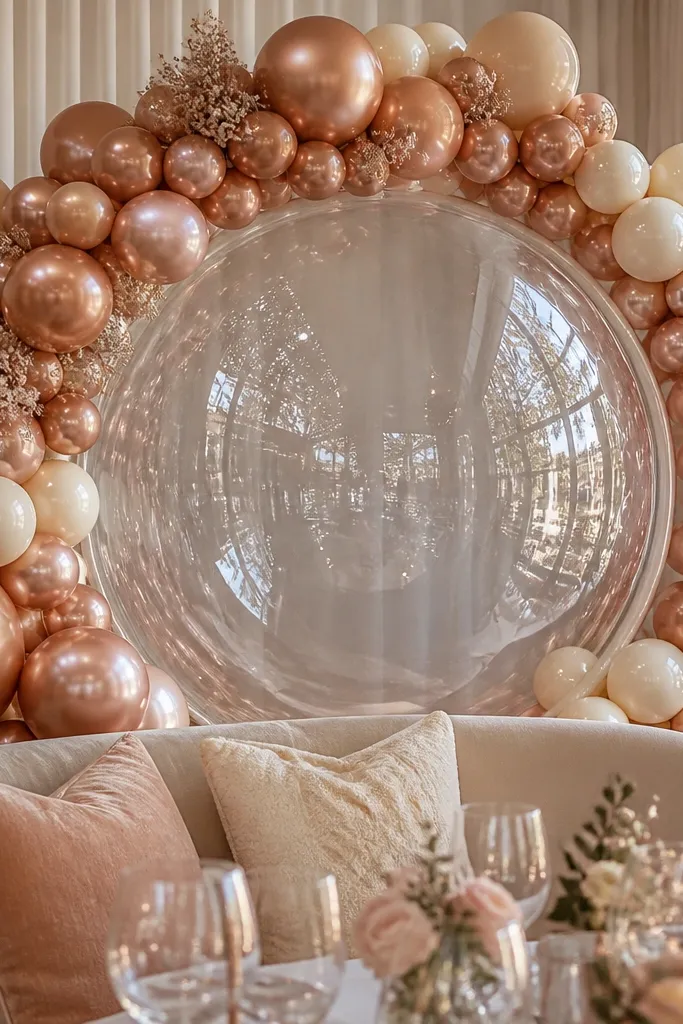
First, build the arch in rose gold pearl with a tight radius and evenly spaced balloons. Then add one clear bubble panel or clear balloon element in the center, positioned so it catches light behind the bride-to-be. Finally, use a small base garland in rose gold and white to hide the stand and keep the bottom edge clean.
This arch is romantic but still modern because the clear bubble panel cuts the softness with transparency. Rose gold pearl balloons look expensive in daylight and under indoor lighting, and the clear panel gives you a focal point that stands out in photos. It’s a great fit for bridal showers with a seated photo moment, like cake cutting or opening gifts. Year-round, it works because the palette stays warm without being heavy.
Skip thisSkip extra foil phrases around the arch; one clear center panel is enough.
Quick tipUse a matte ribbon at the base; glossy ribbon reflects and can distract from the center.
9. Garden Party Balloon Frame With Leafy Green Accent Balloons
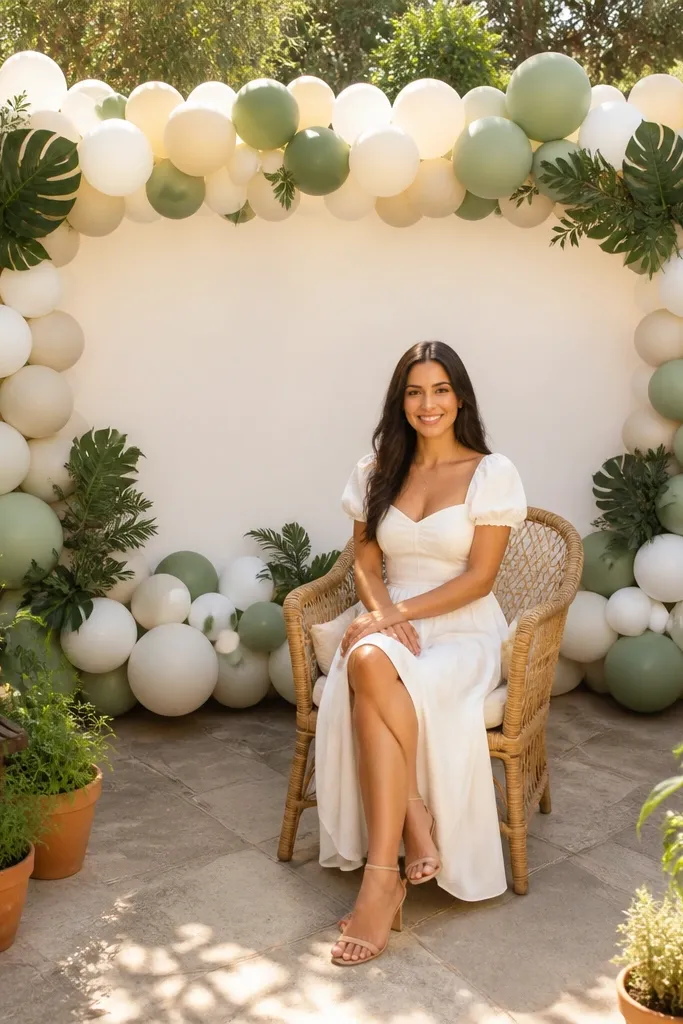
Leafy green accents make balloon decor look like it belongs outdoors, even if your venue is a patio. The photo payoff comes from the frame effect: greens at the corners and a clean balloon center lets the bride-to-be stay the subject. This is ideal for spring and summer, but it also works in fall if you choose olive or deep moss green instead of bright lime. The green adds contrast so the balloons don’t blend into a busy background.
Start by building a simple rectangular balloon frame using white balloons as the main structure. Then place olive or moss green balloons in the four corners and along the top edge in small clusters. Finally, add 1-2 small foliage-style accents (balloons in leaf shapes or green garland) so the corners look intentional, then check the frame is level before inflation weights set.
If it’s windy, use a freestanding base and keep the frame height under 6 feet for stability.
Don’t use bright lime green — it looks neon under natural light and can dominate the photo.
10. Monochrome Black + Champagne Balloon Wall With a Center Heart
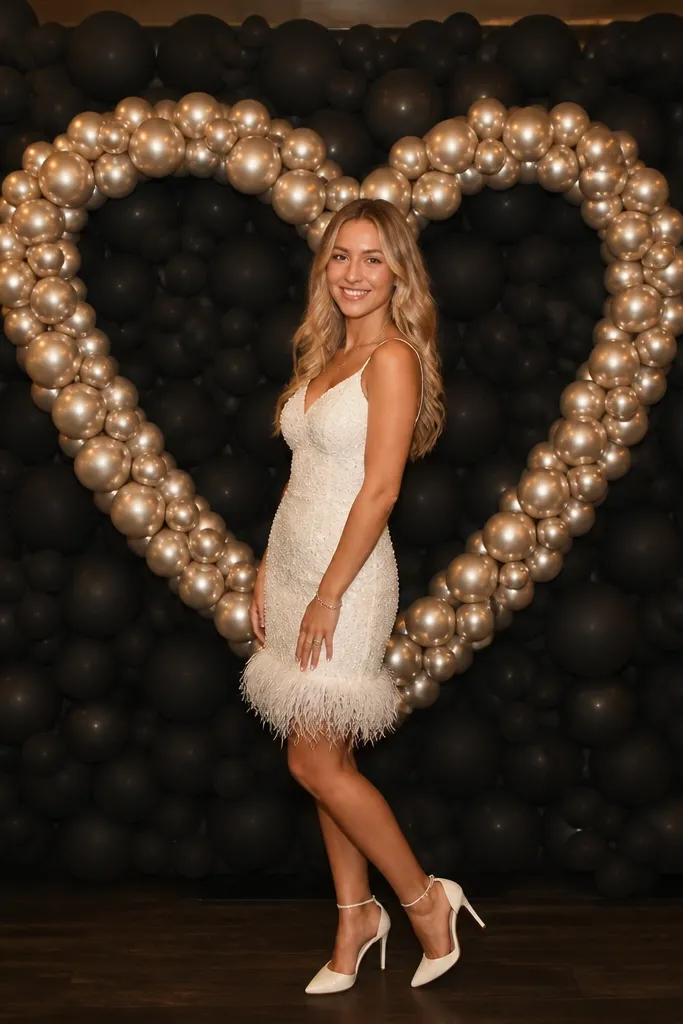
First, build a balloon wall or backdrop using mostly black matte balloons with a champagne mix in the negative spaces. Then place a heart-shaped foil balloon at the exact center, at head height for the bride-to-be. Finally, add a small cluster around the heart using two balloon sizes so the center looks padded and full, then step back to confirm the heart is the visual anchor.
Monochrome black balloon decor photographs like a fashion set. Add champagne balloons and a center heart balloon, and you get contrast that makes the bride-to-be stand out instantly. This is the strongest option for evening events, indoor ballrooms, and winter dates where lighting is dim. It also looks sharp for modern brides who don’t want the usual blush-and-white theme.
Skip thisAvoid adding too many different metallics; champagne is enough with black.
Quick tipUse matte black balloons for the wall; glossy black reflects light and can look patchy.
11. Blush + White Balloon Garlands Over a Table Runner Backdrop
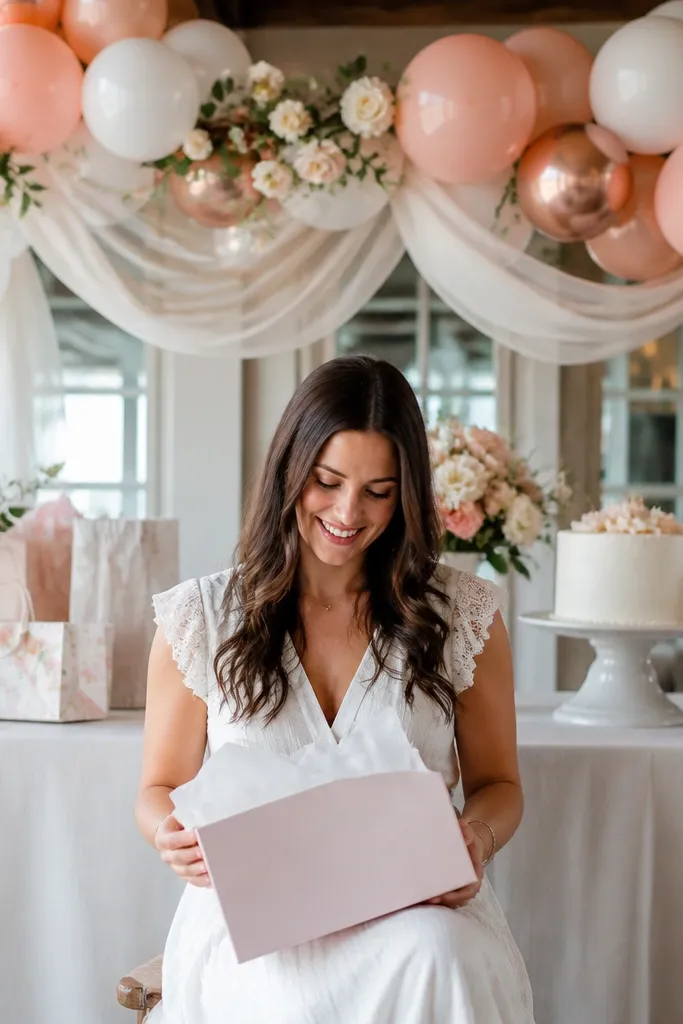
If you’re doing a bridal shower with gifts or a gift-opening table, balloons above the table give you instant photo depth without cluttering the space. Garlands look best when they sit like a soft canopy, not like a wall. Blush and white keep it sweet, while the spacing lets the cake and signage stay visible. This is a year-round setup because it matches both spring florals and winter candlelight.
Start by stretching a thin line or using two backdrop stands above the table at about 4-5 feet tall. Then attach balloon garland strips in blush and white, mixing 11-inch and 5-inch sizes so the canopy has volume. Finally, anchor the garland ends with weights or secure ties so it doesn’t sag, then add one small foil balloon near the center of the table for a focal point.
Hang garlands 10-12 inches above the table edge so they don’t block the top of chairs in photos.
Don’t pack balloons too tightly across the whole width; the table will look smaller.
12. Clear Balloon Tube With Floating Mini Balloons and a Bride Foil Tag
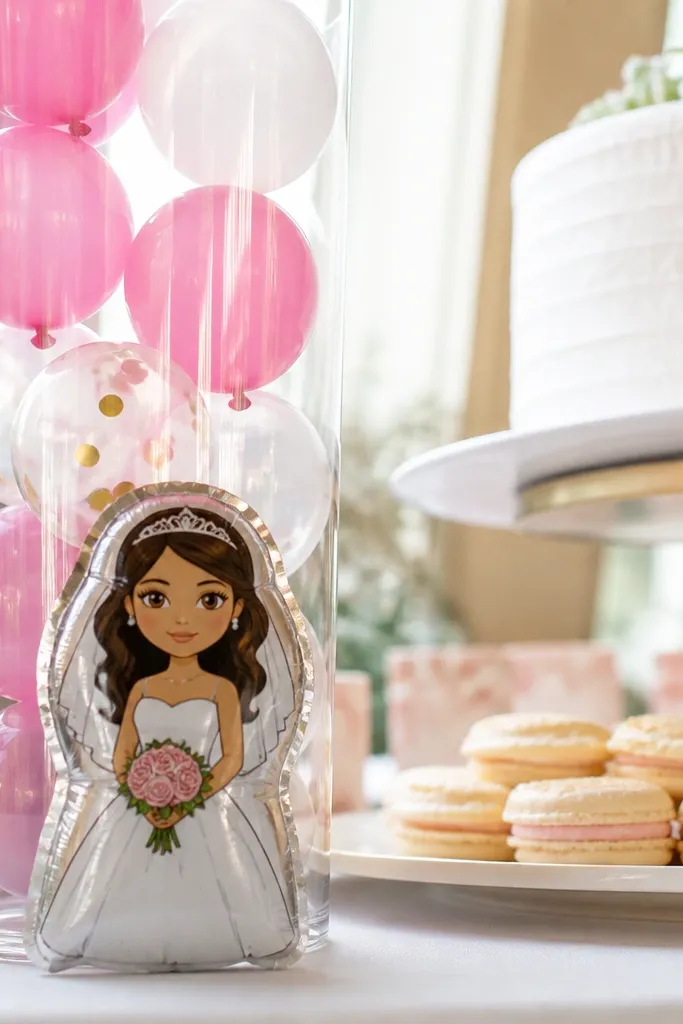
First, choose a clear balloon tube size that fits your table or corner — aim for about 18-24 inches tall for a strong photo presence. Then fill it with mini latex balloons in your palette, adding one foil tag balloon at the top so it reads in pictures. Finally, secure the tube to a base weight or a stand with a hidden ribbon wrap so it looks stable from every angle.
A clear tube is photogenic because it creates depth and motion — mini balloons float inside and catch light as people move. It looks modern, not childish, and it’s perfect for venues where you want something different from arches and garlands. Use it at receptions, photo corners, and dessert tables where you want a centerpiece without taking up floor space. Year-round, the clear tube works because it doesn’t clash with seasonal decor and the mini balloons can be color-matched.
Skip thisSkip dark-colored minis if the venue is dim; they disappear inside the tube in photos.
Quick tipUse mini balloons in matte finishes to reduce glare through the clear tube.
13. Acrylic-Style Balloon Frame With White Balloon Border and Chrome Corners
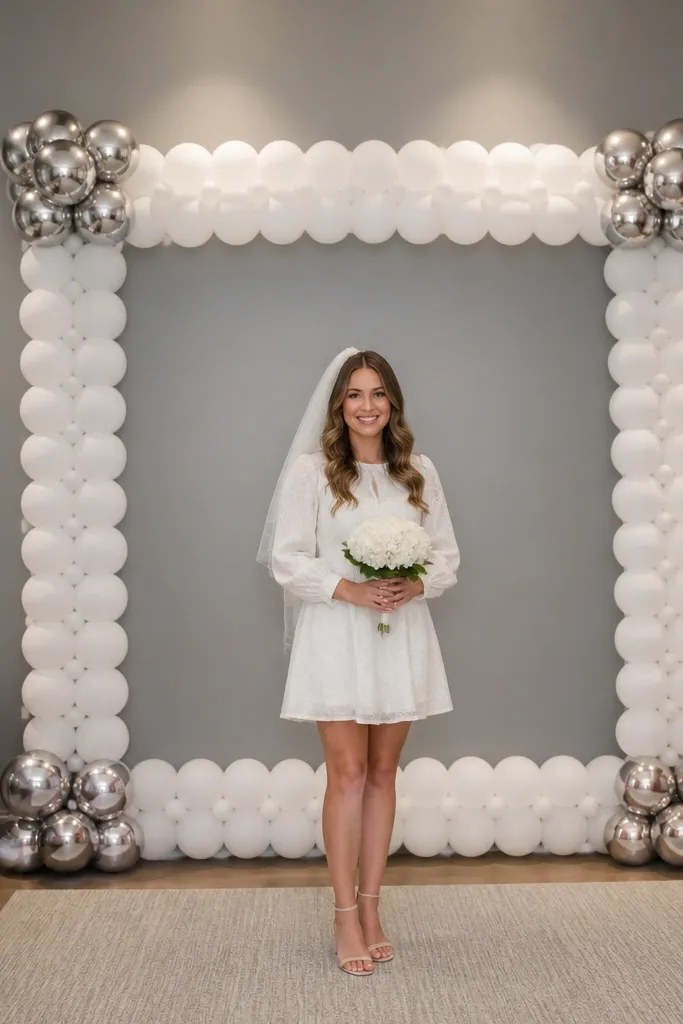
Start by building a rectangular white balloon border using two sizes: larger 11-inch balloons at the corners and smaller 5-inch balloons along the sides. Then place four chrome balloons at the corner points, keeping them slightly forward so they catch light. Finally, add a simple base stand behind the frame so it sits upright without wobble, then check that the border edges are symmetrical before adding any extra accessories.
This is the “clean luxury” look: a white border that feels like a frame, plus chrome corners that add sparkle where the eye lands. The chrome corners create a crisp geometry that holds up in both close-ups and wide shots, which is why it’s a favorite for bridal shower photo corners. It works best in indoor venues with neutral walls, but it also looks good outside against greenery. It’s year-round because white stays bright in spring and winter, and chrome adds glow in any season.
Skip thisDon’t add extra balloons inside the frame; it should stay clean so faces pop.
Quick tipMeasure the frame width to match your subject’s stance — a 3-foot wide frame looks good for most bridal shower photos.
14. Pastel Cloud Balloon Ceiling Drop for a Bridal Shower Entrance
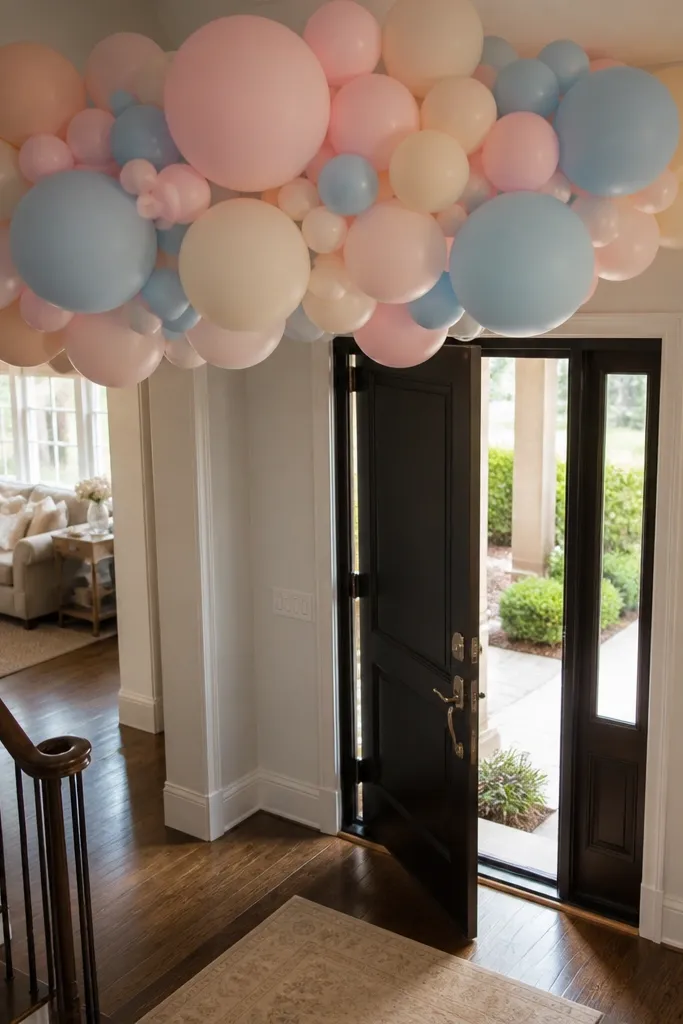
First, confirm you have a hanging point and measure height so the clusters sit about 7-8 feet off the ground. Then create 3 cloud clusters using 10-inch and 6-inch balloons with a small foil accent in one cluster only. Finally, hang them in a gentle arc across the entrance so photos look balanced from straight-on and from the side.
A ceiling drop turns a boring entrance into a photo moment without needing a huge wall. Cloud-style balloon clusters look soft and airy, and the pastel palette makes them feel seasonal without changing your whole theme. This setup is best where you can hang from a hook or ceiling — hotel ballrooms, covered patios, and rental spaces with clearance. It’s especially pretty in spring and summer, but it still works in winter if you choose warmer pastels like blush and caramel instead of icy blues.
Skip thisDon’t hang them too low; people’s heads block the clusters in photos.
Quick tipIf your venue has overhead lights, pick matte balloons to reduce glare on the cloud shapes.
15. Deep Plum + Blush Corner Cluster With a Big Star Foil
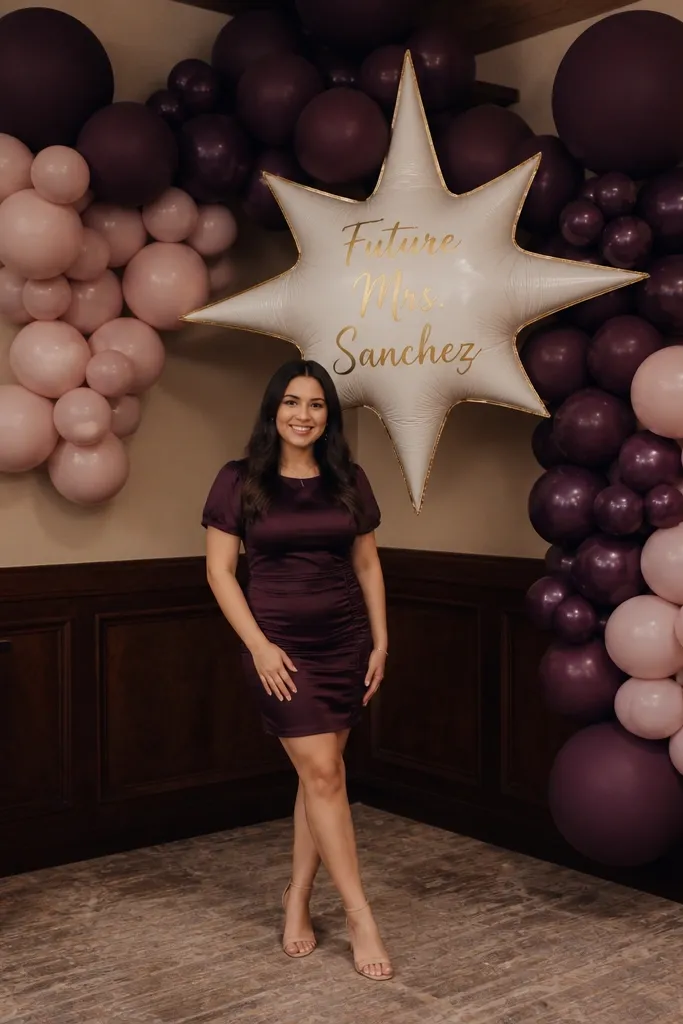
Corner clusters are a smart way to get a “full set” look without covering an entire wall. Deep plum adds drama and makes blush pop, and a big star foil gives you a clear focal point in pictures. This is a strong choice for fall and winter bridal showers, especially in venues with dark wood or neutral beige walls. It also works for evening events because plum holds contrast under warm lighting.
Start by choosing the corner where the bride-to-be will stand closest to the wall, and position the cluster so it’s visible from the main photo angle. Then build the cluster with 8-10 balloons, mixing 10-inch plum and 6-inch blush, and add one large star foil at the top. Finally, place the cluster on a concealed base so it sits at around shoulder-to-head height, and add one small ribbon tail to soften the bottom edge.
Keep plum balloons matte and blush balloons pearl for better photo texture.
Don’t use too many star balloons; one big star reads clean, multiple stars look messy.
16. White + Silver Balloon Floating Stack With a "Bride to Be" Banner Strip
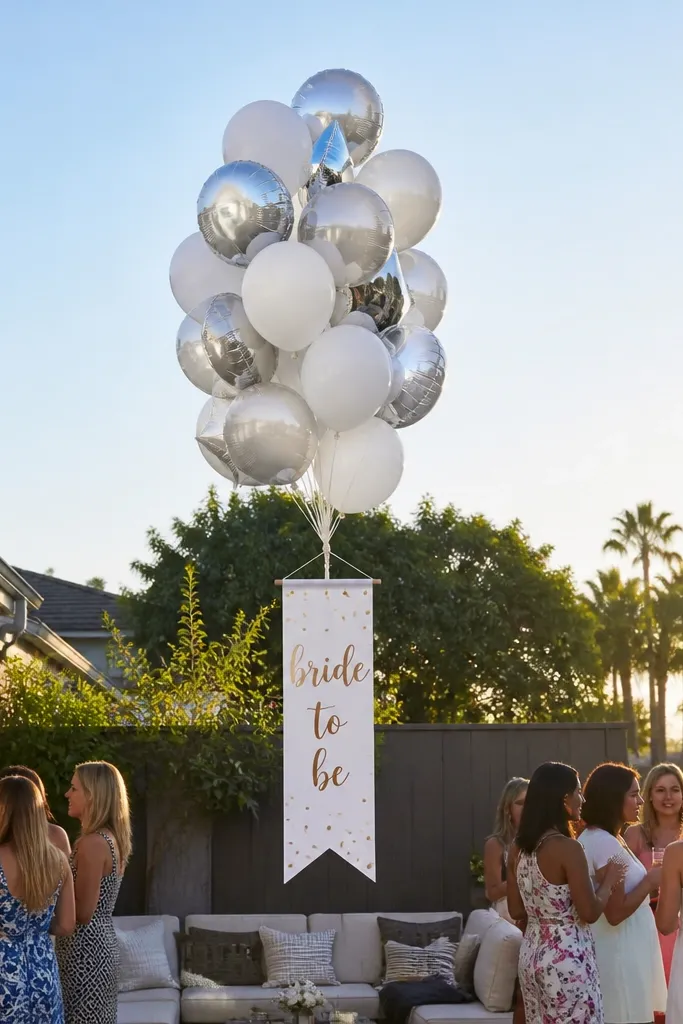
Floating stacks look airy and “event-like” without being heavy. The white and silver combo gives a crisp look that photographs cleanly, and the banner strip makes the message readable even from a distance. This is a great option for outdoor patios and indoor receptions where you want people to gather around the centerpiece. It’s year-round because silver stays bright in winter and doesn’t feel out of place in summer.
First, build a floating stack using a 3-tier cluster: bottom tier with larger balloons, middle tier slightly smaller, top tier with the foil message or banner balloon. Then attach a banner strip (thin ribbon or balloon banner) across the front so the text sits at chest height for photos. Finally, secure the base with a weight and keep the stack centered so it doesn’t drift toward one side.
Hang the banner so it’s slightly curved, not perfectly straight; it looks more natural in photos.
Avoid banner text that’s too high; it gets cut off in most phone photos.
17. Gold Leaf Look Balloon Garland With Champagne Metallic Micro-Accents
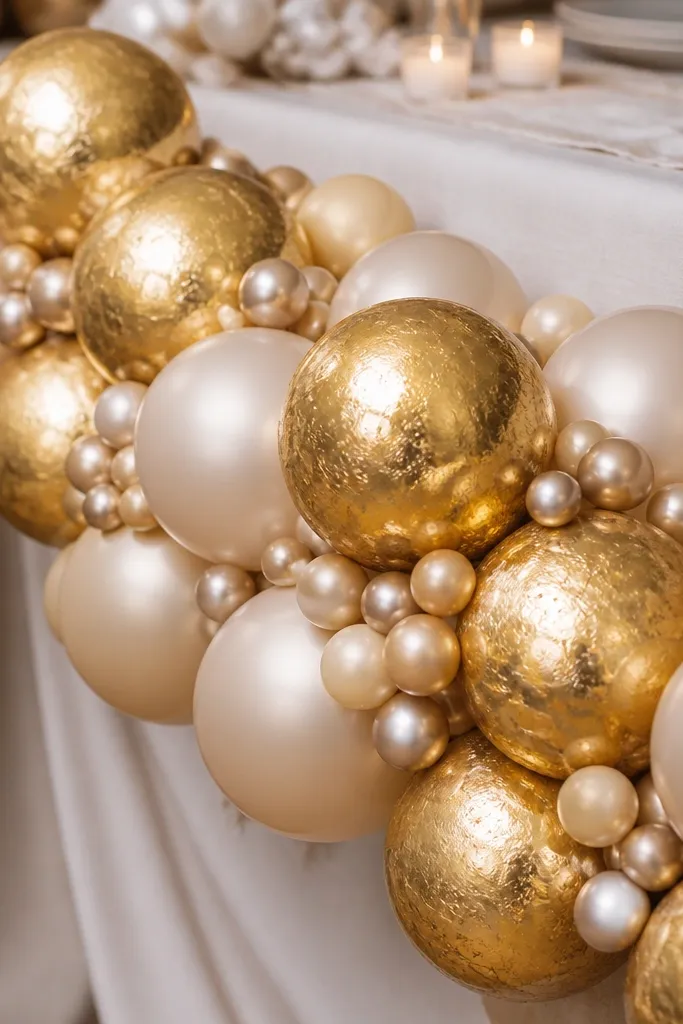
Start by building a garland base strip with white and champagne balloons as your main volume. Then add gold metallic leaf accents at intervals — corners and center are the places that show up in photos. Finally, tuck in a few micro foil balloons (small stars or hearts) so the garland sparkles without becoming busy.
This idea is for when you want “fancy” without going full theme. The gold leaf look (achieved with gold metallic balloons and leaf-shaped accents) adds shape and shine, while champagne metallic micro-accents fill the gaps so it doesn’t look sparse. It’s ideal for bridal showers with neutral tablescapes, because the garland adds texture behind the gift table or dessert table. It stays pretty through the year because gold and champagne work in both warm and cool lighting.
Skip thisDon’t add too many leaf accents; three clusters per side looks intentional.
Quick tipUse a single gold tone across the whole garland; mixing gold hues looks muddy.
18. Blush Balloon Wall With 3D Flower-Look Center and Small Hanging Tags
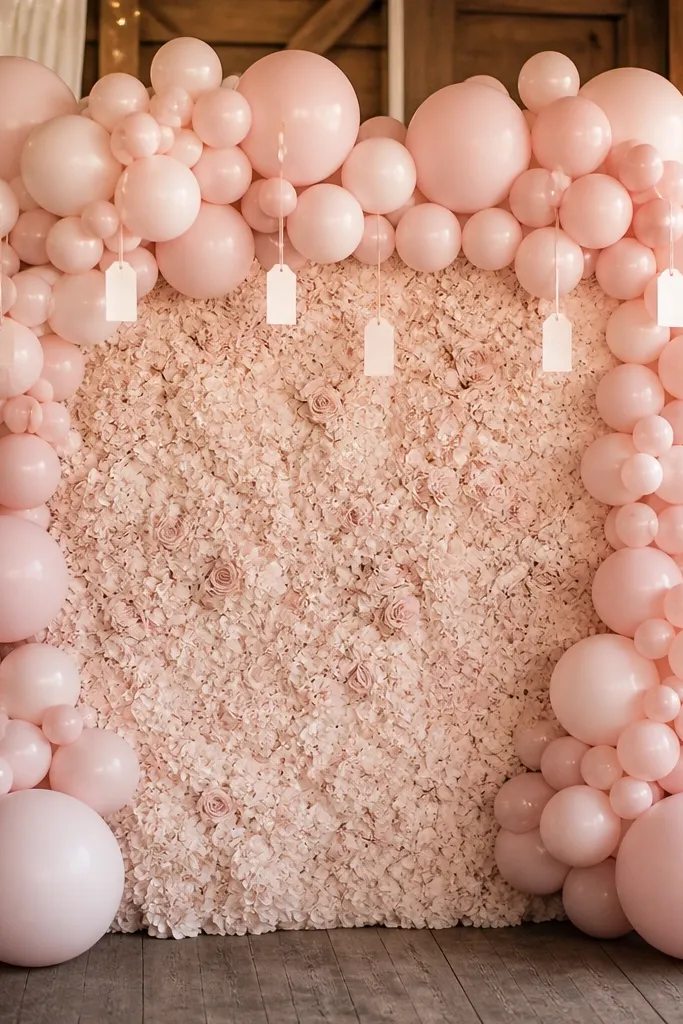
A blush balloon wall is classic, but the 3D flower-look center makes it feel like decor, not a wall of balloons. Hanging tags add a subtle touch that moves when people walk by, which makes photos look less static. This is a great choice for bridal shower gift openings where you want a strong backdrop for group shots. It’s also year-round because blush is forgiving and the flower center adds dimension in both daylight and evening indoor lighting.
First, build a balloon wall panel with blush balloons in two sizes, leaving controlled gaps so it doesn’t look flat. Then create the 3D flower-look center using a layered balloon rosette or balloon flower kit placed at eye level. Finally, add 4-6 small hanging tags from the top of the center panel, keeping them short enough to stay out of the way of faces.
Use pearl blush balloons for the outer wall and matte blush for the rosette center so the flower pops.
Skip long hanging ribbons; they tangle and get caught in hair during photos.
19. Rose Gold Chrome Mini Balloon Grid With a Center Photo Prop

A mini balloon grid looks modern and clean, like a photo set wall without the heavy balloon wall chaos. Rose gold chrome gives you that reflective sparkle, and the center photo prop keeps the composition from looking like a pattern. This works best indoors in spaces with good lighting and a controlled background. Year-round, the grid stays photogenic because it’s structured, and chrome accents make it shine in both spring daylight and winter indoor lighting.
Start with a grid frame or balloon grid kit, then attach mini balloons (typically 5-inch) in a tight pattern. Place rose gold chrome as the dominant color, and use one contrasting mini balloon color (white or blush) only in a small ring around the center. Finally, add a center photo prop balloon or signage element so people know where to stand for the best shot.
Keep the grid size to about 3x4 feet so it fits phone framing without looking too tall.
Don’t cover the whole grid with multiple colors; the pattern will look messy instead of chic.
20. Matte Sage and White Balloon Backdrop With a Gold Bow Banner
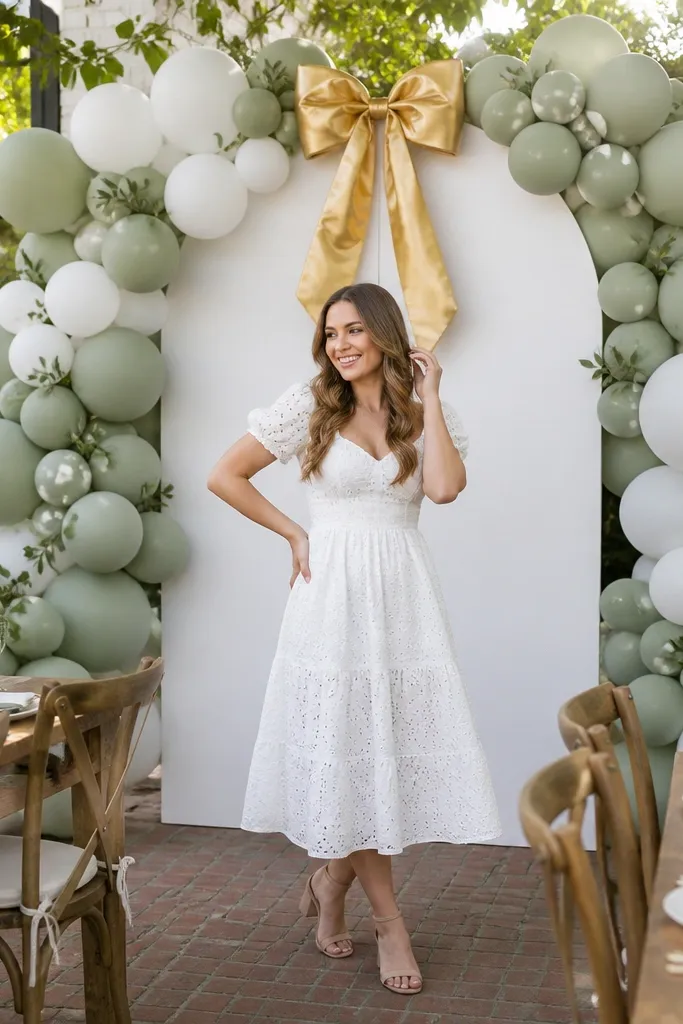
Sage is the calm, grown-up alternative to blush, and it photographs beautifully because it’s softer than green and warmer than icy tones. Pair matte sage with white balloons and add a gold bow banner for a clear focal point. This is a great option for bridal showers that lean rustic-modern, like brunches, garden parties, or farmhouse venues. It’s year-round since sage looks good in spring and summer outdoors and still feels cozy in fall and winter with warm bulbs.
First, build a vertical balloon backdrop panel using alternating matte sage and white balloons in two sizes. Then add a gold bow banner centered above where the bride-to-be stands, keeping the banner at eye level for readable photos. Finally, add a small balloon cluster at the bottom corners to frame the panel and hide the stand hardware.
Match the gold tone to your table decor — champagne gold looks better than bright yellow gold for balloons.
Skip bright mint; it can look too cool and wash out under warm indoor lighting.



