
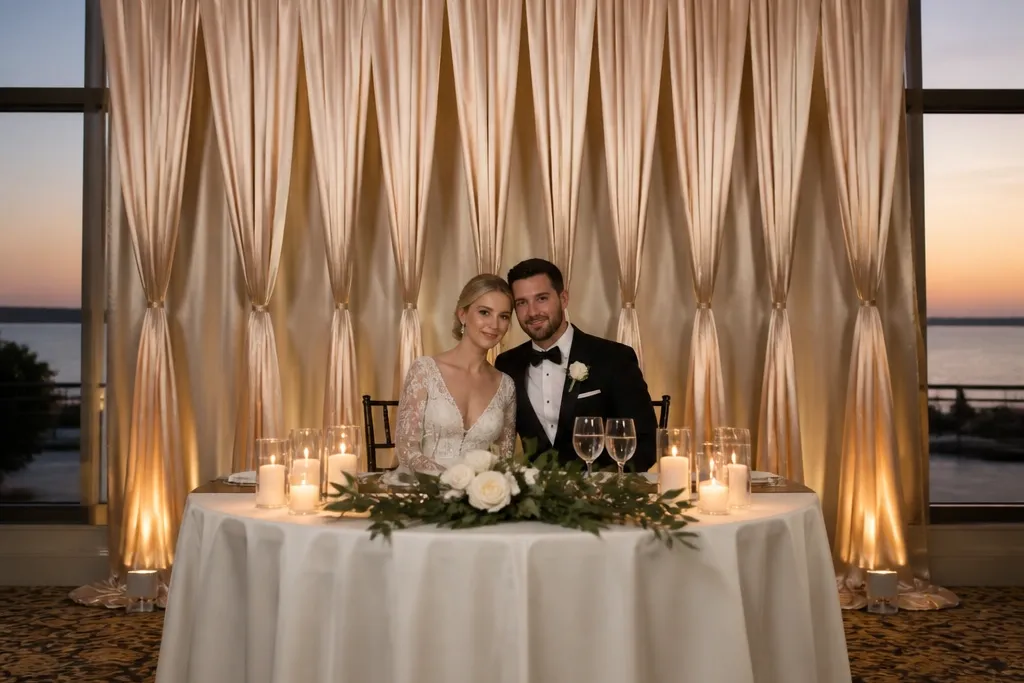
1. Champagne satin drape with a centered fabric knot
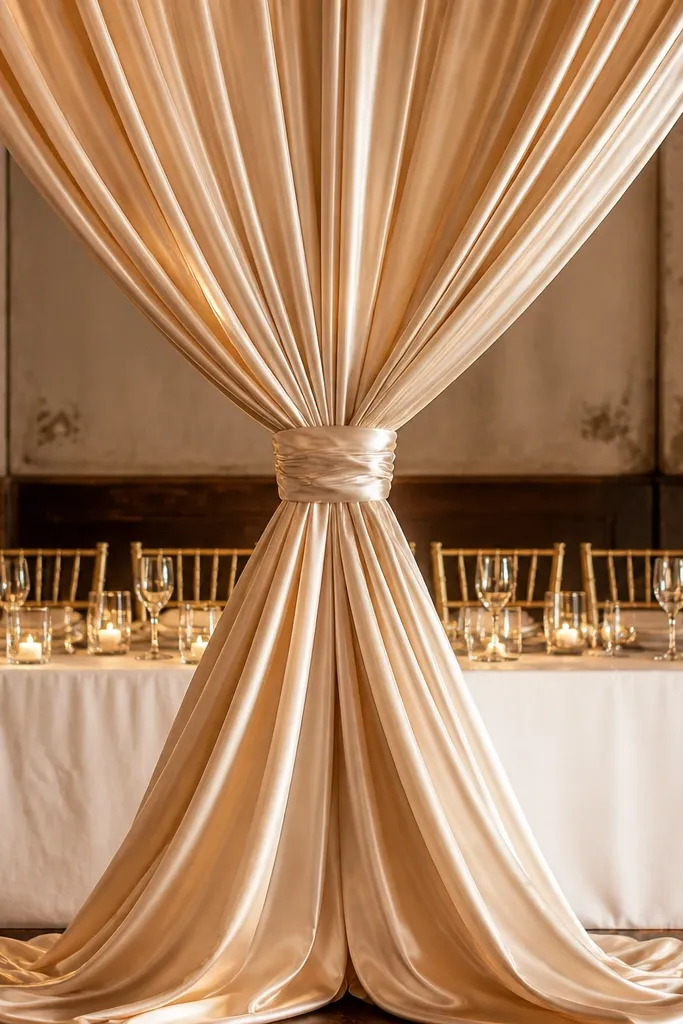
This one looks expensive because satin catches light in a soft way and the knot creates a built-in focal point. The backdrop reads clean from both sides, which matters when guests take photos from angles you can’t control. It also hides small venue flaws like scuffed walls because the fabric covers edge-to-edge. If you want a romantic “wrapped gift” look without flowers, this is the fastest path.
Quick tipChoose satin with a slight weight so it falls in folds, not clingy sheets.
Start by installing a tension backdrop rod or hanging two curtain panels from a ceiling hook so there’s minimal sag. Then tie the center with a matching satin ribbon or cord so the knot sits at the height of the couple’s shoulders. Finally, add a small strip of greenery or a single flower cluster at the knot to keep it from looking too plain. For local sourcing, look for 10-12 ft curtain panels so you can cover a 6-8 ft table width without stretching too tight.
Skip thisDon’t use thin organza if your venue lighting is bright — it turns flat on camera.
2. Two-panel ivory linen with a slim macramé runner
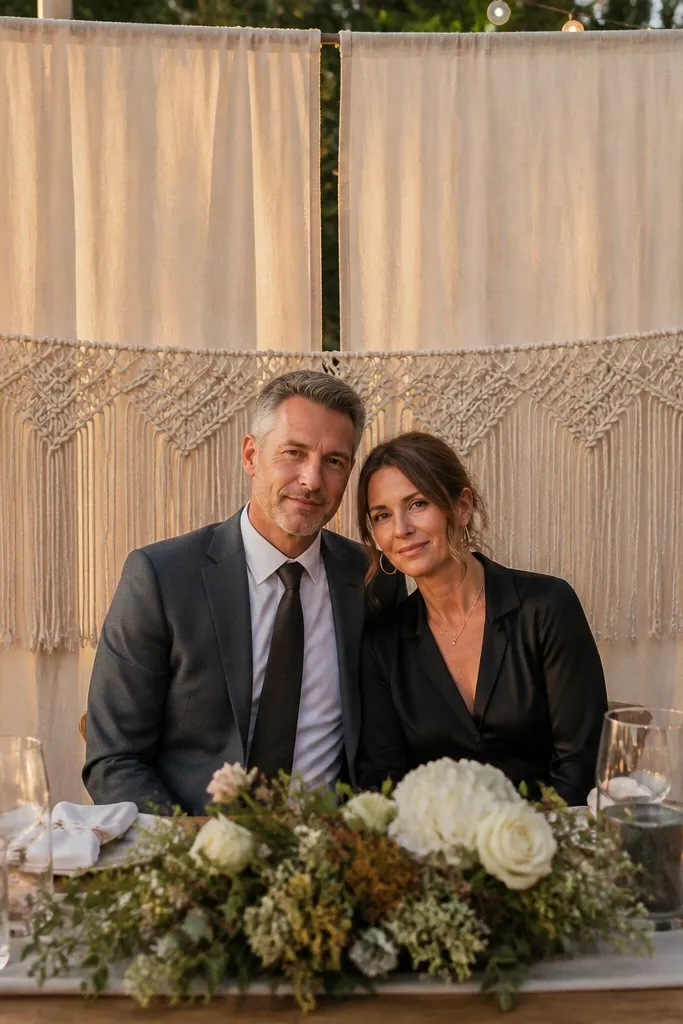
Linen gives you texture without adding bulk, and the macramé adds that handmade look that photographs like a styled set. This backdrop is forgiving because linen hides wrinkles better than glossy fabrics. It also works in outdoor ceremonies because it doesn’t look “too formal” under daylight. For couples who want a warm, modern vibe, this is a strong late-decision choice.
Quick tipUse clothespin clips or binder clips with black tape so the hardware disappears behind the linen.
First, hang two wide linen panels with a little overlap so you don’t see gaps between them. Then place a narrow macramé runner down the center line — keep it straight so the pattern frames both faces. Finally, secure the runner at the top and bottom with hidden clips so it doesn’t sway. Plan on 2 panels that each cover roughly 4 ft, then adjust based on your table width.
Skip thisSkip chunky macramé if your table is narrow — it can overwhelm and crop off in photos.
3. Freestanding white floral grid with foam blocks
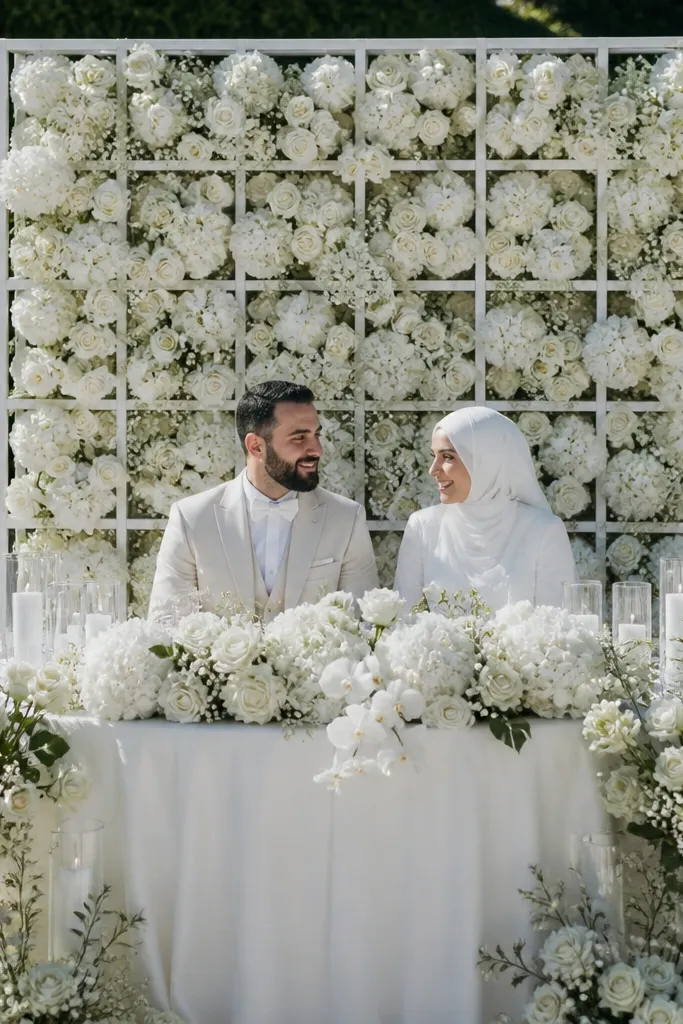
A grid panel looks clean and symmetrical, so it’s great when you need consistent photos all night. You get the “wall of flowers” effect without building an elaborate arch or full installation. White flowers also photograph bright and crisp, which helps in both indoor and outdoor lighting. This is a smart move when you want a statement background but can’t commit to a full floral arch setup.
Start by renting or buying a lightweight floral grid panel that matches your table width, usually 4x6 ft or similar. Then fill it with pre-soaked floral foam blocks or grid-friendly oasis squares to hold stems in place. Finally, use a tight palette like white roses plus small baby’s breath or white spray chrysanthemums to avoid a messy look. Keep the top edge even so the background doesn’t look lopsided in photos.
Cut stems to different lengths on purpose — the slight height variation makes the grid look fuller instead of flat.
Don’t mix too many flower types; a grid looks best with 2-3 main textures.
4. Greenery + blush rose half-moon wall (no full arch)
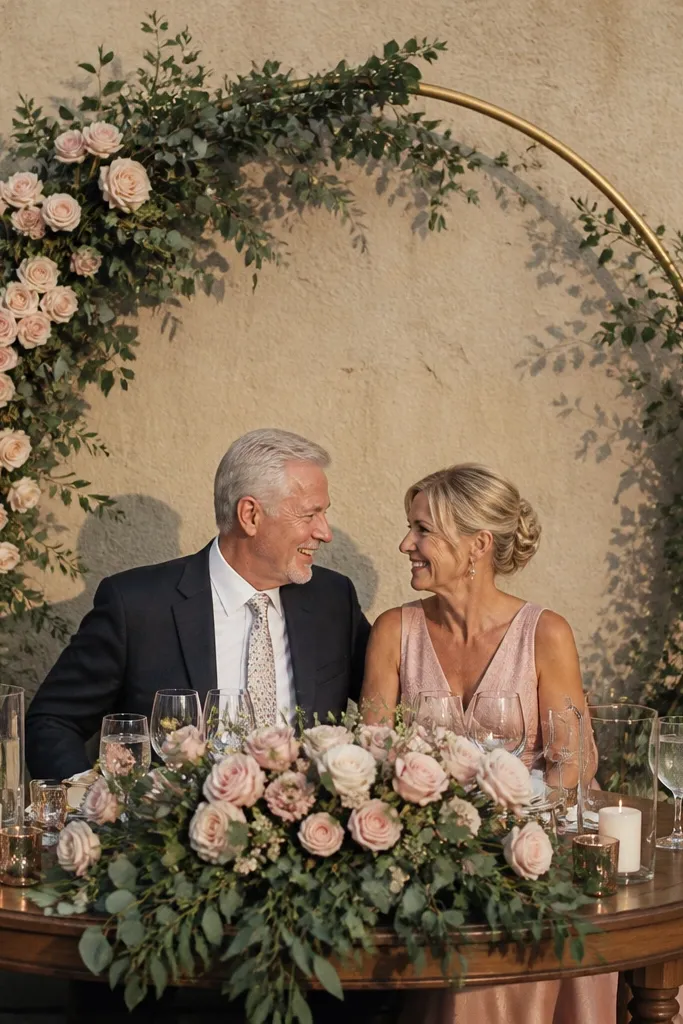
A half-moon wall frames the couple without the bulk of a full arch, so it’s faster and easier to transport. The shape reads clearly in photos because it creates a curved boundary behind heads. Blush roses add softness, while greenery keeps the palette grounded. If your venue has strong light overhead, this shape also avoids the “flat rectangle” problem.
Start by forming a half-moon frame using a flexible wire ring or a pre-made half-circle foam base. Then attach greenery first, covering the perimeter and filling inward so the center looks lush. Finally, place blush rose clusters at the center and two slightly lower points for balance. Aim for a width that covers the space from one chair to the other, usually around 5-7 ft.
Use thicker greenery pieces on the outer curve so the silhouette stays defined from far away.
Don’t leave the center bare — the camera will show it instantly.
5. Mirror pane curtain using small vanity mirrors
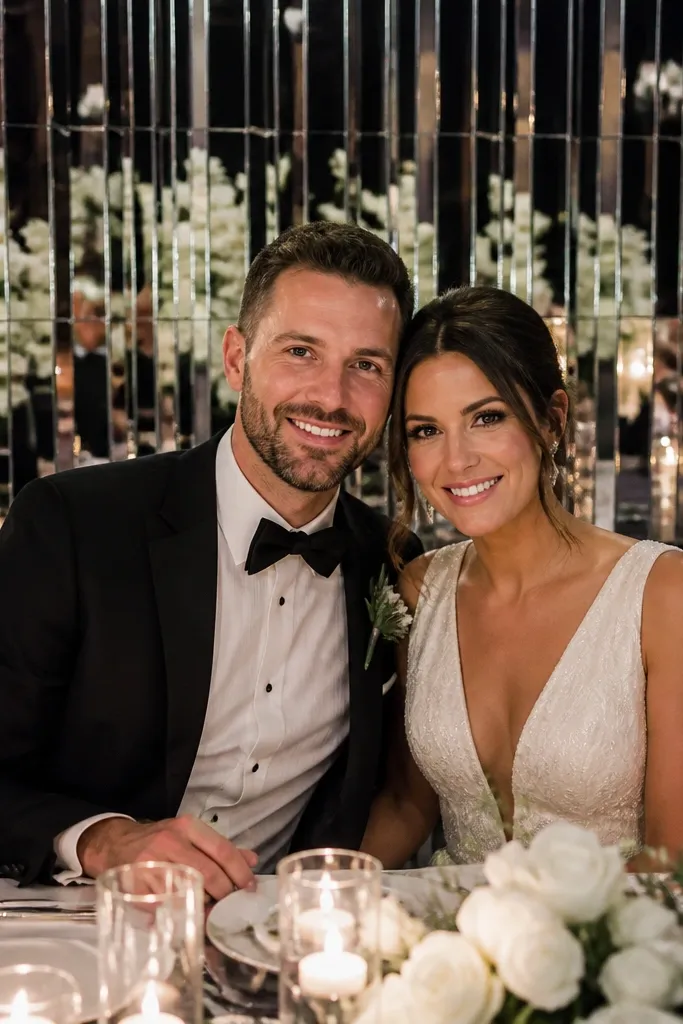
Mirrors make the background do real work — they bounce light back toward the couple and make the space feel brighter in photos. A mirror pane curtain also looks modern and clean, with lots of glints that read as “sparkle” without adding a million lights. It’s especially strong in dim venues where flowers alone can look heavy and dark. If you want a high-impact look with minimal setup, this is one of the fastest.
Start by buying or renting 12-20 small vanity mirrors with flat backs. Then hang them in two or three vertical rows using fishing line or mirror clips, keeping the seams tight so it reads like one surface. Finally, add a thin strip of greenery or a single flower garland along the bottom edge so it doesn’t look like a random photo prop. For a standard sweetheart table, plan a 4-6 ft wide mirror curtain.
Angle the mirrors slightly downward so reflections land behind the couple, not on faces.
Avoid large, loose hanging mirrors that swing — motion turns the look into glare.
6. Curtain of warm white fairy lights with a sheer overlay
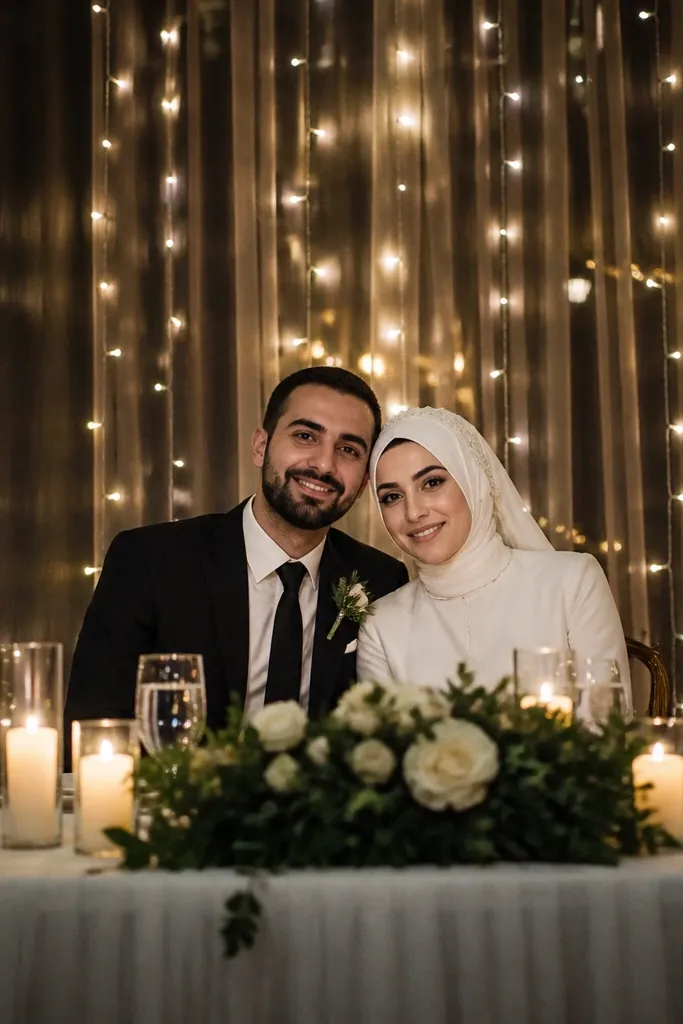
This is the “camera glow” option. Warm white fairy lights create depth even if you don’t have a ton of flowers, and the sheer overlay softens hotspots so it looks romantic, not harsh. It’s also quick because lights are the structure — you’re building atmosphere, not engineering a floral sculpture. In evening photos, it makes skin tones look better and keeps the background flattering.
Quick tipChoose warm white (2700K) fairy lights. Cool white looks blue behind skin in many venues.
Start by hanging two sheer panels from a tension rod, then place fairy lights behind them so the lights don’t show their cords. Then distribute the lights evenly across the width and secure the cord with zip ties or clips so it doesn’t slip. Finally, add a small floral garland only at the center to guide the eye. Use an extension cord plan and tape it down so nobody trips during dinner.
Skip thisDon’t crank brightness to the max — over-bright lights blow out the background.
7. White balloon garland wall with a gold ribbon sweep
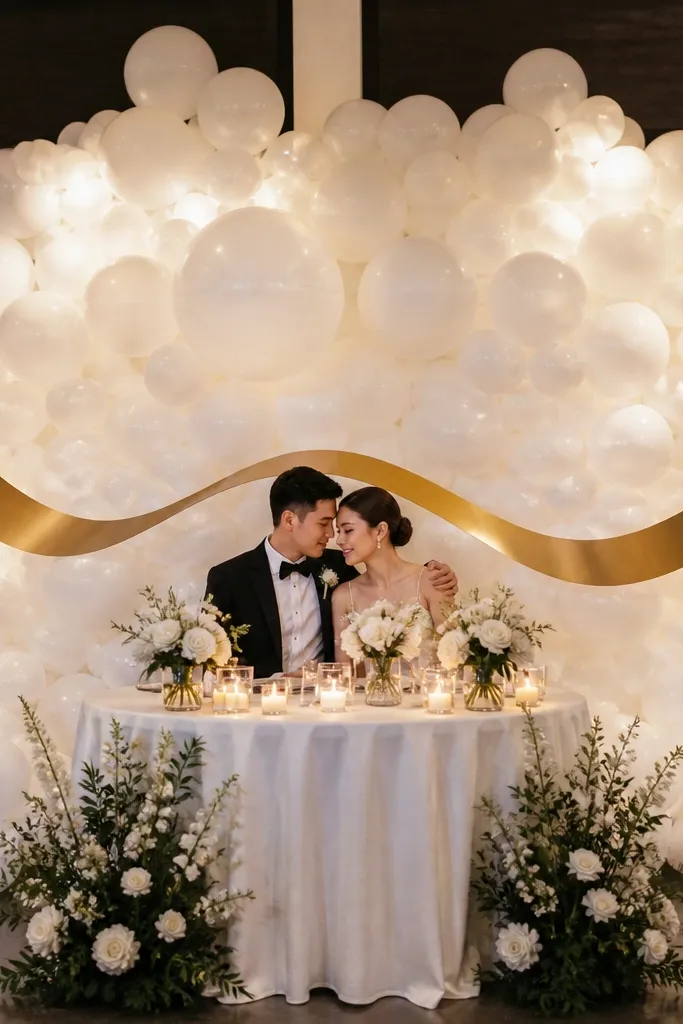
Balloon walls photograph like a soft cloud, and the shape fills the space behind the couple fast. White balloons read clean and bridal, while a gold ribbon sweep adds motion and a classy finishing line. This is a solid choice when you need instant impact and you’re working with a tight build window. The best part is that it hides awkward corners and uneven walls because the balloons cover everything.
Quick tipUse matte white balloons if you have strong overhead lights; glossy ones can glare.
Start by building a balloon garland strip with 3-4 sizes of white balloons, then anchor it to a backdrop stand or to wall hooks. Then sweep a long gold satin ribbon across the center, tying it at two points so it forms a gentle curve behind the couple. Finally, add one small cluster of larger balloons at the top-center for a clear focal point. Plan for a width that matches your table plus extra — usually 6-8 ft.
Skip thisAvoid mixing colors unless you repeat them in the table centerpiece — random balloon colors look messy.
8. Minimalist black frame with cream fabric panels
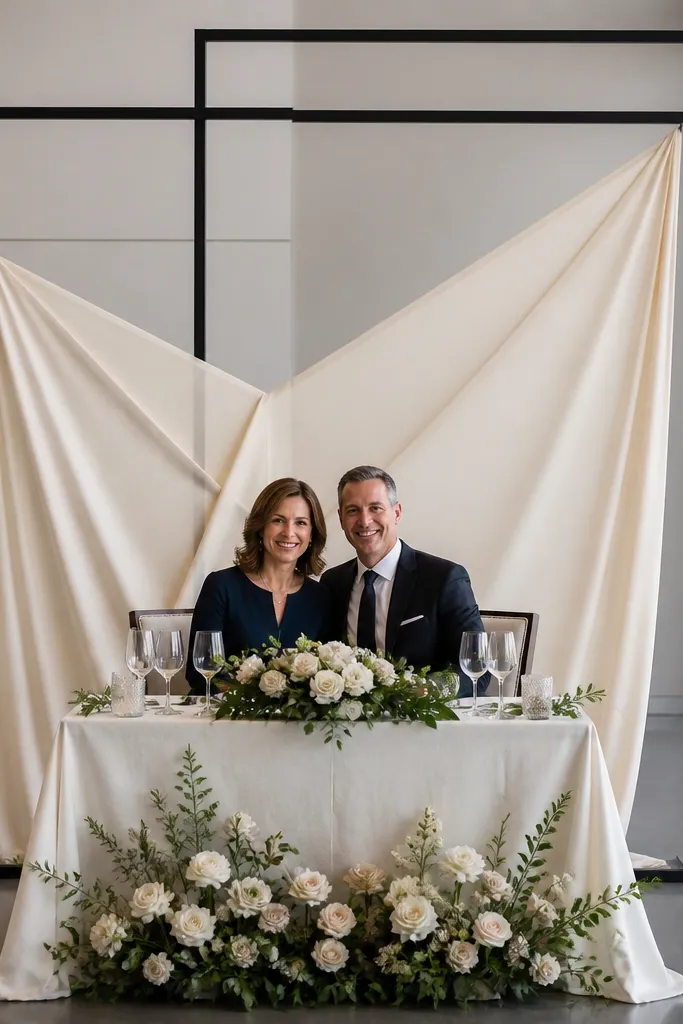
A slim black frame gives you clean geometry, which looks sharp on camera and keeps the decor from feeling chaotic. Cream fabric panels soften the contrast and keep it romantic instead of harsh. This is a great option for modern weddings, courthouse vibes, and venues with neutral walls where you want a graphic look. It also helps if your venue has busy background elements; the frame makes the photo feel intentional.
Quick tipUse fabric clips instead of pins — pins create holes that show through thin panels on camera.
Start by renting a slim backdrop frame or assembling a lightweight rectangular frame with clamps. Then hang two cream panels inside the frame so the fabric edge aligns with the frame edges. Finally, add a single statement element centered on the lower half, like a low floral row or a lantern, so it reads balanced. Measure your table width first and build the frame so it covers the couple from shoulder to shoulder.
Skip thisDon’t choose thick upholstery fabric. It looks heavy and can look wrinkled without steaming.
9. 3D paper flower wall with a single color gradient
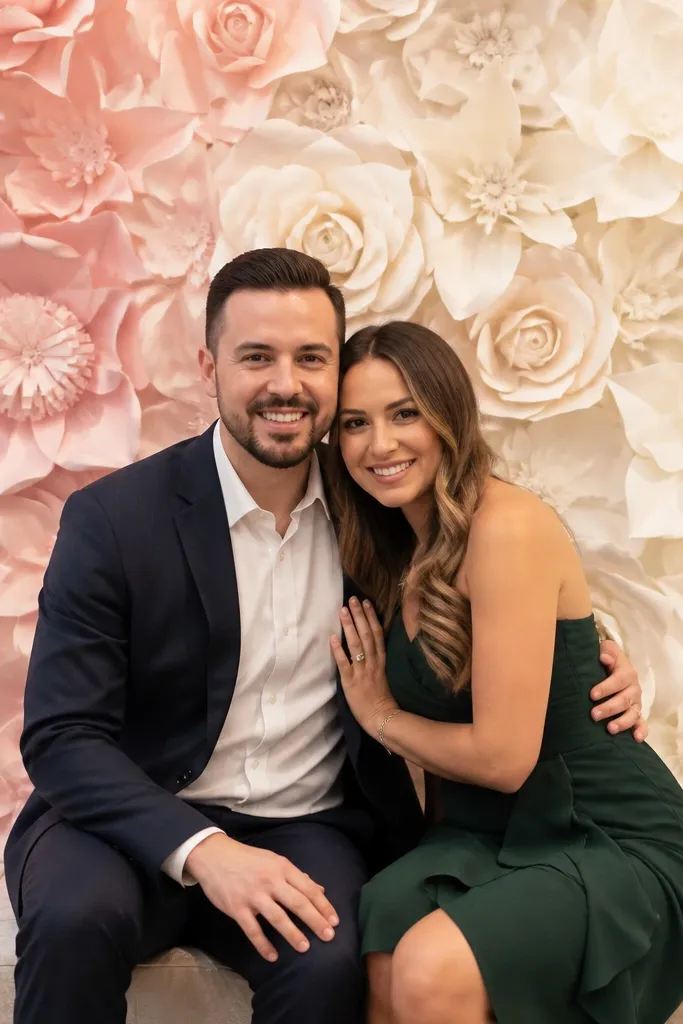
Paper flowers can look shockingly good if you treat them like a set, not craft projects. A gradient — like blush fading to ivory — creates depth and keeps the wall from looking flat. This option is also budget-friendly and fast because you’re placing pre-made pieces in a planned layout. It’s ideal for indoor venues with controlled lighting where the paper texture won’t glare.
Quick tipAdd a thin strip of matte greenery at the bottom edge so the wall looks anchored, not floating.
Start by buying paper flower panels or assembling individual large flowers on a lightweight board system. Then plan a gradient layout: darker blush at the bottom and lighter ivory toward the top, so the background looks dimensional behind faces. Finally, place three larger blooms at eye level and fill gaps with smaller flowers or paper leaves. For photos, cover at least a 4-6 ft width so it fills the frame behind the couple.
Skip thisAvoid glossy paper flowers; they reflect light and can turn shiny in photos.
10. Garden gate backdrop with faux vines and greenery garland
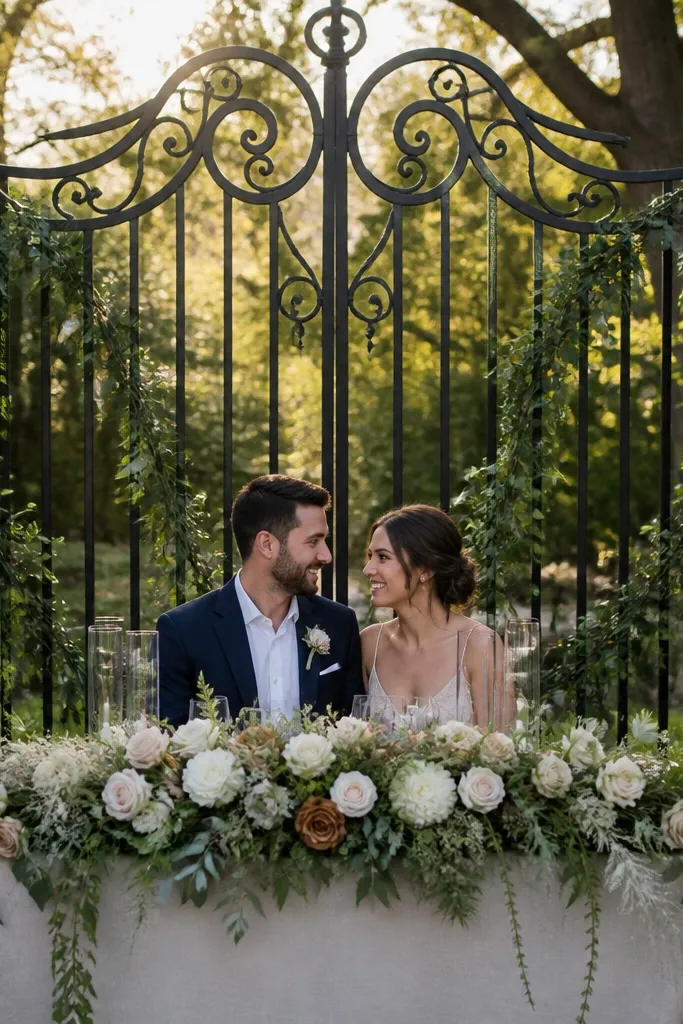
A garden gate gives you depth and storytelling. The vertical bars create natural lines that frame the couple, and the faux vines add texture without the mess of live plants. This looks great in outdoor receptions and in venues with patios, because it matches the setting instead of competing with it. If you want “romantic yard” photos in a hurry, this is a strong bet.
Quick tipAnchor the base with sandbags or weights so the gate doesn’t wobble when guests move around.
Start by renting or buying a lightweight garden gate prop sized to your table area, usually around 4-6 ft tall. Then attach greenery garlands across the gate and let a few faux vines drape down slightly on the sides. Finally, add two small floral clusters at the center latch height so the focal point sits at chest level. Use zip ties on the backside so nothing slips during the reception.
Skip thisDon’t overstuff the gate with flowers. Too much turns it into a dense blob in photos.
11. White fabric backdrop with hanging tassel fringe on the bottom
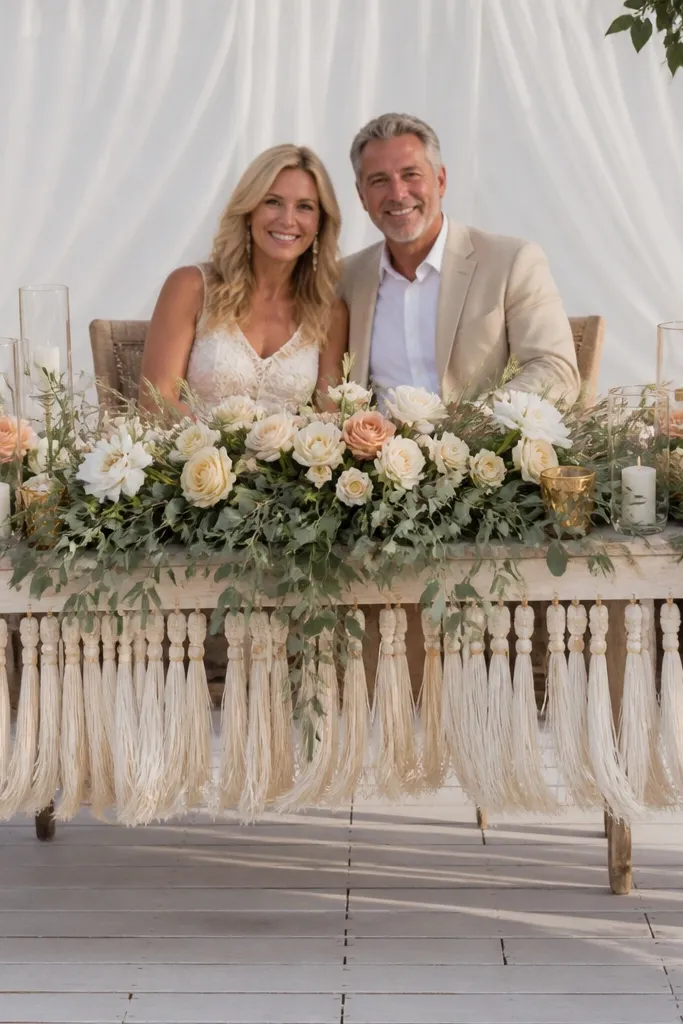
Tassel fringe adds movement and a “photo border” effect right where cameras cut off the lower part of the scene. The white fabric keeps it bridal, and the fringe gives texture that looks crisp in both flash and natural light. This works especially well if you’re placing the sweetheart table close to a wall, because the fringe creates separation from the background. It’s a clean way to look styled without a full floral build.
Quick tipUse matte white fringe. Shiny fringe can look harsh under flash.
Start by hanging a full-width white fabric panel behind the couple, using a tension rod or backdrop stand. Then attach tassel fringe along the bottom edge so it hangs 8-16 inches below the fabric, creating a soft frame. Finally, add a small center cluster or a single ribbon bow at the top center to guide the eye upward. Measure the table width and build the fabric width so there’s no visible edge gaps.
Skip thisAvoid letting the fringe touch chair backs. It can tangle and look messy in motion.
12. Tall lantern cluster with sheer ribbon backdrop behind
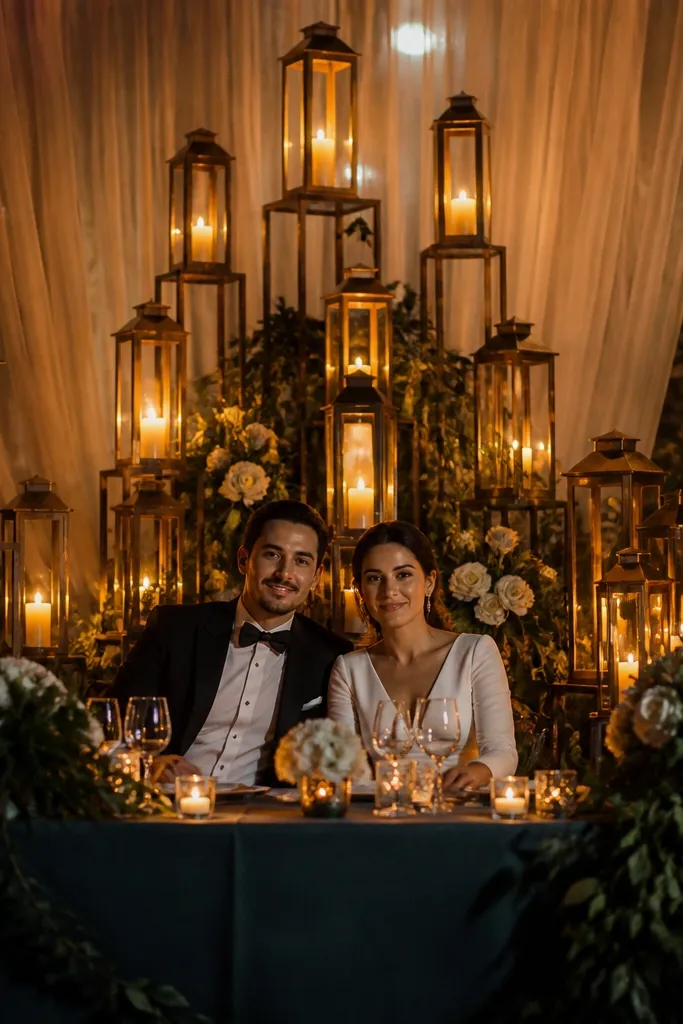
Lanterns look warm and cinematic, and they create vertical height that makes photos feel elevated without building an arch. Pair them with a sheer ribbon backdrop and you get softness behind faces plus a cozy glow at different heights. This is a great choice for fall and winter weddings, but it works year-round in evening receptions. If your venue lighting is dim, lanterns pull the whole scene together fast.
Quick tipChoose lanterns with frosted glass. Clear glass can create glare spots in flash photos.
Start by hanging a sheer ribbon backdrop behind the couple using a rod or two side hooks, creating a layered curtain effect. Then place 3-5 lanterns on the floor behind or beside the table, varying sizes so the glow isn’t perfectly uniform. Finally, tie a ribbon bow or small greenery band to the center of the ribbon backdrop so the eye stays on the couple. Use LED candles if you’re indoors or if venue rules require it.
Skip thisSkip placing lanterns too close to heads. Too much glow behind hair creates blown highlights.
13. Macramé + pampas plume wall with neutral palette
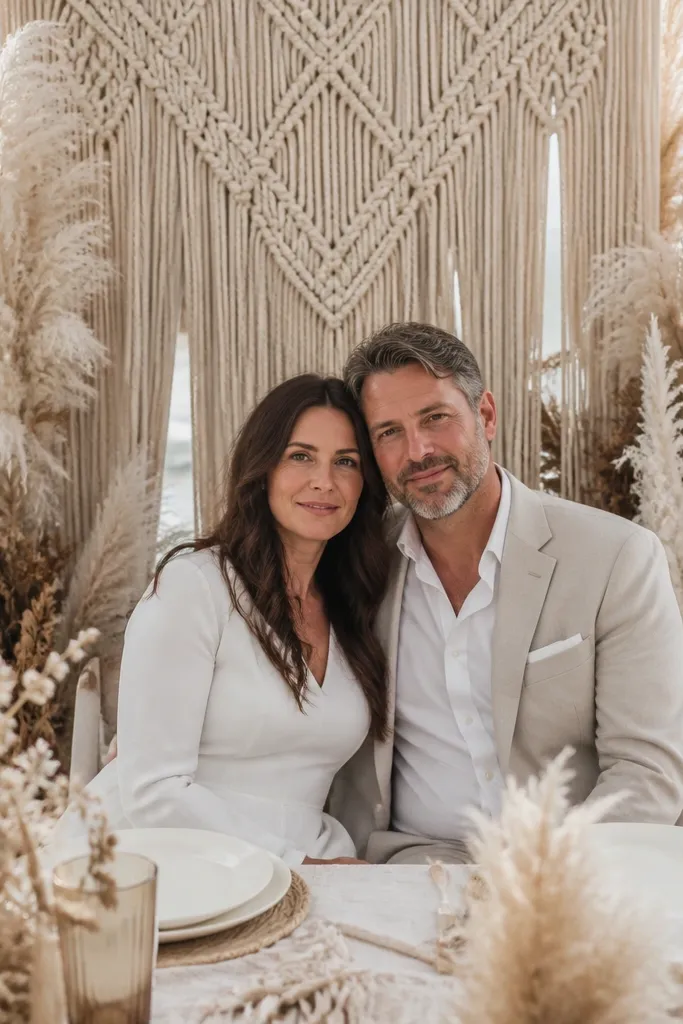
Pampas plumes bring height and airy texture, and macramé adds a handmade pattern that reads well in close-up wedding photos. Keep the palette neutral — cream, sand, and light tan — so the background doesn’t fight your florals. This is a strong option for boho-modern weddings and for venues with beige walls where you want texture instead of more color. It also looks good even when you’re not placing heavy centerpieces at the table.
Quick tipUse matte pampas plumes. Shiny or dyed plumes can look artificial under venue lights.
Start by hanging a large macramé wall piece behind the sweetheart table, centered so it frames the couple. Then attach pampas plumes around the macramé using floral wire or zip ties, focusing on three points: left, center, and right. Finally, add one small dried grass bunch at the bottom corners to balance the composition. Measure your table width and choose a macramé that covers at least that span.
Skip thisAvoid placing plumes too low. They can crowd the table and block hands and plates.
14. Florals on a tension backdrop frame with a clean top row
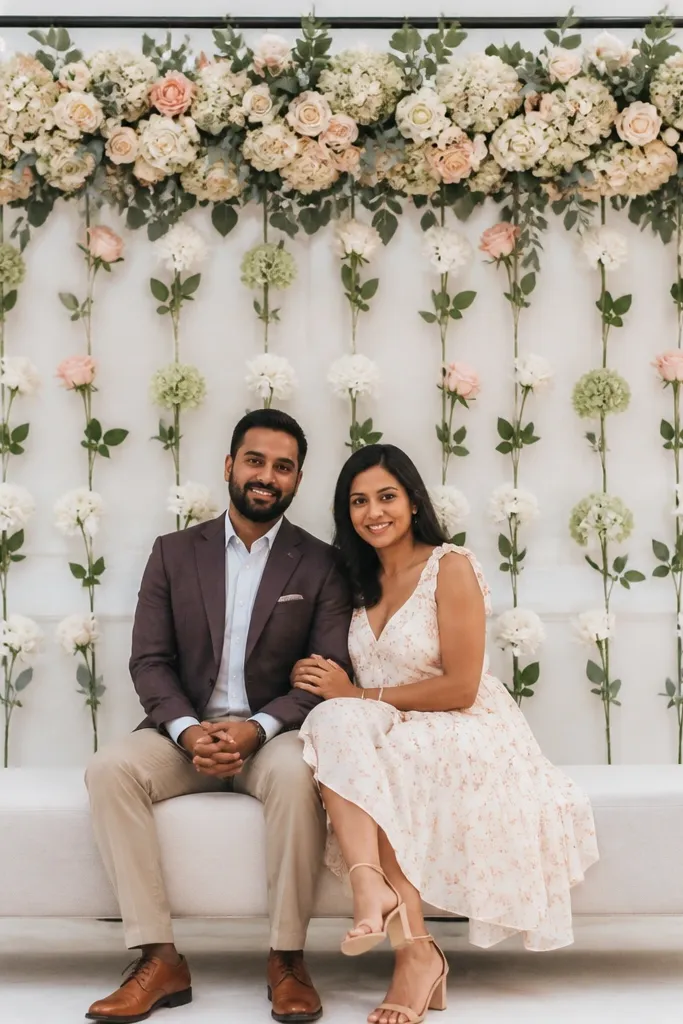
This is the “fast professional” look because the frame gives you straight edges and the floral placement becomes a simple grid. When you keep a clean top row, photos look intentional instead of like a last-minute bunch of stems. Choose a palette like white + blush + sage for softness, or deep burgundy + cream for drama. It’s great when you want full floral impact but you don’t have time for an arch build.
Quick tipCut a few stems shorter than you think. That prevents the floral tips from poking into faces in close photos.
Start by renting a tension backdrop frame sized to cover your table width plus 6-12 inches each side. Then attach floral foam panels or grid sections to the frame and start with the top row so everything lines up. Finally, fill downward with smaller stems and keep the center slightly fuller than the edges to avoid a flat look. Plan for 2-3 bundles of florals depending on your foam coverage and density.
Skip thisDon’t let florals spill wildly beyond the frame. It looks messy and hides the structure that makes it work.
15. Tulle cloud wall with a single satin ribbon cross
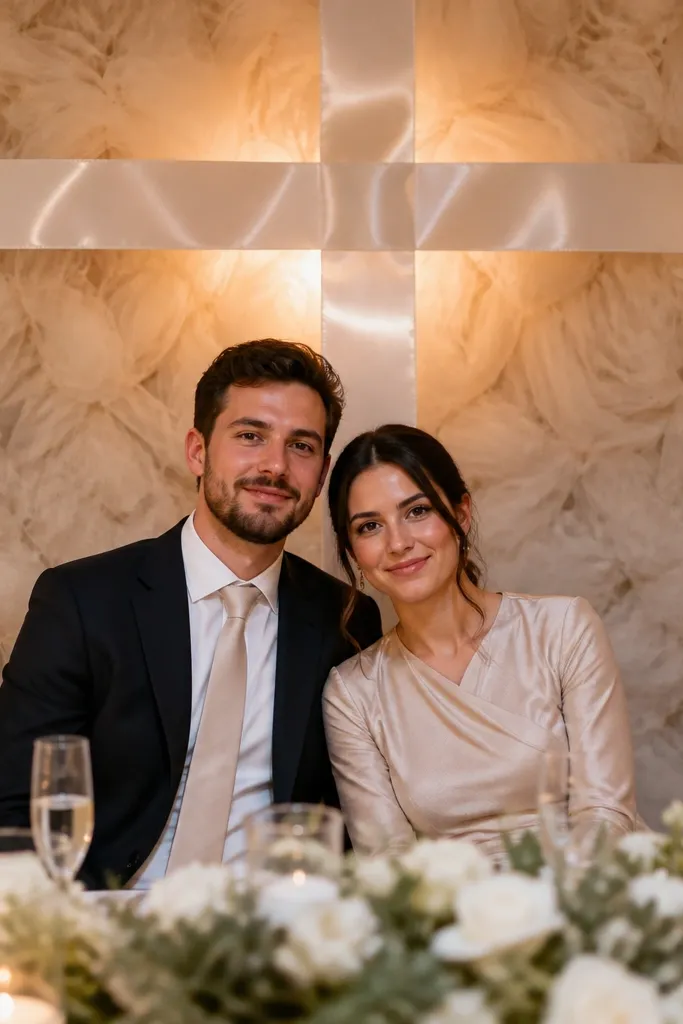
Tulle creates a soft cloud effect that photographs beautifully because it turns background clutter into blur. The satin ribbon cross gives you a clear graphic element that makes the whole thing look designed, not accidental. This works especially well for indoor receptions where you want a dreamy look without heavy flowers. If you want quick setup and maximum “wow” in photos, this is one of the best time-to-impact options.
Quick tipUse tulle that’s 108-120 inches wide per roll so you don’t get thin seams between panels.
Start by hanging a backdrop stand or rod and draping tulle in overlapping strips across the width, gathering lightly so it looks billowy. Then add a satin ribbon cross at mid-height, tying it to the stand so it stays straight in photos. Finally, place one small floral cluster at the center where the ribbon crosses to anchor the look. Choose a tulle color like ivory, blush, or pale champagne and keep it consistent across layers.
Skip thisAvoid mixing too many tulle colors. Two shades max looks styled; five shades looks like a craft table.



