
1. Linen backdrop with a single draped runner
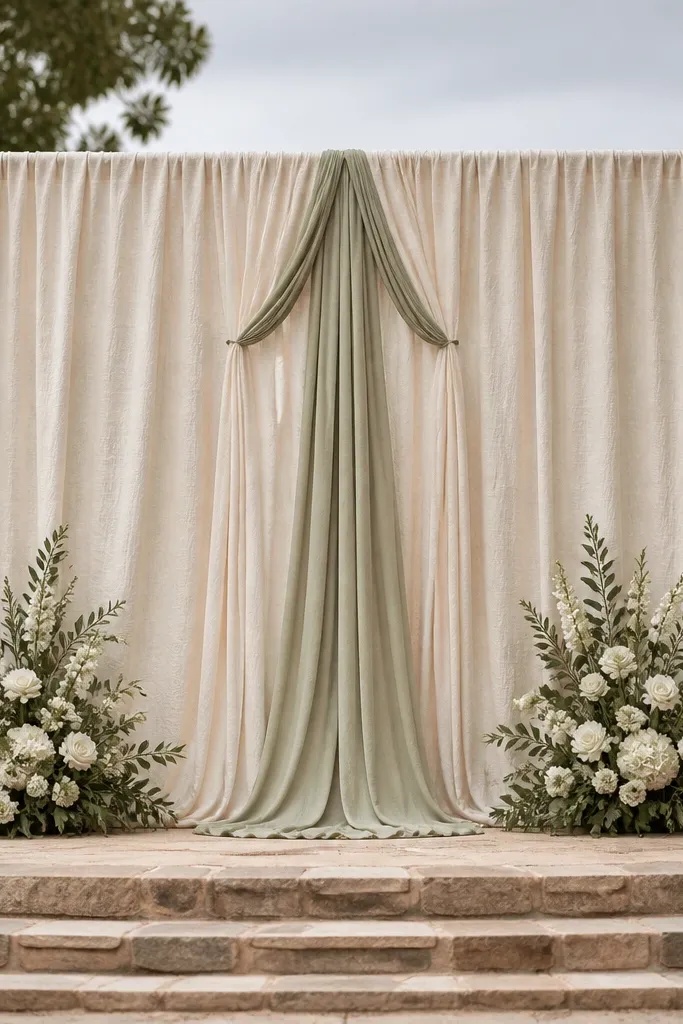
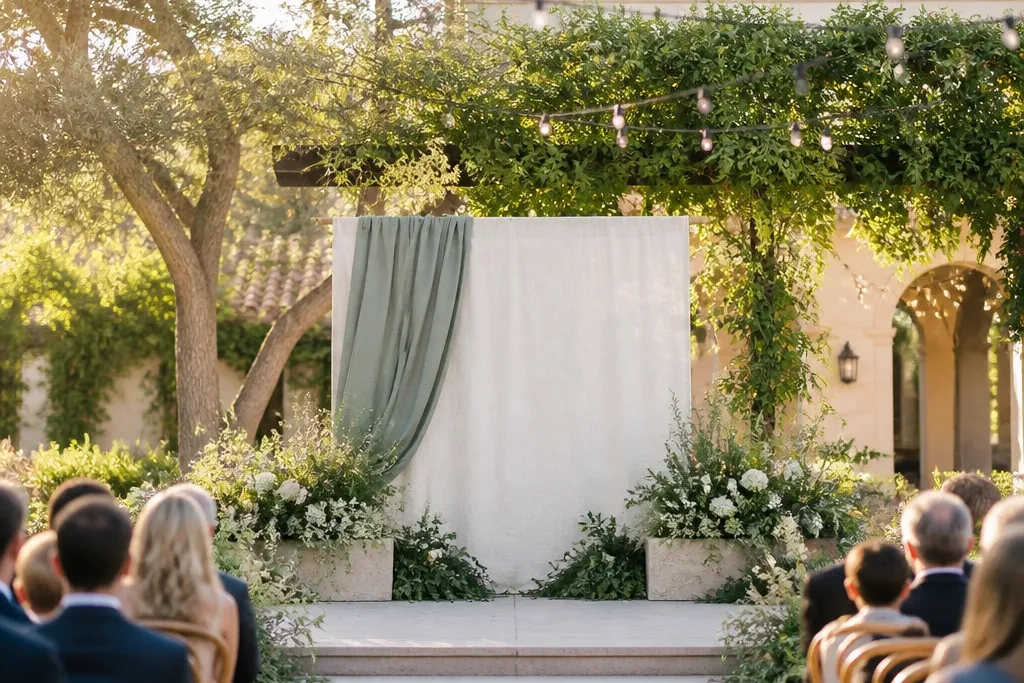
A linen backdrop looks expensive because it has natural folds and a matte finish that photographs well even in mixed lighting. Keep it simple: one main panel behind the couple and one draped runner down the center to create a clear focal point. This works for family friendly wedding stage decor because the fabric is soft, lightweight, and easy to control. Choose cream or ivory for a clean baseline, then add one accent color through greenery or a small sign frame. It’s also a smart option when you want a neutral stage that won’t clash with your ceremony florals.
Start by measuring your stage width and decide how much coverage you need behind the couple — aim for at least the center 6 to 10 feet. Hang the linen with removable clips or a tension rod if your venue allows it; otherwise use two weighted stands with a crossbar. Then add the draped runner: cut a long strip of linen, gather it lightly at the top, and let it fall straight down the center. Finally, place two low greenery clusters at the floor line to connect the backdrop to the stage edges. Budget-wise, linen yardage is usually cheaper than full floral walls, and setup takes about 60 to 90 minutes with a helper.
Press a steam cycle on the linen before setup so the folds look intentional, not wrinkled.
Avoid polyester “tablecloth” fabric that shines under spotlights and looks cheap on camera.
2. Freestanding photo-frame arch with greenery edges
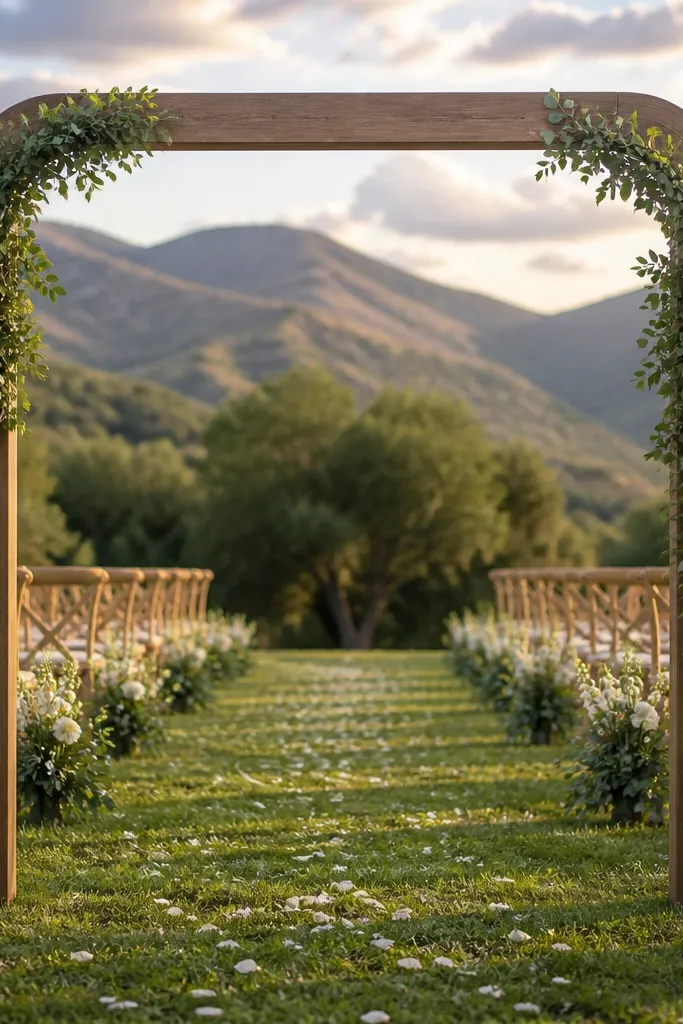
A freestanding frame arch gives you a defined “window” for ceremony photos without building a tall structure. The trick is to keep the frame low enough for kid safety while still reading as an arch in pictures — target around 6 to 7 feet tall. Add greenery only along the sides or corners so it’s lush but not heavy. This style is great for family friendly wedding stage decor because it creates structure while staying stable on the ground. It also works with almost any theme since the frame shape does the heavy lifting.
Start by choosing a frame style: a rectangle arch reads clean and modern, while a rounded arch feels softer. Build or rent a frame with a weighted base, then attach thin faux or fresh greenery stems using zip ties or floral wire. Place the frame centered behind where the couple will stand, leaving about 2 feet of clearance from stage furniture. Then add one small sign or monogram inside the frame for a focal point that doesn’t require tall flowers. Plan for 2 to 3 hours of setup if you’re assembling from pieces; it’s faster if you use a ready-made frame.
Use flexible greenery tips that can bend — they look natural and won’t pop off when someone bumps the frame.
Don’t add long cascading vines that can snag hands or drift into wind.
3. Three matching floor lanterns with greenery bands
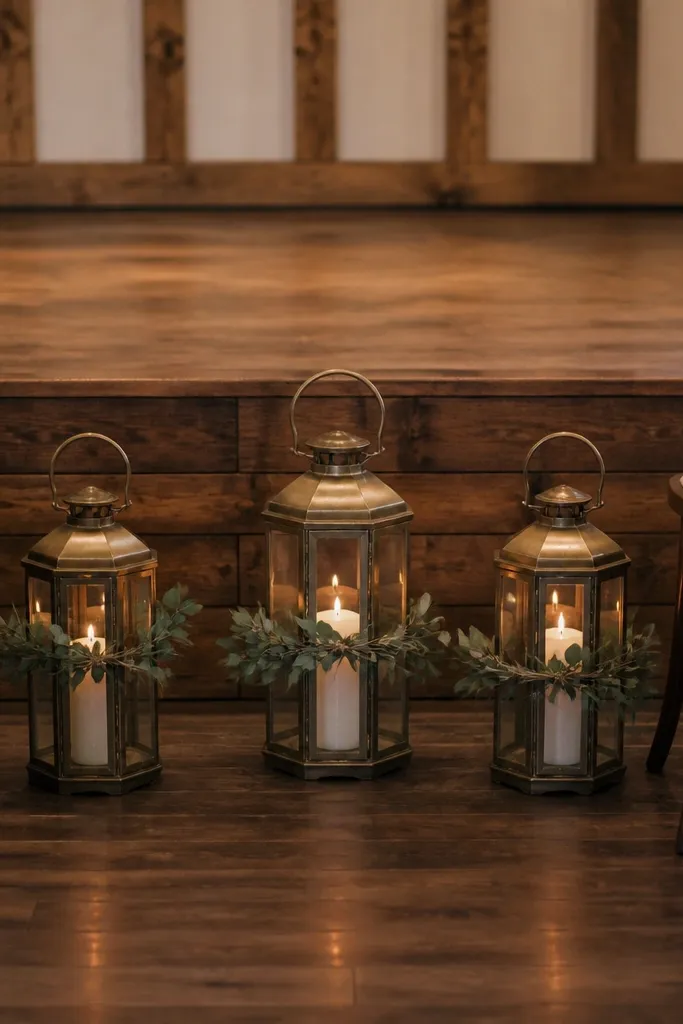
Lantern clusters add charm fast and they’re naturally family friendly wedding stage decor because they’re floor-based and rounded. Pick three matching lanterns — same color metal and same glass shape — and wrap each with a simple greenery band. The band creates a unified look while keeping the lanterns the real star. For photos, place them in a gentle triangle: left, center, right, aligned with the couple’s standing spot. If you want a romantic vibe without tall flower walls, lanterns do it.
Start by choosing lantern size: medium lanterns that are about waist-high look best on typical stages. Then attach greenery bands using floral tape and thin wire so it doesn’t slip. Place lanterns so the center one sits directly behind the couple’s torso line; the side lanterns should land near the outer edges of where guests can see. Add a small LED candle or use flameless candles if the venue allows — it keeps things safe for kids and reduces risk. Expect 45 to 75 minutes setup and a cost that’s usually lower than full floral.
Stick to one greenery type like eucalyptus or boxwood-look greens for a cleaner, more consistent camera result.
Skip tall candles or anything with exposed flames if kids will be close to the stage.
4. Low "garden line" using potted herbs and moss
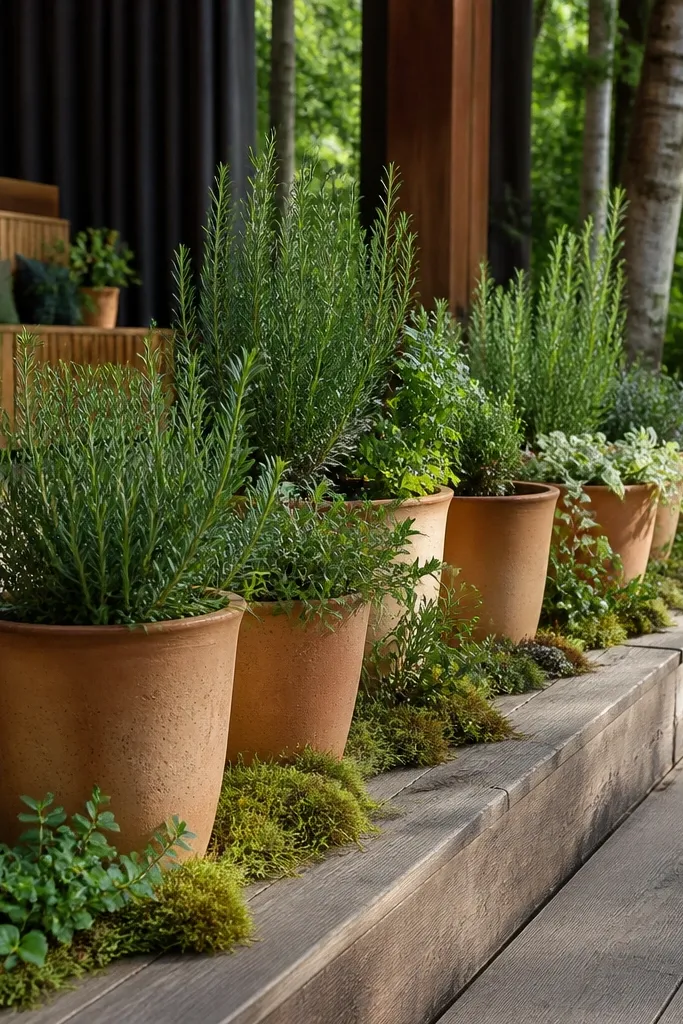
A low garden line looks fresh and lived-in, which is exactly what makes it charming instead of overly staged. Use potted herbs or small leafy plants like rosemary-look, then tuck moss between pots to soften the transition. This is one of the most family friendly wedding stage decor options because kids can’t easily knock over something that’s contained in a pot. It also photographs beautifully because the textures are close to the ground, creating a soft frame around the stage. It works especially well for outdoor ceremonies or venues with natural light.
Start by measuring the stage front edge and decide how many pots you need — a practical rule is one pot every 18 to 24 inches for a continuous line. Then arrange pots on a tray or a runner so you can carry the whole section and keep it tidy. Add moss in between and secure it with light wire so it doesn’t blow or shift. Finally, keep the greenery height under 12 inches so it stays in the “ground frame” zone for photos. Setup is usually 60 minutes, and you can reuse the pots for welcome tables or after the wedding if you used real plants.
Cover pot soil with a thin layer of moss or decorative stone so it won’t show on camera.
Don’t use loose potting soil or anything that sheds — you want clean textures, not mess.
5. Tulle cloud backdrop with a simple floor bow tie
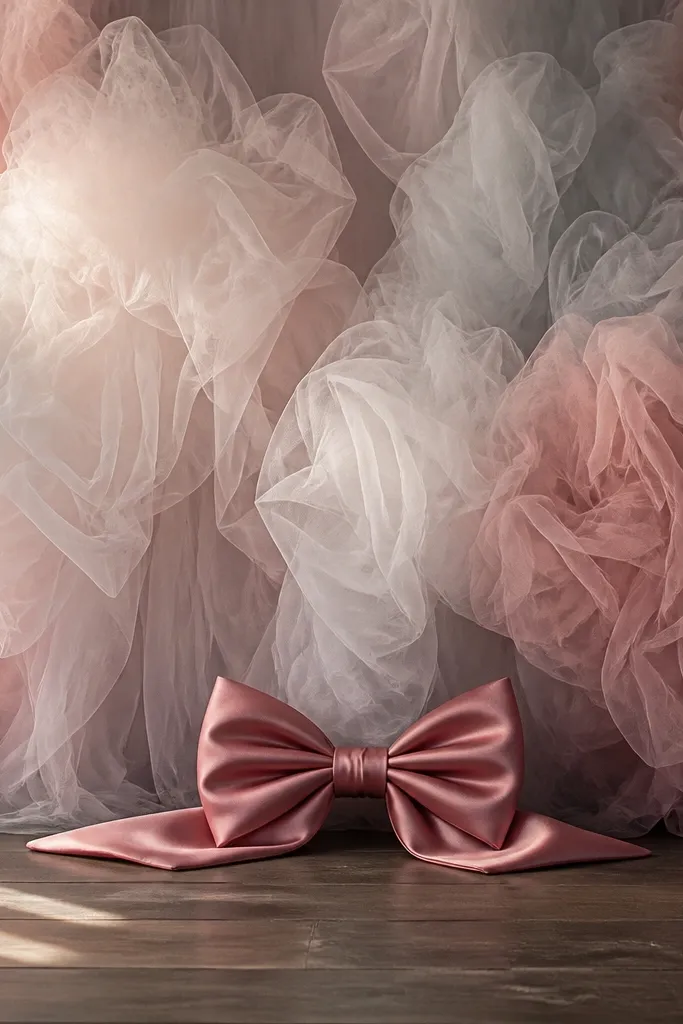
Tulle clouds add that airy, dreamy look without needing a big floral budget. Keep the backdrop made of layered tulle panels, then add one grounded element on the floor — a wide satin or cotton bow — so the stage looks finished. This gives you movement in photos but stays safe because nothing is sharp or dangling low. Choose soft colors like blush, champagne, or sage to keep it friendly and photogenic. Family friendly wedding stage decor loves tulle because it reads light, even when you keep it simple.
Start by cutting tulle into 3 to 5 long panels and layering them at different lengths so you get depth. Attach the top to a tension rod, backdrop stand, or removable clips — keep knots hidden behind the panel. Then create the floor bow: use a wide ribbon or fabric strip, tie it in a big bow, and secure it to a weighted base or runner. Place the bow centered beneath where the couple will stand, with two small greenery clusters at the sides. Give yourself 90 minutes for setup if you’re adjusting layers for symmetry.
Use matte tulle, not shiny — shiny fabric reflects stage lights and looks harsher in photos.
Don’t let tulle touch the ground in a windy outdoor venue; it tangles fast.
6. Chalkboard-style welcome sign on a stand with greenery corners
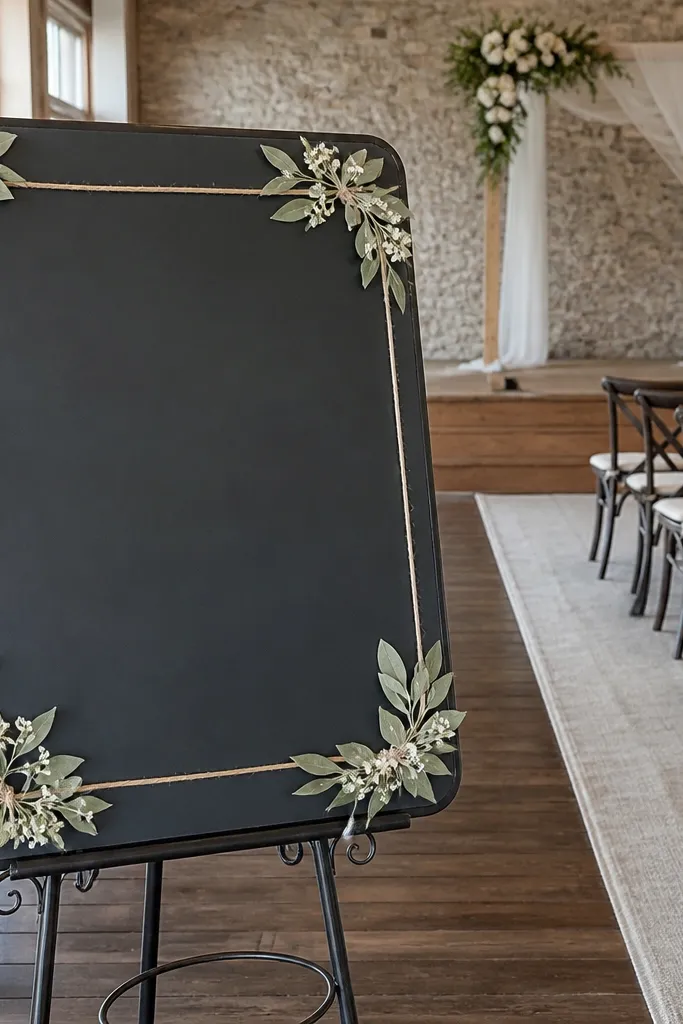
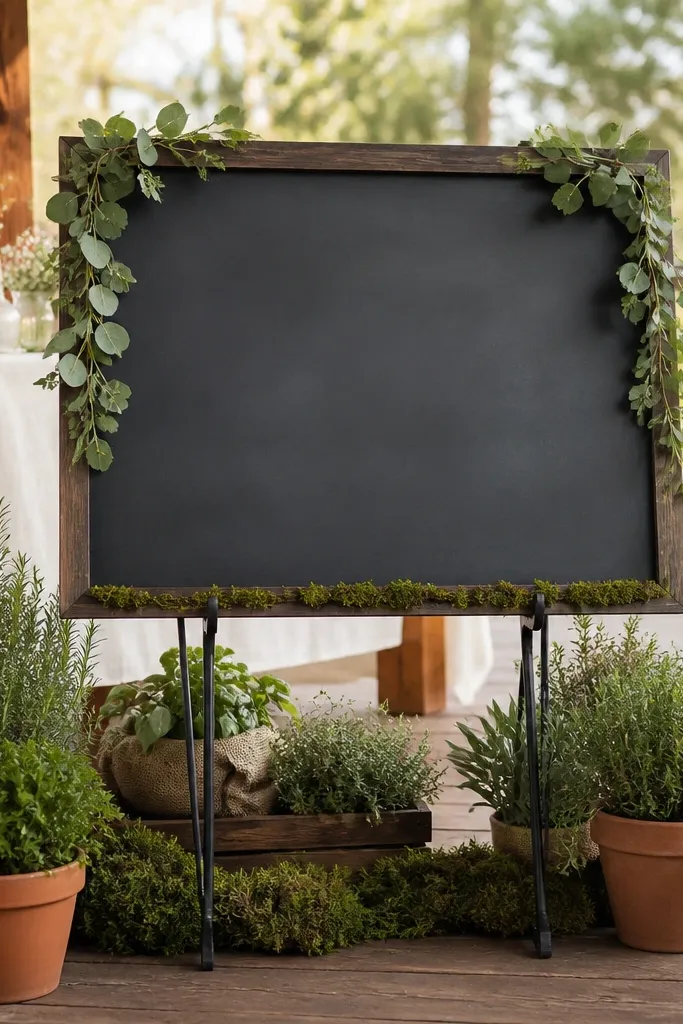
A large sign is a simple way to make the stage feel intentional, and it’s one of the most flexible family friendly wedding stage decor choices. Go for a chalkboard-style look on a sturdy stand, then soften it with small greenery corners on the frame. This gives you clear “where we are” context for guests and gives photographers a clean focal point. Pick handwriting-style lettering or a printed script, then keep the rest of the stage neutral so the sign reads clearly in photos. It’s also handy if you want to include names or a date without building a full backdrop wall.
Start by choosing a sign size that’s readable from the back of the room — around 24 by 36 inches is a good target for many venues. Put the stand where the couple will not block it, usually slightly to the side of center. Then attach greenery corners using zip ties to the stand frame — keep the greenery short so it doesn’t hang into people’s hands. Finally, add one matching floor element like a small lantern or a low pot so the sign doesn’t float alone. Setup is fast: 20 to 40 minutes.
Use a non-glare finish or position it away from direct spotlights so the writing stays readable in photos.
Don’t use a flimsy poster board sign — it looks cheap and can tip in a busy venue.
7. Two fabric-wrapped columns with a center runner
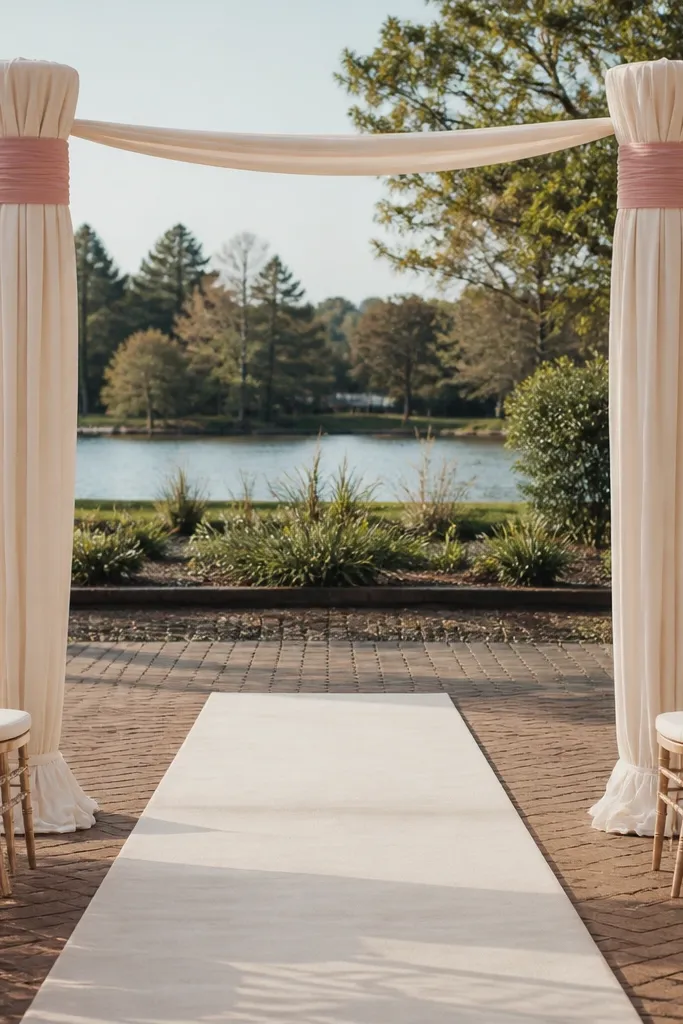
Columns are a clean way to frame the couple without building an arch. Wrap two tall stands or columns in fabric, then connect them with a center runner that visually pulls everything together. Keep the fabric in a neutral base and add one accent band — like sage or dusty rose — so it feels styled, not random. This works well for family friendly wedding stage decor because the columns are tall enough to photograph, but the decor is contained and stable. It also plays nicely with venues that already have a wall or drape behind the stage.
Quick tipMatch the fabric texture across columns and runner so lighting doesn’t make them look like different materials.
Start by selecting column height: 6 to 7 feet is a good range for most stages so you get framing without blocking faces. Wrap columns with linen or cotton fabric panels and secure with Velcro straps or hidden ties. Then add a center runner across the stage floor line — either a fabric strip or a long sheer fabric panel — so the look has a “through-line.” Place the columns about 4 to 6 feet apart, depending on stage width. Give yourself 2 hours for fabric wrapping and final spacing.
Skip thisSkip thin, see-through fabric as your main wrap if you’re aiming for a solid, clean backdrop look.
8. Balloon-free cluster garland using paper fans and greenery
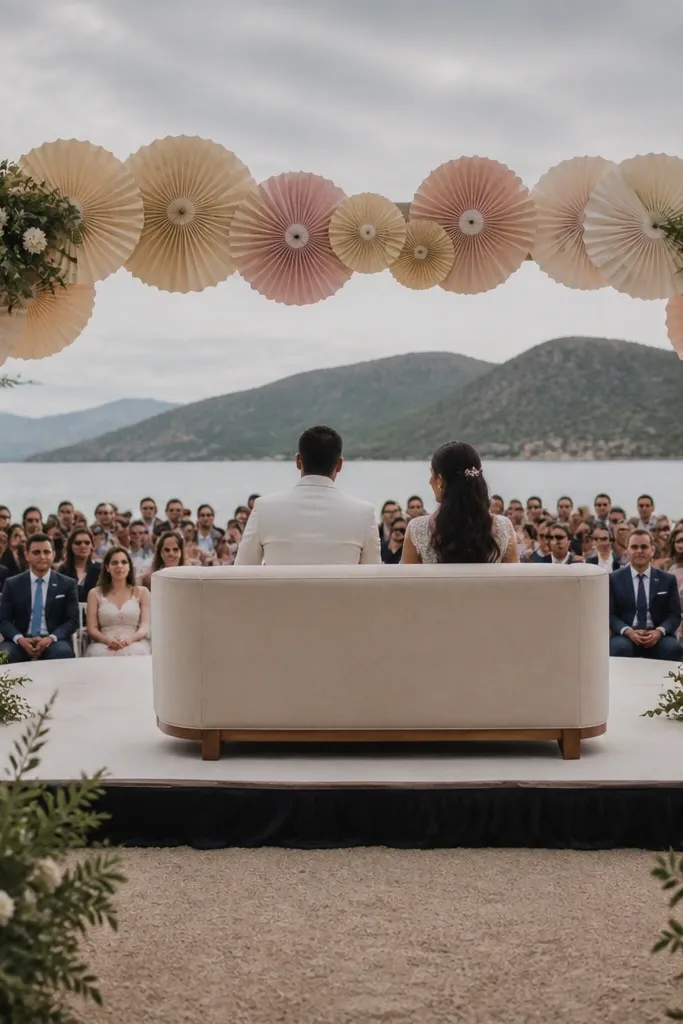
You can get big “wow” at stage height without balloons or heavy florals by combining paper fans with greenery clusters. Hang two or three fan layers behind the couple, then anchor them with small greenery bundles at the corners. The fans create shape and photo contrast, while greenery keeps it wedding-appropriate. This is strongly family friendly wedding stage decor because the materials are lightweight, non-sharp, and easy to secure to the wall or a frame. It also looks great in daylight and under softer indoor lighting.
Quick tipUse matte paper fans in cream or blush to avoid glare on camera.
Start by choosing fan sizes: use one large fan behind center, then two medium fans on each side. Create a simple mounting grid using hooks or removable wall clips if allowed. Then attach greenery bundles to the fan edges with thin wire so the greenery looks like part of the design, not pasted on. Keep the fan bottom at least 4 feet high so it doesn’t become a toy level for kids. Setup takes about 90 minutes if you’re assembling fans from sheets; it’s quicker if you buy pre-made fans.
Skip thisDon’t hang fans too low — kids reach, pull, and the whole look collapses.
9. Monogram table runner mirrored on the stage floor
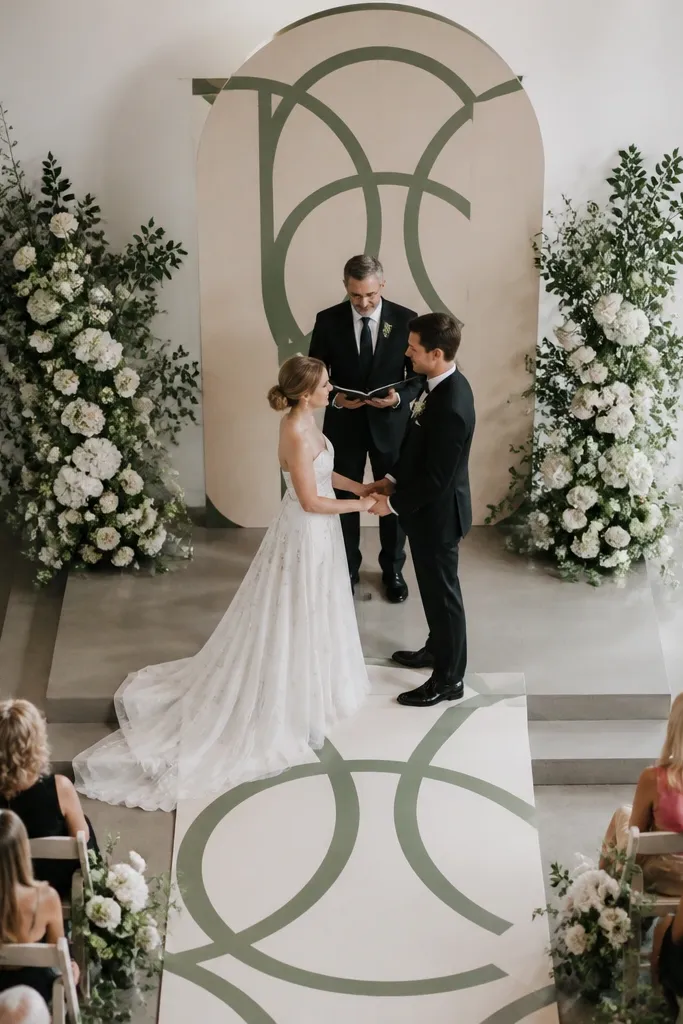
A monogram focus gives you a modern, clean stage look when you keep the rest minimal. Use a large monogram on a flat board or freestanding letter, then mirror the same color fabric on the stage floor with a runner that repeats the monogram’s palette. This works because it creates symmetry and a strong “center” without building a full backdrop. Family friendly wedding stage decor benefits from this approach since the main element is flat, stable, and doesn’t require tall installations. It also photographs well because the monogram sits at torso height.
Quick tipIf you’re worried about slipping, put the runner on a non-slip underlayer so it stays flat on the day.
Start by picking your monogram size — around 18 to 24 inches tall reads well from most ceremony angles. Place it centered behind the couple’s standing spot and secure it with a weighted base or to a backdrop stand. Then add a floor runner in matching fabric or a subtle texture like linen — keep it 12 to 18 inches wide and centered. Finish by adding two small greenery bundles at the runner ends so it looks intentional. Plan 45 to 60 minutes setup, and keep the runner edges secured with tape only if the venue allows.
Skip thisAvoid busy patterns behind the monogram — it makes the stage look cluttered in photos.
10. Oversized fabric bow tie at center with two side lanterns
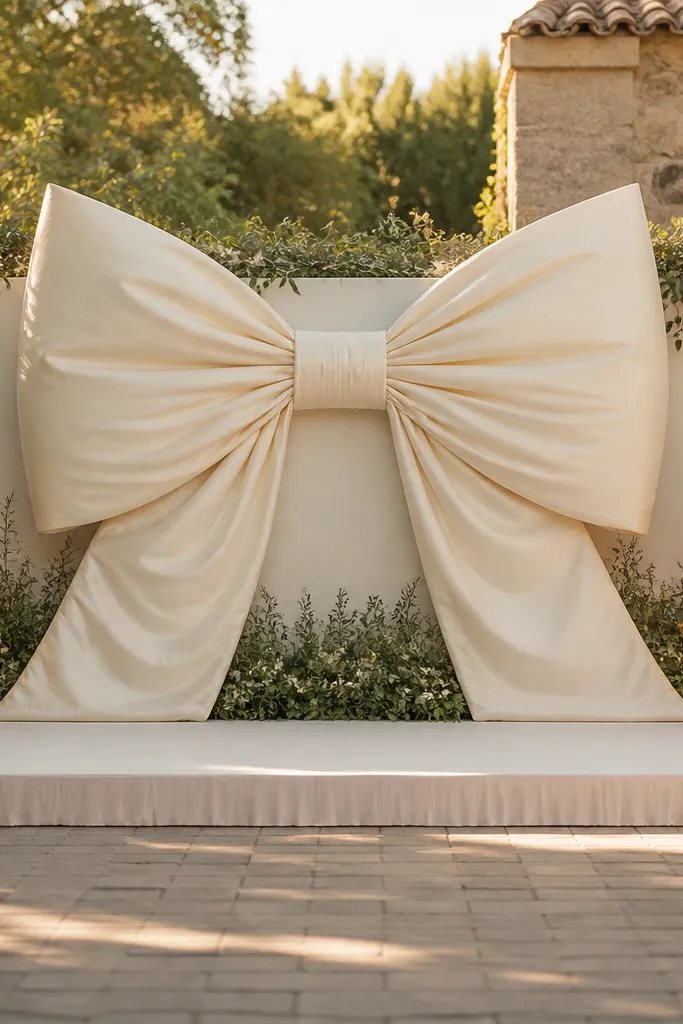
Oversized bows read romantic and cute, and they’re one of the most family friendly wedding stage decor options because they’re soft and low. Pair one big bow at center with two lanterns or low greenery planters on the sides. The bow becomes your main focal point, and the side elements balance the frame without adding clutter. Choose a fabric like satin for shine or cotton for a matte, cozy look — either works, but keep it consistent. This is a solid choice when you want charm without tall floral walls or complicated installs.
Start by picking bow fabric width: for a stage, use a wide ribbon or fabric strip so the bow looks proportional, not tiny. Make the bow offstage first, then secure it to a weighted base or runner so it can’t slide. Place it centered behind the couple’s stance line. Add two lanterns or low planters at equal distances from the center — usually 3 to 5 feet apart depending on stage width. Setup is about 60 minutes, and you can reuse the bow ribbon for reception signage.
Use a fabric that doesn’t snag easily — smooth satin or cotton — so kids can’t pull loose threads.
Avoid thin ribbon bows that collapse and look flat in photos.
11. Staged "hanging" look using floor-to-ceiling fabric panels
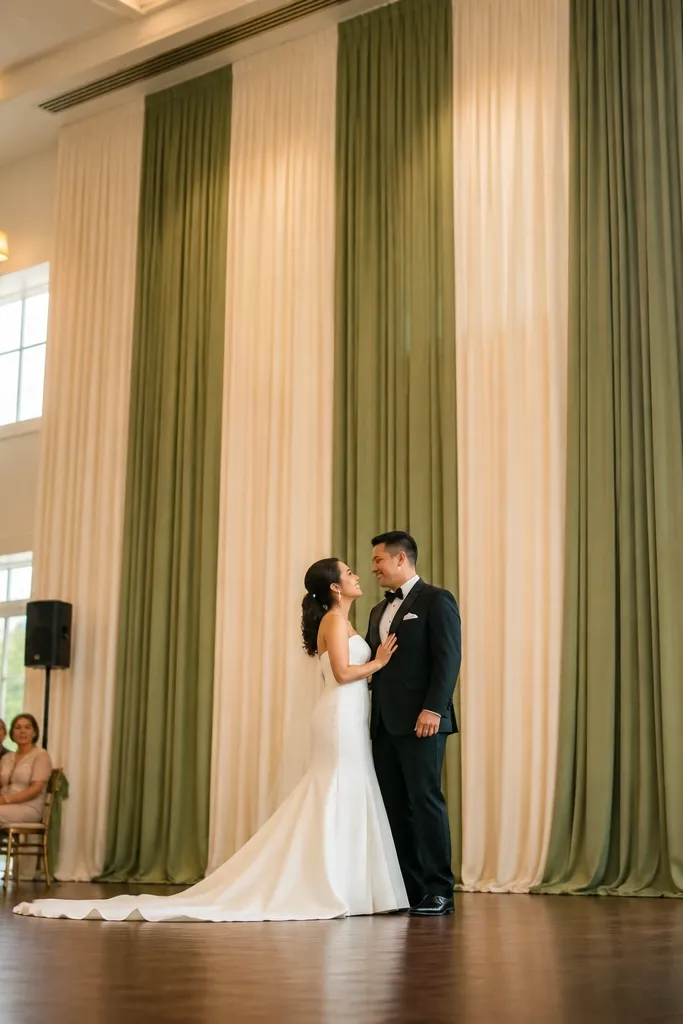
A hanging fabric look makes the stage feel taller and more styled, even when you keep everything simple. Use floor-to-ceiling panels in two tones — like cream and sage — and let them fall straight with gentle gathers. This gives you a clean, photo-friendly backdrop that doesn’t require tall florals. Family friendly wedding stage decor works here because the panels are wide and soft, and you can keep hems off the ground in indoor venues. It also helps hide plain walls or unsightly stage backdrops.
Start by measuring ceiling height and stage width so you can buy or cut panels to fit without dragging. Hang panels with removable ceiling hooks, tension rods, or a backdrop stand — keep knots hidden. Then create dimension by staggering panel lengths slightly and placing the darker tone at the edges. Add a narrow greenery line at the floor so the panels look connected rather than floating. Plan 2 to 3 hours for installation if you’re adjusting multiple panels; it’s faster with a backdrop system.
Steam panels and hang them taut; loose fabric looks wrinkled, not romantic.
Don’t use narrow, lightweight strips that whip in airflow and create messy movement.
12. Terracotta pots with white blooms for a warm, simple frame
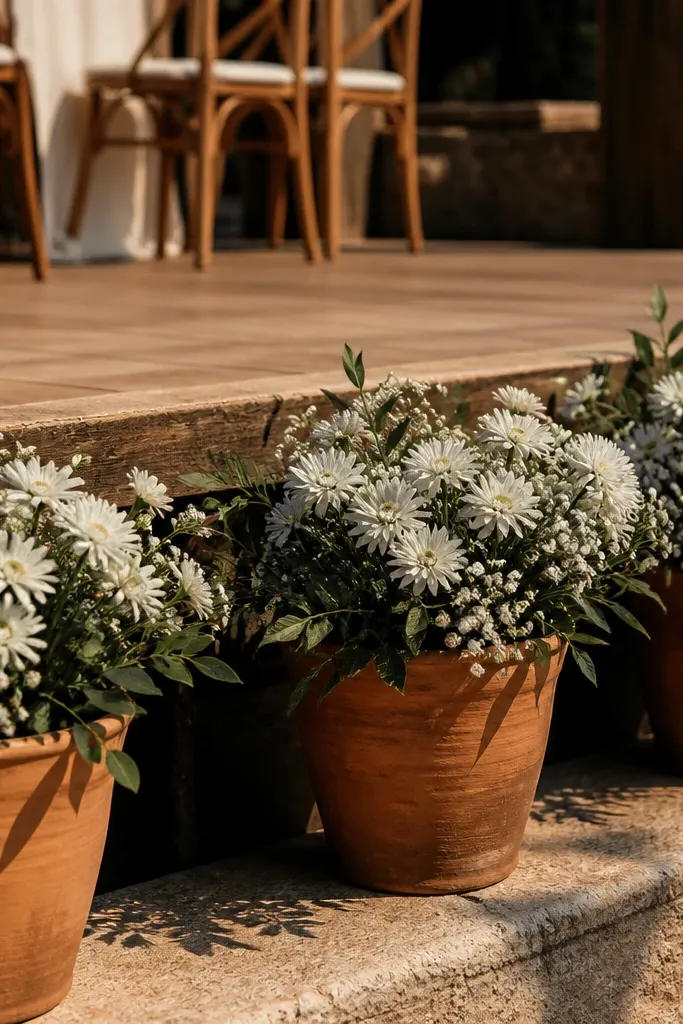
Terracotta pots bring warmth and a natural look that reads friendly in photos. Use a limited flower palette — white blooms like baby’s breath or small daisies, plus greenery — and repeat the arrangement on both sides of the stage. This style is family friendly wedding stage decor because pots are stable, the height stays controlled, and the look holds up outdoors. It also gives you a clear “frame” for the couple without blocking faces. If you want charming but not formal, this is the sweet spot.
Quick tipGroup pots by height — don’t mix tiny and tall pots — or the stage looks accidental on camera.
Start by choosing pot size around 10 to 12 inches wide so the flowers look full without being top-heavy. Place pots in pairs or a line along the stage edges, leaving clear space for foot traffic. Then add white blooms in small clusters and fill gaps with greenery so it looks dense, not sparse. Finish by covering soil with moss or decorative filler for a clean camera view. Setup takes about 90 minutes and you can keep the pots for guests or for later on the property.
Skip thisSkip tall flower stems; they block the couple’s lower body in photos.
13. Soft sage wreaths on weighted stands behind the couple
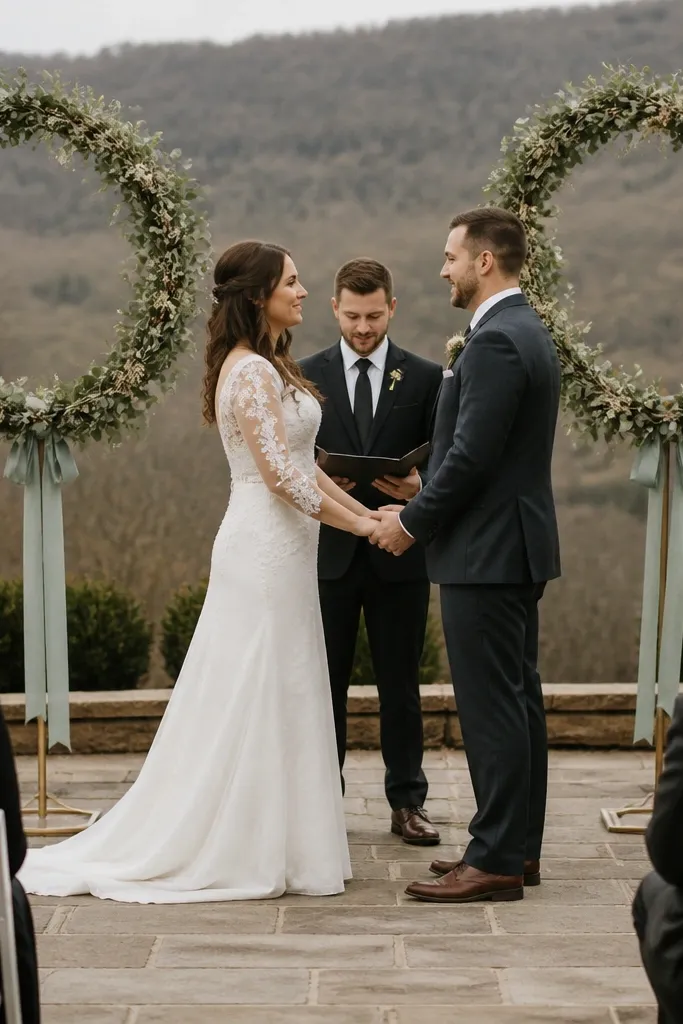
Wreaths behind the couple give you a clear circular motif without building an arch. Use two matching wreaths on weighted stands, then place them slightly behind and above the couple’s shoulder line. The greenery stays contained and the shape reads clearly in photos. Family friendly wedding stage decor loves wreaths because they’re stable, round, and easy to keep kid-safe. Pick sage tones for a calm look, then add one small accent like cream ribbon or a few white blossoms at the bottom edge.
Quick tipIf it’s outdoors, choose wreaths with tight greenery ties so wind doesn’t twist the shape.
Start by selecting wreath size — about 24 to 30 inches diameter works for most stages. Place them on weighted stands and adjust height so the wreath centers sit around chest-to-shoulder level for the couple. Then secure any loose greenery with thin wire so nothing sheds during the ceremony. Add a simple ribbon tie at the bottom of each wreath to make them feel finished. Setup is 45 to 75 minutes, and this layout works well in both indoor and outdoor spaces.
Skip thisDon’t place wreaths too close together — the couple needs space to stand without bumping the stands.
14. Simple balloon-free garland line across the stage front
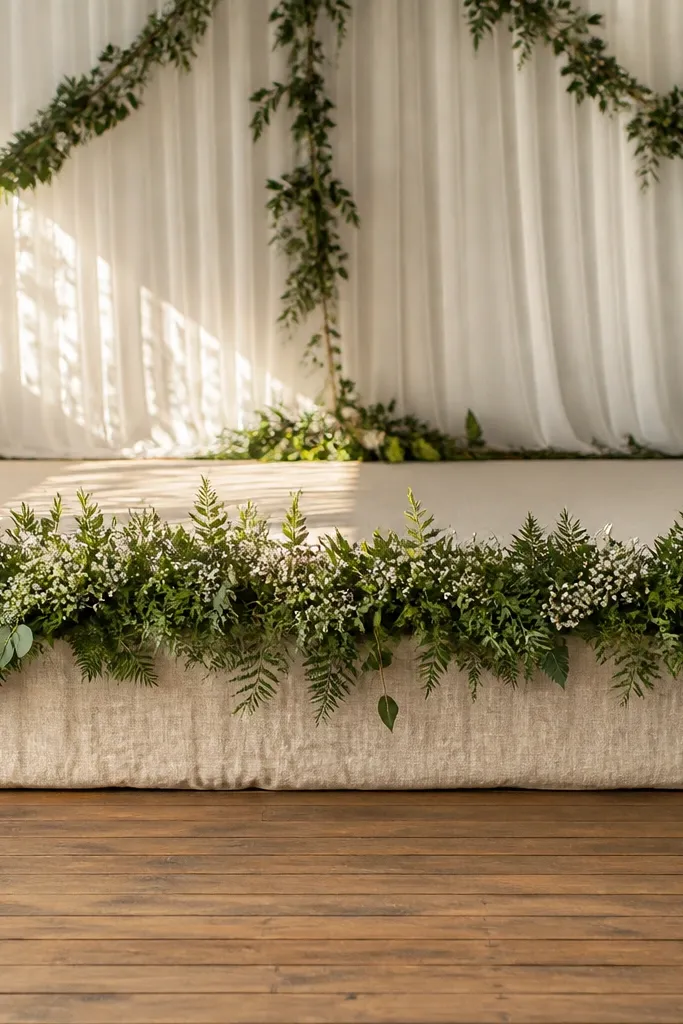
A garland line across the stage front adds a finished border and helps the stage look “framed” in wide shots. Skip balloons and keep it simple: greenery with small filler blooms, laid low and supported by a light runner or stakes. This is one of the best family friendly wedding stage decor options because it’s grounded, not swinging, and it doesn’t invite kids to tug on a balloon cluster. It also helps unify mismatched stage materials, like a plain riser or a wooden platform. The look is subtle, but camera-friendly.
Quick tipUse a mix of small and medium textures, not just one greenery — it keeps the line interesting up close.
Start by deciding how long you need the garland — measure the stage width and subtract a little for any center walkway. Build the garland on the ground first using a flexible base line like faux greenery mesh or a ribbon tie line. Then attach greenery clusters every 6 to 10 inches and add small blooms only where you want photo sparkle. Secure the garland to a runner or to stakes at the stage edge so it can’t slide. Setup takes 60 to 90 minutes and the cost is usually lower than full backdrop florals.
Skip thisDon’t let the garland droop onto the floor where it can snag shoes and trip kids.
15. Sunwashed window frame with sheer curtains and potted olive branches
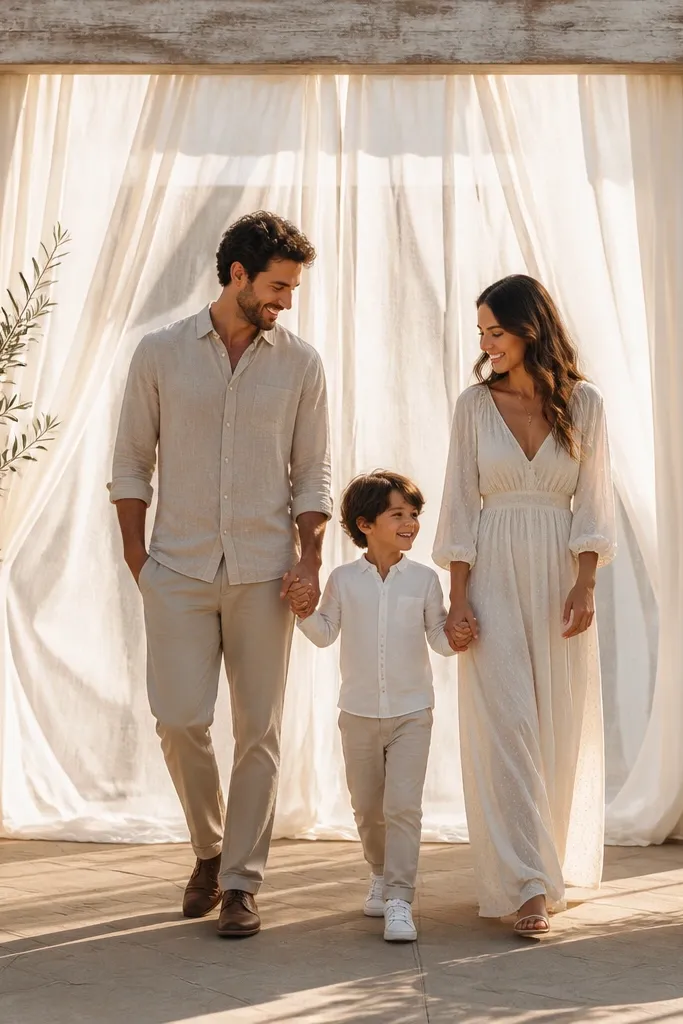
This decoration uses a simple “window” shape to make the stage feel warmer and more family friendly without clutter. The look is airy — sheer curtains soften the couple’s silhouette, and the potted olive branches add real texture that reads well in photos. It works especially well for outdoor venues, courtyards, and places with natural light because the fabric moves with the breeze. It also suits couples who want something charming but calm, with decor that doesn’t fight the ceremony backdrop. I’d choose it for spring and early fall when you can get that sunwashed, golden-hour glow.
Quick tipBring a small steamer and a lint roller in your day-of kit. Sheers crease fast in transit, and 5 minutes of smoothing makes the whole setup look intentional.
Step 1: Build the window frame from lightweight wood trim or buy a collapsible faux frame kit, then paint it matte white or a soft bone color so it doesn’t glare. Hang two long sheer panels on each side using ceiling hooks or a tension rod above the frame, and keep the curtains 6-10 inches wider than the opening so they look full on camera. Step 2: Place 2-3 medium terracotta pots of olive branches (real or high-quality faux) at the base corners, then tie a thin twine bow around each pot handle for a tidy finish. Step 3: For getting there and around, choose a venue with easy load-in near the stage because you’re working with fabric and potted items. Expect to spend about $120-$260 depending on whether you rent the frame and whether the olives are real, and plan 1.5-2 hours for setup and styling. Book the stage decorator or rental at least 3-4 weeks ahead if your wedding is in peak season; fabrics and frame rentals get booked first.
Skip thisAvoid using thick blackout fabric — it makes the stage look heavy and kills the soft, sunlit charm.



