
1. Sage Runner + Clear Glass Votive Line
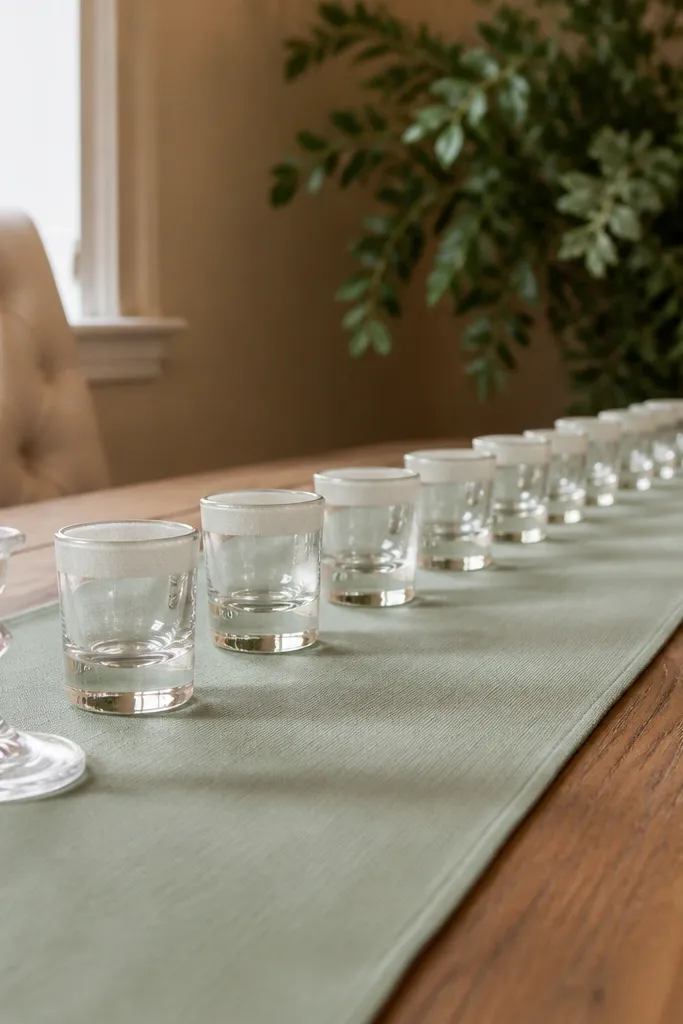
This setup looks expensive because the runner gives you a soft color base and the glass does the rest. A sage runner (matte, not shiny) creates calm contrast against most table linens and wood tones. Then you add a straight, symmetrical line of clear votives so the camera sees order, not random candle placement. Use white tapers inside the votives or pair votives with short pillar candles so the height stays consistent across the whole table. It’s a hidden gem because it avoids big floral blocks and still photographs as styled.
Start by centering a sage runner over the table and pulling it taut so it forms clean folds. Then place 7-9 clear glass votives in a straight line down the middle, spacing them about 6-8 inches apart. Finally, add white tapers (or short pillars) so the candle tops sit roughly level across the row. For travel logistics, pack votives in bubble wrap and keep tapers in a rigid box. Plan for 45-60 minutes to set and adjust spacing once you’re on-site.
Bring a small roll of painter’s tape to mark candle positions on the table pad before you set glass.
Don’t mix candle heights in this layout — it turns the line into a visual mess.
2. Black Linen + Cream Rosebud Confetti
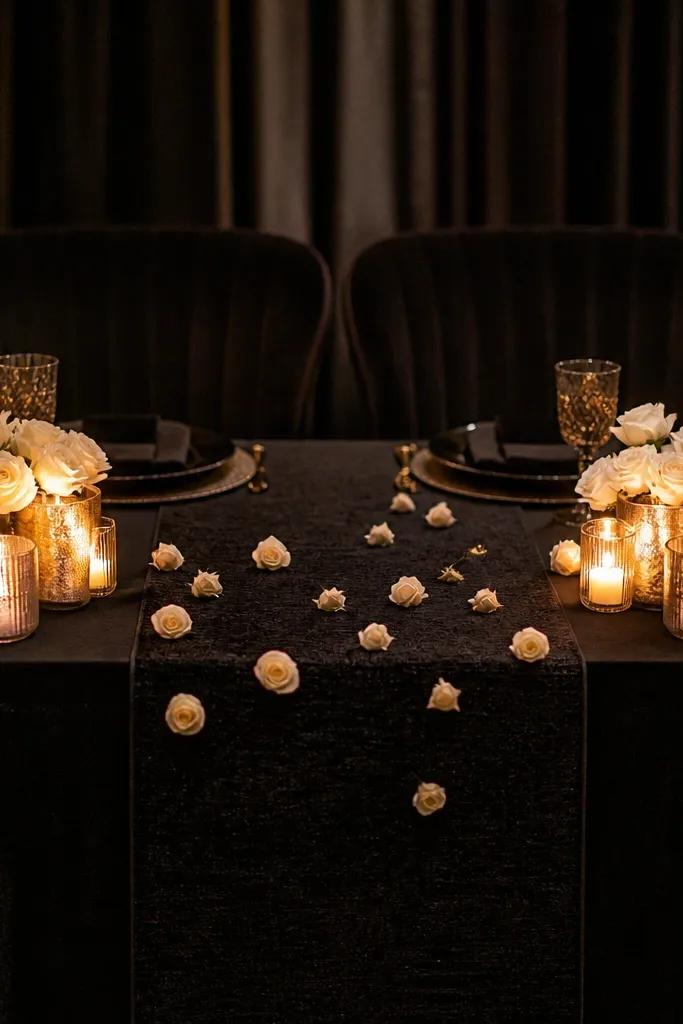
Black linen makes sweetheart tables look instantly styled, especially in evening light. The trick is to avoid a heavy floral blanket. Instead, scatter cream rosebuds and small blooms like confetti across the center strip, leaving plenty of table surface visible. Add two or three tight candle clusters at the ends of the center strip so the middle stays readable in photos. This works because the black background creates contrast and the sparse placement keeps the image airy rather than crowded.
Start with a black tablecloth or black overlay laid smooth with no wrinkles. Then place rosebuds in a loose, controlled band across the middle — aim for 15-25 small stems total for a 72-inch table. Next, set two candle clusters about 12-18 inches from each end of the band, using white candles or cream tapers for consistency. If you’re bringing it to a venue, transport stems in damp paper towels inside a sealed container to reduce wilting. Give yourself 30-45 minutes for scatter placement and final spacing.
Quick tipUse a lint roller on black fabric right before you decorate so you don’t lose contrast in photos.
Skip thisSkip full-size bouquets on black — the table gets visually heavy and hard to photograph cleanly.
3. White Drape Backdrop + Two-Tier Candle Ladder
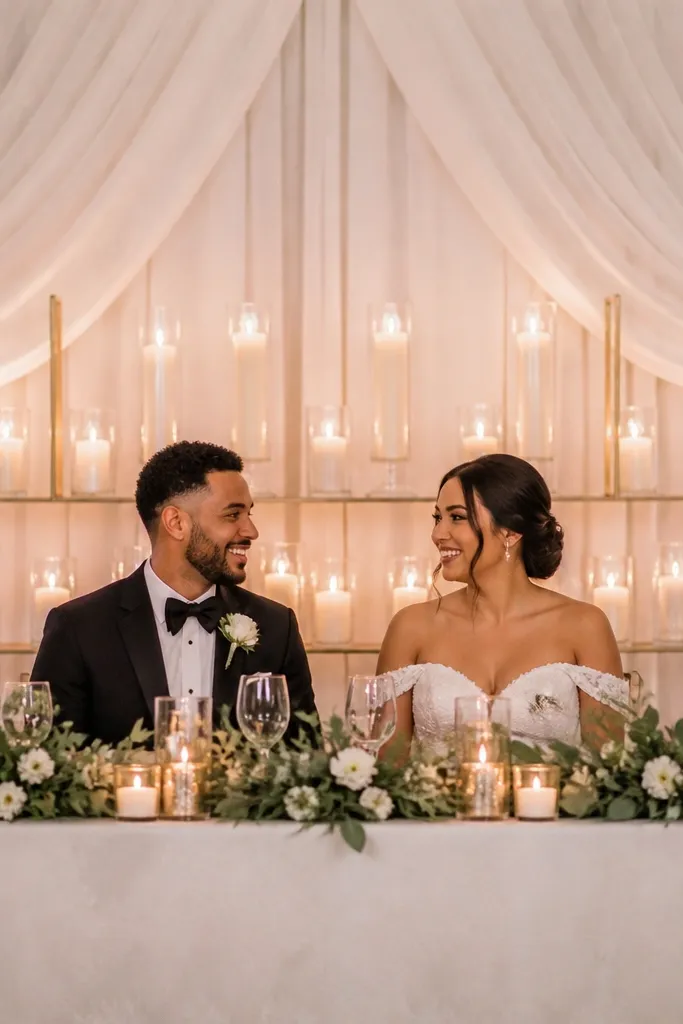
A white drape behind the sweetheart table is a reliable way to make the whole scene look intentional, even if your florals are minimal. The drape creates a soft background that hides venue clutter and makes your couple’s chairs look more defined. Then you add a two-tier candle ladder: taller candles in back, shorter in front. This gives you height and depth without building a tall floral wall. It’s a hidden gem because it looks like a bigger budget setup but uses a simple fabric-and-candle structure.
Start by hanging a white sheer or soft drape behind the table, leaving a little gap so it doesn’t look flat. Then place a row of short candles along the front edge, and a second row behind them with candles about 3-5 inches taller. Finally, adjust spacing so the ladder stays centered on the couple’s seats, not the whole table width. For travel, fold drape carefully and pack candle bases separately in a rigid tray. Plan 60 minutes if you need to secure the drape to stands.
Quick tipUse warm white candles, not cool white LEDs, so the background stays flattering in mixed lighting.
Skip thisDon’t place candles too close to the drape — keep at least 8-10 inches for safety and to prevent heat marks.
4. Terracotta Runner + Dried Palm Fan Center
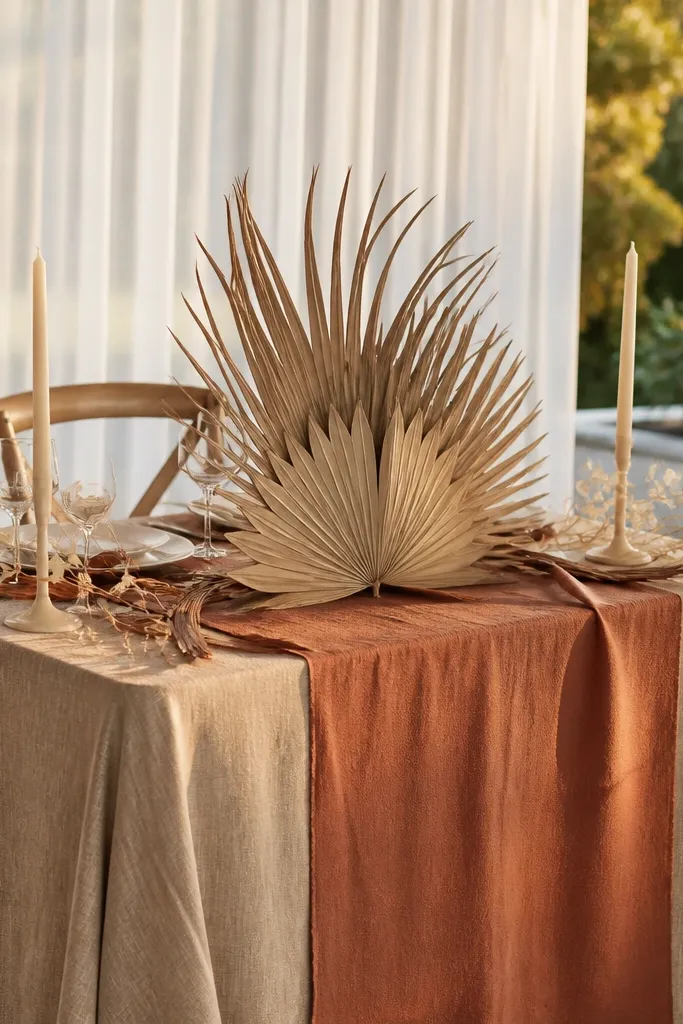
Terracotta reads warm in photos and makes neutral venues feel designed. Pair it with a dried palm fan center — not a full bouquet, just a fan shape that points upward and outward. The dried texture catches light differently than fresh florals, so your table looks interesting even from the side angle. Add two cream candles on either side to balance the fan and keep it from feeling like a single object. This is a hidden gem because dried elements photograph like “textural art” without needing a large florist installation.
Start with a terracotta runner centered on the table and spread it so the ends fall evenly. Then create a dried palm fan using 8-12 fronds tied at the base, keeping the top height around 16-20 inches. Place the fan in the center and add two candle holders about 10-12 inches from the base on each side. If you’re traveling, wrap fronds in tissue and store flat, then fan them out on-site. Budget 40-55 minutes for assembling and placing the fan.
Bring a small bottle of floral spray for dust on dried fronds right before photos.
Skip wet-looking greenery — dried textures are the whole point here.
5. Monochrome Greenery Bands (No Big Bouquet)
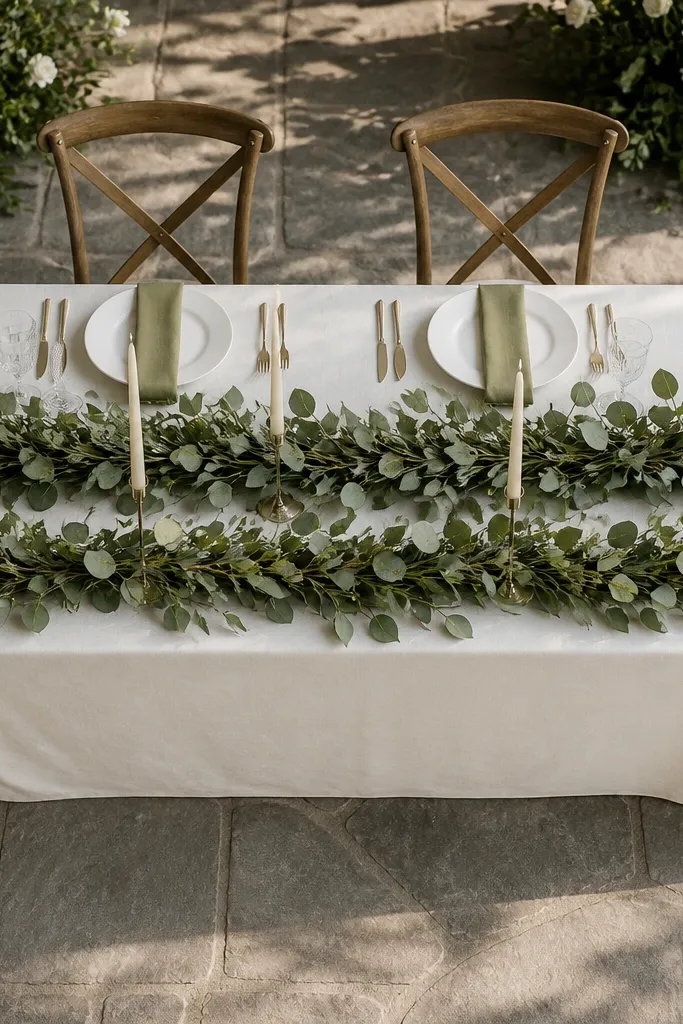
You don’t need a towering bouquet to make greenery look high-end. This idea uses monochrome greenery bands laid across the table in two or three horizontal strips. Choose one green tone (olive, eucalyptus, or smoky green) and stick to it so the table looks curated, not chaotic. Add tiny white tapers spaced evenly along the middle strip. The result is clean, graphic, and very photogenic because it creates clear lines the camera can read instantly.
Start by laying a neutral base fabric (ivory, cream, or light gray) so the greenery reads true. Then cut or break greenery into long strips and arrange them as bands across the center and lower third of the table. Finally, place 5-7 white tapers spaced evenly on top of or just beside the center band, keeping heights consistent at about 12-14 inches. For setup, use floral tape to secure strips to a hidden foam block or to a runner cord. Plan 50-70 minutes depending on how many strips you make.
Quick tipUse one type of greenery for the bands — mixing three greens makes it look “leftovers” on camera.
Skip thisAvoid random scattered stems — bands are what make it look designed.
6. Cream Satin Ribbon Bow Rail
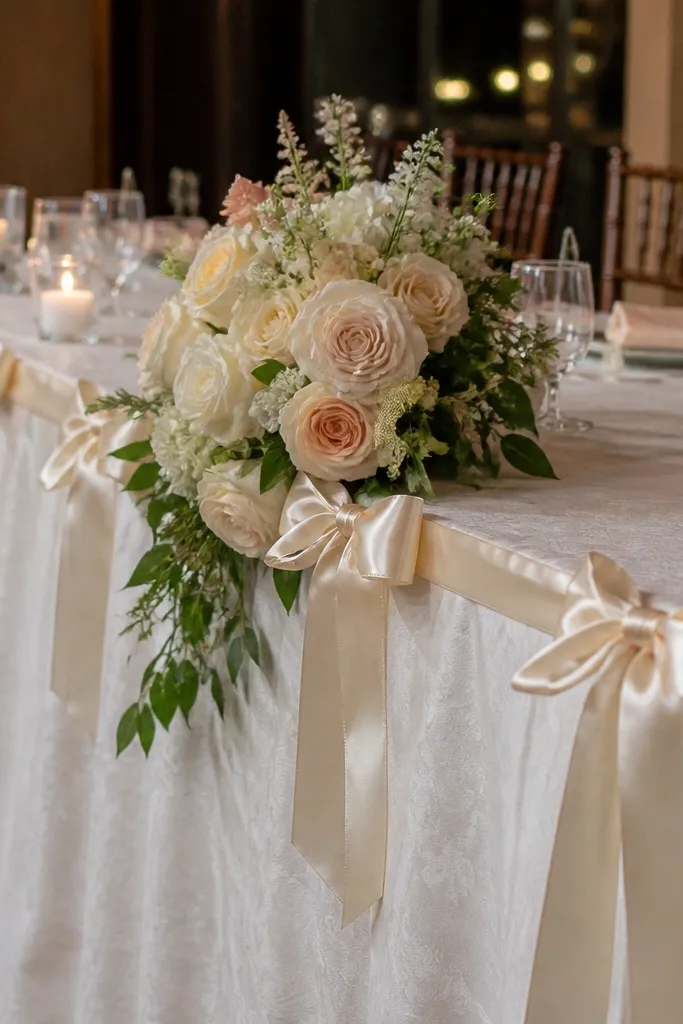
Satin ribbon is the shortcut to that “pulled together” look without adding height. Tie a bow rail along the table edges so the sweetheart table looks framed from the camera side. Use cream satin ribbon with a slight sheen, then keep the bows small and consistent for a clean pattern. Add one low floral cluster at the center so the ribbon doesn’t steal focus from the couple. This is a hidden gem because ribbon styling is common in chairs and arches, but less used as a table-edge design, so it looks fresh.
Start by placing a simple neutral tablecloth and adding a low center floral cluster (small, 8-10 inches wide). Then measure and mark where the ribbon will sit along both long edges, usually about 3-4 inches from the table lip. Tie small uniform bows every 8-10 inches, keeping the loops facing the same direction. Finally, secure ribbon with discreet pins or double-sided fabric tape under the table lip. Give yourself 45-60 minutes to tie bows evenly.
Quick tipSteam the ribbon before tying so it lays flat and doesn’t look wrinkled in photos.
Skip thisDon’t use thick, bulky ribbon — it creates uneven lumps that show up in close shots.
7. Pearl-Accent Candle Holders + Blush Micro Florals
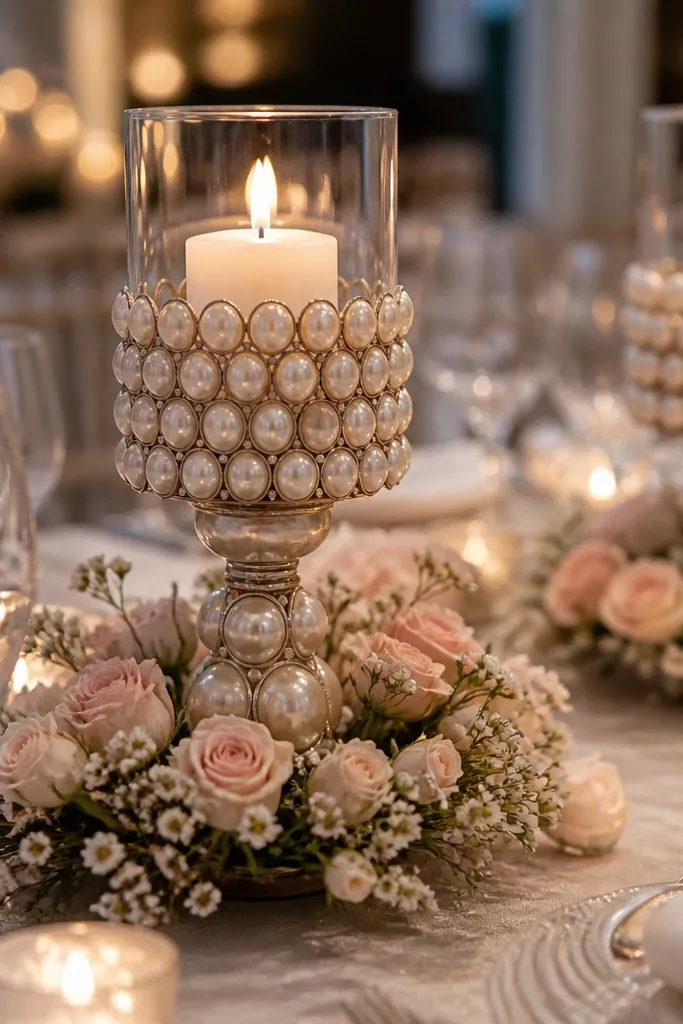
This idea leans into “soft luxury” using small, high-detail elements. Pearl-accent candle holders add a photo-friendly sparkle without needing metallic tableware everywhere. Then you place blush micro florals (tiny roses, baby blooms, or small spray roses) around the candle bases instead of building a big centerpiece. The candles become the structure, and florals just add color and texture. It’s photogenic in both daylight and candlelight because the pearls catch highlights.
Start by setting up 7-9 candle holders along the center line, evenly spaced. Then add a small handful of blush micro florals around the base of each candle holder, keeping them within a 6-8 inch radius so it looks intentional. Finally, add a single neutral runner under everything so the color stays focused. Transport holders in bubble wrap and keep florals in water bags if they’re fresh. Plan 40-55 minutes for placement and final scatter adjustments.
Use a neutral tray or runner underneath so any stray petals don’t land on bare table wood.
Skip large blooms here — they crowd the pearl detail and look bulky.
8. Floating Lanterns Behind the Couple (Table-Back Depth)
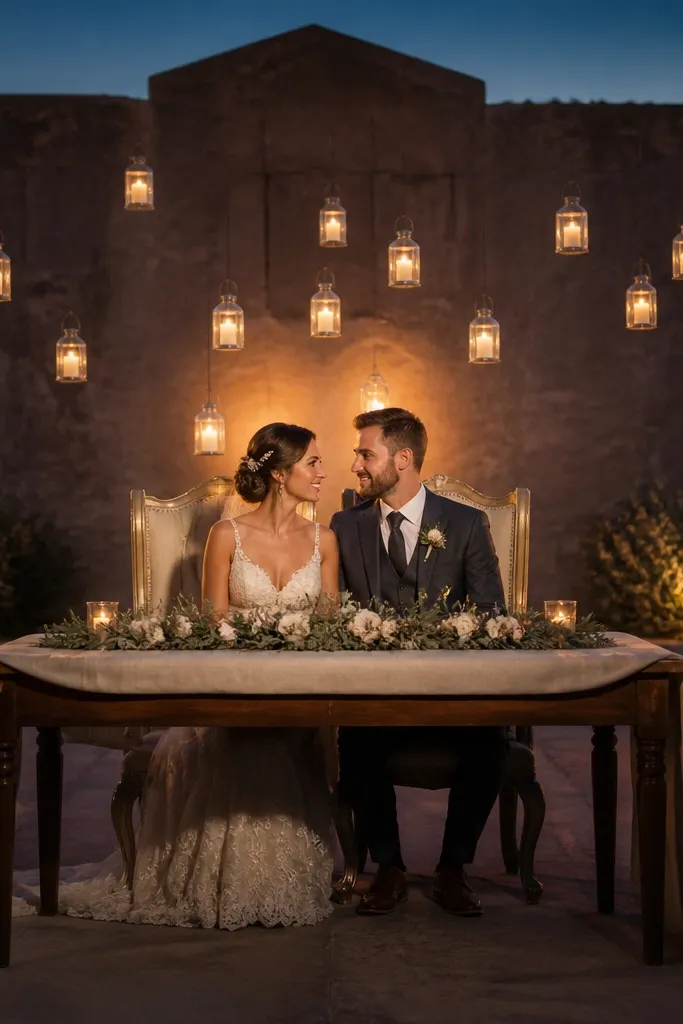
If your sweetheart table faces a wall or open space behind the chairs, lanterns add depth that reads in photos instantly. Place lanterns slightly behind the couple’s seating so the light creates a glow halo behind them. Keep the table front simple: a runner, a few candles, and one small floral band. The lanterns do the heavy lifting for mood and composition. This is a hidden gem because people usually focus only on the table surface, and the background is where photos get their “cinematic” look.
Start by placing your runner and low center decor so the table doesn’t feel empty. Then position two lanterns behind the chairs, angled slightly inward so the light faces the couple. Use warm bulbs or real candles in lanterns if allowed, aiming for the lantern light to sit around shoulder to head height. For travel, pack lanterns in foam or thick towels and bring spare bulbs. Plan 30-45 minutes for placement after you confirm chair positions.
Quick tipCheck venue rules on open flames before you choose candles in lanterns.
Skip thisDon’t put lanterns directly behind the centerpiece — you want them to frame the couple, not compete with florals.
9. Two-Color Floral Stripe with White Candles
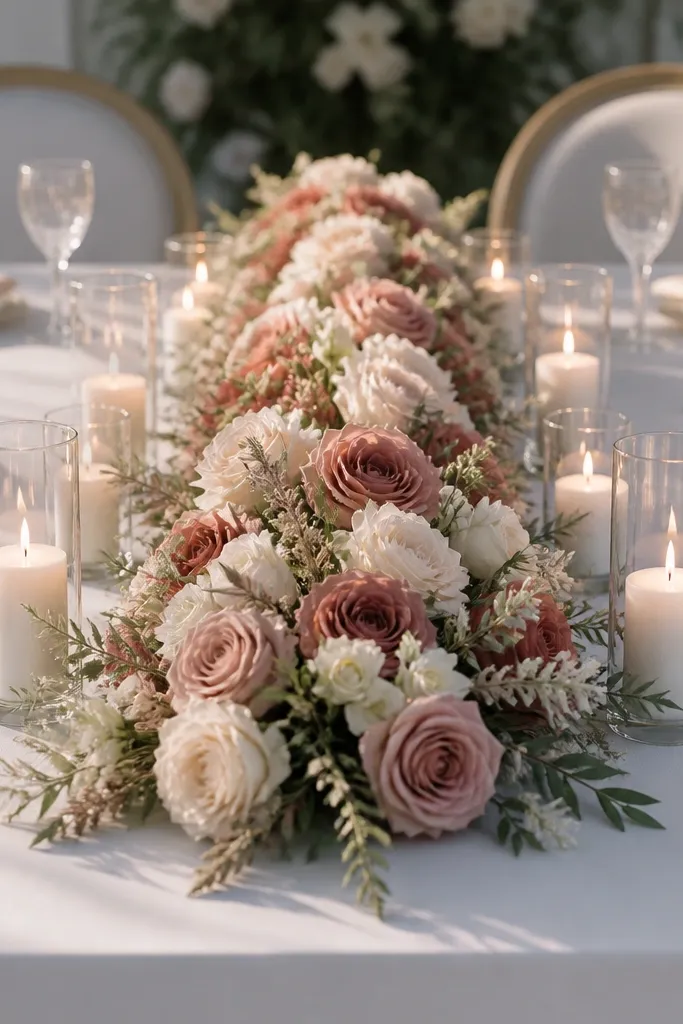
A two-color floral stripe makes your sweetheart table look graphic and intentional. Pick one dominant color and one supporting color, like white plus dusty rose or eucalyptus green plus cream. Lay the florals in a straight stripe across the center so the camera sees a clean line, not a pile. Add white candles spaced evenly along the stripe edges so the table looks balanced from the side. This works because it limits decisions — you’re designing a pattern, not building a bouquet.
Start with a neutral base tablecloth and a runner if you want extra texture. Then arrange florals into a stripe about 10-14 inches wide across the middle, using mostly stems that keep their shape. Finally, place 5-7 white candles along the stripe’s length, keeping flame tops around 12-14 inches above the table. If you’re using fresh flowers, keep them hydrated and build the stripe on-site. Budget 50-75 minutes depending on how many stems you need.
Use floral foam only if you can hide it under a runner — otherwise use tape and a shallow tray base.
Avoid three-plus colors — it stops reading as a stripe and starts reading as clutter.
10. Cloche Centerpiece with Petals and One Stem
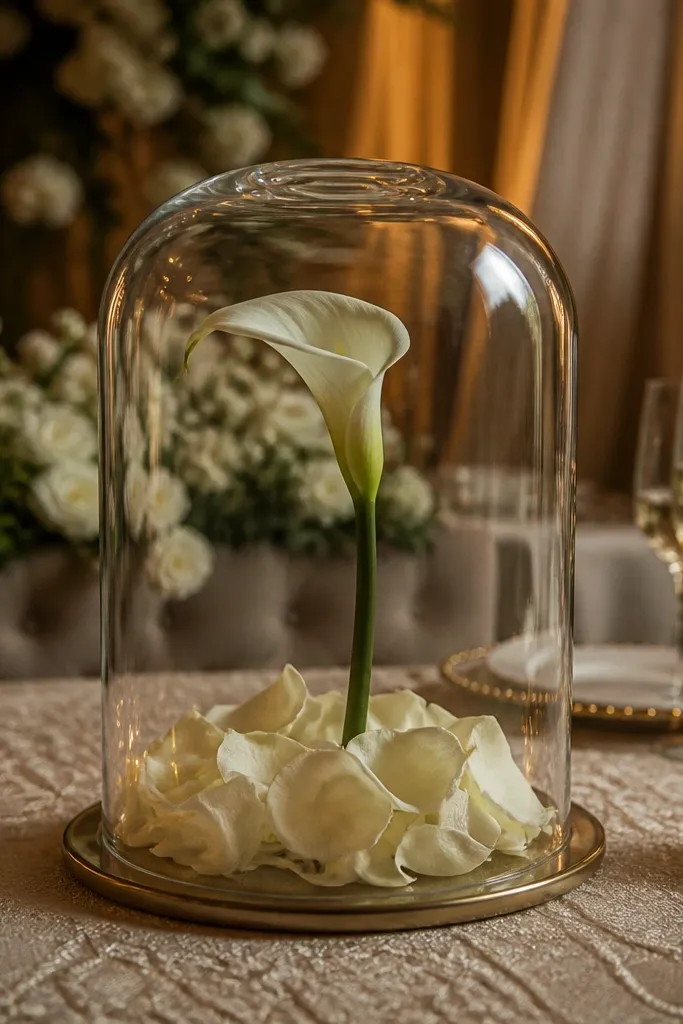
A cloche centerpiece gives you a clean focal point and a “wow” photo moment without building a tall arrangement. Under the cloche, keep it minimal: a small base, scattered petals, and one statement stem (like a white calla, a single rose, or a tall ranunculus). The glass makes everything look curated and protects petals from getting messy before photos. Pair it with two low candles on either side so the cloche stays the star. This is a hidden gem because it turns a small centerpiece into a deliberate visual object the camera can’t ignore.
Start by choosing a cloche size that fits your table — aim for about 9-12 inches wide for a 72-inch sweetheart table. Then build the inside base with a small saucer, scatter petals lightly, and insert one tall stem so it rises just above the base. Place the cloche dead center, then add two low candles 12-15 inches from the cloche on each side. Transport the cloche in a padded box and assemble on-site to avoid spills. Set aside 35-50 minutes for careful placement.
Use dried petals or fresh petals kept dry — wet petals under glass look dull fast.
Skip multiple stems — under a cloche, too much greenery looks like a mess in close-ups.
11. Pampas + Black Taper Pairing (Minimal, Photo-Forward)
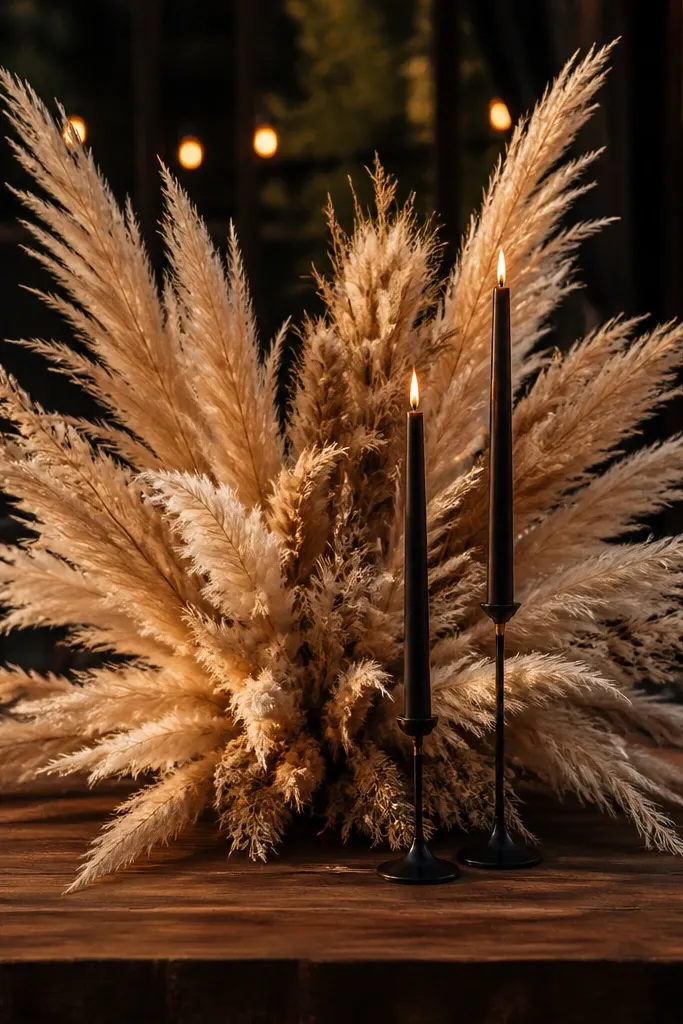
This is the “simple but not boring” combo: pampas grass for texture and black tapers for contrast. Keep the pampas in a tight cluster, not scattered across the table. Then place black tapers in a pair or small odd-number cluster so the table has a strong vertical rhythm. The pampas color reads warm and soft, while black candles add graphic sharpness in photos. It’s a hidden gem because it avoids the usual full floral look and still gives you that styled, editorial vibe.
Start with a light runner or tablecloth so pampas color pops. Then arrange pampas in a small bundle, tied together at the base, and keep the height around 18-24 inches. Place 3-5 black tapers in holders or in weighted bases, aligned so their tops sit level. Finally, add a tiny accent at the center base, like a small white rose or a strip of ribbon, to finish the look. Plan 30-45 minutes for arranging and checking symmetry.
Use a lint brush on pampas before setup — dust shows up under strong venue lighting.
Don’t overfill — more pampas than needed makes the centerpiece look unplanned.
12. Monogram-Letter Napkin Rings + Small Bouquet Corners
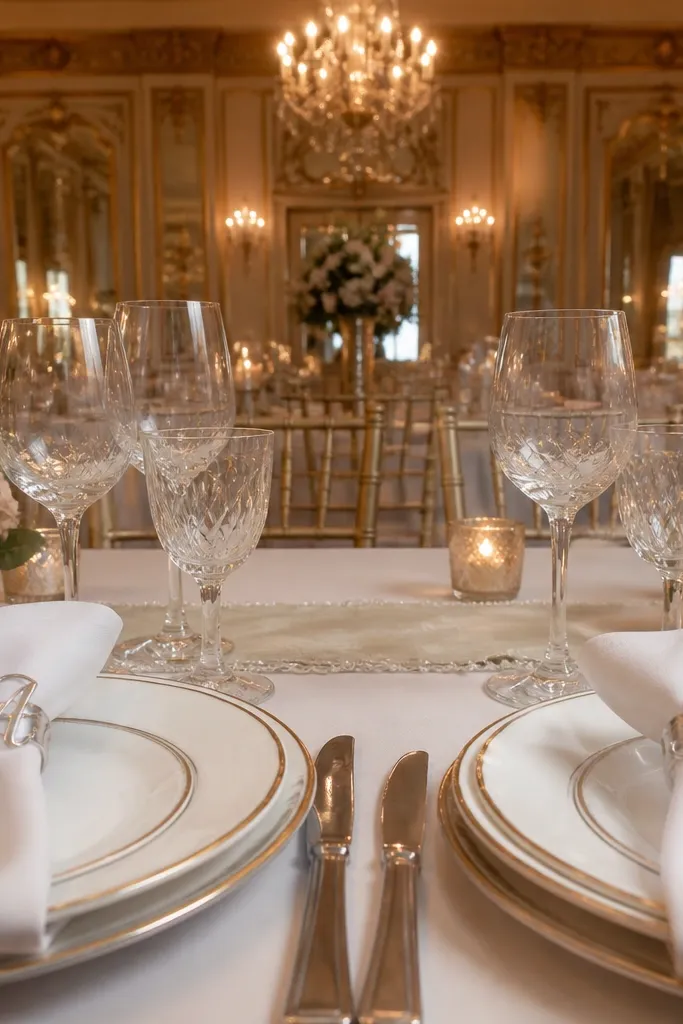
If you want sweetheart table photos to feel personal without a huge centerpiece, style the couple’s place settings. Use monogram letter napkin rings to create a crisp, readable detail at the exact camera height. Then add small bouquet corners — two mini floral arrangements placed near the couple’s side edges of the table rather than in the center. The center stays clean, so your table sign and any welcome text stays legible. This is a hidden gem because it makes the table look styled even in close-ups where you can’t see the whole centerpiece.
Start by placing napkin rings on the couple’s side of the table first so you can judge spacing. Then add two small bouquet corners, each about 8-10 inches wide, positioned near the outer edges of the couple’s seating. Keep the center open for a sign or a slim floral band if you want it. Finally, add one low candle or two near the center line so the table still has a romantic glow. Give yourself 45-60 minutes to coordinate napkins, candles, and corner placements.
Quick tipMatch the napkin ring color to one element in your florals (cream, sage, or black) so it looks intentional.
Skip thisSkip big centerpiece clutter — the personal details get lost when the center is heavy.
13. Olive Branch Table Frame + White Petal Scatter
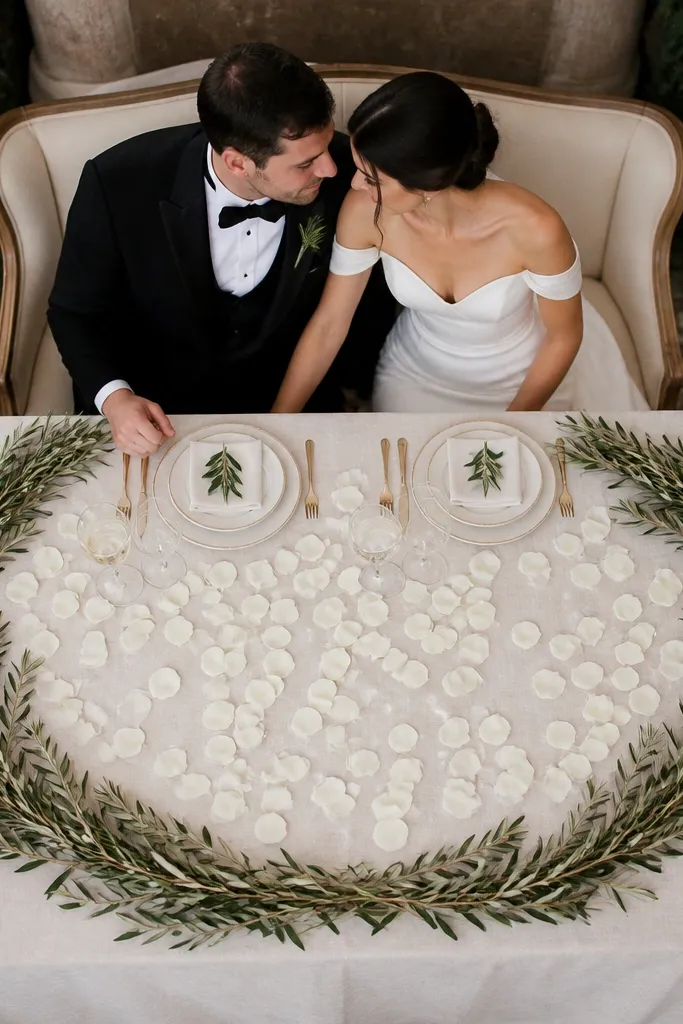
This idea frames the sweetheart table like a picture without building a full arch. Use olive branches to create a loose rectangle or oval “table frame” around the center decor area. Then scatter white petals inside the frame for a clean, bright focal zone that reads well in photos. Add two candles at the bottom corners of the frame so the composition balances on both sides. It’s a hidden gem because olive branches look natural and expensive, but the frame shape gives you structure.
Start by setting a neutral base tablecloth and placing a small tray or shallow base in the center where you want the focal area. Then bend and arrange olive branches into a rectangle/oval around that center, securing the ends with floral wire or tape. Next, scatter white petals inside the frame so they don’t spill past the branches. Finally, place two candles just inside the lower corners of the frame, aligned with the couple’s seats. Plan about 50-70 minutes for shaping and securing the branches.
Use floral wire covered with tape for a cleaner look where branches overlap.
Don’t make the frame too wide — if it touches the chair area, it blocks sightlines in photos.
14. Rainbow Pastel Buttermilk Runner + Single Flower Topper
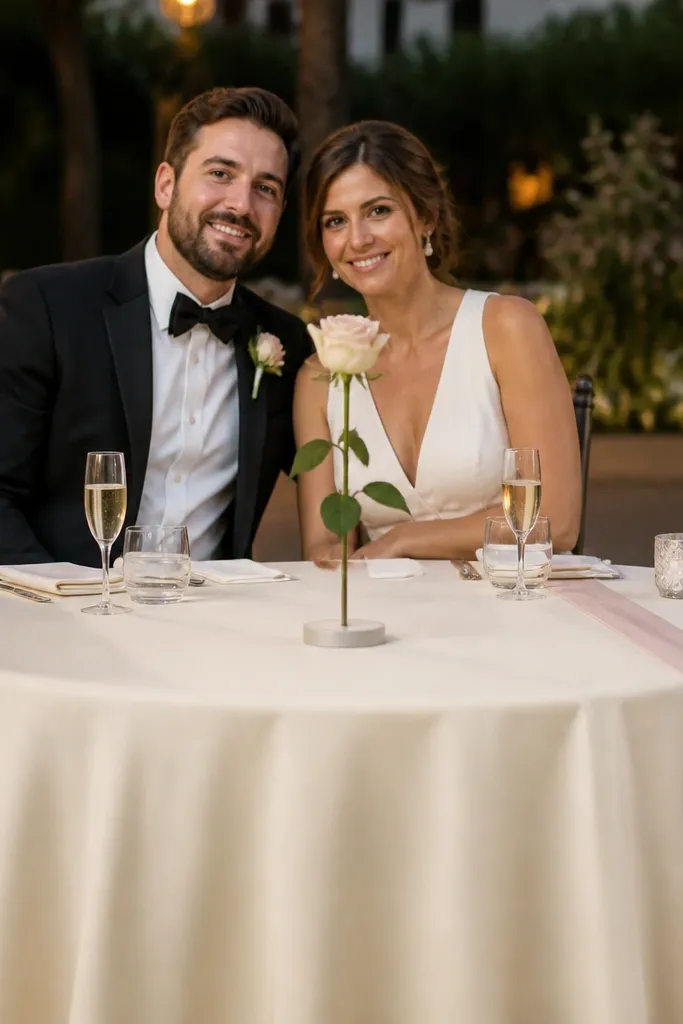
This is for couples who want color without turning the table into a craft project. Start with a buttermilk or soft cream runner as the base, then add a pastel accent ribbon or slim fabric strip in one color family. Place one tall single flower topper in the center — a single statement bloom like a tall rose spray, a gladiolus-style stem, or a long-stem calla. Add two small candles on either side so the topper stays the focal point. It photographs beautifully because it has one vertical star and a calm base that keeps the colors from fighting.
Start by draping a buttermilk runner down the center and smoothing it so it forms a straight path. Then add a pastel accent strip across the runner near the center, keeping it narrow (about 2-3 inches wide). Next, place one tall stem topper in a small base and angle it slightly so it leans toward the couple for a flattering photo line. Finish with two small candles spaced evenly from the center so the composition stays balanced. Budget 30-45 minutes, and transport stems in a rigid tube if possible.
Choose one pastel palette for the entire table — runner, ribbon, and petals should match temperature (warm vs cool).
Avoid multiple toppers — two tall stems makes the center look cluttered instead of styled.
15. Short Olive + White Candle Cluster on a Slim Mirror
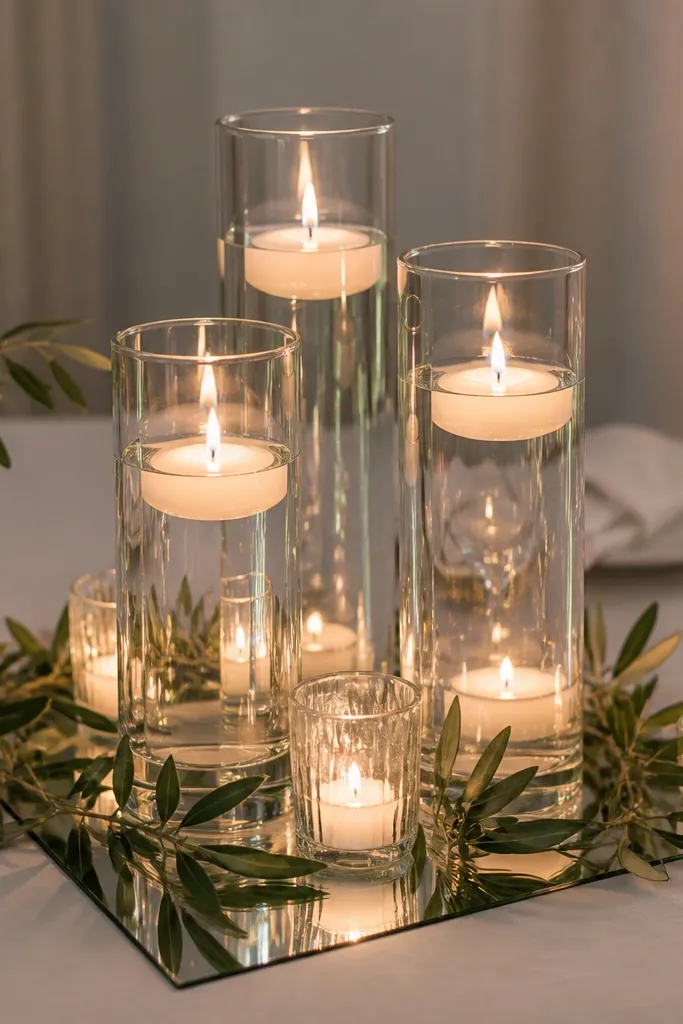
A slim mirror under your candle cluster adds depth and sparkle without needing extra decor. Place short olive sprigs around the candle cluster, keeping them low so the mirror reflection does the work. White candles reflect cleanly on glass, and the olive adds a natural frame. This setup is photogenic because the mirror creates highlights and makes the table look fuller even when the physical elements are minimal. It’s a hidden gem for sweetheart tables because it feels modern while still looking soft and romantic.
Start by laying a slim mirror or reflective tray centered on the table, making sure it sits flat and stable. Then place a tight cluster of 5-7 white candles on the mirror, with the center candle slightly taller for a gentle focal point. Add short olive sprigs around the cluster like a low wreath, keeping the sprigs under 10-12 inches tall. Finally, check that reflections don’t show messy hands or equipment in photos — adjust angles if needed. Allow 40-60 minutes and transport mirrors wrapped tightly in a protective blanket.
Bring a microfiber cloth and wipe the mirror right before photos; fingerprints show up fast.
Don’t use a foggy or scratched mirror — reflections look dull and cheap on camera.



