
1. Wood Slice Candle Stack in a Lantern Frame
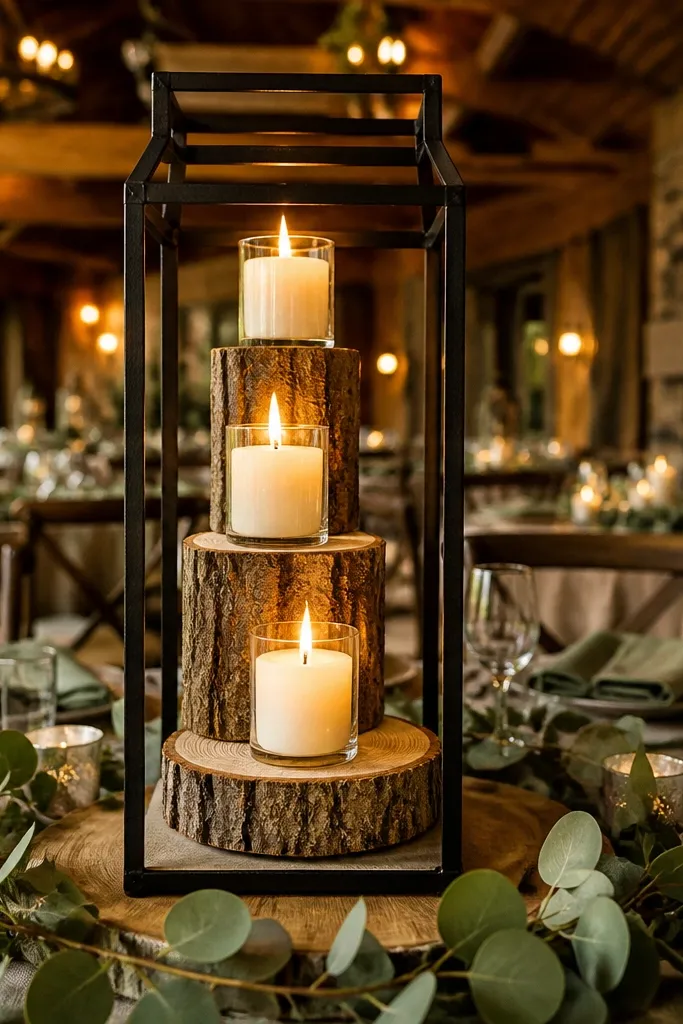
This look reads rustic and polished because the wood slices give you that natural texture while the lantern frame keeps the candles from looking scattered. It’s also easy to photograph: the lantern shape creates a clear vertical line, and the warm candlelight makes the greens look fresh. It works best for fall-through-winter weddings, especially indoors where you want cozy ambience without heavy floral budgets. Use it on a round table for a centered focal point or on a buffet table where people pass by and notice the glow. Keep the candle heights close so the stacked effect looks deliberate, not chaotic.
Start with a lantern (metal or glass) that fits your candles — aim for enough room that the candles don’t touch the sides. Then stack 3 wood slices under the candle bases, using a dab of hot glue on the bottom slice to keep everything from sliding when you move the table. Add sage sprigs tucked behind the lantern handle or along the outer edge so they peek out, not spill across the glass. Place the lantern on a tray or directly on the table and keep the arrangement centered on the place setting spacing.
If you’re using real candles, buy a second pack of tea lights for the weekend so you can swap any that burn down unevenly.
Don’t mix too many candle heights; uneven stacks look accidental in photos.
2. Burlap Runner with Eucalyptus and Tin Pails
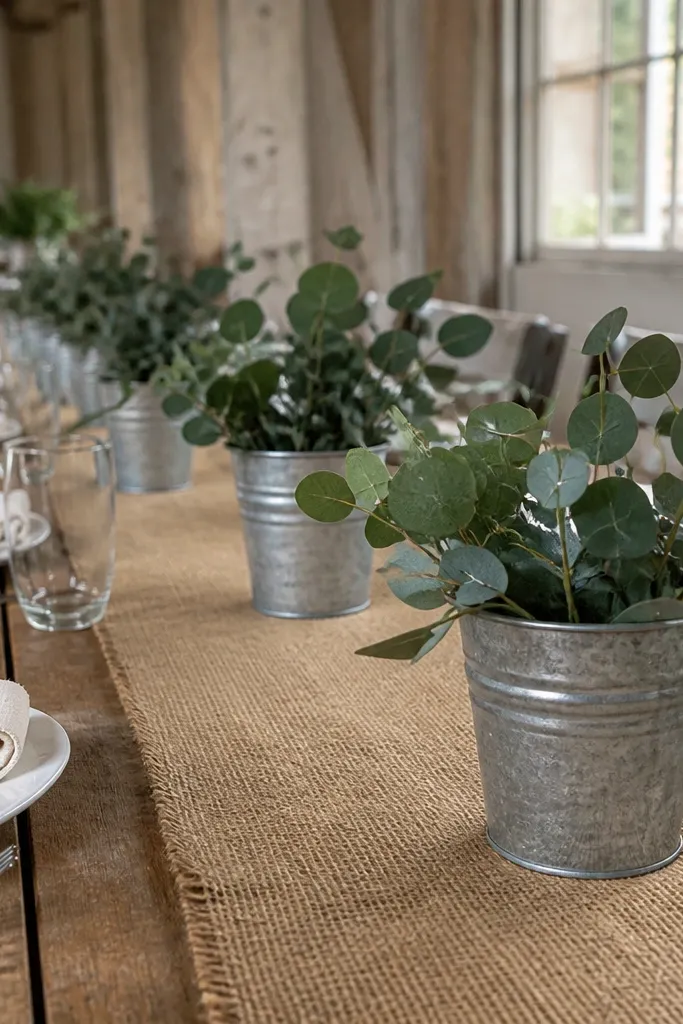
A burlap runner instantly gives rustic texture, and the tin pails make it feel charming without needing full-size vases. The eucalyptus adds a clean green line, so the runner doesn’t look flat. This is a great choice for long tables because you can repeat the same small containers and keep the look consistent from end to end. It’s also friendly for quick weekends: you can buy pre-trimmed greenery and arrange it in minutes. Choose sage eucalyptus for a softer, more wedding-like color than bright supermarket greens.
Lay the burlap runner centered on the table and pull it taut so it doesn’t bunch around the middle. Place 3-5 small tin pails along the runner, spacing them about 24-30 inches apart, and fill each with water or floral foam to hold eucalyptus stems. Trim stems so the pails reach about 8-10 inches tall above the runner, then tuck a couple leaves at the base to hide the foam. Finally, add one simple finishing touch in each pail — a short bundle of baby’s breath or a thin piece of twine tied around the handle.
Fold the runner edges under before styling so you don’t get frayed-looking ends in close-up photos.
Don’t skip spacing; random pail placement makes the runner look messy instead of intentional.
3. Cream Linen Napkin Wraps with Twine and Pine Cones
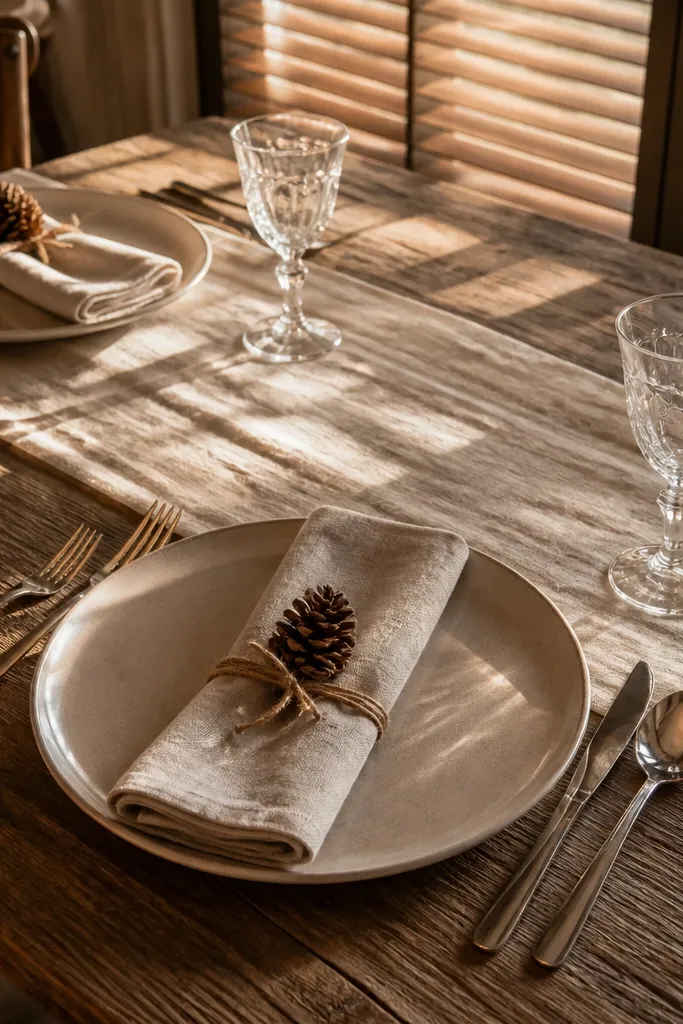
This is rustic table decor that doesn’t rely on centerpieces, which is perfect when you’re short on time or working with venue rules. The pine cone detail reads seasonal and photogenic, and the twine wrap makes it look handcrafted without needing actual DIY carpentry. It’s especially flattering for intimate dinners, rehearsal dinners, and winter weddings where you want cozy details at every seat. Guests notice it because it’s at eye level when they sit down. Keep the rest of the table simple so these wraps stand out.
Start by folding cream linen napkins into a consistent rectangle or triangle so the knot placement looks neat. Tie a small piece of twine around the napkin center, then attach a mini pine cone using a short loop of twine or a dab of hot glue to secure it. Repeat at each place setting so the pine cones align in height, about 2-3 inches above the plate line. Add a small sprig under the knot on half the seats if you want a subtle variation while keeping the look cohesive.
Quick tipUse mini pine cones (about 1.5-2 inches) so they don’t overwhelm the plate area on camera.
Skip thisDon’t use oversized cones; they block utensils and look bulky from above.
4. Stacked Wood Charger + Dried Lavender Sprig
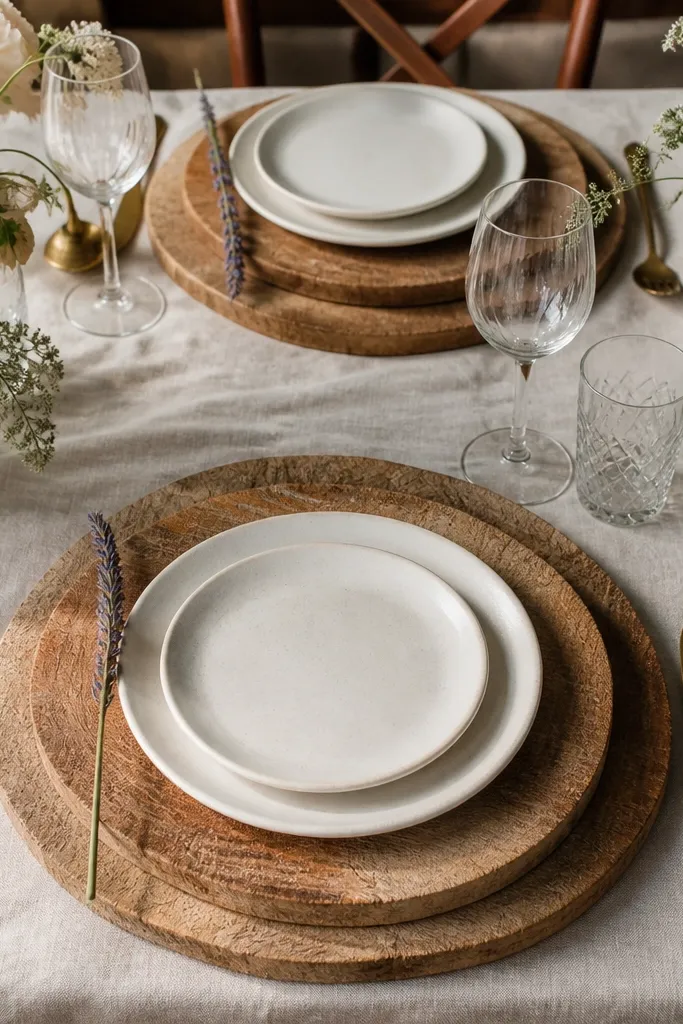
If you want rustic that looks clean, this is the move. The wood charger gives texture, while the single dried lavender sprig keeps it airy and intentional. It photographs beautifully from above because the sprig creates a simple focal point next to each plate. This works for spring and summer because lavender reads light and soft, not heavy like pine or burlap. It also scales well for quick weekends: you can set place settings in batches in under an hour per table.
Place wood chargers under each dinner plate and keep them aligned so the rim shows evenly. Lay one dried lavender sprig across the side of each plate or tucked near the fork so it doesn’t cover labels or place cards. For extra hold, tie the sprig to the plate with a thin ribbon loop or a tiny piece of florist wire hidden behind the plate rim. Finish by adding one matching accent element per table — like a small votive in the center — so the whole table has one theme.
Store dried lavender in a zip bag with a paper towel to reduce breakage before the wedding day.
Don’t add multiple herbs per plate; the look turns cluttered fast.
5. Mason Jar Bud Vases with Burlap Tie Bands
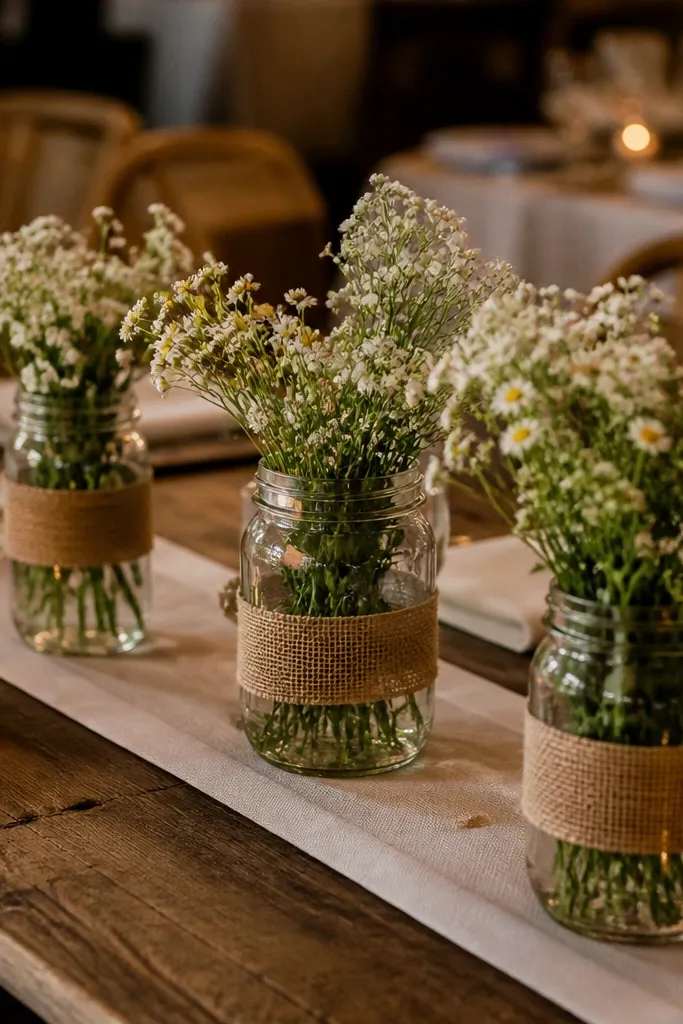
Mason jar bud vases are rustic by default, but the burlap tie bands make them look styled instead of store-bought. This setup is photogenic because the jars create repeated shapes, and the stems stay low so tablescape doesn’t block views. It’s a great choice for indoor venues with limited space because you can cluster jars without needing tall stands. You can also match the jar count to your guest count, which helps if you’re doing a smaller wedding. Keep the stems short and consistent for that charming, orderly look.
Start by cleaning and drying mason jars so they don’t look hazy on camera. Fill each jar with water and add 1-2 short stems (sage, eucalyptus, or white wildflowers) trimmed to about 5-7 inches tall. Cut burlap strips and tie them around the jar neck with a small bow or a tight wrap, trimming the ends so they don’t fray randomly. Arrange jars in a loose row along the center line of the table, with 8-12 inches between jars so each one is visible.
Quick tipUse stems that have similar thickness so the jars look balanced, not lopsided.
Skip thisDon’t use tall, uneven flowers; they make the whole table feel cramped.
6. Tin Candle Cups on a Reclaimed Wood Board
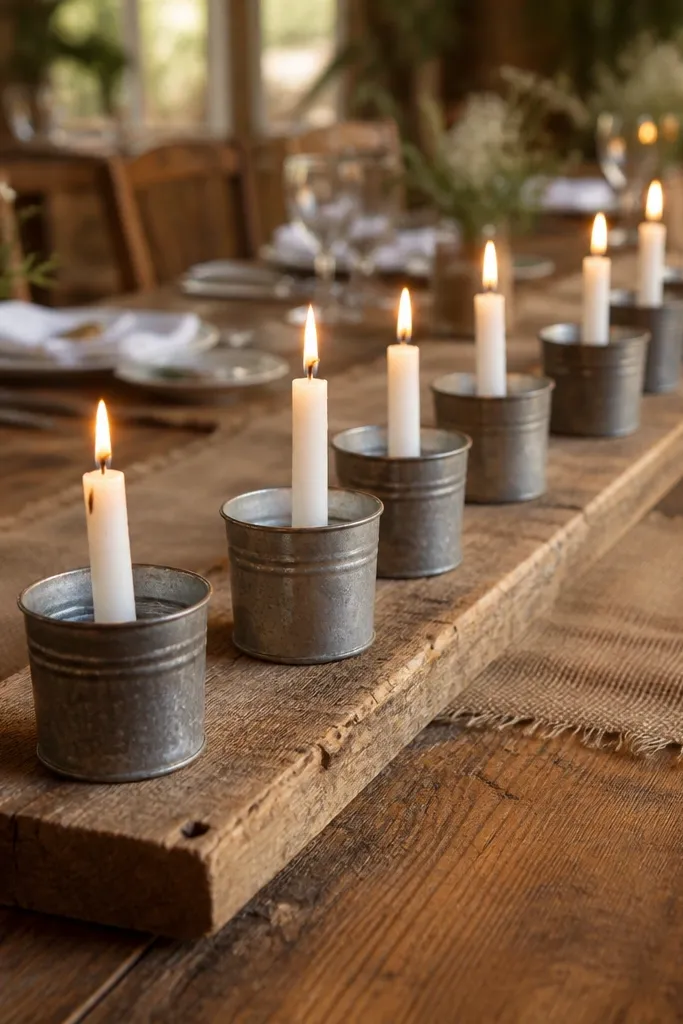
A long reclaimed wood board gives you instant rustic character, and tin candle cups make it feel warm and vintage without needing large lanterns. This is one of the fastest ways to build a strong tablescape because you’re placing a few identical items in a line. It looks great for long tables and also for sweetheart tables where you want a clean focal point behind the couple. The greenery can be minimal — a few sage sprigs tucked around the board edges — and the candles still carry the photo. Use this when you want rustic charm but don’t want it to look “farmhouse themed” too hard.
Lay the wood board centered on the table, then place 5-7 tin candle cups across it in a gentle curve or straight line depending on your table shape. Add tea lights or battery candles and tuck short greenery pieces between cups so they peek out. Keep the candles about the same height and avoid crowding; leave at least 2 inches of wood visible between cups. Finally, add one extra accent at each end of the board — a small pine cone cluster or a mini ribbon bow — so the line looks finished.
Quick tipIf you’re transporting the board, wrap it in a moving blanket so the corners don’t chip and scratch your linens.
Skip thisDon’t cover the board fully with greenery; you need visible wood for the rustic look.
7. Champagne Bottle Bud Vases with Twine Labels
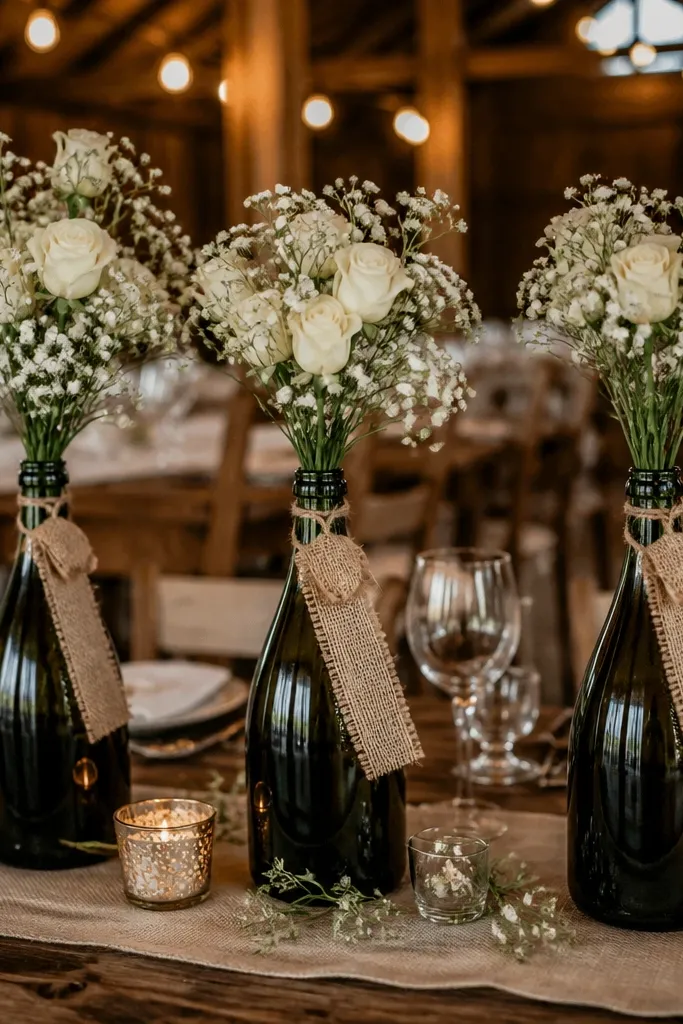
Turning bottles into bud vases looks intentional and a little celebratory, which fits weddings better than plain jars. The glass catches light and makes the table feel more “event” even when you’re keeping decor simple. This works especially well for small centerpieces because bottles don’t take up much width. It also gives you an easy way to add personalization with twine labels or simple tags if you’re doing assigned seating. Choose a few bottles only, keep stems low, and the table stays airy and photogenic.
Clean and remove labels from a set of champagne bottles, then fill them with water or a small amount of floral foam. Trim sage or white baby’s breath to about 7-9 inches tall and insert 2-3 stems per bottle. Wrap a short piece of twine around each bottle neck and tie a small tag or knot detail so the bottles look dressed. Cluster 3-5 bottles in the center of a round table or line up 4-6 bottles down a runner on a long table.
Quick tipPick bottles with similar neck thickness so the height and silhouette look consistent in photos.
Skip thisDon’t use too many bottles; the table can start to look like a bar setup.
8. Rustic Tray Centerpiece with Clear Glass Orbs and Pine Branches
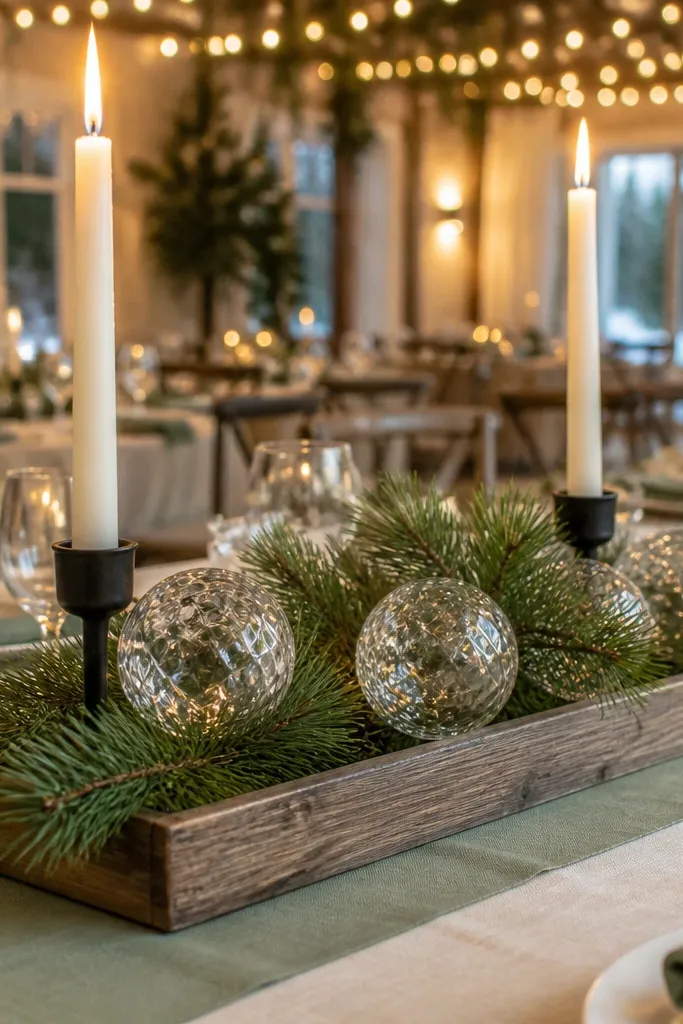
This is rustic with a cleaner, more modern finish because the clear glass orbs reflect light and keep the table from looking heavy. The pine branches bring the seasonal texture, while the tray keeps everything aligned. It’s a strong choice for indoor winter weddings where you want candlelight and shine without spending on full floral arrangements. Use this when your venue has dark walls or low natural light — the glass catches ambient light and helps photos look lively. Keep the base palette mostly white and green with one warm wood element.
Choose a rectangular wood tray and place it centered on the table. Add 3-5 clear glass orbs (vary sizes slightly) and nestle short pine branches around them so they frame the center. Insert white taper candles in small holders or add battery candles if you need safer handling. Finally, add one thin ribbon of burlap or twine across the tray for a rustic touch, then step back to confirm there’s breathing room around the orbs.
Quick tipUse battery tapers if your venue doesn’t allow open flames; they still look crisp in photos.
Skip thisDon’t pack the tray tight; empty space makes the glass reflections look intentional.
9. Cedar Branch Garland with Floating Votives
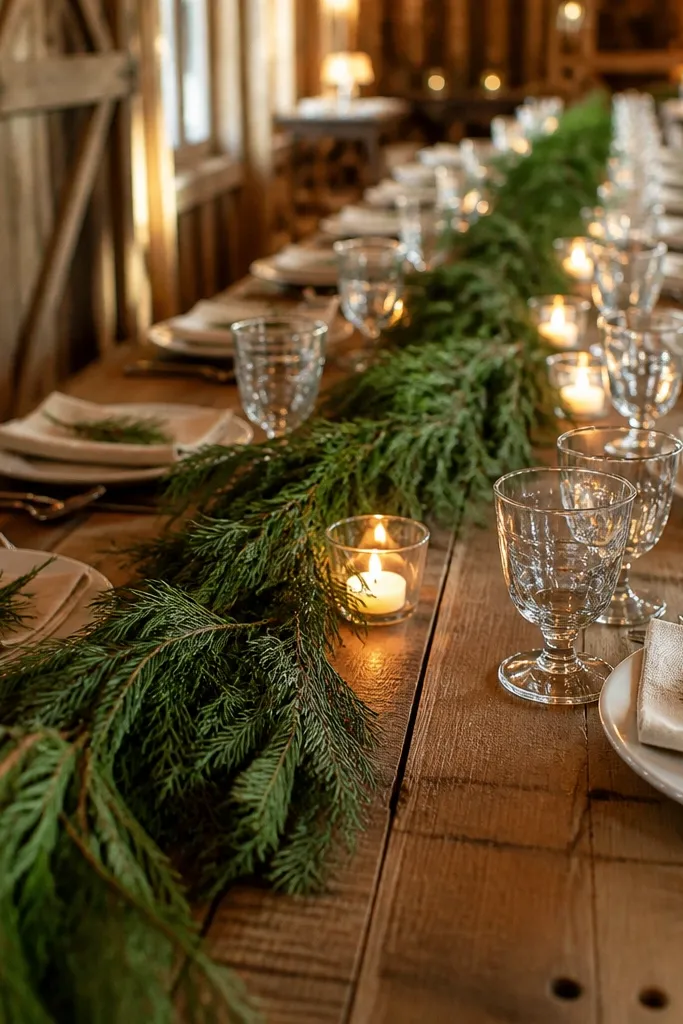
A cedar branch garland creates a long, elegant rustic line, and floating votives give you that warm glow without tall centerpieces. It’s photogenic from the side because you see the line of greenery and the candle light below. This look works best for long tables or head tables where you want movement and height variation without blocking faces. It also feels seasonal without looking like a Christmas theme if you keep the palette to cedar green, cream, and one warm metal. It’s also quick: you’re mostly placing pre-made greenery and setting votives.
Lay a cedar branch garland along the center of the table and secure it with thin floral wire or zip ties on the underside. Set shallow bowls (or wide glass candle holders) along the garland line, spaced about 18-24 inches apart. Add water and place floating votives inside, then tuck small cedar tips around the bowls so they disappear into the greenery. Keep the garland ends neat — fold them inward so they don’t look messy when photographed.
Quick tipDry the cedar slightly before styling so it doesn’t drip onto linens.
Skip thisDon’t use too much water; spills ruin tablecloth photos and can warp runner fabric.
10. Vintage Teacup Planters with Mini Succulents
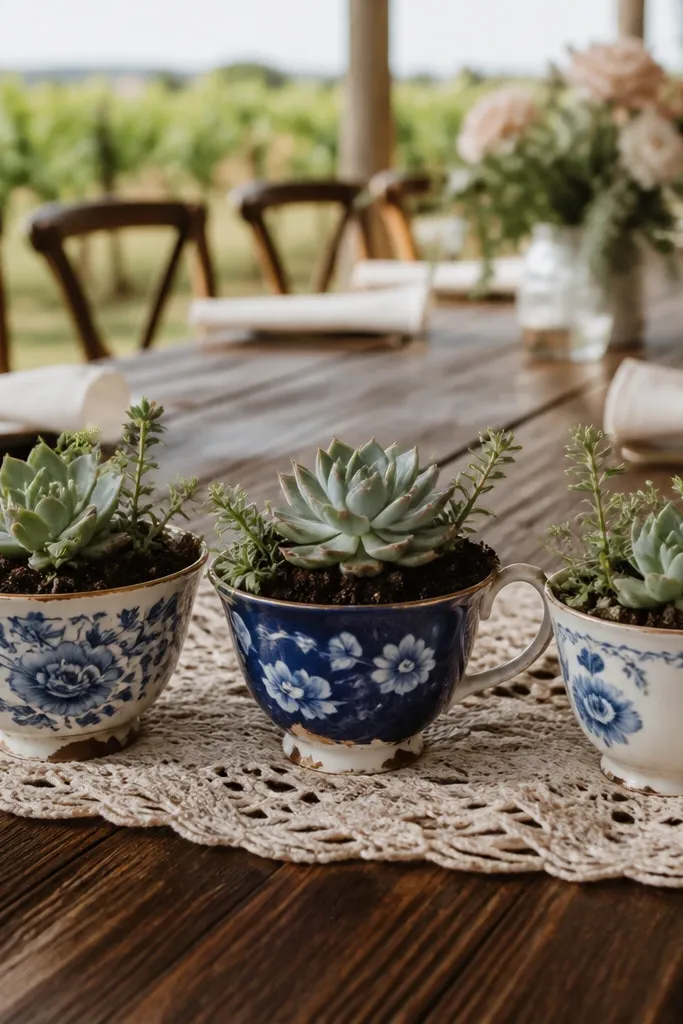
Teacups turn rustic table decor into something charming and a little unexpected. Mini succulents keep the arrangement low and tidy, which is ideal for quick and easy weekend wedding table decor because you’re not fighting wilting stems. This look works best for spring and early summer, especially for daytime weddings where natural light makes the ceramic detail pop. It’s also a great option if you want guests to take something home later. The trick is keeping the teacups consistent enough that the table looks intentional, not thrift-store random.
Pick teacups with matching tones (cream, ivory, or muted floral) and line them up on a tray or runner. Add a small amount of succulent-friendly soil and plant one mini succulent per cup, then top with a thin layer of decorative pebbles if you want extra polish. Place the cups on the table with a small burlap strip or linen square under each one to unify the look. Finish by adding one tiny sprig detail — a single baby eucalyptus leaf — where the teacup meets the runner.
Quick tipBring a small roll of painter’s tape to mark your teacup placement so you can set them fast on wedding day.
Skip thisDon’t mix tall plants with low teacups; keep every succulent under 4 inches.
11. Garland of Dried Orange Slices and Cinnamon Sticks
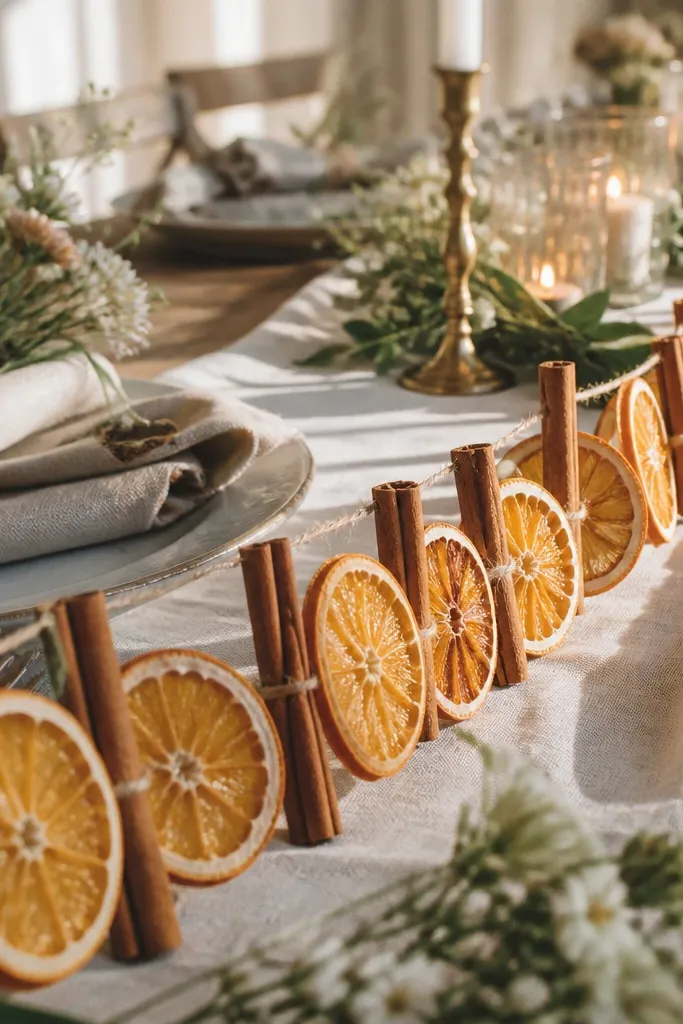
This is rustic decor that looks good and smells good, without needing expensive flowers. Dried orange slices catch light and create a warm, golden color that photographs beautifully against cream linens. Cinnamon sticks add height and texture in a way that feels intentional, especially when you keep the garland length consistent. It’s a great weekend option because you can buy pre-dried citrus and pre-cut cinnamon sticks. Use this for fall weddings, winter weddings, and even late-September events when you want cozy but not heavy.
Start with a neutral runner or tablecloth in cream or oatmeal. String dried orange slices with thin twine and add cinnamon sticks every few slices, then lay the garland across the center line of the table. Secure the ends with small pieces of tape on the underside so it doesn’t shift when guests move chairs. Place 2-3 short candles at each end of the garland so the centerpiece feels balanced rather than one long line only.
Quick tipIf your venue is humid, store citrus garlands in a sealed bag until right before setup.
Skip thisDon’t cover the entire table; the garland needs negative space to look charming.
12. Mason Jar Votive Trio with Burlap Doily Base
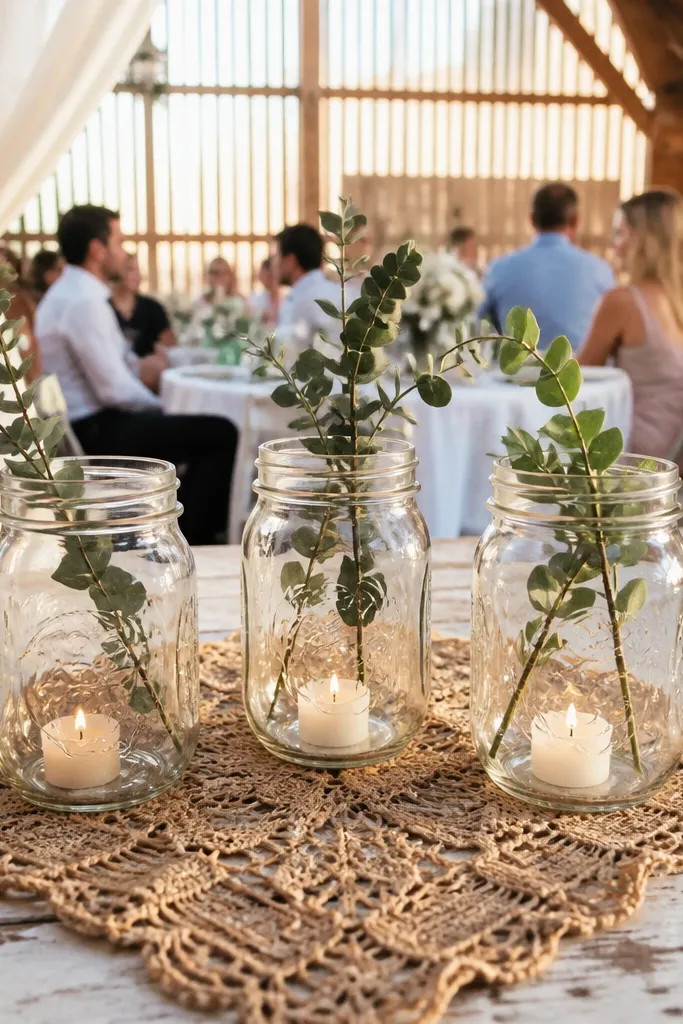
This look is small but impactful because it gives you a repeated pattern: three jar votives, one burlap base, and a hint of greenery. The burlap doily trick makes the jar area look styled even if the rest of the table is plain. It’s perfect for quick and easy weekend wedding table decor when you don’t want to commit to a full runner or big centerpiece. Use it on side tables, guest tables, or as a consistent pattern across multiple tables. Keep it low enough so guests can see each other, and let the candle glow do the heavy lifting in photos.
Cut burlap into circles about 10-12 inches wide and place them centered under your votive cluster. Arrange three mason jars in a triangle, each with a votive candle inside, and trim sage sprigs so they tuck around the jar bases. Add one simple filler — a few grains of dried rice or small pebbles around the jar bottom — only if you want visual texture when candles are off. Finally, set the entire cluster on a tray or directly on the table so it doesn’t slide.
Quick tipUse battery votives with a warm flame mode if your venue has strict flame rules.
Skip thisDon’t use too many greenery sprigs; one tidy tuck per jar looks better.
13. White Candle Clusters on a Stacked Books Base
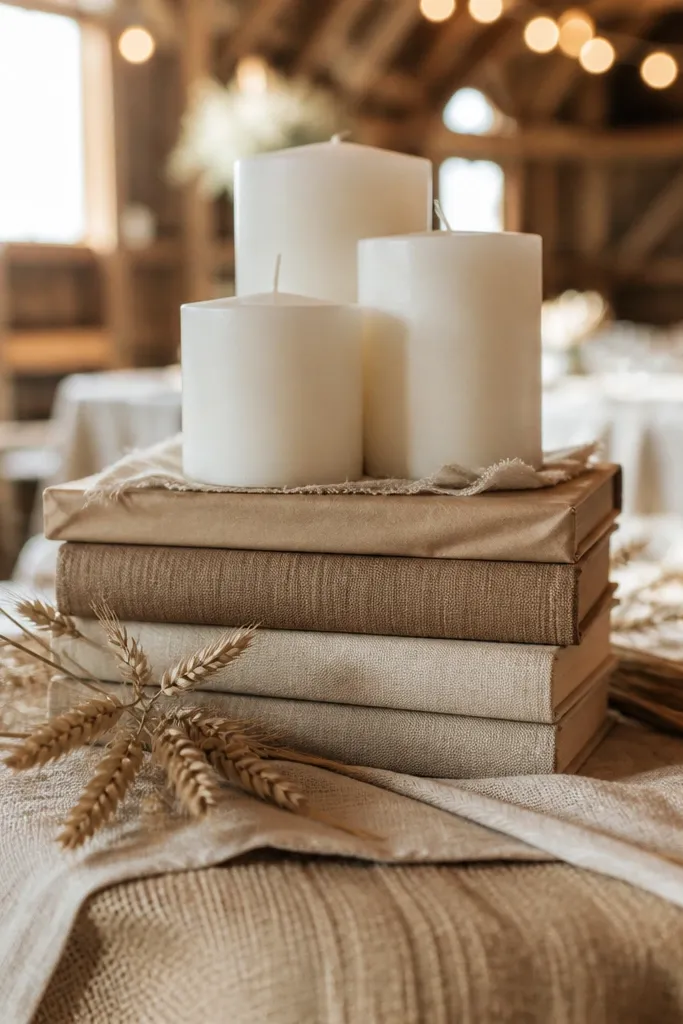
This is a rustic workaround for venues that don’t allow heavy bases or where you need height without complicated stands. Stacked books covered with kraft paper or linen create a stable platform, and white candles add clean contrast against the rustic base. It’s photogenic because it gives you a clear tiered look — candles up top, texture below. Best for indoor weddings where you want a soft, bright table centerpiece that still feels warm. Keep the candles grouped in odd numbers for that balanced, charming shape.
Wrap a few hardcover books in kraft paper or linen so the spines don’t show, then stack them on a small wooden board or tray. Place 3-5 white taper candles in holders on the top surface, keeping the cluster tight enough to read as one centerpiece. Add a thin strip of twine around the stack and tuck one small eucalyptus sprig along the side. Set the board centered on the table and check sightlines from seated eye level.
Use candle holders with flat bases so the stack doesn’t wobble when you set the table down.
Don’t choose slick, shiny paper wraps; they reflect ugly highlights in overhead photos.
14. Rustic Place Card Holders with Mini Wood Blocks
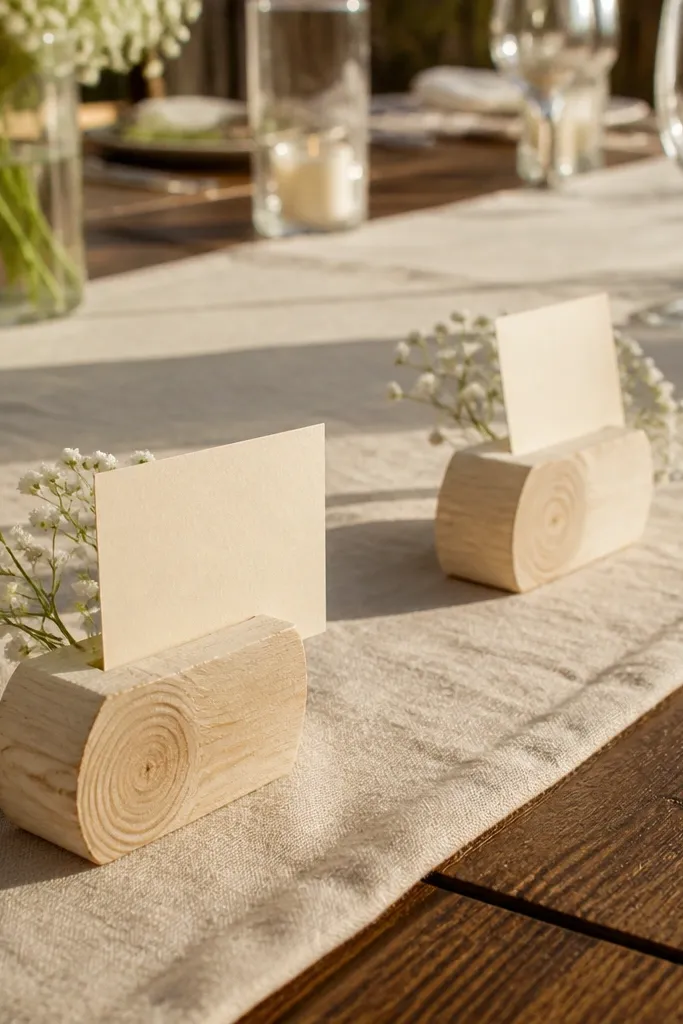
Place card decor is where rustic charm becomes functional. Mini wood blocks keep cards upright and give you natural texture at each seat, so even simple tables look styled. This approach is quick because you’re repeating the same setup for every guest, and it makes the table feel designed rather than bare. It photographs well because each card has a visible vertical line — the wood block — that reads clearly from above. Pair it with low center decor so the blocks aren’t fighting for attention.
Buy or cut mini wood blocks sized so a place card can stand without tipping, then sand edges lightly so they don’t snag paper. Use a small hole or a clip to hold the card securely, or wedge the card into a slit at the top. Tie a short piece of twine around the block and tuck a tiny sage leaf behind the card for a consistent accent. Place one block per guest, and keep spacing even across the table so the pattern looks intentional in photos.
Label the blocks by table number before you transport them so setup is fast and you don’t scramble at the venue.
Don’t use blocks that wobble; shaky cards look messy in every photo.
15. Long Table Runner with Burlap Pocket Vases
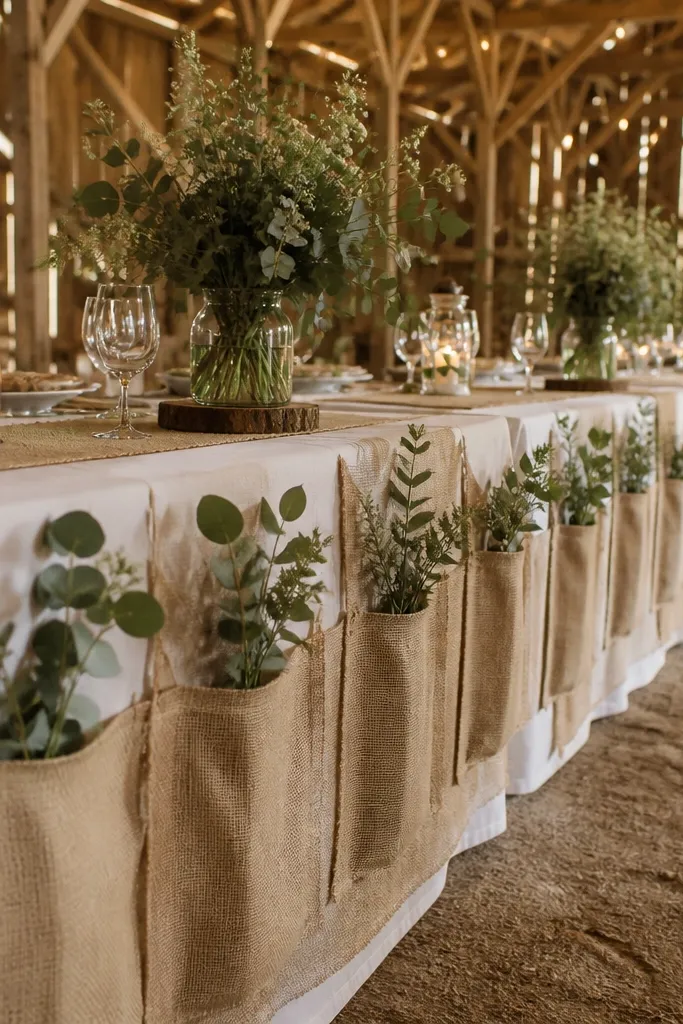
Burlap pocket vases are the kind of rustic detail that looks custom because the greenery looks “built into” the runner. It’s also a time saver: you’re not arranging individual containers; you’re inserting stems into pockets at set points. This is ideal for long tables where you want a continuous look that doesn’t shift as guests walk by. The pockets also protect stems from flopping, which matters on weekend timelines. Keep the stems short and consistent and let the runner texture do the work.
Sew or buy a burlap runner with pockets, aiming for pocket openings big enough for a small foam insert or water vial. Place the runner centered and secure it with a few hidden clips under the edge. Insert foam or water vials into each pocket, then trim eucalyptus or dried wheat stems to about 10-12 inches tall. Add one filler element per pocket — like a single white flower cluster — and keep pocket heights matched for a clean photo line.
Quick tipBring extra straight pins to fix runner gaps quickly if the venue tablecloth shifts.
Skip thisDon’t overstuff pockets; too many stems make the runner look bulky and uneven.



