
1. Wood-Slice Welcome Sign Backdrop
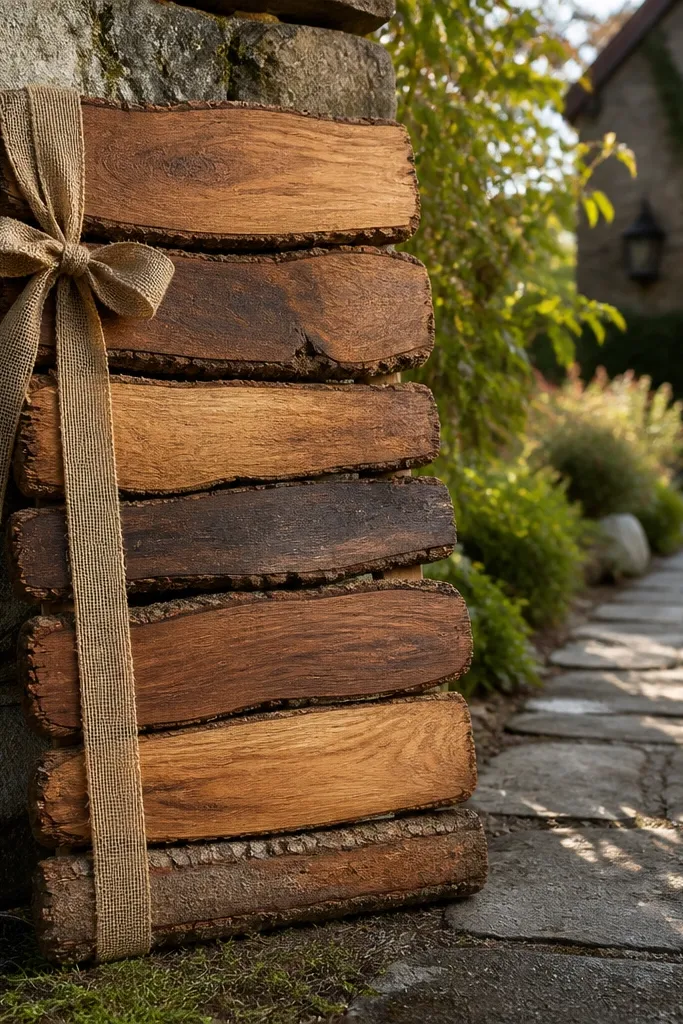
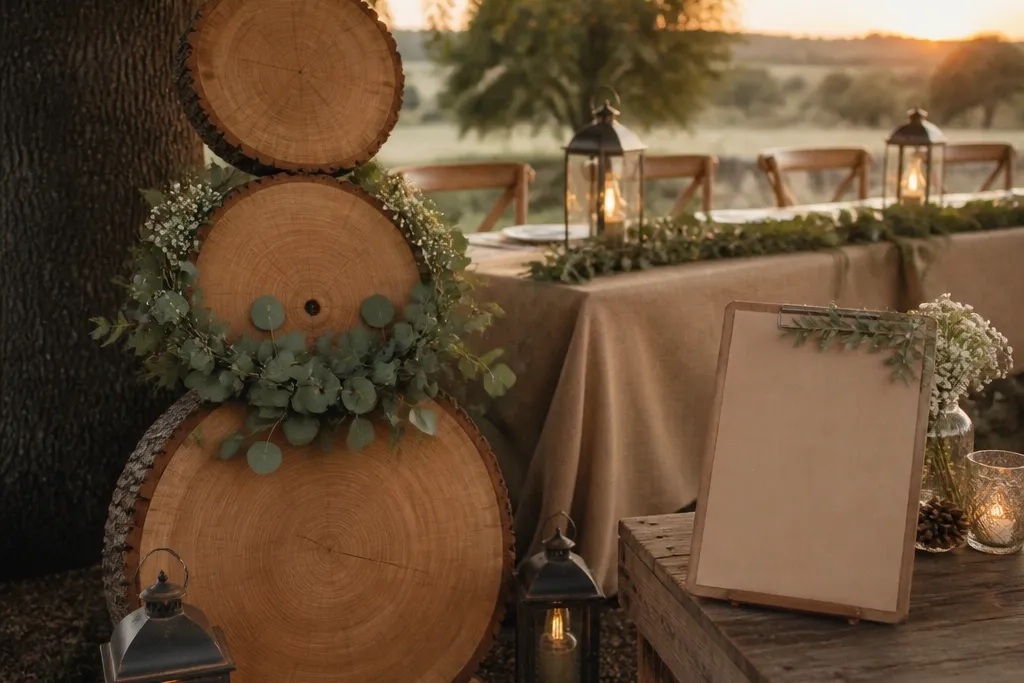
A wood-slice backdrop makes your welcome area look handcrafted without needing a full arch. It photographs with warm color and natural texture, and it hides small imperfections because the slices vary in tone. Use this when you want rustic charm at the entrance — the first thing people see when they arrive. It works best with dark ink lettering and a simple sign shape, so the wood remains the star.
Start by buying a pack of 1-2 inch thick wood slices or wood rounds in mixed diameters. Arrange them on the ground or against a frame in a loose rectangle, then wedge them so they stand without wobbling. Place a kraft paper sign (or a small painted board) in the center and secure it with two zip ties or floral wire to the back support. Budget tip: pick slices with bark still on edges for more texture per piece. Spend 45-90 minutes prepping and keep the backdrop away from heavy foot traffic so it stays neat.
Spray the sign with a matte sealant so it doesn’t glare in sun.
Don’t use white lettering on bright days; it washes out fast.
2. Burlap Runner with Uneven Hem for Head Table
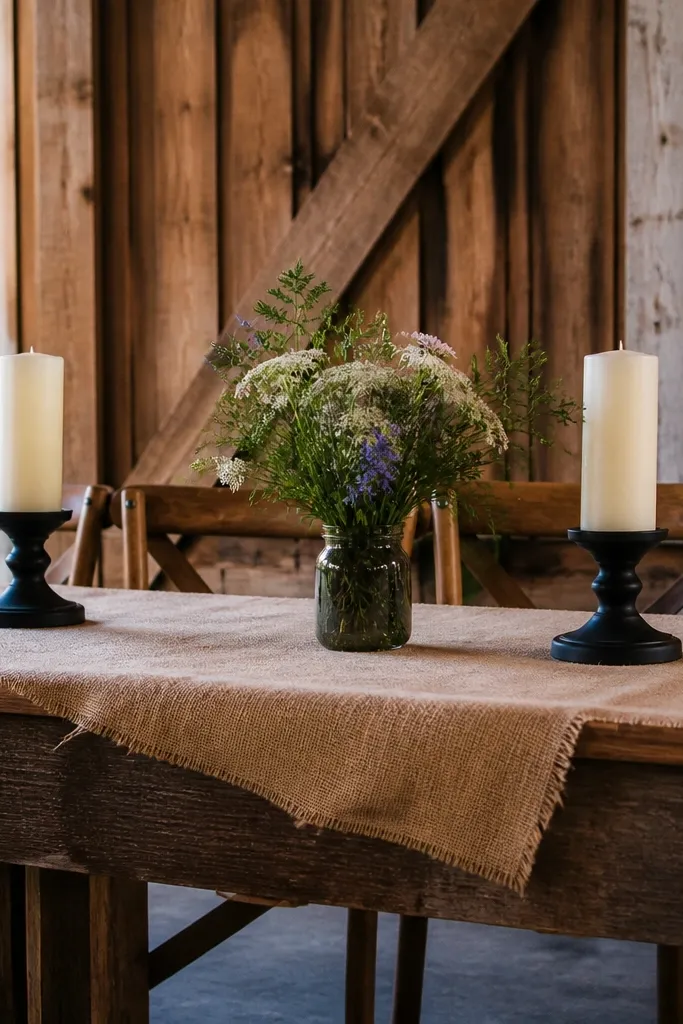
A burlap runner with an uneven, slightly messy hem looks more organic than perfectly ironed fabric. It gives your head table a rustic base that still reads cleanly on camera. Pair it with a few intentional objects like pillar candles and one small floral bundle so the table doesn’t feel overloaded. This works especially well for outdoor weddings where natural light catches the weave and makes the fabric look richer.
Quick tipUse heat-safe candle holders so you can trust the look around guests.
Start with a wide burlap runner (or burlap-look fabric) and cut it to the table length plus 10-14 inches for drape. After you place it, intentionally let one side fall lower and wrinkle the fabric by hand in 3-5 spots. Then add a narrow strip of kraft paper or a thin wood plank across the center to break up the burlap visually. Finally, place candles and one low centerpiece so you preserve negative space. Expect 60 minutes of styling for a head table, and plan to iron only the edges if you need it smoother.
Skip thisSkip full burlap coverage on every surface; it turns into a “costume” vibe.
3. Lantern Cluster on a Budget Rail
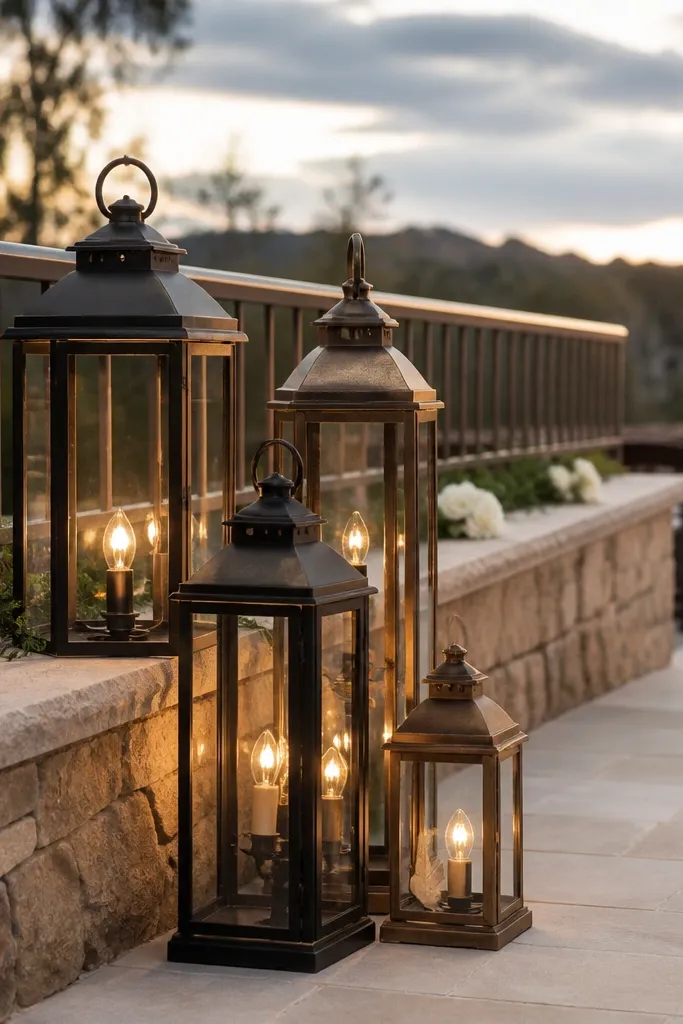
A lantern cluster creates instant atmosphere because light makes the whole scene feel warmer in photos. Instead of buying a big installation, group 3-5 lanterns at different heights so the frame looks layered. Choose matte black, antique bronze, or clear glass with warm bulbs for a rustic look that still feels polished. Hang them near a walkway or behind the sweetheart table so guests have a built-in photo background.
Quick tipUse warm LEDs and dim them if your pack allows it; harsh brightness kills the rustic mood.
Start by picking a simple hanging point like a sturdy beam, shepherd hook line, or portable metal rail. Attach lanterns using different lengths of cord so one sits higher and two sit lower around it. Add battery candles or warm LED bulbs (2700K) so you get consistent glow without fire risk. Keep the cluster about 2-3 feet wide so it looks intentional rather than scattered. Plan 30-60 minutes to install, and test the spacing before you commit so the lanterns don’t overlap in photos.
Skip thisDon’t hang lanterns too low over guest heads; it makes photos uncomfortable.
4. Dried Grass Bundles in Glass Jars
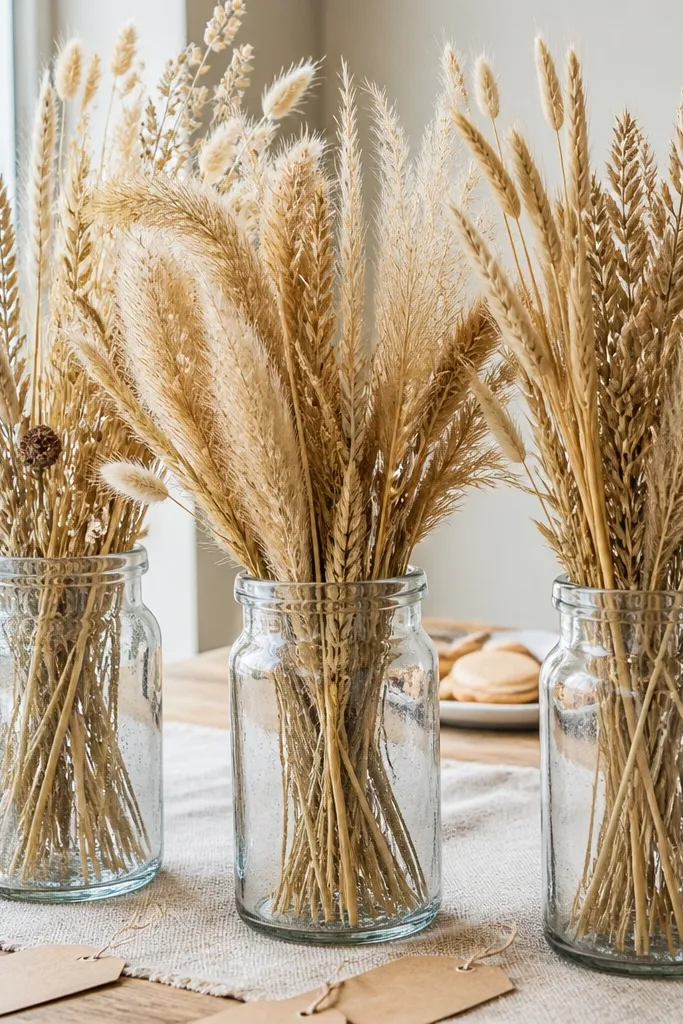
Dried grass bundles add height and movement without expensive florals. When you arrange them upright in clear jars or bottles, they look airy and intentional, not like leftover stems. This is one of those hidden gems rustic wedding decor ideas that reads expensive because the silhouettes are clean and the textures are natural. It’s perfect for aisle markers, table clusters, and even a simple dessert station backdrop.
Start by buying dried grasses or seed heads in bundles, aiming for 18-30 inch stems. Trim them to a consistent height for a tidy look, then place each bundle into a clear jar with floral foam or sand inside. Group jars in odd numbers: three jars for small clusters, five jars for a larger table. Add one small accent like twine around the jar neck. Give yourself 2-3 hours for table-setting prep so you’re not rushing on wedding day.
Spray the stems lightly with unscented hairspray to reduce shedding.
Avoid overstuffing; too many stems in one jar turns into a haystack.
5. Kraft Paper Menu Cards with Wood Clip Display
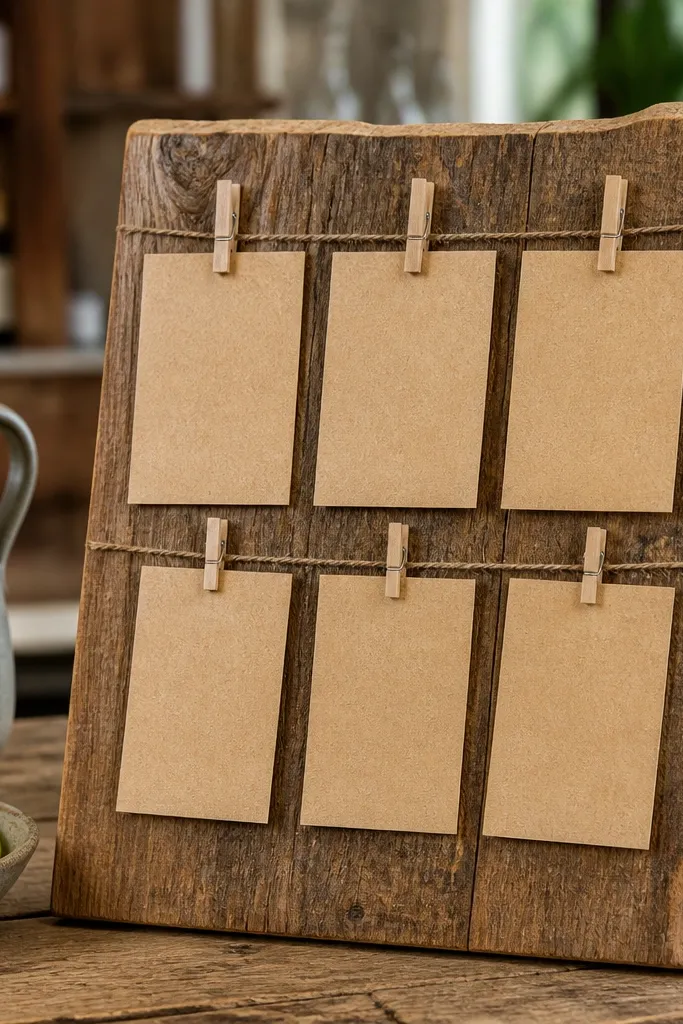
Kraft paper menus look rustic and expensive when they’re displayed with wood clips instead of a flimsy stand. Use this for bar menus, dessert menus, or a simple “welcome drinks” sign. The texture of kraft paper holds up in bright light, and the clipped format gives you that handmade feel without a craft marathon. It photographs cleanly because it stays flat, centered, and readable from a distance.
Start by printing or hand-lettering menu cards on heavy kraft paper (rough edge optional). Cut them to a consistent size like 4x6 or 5x7 so the set looks uniform. Attach each card to a thin wood board with mini clothespins or wood clips spaced evenly. Mount the board on an easel or hang it from a hook behind the bar. Budget tip: use one board for multiple signs and swap cards as needed. Plan 30 minutes for setup and 10 minutes for any last-minute changes.
Use a darker ink pen or paint marker so text stays crisp in sunlight.
Skip glossy laminated paper; glare ruins readability.
6. Twine-Wrapped Bottles for Table Center Accents
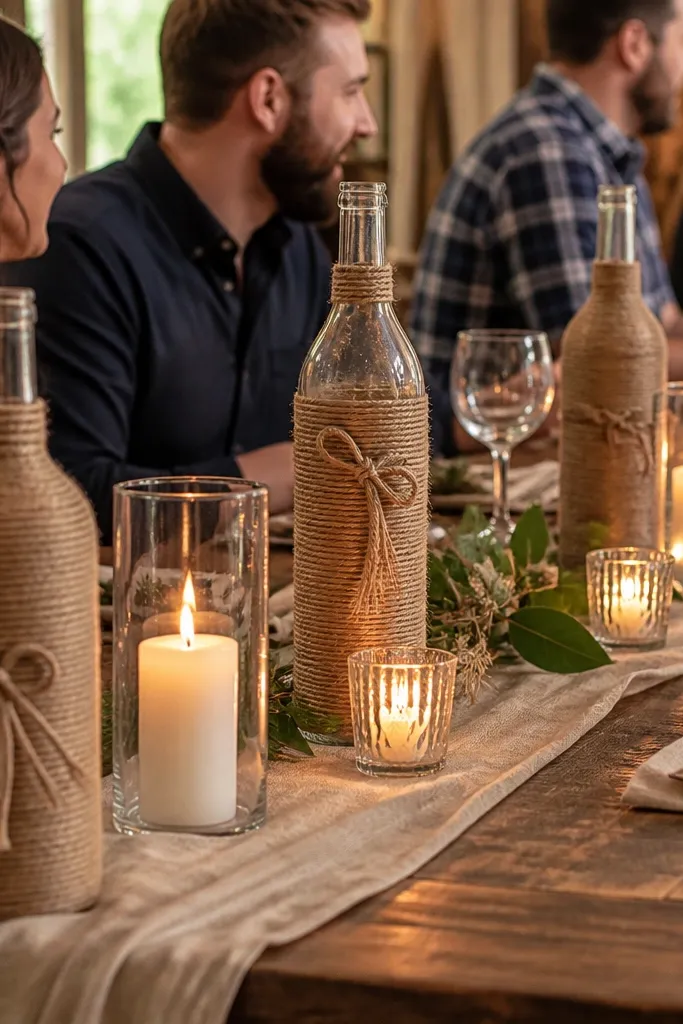
Twine-wrapped bottles are a cheap way to make everyday glass look like decor. They add a tactile, rustic layer that shows up well in close photos on tables. Use them as spacing markers — one near each end of a runner or between candle groups — so the table doesn’t look empty. This also helps unify mismatched bottles you already have, which keeps your spending down.
Start by washing and drying clear bottles, then wrap with jute twine in tight coils. Secure every few inches with hot glue so it doesn’t loosen. Add a small sprig of greenery or dried stem inside the bottle opening, trimming to fit. Place bottles in a loose line across the center or around candles, keeping at least 6-8 inches between glass objects for visual breathing room. Total prep time is about 60-90 minutes for a set of 8-12 bottles.
Choose bottles with a consistent shape for the cleanest photos.
Don’t wrap too loosely; loose twine looks messy instead of handmade.
7. Half-Moon Arch with Foraged Branches
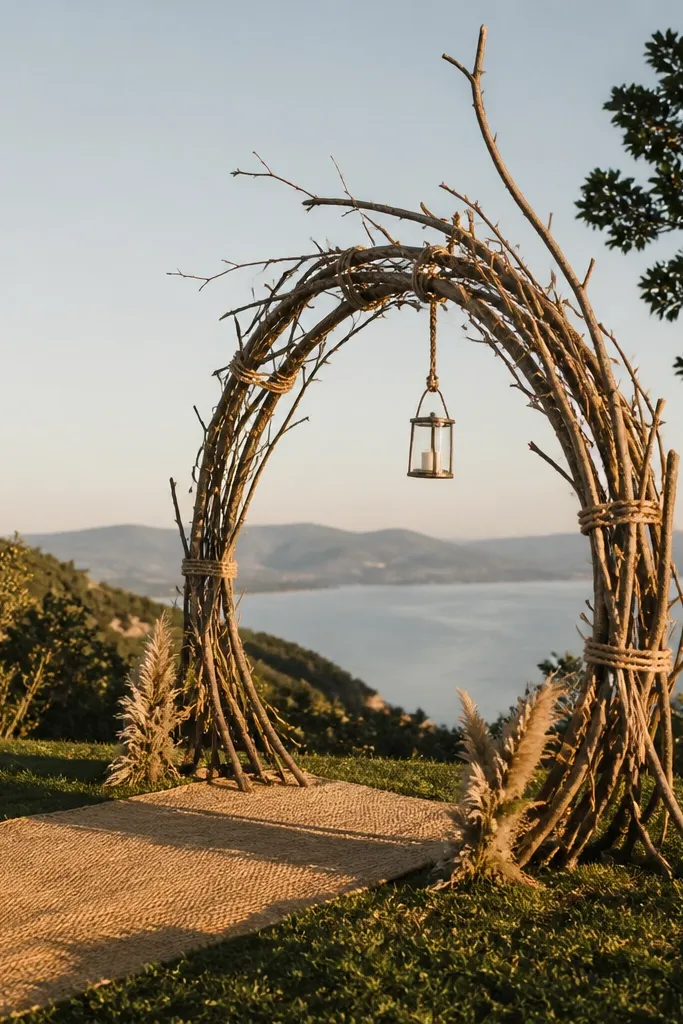
A half-moon arch is a hidden gem because it gives you the arch “moment” without the cost of a full floral wall. Using foraged branches or branch bundles creates a sculptural frame that reads rustic in any season. It also photographs well from the side because the branches create depth and shadows. Place it behind the ceremony seating or at the sweetheart photo spot.
Quick tipUse branch ends of different thicknesses so the silhouette looks natural, not uniform.
Start by creating a simple half-arch frame with flexible stakes or a rental arch base. Attach branches horizontally and vertically, then weave dried greenery lightly so it doesn’t cover everything. Keep the arch airy — you want gaps so the background light shows through. Secure with zip ties and floral wire, then tie a twine bow at the center point for a focal detail. Plan 2-3 hours for assembly and keep it away from wind tunnels if you’re outdoors.
Skip thisAvoid fully covering the frame; dense greenery makes it look expensive but cheap at the same time.
8. Table Numbers on Wood Blocks with Burned Edge Style
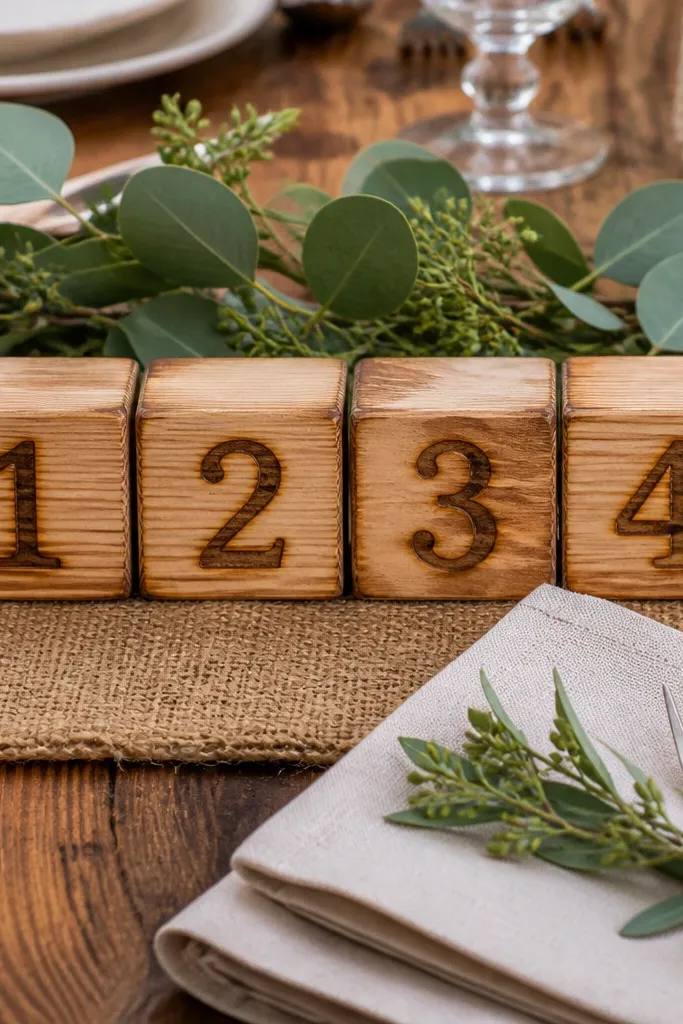
Wood block table numbers look sharp and rustic, especially when the numbers are dark and centered. The burned-edge style — where the wood has a darker rim — reads like intention, not a craft mistake. It’s a clean alternative to printed signs that can get lost against linens. This idea works best for seated dinners because guests scan table numbers quickly and the blocks look good in overhead photos.
Quick tipSeal the numbers with matte clear coat to prevent smudging.
Start with small wood blocks or thick craft wood rectangles, sanded lightly so the numbers can sit cleanly. Apply numbers with a wood-burning tool or a dark paint marker, then lightly distress the edges with sandpaper for contrast. Stand each block using a small foam pad or a folded kraft card base so it doesn’t tip. Keep the font style simple and bold, like block lettering, so it stays readable. Budget tip: make 10-15 blocks and reuse them across years by swapping printed inserts if you ever change format.
Skip thisSkip tiny fonts; if you need a magnifier, guests will ignore it.
9. Drape a Kraft Paper Backdrop for Photo Wall
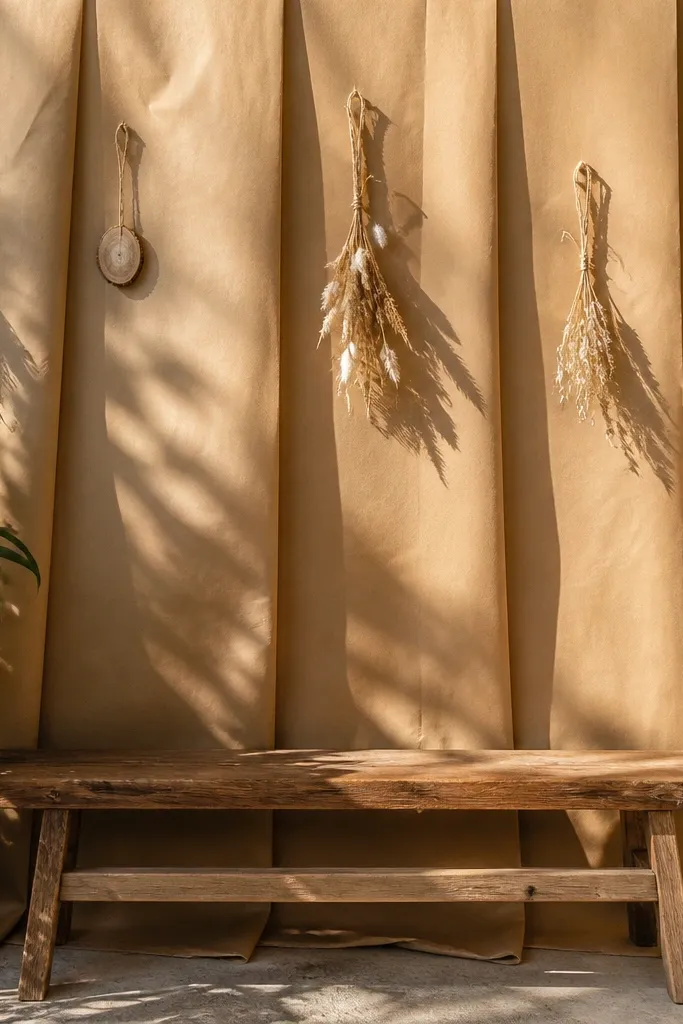
A kraft paper drape gives you a rustic photo wall that costs almost nothing and still looks styled. The paper hangs softly, and it takes well to natural accents like twine, dried grasses, and small wood signage. It also photographs evenly because it doesn’t reflect light the way shiny fabric does. This is a great hidden gem rustic wedding decor option for couples who want a clean background and don’t want a full wall of decor.
Quick tipUse matte kraft paper, not glossy; glossy glare makes photos look washed out.
Start by hanging kraft paper in wide sheets from a backdrop frame, curtain rod, or two trees using painter’s tape and string. Let the paper fall in gentle folds, then trim any uneven edges so it looks intentional. Add a simple focal element like a small wreath, a branch cluster, or one wood sign centered at eye level. Place 2-3 dried stem bundles at the base so the bottom edge doesn’t look empty. Plan for about 1-2 hours to hang and adjust, plus 30 minutes for final styling.
Skip thisDon’t attach paper too tight; tight paper looks like a craft project instead of a backdrop.
10. Candle Sticks in Old Tin Pails
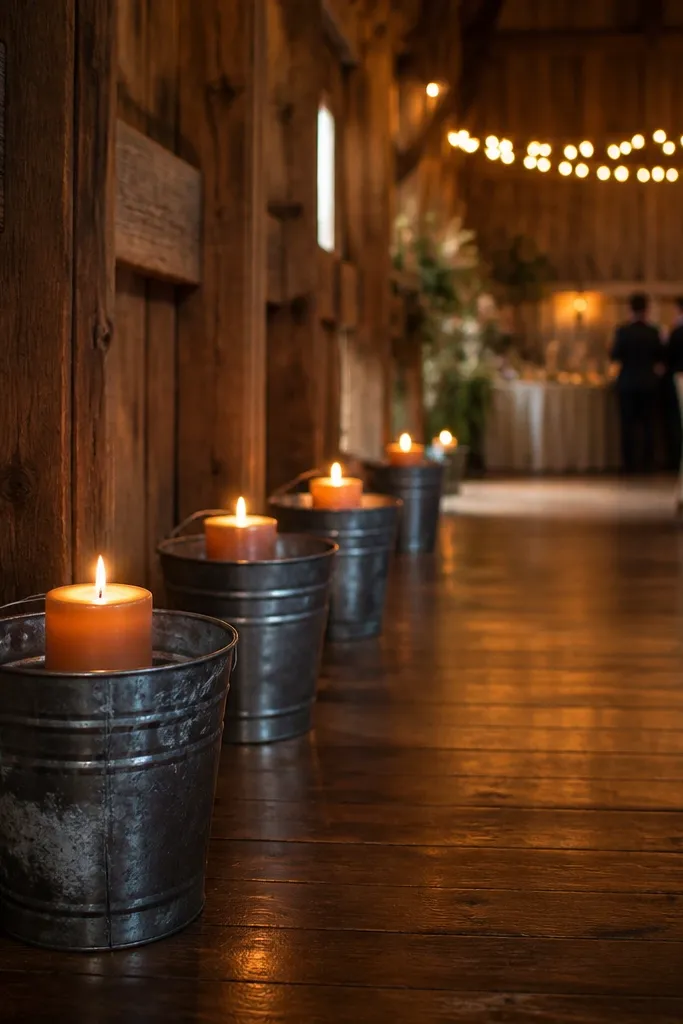
Tin pails make candle styling look grounded and rustic without buying matching lanterns. The metal texture shows up in photos and gives the table a “village” feel. Use them for aisle rows or the dessert station so light leads the eye to the main area. This works best with pillar candles in warm white or amber tones so the glow matches the tin color.
Start by sourcing small tin pails or even sturdy paint buckets cleaned and dried. Place battery candles or LED pillars inside so you keep it safe and consistent. Arrange pails in a line with 10-12 inches between each one for a clean rhythm. Add one thin accent like a strip of burlap or twine around the pail handle if it has one. Budget tip: buy 8-12 pails instead of one huge centerpiece; repetition looks better on camera.
Choose pails with dents and varied patina; perfect tin looks too modern.
Skip unscented real candles in windy outdoor setups unless you have a safe plan.
11. Suspended Dried Flower Pom-Pom Rings
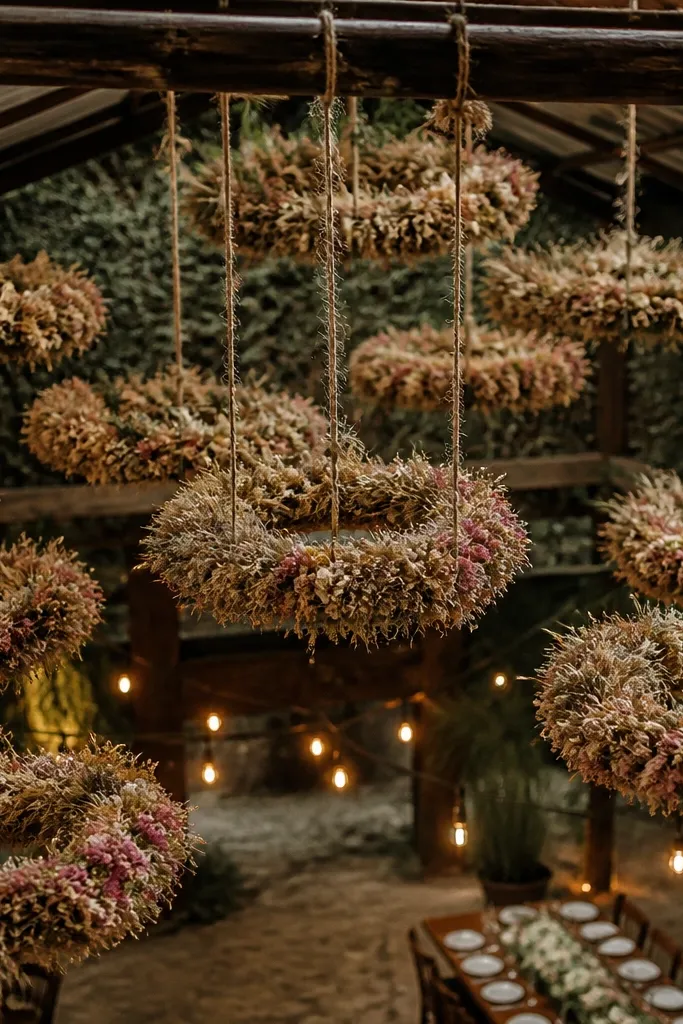
Hanging ring decor is a hidden gem because it reads festive while staying lightweight and budget-friendly. Dried flower pom-pom rings create a clustered, textured look that fills empty space above guests. It’s perfect for dining tents or covered patios where overhead photos matter. Keep the rings small enough to feel delicate, then repeat them at a few points so the room looks designed.
Quick tipSpray a little matte adhesive sealant on the densest spots to reduce shedding.
Start by making ring frames from thin wire or buying lightweight ring hoops. Attach dried florals and seed heads in clusters around the ring, then tie with twine so you can adjust density. Hang rings from fishing line or thin cord at staggered heights, aiming for 3-4 feet above table surfaces. Use groups of three rings per section, like over the dinner space or dessert table. Plan 2 hours to prep rings and 30-45 minutes to hang them with a friend so spacing stays even.
Skip thisDon’t hang too many rings in one spot; it becomes visual noise.
12. Wood Plank Table Top Runners with Stenciled Names
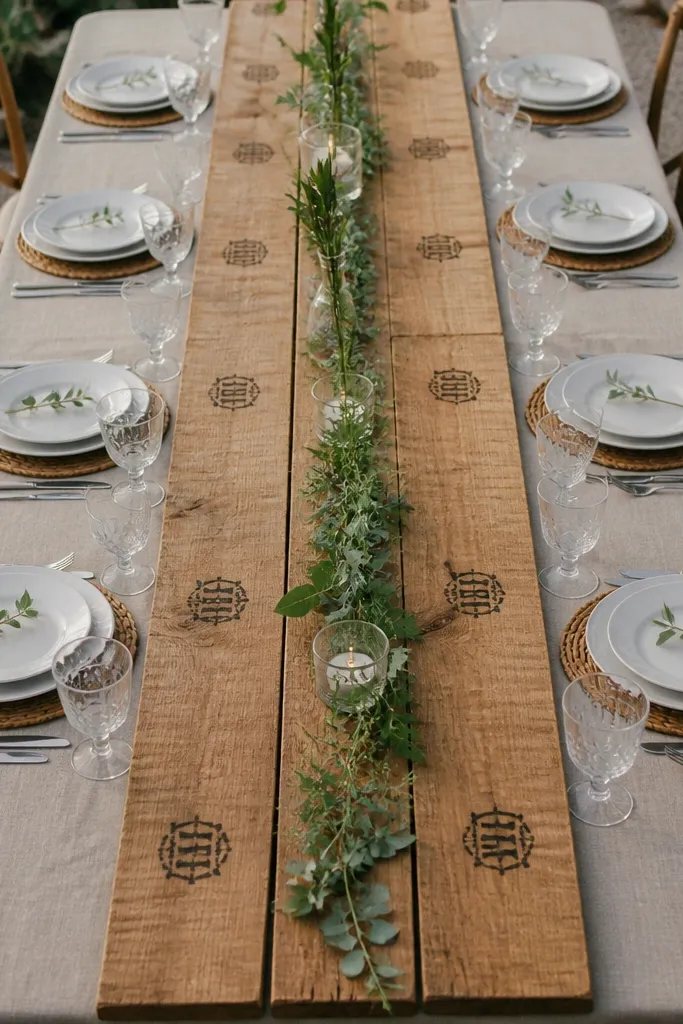
Wood plank runners look like you hired someone, even when you’re doing it yourself. They create a strong horizontal line across the table, which makes place settings feel intentional. Stenciled names or small icons on the planks add a rustic touch without needing a full sign system. This works well for head tables, gift tables, and bar setups where you want a clean, structured look.
Start with narrow wood planks or wood-look panels cut to runner length. Sand edges so they don’t snag linens, then wipe clean. Stencil names or small symbols in dark paint marker or chalk paint, letting them dry fully before styling. Place planks across tables as a runner base, then layer candles and small bud vases on top. Budget tip: use 1-2 plank sets and rotate them between stations if you’re short on pieces. Give yourself 1-2 hours for painting and drying time.
Seal with matte clear coat so paint doesn’t rub off on hands or linens.
Avoid heavy varnish; shiny wood reflects light and can look cheap in photos.
13. Seed Head Aisle Markers with Mini Burlap Bow Ties
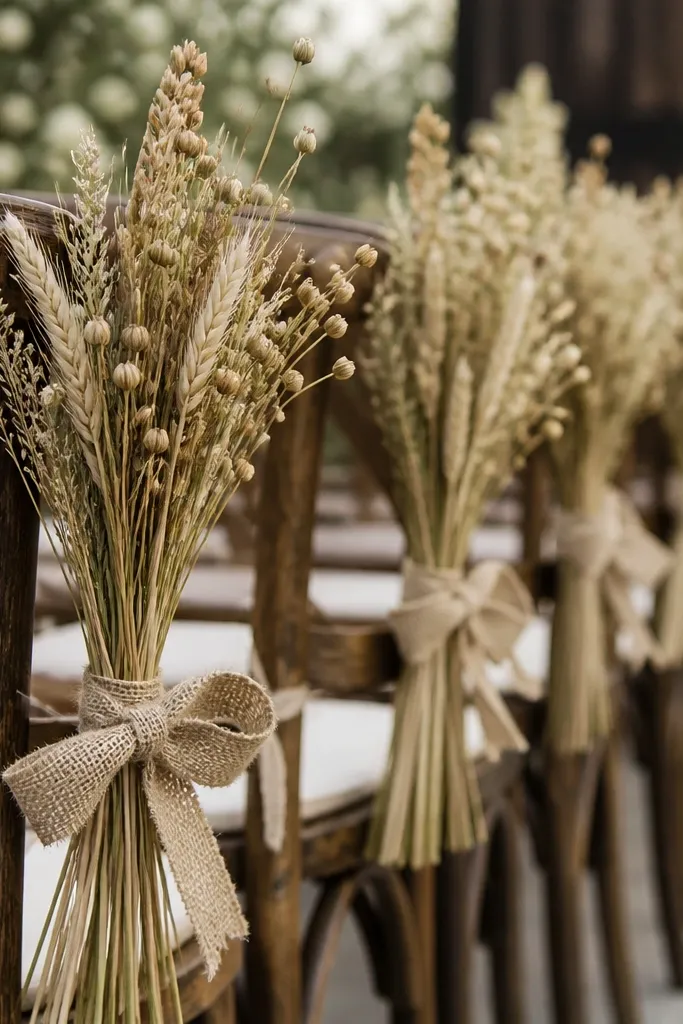
Aisle markers are where rustic decor often looks unfinished because people buy one big bundle and call it done. Mini seed head bundles tied to chairs create a repeated pattern that looks intentional in aisle photos. The burlap bow ties add softness and keep the look from feeling too “wild.” This idea fits ceremony spaces where chairs line up in long rows and guests will photograph down the aisle.
Start by buying dried seed heads and trimming stems to about 6-10 inches for chair height. Tie each bundle with jute twine, then wrap a small strip of burlap into a bow at the chair back for a consistent look. Hang markers at 2-4 points per row, not every chair, so the aisle still feels open. Use a simple measurement: match the bow height across all markers so the row looks even. Plan 45-75 minutes for assembly depending on guest count.
Use a tiny piece of floral wire to keep stems from twisting once tied.
Don’t use satin ribbons; they ruin the rustic texture instantly.
14. Rustic Bar Sign on Corrugated Cardboard
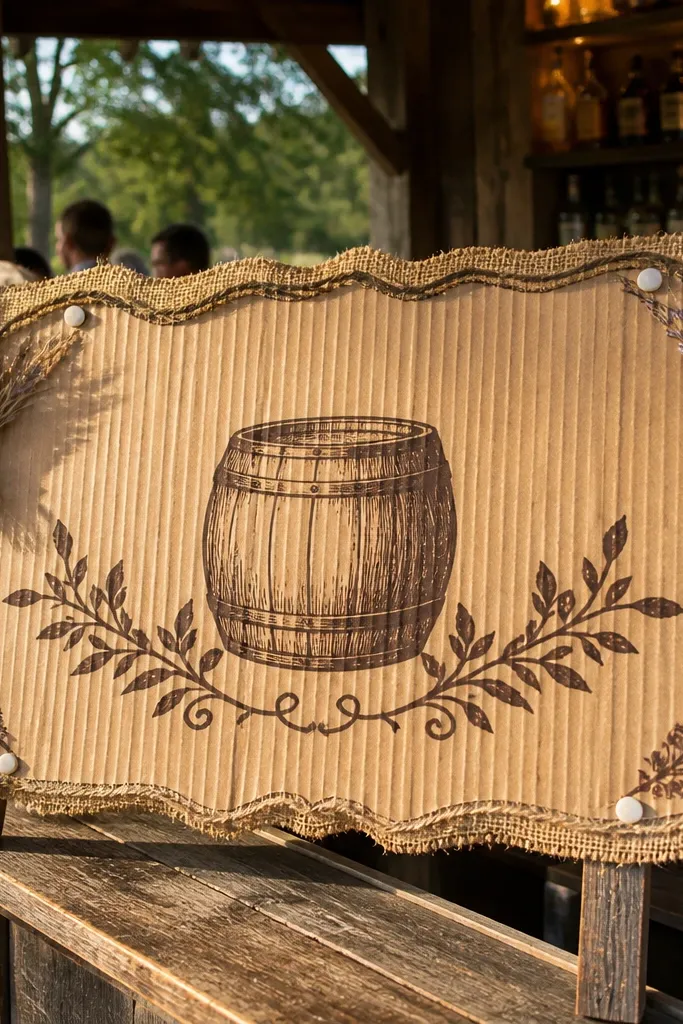
Corrugated cardboard sounds cheap, but when you treat it like craft paper and frame it properly, it photographs like rustic signage. The texture gives depth, and it pairs well with dark ink and small dried accents. This is a hidden gem rustic wedding decor idea for bar menus because you can make multiple signs quickly without spending on wood or acrylic. Place it behind the drink station so the background is textured, not blank.
Start with thick corrugated cardboard and cut it into sign panels. Paint or spray it with matte brown or leave natural kraft tones, then add dark lettering with a paint marker. Frame the edges with twine or hot-glue a thin wood strip so it looks finished. Attach a small dried sprig at the corner with twine for a rustic focal detail. Budget tip: make 2-3 separate signs instead of one huge board; it keeps it flexible if you change drink options. Setup takes about 20-30 minutes once the signs are made.
Seal with matte spray so the ink doesn’t smear from condensation near drinks.
Don’t use glossy spray on cardboard; glare kills the texture.
15. Hanging Twine Photo Clips with Linen Scrap Banner
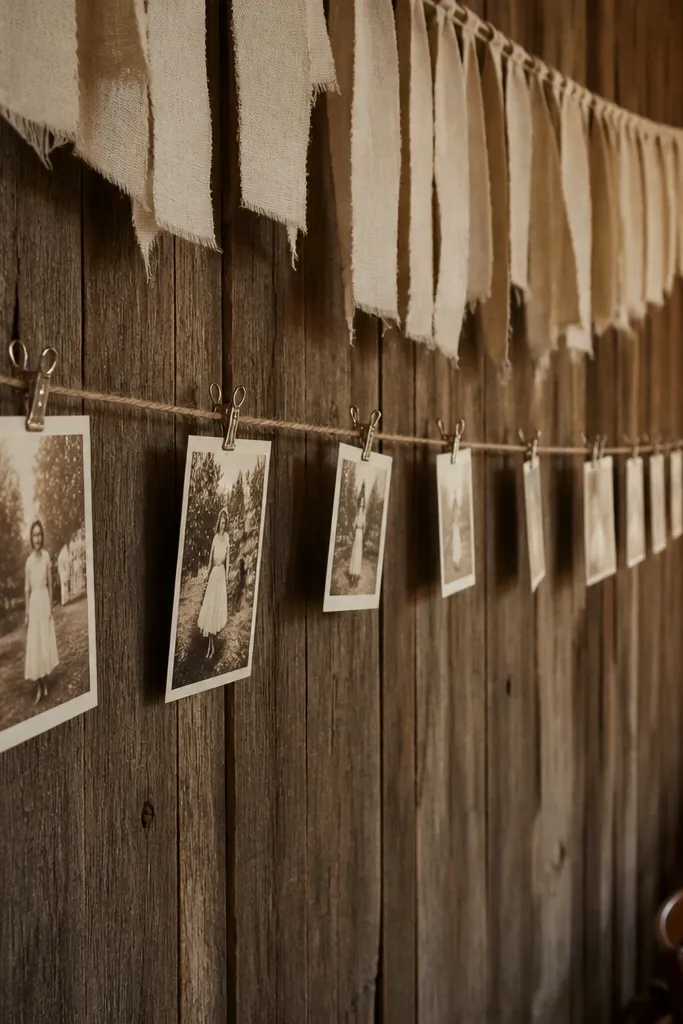
This is a clean way to add personalization that still feels rustic. A twine line with photo clips looks light and airy, and the linen scrap banner at the top softens the look so it doesn’t feel like a craft corner. It photographs well because the line creates a diagonal or horizontal frame behind guests. Use it at the welcome area or near the dessert table where people wait and take pictures.
Quick tipUse matte photo paper so the clips don’t reflect overhead lights.
Start by stretching twine between two sturdy points like a stand or two posts, then secure with hooks. Cut a long strip of linen-look fabric and tie it across the top to hide the twine tie points. Print small photo cards (or use simple kraft cards with initials/dates) and clip them with small clothespins. Space clips evenly with 3-4 inches between each so the line looks orderly. Plan 60 minutes to set up and adjust spacing so it lines up with your photo angles.
Skip thisDon’t overload the line; too many clips makes the background messy.



