
1. Burlap Runner with Weathered Wood Slice Border
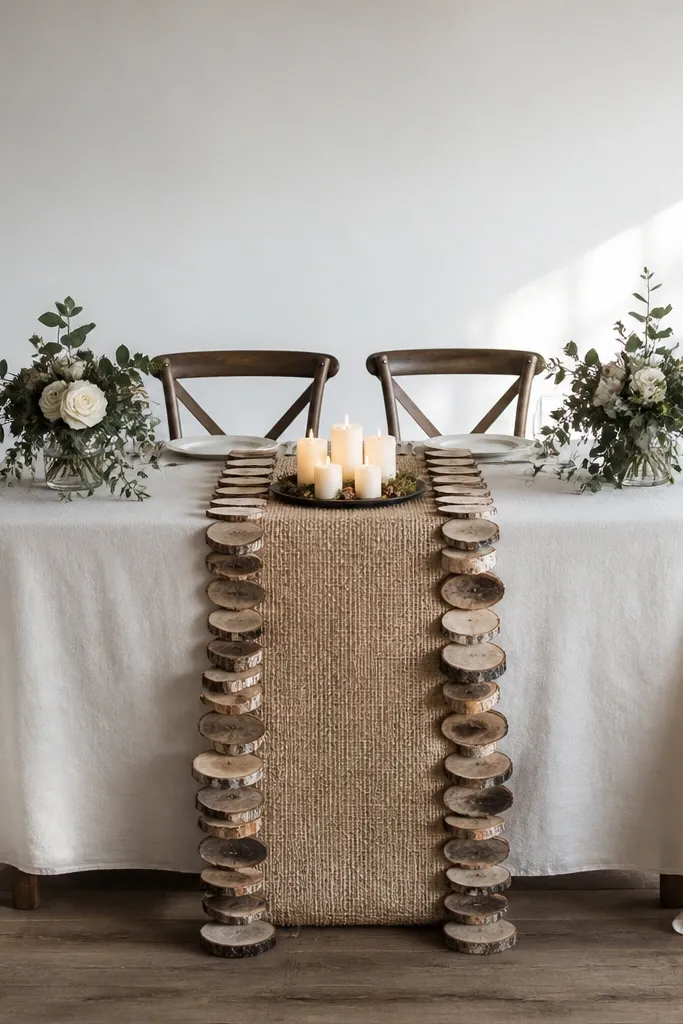
This setup is rustic without looking like a craft project. The burlap runner gives you that cozy, textured base, while the wood slice border adds a natural frame that shows clearly in wide shots. It works best when your sweetheart table is against a plain wall or simple backdrop, because the runner becomes the visual anchor. For photos, burlap in a muted tan reads warmer than bright beige and hides minor wrinkles better than linen. If you’re doing evening or shaded outdoor light, this combo looks especially good because the wood slices catch highlights.
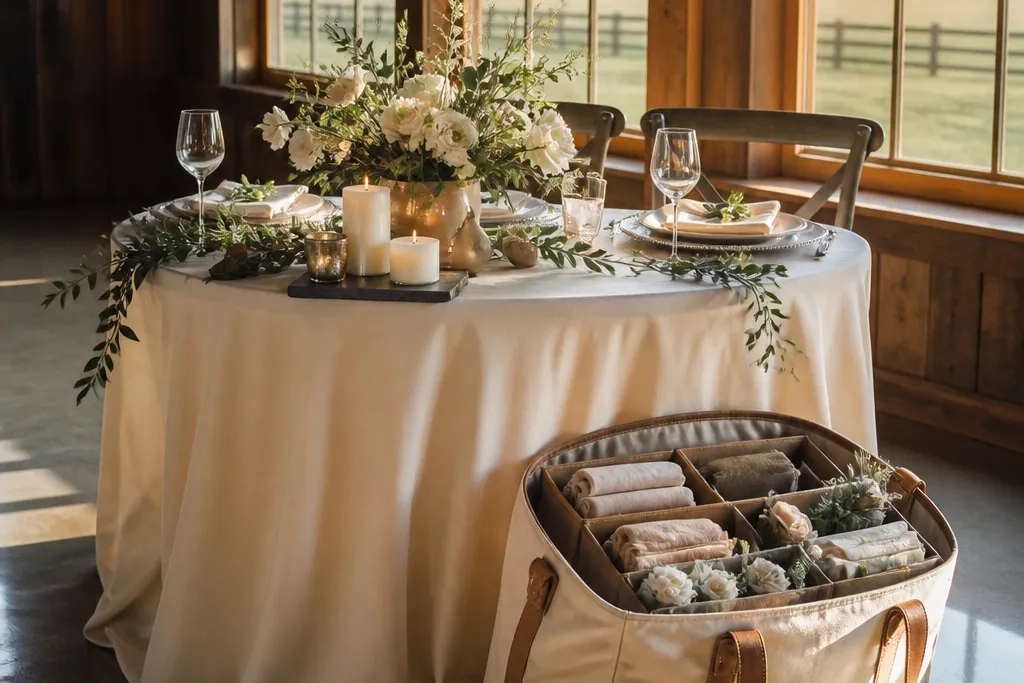
Start by buying wood slices that are flat and stable — 3-4 inch diameter pieces with minimal bark curl. Pack them in a rigid shoebox or shallow plastic organizer with paper between slices so they don’t chip. Fold the burlap runner once lengthwise, then roll it around a clean cardboard tube so it doesn’t crease hard. Finally, attach the runner to the table using painter’s tape on the underside so it doesn’t shift while you set chairs.
Label your wood-slice box “DO NOT STACK” so venue staff don’t pile things on top.
Don’t use super-thin burlap that flops — it looks cheap and makes the table look uneven.
2. Cream Linen Tablecloth with Jute Twine Bow Details
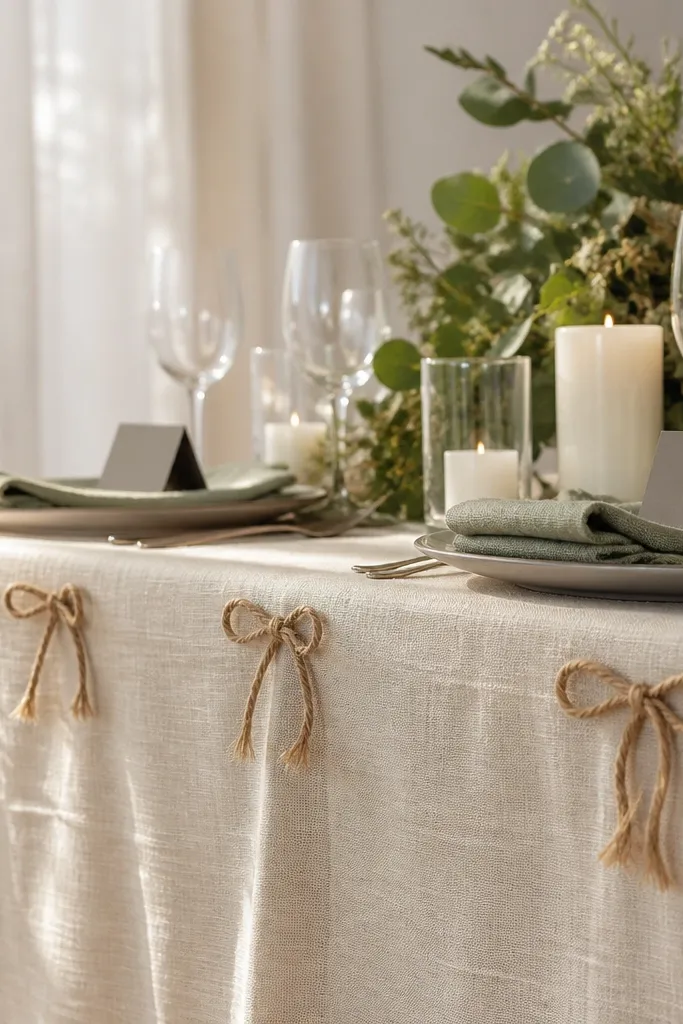
Cream linen makes rustic feel grown-up fast. The jute twine bows add that handmade warmth, but they stay subtle when you keep them small and evenly spaced. This is the best choice if your wedding colors are neutral — think ivory, warm gray, or muted sage — because the twine doesn’t fight your palette. It also photographs cleanly in both indoor warm lighting and overcast outdoor light. Pair it with simple place settings so the bows don’t compete with chargers or plates.
Start with a tablecloth that falls 10-12 inches past the tabletop so your sweetheart table looks intentional from the end of the aisle. Then tie 6-10 jute bows total: two per long side and one per corner, using jute twine that’s about 1/8 inch thick. Pack the twine in a small zip pouch and pre-tie bows onto small pieces of tissue paper so they keep shape. Finally, tape the bow tails under the tablecloth hem so they don’t loosen when you move chairs.
Quick tipBring a small lint roller — cream linen shows fuzz and it ruins “rustic cozy” fast.
Skip thisAvoid big bows. Oversized twine knots look costume-y on camera.
3. Pinecone and Candle Cluster Centerpiece on a Slate Tray
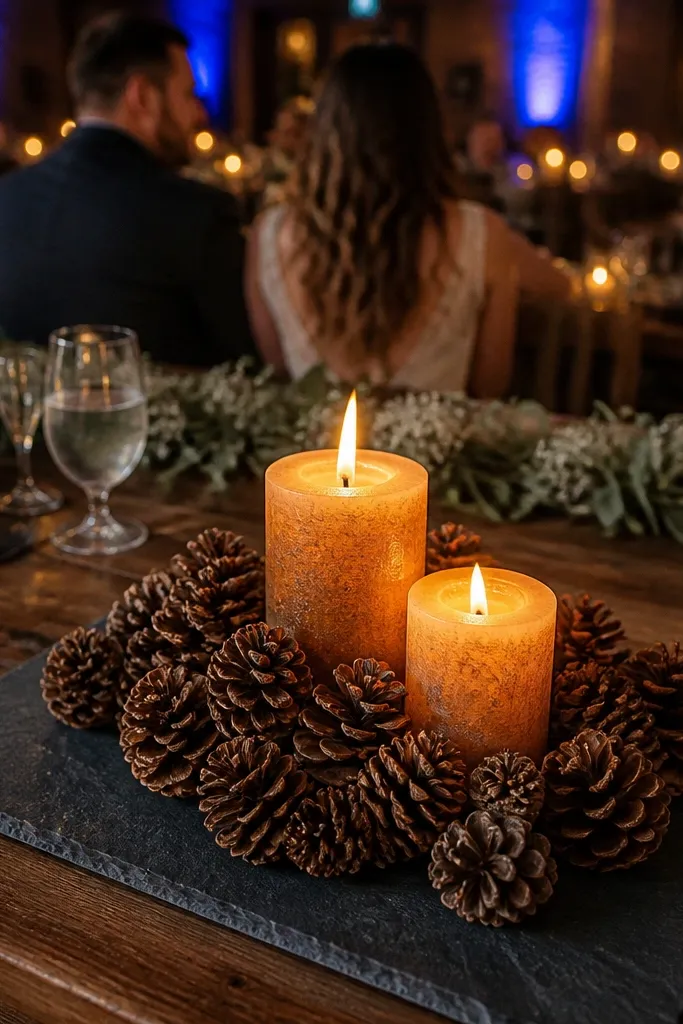
A slate tray grounds the whole look. It keeps pinecones from looking scattered and gives you a dark, photo-friendly surface that makes candlelight pop. This centerpiece is perfect for winter, early fall, and evening receptions because the contrast feels cozy instead of flat. It also works for sweetheart tables that have a lot of movement around them, since the tray is a contained “unit” you can lift and reset. Choose unscented pillar candles that look like real wax — they read warmer than glossy LED globes.
Start by packing the slate tray in bubble wrap inside a hard-sided box. Then place pinecones in the tray with a little space between them so they don’t crush each other. Use candle holders or thick felt pads under candles so they don’t slide on slate. Finally, wrap each candle base separately and assemble on-site only after the tablecloth is positioned.
Quick tipKeep a small bag of spare felt pads. Slate can be slick and candles can creep during setup.
Skip thisDon’t put loose pinecones directly on a tablecloth — they snag, roll, and create random gaps in photos.
4. Greenery Garland with Burlap Ribbon Streamers
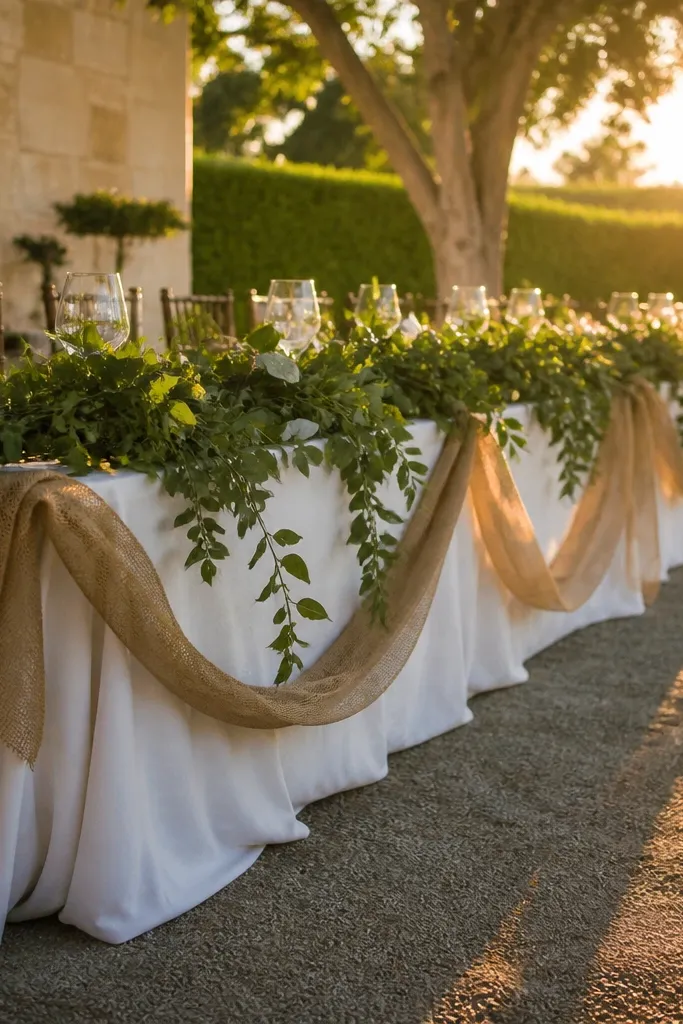
This is rustic with motion. The greenery gives you depth and a soft frame, while burlap ribbon streamers add that cozy “hand-tied” look without needing a full burlap runner. It looks best when your sweetheart table is longer than it is wide, because the garland naturally guides the eye. For photos, deep greens against warm neutrals create contrast that holds up in low light. Keep ribbon lengths short so they don’t tangle around chair backs.
Start by buying a pre-made garland or making one with faux evergreen strands on a flexible base so it packs flat. Pack it in a long garment bag with paper between branches to prevent snagging. Cut burlap ribbon into 8-10 inch lengths and pre-tie them with thin wire to the garland base before travel. On-site, center the garland first, then secure with zip ties hidden under the table edge so it doesn’t drift.
If your venue has wind outdoors, bring two extra zip ties. One gust can lift a lightweight garland.
Skip long ribbon tails. They wrap around legs and look messy in candid shots.
5. Lantern Pairing with Dried Orange Slices
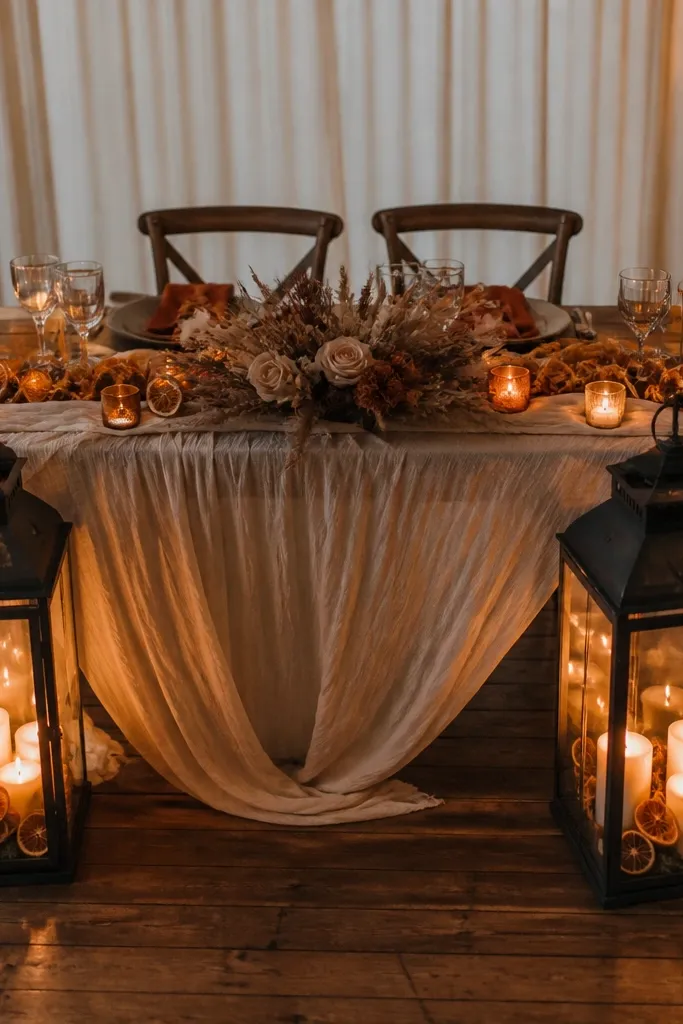
Lanterns create a clear focal point, and dried orange slices make it feel seasonal without turning into a theme park. This setup is great for rustic fall weddings, especially if your palette includes terracotta or warm brown. The lanterns frame the couple space, so even when guests sit close, the table still looks styled. It also gives you reliable photo depth because lanterns sit at a consistent height and catch light. Use warm bulbs or unscented candle inserts for a cozy glow.
Start by choosing lanterns with removable tops or doors so you can swap inserts after travel. Pack each lantern in a box with foam or crumpled paper so the metal doesn’t rattle and dent. Place dried orange slices in a separate small container — heat and humidity make them fragile. Assemble on-site by putting lantern inserts in first, then adding orange slices last so they don’t get crushed.
Quick tipBring a microfiber cloth. Lantern glass smudges show in every flash photo.
Skip thisDon’t use fresh citrus slices. They turn dark fast and look off in evening light.
6. Wood Crate Backdrop for Place Settings and Menu Cards
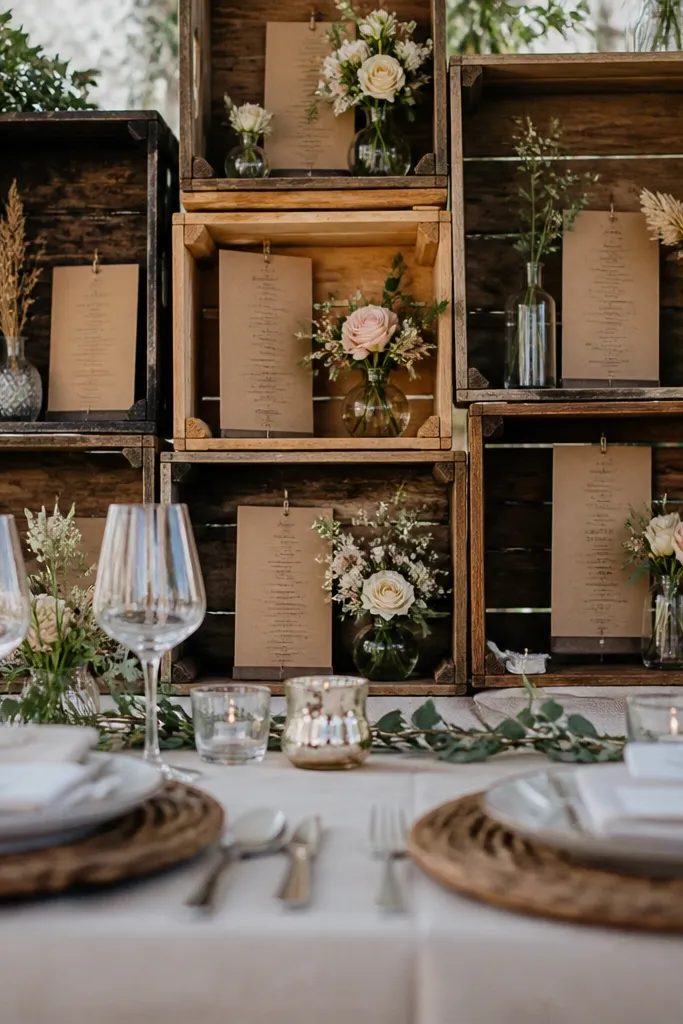
A sweetheart table can look flat if the styling only sits on the tabletop. This idea builds a vertical rustic layer using small wooden crates behind the place settings so the table looks full in portraits. It’s especially good if you have a plain wall behind the sweetheart table — the crates add structure without needing a big floral installation. For photos, crate slats create natural lines that frame the couple and make your place cards look intentional. Keep florals minimal so the crates stay the star.
Start by selecting crates that sit low enough to not block guest sightlines, usually 6-10 inches tall. Wrap the crates in moving blankets or bubble wrap for transport, then pack them upright in a sturdy box. Create a small foam or floral tape strip to hold dried stems so nothing falls. Finally, set the crates on the table edge or a riser pad, then secure menu cards with clips so they don’t shift when you seat people.
Quick tipUse binder clips for menu cards. Tape can rip paper and looks messy.
Skip thisAvoid tall crates. Anything above table height blocks faces in group photos.
7. Thick Twine Wrapped Bud Vases in a Linear Row
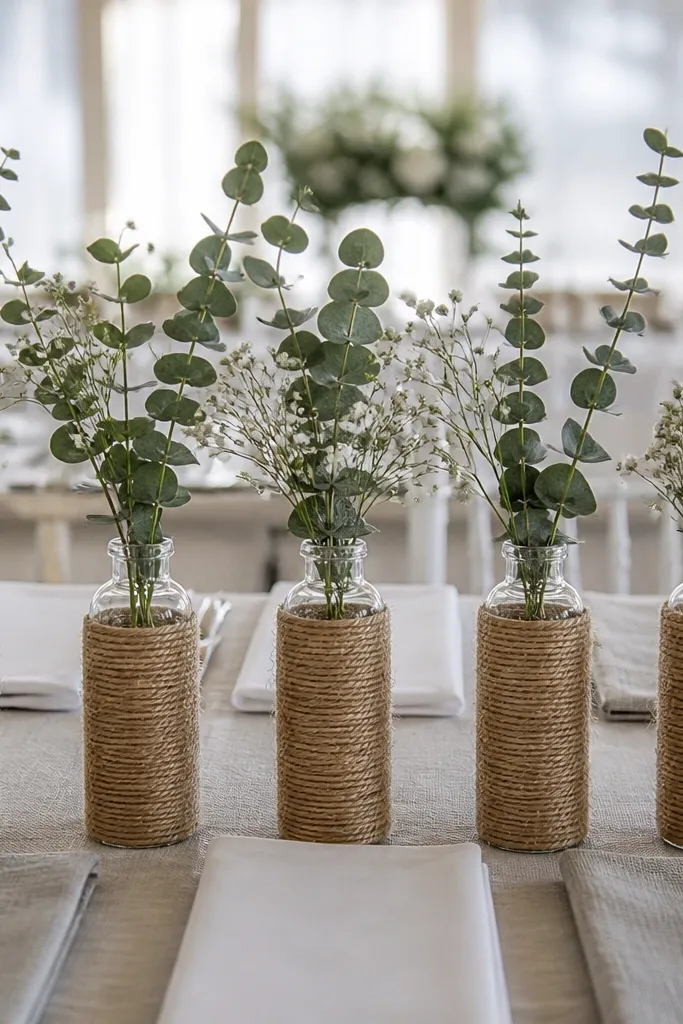
This is the “clean rustic” option. A linear row of bud vases gives you a neat, photo-ready rhythm, and twine wraps make the bottles look handmade even if the vase is simple glass. It works well for spring and summer because you can use airy stems like baby’s breath, wildflower mixes, or eucalyptus. The row also makes it easy to keep symmetry, which matters for sweetheart table photos taken straight on. Keep the flowers light and airy so the twine texture stays visible.
Start by choosing 5-7 bud vases and label them with painter’s tape so you don’t mix orientation on site. Wrap each vase with twine before travel, then secure with a tiny dot of hot glue at the base — let it cool fully before packing. Pack vases in a dish organizer or egg carton insert so they can’t tip. Finally, fill with water and stems on-site after the tablecloth is down, so nothing sloshes during setup.
Quick tipBring a roll of floral tape. It’s faster to stabilize stems than re-tie twine on site.
Skip thisDon’t overfill vases with water before transport. Movement causes spills and water stains on linens.
8. Roasted-Color Faux Leather Place Mat Runners
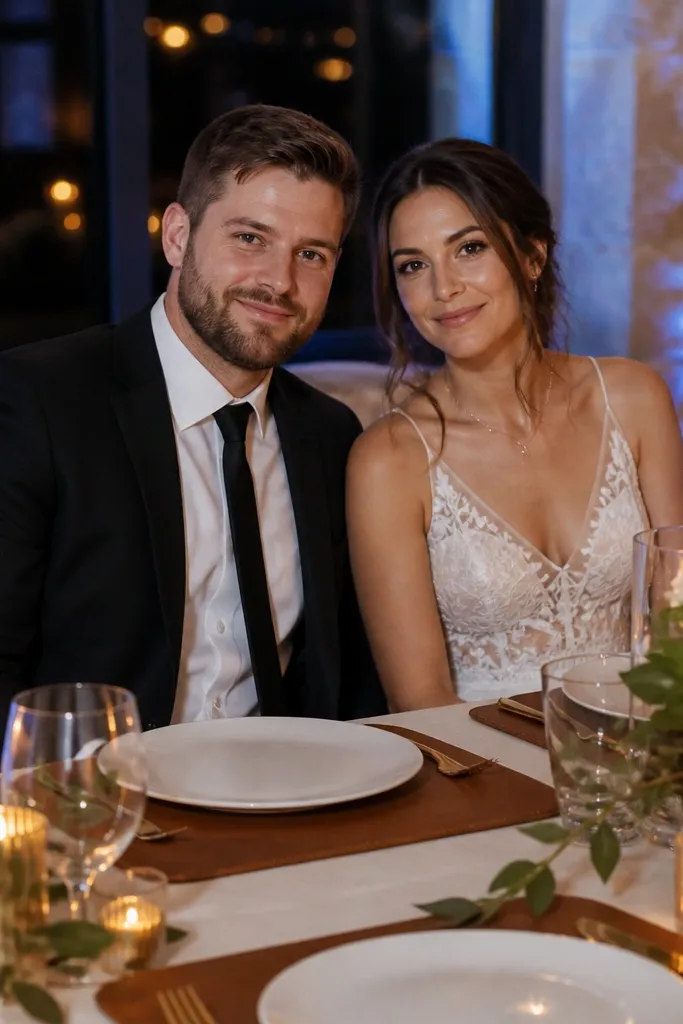
If you want cozy and modern rustic, place mats do the job. Faux leather in roasted brown creates a warm base under plates, and it photographs better than bare wood when the venue lighting is mixed. The trick is to use a linen tablecloth underneath and keep the leather only where plates sit. That gives you texture without turning the whole table into a heavy brown block. This setup looks great in fall and winter and pairs well with gold flatware and neutral napkins.
Start by cutting or buying leather-look runners sized to your placemat area, then pack them flat in a garment bag. Use a clear plastic sheet between pieces to prevent scuffs. Lay the linen tablecloth first, then place the leather runners centered under each setting. Finally, anchor the napkins and place cards so guests don’t slide them — a tiny piece of double-sided tape under the napkin ring area works if your venue allows it.
Quick tipTest one corner of the double-sided tape on a spare fabric scrap from your rental. Some linens pull threads.
Skip thisSkip full-table leather. It makes the sweetheart table look heavy and dark in photos.
9. Rustic Balloonless Ceiling Lighting with Candle Height Markers
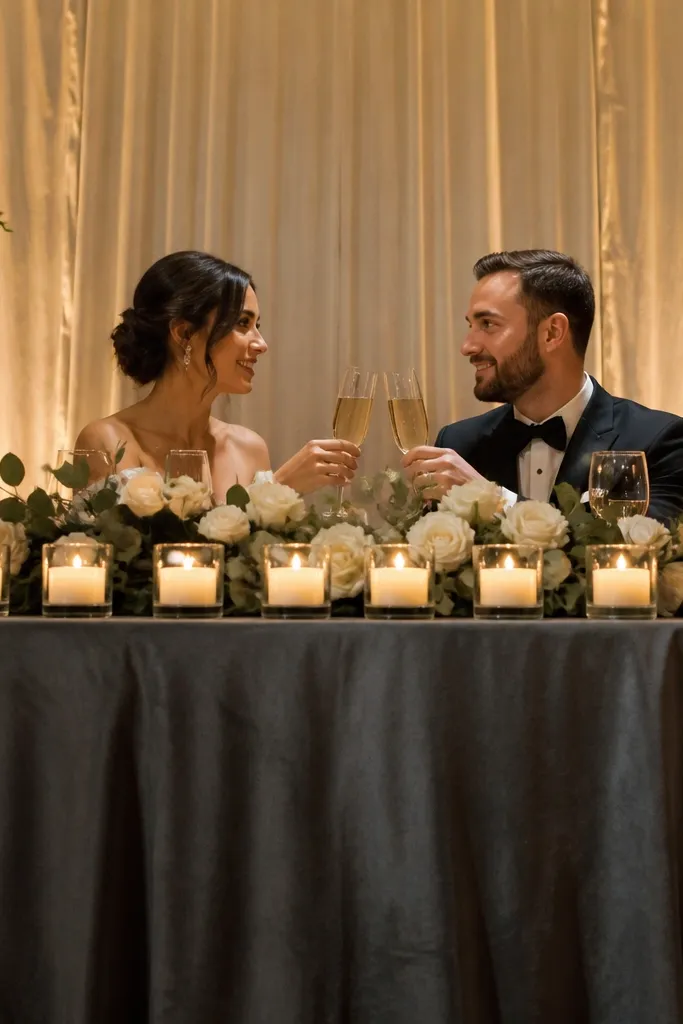
This one sounds technical, but it’s about how your table reads in photos. Low candle clusters look best when all candles sit at the same height, creating a clean band of light. Instead of guessing, use height markers — small, hidden supports under candle bases — so the glow looks intentional rather than random. This works for indoor halls and outdoor patios where overhead lighting changes during the night. The rustic charm comes from the candlelight and simple textures, not from adding more decor.
Start by choosing candles with similar diameters and heights so you don’t end up with lopsided illumination. Pack each candle base separately and bring a small roll of felt pads plus thin wood blocks for height adjustment. On-site, place the slate or tray first, then set candles using height markers under the base. Finally, step back and check from the guest seating angle before you finalize any ribbon or greenery.
Quick tipBring a small ruler or measuring tape. Candle height mismatch is easy to fix early and impossible to fix once guests are seated.
Skip thisDon’t rely on “eyeballing” height. It shows in every wide shot.
10. Macramé Accent with Neutral Dried Stems at the Table Corners
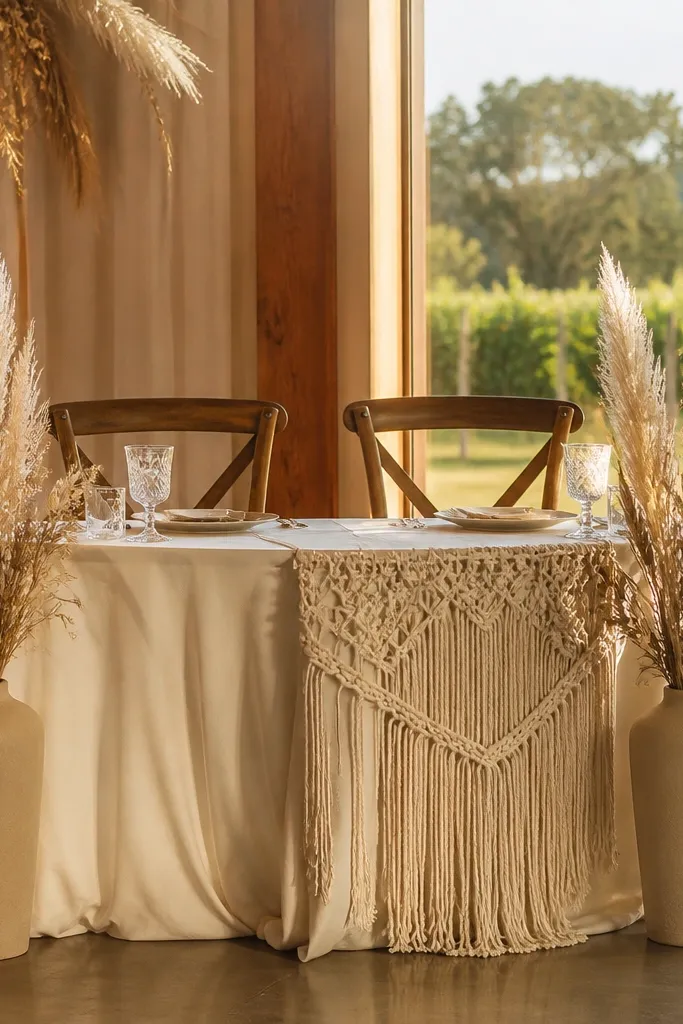
Macramé adds softness without needing a big floral budget. Place a small macramé accent at one or both corners behind the sweetheart table setting, then balance it with dried stems in two matching vases. This look is photogenic because it creates a vertical texture behind the couple, adding depth even when your table is small. It’s best in fall and winter, but it also works in spring with lighter dried florals like pampas-style plumes or oat grass tones. Keep colors neutral — warm cream, sand, and light tan — so it reads rustic instead of boho-overdone.
Start by folding macramé flat using tissue paper between knots so it doesn’t snag. Pack it in a garment bag so it doesn’t get crushed. For the dried stems, bring two vases plus a small bag of floral foam or tape to hold stems upright. Assemble on-site by attaching macramé to the table edge using a hidden zip tie, then place stems last so they don’t snap during transport.
Quick tipDried stems shed. Put a lint roller and a small trash bag in your setup tote.
Skip thisAvoid heavy wet florals with macramé. The fibers absorb moisture and the texture looks off.
11. Copper Candlestick Trio with Smoky Glass Votives
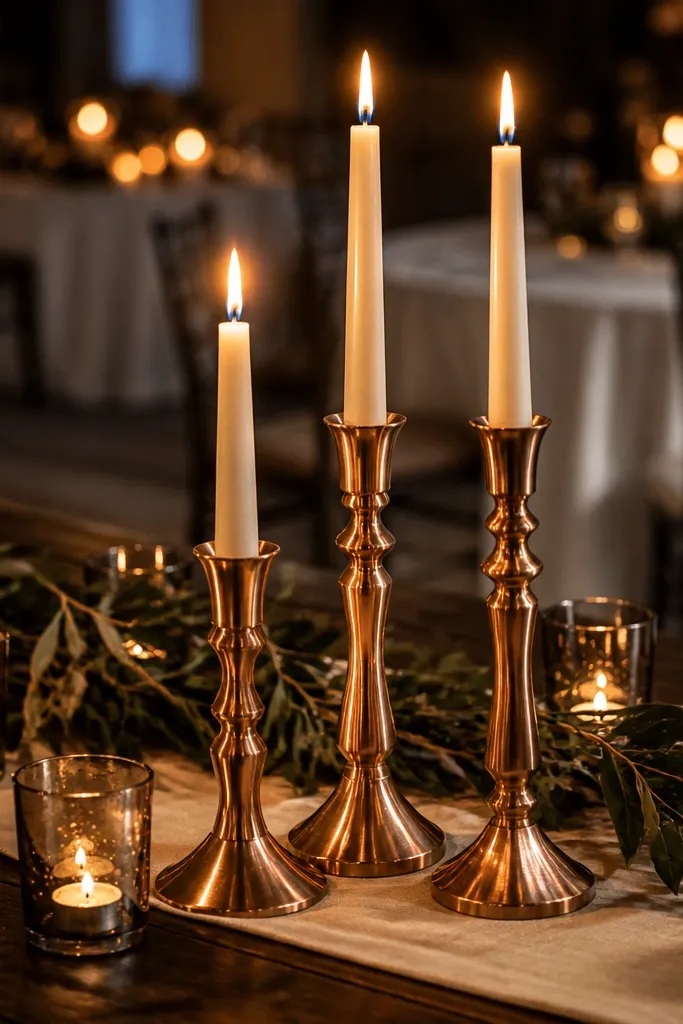
Rustic doesn’t have to mean only wood and burlap. Copper candlesticks add warmth and look expensive on camera, while smoky glass votives give you a moody, cozy feel that still reads clean. This idea works especially well for winter weddings and evening receptions where candlelight is the main glow. The trio layout is deliberate — it frames the couple and keeps the center from looking empty. If your sweetheart table is close to the dance floor, this also feels “contained” because the votives don’t sprawl.
Start by packing smoky glass votives in a box with individual dividers or egg-carton inserts. Then wrap copper candlestick bases with cloth to prevent scratches and keep them from clinking. Set up on-site by placing a neutral runner first, then arranging the candlestick trio in a tight triangle. Finally, add votives last so you don’t burn out the look before photos — assemble right before guests sit.
Quick tipUse LED candles if the venue restricts open flame. Smoky votives still look right with LED when the flame flicker is warm.
Skip thisDon’t combine copper with bright neon florals. The copper will look louder than the entire palette.
12. Pampas-Style Dried Grass and Linen Napkin Wraps
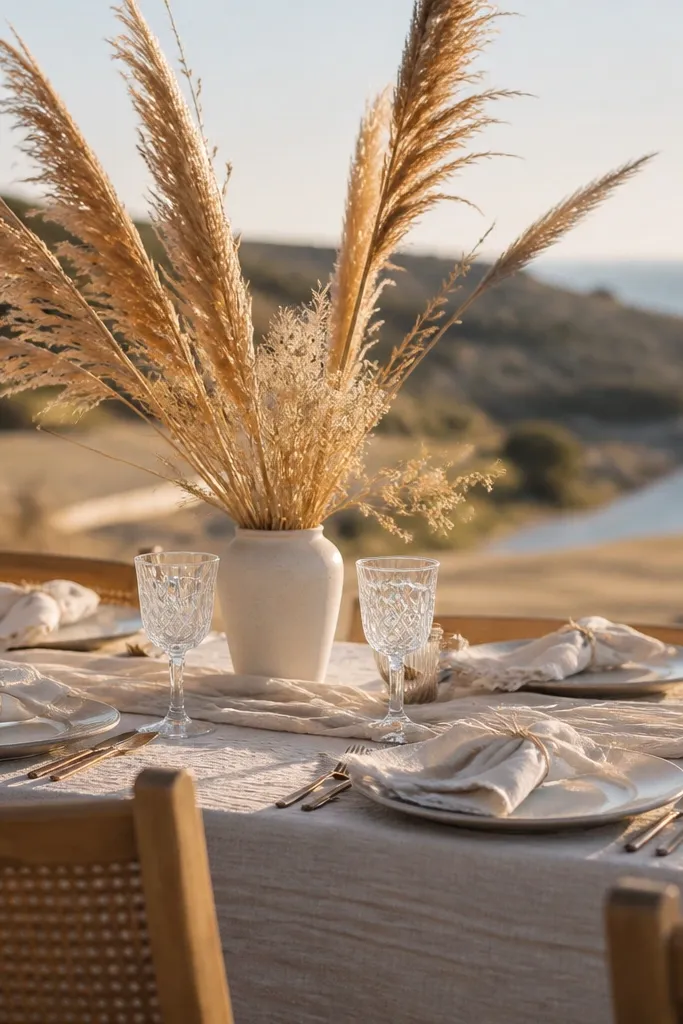
Height is what makes a sweetheart table look like a scene, not a table. Pampas-style dried grass creates that tall, airy rustic silhouette, and linen napkin wraps tie the look together with texture. This works in fall, winter, and early spring because dried grass tones blend with neutral palettes and soft lighting. For photos, the tall plume creates a vertical line behind the couple’s faces, which helps portraits look framed. Keep the arrangement simple: one tall focal vase and two smaller supporting clusters.
Start by packing dried grass in a long box or tube so the plumes don’t crush. Wrap the vase separately and protect it with bubble wrap. For napkins, fold them the same way for both sides, then wrap with twine and secure with a small knot at the back of the fold. Assemble by placing the tall vase first, then setting napkins and place cards last so you don’t bump the grass.
Bring a small spray bottle with distilled water only if your dried grass sheds a lot. Light misting reduces static flyaways.
Avoid overstuffed plumes. Too many stems make the centerpiece look messy instead of airy.
13. Chunky Knit Table Runner with Warm Neutral Center Vase
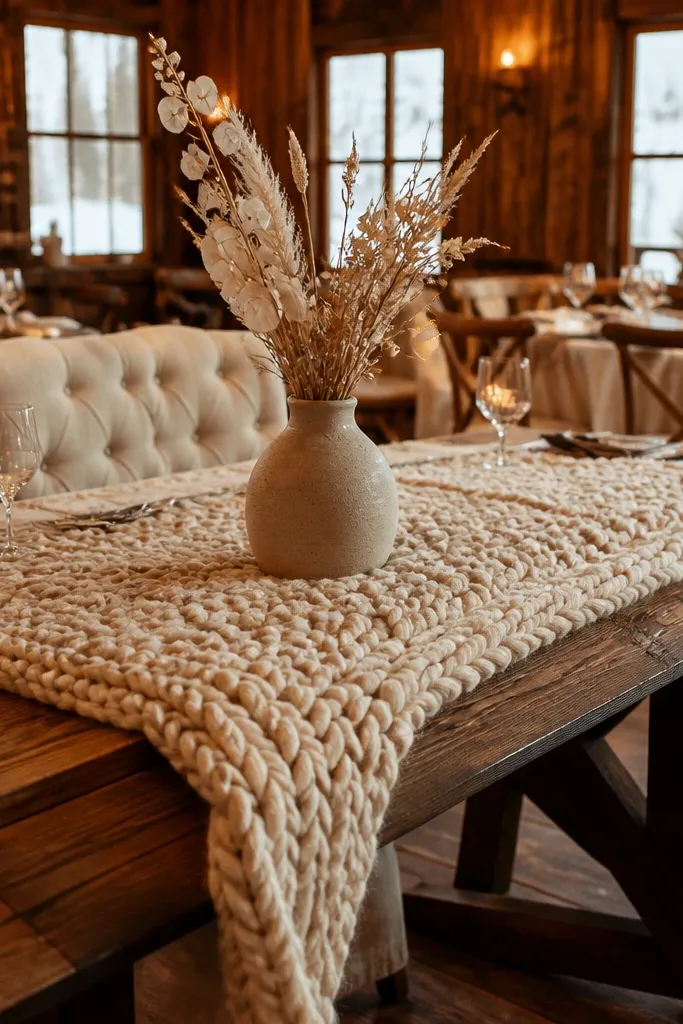
Chunky knit reads cozy instantly, and it photographs like a soft blanket under warm lighting. The key is to keep the centerpiece minimal — a single neutral vase with a few stems — so the knit texture is the star. This look is best for winter weddings, cabin venues, and indoor receptions where you want the table to feel warm even if the room is cool. It also hides small table imperfections because the knit has depth and texture. Choose oatmeal, oat, or warm cream so it doesn’t look gray on camera.
Start by using a knit runner that is thick enough to drape, then pack it rolled around a cardboard tube to avoid harsh creases. Bring a garment steamer or a handheld steamer for the day-of if you can; steam helps the knit relax. Place the runner centered and anchor with painter’s tape on the underside. Finally, insert your vase and stems last so the runner doesn’t get snagged while you adjust chairs and place settings.
Skip fabric spray perfumes near the knit. It can stain and show as dark spots in flash photos.
Avoid thin knit that collapses. It looks flat and loses the cozy effect.
14. Rustic Macramé Plant Hanger Vases with Single-Color Stems
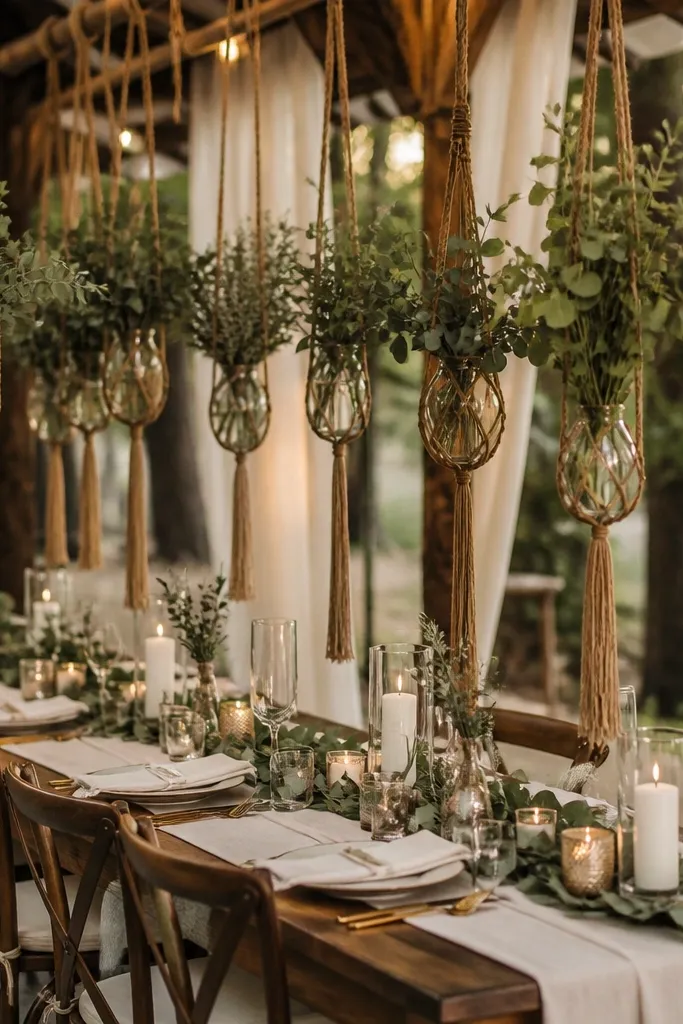
Hanging vases add vertical drama without crowding the tabletop. Rustic macramé looks handmade and softens the space behind the couple, and single-color stems keep it from looking cluttered. This is a strong choice when your sweetheart table is small and you need impact without taking up surface area. It’s also great for venues with decent ceiling height because the hanging element reads clearly in photos. Keep the stems consistent — for example, all warm cream or all deep sage — so the look stays cohesive.
Start by choosing hanging planters with adjustable cords so you can set the height to just above head level for safety. Pack the macramé vases flat in a box, protecting knots with paper. Bring a small hook set and extra zip ties so you can secure cords to the frame or stand the venue allows. Assemble by hanging first, then filling with water and stems on-site, and finally checking spacing from both sides of the sweetheart table.
Measure height before you hang anything. A 12-inch difference shows in photos and can block faces.
Don’t use mixed-color stems. The hanging vases read busy fast in wide shots.
15. Birch Log Candle Risers with Floating Tealights
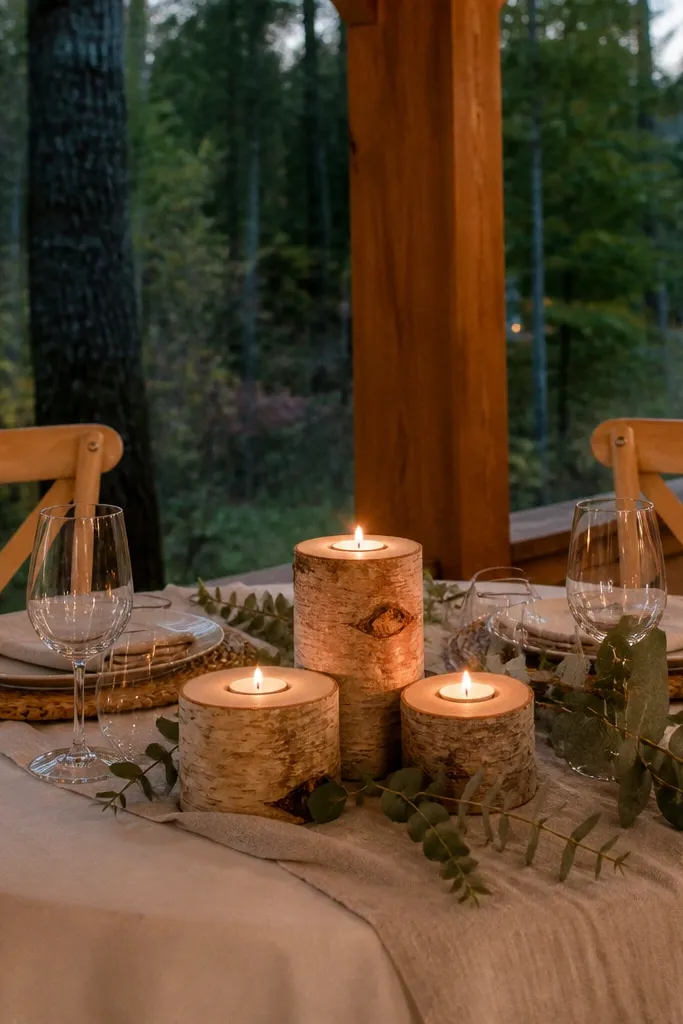
Birch log risers give you that true rustic cabin feel and they look great even when the table is otherwise simple. Use them with tealights so the glow bounces off the pale wood, which reads warm and flattering in photos. This idea works best when your wedding has light wood tones or neutral decor and when you want a centerpiece that’s stable. Floating tealights in individual holders keep the flame area controlled and reduce the chance of wax mess. The result is a cozy, layered look without a big floral installation.
Start by selecting birch log rounds or chunks that are flat on top and stable — no wobbling edges. Pack each piece in a hard box with crumpled paper so it can’t shift. Place tealights in small holders or cups and pack them separately to prevent wax transfer. On-site, set risers first, then place tealight holders on top only after the runner and tablecloth are final.
Quick tipBring a small pair of kitchen tongs. Setting tealights quickly is easier when you can adjust without touching warm wax.
Skip thisAvoid logs with loose bark. Bark flakes land on linens and look messy in flash.



