
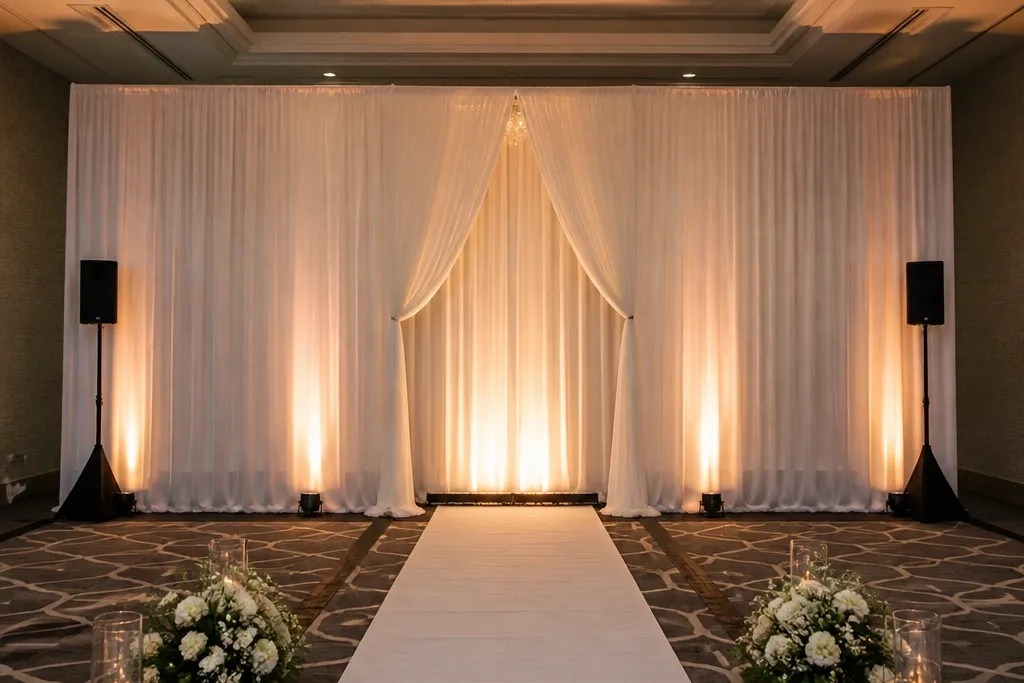
1. Center-gap fabric curtain wall with a single warm light wash
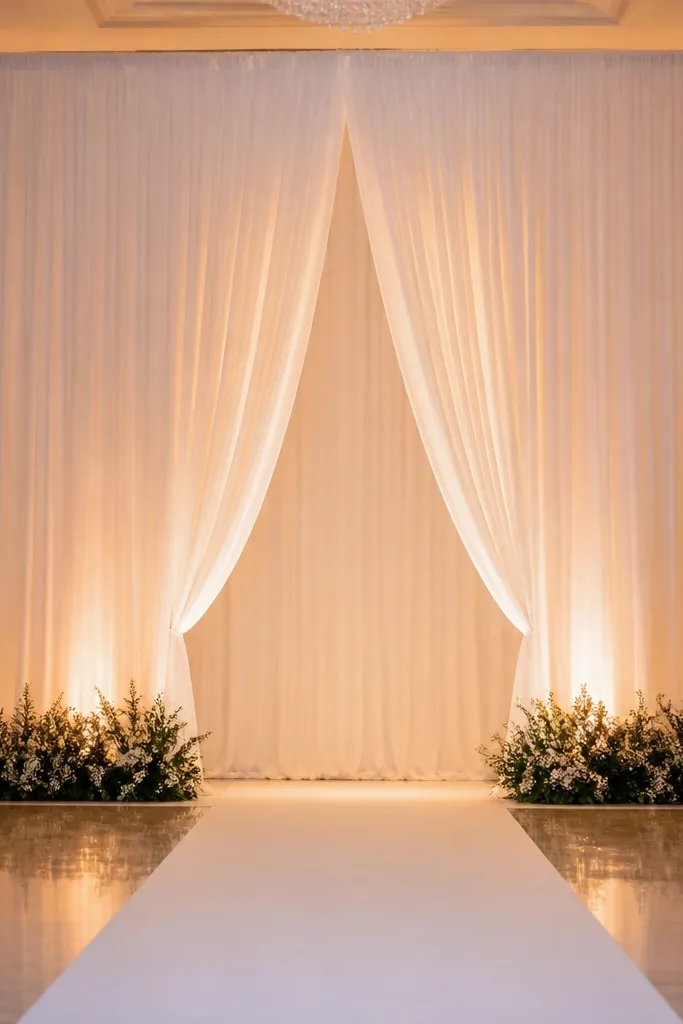
This is the minimalist stage look that reads instantly on camera because the fabric creates a soft, continuous backdrop while the center gap gives you a clean focal point for the couple. The warm light wash behind the fabric helps edges glow instead of looking flat, which matters in ballrooms where overhead lighting is harsh. Keep the fabric color close to warm white or off-white so it doesn’t look gray under cool LEDs. This style works best when the venue has stable walls or a ceiling rig and you can hide power and cables.
Start by measuring the stage width and choosing a curtain span that covers it with at least 6-10 inches of overlap on each side. Then plan the lighting first — two warm uplight positions aimed at the fabric from low angles so the fabric texture shows. Finally, add only a minimal runner or two small side candle clusters; if you add large florals here, the look stops being minimalist. If you’re renting, ask for pre-assembled curtain track or frames to avoid late-stage improvising.
Bring a fabric swatch and compare it to the venue wall color in the room lighting, not in daylight.
Don’t use bright white fabric in a ballroom with cool overhead bulbs — it turns gray in photos.
2. Acoustic panel backdrop with a single greenery line
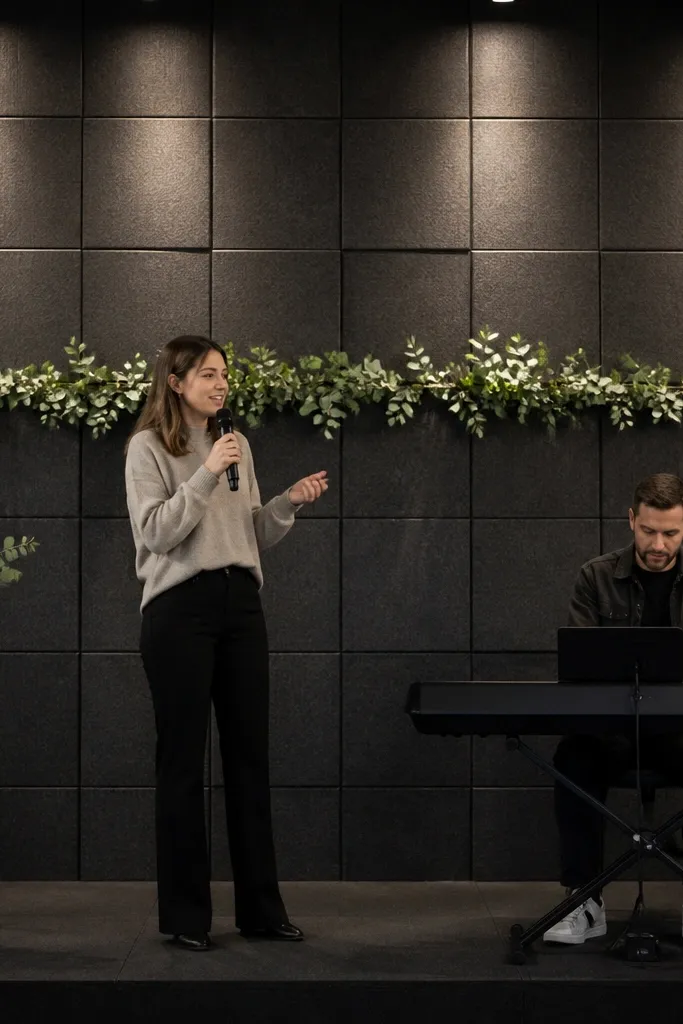
Start by picking panel color: natural light oak or warm white depending on your venue walls. Then decide your greenery line thickness — keep it narrow (about 6-10 inches tall) so it frames the couple without taking over. Finally, attach greenery to a simple mounting channel or ribbon grid so it stays straight; use pre-wired stems to avoid messy gaps. For travel days in, plan to assemble panels on-site with two people because panel alignment is what makes it look clean.
Acoustic panels give you a modern, high-end stage backdrop with almost zero clutter. The texture makes the stage look intentional even if you skip heavy decor, and the panel grid helps photos look sharp without adding visual noise. A narrow greenery line — think one continuous strip — keeps the minimalist promise while still giving you a natural organic touch. This works especially well in contemporary event spaces where the walls are already neutral and you want the stage to look architectural, not floral-heavy.
Skip thisSkip mixed leaf textures here — different leaf shapes fight the clean panel look.
Quick tipUse a low-profile greenery line instead of a full garland; it reads better from the back row.
3. Geometric metal frame with sheer drape and minimal florals
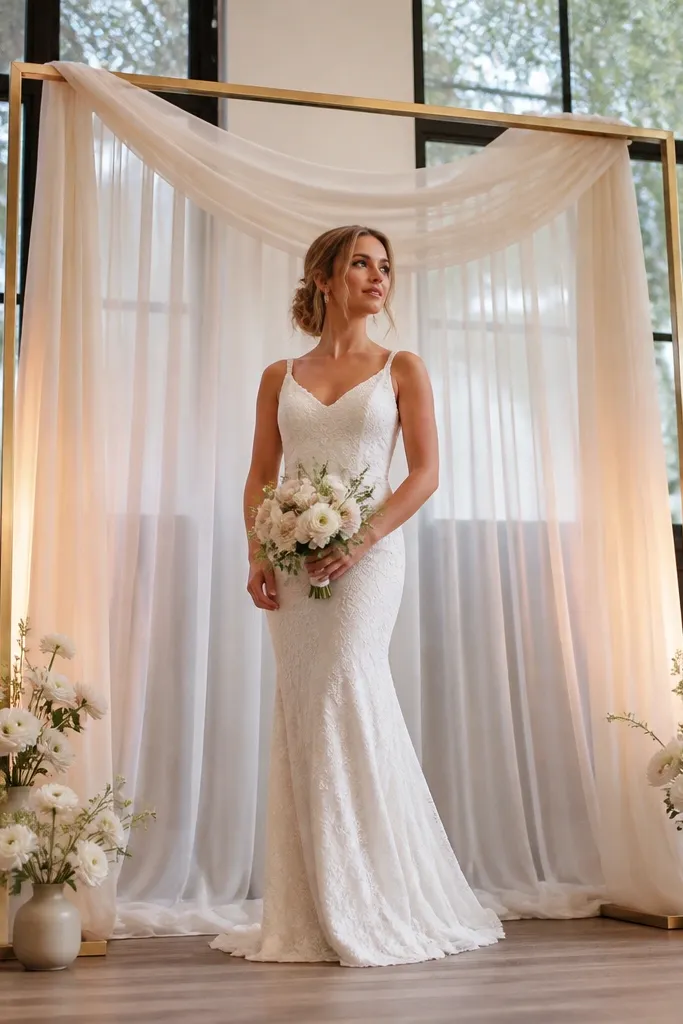
Start by choosing frame finish that matches your venue hardware — matte black for industrial rooms, brushed gold for warm-toned interiors. Then hang the sheer so it falls in vertical folds — aim for even spacing and avoid twisting the fabric. Finally, place two small side arrangements at the same height; measure from the stage floor so both sides look symmetrical in photos. If you’re doing this in a weekend wedding window, rent the frame unless you have a reliable crew — DIY frames eat time.
A geometric frame adds structure without turning your stage into an arch circus. The frame gives you straight lines for minimalist taste, while sheer drape softens the edges and makes the couple stand out. Keep florals minimal: one tight arrangement per side or a low base piece, not a full halo. This style is best for venues with decent ceiling height and enough space behind the couple for light to hit the drape.
Skip thisDon’t add a thick floral garland around the frame — it ruins the geometric minimal effect.
Quick tipTest sheer opacity by holding the fabric against the venue wall — you want it airy but not see-through enough to reveal clutter behind.
4. No-backdrop stage with a low floral block and lantern line
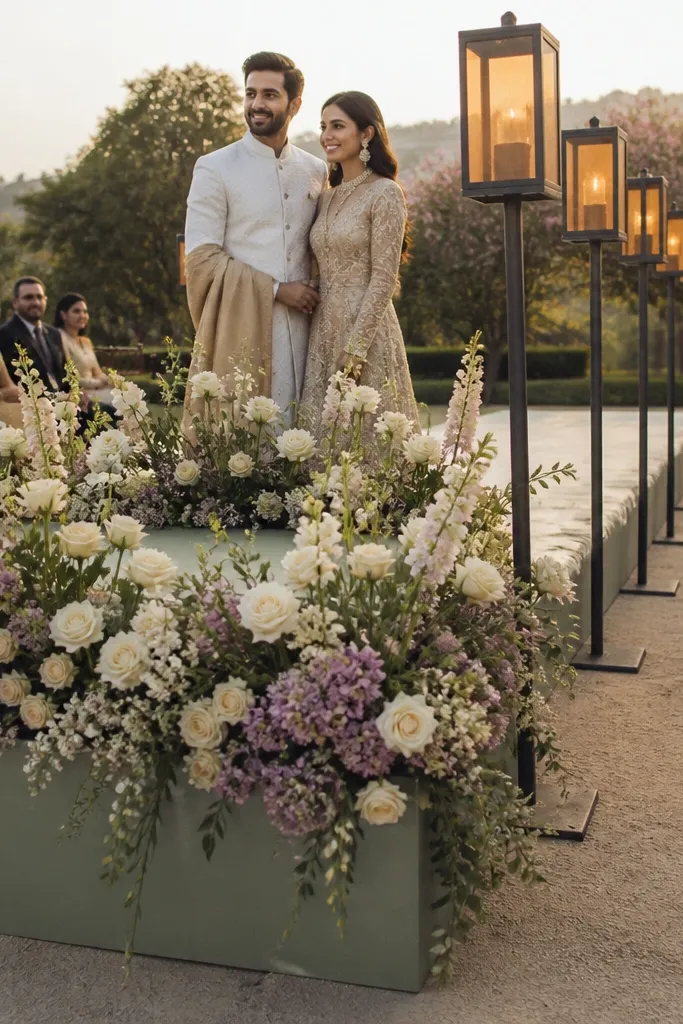
Start by placing a low floral block centered at couple height — you want it around waist level so it stays visible but doesn’t block faces. Then build a lantern line along the front edge of the stage with equal spacing (about 12-18 inches apart) so it looks deliberate. Finally, keep the greenery palette tight — one main green and a few texture accents; too many species looks messy fast. For travel days in, use rental lanterns or pre-assembled candle lantern clusters to avoid last-minute wiring.
This is the minimalist stage style that saves you when venues have ugly backgrounds or when you’re short on setup time. Instead of building a big backdrop, you build a strong foreground: a low floral block plus lanterns that catch light and guide the eye to the couple. It photographs well because the composition stays clean — no busy wall behind the couple. This is a smart pick for backyards, gardens, and beach ceremonies where wind and transport are real problems.
Skip thisDon’t stack tall vases here — they wobble outdoors and block guests in photos.
Quick tipUse battery candles with a warm flicker if your venue has strict open-flame rules.
5. LED uplight wash stage with one sculptural centerpiece
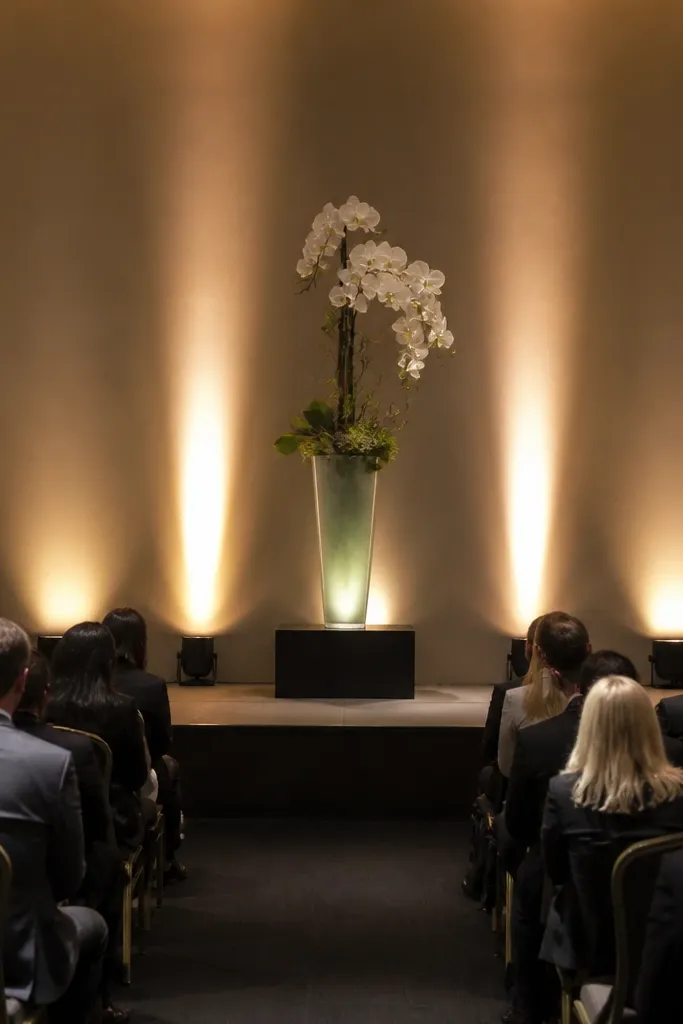
If you want minimalist that still looks expensive, light does the heavy lifting. A warm LED uplight wash gives you depth and separation from the background, and a single sculptural centerpiece keeps the stage uncluttered. This style works in almost any venue as long as you can place lights safely and hide cables. It’s also the most forgiving for uneven backgrounds because the light creates an intentional glow zone behind the couple.
Start by mapping power access — identify where extension cords can run without crossing guest paths. Then place two to four uplights at the stage corners aimed inward, using warm settings (around 2700K) so skin tones look natural. Finally, choose one centerpiece: a minimalist ceramic vessel, a sculptural glass arrangement, or a low floral block with clean lines. Keep the centerpiece height under the couple’s shoulder line so it doesn’t compete in photos.
Bring gaffer tape and label your cable runs — you want fast teardown and less cable chaos.
Don’t rely on overhead house lights — they flatten the stage and kill the glow.
6. Weighted column clusters with minimal greenery bands
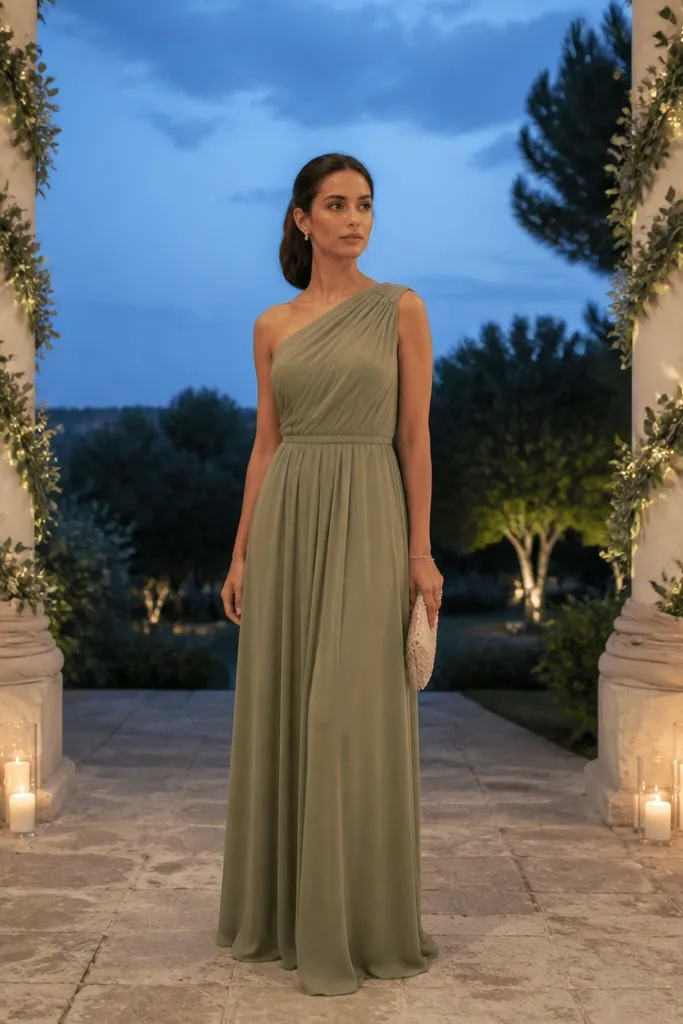
Start by choosing your base — use heavy weighted planters or rental stone bases so the columns won’t shift in wind. Then wrap narrow greenery bands around each column at consistent heights; aim for 2-3 bands total, not a full wrap. Finally, add small candle holders low to the ground so the lighting reads without blocking guests. For weekend wedding stage decor days in, schedule setup early because weighted elements need careful placement on uneven ground.
Column clusters give you vertical drama without a full arch. The trick is keeping the decor minimal and stable — weighted bases, narrow greenery bands, and small candle accents so the stage doesn’t look crowded. This style is great for outdoor ceremonies where you want a defined “frame” for the couple but you can’t commit to a large backdrop. It also works in barns because the columns echo the vertical feel of beams.
Skip thisAvoid tall, lightweight columns with fabric — wind will twist the whole setup.
Quick tipIf the ground is sloped, bring thin plywood shims to level the bases.
7. Mirror acrylic panel with a candle gutter
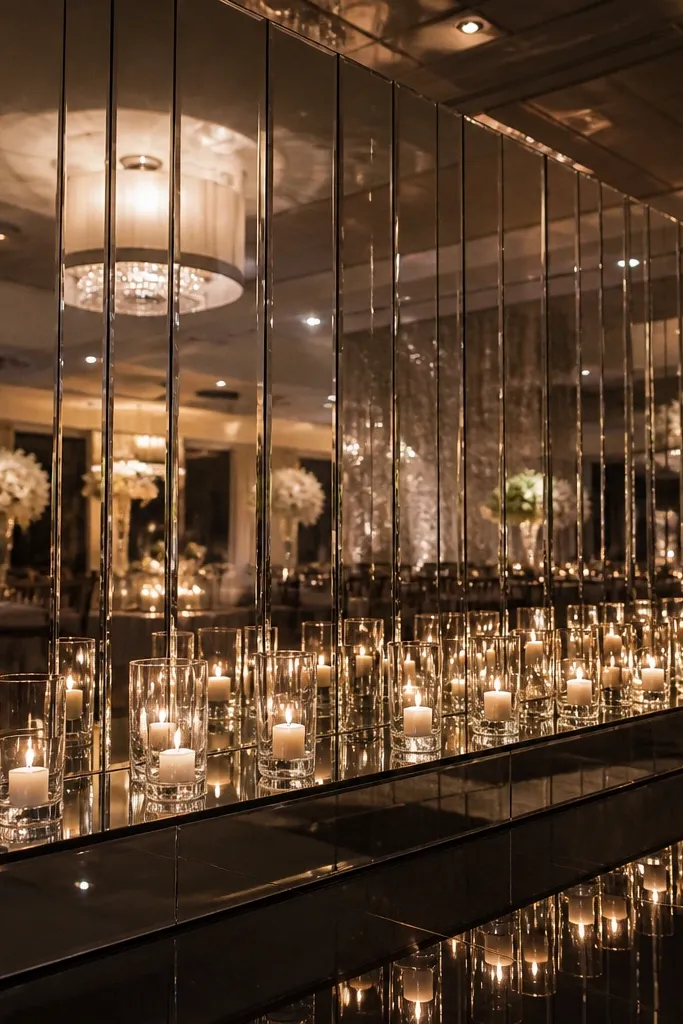
A mirror acrylic panel makes the stage look bigger and cleaner because it reflects light and reduces the need for extra decor. Pair it with a straight candle gutter — a controlled line of candles or lanterns — and you get a minimalist composition that still has sparkle. This works best in venues with existing lighting that can hit the panel without glare. If the venue is dark and you add warm lights behind it, the reflection helps the stage read on camera.
Start by positioning the panel so it doesn’t catch the projector or camera flash directions; angle it slightly if needed. Then build the candle gutter centered and straight, using consistent candle sizes and spacing (about 10-14 inches). Finally, use warm lighting — either uplights aimed at the panel or low warm string lighting kept hidden behind the candle line. For travel days in, protect the panel edges and plan a safe carrying method because acrylic scratches easily.
Test for glare by standing where the ceremony photographer will be and checking reflections.
Don’t use cool blue lighting here — it makes skin look washed out in reflections.
8. Clean archless stage with runner and two side arrangements
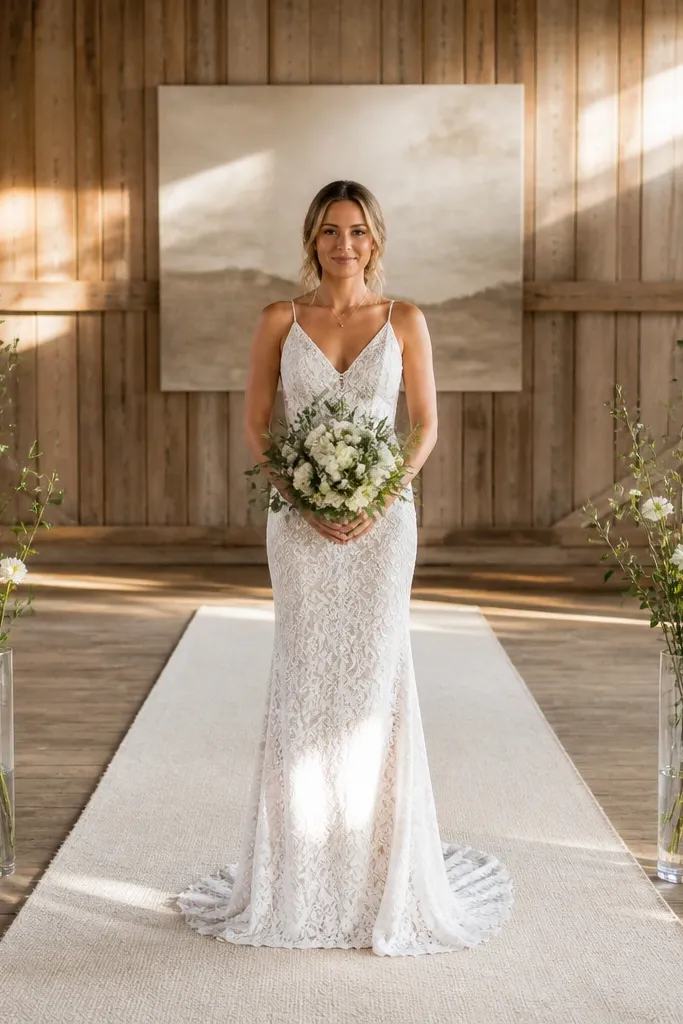
This is the most reliable minimalist stage style for venues that already have a strong background — like barns, neutral hotel rooms, or spaces with tasteful wall art. The runner creates a clear path for the couple, and two side arrangements frame them without crowding the stage center. It looks intentional in both wide shots and close-ups because the composition is balanced and the center stays open. Choose this when you want minimalist but you don’t want the stress of building a large backdrop.
Start by picking a runner width that matches your stage — typically 24-36 inches wide for a standard stage. Then create two matching side arrangements at the same height, with low profiles so they sit below eye line. Finally, keep the center clear: no big floral blocks, no tall candles, just the couple space. For weekend wedding stage decor days in, this style is fast because it uses fewer pieces and doesn’t require rigid frame installation.
Use the same vase shape for both sides, even if the flowers vary — shape matching matters more than perfect flower matching.
Don’t center a large bouquet on the runner — it breaks the open minimalist space.
9. Single-color floral row in slim vases
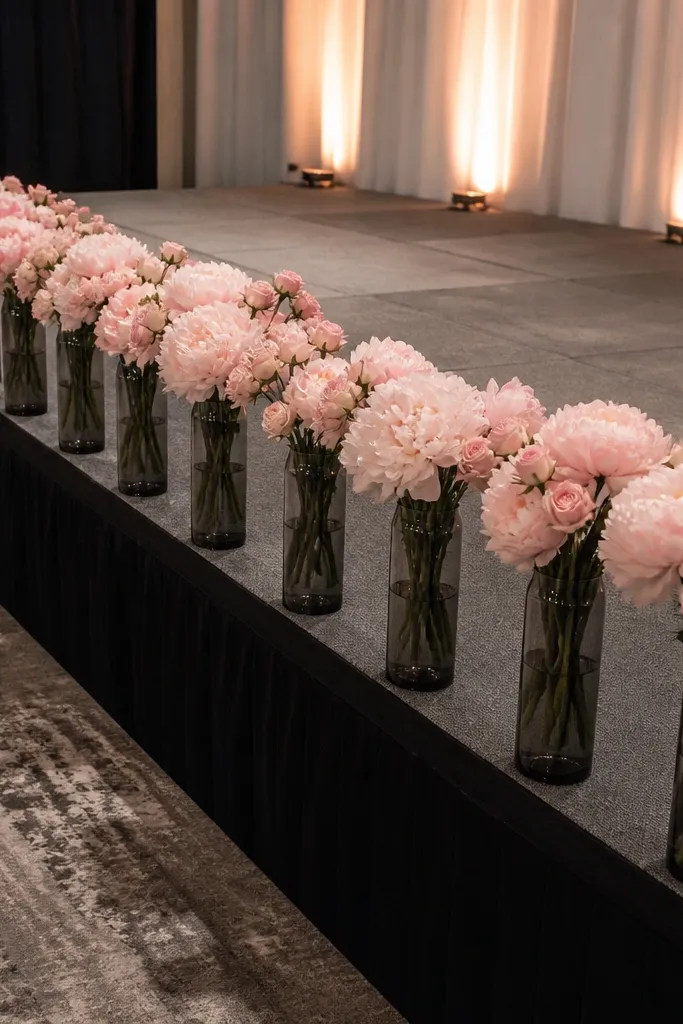
Minimalism works when your color stays controlled. A single-color floral row in slim vases gives you a clean, graphic look that doesn’t spill into the stage like a full bouquet wall. Choose one main color — warm white, soft blush, or sage-green — and let the stems do the work. This is excellent for indoor venues where you can control lighting and you want a stage that feels modern, not romantic-overloaded. It also helps when your venue background is busy because the stage foreground stays simple.
Start by selecting vases with consistent height and opening width so the row looks even. Then decide spacing — 10-16 inches apart looks neat without turning into a line of identical dots. Finally, keep the stem lengths consistent by cutting stems to a measured height; use a foam-free arrangement method like floral pins into water-resistant base if you’re using rental vases. For travel days in, prep vases ahead of time in the exact arrangement order so the row goes up in minutes.
Pick flowers that hold their shape for photos — sprays and structured blooms read better than floppy varieties.
Avoid mixing multiple flower sizes in one row — it creates visual clutter quickly.
10. Reclaimed wood slat backdrop with sparse greenery
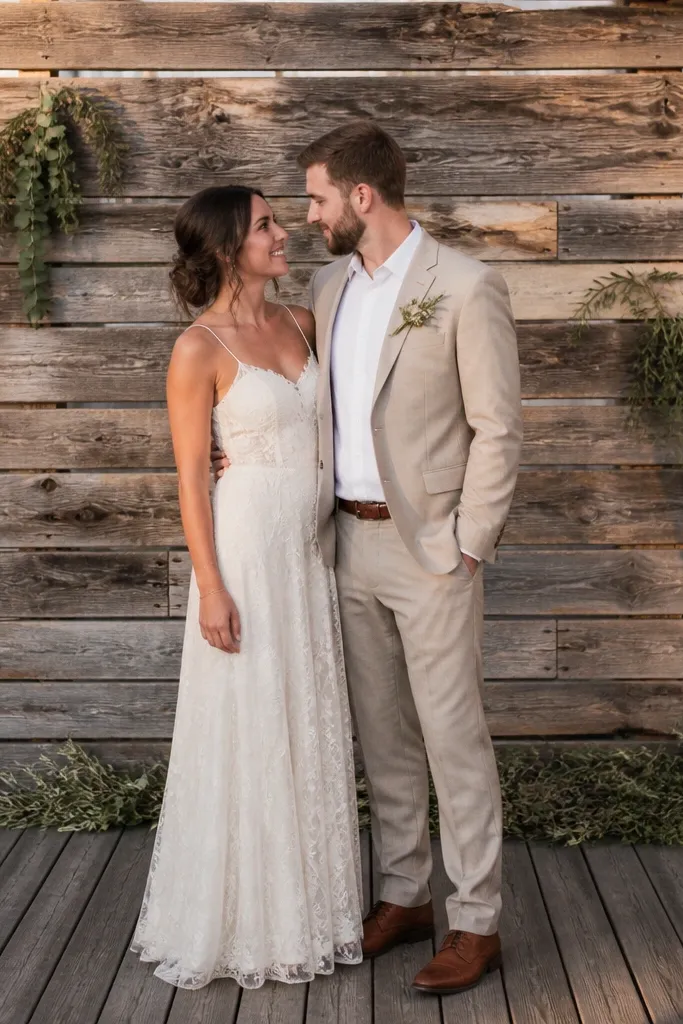
Start by choosing slat spacing and color — lighter reclaimed wood reads airy, darker wood reads moody. Then attach sparse greenery at just a few points across the slats, keeping clusters small and centered. Finally, add a low candle line at the base so the stage looks complete from the front row. For weekend wedding stage decor days in, schedule delivery early because slat backdrops take time to align and level.
Wood slats give you texture without building a heavy floral wall. The stage feels warm and architectural, and sparse greenery keeps it minimalist instead of rustic-choked. This is a strong option for outdoor receptions that need definition but can’t handle fabric backdrops in wind. The slats also photograph well because the background has depth — you get separation from the couple without adding extra objects.
Skip thisDon’t cover the slats with full garlands — it stops looking minimalist fast.
Quick tipUse a level and mark mounting points on the floor with tape so you don’t lose time correcting it later.
11. Minimal balloon-free "clean frame" with greenery dots
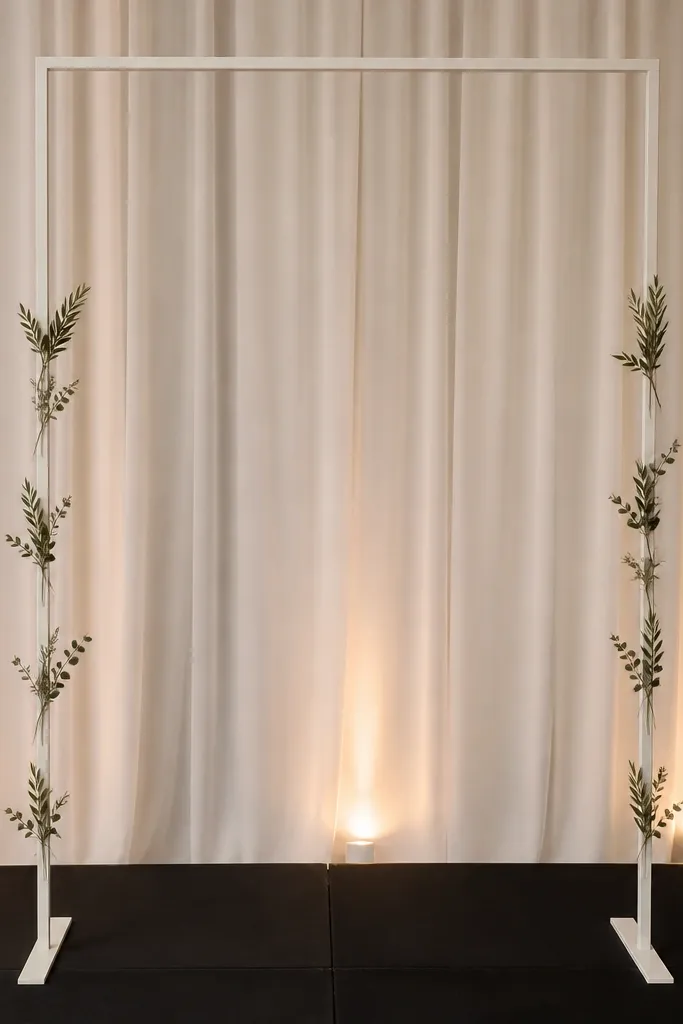
This style relies on shape, not bulk. A clean rectangular frame with a few greenery dots creates a modern stage boundary that still feels soft. It works when you want a minimalist look but you hate fabric backdrops because they wrinkle or catch wind. Keep the greenery “dots” small and spaced so the composition stays airy. This is a great fit for venues with neutral walls or outdoor patios where you want the stage to stand out without a big backdrop wall.
Start by choosing a frame material that can travel well — lightweight aluminum or a rental steel frame. Then add greenery dots using pre-wired clusters; place them at corners or along the center line so the geometry stays obvious. Finally, keep the stage floor minimal — a runner or a single low arrangement is enough. For travel days in, plan to assemble the frame with a clear checklist because alignment errors show up immediately in photos.
Take one quick photo from the back of the venue before you add any extra pieces — it prevents over-decorating.
Avoid adding a full garland across the frame — dots look minimalist; full coverage looks busy.
12. Stoneware low centerpiece with floating candles
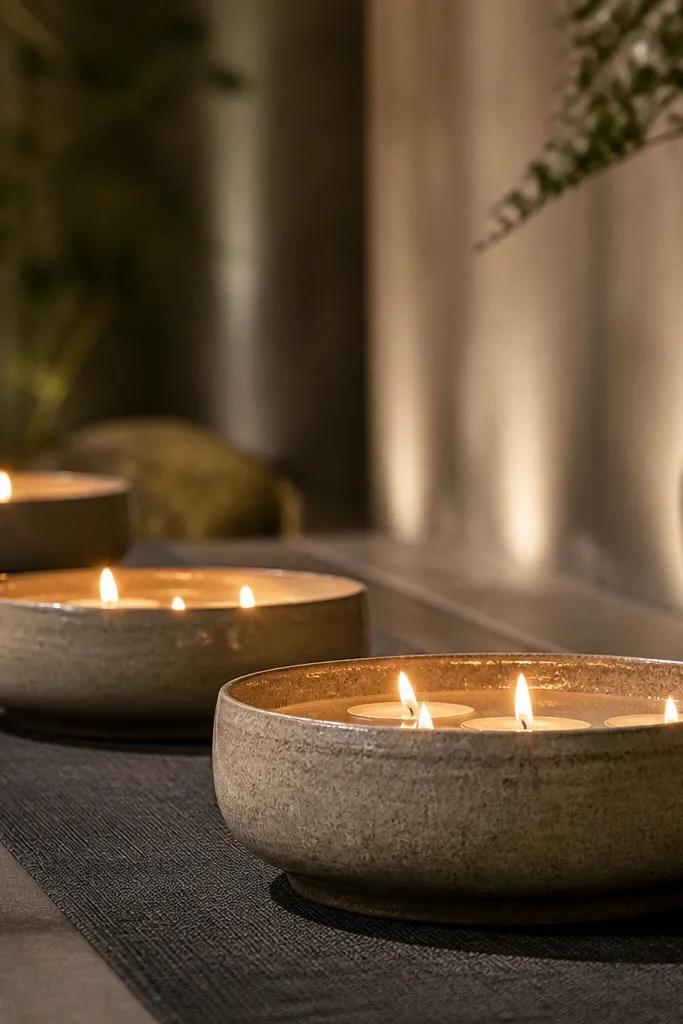
Start by choosing stoneware bowls that are wide enough to hold multiple floating candles without crowding. Then place them in a centered cluster — two or three bowls max — and keep them low enough that they don’t block faces. Finally, use warm LED floating candles if open flame is restricted, and test the light level so it’s visible in the venue’s evening conditions. For weekend wedding stage decor days in, pack candles and wicks separately so you can swap quickly if one set fails.
Low stoneware bowls with floating candles create a calm, minimalist centerpiece that looks intentional from every angle. The glow reflects subtly on the surface, so the stage has movement without adding clutter. This is a smart pick for evening ceremonies when you want ambiance without tall decor. It also works outdoors because the visual weight stays low — less wind drama, less wobble.
Skip thisDon’t add tall vases around the bowls — it makes the centerpiece feel heavy and less clean.
Quick tipUse a shallow tray under each bowl so spills don’t hit the stage fabric.
13. Monochrome greenery garland on a thin rod
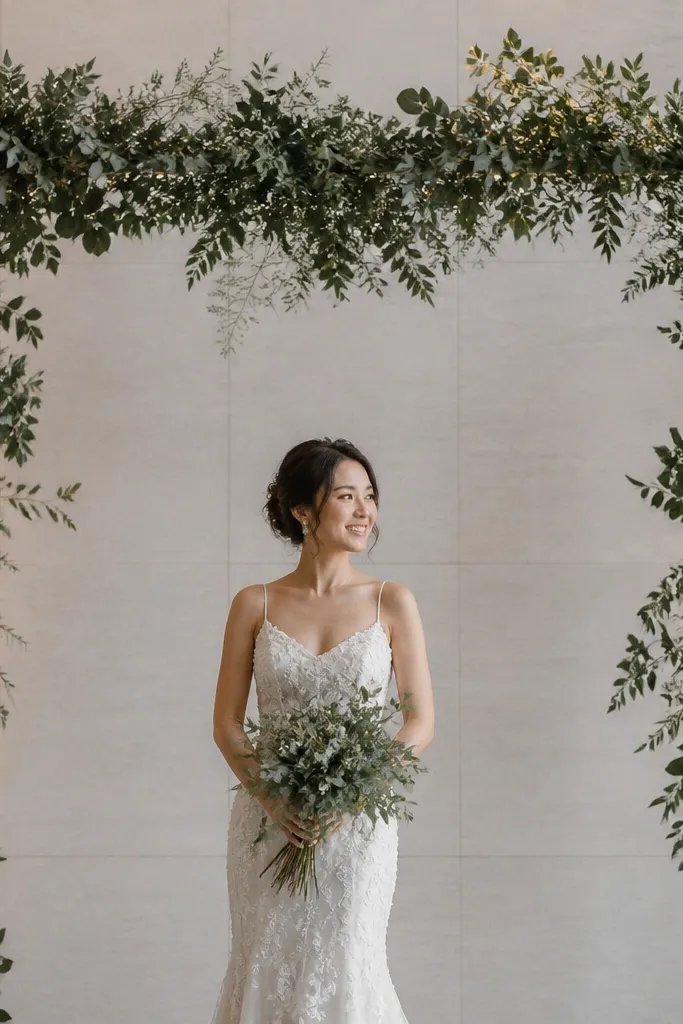
Start by picking one primary green tone — sage, eucalyptus, or dark green — and avoid adding multiple leaf shapes. Then mount a thin rod across the stage at the couple’s shoulder height so the garland frames them without covering faces. Finally, add only two small base elements like candle clusters or slim vases; let the garland do the visual work. For quick weekend installs, pre-cut the garland into sections so you can hang and adjust fast.
A thin rod with a monochrome greenery garland gives you a minimalist “frame” effect without a full backdrop. The garland looks light and airy because it hangs with negative space, and the monochrome palette keeps it from looking like a mixed bouquet wall. This is best for venues with good natural light or controlled indoor lighting where the greenery reads clearly. It also works when you want a stage that stays consistent across day and night — greenery doesn’t rely on heavy lighting tricks.
Skip thisSkip mixed filler flowers here — they make the stage look like a generic floral backdrop.
Quick tipUse zip ties or floral wire at the rod attachment points so the garland doesn’t sag unevenly.
14. Monochrome silk panel backdrop with hidden cable ties
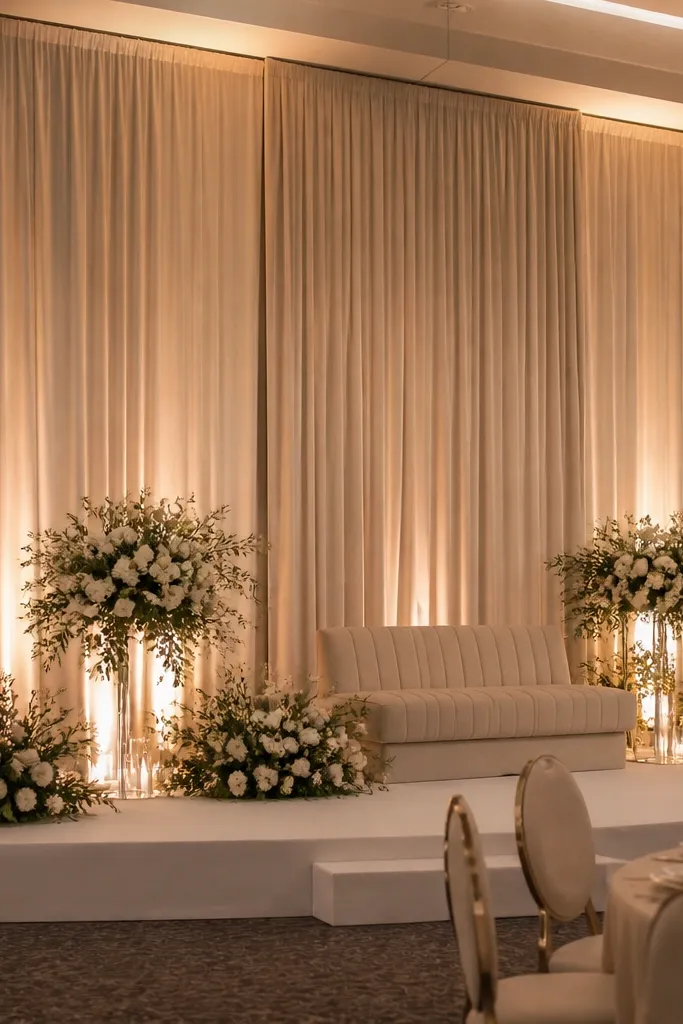
Silk panels look minimalist because they fall smoothly and hide the mess behind the stage. The monochrome palette — warm white, light gray, or soft beige — keeps the look modern and calm. Use panels instead of one big sheet when you want clean edges and better control over wrinkles. This style is ideal for indoor receptions and shaded outdoor patios where wind won’t whip the fabric.
Start by choosing panel width so each panel overlaps by about 2-4 inches, which hides seams. Then attach with hidden cable ties or clips to a rental frame so the drape stays straight and doesn’t show hardware. Finally, add one lighting wash behind the panels and keep florals minimal — a low centerpiece or two side arrangements. For weekend wedding stage decor days in, do a quick wrinkle check under the venue lights before you finalize placement.
Bring a handheld steamer and hang the panels at least 1 hour before the ceremony block for best drape.
Don’t use fabric that clings — clingy silk shows wrinkles and looks messy under strong lighting.
15. Matte black lantern clusters with a thin greenery base
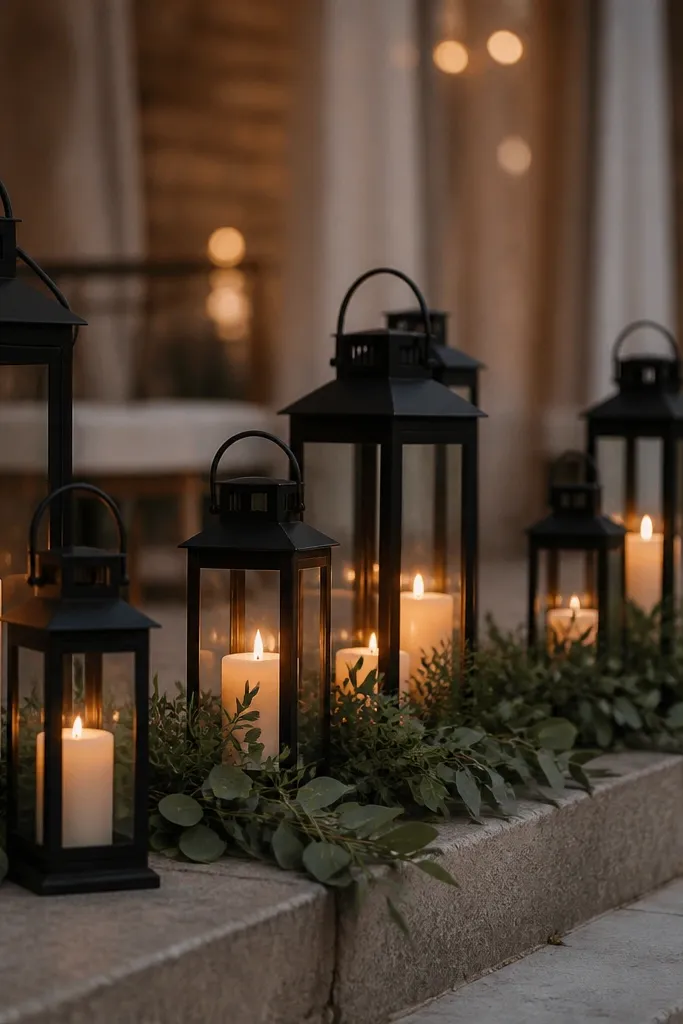
Lantern clusters add a strong minimalist mood because the lantern shapes are consistent and the color stays controlled. Matte black keeps it modern and helps the lanterns stand out against light backdrops without turning the stage into a themed set. Pair the lanterns with a thin greenery base so the stage looks grounded and not floating. This works especially well for evening ceremonies, outdoor patios, and barn receptions where you want a clean “frame” without a big floral wall.
Start by grouping lanterns in two clusters or one centered cluster, keeping the total lantern count low enough to avoid visual noise. Then build a thin greenery base under and between lanterns using pre-wired strips or a narrow runner of greenery. Finally, add one warm light source behind the lantern line so the lantern glass catches glow. For travel days in, rent identical lanterns if possible, because mismatched lantern sizes ruin the minimalist geometry.
Choose lanterns with a consistent glass tone — clear vs frosted changes how much light shows on camera.
Avoid mixing lantern finishes like brass and chrome — it breaks the monochrome look.



