
1. Tall Cream Drape + Center Bloom Column
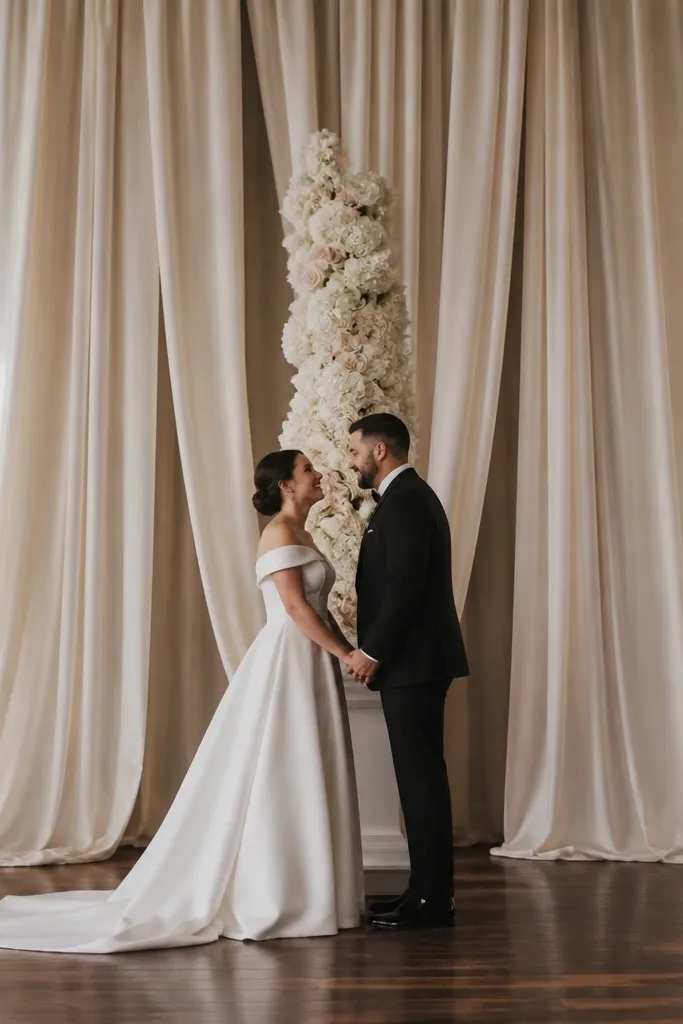
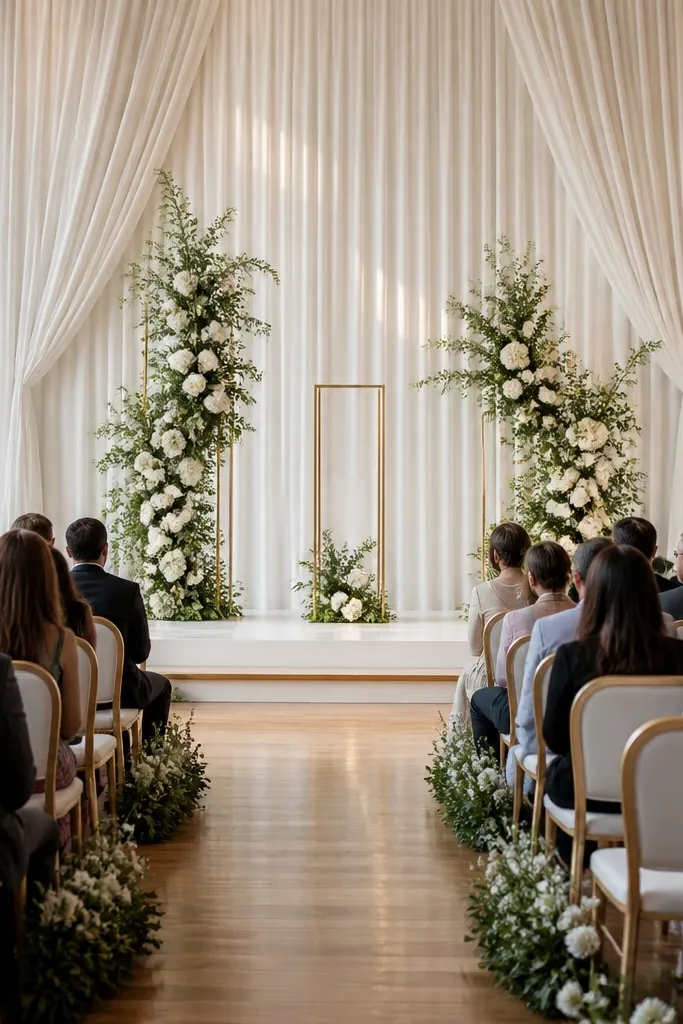
This is the stage look that photographs clean even in venues with ugly walls. The tall cream drape creates a soft, continuous background, and the center bloom column gives the couple a clear focal point without cluttering the edges. Choose a drape that falls in vertical folds rather than a flat sheet — those folds catch light and make the stage feel designed. It suits both spring weddings and winter ceremonies because cream works with dusty pink, sage, and even black-and-white accents.
Quick tipIron the drapes or steam them hard before install; wrinkles show up more on cameras than you think.
Start by hanging two tall drapes on either side of the stage using a tension rod or ceiling track so the fabric reaches at least to shoulder height above the couple when standing. Then build one vertical column in the center using a mix of greenery and 2-3 bloom types, keeping the biggest blooms clustered in the upper third. Finally, place two slim candle lanterns or small bud vases at the base to frame the column without taking over the center.
Skip thisAvoid adding side arrangements that compete with the center — keep the edges calmer.
2. Black Velvet Backdrop With Gold Ribbon Arch
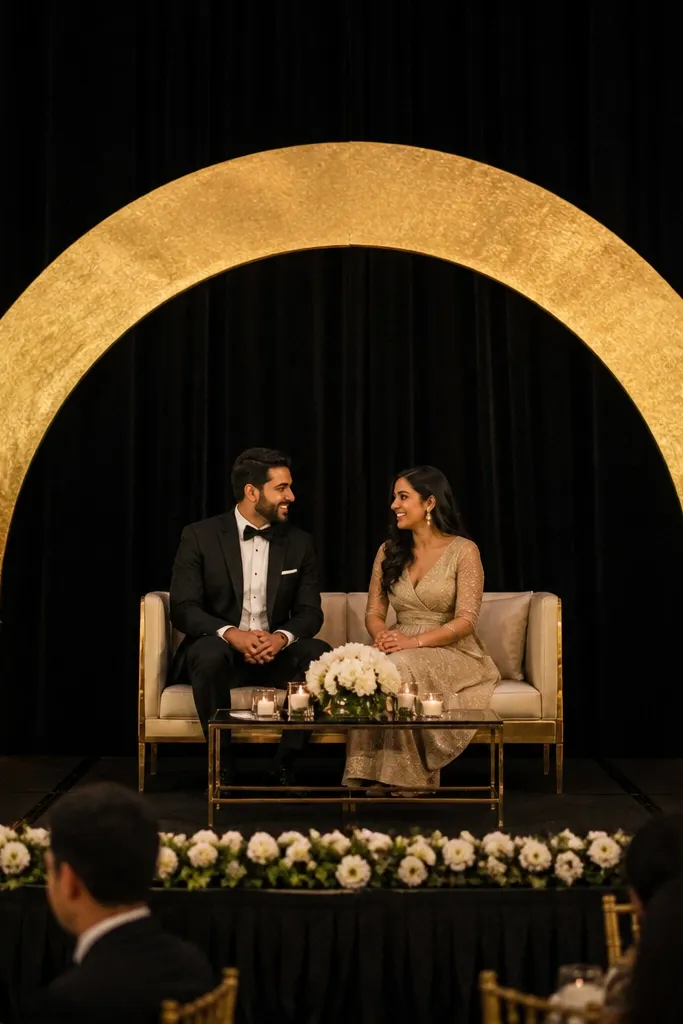
If you want “stylish” more than “cute,” black velvet is the shortcut. It absorbs light, which makes skin tones look warmer and makes gold accents pop. The ribbon arch adds movement and gives you a crisp shape above the couple, so your stage reads instantly from the back row. This works best for evening ceremonies, especially with jewel tones like burgundy, emerald, or plum.
Start by covering the back wall or stage frame with black velvet panels, using zip ties or Velcro strips so seams stay tight. Then build a simple arch frame (PVC or metal hoop) and wrap it in satin gold ribbon with even spacing. Finally, add small metallic stems or dried pampas-like texture at the base corners to keep the look balanced.
Test ribbon color under venue lighting; some golds go too yellow under warm LEDs.
Skip heavy white florals against black velvet unless you’re using a consistent warm-white palette.
3. Sandstone Linen Runner With Asymmetrical Candle Line
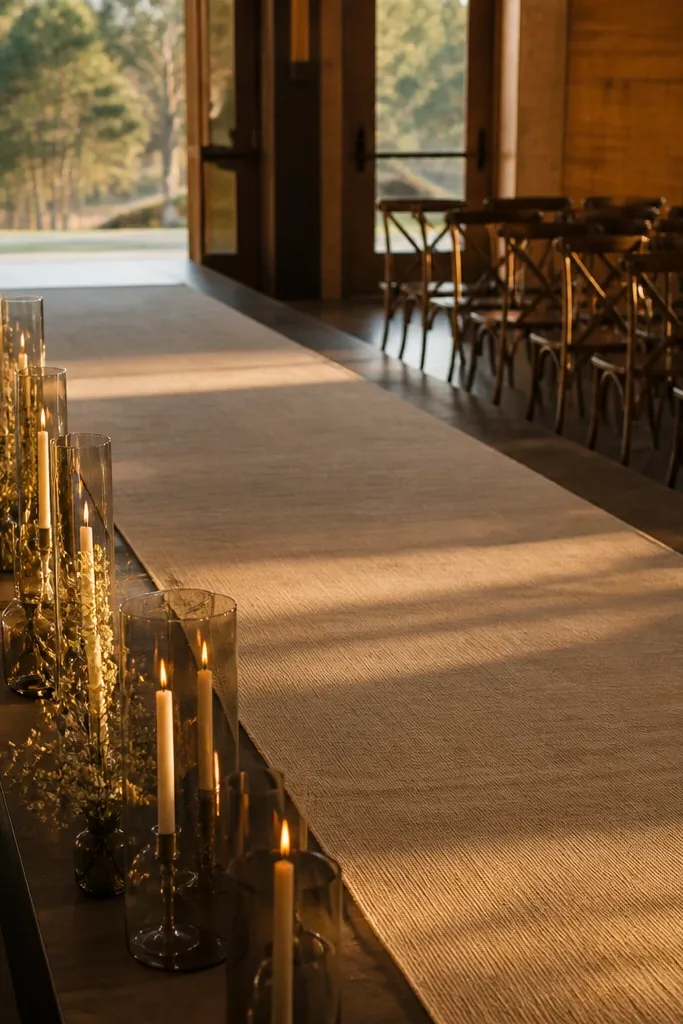
This is a stage decoration trick for venues where the back wall is plain or hard to cover. A linen runner sets a grounded, luxury texture, and an asymmetrical candle line adds height and drama without needing a full backdrop. The diagonal placement feels modern and keeps the stage from looking like a wedding “template.” It looks especially good for beach-adjacent spaces, courtyard venues, and outdoor ceremonies with natural light.
Quick tipUse glass hurricane covers for wind-prone areas; they also make candlelight look smoother in photos.
Start by laying a sandstone or oat linen runner down the stage center, making sure it hangs evenly on both sides of the stage edge. Then place candles in a staggered line — start with taller candle holders at one corner and step down toward the opposite side. Finally, add two small low floral clusters at the runner’s midpoint so the candles don’t become the only focal point.
Skip thisAvoid placing candles in a perfect straight line if you want the look to feel styled, not basic.
4. Macramé Curtain Panels With Warm White Fairy Lights
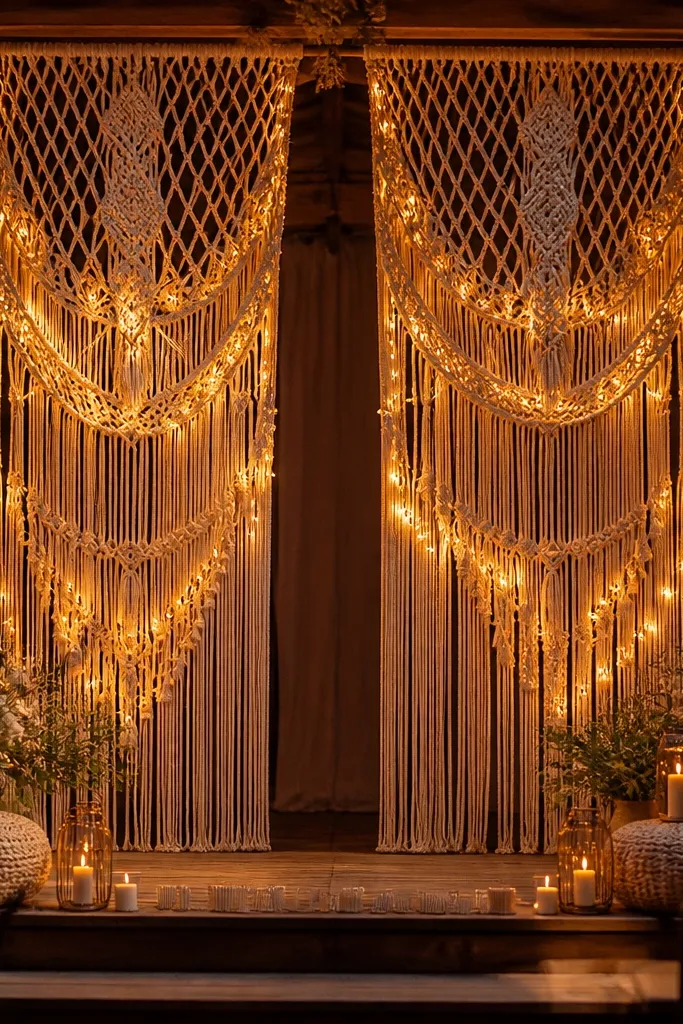
Macramé gives you a handcrafted texture that reads as intentional even with minimal flowers. Hang it in curtain panels behind or beside the stage so you get depth — the background isn’t flat, which helps photos look layered. Warm white fairy lights inside the macramé create a gentle glow without the harsh look of bright LEDs. This suits boho weddings, intimate ceremonies, and even modern minimalist venues if you keep the palette neutral.
Start by securing macramé panels to a simple frame behind the stage so they don’t swing during the ceremony. Then run warm white string lights along the inner edges, tucking the battery pack backstage or behind a stage side panel. Finally, keep florals minimal: one small bouquet at center or a thin greenery garland across the floor line.
Choose warm white bulbs with a dim setting; bright fairy lights wash out the texture.
Skip cool blue lighting — it makes macramé look gray on camera.
5. White Hydrangea Wall Panels With Greenery Grid
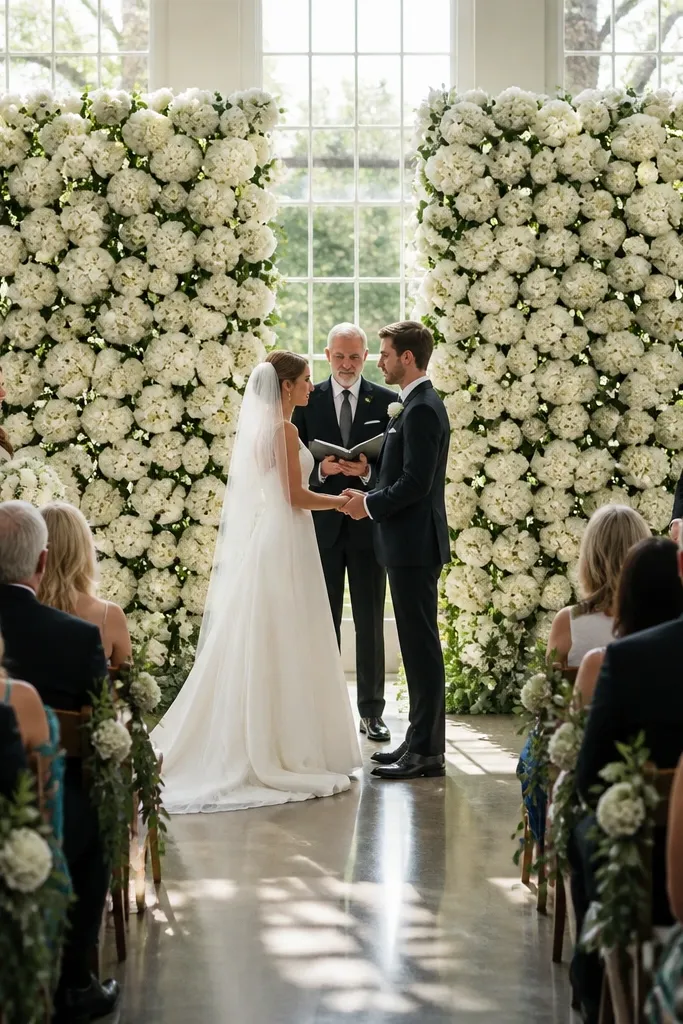
Hydrangeas give you that full, cloud-like volume that makes a stage look instantly expensive. A wall panel approach is cleaner than scattered bunches because it reads as one cohesive backdrop. Add a subtle greenery grid so the white blooms don’t look like a flat sticker wall. This is perfect for daytime ceremonies where you want the stage to stay bright and airy in photos.
Quick tipUse a mix of bloom sizes — large centers plus smaller heads around the edges — for a more natural look.
Start with two to four freestanding panel frames, then attach greenery first so you can anchor the flower clusters. Place hydrangea heads in a repeating pattern, leaving small gaps for depth rather than filling every inch. Finally, add a thin garland line at the base so the floor doesn’t look empty in wide shots.
Skip thisDon’t use only one size of flower; it looks uniform and fake fast.
6. Sage Green Leafy Cascade on a Clear Acrylic Frame
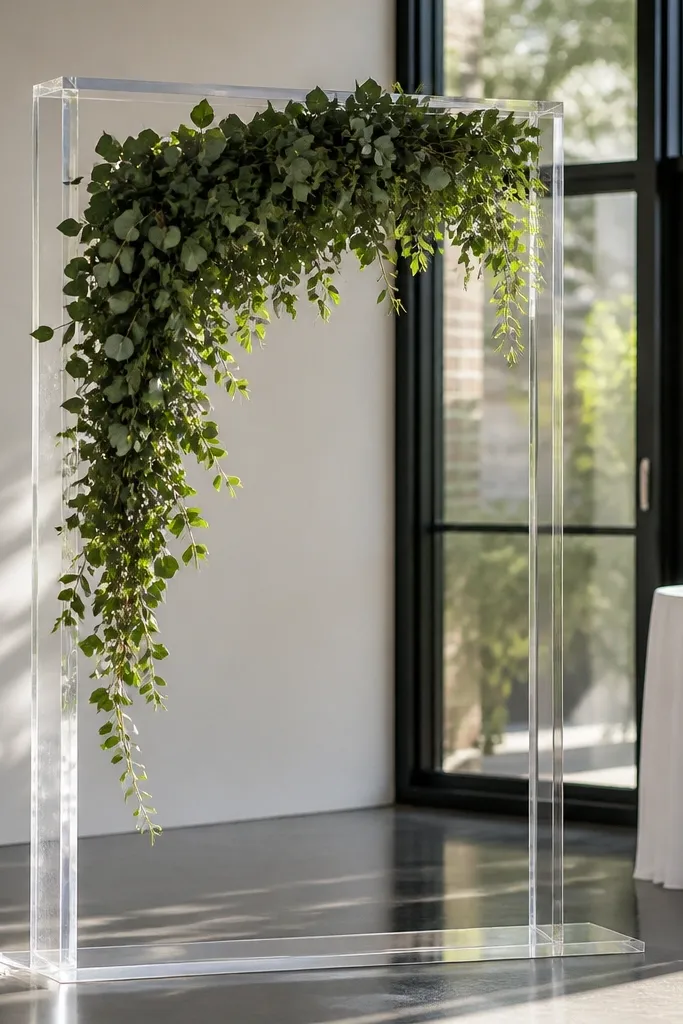
A clear acrylic frame keeps your stage feeling light, which is a big win for venues with small stages or low ceilings. The leafy cascade adds movement, and sage green reads modern while still feeling romantic. This look is great for couples who want “pretty” without a huge floral wall taking over the room. It also photographs well because the greenery has texture, while the clear frame stays unobtrusive.
Start by setting up a clear acrylic rectangular frame centered behind the couple. Then build a cascade by attaching greenery strands from the top corners down toward the center, keeping the heaviest part around chest height. Finally, add two small mirror-finish candle holders at the base corners to catch light and make the frame glow slightly.
Wipe acrylic with glass cleaner right before photos; fingerprints show up instantly.
Avoid thick, heavy floral clumps in the center — keep it flowing, not stuffed.
7. Pastel Blossom Curtain With Vertical Ribbon Strands
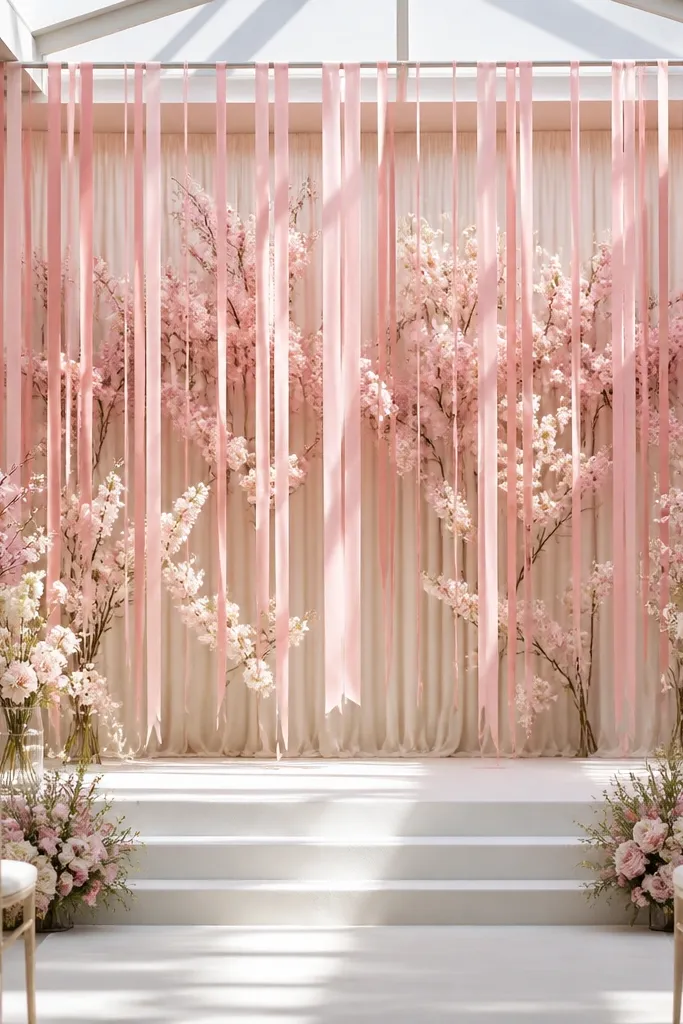
This one looks dreamy without needing a massive arch. A pastel blossom curtain gives you soft color, and vertical ribbon strands add length — they make the stage look taller in photos. Choose ribbon colors that match your bouquets and bridesmaid dresses so everything feels connected. It’s ideal for spring ceremonies, garden venues, and indoor halls where you want the stage to feel airy.
Quick tipUse satin ribbon, not matte — satin catches light and makes ribbon strands show up on camera.
Start by hanging a lightweight backdrop curtain behind the stage so it drapes smoothly from top to floor height. Then attach small blossom clusters in a loose vertical pattern, keeping the center slightly denser than the edges. Finally, add vertical ribbon strands from the top bar down, mixing two widths for a more interesting look.
Skip thisSkip too many ribbon colors; three shades max reads intentional.
8. Monochrome Black + White Flower Steps
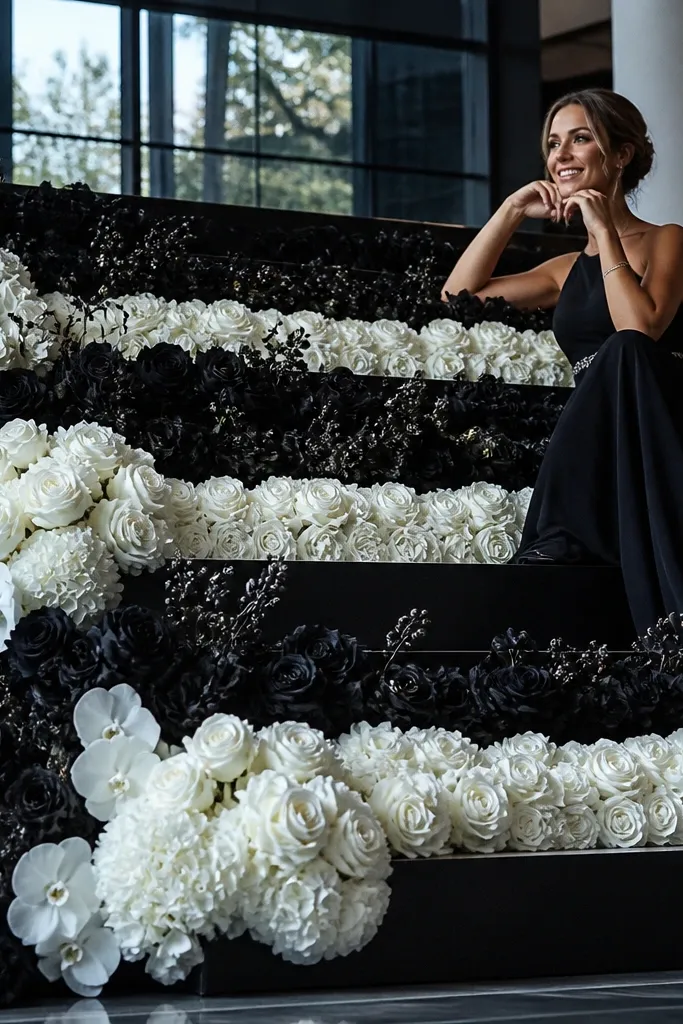
Monochrome steps look like editorial styling because you’re controlling contrast. Use black and white blooms with lots of texture — think dark berries or black foliage alongside white flowers — so it doesn’t turn into a flat black-and-white filter. The stepped layout gives you height even if your venue doesn’t allow tall structures. This works for modern venues, art spaces, and winter weddings where you want the stage to feel dramatic.
Quick tipKeep black blooms matte and white blooms crisp; shiny petals look messy under warm lighting.
Start by placing two or three low risers or step platforms behind the aisle so the arrangement has levels. Then build each level with a different density: heavier blooms on the top step, lighter on the lower steps for depth. Finally, add a thin garland line along each step edge so the decor looks finished from the side angle.
Skip thisDon’t mix too many flower types — monochrome looks best when the texture variety comes from foliage and shape.
9. Terracotta Lanterns With Dried Palm Feathers
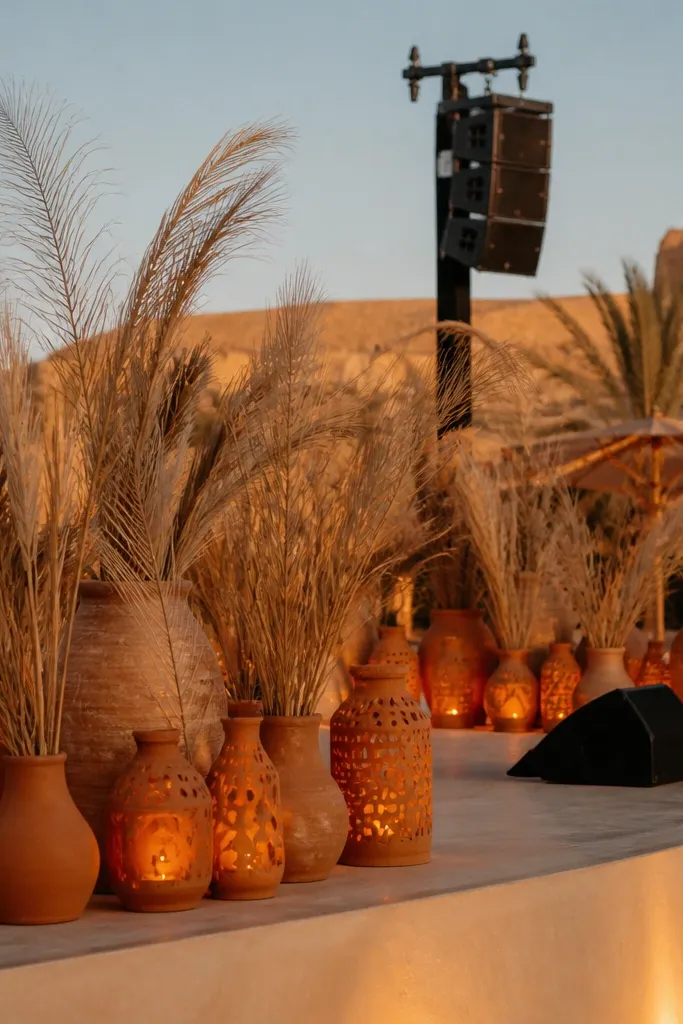
Lantern clusters create instant atmosphere, and terracotta keeps the vibe warm instead of costume-y. Dried palm-feather stems add height and a natural silhouette that reads well even from far away. This stage decor is a great match for outdoor ceremonies, rustic venues, and desert-inspired color palettes. It also works for fall because the color story stays warm even when the weather cools.
Start by placing terracotta lanterns in pairs at both stage corners, using different heights so the frame doesn’t look symmetrical and stiff. Then tuck dried palm-feather stems behind the lanterns so they rise above the candle level. Finally, add a low runner of greenery or pampas grass across the stage base to connect the whole look.
Use LED candles inside lanterns — the glow stays consistent and won’t flicker unevenly on camera.
Avoid fresh water-heavy greenery with lanterns; it can wilt fast in heat.
10. Gold Rim Mirror Panels With Pearl-White Vines
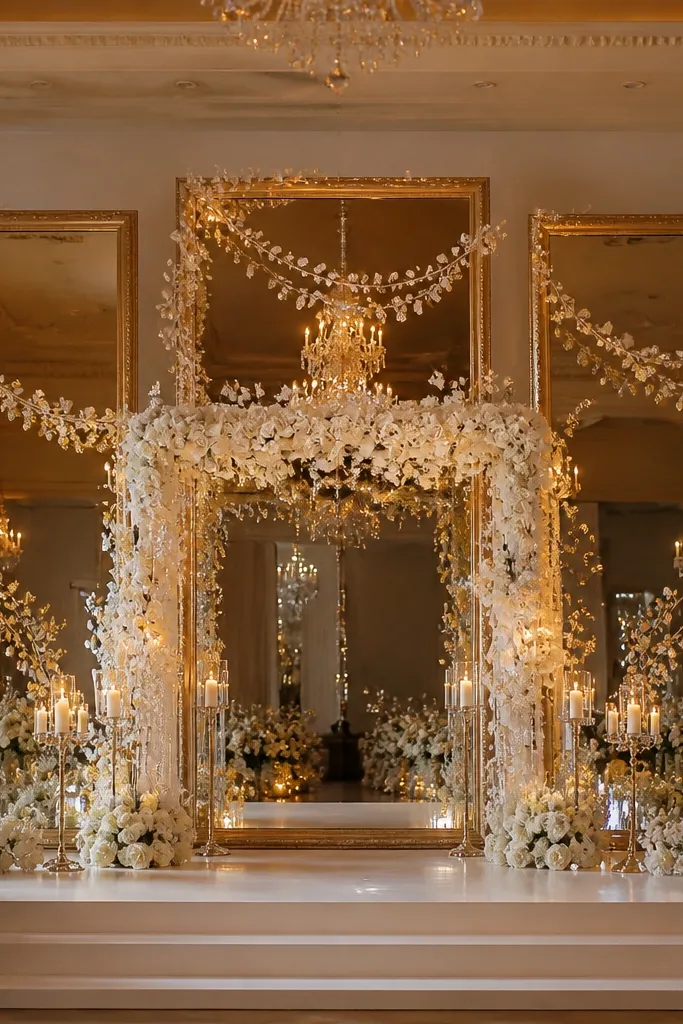
Mirrors make a stage look bigger and brighter without adding more decor bulk. Gold rim panels add a classy frame, and pearl-white vines bring softness so the mirrors don’t feel too harsh. This is a smart choice when your venue has good lighting but a plain back wall. It’s also excellent for evening ceremonies because reflected light makes the stage glow.
Start by securing two to three mirror panels behind the couple, angled slightly so reflections don’t blast guests in the face. Then drape pearl-white vine garlands across the mirror edges and down into the lower corners, keeping the center clean. Finally, add one small floral spray at the base of each mirror panel to hide the attachment points.
Test mirror angles with a phone flashlight; you’re aiming for soft reflections, not glare.
Skip placing mirrors directly flat if your room has strong overhead lights.
11. Blush Chiffon Swag Backdrop With Low Floral Ledges
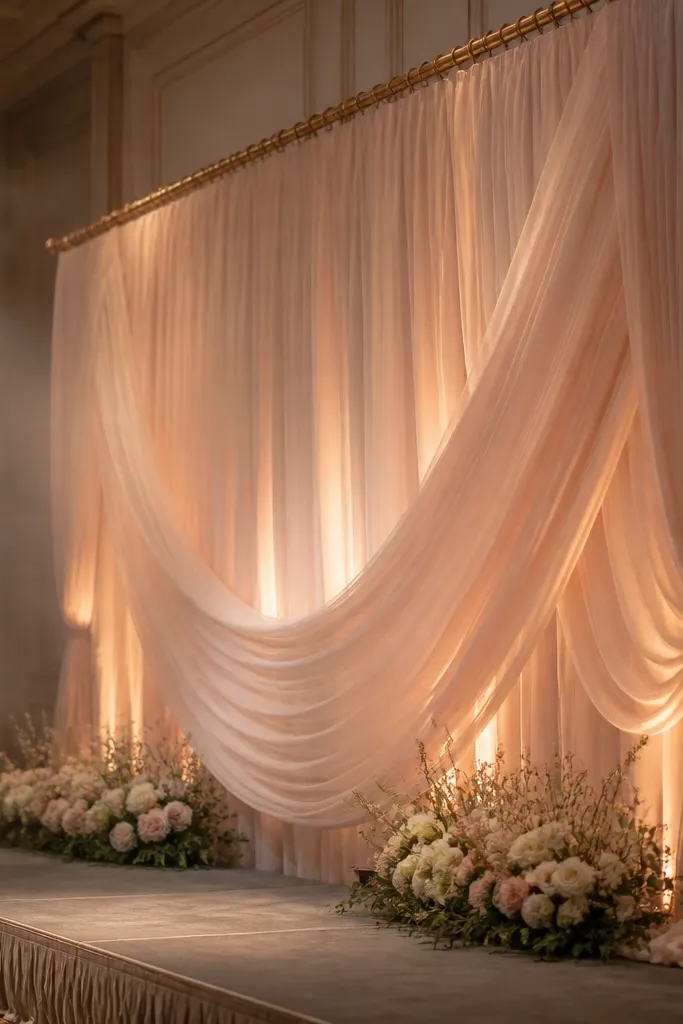
Chiffon swags give you that romantic motion without needing a heavy floral wall. The trick is keeping the florals low, so the stage looks elegant and not crowded. Blush chiffon looks good with warm neutrals and champagne golds, and it photographs like soft watercolor. This suits indoor receptions, ballrooms, and even outdoor ceremonies in mild weather.
Quick tipUse fabric weights at the bottom hem; chiffon blows and twists fast on stage.
Start by hanging chiffon in wide swags across the back — use multiple attachment points so the fabric falls in arcs, not straight lines. Then add low floral ledges along the front edge of the stage using smaller arrangements spaced evenly. Finally, frame the couple’s walking path with two slim greenery lines that don’t cross the center.
Skip thisAvoid tall bouquets at center if you’re using chiffon — they block the flow and ruin the light, airy look.
12. Terrarium Centerpiece Arch With Hanging Air Plants
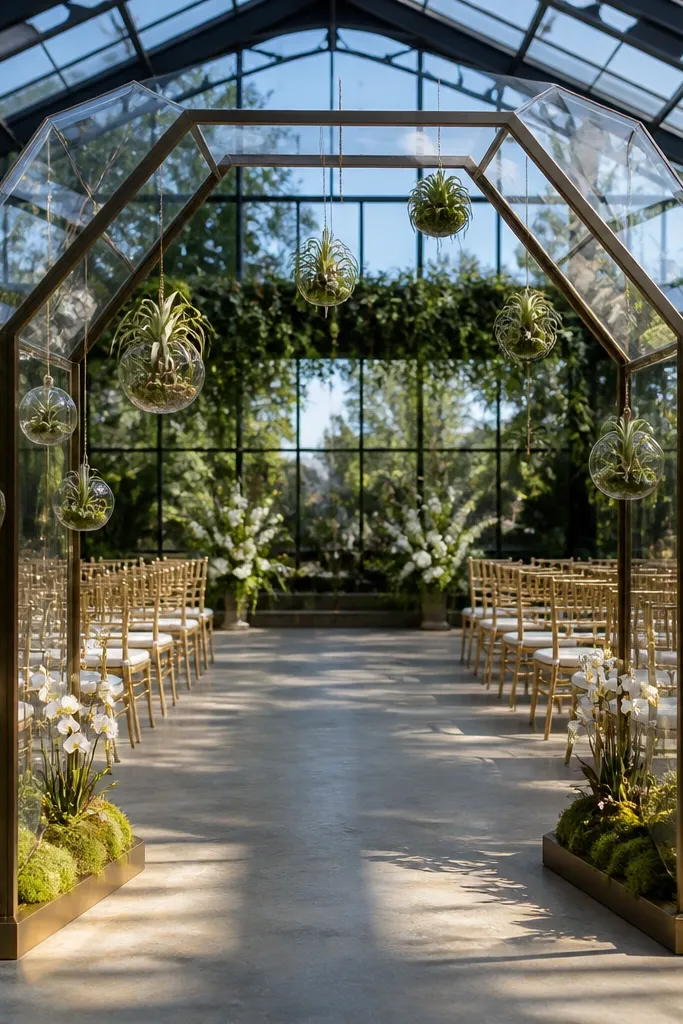
A terrarium-style arch looks modern and gives you that “wow” without using massive flowers. Hanging air plants add delicate movement, and the glass containers make the whole stage feel curated. This stage idea is great for couples who want something botanical but not traditional. It also works well for indoor venues where you want a clean, controlled look.
Quick tipGroup glass pieces by size — three larger containers plus several small ones — for a balanced layout.
Start by building a simple arch frame and attaching clear acrylic or wire mesh panels so terrarium pieces stay secure. Then hang air plants at different heights so the arch has depth instead of being one flat row. Finally, place small glass container clusters at the base corners and keep the center open for the couple.
Skip thisDon’t overcrowd the arch with too many glass shapes; it turns into visual noise.
13. Navy Backdrop With White Floral Corner Spirals
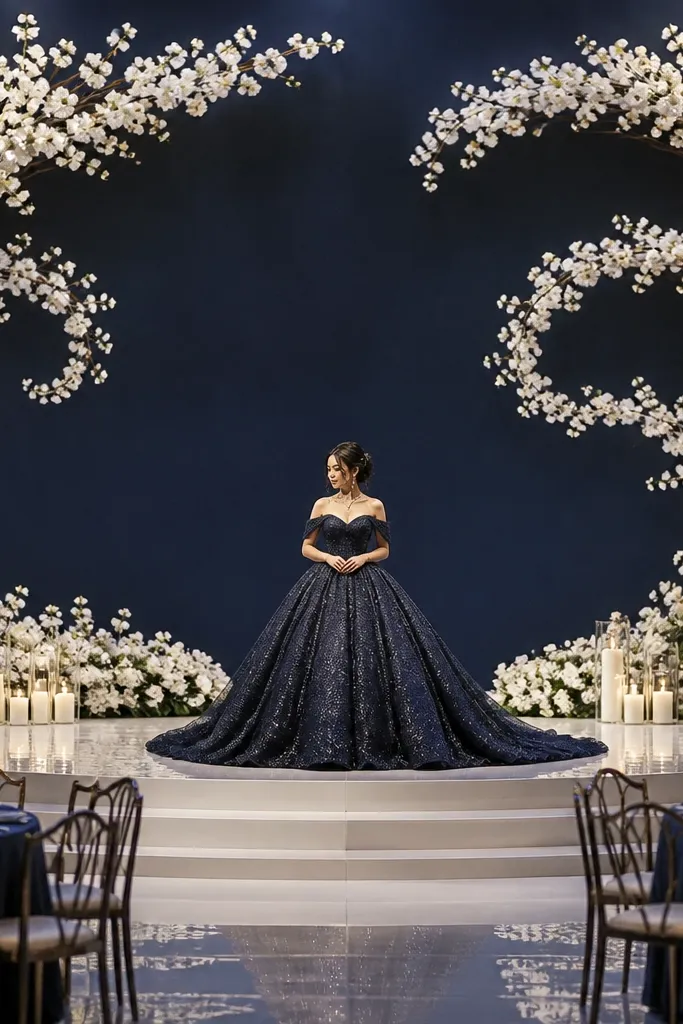
Navy is underused for stage decor, and it looks expensive on camera because it creates strong contrast with white florals. Corner spirals make the stage feel designed from multiple angles, not just straight-on. The spiral shape also helps the eye move toward the center without needing a big centerpiece. This look is excellent for night ceremonies, winter weddings, and modern couples who like crisp lines.
Quick tipUse a mix of white textures — smooth petals plus airy filler — so the white doesn’t look flat.
Start by covering the back wall with navy fabric panels, keeping seams hidden behind stage supports. Then build corner spirals by arranging white flowers and greenery in a curved path from the floor up to about shoulder height. Finally, add two small lanterns or candle clusters near the center base, not in the corners, so the spirals don’t overwhelm the middle.
Skip thisSkip bright neon accents; navy + white should stay clean and classic.
14. White Ceramic Vase Grid With Greenery Filler
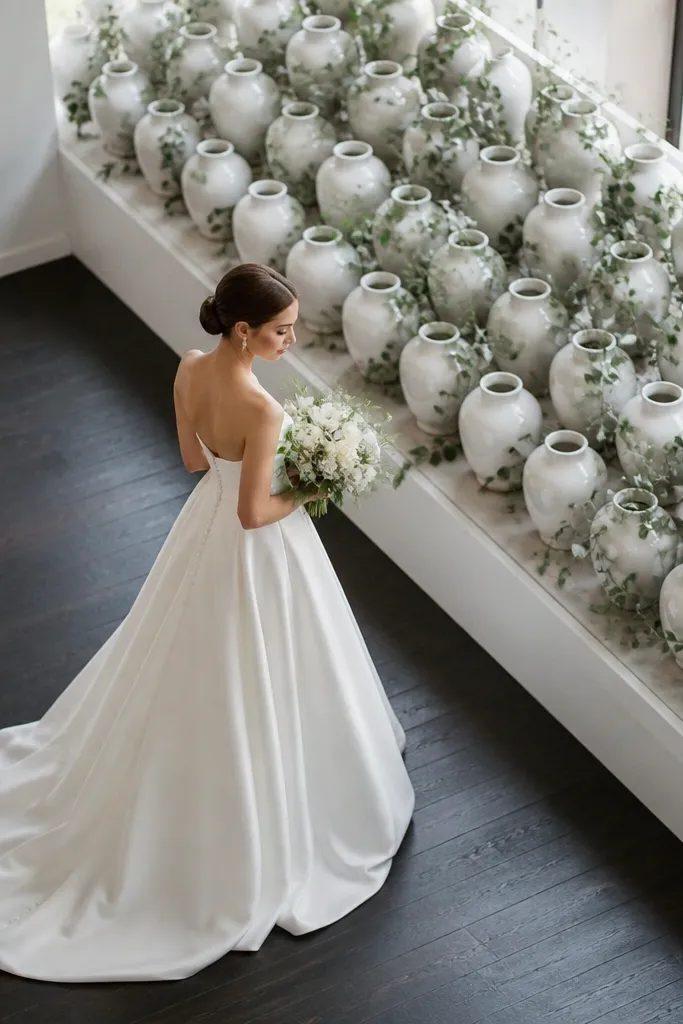
A vase grid looks styled because it’s structured, and structure reads well in wide shots. White ceramic vases keep the stage bright, while greenery filler adds the organic softness that makes it feel wedding-like. This works when you want the stage to look elegant but not overly floral. It suits indoor halls and outdoor tents where you can set up a neat, repeatable pattern.
Quick tipPick vases with matching heights; mismatched heights make the grid look accidental.
Start by placing a long table or platform on the stage and mark a simple grid spacing — for example, 4 vases across by 2 rows deep. Then fill each vase with greenery first and add one bloom type in small clusters so each vase contributes without becoming bulky. Finally, keep the grid aligned with the couple’s centerline so photos look symmetrical even from an angle.
Skip thisAvoid mixing vase colors; the grid loses its clean, aesthetic impact fast.
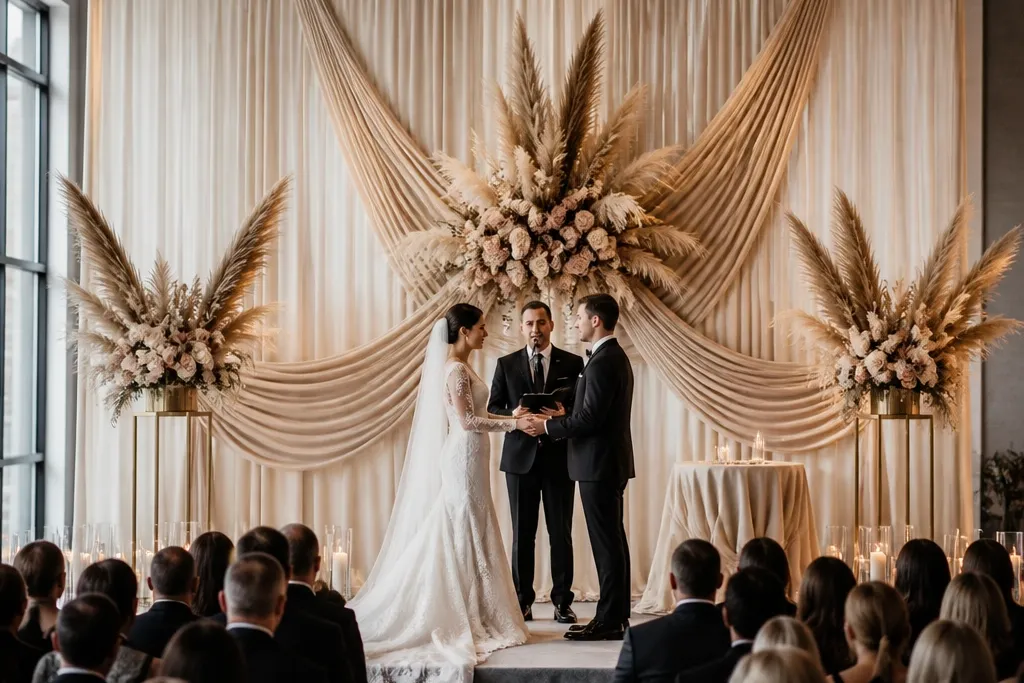
15. Sculptural Pampas + Blush Rose Cluster at Center
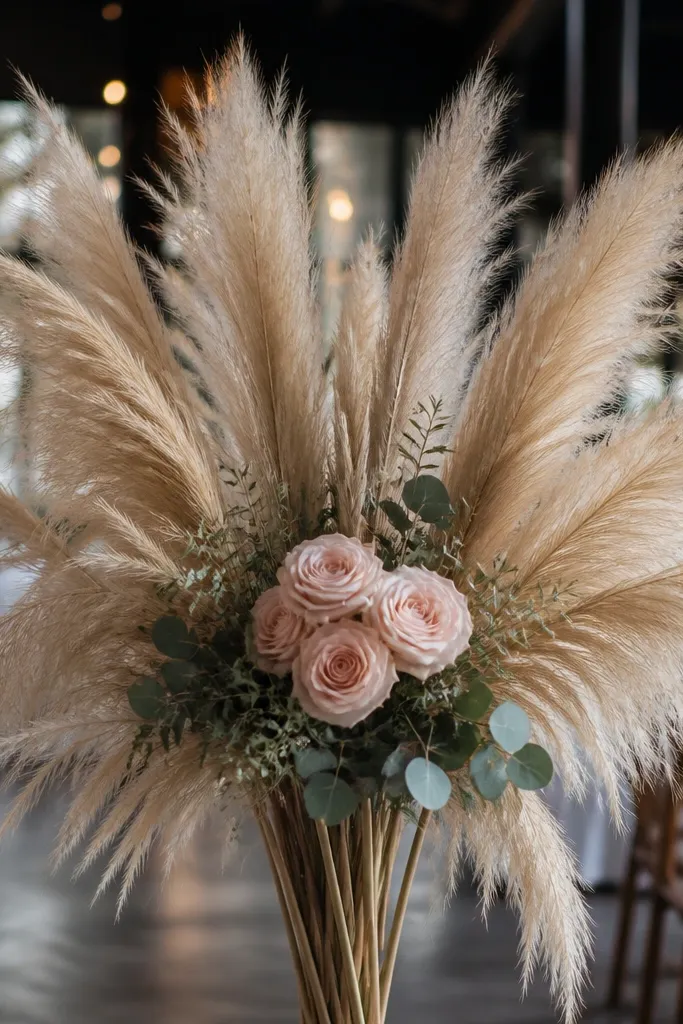
This is a stage look that feels airy but still has a strong silhouette. Pampas gives you tall, sculptural texture, and a single blush rose cluster anchors the entire composition. The best part is how it photographs: the fluffy tips create soft motion blur while the center blooms stay sharp. It fits boho weddings, modern neutral palettes, and even minimalist couples who want one pretty focal point instead of a full wall.
Quick tipUse spray hair-style fixative on loose pampas tips right before install; it reduces shedding during photos.
Start by placing two large pampas bundles at the stage corners, angling them slightly inward toward the center. Then create one center cluster using blush roses (or blush garden roses) with greenery tucked behind so the bloom mass looks full. Finally, add a thin runner of neutral fabric or a strip of dried grass across the front edge to connect everything.
Skip thisDon’t add extra bouquets on the sides — pampas already provides the drama.



