
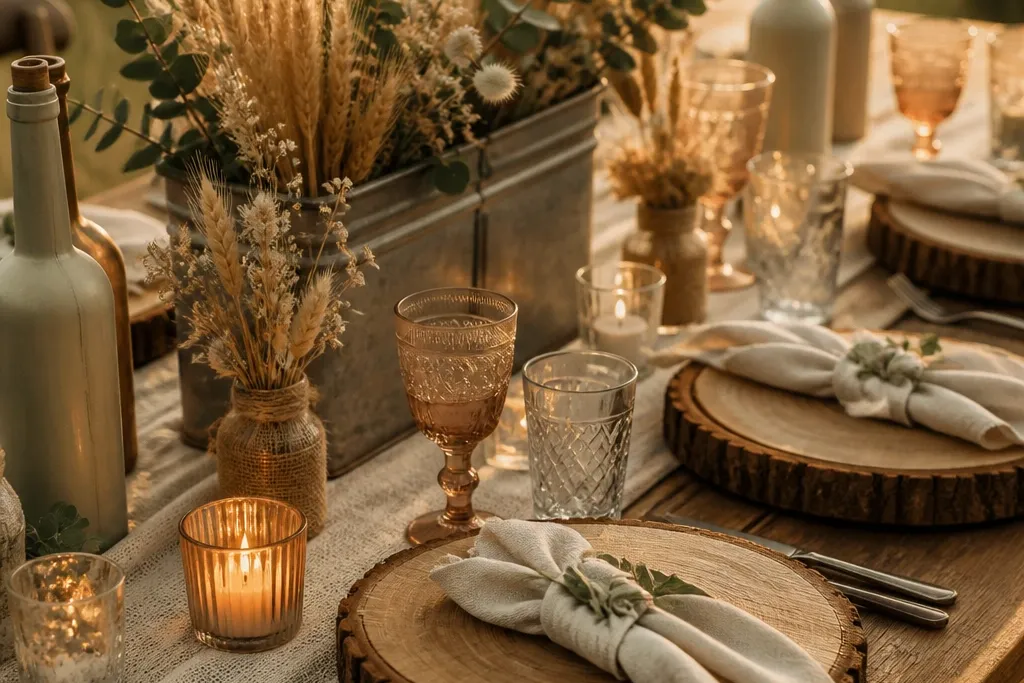
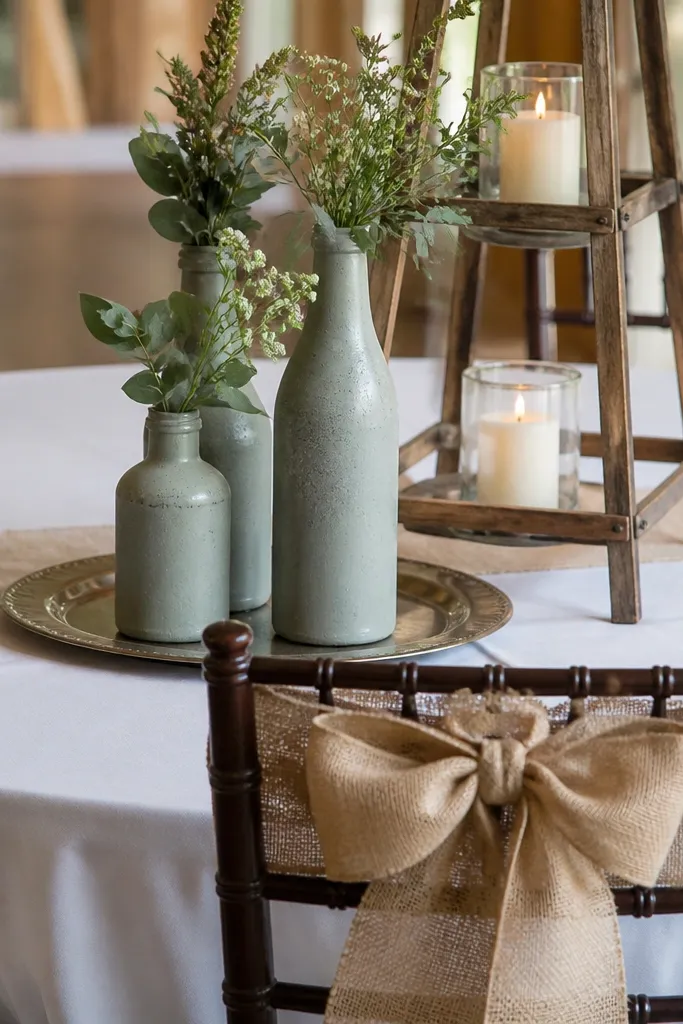
1. Wood-slice charger plates with stained edges
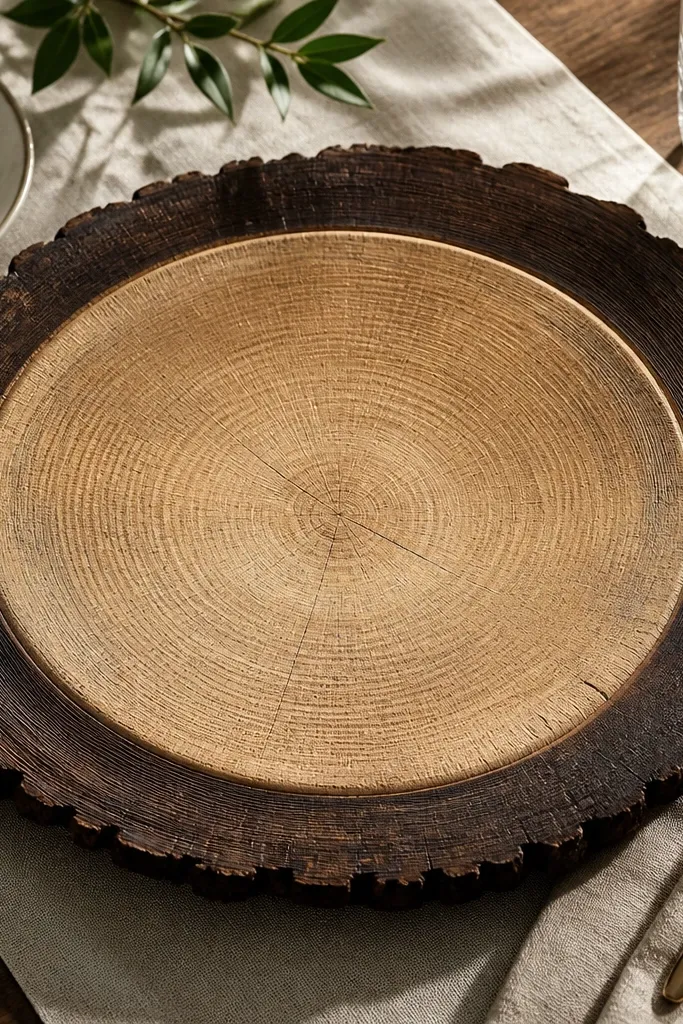
Wood-slice chargers look expensive because they add real depth under everything on the table. The key detail is the edge — bare wood rings can look pale and unfinished in photos. Stain just the outer rim a shade darker than the center so the plate reads layered and intentional. Pair them with simple linens so the chargers stay the star instead of competing with busy centerpieces. This works best for fall weddings, rustic barns, and outdoor receptions where warm light makes the grain pop.
Start with raw wood slices and sand the top and sides lightly so the stain looks even. Then apply a thin coat of dark walnut stain to the edge only, wipe off excess, and let dry fully before using. Finally, seal with a matte clear spray so wine glasses and candle drips don’t ruin the surface. Expect to spend about $1-3 per slice if you buy wood slices in bulk and a small amount on stain and sealant. Plan for chargers to be your table base so you’re not adding extra complicated layers.
Use matte spray, not gloss, or your chargers will glare in flash photos.
Skip untreated wood edges — they photograph washed out and cheap.
2. Linen runner with a faux hem fold
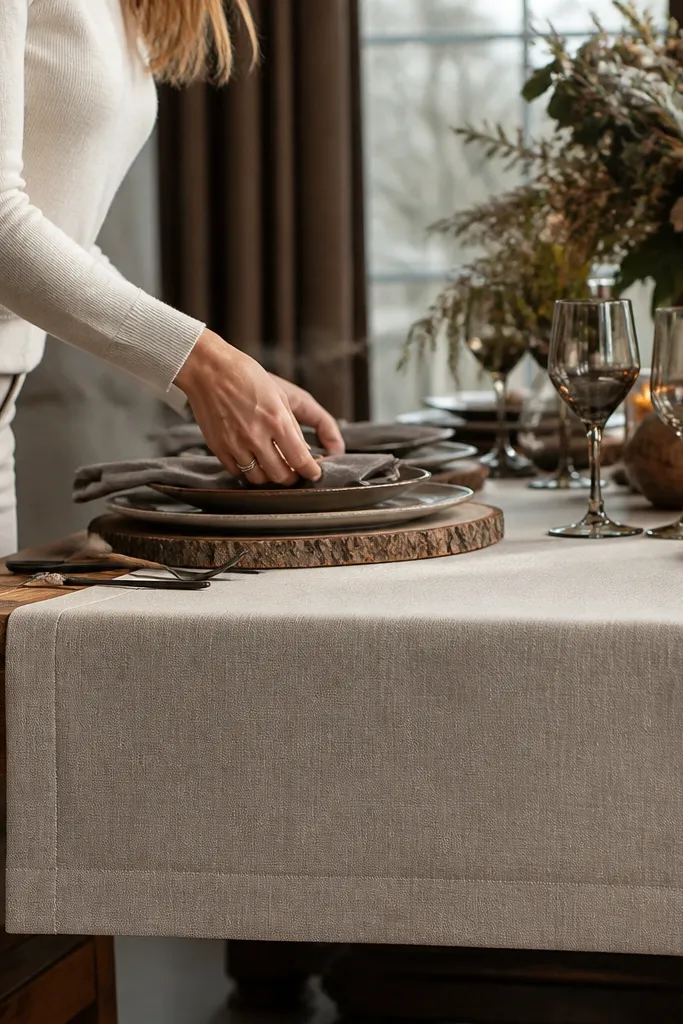
A linen runner instantly upgrades rustic decor because linen reads soft, structured, and expensive. The trick for a DIY win is making the ends look finished instead of cut. A faux hem fold gives you that tailored look without sewing, and it photographs cleanly when the camera catches the table edge. Choose a runner that’s about 14-16 inches wide for a standard banquet or farmhouse table so it doesn’t look skimpy. This is a strong move for both indoor halls and outdoor tents where wind can lift thin fabrics.
Start by cutting your linen to length with an extra 2-3 inches for folding. Then fold each end up 1 inch, press firmly, fold again 1 inch, and secure with fabric glue dots or discreet hand stitches. Finally, iron on low heat through a cloth to set the folds so they stay put during setup. If you’re using a long table, do one runner per table section instead of trying to stretch one huge piece. Plan to place the runner slightly off-center so the table looks styled, not perfectly centered and flat.
Quick tipPress the fold with a hot iron and keep it flat overnight if you can — it holds better at the venue.
Skip thisDon’t use raw-cut linen ends — they fray fast and look “craft store” in photos.
3. Thrifted glass bottle clusters with muted spray paint
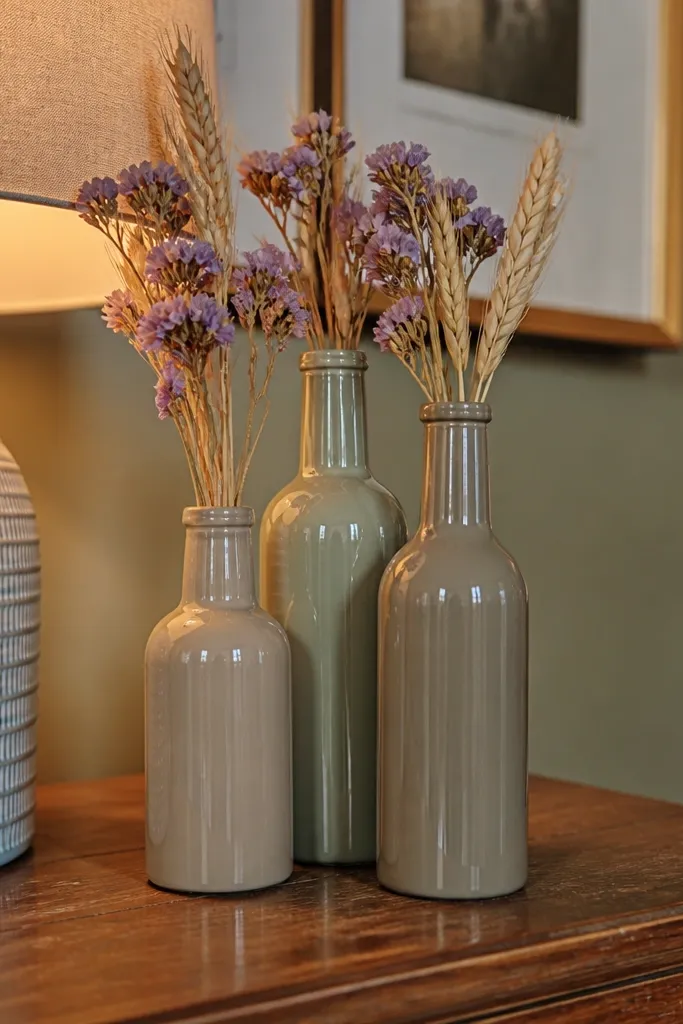
Glass bottles look high-end when they match in finish and color intensity. Instead of painting everything bright, use muted spray paint so the bottles look like they belong together. Group 3-5 bottles at one height range so the cluster reads intentional rather than random. This is one of the easiest ways to get that expensive rustic vibe because glass catches light and makes flowers look more expensive than they are. It works year-round, but it’s especially good for spring and summer receptions with soft daylight.
Start by washing thrifted bottles thoroughly and letting them dry completely so paint sticks. Then mask labels and spray 2-3 light coats in a matte or soft-satin finish, letting each coat dry before the next. Finally, add stems with consistent trimming — for example, cut all main stems to the same height and use shorter filler stems underneath. For a polished look, use one bottle with a wider opening for larger blooms and two narrower ones for filler. Budget roughly $0-5 per bottle depending on what you find at thrift stores and how many you need.
Use painter’s tape to keep the bottle rims clean so they don’t look messy in close-up photos.
Skip glossy paint — it reflects flash and can look cheap under overhead lighting.
4. Dried floral "line bouquet" in a metal trough
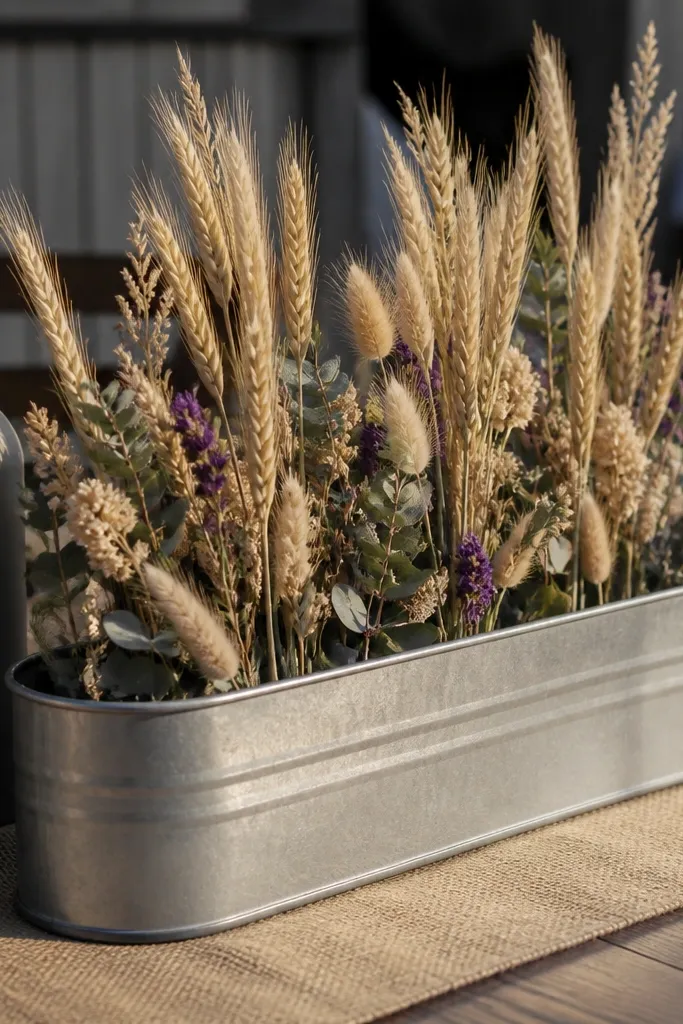
A line bouquet looks expensive because it creates movement without looking bulky. A metal trough adds a cool-toned contrast to warm rustic palettes, and it makes the dried stems feel curated. Choose dried florals with strong shapes — think wheat, bunny tail, statice, and eucalyptus-like leaves — then arrange them in a gentle arc. Keep the arrangement low enough for place settings but long enough to read in wide shots. This setup is perfect for barns, farm venues, and covered patios where long tables are the main photo angle.
Start by filling a metal trough with floral foam or a reusable waterless floral base made for dried stems. Then insert stems in a line — tallest in the middle, shorter at both ends — and use filler only where it closes gaps. Finally, trim and secure with floral wire so stems don’t slide during transport. If you don’t want foam, you can use a bed of chicken wire anchored to the trough with zip ties, then push stems in through the gaps. Plan on making one trough per table section so each looks consistent across the room.
Spray dried florals with a light coat of hairspray before assembly to reduce shedding during setup.
Skip tiny mixed bouquets — they read scattered unless you have a lot of time to style.
5. Lantern aisle markers with matching battery candles
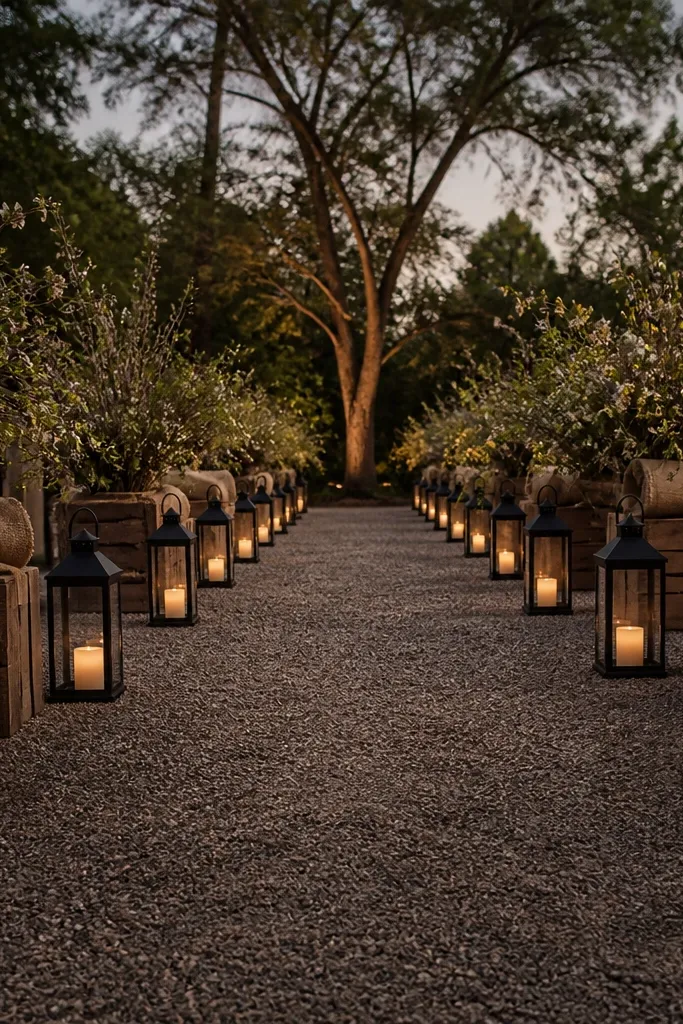
Lantern aisle markers look expensive because they create a repeating pattern, and repetition is what your brain reads as “designed.” Matching lantern size and finish matters more than the flowers. Use battery candles with a warm tone so the light looks steady and photo-friendly. Place them in a straight line or alternating rhythm for depth, but keep spacing consistent so it doesn’t look like a last-minute scatter. This works best at dusk, but it also looks great in daylight because the lantern shapes stand out against grass or wood floors.
Start by choosing lanterns in one finish family — black metal, antique brass, or white-washed wood. Then set a spacing guide on the ground with painter’s tape so each lantern sits the same distance apart. Finally, insert battery candles and test the light before the ceremony so you know the glow level is visible from the back rows. For cost control, buy lanterns secondhand and replace only the candles, not the whole set. Plan on 1 lantern per 4-6 feet of aisle depending on your walkway length and photo angle.
Use painter’s tape to mark exact placement spots so you don’t guess once the aisle is busy.
Skip mismatched lantern sizes — it reads like you collected whatever you found.
6. Rustic arch backdrop with ladder shelves
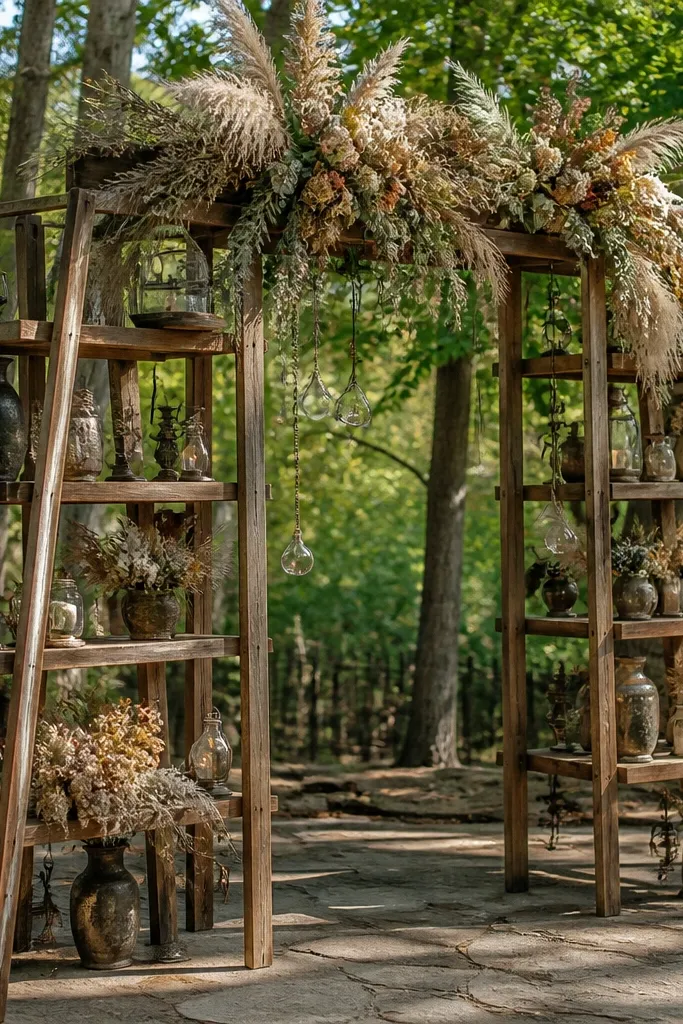
A ladder-shelf arch looks expensive because it has built-in structure and depth. You get multiple planes for florals, greenery, and hanging elements without needing complicated carpentry. The shelves also create natural “photo frames,” which is why this style looks good from the side, not only straight-on. Keep the decor light — dried stems, small clusters, and a few long drapes — so the arch doesn’t turn into a heavy wall. This suits outdoor ceremonies, garden weddings, and any venue where you can anchor the arch safely.
Start by securing a ladder shelf unit or building a simple frame with wood pieces that are stable enough for decor weight. Then attach greenery and dried florals in sections — one top cluster, two mid clusters, and a few hanging stems — so the arch has balance. Finally, add one fabric element like a linen panel or neutral ribbon drape to connect the pieces visually. If the venue charges for complicated installs, choose a freestanding arch that you can assemble quickly in under 30 minutes. Budget depends on whether you thrift a ladder or buy one new, but the biggest savings come from using a pre-built shelf.
Use zip ties for temporary attachment during setup, then replace with wire or twine once everything is positioned.
Avoid covering the entire ladder — bare wood edges are part of the expensive look.
7. Neutral garland on a curtain rod for photo walls
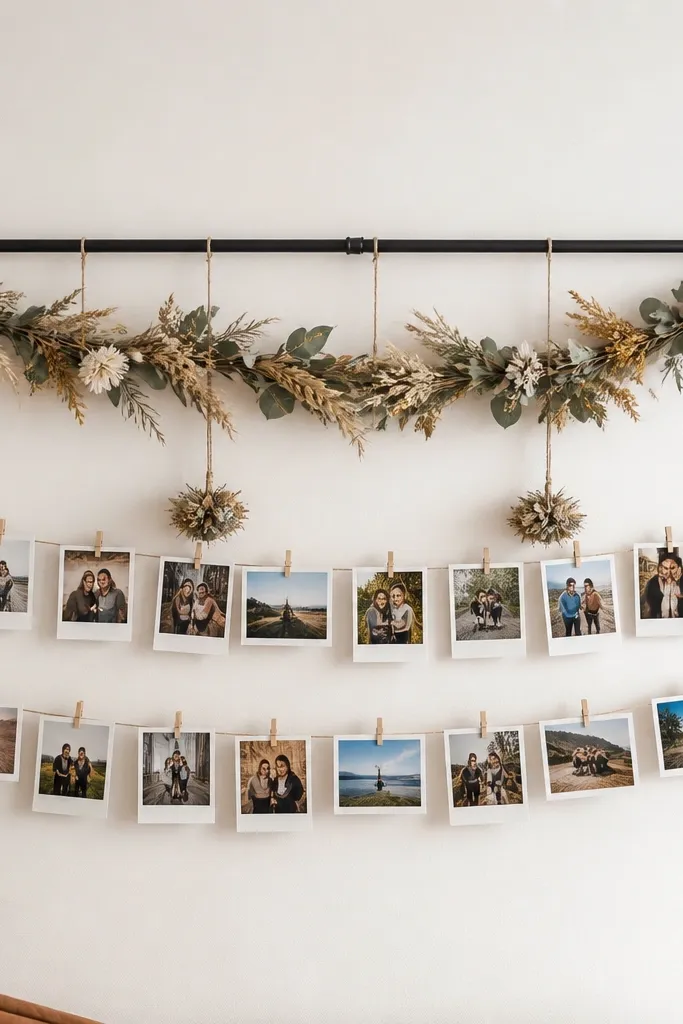
A photo wall looks expensive when it has a clean horizontal line, not a chaotic pile. A curtain rod gives you instant stability and keeps the garland evenly tensioned. Choose a neutral dried garland — wheat, seeded eucalyptus-like greens, and small dried blooms — so the texture reads upscale. Add two or three hanging elements with different lengths so it looks layered instead of flat. This is ideal for indoor venues with plain walls or outdoor receptions where you need a backdrop that holds up in wind.
Start by mounting a curtain rod at the height where guests will stand for photos, usually 6-7 feet for best framing. Then drape garland evenly across the rod, using floral wire underneath to prevent sagging. Finally, hang a few longer strands down the sides and add a simple sign frame or monogram cutout centered behind the garland. For a DIY-friendly setup, use command hooks on the rod ends if the venue allows — otherwise, use standard wall anchors. Allocate about 1-2 hours to assemble and test the spacing so it looks balanced in photos.
Quick tipHang the garland slightly higher than you think, then trim later — sag looks messy in pictures.
Skip thisSkip heavy fabric backdrops if you don’t have a steamer — wrinkles scream cheap.
8. Burlap bows with hidden wire tails
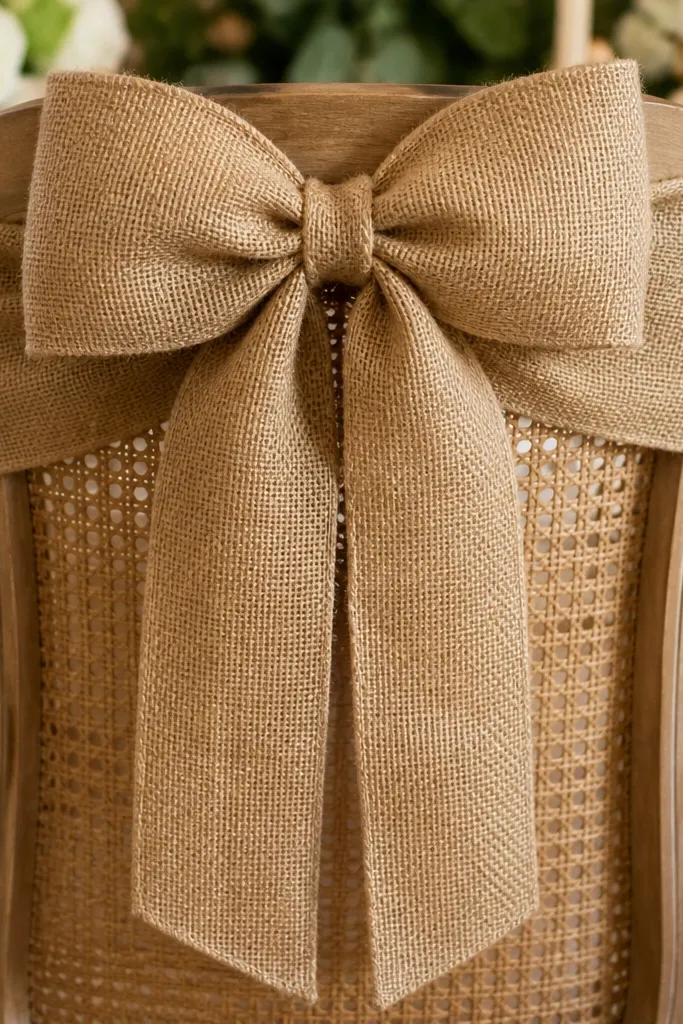
Burlap bows look expensive when they’re structured. The problem with most DIY burlap bows is they collapse or fray, and then the whole chair detail looks messy. Use hidden wire tails so the bow holds its shape and the tails fall cleanly. Tie bows to chair backs in a consistent position so photos look uniform across the aisle. This detail is a great add-on for rustic ceremonies where the seating is visible in guest photos and wedding party shots.
Start with burlap ribbon that’s at least 3-4 inches wide, not thin craft ribbon. Then form the bow loops and wrap a thin floral wire around the knot so you can shape the tails. Finally, tuck tail ends under or trim them cleanly, then secure the bow to the chair back with twine or zip ties hidden behind the chair rail. If you want extra polish, spray the burlap lightly with fabric stiffener and let it dry so it holds edges. Make 1-2 sample bows first, then match the loop size across the rest.
Quick tipPin the tails in place while stiffener dries so they don’t curl during transport.
Skip thisAvoid loose burlap with frayed ends hanging — it reads like a craft project.
9. Candle heights ladder on a single base tray
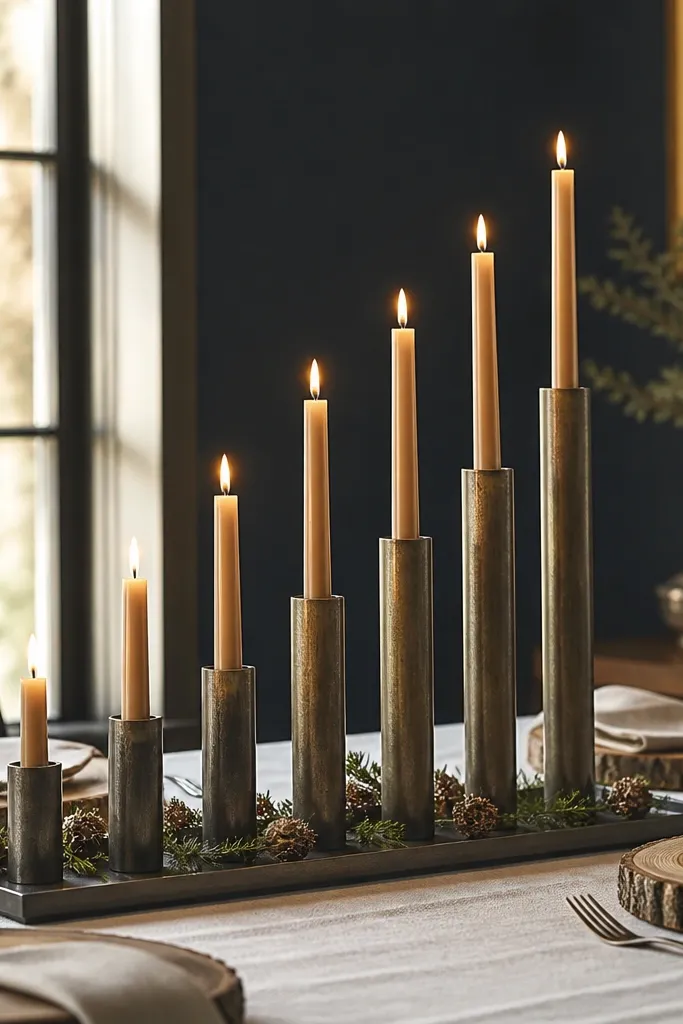
A candle height ladder looks expensive because it creates a clean vertical rhythm, and that’s what reads in wide shots. Use one base tray so the whole centerpiece looks designed as a unit, not scattered candles across a table. Stick to warm metallics like antique bronze or black, then use real taper candles or battery candles if you need safety. The varying heights add dimension, while the tray keeps everything grounded. It’s a strong choice for dinner tables, head tables, and sweetheart setups.
Start by choosing a base tray size that covers the centerpiece zone — for a 72-inch table, aim for a tray around 16-20 inches wide. Then place the tallest candles in the center, add medium candles on the sides, and use short candles to fill gaps at the edges. Finally, secure with candleholders or non-slip pads so nothing wobbles. If using taper candles, use wax drip catchers or holders designed for tapers so the tray stays clean. Plan on 5-7 candles total for a balanced look without crowding plates.
Quick tipUse matte candleholders — reflective gold makes shadows harsh in flash photos.
Skip thisSkip random heights — uneven candle levels make the centerpiece look accidental.
10. Seamless burlap wrap on vases with twine ties
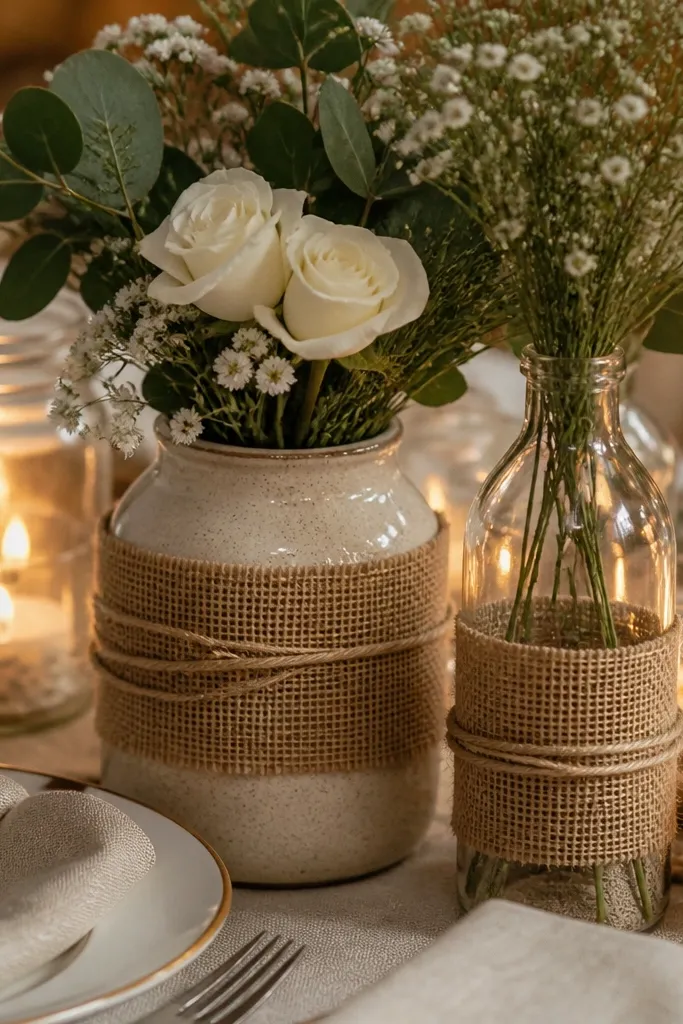
Burlap-wrapped vases can look surprisingly expensive if the wrap is tight and the ties are clean. Neat bands of twine hide seams and create a structured, tailored look. Choose vases with interesting shapes — squat jars, narrow glass, or ceramic — then wrap only where the camera will catch it. The wrap adds texture without adding clutter, and it makes even simple dried stems look styled. This is a great move for rustic tables where you want texture but don’t want to fill the table with lots of florals.
Start by cutting burlap strips long enough to overlap slightly around the vase. Then wrap the burlap tightly and use hot glue or fabric glue to secure the overlap on the back side. Finally, tie twine bands around the vase at two points — one near the top and one near the middle — then trim the twine ends to be short and tidy. For a cleaner look, use twine in a single color family, like natural jute or light brown. If you’re making multiple vases, measure the band spacing with a ruler so they match across the table.
Quick tipAngle the seam toward the back so it disappears in guest photos.
Skip thisAvoid loose wraps with visible glue — the seam is what makes or breaks the expensive look.
11. Mismatched wood frames with one shared stain
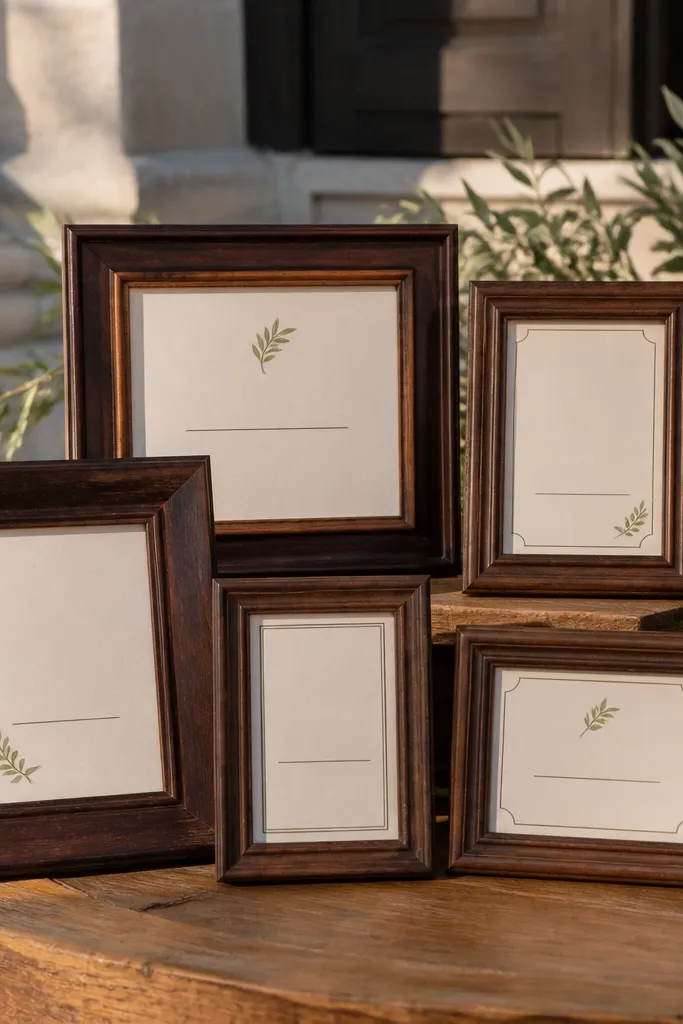
Frames make rustic decor feel designed because they add graphic structure. The expensive-looking part is making them look like they belong together — one shared stain tone ties different sizes and shapes into a set. Use frames to hold photos, place cards, or simple signage printed on cream paper. A cluster of 3-5 frames gives you a backdrop that reads well in wide shots and still looks good up close. This is a smart choice for indoor ceremonies, rehearsal dinners, and any venue with blank walls.
Start by finding different frame sizes at thrift stores or craft resale shops, then remove glass and backing. Sand lightly so the old finish doesn’t show through, then stain all frames with the same stain color and wipe evenly. Finally, insert printed cards or photo prints with the same cream cardstock so the cluster looks cohesive. Hang frames as a group with a consistent height plan — center the middle frame at about eye level. Plan on 1 frame cluster per main photo area, not every table.
Use foam mounting squares so the paper sits slightly off the backing and catches light.
Skip mixing stains — multiple wood tones read like unplanned thrift finds.
12. Paper lanterns with warm string lights inside
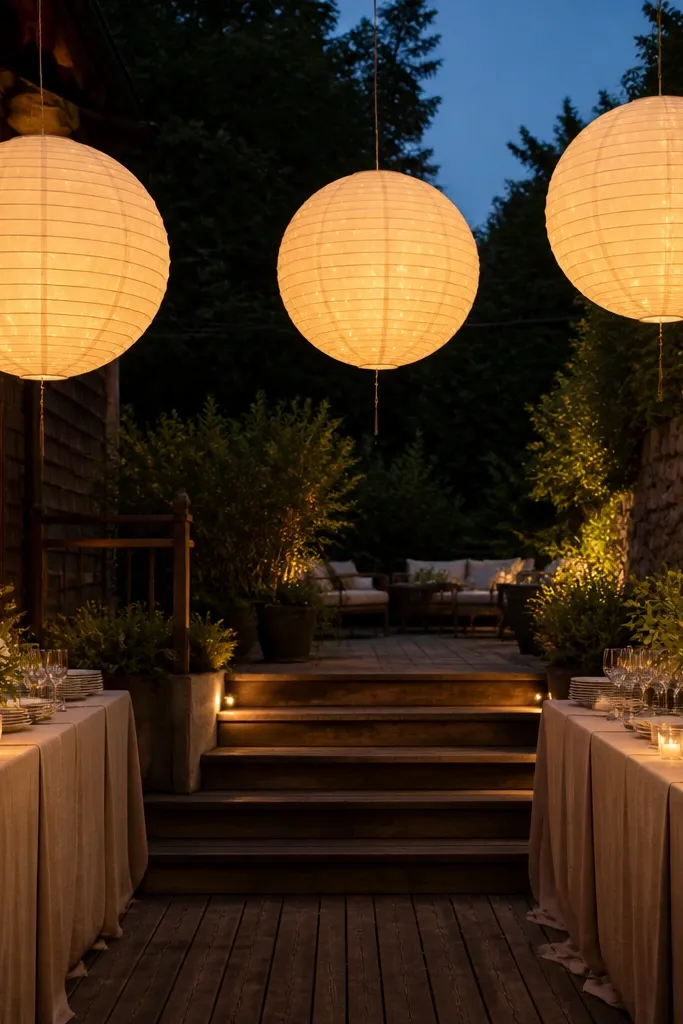
Paper lanterns look costly when the light is warm and even. Putting warm string lights inside makes the lantern glow look intentional instead of dim or patchy. Choose lanterns in cream, oat, or light brown so they match rustic wood and linen. Hang them at different heights in a row or cluster to create depth over the dance floor or bar. This works best in the evening, but you can still use it daytime for the texture and shape.
Start by selecting lantern sizes — 10-12 inch lanterns for close-up areas and larger ones around 16-20 inches for the main photo background. Then open the lanterns carefully and thread warm white string lights through so the light sits evenly. Finally, close the lanterns and hang with fishing line or sturdy hooks so they don’t swing too much. Plan to plug in with extension cords that are covered or routed away from foot traffic. If you want a uniform look, keep lantern spacing consistent across the line.
Quick tipUse warm white (2700K) lights, not cool white, or the lantern glow looks harsh.
Skip thisSkip cool-toned bulbs — they turn warm rustic colors gray in photos.
13. Rustic menu board with wood slice "mounting points"
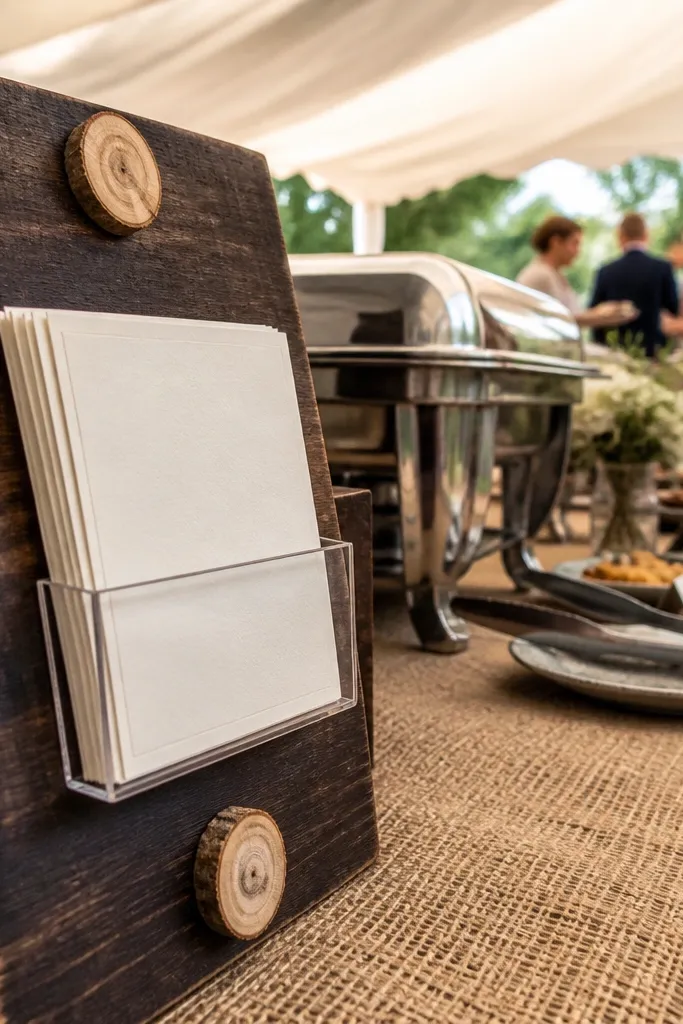
A menu board looks expensive when it has texture and a clean mounting method. Wood slices used as mounting points make the board feel custom without needing fancy hardware. Pair that with cream card stock and a simple serif-style font (or clean handwriting) so the board reads readable from a distance. Put it near the bar or welcome area so it becomes a photo magnet. This is a quick DIY that still looks styled in detail shots.
Start by choosing a board base — plywood, thin wood panel, or a large frame backing — and sand the surface so it takes ink well. Then stain or paint the board in an oat or espresso tone, letting it dry fully. Finally, attach wood slice “pads” where you’ll mount cards or menu sections, using hot glue or small screws through the back. Add your text with printed labels or vinyl lettering for consistent alignment. Plan for the board to be at least 24 inches wide so it doesn’t look lost in a busy venue corner.
Use black or espresso ink on cream paper for the best contrast under warm venue lighting.
Avoid tiny fonts — if guests need to step closer, it won’t look good in photos either.
14. Chair back "lace and twine" with a single dried stem
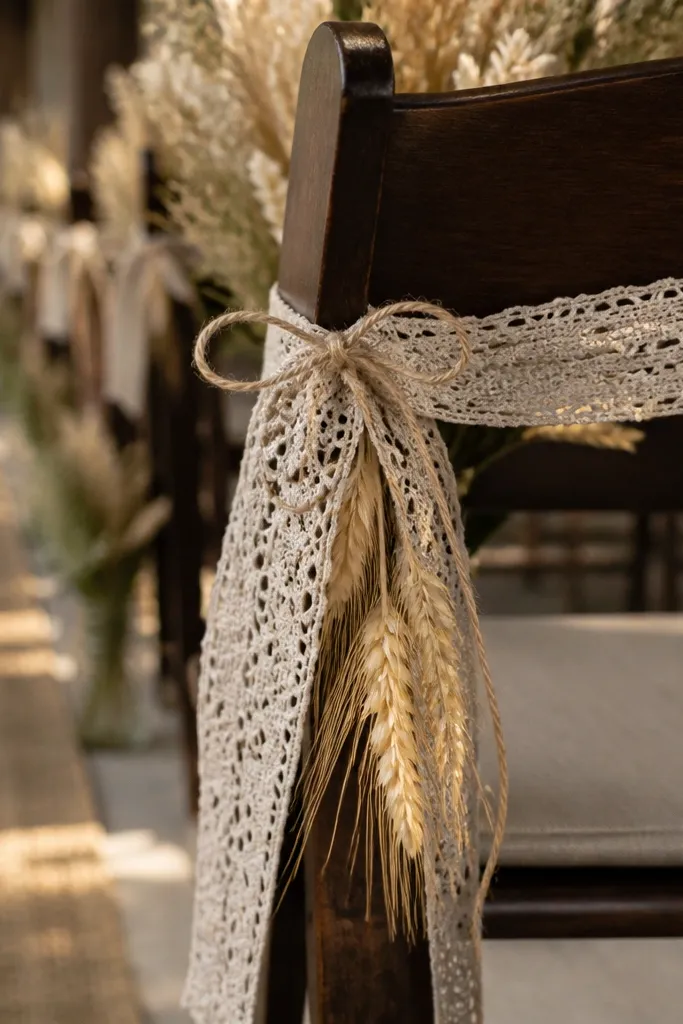
This chair detail reads expensive because it’s restrained. Instead of stuffing chairs with big bows and lots of florals, you anchor with lace ribbon, then add one dried stem for movement. Lace gives softness, twine gives rustic texture, and a single stem keeps it from looking cluttered. Choose lace in cream or light oat, and keep the dried stem color close to your palette. It’s ideal for ceremonies where chairs show up clearly in the background of portraits.
Start by cutting lace ribbon strips long enough to wrap around the chair back once with tails hanging evenly. Then tie twine over the lace knot to secure it and hide the lace ends. Finally, attach one dried stem (like wheat or small dried flowers) using floral wire behind the chair rail so it sits centered. Keep the stem height consistent across chairs by measuring from the top of the chair back to the stem tip. Make 8-12 sample chairs first if you’re unsure, then scale the method.
Quick tipUse a single stem type across all chairs so the pattern looks intentional in wide shots.
Skip thisSkip multiple stems per chair — it looks like leftover florals stuck on.
15. Tall bud vase cluster with staggered sizes
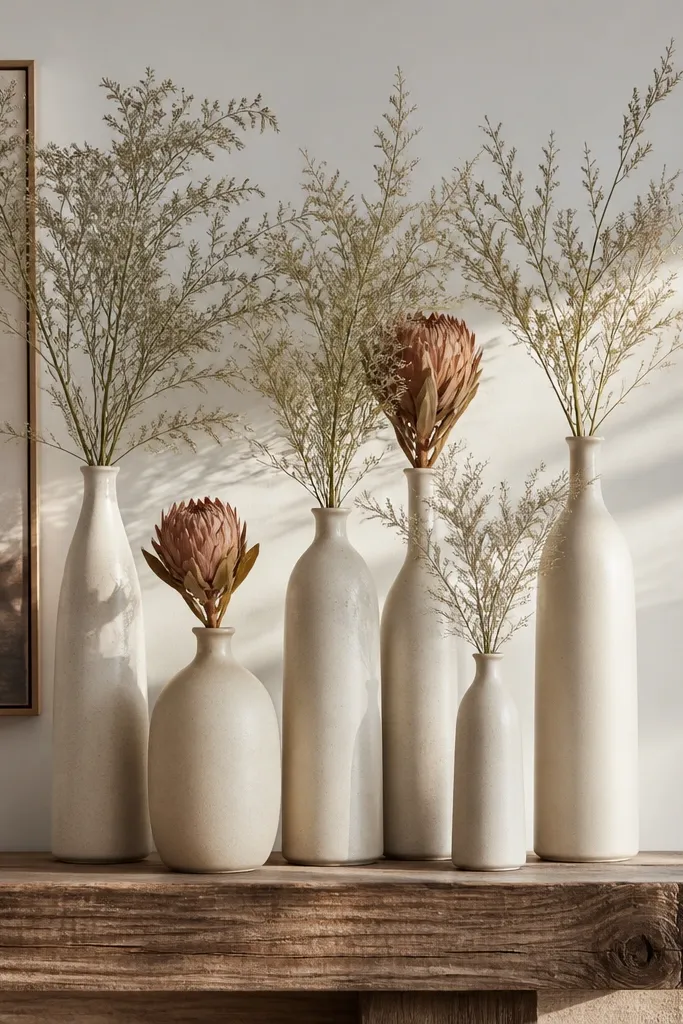
A tall bud vase cluster looks expensive because it creates a clean skyline. Stagger vase heights instead of lining them up evenly, and keep the stems trimmed so the top line is smooth. Use small amounts of dried greenery and one or two dried bloom types so the cluster looks curated. This is a better DIY than one big centerpiece because you can place vases around centerpieces or place settings without crowding. It suits long head tables, cocktail tables, and sweetheart corners.
Start by collecting bud vases in 3-4 sizes, ideally in glass and ceramic finishes that look related. Then place the tallest vase in the center, medium on the sides, and the shortest at the edges of the cluster. Finally, fill with water if using fresh greens, or use waterless floral foam for dried stems, then trim stems to match the top silhouette. Secure stems with floral wire if they slip, especially for tall vases. Plan for 6-10 vases per cluster depending on table length and how close guests sit.
Quick tipTrim stems with the tallest vase in place so your height line stays consistent.
Skip thisAvoid overfilling vases — tall clusters look best when stems are spaced and airy.



