
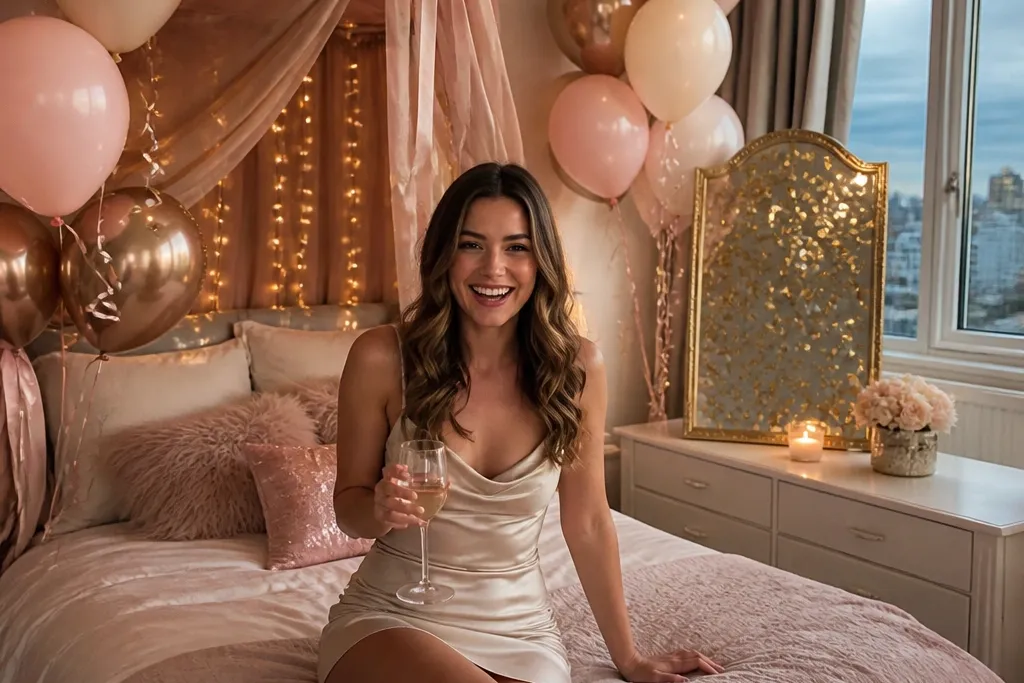
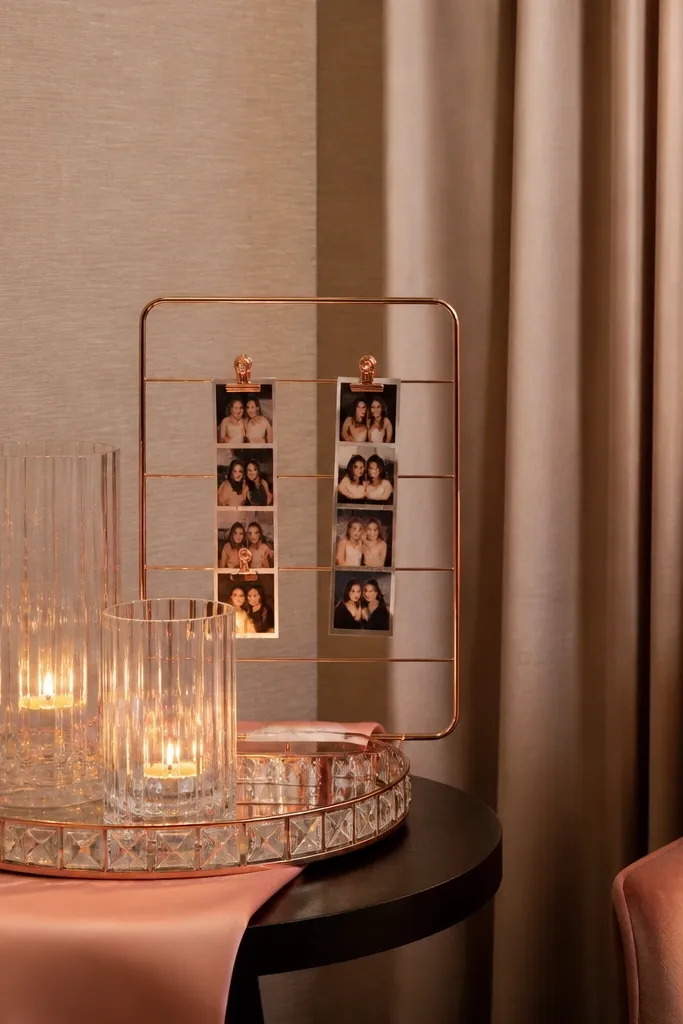
1. Satin Ribbon Bed Canopy with Weighted Corners
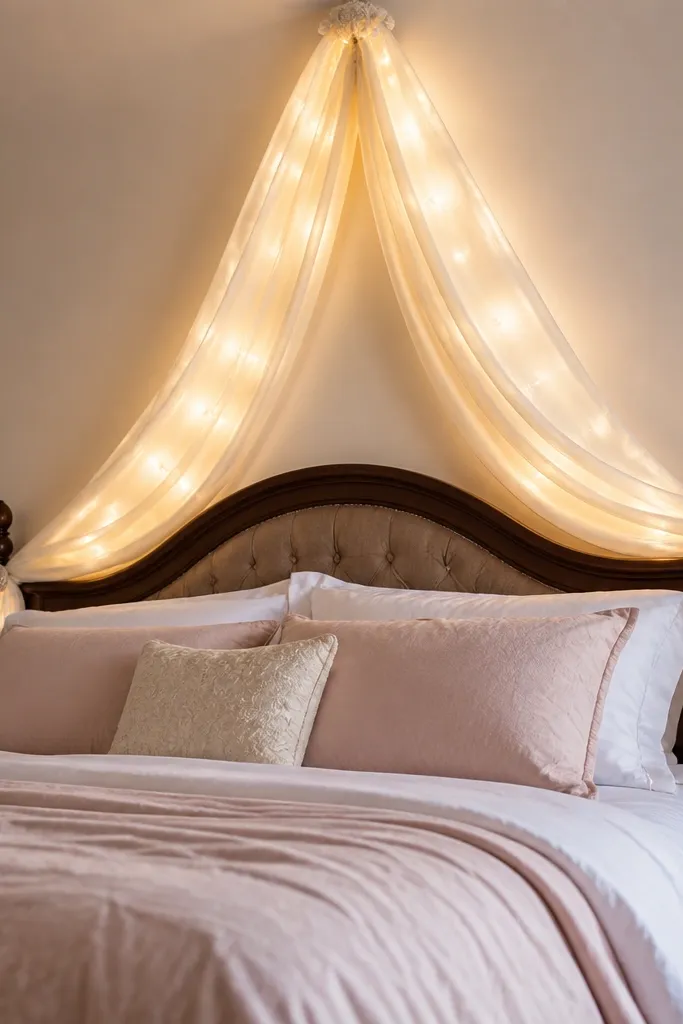
This is the easiest way to make the bed look like the main event. Choose 8-12 feet of satin ribbon fabric in ivory or blush and drape it into a soft V shape above the headboard, then let it fall in two long panels. Add warm fairy lights tucked behind the ribbon for a glow that reads luxury in low light. It’s especially good for suites where you can’t mount a backdrop to the wall, because the canopy can sit freestanding with weighted corners.
Start by buying ribbon fabric by the yard (not pre-cut streamers) so you get enough length for a full drop. Then create two weighted corners using small sandbags or heavy decorative stones placed at the base where the ribbon meets the floor. Finally, tuck warm white string lights behind the ribbon and secure the ends with clear tape on the frame or bed skirt, not the wall.
Use warm white lights (2700K) and keep the ribbon color slightly warmer than the sheets so everything looks cohesive.
Don’t use stiff tulle that sticks out — it looks cheap fast and makes photos look messy.
2. Gold Confetti Mirror Sign on a Dresser
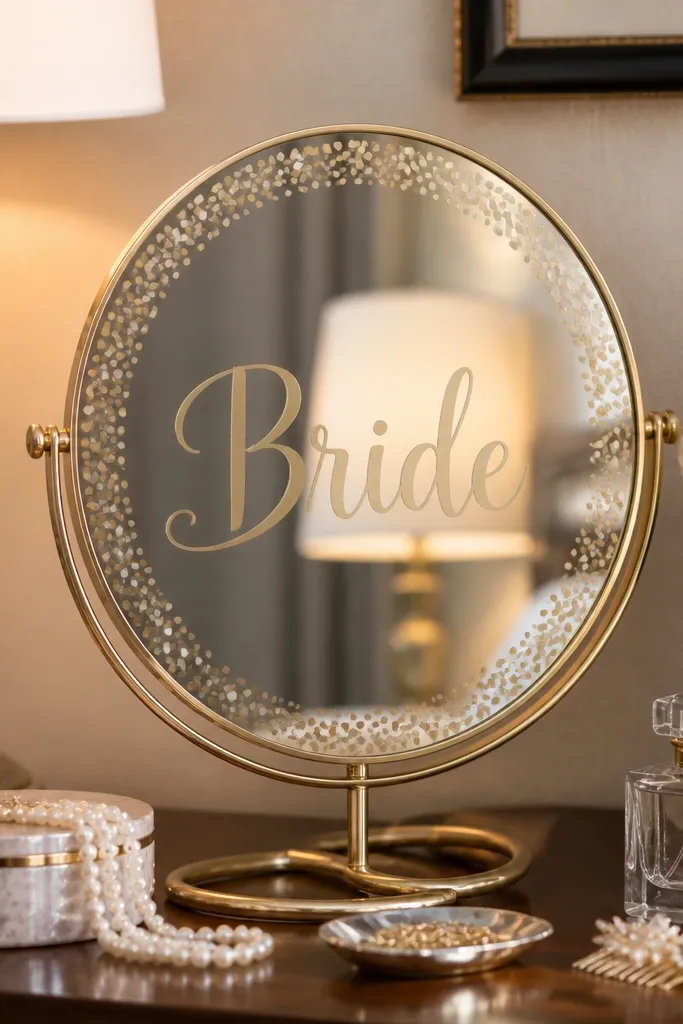
A mirror sign turns a plain dresser into a photogenic arrival zone. Pick a small, lightweight tabletop mirror and dress it with a confetti-style decal or stencil text that reads “Bride” or her first name. Add a ring of gold accents around the mirror — think thin metallic garland or a few metallic balloons taped to the frame. Mirrors also bounce light, so your room looks brighter in photos even if the suite lighting is dim.
Start by placing a runner or satin cloth on the dresser so the mirror doesn’t sit on bare wood. Then position the mirror centered and secure it with non-slip matting so it doesn’t slide when people bump it. Finally, add one “supporting prop” cluster — two to three champagne flutes and a small vase — so the photo looks styled, not empty.
If the room has poor lighting, face the mirror toward a window or the brightest lamp to catch natural light.
Skip huge free-standing mirrors unless you can anchor them — wobbling ruins the look and the safety.
3. Faux Pearl Balloon Arch Without the Wall
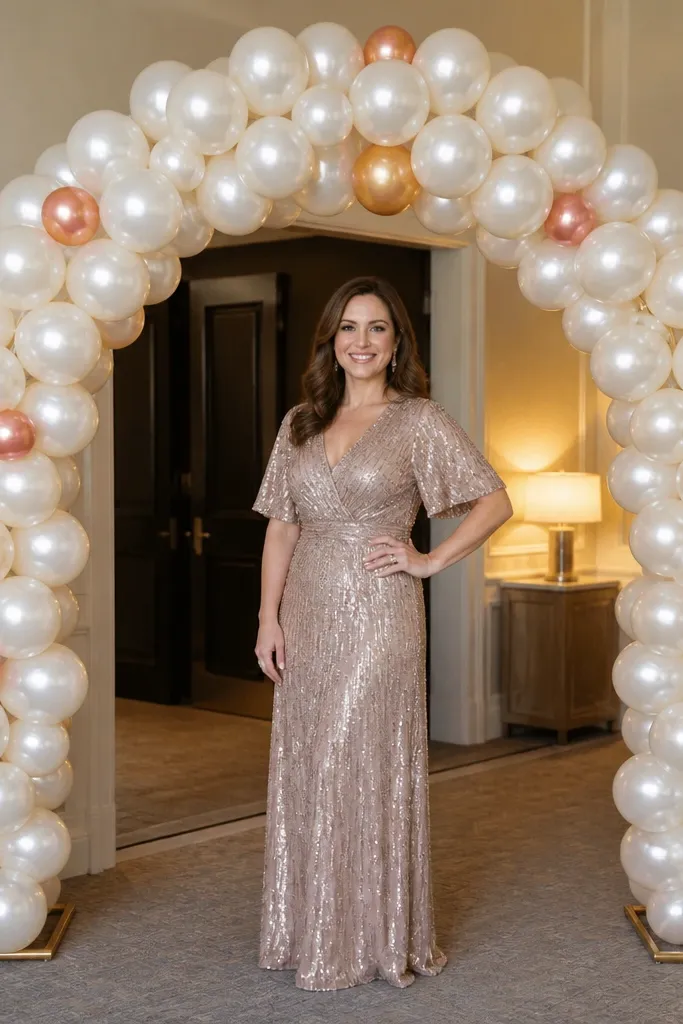
Balloon arches look fun, but they usually fail in suites because you can’t attach them to walls safely. This version uses faux pearl balloon mixes and a freestanding stand to create a clean, upscale frame for photos. Keep the palette tight: white pearl balloons plus 1 small percent champagne or rose accents, and only gold at the edges. The pearl effect gives that luxury texture, and the arch becomes a repeatable photo spot for group shots and gift pics.
Start by renting or buying a freestanding balloon arch kit with a stable base and 2-3 crossbars. Then build the arch using pearl-style balloons in the main color and add only a few metallic balloons for highlights. Finally, place the arch by the doorway or near a window where it won’t block foot traffic.
Choose matte or pearlescent balloons over shiny foil for a softer, more expensive look in indoor lighting.
Don’t go heavy on multiple accent colors — you end up with a party look instead of a luxury bride room look.
4. Tulle + Drape Welcome Banner on a Freestanding Frame
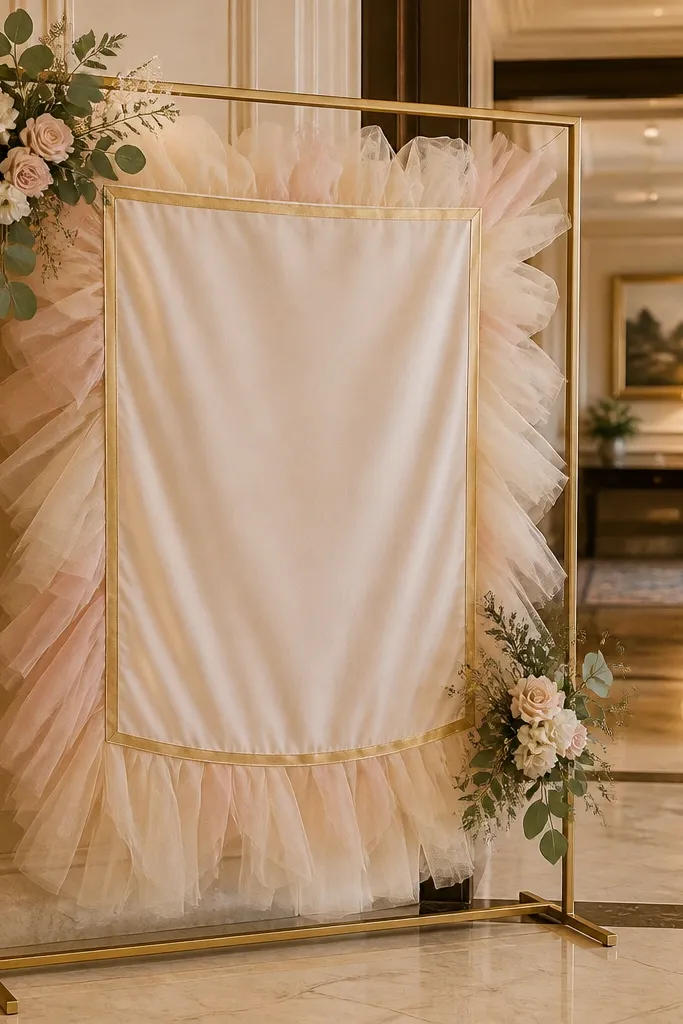
A welcome banner instantly tells guests they’re in the right place, and it photographs great at the entry. Use a freestanding metal sign frame so you’re not taping banner edges to walls. Hang a layer of tulle behind the banner text for volume, then add a thin gold ribbon border so it reads intentional. This is ideal for bachelorette rooms where you want a clean photo moment that doesn’t depend on the bed being visible.
Start with a freestanding frame (or a tall display stand) and hang sheer white tulle in two vertical panels behind where the text will go. Then attach the banner lettering using removable clips or zip ties so it’s fast and doesn’t leave residue. Finally, set the frame near the entrance with the banner facing the room so the camera catches it when guests walk in.
Keep the banner height around eye level (about 60 inches) so group photos don’t cut it off.
Skip glitter lettering — it looks scratchy and messy under hotel lighting.
5. Floating Flower Table Runner with Clear Acrylic Risers
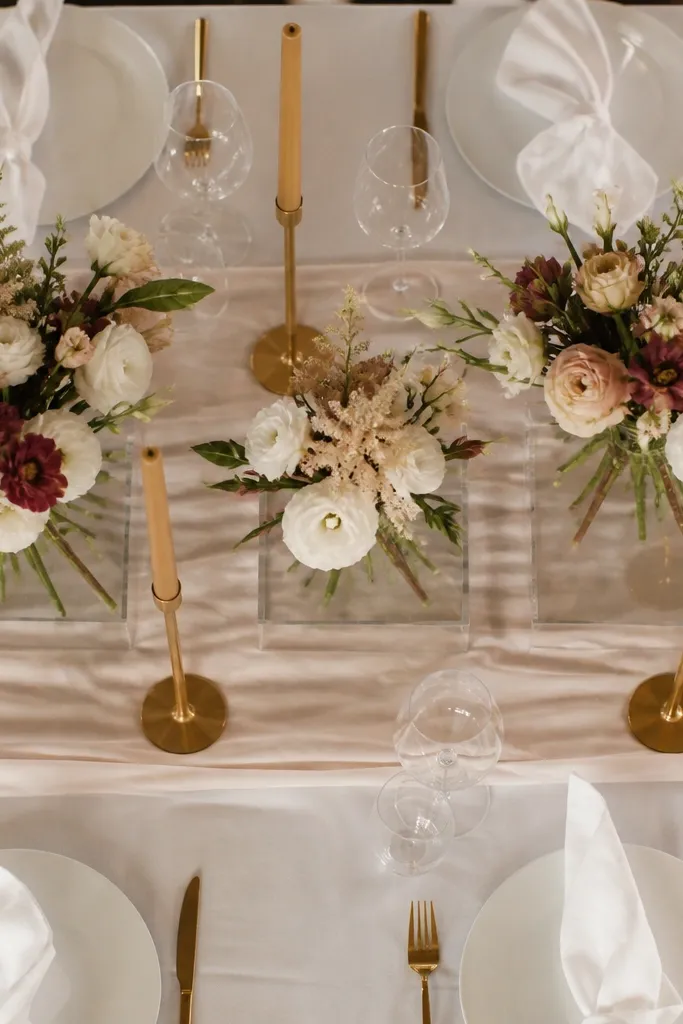
If your table always looks flat, this fixes it with height and transparency. Use a long runner in white or blush silk-like fabric, then place flowers in three clusters on clear acrylic risers so the stems look like they’re floating. Add gold taper candles in holders with thin lines, not bulky bases. The acrylic catches light and makes the whole setup look polished in pictures without turning the room into a cluttered floral wall.
Start by laying the runner and placing a long strip of faux greenery under the main clusters to connect everything. Then build height using clear acrylic risers: one low (2-3 inches), one medium (4-5 inches), one tall (6-7 inches). Finally, add candles and a small “gift tray” in the negative space so guests can set items without ruining the arrangement.
Pick flowers with small, dense heads (like baby’s breath style or small roses) so the clusters read full from a distance.
Don’t use thick, opaque foam blocks — they show in photos and kill the floating effect.
6. Rose-Gold Photo Strip Wall on a Clip Line
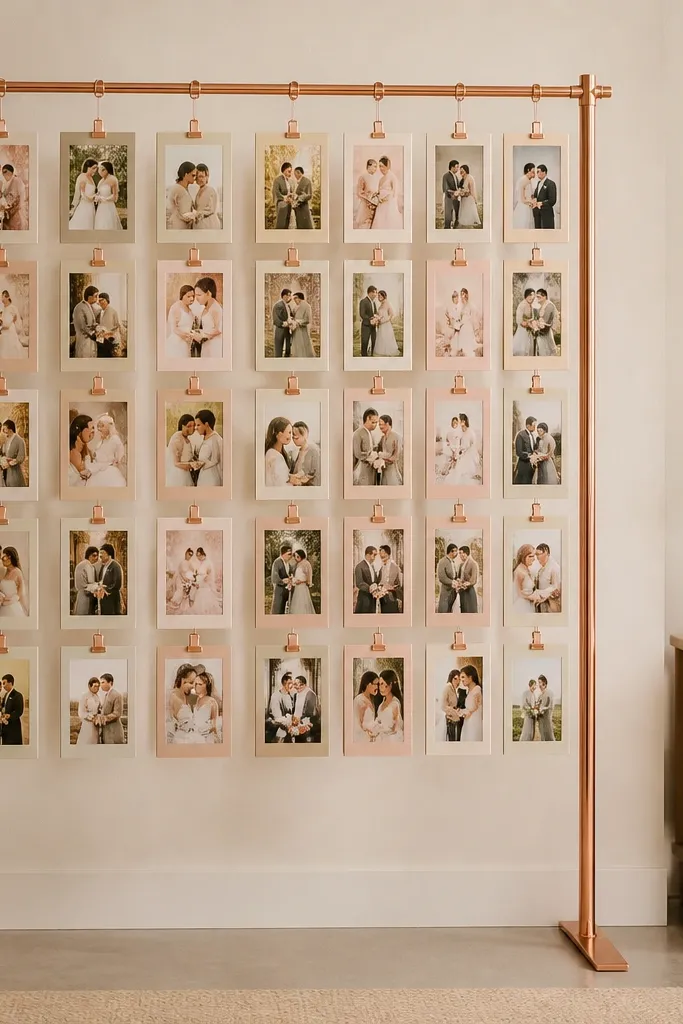
This decor turns candid moments into part of the room’s look. Set up a clip line across a blank wall using a freestanding tension rod or a stand (so you’re not drilling). Print small photo strips in a matching border color — blush, cream, or soft gold — then clip them in a grid. The rose-gold accents look romantic without being childish, and guests love adding their own pics during the night.
Start by choosing a border color that matches your room palette and printing 20-30 small strips (roughly 4x6). Then install a clip line using a freestanding rod or a stand with hooks and add 2-3 decorative clothespin types for texture. Finally, leave the line partially empty at the start so people can add photos as the party goes.
Use thin frames or strips with consistent spacing (about 1 inch gaps) for a clean, luxury grid.
Avoid mixing random border colors — it looks like a scrapbook dump instead of a styled photo moment.
7. Crystal Candle Cluster on a Mirrored Tray
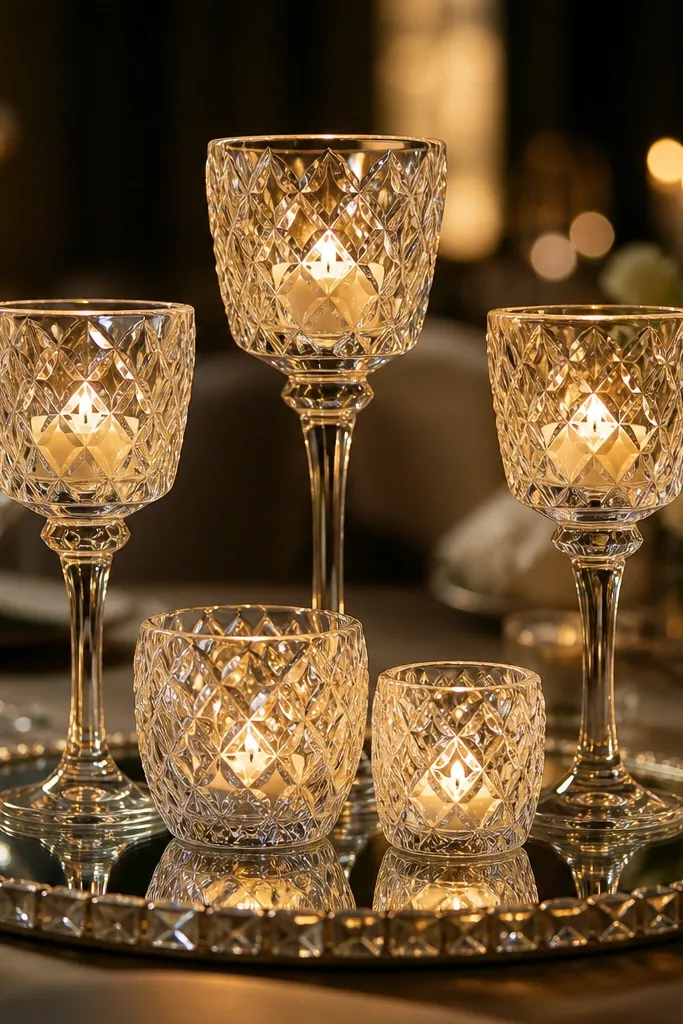
A mirrored tray makes candles look like a centerpiece from a high-end hotel lobby. Arrange crystal-style candle holders in a cluster, then place them on a mirrored tray so reflections multiply the light. Stick to 3-5 holders so it stays elegant, not crowded. This works in any suite because it uses a small footprint and instantly upgrades dim lighting with warm glow.
Start by buying a mirrored tray with raised edges so candles don’t slide. Then group 3 taper candles and 1-2 short pillar candles for height variation, keeping all holders in the same metal finish. Finally, place the tray on a side table near a lamp or window so the reflections catch light throughout the room.
Quick tipChoose flameless candles if the suite has smoke alarms that are sensitive to real flames.
Skip thisSkip oversized trays — they look like you brought a whole party setup instead of styling the room.
8. Linen Balloon Weight Set with Mini Bouquet Vases
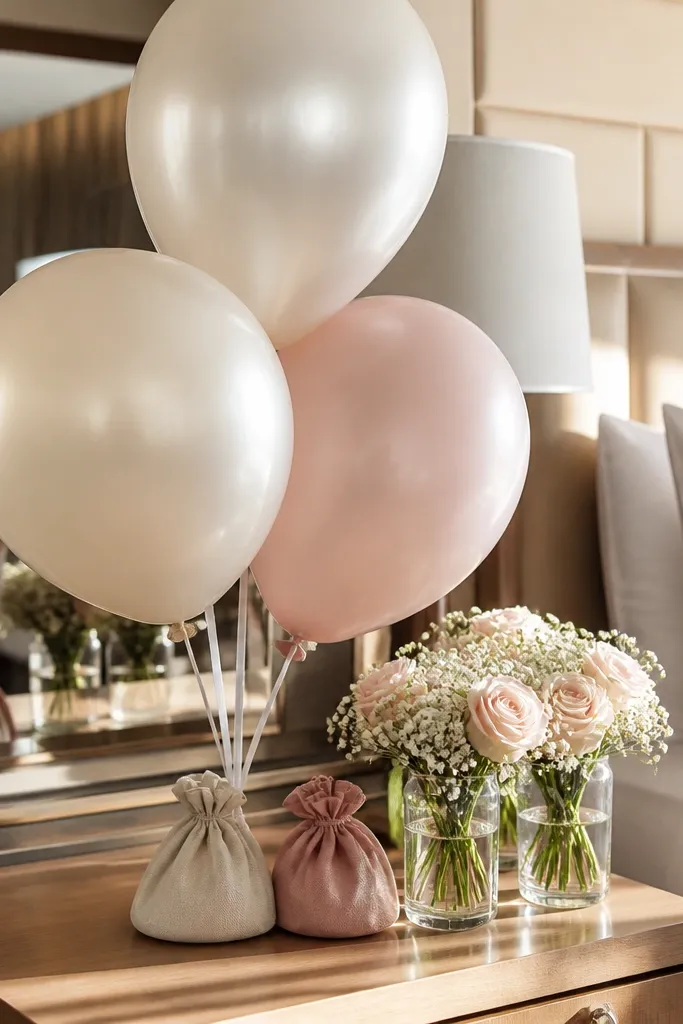
Balloon decor usually looks messy because the weights are ugly and the balloons drift. This setup looks intentional by using linen fabric weights that match your color palette and pairing balloons with mini bouquet vases. Use 3-5 balloons in one main color, then let each balloon anchor to a small linen-wrapped weight placed near a mini vase. The bouquets add softness and texture so the balloons don’t steal the whole look.
Start by selecting balloon colors that match your room linens: ivory, blush, or champagne. Then make or buy balloon weights wrapped in linen and tie balloons to the weights with short ribbon loops. Finally, cluster mini vases (3-4 inches tall) along the dresser or bedside table and tuck one small stem arrangement into each vase.
Quick tipKeep balloon strings short so the balloons sit close to the furniture in photos.
Skip thisDon’t use heavy plastic weights that show — they ruin the luxury feel on camera.
9. Champagne Wall Sconce Look with Faux Gold Frames
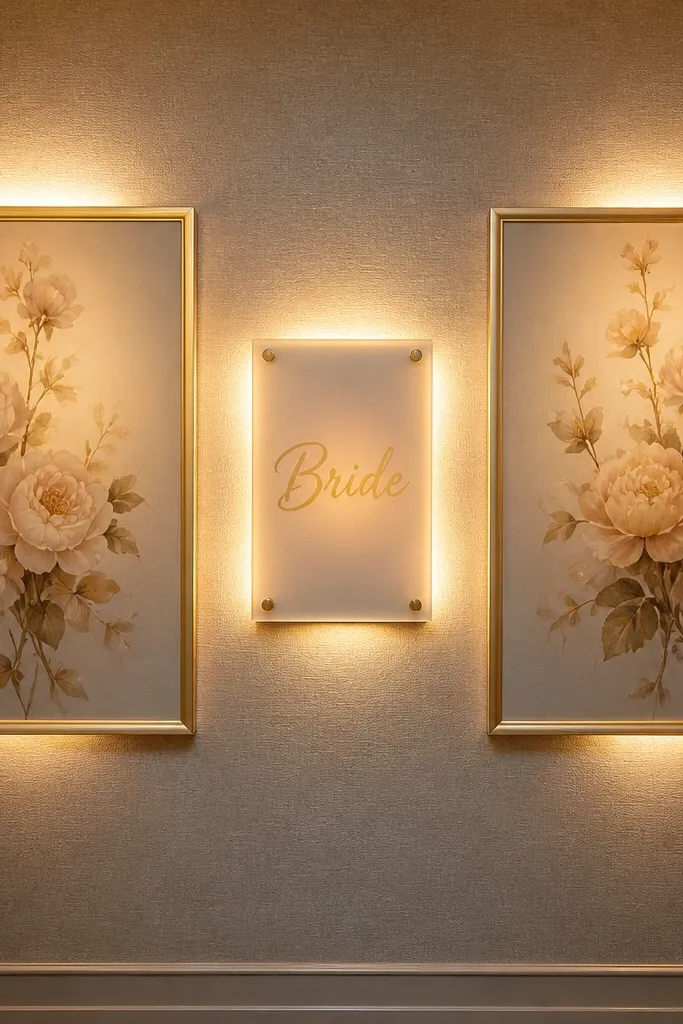
If your suite has bland wall space, you can fake a sconce look using framed art and warm lighting. Hang or place two slim gold frames with a small “Bride” sign inside, then add LED candle-style lights or warm puck lights behind translucent vellum. The warm halo makes the wall look styled and expensive without installing real fixtures. This idea is great for suites where the bed isn’t centered and you need a wall moment for photos.
Start by choosing slim frames in the same metal finish (gold OR champagne-gold). Then insert a printed sign card and place a warm LED light source behind the vellum or around the inside edges using adhesive clips. Finally, position the frames slightly above eye level so they show in group shots without cutting off heads.
Use warm white LEDs and test them against your phone camera before the party starts.
Skip cool blue LED lights — they make skin look off and kill the romantic vibe.
10. Bride Room Welcome Tray with Monogram Candles
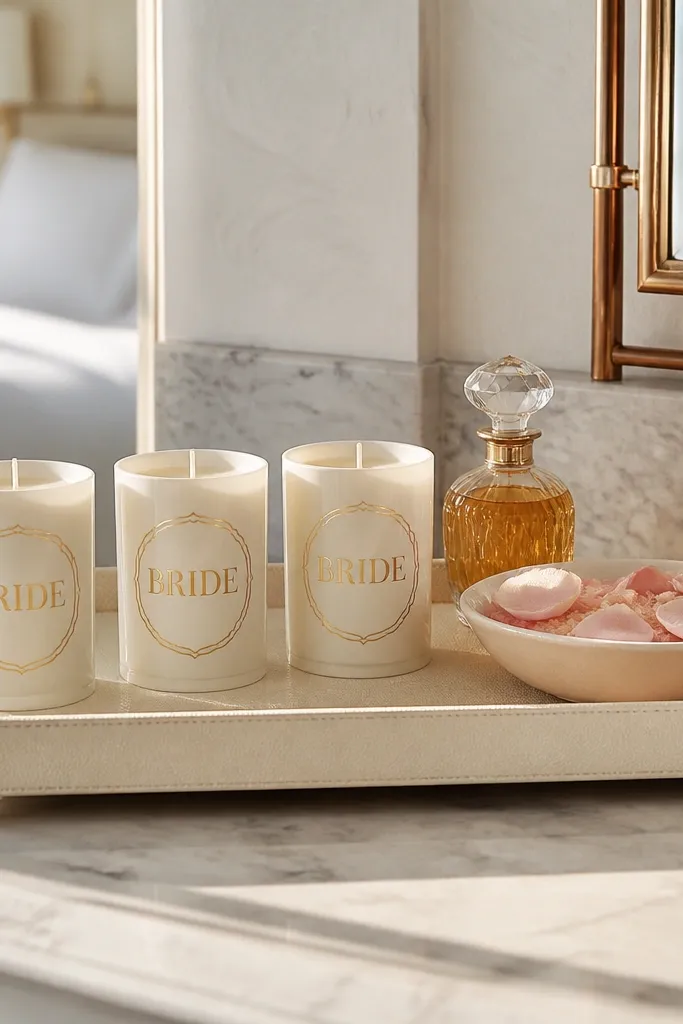
This is a small decor idea that looks high-end because it’s styled like a hotel amenity. Use a tray with a clean silhouette and add monogram candles (first initial or “BRIDE”), a perfume bottle, and a small bowl of rose petals or decorative bath salts. Keep everything in one scent family or one color family — creamy whites and soft gold work best. Guests feel cared for the moment they see it, and the tray photographs beautifully next to gift bags.
Start by choosing a tray size that fits one surface without crowding (about 12-14 inches long). Then place the monogram candles in the center and build outward with one tall item (perfume), one medium item (petals or salts), and one small item (matches or mini card). Finally, add a thin ribbon strip under the tray or around the candles to tie the palette together.
Quick tipUse the same font style on candles and signage for a more polished look.
Skip thisDon’t mix too many scents and colors — busy trays look chaotic in photos.
11. Neon-Edge Acrylic "Bride Squad" Photo Station
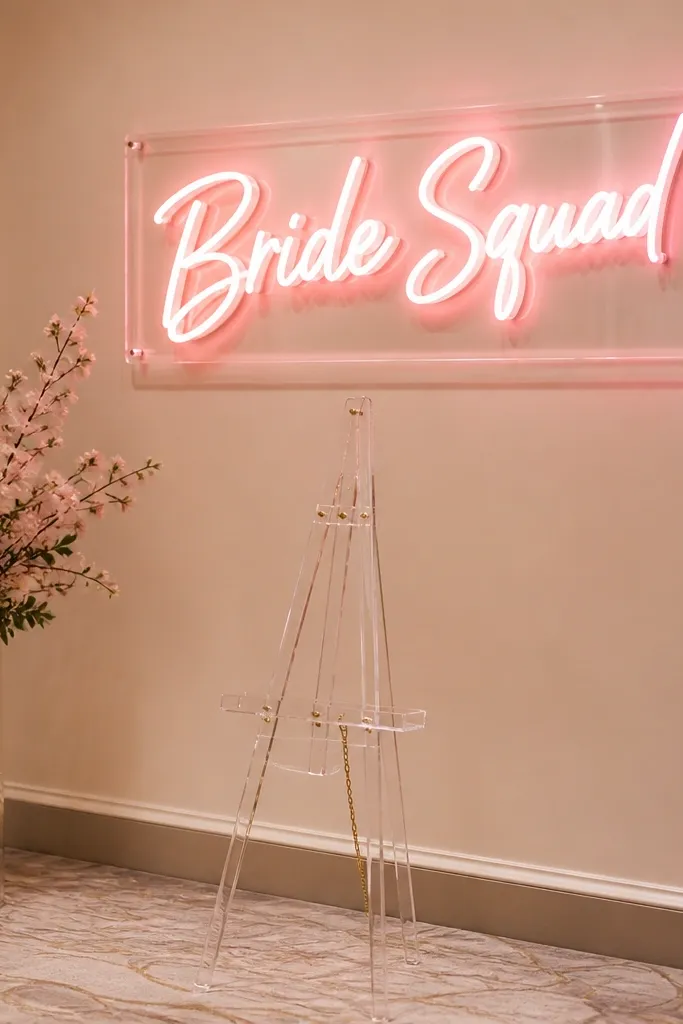
This is for brides who want fun energy with a luxury finish. Use a clear acrylic sign with a neon-style edge effect and pair it with a simple backdrop in solid cream or light blush. The clean background makes the sign pop and keeps the photo from turning into a mess of decorations. It’s also easy to move from room to room if you’re staying in one suite but want multiple photo stops throughout the night.
Start by setting up a small free-standing photo station: a backdrop panel (fabric or board) and a stable stand for the acrylic sign. Then place the sign about 6-8 inches in front of the backdrop so it catches light and doesn’t look flat. Finally, add one simple floor prop like a satin runner or a small scatter of confetti-style paper to make the ground look styled.
Quick tipShoot or set up the station near a lamp, not overhead lighting, to keep the sign glow smooth.
Skip thisDon’t add extra text signs around it — the neon sign should be the headline.
12. Garden Party Bedside Backdrop with White Fabric Panels
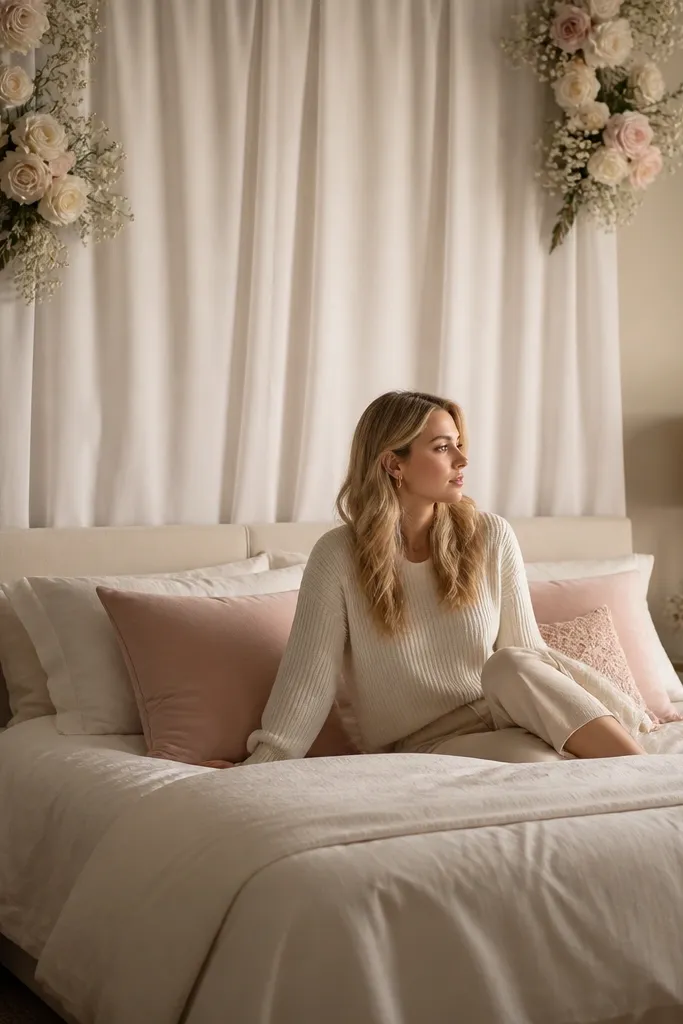
This gives you an editorial bed backdrop without balloon chaos. Hang two tall white fabric panels behind the bed so you get soft folds that photograph well, then add small floral clusters at the top corners. Keep the flowers minimal: think 3-4 stems per corner in white and blush tones. The fabric creates a clean vertical frame, and the gentle drape makes the whole room feel designed.
Start by selecting lightweight fabric that drapes (sheer voile or lightweight linen blend). Then hang it using a tension rod or a freestanding backdrop stand positioned behind the bed. Finally, tuck small floral clusters into the top folds and add warm string lights along the inner edge of the panels.
Choose fabric that looks good slightly wrinkled; ironing every fold isn’t necessary and can look too stiff.
Skip heavy fabrics like thick velvet — they absorb light and make photos look dark.
13. Gold Foil Balloon Centerpiece with Floating Table Number Cards
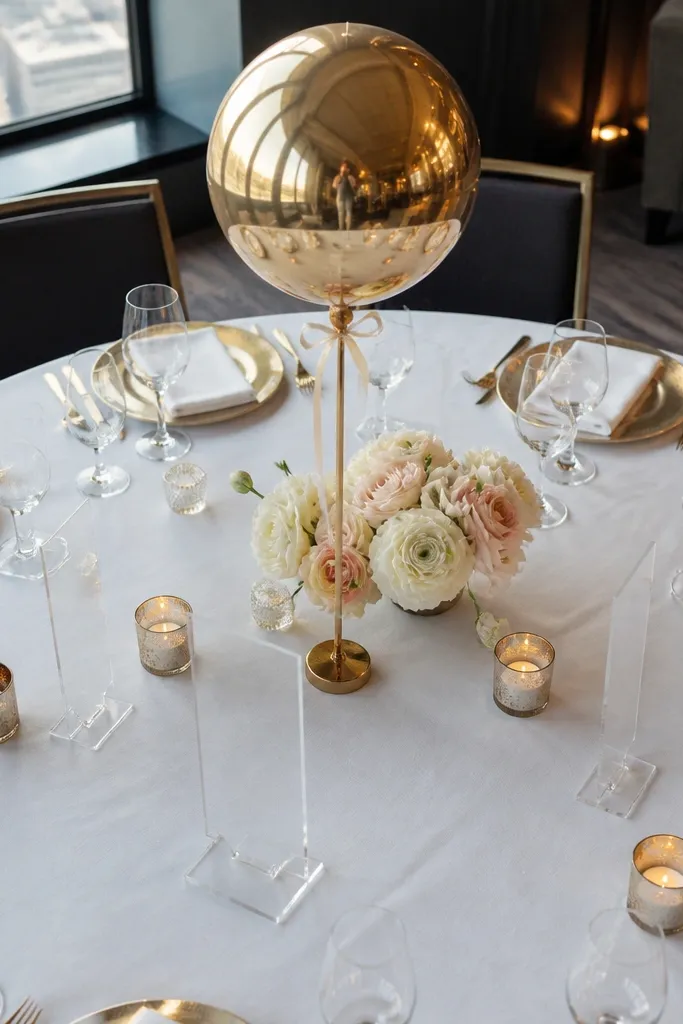
If you’re doing a seating moment, this turns a basic table into a luxury “event” look. Use a round table centerpiece with one gold foil balloon tied to a weighted base, plus a cluster of small flowers at the base. Add table number cards or activity cards on acrylic stands so they look like they’re floating above the table. The gold foil catches light and reads party-luxe, while the acrylic keeps the whole thing modern and clean.
Start by setting the round table with a simple tablecloth in cream or blush and place the weighted base in the center. Then tie a gold foil balloon to the base and add a small flower cluster underneath. Finally, place 3-5 acrylic card stands around the centerpiece with numbered cards or photo prompts.
Use acrylic card stands at the same height so the table looks intentional when photographed from above.
Don’t mix foil colors like silver and gold — it reads messy in hotel lighting.
14. Satin Robe Display on the Bed with Ribbon Hangers
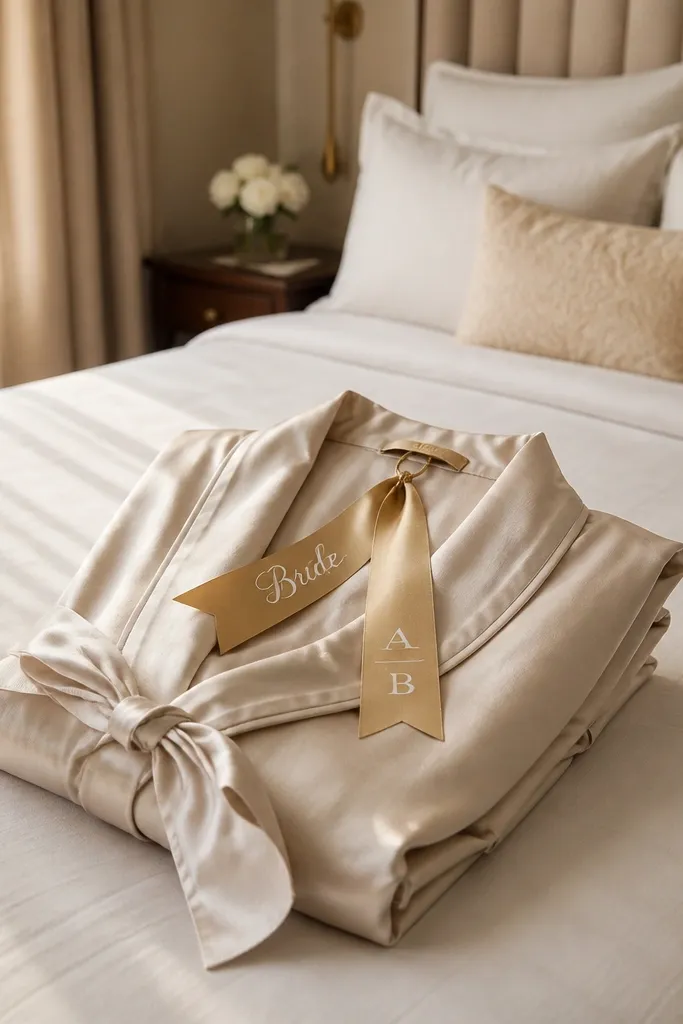
Robes are practical, but styling them makes them decor. Lay satin robes neatly on the bed, then add ribbon hang tags with “Bride” or initials so guests feel like they’re stepping into a boutique hotel moment. Choose one robe color and one accent — gold ribbon tags work best against ivory, blush, or light champagne. This is a clean, luxurious look because it uses fabric texture and symmetry instead of clutter.
Start by folding robes the same way and placing them in a row along the bed length. Then add ribbon hang tags on each robe using a small clip or thin loop so they look attached, not thrown on. Finally, add a single flower or candle near the headboard for a focal anchor so the bed looks finished in photos.
Quick tipKeep robe colors consistent with your main palette; mixing too many robe shades makes the bed look busy.
Skip thisDon’t use printed cartoon hang tags — they ruin the luxe vibe fast.
15. Champagne and Blush Balloon Cluster for the Doorway
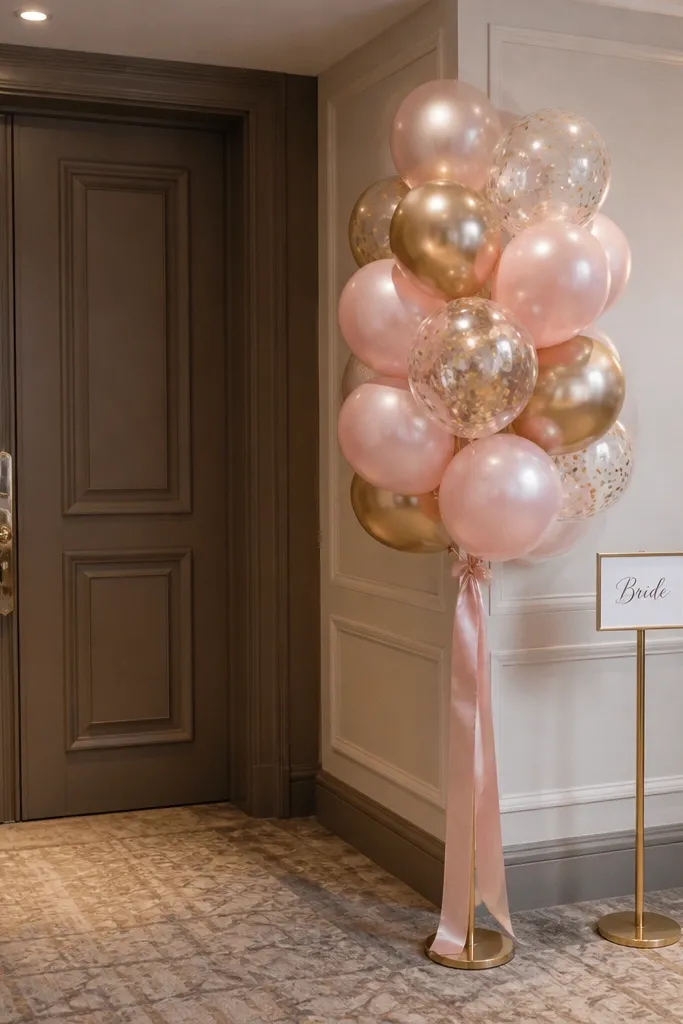
Doorway decor is the quickest way to make the suite feel like a branded event. Instead of a full arch, go with a tight cluster of champagne and blush balloons mounted to a weighted stand next to the door. Add a small “Bride” sign at eye level, then finish with a satin ribbon tail that hangs down for movement in photos. This setup works in narrow hallways where an arch would block space, and it frames arrivals without taking over the room.
Start by selecting 6-10 balloons total in two shades plus one small gold accent balloon. Then anchor the cluster to a weighted stand or heavy base so it stays upright. Finally, place the sign on the stand or a small tabletop near the doorway so it’s readable in pictures.
Use the same ribbon color you use elsewhere (like gold or blush) so the whole room feels connected.
Skip balloon counts that are too high — a doorway cluster should look tight, not crowded.



