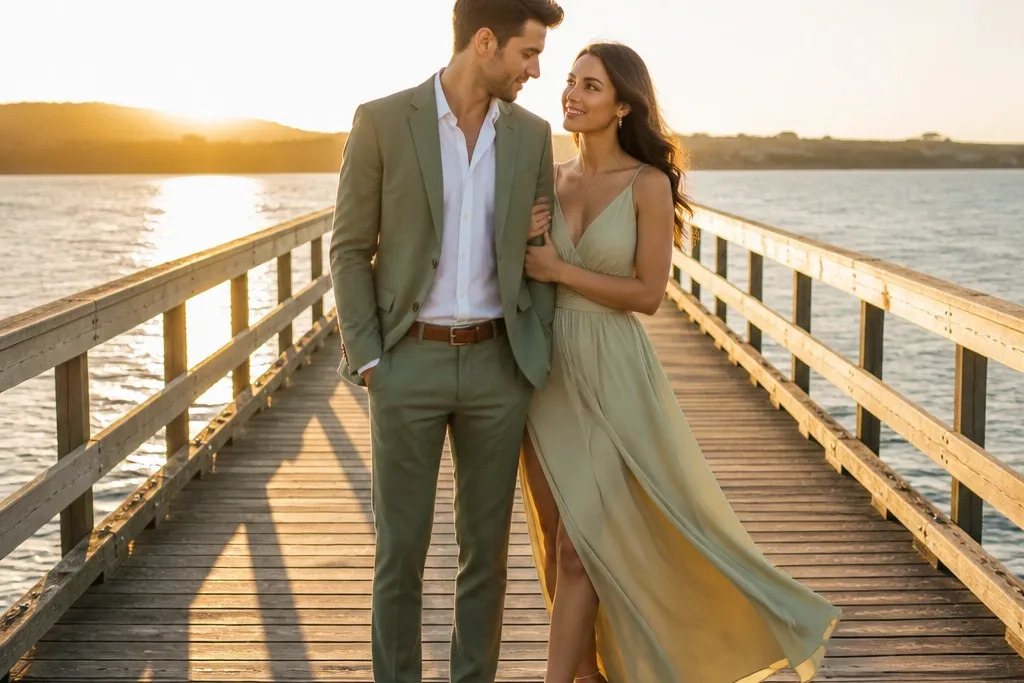
1. Golden Hour Walk on a Boardwalk With Long Shadows
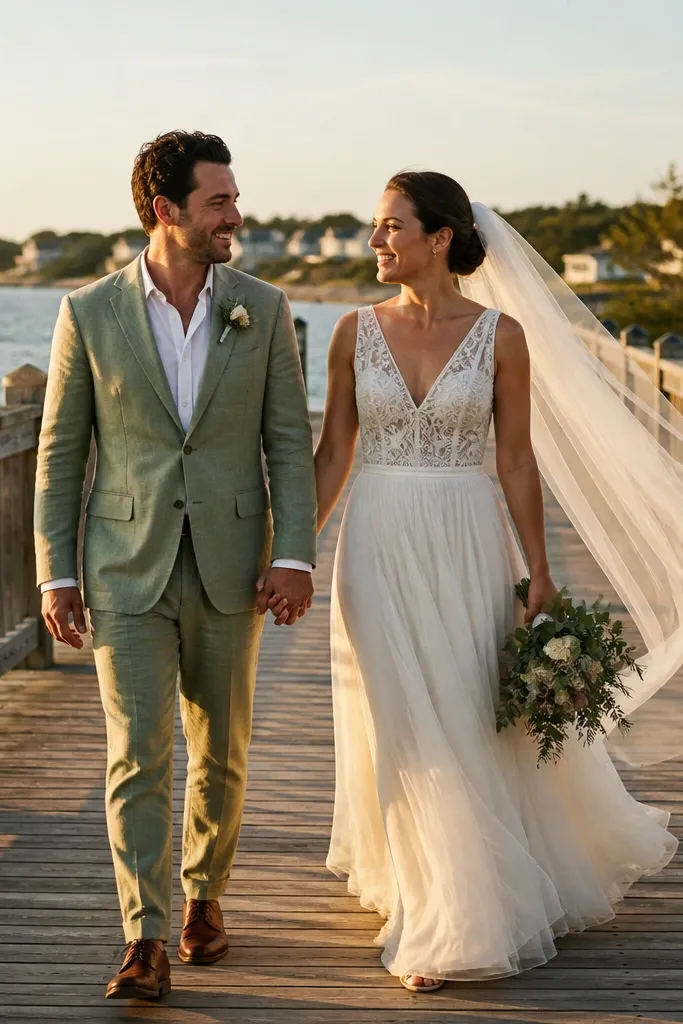
A boardwalk gives you built-in leading lines that pull the viewer straight to your faces. At golden hour, the wood grain and the long shadows add texture without needing props. This works best when the boardwalk is wide enough for you to walk without bumping into railings or other people. Choose a spot where the water or sky fills the background so the frame stays clean and cinematic.
Quick tipBring a small lint roller for outfits — boardwalk dust shows up fast in close frames.
Start by arriving 45-60 minutes before sunset so you can scout where the light hits the walkway. Then pick a walking path that shows a strong vanishing line toward the horizon and keep your pace steady for 10-15 frames. Finally, position your bodies so the sun is behind you at a slight angle, which keeps faces bright and reduces harsh squinting.
Skip thisDon’t stop in the middle of the boardwalk — the lines look best when you’re moving.
2. Stone Steps Framing: Sit-Stand With Architectural Lines
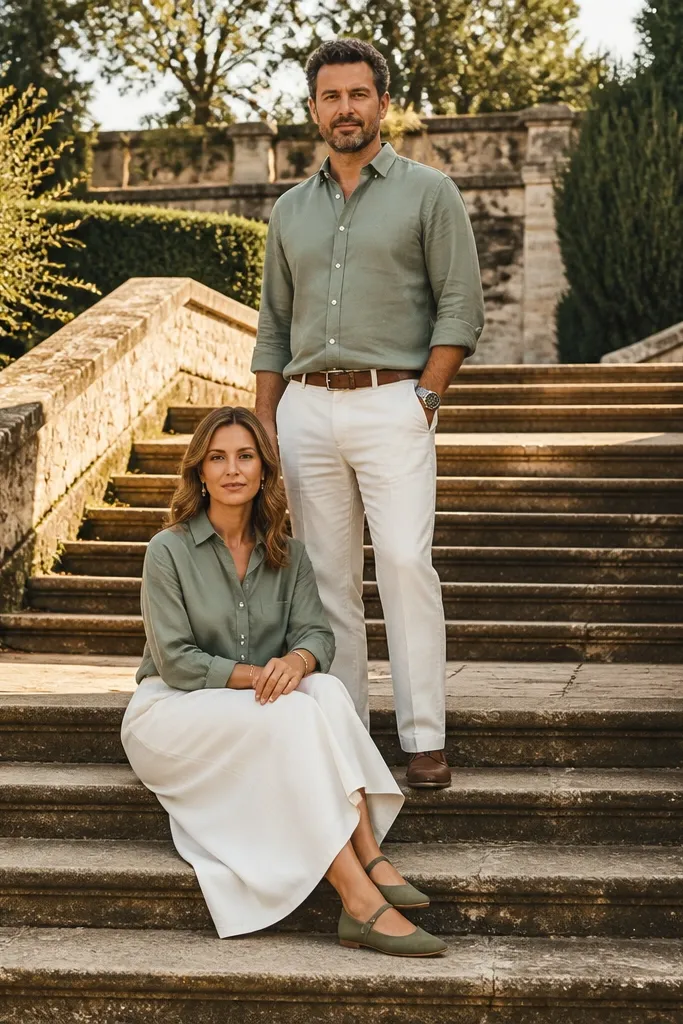
Stone steps create a natural staircase composition that flatters almost every body type. The trick is using the edges as a frame so your faces sit on a clean line, not in the middle of visual noise. This setup looks especially good in parks with older architecture, where the stone has warm tone and small texture. It also pairs well with formalwear because the background feels structured and timeless.
Start by finding steps with 2-3 landings so you have options for height and separation. Then place one person on a lower step and the other slightly higher, angled toward the same direction to keep the geometry tidy. Finally, shoot from slightly below eye level so the steps lead upward and your faces stay dominant.
Wear shoes with minimal scuffing — stone shows marks clearly in sharp light.
Avoid steps with graffiti or uneven lighting — it distracts more than you think.
3. Tall Grass Wind Portraits: Soft Movement, Sharp Faces
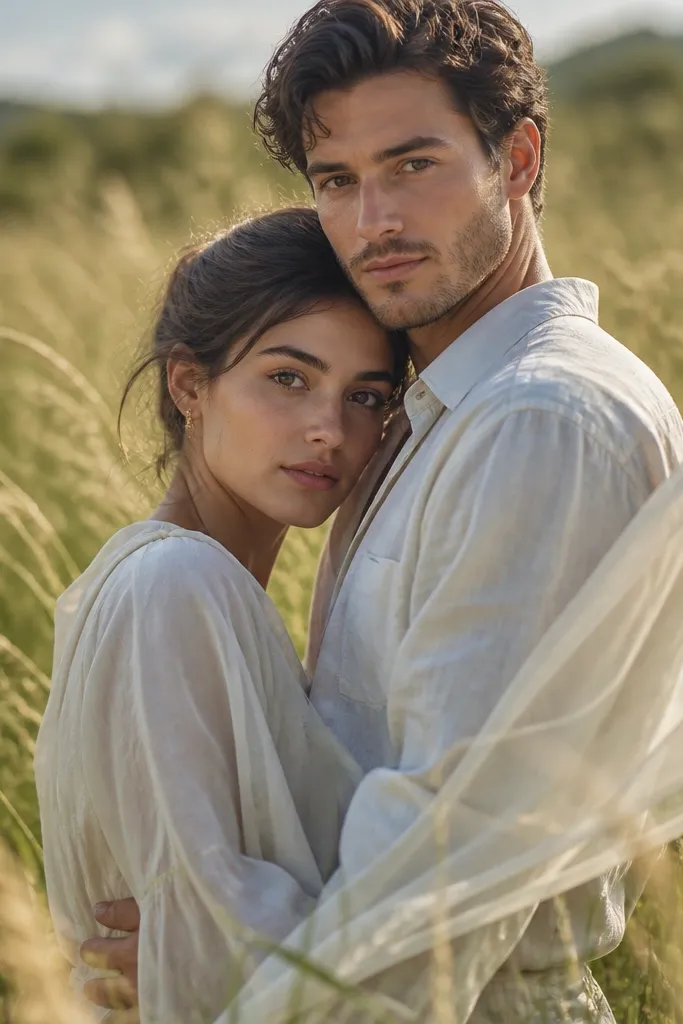
Tall grass gives you movement and texture in one place. When a breeze hits, you get natural motion blur in the background while your faces stay crisp, which reads as “creative” instantly. Look for fields where the grass is dense and waist-high, not sparse. This is a great pick for spring and early summer because the color stays lush and the light feels gentle.
Quick tipUse a light grip on the bouquet — too much waving makes it look messy.
Start by choosing a patch where you can stand without sinking into the grass — you want posture to look intentional. Then have one person slightly turned away while the other faces camera, so the grass catches differently across your silhouettes. Finally, shoot in short bursts as the wind changes direction so you get multiple looks without waiting forever.
Skip thisDon’t wear all-black — tall grass eats contrast and your outfits can disappear in shade.
4. Row of Trees Tunnel: Walk Toward the Camera
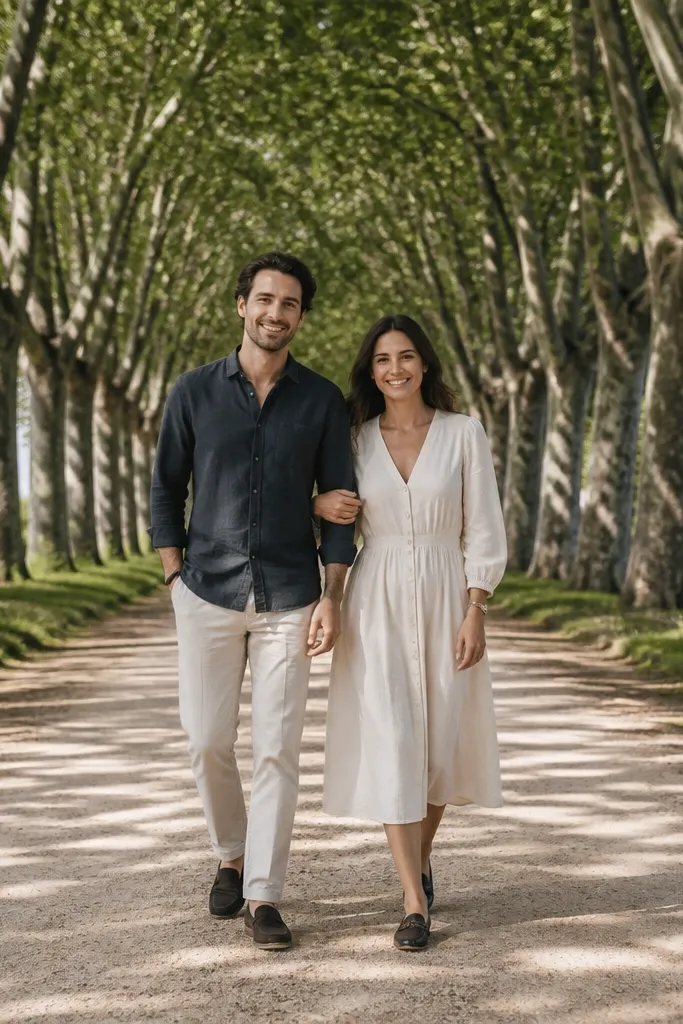
A tree tunnel creates depth and a clear path for the eye. The canopy makes natural shade, which helps skin tones stay even and gives you a calm, romantic mood. This works best when the trees are evenly spaced so the frame looks like a corridor, not random branches. Pick a path where the ground isn’t too cluttered because you want the tunnel to do the heavy lifting.
Quick tipBring a small hair tie if you have flyaways — canopy shade makes stray hairs more visible.
Start by standing at the center of the path and check that the trees align like a corridor from your shooting spot. Then walk toward the camera for 8-10 steps, keeping hands connected and torsos turned slightly toward each other. Finally, shoot at two heights — one at chest level for full-body shape and one at eye level for expressions.
Skip thisDon’t pose too stiffly — tree tunnels look best when you’re moving naturally.
5. Sunlit Courtyard Doorframe: Lean and Look Through
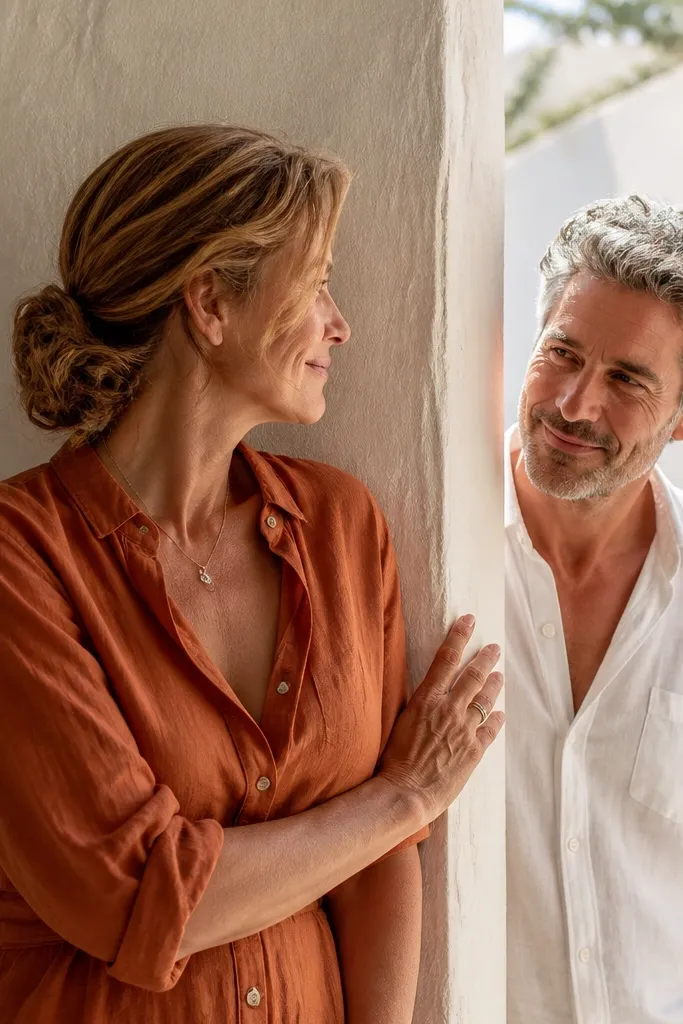
Doorframes and arches give you instant composition. You get a crisp border around your faces, and bright light behind you helps skin look warm and glowing without filters. Choose courtyards with clean stone or plaster walls so the background stays smooth. This idea also photographs beautifully at midday because the contrast is controlled by the frame.
Start by finding a doorway where the inside is shaded and the outside is bright, so you can balance exposure. Then lean your bodies so one shoulder touches the frame edge, but keep faces angled toward the light. Finally, take a second set where you both look out through the opening, which makes the frame feel intentional rather than accidental.
If the light is harsh, back up 2-3 feet into the doorway so you don’t blow out highlights.
Avoid busy doorframes with peeling posters — the border becomes visual clutter.
6. Ocean Cliff Edge: Sit Back, Wind Hair, Clean Horizon
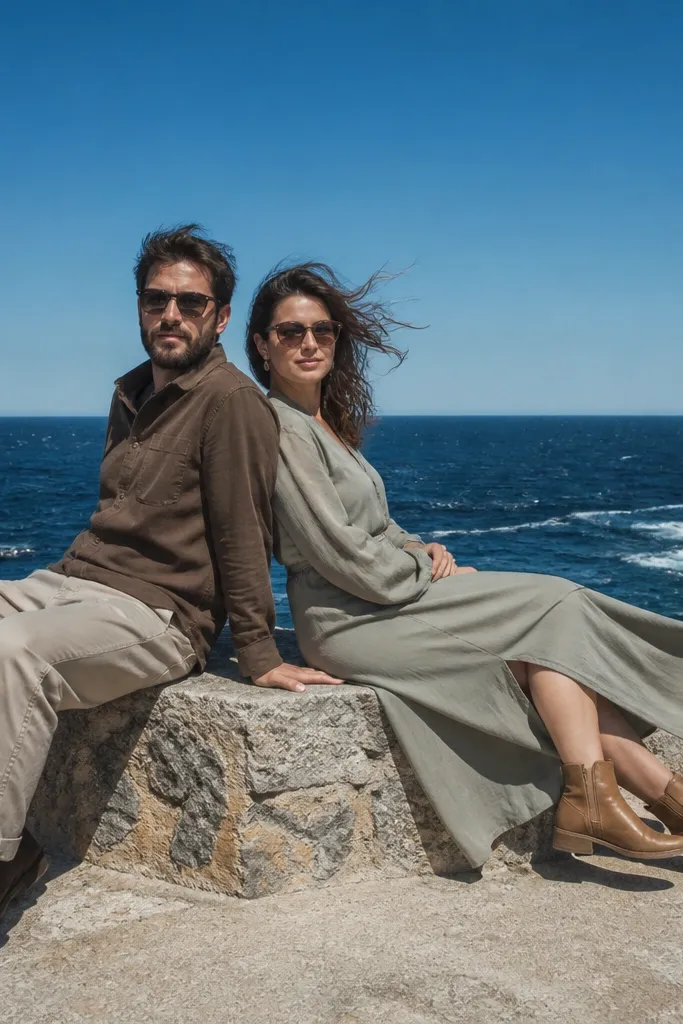
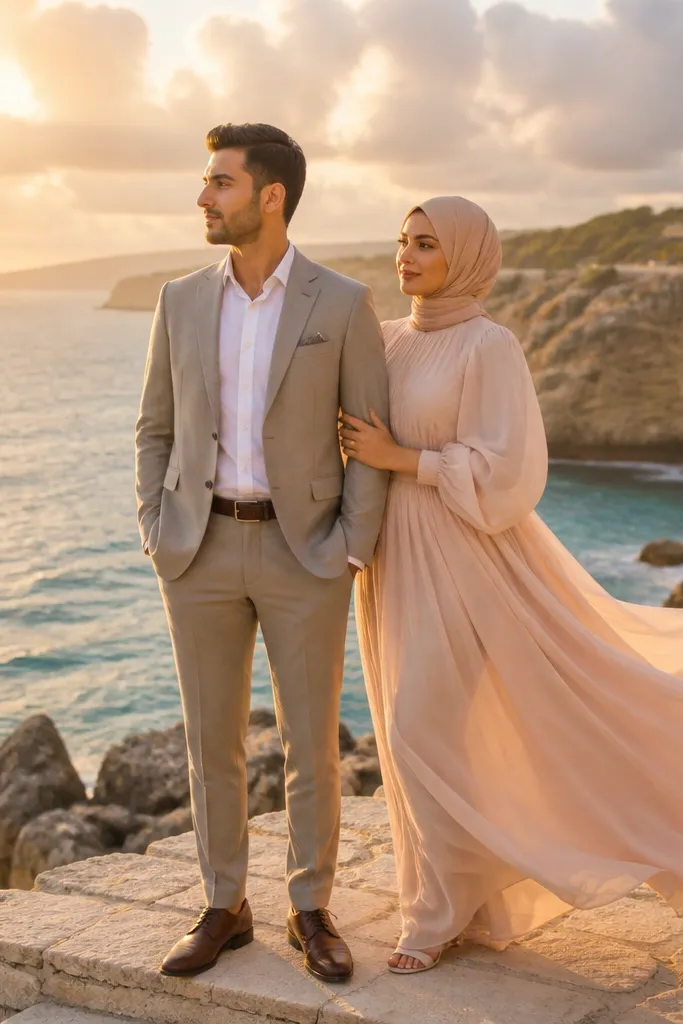
A cliff edge gives you a horizon line that instantly makes photos feel cinematic. The space behind you is simple, so the couple reads clearly even in wide shots. Wind is the secret weapon here — it moves fabric and hair, creating life without extra posing. This is best when the sky has clear separation (blue or dramatic clouds) so the horizon doesn’t blend into a grey blur.
Quick tipBring a scarf or hair clip — ocean wind loves to tangle curls and flyaways.
Start by choosing a safe spot where you can sit without rushing — stability matters for calm expressions. Then sit with your backs slightly turned to the camera and angle your chins toward each other, so faces catch light while the background stays wide. Finally, shoot a few frames looking at the horizon and then rotate back to each other for the more intimate set.
Skip thisDon’t stand right at the edge — the composition gets tight and your safety margin disappears.
7. Desert Dunes: Side Profile With Footprints Leading In
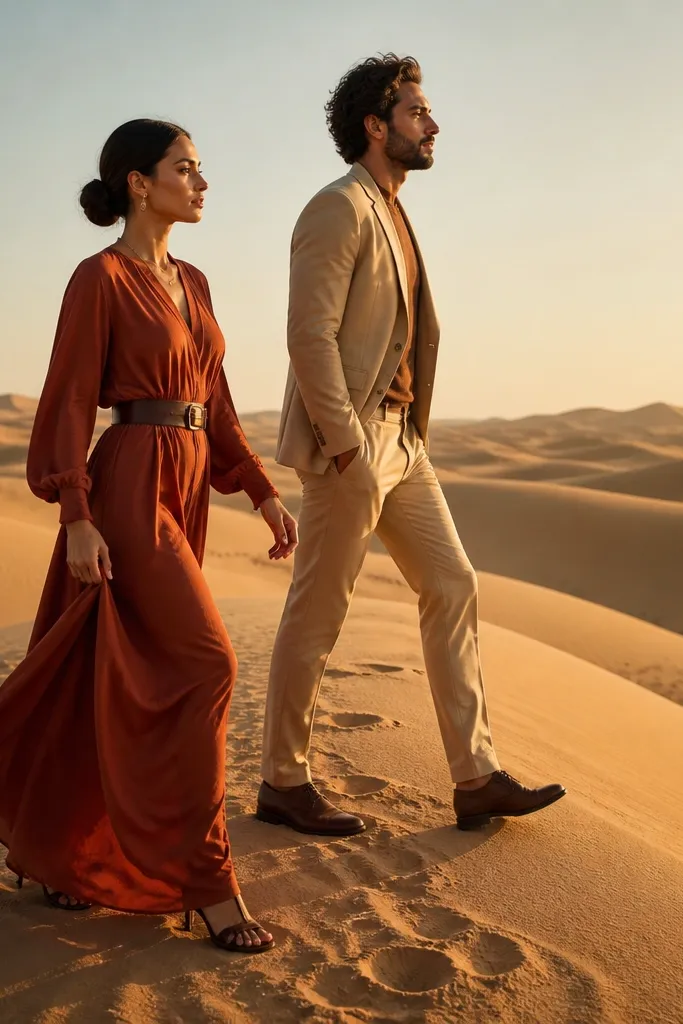
Desert dunes add graphic shapes and a clean color palette that makes outfits stand out. Footprints create a natural leading line, so the viewer’s eye follows your body placement. This looks especially good when the sand is slightly textured and not perfectly smooth — smooth sand can look flat. Choose warm neutrals in clothing so you blend into the scene while still looking styled.
Start by walking a few steps into the dune so you’re not standing on hard flat ground. Then pose in side profile and place your feet so footprints form a clear path toward the camera. Finally, shoot from lower than waist height so dune curves and footprints fill the frame.
Pack a small bottle of water for hands — dry sand makes skin look flaky in close-ups.
Avoid bright white outfits in strong sun — they blow out faster on sand.
8. Forest Ferns: Low Angle Portraits for Texture Depth
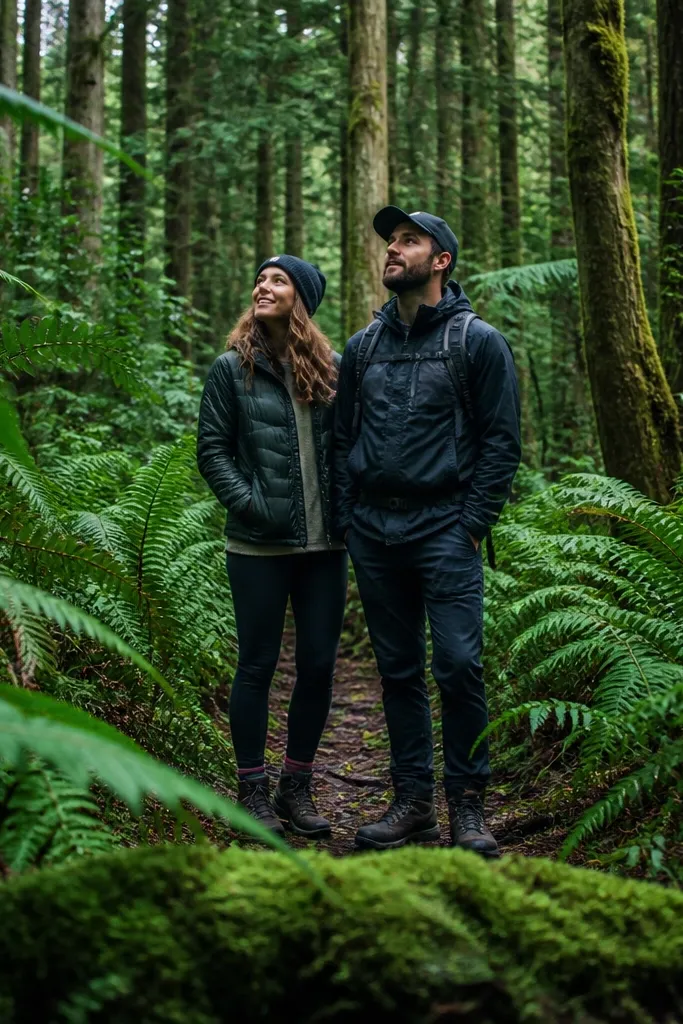
Ferns and leaf layers add depth you can’t fake with a plain backdrop. A low angle makes the foreground plants feel bigger, which turns a normal forest walk into an artful composition. This works best in shaded woods where the greens look rich and consistent. If there’s soft overcast, you’ll get even skin tones and fewer harsh shadows on faces.
Quick tipWear darker shoes and keep hems off muddy ground — moss stains show up in photos.
Start by crouching low and finding a spot where ferns frame your faces on both sides. Then place one person slightly behind the other so you get separation in the greenery. Finally, shoot close enough that the leaf texture reads, but keep enough distance that faces stay sharp and not swallowed by background blur.
Skip thisDon’t center your faces in a messy cluster — choose a cleaner fern “frame” area.
9. Waterfront Steps: Toss Bouquet, Then Hold Still
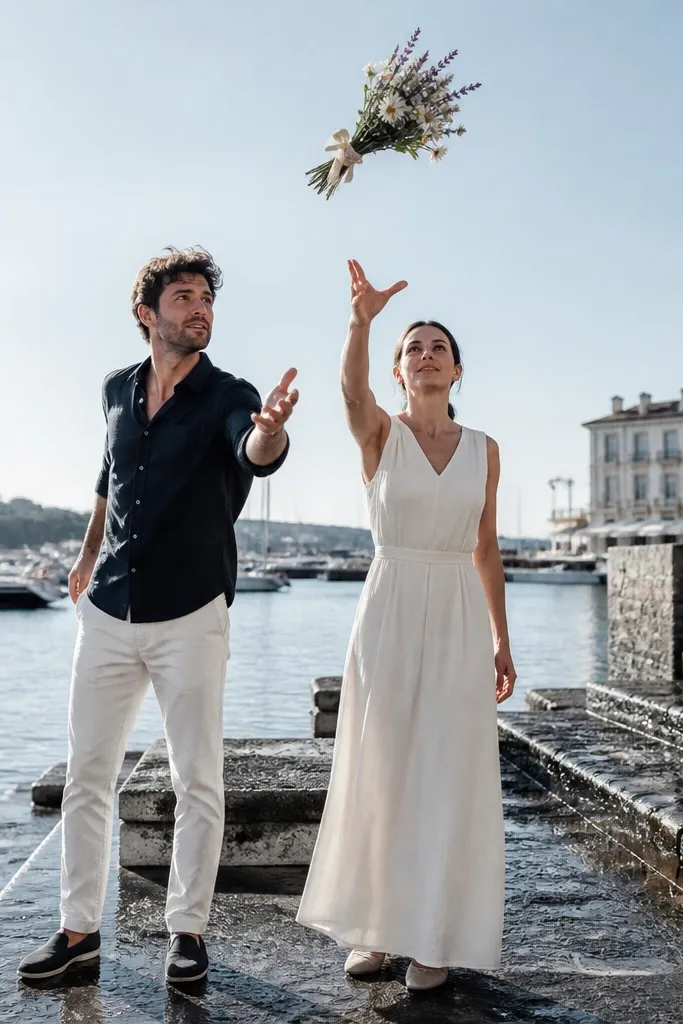
Boat-step waterfronts give you a mix of architecture and water texture. The best part is the bouquet toss — it creates motion while you keep expressions controlled. The water behind you gives a soft, moving background that looks romantic without looking chaotic. This is a great choice when you want photos that feel playful but still polished.
Start by standing on a section of steps with a clear view of water behind you and no rail clutter. Then practice the toss: release the bouquet gently upward and slightly forward so it lands back near your hands. Finally, capture one series while you freeze right after the toss, and another series where you catch it and look down briefly before returning eye contact.
Use a bouquet with sturdy stems for tossing — loose flowers collapse mid-air.
Don’t toss too high — tall throws look like accident shots, not intentional style.
10. Railroad Track Lines: Walk Between the Rails
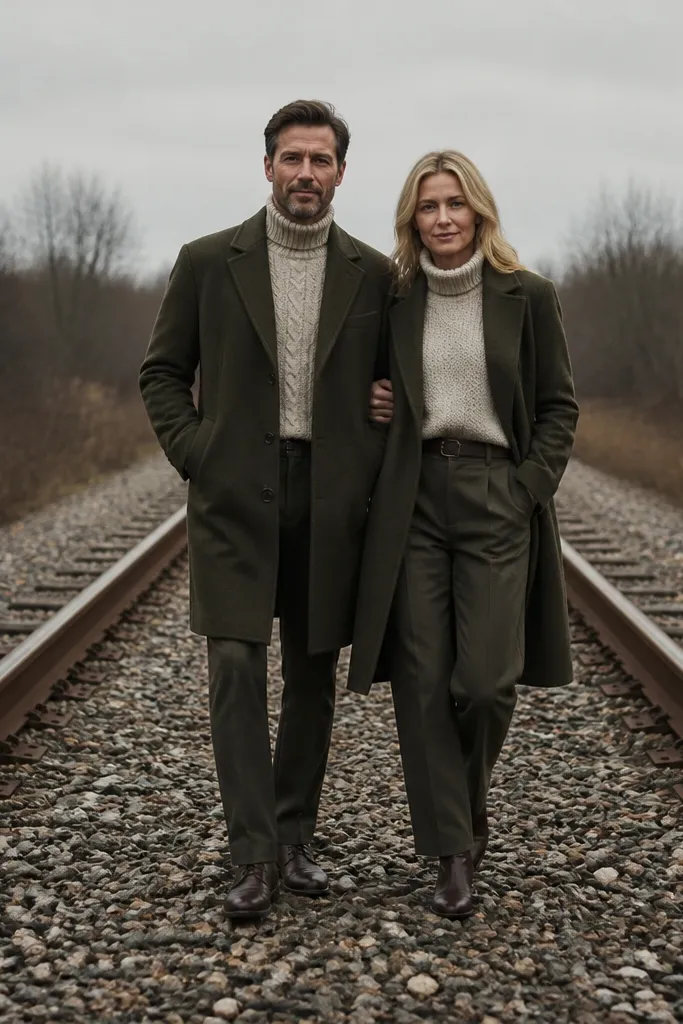
Railroad tracks are pure geometry. The parallel lines pull everything into a dramatic perspective that looks creative even in simple outfits. This setup works best on abandoned, clearly safe sections where you can stand without stress. Pick overcast days for softer light so faces stay even and the scene doesn’t glare.
Quick tipWear shoes with good grip — gravel tracks shift underfoot.
Start by checking the area carefully for safety and permission rules — don’t gamble on access. Then have the couple walk slowly between the rails, keeping shoulders relaxed and hands connected. Finally, shoot from a low corner angle so the rails converge behind you, making the background feel deeper.
Skip thisAvoid bright midday sun — reflections on metal can blow out highlights.
11. Lighthouse Path: Strong Profile Against White Walls
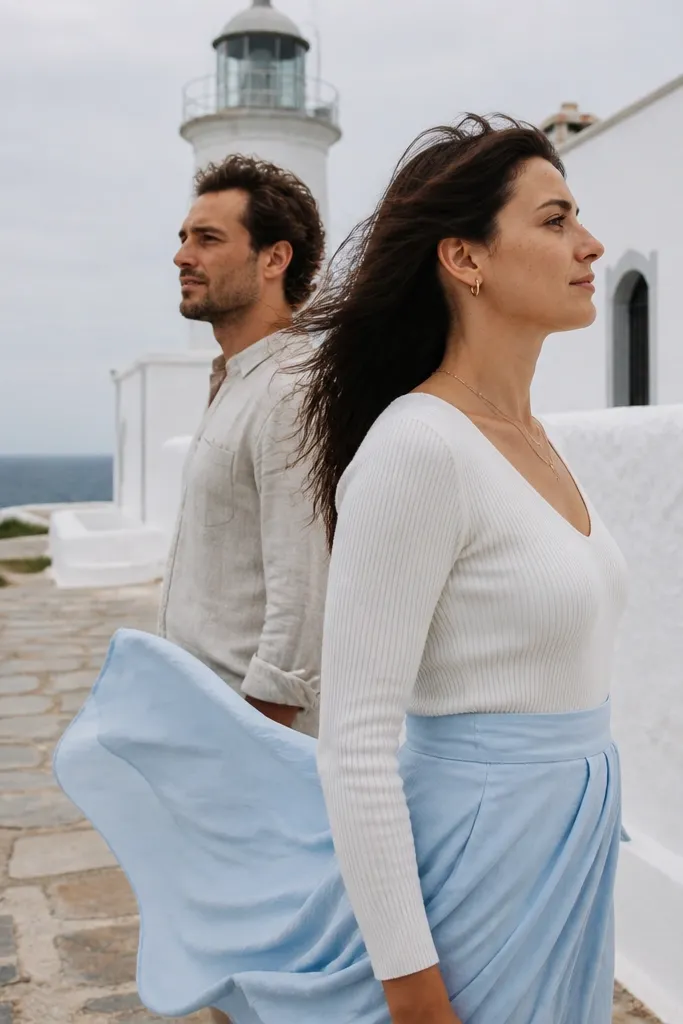
White walls and clean shapes make lighthouse areas look styled without effort. The contrast between your outfits and the white background keeps images crisp and editorial. Profile poses look extra good here because the lighthouse structure gives you a clear edge line. This is also a strong pick for breezy days — the wind adds movement while the architecture stays steady.
Quick tipBring a light-colored outer layer if your outfits are dark — it helps catch wind-blown light on hair.
Start by positioning yourself so the wall is behind you and you’re not silhouetted too hard. Then pose in profile and turn your faces toward each other, letting the wall create a clean side highlight. Finally, take a second set with you walking along the path, keeping the lighthouse partially in frame for context.
Skip thisDon’t place yourselves too far from the wall — you lose the clean contrast.
12. City Alley Sunbeam: One Person in Light, One in Shade
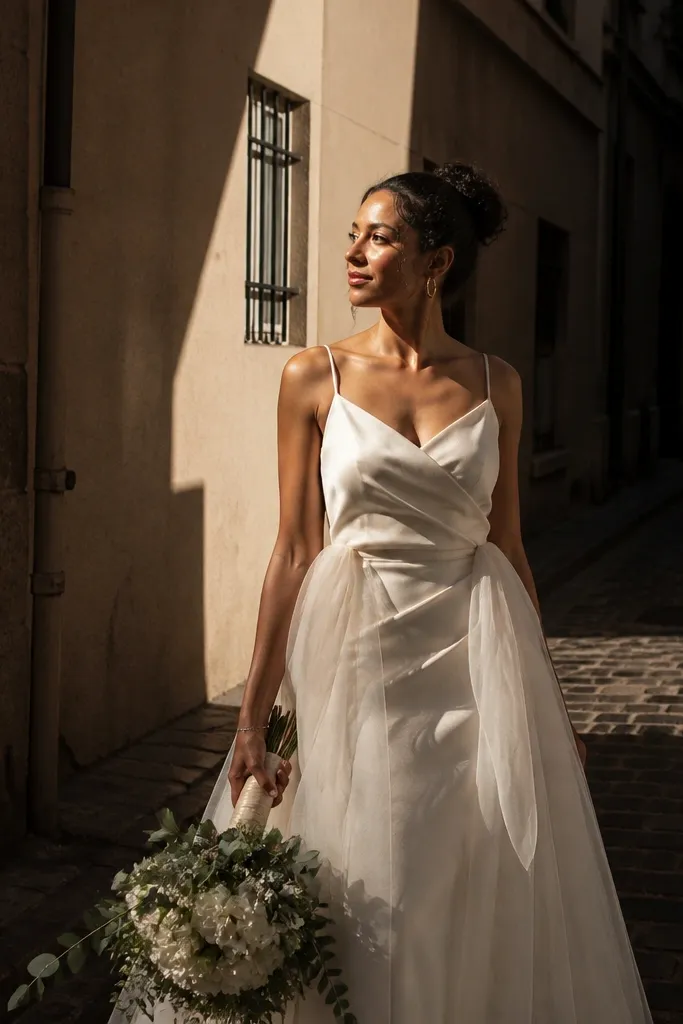
Urban sunbeams create a dramatic look that still feels romantic. The contrast between light and shade gives you a high-end mood without heavy editing. Find alleys where buildings leave a clear stripe of sunlight on the ground, then use that stripe as your “stage.” This works best in late afternoon when sun angles are low and beams are long.
Quick tipUse matte fabrics — shiny ones catch alley light and create distracting glare.
Start by scouting from the entrance and watching for a stable sunbeam spot that lasts 10-15 minutes. Then place one person in the beam and one just outside it, keeping both faces turned toward the light for flattering exposure. Finally, shoot at two distances: a mid shot for styling and a wider shot to show the alley framing.
Skip thisAvoid alleys with hanging wires or messy signs — they steal attention from your faces.
13. Lakeside Dock With Row Boat: Sit Side-by-Side
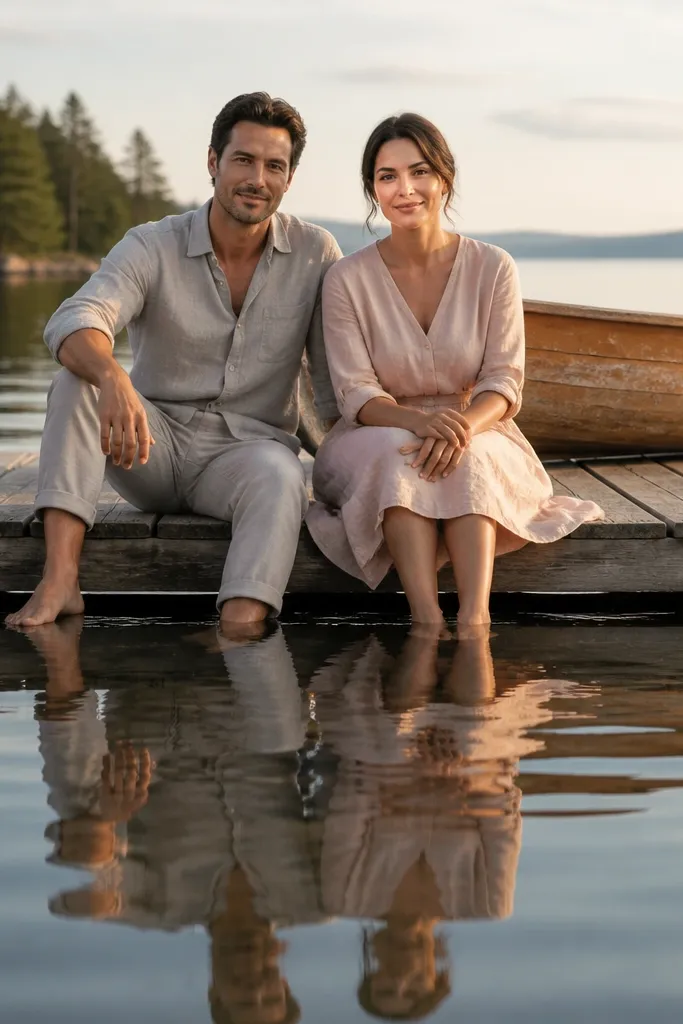
Docks and row boats add a story feel without needing extra props. Side-by-side sitting is flattering and keeps your outfits readable, especially if you’re wearing coordinated colors. The lake surface also gives you soft reflections that look dreamy when the wind is calm. Choose a calm morning or late afternoon so reflections don’t turn into messy ripples.
Start by finding a dock with a clear open water background, not one crowded with boats. Then sit with knees angled slightly toward camera and keep your shoulders close but not touching to avoid awkward arm shadows. Finally, shoot one series facing the horizon and one series looking at each other, using reflections as a bonus.
Bring a small towel for dock splinters and damp wood — it keeps fabric from picking up grime.
Don’t stand — docks look best with seated poses because it stabilizes composition.
14. Canyon Rock Arch: Hand on Stone, Faces Toward the Opening
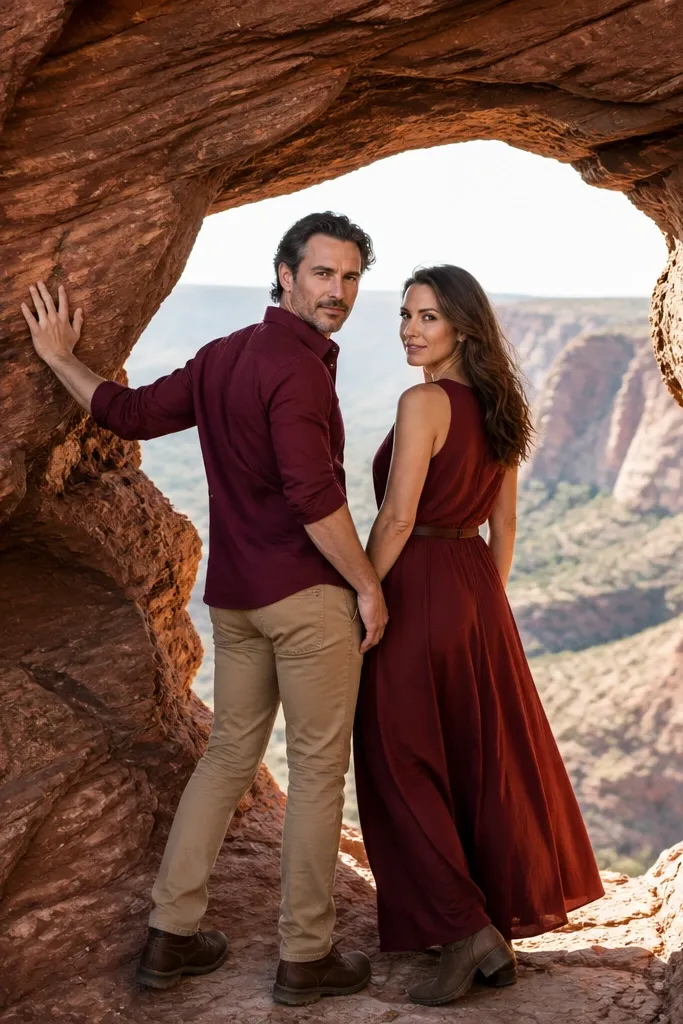
Rock arches naturally frame you and create a “window” effect that looks cinematic. Stone texture adds depth, and the opening behind you gives clean negative space. This is ideal when you want a bold, dramatic backdrop without needing a photographer to invent something complicated. Choose a location where you can shoot from inside the arch so the background stays controlled.
Quick tipWear shoes with grip — canyon stone can be dusty and slippery.
Start by locating where the arch opening creates the cleanest background — often it’s mid-height, not the ground. Then place one hand on the stone for scale and touch, while both faces angle toward the opening light. Finally, take wide frames to show the arch shape and then move closer for details like bouquet edges against rock texture.
Skip thisAvoid midday if the arch blocks light — you’ll get harsh shadows across faces.
15. Blooming Orchard Rows: Twirl With Petals in Front
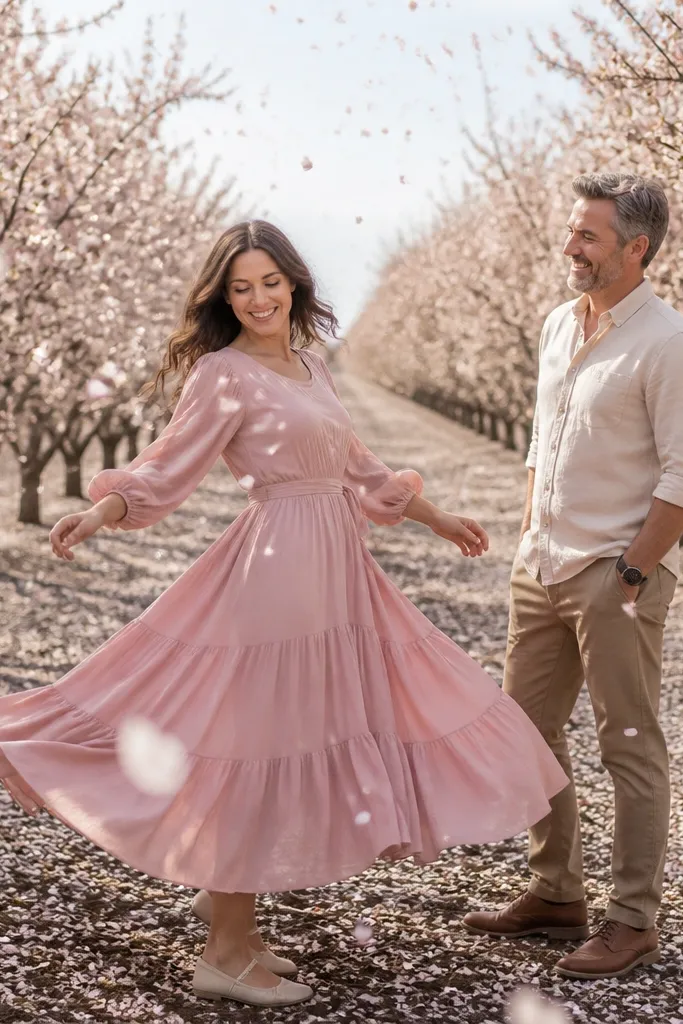
Orchard rows look like a whole set because the tree spacing creates repeating lines. Petals add a romantic pop, especially if you position them in the foreground for depth. This idea works best in peak bloom weeks when branches are full and the ground has enough petals to show movement. It also flatters softer wedding colors because blossom tones sit nicely against pastel outfits.
Start by choosing a row where you can stand with trees behind you and enough space to spin without hitting branches. Then have one person twirl slightly while the other holds the bouquet steady and looks at them. Finally, throw a small handful of petals toward the camera and shoot in bursts — you want petals flying across the foreground, not landing on your faces.
Pick petals from a different section if possible — less wind damage to your main blossoms.
Don’t overdo the petal toss — too many petals turn the frame into a blur.
16. Snowy Park Bench: Warm Coat, Crisp Background
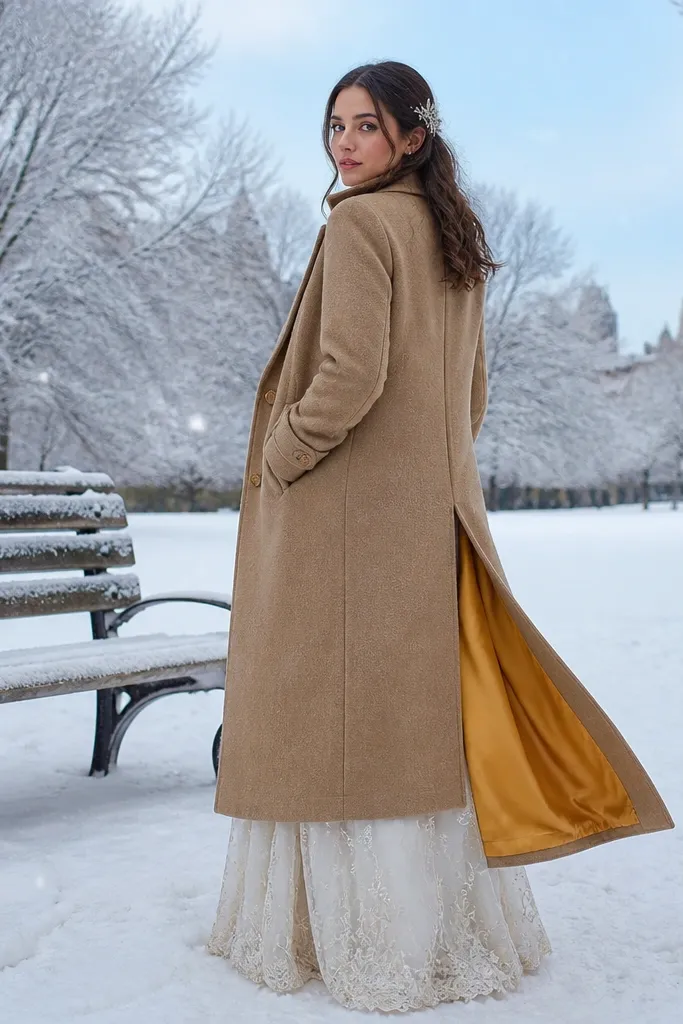
Snow turns an ordinary park into a clean, high-contrast set. The white background makes your outfits stand out and gives you soft light that’s flattering for skin. This idea works best with fresh snow or light snowfall where the ground isn’t grey and dirty. It also keeps backgrounds simple, which is a big win for pre-wedding sessions where you want your faces to be the focus.
Start by booking a time when the sun is out but the wind is calm, so you don’t lose hair and makeup to gusts. Then sit close on the bench with one person slightly angled and the other facing camera, using the snow as negative space. Finally, take a few frames with gloves off briefly for hands and bouquet details, but keep expressions relaxed and warm.
Use a wool scarf instead of a slippery satin — it stays put in snow wind.
Avoid dirty snow banks — they add grey patches that ruin the clean look.
17. Beach Wind Portrait: Bare Foot Step Back, Then Look Up
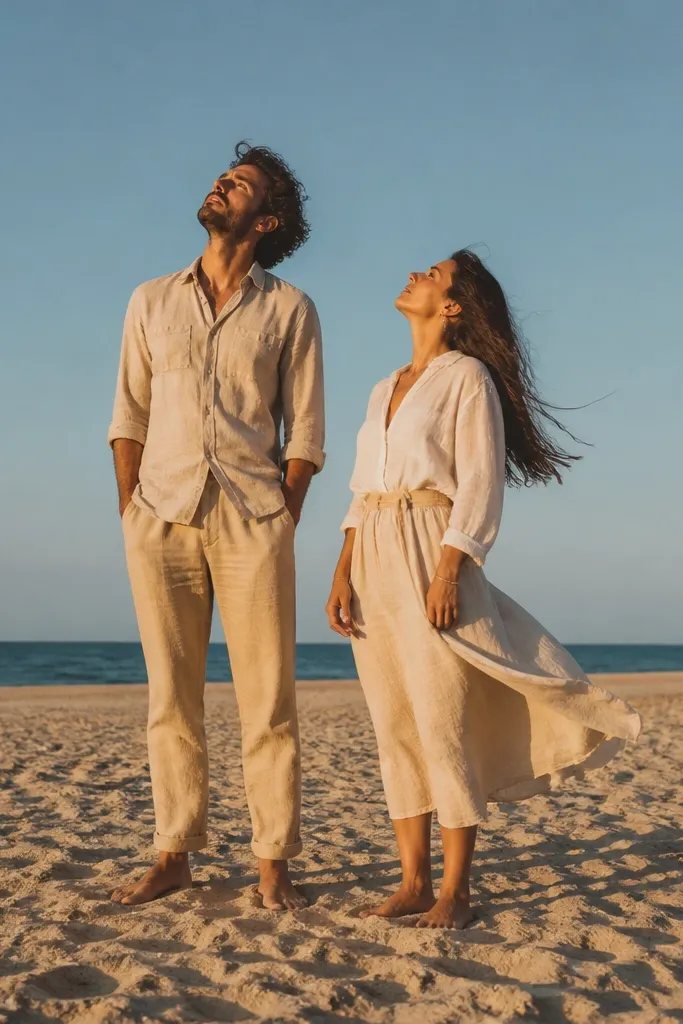
Beach wind looks good because it moves fabric and hair while the background stays simple. The key is stance: step back creates natural depth and keeps you from blending into the horizon line. This setup is best with dry sand and a clear sky, or with overcast when you want softer contrast. Keep the palette grounded so your outfits read clean against sand and sea.
Quick tipPack a small bag of baby wipes — they fix salt streaks fast.
Start by walking a few steps away from wet sand so you don’t track dark patches into the frame. Then pose with one foot slightly behind and both bodies angled, letting hair and clothing react to the wind. Finally, shoot a sequence where you look up briefly at the sky line and then return to eye contact as you settle.
Skip thisDon’t pose with flat shoulders — it makes wind look messy instead of styled.
18. Grass Drape on a Blanket: Sit, Cover, Reveal
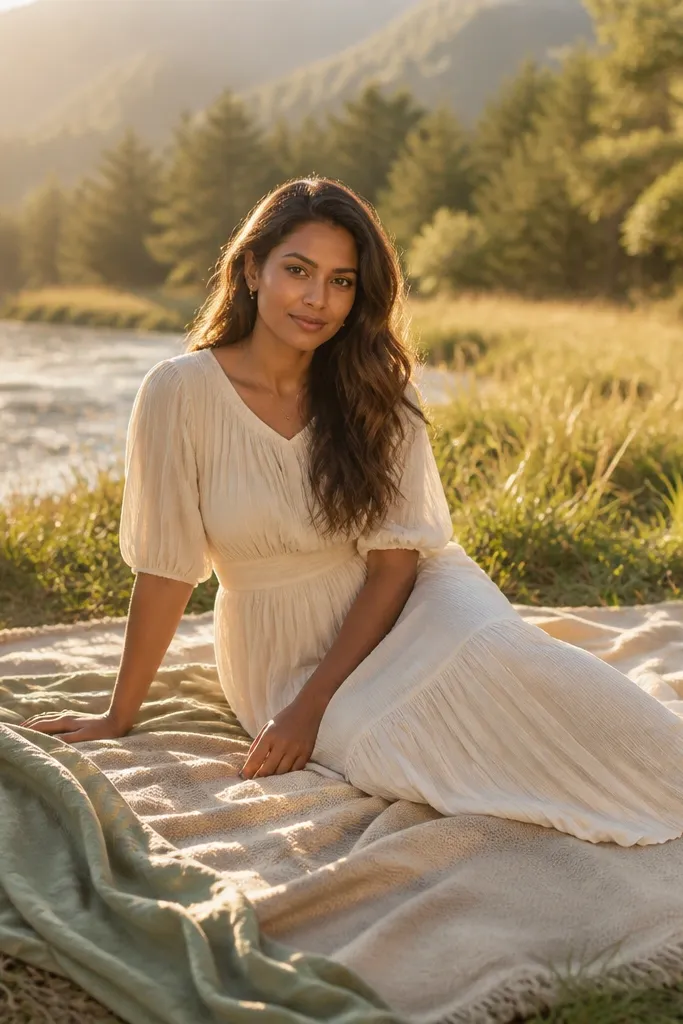
A simple blanket changes outdoor photos from random to intentional. You get a clean base for color and fabric textures, and you can arrange hands and posture without fighting the ground. This works in fields, parks, and even near the edge of a beach where grass stays neat. The look is best when you pick a blanket color that contrasts with the grass — cream against green, or charcoal against pale sand.
Start by laying the blanket on flattened grass and smoothing it with your hands so it doesn’t wrinkle in key frames. Then sit close and drape fabric edges over your legs or around your hands, keeping faces angled toward the light. Finally, take a set where one person gently lifts the fabric edge and you both look at each other as it settles.
Use a fabric brush or lint roller before you sit — grass fibers show up in bright light.
Avoid blankets that match the grass too closely — you lose the styled base.
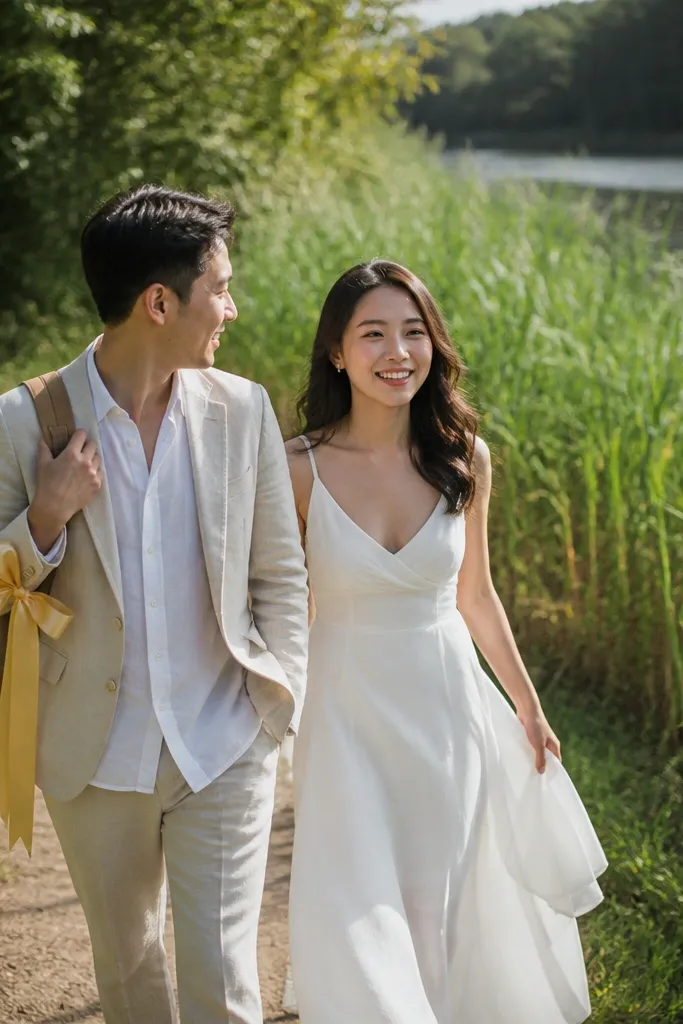
19. Riverside Reeds: Lean Back for a Clean Silhouette
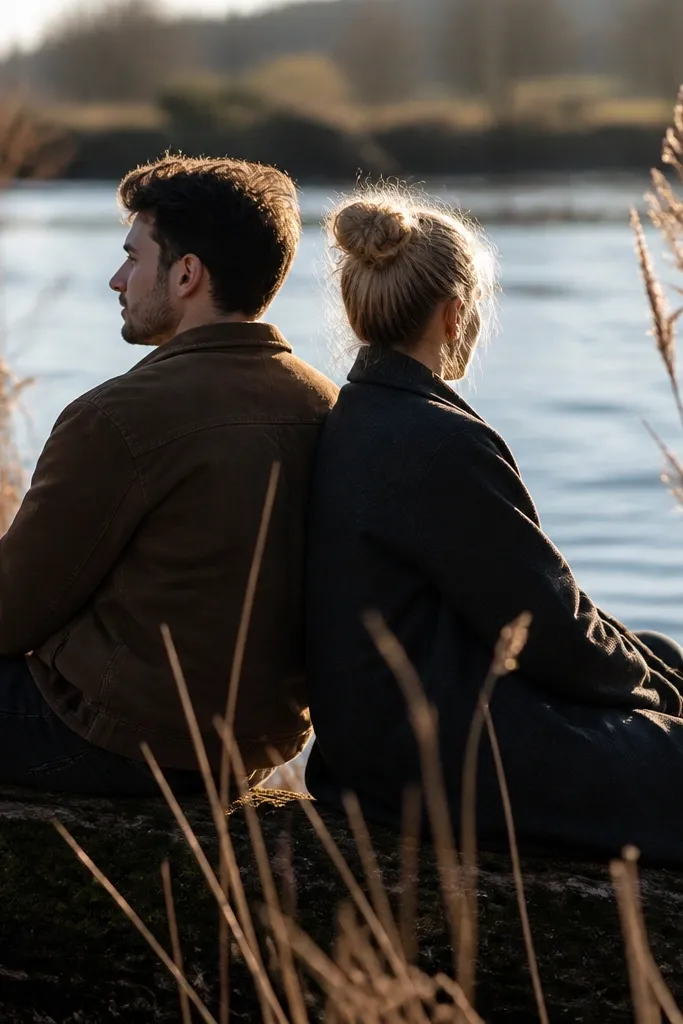
Reeds create a layered background that looks airy instead of busy. Leaning back gives you a clean silhouette against the softer river tones, and it keeps your arms from crossing awkwardly. This is ideal when the water has calm texture and the reeds are tall enough to frame your bodies. Choose late afternoon so backlight warms the scene and adds glow to the edges of your outfits.
Quick tipTie your bouquet ribbon so it doesn’t slap in the breeze and distract from faces.
Start by finding a reed patch where you can stand without getting tangled — you want controlled framing, not struggle. Then lean back slightly with chins up, so the light catches your faces and you keep eye contact. Finally, shoot both wide and mid shots — wide shows reeds depth, mid shows expressions and bouquet details.
Skip thisDon’t stand too close to reeds — it creates a messy tangle at shoulder height.
20. Trail Switchback: Walk Up, Hold Hands, Let the Path Lead
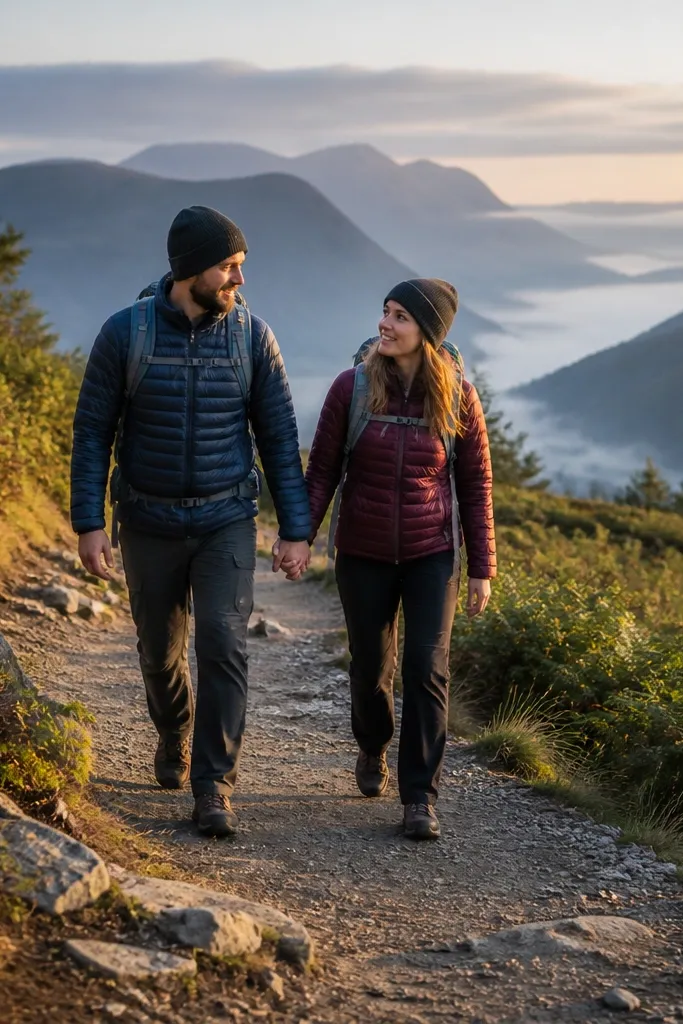
Switchback trails create a built-in sense of journey. The curve pulls the viewer through the scene and makes full-body shots look dynamic without exaggerated poses. This works best on hikes with clear sight lines where the path isn’t crowded with rocks or signage. It also photographs well in early morning when the light is softer and backgrounds stay calmer.
Start by choosing a switchback where you can see the curve lines behind you from where you’ll stand. Then walk up slowly while holding hands, stopping briefly at the cleanest angle for 5-8 frames. Finally, take one shot looking back toward the camera so your faces stay connected to the viewer.
Wear outfits with pockets or secure closures — hiking trails shake loose buttons.
Avoid cluttered trails with trail markers in frame — it breaks the aesthetic.
21. Waterfall Mist: Soft Focus Effects Without Losing Faces
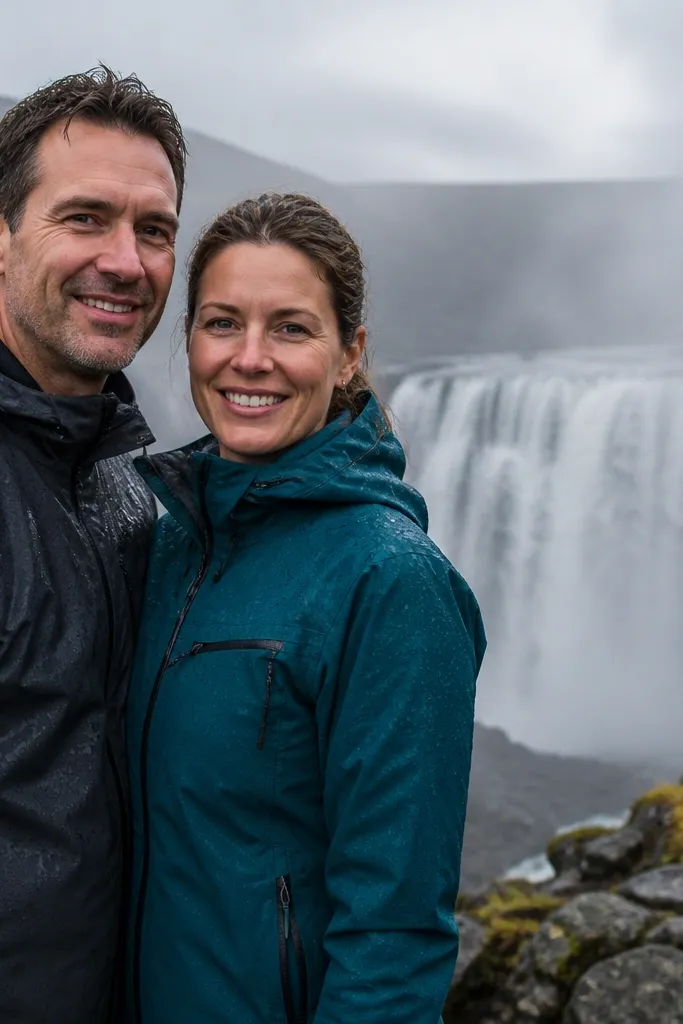
Waterfall mist adds a dreamy veil that makes backgrounds look smooth. It also creates natural sparkle in the air, which reads as romantic and creative. The trick is distance: too close and you lose sharpness and comfort, too far and the scene looks ordinary. This is best on overcast days or just after rain when the mist is present and the lighting is even.
Start by scouting a spot where you can stand safely with a clear view of the falls behind you. Then position yourselves with the waterfall slightly off-center so the spray doesn’t land directly on your faces. Finally, shoot in short bursts and keep faces angled toward the light, using the mist as a backdrop texture rather than something you fight.
Bring a compact towel and blot — mist sits on fabric and makes dark patches.
Don’t wear delicate lace or thin knits — mist clings and can sag fabric.
22. Meadow Sunset Silhouette: Hold Bouquet High, Simple Background
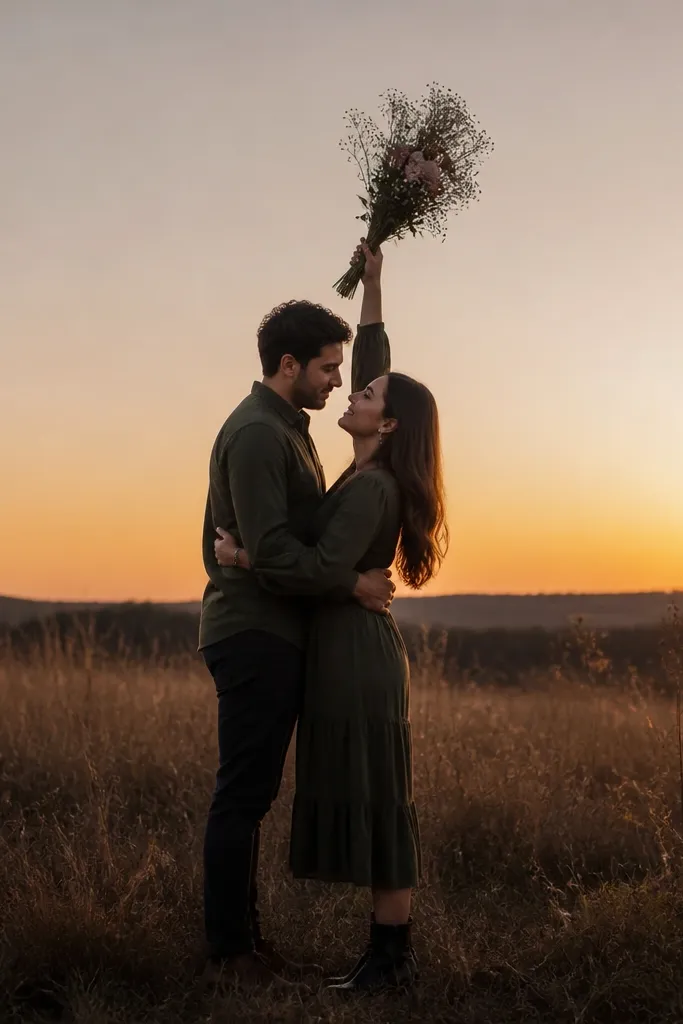
Silhouettes look clean and styled when the background is simple and the couple’s shape is strong. A meadow at sunset gives you wide negative space and a smooth sky gradient, which makes the bouquet look like a design element. This is ideal when you want dramatic mood without complicated poses. Keep the outfits coordinated and avoid tiny patterns that disappear against the bright sky.
Quick tipUse a bouquet with a defined silhouette — long stems and round blooms read better against sky.
Start by finding a spot where the horizon is visible and there are no tall buildings intruding. Then position the couple side-by-side and hold the bouquet slightly above chest level so it reads clearly against the sky. Finally, shoot when the sun is low and the sky is bright behind you, and take a quick set of backlit portraits plus a second set with faces turned toward each other for more detail.
Skip thisAvoid cluttered fields with random fences — silhouette backgrounds need space.
23. Urban Wall Texture: Lean Against Brick, Look Past the Camera
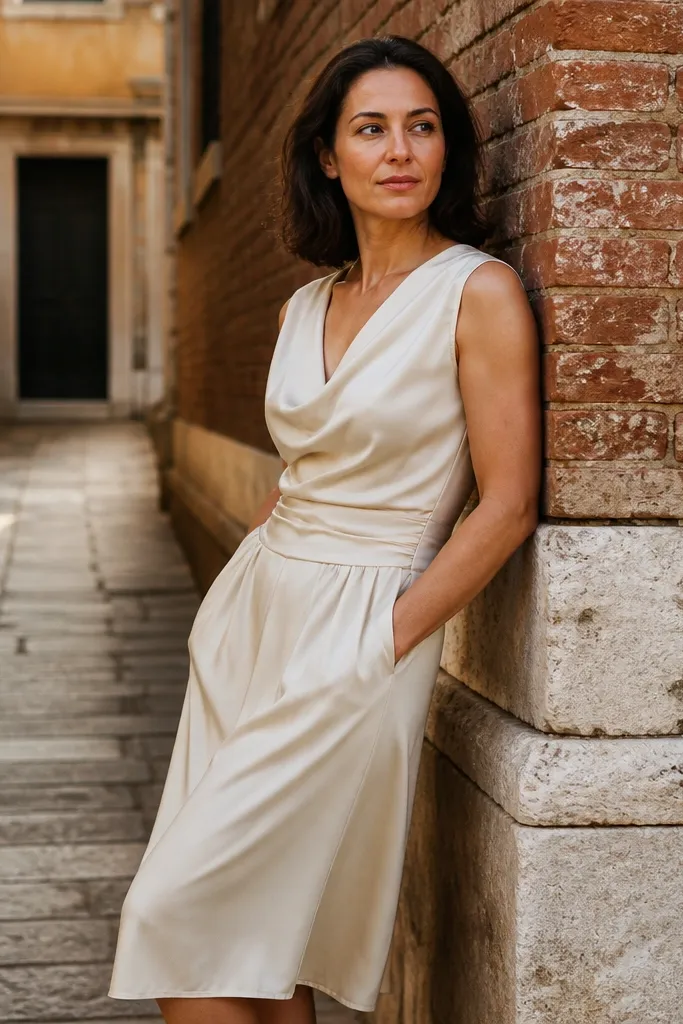
Brick and stone walls add texture that looks expensive on camera. Leaning against a wall gives structure to your posture and keeps hands from floating. The best part is the “look past” direction — it gives a candid editorial vibe while still looking intentional. This idea works well in cities where you can find a clean wall section with minimal graffiti and no busy posters.
Start by picking a wall with consistent color and texture so your background doesn’t shift behind your heads. Then lean in with hips angled and keep faces turned slightly away from the wall so the light hits skin. Finally, shoot from a slight angle, not straight-on, so the wall texture runs diagonally and adds depth.
Avoid glossy shoes on brick — they reflect harsh light and distract.
Don’t stand too close to the wall — you want space for a clean head-and-shoulders separation.
24. Lakeside Sunset Reflection: Walk Into the Mirror Water
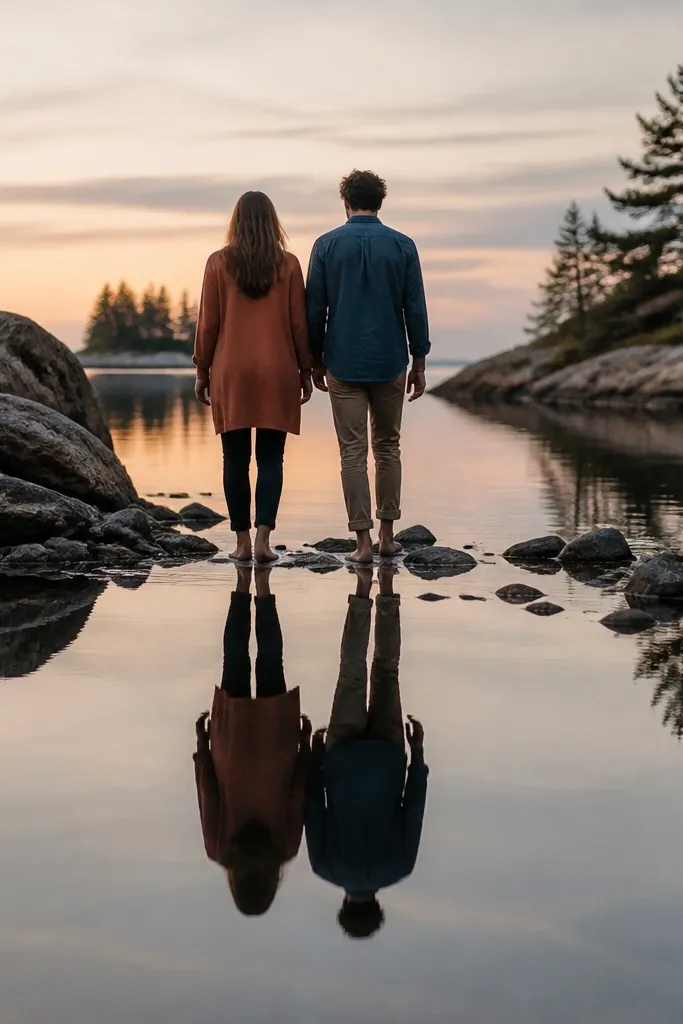
Reflections turn outdoor portraits into something graphic and intentional. When the water is calm, you get a mirrored line that frames your bodies and makes even simple poses look styled. This works best on lakes and sheltered coves where wind is low. Pick a time right before sunset so the color gradient is strong and the reflection still holds.
Start by scouting where the water stays still and where the reflection line is smooth. Then have the couple walk slowly toward the camera until the reflections sit directly under you. Finally, pause for 6-10 frames with relaxed faces and then step slightly apart to create two reflection lines for variety.
Choose outfits with solid colors — patterns ripple in reflections and get distracting.
Don’t shoot when wind is kicking up ripples — reflections turn into random texture.
25. Snowy Pine Path: Cozy Wrap, Slow Steps, Soft Light
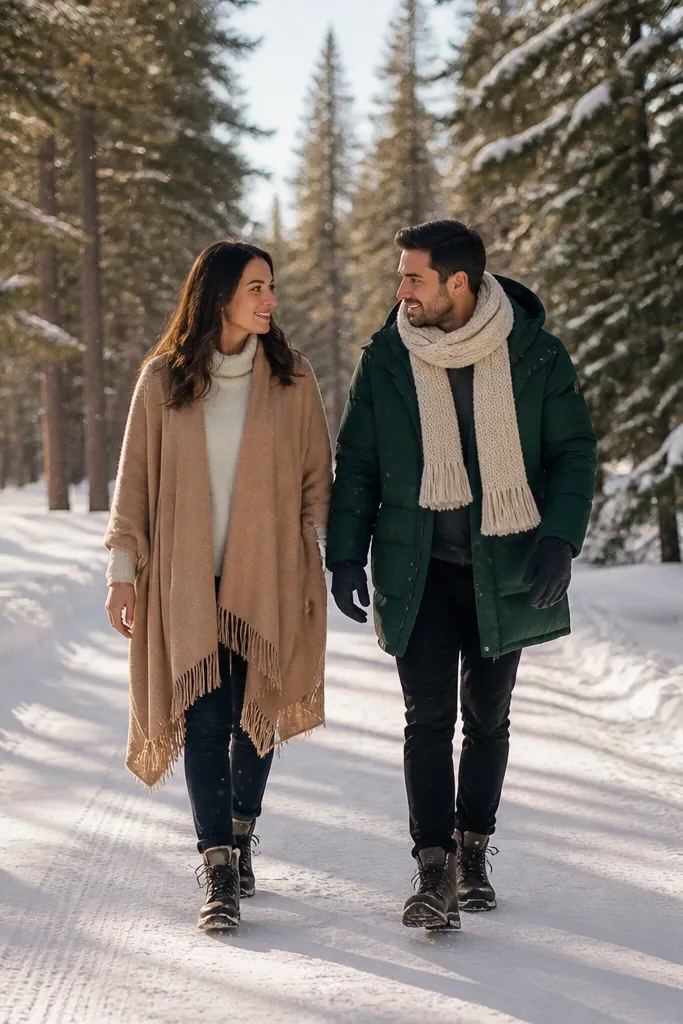
Pine paths in snow look like a postcard, but the photos only work if you keep the motion slow and the styling cozy. The dark trees give contrast, and the snow brightens faces without harsh shadows. This idea is best during light snowfall or right after, when the ground is clean and the air feels soft. It also photographs well for couples wearing warm tones like camel, burgundy, and forest green.
Start by arriving after a fresh snowfall window, then walk slowly so the path stays clean and you don’t kick up grey slush. Then have one person hold the other’s arm and keep your bodies close, with faces angled toward the camera as you take steps. Finally, shoot at two points — one wide shot down the path and one closer shot where the pine branches frame your heads.
Use a matte setting on hair if you have flyaways — snow light makes shine look oily.
Avoid stepping on uneven icy patches — you’ll tense up and it shows.