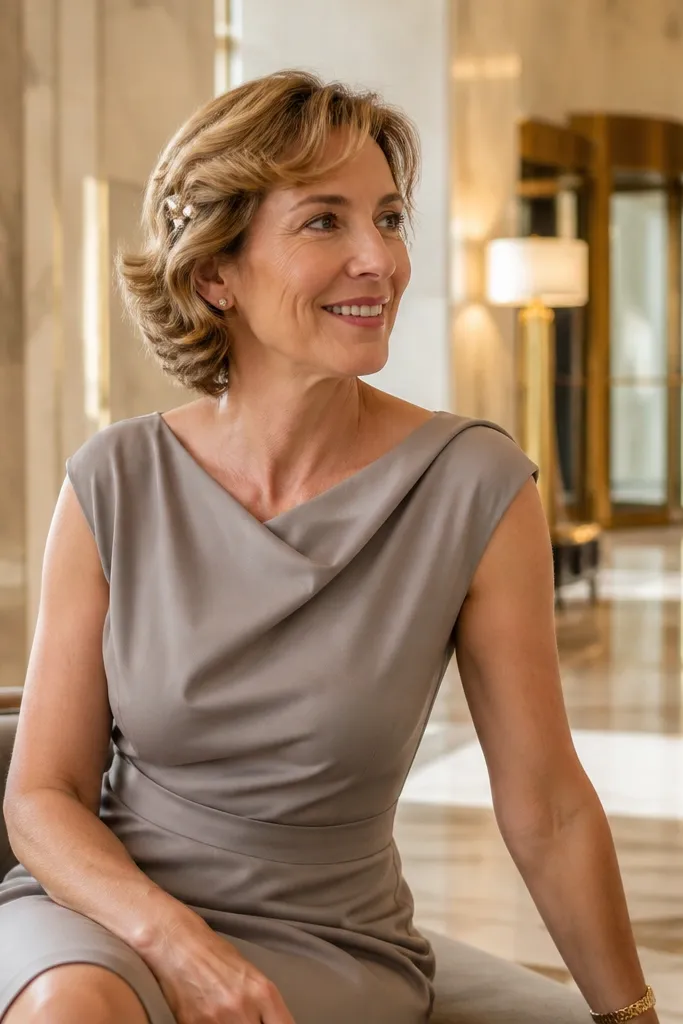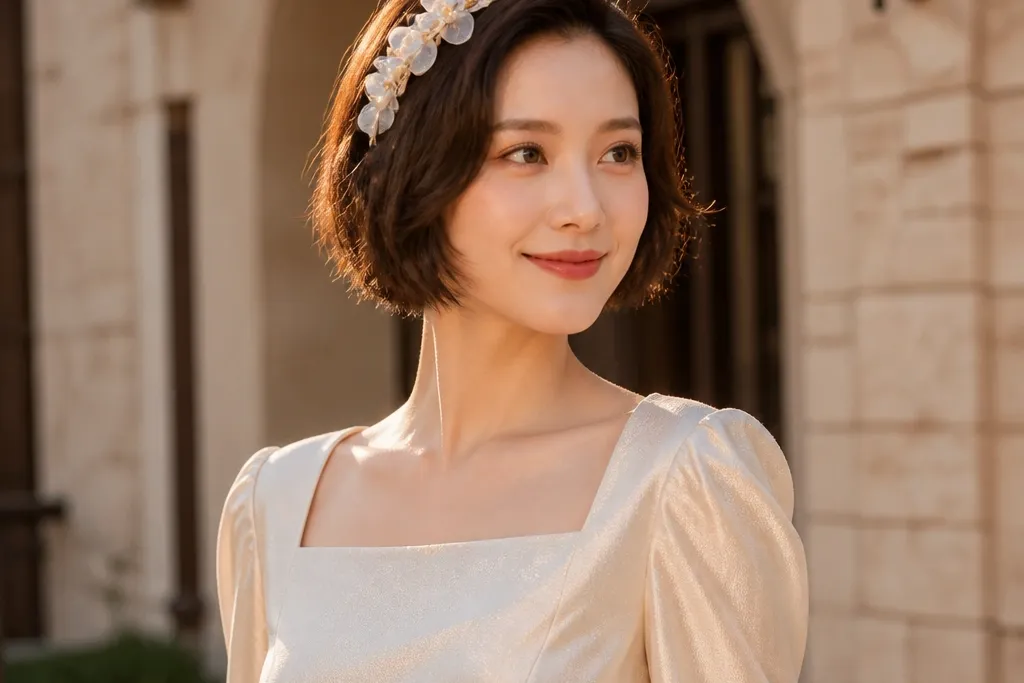
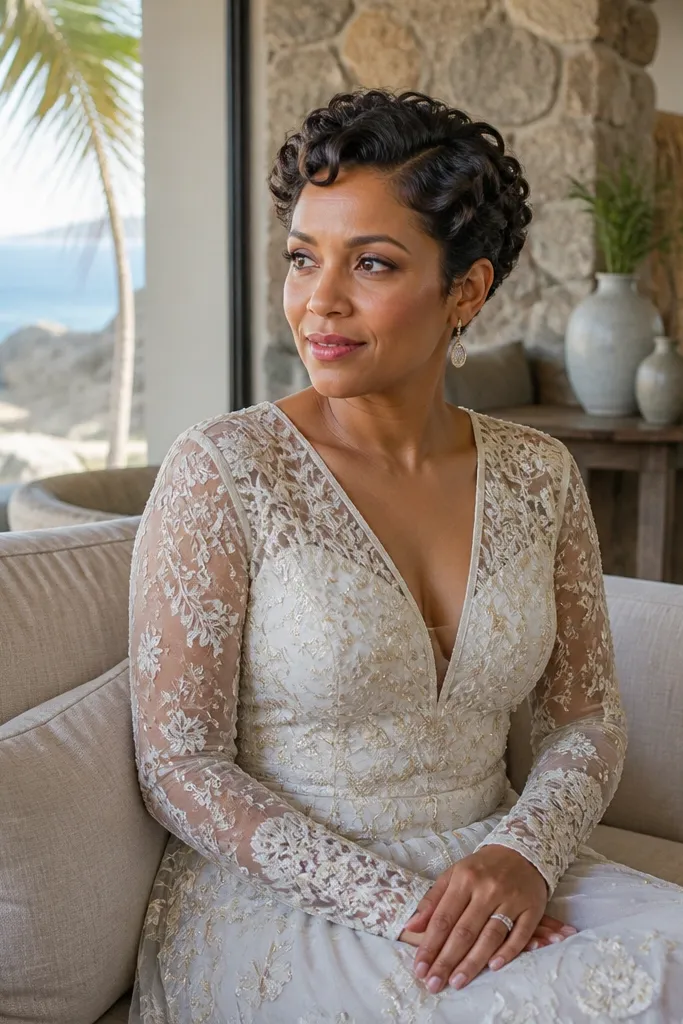
1. Sculpted Side-Swept Pixie with Pearl Pin Cluster
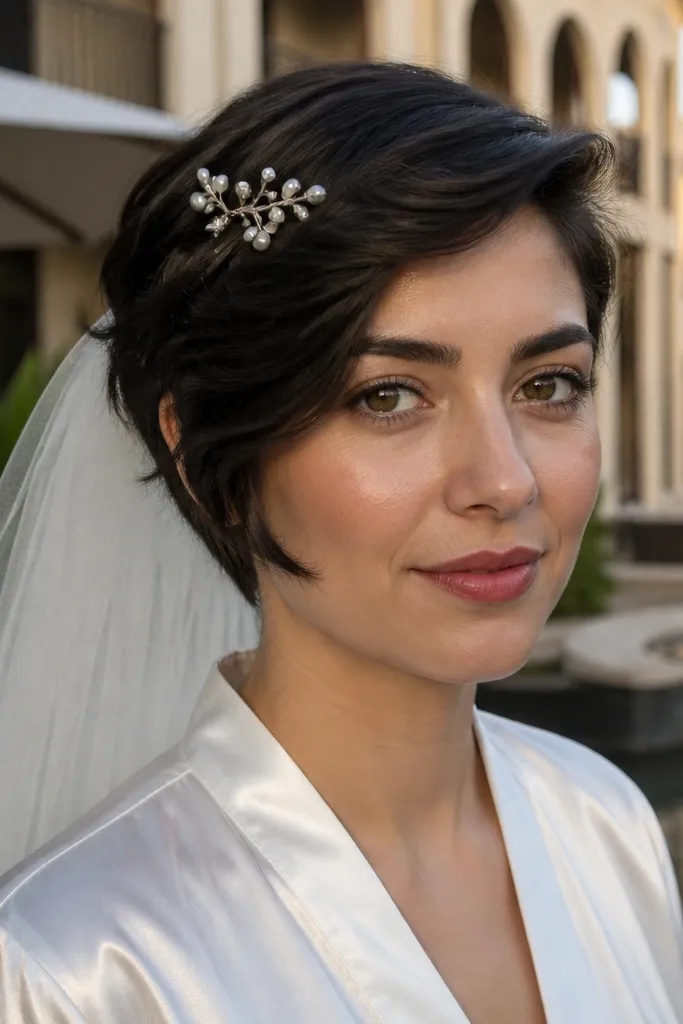
This look turns a pixie into a styled, bridal frame instead of a “haircut day.” The side sweep gives you a long line across the cheek, and the pearl pin cluster makes the front read as intentional from every angle. It photographs especially well when your hair has a bit of natural wave or you add a soft bend with heat. Choose this if you want something romantic without sacrificing your short haircut shape.
Start with damp hair and add a root-lifting mousse, then blow-dry with the dryer angled to push hair toward your chosen side. Use a small-barrel curling iron to bend the front pieces inward, not tight curls — think soft arcs. Finish by pinning a tight cluster of pearls or a small comb near the temple, then mist with a light-hold spray so the pins stay put without matting the hair.
Bring 6-10 bobby pins in your emergency kit and keep them the same color as your hair so touch-ups disappear.
Don’t place pins too low — if they sit on the ear, photos read like “random clip,” not bridal styling.
2. Half-Up Crown Braid on a Short Bob
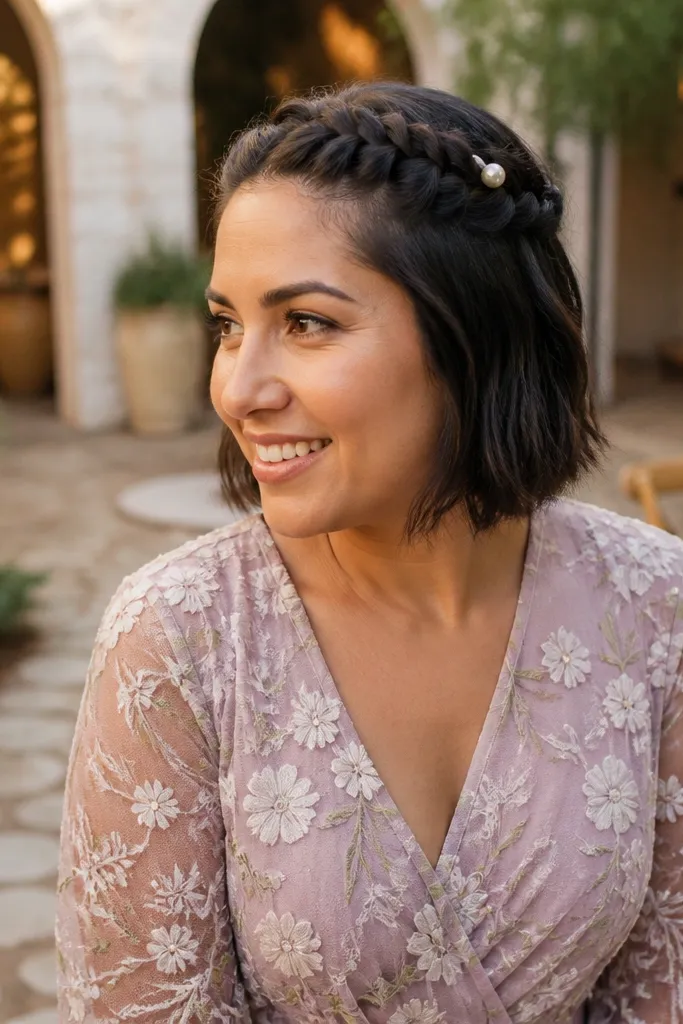
Part your hair and start the braid at one temple, taking small sections from the front so the braid looks smooth on camera. Work across to the other side, keeping tension even but not tight — you want a soft, rounded crown. Secure the end with a small elastic or pin, then tuck the remaining short pieces so they sit behind the braid line.
A crown braid is one of the most photogenic ways to make short hair look ceremonial. It adds structure across the head so your hairline looks neat even when the rest is soft. For short bobs, the braid gives you a “built” look without needing extra length for a full braid. This is a great choice for a wedding with a veil or headpiece because the braid anchors the styling and keeps the top from collapsing in photos.
Skip thisSkip messy, chunky sections — on short hair they can look bulky instead of bridal.
Quick tipUse a texturizing powder on the sides before braiding — it grips better and makes the braid look fuller.
3. Low Twisted Bun with Face-Framing Tendrils
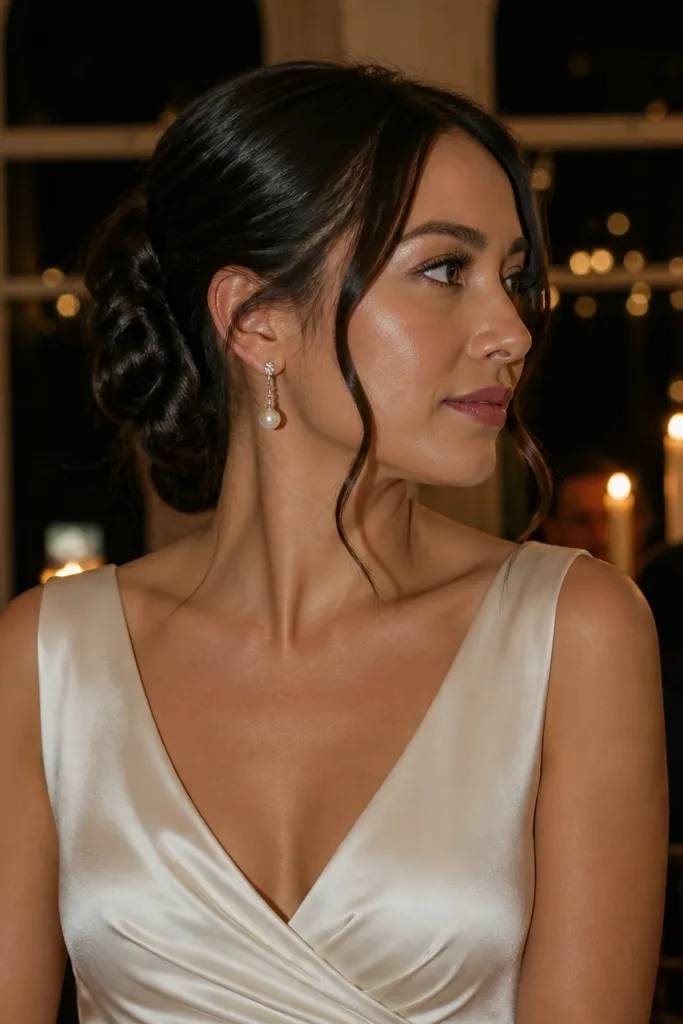
A low twisted bun makes short hair feel classic and wedding-ready without needing long length. The twist creates ridges that catch light, so the bun looks dimensional in photos. Add two face-framing tendrils so your face doesn’t look boxed in by a fully pinned style. Pick this when you want elegant and polished, but still “soft” instead of stiff.
Gather hair at the nape and twist sections into a low coil, using bobby pins in a crisscross pattern for stability. Leave two thin front pieces free, then bend them with a curling iron to create gentle S-shapes. Finish by smoothing flyaways with a tiny amount of hair wax or cream on your fingertips, then lock everything with a flexible hold spray.
If your bun won’t fully close, secure the twist first and hide gaps with a small decorative pin comb.
Don’t leave the bun too high — short hair buns look best near the nape where they look intentional.
4. Vintage Finger-Wave Bob with Side Comb
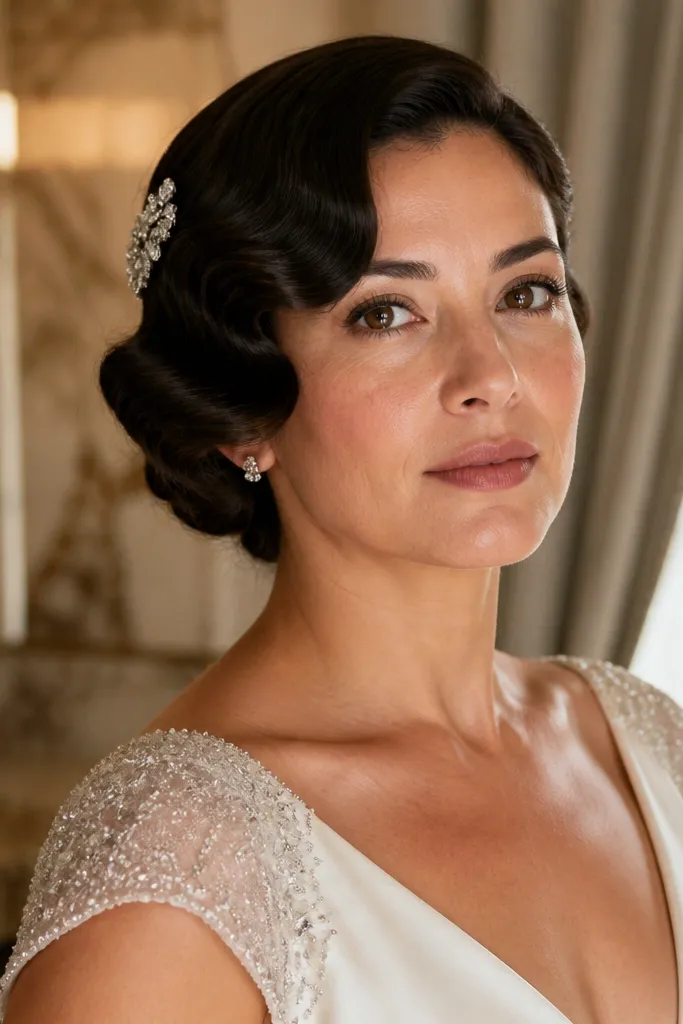
Finger waves turn a short bob into a true vintage bridal look. The waves create a pattern that reads clearly in close-up photos, especially with a glossy finish. A side comb or barrette adds a clean, sparkly focal point without fighting the wave pattern. This look is best for weddings with a classic dress vibe and for anyone who wants something styled, not casual.
Start with damp hair and apply a smoothing gel, then create wave sections using your fingers and a rat-tail comb. Let the waves set fully by either air-drying with clips or using a cool setting, then remove clips without brushing. Add a side comb where your part meets the wave line, then mist lightly with shine spray so the wave pattern stays crisp.
Plan a slightly earlier styling window - finger waves need full set time to look sharp.
Don’t brush finger waves after they set — it turns the pattern into fluff.
5. Messy Textured Bob with Featherlight Veil Placement
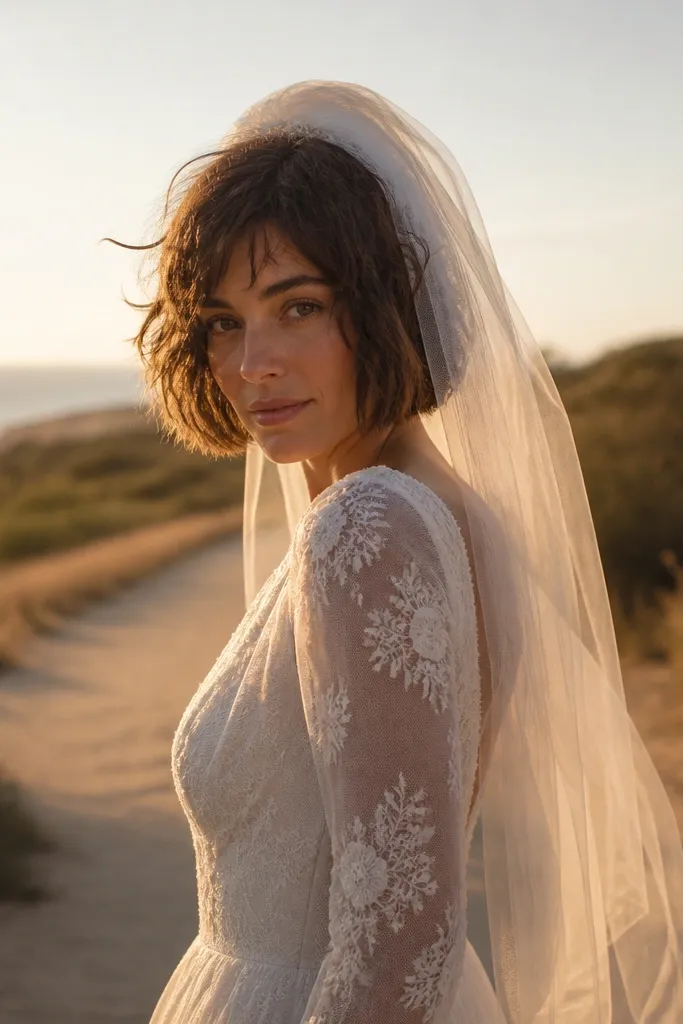
This is the “relaxed but bridal” option for short hair. The messy texture gives you volume and movement, while the veil placement keeps the look ceremonial instead of random. Put the veil high so it frames your face and doesn’t crush the shape at the back. It’s a strong choice for outdoor photos where wind and movement make loose texture look natural.
Blow-dry with your head flipped for root lift, then use a curling iron to add uneven bends to the ends. Rub a small amount of styling cream through the mid-lengths, then lightly separate strands with your fingers. Attach the veil comb right at the crown so it sits above the densest volume, then finish with a flexible hold spray.
Use a veil comb with strong teeth — short hair needs grip, not sliding clips.
Skip a heavy gel base — it can make texture look greasy under daylight.
6. Soft Pin-Curl Waves for a Pixie Wedding Front
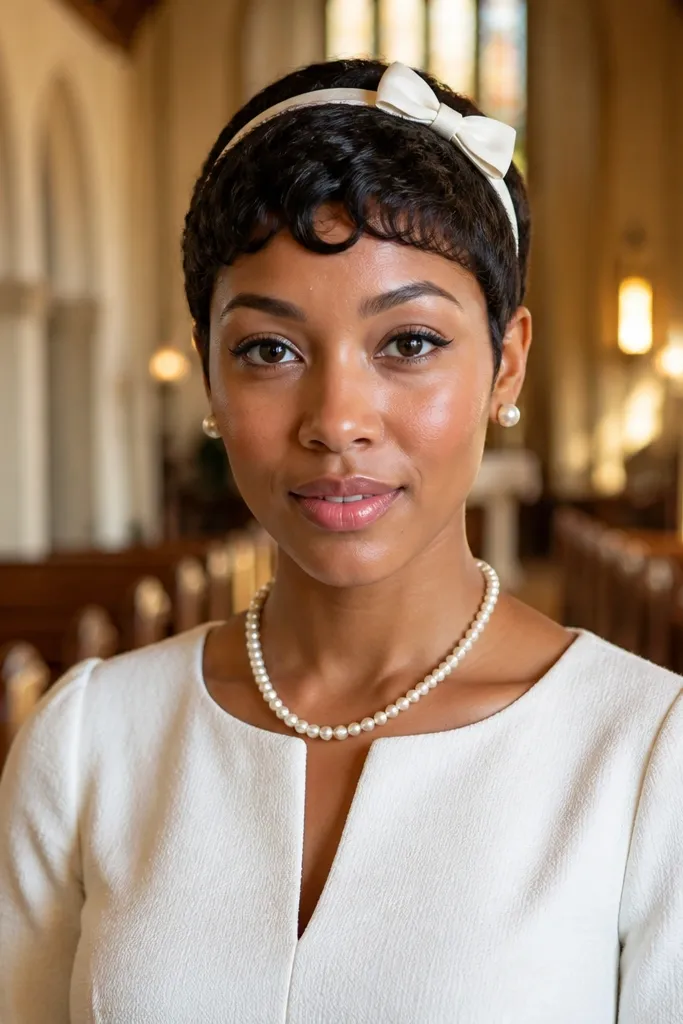
Pin curls are the fastest way to add “bridal polish” to very short hair. You can’t rely on length, so you rely on shape: the pin curls create a wave pattern right where the camera focuses — the front. This look is especially flattering if your pixie has a short fringe that you want to dress up without making it look like a wig. It reads romantic and intentional even if your hair is under 2 inches at the back.
Dampen the front fringe, then roll small sections into pin curls and secure with flat clips close to the scalp. Let them set until fully cool, then remove clips and gently comb with your fingers only. Place a tiny rhinestone barrette or a few pearl pins along the side to finish the front framing.
Set pin curls with a little hairspray before clipping — it helps them hold through ceremony photos.
Don’t make pin curls too large — on short hair they can collapse into uneven lumps.
7. Sleek Bob with Glossy Center Part and Tucked Ends
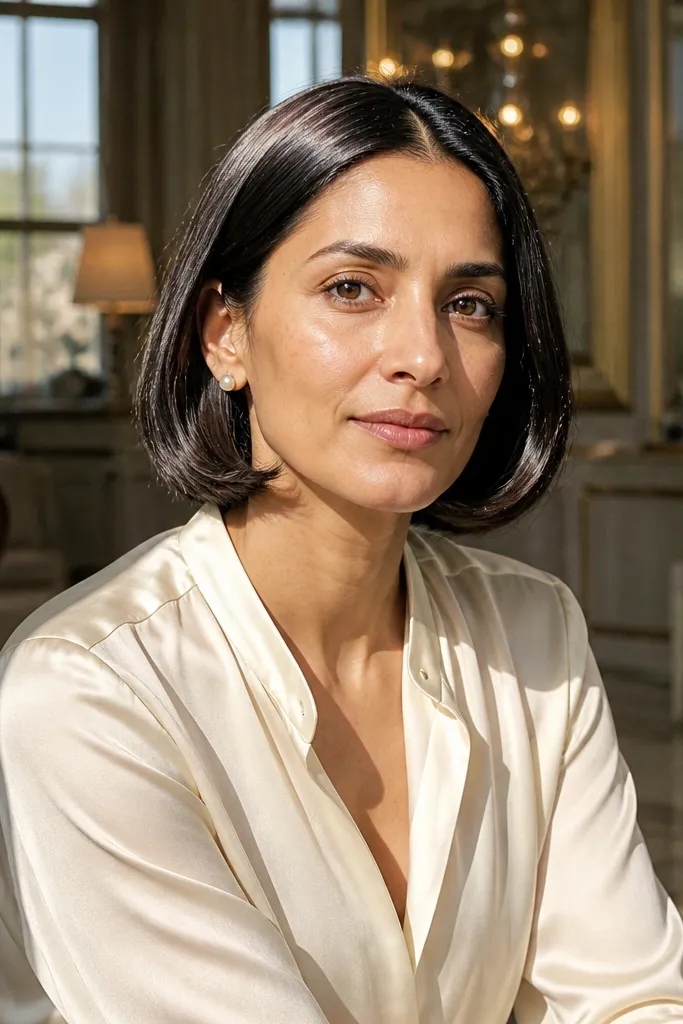
Start with heat protectant, then blow-dry straight and brush for a smooth base. Flat iron in small sections, then tuck the last inch of each side slightly behind itself so the ends don’t flip. Finish by applying a shine serum to the top layer only, then secure any flyaways with a light mist and a few bobby pins at the crown if needed.
If your goal is “beautiful and clean,” a sleek bob is hard to beat. The center part creates a symmetrical frame, and tucked ends make the whole look feel dressed up without extra accessories. This is best for straight hair or hair that can be smoothed quickly with a flat iron. It photographs like a magazine cover because the shine and lines stay consistent across the day.
Skip thisSkip thick hairspray over the whole head — it dulls shine and looks chalky in close-up.
Quick tipUse a small amount of shine serum — if it touches your part line, it can look greasy in flash photos.
8. Braided Halo from Short Layers with Tiny Rhinestone Pins
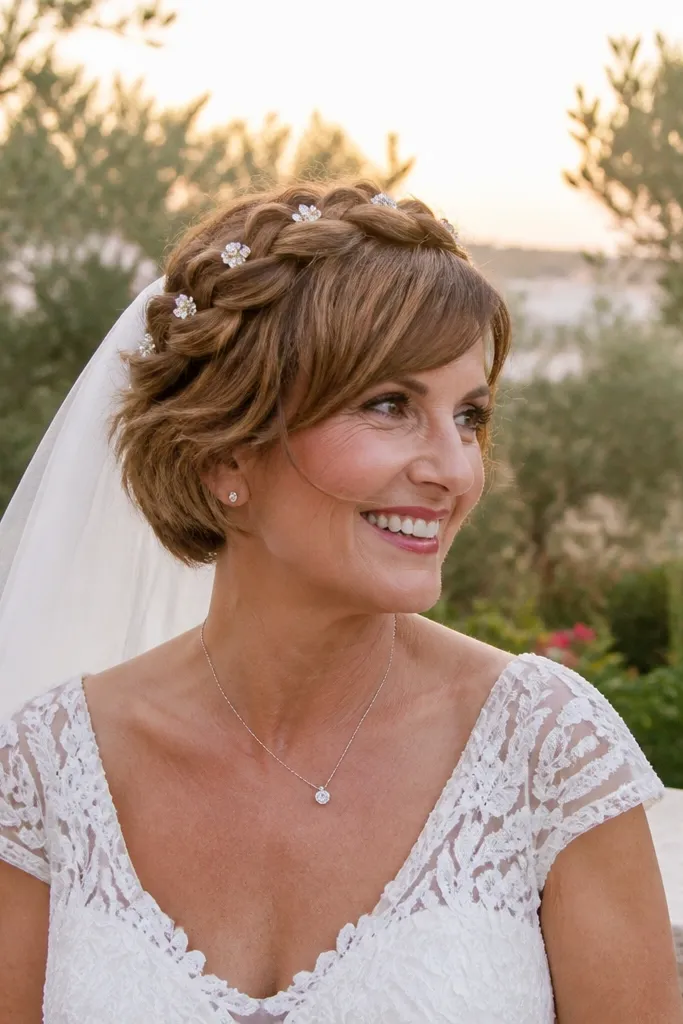
Part your hair slightly off-center and braid small sections around the head, pinning as you go to keep the halo even. Use a thin elastic at each join if your layers are short, then tuck and hide it under the next section. After the halo is complete, add rhinestone pins in a staggered line at the temples for a balanced sparkle.
A halo braid is dramatic on short hair because it creates a crown shape you can’t get from length alone. Short layers can make the braid look too chaotic, so the trick is using small rhinestone pins to guide loose strands into place. The result looks high-end and bridal, especially in daylight where the pins sparkle without overpowering. Choose this if you want a statement look that still feels wearable.
Skip thisDon’t pull the braid too tight — short halo braids should sit flat but not compress your scalp.
Quick tipIf your hair slips, braid with slightly damp hair and let it dry fully before removing any temporary clips.
9. Twisted Side Roll with Minimal Pearl Barrette
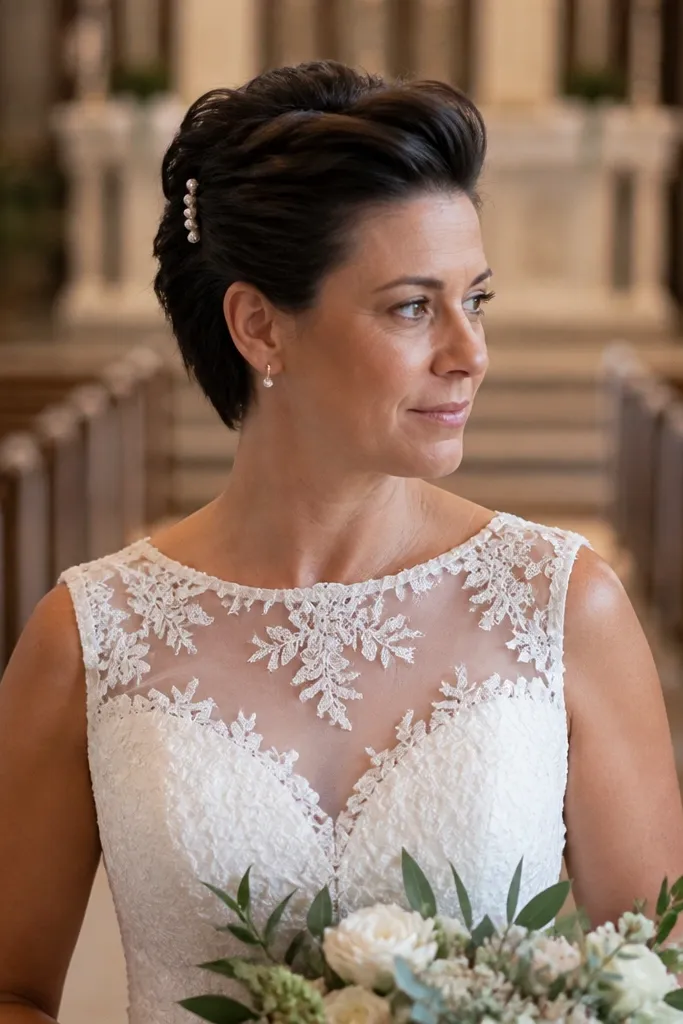
This look is clean, modern, and very flattering for short haircuts with volume at the crown. The twisted side roll gives you height and a sculpted silhouette, and the minimal pearl barrette adds bridal polish without making the hair look heavy. It’s a strong pick if you hate lots of pins or bulky headpieces. The side roll also helps your hair stay in place through wind and movement.
Create a deep side part, then twist two to three sections from the front toward the back and pin them into a small roll at the side. Smooth the top layer with a light styling cream so it looks controlled on camera. Add the pearl barrette right where the roll meets the scalp, then mist with a flexible hold spray to set the twist.
Choose a barrette that’s wide enough to cover the twist seam — hiding the seam is what makes it look expensive.
Don’t overdo the twist thickness; if it’s too bulky, short hair looks “lopsided bun.”
10. Wedding Volume Bob with Crown Lift and Soft Waves
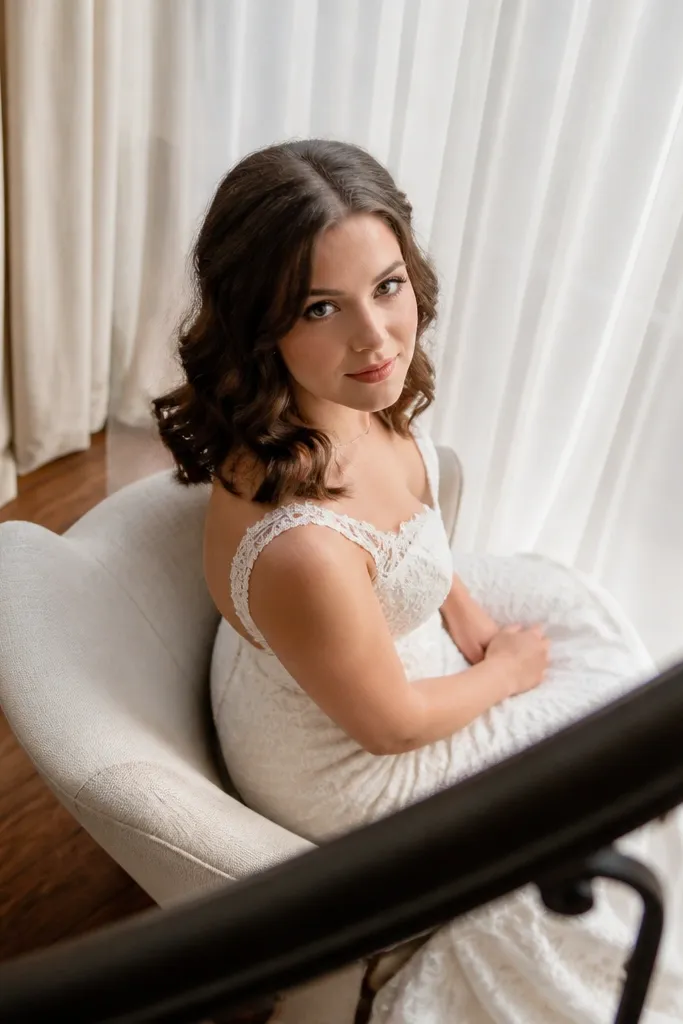
This is the classic “bridal hair, but still your hair” look. Crown lift makes short hair look fuller, and soft waves keep it romantic instead of helmet-like. The best part is how photogenic it is from above — the crown looks airy, and the waves frame the cheek. Pick this for indoor venues where you want fullness under warm lighting.
Use a root spray or mousse and blow-dry for crown lift by lifting sections upward with a round brush. Curl only the mid-lengths and ends, leaving the roots straighter so the volume stays light. Brush through gently with fingers, then set with a medium-hold spray and finish with a light mist of shine on the top layer.
Curling the ends in different directions makes the waves look natural and avoids a uniform look.
Don’t curl from the root — it crushes crown lift and makes short hair look flat in photos.
11. Headband-Forward Pixie with Swarovski-Style Sparkle
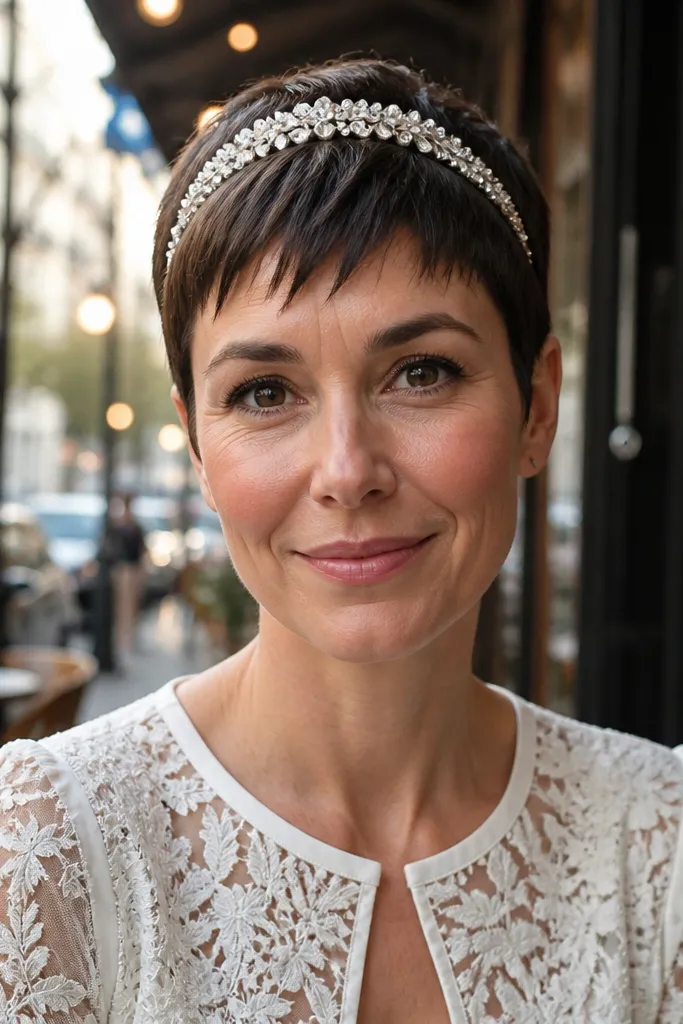
Style your pixie with a blow-dry to create a bit of lift at the front, then smooth the sides so the headband has a clean canvas. Place the headband slightly above your natural hairline so it doesn’t sit on your eyebrows, then secure with bobby pins hidden in the sides. Finish with a light hairspray around the headband edges so it doesn’t shift.
Headbands are the simplest way to make short hair look bridal fast. When the headband sits at the hairline, it creates a clear focal point that reads in every photo — front, side, and during dancing. A sparkle headband works even if your hair is too short to pin into a bun. Choose this if you want a clean, glam look without complicated styling steps.
Skip thisSkip a headband that’s too wide — wide bands can overwhelm a pixie and look costume-y.
Quick tipIf you wear a veil, pick a headband with a thin band so the veil comb can still sit flat.
12. Waterfall Micro-Braid Around a Short Bob
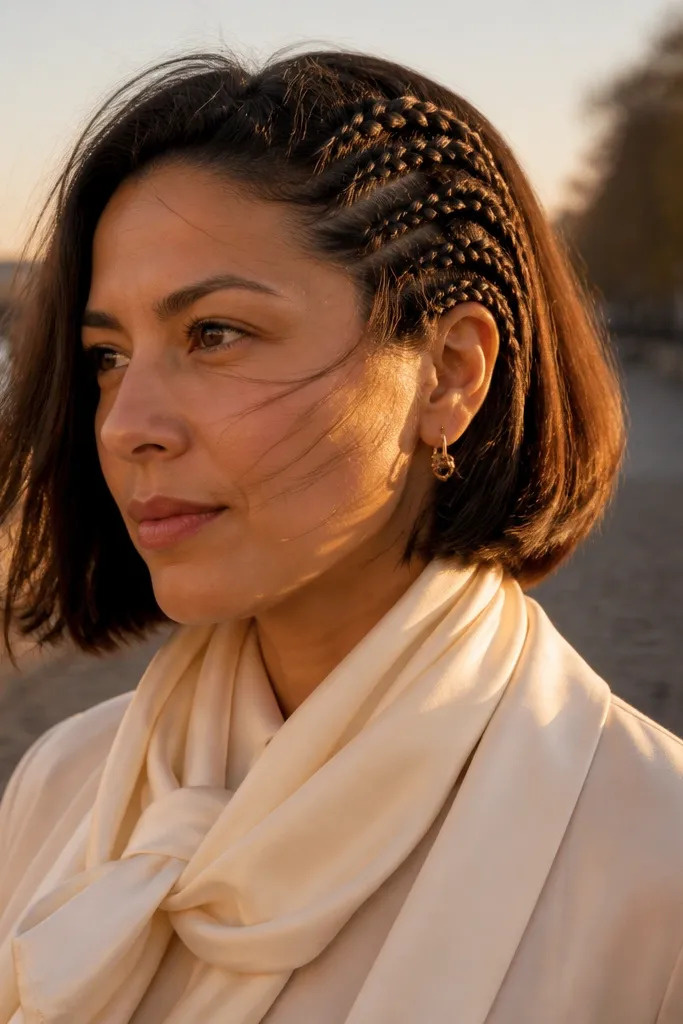
Waterfall braids look delicate, but they’re also very flattering on short hair because the braid pattern adds motion where length is limited. A micro-braid keeps the look refined, and the “cascading” sections create a romantic line across the side of your face. This works best on bobs that have a bit of length at the ends to tuck into the braid. It’s a great fit for garden weddings and soft, airy dresses.
Part your hair and take a small section near the crown, then start a simple 3-strand braid. Every second stitch, drop one section and replace it with a new small piece from above to create the waterfall effect. Pin the end discreetly behind your ear, then mist with spray so the braid stays crisp through the day.
Use a slightly stronger hold spray on the braid itself, not the rest of your hair.
Don’t make the waterfall pieces too big — on short hair they look like chunky knots.
13. Rose-Cluster Twist Bun for Extra-Short Hair
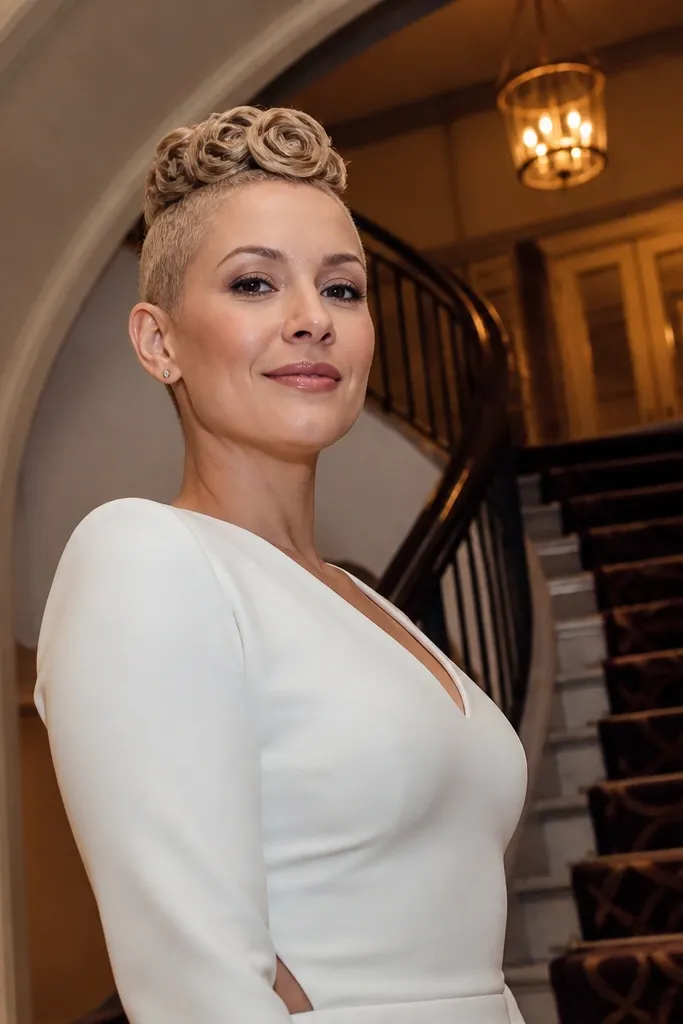
This look uses small twists instead of relying on long hair for a bun. The result looks like a cluster of roses, which is exactly what makes it bridal and photogenic. It’s flattering on cropped cuts because the twists create height and shape at the crown. Choose it if you want something romantic but still structured.
Section hair into 3-5 small chunks at the crown, then twist each chunk and pin into a compact coil. Add a little styling paste so short pieces grip, then tuck ends under nearby coils. Finish by placing a decorative comb or a few pearl pins where the coils meet, so the cluster reads intentional and centered.
If your hair is slippery, apply dry shampoo at the crown before styling; it adds grip without looking powdery.
Don’t use heavy wax on the whole head — it can make short twists look shiny in a cheap way.
14. Feathered Bob with Side-Swept Fringe and Rhinestone Comb
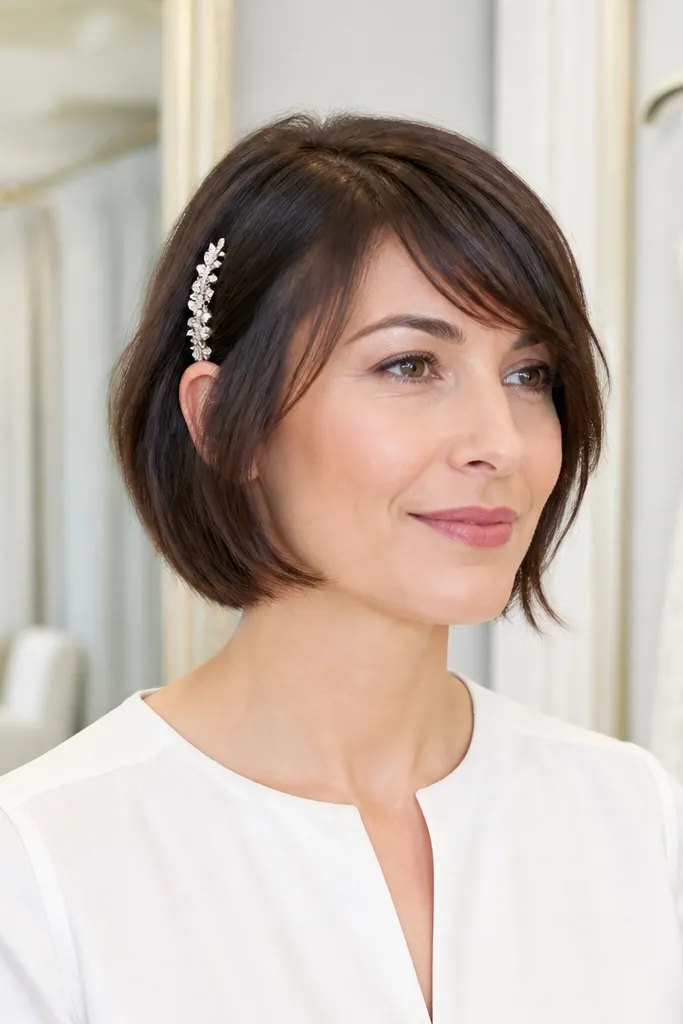
This style is built for face-framing beauty. Feathered ends add movement, and the side-swept fringe hides any uneven growth that can happen on short cuts. A rhinestone comb placed along the side seam gives you a clear bridal focal point without taking over the entire look. It’s a great option for brides who want glam but still want their hair to look light.
Blow-dry with a brush to create a soft lift at the roots, then angle the fringe across the forehead. Use a curling iron to feather just the ends — keep the curl loose so it looks like movement, not ringlets. Secure the side with a small comb or pin and finish with a flexible hold spray to keep the fringe from falling flat.
Match your comb metal to your jewelry metal so the sparkle reads cohesive.
Skip strong curls — feathered bobs need softness to look bridal, not curly.
15. Half-Up Mini Bow from Short Hair Clips
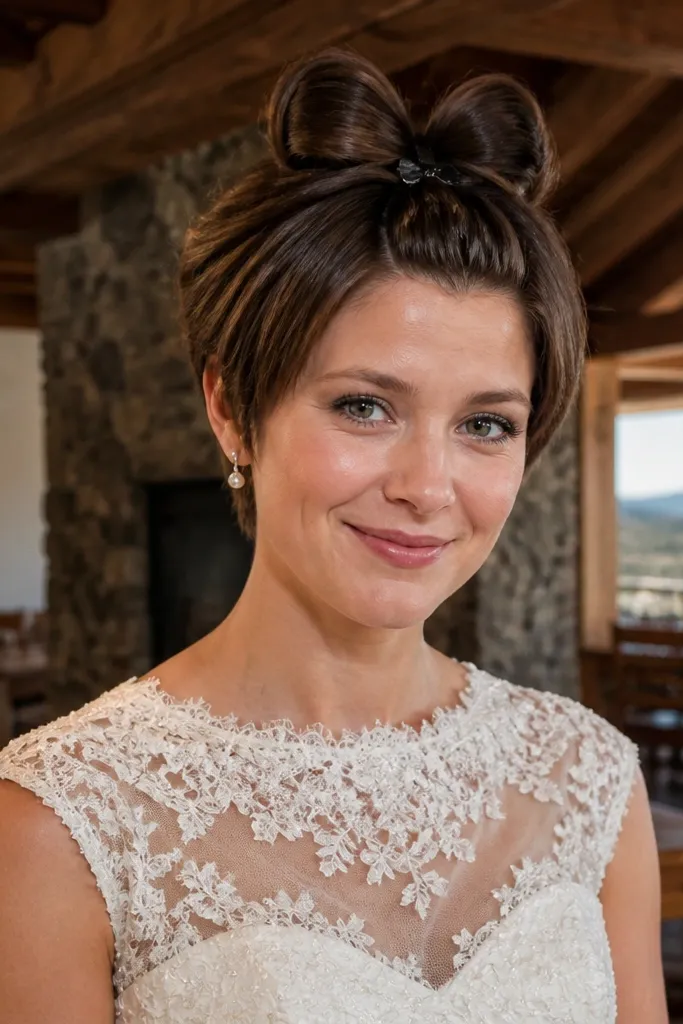
Take a small top section above the ears and clip it back, then divide it into two pieces for the bow loops. Roll each loop upward and pin tightly so the bow holds shape. Add a small accent pin at the center and gently smooth the remaining hair with a light spray for a polished finish.
A mini bow is adorable, but on short hair it can look messy unless it’s built with clips and structure. This version uses a small half-up section and shapes it into a bow with bobby pins, so it reads crisp and wedding-appropriate. It’s perfect for brides who want cute without going full costume. Photographically, the bow sits high and stays visible in portraits.
Skip thisDon’t rely on hair alone for the bow form — you need pin structure to keep it from collapsing.
Quick tipUse a bow comb or a satin ribbon strip that matches your dress — the center detail makes it look intentional.
16. Sleek Wet-Look Bob with Pearl Headband
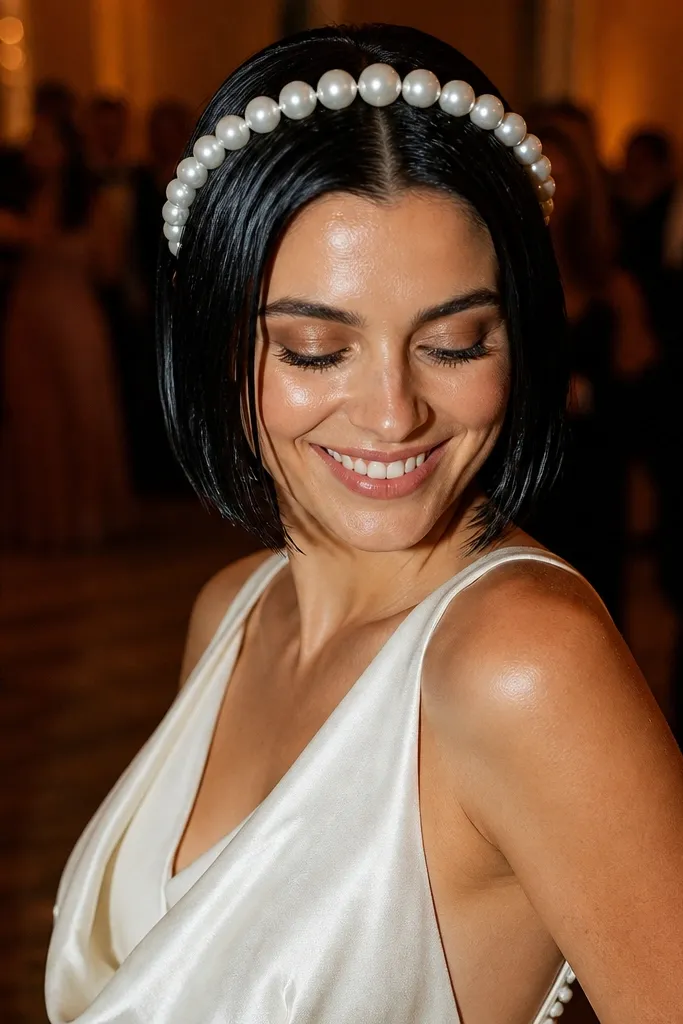
Start with damp hair and apply a smoothing gel, then blow-dry straight until it feels firm. Use a flat iron lightly for extra smoothness, then apply a tiny amount of shine product only on the top layer. Place a pearl headband at the hairline and secure with hidden pins, then mist with a light spray so it stays sleek all night.
The wet-look finish looks modern and bridal when it’s controlled, not greasy. On a short bob, the shine catches light and makes the hairline look sharp. Pair it with a pearl headband for instant wedding cues without extra styling. This works best for evening receptions and photos with strong lighting where shine reads beautifully.
Skip thisSkip heavy gel buildup — too much product looks wet in a bad way in daylight.
Quick tipKeep a dry cloth in your kit — if you touch your hair, a quick wipe prevents smudged shine.
17. Mini Braided Bun with Side Part and Pearl Drops
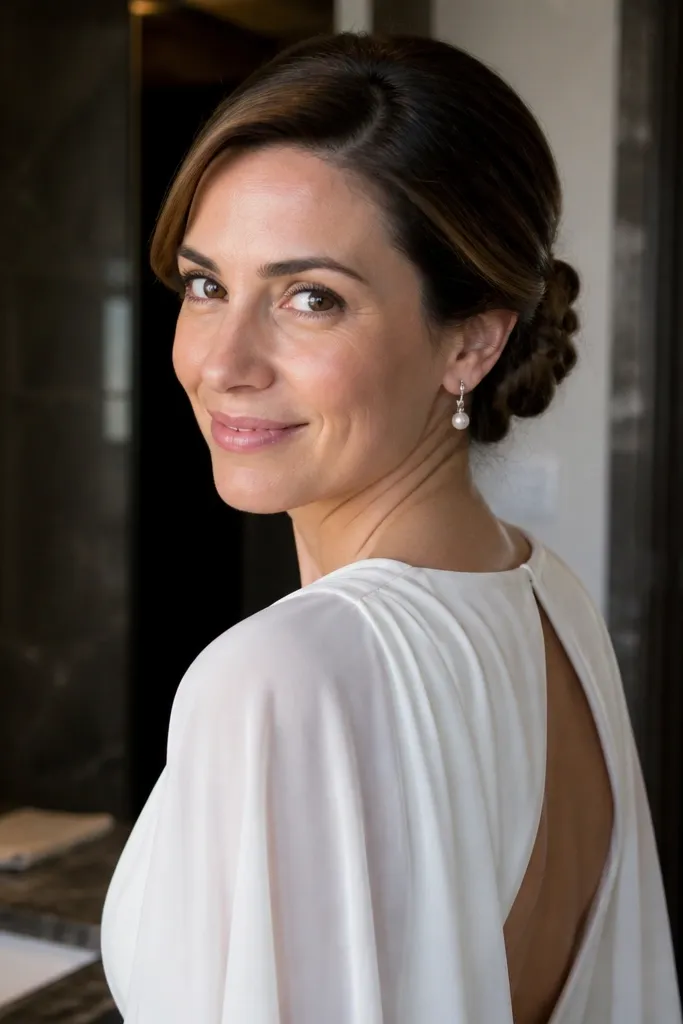
Part your hair and braid a small section from each side, then connect them and pin into a compact bun at the back/side. Secure with bobby pins and one decorative pin that covers the join. Add pearl drops using hair-safe wires or small pin attachments, then set the whole style with medium-hold spray.
This look blends braid texture with bun structure, which is the best combo for short hair. The mini braided bun looks detailed even if your hair isn’t long enough for a full updo. Side parting adds shape and makes the bun sit neatly rather than flat. Pearl drops near the side add a soft bridal sparkle that shows up in close portraits.
Skip thisDon’t make the bun too tight — short hair needs a little lift so it doesn’t look glued to the scalp.
Quick tipPlace pearl drops where your earrings end so the look balances on camera.
18. Curled Under Bob with Veil-Friendly Crown Pinning
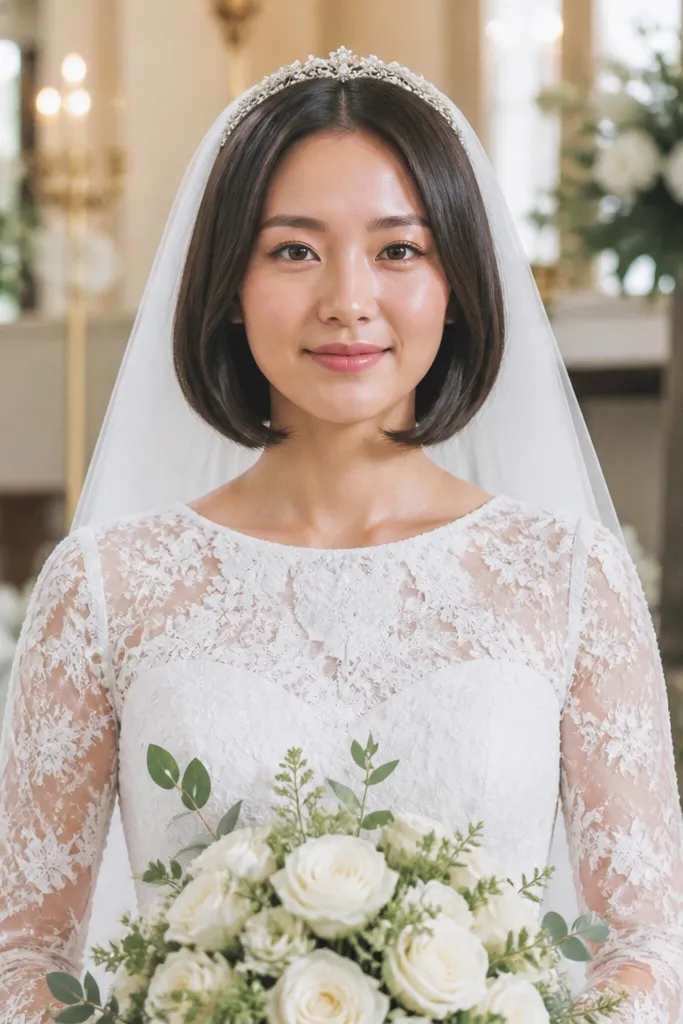
A curled-under bob is naturally flattering and reads bridal without extra drama. It frames the face cleanly and gives you a smooth silhouette that veils sit on easily. The crown pinning keeps the veil from sliding — that’s the difference between “pretty” and “stays perfect during photos.” Choose this if you want classic and calm, with just enough curl to look styled.
Blow-dry and curl the ends under using a round brush, then set the shape with a light mist. Pin the top sections lightly at the crown to create a stable base for your veil comb. Attach the veil comb directly onto the pinned base, then finish with spray only around the crown so the veil doesn’t shift.
Do a quick veil test at home by walking and turning your head — if it slides, adjust the pinning before the wedding day.
Skip pinning the veil over loose, unpinned hair — it shifts and ruins the crown shape.
19. Pin-Straight Pixie with Minimal Barrette at the Crown
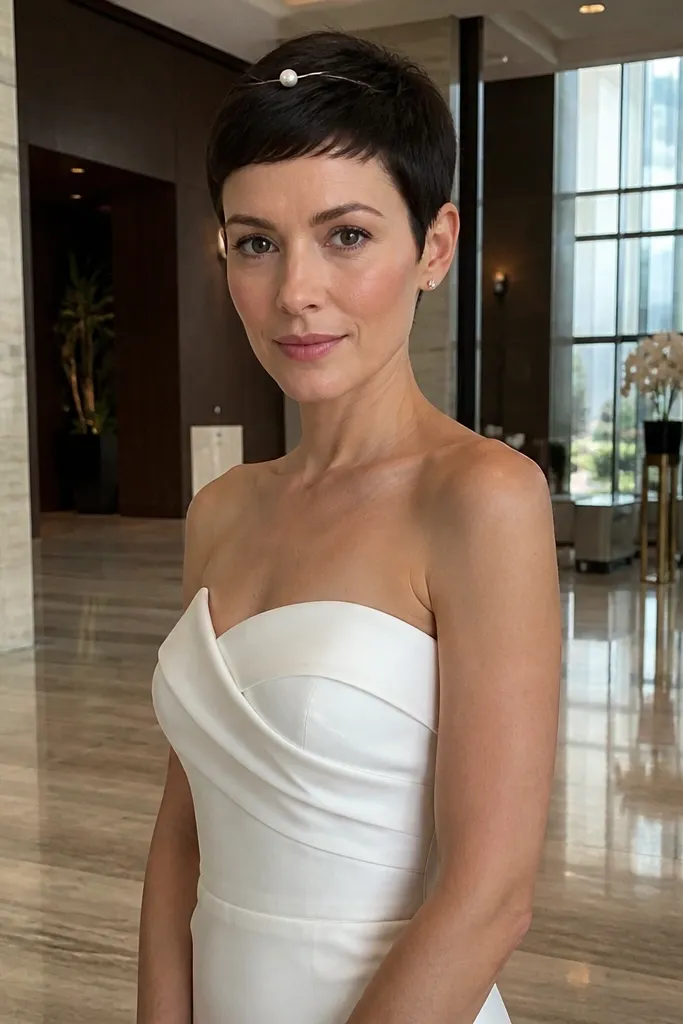
Apply heat protectant and blow-dry straight, then flat iron small sections for a smooth finish. Comb the front into place and set with a strong-hold spray, focusing on the top layer. Place a small barrette at the crown where it catches the light, then use two bobby pins hidden underneath for extra hold.
This is for brides who want sleek, modern, and super clean. Pin-straight styling makes short hair look intentional, and a minimal barrette at the crown adds just enough bridal detail. It’s also one of the best choices for humidity because straight hair with the right hold doesn’t puff. The look stays graphic in photos, especially when your dress has clean lines.
Skip thisDon’t skip heat protectant; straight pixies show heat damage faster than longer hair.
Quick tipUse a fine-tooth comb to align the front — messy alignment shows instantly in wedding photos.
20. French Twist at the Crown with a Loose Short Bob Fringe
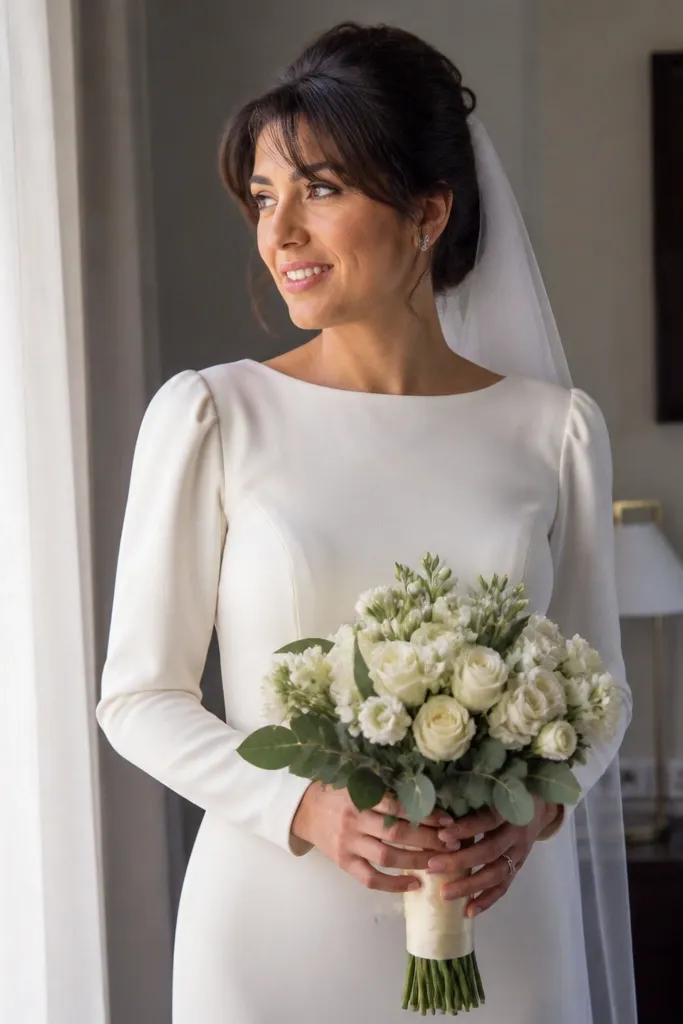
Step 1: Create a deep side part, then back-comb the crown section lightly and smooth the top so it holds shape. Twist the back hair upward into a French twist at the crown, pinning in a tight grid with bobby pins that match your hair color, then add 2-3 pearl pins where the twist meets the part line. Step 2: Keep the front fringe deliberately loose — don’t pin it down — and mist with a light hold hairspray so it stays separated in photos. For travel logistics, plan the style at your hotel or rental mirror with good lighting, and bring a travel pack of pins plus a mini comb. Cost is low: expect to spend about $20-$60 on pins and hairspray if you don’t already have them, and allocate 25-35 minutes for a first attempt. Book your hair trial early if you’re using a stylist, and schedule it 2-4 weeks before the wedding so you can adjust pin placement and fringe shape.
This look is wedding-polished without needing long hair to get height. The twist sits high at the crown, so your face reads open and lifted, while the loose fringe keeps it soft and photo-ready from every angle. It works especially well on short bobs because you can gather the back into the twist while the front stays light and moveable. If you want something pretty and structured that still feels romantic, this is the one. It fits best for spring and fall weddings when you want a clean style that doesn’t fight humidity or heavy heat.
Skip thisDon’t try to twist every strand if your fringe is short — leaving it loose is what makes the look beautiful instead of tight and flat.
Quick tipPack a small satin scrunchie and a travel hair spray so you can reset flyaways right before photos without restarting the whole style.