1. Side-Part Sleek Bob with Glossy Ends
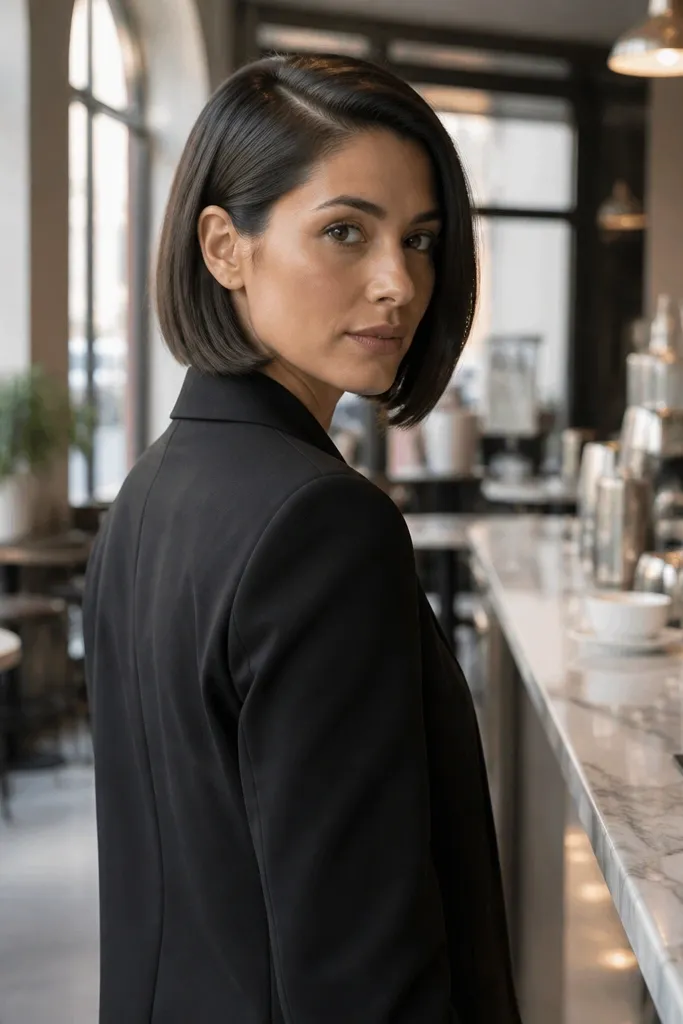
This look is clean and camera-friendly because the side part creates instant structure, and the glossy ends catch light in a flattering way. It works best on a short bob or lob that hits at the jaw or slightly above, where you can smooth the hair into a single direction. If you’re wearing something minimal and tailored, this hairstyle makes the whole outfit read intentional. Indoors, it looks polished; outdoors, keep it controlled with a firm hold spray so wind doesn’t frizz the surface.
Start by blow-drying your hair in the direction of the side part using a paddle brush, focusing on roots for lift. Then flat-iron only the top layer very lightly, and smooth the ends just enough to remove bends. Finish with a small amount of shine serum rubbed between palms and pressed over the last 2-3 inches, then lock it with a flexible-hold hairspray.
Pack a mini travel hairspray and a fine-tooth comb for quick part touch-ups between photos.
Avoid heavy oil all over — it makes short hair look greasy instead of glossy.
2. Pin-Curled Pixie Side Swoop
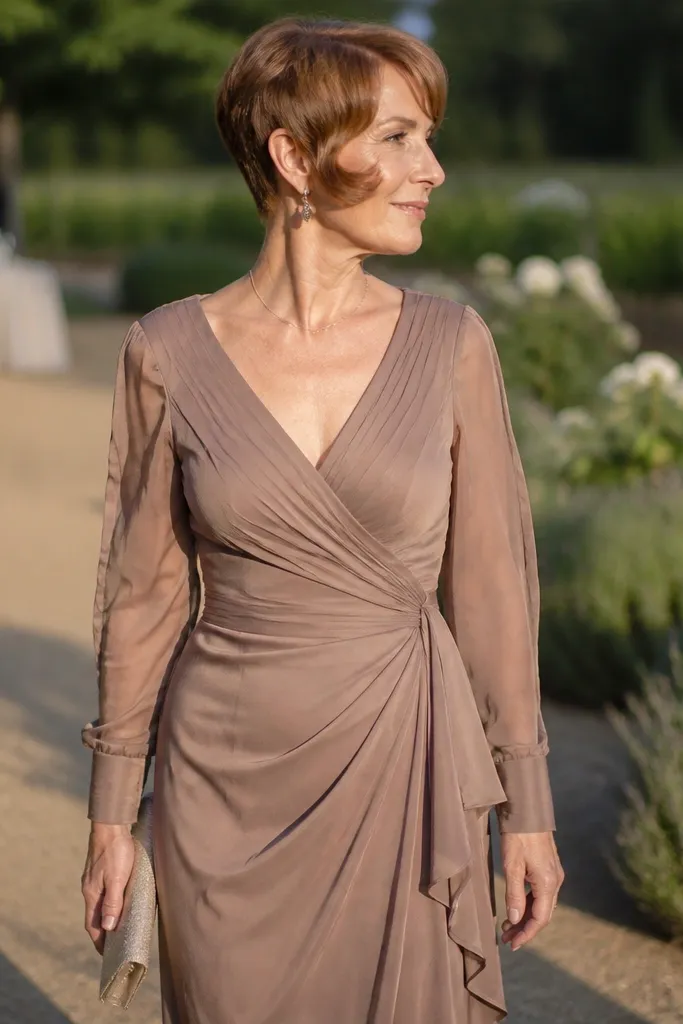
A pin-curl swoop turns a short pixie into something romantic without needing long hair. The shape is visible in photos because the curl sits along the cheek and creates a “frame,” which reads chic even when the cut is short. It’s especially good for wedding guest looks when you want softness but still need control. This one shines for evening events and for dresses with straps or a neckline that shows the face.
Start with damp hair and add a light mousse or curl cream, then comb it into a deep side. Create a curl by twisting a small section around two fingers, then slide it into a flat loop against your scalp. Pin it with two bobby pins and let it set for 10-15 minutes with a cool blow dryer or air dry. Release, then set with a flexible-hold spray.
Use bobby pins in the same color as your roots so the swoop looks intentional, not hidden.
Skip big sections — large pin curls collapse fast on short hair.
3. Soft Finger-Wave Bob
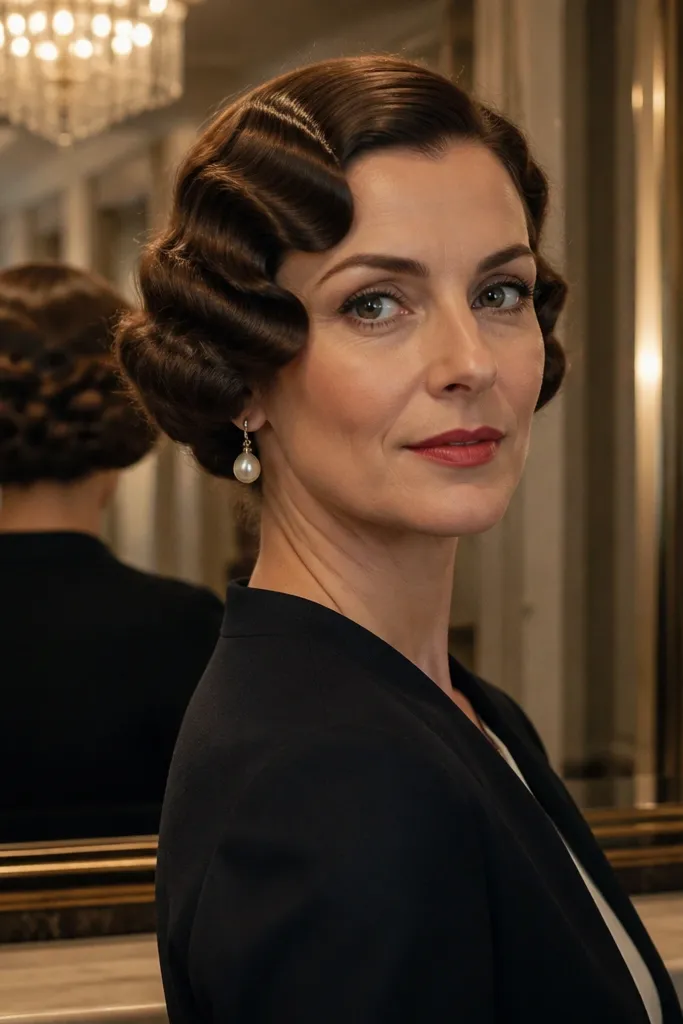
Finger waves look classic and styled, and short hair is actually perfect for them because the wave pattern stays crisp. The result is glamorous without bulky volume, and it photographs beautifully from the front and side. Choose this when the wedding dress code leans formal or when your outfit has vintage details. It also works for thick hair because the wave holds its shape with the right product.
Start on damp hair with a smoothing cream, then create a deep side part. Use the tail of a rat-tail comb to mark small wave ridges, and set each ridge with your fingers by pressing and forming a shallow “S.” Pin the wave sections down lightly and mist with setting spray. After 15 minutes, remove pins and brush through gently with your fingers, then finish with a light hold spray.
Quick tipDo the waves closer to the scalp — shallow waves look flat in photos.
Skip thisAvoid brushing with a brush — it breaks the wave pattern.
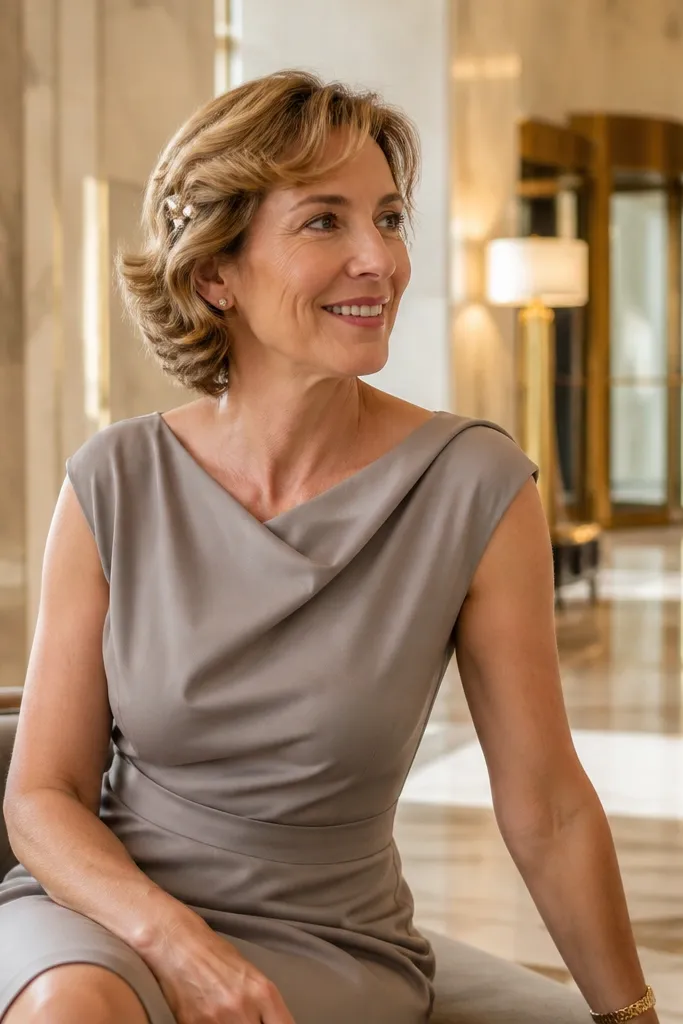
4. Half-Up Mini Twist with Pearl Pins
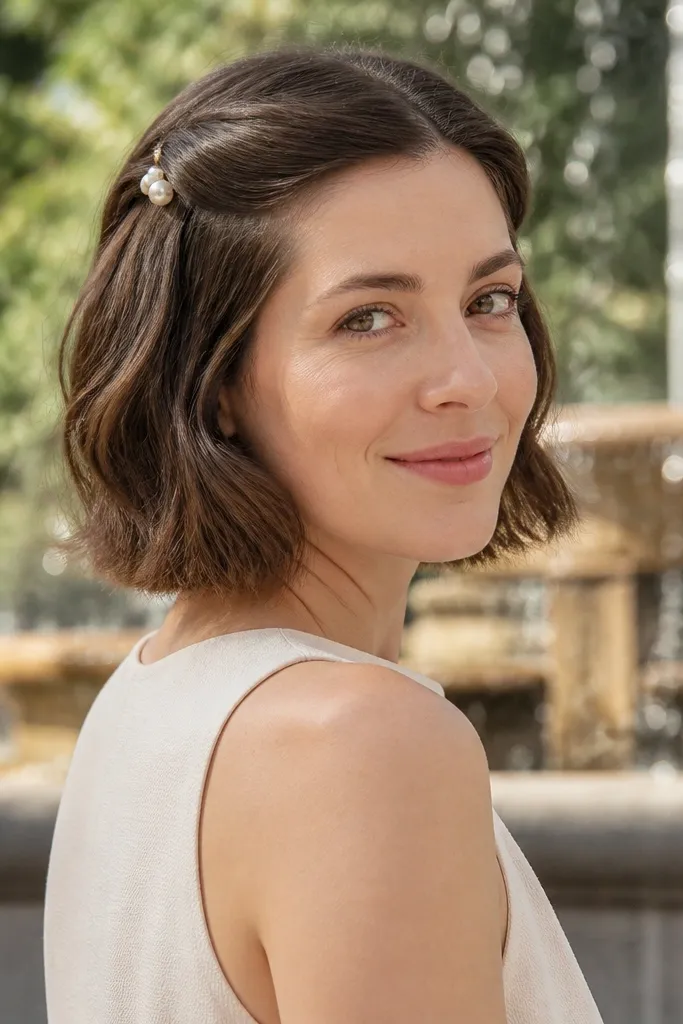
A half-up twist makes short hair look dressed up fast, and pearl pins read wedding-appropriate without trying too hard. This style is best for chin-length bobs and longer pixies where you can grab a small section near the temple. It’s also flattering for people who want their face to look open on camera. If you’re wearing earrings, this keeps the focus on them while still adding hairstyle detail.
Start by separating a small section on each side above your ear line. Twist each section back toward the crown, then cross them or tuck them into one direction at the back of your head. Secure with pearl bobby pins, placing them slightly diagonally so they hold and look intentional. Finish by smoothing flyaways with a tiny dab of gel and misting the rest lightly.
Match pin color to your jewelry metal (silver or gold) so it looks cohesive.
Don’t twist too tight — tight twists on short hair can look stiff instead of chic.
5. Textured Crop with Side-Swept Fringe
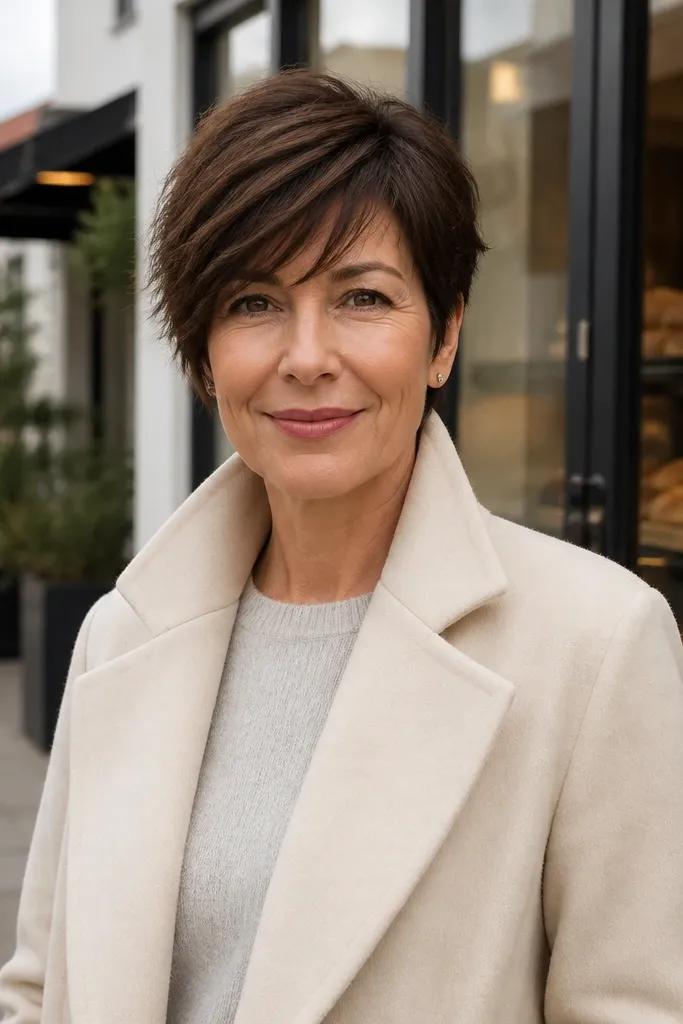
If your cut is a textured crop or pixie with fringe, this is the easiest way to look styled in minutes. The matte texture hides small imperfections and gives the hair a “lived-in but intentional” look that holds up through dancing. It’s a great choice for daytime weddings and for casual formal outfits where you still want to look put together. The key is the fringe — sweeping it to one side adds structure and makes your face look more defined.
Start with dry hair and apply dry shampoo at the crown and roots for grip. Use a blow dryer on low heat to direct the fringe to one side while you shape it with your fingers. Add a small amount of matte styling paste, then rub it between palms and press into the top and fringe only. Finish with a light mist of flexible hold spray so it stays textured.
Quick tipPin the fringe for the first hour if the wedding is windy, then release later.
Skip thisAvoid shiny pomade — it makes textured short hair look oily.
6. Sleek Low Twist at the Nape
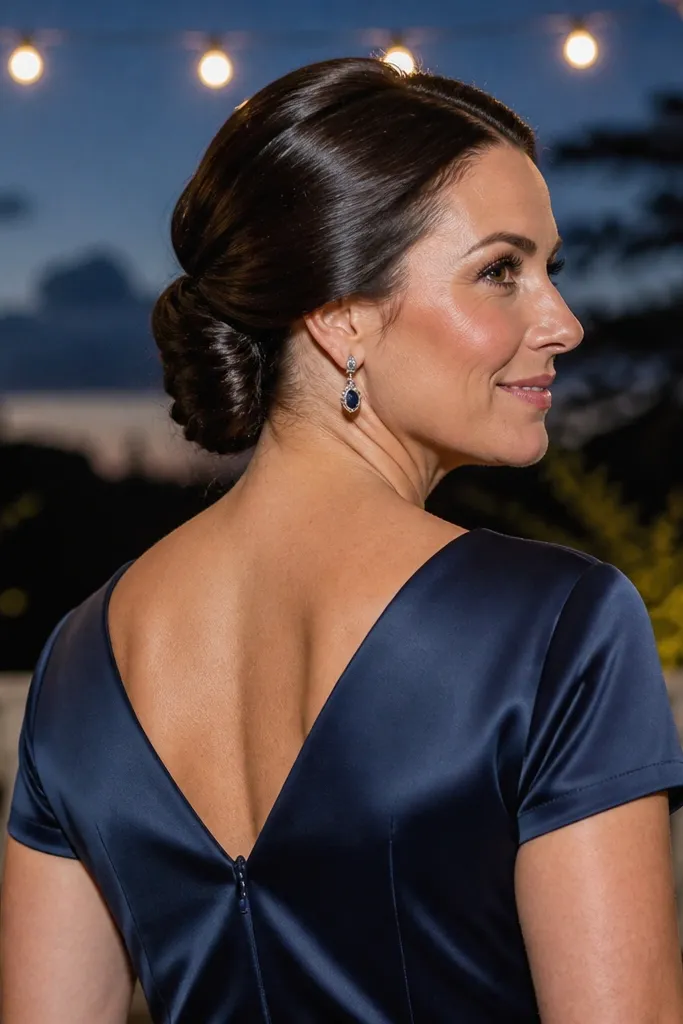
This one looks surprisingly elegant on short hair because the twist creates a “gathered” shape at the back, where photos often catch it. It’s ideal for a bob that’s at least a few inches long at the nape or a longer pixie. The finish is sleek, so it pairs well with satin dresses, strapless necklines, and up-close portrait angles. Indoors it looks sharp; outdoors it still holds if you lock it with a strong hold spray.
Start by brushing hair straight back and applying a small amount of smoothing cream. Gather the bottom section at the nape and twist it clockwise or counterclockwise, then tuck the ends under. Secure with 2-3 bobby pins and a hairpin that matches your hair color. Smooth the sides with a fine comb and set with a strong hold hairspray around the twist.
Quick tipUse a bobby pin cross pattern (X) for better hold without extra bulk.
Skip thisDon’t leave the twist ends loose — short ends stick out and look messy.
7. Curled Bob with a Hidden Clip Crown
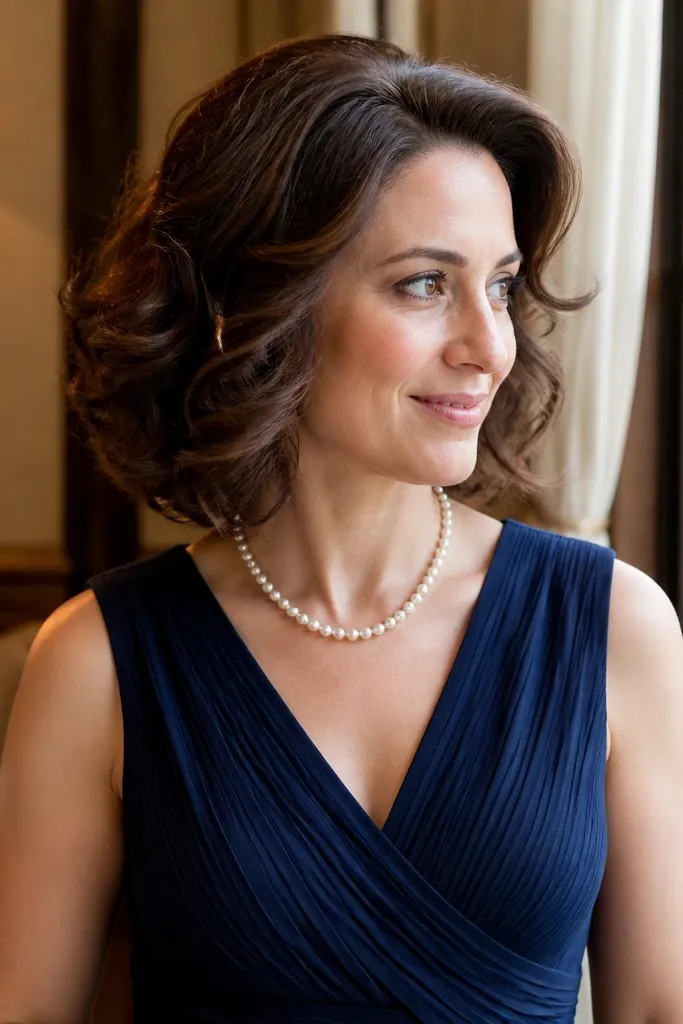
This is for bobs that curl easily or already have natural waves. The curls give you the “wedding hair” look, while the hidden clip keeps the top from falling forward in photos. The result is balanced: volume at the crown, soft waves around the face. It’s a strong pick for weddings with lots of photo flash because the curls reflect light nicely without looking flat.
Start by blow-drying the roots with your head slightly forward to build lift. Curl sections using a small barrel (3/4 to 1 inch) and alternate directions for a natural pattern. Then take a thin top layer near the part and pin it back with a small claw clip or a slim barrette, hiding it under the curls. Finish by lightly separating curls with your fingers and spraying only the mid-lengths.
Quick tipUse a clip with teeth for grip; smooth clips slide on short hair.
Skip thisAvoid over-brushing — it turns curls into puff.
8. Half-Up Bob with a Satin Ribbon Tie
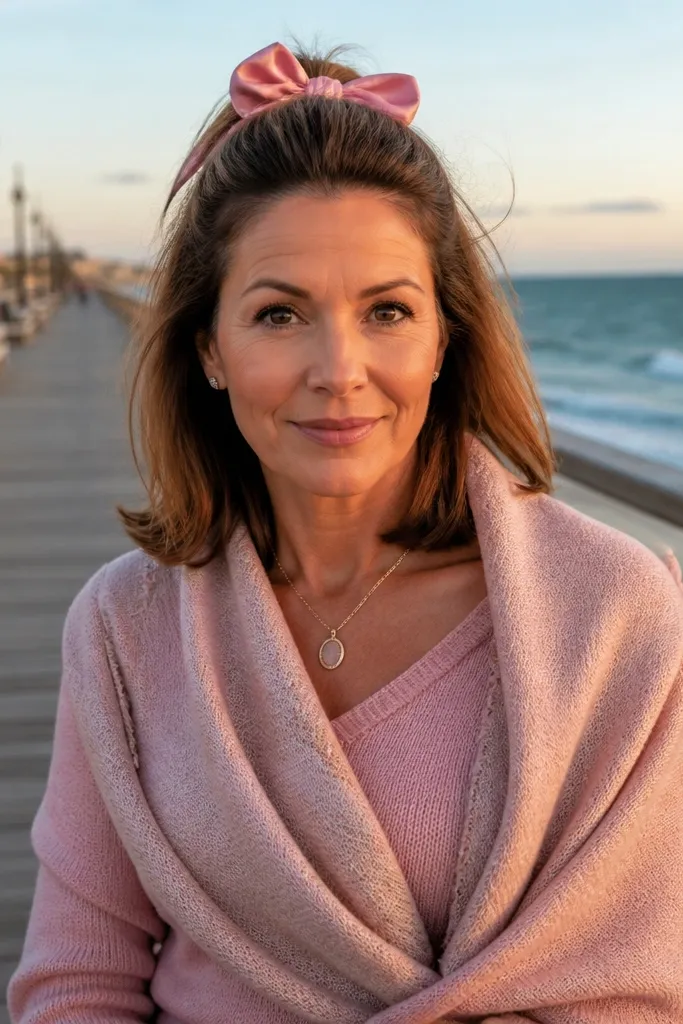
A ribbon tie makes short hair look festive without needing extra length. It works best when the half-up section sits at the crown, creating a clean lift and a visible “tie” detail in photos. Choose a ribbon color that matches your outfit accents, like dusty rose with a blush dress or black with a dark suit. This is a great option for garden weddings and spring ceremonies where you want a soft, pretty feel.
Start by creating a horizontal half-up section from ear to ear. Tease the crown lightly for lift, then smooth the top layer so it looks neat. Pull the half-up section back and secure with a small elastic, then wrap a satin ribbon around it and tie a tight knot. Tuck the ribbon tails so they don’t whip around in wind.
Use a satin ribbon 1/4 to 1/2 inch wide for a clean look on short cuts.
Avoid wide, floppy ribbon — it overwhelms short hair.
9. Bubble Bob with Micro-Elastic Segments
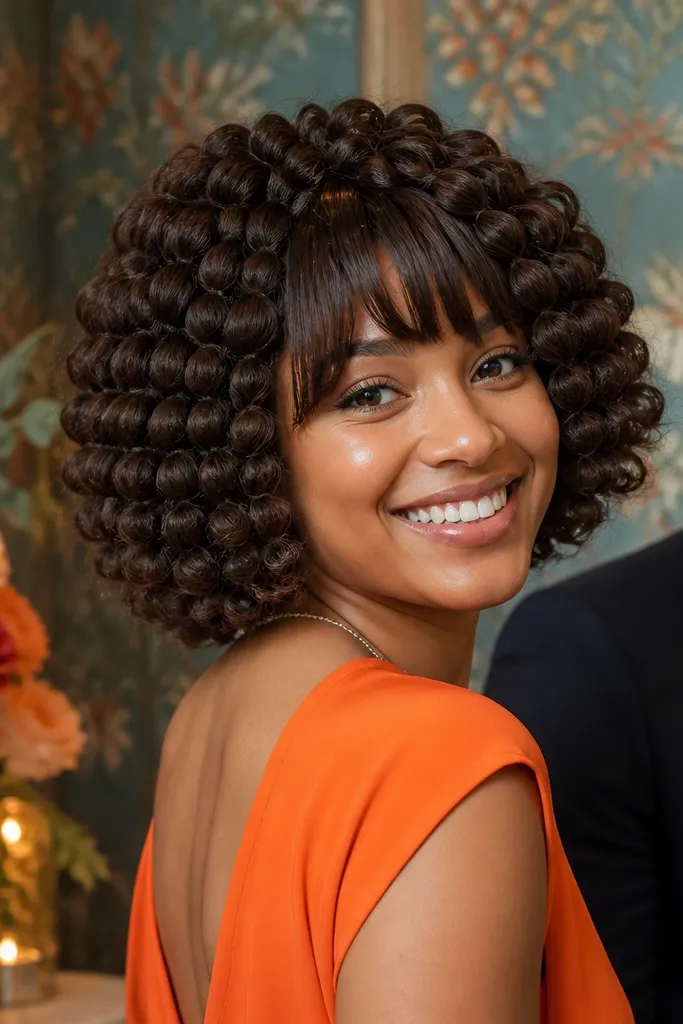
Bubble styles look playful and chic, and short hair can pull them off because the “bubbles” are compact. This is a fun choice for younger wedding guests or for events with a colorful theme, and it stands out in group photos. It also helps if your hair is too short for a traditional ponytail — the micro-elastics create the shape. The finish is structured, so it’s great for humid days when softer styles frizz.
Start with slightly damp hair and add a lightweight gel or mousse for hold. Divide the hair into 3-5 small sections along the sides and back, then secure each with a micro-elastic. Gently tug each bubble outward with your fingers to create the rounded shape, starting from the bottom. Finish with hairspray and smooth any flyaways around the hairline.
Choose elastics the same color as your hair so the segments look intentional.
Avoid too much product — it makes the bubbles clump.
10. Back-Swept Pixie with Wet-Look Finish
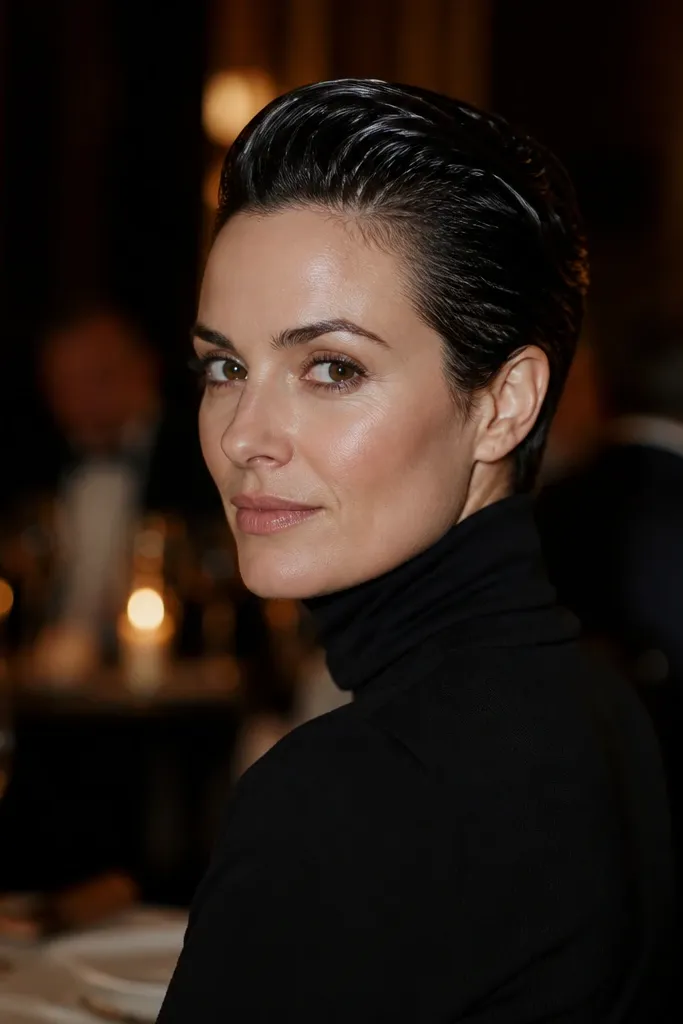
A wet-look pixie is bold and photo-ready because it shows off your cut and face shape instantly. It’s best for formal evening weddings where you want a fashion-forward vibe without adding length. The shine catches flash, and the swept-back hair keeps your forehead and eyes clear. If you’re worried about short hair looking “too boyish,” this style makes it sleek and flattering.
Start with damp hair and apply a gel with strong hold, then comb it straight back. Use a fine-tooth comb to set the direction and smooth the surface. Dry with a blow dryer on low heat while keeping the comb in place to lock the shape. Finish with a tiny amount of shine spray on top only, then set with a light hairspray mist.
Use gel, not oil — oil makes the wet look messy by mid-evening.
Avoid leaving flyaways — wet-look hair shows every stray hair.
11. Vintage French Roll for a Short Bob
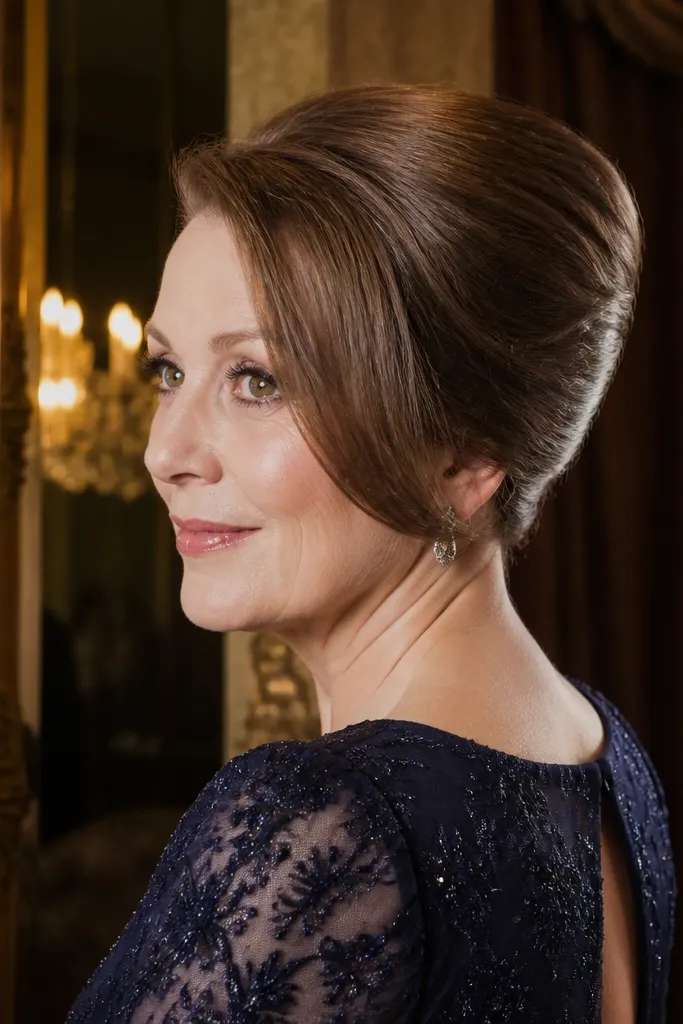
A French roll on short hair is the “wow” option when you want something more sculpted than a clip. The roll creates a lifted, rounded shape at the back and looks elegant in close-up photos. This works best for bobs that are at least chin-length with enough thickness to roll. It’s perfect for evening weddings and for outfits that already have drama in the neckline.
Start with dry hair and add texture spray for grip. Part your hair slightly off-center, then gather a section at the back and twist it inward toward the roll. Use bobby pins to secure the roll in layers, pushing pins into the base so they hold without slipping. Finish by smoothing the top and spraying the roll lightly with strong hold.
Quick tipPin from underneath first, then add top pins — it keeps the roll tight.
Skip thisAvoid trying this on very thin hair — the roll won’t hold its shape.
12. Soft Waves with a Center-Part Headband
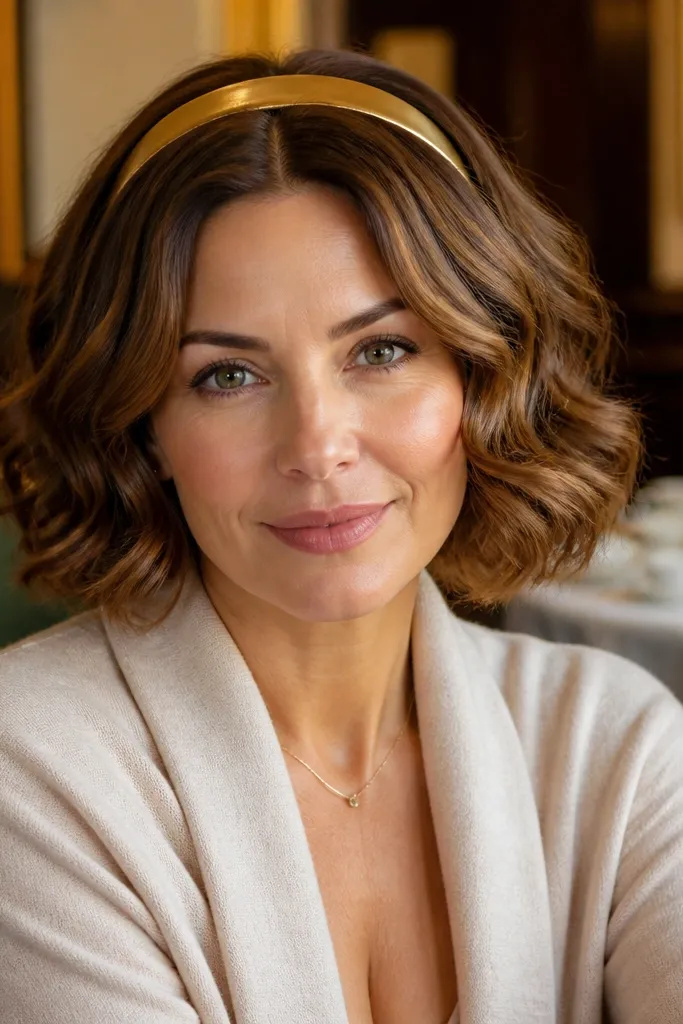
This is the easiest way to look wedding-ready when your hair is short but still has enough length for wave shaping. A center-part headband adds symmetry, and symmetry reads polished in group photos. Choose a headband with a subtle texture like satin or a thin beaded band so it looks intentional without stealing attention from your dress. It works for nearly every wedding setting — church, garden, and formal indoor ceremonies.
Start with a center part and blow-dry the roots straight up for volume. Curl only the mid-lengths with a 3/4-inch iron, then leave the ends slightly softer for a natural wave. Place the headband after styling so it doesn’t flatten your curls. Use a light hairspray around the crown and tuck any stray bits behind the headband.
Pick headbands that sit slightly behind your hairline so they don’t dent your curls.
Avoid thick headbands — they overpower short hair.
13. Ribbon-Braided Side Accent on a Bob
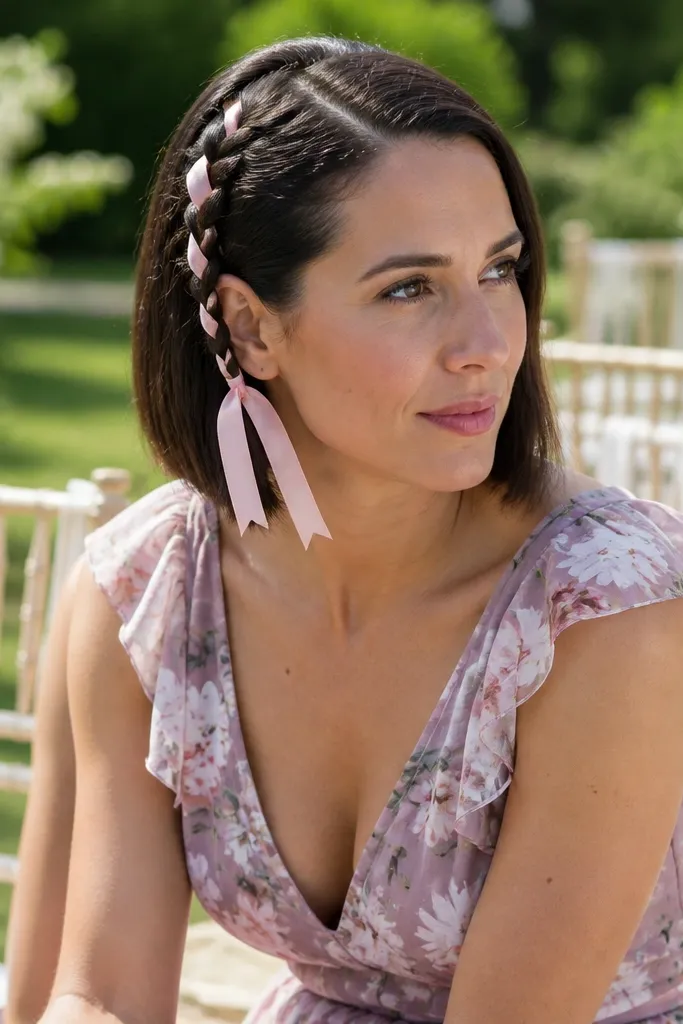
A side braid with ribbon gives you the “wedding detail” look while keeping the style anchored to short hair length. The braid sits near your cheek, so it shows up in photos without needing much length. This is great for daytime weddings because it looks pretty, not heavy. If your hair is straight and resists waves, weaving ribbon into a small braid adds texture and visual interest.
Start by creating a side part and dividing a small section near your temple. Add a thin ribbon strip to the braid section and braid across the side, securing the end with a tiny elastic. Wrap the ribbon tail around the elastic and pin it down with a bobby pin. Finish by curling the rest of your hair with a flat iron or leaving it sleek if you want a cleaner contrast.
Use ribbon that’s 1/8 to 1/4 inch wide so it braids cleanly.
Avoid big braids — short hair can’t support them without slipping.
14. Low-Volume Blowout with a Micro Bang Pin
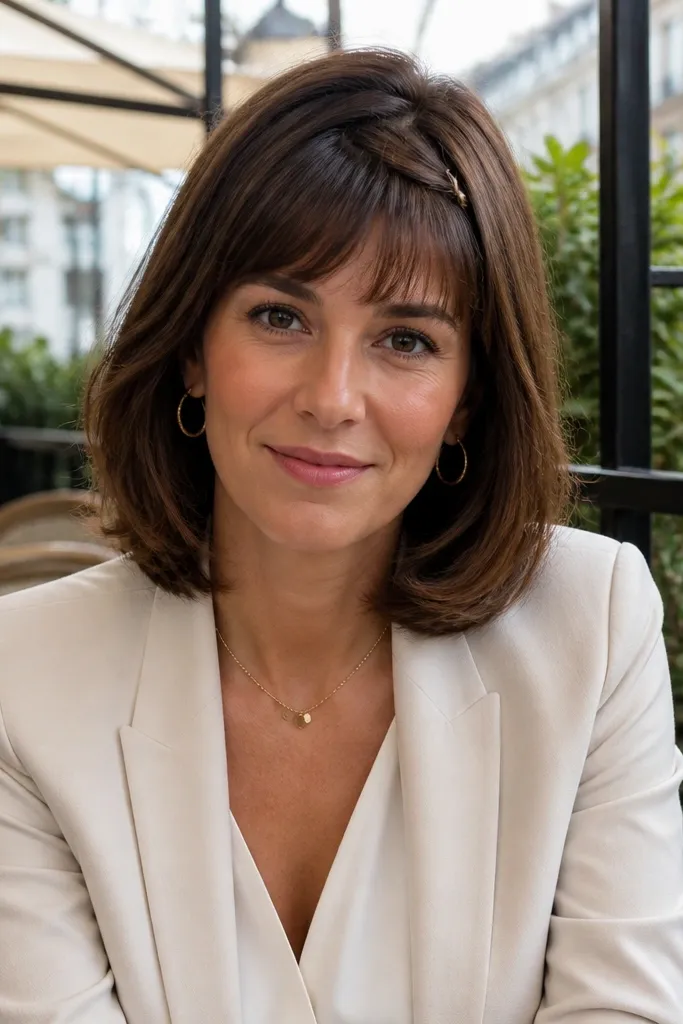
This is the “looks like you spent time” option for short hair with bangs. The blowout gives you smooth movement, while pinning a tiny section of bangs creates a deliberate, styled focal point. It’s flattering for face shapes that need a little lift around the eyes. This works for both formal and semi-formal weddings because it looks neat without going full glam.
Start with damp hair and apply heat protectant. Blow-dry the bangs and top layer with a round brush, directing them slightly off-center. Pin the outer edge of the bangs with a small bobby pin, placing it where it disappears under the rest of the hair. Finish with a flexible hold hairspray so the blowout stays soft, not stiff.
Quick tipPin before hairspray so the pin locks the shape instead of sliding.
Skip thisAvoid pinning the bangs too high — it can look like a headband dent.
15. Twisted Side Knot on a Chin-Length Bob
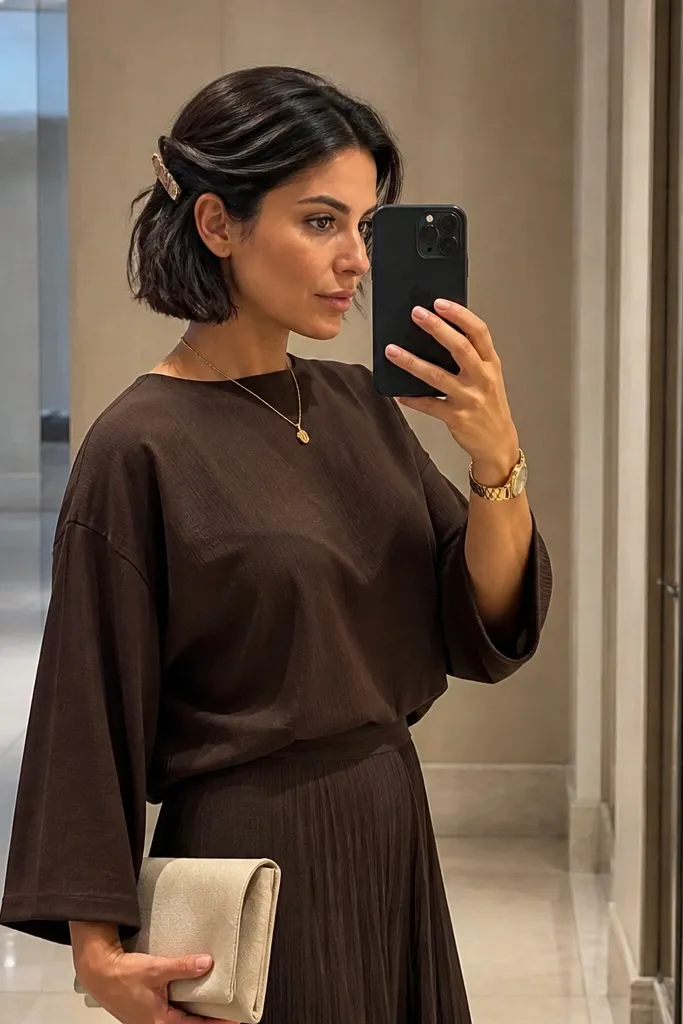
A twisted side knot makes short hair look like it’s been styled for a wedding, not just brushed. The knot sits near the ear, which is visible in portraits and adds structure to the side profile. It’s best for chin-length bobs where you can gather enough hair to twist without pulling too tight. This is a strong choice for weddings with warm weather because the knot stays put even if the air is humid.
Start by adding a little styling cream to the sides so the hair grabs. Gather a small section from one side (above the ear) and twist it backward. Wrap the twist into a small knot and secure with 2 bobby pins, then gently tug one side of the knot to make it look rounder. Smooth the rest of the bob and finish with hairspray around the knot.
Use one hairpin and one bobby pin — the hairpin gives structure, the bobby pin stops slipping.
Avoid skipping side smoothing — knot styles look sloppy when the sides poof.
16. Crown-Volume Pixie with a Statement Barrette
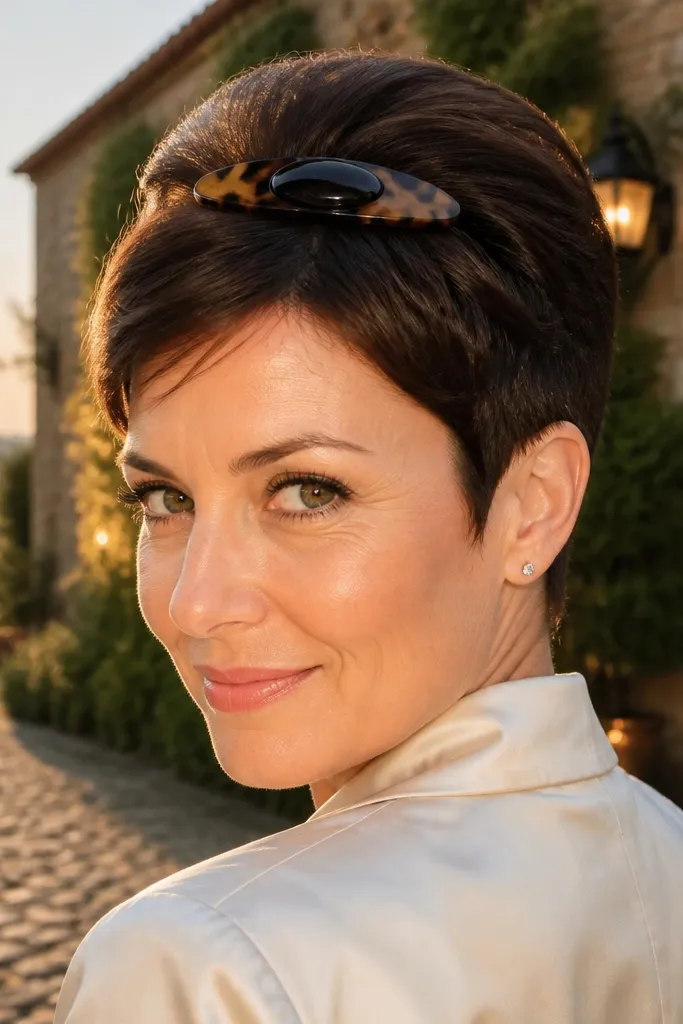
If you want maximum impact on very short hair, crown volume plus a statement barrette is the formula. The barrette creates an instant focal point, and the volume makes the cut look intentional and styled. This works especially well for pixies and short crops, where you can’t rely on long hair to carry the look. Choose a barrette with pearl, metal, or crystal for evening weddings.
Start with dry shampoo at the roots and massage it in for grip. Blow-dry the crown upward, then use a teasing comb very lightly at the base for extra lift. Position the barrette slightly off-center, pressing it into the hair so it hides the base. Finish by smoothing the outer layer with your hands and spraying only the crown.
Quick tipPlace the barrette where your hair naturally parts so it sits flat and doesn’t slide.
Skip thisAvoid over-teasing — it makes pixie hair look messy instead of chic.
17. Satin-Scrunch Wave Bob
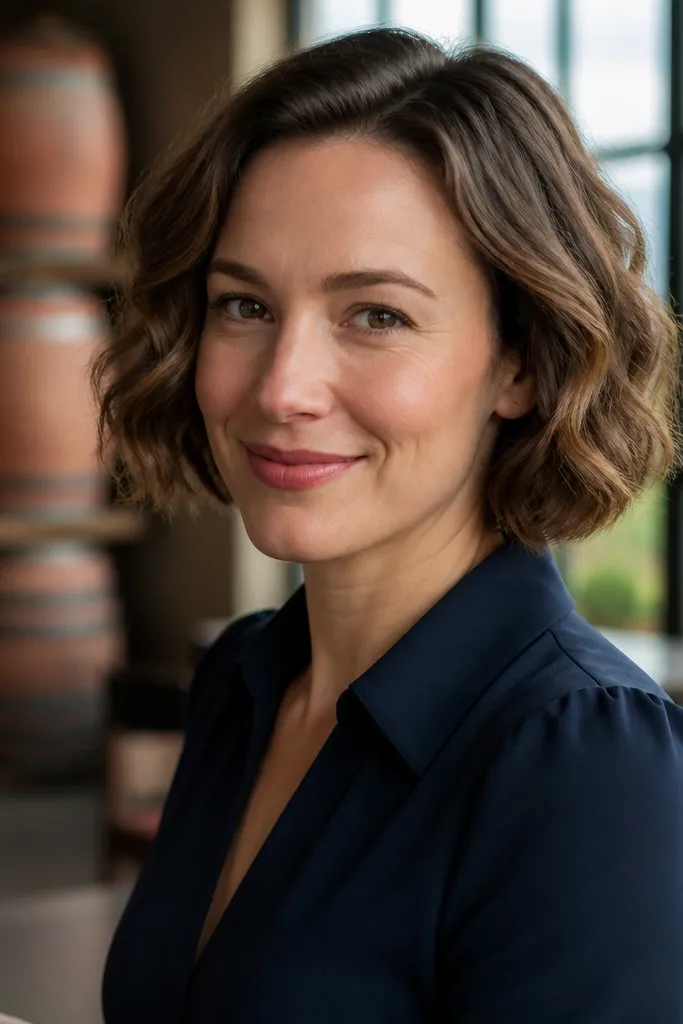
Scrunching creates soft, touchable waves that look good in motion and don’t collapse as quickly as some heat-only styles. This is a great option for short bobs that want volume without big curls. Satin scrunching also makes the waves look smoother and less frizzy, which matters for wedding humidity. It’s a smart pick for daytime events, especially if your outfit has airy fabric like chiffon or lace.
Start with damp hair and apply a wave cream, then use a microfiber towel or soft cotton T-shirt to scrunch from the ends upward. Let it dry about 70-80% before touching it again. Once dry, scrunch lightly with a tiny bit of styling mousse to reactivate shape, then set with a flexible spray. If you need more hold, add a light mist at the roots, not the ends.
Sleep on it only if the wedding is next day; otherwise set it the morning of so it stays fresh.
Avoid brushing after it dries — it turns waves into frizz.
18. Sleek Side Sweep with a Thin Gold Pin
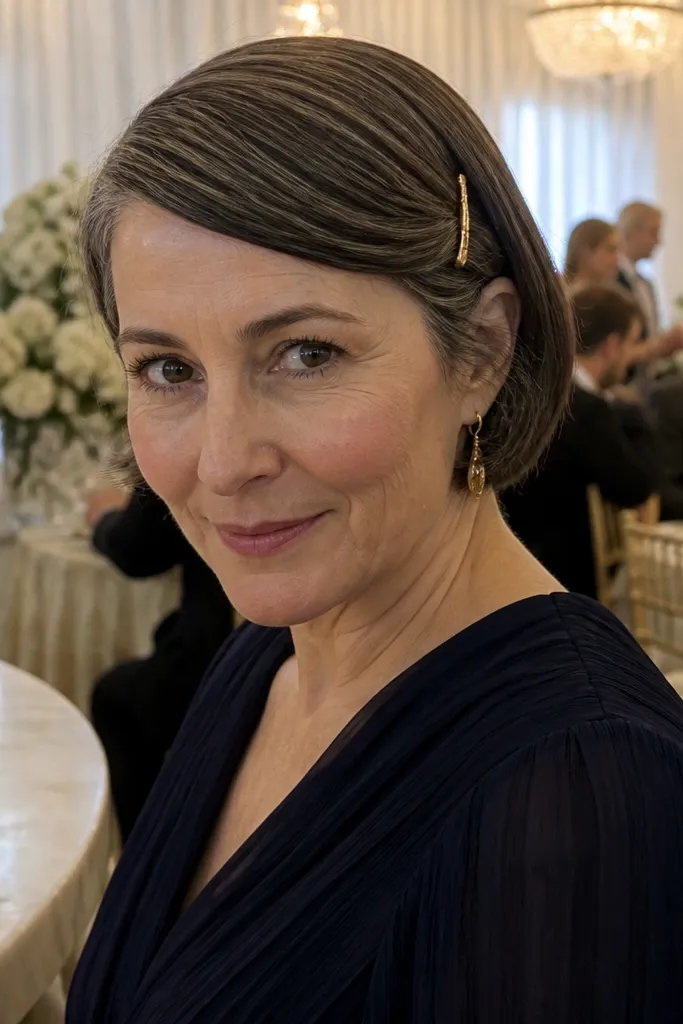
A sleek side sweep is chic because it’s controlled, and the thin pin makes it feel dressy without being heavy. This works well for short bobs and lobs where you can sweep hair across the forehead and secure it at the temple. The gold pin adds a subtle luxury detail that shows up in close-up wedding photos. It’s best for indoor weddings or evenings when you don’t need to fight wind all day.
Start by blow-drying your hair straight and then sweeping it to one side with a brush. Use a flat iron only on the top layer for a smoother surface. Secure the sweep at the temple with a thin decorative pin, placing it at a slight angle so it catches light. Finish with shine spray lightly over the top and a small amount of hairspray at the pin area.
Bring an extra pin — pins can loosen if you move around a lot.
Avoid placing the pin too low — it can look like it’s holding a random section instead of the sweep.
19. Textured Tousle with a Pearl Claw Clip
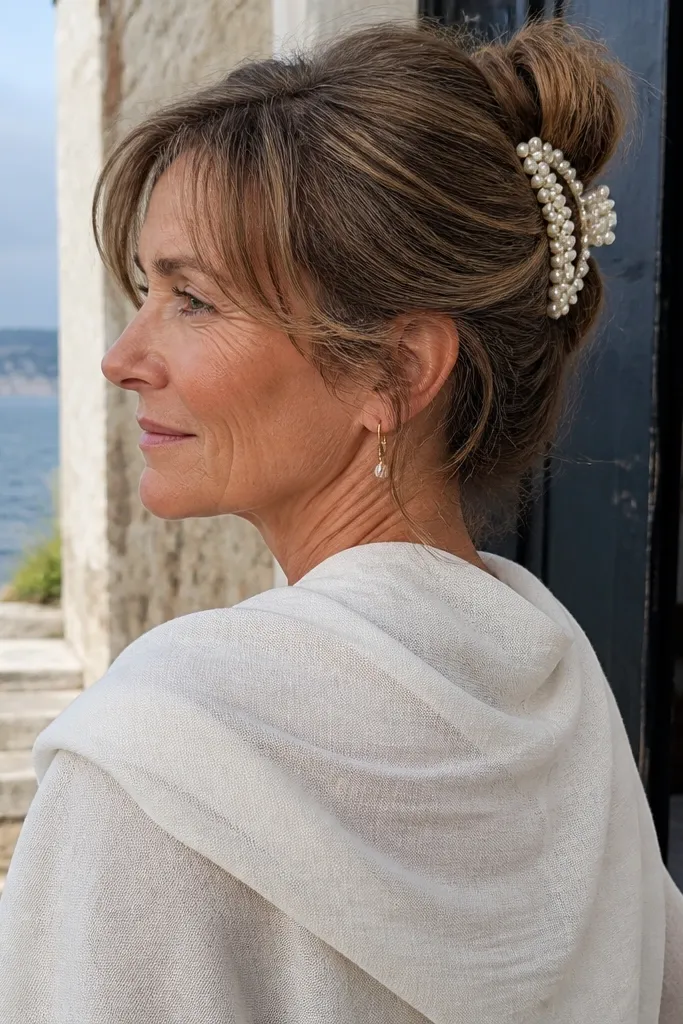
This look is playful but still polished, because the pearl claw clip instantly reads “wedding guest.” The textured tousle gives you volume at the crown and movement around the face, which helps short hair look fuller in photos. It’s especially flattering for fine hair because the texture adds body without needing long layers. Great for garden weddings, brunchy ceremonies, and daytime receptions.
Start with dry hair and apply dry shampoo at the roots. Use a curling wand or iron lightly on the top layer only, then separate with fingers to keep texture. Place the pearl claw clip at the back crown, grabbing a small section so it doesn’t flatten everything. Finish with a flexible hold spray to keep the tousle from turning into frizz.
Clip slightly higher than you think — short hair needs height for a chic silhouette.
Avoid clipping too much hair — it can turn into a bulky cap.
20. Micro Braid Crown with Loose Side Pieces
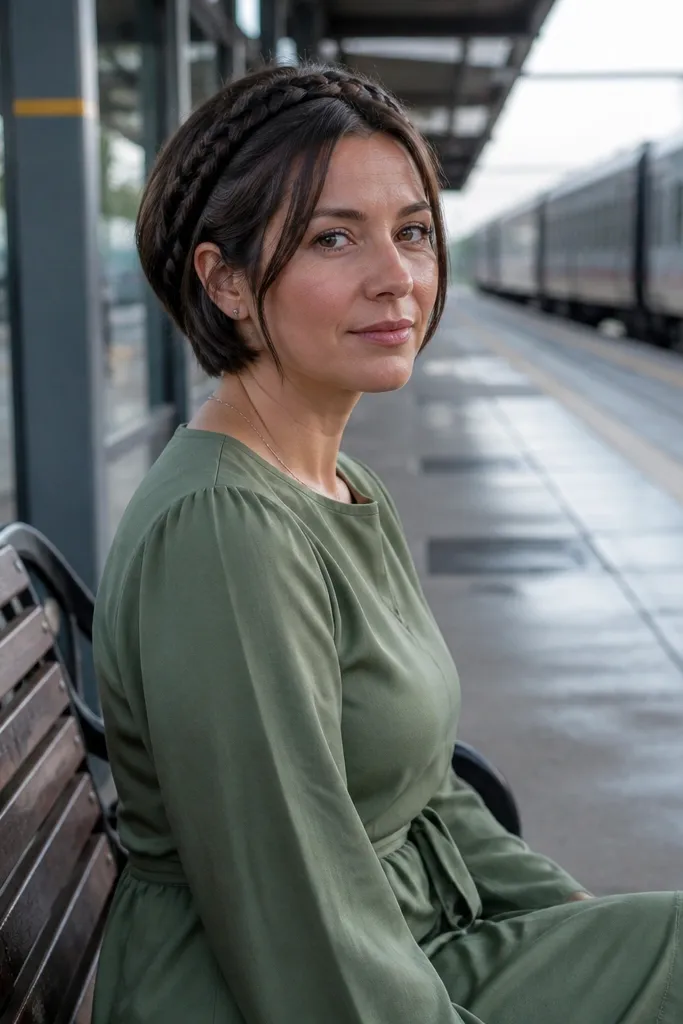
A micro braid crown is one of the most photogenic ways to dress up short hair because it creates a delicate pattern across the head. The loose side pieces keep your face soft and prevent the look from feeling too tight or formal. This works best on bobs and longer pixies where you can braid small sections without pulling too much. It’s a solid choice for outdoor weddings because braids handle wind better than sleek styles.
Start by parting your hair slightly off-center and sectioning small pieces along the hairline. Braid each section into a tiny braid, then pin it along the crown like a headband. Leave a small loose section on each side so the braid crown looks airy. Secure with bobby pins and mist lightly with flexible hold spray.
Quick tipUse tiny elastics for the ends, then tuck them under the nearest braid for a clean finish.
Skip thisAvoid thick braids — they pull short hair tight and look bulky.