
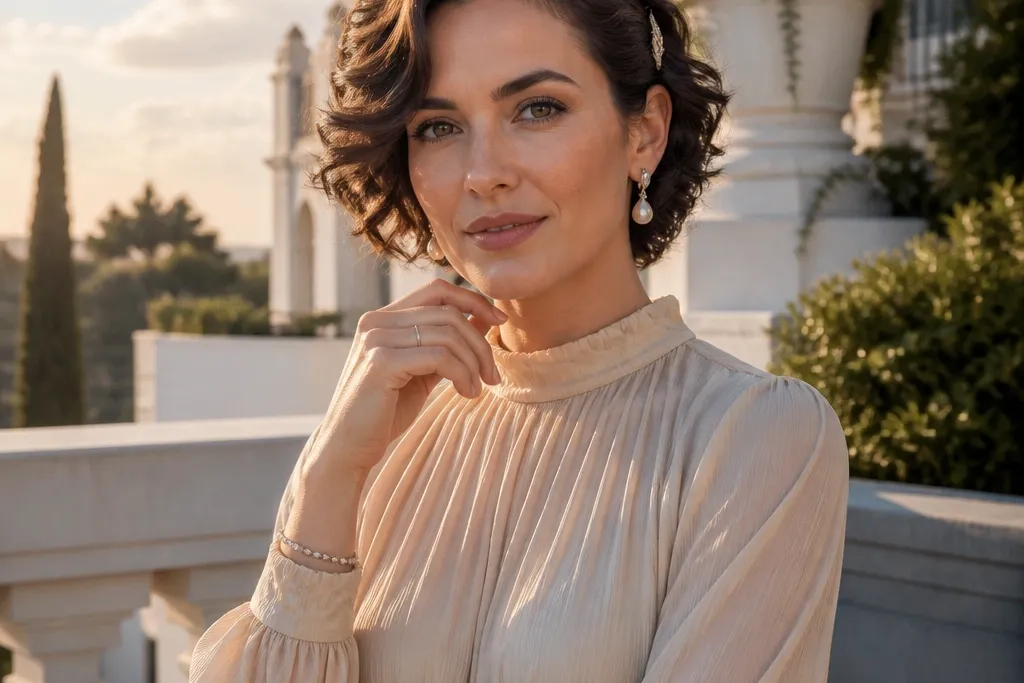
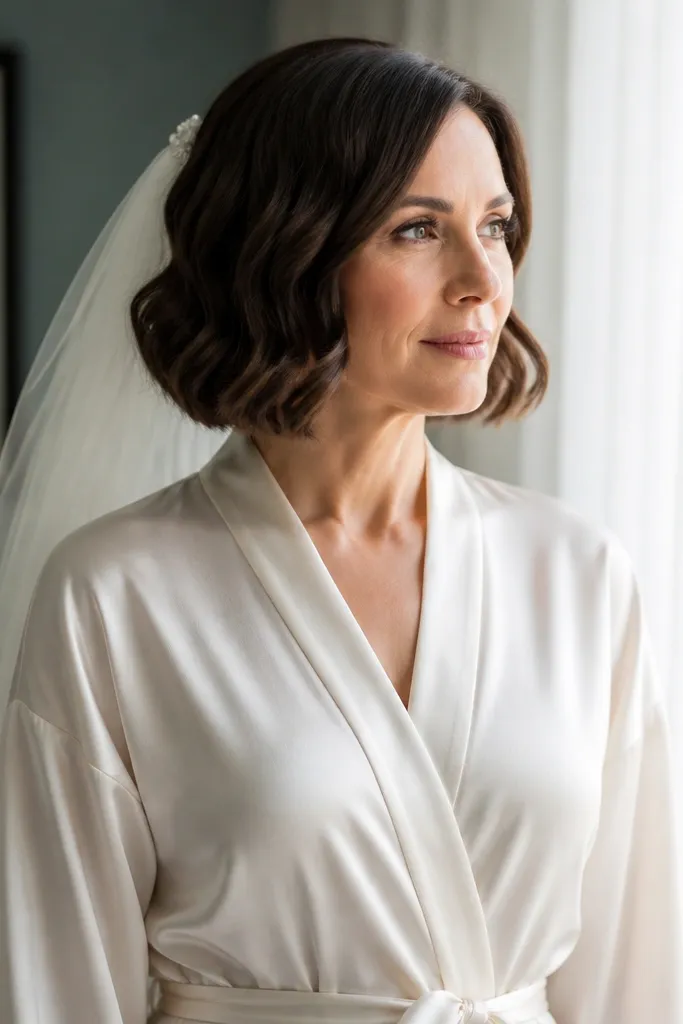
1. Pin-Curl Bob with a Deep Side Part
Start with dry hair or hair that’s fully cooled from a blowout so the curl doesn’t loosen too fast. Create a deep side part, then take 1-inch sections from the front and wrap into tight pin curls, placing each curl so it points toward the cheek. Pin with bobby pins in a crossed pattern, then spray with a firm-hold hairspray and let it set for 5-10 minutes. Release the curls last, then lightly comb through with fingers only at the ends so the shape stays crisp.
A pin-curl bob is one of the cleanest ways to make short hair feel bridal. The deep side part gives you instant drama, and the pinned curls create a sculpted curve that reads elegant even when your hair length is limited. This look photographs well because the curl shape is deliberate, not accidental. It also works with most veils because the pins sit flat and the front stays controlled. Choose this when you want a polished, old-Hollywood feel without needing hair to be longer.
Skip thisAvoid brushing out the curls — it turns the shape into a wave that won’t read bridal on camera.
Quick tipPack 20-30 bobby pins in a small zip pouch and bring hairspray with a firm hold, not a flexible mist.
2. Sleek Low Twists with a Pearl Clip
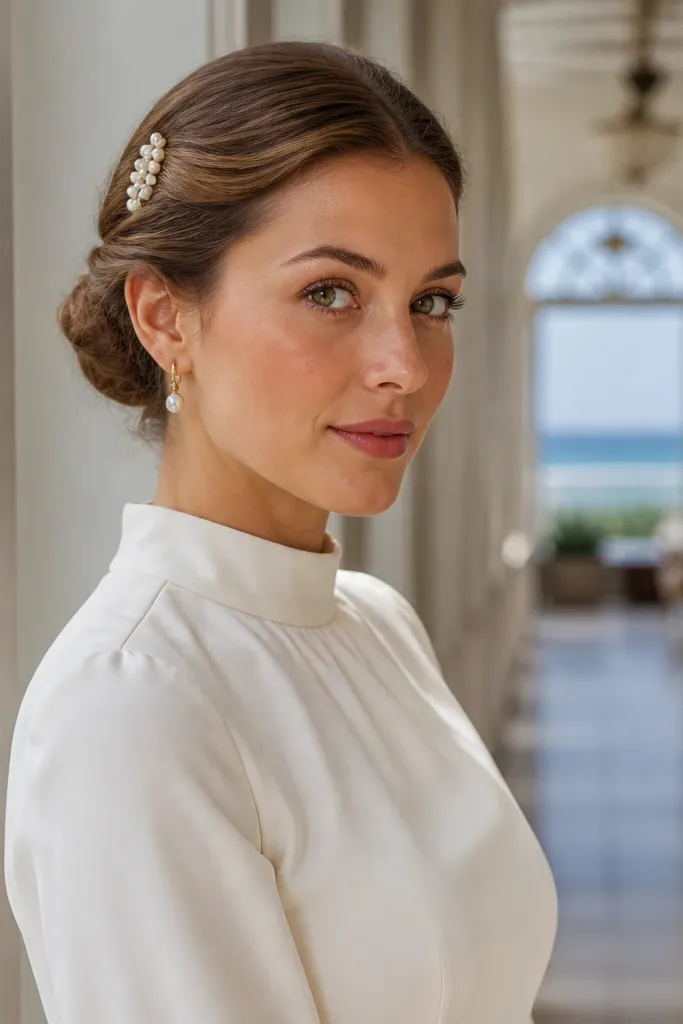
Start by smoothing hair with a light gel or smoothing cream, focusing on the roots and hairline. Split hair into two sections, then twist each side downward toward the nape, pinning as you go so the twist stays flat. Add a pearl clip near the side part or just above the ear where it will show in portraits. Finish with a shine serum on the top layer only, then set the back with a quick spray so twists don’t loosen.
If you want a modern bridal look, sleek low twists are the answer. This hairstyle keeps the focus on your face and neckline, which is why it looks so good with strapless dresses, high necklines, and statement earrings. The twists add texture without bulk, and a pearl clip makes it feel wedding-appropriate without covering your hairline. It’s also easy to keep tidy during photos because the style is smooth and controlled. Pick this when your short cut already has a strong shape and you want it to look intentional, not just styled.
Skip thisSkip heavy oil on the whole head; it can make sleek hair look greasy under flash.
Quick tipTravel with a mini bottle of smoothing cream — it fixes flyaways fast right before portraits.
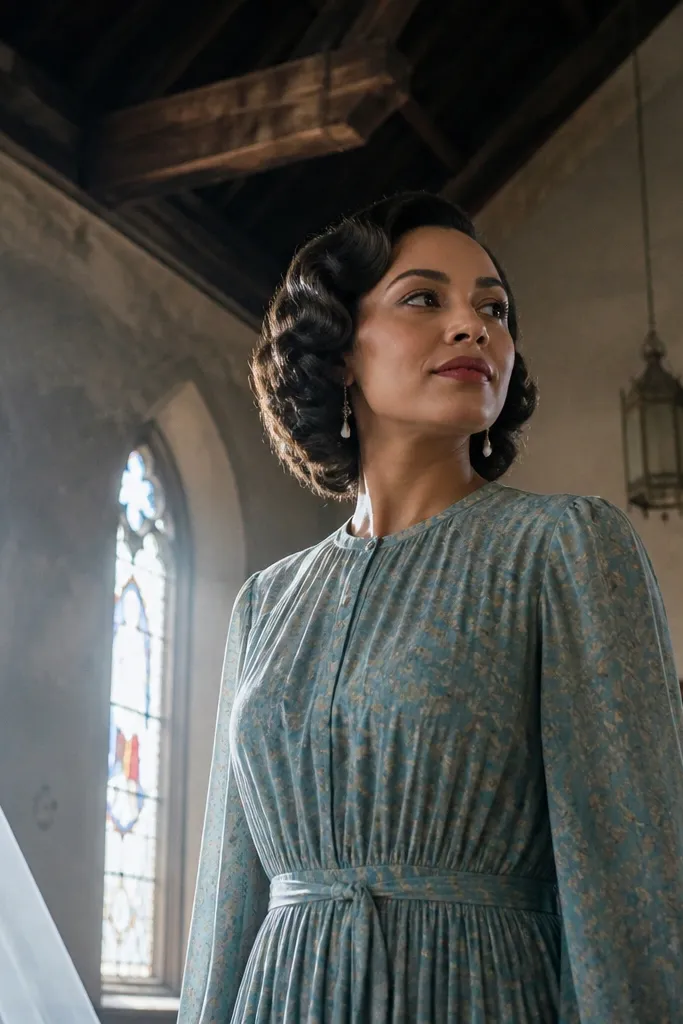
3. Soft Victory Rolls on a Short Bob
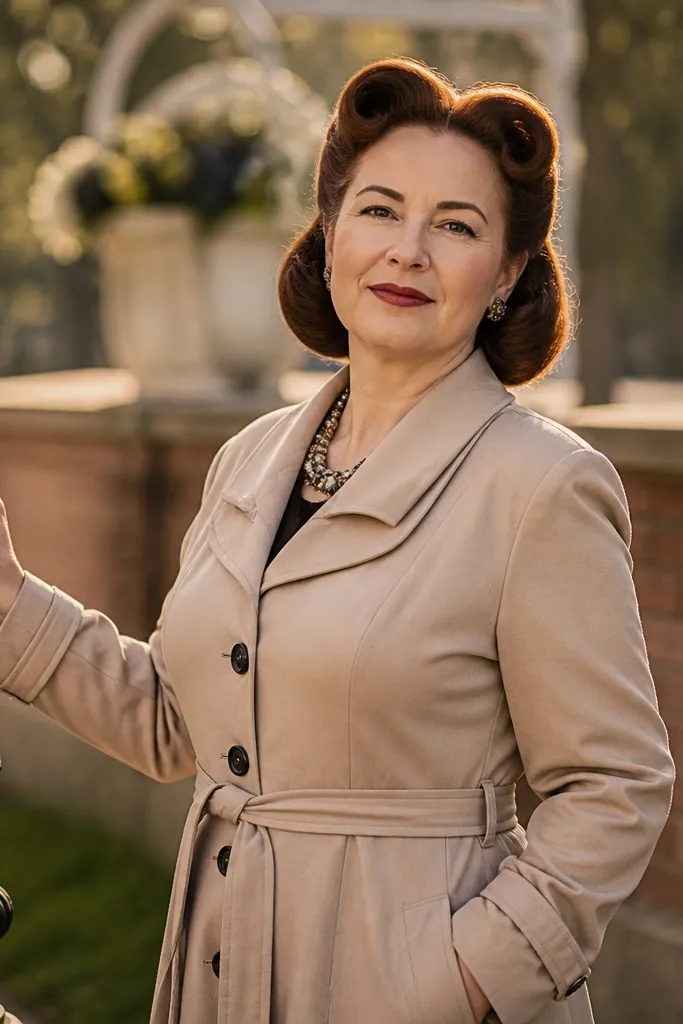
Start on damp hair with a root lift spray, then blow-dry the front sections up and back. Create a roll by taking a 1-2 inch section, rolling it backward with a comb, then pinning at the base and the midpoint. Repeat on the other side, then smooth the remaining hair down into a neat side wave and pin behind the ear. Set with a firm-hold hairspray and wait 5 minutes before removing pins.
Victory rolls on a short bob give you instant vintage glamour. The rolls create height and structure at the front, which is exactly what short hair needs for formal photos. Instead of big, stiff rolls, go for soft rolls that blend into the sides so the look stays wearable. This is especially flattering if your face shape is round or you want to add definition at the cheekbones. It also pairs beautifully with red lipstick and classic makeup because the hair frames the face like a crown.
Skip thisDon’t make the rolls too big; oversized rolls on short hair look top-heavy.
Quick tipUse a rat-tail comb for clean parting — messy part lines show up fast in wedding photos.
4. Feathered Side-Sweep Waves with a Hair Comb
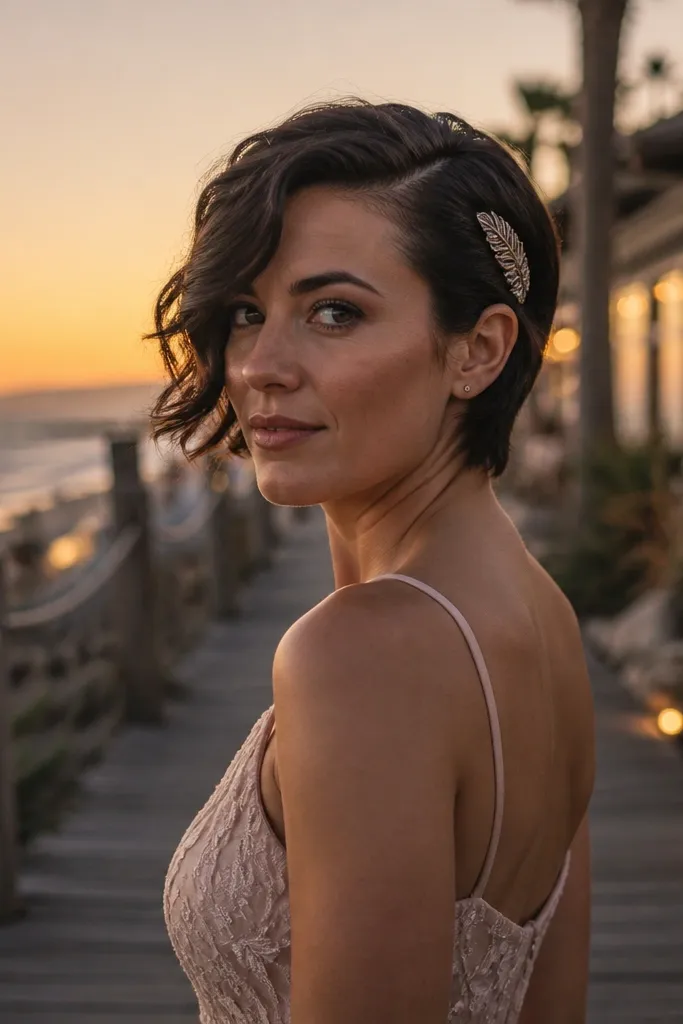
Start by blow-drying with a side part, then apply a heat protectant and a light styling cream. Curl 1-inch sections using a 3/4 to 1-inch curling iron, directing the curls slightly forward at the top and back at the ends. Brush the front gently with a wide-tooth comb to create the feathered effect, then pin the side where the comb will go. Secure the comb with extra pins through the hair, not just into the hair surface.
Feathered side-sweep waves are a flattering choice for short cuts because they create movement without requiring length. The waves start near the crown or mid-front and sweep across the forehead, which elongates the face in photos. A small hair comb pinned near the temple makes the style look bridal without fighting your hair’s natural shape. This look is also forgiving for second-day hair because the wave pattern hides uneven texture. Choose it when you want romantic, photogenic softness rather than slick polish.
Skip thisSkip tight ringlets — they look heavy on short hair and don’t feather nicely.
Quick tipPin the comb slightly higher than you think; it will sit lower once hair cools.
5. Half-Up Micro Braid Crown
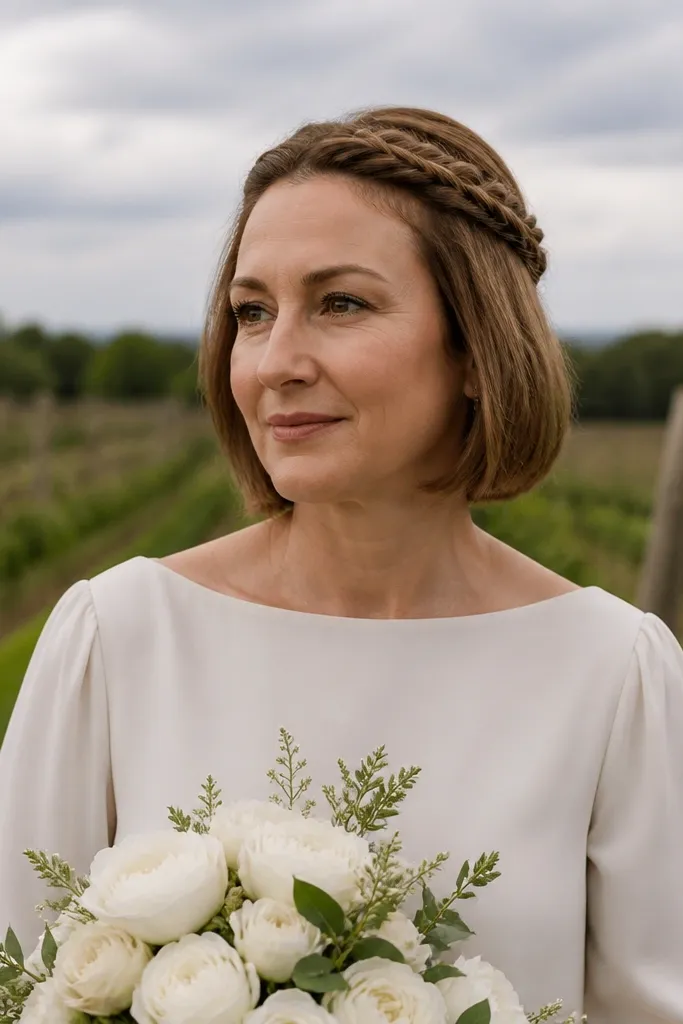
A half-up micro braid crown makes short hair look like it has length. The small braids create a lace-like texture, and pinning them forms a clean frame around the head. This style feels bridal because it has that intricate detail, but it stays practical because you’re not trying to braid long sections. It’s a great match for outdoor weddings and daytime photos where you want texture that catches light. If your hair is bob length or slightly above the shoulders, this gives you the “crown” look without needing extra hair extensions.
Part hair from ear to ear and clip the back section out of the way. Braid tiny sections along the front hairline, working toward the opposite side, then pin the ends under the crown so they disappear. Add two more bobby pins at the base where the crown meets the head so it doesn’t shift when you turn. Finish with a light mist of strong hold hairspray and gently tug the braid loops for a fuller look.
Bring a spare mini elastic and a few pins — micro braids relax if you have to redo one section.
Don’t braid too tight; tight micro braids look flat and stringy on short hair.
6. Sculpted French Twist for a Pixie
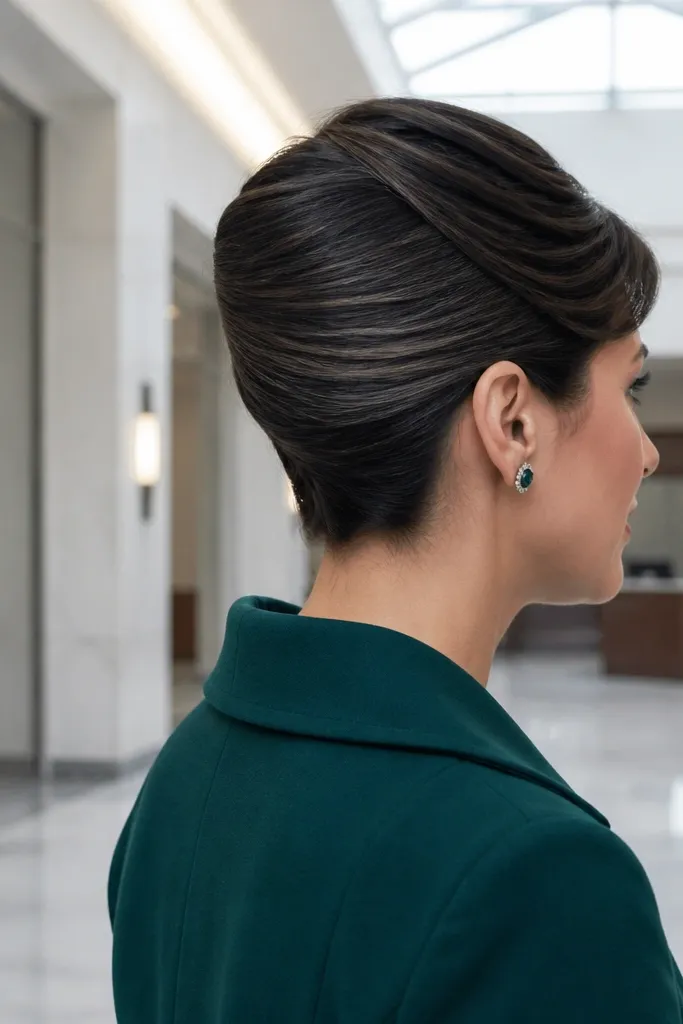
Start by building grip with a dry texture spray or volumizing powder at the roots. Push the top hair slightly back, then gather the back into the direction you want the twist to sit. Twist tightly and pin in layers, using longer bobby pins for the base so the twist holds. Spray firmly, then smooth any flyaways with a tiny amount of styling cream on your fingertips.
A sculpted French twist works on pixie cuts when the twist is tight and the top is shaped first. It looks formal because it’s structured, not messy, and it exposes the neck and jawline. This is a strong option if you wear a veil or headband, because the back shape gives the accessory something stable to sit on. The key is controlling the top texture so it doesn’t poof — you want a smooth twist with controlled lift at the crown. Choose this when you want a modern bridal updo without needing length.
Skip thisAvoid loose twisting; a loose pixie twist turns into a messy bun in photos.
Quick tipUse longer pins (the 2-inch kind) for the base — short pins slip on short hair.
7. Classic Bubble Waves on a Short Bob
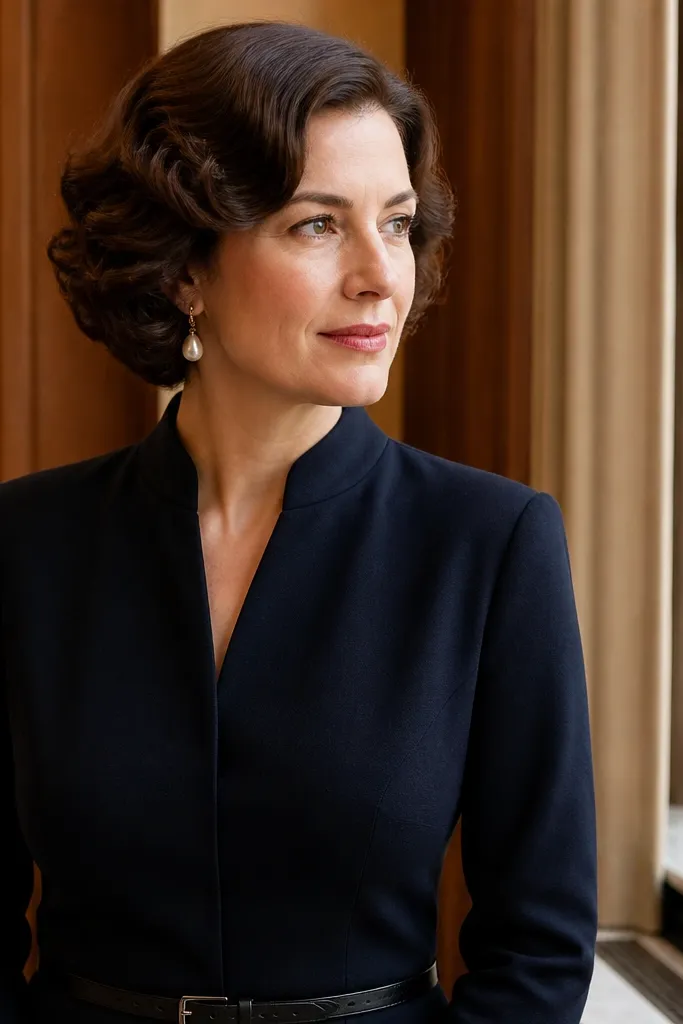
Bubble waves look playful but wedding-appropriate when the styling is crisp. On short bobs, the “bubbles” create visible texture that reads beautifully in both bright sun and indoor lighting. The side part keeps it flattering, and the wave pattern adds volume where short hair often falls flat. This is a great choice for brides who want something a little different from standard curls. It also pairs well with minimal jewelry because the hair does the talking.
Start with heat protectant and blow-dry smooth, then create a deep side part. Use a flat iron to clamp small sections and roll the hair in alternating directions, keeping each bend tight and evenly spaced. After curling, let the waves cool completely, then separate with fingers to create the bubble shape. Finish with medium-to-firm hairspray and lightly brush only the front so it doesn’t look stiff.
Space the bends evenly on purpose — uneven bubbles look accidental in photos.
Skip soft, loose waves; the bubble effect needs tight bends to show.
8. Sleek Bob with a Micro Crown Headband
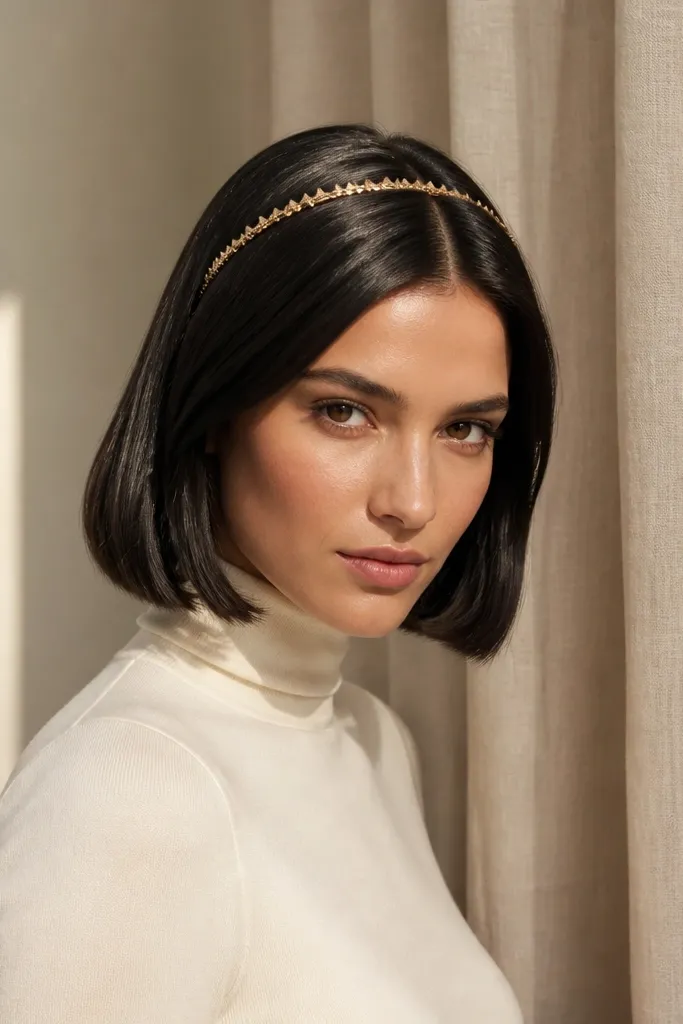
A sleek bob with a micro crown headband is clean, elegant, and very photo-friendly. Straight or lightly polished hair makes the headband stand out, and the thin band reads delicate in portraits. This is a smart pick if your hair is naturally straight or if you’re willing to straighten for the day. The look also helps with veil fit because a smooth base reduces snagging. Choose this when you want minimal styling but maximum polish.
Start by drying hair completely and apply a smoothing serum to the mid-lengths and ends. Straighten in small sections, then brush the top layer flat for a glassy finish. Place the headband slightly behind the hairline so it sits steady and doesn’t slide forward. Secure with bobby pins at the sides, then set with a light mist so the straightness holds for portraits.
Test the headband placement with the veil or hat before the event so it doesn’t sit too low.
Avoid using too much serum on roots — it flattens the hair and makes the band look off-center.
9. Half-Up Twist with Curtain Bangs
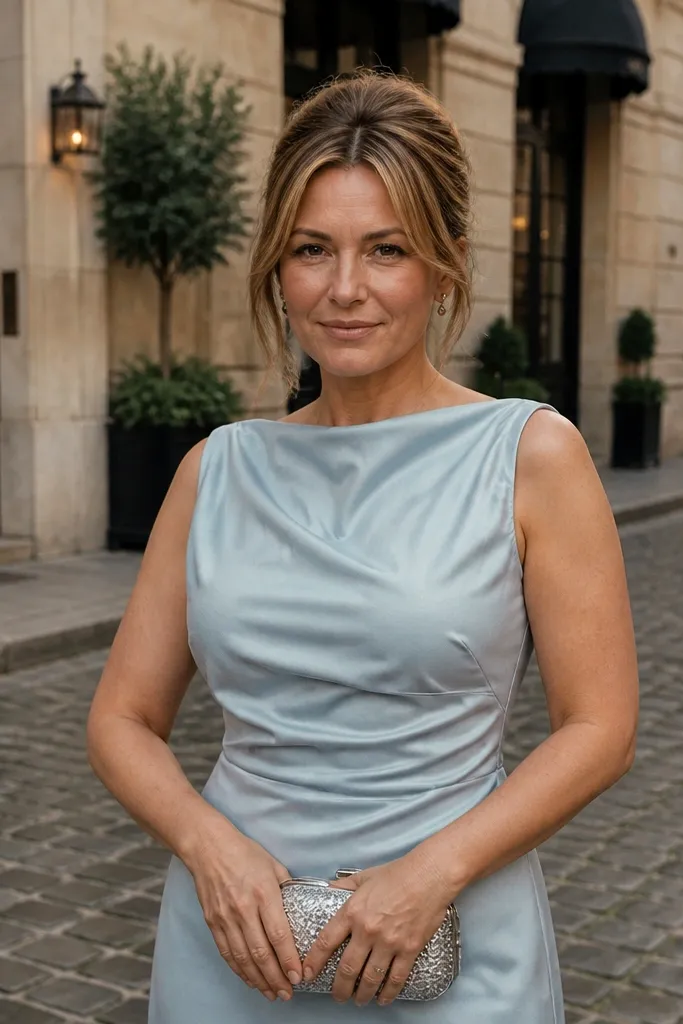
Half-up twists plus curtain bangs is one of the most flattering formal styles for short hair because it frames your face from both sides. The twist keeps the top section off your forehead for clear photos, while the curtain bangs soften the frame. This look is also great if you have an uneven bob or layers that don’t curl evenly. It reads romantic and polished without looking overdone. Pick this when you want a bridal style that still feels like you.
Start with a middle or soft side part and blow-dry bangs with a slight outward curve at the ends. Twist the top sections back from each side and pin them at the crown, keeping the twist narrow so it doesn’t bulk up. Curl or shape the curtain pieces with a small barrel iron, then lightly separate the front strands for that airy look. Finish with a soft-hold hairspray so bangs move naturally but stay in place.
Pin the twist higher than the crown — it keeps your face open and prevents the style from sagging.
Don’t pin the front too tightly; tight pinning makes curtain bangs look stuck instead of flowing.
10. Braided Side Bun for a Short Bob
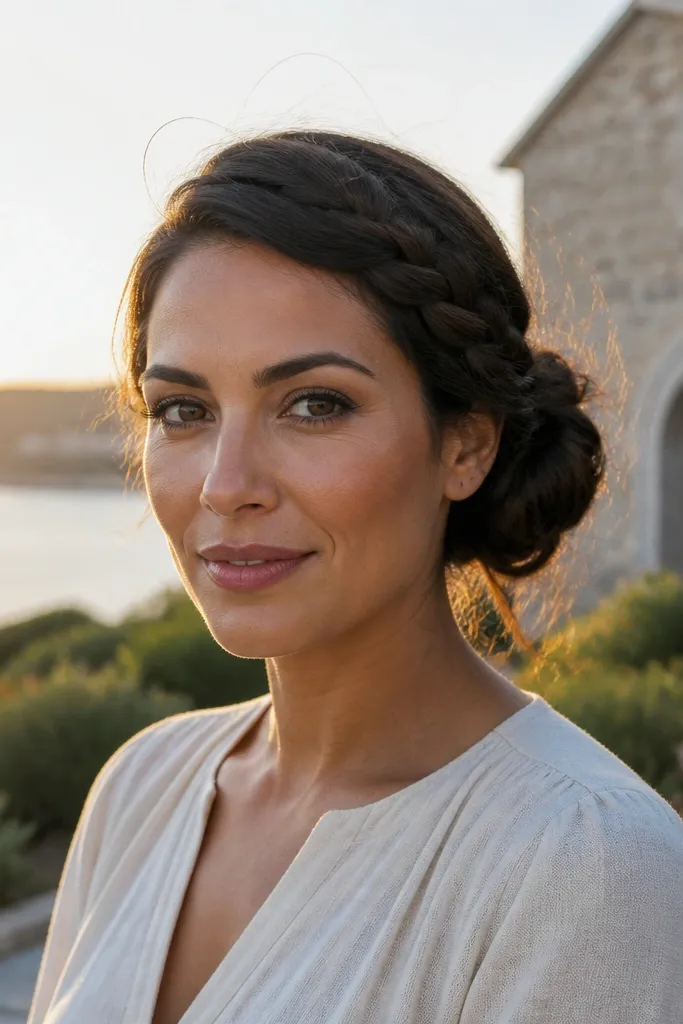
Start by styling hair with a texture spray so it grips pins. Gather hair to one side, twist into a compact bun at the nape or just above, then pin the base with two to three pins. Braid a small section from the remaining hair, wrap the braid around the bun, and pin the end underneath. Spray firmly, then gently tug the braid for a fuller look that still stays neat.
A braided side bun is dramatic without needing long hair. The side placement creates angle and motion, and the braid adds detail that reads bridal in close-ups. On short bobs, the bun works best when it’s slightly messy at the edges but pinned firmly at the base. This look is perfect for receptions and outdoor ceremonies because it stays put and looks intentional. It also works well with earrings since the side bun keeps one side of your face open.
Skip thisAvoid a perfectly smooth bun; short hair needs texture so it holds the shape.
Quick tipUse a few grip pins at the bun base — they prevent the bun from sliding when you move.
11. Rolled Rose Twist at the Nape
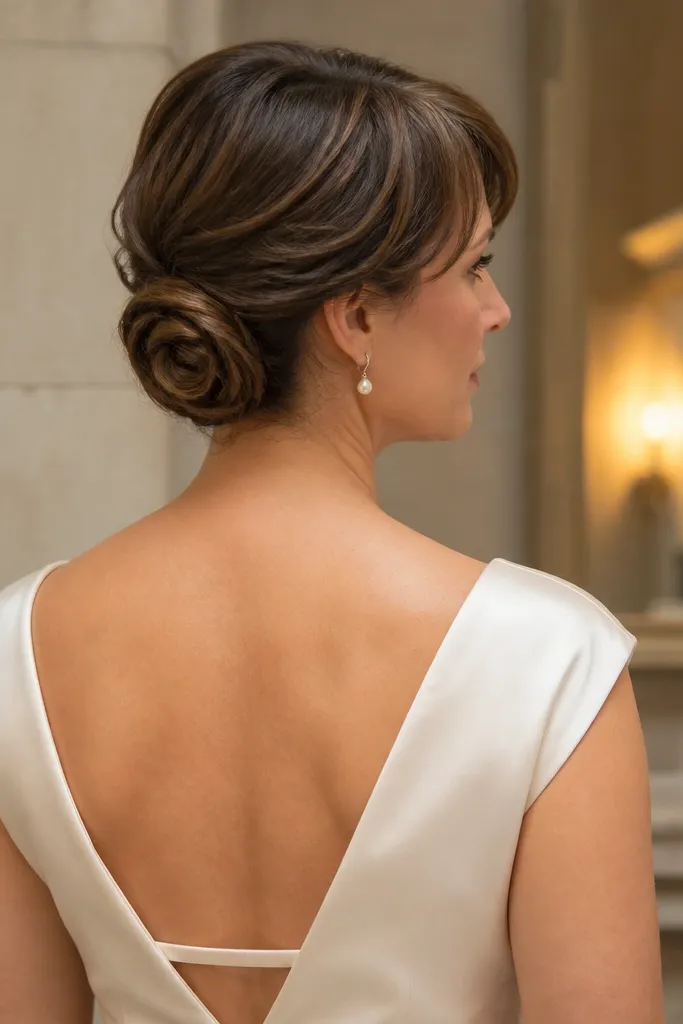
This is the most “bridal-detail” look on the list. The rose-like twist at the nape creates a focal point that shows in up-close photos, especially if your dress has an open back. Short hair can still form a flower shape when you roll in layers and pin with patience. The top stays softly lifted, so the style doesn’t look flat or heavy. Choose this if you want something feminine and special without a full classic updo.
Create a soft lift at the crown with blow-dry and root spray, then smooth the sides so they don’t puff. Gather the hair at the nape into a small section and start rolling inward toward the scalp, pinning each layer as you build the rose shape. Use longer pins for the core so the roll stays tight. Finish with firm hairspray, then add a tiny pearl or rhinestone pin on the outer edge for extra sparkle.
If your hair is slippery, dust the nape with a tiny amount of setting powder before rolling.
Don’t roll too loosely; loose rolls look like a twist, not a rose.
12. Sleek Center-Part Waves with a Veil Clip
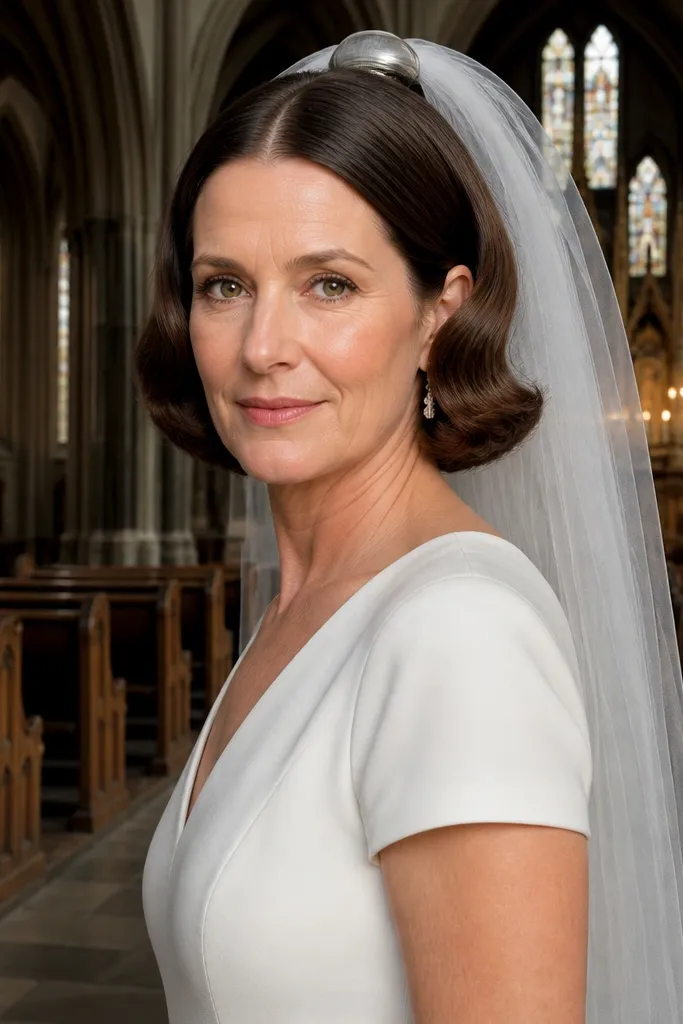
Start by blow-drying with a center part and apply smoothing cream to the top layer. Curl only the ends and mid-lengths with a 3/4 to 1-inch iron, keeping the roots flat so the part stays sharp. Pin the sides lightly behind the ears so there’s no movement under the veil. Clip the veil at the crown and secure it through the same pinned points, then mist with firm hairspray to lock everything in.
Center-part waves look elegant because they create symmetry, and short hair benefits from symmetry more than you’d think. Keep the roots sleek and the wave pattern controlled, then add a veil clip that sits at the crown for a clean line. This style works well for brides wearing a traditional veil, because it doesn’t fight the veil’s weight — the hair is already smooth and pinned at the right spots. It also looks polished in both daylight and flash since the shine is controlled. Pick this when you want classic bridal styling with a modern, neat finish.
Skip thisAvoid loose roots — a puffy center part under a veil reads messy fast.
Quick tipPractice veil placement with the same hairstyle the day before; tiny clip shifts change the silhouette.
13. Textured Pixie with a Flower Crown Pin
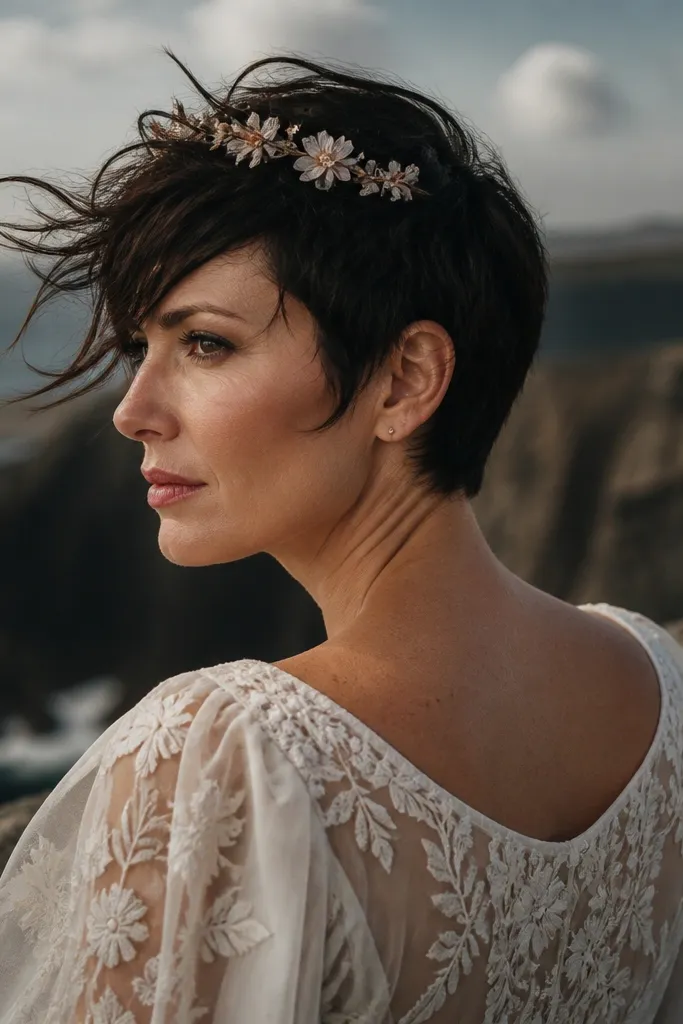
A textured pixie can look incredibly formal when the texture is intentional. Instead of trying to smooth everything down, you shape the pixie so it has lift at the crown and controlled direction in front. A flower crown pin adds the bridal element without covering your face or flattening your cut. This is a good option for outdoor weddings and late-summer ceremonies because the texture catches light and looks lively. Choose this when you want a style that feels fresh and modern, not like you’re wearing someone else’s hair.
Start with dry hair and use a matte styling paste or cream, warming a pea-sized amount between your fingers. Shape the crown with upward motion, then direct the front strands slightly to one side so it frames your eyes. Add the flower crown pin near the front hairline, then secure it with two bobby pins hidden in the texture. Finish with a light mist of hairspray so the spikes hold without getting crunchy.
Bring a small lint roller — flower pins can pick up stray fibers from veils and bags.
Skip wet-looking gel; shiny pixie texture reads greasy in flash photos.
14. Satin-Smooth Bob with a Bow Hair Tie
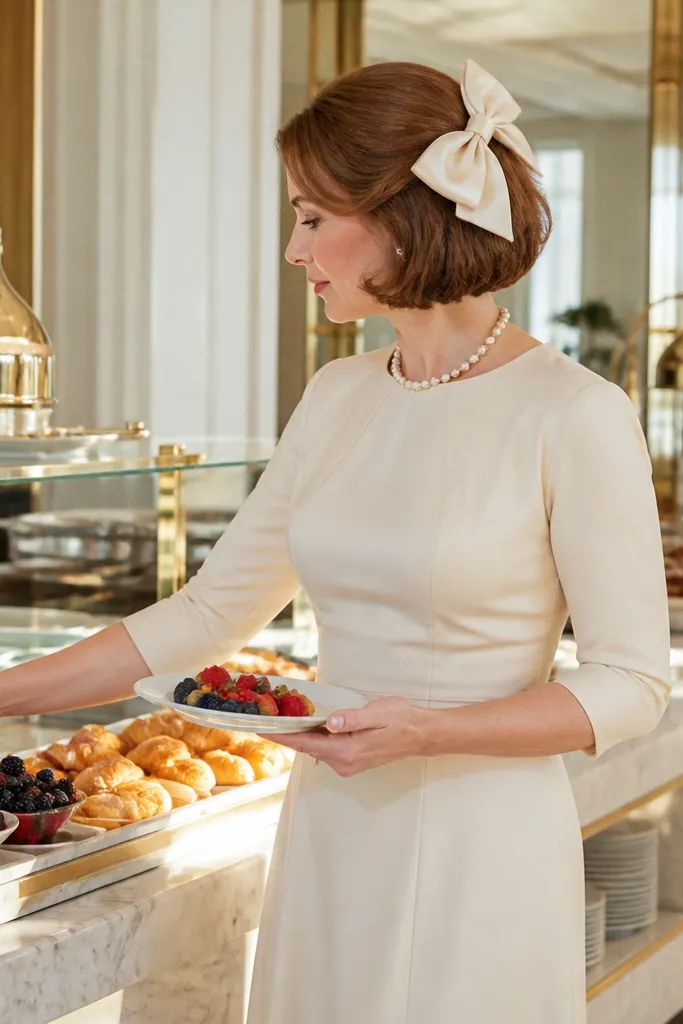
Start by blow-drying hair straight and flat using a concentrator nozzle, then apply smoothing serum to the mid-lengths and ends. Straighten in small sections for consistent shine, then brush the top layer until it lies flat. Position the bow at the back of the head where it will show in side profiles, and pin it through the hair so it doesn’t slide. Set with a quick hairspray mist, then check the back in a mirror before you leave.
A satin-smooth bob with a bow hair tie is sweet, formal, and very photogenic. The smooth finish makes the bow look intentional instead of decorative, and the bow placement at the back or side adds a clear focal point. This style works best on bobs that can be polished with heat or a strong smoothing routine. It also photographs beautifully because the bow creates shape behind the head while the face stays clean. Choose this when you want a classic bridal vibe with a slightly playful touch.
Skip thisAvoid matte styling on this look; matte makes the bow look dull and the hair look unfinished.
Quick tipPin the bow with a cross pattern and test it by turning your head — if it shifts, it will show in photos.
15. Twisted Crown Updo for a Short Bob
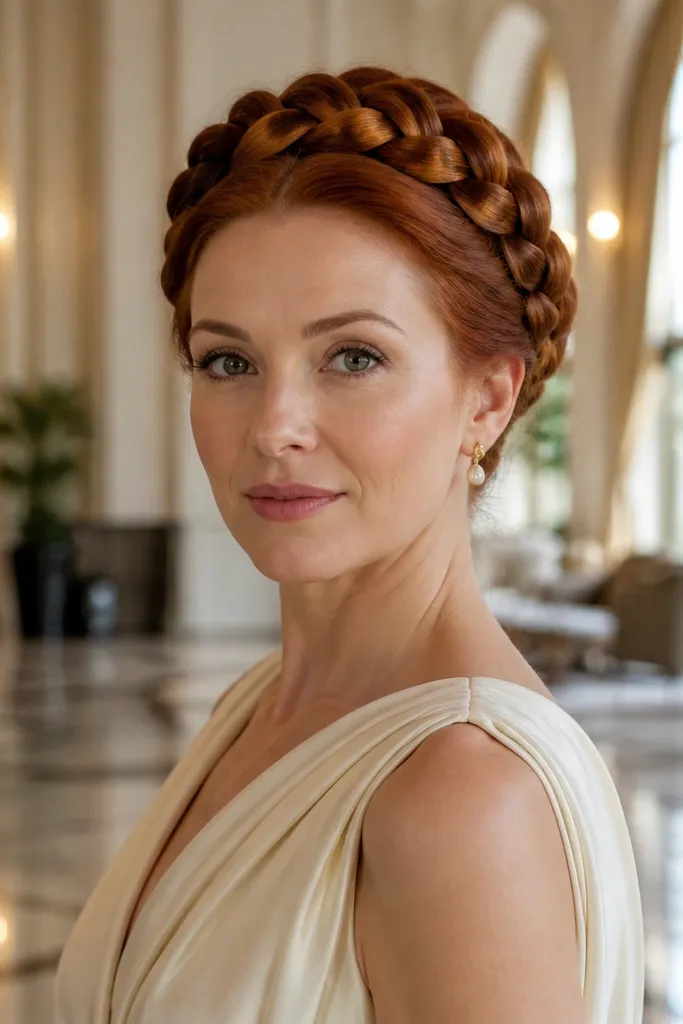
Part hair from ear to ear and clip the back section while you work the front. Twist small sections from the hairline backward, pinning each twist into a growing crown ring. When you reach the sides, keep the twists snug so the crown stays round, then tuck and pin remaining ends under the crown. Finish with firm hairspray and a final pin check along the nape and both sides.
A twisted crown updo is formal and sculptural, even on short hair. The crown wraps the head, creating a halo effect that looks bridal in portraits and ceremony photos. This style hides awkward short ends by pinning them into the crown structure, so you don’t get that “hair sticking out” look. It also stays secure because the crown has multiple pin anchors around the circumference. Choose this when you want an updo look that still feels airy and not too heavy.
Skip thisDon’t skip the multiple anchor pins — a single pin per twist won’t hold on short hair.
Quick tipUse a mirror for the back pin line; crown updos fail when one side loosens first.



