1. Kampong Glam shophouse arches with bold linen
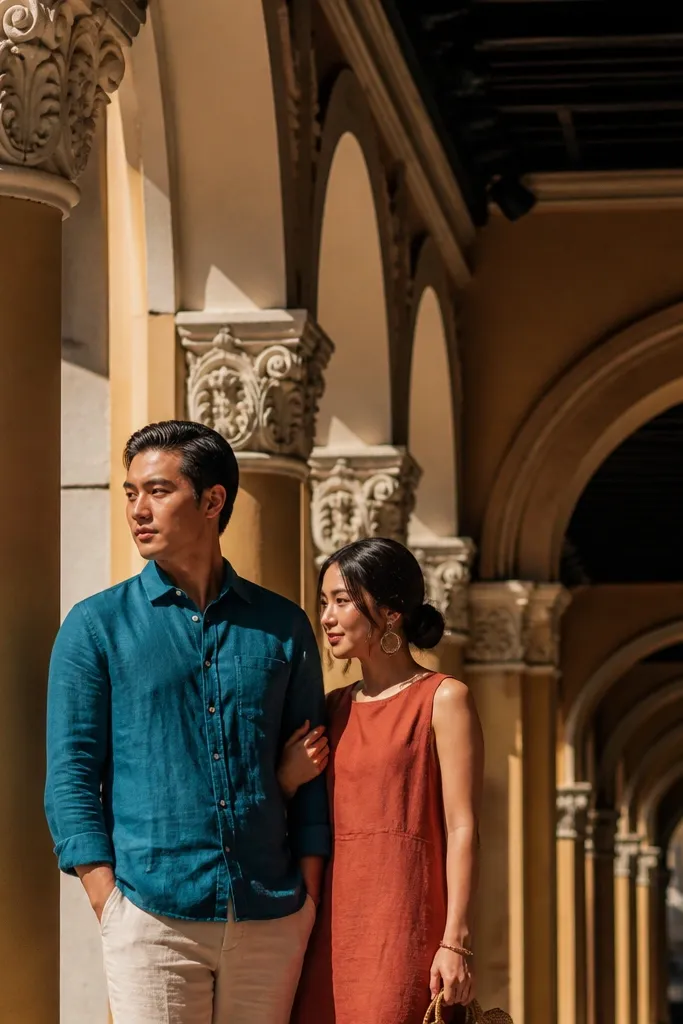
Start by choosing one shophouse lane and staying within 30-40 meters so you don’t lose time to crowd hopping. Then scout two angles before shooting: one straight-on for symmetry under the arches, and one at a corner for depth. Travel is easy by MRT to Bugis, then walk 10-15 minutes; keep an eye on nearby cafes if you need a quick wardrobe break. Spend about 60-90 minutes total, and book a photographer with experience in narrow streets so they can manage spacing and timing. For cost, expect a typical pre-wedding outdoor session to run in the mid-range for Singapore — plan around $250-800 depending on package length and editing.
Kampong Glam gives you that instantly recognizable Singapore vibe — ornate facades, warm tones, and passageways that frame couples naturally. The best frames come from the repeating arch shapes, because they create a clean visual rhythm behind you. Wear linen in warm creams, rust, or deep teal so your outfit doesn’t fight the facade colors. This works especially well for couples who want stylish, slightly dramatic photos without needing a huge “set.” Go in the morning or late afternoon so the street isn’t packed and your background stays sharp.
Skip thisDon’t shoot right at peak evening foot traffic; the best arch photos need clean, uncluttered backgrounds.
Quick tipBring a small fabric lint roller — the shophouse area shows dust on dark trousers fast.
2. Clarke Quay at blue hour with dark denim
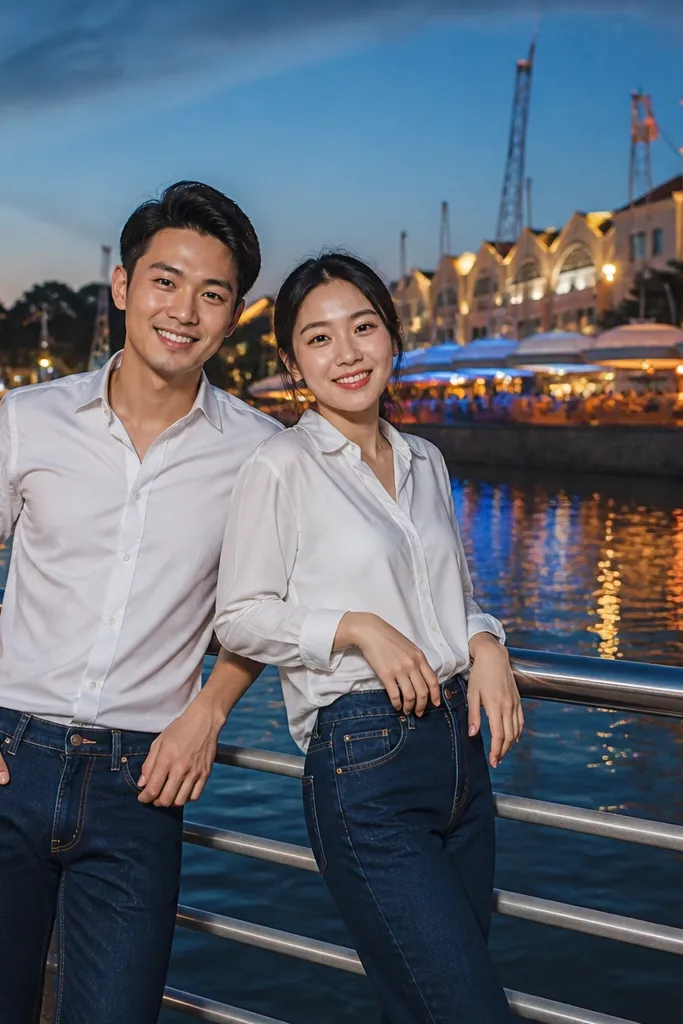
Start by arriving 30-45 minutes before sunset so you can test exposure before the lights fully kick in. Then do one set along the water edge for reflections, and one set on the bridge or steps for height and leading lines. Getting there is straightforward via MRT to Clarke Quay, then short walking routes along the promenade. Plan 75-105 minutes so you’re not rushed when the light changes quickly. If you want fewer people, pick a weekday evening and keep your shooting time tight to avoid crowds thickening.
Clarke Quay looks best when daylight is fading, when the buildings glow but the sky still has color. Blue hour gives you reflections in the water and a cinematic feel without looking like a night club. Dark denim and crisp white shirts anchor the look and keep skin tones flattering under mixed lights. This is a great pick if you want “styled nightlife energy” while still keeping the photo romantic. It also works for couples who want a variety: riverwalk, bridges, and building lights all within a short walk.
Skip thisSkip bright colored outfits here; neon signage can overpower reds and oranges.
Quick tipWear shoes that don’t scuff easily — the riverwalk has rough patches and you’ll be stopping often for poses.
3. Gardens by the Bay Supertree silhouettes with jewel tones
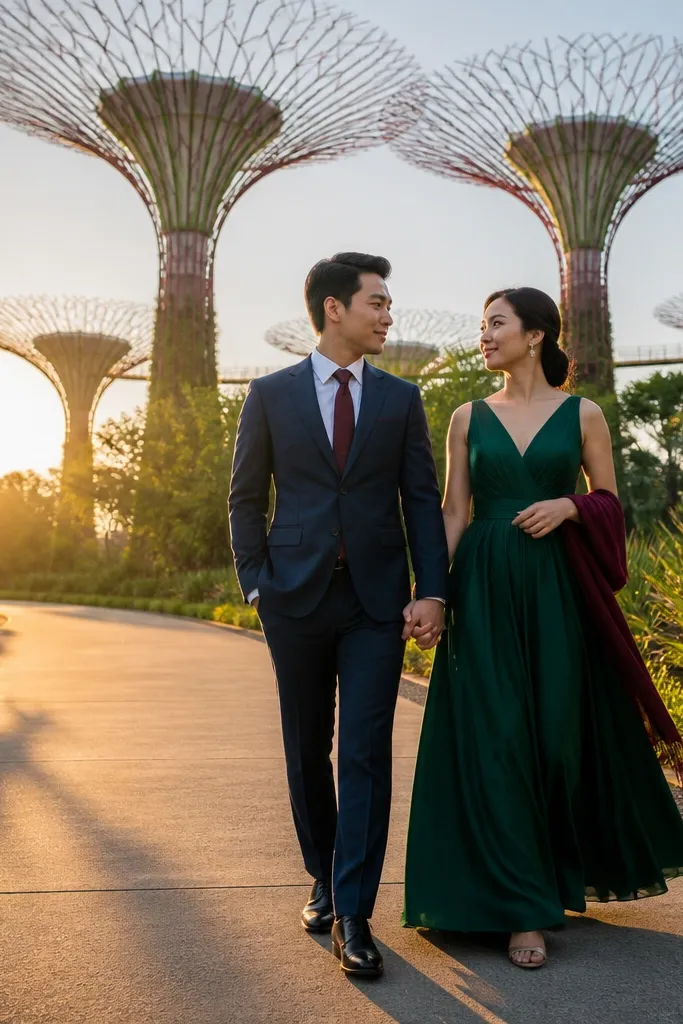
Start by picking your outfit palette first, then choose a shooting point where you get both a tall background and open space for full-body shots. Walk to one main vantage and do a 20-minute routine: full-body walking, then turn-and-look poses, then a close framing series. Get there by MRT to Bayfront, then use the walkway access to move between areas quickly. Budget time at 90-120 minutes because you’ll want wide and close shots. For fees, treat this as a paid attraction day depending on which garden areas you enter.
The Supertree area gives you height, structure, and a futuristic Singapore look that still photographs beautifully outdoors. Silhouettes and long shadows add drama, especially when you place your bodies slightly off-center. Jewel tones like emerald, burgundy, and navy pop against the greenery and concrete. This set is ideal if you want a polished, high-fashion feel and don’t mind a more “planned” background. It also gives you multiple looks in one area: wide skyline frames and tighter foliage textures.
Skip thisDon’t shoot with your backs to the main lighting — you’ll get silhouettes without shape.
Quick tipWear breathable fabrics — Singapore humidity makes heavy wool look flat under bright lights.
4. Southern Ridges sunset walk with flowy neutrals
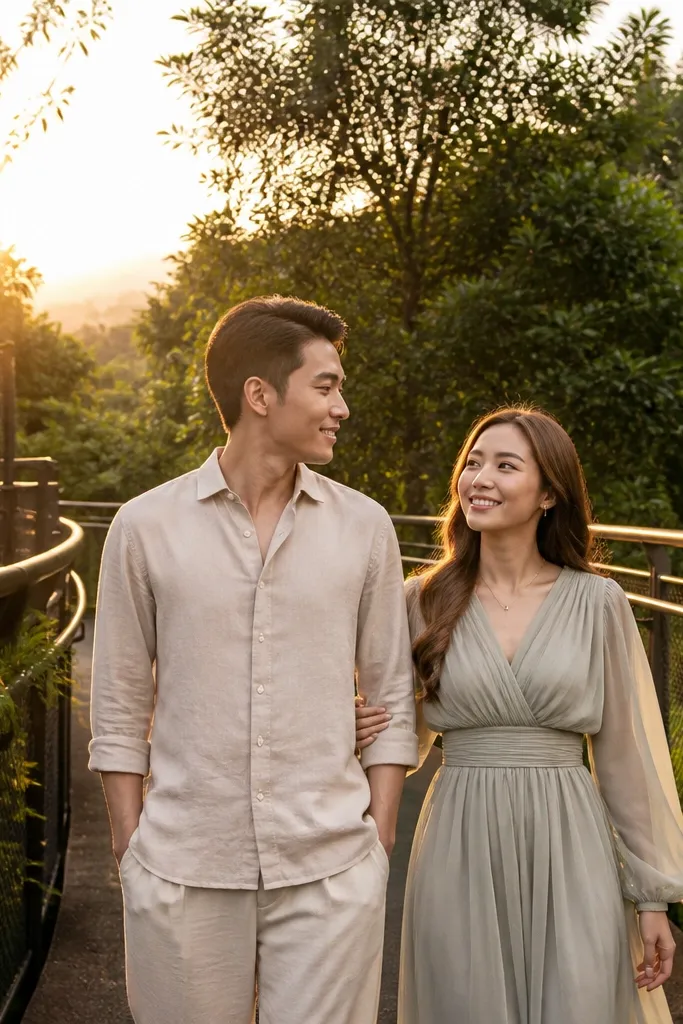
Southern Ridges is a cheat code for stylish outdoor photos because it gives you layers of greenery and a moving background. The elevated walk means you can shoot with depth — trees fade behind you, and your couple stays crisp. Flowing neutrals like beige, sand, and soft sage look clean against green foliage. This is perfect for couples who want motion, wind in outfits, and photos that feel “designed” without looking posed. The best frames come from overlooks where the path curves and frames your walk.
Start with a route plan: pick one overlook segment and commit to it so you don’t spend the session hiking randomly. Then shoot in three passes — walking on the path, standing at the overlook, and a short close-up set beside textured greenery. Travel is easiest by MRT to HarbourFront area plus taxi or bus for the trail entrance; plan for 10-20 minutes of getting to the exact start. Give yourself 2-3 hours total if you want relaxed pacing, but 90 minutes at one segment still delivers strong photos. Book a weekday if you want fewer people on the ridge.
Bring a small towel or tissue — humidity makes leaves and benches leave marks on light fabrics.
Avoid shooting in the middle of the ridge at peak sun; shadows get patchy and faces look uneven.
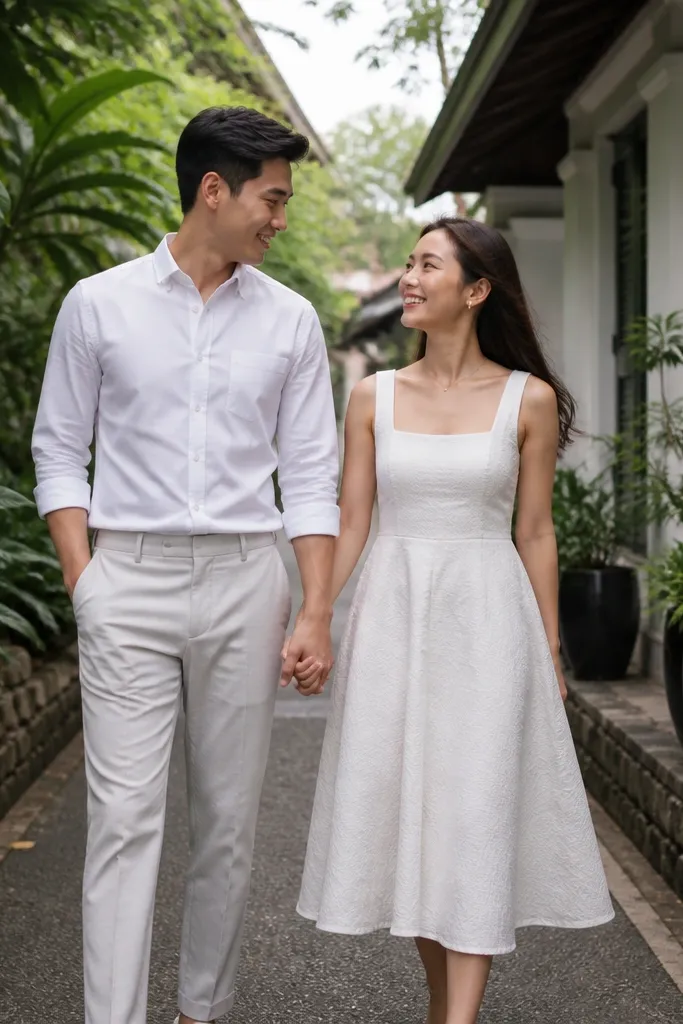
5. Dempsey Hill greenery lanes with tailored whites
Start by choosing a single cluster of lanes near the main entrance so you can keep your shoes and pace comfortable. Then do a 15-minute walking sequence on the lane, followed by a doorway or wall backdrop set for tighter frames. Getting there is simple by MRT to Botanic Gardens area plus a short ride or bus to Dempsey. Allocate 75-90 minutes; you’ll get enough angles without dragging the session. For cost, plan for transport and the photographer package — Dempsey itself doesn’t require special paid entry for most outdoor areas.
Dempsey Hill has that calm, boutique feel that photographs like a styled editorial set. The greenery lanes give you soft backgrounds, and the low-rise buildings create a grounded, timeless look. Tailored whites and light gray keep your photos clean and timeless in Singapore’s humid air. This works well for couples who want outdoor photos that feel intimate, not crowded or touristy. It’s also easy to get variety because there are multiple lanes and doorways without needing to travel far.
Skip thisSkip dark outfits if you’re shooting after heavy rain; wet ground can stain hems and shoes.
Quick tipUse a light-colored outfit with texture — linen or cotton poplin looks best when the background is leafy.
6. MacRitchie TreeTop Walk with dramatic hair movement
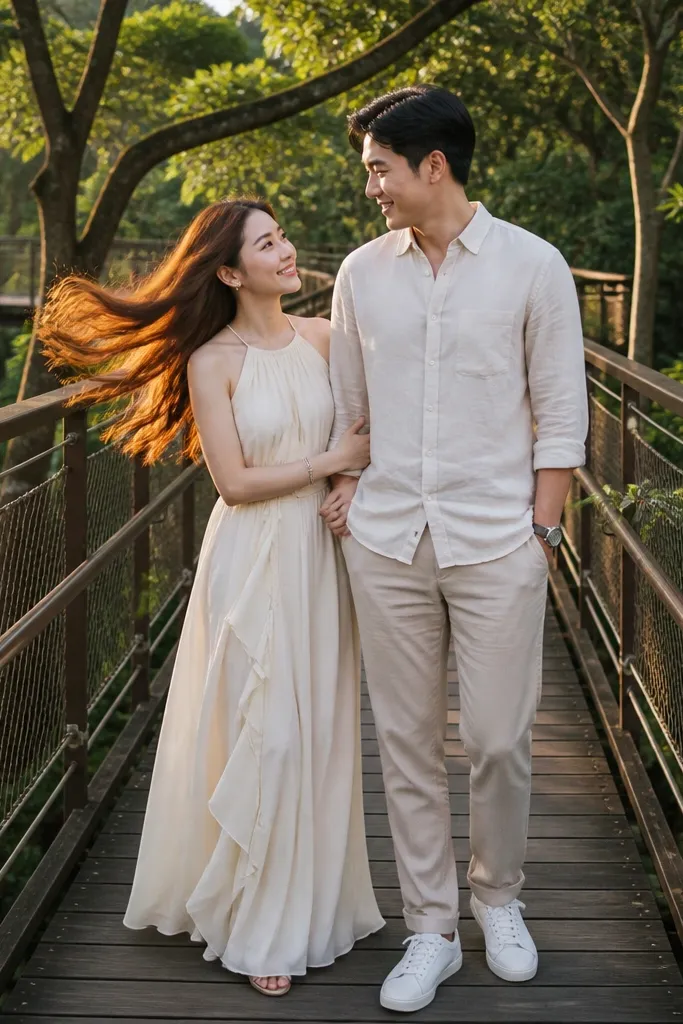
Start by arriving early morning so you can shoot before the walkway gets busier. Then plan two sets: one on the bridge for depth, and one at the viewing area for wide shots with canopy layers. Getting there is easiest via MRT to the nearest station plus bus or taxi to MacRitchie Park. Spend about 90-120 minutes including walking time; don’t rush, because the suspension walkway makes poses feel more deliberate. If you want the cleanest frames, choose a weekday and avoid rainy days.
MacRitchie gives you a forest canopy look that feels like you escaped the city, and the TreeTop Walk adds instant structure. The elevated walkway creates leading lines that pull the viewer toward you, which makes photos feel more “cinematic” than a flat park. For style, pick clothes that move — chiffon, light linen, or breathable cotton with a bit of drape. This is a strong choice for couples who want a moody, nature-forward aesthetic without leaving Singapore. Go early to keep the platform calmer and let the background stay uncluttered.
Skip thisDon’t shoot near the busiest entry points — background people ruin the “escape the city” look.
Quick tipPack a small anti-frizz spray; humidity + canopy breeze can turn flyaways into a visual distraction.
7. East Coast Park shoreline with crisp stripes
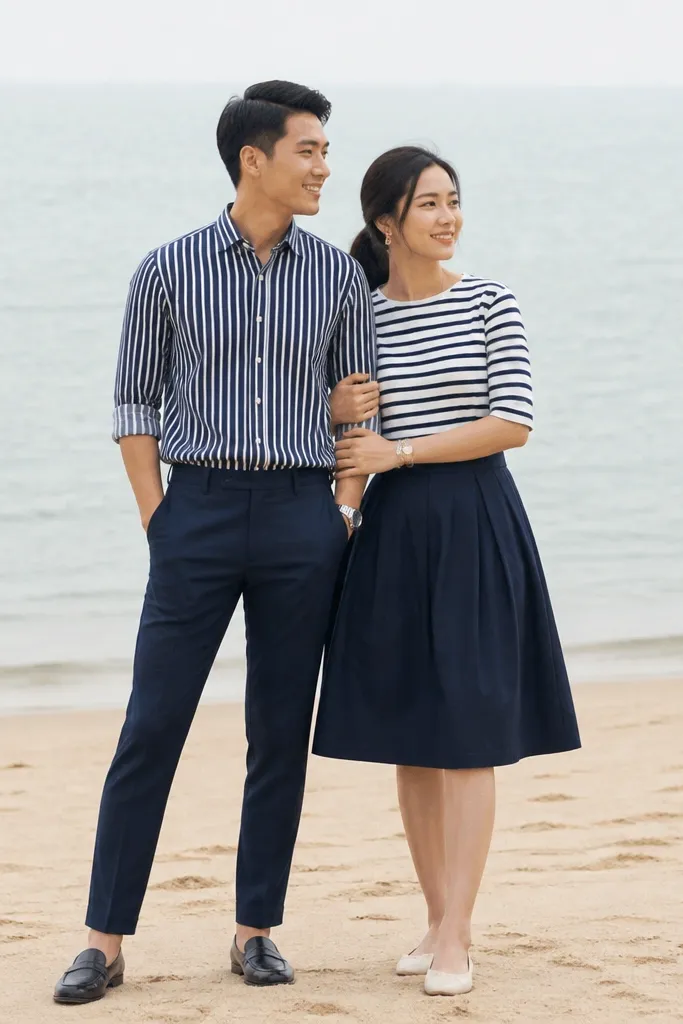
Start by picking a specific stretch of beach and arriving early enough to claim a clean background area. Then do a walking sequence along the sand line, followed by a seated or leaning pose with the horizon behind you. Getting there is easiest by MRT to Bedok plus bus or taxi; allow extra time during peak traffic. Plan 90 minutes so you can shoot during the softer light and still have time for clothing adjustments. For money, the beach itself is free for outdoor access, so your main costs are transport and photographer.
East Coast Park is dependable for beach-style pre-wedding photos because the shoreline gives you a clean horizon and lots of open space. Crisp stripes and nautical colors look sharp against the sea, and the flat background makes outfits stand out. This location is great for couples who want bright, breezy photos without the drama of crowds in tourist hotspots. Wind here is real, and that’s a gift if you plan for it — you’ll get natural movement instead of stiff posing. Best results come when you place your bodies slightly turned toward the horizon to keep the composition balanced.
Skip thisDon’t schedule this at midday; the sky glare flattens faces and makes the sea look harsh.
Quick tipWear shoes you can rinse — sand sticks, and you’ll be walking more than you think.
8. Pulau Ubin rustic paths with earth tones
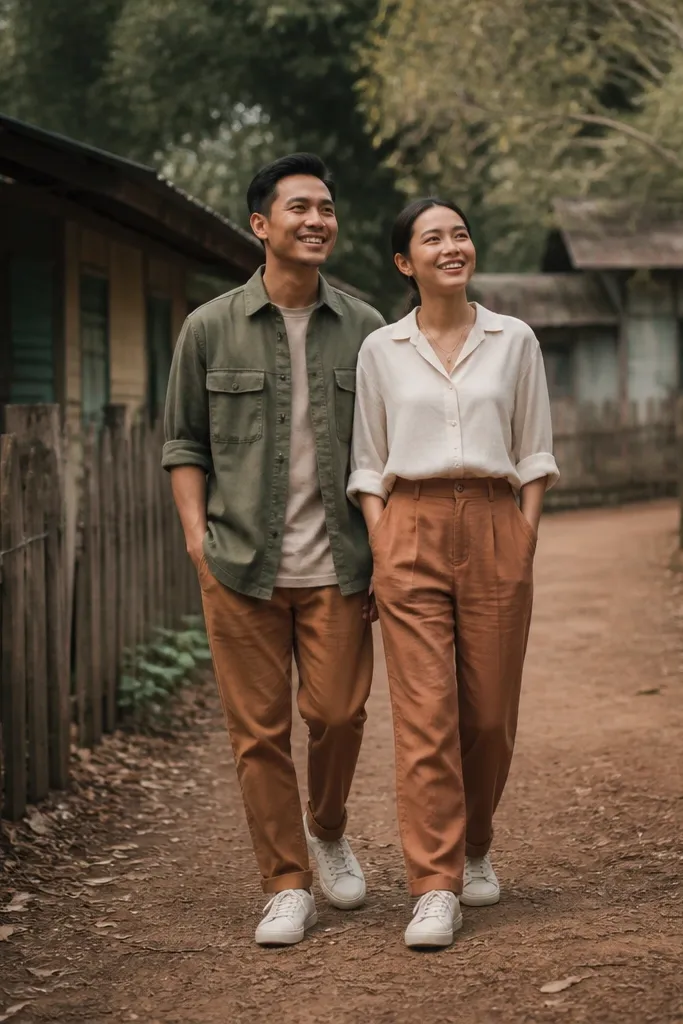
Start by choosing your photo route before you arrive: pick one main path and one side alley so you don’t waste time searching. Then shoot in two modes — slow walking for texture and a few framed portraits against fence lines for clean backgrounds. Travel involves getting to Changi Ferry Terminal area, then taking the ferry and coordinating transport on the island. Give yourself 2-3 hours if you want relaxed pacing; 90 minutes is enough if you keep the route tight. If you want the least crowd, go earlier in the morning and plan to finish before late morning.
Pulau Ubin is where you get rustic texture in Singapore, from wooden fences to weathered paths. Earth tones like olive, terracotta, and cream look natural here and keep the photos from looking staged. You’re also getting an offbeat feel — the background isn’t full of signage, so your outfits and faces stay the focus. This is ideal for couples who want a documentary-style aesthetic but still want it to look stylish. The best photos come when you lean into the setting — hold props like a simple umbrella or a woven basket for visual rhythm.
Skip thisSkip glossy fabrics; they reflect the bright sky and look out of place against rustic textures.
Quick tipBring a change of socks for light shoes — Ubin paths can be dusty even when it’s dry.
9. Botanic Gardens orchid garden edges with soft pastels
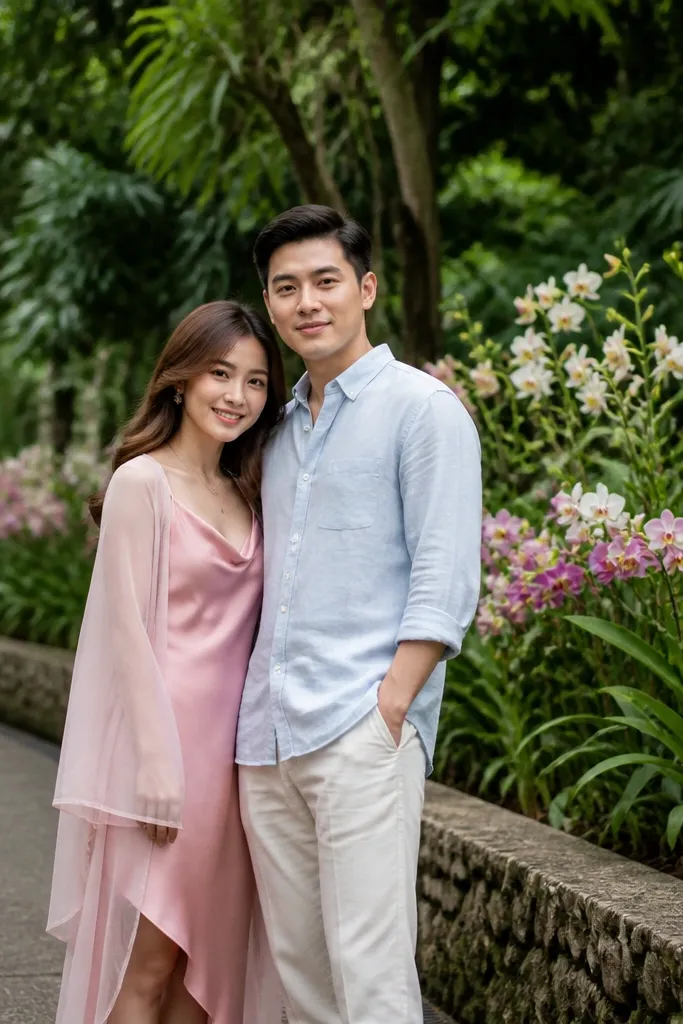
Botanic Gardens gives you controlled beauty — lush greenery, layered plants, and paths that frame couples without looking messy. The orchid garden edges are especially photogenic because the background stays dense but soft, which makes skin tones look smooth and flattering. Soft pastels like blush, pale blue, and light lilac are the cleanest choices here. This works for couples who want romantic photos without relying on skyline views. It also gives you a “timeless Singapore” look that doesn’t need heavy styling.
Start by scheduling an early slot so you avoid harsh sun and busy walkways. Then pick a small cluster of spots: one narrow path for leading lines, one plant wall for close frames, and one area with open light for full-body portraits. Getting there is easy by MRT to Botanic Gardens area, then walking in. Plan about 90 minutes so you can move calmly and keep the photos consistent. Expect attraction entry rules depending on the garden zones — check access before you go.
Use a plain background approach: keep the framing tight so flowers don’t turn into visual noise.
Don’t wear bright neon here; saturated colors fight the garden palette.
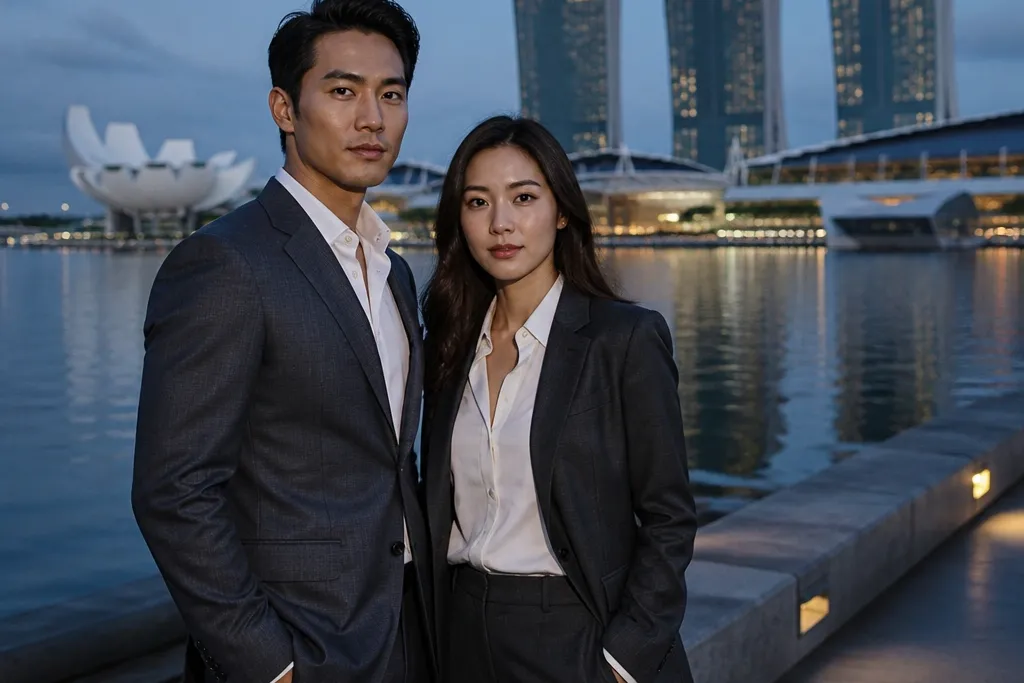
10. Marina Bay waterfront promenade with monochrome suits
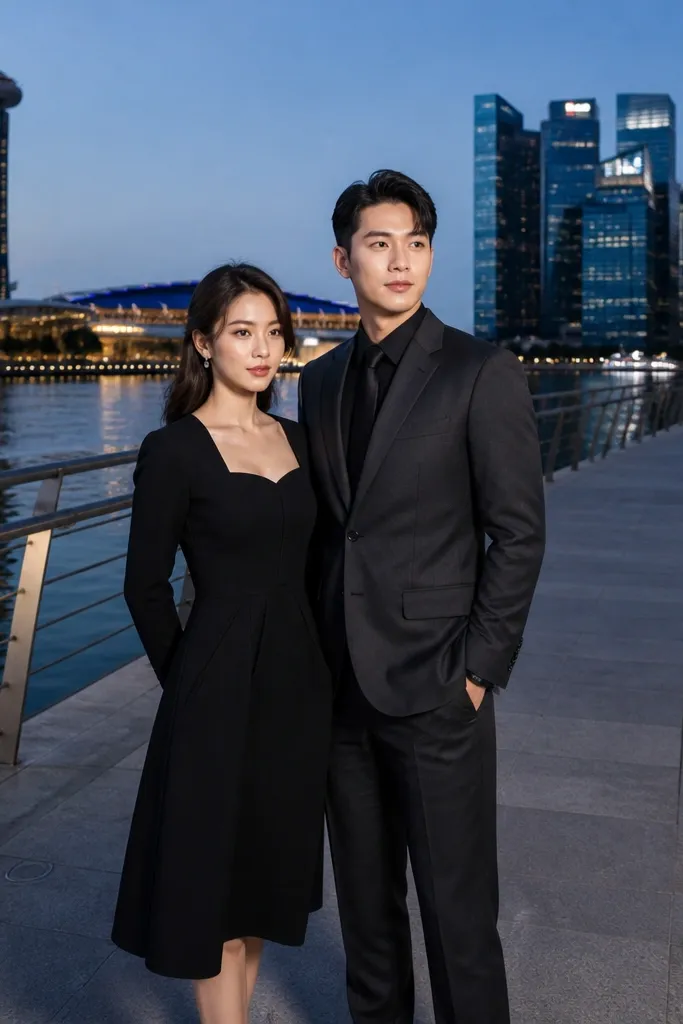
Start by arriving near sunset, then pick a side of the promenade where the sun isn’t directly in your eyes. Then do your hero shots first: walking toward the skyline, then turning back for a symmetrical look. Getting there is simple by MRT to Marina Bay or Raffles Place plus a short walk. Spend 60-90 minutes; Marina Bay looks best when you move quickly and keep light consistent. If you want less crowding, choose a weekday or shoot right as the light transitions.
Marina Bay promenade is the cleanest place in Singapore for a modern, styled look because the geometry is obvious — wide walkways, skyline lines, and open sky. Monochrome outfits look sharp against the water and concrete, and you’ll get clean negative space for composition. This is ideal if you want photos that look expensive without using props. You can also get both wide establishing shots and tight portraits with the skyline behind you. The trick is choosing the angle so you don’t get harsh reflections blasting the lens.
Skip thisDon’t set up in the brightest open section at midday; the reflections flatten faces.
Quick tipBring a small towel for condensation on water bottles — Marina Bay humidity can fog glasses and camera gear quickly.
11. Little India stair murals with saturated outfits
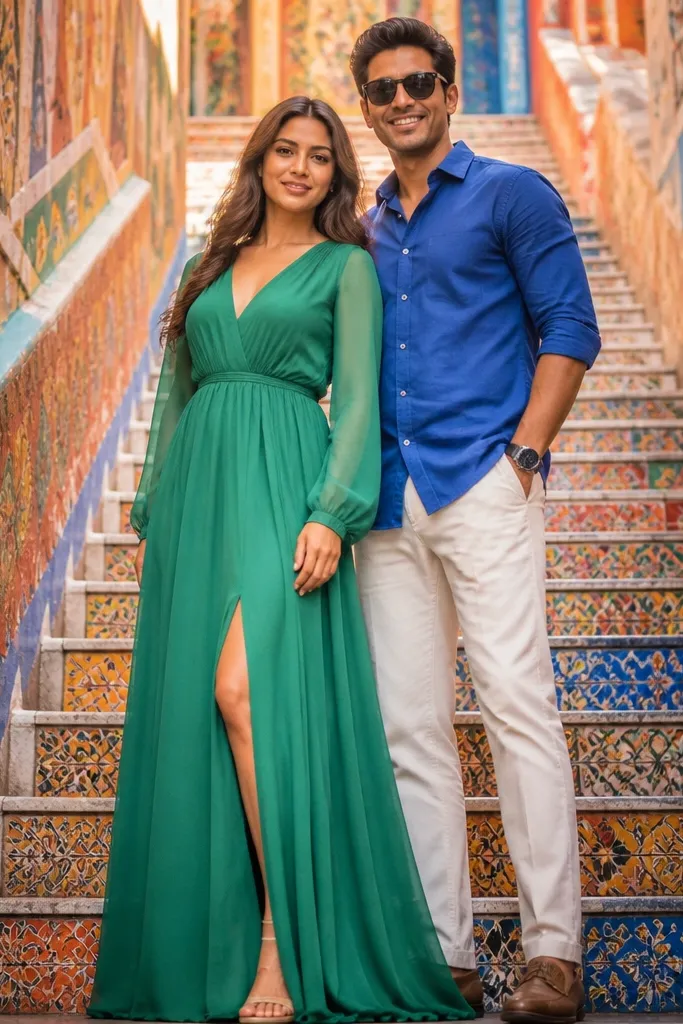
Start by choosing one mural wall and one stair angle so your session stays consistent. Then shoot in a tight loop: portraits at the wall, then 5-10 minutes on the stairs for leading lines, then return for a couple of wider frames. Getting there is easy by MRT to Little India, then walking 5-15 minutes to the stair/mural zones. Plan 75-95 minutes because foot traffic fluctuates and you’ll want to time your shots between crowds. If you’re worried about crowds, schedule late morning or early evening on a weekday.
Little India is loud in the best way for pre-wedding photos — murals, textured walls, and stairs that create instant depth. Saturated outfits like marigold, emerald, and cobalt look striking against the colorful environment without blending in. This location is for couples who want energy and color, not soft pastel romance. The stair angles make poses look dynamic, especially if you step slightly higher than your partner. You’ll also get plenty of variety in a small area, which is useful when the background changes fast.
Skip thisSkip the busiest intersections — you’ll spend more time waiting for clean backgrounds than shooting.
Quick tipWear solid colors and avoid tiny prints; the murals already add visual texture.
12. MacRitchie reservoir edge with linen and soft browns
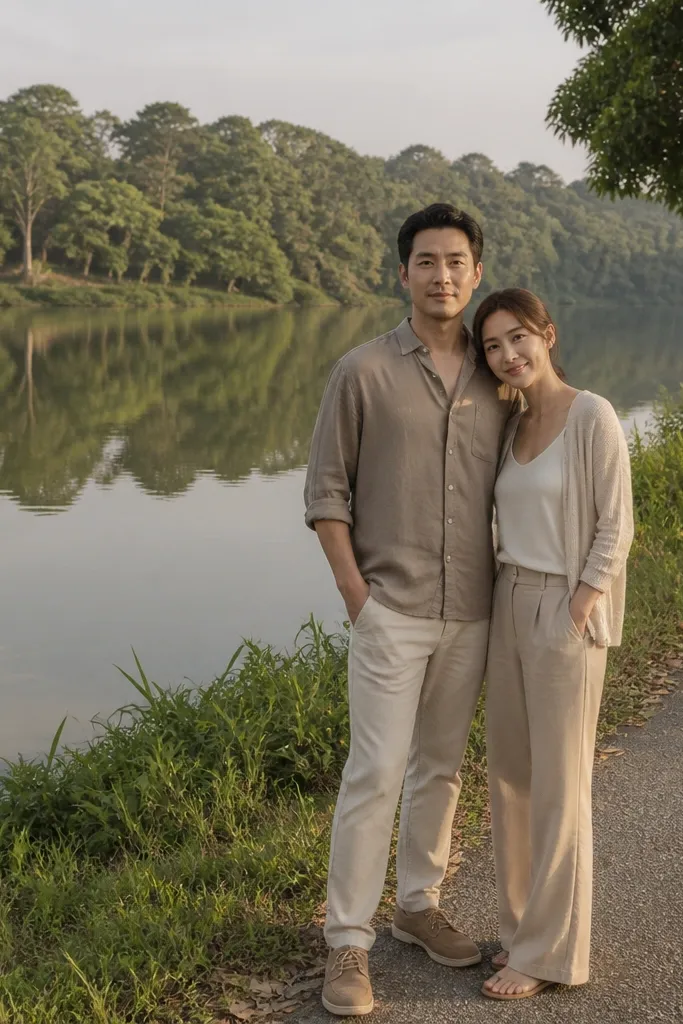
Start by picking a spot where the water is visible but the background trees don’t overtake the frame. Then do two passes: seated or leaning portraits with the water behind you, followed by a short walking set on the path. Getting there is the same as MacRitchie Park access; arrive early for a quieter edge. Spend 60-90 minutes so you can catch consistent reflections without rushing. For cost, it’s a low-cost shoot location since outdoor access is straightforward, so your money goes into the photographer and editing.
If you want nature photos with a calmer, cleaner background than the TreeTop Walk, the reservoir edge gives you still water and layered trees. The horizon stays simple, so your outfits and expressions become the focus. Soft browns, taupes, and cream linen look natural and flattering against green reflections. This is a strong choice for couples who want romantic, not chaotic — fewer visual distractions than busy parks. The light is usually forgiving along the water edge, which helps skin tones look smooth in photos.
Skip thisDon’t shoot with the sun directly behind you; it creates flat faces and harsh flare on the water.
Quick tipAvoid shoes that stain easily; reservoir edges can have damp patches.
13. Marina Barrage with skyline frames and airy dresses
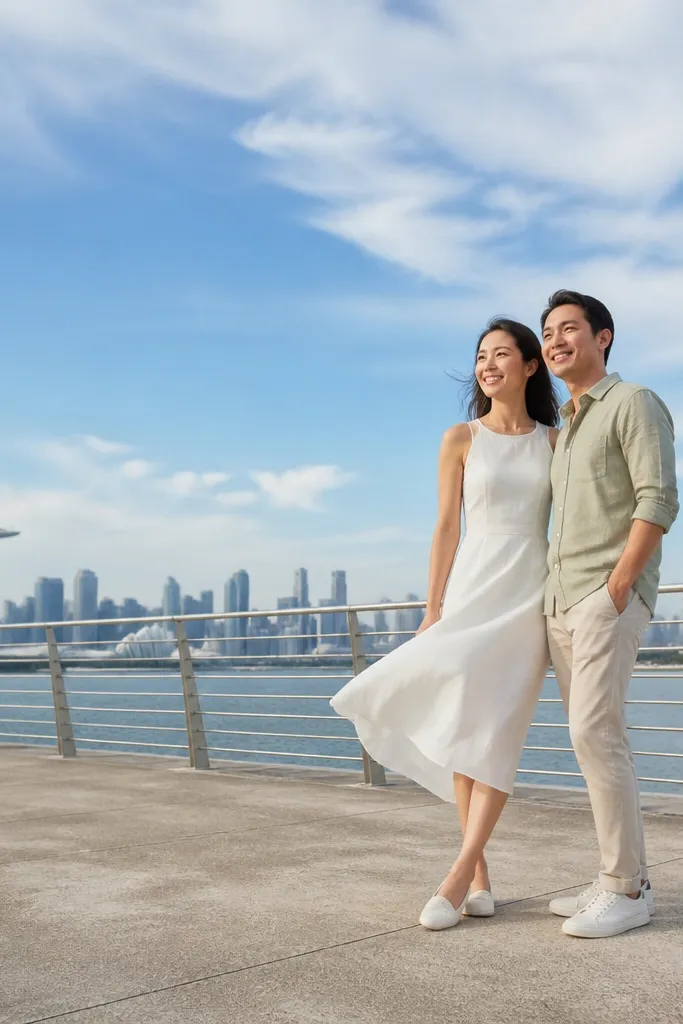
Start by checking the wind — if it’s gusty, choose fabrics with movement and bring hair clips. Then shoot in two directions: one set facing the skyline, and one set with you turned so the railing forms a leading line. Getting there is easy by MRT to HarbourFront or Marina Bay area plus a short ride or walk depending on your route. Plan about 75-105 minutes, because the open area gives you fewer “micro” angles, and you’ll get the best variety by moving position. If you want fewer people, go on a weekday and earlier in the evening.
Marina Barrage gives you wide-open sky, big skyline lines, and a modern outdoor feel without the heavy crowds of some waterfront areas. The leveled surfaces and railings create clean composition, so your photos look structured and stylish. Airy dresses and light button-downs photograph well here because the wind doesn’t just move fabric — it adds shape. This is great for couples who want a “Singapore skyline but editorial” look. The best frames come when you keep the horizon visible and place your bodies in front of the skyline layers.
Skip thisSkip heavy, stiff fabrics; they look wrinkled fast in open, windy spots.
Quick tipBring a compact lint roller and a couple of hair clips — wind shows every hair strand.
14. Tiong Bahru window rows with neutral knits
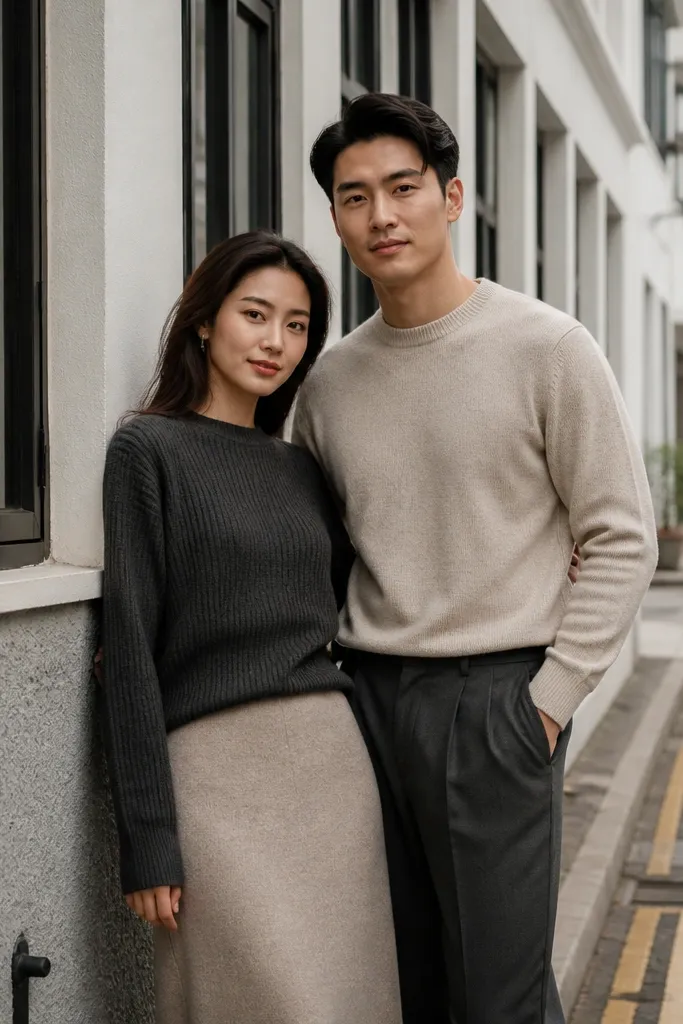
Start by choosing a short street segment and planning to shoot in place with 2-3 angles, not a long chase across the neighborhood. Then do portraits against the window frames and textured walls, followed by a walking set down the quieter lane. Getting there is easy by MRT to Tiong Bahru area plus a short walk; keep an eye on traffic at crossings. Spend 60-90 minutes so you avoid rushing if you hit a busier block. For cost, it’s free outdoor access — your budget goes into transport and the photographer package.
Tiong Bahru’s streets and shopfronts give you a clean, lived-in modern look — lots of window rows, textured walls, and calm residential energy. Neutral knits in charcoal, oatmeal, and soft gray look especially good because the background is busy but not overly colorful. This is a smart pick for couples who want stylish photos that don’t scream “tourist.” The window frames create natural borders in your compositions, so you get clean, editorial-looking portraits. It also works well for couples who want to walk between shots without a long travel plan.
Skip thisDon’t shoot right outside busy storefront entrances; you’ll get strangers stepping into frames.
Quick tipWear low-contrast shoes in dark tones; bright sneakers can look out of place next to muted shopfronts.
15. Sentosa beach club style with white-on-sand

Start by picking one beach zone and arriving earlier than you think so you can find a clear patch of sand with a nice background. Then shoot three moments: standing portraits with palms behind you, a walking sequence toward the shoreline, and a close-up set with wind movement. Getting there is easy by MRT plus short transit options or taxi; plan time for resort entry routes if needed. Allocate 90-120 minutes to get full-body variety before light shifts and crowds increase. For cost, expect transport and any paid access if you choose resort facilities.
Sentosa gives you high-impact beach visuals, and the best styled photos happen when you commit to a clean color theme. White-on-sand looks sharp, especially when you add texture like linen shirts, cotton dresses, or a lightweight knit. The palms and resort architecture create a layered background that still reads as “Singapore holiday” in photos. This works well for couples who want a polished, aspirational look with minimal effort. Choose beach pockets away from the most crowded areas so your frames stay calm and intentional.
Skip thisSkip patterned swim-coverups; busy patterns fight the beach lighting and reduce the “styled” look.
Quick tipUse a light sunscreen that doesn’t leave residue on collars; it shows in bright outdoor photos.