1. Sunlit Hand-Walk on a Quiet Dune Path
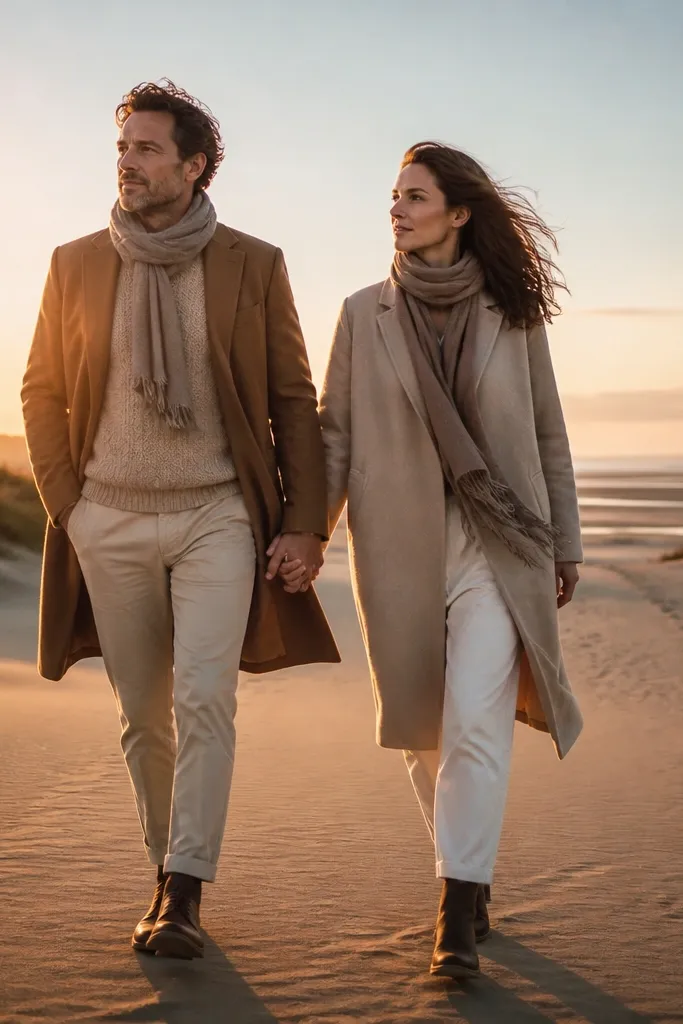
A dune path gives you a natural leading line that pulls the viewer toward you. The sand texture looks soft in warm light, and the horizon makes it easy to frame you without busy buildings. For the dreamy look, keep your pace slow and let your hands stay connected while your bodies angle slightly toward the camera. This pose works best when the wind is light enough to move hair and fabric, but not so strong that you’re fighting it.
Start by finding a section of dune with a clear trail worn into the sand and minimal foot traffic. Then plan to arrive 60 minutes before sunset so your shadows stretch across the path. Walk two slow steps toward the camera, pause, and let one person glance back while the other looks forward. Finally, take 8-12 frames in a row while you keep the same hand contact so the motion looks continuous.
Quick tipUse light-colored fabric or a dress hem that moves — the sand catches it beautifully in side light.
Skip thisDon’t stop in the middle of the busiest-looking section of the path; walk past the crowd and shoot from the quieter stretch.
2. Back-to-Back Lean Against a Weathered Fence
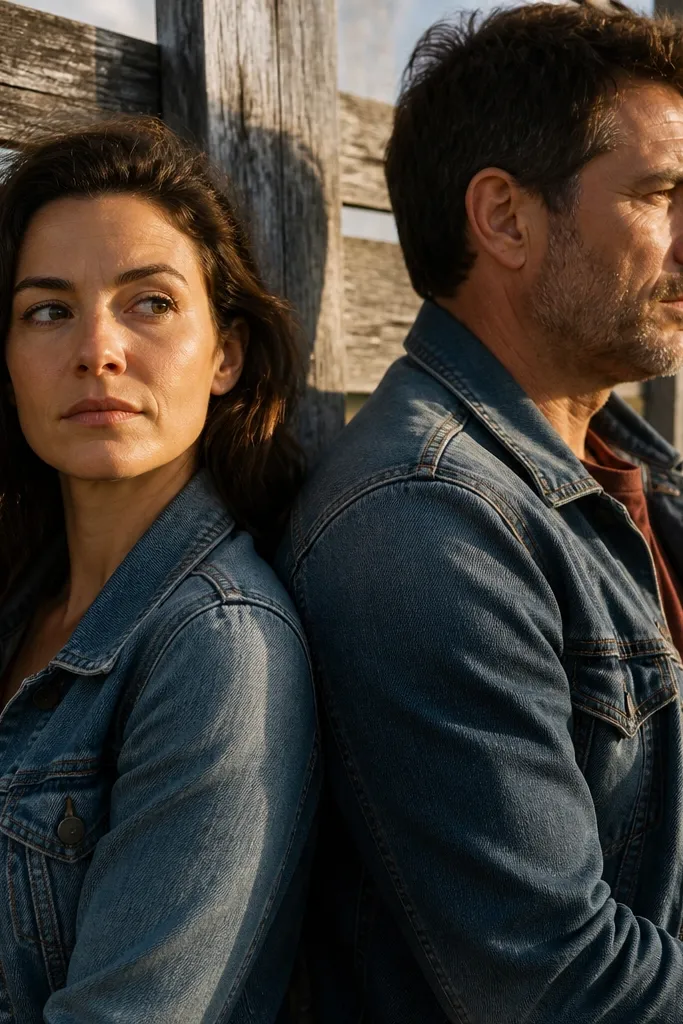
A weathered fence adds texture and age without looking cluttered. Back-to-back poses feel intimate while still giving you separation, so you don’t end up with flat, “standing together” photos. The fence lines also shape your silhouettes, which makes the image look more graphic and aesthetic. This setup is great for couples who want a romantic mood but don’t want to constantly hold hands.
Start by locating a fence section with peeling paint or sun-bleached wood and a clean background with no parked cars. Then position yourselves so the fence is behind you at a 45-degree angle to the camera, not straight-on. One person leans slightly higher on their side, the other matches the angle but keeps their shoulders relaxed. Take a quick series where you adjust chin height — the best frames happen when both faces are lit by the same side light.
Bring a thin scarf or wrap — it catches light against the fence texture.
Skip glossy new fences; they reflect harsh highlights and kill the dreamy, soft tone.
3. Cliff-Edge Frame with a Slow Turn
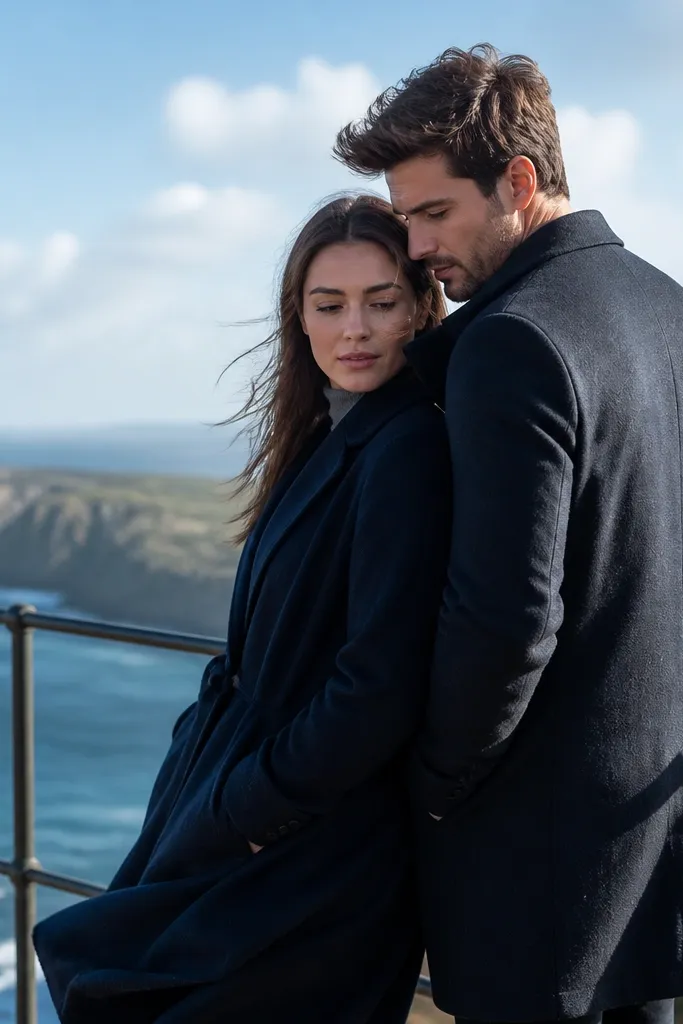
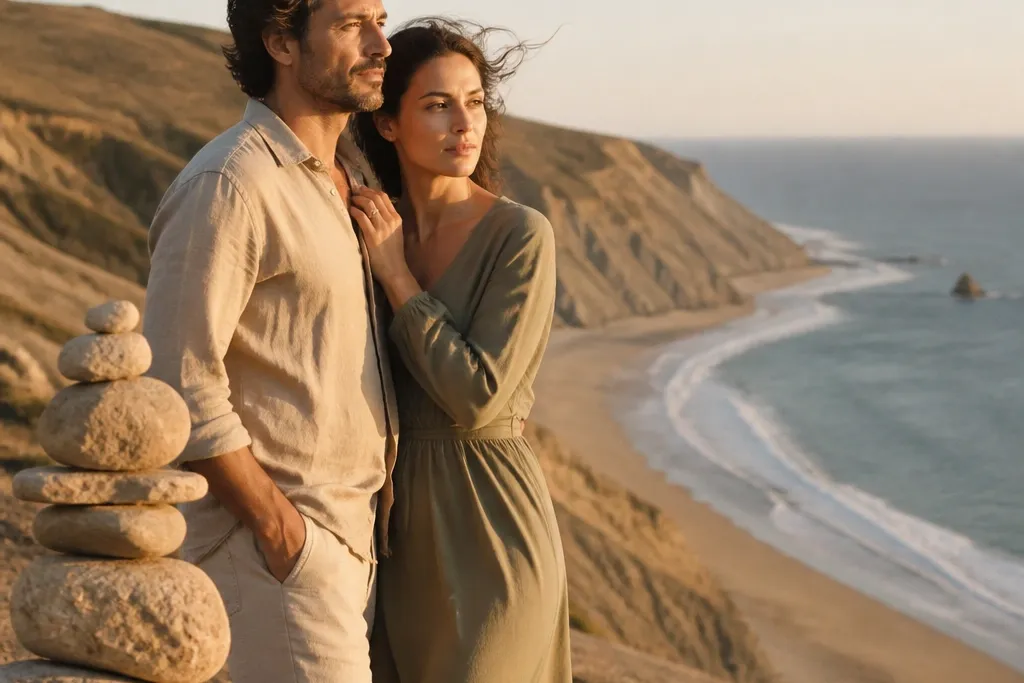
Cliffs look dramatic, but the best pre wedding shoot versions are calm and safe-looking, not frantic. A slow turn keeps the body language natural and gives you a sense of space, which makes the image feel cinematic. Stand close enough for warmth, but keep a little distance so the background doesn’t overwhelm you. This pose is especially flattering for wind-friendly locations because hair and hems move without you forcing anything.
Start by choosing a lookout with a clear safe boundary and a wide view behind you. Then shoot with the sun coming from the side so your faces get warm light and the cliff stays darker. Do the pose by having one partner face the horizon while the other stands slightly closer to camera. On your cue, the horizon-facing partner turns slowly back toward the lens and holds the moment for 3-4 seconds.
Quick tipBring lens cloth wipes; coastal spray makes flare and haze if you don’t clean quickly.
Skip thisDon’t frame too wide — leave enough space around your bodies for breathing room, but keep the cliff from turning into a chaotic background.
4. Stone Steps Pause with Hands on the Railing
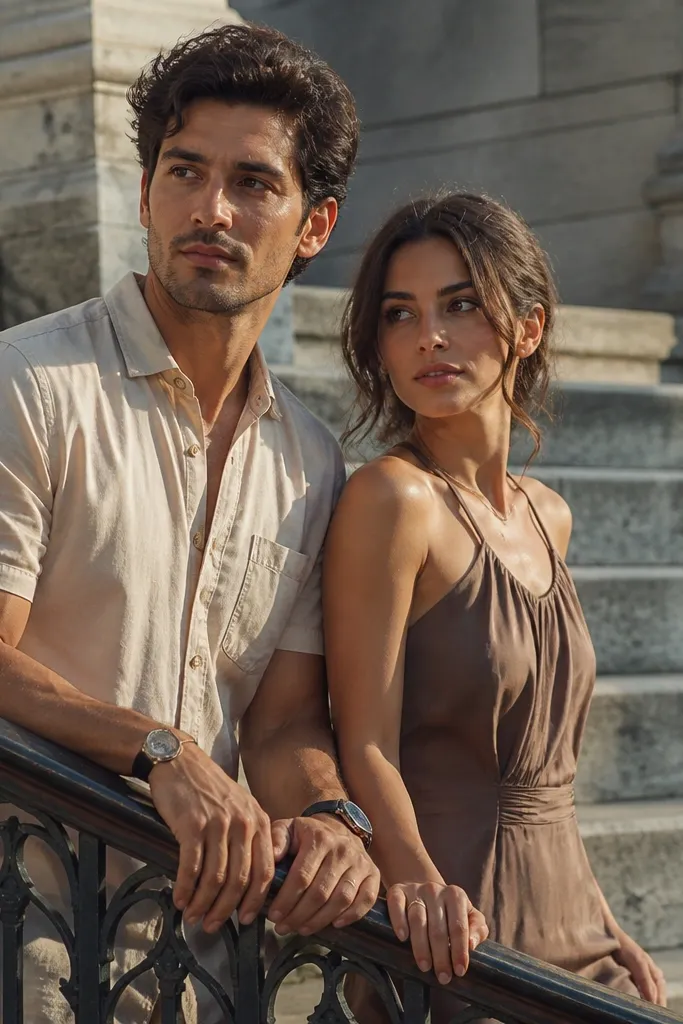
Stone steps are a cheat code for composition because they create natural layers. Hands on a railing make the pose look intentional and less stiff than arms at your sides. The grayscale texture of stone also makes skin tones pop in warm light. If you want dreamy but realistic, this is the kind of place where your photos look like a memory, not a staged set.
Start by finding steps where the railing is clean and the background has depth — trees, a courtyard, or a quiet street bend. Then position you on a mid-step so your bodies sit in the frame without cutting off knees or shoes. Place one hand lightly on the railing and keep the other hand near your partner’s waist or hand. Finally, take frames from waist height and again from chest height to vary the perspective.
Quick tipWear shoes with interesting texture (leather, suede, or a simple boot) — stone steps show it off.
Skip thisAvoid muddy steps; wet stone adds unwanted dark patches and distracts from faces.
5. Rowboat at the Dock, Close Foreheads
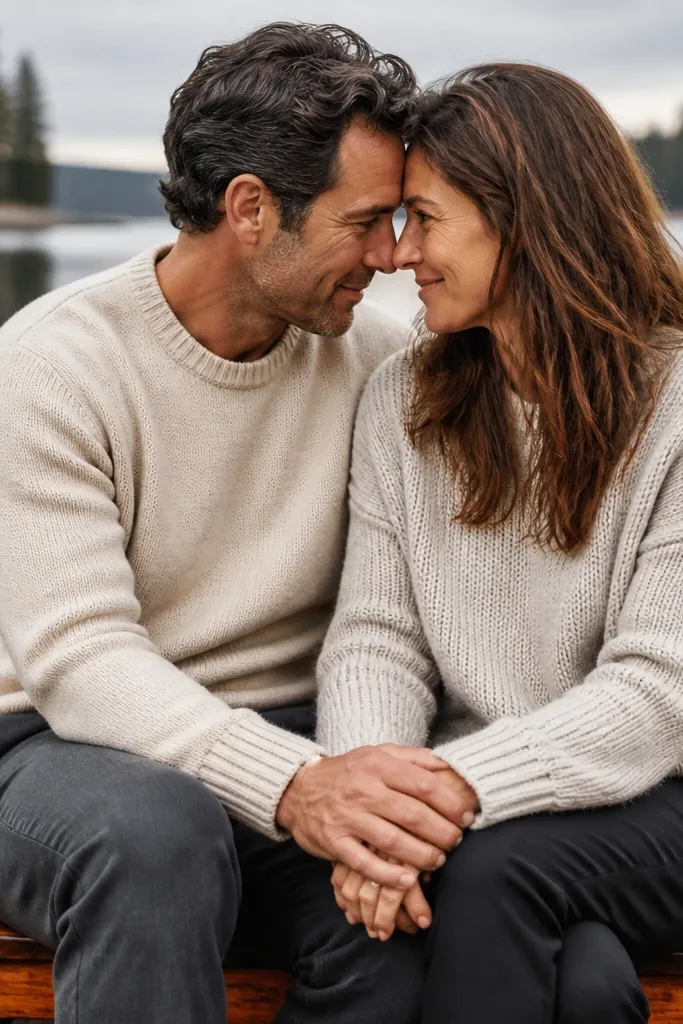
A dock with a rowboat gives you soft reflections and a calm, romantic mood without needing a fancy backdrop. Close foreheads make the photo feel private even in public spaces. The boat creates a natural foreground shape, which adds depth and keeps the frame from looking flat. This pose works best when the water is still enough to mirror light.
Start by picking a dock where the boat is not surrounded by other boats or bright signage. Then arrive near sunrise or late afternoon when reflections are gentle. Do the pose by standing beside the boat so your bodies block the most distracting parts of the dock. Touch foreheads, then shift your faces slightly toward the camera for 5-6 frames while you keep your hands resting on the boat edge or each other’s wrists.
Quick tipIf the water is choppy, shoot one step farther from the edge and use the boat as the main shape, not the reflection.
Skip thisSkip docks with bright overhead lights; they create harsh skin highlights and ugly shadows.
6. Library-Quiet Garden Path, Slow Side Step
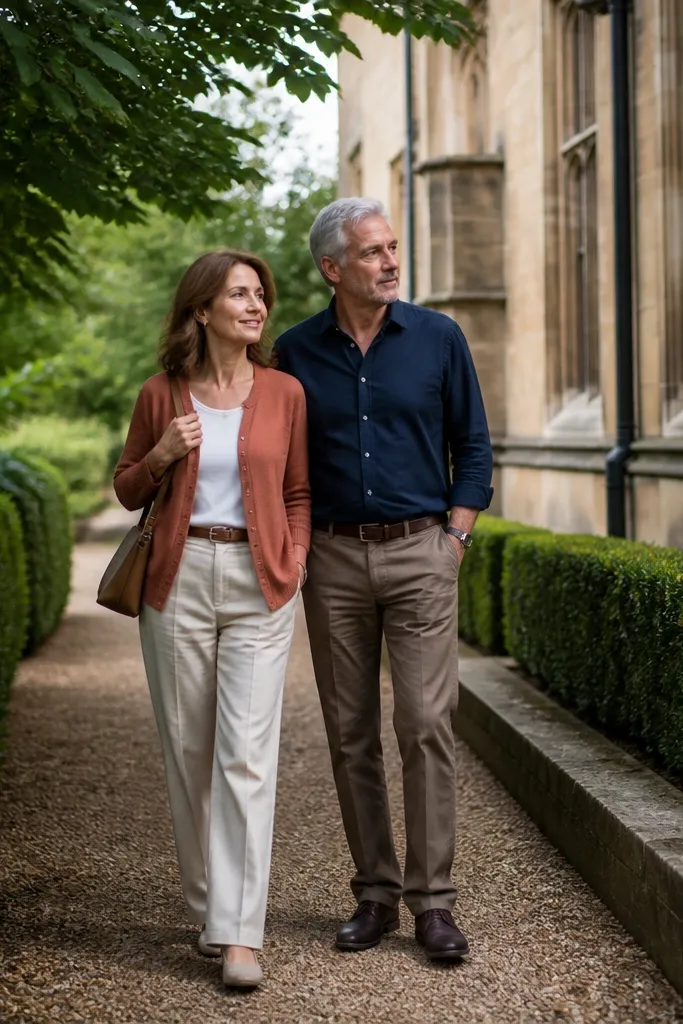
A quiet garden path gives you controlled backgrounds — greenery, stone edges, and narrow sightlines — which makes your faces stand out. Side-step poses look natural because your bodies aren’t directly facing the camera the whole time. The dreamy part comes from shade and leaf texture that turns the background into soft shapes. This works well for couples who want a romantic vibe without beach wind or cliff drama.
Start by scouting for a path with overhanging leaves or tall hedges so the light stays soft. Then position yourselves so the camera sees the path receding behind you, not a wide open yard. Do the pose by stepping sideways together while one person glances back over their shoulder. Keep the distance between you small — around a forearm length — so you look connected even when turned.
Quick tipBring a small comb or brush if it’s humid; flyaways show up fast in dense greenery.
Skip thisDon’t choose a garden with lots of bright flowers in the same frame; it turns the photo into a color mess.
7. Fields at Golden Hour, Wrap Around the Waist
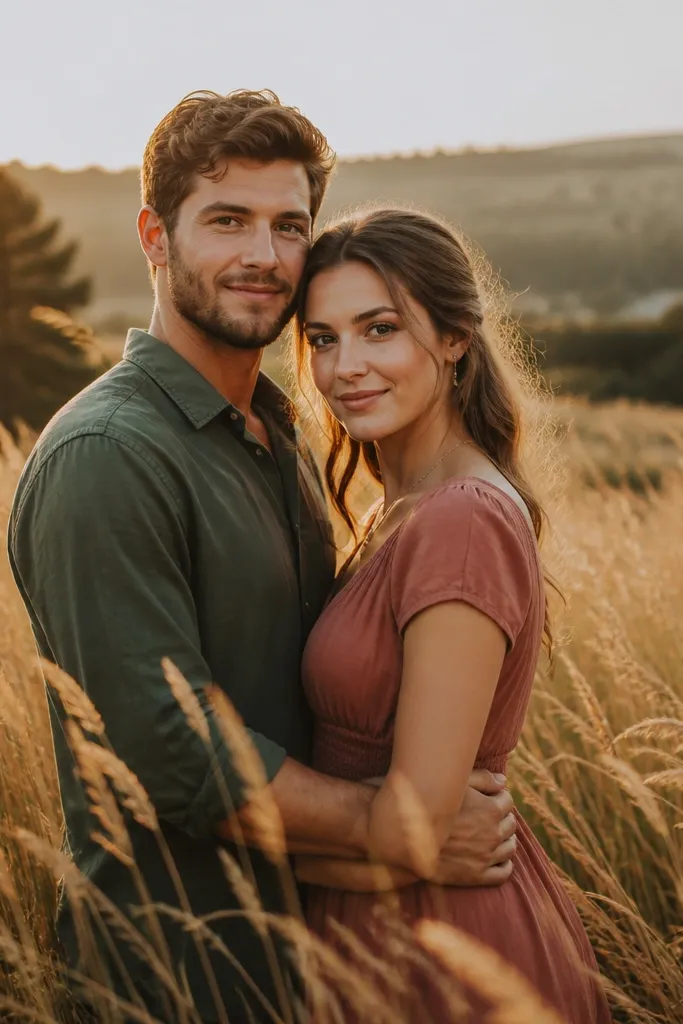
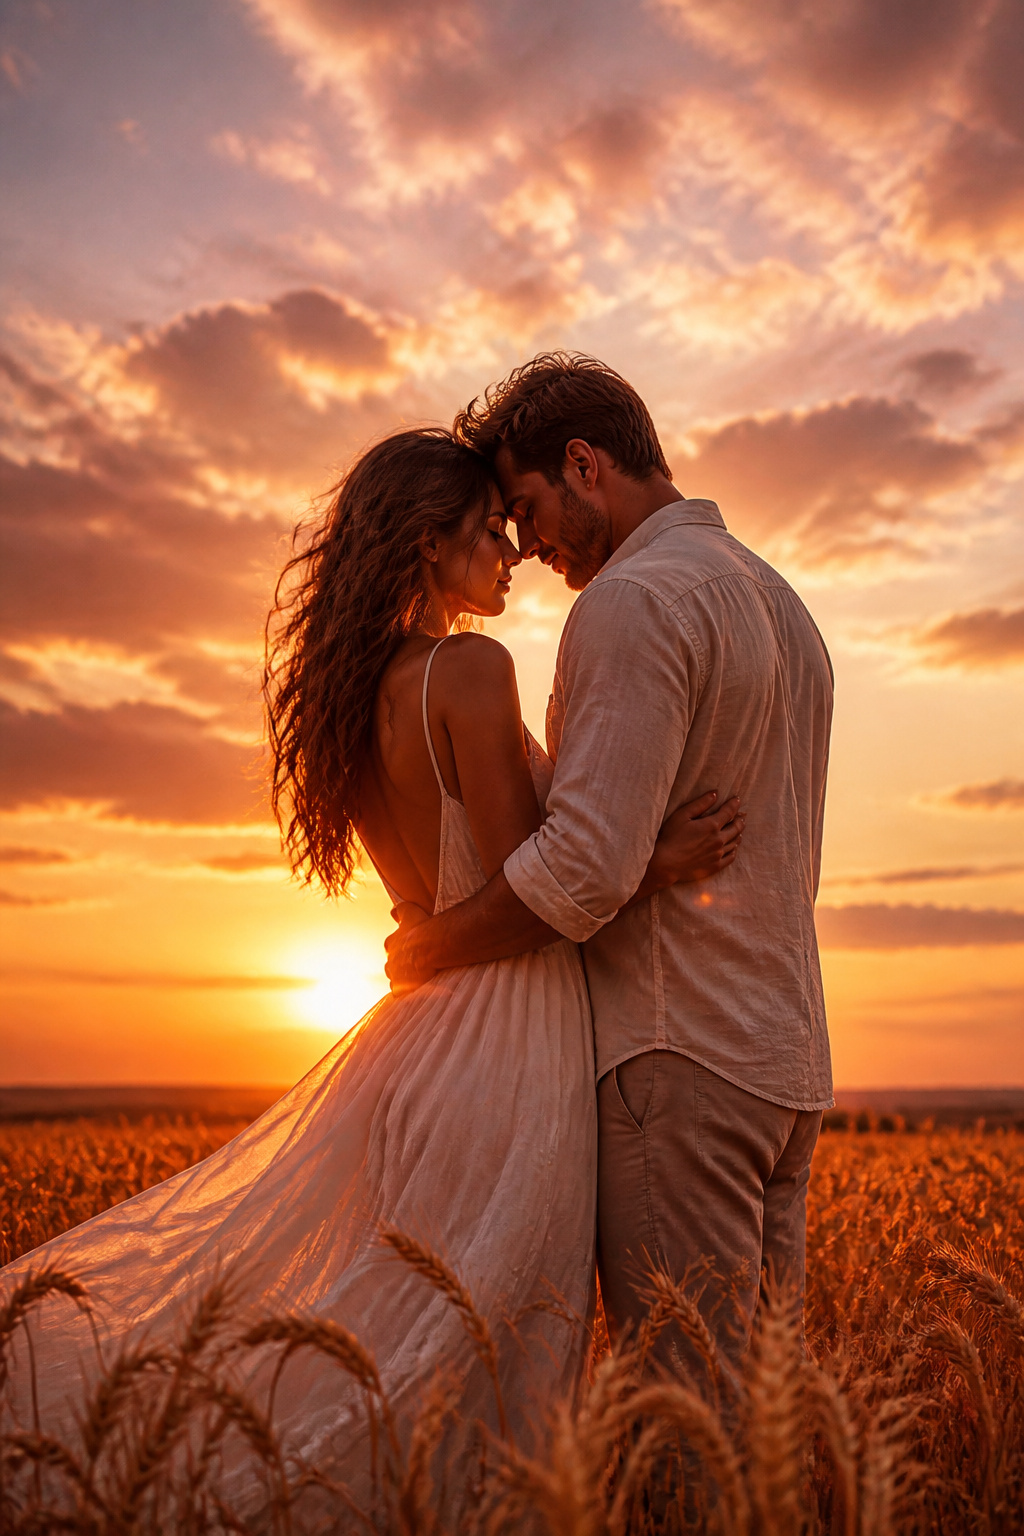
Tall grass fields make dreamy pre wedding photos because they create a soft, textured foreground and a gentle glow. The wrap-around waist pose feels affectionate and secure, which photographs well when you’re standing still for a few seconds. The key is letting the grass move your silhouettes, not hiding you inside it. This is a great choice when you want romantic color and a simple, uncrowded backdrop.
Start by finding a field edge with a clear path into the grass and no barbed wire or visible farm structures. Then shoot near sunset so the grass lights up from behind, creating a halo effect. Place one partner with their back angled slightly to the camera while the other wraps arms around the waist. Hold still, breathe naturally, and take a short burst while you keep your chins aligned so faces stay sharp.
Use a lint roller on dresses and dark fabrics; grass seeds cling fast.
Don’t step too deep into tall grass; it hides shoes and can make poses look unbalanced.
8. Market Alley Window Light, Hands at the Window Frame
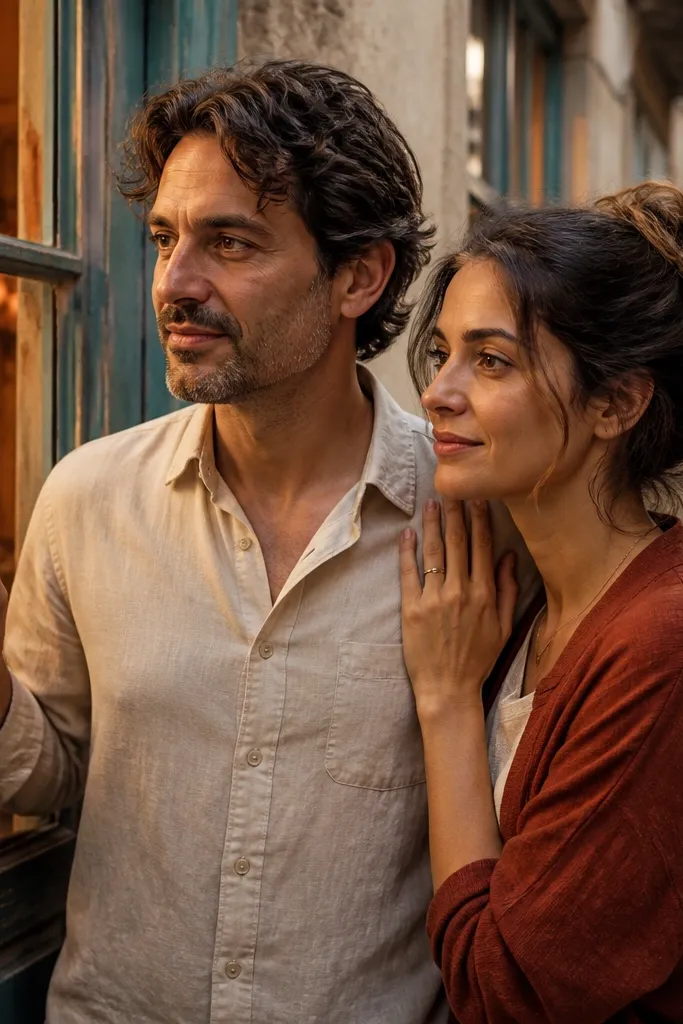
Narrow market alleys give you that “found in a real place” look because the light is already styled. Window frame poses are photogenic because they create a clean border around your faces. The warmth from inside reflects on skin and fabric, which makes photos feel intimate and lived-in. This setup works even in cities if you pick a quieter side street with fewer walkers.
Start by finding an alley with window light and minimal signs blocking the background. Then stand so the window is behind you at a slight angle, creating glow without flatness. Place hands on the frame — one hand each — and let your bodies lean in toward the light. Take frames while you subtly shift your weight from one foot to the other; the best ones show relaxed shoulders.
Quick tipWear clothing with texture like linen, denim, or cotton twill — window light shows it well.
Skip thisSkip alleys with flickering LED signs; they create color shifts across skin.
9. Quiet Waterfall Boardwalk, Step-Touch Forearms
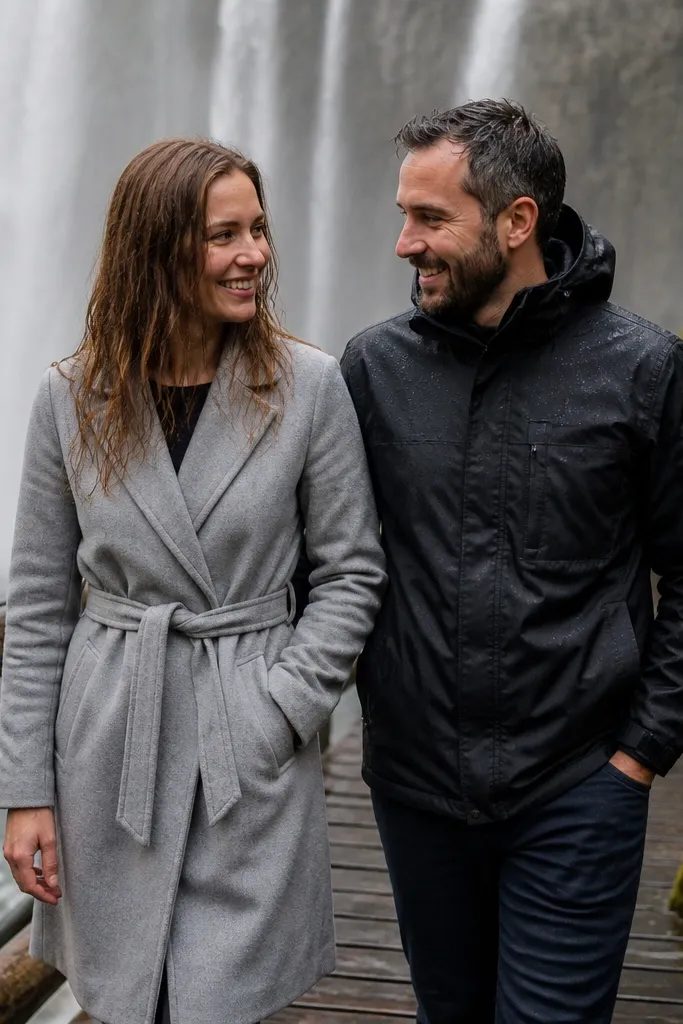
Waterfall boardwalks can look overdone in photos, but the quiet version is all about your distance and your pose. Forearms touching gives closeness without forcing full body contact in the mist. The sound and motion of water also make the background feel alive, while your stillness keeps the photo dreamy. Choose a spot where the crowd is light and the walkway isn’t blocked by railings too close to your faces.
Start by walking the boardwalk to find a section with a clear view and fewer people waiting for the same angle. Then shoot when mist is strongest — late morning after light rain or early afternoon in humid weather. Position you side-by-side, then do the step-touch by placing one forearm lightly against your partner’s arm while you take one slow step forward. Finally, keep your faces turned toward the camera and let the water blur behind you with a faster shutter.
Pack a small towel for lens droplets; wiping between frames keeps skin highlights clean.
Don’t shoot with the camera too close to railings; they create distracting bars across your faces.
10. Desert Road Shoulder, Walk Toward the Same Point
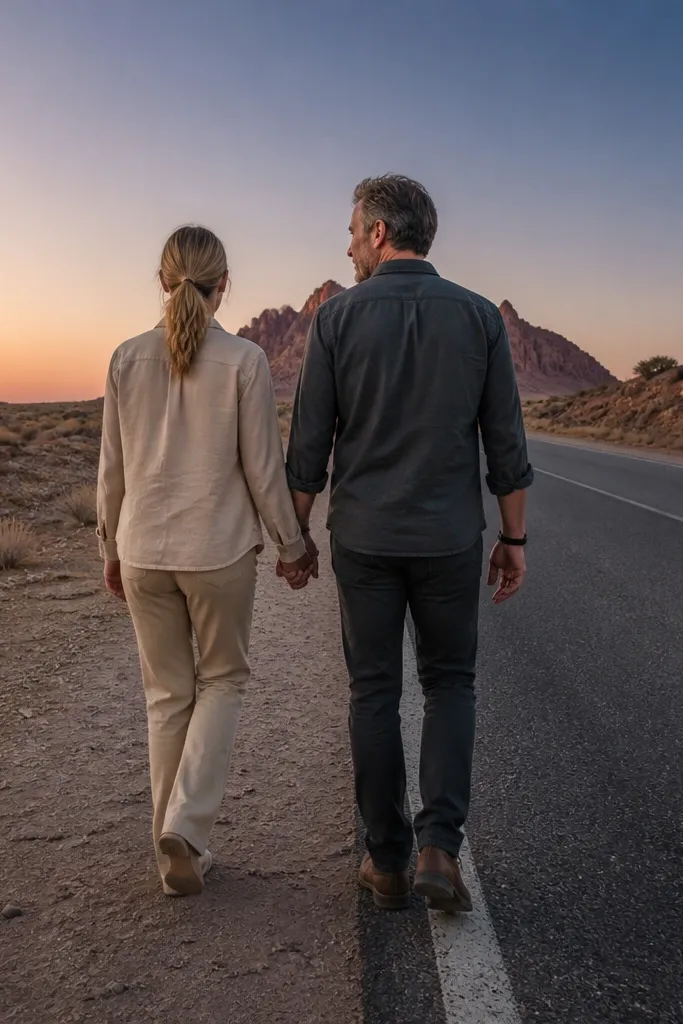
An empty desert road shoulder looks cinematic because it has one clean direction line. The pose is simple: you’re walking toward the same point, so your bodies stay aligned and your photos feel intentional. Desert skies add that dreamy color gradient, especially if you shoot near sunset. This is ideal for couples who want a dramatic look without props or complicated styling.
Start by choosing a road with minimal traffic and a safe shoulder area where you can stand off the travel lane. Then plan to shoot 45-75 minutes before sunset so the road surface catches warm tones. Do the pose by walking together in sync, keeping your hands either linked or hovering close. Take a burst while you move, then stop at one mark and angle your torsos slightly toward the camera for 3-4 frames.
Quick tipBring water and sunscreen — desert shoots turn into misery fast if you’re not prepared.
Skip thisDon’t stand flat on the road edge; move a few steps back so your feet don’t sit in harsh dust glare.
11. Forest Fern Arch, Couple Peek Through
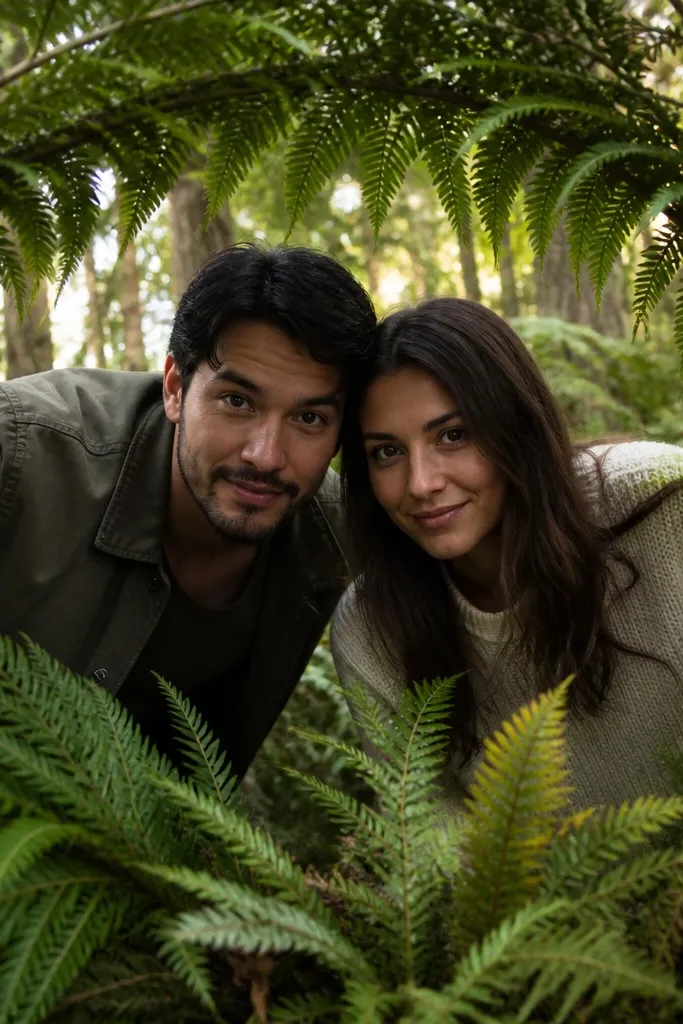
A fern arch is pure hidden-gem energy because it frames you without looking like a staged “photo spot.” Peeking through creates a playful, intimate mood and gives the camera a natural vignette. The dreamy quality comes from shade and layered greens that soften everything behind you. This is best for couples who like whimsical, slightly fairytale energy but still want realism.
Start by finding a natural arch where ferns or branches form a gap at chest height. Then position yourselves so your faces sit in the opening and your bodies are slightly behind the greenery. Take the pose by having one partner peek first, then the other steps in beside them. Keep the movement slow so your faces stay sharp and the leaves don’t blur across your expressions.
Quick tipTurn your bodies a few degrees away from the arch so leaves don’t cover eyelashes.
Skip thisSkip tangled brush where you have to push through; it ruins the clean look and you’ll look tense.
12. Lighthouse Path, Hand-in-Back Pocket
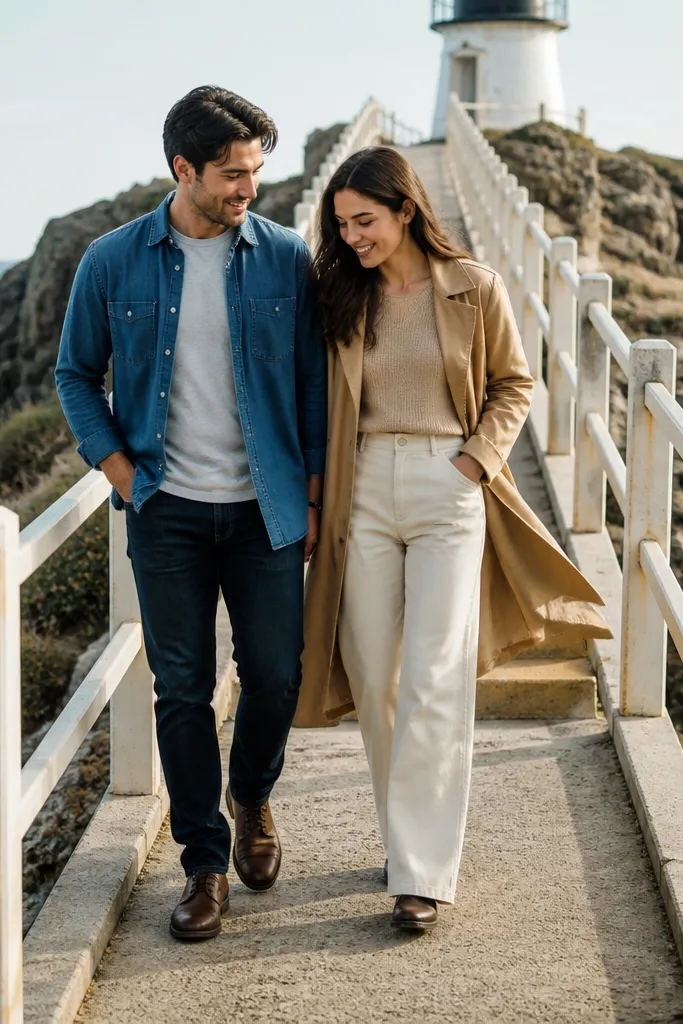
Lighthouse paths have a built-in rhythm — railings, steps, and repeating lines — that makes posing feel easy. The hand-in-back-pocket pose looks relaxed, not forced, and it gives you a clear silhouette shape. Add a soft smile and keep your chin slightly down so the light hits your face evenly. This works well when the path is uncrowded because you get space around you for that dreamy coastal mood.
Start by scouting the path and choosing a spot where the lighthouse or coastline is visible but not blocked by crowds. Then shoot on a calm wind day so hair and fabric don’t whip into your faces. Place one partner with one hand in the back pocket or waistband, shoulders relaxed, and the other partner close to their side. Walk two steps, stop, and take frames while you adjust chin angles — the best look is when both faces are lit and shoulders stay down.
Quick tipIf it’s breezy, tuck one end of a scarf behind a shoulder so it doesn’t cover your face.
Skip thisDon’t pose too far apart; on lighthouse paths, distance makes you look like two separate subjects.
13. Old Bridge Rail, Toss a Light Fabric Strip
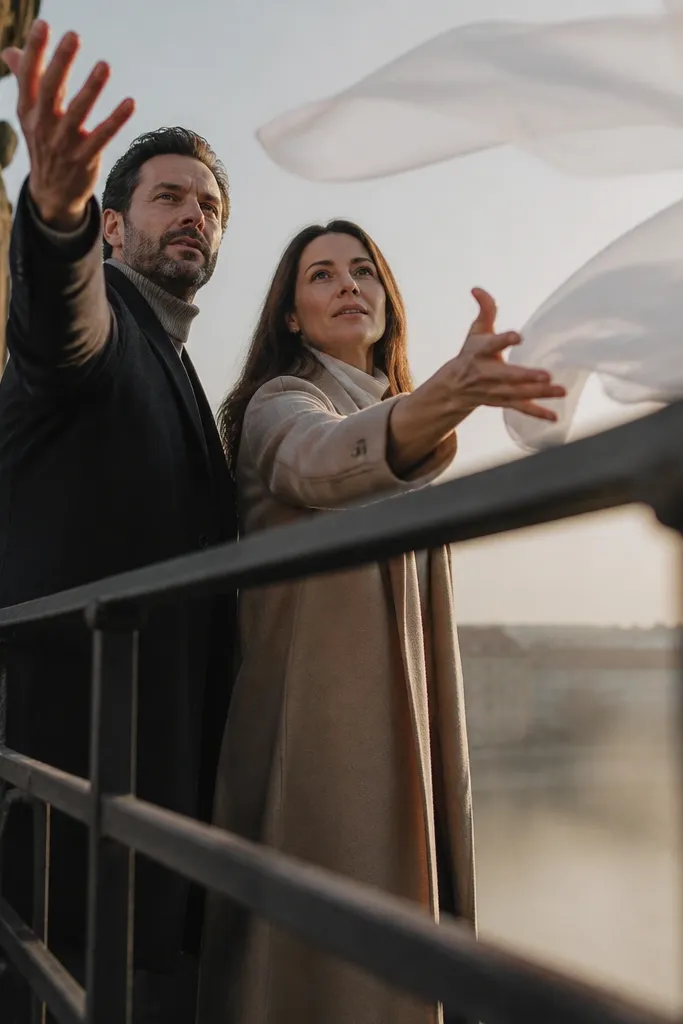
A bridge with a strong rail line creates graphic framing, and tossing fabric makes the image feel alive. The fabric strip gives you motion blur in the right places while your faces stay relatively still. This is dreamy without being overly posed because the movement is happening in one controlled element. Pick a fabric that moves easily — a thin scarf or chiffon — and keep the rest of your body calm.
Start by choosing a bridge spot with open water or a clear valley view behind you so the background stays clean. Then bring a light scarf and decide who holds it — one person keeps the end, the other holds the other end or lets it float. Do the pose by standing close to the rail, lift the scarf gently, then pause when it arches. Finally, shoot a burst as the scarf peaks and then settles.
Quick tipUse a scarf color that contrasts the background: cream for dark water, muted sage for green valleys.
Skip thisSkip heavy fabric; it drops too fast and looks like a random prop.
14. Lakeside Dock Steps, Sitting with Feet Toward Camera

Sitting poses can look stiff, but dock steps fix that with natural angles and depth. Feet toward the camera makes the pose feel relaxed and intentional, and it adds a soft foreground layer. Lakeside light also smooths skin and makes eyes look bright. Keep your knees close and your bodies slightly angled so the camera captures both faces without awkward stretching.
Start by finding dock steps or a low platform with stable footing and a calm background. Then arrive with time to test reflections — move a few steps left or right to see where the light hits. Sit with your shoulders angled toward the camera and place feet toward it for a flattering line. Take frames while you talk or laugh quietly, then do one controlled moment where you lean foreheads together for 2-3 seconds.
Quick tipBring a small towel for wet wood; it prevents you from sitting in uncomfortable cold patches.
Skip thisDon’t sit directly under a bright overhead light; it flattens faces and kills the dreamy warmth.
15. Snowy Path in Early Morning, Hands on Cheek
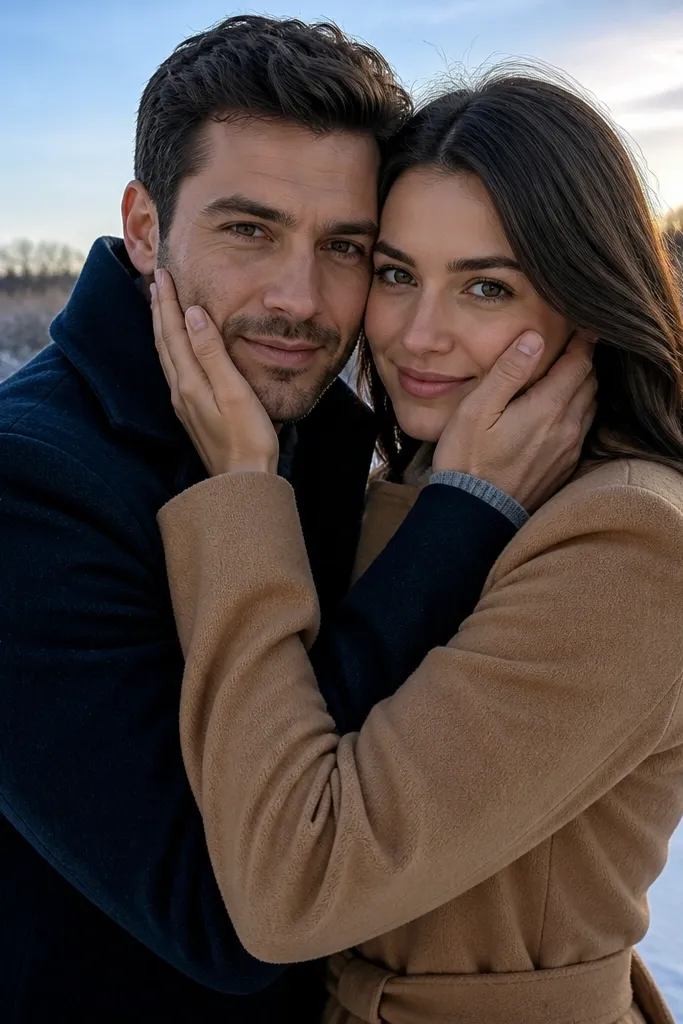
Snow is the fastest way to get dreamy photos because it brightens everything and adds clean texture. Hands on cheeks makes expressions look warm and cozy, which reads romantic even in cold weather. The key is to shoot with low sun so snow doesn’t look flat. This pose is best for couples who want a sweet, gentle mood and don’t mind layering clothes that still photograph well.
Start by scouting a quiet path with snow coverage and minimal footprints. Then shoot in early morning when the light is soft and crowds are low. Do the pose by standing close, hands on cheeks, and turning chins slightly toward the camera so eyes catch light. Take a burst as you breathe — you’ll get natural micro-smiles rather than forced posing.
Use a dark outer layer under lighter scarves; it frames faces and keeps the photo from looking washed out.
Skip midday snow shoots; harsh overhead light makes shadows under eyes look heavy.
16. Riverside Rocks, Sit Side-by-Side and Touch Hands
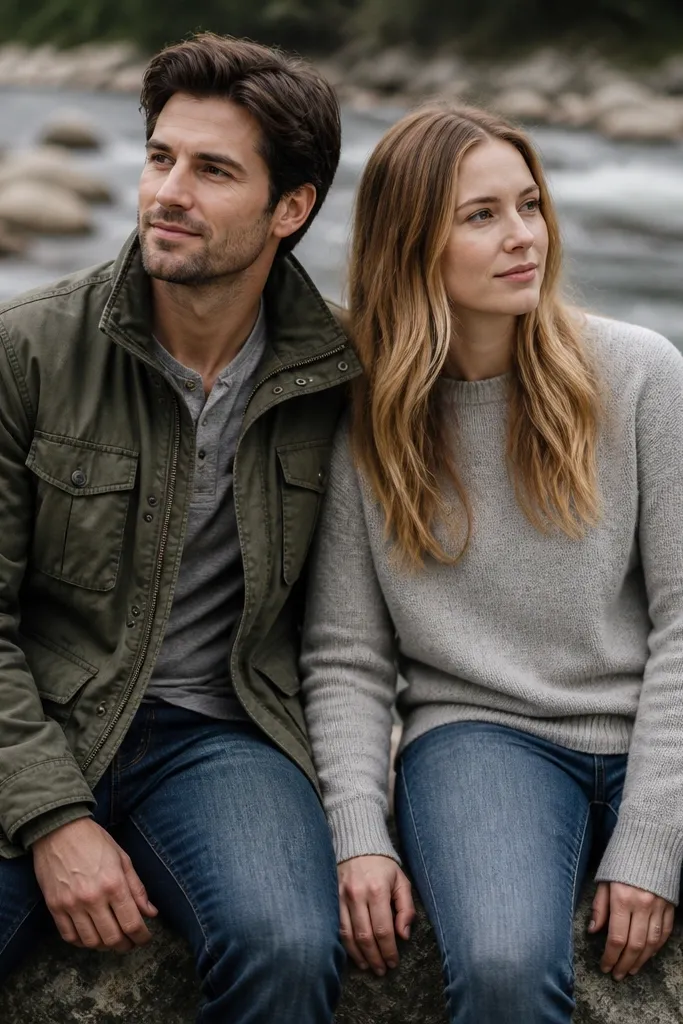
Rock seating by a river gives you texture and depth without needing a dramatic landmark. Side-by-side sitting is flattering because your bodies form a natural line along the frame. Touch hands keeps the connection visible even when you aren’t hugging tightly. The dreamy look comes from the river blur behind you and the way warm light hits skin through mist.
Start by choosing a rock area that’s stable and not slippery, then pick a spot where the river is visible but not full of boats. Then shoot near golden hour and keep your camera slightly lower than eye level for a more intimate angle. Sit close, touch hands, and angle your torsos toward the same direction. Finally, take frames while you look at each other, then one set where you both look past the camera toward the horizon.
Quick tipBring a compact seat pad; it makes sitting poses look less tense because you’re comfortable.
Skip thisDon’t sit with your backs too straight — slight relaxation reads more natural in photos.
17. Cobbled Lane, Walk and Look Back Over Shoulder
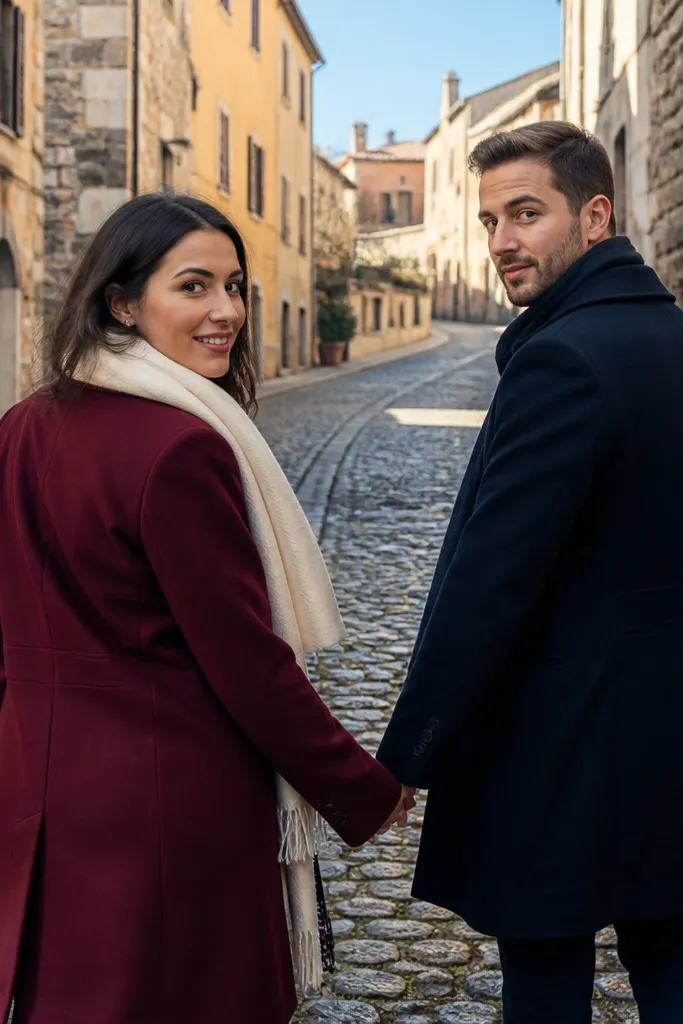
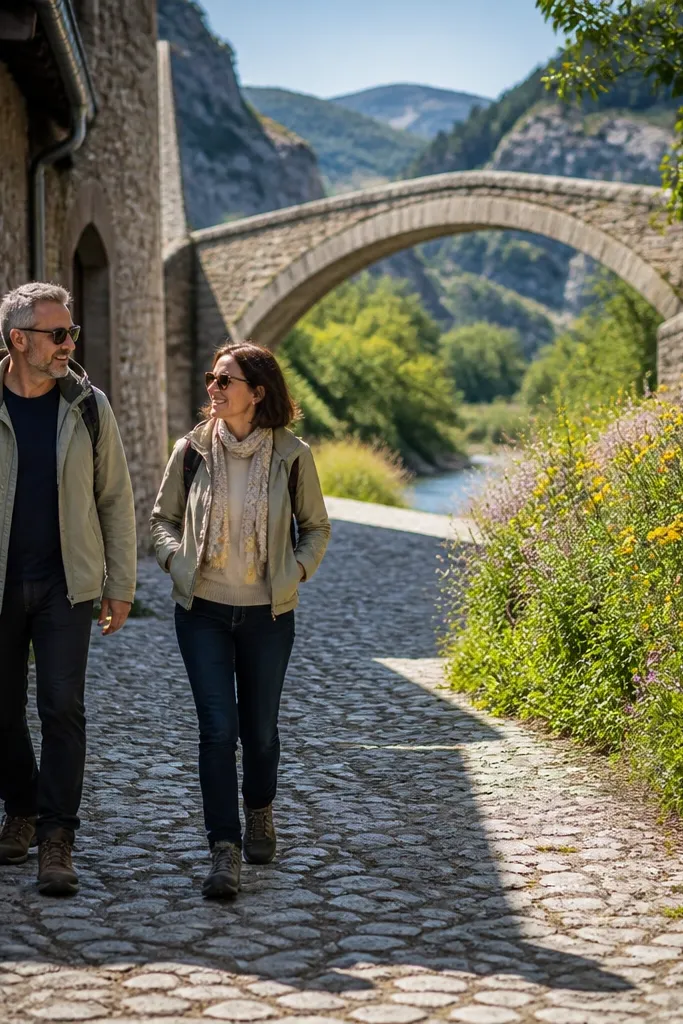
Cobbled lanes look like a movie set, but the hidden gem move is to use them at off-peak hours. The cobbles create a strong pattern that adds texture and makes your outfit colors pop. The walk-and-look-back pose adds emotion without needing a big gesture. It also keeps the background from feeling like a static backdrop since your bodies create motion.
Start by finding a lane that has a bend or a narrow sightline so the background recedes. Then plan to shoot early morning or late afternoon when foot traffic is low. Walk slowly away from the camera for 6-8 steps, then have one person look back while the other keeps walking and glances slightly toward the lens. Take a burst during the pause, then repeat with roles switched.
Quick tipChoose footwear with clean soles; cobbles show scuffs and dirt fast.
Skip thisDon’t stop too long mid-lane; you’ll attract attention and the light changes while you’re waiting.
18. Deserted Boardwalk, One Person Spins, Other Holds
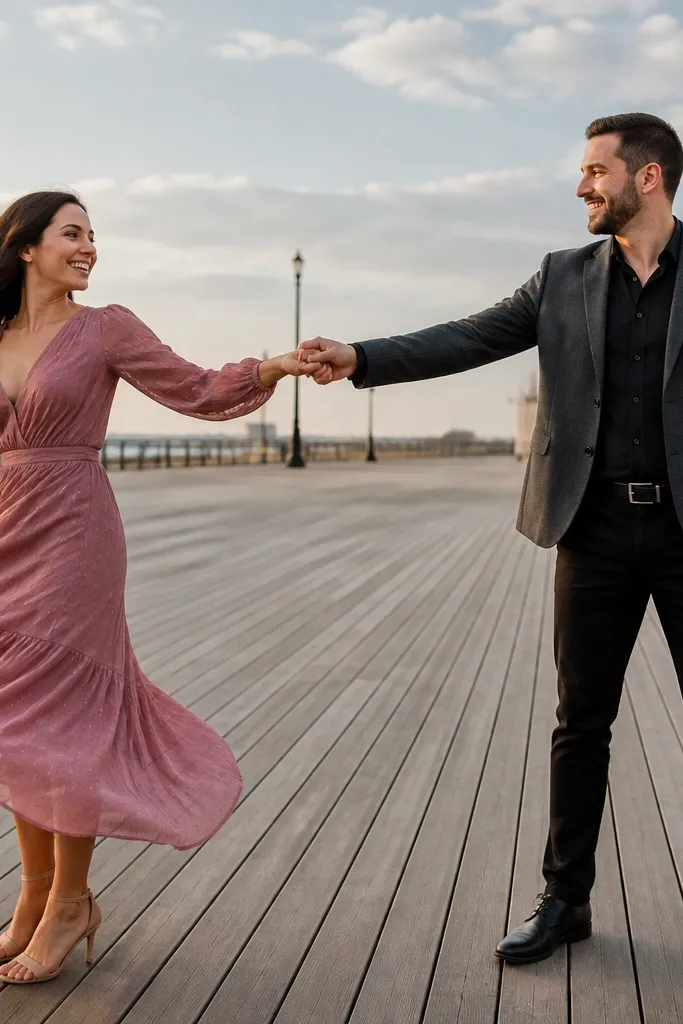
A deserted boardwalk gives you long, straight lines and a calm sky background — perfect for dreamy, aesthetic photos. The spinning moment adds energy, and the holding pose keeps it romantic instead of chaotic. This works because one body moves while the other stays grounded, so your images look dynamic but still composed. It’s also a great option for couples who want fewer “posed” frames and more real emotion.
Start by locating a boardwalk section with minimal signage and few people for at least 20-30 minutes. Then shoot close to sunset so the wood planks warm up in color. Do the pose by having one partner stand with back slightly to camera and hold their partner’s hands or waist lightly. On cue, spin gently for 1-2 seconds and stop when the moving partner faces the camera.
Use a light skirt or dress hem — it catches motion blur in a good way on wood planks.
Don’t over-spin; if you rotate too far, faces blur and you lose the dreamy, sharp connection.
19. Canyon Rim, Sit on the Edge with Legs Angled
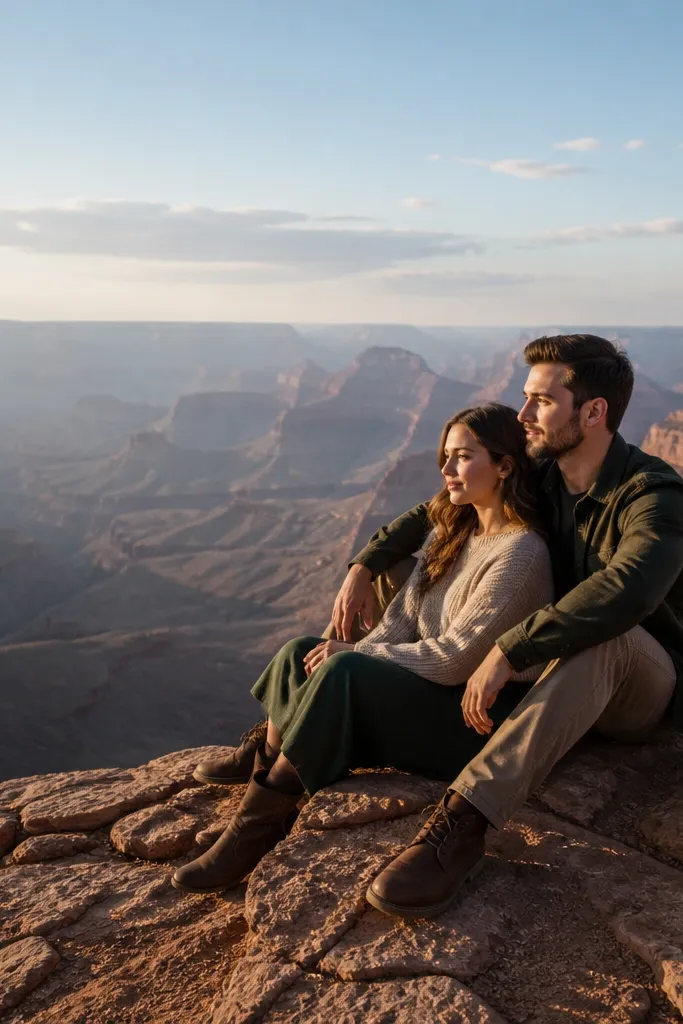
Canyon rims can look intense, and that’s exactly why the pose needs to be controlled and close. Sitting with legs angled creates a strong diagonal line and keeps your bodies grounded. The dreamy part is the vast background — you look small in a good way, like the world is big and you’re together inside it. Choose a spot with safe footing and a view that doesn’t require climbing or leaning.
Start by finding an official overlook with a safe sitting area and no loose gravel near the edge. Then shoot when the canyon walls catch side light — late afternoon gives a warm glow and less harsh contrast. Sit close enough for shoulders to touch, then angle legs toward the camera so the frame has shape. Take frames while you talk quietly, then do one moment where you both look at the horizon and lean in slightly toward each other.
Quick tipBring a darker layer for the lower half; bright fabric can reflect too much on dusty ground.
Skip thisSkip dramatic edge hugging; safety and stability matter more than a “danger pose.”
20. Tall Grass + Denim Jacket, Jacket Sleeve Hold
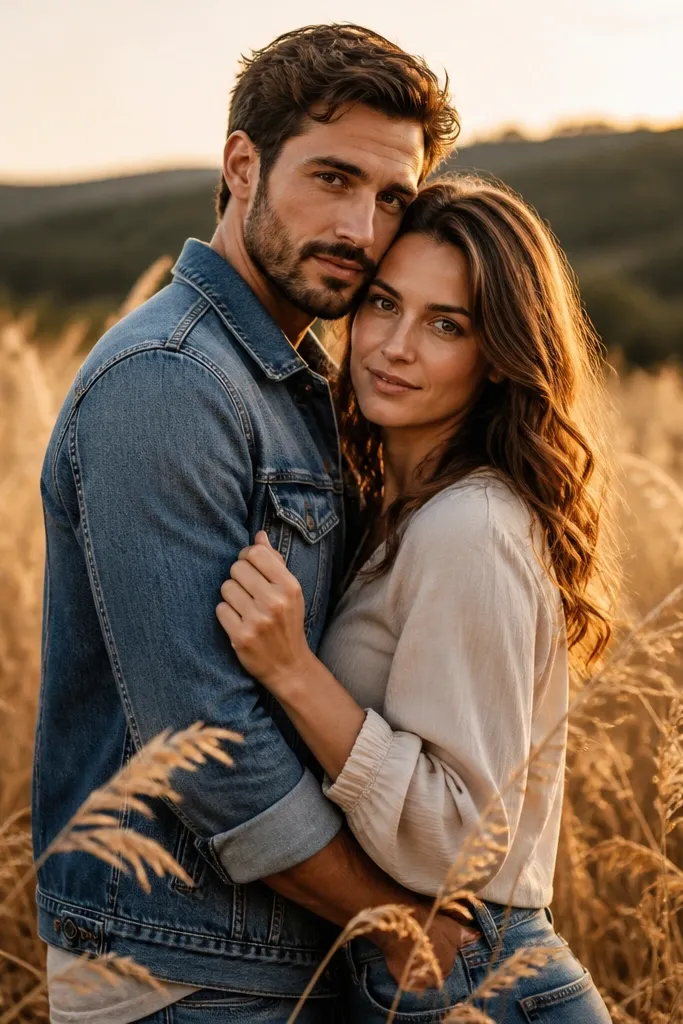
This pose is aesthetic because it uses clothing as a visual connector. Holding a jacket sleeve gives you something specific to do with your hands, which keeps photos from looking generic. Tall grass gives you the soft background texture, while denim adds contrast that looks great in warm sunset light. It also works across body types because the action is simple and close.
Start by choosing a field where the tall grass doesn’t hide your feet completely. Then coordinate outfits so one item has texture — denim, corduroy, or a knit — and the other is smoother. Do the pose by standing close and having one person hold the other’s jacket sleeve near the wrist. Take a burst as you sway slightly, then freeze for 3 seconds with relaxed shoulders.
Quick tipIf the grass is wet, wear socks you don’t mind; wet grass can show through light hems.
Skip thisDon’t hold the sleeve too tight; it pulls fabric and can make your hand look tense.
21. Old Doorway Frame, Lean-In Faces
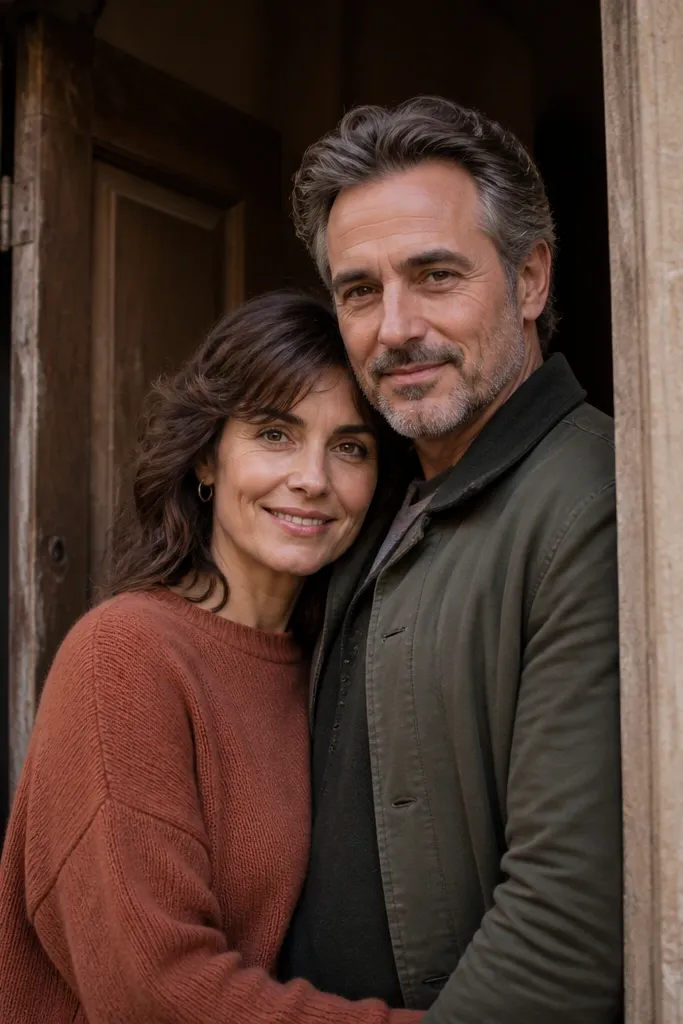
Doorways act like natural picture frames, and old doors add character without needing extra props. Lean-in faces make it intimate, and the doorway’s geometry makes the photo look designed. This is a strong choice when you’re somewhere historic or on a quiet street edge with minimal foot traffic. The dreamy look comes from contrast: your soft expressions against the worn textures.
Start by scouting a doorway with peeling paint or carved wood and a background that stays quiet. Then position your feet so your heads sit in the top half of the doorway frame, not the bottom. Do the pose by leaning in until your faces are close but not touching — then pull back a few centimeters for variation. Take frames while you shift eye contact between each other and the camera.
Quick tipUse a slightly wider lens perspective from a few feet back so the doorway doesn’t distort your faces.
Skip thisAvoid doorways with bright modern signs or clutter inside; it competes with your faces.
22. Quiet Stairwell, Hands on Collar and Small Smile
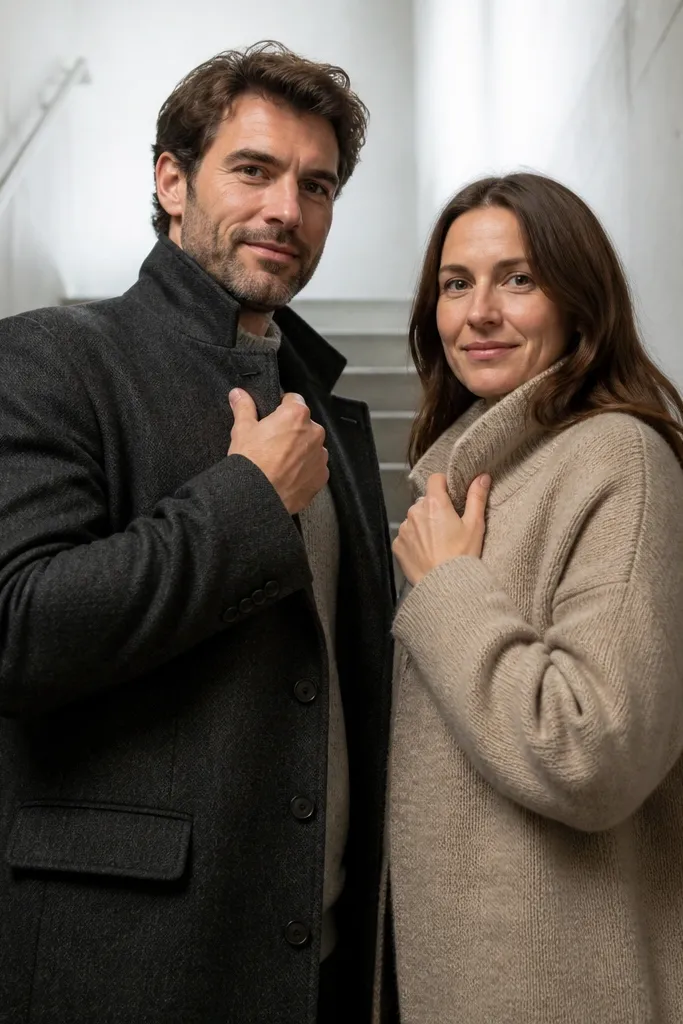
Stairwells are underrated for dreamy pre wedding photos because the lines lead the eye up and your bodies sit naturally in the geometry. Hands on collar (or jacket lapel) gives you a built-in grooming action that looks real, not posed. The stairwell walls also absorb light, so faces stay soft. This setup works best when you find a stairwell with natural daylight and no loud graffiti or random clutter.
Start by choosing a stairwell with clean walls and a single light source from a window or open landing. Then shoot at a time when daylight is steady so you don’t get flickering shadows. Pose by having one partner gently adjust the other’s collar or neckline, then pause and hold eye contact. Take a burst while you keep hands in place for 5-6 frames, then do one variation with both hands relaxed at your sides.
Wear a jacket or button-up you’re comfortable adjusting; it makes the pose look effortless.
Skip stairwells with wet floors or dark corners; they create messy reflections and harsh contrast.
23. Sunken Garden Courtyard, Sit on Low Wall Facing Away
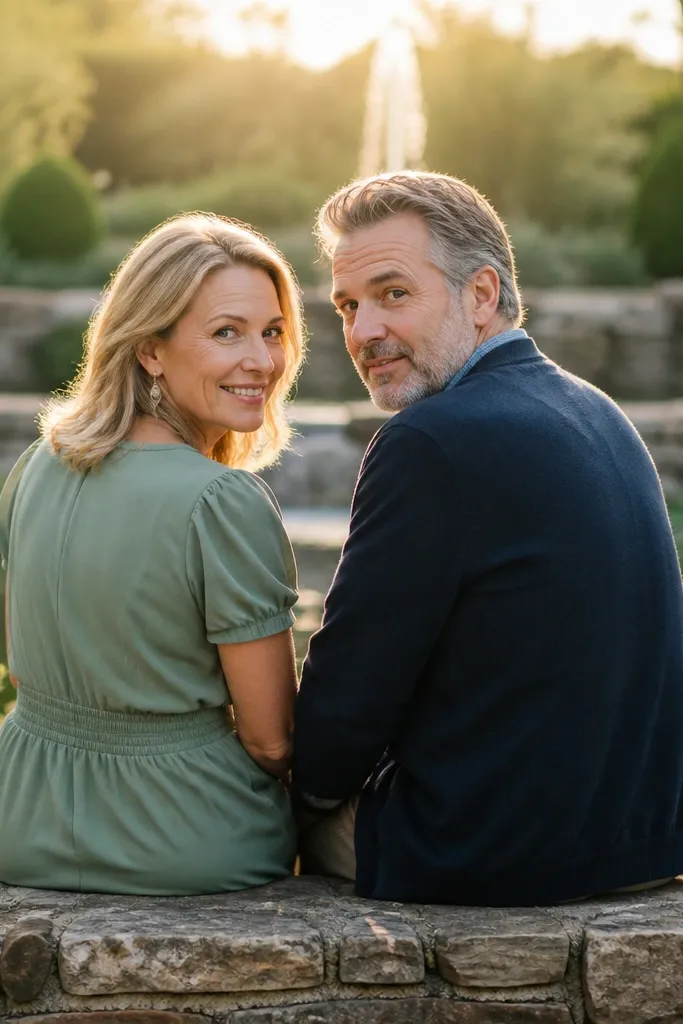
A low wall in a courtyard creates instant composition and makes it easy to keep the scene uncluttered. Sitting facing away gives you space for dreamy backlight and keeps your expressions relaxed instead of over-staring. Turn your heads back toward the camera for the connection, and the result feels candid but still styled. This is a strong choice when the location has pretty architecture but you don’t want to pose in front of it like a postcard.
Start by finding a courtyard or garden with a low stone edge and a clean background line behind you. Then shoot when the sun hits the courtyard from one side, creating glow on hair and shoulders. Sit close, with one person slightly in front of the other, and turn heads back toward the lens. Take 10-12 frames while you hold still, then add one variation where you both look at each other for a softer expression.
Quick tipBring a neutral throw or wrap you can hold in your lap; it helps the sitting pose look intentional.
Skip thisDon’t sit with legs dangling if the wall is uneven; adjust until your knees line up for a clean silhouette.
24. Quiet Beach Rock Stack, Forehead Touch Behind the Rocks
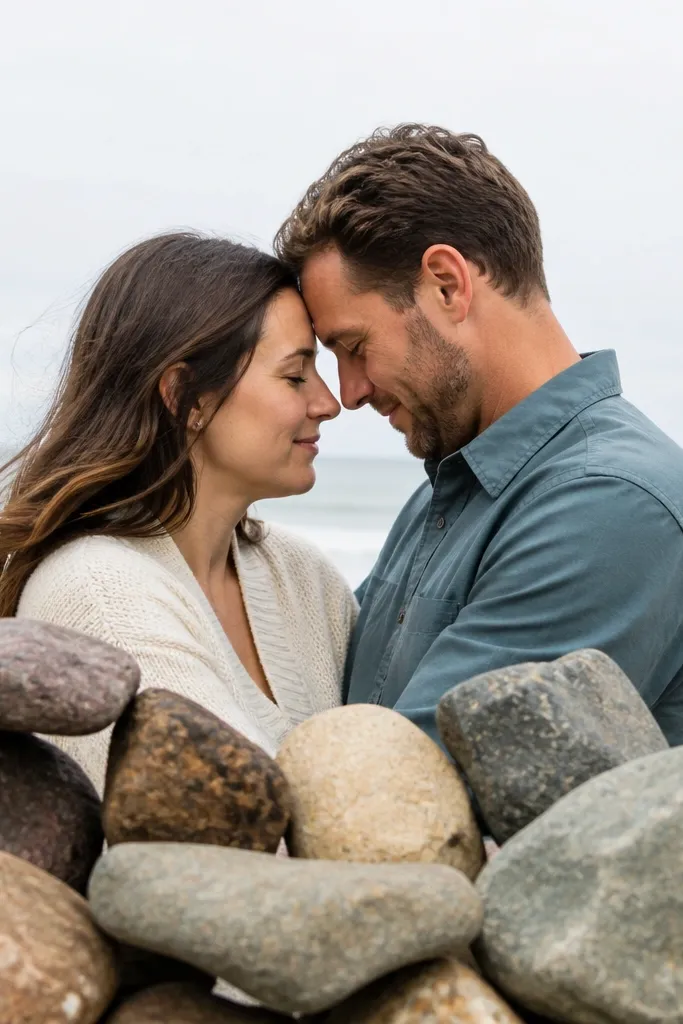
Rock stacks create a natural foreground barrier that makes your faces feel framed and protected, even at the beach. Forehead touch behind the rocks is romantic, and it also helps with crowd control because you’re not standing in open sand. The dreamy look comes from the contrast between textured rocks and smooth skin tones under soft coastal light. This works best on beaches where the rock formations aren’t crowded with other photographers.
Start by scouting a beach segment with rock stacks and a clear approach that isn’t slippery. Then plan for low tide or a time when the waves aren’t crashing too hard — you want mist, not spray. Position the rocks so they sit between you and the camera at a low level, then bring foreheads close behind them. Take frames as the wind moves hair; pause for 2-3 seconds to keep eyes sharp.
Wear footwear with grip; beach rock sand can be deceptive underfoot.
Avoid positioning where waves reach your lower legs; safety ruins the mood fast.
25. Lone Tree on a Hill, Slow Walk Toward It Together
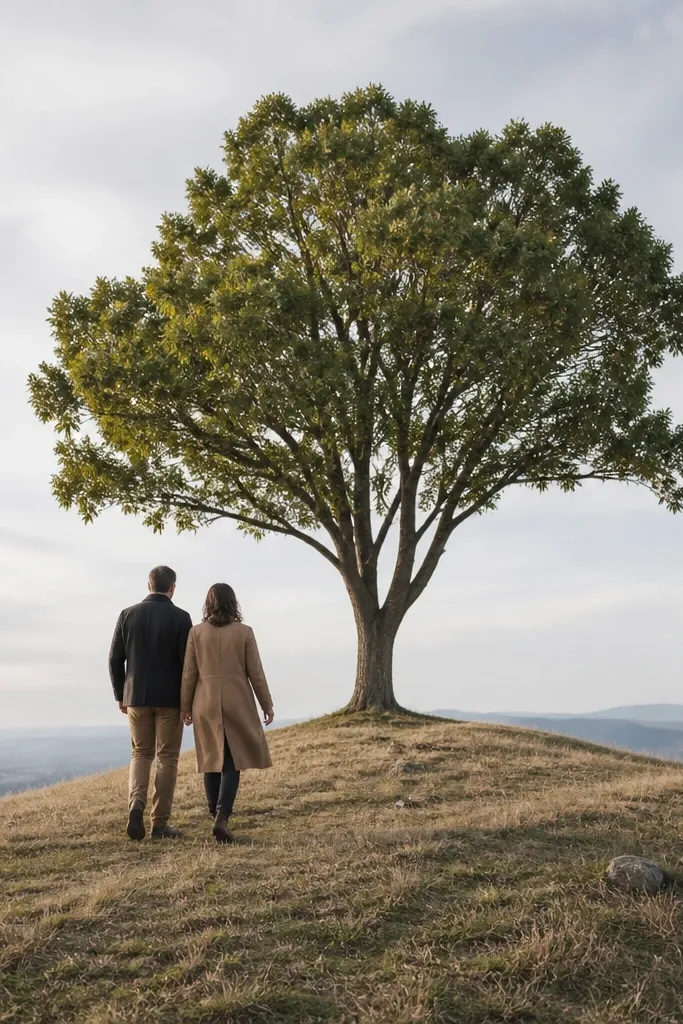
A lone tree is one of the cleanest backgrounds you can find off the beaten path. It gives you a single focal point, and the hill creates depth so your photos look layered. The pose is simple and cinematic: you’re walking toward the tree together, then stopping close to it. This works for couples who want a dreamy, story-like vibe without looking like they’re posing in front of a famous landmark.
Start by finding a hill edge or field with one standout tree and a clear path to it. Then shoot around sunset so the tree silhouette and your faces are both lit correctly. Walk toward the tree slowly with your shoulders slightly angled toward each other. Stop near the tree trunk, lean in, and take a burst while you keep your feet planted so the composition stays steady.
Quick tipIf the tree is too bright in sun, stand a few feet off to the shaded side and let the background silhouette do the work.
Skip thisDon’t pick a hill spot with power lines or road signage in the same frame.