1. Petal Path Walk for Bride and Groom
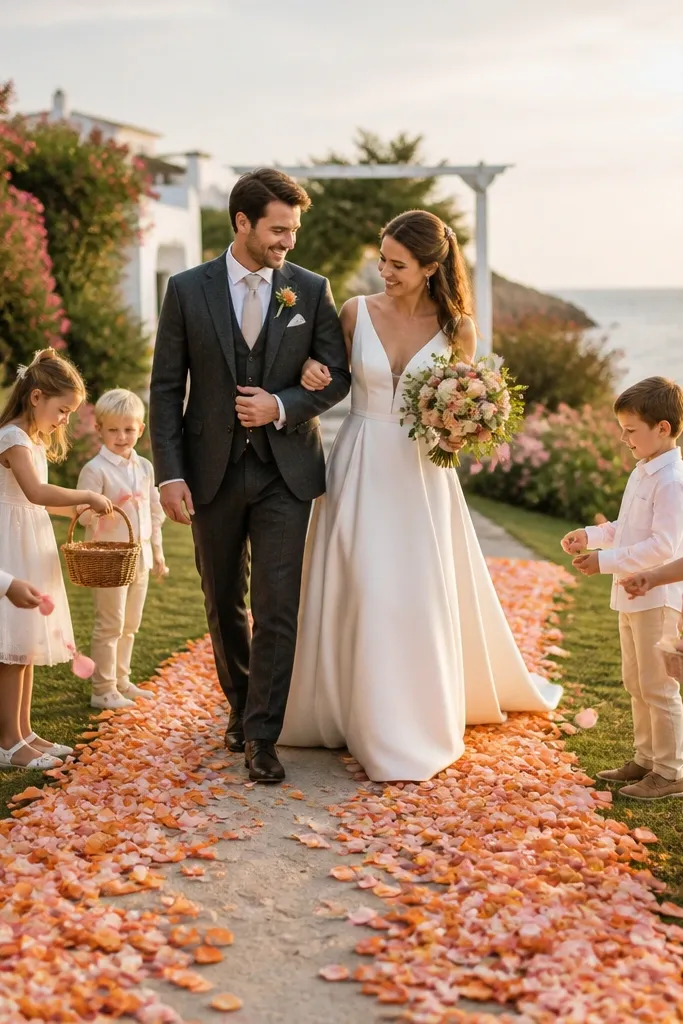
This is the kind of family-friendly wedding photo idea that looks styled even when it’s moving fast. Guests create a clean “path” with petals while the couple stays centered, so the story reads clearly: celebration + togetherness. It works best when kids are involved because they can hold a small handful of petals or sprinkle from a cone without needing to pose. Choose a wide aisle or walkway so there’s enough space for the family line to form without squeezing. Early evening is ideal because the petals catch light and the background stays warm.
Start by marking a line on the ground with tape or chalk so guests know where to stand. Then give each family group a simple cue: “When you hear the countdown, open your hands and sprinkle as they pass.” Finally, keep the couple’s movement to two slow steps, pause for one beat, then continue — this prevents blur and gives the photographer time to get sharp frames. For logistics, plan 5-8 minutes total, including getting petals into kid-friendly cones. If you want the look to be consistent, use the same petal color throughout (white, blush, or pale peach) and avoid mixed textures that scatter everywhere.
Use small paper cones for kids so petals stay controlled and the floor doesn’t get messy.
Skip a narrow space — cramped lines make people shove and ruin the clean path look.
2. Grandparent Ring Ribbon Portrait
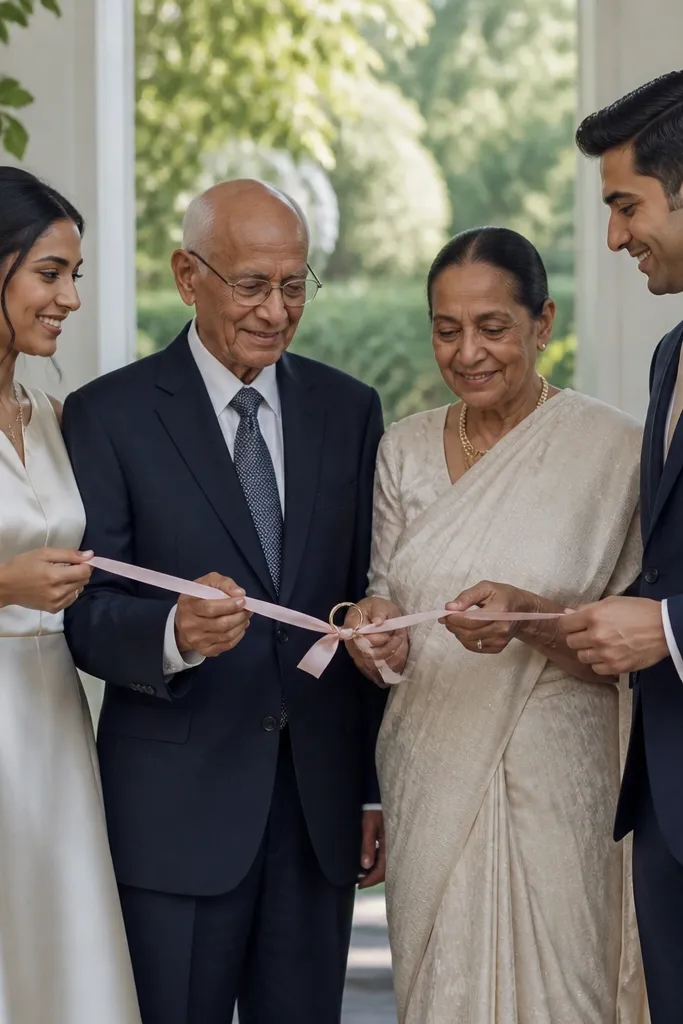
This moment is sweet and photogenic because it turns “family participation” into a visible prop. The bride and groom hold the ends of a ribbon or fabric strip, while grandparents stand beside them holding the middle so the ribbon forms a gentle diagonal across the frame. It looks intentional, not forced, and it’s easy for grandparents who don’t want to walk around. The ribbon also adds texture and movement without chaos. For best results, use satin or soft chiffon in a wedding-appropriate color and pick a background with one dominant tone, like a garden wall or a light-colored venue facade.
Start by choosing a ribbon length of about 6-8 feet so it drapes across bodies without bunching. Then assign roles: grandparents hold the center point at chest height, bride and groom each hold their end, and the photographer asks everyone to angle shoulders toward the camera. Finally, do two versions: one with the couple smiling, one with a quiet moment where they look at each other while grandparents keep a steady smile. Budget time at 6-10 minutes since you’ll likely need a quick reposition for height differences. If the venue has wind, chiffon behaves better than stiff satin.
Bring a small lint roller — satin picks up stray fibers and shows them in bright light.
Skip wrinkled fabric — it creates distracting creases that pull attention away from faces.
3. Kids' Bouquet Toss with a Safety Angle
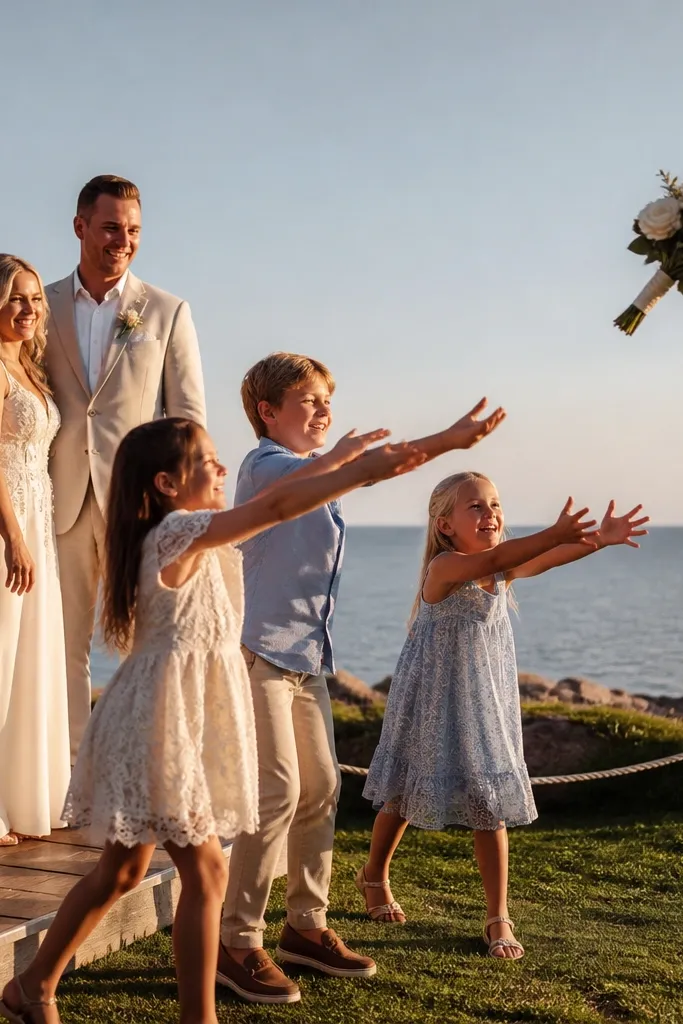
This is a family-friendly wedding photo idea that reads playful, not chaotic, because you control the “toss” with a safe setup. Instead of tossing near crowds, kids toss toward a clear empty spot (like an open lawn edge or a marked area) while the bride and groom watch from a fixed position. The visual payoff is a moment of attention: everyone looks toward the action, which gives you real expressions. It’s best with older kids who can aim and with a bouquet that’s lightweight. Choose a background with space so the frame stays uncluttered and the bouquet movement shows clearly.
Start by marking a landing area with a small cone or sign and keep guests behind a boundary line. Then have the bride and groom stand at least 10-15 feet away, angled slightly so their faces catch light while kids toss. Finally, do three takes with a reset between each one; the photographer can shoot a sequence as the bouquet arcs. Plan 10 minutes total because props and spacing take time, especially if you’re coordinating multiple kids. If the actual bouquet is too heavy, use a smaller toss bouquet or a ribbon-wrapped bouquet substitute.
Use a toss bouquet with silk stems or a lightweight handle so it arcs nicely without hurting anyone.
Skip throwing in tight spaces — you’ll get tangled feet and distracted faces.
4. Family Photo with One Color Petal Backdrop
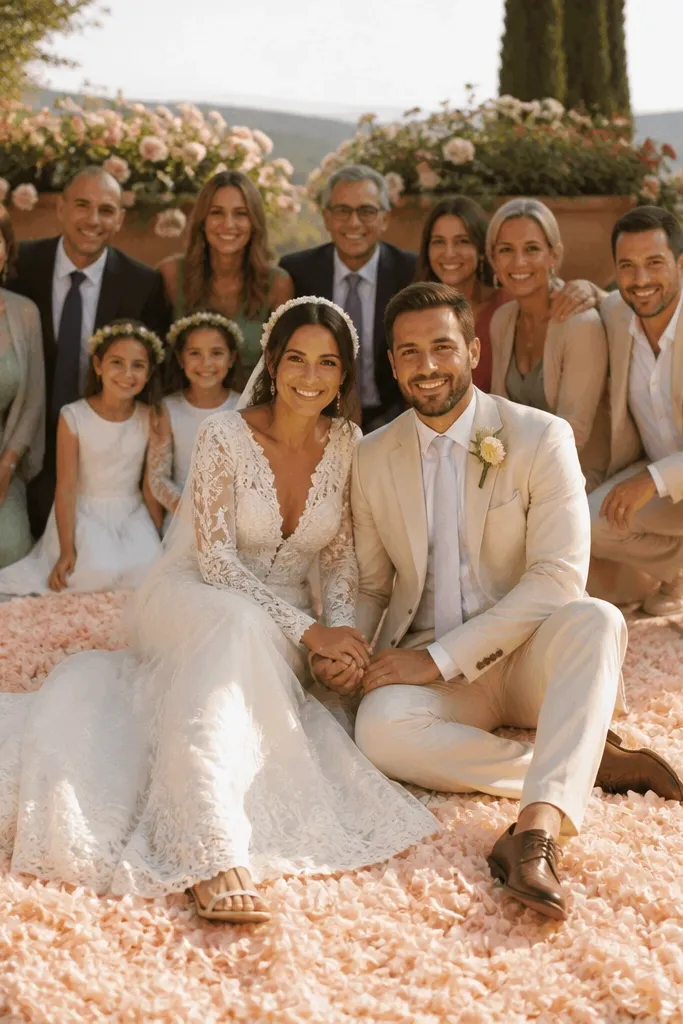
This makes family photos look designer-level because the background stays cohesive. You spread petals in one color (like blush or pale apricot) in a patch behind the group, then place the bride and groom slightly forward so they sit on top of the “soft texture.” Kids love this because it looks like a themed moment, and grandparents like it because it’s easy to stand and smile without moving. The petals create a dreamy base without needing fancy decor. The best look happens when the petals are dry and you shoot in open shade so the background doesn’t blow out.
Start by choosing a single petal color and spreading it in a thin, even layer about 6-8 feet wide. Then position the couple in the front center while family forms a gentle semicircle behind, keeping at least 2 feet of space between rows. Finally, shoot from a slightly higher angle than waist level so you can see the petal texture while keeping faces sharp. Plan 8-12 minutes, including setup and a quick cleanup. If your venue bans petals indoors, use a similar textured fabric backdrop outdoors.
Quick tipBring a small bag of extra petals for touch-ups after people step around.
Skip thisSkip mixed petal colors — they create visual noise and make the photo feel messy.
5. Bride and Groom with Kids Holding Light Up Signs
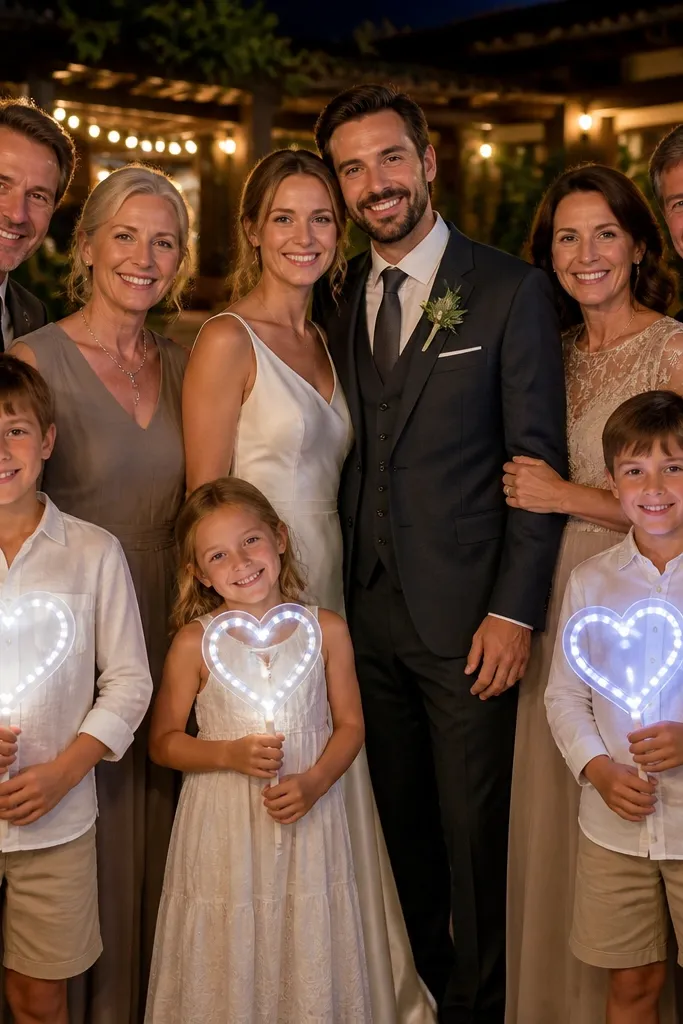
Night photos can look magical without looking like a nightclub. Kids hold small, safe light-up signs or LED sticks while the bride and groom stand close together, framed by warm ambient lights. The key is keeping the couple still so you get clean faces, while the kids add sparkle and motion. This is a great family-friendly wedding photo idea for receptions where you don’t want to pull everyone into a long formal lineup. Use warm-toned lights so skin stays flattering and the background doesn’t turn blue.
Start by testing the lights in the reception space before the couple arrives, so you know how bright they are against the venue. Then assign kids to positions at the edges of the frame, keeping their signs at chest height. Finally, keep the couple’s pose simple — hands together, shoulders angled — and let the kids do one controlled movement cue: “Hold steady for two seconds, then lower.” This takes about 10 minutes including distributing lights. If you’re using battery LEDs, bring spare batteries so the glow doesn’t fade mid-set.
Choose warm white LEDs, not cool blue — cool tones make skin look gray.
Skip random hand waving — it turns into blurred streaks and ruins the clean look.
6. First Dance Sidecar: Couple + One Parent Each
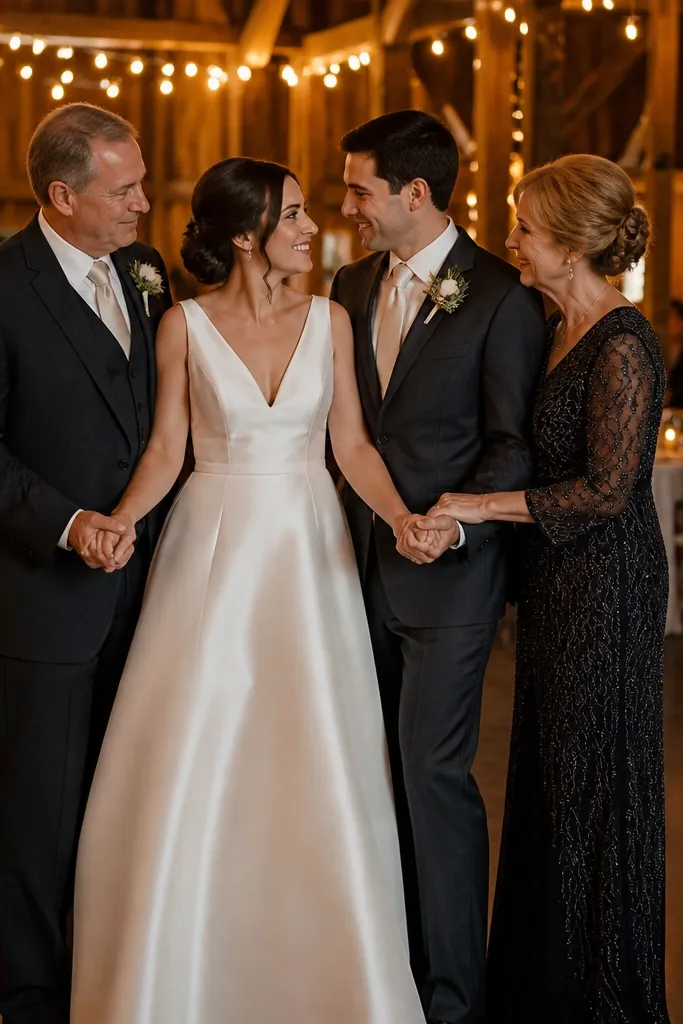
You keep the emotional moment of the first dance, but you add a family-friendly layer that photographs beautifully. The bride and groom stay in the center while one parent stands on each side, holding hands lightly or resting a palm on the couple’s upper arms. It looks intimate without crowding because the composition is symmetrical. Kids can watch close by, and grandparents get to be part of the story without needing to dance for long. This works best when the floor has clean lighting and you can control the background so it doesn’t look like a busy room.
Start by planning with the DJ or coordinator so you get a 2-3 minute pocket in the first dance song. Then position parents at the couple’s sides before the music starts, so there’s no scrambling during the best light. Finally, direct a simple action: the couple does a slow sway, parents hold still and smile, and the photographer shoots a short burst from the front and a second angle from the side. Budget 6-8 minutes total. If the venue is dark, ask the photographer to use a flash diffuser or a bounce light setup for consistent skin tones.
Quick tipPick parents who are comfortable standing still — the cleanest photos come from calm bodies.
Skip thisSkip adding too many people at once — more than two parents per side makes faces overlap.
7. Backyard Chalk Heart Frame
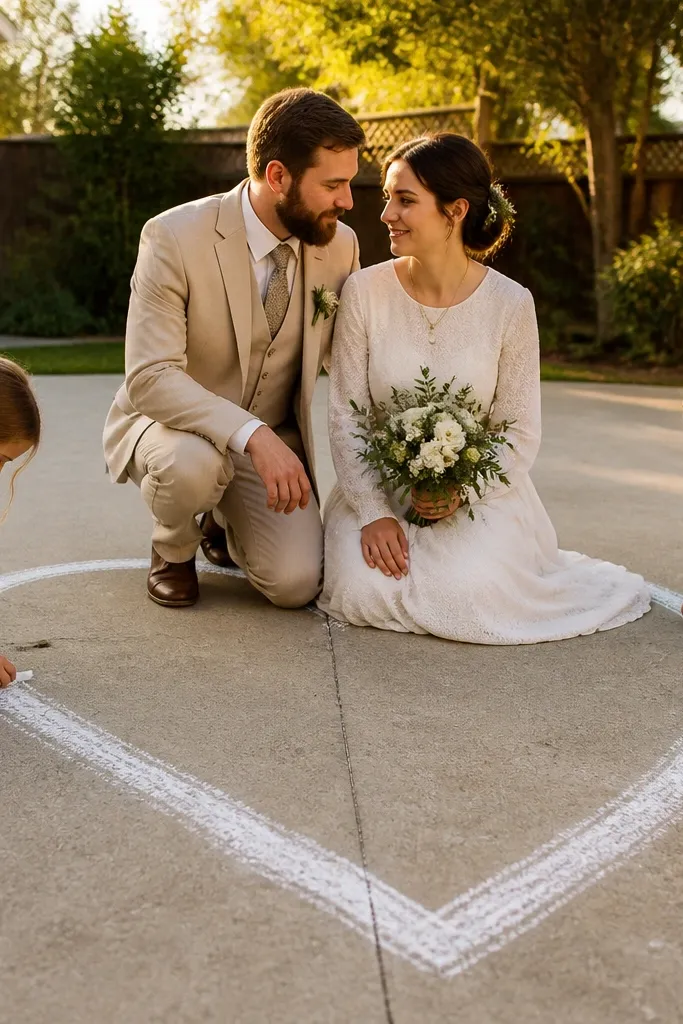
Chalk frames look adorable and structured, which is rare for family-friendly wedding photo ideas. The heart acts like a natural border, so kids can draw or color the edges while the bride and groom pose in the center. It’s visually clean, especially in daylight when the chalk lines contrast with grass or pavement. This works well for casual venues like farms, backyard ceremonies, or any outdoor space with a flat surface. Morning light makes chalk look crisp; late afternoon can add a warm glow.
Start by preparing chalk in two colors: one main color (white or light gray) and one accent (soft pink) for small details. Then outline a heart about 8-10 feet wide so the couple fits full-body or mid-body with room for family to stand at the edges. Finally, shoot once the couple is inside the heart and ask kids to hold still for a quick “frame” moment. Plan 15 minutes because chalk needs setup time and you may need a retouch. If it’s windy, use thicker chalk or place a small cloth under any chalk buckets to avoid spills.
Quick tipDo the chalk right after guests arrive, not right before portraits, so you’re not rushed.
Skip thisSkip glossy surfaces where chalk won’t stick — it smears and ruins the crisp frame.
8. Bouquet Ribbon Wind Photo with Family Heads Close
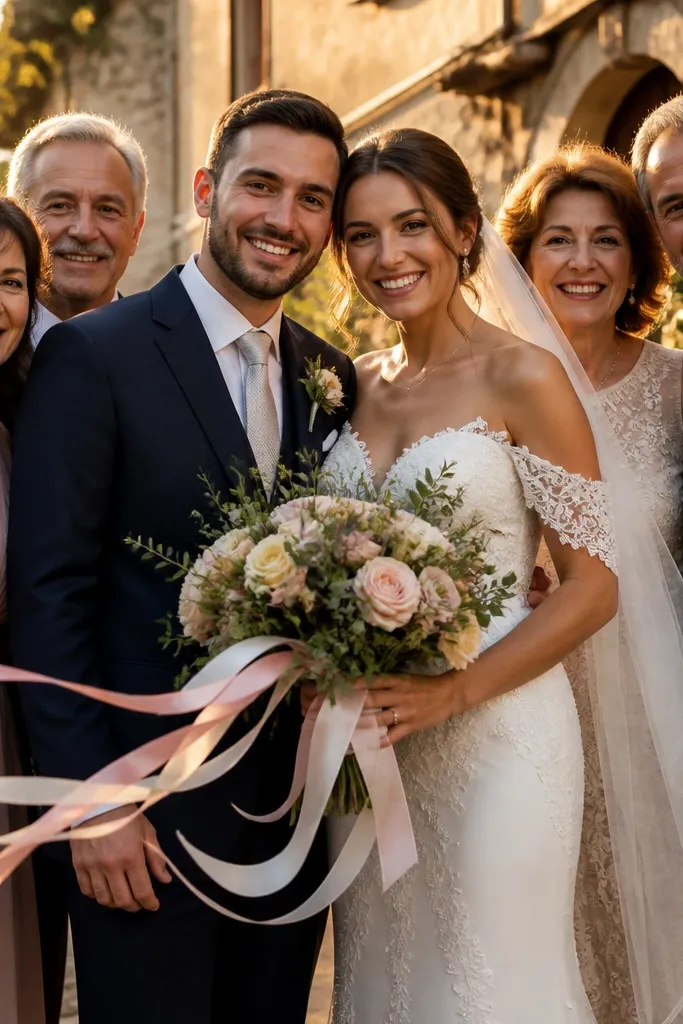
Wind photos look intentional when you control the element: ribbon movement. The bride holds a bouquet with long satin or organza ribbons, and the groom stands close enough that their heads align in the same plane of focus. Family members lean in behind or beside them, smiling toward the couple, not the camera. It makes the photo feel alive because ribbons catch light and create soft motion trails. This idea is especially good for family-friendly weddings because kids can adjust ribbons without complicated posing instructions.
Start by tying 2-3 ribbon tails to the bouquet handle, each about 18-24 inches long. Then choose a spot with open air and a clean background — the edge of a field or a courtyard with space works well. Finally, direct one movement cue: “Take one slow step forward, then hold.” The photographer shoots as the ribbons lift in the breeze. Plan 10-12 minutes, including one test turn of the bouquet before the main take. If there’s no wind, gently fan the ribbons with a program or a cloth.
Quick tipUse organza for easier motion; satin can look too heavy and dark in photos.
Skip thisSkip busy crowds behind — ribbon motion plus clutter makes the frame feel chaotic.
9. Family Bench Cheer with Bride and Groom Centered
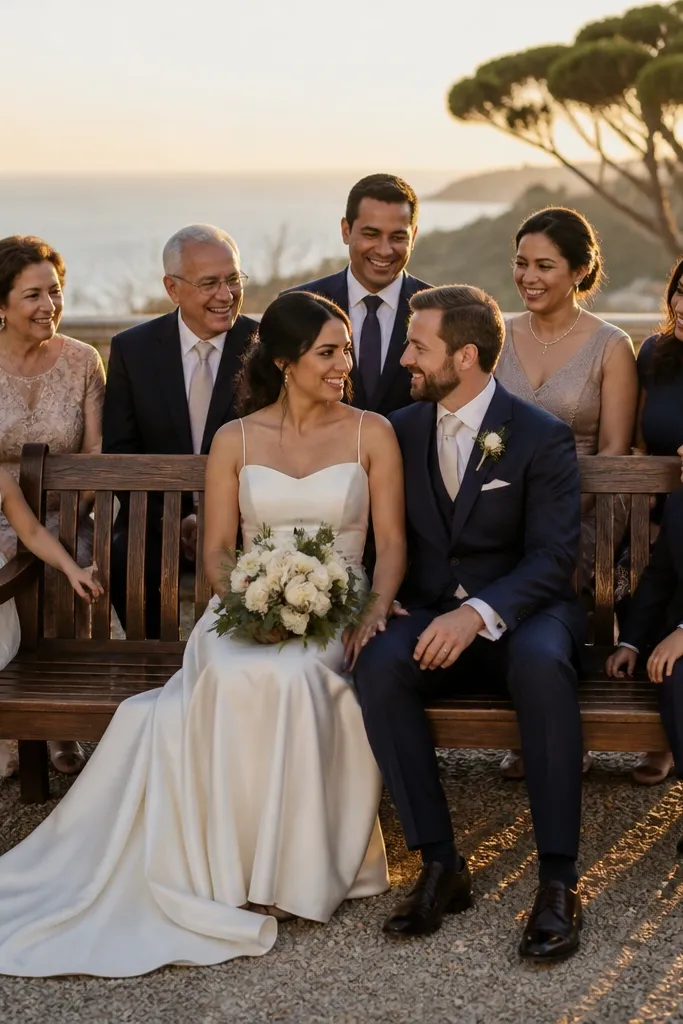
A bench shot looks classic but you make it family-friendly by giving everyone a job. Bride and groom sit or stand centered on the bench, while family sits in a staggered line so no one blocks faces. Kids can sit on the ends with their legs angled toward the couple, which keeps their bodies in frame and gives you a tidy composition. This is a great option when the venue has a scenic bench in a garden, park, or courtyard. Daylight makes skin tones look fresh; overcast skies also work because the bench background stays soft.
Start by scouting for a bench with a simple background behind it, not a wall covered in signage. Then place the bride and groom at the center, and arrange family in two rows if needed, keeping at least 1 foot of separation between knees and shoulders. Finally, direct a “cheer” moment: everyone smiles, then lifts their hands or waves slightly for two seconds while the couple stays steady. Plan 8-10 minutes. If the bench is in full sun, schedule it near late afternoon when the light is lower and less harsh.
Bring a small lint roller or brush — benches collect dust and it shows on light clothing.
Skip crowded bench placement — if people sit too close, faces get blocked and expressions look strained.
10. Dad-Daughter and Mom-Son Hands Bridge
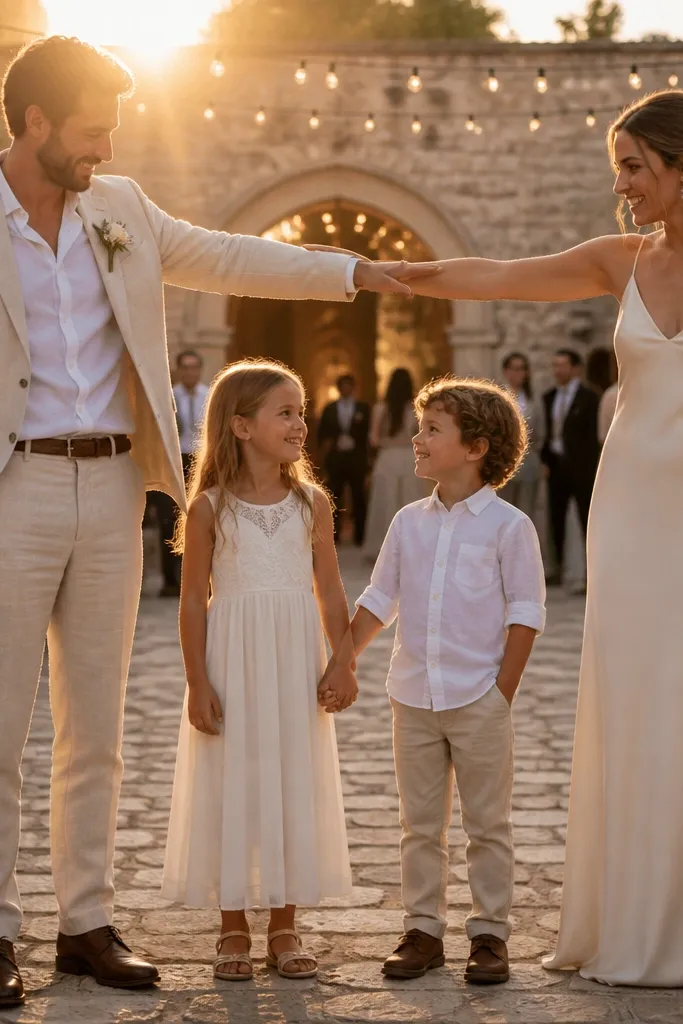
This idea is photogenic because it creates a clear shape: a bridge formed by hands across the couple. The groom stands with one parent and one child, while the bride mirrors the arrangement, so the frame looks balanced. Kids can hold hands confidently, and parents get a role that feels personal without needing to perform. It’s also a nice option if some family members don’t want to be in a full group photo but will stand close. The best look comes from bright, even lighting where skin tones stay consistent and hands are clearly visible.
Start by assigning pairs before you start shooting, so you don’t waste time figuring out who stands where. Then position the couple in the center and have two sets of hands form a gentle arch at chest height, with fingers interlaced or palms lightly touching. Finally, ask everyone to hold the shape for a 2-second countdown, then relax into natural smiles. Budget 10 minutes because you’ll want a few variations with different children. Choose a background that doesn’t have busy patterns behind hands — plain stone, grass, or a smooth wall works best.
Quick tipAsk kids to bend elbows slightly — straight arms make hands look stiff and awkward in photos.
Skip thisSkip mixing too many children — one pair per side keeps the bridge readable.
11. Bride and Groom Frame with Matching Umbrellas
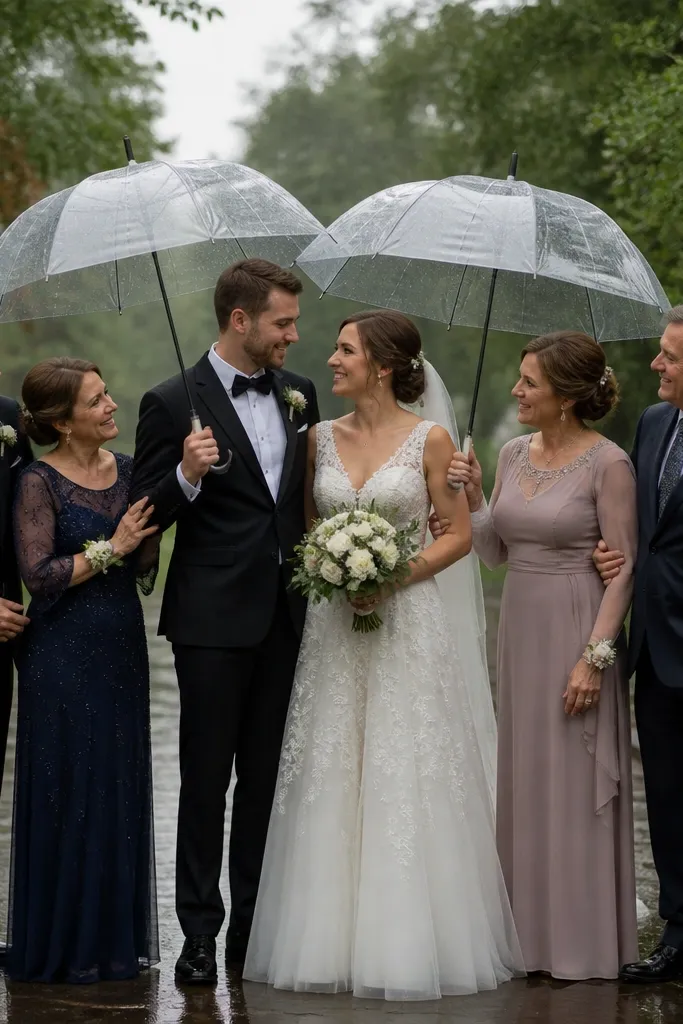
Umbrellas give you a graphic, styled look instantly, even in plain weather. Bride and groom hold matching umbrellas or stand under a large umbrella, creating a clean dome shape above them. Family can stand close at the edges, peeking into the frame, which keeps everyone involved while the umbrellas keep the composition tidy. This is a strong family-friendly wedding photo idea for outdoor venues because it works in light rain or even just after a drizzle when the ground looks glossy. Pick umbrella colors that match the wedding palette — navy, black, or deep green look especially good.
Start by choosing umbrella colors that contrast with the background, not the couple’s clothes. Then place the couple in the center and bring family to the sides so the umbrella frame stays visible. Finally, direct one movement cue: “Walk two steps forward together,” so the umbrella catches light and you get a natural sense of motion. Plan 12-15 minutes so you can coordinate umbrellas without dropping them. If it’s windy, use weighted umbrella stands or hold umbrellas with a firm grip at the handle base.
Quick tipUse matte umbrellas — glossy ones reflect venue lights and can blow out highlights.
Skip thisSkip patterned umbrellas if the background is already busy — patterns fight for attention.
12. Sidewalk Chalk Names with Couples Holding Center
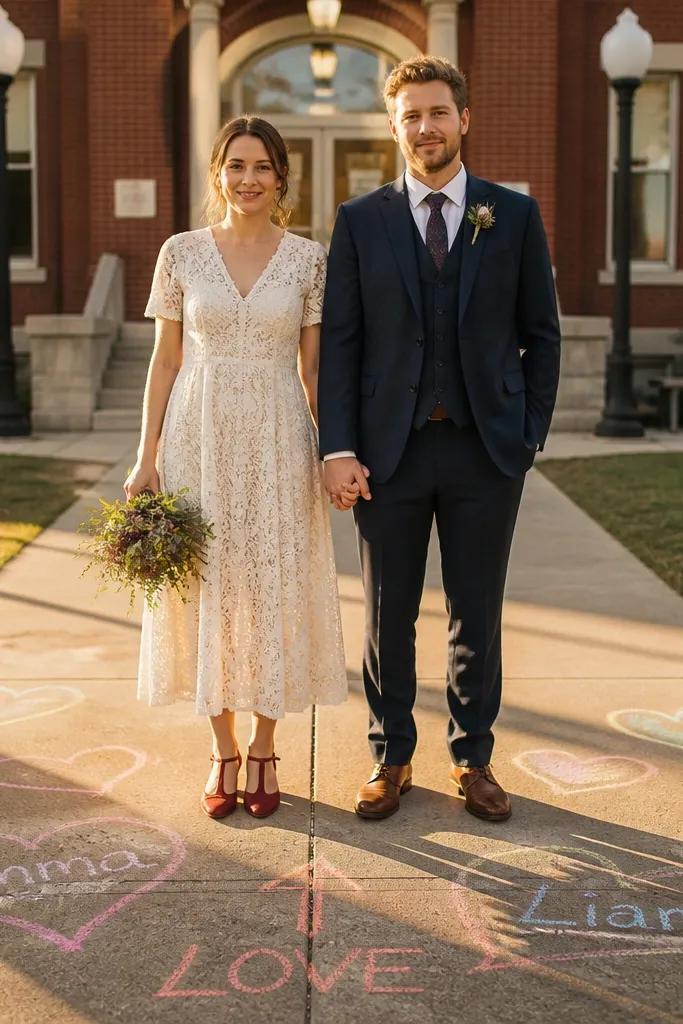
This is a creative family-friendly wedding photo idea that looks intentional because it turns a fun detail into a composition. Kids can write or decorate chalk names on the ground near the couple, while the bride and groom stand centered holding hands so their faces stay the focus. It has a candid feel, but the setup makes it look styled. It works best outside on sidewalks, driveways, or patios where chalk shows clearly. Choose one simple script color and keep the rest minimal so the photo doesn’t turn into a cluttered mess.
Start by drawing the couple’s first names or initials in a box about 4-5 feet wide, leaving space in the center for full hands. Then place the bride and groom over the center and ask kids to stand behind the chalk line, not inside it. Finally, shoot from a slightly lower angle so the chalk lettering frames the couple without cutting faces off. Plan 15 minutes including chalk setup and one cleanup step. If the ground is dusty, lightly mist the surface so chalk adheres and doesn’t brush away.
Use masking tape to outline the box before chalking — it keeps the lettering straight.
Skip too many words — three lines max keeps the frame clean.
13. Garden Arch Two-Step with Kids as Flower Holders
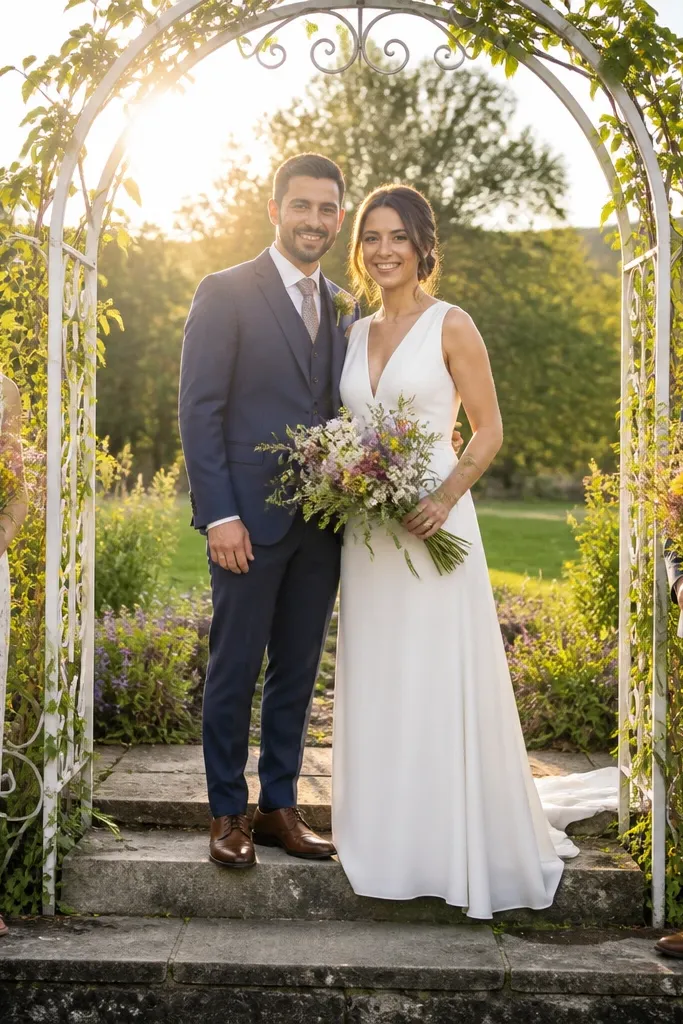
A garden arch creates instant framing, and this version keeps it family-friendly by placing kids in a supporting role. Bride and groom stand under the arch, while kids hold small flower bundles or single stems that add color at the edges. The arch makes the background look elegant without extra decor, and the kids' flowers create a “gradient” of color that feels cohesive. It’s best in spring and early fall when gardens look full but not overgrown. Shoot in late afternoon so the arch casts soft shadows and faces look smooth.
Start by positioning the couple directly centered under the arch and choosing a kid placement that doesn’t block the couple’s torso. Then hand kids small bundles in coordinating colors, and direct them to raise the flowers only to shoulder height for one quick moment. Finally, use a two-step cue: “Step toward the camera, then stop.” That gives you sharp faces plus a natural shift in posture. Plan 10 minutes. If the arch is close to a wall, ask the photographer to shoot with the arch centered so the background stays uniform.
Quick tipKeep kids' flower bundles small — big bouquets block faces and look heavy in photos.
Skip thisSkip cluttered garden areas behind the arch — it fights the framing effect.
14. Bride and Groom with Kids Holding Bubble Wands
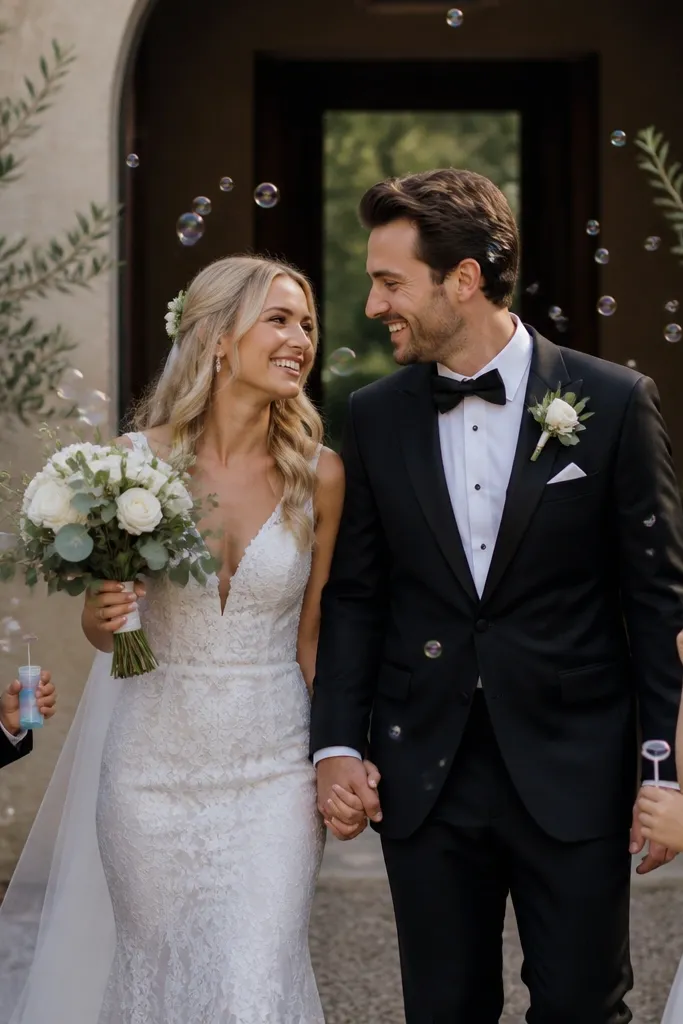
Bubbles are one of the few kid-friendly wedding photo ideas that look photogenic even when they’re spontaneous. The bride and groom stand close together while kids hold bubble wands at the edges, then blow bubbles during a short pose moment. Bubbles catch light and create soft circles that make the background look dreamy without editing gymnastics. This works best outdoors with sunlight or near a bright open doorway inside. The trick is controlling the timing so you get bubbles in front of faces, not only in the sky.
Start by choosing a bubble solution that creates larger bubbles, not tiny foam. Then assign kids to two positions — left and right of the couple — and keep wands at chest height. Finally, time it: count down from three, have the couple hold still for two seconds, then shoot a burst while bubbles rise. Plan 8-12 minutes. If it’s windy, do the bubbles in a sheltered area so you don’t lose them to the air.
Quick tipBring a spare bottle and a towel — bubble spills happen and show on shoes.
Skip thisSkip dark interiors — bubbles disappear unless there’s strong light.
15. Reception Table Toast with Kids at the Ends
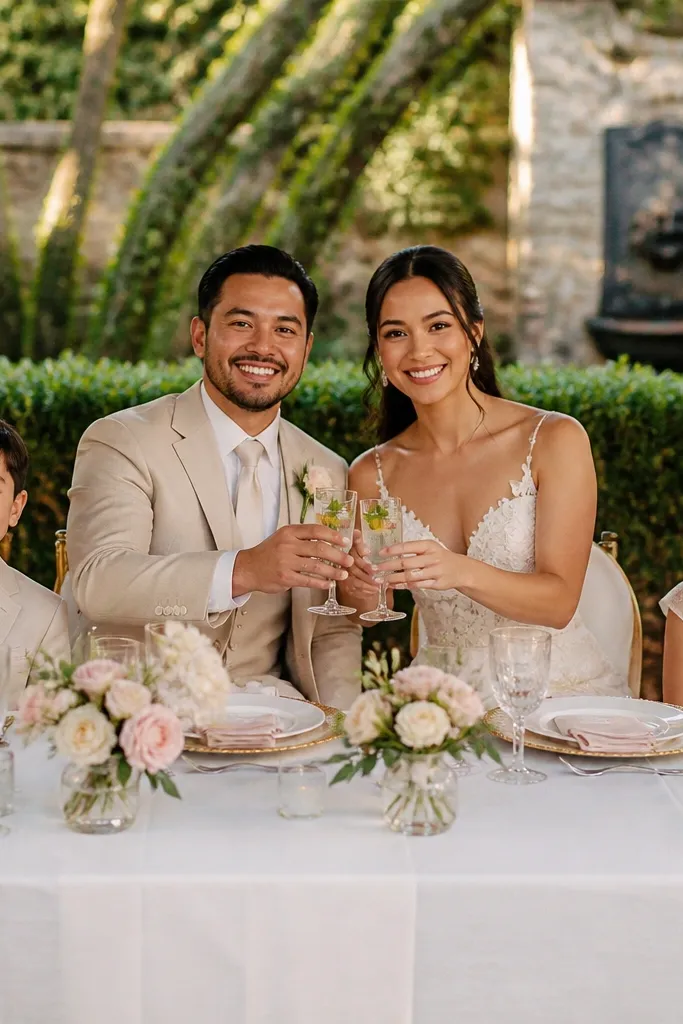
A reception table toast looks great because it gives you a real setting and a natural “moment” without extra staging. Bride and groom hold glasses or mocktails, then you place kids at the ends of the table so they’re included but not in the couple’s space. The tableware creates tidy lines, which makes the photo feel designed. This is family-friendly because kids sit comfortably, and grandparents can join without walking. It’s best when the table has clean linens and a simple centerpiece height so faces aren’t blocked.
Start by choosing a table with enough space for a full-body or mid-body framing and a background that doesn’t show messy equipment. Then position the bride and groom at the center, and place kids at the ends with a small prop like a folded napkin hat or a tiny bouquet. Finally, direct a one-second action: “Toast, then look at the person next to you.” That creates real expressions fast. Plan 12-15 minutes because you’ll need to coordinate seating and glass positions. If kids are too fidgety, use a shorter burst and focus on the couple’s faces.
Use clear or light-colored cups for kids so they don’t look dark against bright table linens.
Skip tall centerpieces — they block eyes and make the photo feel cluttered.
16. Couple + Family Silhouette at a Window
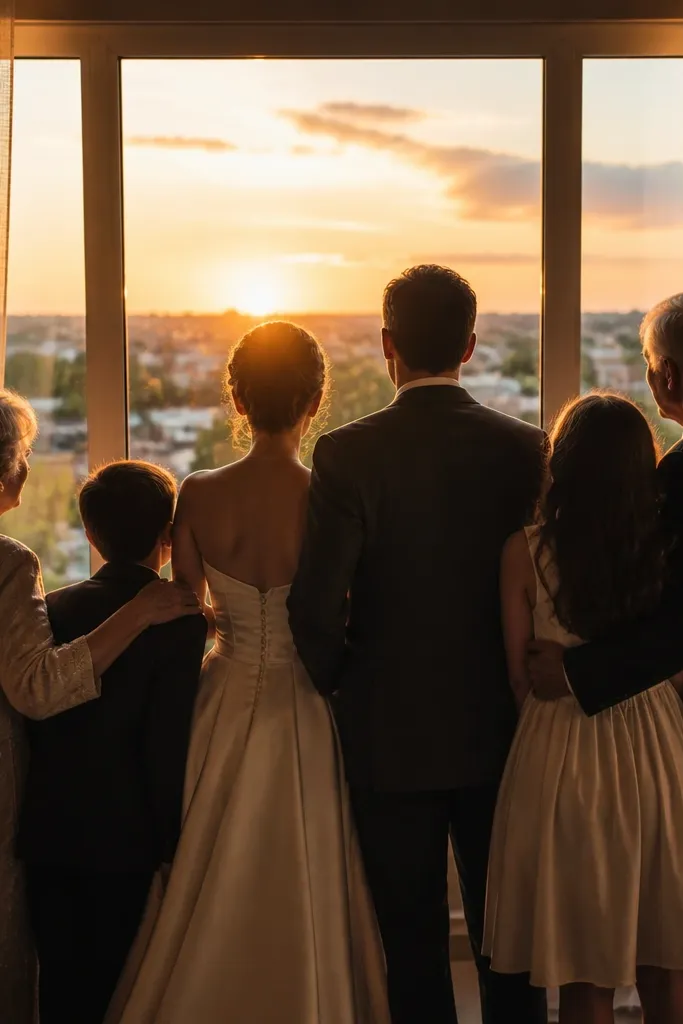
Silhouette-style window photos look dramatic while still being family-friendly because the family stands close behind the couple. Bride and groom are in front of a bright window, and family holds position as a soft shape behind them — kids included, grandparents included. The photo feels cinematic, but it’s simple: one location, one pose, one direction. This works indoors when you have a large window with strong daylight and plain walls around it. Shoot around midday when the light is strongest so silhouettes have clean edges.
Start by turning off overhead lights and keeping the room lights low so the window becomes the main light source. Then place the couple 2-4 feet from the window and have family stand slightly behind, spaced so silhouettes don’t overlap too much. Finally, ask the couple to touch foreheads or hold hands, then keep everyone still for a 2-second burst. Plan 10 minutes. If the window has heavy blinds, shoot with the blinds partially open to create soft light bands instead of harsh stripes.
Use light-colored fabrics for the couple under the window so edges define better in silhouette.
Skip dirty window glass — it creates streaks that ruin the clean silhouette look.
17. Bride and Groom with Kids Holding Photo-Frame Props
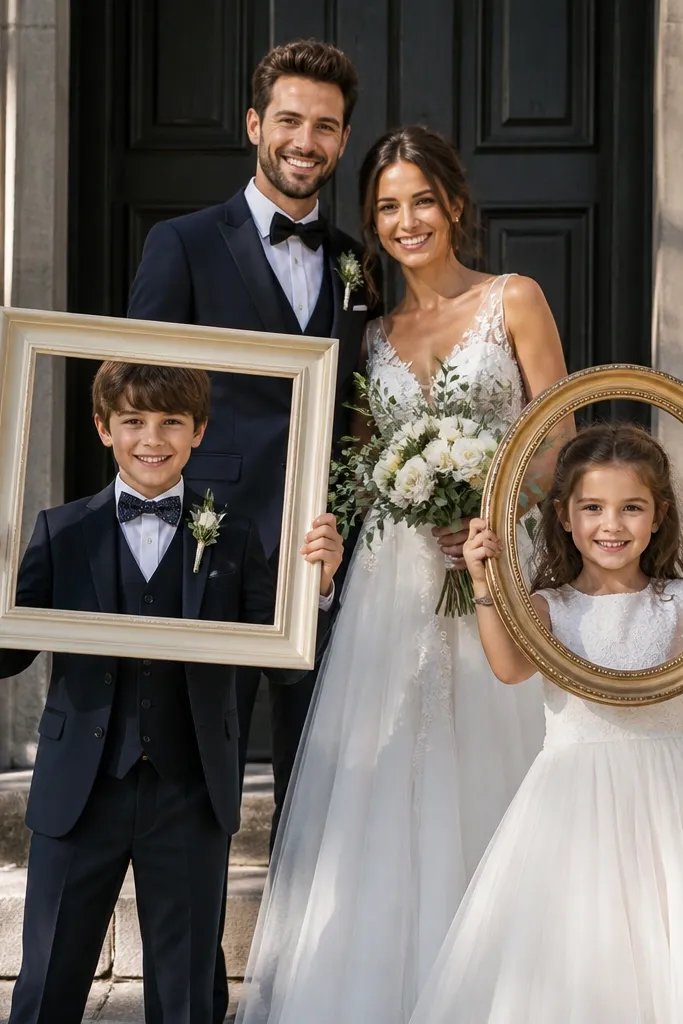
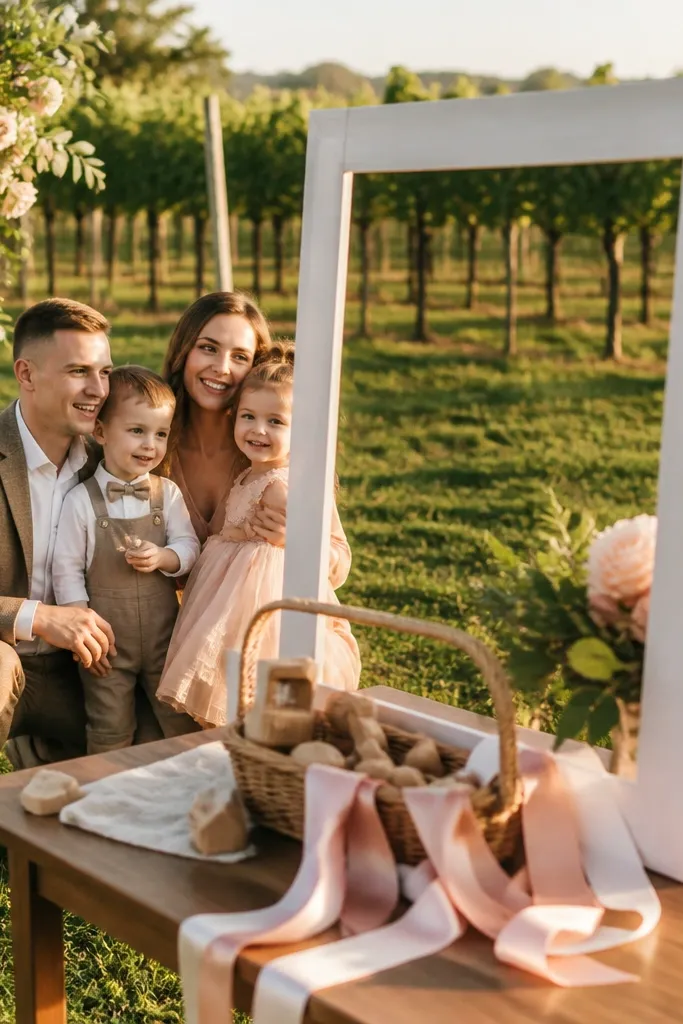
Photo-frame props make family-friendly wedding photo ideas look playful and intentional. The couple stands behind a frame held by kids, so the faces stay centered while the kids add a fun, graphic element. It’s especially good for families with multiple kids because each child can hold a different frame shape: heart, rectangle, or circle. The look is clean because frames create borders in the image, and the couple becomes the “picture inside the picture.” This works best in bright shade or near a wall with one color behind the couple.
Start by buying or making lightweight frames about 12-18 inches wide so kids can hold them comfortably. Then choose a simple background and set the couple’s position first, keeping them at the same height as the frame’s center. Finally, direct kids to hold the frame steady for two seconds while the couple smiles naturally. Plan 10-12 minutes, and do one take with each frame shape so you get variety without long delays. Bring a thin dowel or handle so frames don’t flop.
Quick tipMake frames in one color (white or black) so the photos match even if kids hold them at different angles.
Skip thisSkip heavy props — kids tire out and you lose the clean, steady expression.
18. Couple Seated Close with Kids on the Floor
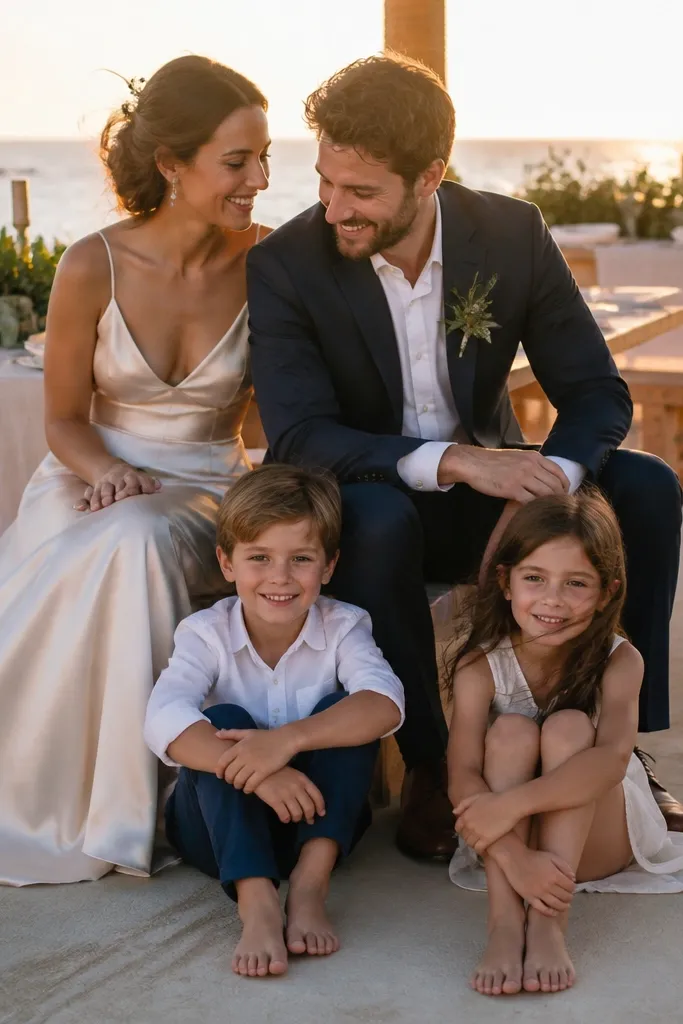
This is a family-friendly wedding photo idea that looks intimate because it respects height differences. The bride and groom sit close together, and kids sit on the floor in front or beside them so everyone’s faces are visible without towers of posing. It reads warm, not staged, because body language feels natural — kids can lean in, hold hands, or rest on a knee. It’s also practical for venues where standing for long portraits is hard. Choose a spot with soft, even light and a background that doesn’t show clutter behind the couple’s heads.
Start by scouting a low-traffic area with a smooth floor or grass patch where kids can sit comfortably. Then seat the couple first, angled slightly toward the light, and invite kids to sit at different distances so the composition has depth. Finally, ask for one interaction cue: “Hold hands with whoever is closest,” then shoot a short burst. Plan 15-20 minutes because you may need to adjust seating positions for best face visibility. If the floor is too bright or reflective, use a small blanket under kids to reduce shine.
Quick tipBring a small blanket and a pack of wipes, because kids' shoes and grass stains show in photos.
Skip thisSkip standing poses with kids — it creates blocked faces and awkward eye lines.
19. Lake Edge Reflection with Hand-in-Hand Family
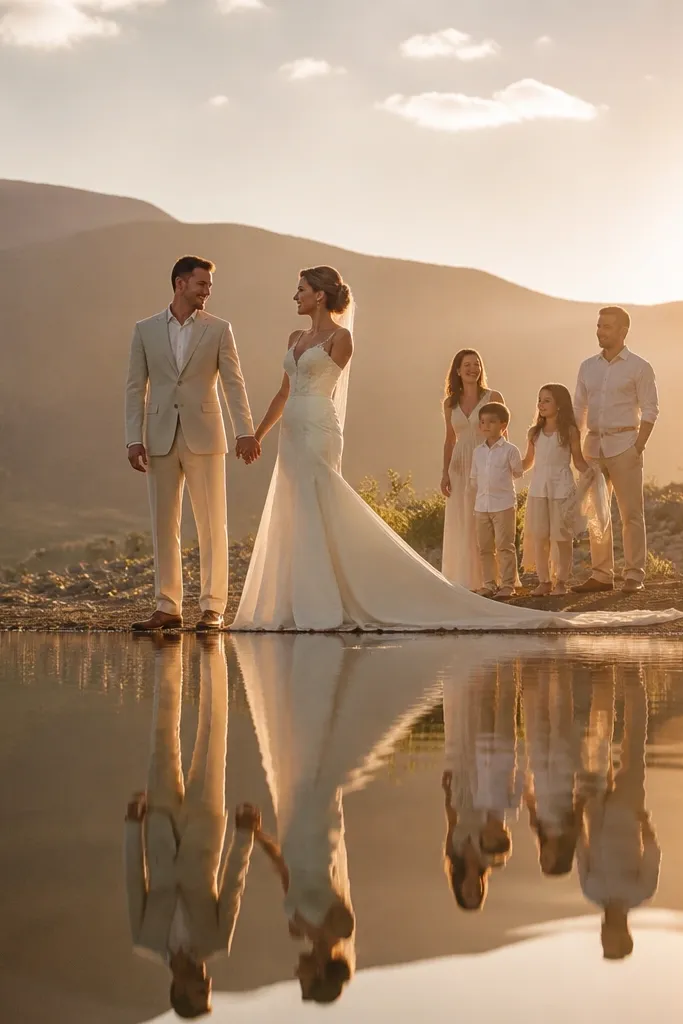
Water reflections look beautiful with minimal effort because the background doubles the composition. Bride and groom stand at the lake edge holding hands while family stands slightly behind them, close enough to be included but far enough to avoid blocking. Kids can be assigned to hold the ends of a small towel or blanket, then stand still for reflections to settle. This idea works best at calm water times like early morning or just after sunset when ripples are slower. If you want aesthetic photos that still feel family-friendly, this one delivers without needing fancy props.
Start by timing your shoot for low wind and calmer water, typically 60-90 minutes before sunset. Then position the couple so their reflections land in the frame, and keep family slightly behind and higher on the shore to avoid muddy foreground. Finally, direct everyone to hold still for a 2-second window, then do one gentle step forward for variety. Plan 20-30 minutes total because you need time to find the right spot and wait for calm ripples. If the shore is rocky, bring a small mat for the couple’s shoes so they stay steady.
Bring a dark towel to wipe shoes — wet feet create bright spots in reflections.
Skip choppy water — the reflection turns into a blurry mess and ruins the clean look.
20. Couple Under Porch Lights with Family Holding Lanterns
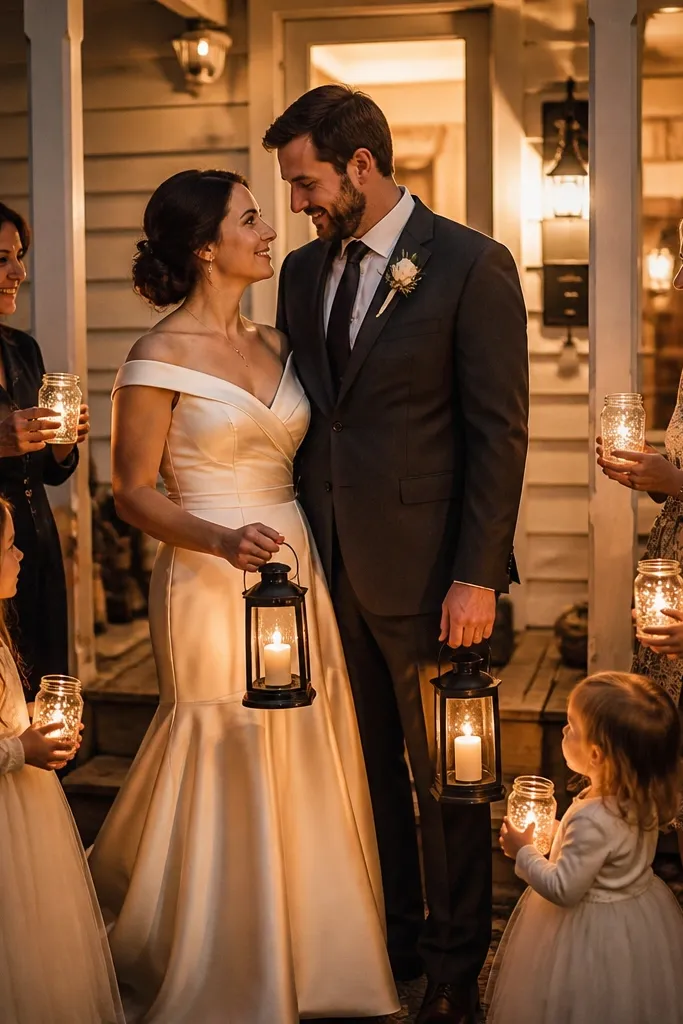
Porch-light photos have that cozy, warm look that photographs well for wedding memories. Bride and groom stand under existing warm lights, and family holds lanterns at the edges so the light wraps around faces instead of flattening them. Kids can carry small lanterns or glow jars, but keep them at waist height so they don’t block the couple. This is family-friendly because it’s a controlled setup: people can stand still, smile, and feel included without running around. It’s especially good in cooler months when the lighting looks extra warm against night air.
Start by scouting the venue for warm porch lights or covered entryways where the background stays simple. Then distribute lanterns to family with clear instructions: “Hold lantern low, face the couple, and don’t swing.” Finally, keep the couple close together and ask for one interaction cue — forehead touch or hand hold — then shoot a short burst. Plan 15 minutes. If you’re renting lanterns, use warm bulbs or tea-light style lights to avoid harsh green or blue color cast.
Quick tipUse lanterns with warm bulbs and avoid flickery LEDs that create weird skin color changes across frames.
Skip thisSkip moving lanterns — swaying lights create blur and distracting streaks.