1. Doorway Frame With One Step In
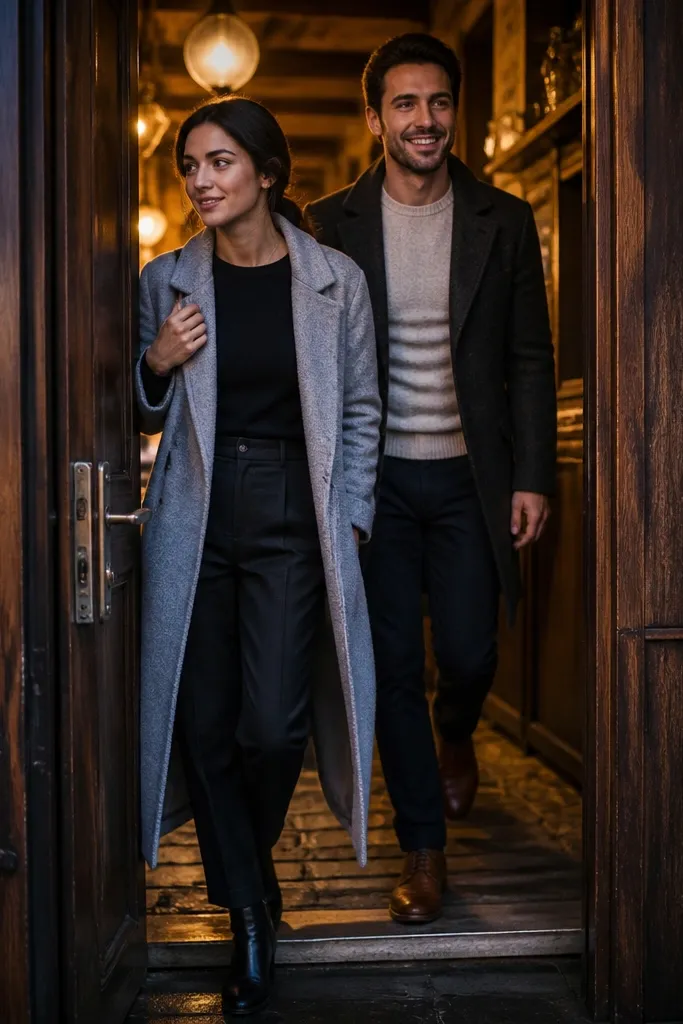
This is the fastest way to make a pre-wedding shoot look intentional because the doorway creates a natural border and shape. Stand just inside the frame so you get depth — the couple reads sharp while the outside background softens. Have one person take a single step forward, then pause; that tiny movement gives you expression without needing a full routine. It works best at venues with tall entrances, arched doors, or even a simple hotel entry with strong lines. Early evening light helps the doorway glow, but open shade still gives clean contrast.
Start by scouting a doorway with straight edges and minimal clutter. Then position both of you with shoulders angled slightly toward the camera, and do one controlled step forward — pause for 2-3 clicks. Finally, rotate 10-15 degrees to catch a second angle from the same doorway so you get variety without moving locations.
Bring a dark or neutral layer you can slip on/off quickly so you can match the doorway lighting.
Don’t stand centered and dead-flat — offset your bodies and let one person step first for shape.
2. Wall Lean With Hands Linked
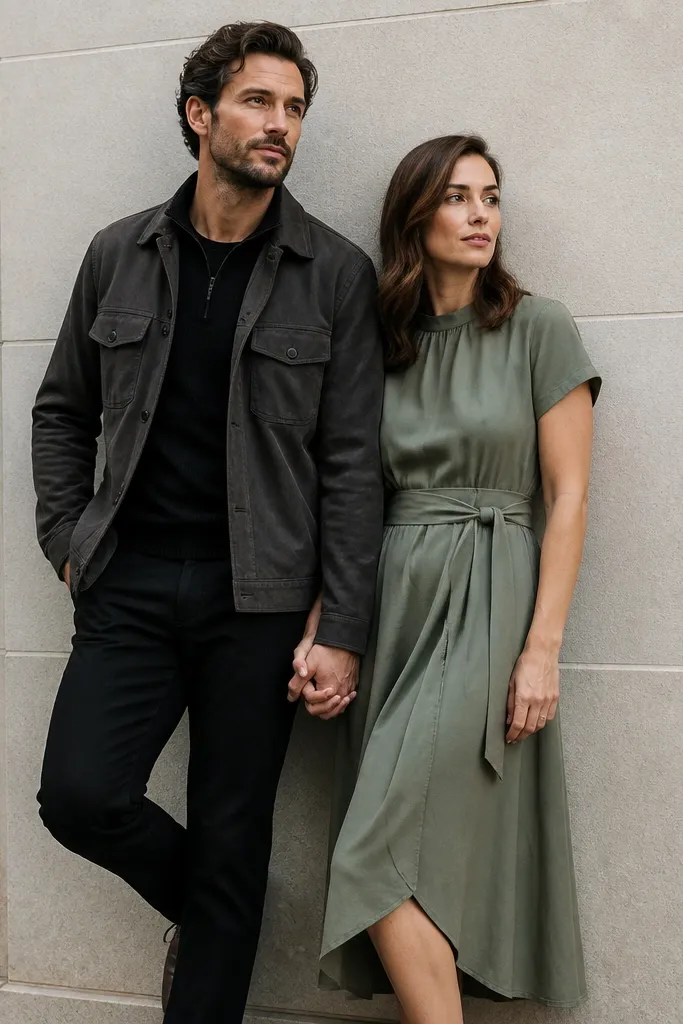
Start by finding a wall with one dominant color and no busy posters or signage. Then lean your hips slightly and link hands at mid-chest level, letting elbows soften. Finally, take three variations: both facing camera, both angled 20 degrees, and one person looking back over a shoulder.
A plain wall turns a quick session into a clean, fashion-style set. The lean creates natural posture and makes shoulders look relaxed instead of stiff. Linked hands keep the interaction clear for the camera, even when you’re trying to stay calm and natural. This works great in city streets, hotel corridors, and outdoor terraces with solid-colored surfaces. For photos that look best, aim for open shade so skin tones stay even and the wall doesn’t blow out.
Skip thisSkip patterned walls — they steal attention from faces and hands.
Quick tipUse your bouquet ribbon or a scarf to add a small touch of motion without changing the pose.
3. Staircase Banister Walk-By
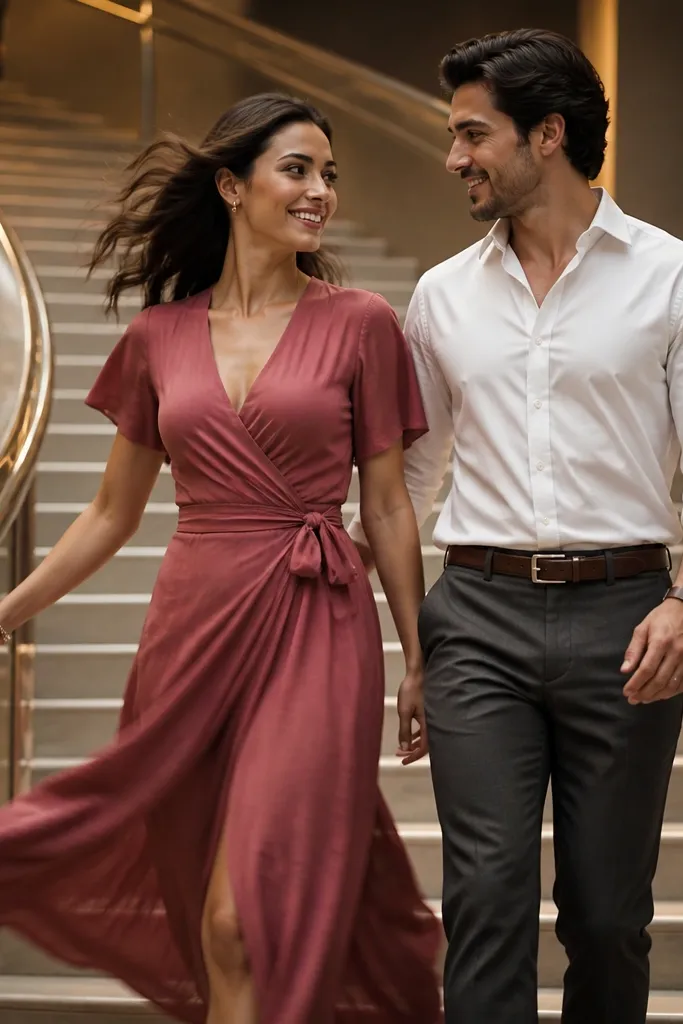
Start by standing at the base (or mid-point) of the stairs and pick a camera angle that aligns with the banister line. Then walk past at a slow pace for 5-7 seconds while you keep hands lightly together or linked. Finally, stop for one beat near a step edge for a clean “pause” frame.
Stairs add instant visual rhythm and depth, and a banister gives you a clear line to guide the eye. The trick is to keep it slow: you’re not sprinting up, you’re gliding past the camera position. This creates movement in hair and clothing while keeping expressions readable. It’s ideal when your venue has indoor stairs, outdoor steps, or a terrace with railings. Golden hour from the side makes the banister shine and gives a polished look.
Skip thisDon’t look down at the feet — pick a focal point at eye level so faces stay sharp.
Quick tipIf your venue allows it, shoot on the same stair section for all couple frames so you don’t lose time re-framing.
4. Bench Sit, Then Stand Together
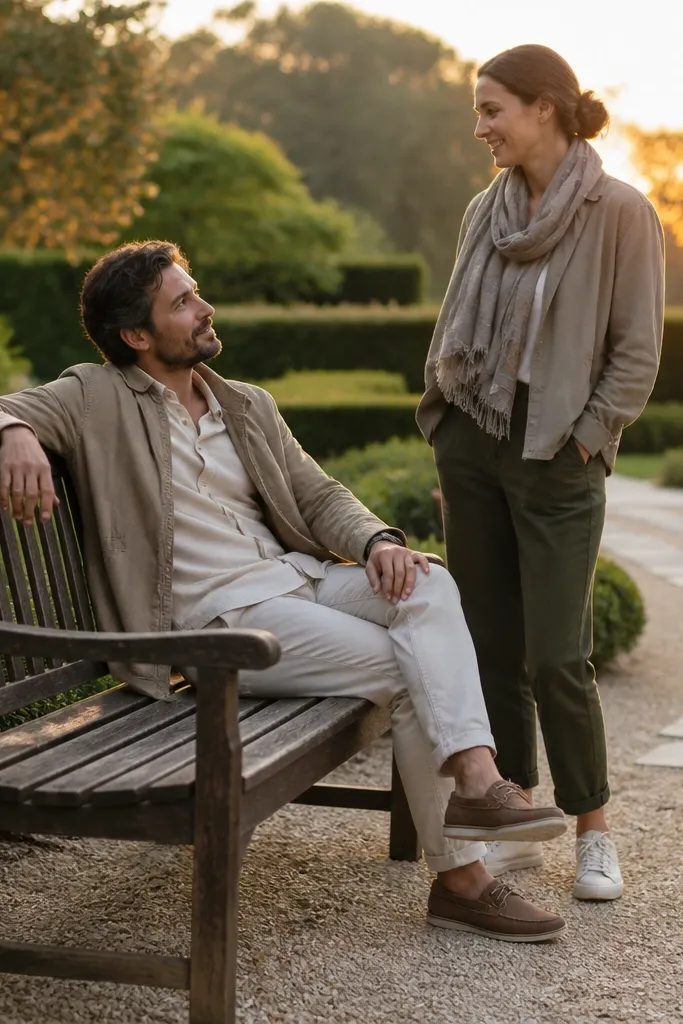
Start by choosing a bench with a simple background behind it, like grass, a wall, or a hedge. Then sit close with knees angled toward each other, hands resting lightly on thighs or linked between you. Finally, stand up together and take 3 steps in the same direction for movement frames.
Benches are practical and photogenic, and the sit-to-stand sequence looks natural instead of posed. Sit first to relax bodies, then stand together so you get a second look with different body shapes. This gives you variety in minutes without changing locations. It’s great in parks, courtyards, and hotel gardens where benches blend into the background. Overcast light makes this especially flattering because the scene stays evenly lit.
Skip thisDon’t sit too far apart — the “together” feeling disappears fast.
Quick tipWear shoes you’re comfortable showing — benches are an easy place to capture footwear and posture.
5. Curtain or Drapery Pull-Through
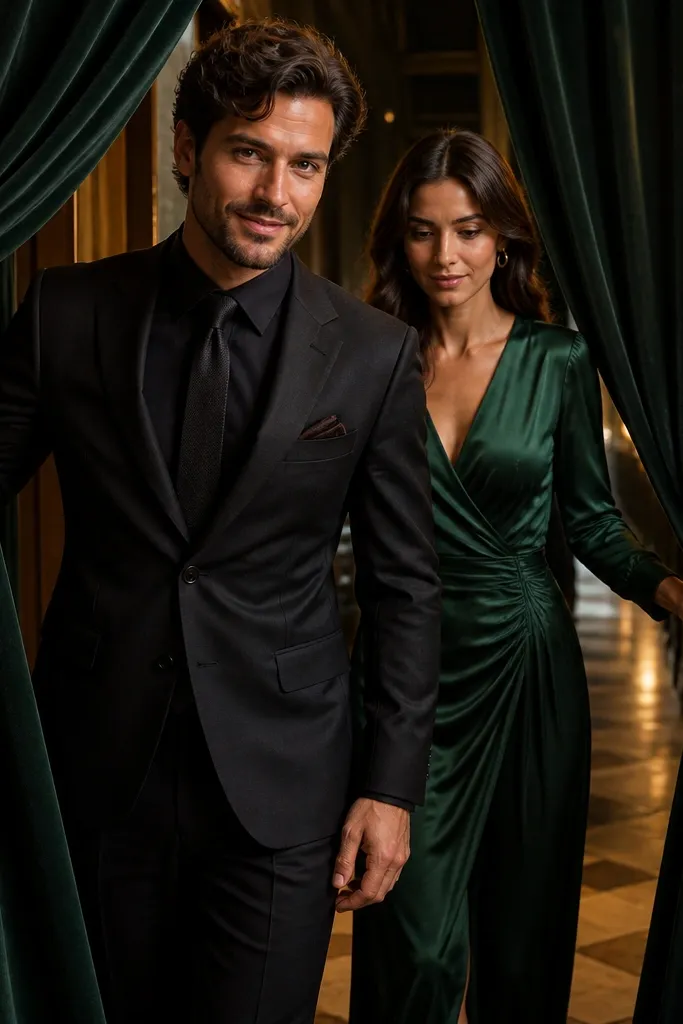
Drapery turns a basic hallway into a cinematic scene. The best look comes from texture and motion: one person holds the fabric aside while the other steps through close behind. You get a framed “reveal” effect without needing a dramatic location change. This works perfectly in venues with stage curtains, hotel lobbies with heavy drapes, or outdoor fabric canopies. Shoot near the drapery for light that wraps around you and keeps the background softer.
Start by locating a curtain or draped fabric panel with enough space for you to step close to the camera. Then have one partner hold fabric at shoulder height and the other step through toward the camera for 2-3 frames. Finally, switch roles or angle slightly so you get two different reveals in one spot.
Bring a lint roller — fabric shows every tiny speck once the light hits.
Avoid busy patterned drapes — they create visual noise that competes with faces.
6. Golden Hour Walk Toward Light
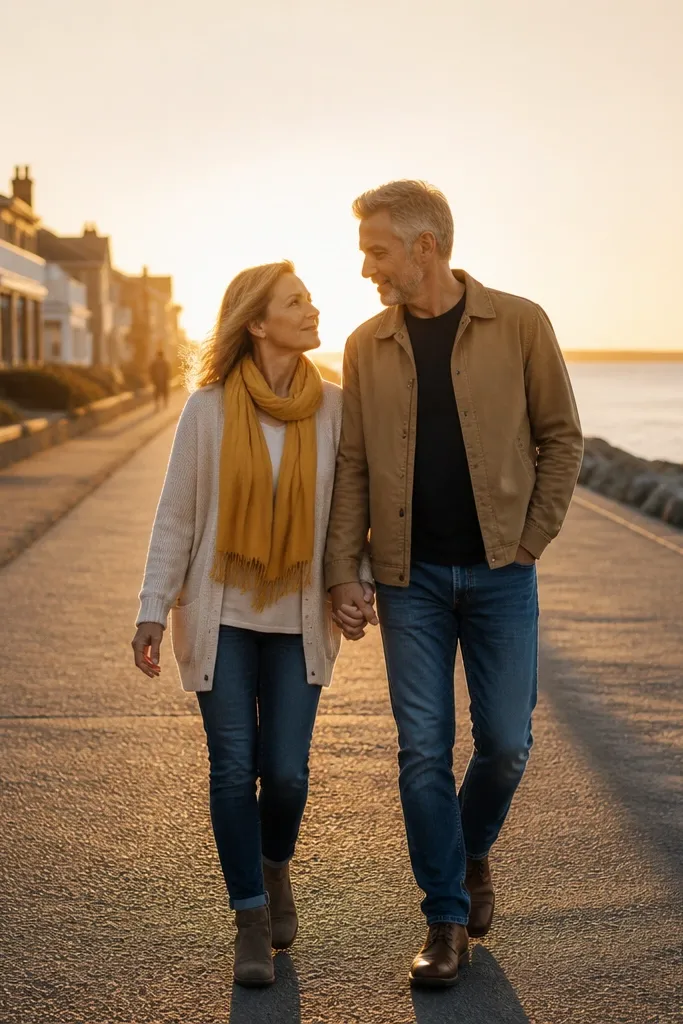
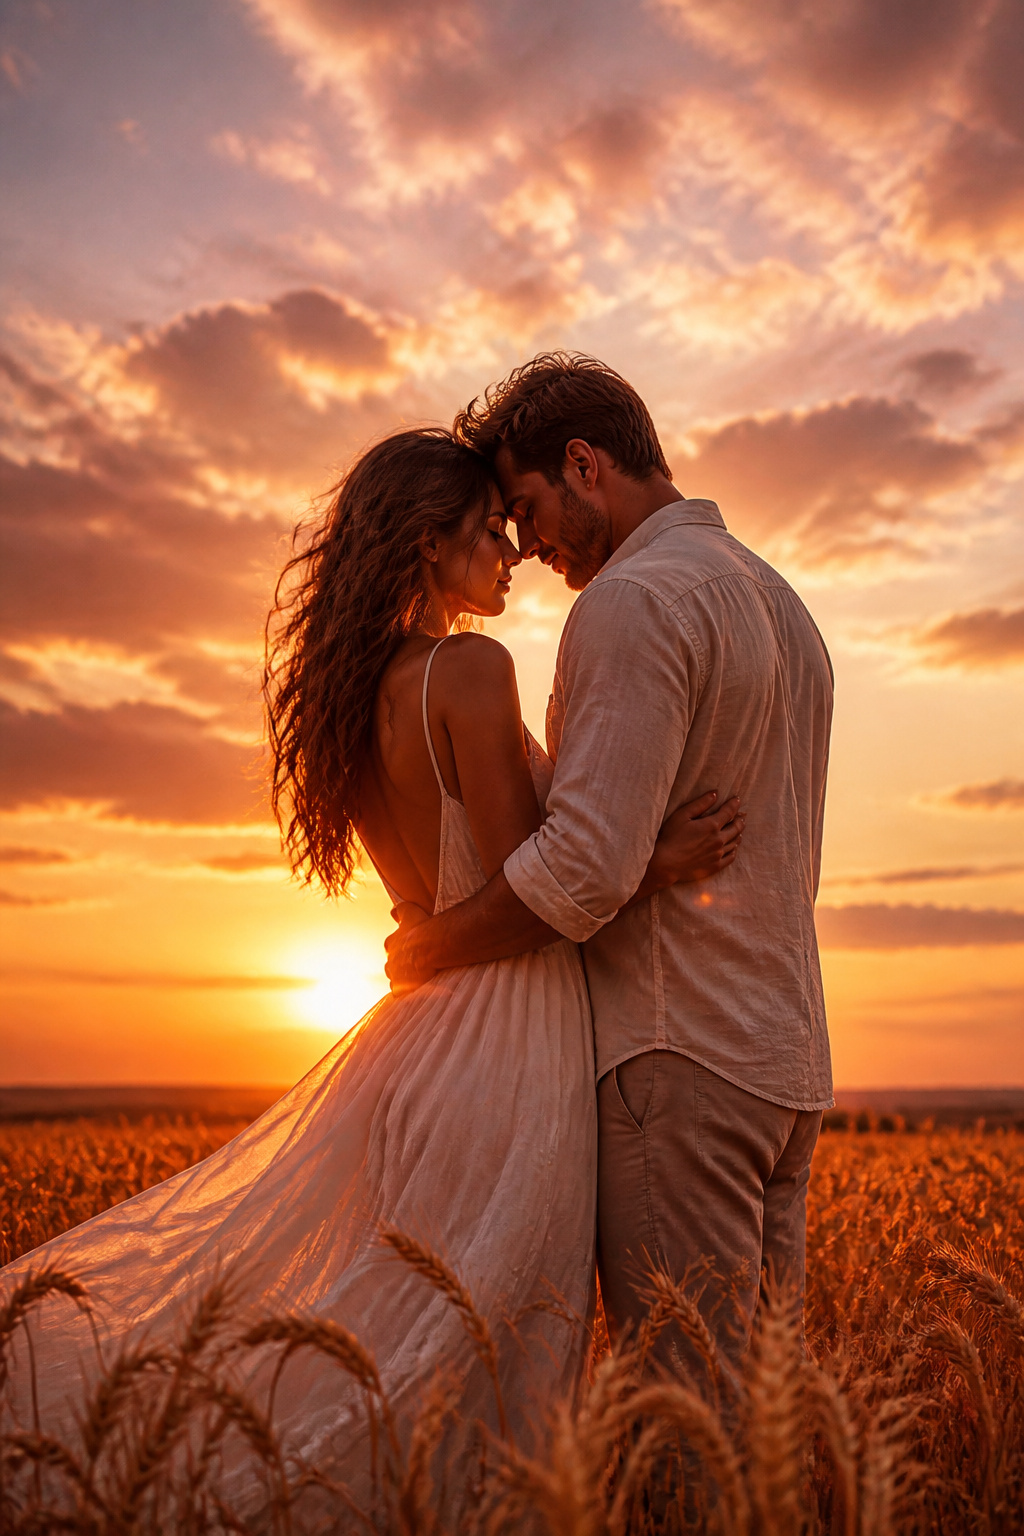
Start by finding a path where the sun hits from the side or behind your shoulder. Then set a starting point, walk slowly toward the light for 10-15 seconds, and stop for one kiss or forehead touch at the end. Finally, repeat from a slightly different starting angle so you get one clean “mid shot” and one “wide context” frame.
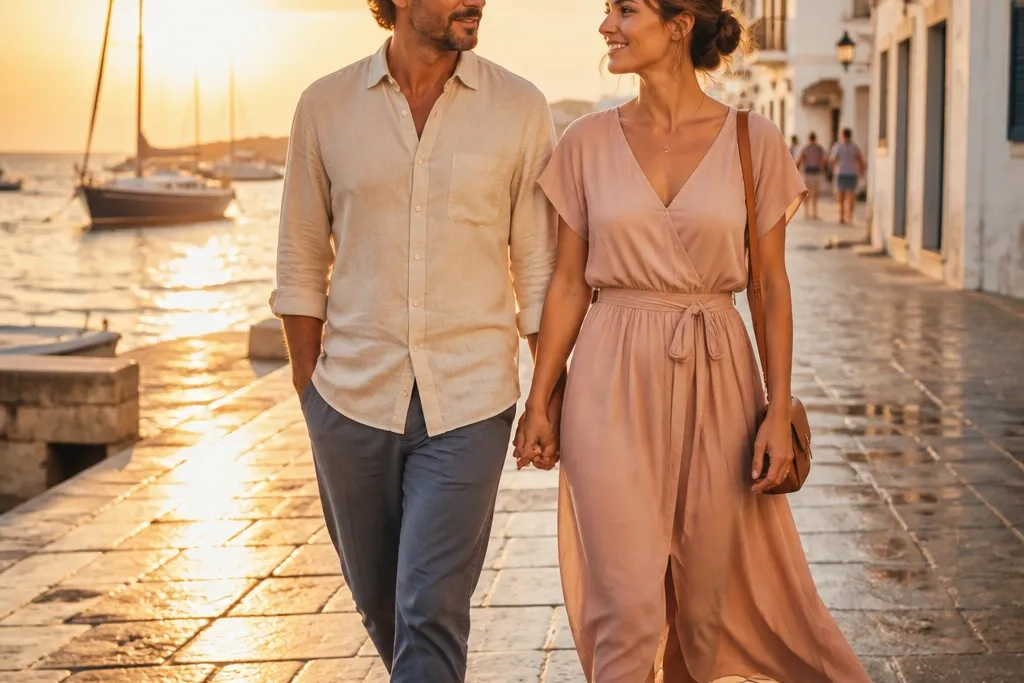
A simple walk looks expensive when the direction is right. Walking toward warm light gives glowing edges and makes both people look more alive without forcing big poses. Keep your pace slow and close so the connection reads clearly. This idea works in open fields, waterfront paths, and long streets with low buildings. Golden hour is where it shines, because the sky adds color and the background looks soft.
Skip thisDon’t face the sun directly — you’ll get squints and harsh shadows.
Quick tipAssign one person to lead direction — wandering around costs time and creates awkward body angles.
7. Shadow Play on Steps
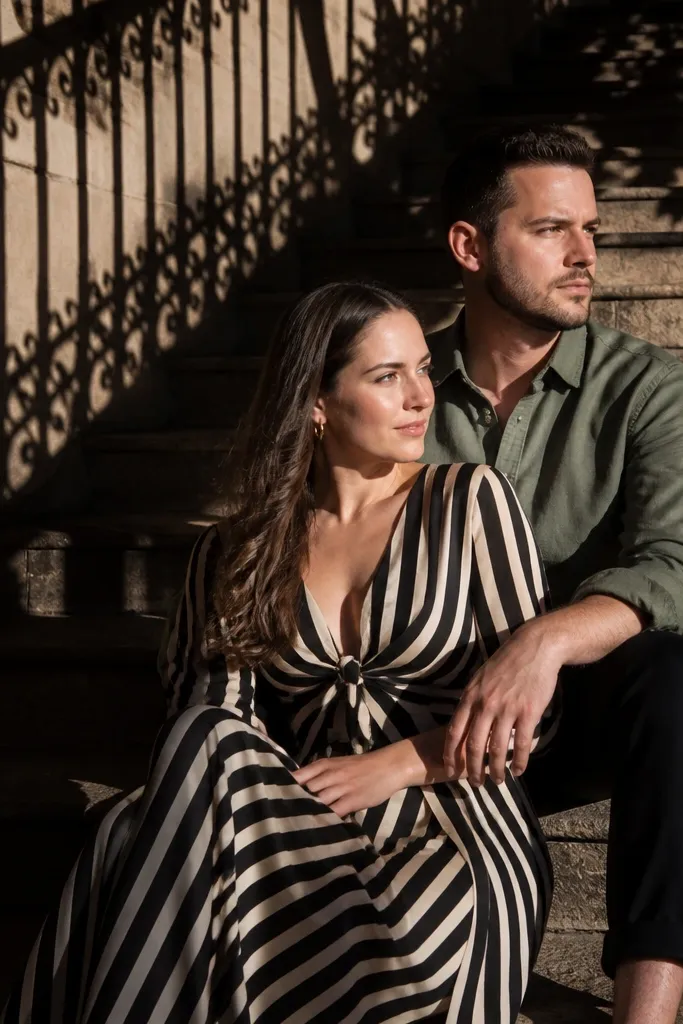
Start by looking for a surface with clear shadow shapes, like steps or a walkway. Then position you so shadows land behind your bodies, not across faces, and hold hands in front of your chest. Finally, take frames at two distances: one closer for faces, one farther for full shadow shapes.
Shadows make quick shoots look artsy because they add design lines even when you’re in a plain place. Place your couple so a railing, tree branch, or building edge casts a strong shadow pattern behind you. Then keep your bodies still while you move slightly with hands — that contrast makes the image feel intentional. This works best in late afternoon sun, especially near trees, pergolas, and tall fences. The aesthetic is clean and modern when the shadow pattern is high-contrast.
Skip thisSkip cloudy light for this — flat light kills the shadow pattern.
Quick tipUse the same hand position for both shots so the image feels like a set.
8. Bouquet Ribbon Wind Shot
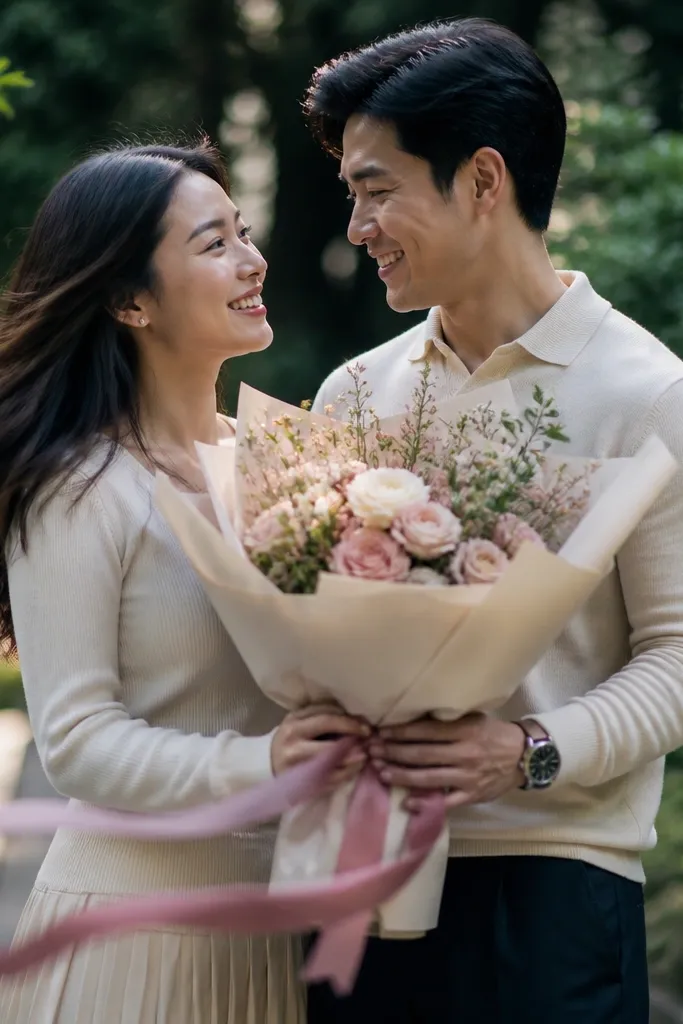
Start by checking the bouquet ribbon length and making sure it’s free to move. Then hold the bouquet near chest level and take 5-7 frames while you do a slow pivot or walk two steps. Finally, tighten the framing for one close crop that centers the ribbon and hands.
This is a detail-focused idea that still looks like a full concept because ribbons and fabric react to motion. Hold the bouquet close between you and do a small movement — a half-turn or a slow walk — so the ribbon lifts. The photo reads romantic but stays controlled, since you’re not trying to run or jump. It’s perfect for couples who want something pretty without needing a location change. Bright shade makes ribbons show texture without overexposure.
Skip thisDon’t point the bouquet away — keep it close so the ribbon stays the focal point.
Quick tipIf there’s wind, use it; if there’s no wind, create motion with a gentle turn instead of waving.
9. Car Door Lean With Modern Clean Lines

A car door gives you a solid shape and a reflective, modern background that photographs well fast. It’s especially good for couples who have a vehicle nearby — you can get a styled look without needing a new venue. The key is clean lines: stand so the door edge frames you and your bodies angle slightly for shape. This works best in covered parking or shaded areas to avoid glare on the paint. The aesthetic is crisp and slightly editorial.
Start by choosing a car with minimal logos and no clutter around you. Then lean in with hips toward the car and shoulders angled toward camera, keeping hands together and faces relaxed. Finally, shoot one frame from the front corner and one from the side window line for two different backgrounds without moving far.
Wear sunglasses only if you can remove them quickly for a second set of frames.
Avoid direct sun on the car surface — glare turns faces into silhouettes.
10. Fountain Edge Hand Hold
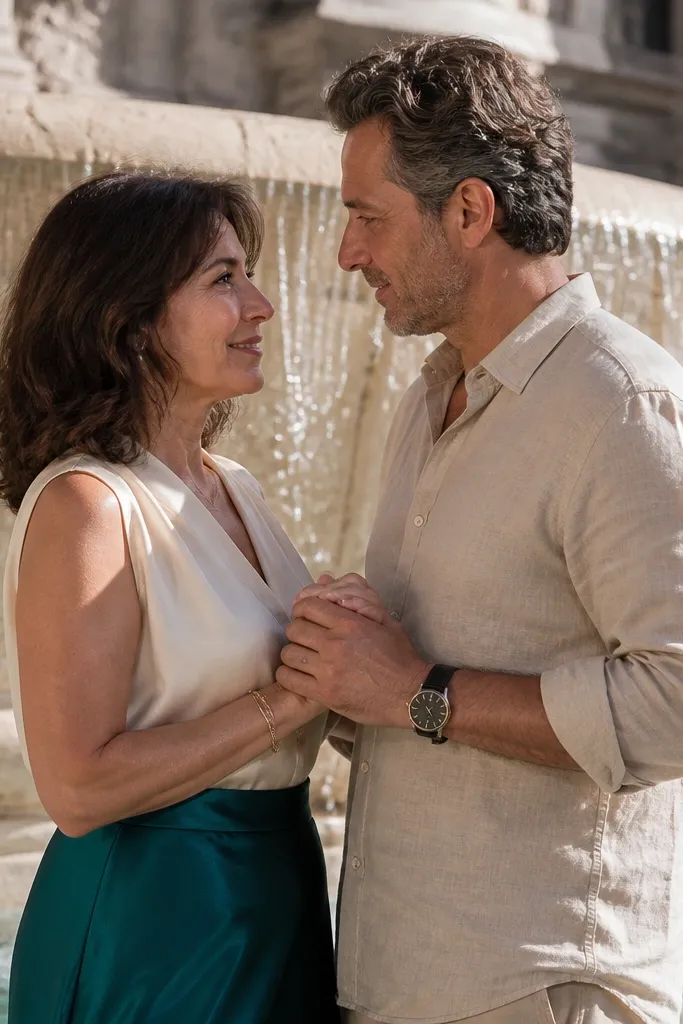
Water adds motion and sparkle, and the fountain edge gives you a stable place to pose without awkward balancing. The best look is when water is slightly blurred and the couple stays sharp — that contrast makes the image feel polished. Keep the interaction simple: hands held, faces close, small smile. This works in outdoor courtyards, hotel fountains, and city squares. Shoot in late afternoon when the fountain catches warm light.
Start by positioning at the fountain edge so your bodies are 3-6 feet away from splashing. Then hold hands and lean in slightly for expression while keeping your stance steady. Finally, take one wide frame showing the water and one tighter crop on your faces and hands.
Bring a microfiber cloth for your bouquet or sleeves — mist shows fast.
Don’t stand where water spray hits your clothes — damp fabric ruins the crisp look.
11. Lawn Grass Walk With Tidy Framing
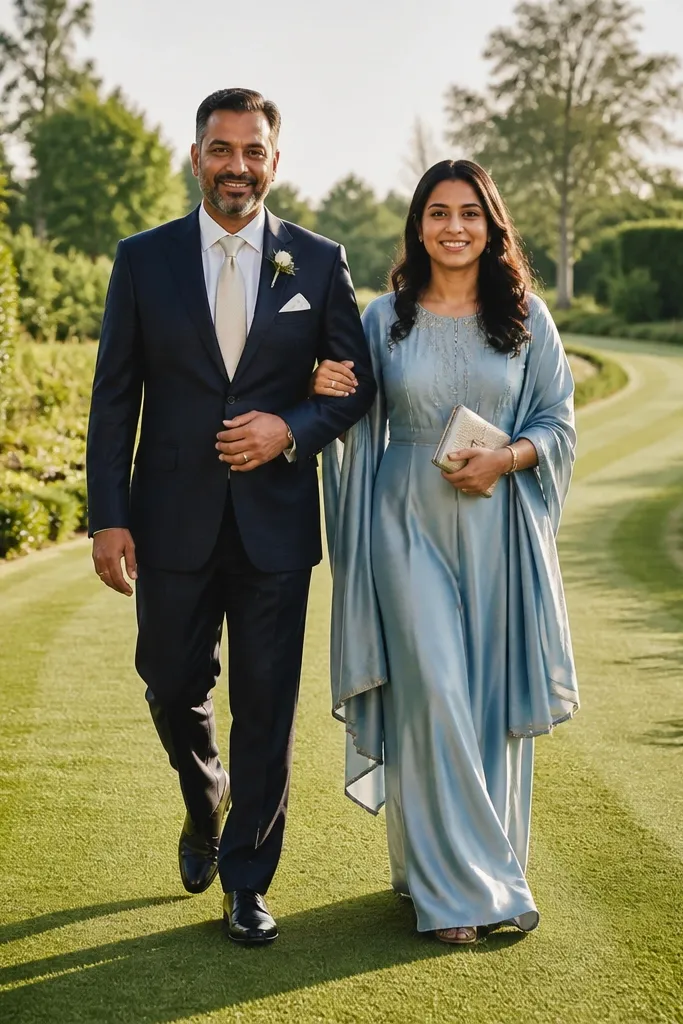
Start by picking a spot where the background behind you is mostly grass or a single tree line. Then walk side by side along a straight line for 8-12 seconds and stop for one close expression frame. Finally, move your framing slightly lower for one photo that shows dress fabric or suit texture against the grass.
Grass looks soft and romantic, but only when the horizon is clean and the frame is controlled. Use a path line — a slight curve in grass or a walkway edge — so your bodies read clearly against a simple background. Walking gives movement, and staying centered keeps the shot aesthetic. This suits outdoor venues with lawns, open gardens, and resort grounds. For the best look, shoot when the sun is low or when the sky is evenly overcast.
Skip thisAvoid walking through tall, messy grass — it creates distracting shadows and texture.
Quick tipUse a consistent stepping rhythm so motion blur looks intentional, not accidental.
12. Sunshade Under Canopy Frame
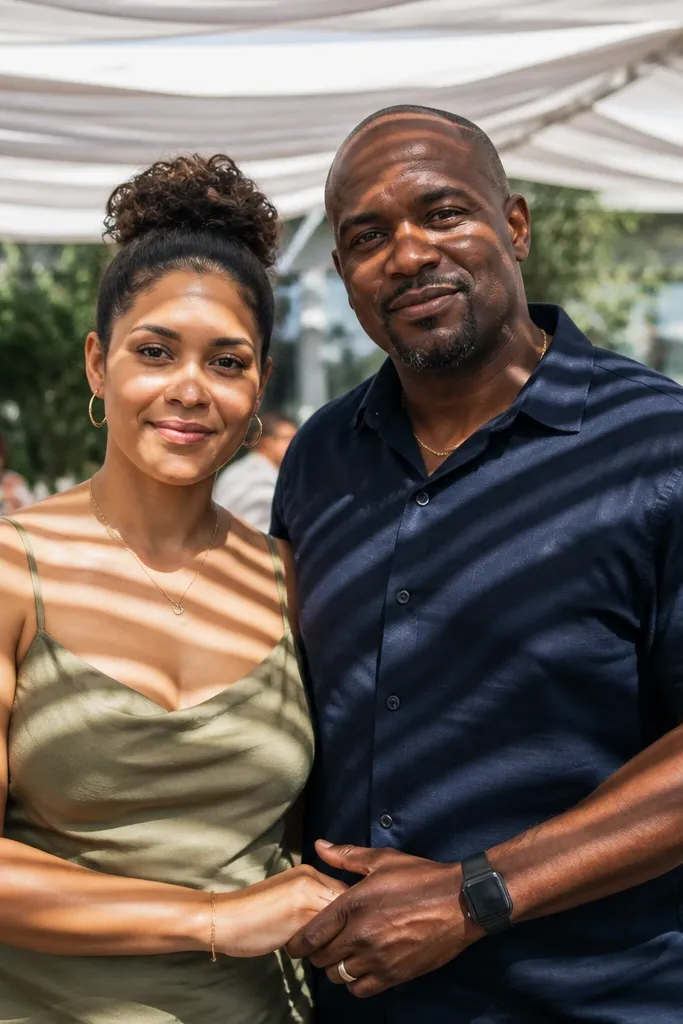
Start by checking where the shade pattern falls on your faces, then position so shadows frame your bodies but don’t cross eyes. Then stand close and link hands at waist level for a clean, readable interaction. Finally, take one frame facing camera and one frame angled toward the light opening beyond the canopy.
Canopies and covered patios create shade patterns that look stylish without needing extra props. The contrast between light stripes and skin makes faces pop, and the sheltered area keeps everyone comfortable. Pose close — shoulder to shoulder — so the look reads intimate, not posed from far away. This works in venues with pergolas, awnings, and outdoor dining covers. Late afternoon under the canopy gives the strongest stripe effect.
Skip thisDon’t let overhead lights mix with sunlight — mixed color casts make skin look uneven.
Quick tipIf stripes are too strong, step half a pace until the pattern softens on your faces.
13. Mirror Hallway Couple Reflection
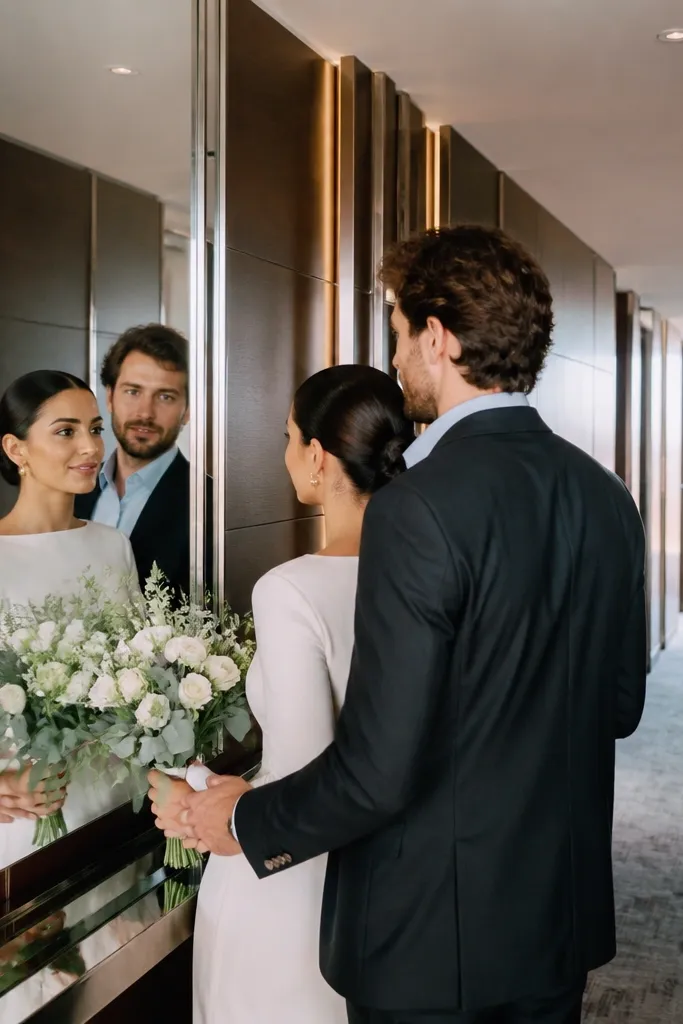
Start by finding a mirror surface with space behind you so reflections don’t crop off heads. Then pose close and slightly off-center, with hands linked so the reflection adds symmetry. Finally, shift your position by one step and shoot again to get a second composition with different mirror angles.
A mirror hallway is a cheat code for variety because you get depth, reflections, and a clean “studio” feel in minutes. Stand so you get both faces reflected and one person’s bouquet or hands visible in the mirror plane. This idea looks best when the hallway is tidy and the mirrors are aligned, so the lines stay straight. It suits hotel lobbies, indoor venues, and modern apartments used for weddings. Choose a time when the hallway lighting is steady, not flickery.
Skip thisSkip cluttered hallways — reflections multiply distractions fast.
Quick tipWipe mirror edges quickly with a clean cloth if you see smudges — they show in every frame.
14. Lakefront Bench With Windy Hair Moment
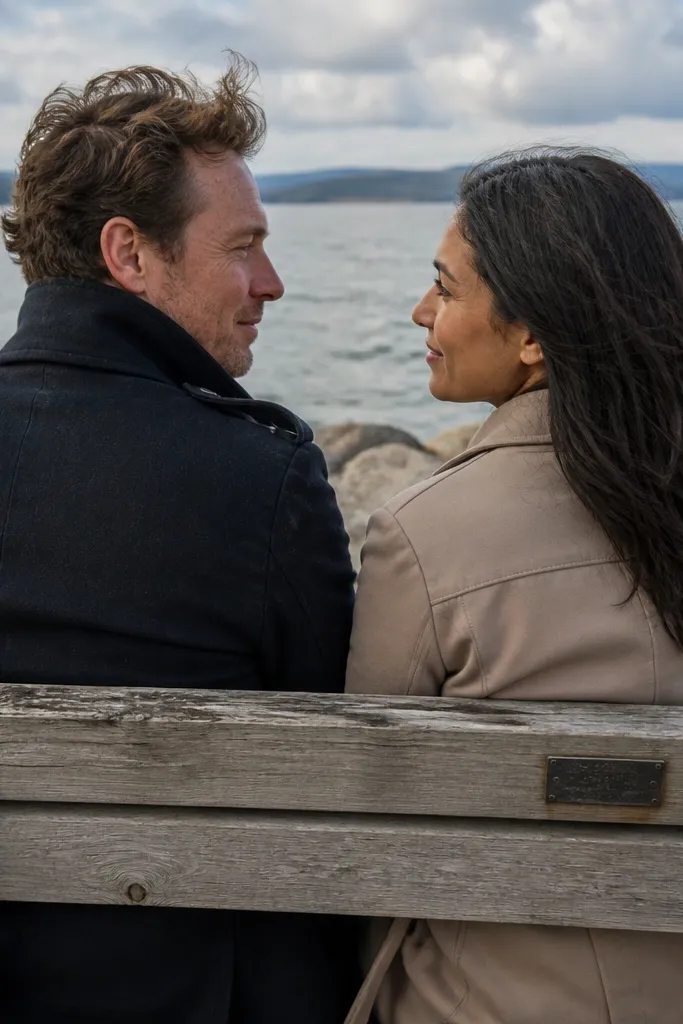
A lakefront bench gives you a calm horizon plus wind for natural hair movement. The trick is to keep your posing simple and let the environment create motion. Sitting close with one person’s head slightly turned gives expressions without needing big movement. This works best near water where there’s usually a breeze, even when the rest of the venue is still. The aesthetic is soft and romantic, especially when the horizon is level in the frame.
Start by picking a bench with a clear view of the water behind you and no random boats or bright signs. Then sit close, shoulders angled, and take 6-8 frames while you hold hands and let hair move in the wind. Finally, switch to a standing frame at the same spot so you get both calm and full-body variety.
Bring a small hair tie or bobby pins — wind loves to steal flyaways right before photos.
Don’t face a bright sun reflection off the water — it blows out highlights on faces.
15. Ladder Alley Couple Pause
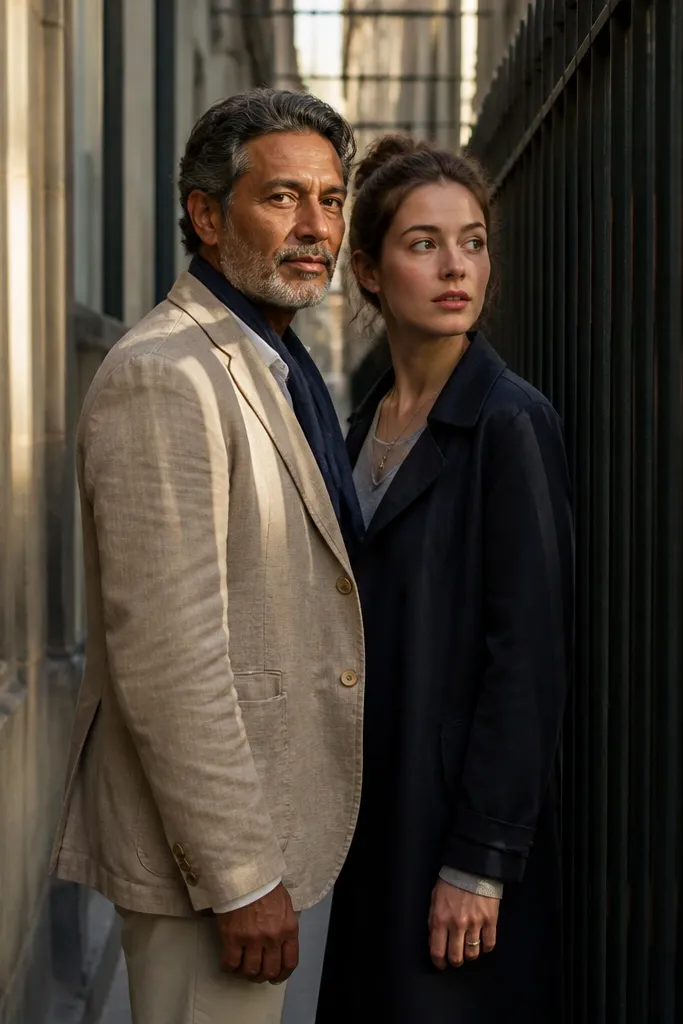
Start by finding a spot with strong repeating lines and enough space for both of you to stand side by side. Then pause with one hand hold and turn your faces slightly toward the camera for expression. Finally, take one frame from farther back to show the lines, then one closer crop for faces and hands.
A narrow alley with repeating lines looks graphic and modern, which makes quick couple frames feel styled. The best versions use leading lines behind you — fencing, repeating windows, or a wall texture that creates a ladder pattern. Keep the couple close so the photo stays intimate even with the tight space. This is a strong choice in urban venues, brick alleys, and industrial courtyard corners. Shoot when the light creates clear geometry, like late afternoon.
Skip thisAvoid alleys with trash bins or parked clutter in the background — they show instantly in tight frames.
Quick tipWear solid colors if you can — busy prints fight with the alley geometry.
16. Window Sill Cuddle With Steady Light
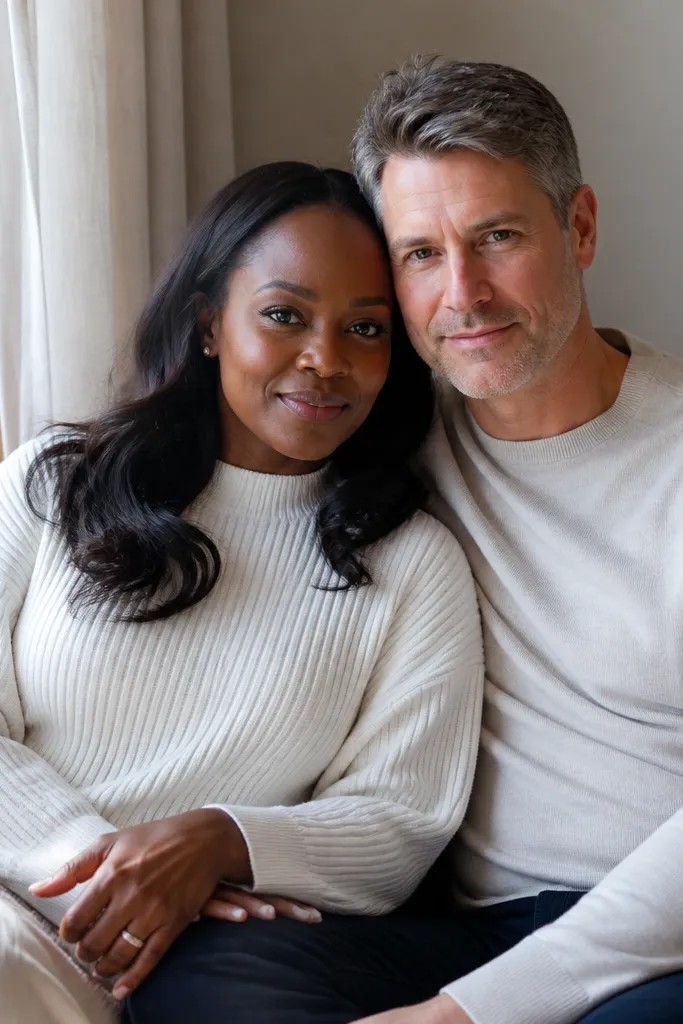
Start by standing or sitting so the window is to the side of your face, not blasting straight into the lens. Then rest your hands on the sill or link hands and hold each other’s gaze for 2-3 seconds at a time. Finally, take one wider frame showing the window and one tighter crop on faces and hands.
Indoor window light is reliable and flattering, and it makes quick images look polished even when you’re pressed for time. The window sill gives you a natural place to rest hands and keep posture relaxed. Cuddle close but keep your faces angled — that stops the “flat” look. This idea fits rainy days, hotel rooms, and indoor venues with large windows. North-facing light is especially good because it’s consistent and doesn’t create harsh highlights.
Skip thisDon’t sit with your back to the window — you’ll get dark faces.
Quick tipMove 1-2 feet closer or farther until the background outside is soft, not bright.
17. Flower Wall Step-Touch
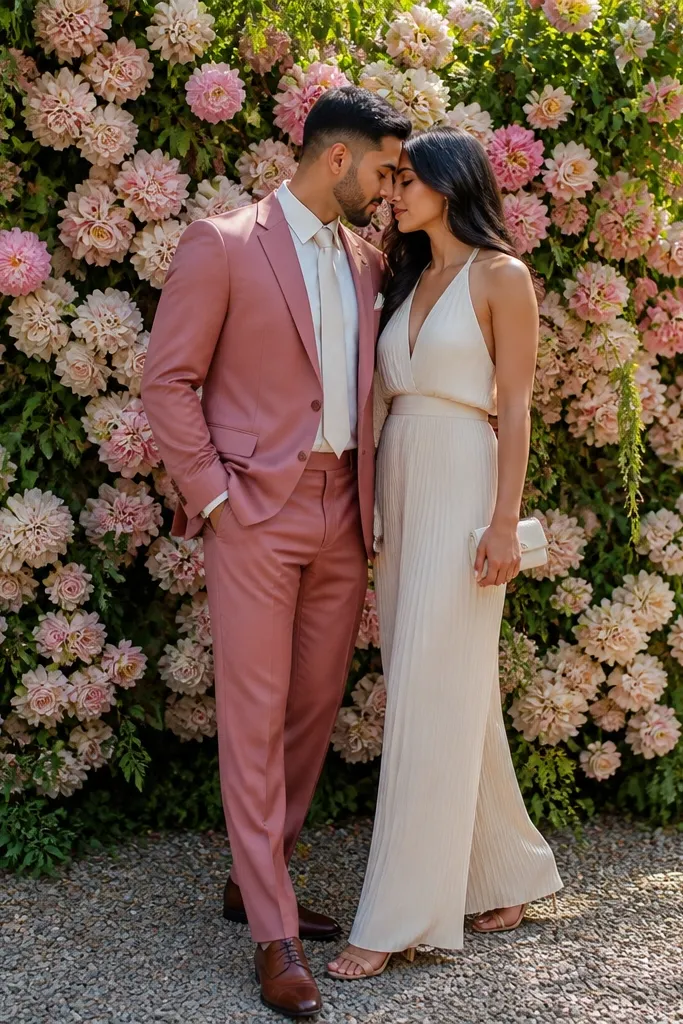
Start by facing the flower wall straight-on so it fills the background. Then do a single step forward and touch foreheads for 3-4 frames while staying still. Finally, repeat with the couple angled 20 degrees so you get one straight and one angled look without changing location.
A flower wall is already aesthetic, so your job is to use it like a studio backdrop. The step-touch pose adds energy without complexity: one person steps slightly forward and you touch foreheads or noses for a quick, intimate frame. This reads romantic because it’s close and expressive, not because you’re doing complicated moves. It’s perfect for venues with built-in floral installations, garden walls, or any photobooth-like flower setup. Midday works if the flower wall is evenly lit; otherwise, aim for late afternoon.
Skip thisAvoid standing too far from the wall — you’ll lose the full backdrop effect.
Quick tipKeep your bouquet tied and tidy — loose ribbons can snag on texture backdrops.
18. Golden Gravel Path Slow Turn
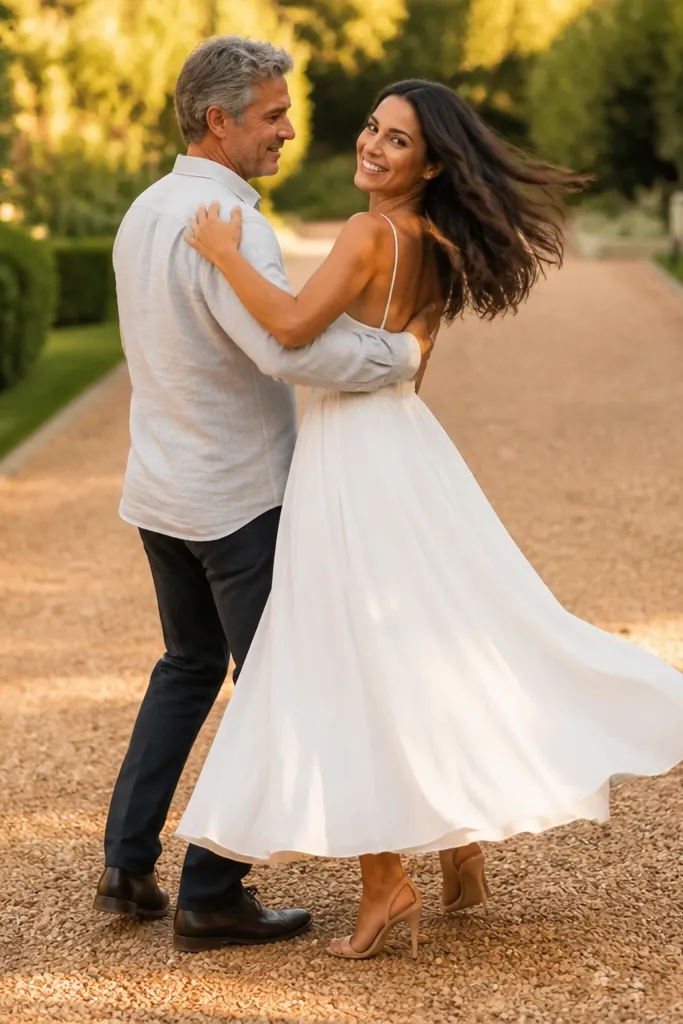
Start by finding a gravel path with a clear line leading away from the camera. Then stand close and do a slow pivot — one step to turn together — then pause for a couple frames. Finally, take one wide shot at the start and one tighter crop after you pivot so you capture both texture and expression.
Gravel paths look good because they add texture and depth, and they catch light in a way that feels “designed.” A slow turn gives motion blur in the background while keeping your faces readable. This idea works in gardens, estate grounds, and countryside venues where paths are clean and uninterrupted. It’s especially photogenic at golden hour when the ground looks warm and the sky softens. Keep movement small so you don’t end up with messy, jerky frames.
Skip thisDon’t pick a path with scattered leaves or trash — gravel backgrounds reveal everything.
Quick tipWear shoes you can walk in without crunching too loudly if you’re near guests — it keeps the vibe calm.
19. Tennis Court Net Lean
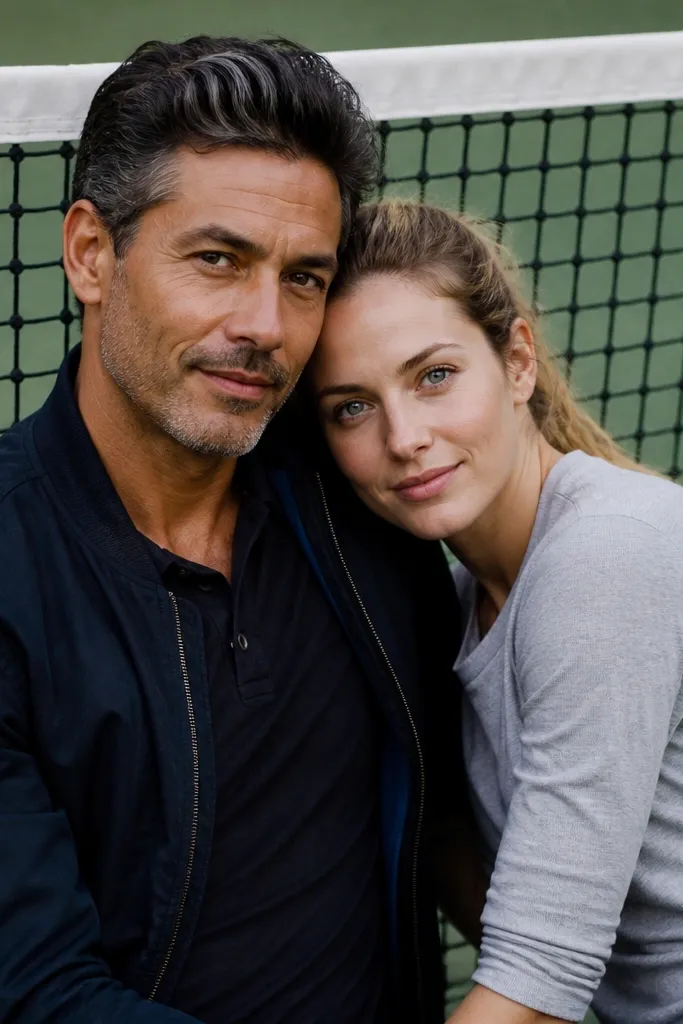
Sports courts give you strong geometry and a clean, graphic aesthetic. The net creates a subtle pattern behind you that makes even simple poses look styled. Leaning close keeps the couple intimate while the net adds structure. This works at venues with tennis courts, sports facilities, or fenced outdoor areas with repeating lines. Shoot when the light is low enough to avoid harsh overhead shadows across faces.
Start by finding a section of net where the pattern is visible but the background behind it isn’t busy. Then lean in with shoulders angled toward camera and link hands near chest level. Finally, take one frame straight-on and one frame slightly to the side so the net pattern shifts in the background.
If the court is dusty, brush off the hem area before you pose — dark fabric shows dust quickly.
Don’t stand directly in front of bright court lights — they flare and wash faces out.
20. Rock Wall Side Hug With Windy Fabric
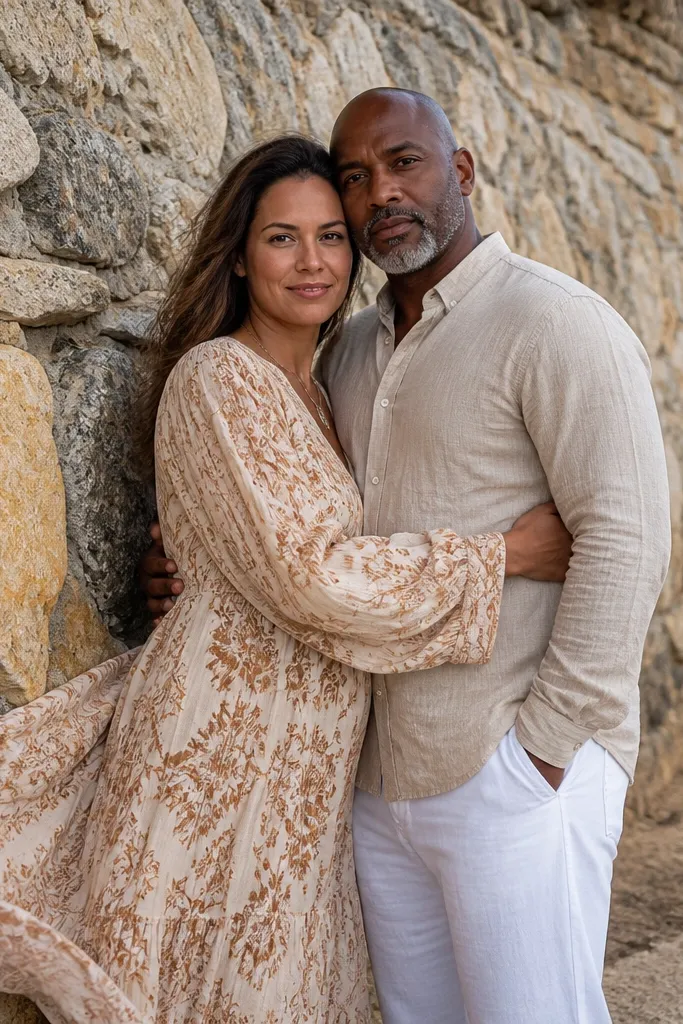
A rock wall gives you texture and rugged romance, and it photographs well even with limited time. The side hug is easier than a full turn because it keeps bodies stable while you focus on expressions. Let fabric move — a skirt hem or dress sleeve — for motion without complicated movement. This suits outdoor venues with natural stone, cliffside paths, or garden rock features. Late afternoon light makes the rock look dimensional instead of flat.
Start by choosing a rock section with even texture and no sharp debris close to your feet. Then position side by side and do a side hug with heads close, keeping hands gentle and visible. Finally, take three frames with small motion: one look at camera, one look at partner, one look slightly off-camera for variety.
Keep your shoes angled slightly outward — it makes posture look better against textured walls.
Avoid cluttered rock piles — random objects will steal attention from faces.