
1. Sunset walk toward the surf with a clean horizon
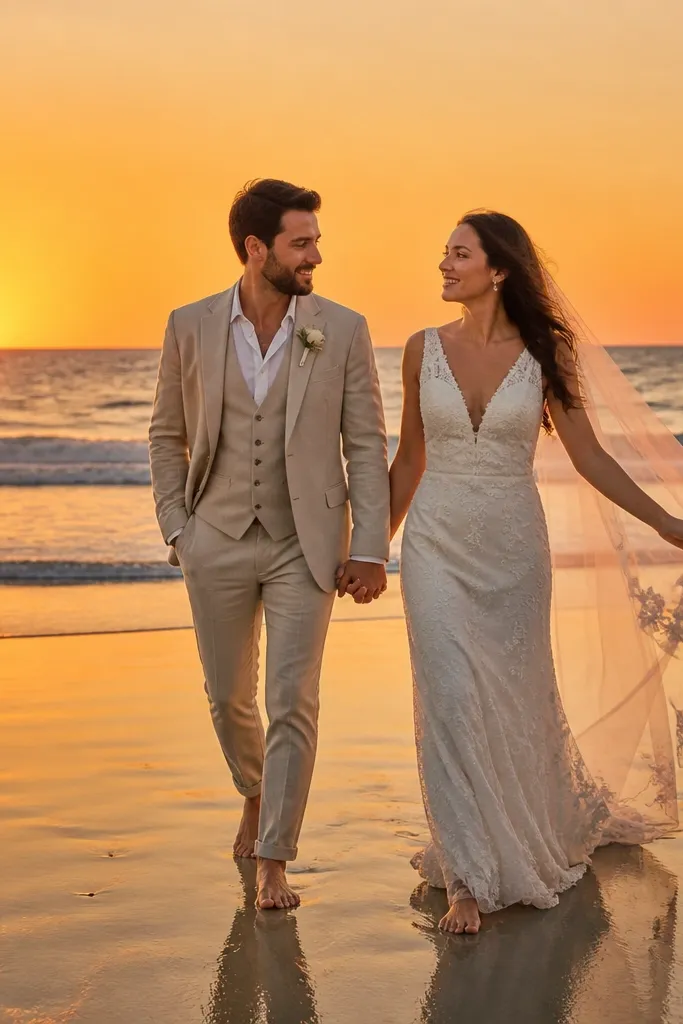
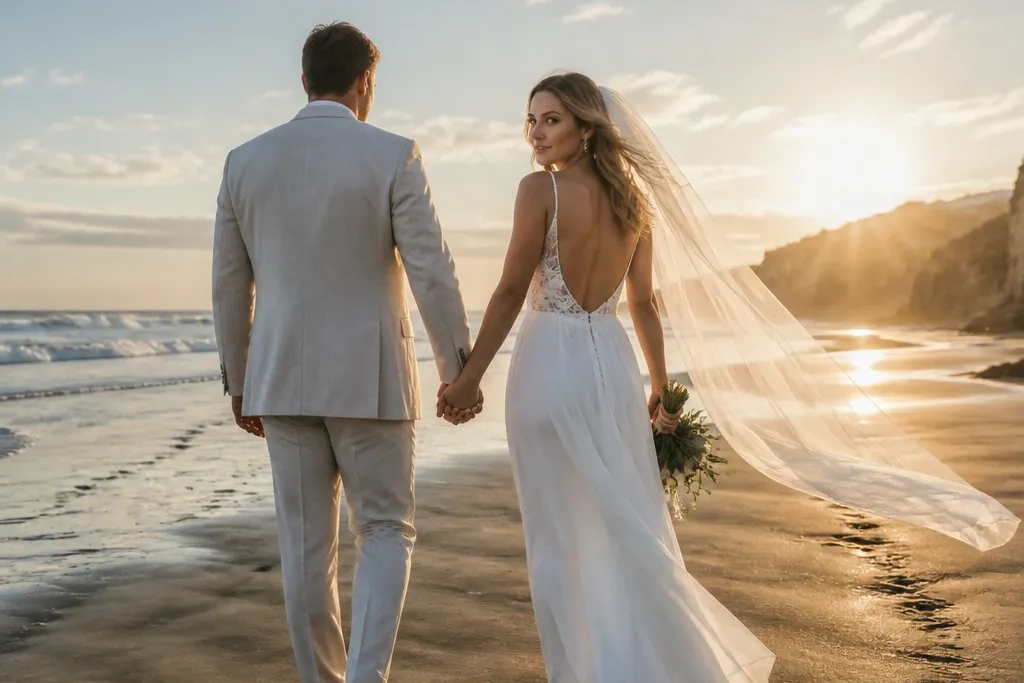
This is the beach photo that looks effortless because it uses the shoreline as a leading line. Wet sand reflects warm sunset light, so the couple’s legs and hems look grounded instead of floating in bright glare. It suits couples who want romantic movement without needing props. For best results, choose a beach stretch with a clear view of the ocean and minimal rocks in the frame.
Start by timing it to begin 35-45 minutes before sunset so you get that orange edge without full darkness. Then walk the couple in one direction along the same line of sand — don’t stop and reset repeatedly. Finally, direct your photographer to keep the horizon high enough that the ocean stays visible but the couple stays dominant.
If the beach is crowded, go 10 minutes earlier and you’ll still catch the same light with less background clutter.
Skipping wet-sand timing and shooting on dry sand at midday makes the whole image look flat and harsh.
2. Veil lift wind moment with the ocean behind
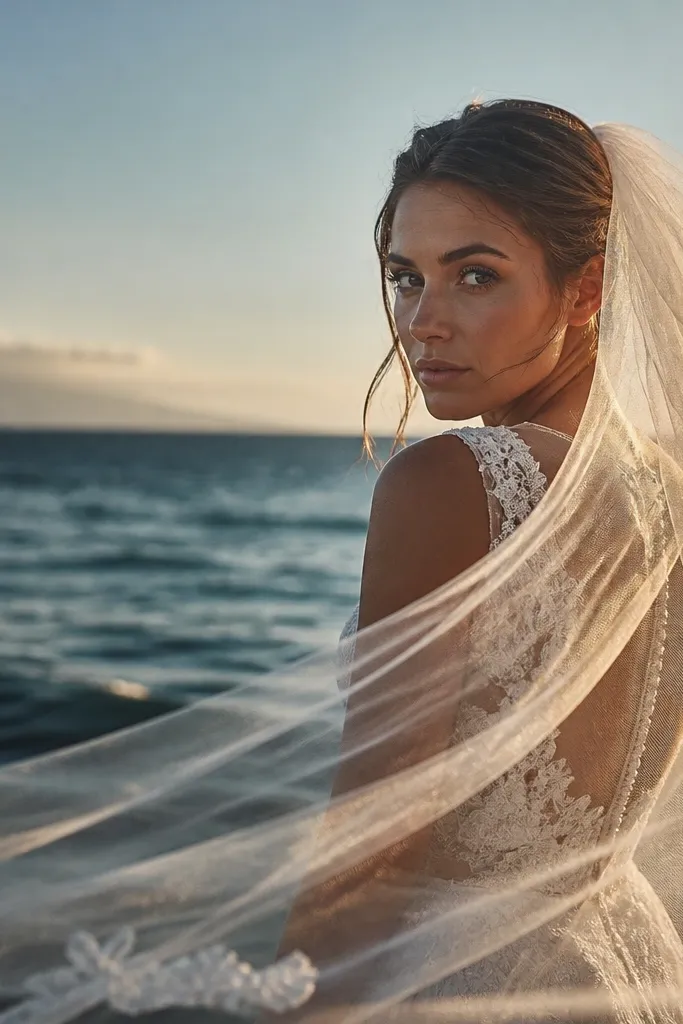
Wind is your assistant here. A veil lift creates a strong shape across the frame, and the ocean adds depth so the photo doesn’t feel like a portrait in front of a wall. This works especially well for airy veils, tulle, and lightweight trains that move with air. The best look comes when the veil forms a soft arc rather than a tangled mess.
Quick tipBring a small spray bottle with water — it helps the veil fall smoothly instead of clinging to dry static.
Start by doing this right after portraits begin, when the sun is low and the veil catches light. Then assign a simple cue: the bride turns slightly, lifts the veil, and holds it for one breath while the photographer shoots a short burst. Finally, have the photographer watch for the veil’s peak shape and keep the camera angle level to avoid a stretched face look.
Skip thisLetting the veil fight the hair without a plan makes it look messy instead of cinematic.
3. First-look close portraits at the boardwalk edge
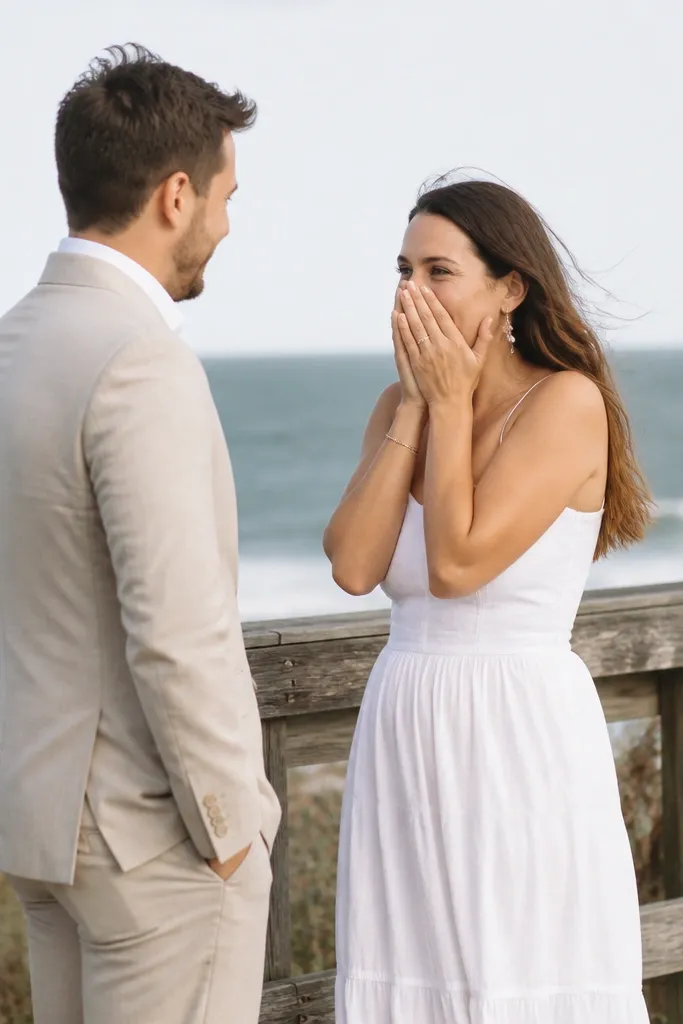
Boardwalk edges give you controlled lines on a beach day, which is rare. The railing creates a clean foreground and the ocean stays in the distance, so you get depth without chaotic sand backgrounds. This suits couples who want intimate first-look energy without stepping far into open beach glare. It also looks great in photos because wood and metal add texture that sand alone can’t.
Start by locating a boardwalk segment where the railing lines lead toward the water. Then schedule the first look 20-30 minutes before sunset so you get warm light on faces and a soft background. Finally, ask for tight framing that crops out people and focuses on hands, shoulders, and expressions rather than wide scenery.
Choose a spot with partial shade from the railing so the faces don’t blow out in bright sun.
Shooting a wide boardwalk portrait with direct ocean glare makes the couple look lost.
4. Barefoot handhold across a wet-sand reflection line
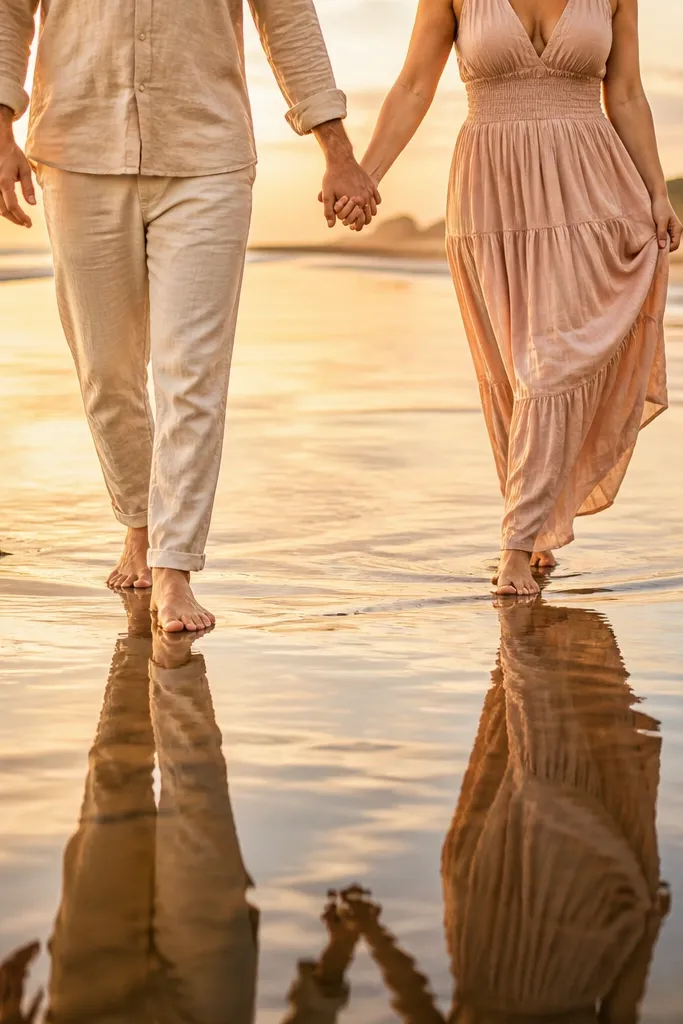
The wet-sand boundary is a natural “mirror line.” When the couple’s feet land along that edge, the reflection adds a dreamy layer that looks intentional, not accidental. This suits minimalist couples and anyone wearing lighter fabrics that catch warm tones. It also works well for engagement-style vibes without needing a full scenic background.
Quick tipPick a day with small waves; strong chop breaks the reflection and turns it into random texture.
Start by walking forward onto wet sand until the reflection line is visible beneath the feet. Then have the couple hold hands and take two slow steps, pausing for one beat so the photographer can capture the exact moment the water line frames the shoes. Finally, direct the photographer to shoot low enough that the reflection line is clearly visible.
Skip thisStanding still on dry sand — the photo loses the reflective glow that makes this shot special.
5. Ceremony arch silhouette against sunset sky
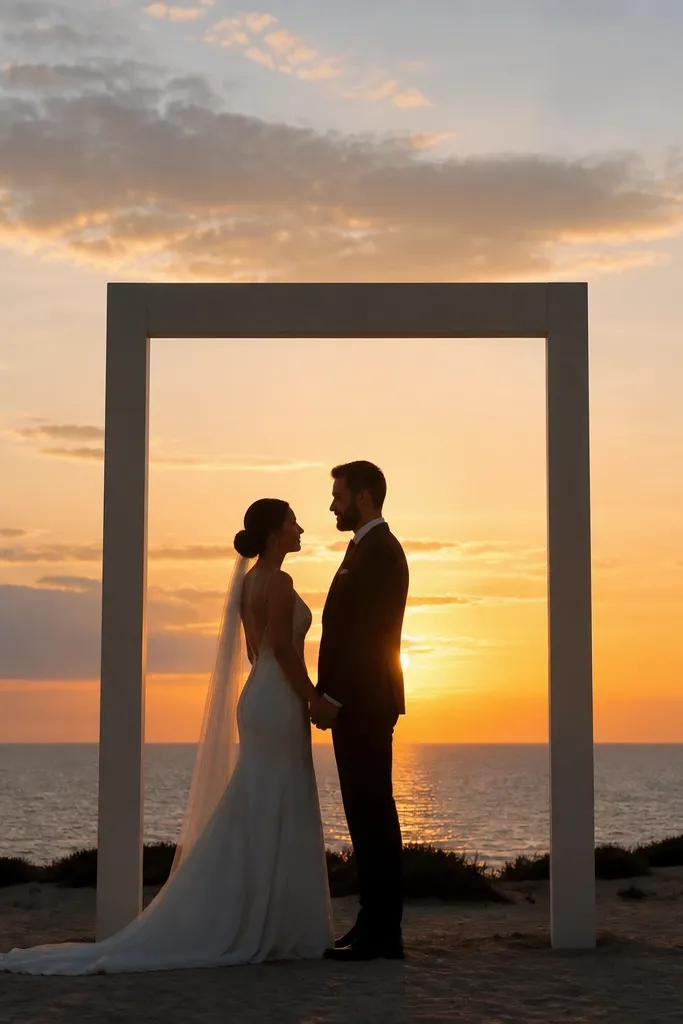
A sunset silhouette makes the beach feel cinematic fast. Even if your arch isn’t huge, backlight turns it into a graphic shape, and the couple’s outlines read clearly. This works best when the arch is in front of open sky, not blocked by dunes or tall structures. The couple’s pose matters — keep it simple and centered for the cleanest silhouette.
Quick tipIf the sun sets behind buildings, move the arch or plan the silhouette shot 10-15 minutes later from a different angle.
Start by placing the arch so the sun is behind it, not beside it. Then schedule a 5-minute window immediately after the couple walks in or right after vows so you’re not rushed by crowd movement. Finally, ask the photographer to expose for the sky so the arch and couple read as dark shapes with warm color gradients behind.
Skip thisTrying to get silhouette photos in the middle of the day — you need that low-angle sky for clean backlight.
6. Color-pop bouquet against pale sand and sea foam
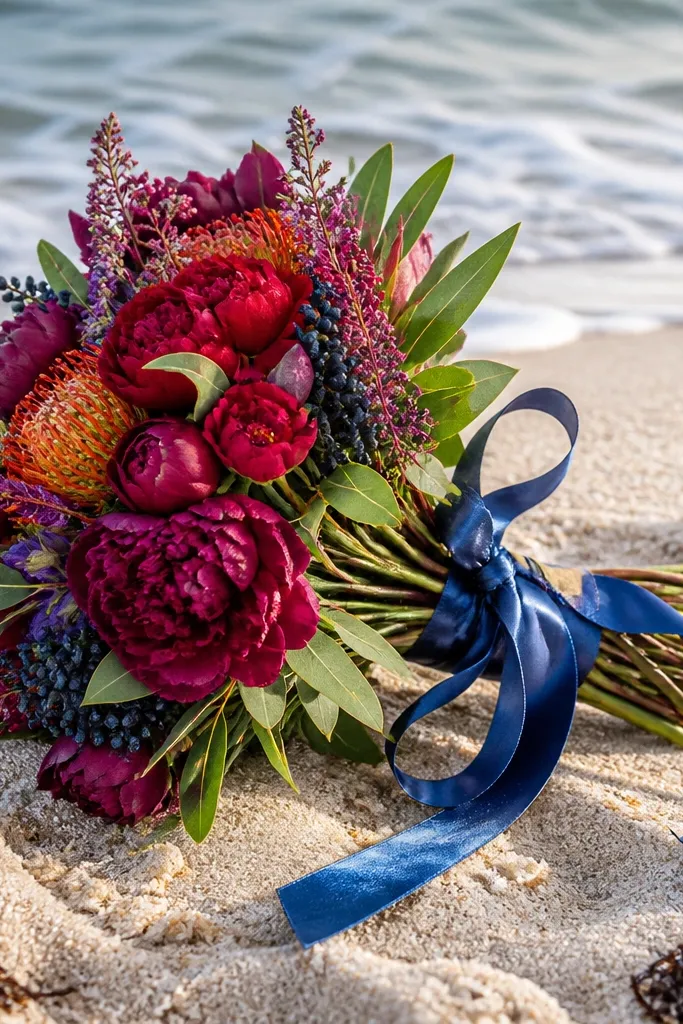
Details win on beaches because everything else competes with scenery. A bouquet photo with sea foam behind it makes the colors pop without needing fancy settings. Choose a bouquet with strong color contrast — deep berry, coral, or cobalt ribbon — so it stands out against pale sand and light water. This is also a good shot for windy days because you can keep it mostly still while the background moves.
Start by finding a spot where waves break softly, leaving foam texture rather than dark water. Then hold the bouquet near chest height and tilt it slightly toward the sun so petals catch warm highlights. Finally, have the photographer focus on the bouquet and keep the background slightly blurred by using a tighter framing.
Bring a small towel to wipe bouquet stems and reduce sand specks before the shot.
Letting sand collect on the bouquet ribbon — it reads as dirt in close detail photos.
7. Groom's suit hem on sand with cuff details
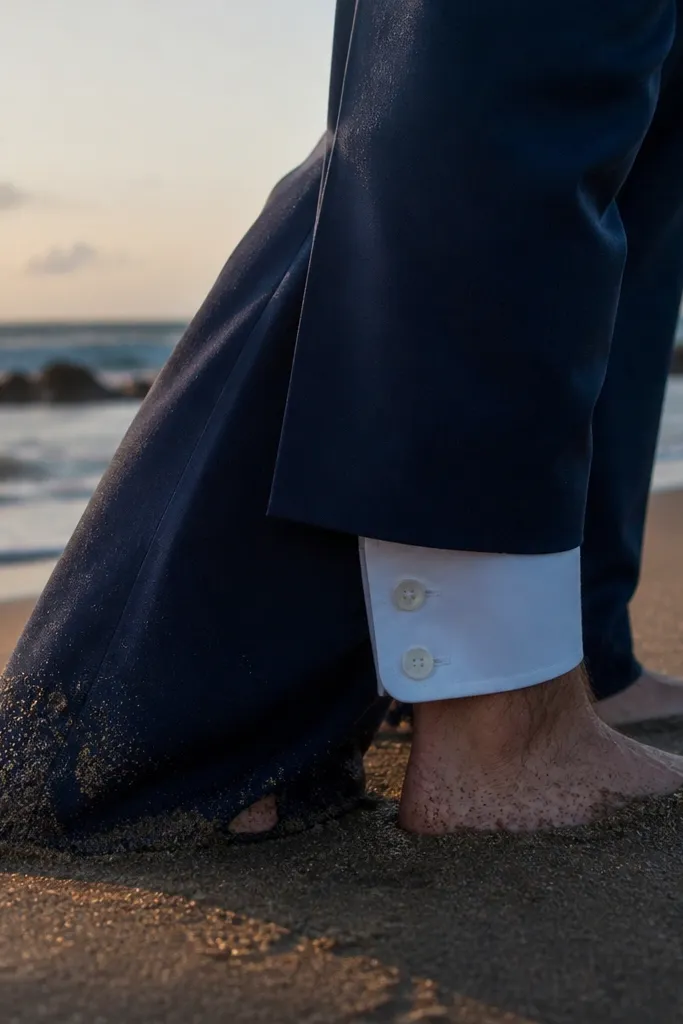
Beach weddings look best when you capture the textures people forget: suit hems in sand, cuff buttons against salt air, and the contrast between tailored fabric and natural ground. This detail shot feels editorial because it’s not a generic “wedding shoes” picture — it’s about how the outfit meets the environment. It suits classic suits, linen pants, and dark shoes that contrast with bright sand. The ocean can sit out of focus so the fabric texture stays the hero.
Start by taking the shot right after portraits begin so the suit has a little movement but isn’t covered in grit. Then position the groom so the pant leg rests naturally on wet sand — not dragged. Finally, ask for a low camera angle and tight crop that includes the cuff and shoe edge.
Pack a spare pair of socks or quick-dry wipes; salt stains show up in detail shots.
Walking for 30 minutes and shooting after — too much sand dust kills the clean fabric texture.
8. Couple framed by two leaning palms at golden hour

If your beach has palms, you get instant framing. Two leaning trunks create a natural window, and the sun behind them adds glow without needing filters. This works for couples who want a structured composition but still want the beach to feel open. The key is choosing palms with spacing that matches your couple width so faces don’t get cut off.
Start by scouting during daylight and marking where the trunks line up with the horizon. Then plan the shoot for golden hour when the sun is low enough to rim-light hair and shoulders. Finally, direct the photographer to keep the trunks symmetrical in frame and have the couple stand at a consistent distance from the palms.
Avoid palms with lots of dead fronds — brown bits look messy in backlight.
Shooting with palms too close to the couple so branches cover faces and turn the photo into a cluttered mess.
9. Ocean wave splash mid-step portrait
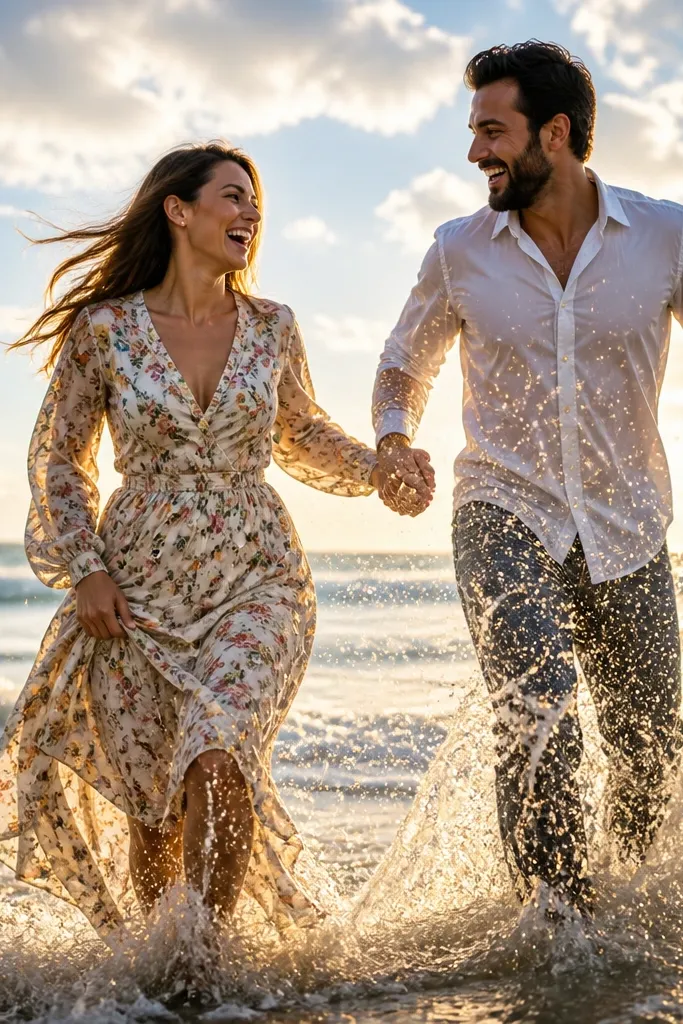
Wave splash shots look dramatic because you get a frozen moment of water — not just a background. The best versions show the couple’s expressions and the spray creating a halo around legs and hems. This suits couples who are comfortable moving and laughing through the mess. You’ll get the most photogenic splash on beaches with moderate wave height and a clear shallow edge.
Quick tipWear quick-dry shoes or go barefoot only if the sand is smooth; sharp shells ruin the shot and the mood.
Start by testing the water depth at a safe spot so you don’t overstep into unstable footing. Then time the shot for when a wave is about to reach — have the couple take one step forward on your cue. Finally, ask your photographer for burst shooting and to prioritize face focus while capturing the spray.
Skip thisTrying this right after ceremony when hair and makeup are already fragile from wind and salt.
10. Close couple kiss with hands in wet-sand foreground
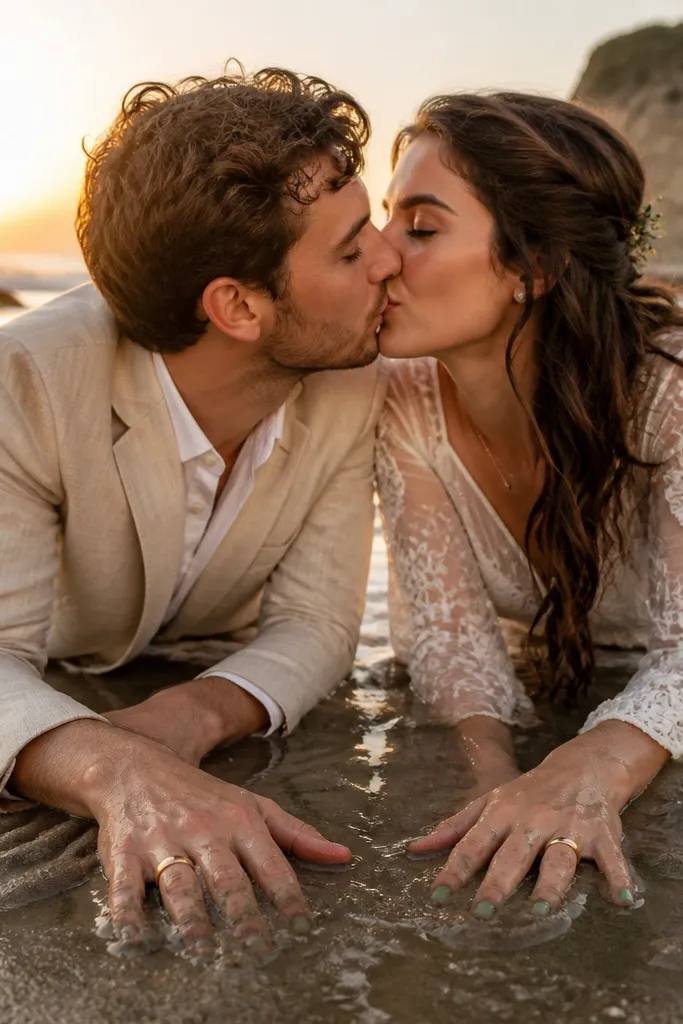
This is a beach romantic shot that still looks clean because the foreground texture anchors it. Hands in wet sand add a tactile layer and keep the frame from being just sky and faces. It suits couples who want a more intimate vibe than full-body portraits. Choose a kiss that includes hands — the photo feels styled even if you’re improvising.
Quick tipBring a microfiber cloth to wipe hands and knees before the shot so skin doesn’t look chalky from salt.
Start by positioning the couple where wet sand is smooth and reflective, not churned by strong waves. Then have them get low — elbows or hands near the sand — and keep the kiss for a short, timed burst. Finally, direct the photographer to crop so wet sand texture fills the lower third and the horizon stays barely visible.
Skip thisKissing too far from the wet sand — you lose the reflective foreground that makes it aesthetic.
11. Bride's dress trailing over a seaweed-free tide line
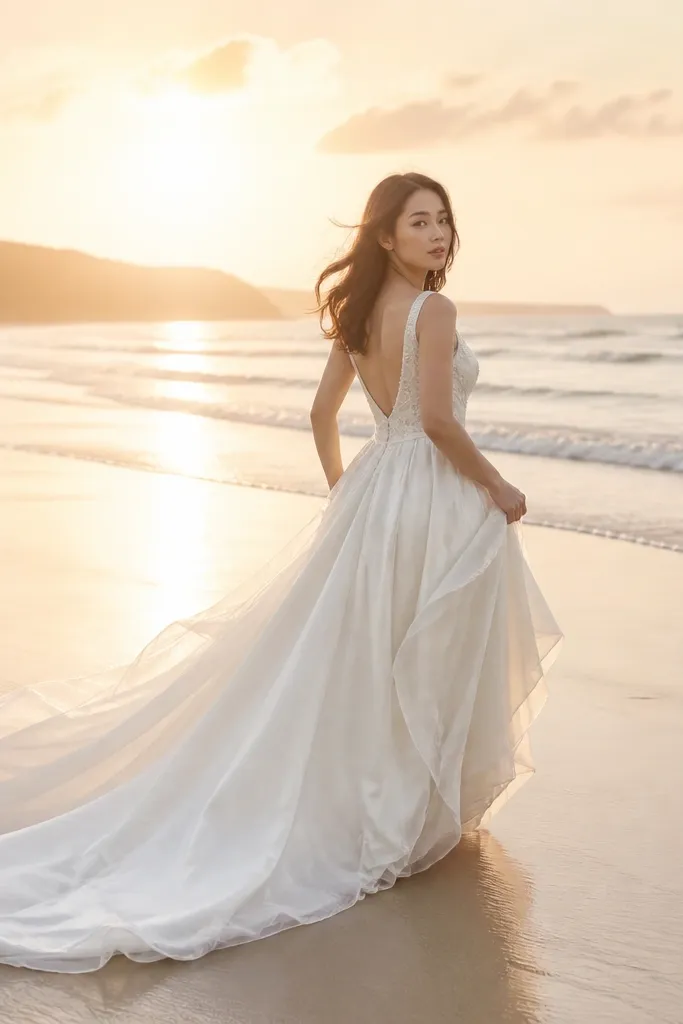
Dress-drag shots look dreamy when you control the ground. A clean tide line — no seaweed clumps, no dark debris — gives you a smooth visual path for the fabric to follow. This works best with satin, chiffon, and light layers that move and catch warm light. The ocean behind stays soft while the dress creates the main shape.
Start by scouting the tide line for a stretch that is smooth and clear at least 20 minutes before you shoot. Then have the bride step into wet sand and lightly trail the hem for one or two steps — don’t let it pile. Finally, ask the photographer to shoot from slightly above waist height so the dress curve is visible without turning the bride into a silhouette.
Assign someone to watch the hem during the shot; one snag can ruin the fabric look instantly.
Dragging the dress through messy tide debris — it looks dirty, not romantic.
12. Groomsmen and bride squad in staggered line on the dune grass
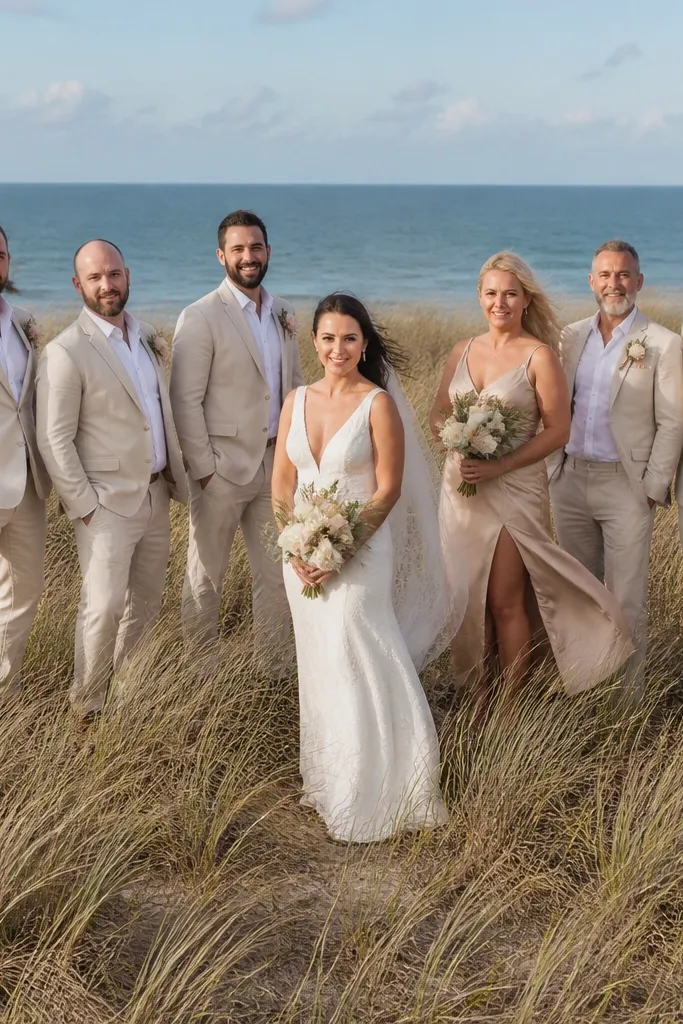
Group photos on sand often flatten everyone into the same horizontal line. Dune grass fixes that by adding texture and height variation, so you get depth and dimension. Staggered poses look intentional and clean, even when people are moving because of wind. This also looks great for larger groups because the dunes separate the background from faces.
Start by choosing a dune patch with visible grass texture and a clear background horizon. Then pose in a staggered arrangement — vary heights by having some stand slightly forward and others lean back. Finally, have the photographer shoot at a slight angle rather than straight-on so the dune grass creates diagonal texture behind the group.
Schedule group photos first while everyone still has calm energy; wind gets worse as the day heats up.
Stacking everyone shoulder-to-shoulder — it makes the photo look cramped and forgettable.
13. Ring detail with wave foam texture
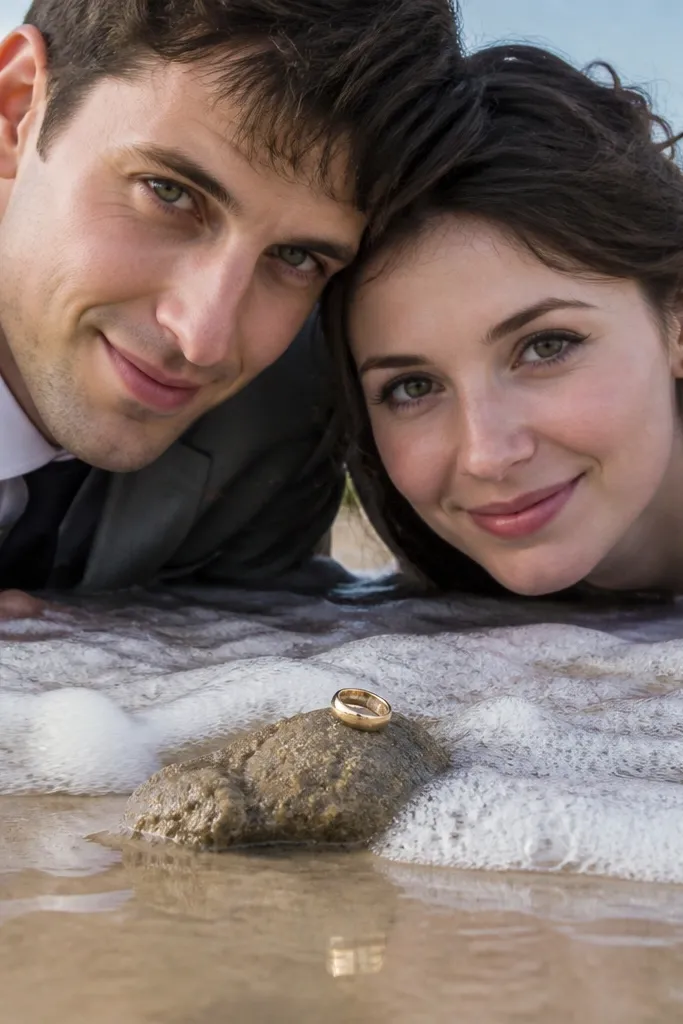
Ring close-ups look better on the beach when the background has foam texture instead of plain sand. Foam creates a soft, mottled pattern that makes metal look brighter without harsh glare. This suits couples who want details that feel coastal and not generic studio-style. Keep it simple: rings, sand, foam — no extra clutter.
Quick tipUse a lens cloth between shots; salt mist can make rings look dull fast.
Start by wiping a small patch of sand and waiting for a gentle wave to leave foam behind. Then place the rings on that foam texture using clean hands and a ring holder if you have one. Finally, shoot from above with tight framing so the rings stay sharp and the foam blurs into soft shapes.
Skip thisPlacing rings on dry sand — you get ugly grain and the metal glare turns into blown highlights.
14. Sunrise couple portrait with soft backlight and misty air

Sunrise gives you a calmer beach and softer contrast, which matters for skin tones and fabric color. Mist or sea haze turns the background into a gentle gradient, so the couple looks like the main subject without needing heavy editing. This is the best fit for couples who want minimal, dreamy visuals rather than bold sparkle. It also works well for dresses with lace or beading because backlight makes textures glow.
Quick tipBring a lightweight robe or sweater for the couple during the wait; cold makes expressions tighten.
Start by booking sunrise portraits so you arrive 20 minutes before the first light hits the horizon. Then position the couple with the sun behind one shoulder so the face gets light but not direct glare. Finally, ask for a medium distance framing that includes a bit of empty beach space for that airy look.
Skip thisTrying to shoot sunrise portraits after the beach fills up — background noise kills the calm aesthetic.
15. Palm shadow dance moment for playful engagement energy

Shadow patterns make beach photos look designed, even when you’re just walking. Palm shadows create graphic shapes that cut across skin and fabric, and the movement of dancing makes those shapes shift. This suits couples who want something fun and not overly posed. You’ll get the most aesthetic contrast when the sun is low and the palms cast crisp lines.
Quick tipPick a spot where the sand is light-colored; dark sand makes shadows look muddy.
Start by walking the couple under palm shade and watching where the shadows fall across the bodies. Then have them do one simple action — a slow twirl or side-step — and shoot in short bursts. Finally, direct the photographer to keep the shadows visible across torsos and faces, not just the ground.
Skip thisDoing this in flat midday light — shadows lose shape and the whole effect disappears.
16. Exit celebration with confetti against a darkening sky
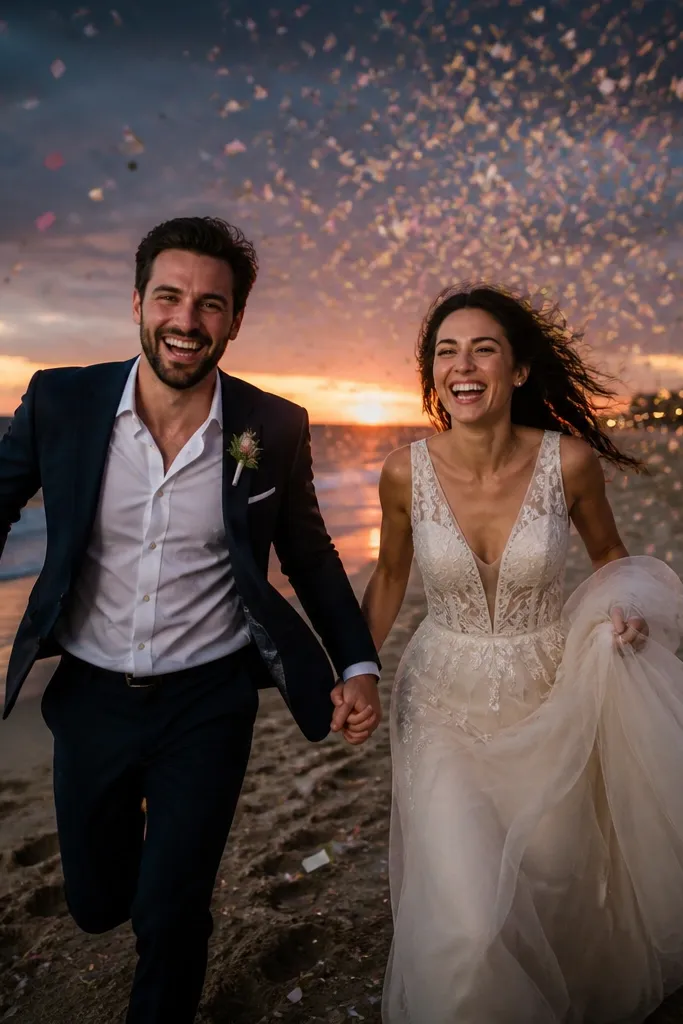
Beach exits look more cinematic when the sky is already deepening. Confetti against a darker sky catches light and creates motion trails, so even simple poses look like a moment. This works for couples who want photo energy without needing extra props. Keep confetti colors coordinated with your palette so it looks intentional rather than random.
Quick tipUse biodegradable confetti if the venue requires it, and confirm where it can land to avoid cleanup issues.
Start by waiting until the sky shifts from bright to soft blue, usually 15-25 minutes after sunset. Then position the couple with the ocean behind them so confetti floats through a darker background. Finally, ask the photographer to shoot slightly from the side so you see confetti movement and the couple’s faces at the same time.
Skip thisThrowing confetti too early in bright orange light — it blends into the sky and looks flat.
17. Flat-lay bridal details on a clean beach towel
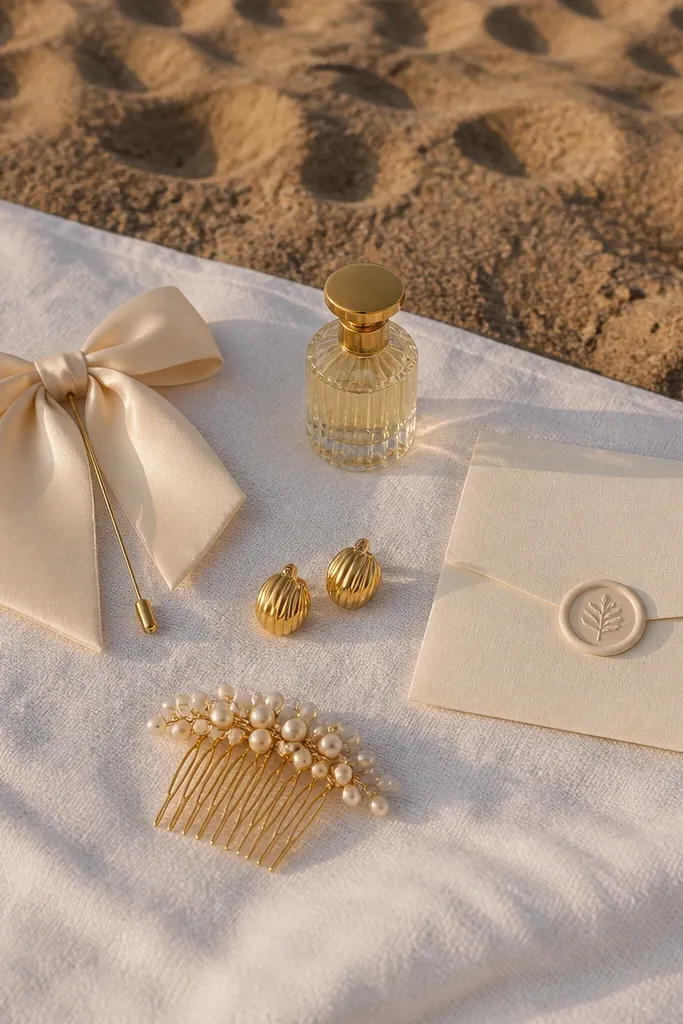
Flat-lay details can still look elevated at the beach if you control the surface. A clean towel gives you a stable background while sand texture stays out of the frame. This is where you photograph jewelry, perfume, invitation pieces, or hair accessories that would get lost in wide scenery. Choose a towel color that contrasts with your bouquet — white, cream, or soft blush all work.
Quick tipBring a small zip bag for rings and pins so you can move quickly if waves or wind hit.
Start by setting up on a towel in a sheltered spot just off the wind line. Then arrange items with spacing — don’t pile everything together, and keep rings centered. Finally, shoot from directly above with tight framing so the towel fills most of the image and sand grains don’t creep in.
Skip thisDoing flat-lays in direct wind — small pieces scatter and the photo looks rushed.
18. Couple portraits with surfboard or driftwood as a prop

A surfboard or driftwood piece adds a beach identity marker that makes the images feel location-specific. It’s also a posing anchor, which helps the couple relax instead of fidgeting. This suits couples who want coastal character without turning the photos into a theme park. Choose a prop with clean lines and minimal clutter so it doesn’t dominate the frame.
Quick tipIf you’re borrowing a surfboard, ask for the kind with a simple color — plain boards photograph cleaner than heavily stickered ones.
Start by selecting a prop that’s dry enough to handle and free of loose barnacles or sand piles. Then place it at an angle and have the couple lean from shoulders, not just hands — it looks natural. Finally, shoot with the ocean behind and keep the horizon straight so the prop lines feel intentional.
Skip thisUsing a prop covered in random stickers or rope — it turns the image into a cluttered product photo.
19. Dramatic backlit dress flare with sea spray
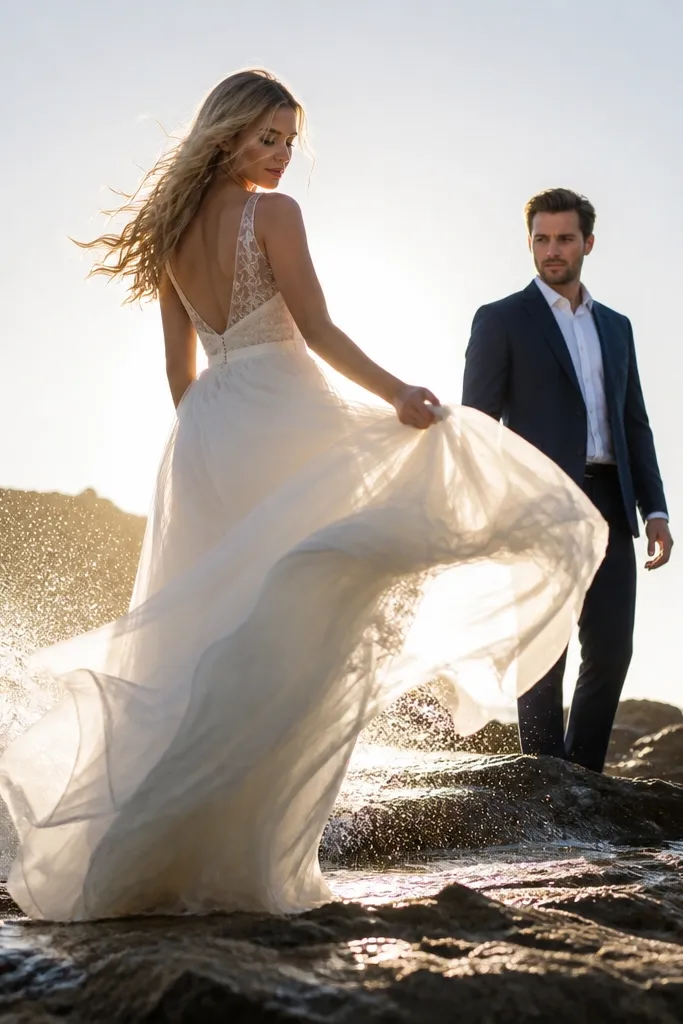
This is the dress-movement shot that looks like it belongs in a fashion spread. Backlight makes the dress edges glow, and sea spray adds a soft mist veil that hides harsh background details. It suits gowns with movement — chiffon skirts, satin with a flare, and dresses with layered tulle. The couple’s job is simple: move through the frame instead of posing stiffly.
Quick tipPlan this for when wind is steady, not gusty; gusts can whip the veil into the lens and ruin the effect.
Start by standing where waves splash lightly but safely, ideally where water reaches around ankle height. Then have the bride take two steps and turn slightly while the photographer shoots a burst during the turn. Finally, position the sun behind the dress edge so the flare catches light and the mist creates a gentle background haze.
Skip thisTrying it with a tight, non-moving skirt — the dress won’t flare and the shot turns into a bland silhouette.
20. Wedding party candid laughter at waterline with minimal posing
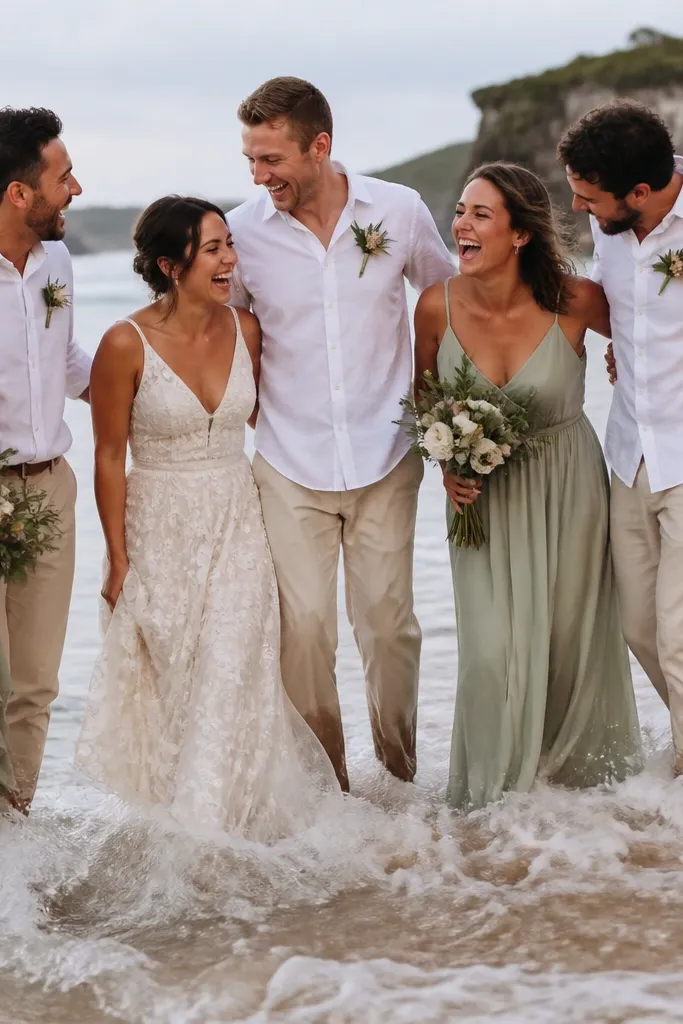
Candid waterline moments look real because the ocean keeps changing the scene. You get expressions that aren’t forced, and the background stays soft enough that faces read clearly. This suits groups that want energy, not stiff “stand here” photos. The trick is to keep the group close and let the waves do the motion work.
Start by gathering the party just at the edge of the water where wave foam creates texture. Then give one prompt: “Turn toward the ocean and laugh when I count to three.” Finally, have the photographer shoot continuously for 10-15 seconds so you catch overlapping laughs and head turns.
Assign someone to keep people from drifting too far apart; spacing matters for a clean group frame.
Letting the group wander down the beach — you lose cohesive framing and the photo looks like separate snapshots.