
1. Side-Swept Pixie with Pearl Pin Crown
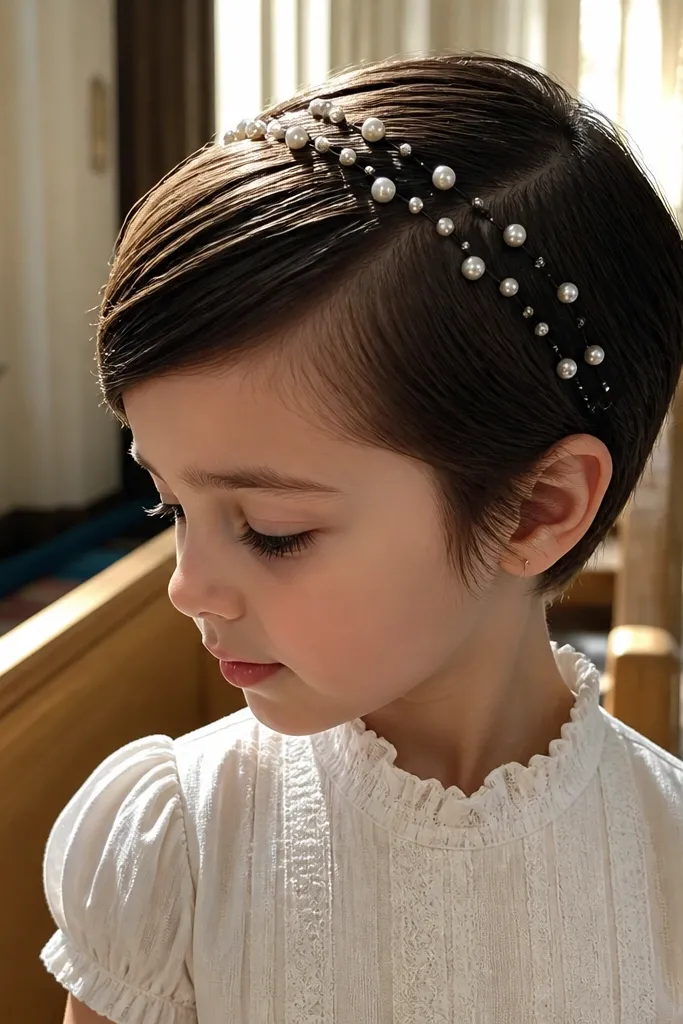
Start with damp hair and comb in a light smoothing cream, then blow-dry on a side direction using your fingers to keep the swoop consistent. Next, clip or pin the crown area with 3-5 bobby pins carrying tiny pearls, aiming them slightly inward so they don’t slip. Finally, mist from 10-12 inches away with a light hairspray so the sweep stays during movement. For travel timing, do this 30-45 minutes before photos so you can tweak the part without rushing.
This look makes very short hair photograph like it has intention. You’re creating a smooth side swoop that reads clean from across the aisle, then placing pearl pins where the hair naturally parts. The pearls catch light in a way that looks bridal without turning the style into a costume. It suits kids who hate anything that feels tight on the forehead. It also works great for outdoor ceremonies because the swept shape stays readable even when there’s a little breeze.
Skip thisAvoid heavy gel on pixies; it can look shiny and stiff instead of cute.
Quick tipPin the pearls on the crown, not the side — it looks more balanced in flash photos.
2. Bob with Hidden Side Braid and Bow Clip
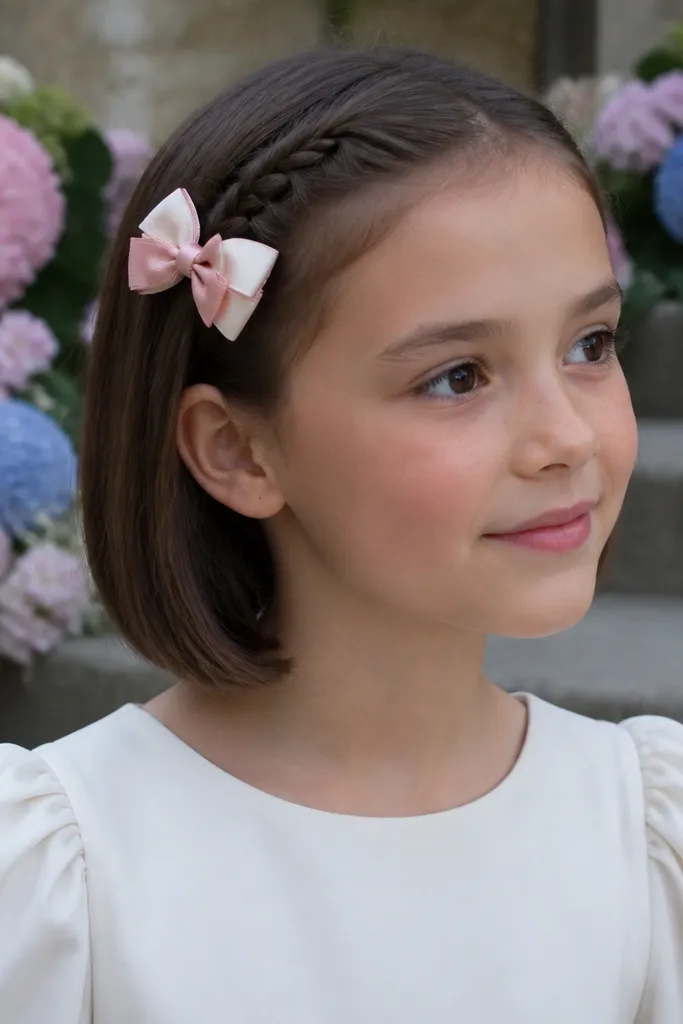
A hidden side braid gives short hair texture without making the hairstyle feel bulky. The bow clip makes it look wedding-ready instantly, especially if it’s satin or grosgrain in ivory, blush, or soft gold. This is a smart pick for kids with straight or slightly wavy hair because the braid can blend into the bob for a neat frame. In photos, the braid adds depth while the bow adds the cute factor. It also holds well for receptions because the braid helps keep the side tucked.
Start by creating a deep side part and smoothing the hair with a small amount of styling cream. Then take a thin section from the part line, braid it 2-3 inches, and tuck the braid under the bob toward the ear, securing with two bobby pins. Finally, clip a satin bow at the tucked braid point so it covers the pin area. If you’re traveling, pack a bow clip with a secure comb base so it doesn’t pop off in the car.
Choose a bow that matches the outfit color temperature — ivory for white dresses, blush for pink accents.
Skip a giant bow on a short bob; it hides the whole shape and looks out of scale.
3. Half-Up Micro Twists with Ribbon Tie
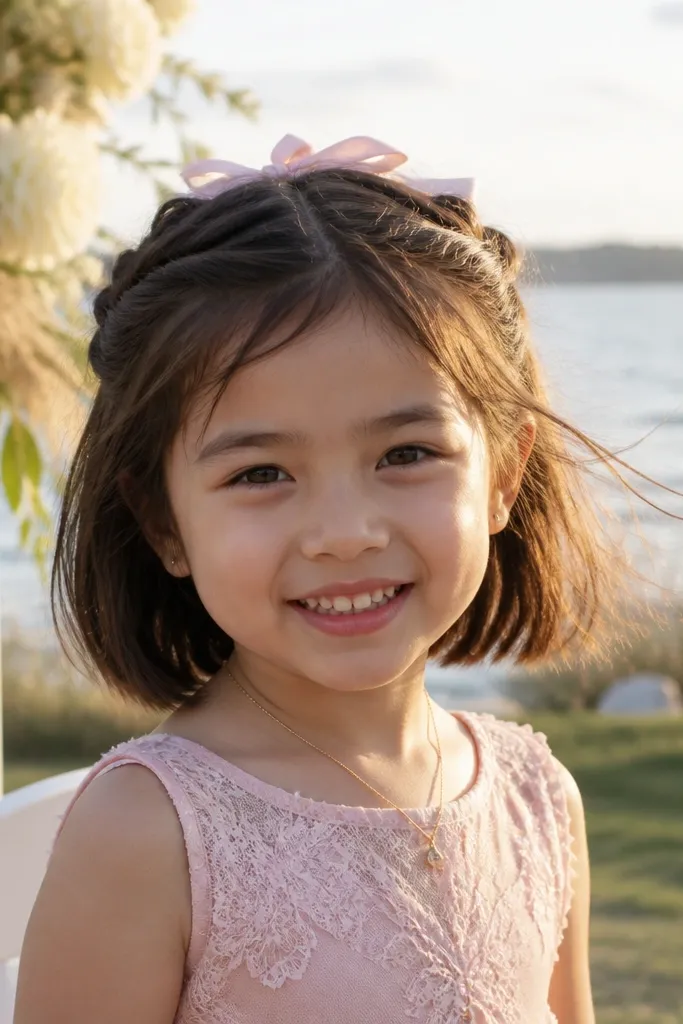
Micro twists look delicate and photogenic, even on short hair that won’t hold a classic half-up ponytail. This style frames the face and keeps hair off cheeks, which matters for kids who get fussy when hair touches their skin. The ribbon tie adds a soft wedding feel without weighing down the hair. It’s especially good for collar-length hair and bobs that are thick enough to twist. In outdoor light, the twists catch highlights along the twist lines.
Start with slightly damp hair and apply a light mousse or cream for grip. Then section two small front pieces on each side and twist them backward, pinning them together at the crown with bobby pins. Finally, tie a narrow ribbon around the pinned point and secure the ends with a tiny pin so it doesn’t slide. Do it 20-30 minutes before photos and let it set while everyone gets dressed.
Use a ribbon about 1/4 inch wide for short hair so it stays neat instead of wrapping too thick.
Avoid twisting dry hair; it tangles and creates uneven sections that show in close-up photos.
4. Crown Braid Halo for Short Curly Hair
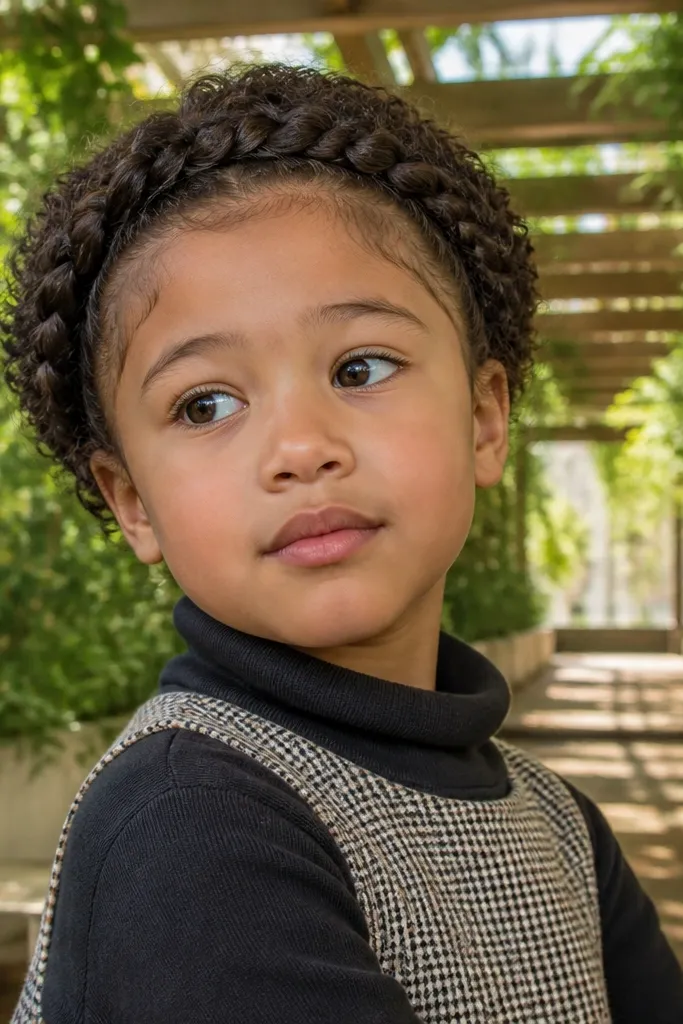
A crown braid halo turns short curls into something that looks intentional and sweet. It keeps curls in a controlled ring around the head, which makes the face look framed even when curls bounce. This look is best for kids with curls that are short but not too wispy, so the braid has enough hair to hold. The halo effect looks great for both indoor and outdoor weddings because it stays readable from different angles. It’s also a win for kids who don’t want to feel a lot of clips in their hair — the braid holds the shape.
Start by defining curls with leave-in plus curl cream, then gently detangle with a wide-tooth comb. Part the hair and begin a small three-strand braid along the hairline, working around the head and using tiny additions as you go. When you reach the start point, secure with bobby pins hidden under the braid. Finally, mist lightly with curl-friendly hairspray and let curls keep their bounce. Plan for 45-60 minutes because curly sections need careful handling.
If curls are very short, braid with smaller sections and don’t chase perfect symmetry - cute wins in motion.
Don’t pull curls too tight; it can cause frizz and makes the halo look flat.
5. Short Bob with Bow-Back Pin Roll
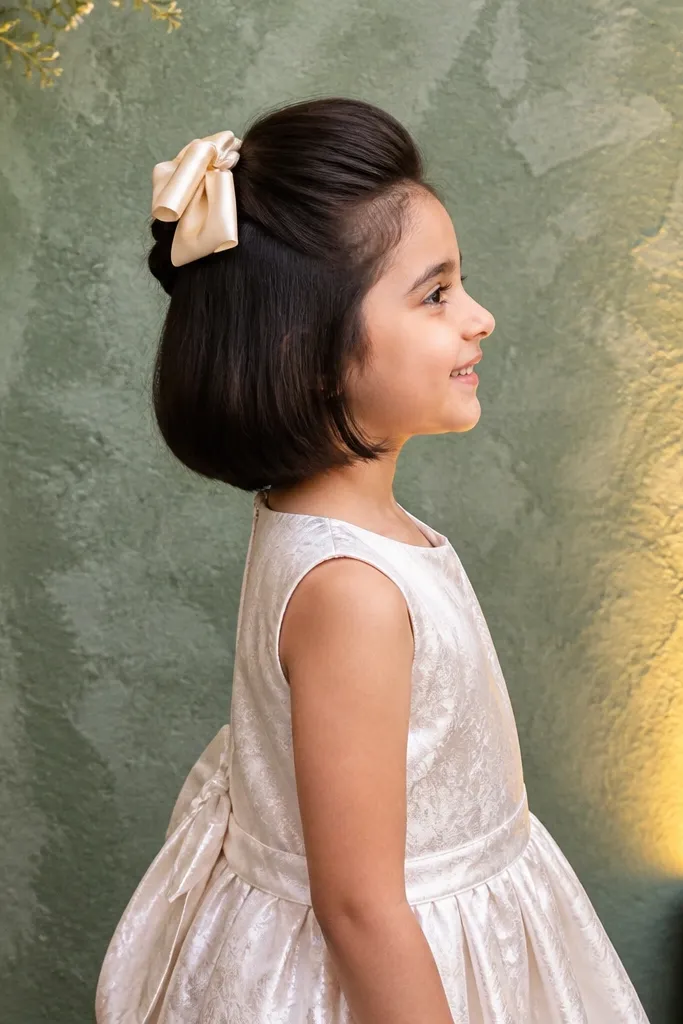
Start with straight or gently blow-dried hair and create a natural part. Take a small back section, roll it inward toward the scalp, and secure with two bobby pins in an X shape. Then add a bow clip over the pinned area so it hides the hardware. Finish with a light mist of hairspray at the roll and the ends to keep the bob rounded. If you’re traveling, do this in a bathroom with good lighting so you can see the back placement.
This is a clean, photo-friendly style that works when you want something “wedding” but still comfortable. You’re rolling a small section at the back to create lift, then pinning it so the bob looks shaped from the front and side. A bow at the pinned roll adds that cute wedding detail without covering the face. It’s a great match for straight bobs and thin-to-medium hair because it creates volume where kids need it for photos. The pin roll also helps keep hair from falling forward during the ceremony.
Skip thisSkip loose pins; if the roll shifts, the whole bob shape looks messy in photos.
Quick tipUse a bow clip with a flat base so it sits flush on the roll.
6. Twisted Side Pony for Teens with Short Hair
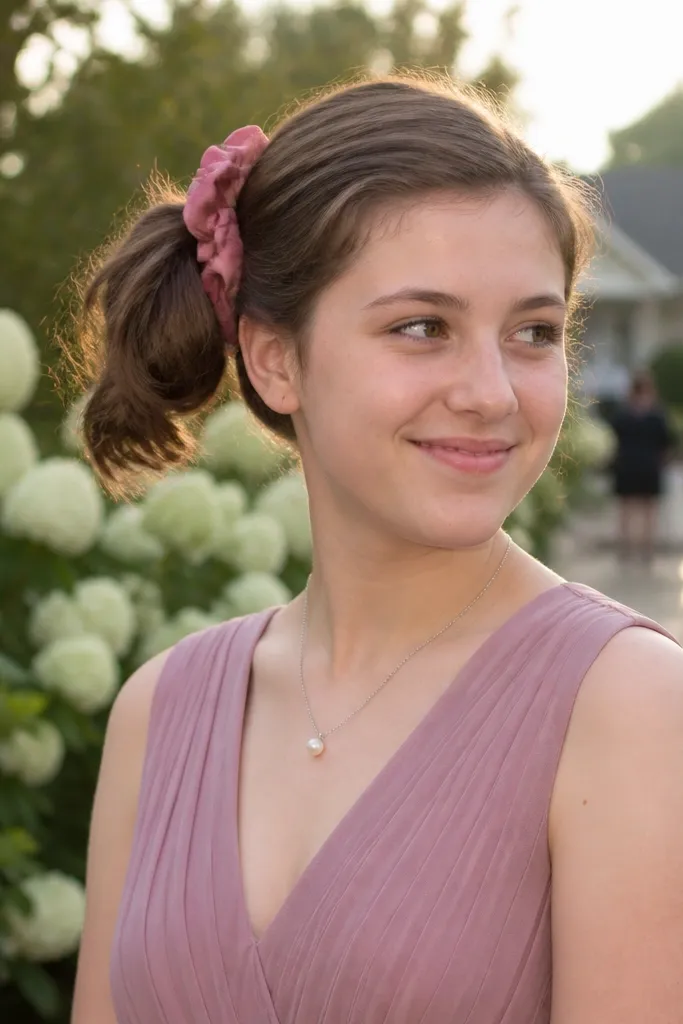
For older kids with slightly longer short hair, a twisted side pony looks both cute and grown-up in the best way. The twist gives the pony a polished look even when the length is too short for a full ponytail. Add a small ribbon tie or a thin satin scrunchie to keep it wedding-appropriate. This style is especially flattering for kids with thick hair because it holds shape and doesn’t look stringy. It also photographs well because the side gathering creates a strong silhouette.
Start by brushing hair to a side direction and smoothing with a dab of gel or cream. Twist the gathered hair around itself once or twice, then secure with a small elastic at the end. Wrap a thin ribbon or satin strip around the elastic and pin it in place. Finally, tug gently on the twist to make it slightly fuller, then mist lightly to lock it. Schedule 25-35 minutes before photos so you can adjust the side placement.
Place the pony slightly above the ear for a more flattering angle in portraits.
Avoid using a bulky scrunchie; it can make short hair look uneven at the tie.
7. Mini French Braids with Ribbon Ends
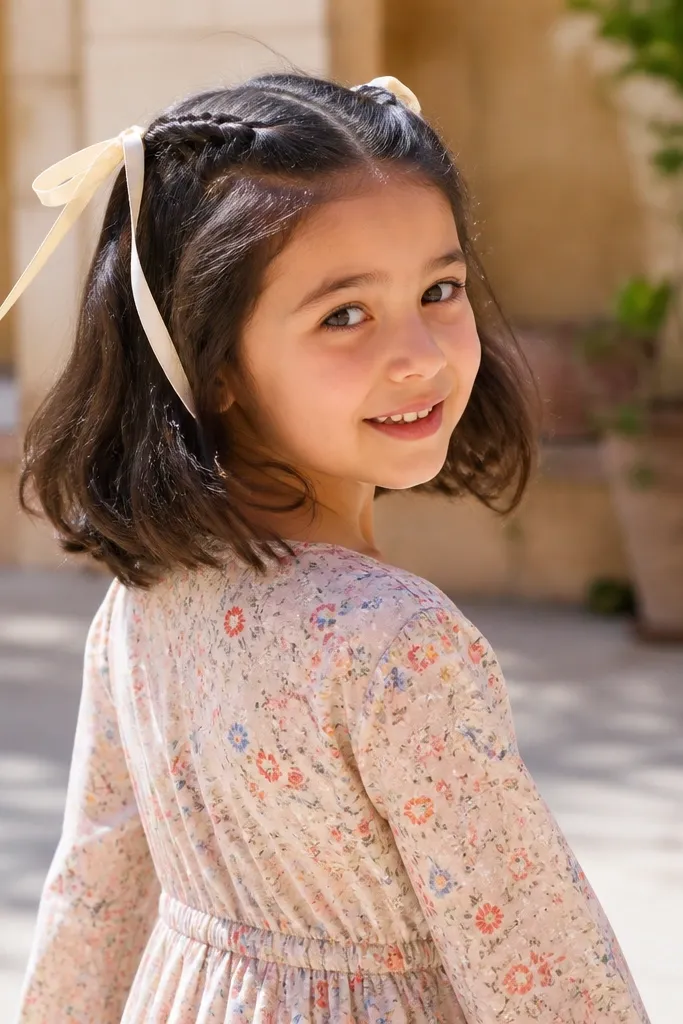
Start by parting the hair down the middle or slightly off-center, then apply a smoothing cream to reduce flyaways. Begin French braiding from the front hairline, taking small additions so the braid stays close to the scalp. Stop at the length you have and secure with a tiny elastic, then tie a ribbon around the elastic and trim ends to even lengths. Finish with a light hairspray mist and check both sides in a mirror. Travel tip: pack extra elastics so you don’t run out.
Mini French braids keep hair tidy and look adorable in motion. The ribbon ends add a wedding touch without needing extra clips all over the head. This style is great for short hair that’s thick enough to braid in small sections. It works for both straight and lightly wavy hair, and it holds up through dancing because braids don’t collapse like loose hair. In photos, the braids create clear lines that stand out even in busy backgrounds.
Skip thisDon’t braid too big; thick mini braids on short hair can look chunky instead of cute.
Quick tipUse a ribbon that matches the wedding palette — satin ivory or blush looks best against children’s hair.
8. Waterfall Pin-Sweep for Collar-Length Hair
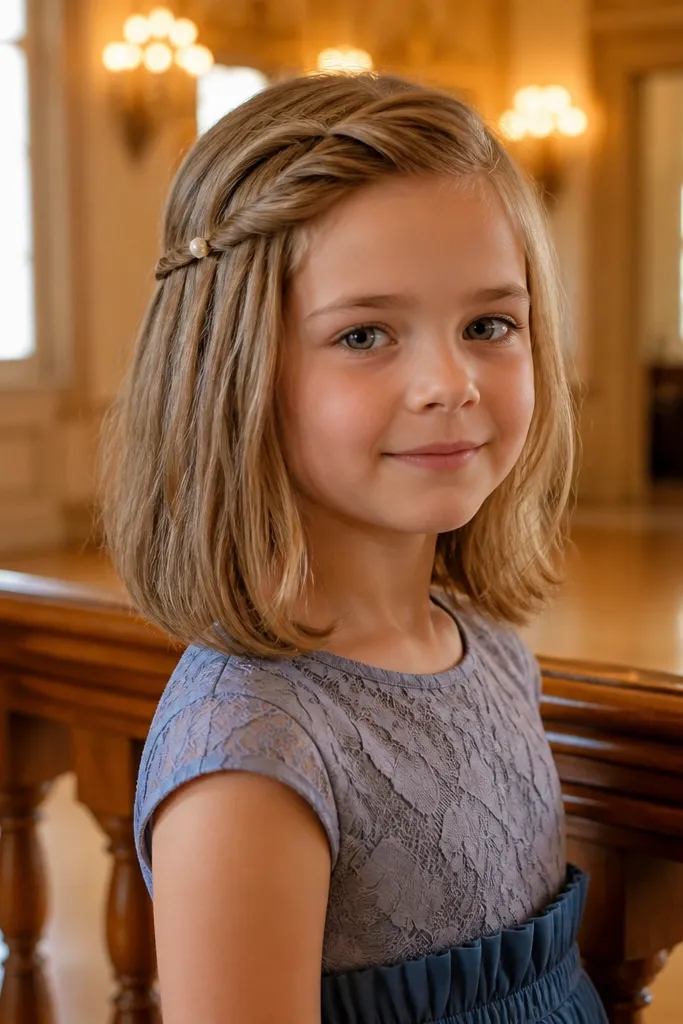
Start by parting slightly to one side and smoothing with a light cream. Take a top front section, do a simple waterfall pattern for 3-4 links by separating, crossing, and letting one strand fall each time, then continue until you run out of length. Pin the final point under the hairline with two bobby pins. Finish with a gentle mist of hairspray and a quick comb-through so the pinned piece blends. Do this 30-45 minutes before photos to avoid last-minute rework.
A waterfall pin-sweep makes short hair look styled without requiring long braids. You’re creating a visible “fall” section that looks like it’s cascading, then pinning it so the shape stays. This is a great choice for collar-length hair where a classic half-up braid won’t sit right. The pin-sweep reads elegant and sweet in close-ups. It also keeps hair off the face during vows, which is a win with kids.
Skip thisSkip thick product under the pinned area; it can make the waterfall look greasy.
Quick tipMatch your pin color to the hair shade; invisible pins look cleaner in flash.
9. Side-Part Bob with Crisscross Bobby Pin Star
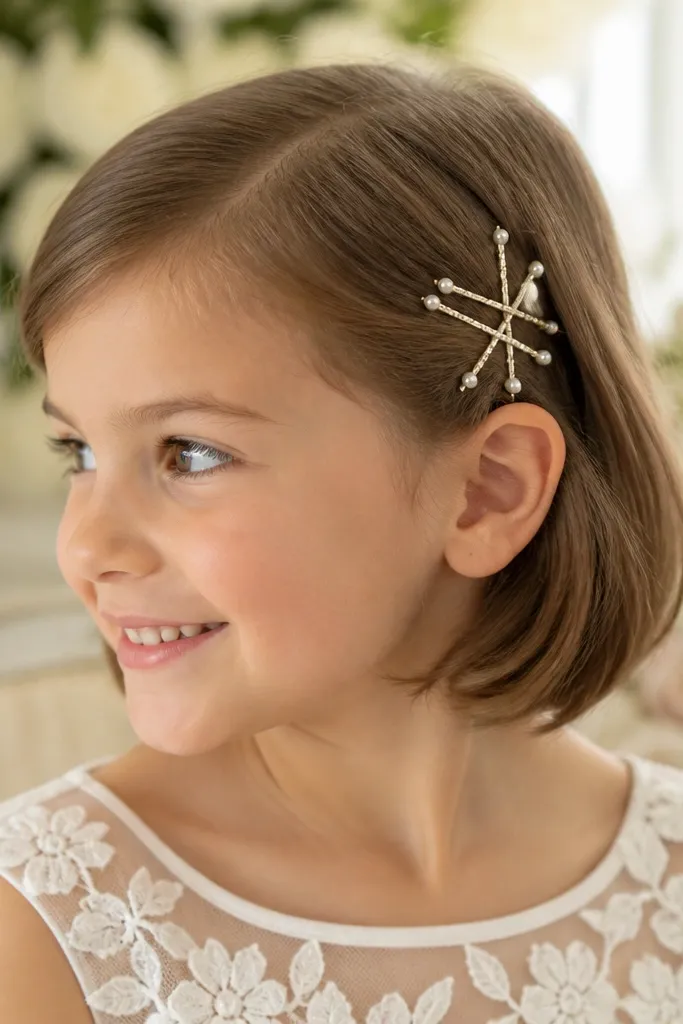
Start with a sharp side part and apply smoothing cream to keep the part line neat. Comb hair over to the side you want, then take a small section near the temple and pin it in a crisscross pattern using 4 bobby pins. Optionally place a single decorative pin at the center of the crisscross. Finish with a light mist so the pinned shape stays. For travel, pack a small mirror so you can check the temple detail from the front.
This is a cute, graphic style that works when you want something photogenic but low fuss. The crisscross bobby pins create a tiny star-like detail near the temple, drawing attention to the face. It’s best for short bobs and hair that can be controlled with light product. Add one small pearl or rhinestone pin on top for a wedding finish. This style looks good in both outdoor daylight and indoor flash because the pin detail catches light.
Skip thisAvoid pins placed loosely; a crooked cross looks messy in photos.
Quick tipKeep the star detail small — if it’s too big, it reads “hair accessory” instead of “wedding detail.”
10. Short Hair Tucked Waves with Headband Bow
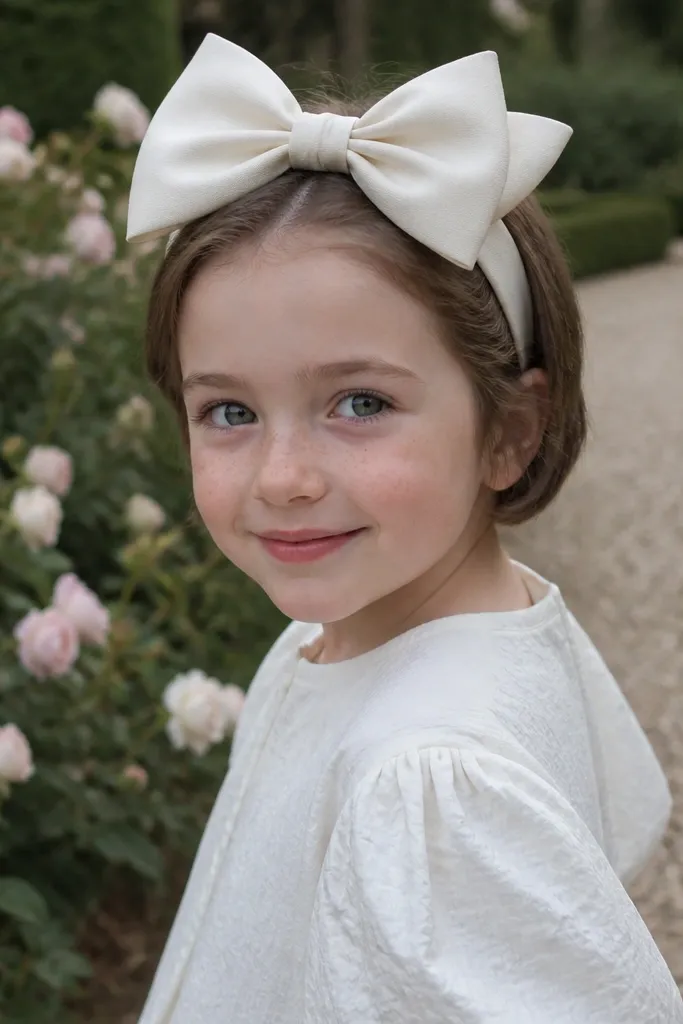
If your child’s hair is short but can hold a slight wave, this is a sweet, photo-ready option. The waves add softness while the headband bow makes the whole look feel like a wedding outfit. Tucking the sides under the headband keeps hair from falling loose around the cheeks. It’s especially good for little girls who get distracted by loose hair and for venues with warm indoor lighting. This look also gives you a consistent “front picture” even if hair shifts later.
Start by misting hair lightly, then use a small curling iron or hot rollers to create soft bends on the ends only. Brush the waves gently with a wide comb so they look loose and sweet. Place a bow headband on top, then tuck each side behind the band and secure with one bobby pin if needed. Finish with a quick hairspray mist and avoid over-spraying the headband area. Book this for a morning photo session because you’ll have more time to set and adjust.
Choose a headband that sits slightly above the brow so it doesn’t cover the eyes in portraits.
Skip tight headbands; they can leave red marks and make kids uncomfortable fast.
11. Half-Up Clipless Twist with Satin Loop
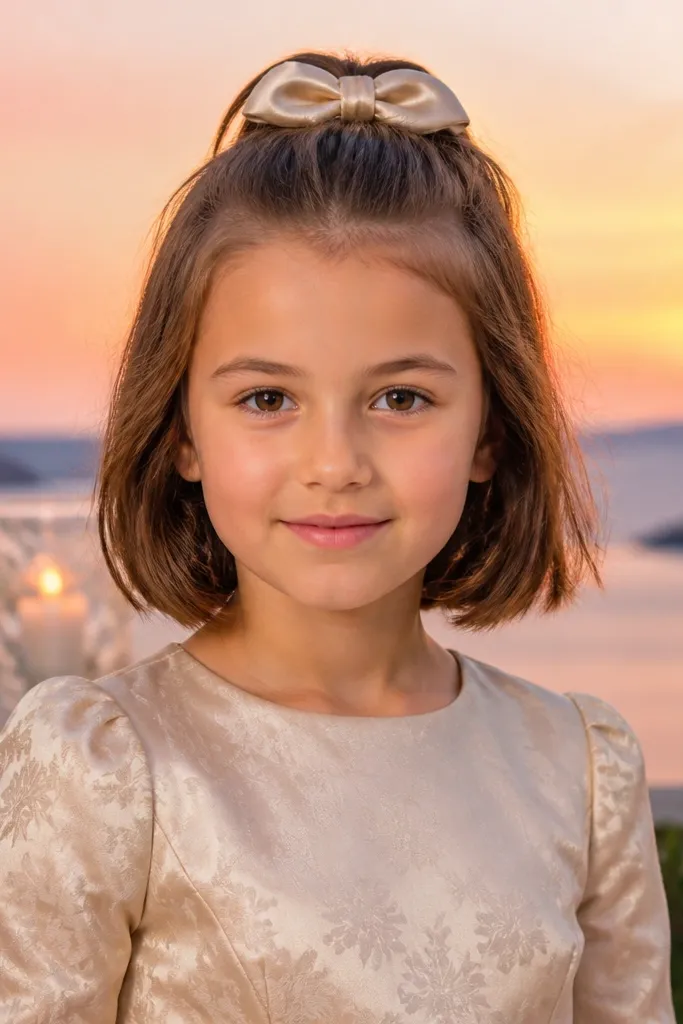
Start with damp hair and apply a light styling cream for grip. Twist two small sections from the front back toward the crown, then overlap them and tie a satin ribbon loop around the point where they meet. Secure the knot with a tiny bobby pin hidden under the ribbon fold. Let the hair air-dry for 10 minutes or use cool air from a dryer, then add a light mist for hold. Pack extra satin ribbon in the same color as the wedding palette.
This style looks clean because it hides the support. Instead of a visible clip, you use a satin loop tied at the crown to hold two small twists. It’s a great option for short hair that won’t ponytail and for kids who hate clips. The satin loop reads wedding-cute and adds a soft shine in photos. It also keeps hair away from the face while letting the rest stay natural and bouncy.
Skip thisAvoid cotton string — it frays quickly and looks rough in close-up photos.
Quick tipUse satin ribbon with a width of about 3/8 to 1/2 inch so it ties neatly on short hair.
12. Short Bob with Faux Crown Roller Pins
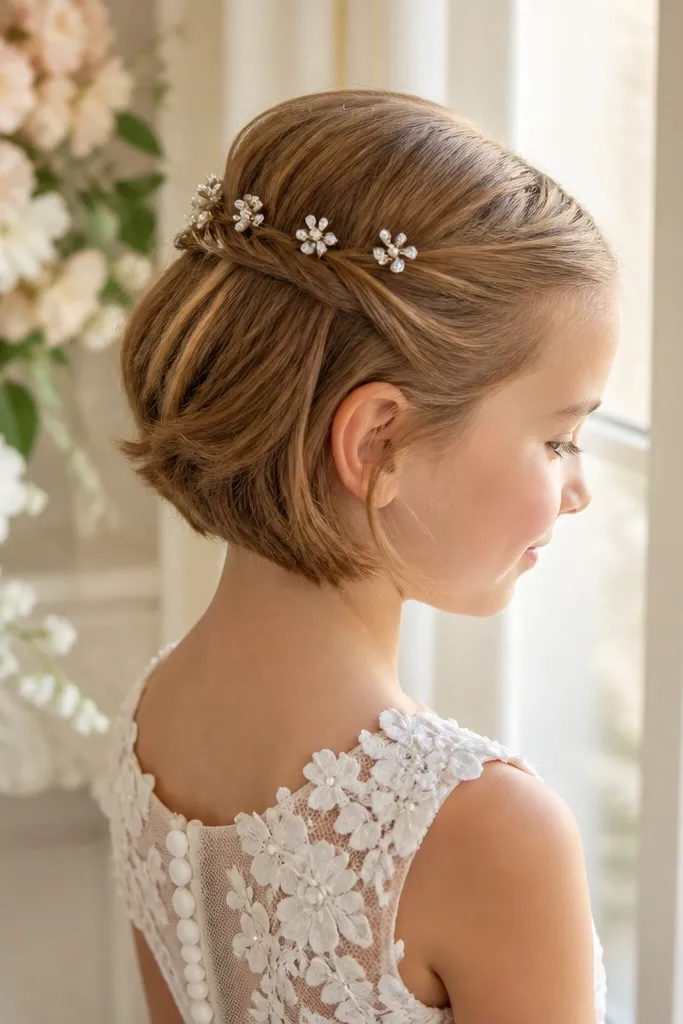
This look gives short hair lift at the crown, which makes the whole head shape look more “photo finished.” It’s a clever workaround when there isn’t enough length to do a full updo. You’re rolling a small strip of hair on top and pinning it so the bob sits away from the scalp. Add a simple pearl pin or a tiny floral clip at the side for wedding charm. This style is flattering for both straight and wavy hair because the roll creates a clean top line.
Start by blow-drying the crown section slightly upward so it has a base shape. Take a narrow top strip, roll it toward the back of the head, and secure with 3 bobby pins in a fan pattern. Smooth the sides down with a little cream so they blend into the roll. Finally, mist lightly and press the roll area with your palm for 10 seconds so it sets. Travel timing: plan this right before dressing, not after, so you don’t mess up hair while putting on a headpiece.
Use pins that match hair color or are dark enough to disappear in flash.
Skip big rollers; they can flatten the roll and make short bobs look flat.
13. Pixie Side Swoop with Mini Flower Pin
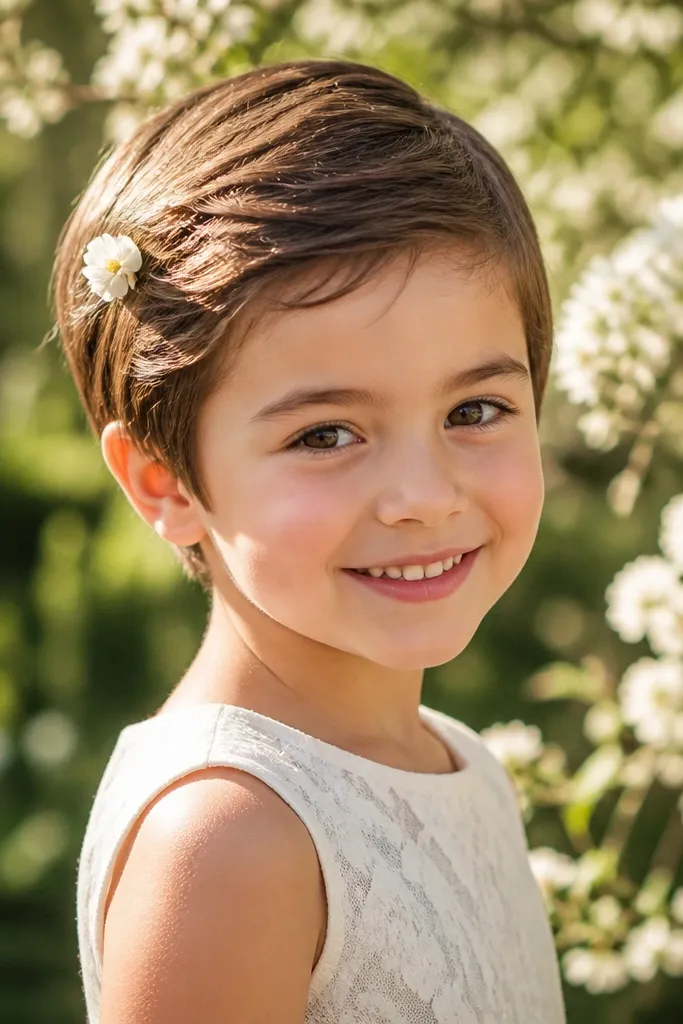
This is the simple, pretty option for kids who don’t want a lot of “doing.” The side swoop gives structure, and a single mini flower pin adds the wedding look. For short hair, less is more — one flower reads cute without clutter. It’s best for pixies and short layers where the hair naturally falls into a swoop. In photos, the flower sits near the ear so it looks balanced and doesn’t cover the face. It also works well for beach weddings because the swoop stays readable in wind.
Start by smoothing the hair with a small amount of styling cream, then comb it into a side-swept direction. Blow-dry with a brush or fingers to set the swoop, focusing on the front section. Place a mini flower pin at the side where the hair naturally meets the ear, securing with 2 bobby pins so it doesn’t wiggle. Finish with a light mist of hairspray. If you’re traveling, keep the flower pin in a small case so petals don’t get bent.
Pick a flower pin with a flat back — it sits better on short hair.
Avoid oversized flowers; they overpower a pixie and look heavy in pictures.
14. Short Hair with Triple Ribbon Barrette
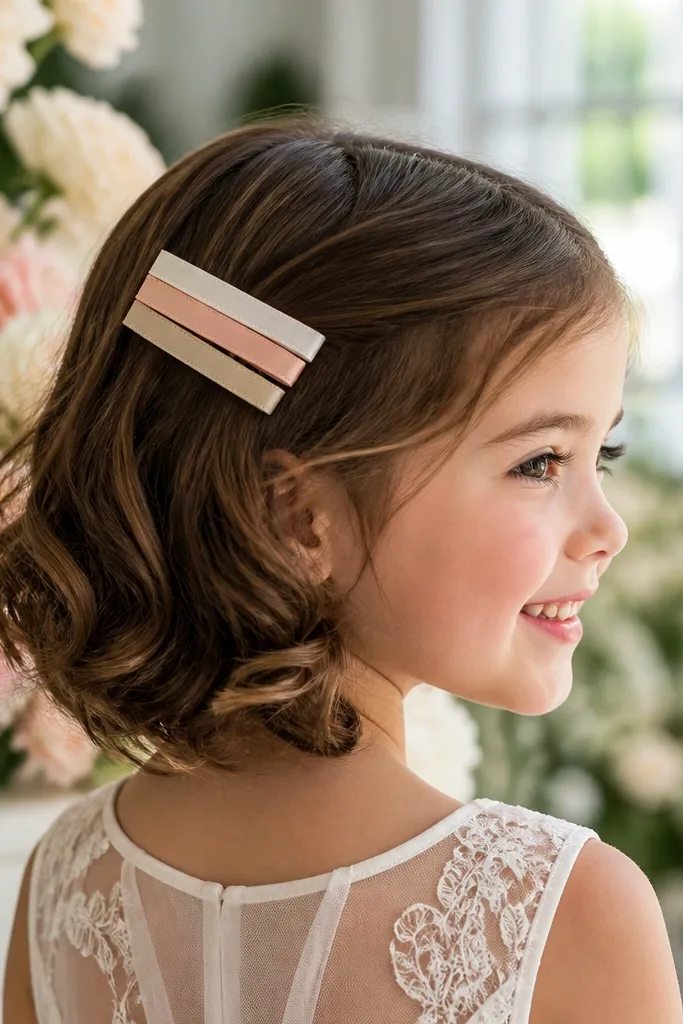
A triple ribbon barrette makes short hair look styled even when the haircut is simple. The key is placement: keep it near the crown or slightly off-center so it frames the face, not the forehead. The ribbons add color and texture that reads well in both bright outdoor light and indoor reception lighting. This works for straight bobs, chin-length cuts, and even very short hair with enough length to tuck under. It’s also a great option when you need something quick because the barrette does most of the styling work.
Start with dry hair and smooth flyaways with a tiny dab of gel or smoothing cream. Place the barrette slightly above the ears, then adjust until it creates a clean line across the head. Tuck any short pieces under the barrette with one bobby pin if needed. Finish with a light mist and check the placement in a mirror from the front and side. Plan this for 10-15 minutes before photos so you can still touch up shine or flyaways.
Use ribbon colors that match the wedding bouquet palette — ivory and blush are the safest for kids.
Skip barrettes placed too low; they can look like a hairband instead of a wedding detail.
15. Micro Braid Crown for Thin Short Hair
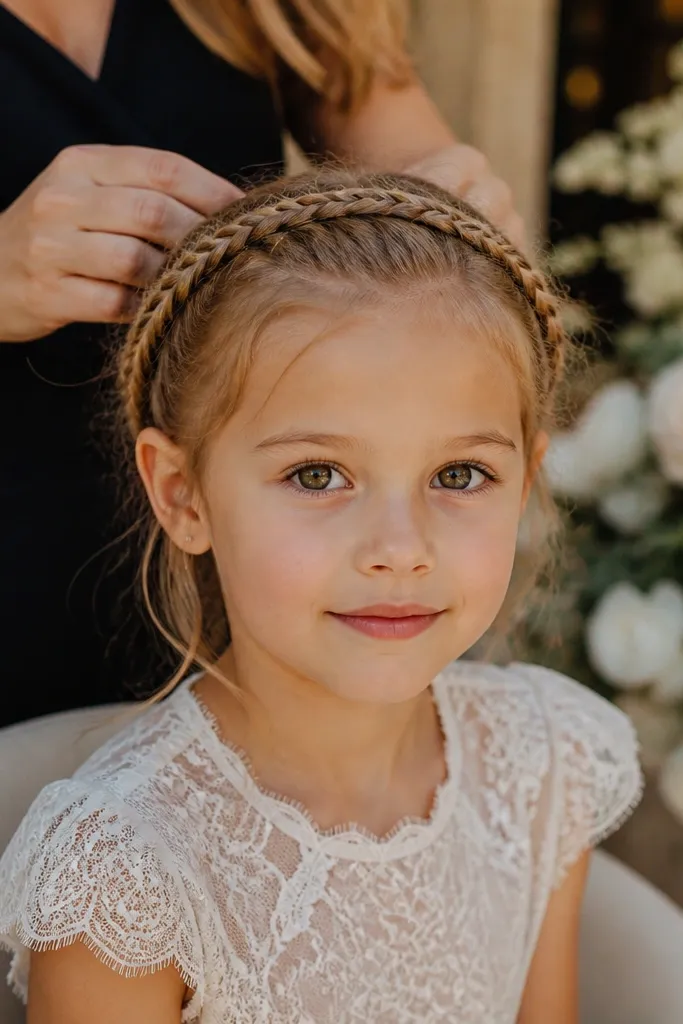
Start with damp hair and add a lightweight volumizing mousse so braids grip. Part the hair into a few sections around the crown, then braid each section into a small three-strand braid. Wrap the end of each braid slightly and pin it into place to create a ring shape. Finally, mist lightly and smooth the outer hair with a soft brush. For travel, do this at least an hour before photos so you can handle any tiny slip-ups.
Thin short hair can look sparse in wedding photos, and this style fixes that by adding multiple small braid lines. The micro braid crown creates a woven texture around the head, so the hair looks fuller without needing thick extensions. It’s best for kids with fine hair who still have enough length for small braids. In pictures, the crown pattern looks delicate and intentional. It also keeps hair from separating into wispy strands during the ceremony.
Skip thisAvoid skipping mousse; braids fall apart on fine hair without grip.
Quick tipUse small elastics for each micro braid so you don’t need long pinning to secure ends.
16. Short Hair with Curved French Twist at the Nape
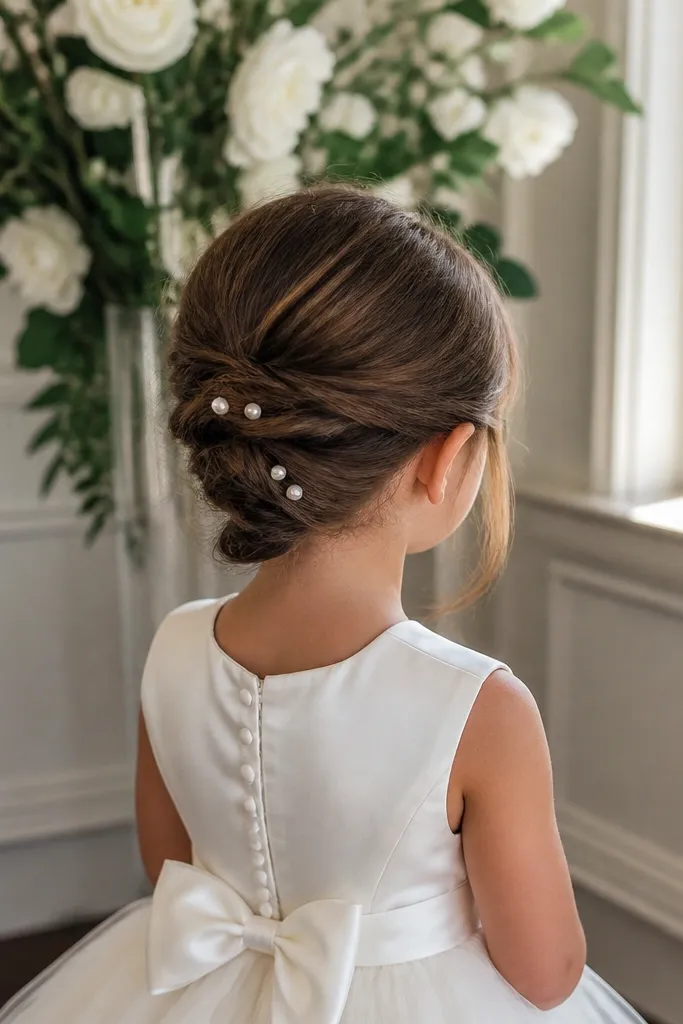
This is a neat up-style look that works even when hair is too short for a full bun. The curved French twist at the nape creates a tidy, sculpted shape that looks great from behind and in candid shots. It suits straight hair and bob lengths because you need enough body to roll into the twist. Add a small pearl comb or a satin ribbon at the twist point for wedding polish. It’s also good for kids who don’t like hair in their face since the twist keeps everything tucked.
Start by brushing hair back and applying smoothing cream to the nape area. Create a low section and begin a French twist by rolling inward while adding small sections as you go. Secure with bobby pins crossing through the twist and into the scalp. Then place a small decorative pin or ribbon over the pin line to hide hardware. Give it 10 minutes to set, then mist lightly. Travel tip: bring an extra pack of bobby pins because twists need more than you think.
Pin the twist slightly off-center for a softer look in photos.
Avoid making the twist too tight; it can pull the scalp and look uncomfortable.
17. Short Bob with Side-Swept Flower Garland Clip
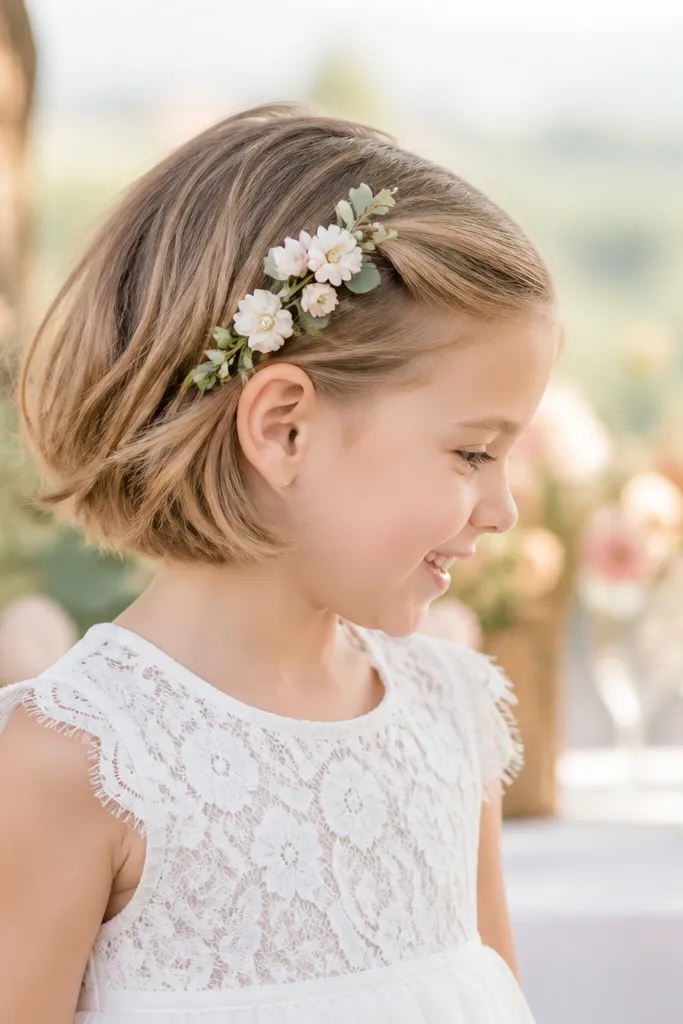
This style gives you a “garden” wedding look without building an entire updo. A side-swept flower garland clip sits along the hairline and adds height and glow to short bobs. It’s ideal for kids who have enough hair length to hold the clip securely and who look great with soft color accents. The garland adds a photogenic curve that looks good in both portrait shots and walking candid moments. It’s also a great match for spring and summer weddings.
Start with clean, dry hair and smooth it with a tiny amount of gel or cream. Part the hair slightly and position the garland clip along the side hairline, then press down to secure the base. Tuck any short flyaways behind the clip and pin them lightly if needed. Finish by misting hair around the clip to reduce static. If you’re traveling, carry the clip in a padded pouch so it doesn’t bend.
Place the garland where the hair naturally falls — don’t force it across a part that doesn’t suit the haircut.
Skip heavy foam clips; they can sit too high and look unnatural on short hair.
18. Half-Up Pompadour with Pearl Headband
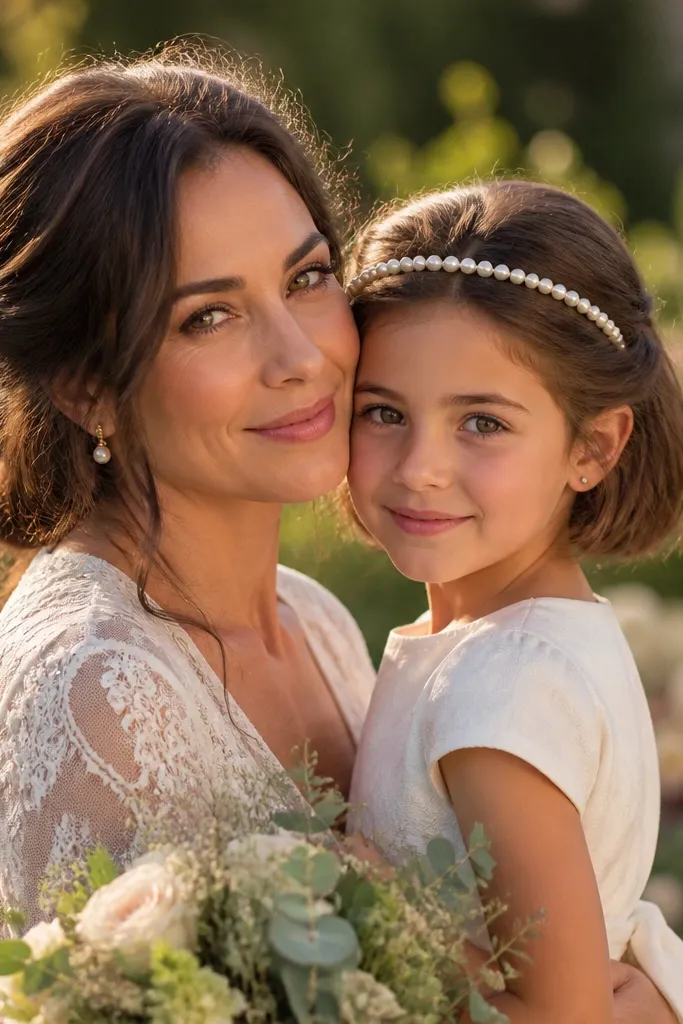
This look adds a little lift and sweetness, which is why it reads so well in wedding portraits. The half-up pompadour creates a gentle height at the front, and the pearl headband makes it feel bridal. It works for bobs and slightly longer pixies where you can tease the front section lightly. Kids with fine hair usually look best because the headband and pompadour give structure. It’s also great for indoor ceremonies because the headband catches warm light nicely.
Start with dry hair and tease a small front section at the roots, then smooth the top layer so it looks neat. Gather the teased section into a half-up shape and secure with bobby pins close together. Add a thin pearl headband and adjust until it sits evenly across the forehead. Mist lightly to hold the pompadour shape. Plan for 20-25 minutes so the teased roots settle before you lock it in.
Use a headband width of 1/4 to 1/2 inch so it looks delicate, not bulky.
Avoid big teasing; too much volume looks like a costume on short hair.
19. Short Hair Twist-Out with Crisscross Barrette
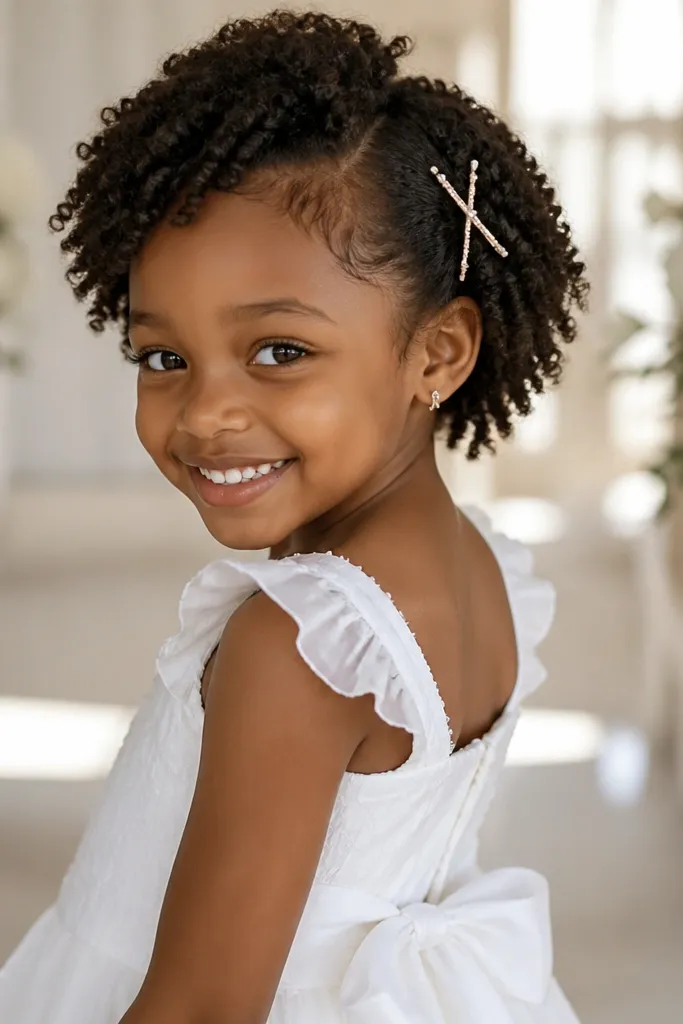
This is a clever way to make short hair look styled from every angle. You create two or three small twist-out sections near the sides, then anchor them with a crisscross barrette that hides the pins. The result is neat, photogenic, and not too fussy for kids. It’s best for short hair with some texture or slight wave, but it works for straight hair with enough product. The barrette detail catches light and looks special without covering the face.
Start by applying a smoothing cream or mousse, then part the hair slightly off-center. Take two small side sections, twist them backward, and pin them lightly at the back of the ear area. Place the crisscross barrette over the pinned point to lock everything in place. Finish with a light mist and check both sides in the mirror. If you’re traveling, this is a good option because it doesn’t require tools beyond pins and a barrette.
Choose a barrette with a secure hinge; springy barrettes pop loose on short hair.
Skip loose twists; if they don’t grip, the barrette just becomes decoration.
20. Short Curl Clip-Up with Mini Rhinestone Comb
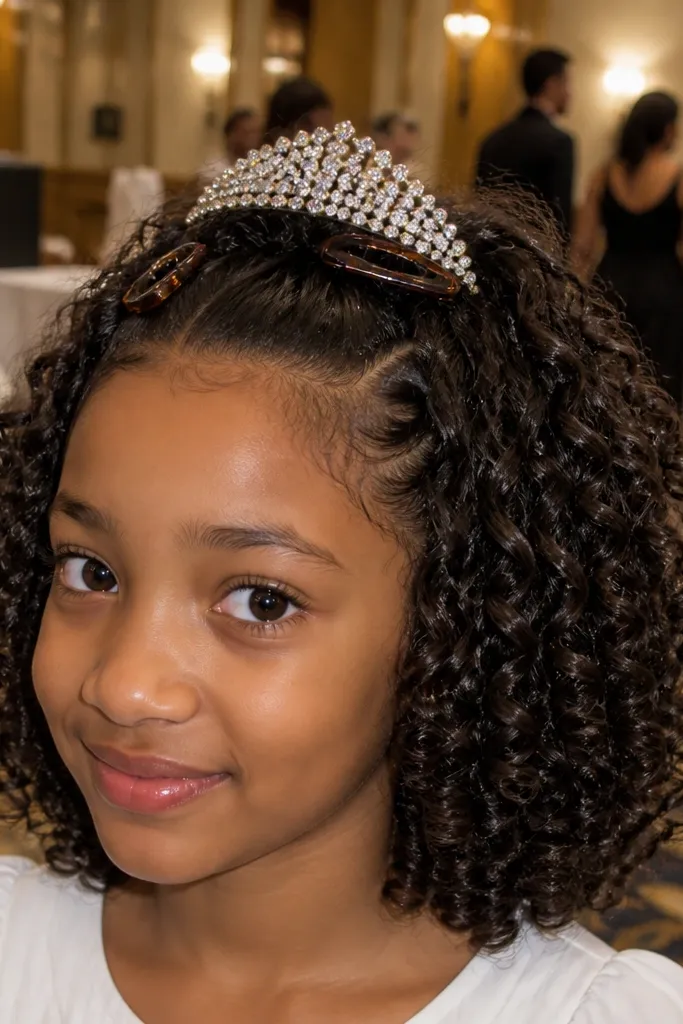
Short curls can look adorable but messy, and this style gives them a clean plan. You pin up a small front section so the curls sit off the forehead, then use a mini rhinestone comb to add sparkle. It looks great in indoor weddings where light reflects off the comb. This style suits kids with defined curls who don’t want their hair fully controlled. The pinned-up front also keeps curls from sticking to cheeks during vows.
Start with damp hair and apply curl cream, then let curls form naturally. Pin a small front section up and back with bobby pins, leaving the rest to fall naturally. Slide a mini rhinestone comb over the pinned area and secure with one extra pin if needed. Mist lightly with a curl-safe hairspray so curls stay defined. Travel planning: do this last, after outfit and accessories, so you don’t bump the pin area.
Keep the comb small and centered — it looks intentional on short hair.
Avoid crunchy gel; it can make curls look stiff and shiny in photos.



