
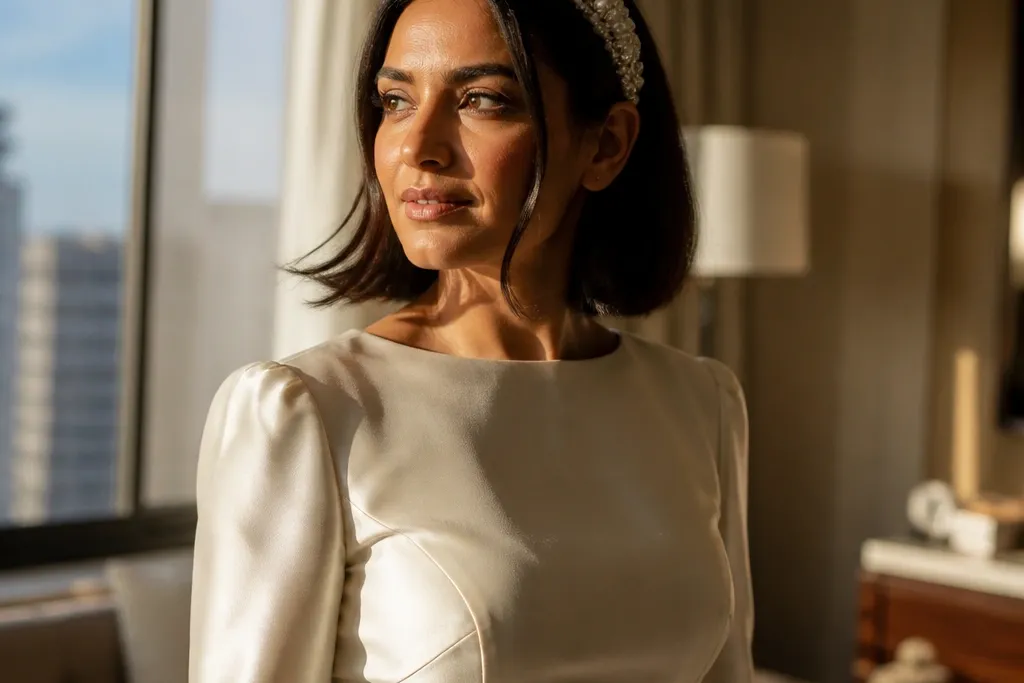
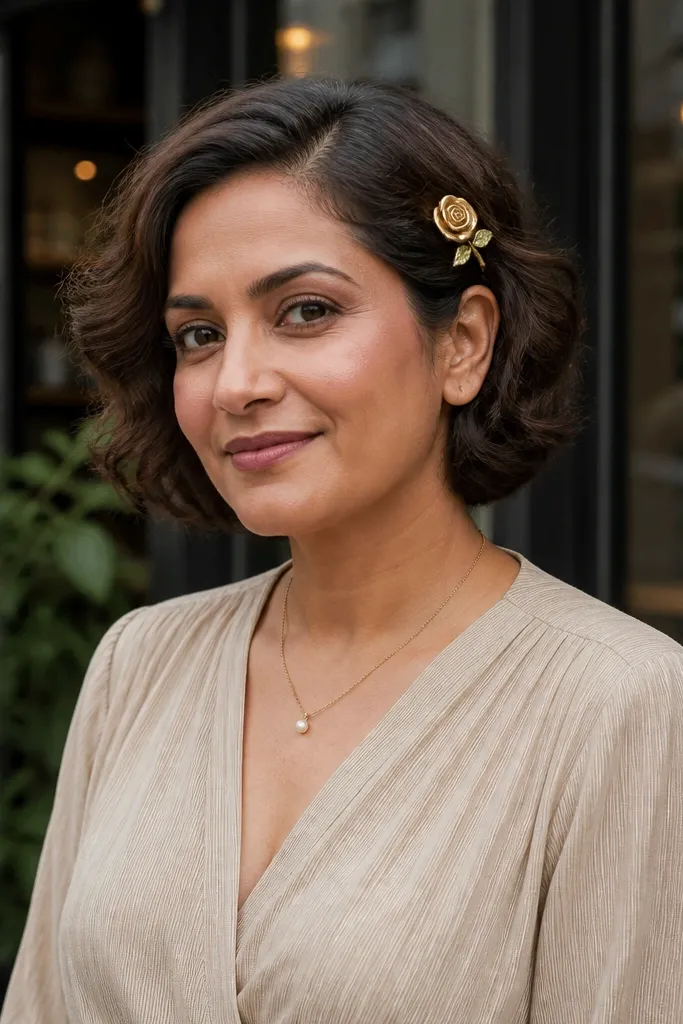
1. Sculpted Side-Sweep with Micro-Pins
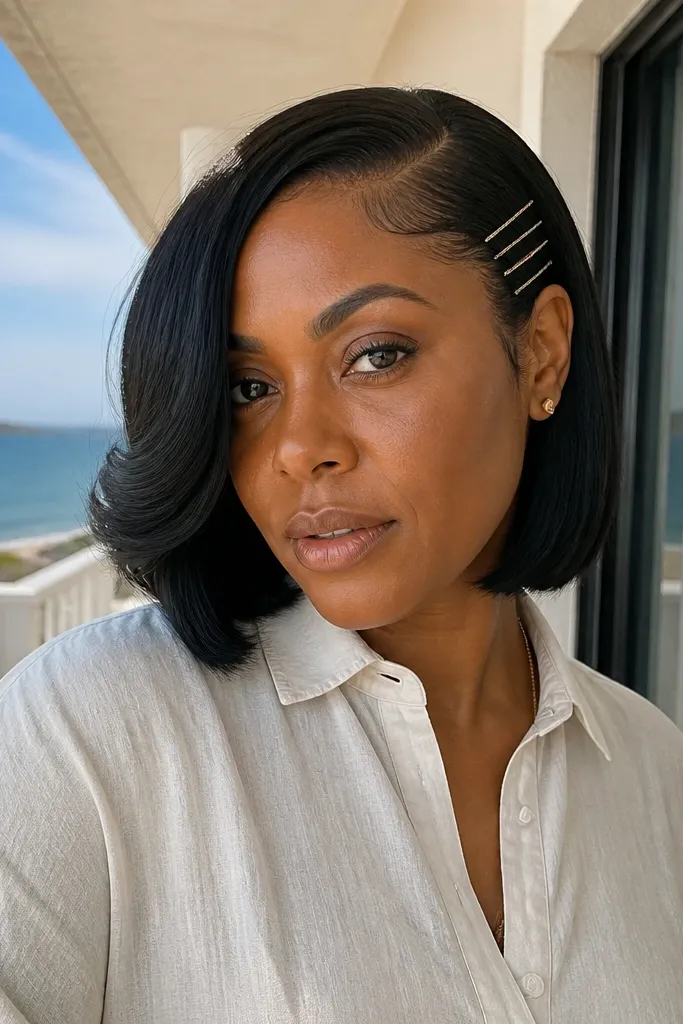
This style works because a side sweep gives you instant bridal framing even when the hair is too short for big updos. The key is that the sweep has a defined curve, not a floppy flop. Matte micro-pins keep the shape while staying visually quiet in photos, especially under flash. It’s best for bobs and blunt cuts that sit slightly away from the head at the back. It also looks great in spring and summer because the shine reads fresh rather than heavy.
Start with damp hair and rub a small amount of mousse into the roots on the sweeping side. Blow-dry the front section first, directing it across the forehead and down into the side sweep, then smooth the hairline with a pea-sized gel on your fingertips. Finally, set the sweep by placing two to three matte bobby pins diagonally — one near the temple, one midway, one at the back of the sweep — then finish with a light hairspray mist.
Use bobby pins that match your hair color or go matte black for contrast against lighter hair.
Skip leaving the ends loose — the short ends will flip and ruin the curve.
2. French Twist for a Pixie Edge
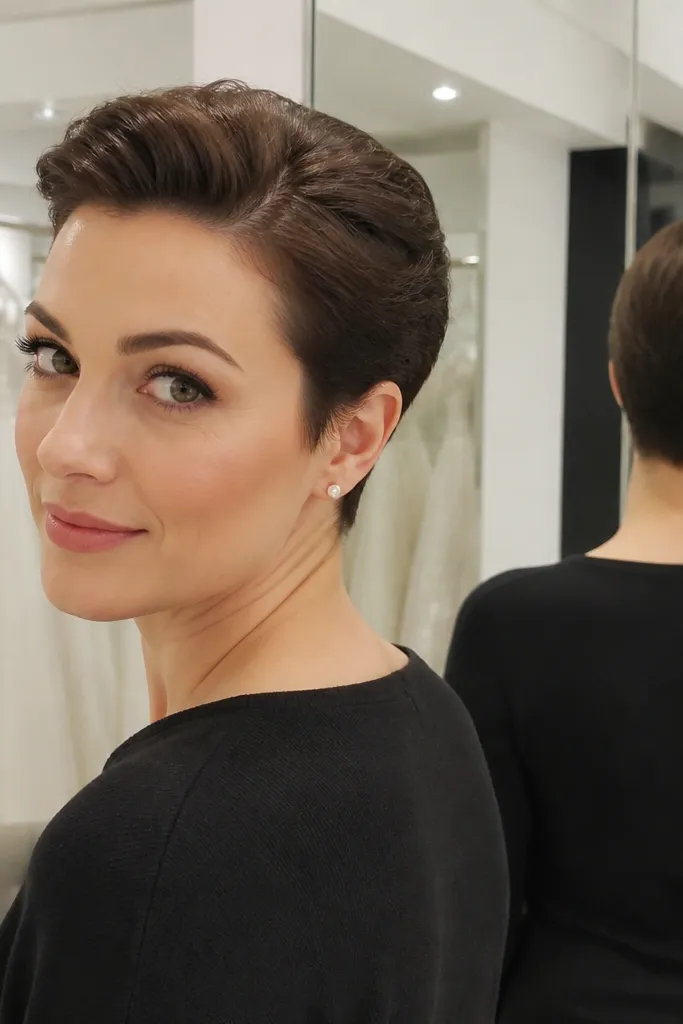
Start by applying a smoothing cream to the sides and a light styling foam to the top for grip. Twist the front and top sections back toward the crown, keeping the twist tight against your scalp as you go. Pin with a cross pattern — one pin to anchor, then a second pin to lock the twist at a slightly different angle — then mist lightly with hairspray to keep the crown from lifting.
A twist gives short hair a “real hairstyle” look without needing length. This one is tight at the crown, so it photographs clean instead of looking like hair tucked randomly. It’s especially flattering on pixies and very short bobs where the back wants to stick up. The twist also pairs well with delicate earrings because your face stays open. It’s a strong choice for fall and winter weddings when you want a warmer, more structured look.
Skip thisDon’t overstuff the twist — too much hair makes it bulky at the crown.
Quick tipSet your pins with hairspray before the final mist so they grab immediately.
3. Half-Up Crown Clip with Textured Fringe
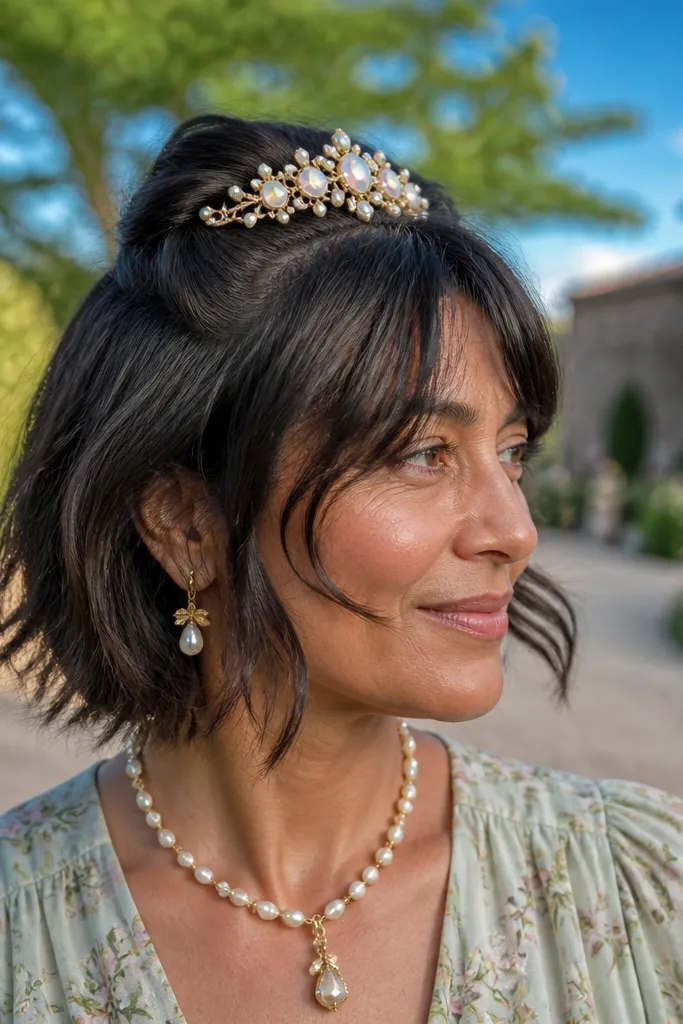
When hair is very short, “half-up” still works if the top section is lifted and pinned into a crown shape. This looks romantic because the fringe stays soft while the lifted crown reads polished. A jeweled or pearl crown clip adds bridal sparkle without needing length for a full updo. It’s ideal for weddings with a lot of movement in photos, like candid portraits, because the clip holds the top in place. It also suits beach-to-garden settings because the texture stays airy.
Start by blow-drying the fringe so it falls naturally across your forehead, then add a texturizing spray to the mid-lengths. Lift the top section from behind your ears and gather it toward the crown, keeping the sides smooth. Snap in a crown clip centered above your part, then lightly adjust the fringe so it frames your cheekbones. Finish with a tiny spritz near the fringe to stop flyaways.
Choose a clip with prongs or a strong hinge so it grips short hair without slipping.
Skip a flat, wet-looking finish — it kills the soft, bridal texture.
4. Wet-Look Side Part with Pearl Bobby Pins
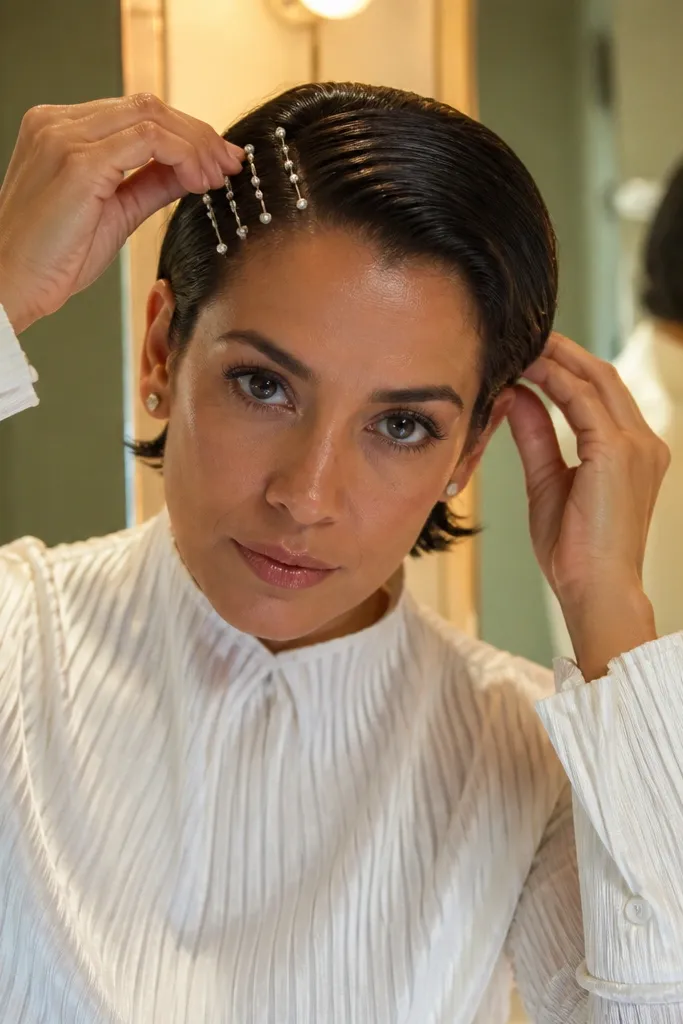
Start on dry hair with a smoothing gel — press it in with your palms along the hairline and part. Create a deep side part using a rat-tail comb, then brush the front section flat toward the temple. Place two pearl bobby pins along the temple line — one slightly above, one slightly below — to hold the front and add decoration. Finish with a shine spray mist only on the top surface so it doesn’t soak the roots.
A wet-look part is one of the most photogenic options for short hair because it creates a clean line that the camera reads instantly. The gloss makes the hairline look intentional, and the deep side part gives you instant drama. Pearl bobby pins add bridal detail without needing a veil comb or long hair. This is a strong pick for indoor receptions and evening photos where flash will hit the shine. It’s also perfect if you want a sleek look that still feels bridal and not too “going out.”
Skip thisDon’t set this with heavy powder or dry shampoo — it dulls the wet finish.
Quick tipUse gel sparingly at the roots so you don’t get greasy-looking separation in flash.
5. Twisted Crown Braids on Short Hair
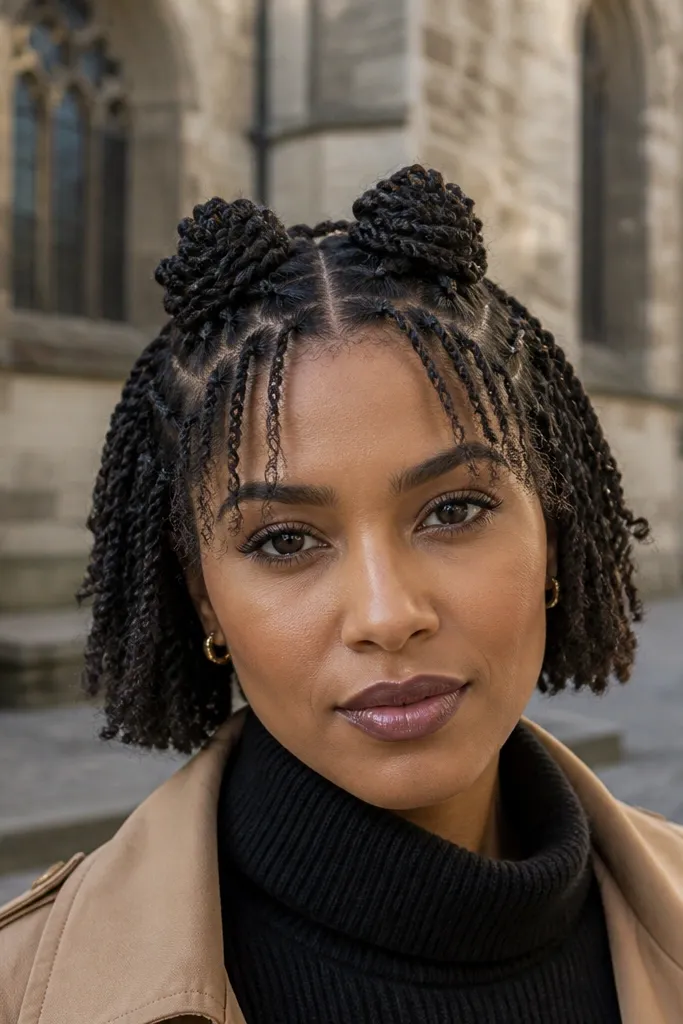
Start by applying a light leave-in conditioner and a small amount of foam to help short strands grip. Separate two sections from the top near each temple and twist them backward toward the crown, adding a little hair from the outer edge as you go. Pin each twist at the crown with one matte bobby pin, then add a final pin to cross-lock the ends so they don’t pop out. Mist lightly to keep the twists defined.
This is the short-hair version of a crown braid: two small twisted sections that look braided but require less length. The crown placement makes your face look lifted, and the twists add texture you can see clearly in photos. It works best for bobs and chin-length cuts, especially when you have a bit of fringe to soften the forehead. Because it’s pinned, it stays put through dancing and wind. It’s a good fit for spring and outdoor ceremonies where you want something pretty but secure.
Quick tipIf your ends are too short to reach, tuck them under the twist and pin directly at the scalp.
6. Finger-Waved Pixie with a Soft Side Pin
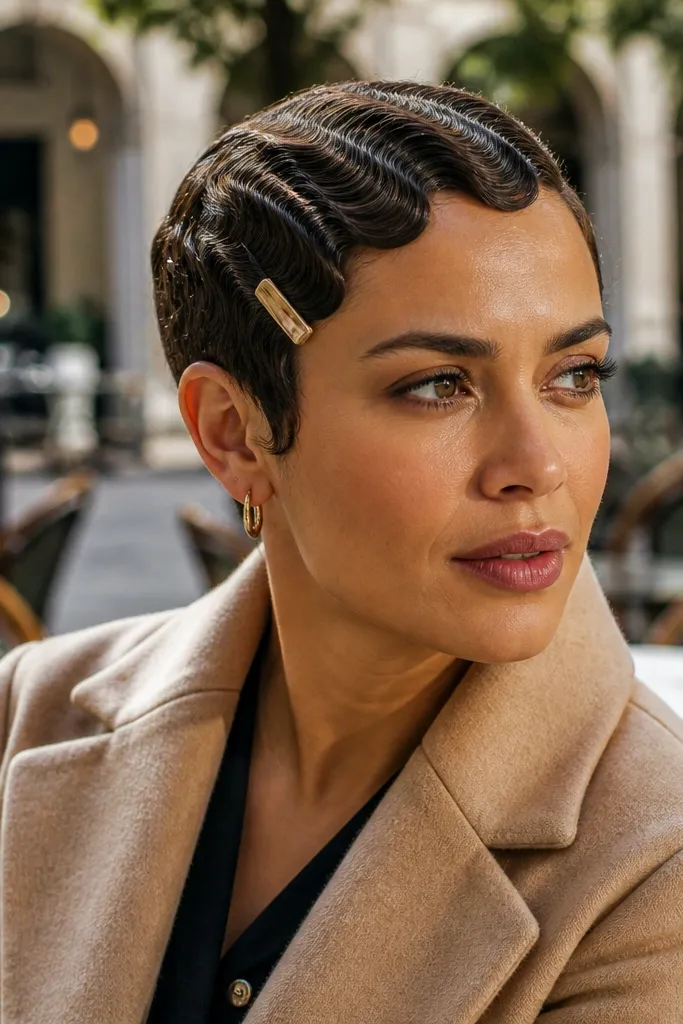
Start with damp hair and apply curl cream to the front and top, then comb in a slight side part. Create wave sections by pressing your fingers into the hair and shaping the curve, then set each wave with a clip for a few minutes. Remove clips, smooth the outer edge lightly, and pin one side wave near the ear to lock the shape. Finish with a strong-hold hairspray that you spray from 10-12 inches away.
Finger waves look bridal because they create pattern. Even on a pixie, you can build wave lines that catch light and read clearly in close-ups. The soft side pin keeps one wave section from unraveling, so the style stays sharp from ceremony to photos. This works especially well when your hair naturally holds a bend or when you can use curl cream plus a strong hold spray. It’s a great choice for vintage-themed weddings and for people who want a style that looks styled, not just tucked.
Skip thisSkip brushing out the waves — it turns them into frizz.
Quick tipLet the waves cool before removing clips so they hold their shape.
7. High-Gloss Crown with Low Volume
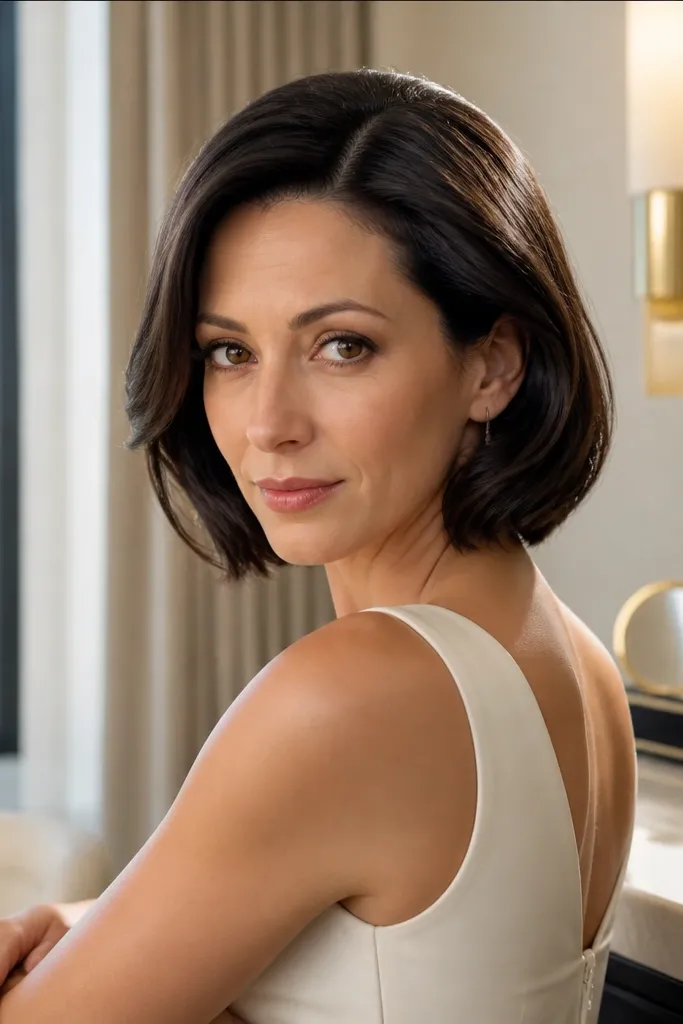
Start with dry hair and apply a smoothing cream only to the top and sides, avoiding the roots if you want a little lift. Comb your part line sharply using a fine-tooth comb. Use a boar bristle brush or smoothing brush to polish the crown in one direction, then tap down flyaways with gel on your fingertips. Finish with a light shine spray on the top surface.
This is a sleek bridal look that doesn’t need extra length. The crown is glossy and controlled, while the sides keep a soft volume that flatters your cheeks. It’s especially flattering for short hair that tends to puff up — you tame it with polish at the hairline and keep the top smooth. The result looks expensive on camera because it reduces visual chaos. Choose this when you want a minimal, modern bridal vibe without losing femininity.
Skip thisDon’t over-volumize the crown — the glossy look needs a controlled base.
Quick tipBring a mini smoothing brush and a travel gel stick for touch-ups between photos.
8. Rose-Clip Placement on a Short Bob
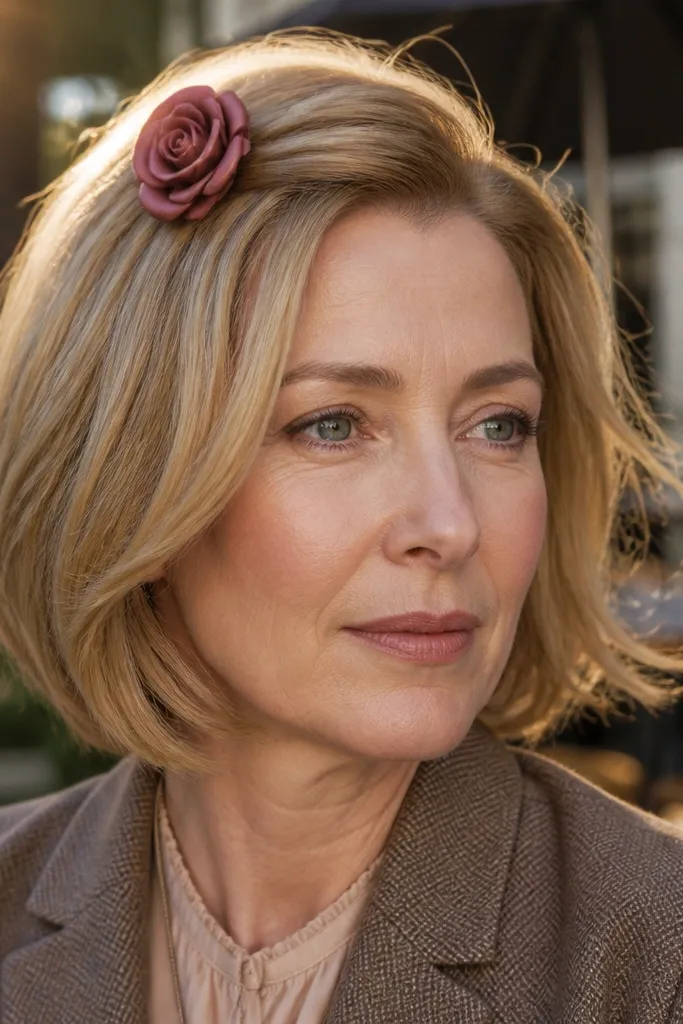
Start by creating a gentle side part and blow-dry the hair with a round brush to keep the ends slightly curved. Curl only the front and side sections with a small barrel, then finger-comb to loosen. Place the rose clip at the side where your hair naturally separates, tucking a few strands behind it. Secure with one hidden bobby pin and finish with a flexible hairspray.
For short hair, the fastest way to make it feel bridal is a statement clip placed exactly right. This style uses a rose-shaped clip tucked slightly off-center so it looks like a designed accessory, not an afterthought. Pair it with soft waves at the ends so the clip sits against texture and doesn’t look stuck on. The waves should be loose enough to move but controlled enough to keep their shape in photos. It’s a strong choice for daytime ceremonies and garden weddings.
Skip thisSkip placing it dead center on a bob — it can look like a sticker instead of a focal point.
Quick tipChoose a clip with a wide base so it grips short layers.
9. Mini Bantu Knots on Short Hair
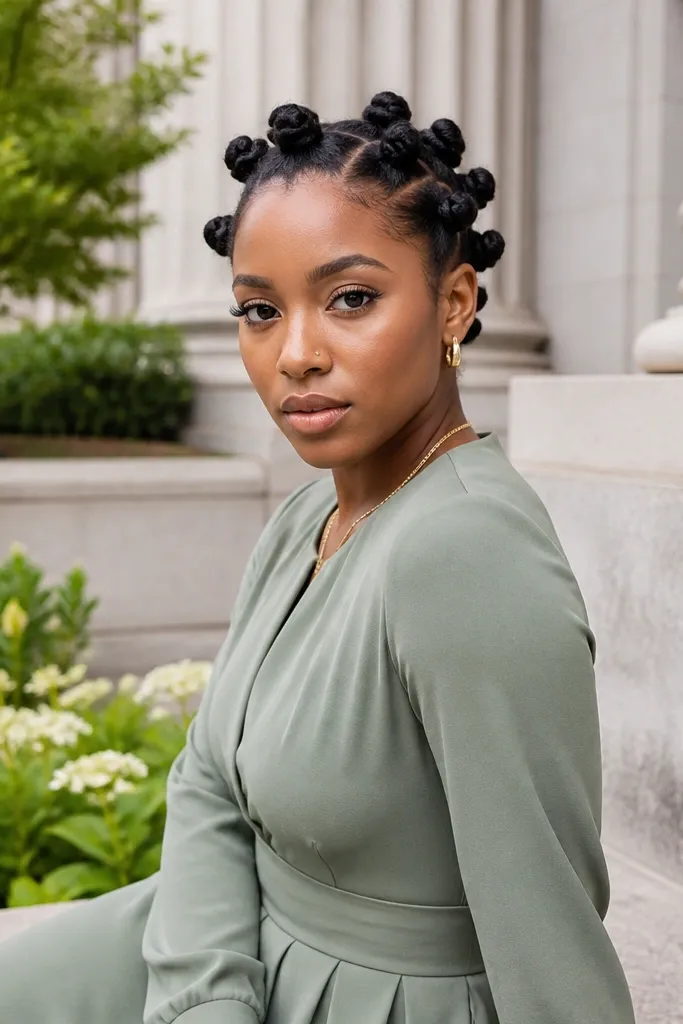
Mini bantu knots look bridal because they create sculptural texture, and short hair actually helps — the knots stay compact and defined. The style photographs well because each knot has visible shape, and the part line gives you structure. It’s a great option if you have natural texture and want something festive without a ton of heat. After the ceremony, you can loosen the knots for a textured wave look. This works for summer weddings too because it keeps hair off your neck.
Start with freshly washed or damp hair and apply a curl cream or twisting gel for slip. Section hair into 2-4 small squares and twist each section into a tight coil, then wrap the tail around to form the knot. Secure with a small elastic or bobby pin, then let it set until fully dry. Untie gently and separate with fingers, then finish with a light mist to reduce frizz.
Plan knots the day you want maximum definition — they look best when hair is fully dry before untying.
Don’t comb after you untie — it turns the pattern into fuzz.
10. Sleek Low Knot Twist with Face-Framing Strands
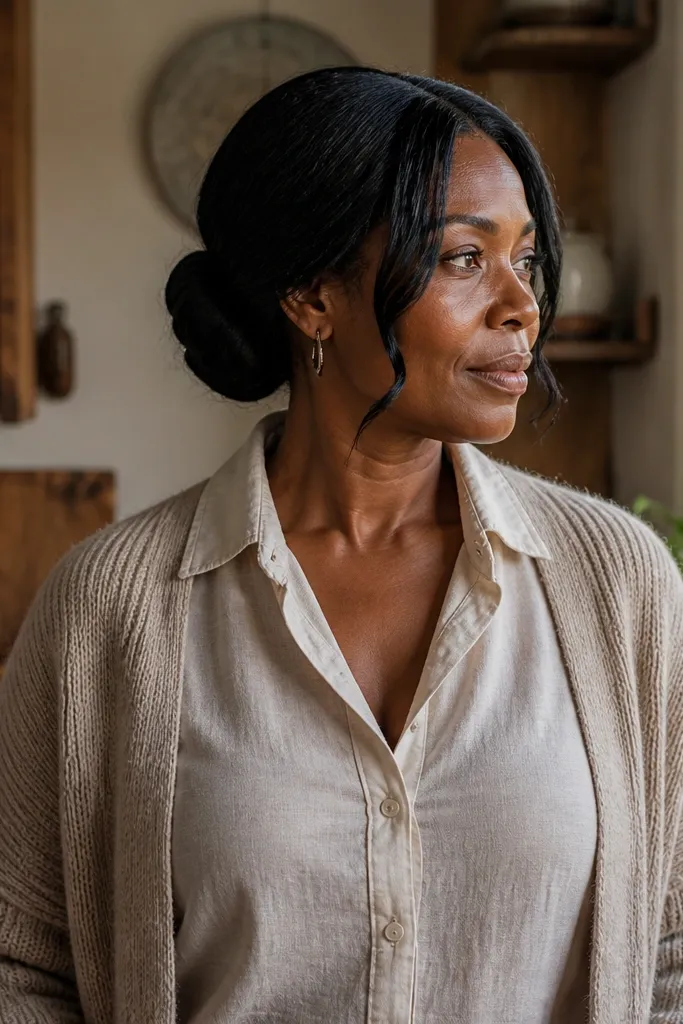
Start by smoothing the back with a lightweight gel so the twist looks tight. Gather the hair at the nape and twist downward into a compact knot, then pin in layers — one pin at the top edge and one at the bottom edge. Leave two small sections at the front out to curl or wave. Curl them with a small iron, then blend the ends so they look intentional rather than like separate pieces. Mist lightly to keep the knot secure.
A low twist knot makes short hair feel formal without needing a full bun. The face-framing strands soften the look and keep it romantic, which is important because the knot itself can read strict. This is a good option for people with a slightly longer front or layers that can be left out around the cheeks. It also photographs beautifully from the front and the side because you see both the clean twist and the soft pieces. Great for fall weddings and evening receptions.
Skip thisSkip leaving the front sections too thick — they can overpower the knot.
Quick tipUse two bobby pins in an X shape at the knot center for the most reliable hold on short hair.
11. Tucked-Behind-Ear Wave and Ribbon
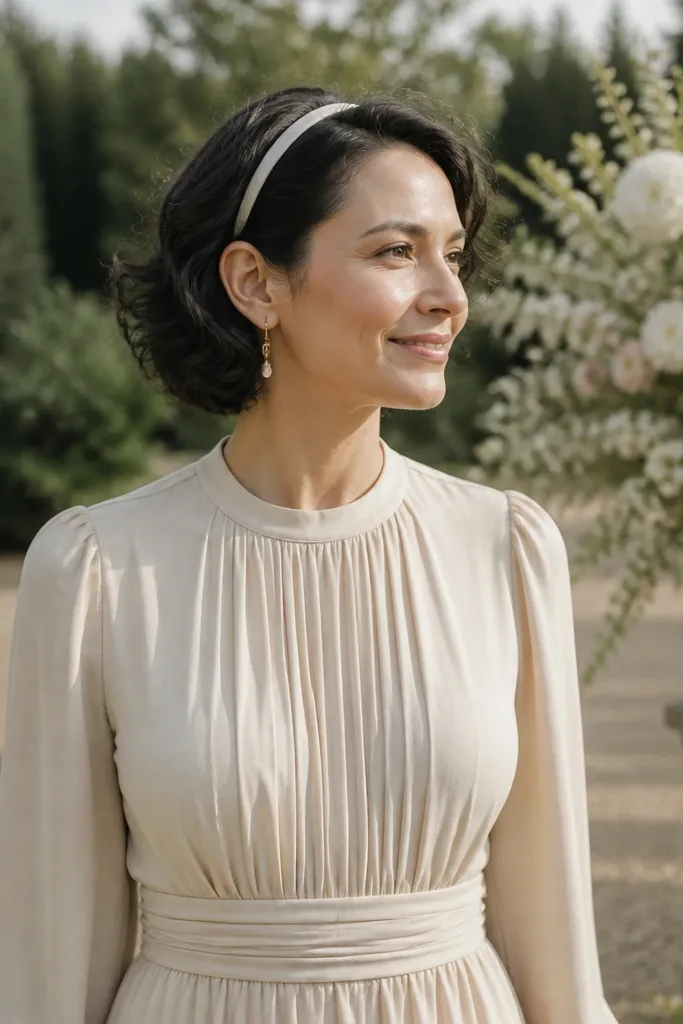
Start by creating a side part and curling just the front and one side with a small barrel. Finger-comb the wave so it looks soft, then tuck the wave behind your ear. Place a thin ribbon headband so it sits slightly above the eyebrows, not on your hairline. Secure the ribbon ends with hidden pins, then smooth any flyaways with a touch of gel at the hairline.
A thin ribbon headband and a tucked-behind-ear wave is one of the easiest ways to make short hair look wedding-ready. The ribbon adds color and softness without requiring extra length for a headpiece comb. The tucked wave keeps your face open and makes the whole look feel airy. This works best if your hair is short enough to stay in place behind the ear but long enough for a visible wave. It’s a sweet choice for spring weddings and outdoor photos.
Quick tipPick ribbon width around 1 cm — wider ribbons can overpower short hair.
12. Micro-Bouffant Crown with Soft Flip
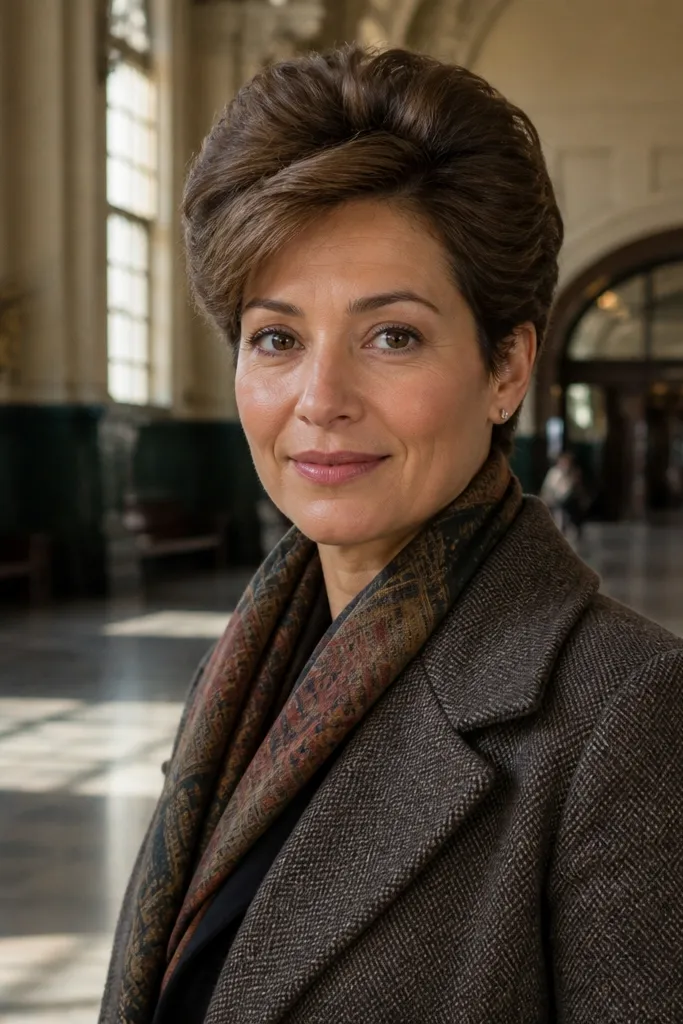
This hairstyle gives you height without turning short hair into a helmet. A micro-bouffant at the crown creates a bridal silhouette in photos because it adds vertical shape around your face. The front soft flip keeps it playful and feminine, which balances the lift at the top. Use this if your hair is naturally flat or fine, because the crown lift will make everything look more intentional. It’s a strong option for portraits and indoor lighting where volume shows.
Start with root-lifting mousse and blow-dry the crown upward. Tease lightly at the crown only — one or two short back-comb strokes — then smooth the top layer so it looks polished. Create a small soft flip at the front by curling only the last inch of the fringe and directing it slightly upward. Set with hairspray and pin any flyaway at the crown.
Keep teasing minimal; the top layer should stay smooth for a bridal finish.
Skip heavy hairspray before you tease — it makes the hair clump.
13. Half-Up Twist with a Small Gem Barrette
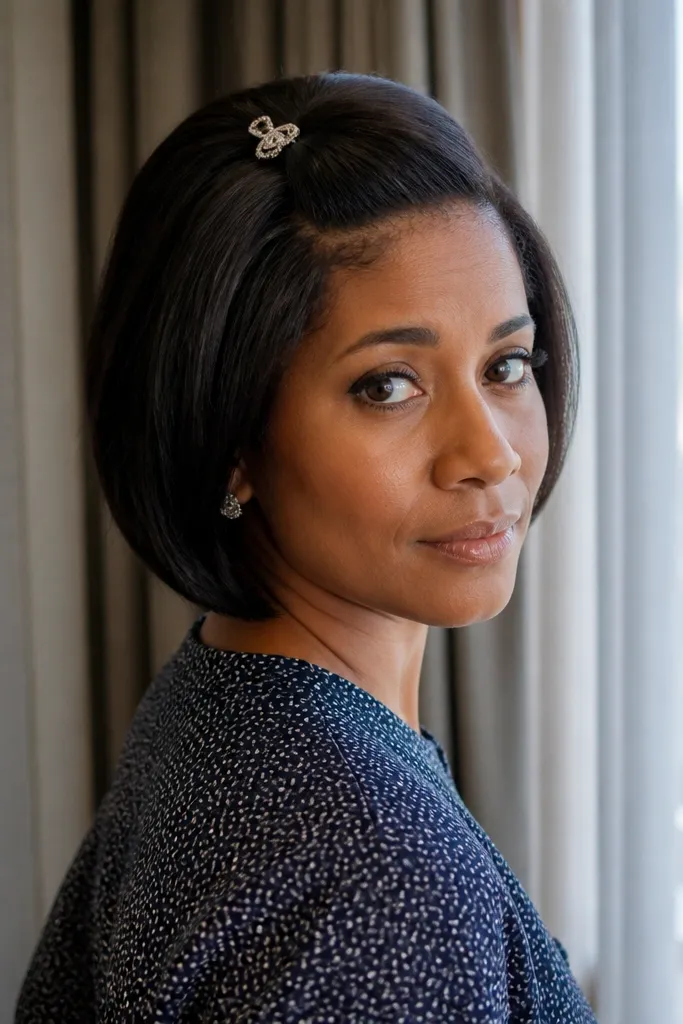
Start by parting your hair and applying a small amount of styling cream to the sides for smoothness. Twist a small section from each side toward the back of the crown, then pin them together. Slide a small gem barrette over the pinned area to cover the hardware. Adjust the twist so it creates a gentle lift, then mist lightly to hold without stiffness.
This looks like you spent more time than you did, because the twist creates structure and the gem barrette adds sparkle. It’s perfect for very short hair where a full half-up section would fall flat. The twist should sit near the crown, not high on the top of the head, so it looks natural and secure. It’s also comfortable for long wedding days since it doesn’t pull at the scalp like tight pins can. Great for people who want something glam but still light and wearable.
Skip thisAvoid placing the barrette too low — it can look like a random clip.
Quick tipChoose a barrette that’s wide enough to hide pins but not so heavy it slides on short layers.
14. Feathered Pixie with a Wet-Texture Top
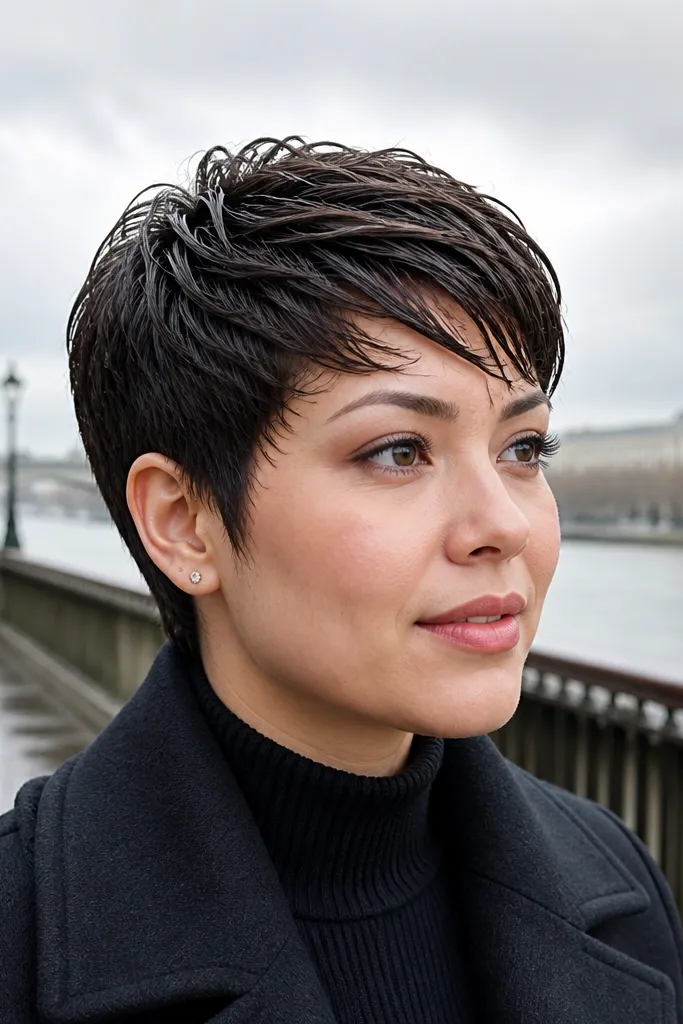
Feathered pixies look bridal when the top has controlled texture, not frizz. This style uses a wet-texture product so the feathered sections catch light and look sculpted. It’s ideal for pixies with layered texture where you’d normally struggle with flyaways. The look is dramatic in a good way because the hair reads like designed pieces rather than random strands. Choose this for winter and early spring because the sheen looks warm and photogenic in low sun.
Start by dampening the top slightly with a spray bottle. Apply a texture gel or styling paste and work it into the feathered sections using your fingertips. Shape the top with a comb, then let it set for a minute before you touch it again. Finish with a flexible hairspray so the texture stays defined without crunching.
Use your fingertips, not a brush, once the texture product is in — brushing breaks the pattern.
Skip matte-only products — they make feathered pixies look dusty on camera.
15. Braided Headband with Loose Short Ends
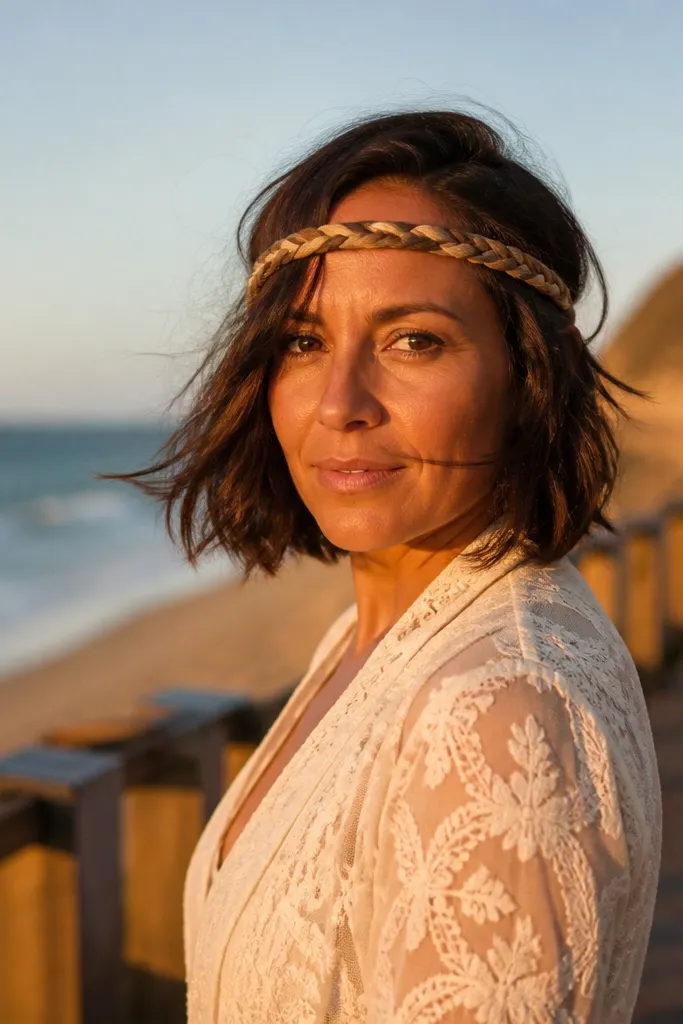
Start with a light styling cream to help sections braid cleanly. Create a braid across the top like a headband — take small sections from one side and braid toward the other, keeping tension gentle. Secure with a small elastic at the end, then tuck the elastic under the remaining hair and pin. Leave two or three tiny ends loose near the temple for soft movement. Mist lightly at the braid so it stays put.
A braided headband makes short hair feel romantic fast, because it frames your forehead like a crown. The “loose ends” part matters: leaving a few short ends soft keeps it from looking too tight or costume-like. This is a great choice for bobs and short layers because you can braid a top section and let the rest fall naturally. It photographs well in daylight because the braid texture shows clearly. It’s also a smart option for windy outdoor ceremonies since the braid anchors the front.
Skip thisDon’t pull the braid too tight — short hair will kink and look lumpy.
Quick tipIf your hair is too short to braid fully, braid smaller sections and pin the braid ends to the scalp.
16. Sleek Pin-Curl Ringlets at the Front
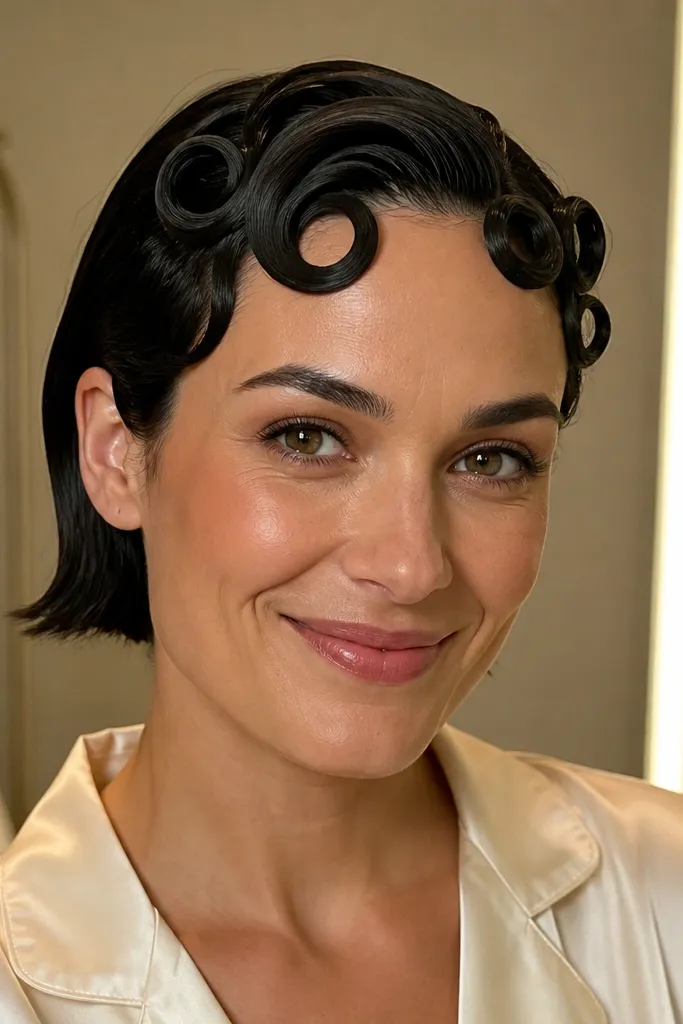
Pin-curl ringlets are a clean way to add wedding-level detail without needing long hair. This style focuses on the front so you get visible curl shape in close-ups, while the sides stay sleek. It’s flattering for short bobs and lobs that have a bit of length around the face. The ringlets look especially good with a veil or a small headpiece because they sit neatly where accessories are placed. Choose this for classic, formal weddings or anyone who wants a retro touch.
Start with damp hair and apply setting lotion to the front sections only. Roll small sections into pin curls using your fingers, then place bobby pins horizontally to hold each curl against the scalp. Let it dry fully, then remove pins and gently separate the curls with your fingers. Smooth the sides with a touch of gel so the curls stay the focal point. Finish with hairspray aimed at the front only.
Set pin curls fully dry for springy ringlets that don’t fall flat by dinner.
Skip separating too much — tiny ringlets should stay defined.
17. Center-Part Sleek Bob with a Hidden Comb
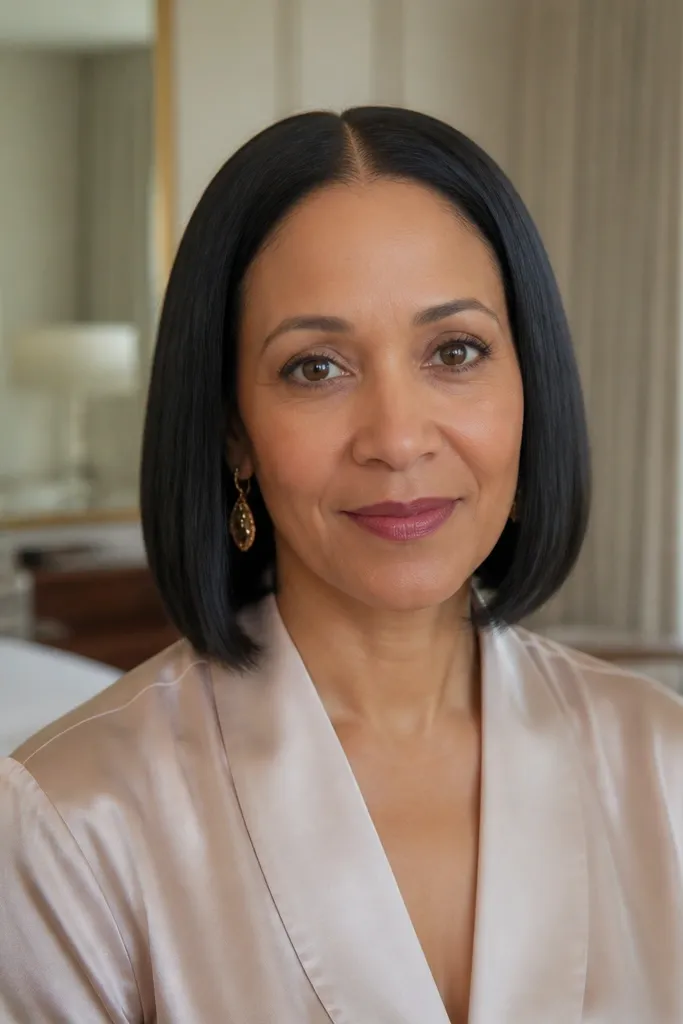
Start by blow-drying the hair straight with a concentrator nozzle, then comb the center part sharply. Apply a shine serum to the ends and a small amount of smoothing gel along the part line. Slide a thin, discreet hair comb under the top layer near the crown and secure it with two bobby pins. Check the part line in a mirror — it should stay flat — then mist lightly to set.
A center-part sleek bob is one of the most flattering bridal looks for short hair because it makes your face look symmetrical and calm. The hidden comb trick is what turns it into a hairstyle, not just a blowout. It anchors the top so the part line stays crisp through photos and wind. This works best for bobs that are at least chin-length or have enough weight to stay smooth. It’s a great option for minimalist brides and for ceremonies with clean, modern styling.
Skip thisDon’t use too much conditioner or oil — it can make the part look greasy.
Quick tipBring an extra comb and bobby pins so you can re-secure quickly if it shifts.
18. Side-Swept Pixie with a Tuck-and-Go Clip
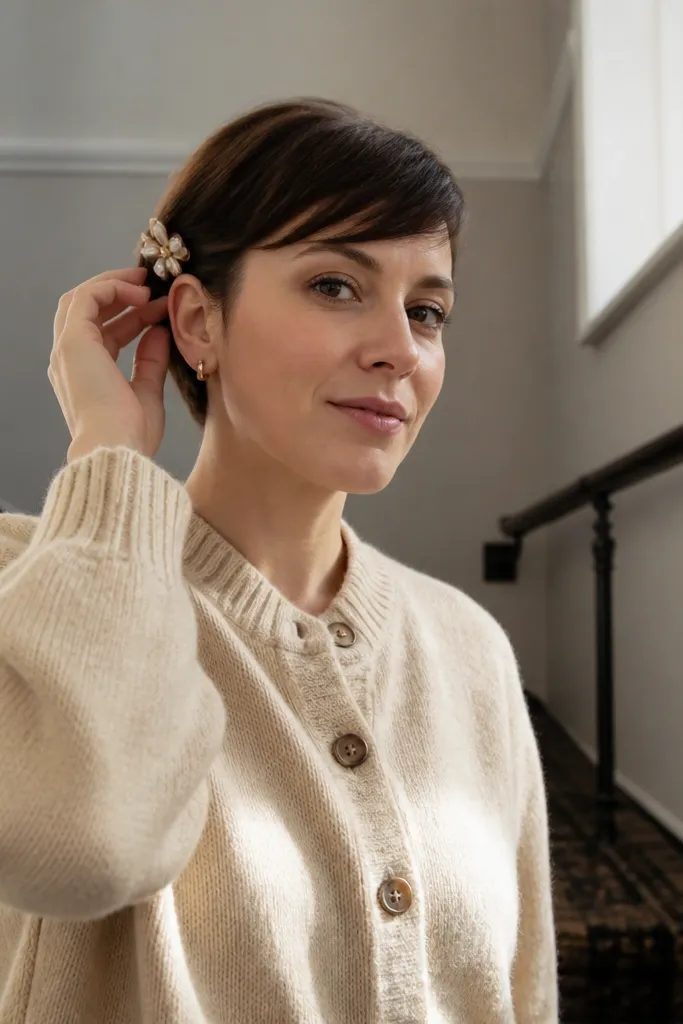
Start on dry hair with a light styling cream and comb the front into a deep side sweep. Tuck the shortest ends behind your ear and hold them with your fingers. Slide a small decorative clip over the tuck so it covers the hardware area. Smooth any flyaways with a tiny amount of gel on fingertips, then set with a quick hairspray mist.
This is a low-effort bridal look for short hair that still reads styled. You sweep the front to one side, tuck the end behind the ear, then secure with a decorative clip. The clip adds the bridal note while doing the actual job of holding the tuck. It’s best for pixies and very short bobs where pins alone can feel fussy. The style also works well for warm weather because it keeps hair off your neck and looks clean in humidity.
Skip thisSkip a flimsy hairpin — you want the clip to hold the tuck, not just decorate it.
Quick tipChoose a clip with a hinge or clamp — spring clips pop loose on very short layers.
19. Messy-Soft Curl Cluster with One Anchor Pin
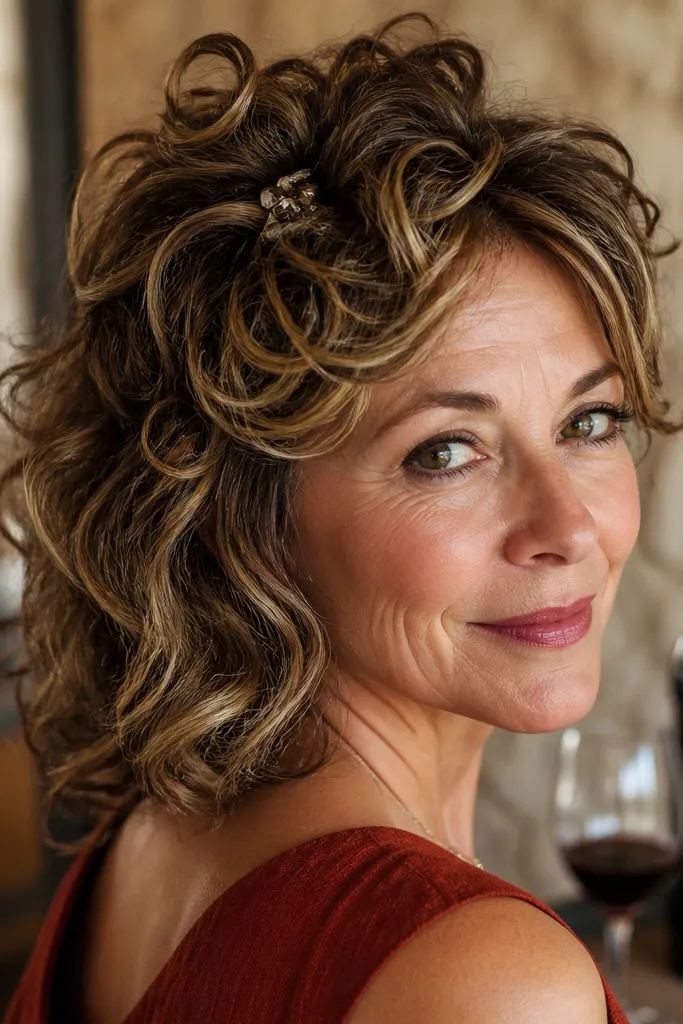
This hairstyle is intentionally soft, but it still looks bridal because you control where the “mess” sits. You create a curl cluster at the crown or one side, then anchor it with one visible pin or small accessory. The rest of the hair stays loose, so it moves naturally in photos. It’s a great pick if you hate tight hairstyles and want something romantic rather than strict. Works well for spring and summer weddings because the curls look airy and not heavy.
Start by curling small sections with a small barrel, then loosen them with your fingers for a soft shape. Gather curls at the crown or upper side and press them together lightly. Insert one bobby pin or a decorative pin at the center of the cluster to anchor it. Finish with a light mist and avoid brushing — brushing breaks the cluster shape.
If your curls fall fast, use a curl spray before styling and set with a final mist from a distance.
Don’t anchor with multiple pins — it stops looking “soft” and starts looking stressed.
20. Satin Bow Headband with Sleek Front
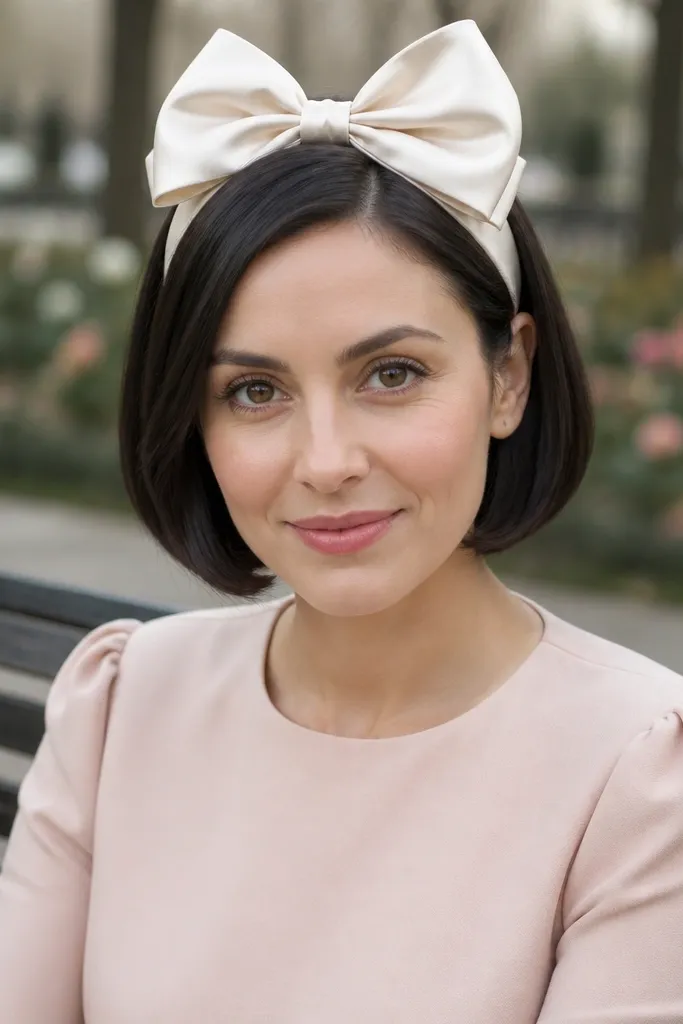
Start by smoothing the front with a gel or smoothing cream so there’s no fluff at the hairline. Place the satin bow headband so it sits just above your eyebrows, not on your forehead crease. Tuck the sides slightly behind the headband if your hair is short enough, then pin any stubborn strands under the band. Finish with a tiny hairspray mist around the front to keep everything crisp.
A satin bow headband is one of the most photogenic bridal accessories for short hair because it creates instant height and cuteness without needing length. The trick is pairing it with a sleek front so the bow looks intentional, not random. The bow sits high enough to be seen in portraits, and the satin catches light beautifully on camera. This looks great with strapless dresses or anything off the shoulder because it frames the upper face. It’s best for spring and summer ceremonies where you want a light, sweet vibe.
Skip thisSkip a bow that’s too large — big bows can swallow very short hair proportions.
Quick tipMatch the bow color to your dress undertone — warm ivory with warm ivory, cool white with cool white.



