
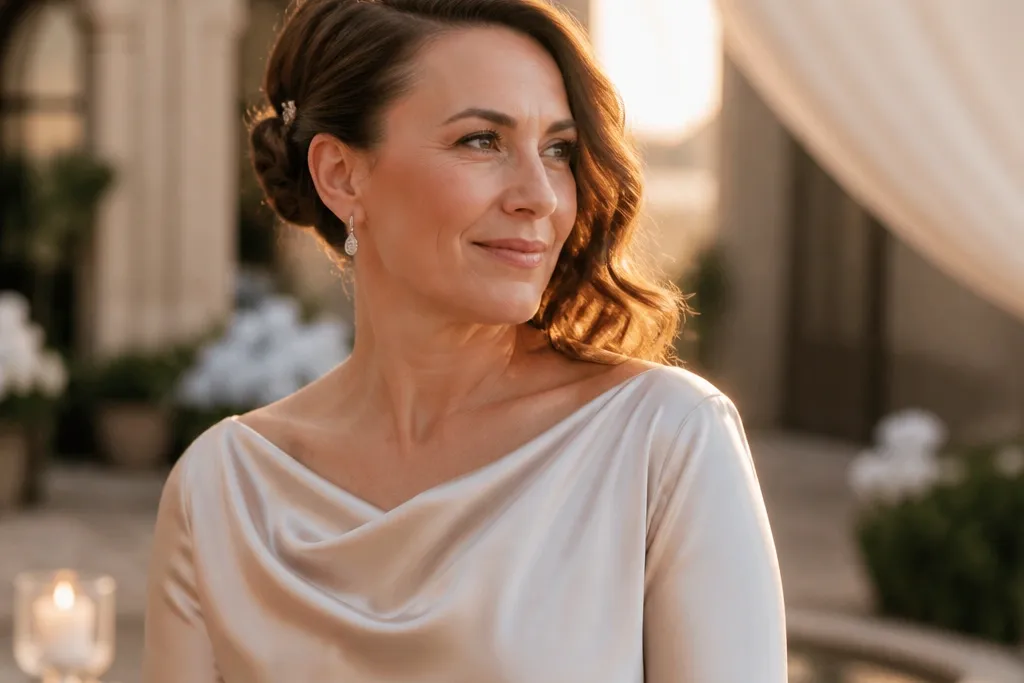
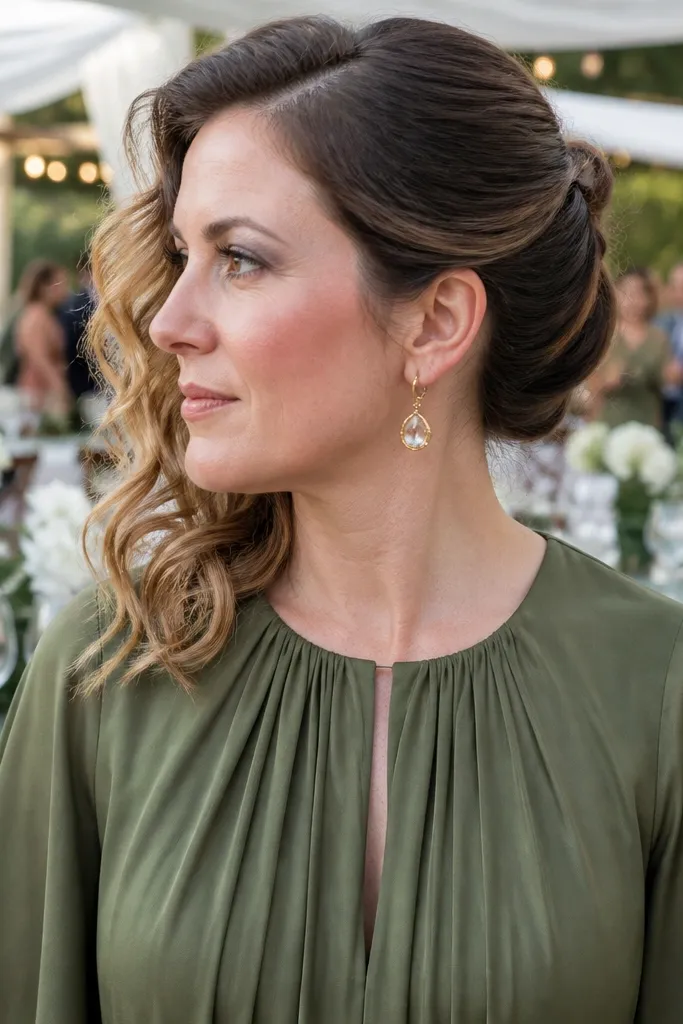
1. Pinned Bob Updo with a Tight Side Twist
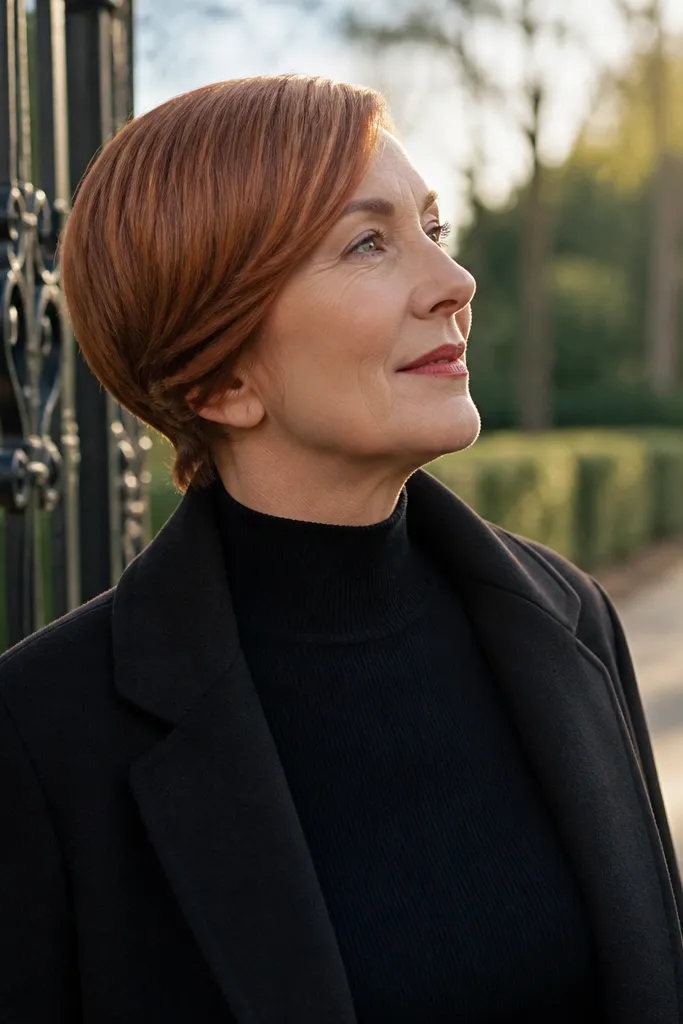
If your bob hits your jaw and keeps slipping forward, a tight side twist gives you control without needing extra length. This style looks intentional because the twist creates a clear diagonal line that frames the face. It also holds up well for outdoor venues where wind turns loose hair into a problem. Choose this when you want “mother of the bride polished” without a big bun that can feel too heavy on short hair.
Quick tipUse pins that match your hair color and keep them in your clutch for quick fixes after photos.
Start by parting slightly off-center, then mist the roots with a light holding spray and brush smooth. Twist the hair toward the ear, wrap it once, and pin along the twist using 6-8 bobby pins placed in a crisscross pattern. Finish with a small amount of shine serum on the outer layer so it doesn’t look dry under flash.
Skip thisDon’t leave the ends loose — short ends lift and show the “work” in pictures.
2. Low Tuck Chignon for a Bob (No-Drama Back)
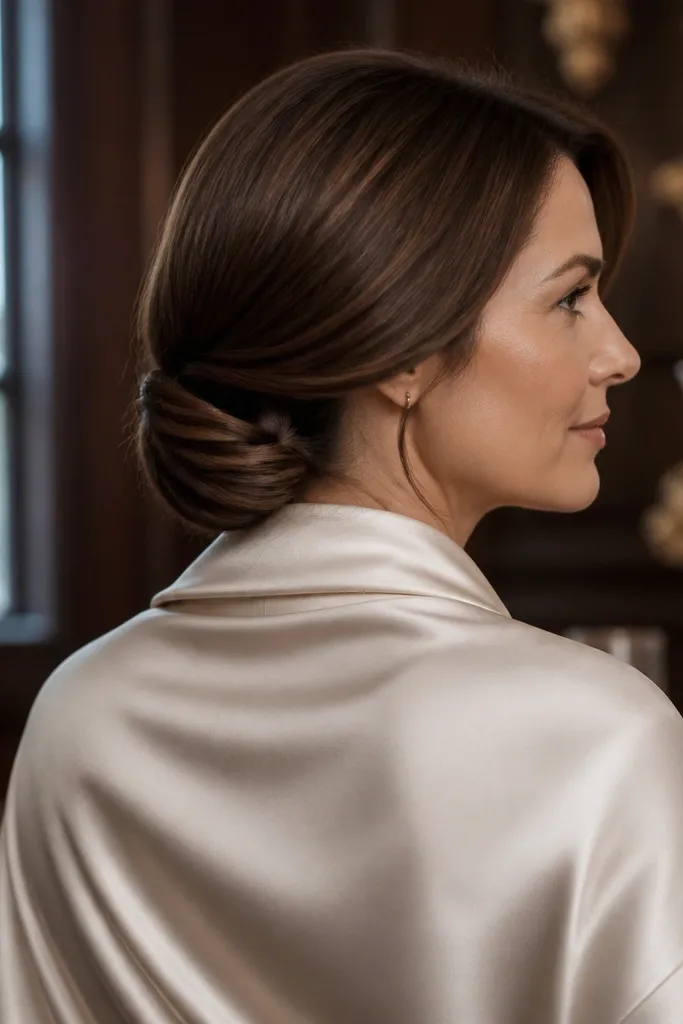
A low tuck chignon is the choice when you want an updo that feels grown-up and flattering, not bulky. With a short bob, the trick is tucking the ends under so the nape stays smooth and the back doesn’t look flat. This works beautifully with high necklines, off-the-shoulder dresses, and satin fabrics that show shape. It’s also a smart pick for church or indoor ceremonies where you’ll be seated for a while.
Quick tipIf your bob is short-short, use a mini hair donut only at the nape and hide it with the outer layer.
Start with a damp-to-dry blowout and add a root lift at the crown for shape. Tuck the hair into a low roll at the nape, then secure with 8-10 pins angled upward into the roll. Spray lightly, then smooth the outer layer so the tuck looks like it’s grown from your bob.
Skip thisAvoid placing the tuck too high — it can make your head look top-heavy.
3. Half-Up Crown Pin with Soft Bob Ends
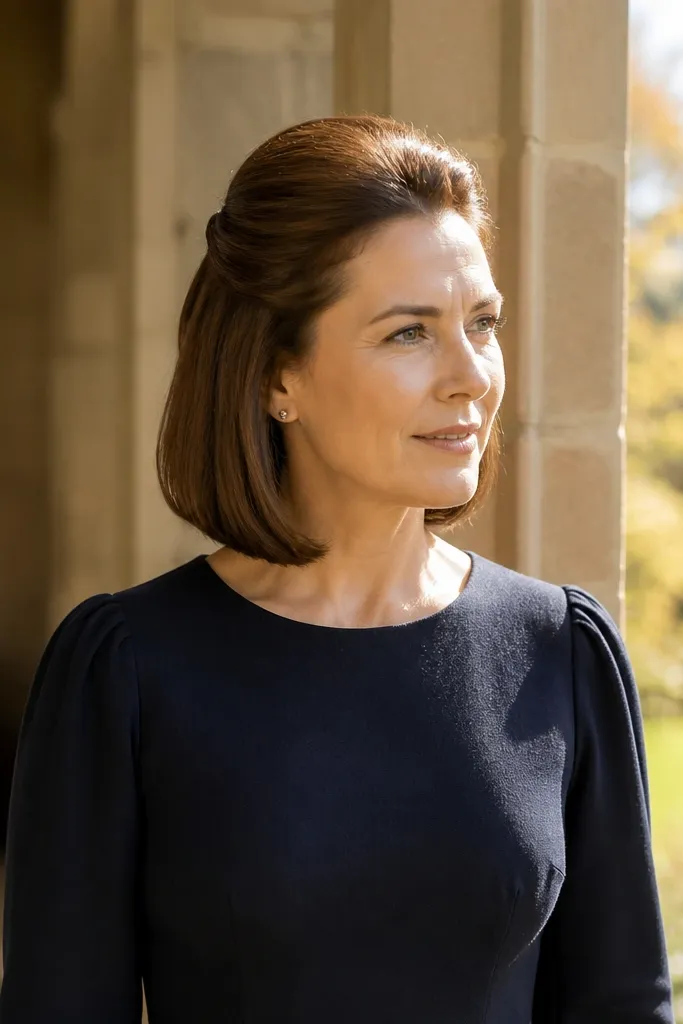
This is the “best of both” style when you want updo structure but don’t want to fight every strand. The pinned crown keeps your face open for photos, and the remaining bob keeps movement so it doesn’t look severe. It’s also forgiving if your hair is between lengths — the pinned section hides awkward cut lines. Pick this for daytime wedding events, garden receptions, or when you’re wearing statement earrings.
Create a clean side part, then lift a section from temple to temple. Back-comb lightly at the roots for grip, smooth the top, and pin the section in place at the crown. Leave the rest sleek or softly waved, then mist once around the pinned area so it stays put without looking crunchy.
Press your pins in at a slight angle toward the scalp; that’s what prevents sliding.
Don’t pin too low on the forehead — it crowds your face and makes the bob look shorter.
4. Classic French Twist for a Short Bob
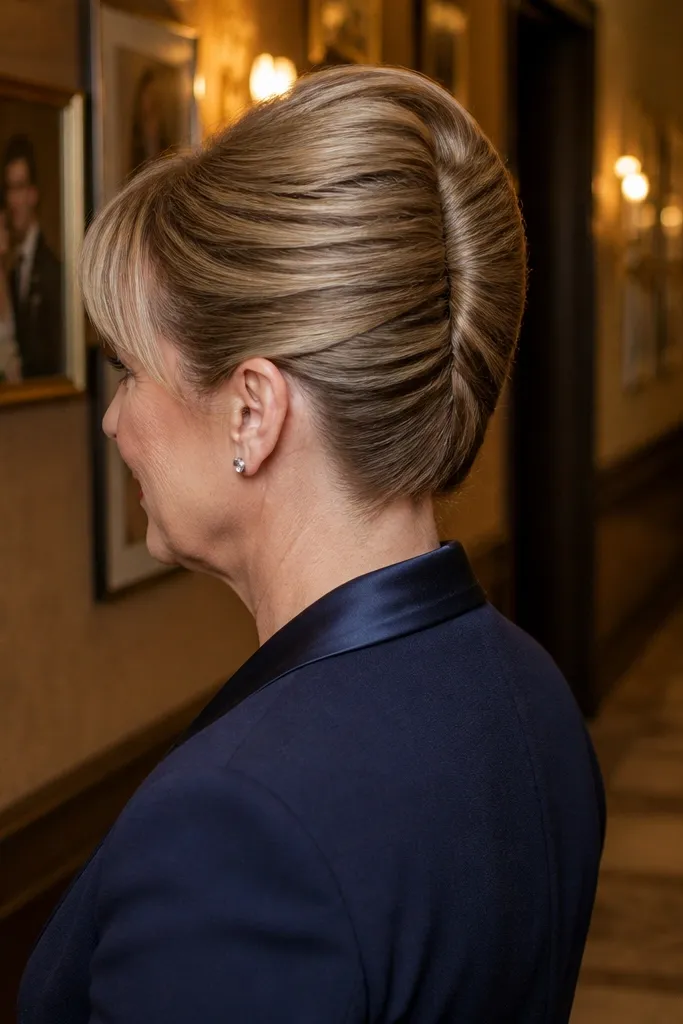
A French twist reads instantly formal, even on short hair, because the top stays smooth and the twist line is clear. It’s also a great match for structured dresses and formal fabrics that need a clean silhouette. This style gives you a polished back view without the “trying to make a bun” look. Choose it when you want your hair to look finished from every angle during speeches and dinner photos.
Quick tipIf your sides are short, keep the outer layer smooth and pin it flat before you twist.
Start with dry hair and a little textured powder at the roots so it grips. Gather the hair at the back, twist inward, and tuck the ends under as you go. Secure with pins in layers — first around the twist base, then a final pass across the top — and finish with a light hold spray.
Skip thisSkipping root grip is the fastest way to get twist slippage.
5. Sleek Bob Bun Twist at the Nape
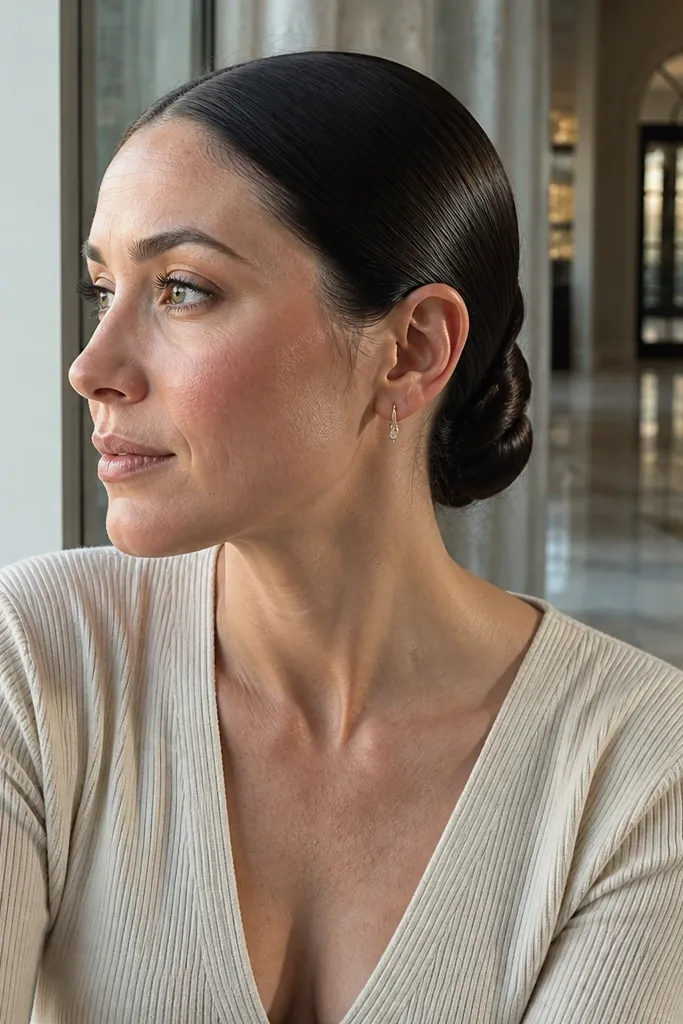
This is the modern cousin of an updo. It’s compact, neat, and great for short bobs that don’t have enough length for a traditional bun. The sleek finish catches light nicely and looks sharp in indoor lighting. If your hair gets frizzy, this style makes that problem disappear because you’re controlling the surface with a smoothing product.
Quick tipA flat, paddle brush is better than a comb for smoothing short hair without dents.
Brush hair straight back and apply a small amount of smoothing cream to the outer layer. Twist the hair into a compact roll at the nape and pin through the roll with 6-8 bobby pins. Spray lightly, then use a soft bristle brush to lay down any flyaways.
Skip thisDon’t overdo gel — it can look shiny in a way that reads “helmet” in photos.
6. Soft Waves with a Deep Side Part
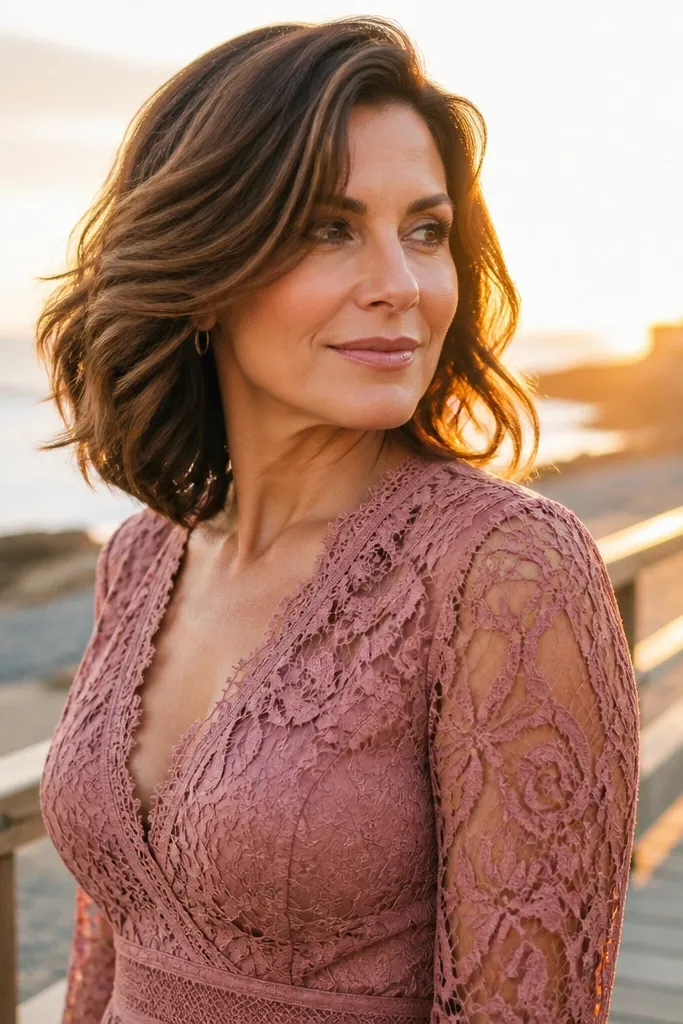
If you want your bob to look romantic but still tidy, soft waves are the sweet spot. The deep side part does the heavy lifting for face framing, and the waves add movement without making the hair look messy. This works especially well for medium-thick hair and for dresses with lace, chiffon, or flowy sleeves. It’s also a strong choice for evening receptions where you want hair to look good in motion.
Quick tipCurl the side closest to the part slightly tighter — it makes the face frame look intentional.
Part deeply, then section hair into two layers. Use a 3/4-inch curling iron and wrap alternating directions, stopping the curl around mid-length so ends stay smooth. Brush through gently with your fingers, then spray only the wave pattern area to keep it light.
Skip thisAvoid curling all the way to the ends; that can make short ends puff out.
7. Velvet Curls with Tuck-Behind Cheekbone Shape
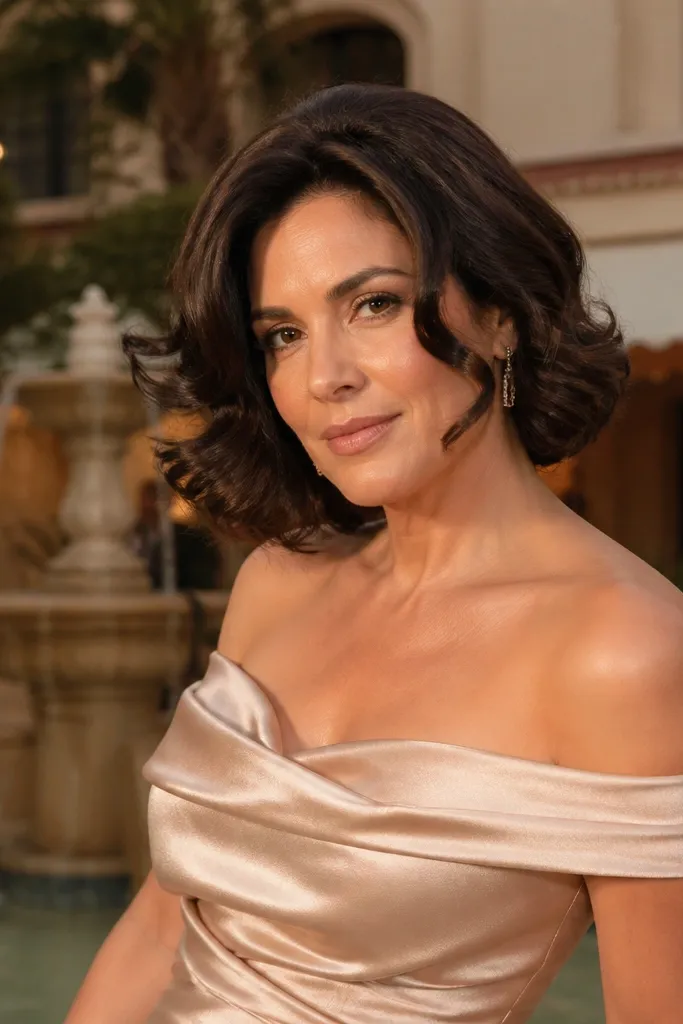
This look combines bounce with control. The curls give you that wedding-ready texture, but tucking a small section behind the cheekbone stops the hair from covering your face. It’s a smart option if your bob is layered and you get flyaway pieces around the jaw. Pick this for strapless or off-the-shoulder dresses where you want your neckline to stay visible.
Quick tipPin only one side tuck — it keeps the look balanced instead of symmetrical.
Create a side part and curl in 1-inch sections, alternating direction for natural shape. On the side you want to frame, tuck one small curl section behind the ear and pin it flat. Finish with a light mist so the curls hold their shape without turning crunchy.
Skip thisSkipping the cheekbone tuck lets curls swing into your photos and ruin the frame.
8. Pin-Curled Bob for Maximum Hold (No Droop)
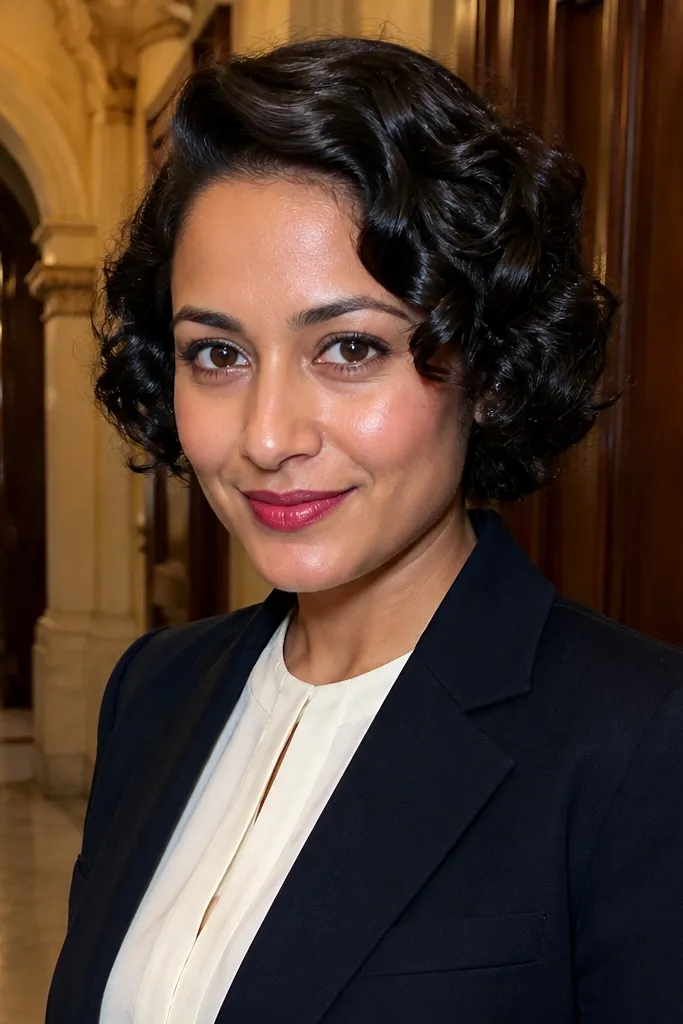
Pin-curls are for the days when you want curls that stay defined through ceremony, dinner, and the dance floor. Short hair can droop fast because there’s less length to support the curl, but pin-curling forces shape to set at the right angle. This style looks polished and camera-friendly, especially with flash. Choose it when your hair is fine, slippery, or you know humidity will hit.
Quick tipUse the smallest barrel you can handle — short hair needs tighter curls to look full.
Section hair and curl each piece with a smaller barrel, then roll each curl into a ring and pin it to the scalp. Let it cool fully — at least 15-20 minutes — then remove pins and separate curls with fingers. Spray lightly at the roots and mid-length only, so ends stay soft.
Skip thisDon’t brush pin-curls aggressively; it flattens the shape.
9. Classic Curl Flip at the Ends (Short Bob Edition)
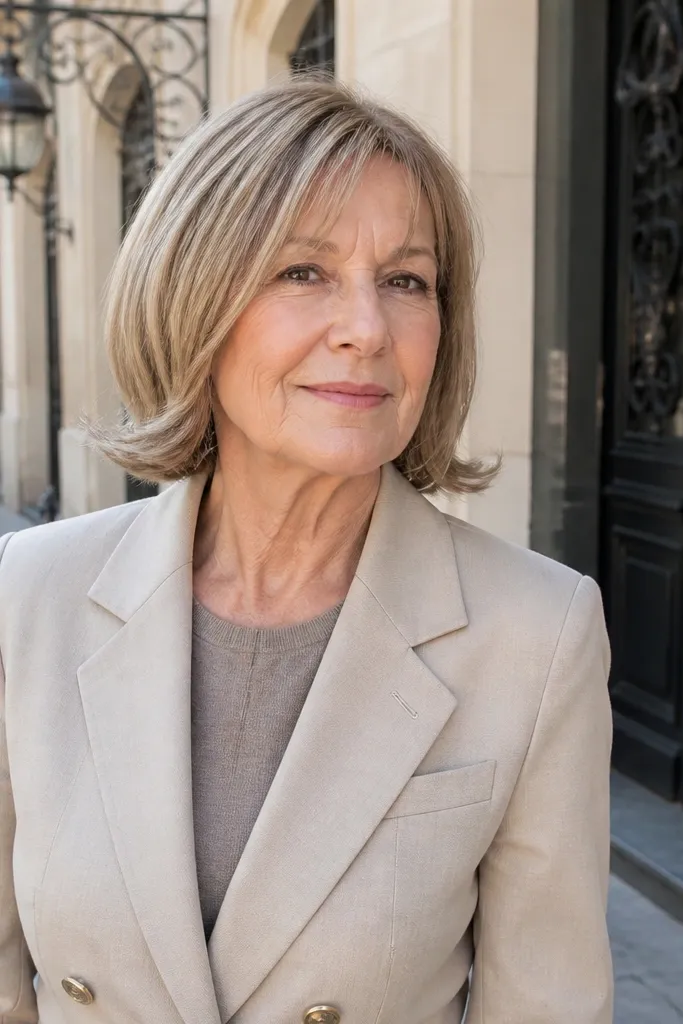
This is a clean, flattering option when you want curls without a full head of texture. The “flip” at the ends makes your bob look longer and more polished, and it pairs well with sleek dresses and structured blazers. It’s also great for older wedding guests because it looks neat and doesn’t require constant touch-ups. Pick this when you like your hair to look put-together more than bouncy.
Blow-dry smooth and apply a heat protectant. Curl only the last 1-2 inches at the ends, wrapping away from the face for the front pieces. Leave the top smooth, then set the ends with a quick mist and allow it to cool before you move.
If your ends pop out, switch to a smaller barrel for tighter flips.
Avoid curling the whole length — it can make a short bob look round and bulky.
10. Sculpted Curls with a Raised Crown Pin
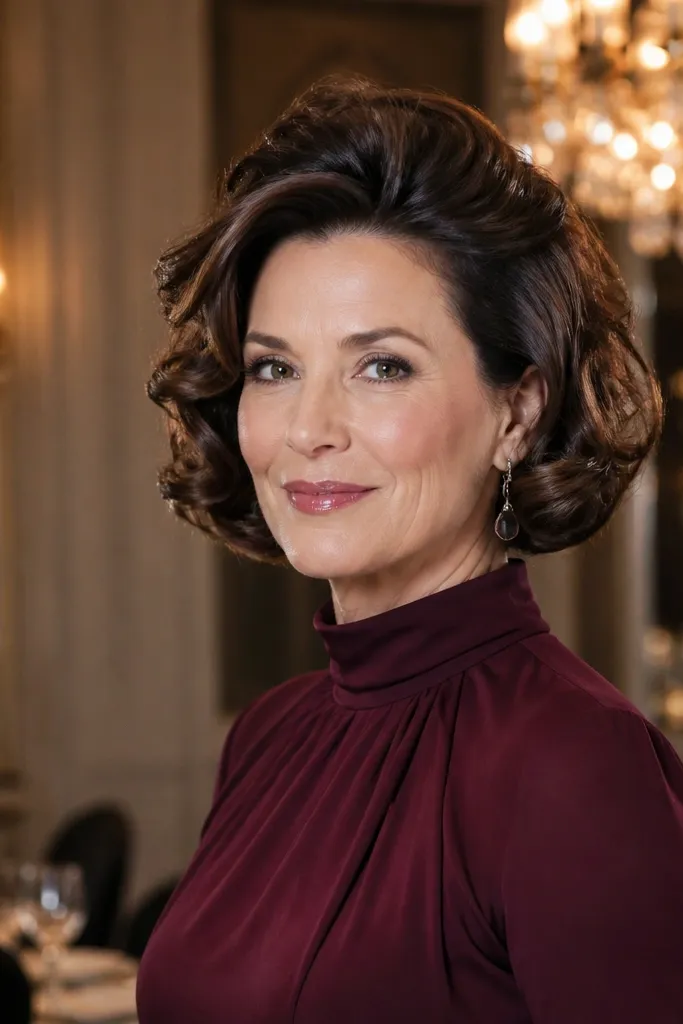
This style is for bobs that fall flat at the crown. By raising the crown slightly with a pinned lift, you get height that photographs well and balances your face. The curls then sit on top of that lift, so they look fuller instead of compressed. It’s a strong match if you’re wearing a dress with a high neckline or if you want more volume without a helmet of hair.
Create a crown lift by back-combing a small section at the top and pinning it in place. Curl the rest in 3/4-inch sections, keeping the front slightly larger for face framing. Finish with a light spray focused on the crown and front curls only.
Pin the crown lift first, then curl around it so you don’t fight pinned hair later.
Don’t add too much volume at the sides — it can widen your face.
11. Twisted Low Knot with Loose Face-Framing Pieces
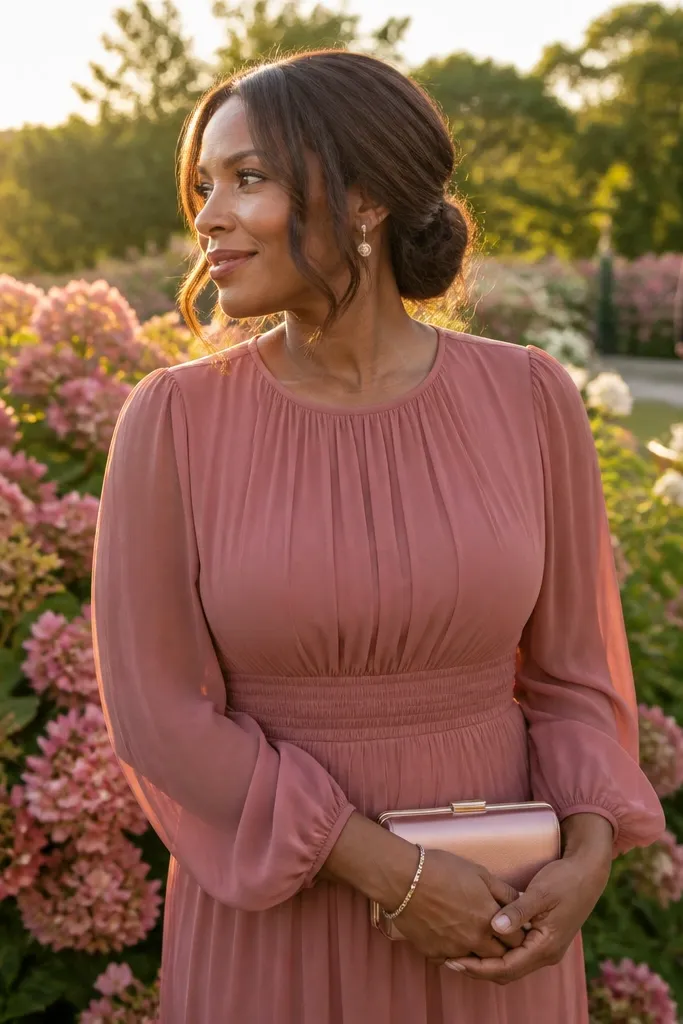
This is a friendly updo that avoids the “all hair pinned back” look. The low knot keeps the back neat, and the loose face-framing pieces soften everything around the cheeks. It’s ideal if your bob has shorter layers around the face and you want to show them instead of hiding them. Choose it for outdoor photos where you still want movement, but not tangles.
Start by curling or waving the face-framing sections lightly. Twist the rest of the hair into a low knot at the nape and pin through the knot in layers. Leave two thin sections loose on each side, then mist lightly so they stay soft.
Keep face-framing pieces about the width of your finger — too thick hides your earrings.
Avoid pinning the knot too tight; it can create a bump that shows under flash.
12. Half-Up Twist with a Small Bunlet at the Back
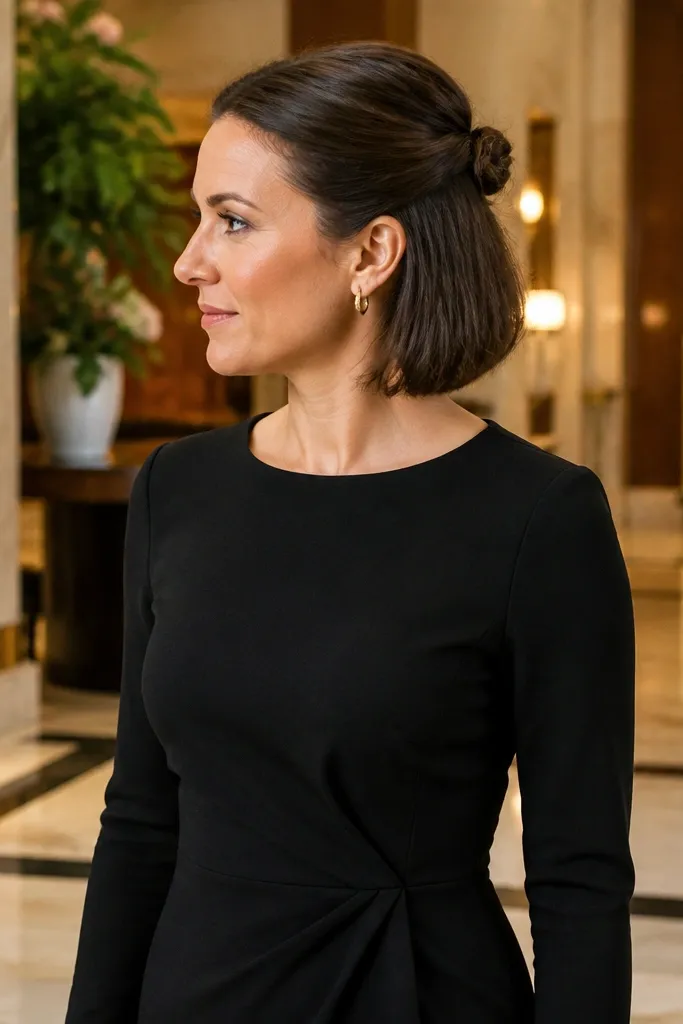
When you want more than a half-up style but don’t have the length for a full bun, a tiny bunlet solves it. The half-up twist keeps the front controlled, while the bunlet adds shape at the back without making your hair look heavy. This is a great pick for short bobs that sit flat at the back. It also looks great with simple jewelry because the hair shape does the talking.
Quick tipIf the bunlet won’t hold, add a small amount of dry shampoo to the underside for grip.
Part hair and twist the top section back, pinning it at the crown. Gather remaining hair and wrap it into a small bunlet at the nape, then secure with 6-8 pins. Smooth the outer layer and finish with a light mist to hold the twist line.
Skip thisDon’t make the bunlet too big — it looks like a try-hard bun on short hair.
13. Sleek Side Part with a Hidden Pin Roll
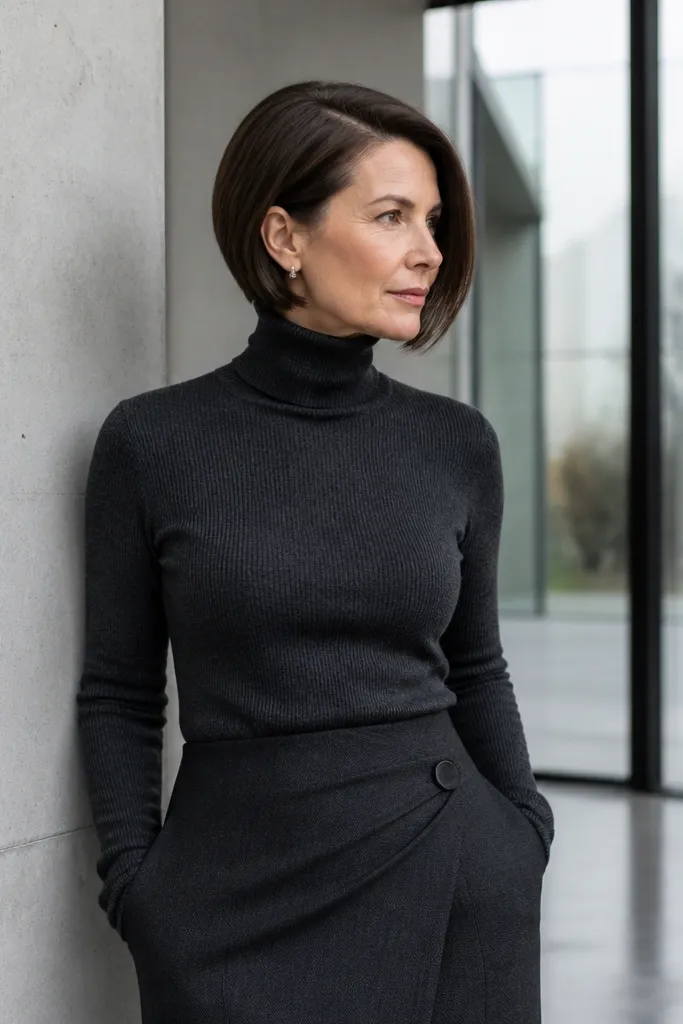
This is a stealthy style that looks fancy without obvious pins. You get a smooth, polished top and a subtle roll that keeps the back from flattening. It works especially well for straight bobs and for moms who want a clean look that doesn’t scream “done in a hurry.” Pair it with structured shoulders and simple, classic accessories. It also handles wind better than loose curls because the roll anchors the ends.
Quick tipUse a rat-tail comb to lift and place pins exactly — it prevents pin dents.
Blow-dry straight with a side part and apply smoothing cream. Roll one side of the hair toward the back, tuck the ends under, and pin so the pins are hidden under the outer layer. Spray lightly on the roll area, then comb the top smooth for a sleek finish.
Skip thisAvoid leaving the roll visible from the side; it should read as a smooth bob, not a chunky knot.
14. Soft Curls with a Feathered Bob Fringe Sweep

If you have bangs or a short fringe, use them. Sweeping the fringe with soft curls frames the face and makes your bob look styled even when the rest is simple. This is a flattering option for rounder faces because the fringe adds vertical balance. It’s also a great pick if you want a less formal look that still reads wedding-ready. Choose this for spring and summer weddings where you want your hair to look airy, not stiff.
Curl the hair starting at cheek level and keep the fringe either straightened or lightly waved. Sweep the fringe across and set it with a tiny dab of styling cream. Pin the crown lightly if needed, then spray to hold the curl pattern without stiffening the fringe.
If your fringe falls straight, use a round brush and quick heat for 10-15 seconds, then set with cool air.
Avoid heavy curl product on the fringe; it can look greasy fast.
15. Classic Updo with a Tiny Braided Crown Insert
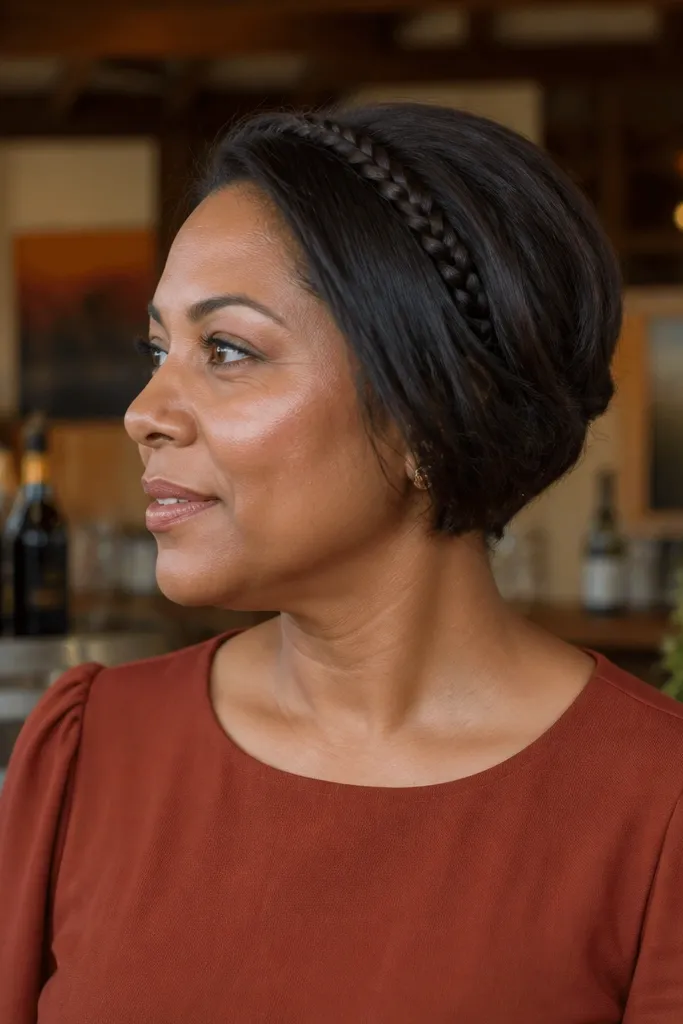
A small braided insert makes a short bob updo feel special without needing length. The braid adds texture and a “designed” look that stands out in photos, especially if your dress is simple. It’s best when your bob has enough top hair to braid a narrow section, even if the rest is too short. Choose this when you want an updo that looks like effort, but still feels comfortable for a long day.
Quick tipBraid with the hair slightly damp for a cleaner, tighter pattern.
Create a narrow braid from one side of the crown to the other, keeping it tight and flat. Pin the braid across the top, then tuck the remaining hair into a low twist or French twist underneath. Secure with pins and smooth any flyaways with a tiny amount of shine serum.
Skip thisDon’t braid too wide — short hair makes wide braids look bulky at the crown.
16. Curls with a Ribbon-Soft Pin Back
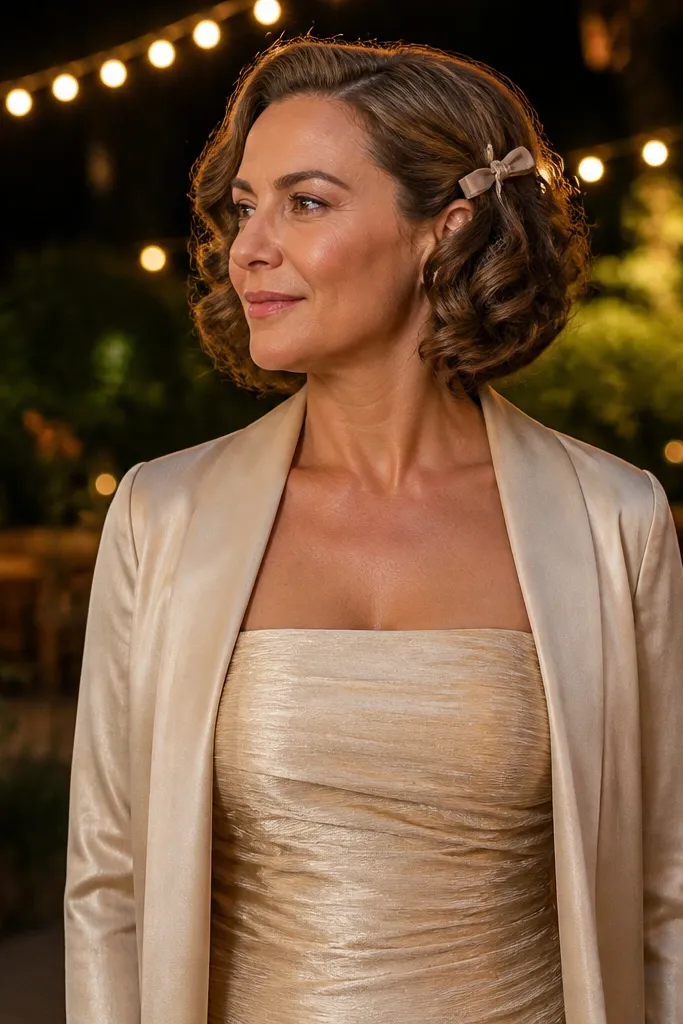
This look is for bobs that need face framing but still want curl movement. You curl the hair, then pin a small section behind the ear so the face stays open and the curls don’t cover your cheek. It’s a flattering compromise if you feel a full updo makes you look older or too severe. Pick this for strapless dresses, halters, and photo-heavy ceremonies where your face needs to stay visible.
Quick tipMatch pin color to hair, not to outfit. Hair blends win in photos.
Curl in 1-inch sections, then gently separate for a softer finish. Pin a small back section behind each ear or just one side, keeping it low enough to look natural. Mist lightly so the pin area holds without flattening the curls.
Skip thisAvoid pinning too high; it can make the ear look pushed forward.
17. Vintage-Inspired Finger Waves on a Short Bob
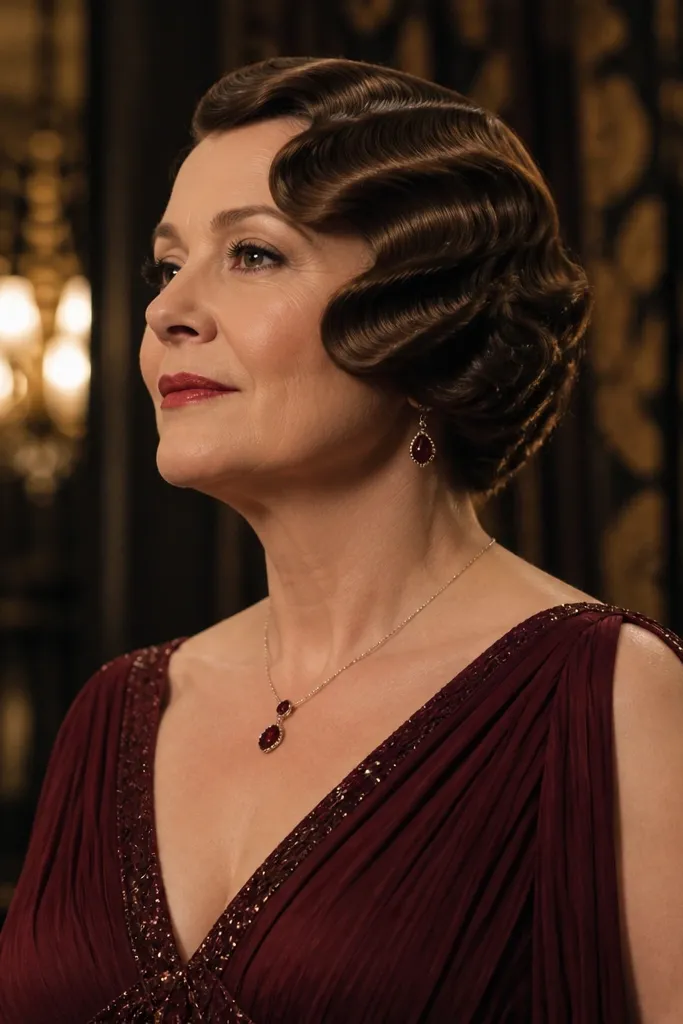
Finger waves give you instant vintage polish, even on short hair. The lines are smooth, the texture is controlled, and the style holds up well for formal weddings. This is a strong pick if your hair is naturally thick or you want a dramatic look that still feels classic. Choose this when you’re wearing a dress with structure — think satin, crepe, or a neckline with clean edges.
Quick tipWork in small sections — large sections smear and lose the wave pattern.
Apply a setting lotion or gel to damp hair and comb into even sections. Shape each wave using finger pressure and a wave comb, then let it set until fully dry. Finish with a light brush-through only at the edges and set with hairspray for hold.
Skip thisDon’t skip setting; finger waves need dry time to look crisp.
18. Modern Sleek Bob with a Mini Top Roll

This is the cleanest updo option for short bobs that don’t want curls. A mini top roll adds lift at the crown while keeping the sides sleek, so your face looks lifted in photos. It’s also a good choice if you wear glasses because it keeps hair away from the frames. Pair it with modern dresses, monochrome outfits, and minimal jewelry. It’s especially flattering when your hairline is a little uneven.
Smooth hair back and create a small crown section. Roll that section upward into a compact coil and pin it in place with 4-6 pins. Press the rest of the bob flat with a brush, then mist the roll lightly so it stays put.
Use a fine-tooth comb to make the top roll section extra clean before pinning.
Avoid making the roll too tall; it can look like a “helmet” on short hair.
19. Curls with a Soft French Roll Back Section
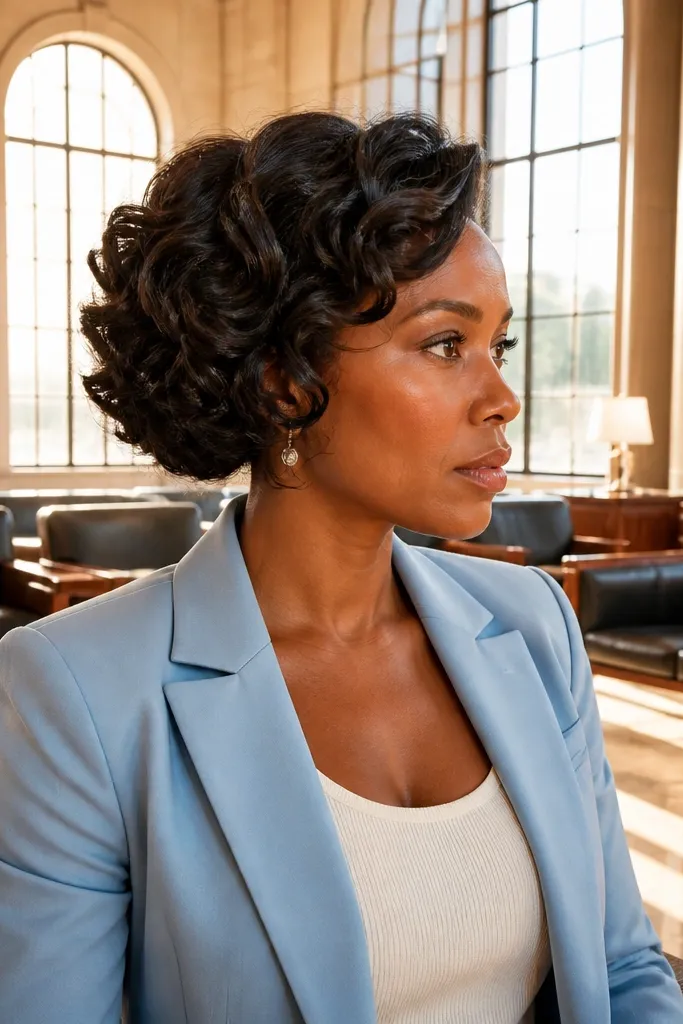
This hybrid style gives you the romance of curls with the structure of an updo. The French roll back section keeps the nape tidy and prevents the back from looking flat, while the curls keep the front lively. It’s a great option for bobs that are too short for a full updo but long enough to tuck a roll. Choose it for evening weddings when you want hair to look styled from both front and back.
Curl hair in 3/4-inch sections and let it cool. Separate a small back section, roll it slightly inward, and pin it flat at the nape. Smooth any edges around the roll, then mist the curls lightly so the shape stays defined.
Pin the roll before you separate curls; it keeps the roll area from getting messy.
Don’t roll too much hair — on short bobs it can create a bulky ridge.



