
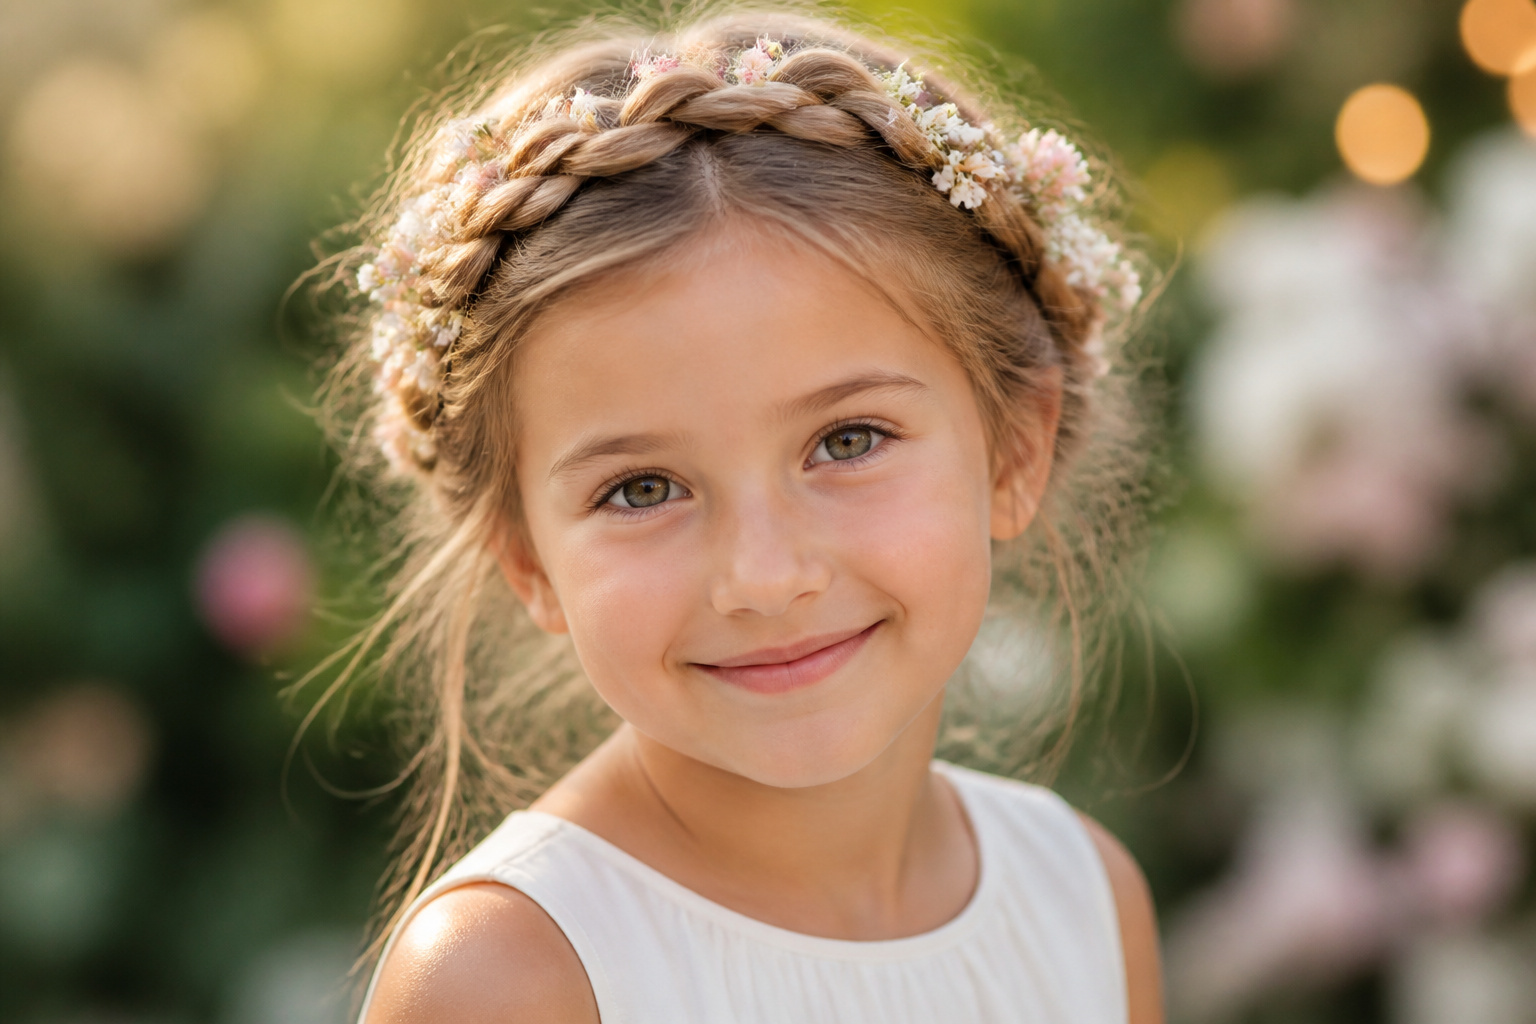
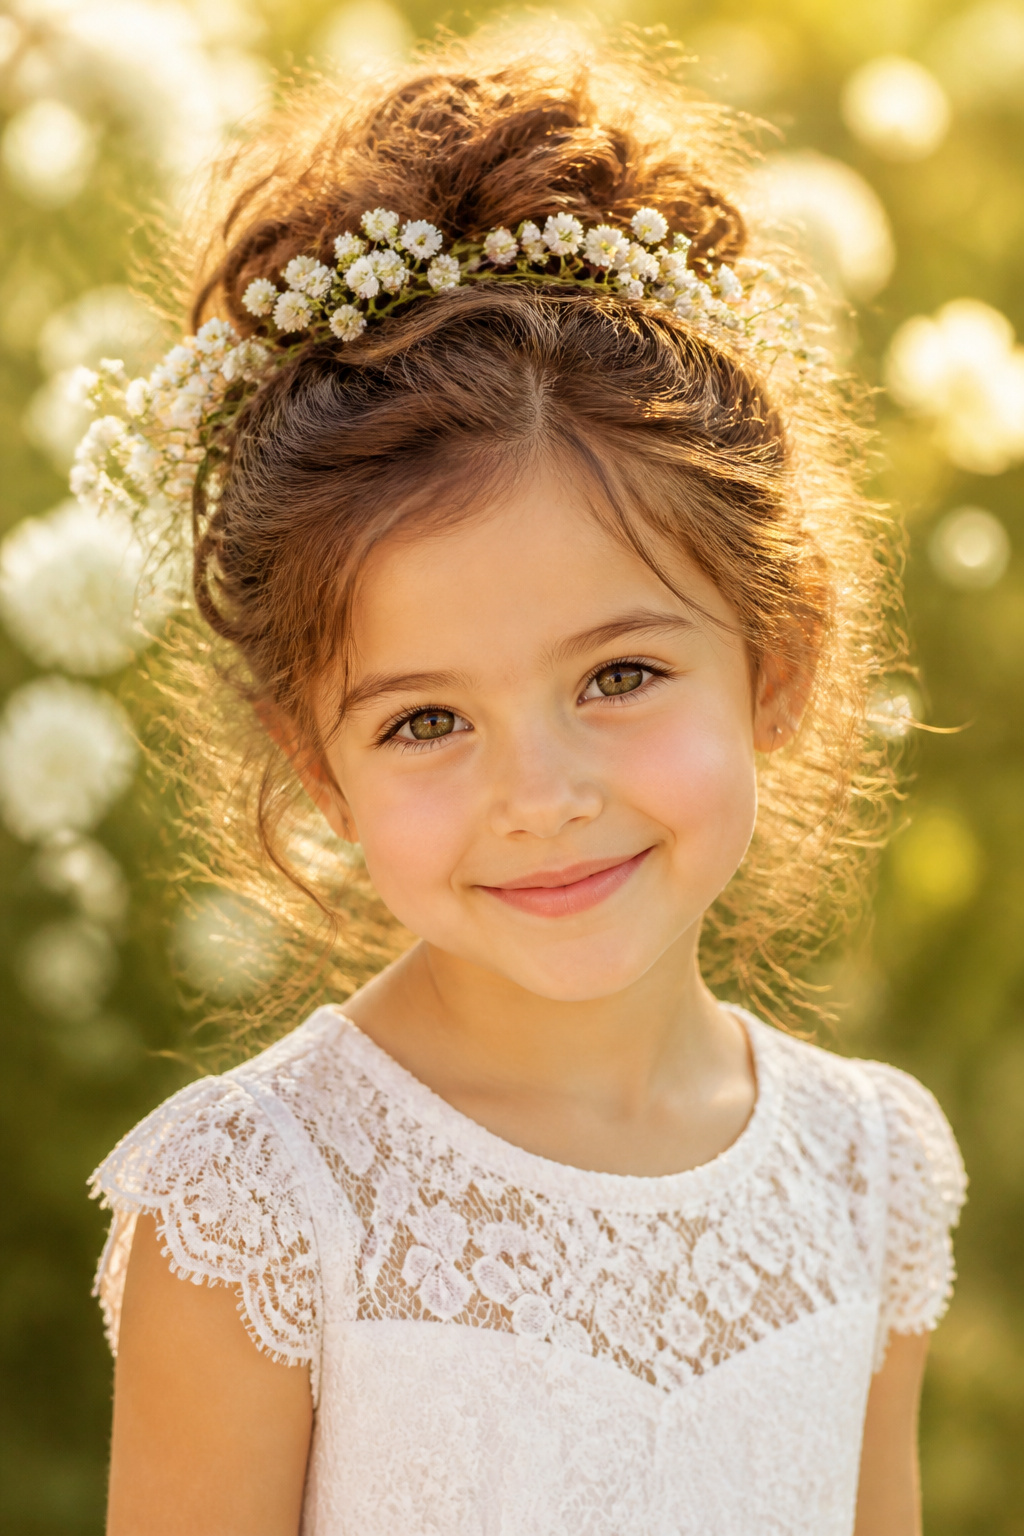
1. Half-Up Bow Ponytail with Two Clips
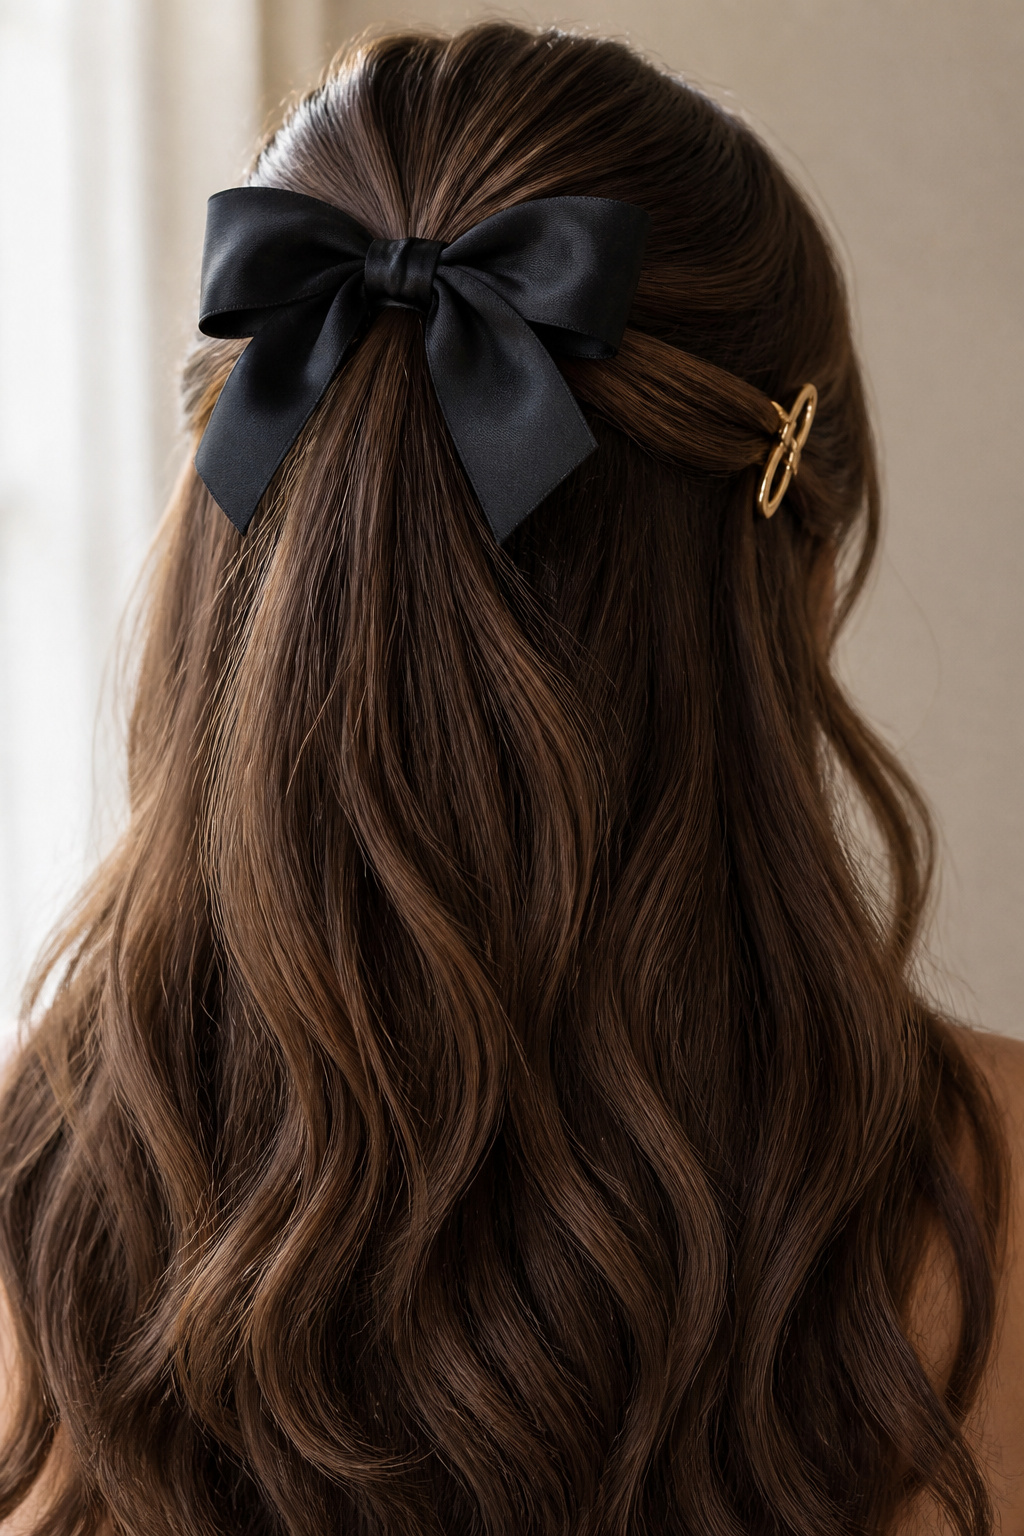
Start by misting the top layer lightly with water or detangler spray. Pull the front half of the hair back into a small ponytail at the crown, then secure with a clear elastic. Add two matching mini claw clips or ribbon clips on either side of the elastic to hide the band and keep flyaways down. For a cleaner look, tuck loose ends under the ponytail base and pin them with one bobby pin.
This is the kind of beginner-friendly wedding guest hairstyle that looks intentional even if your parts aren’t perfect. The half-up section keeps hair out of the face for ceremony photos, while the bow detail makes it look dressed up without heavy styling. It works on straight, wavy, and light curls because the ponytail shape stays readable in pictures. I like it for younger kids because you can secure it quickly and add a second clip for extra hold when hair is slippery.
Skip thisSkip tight pulling on the sides; it makes cowlicks worse and shows red marks in photos.
Quick tipPack extra elastics in your bag — kids hair slips out fast after snacks.
2. Bubble Braid Ponytail for Shorter Hair
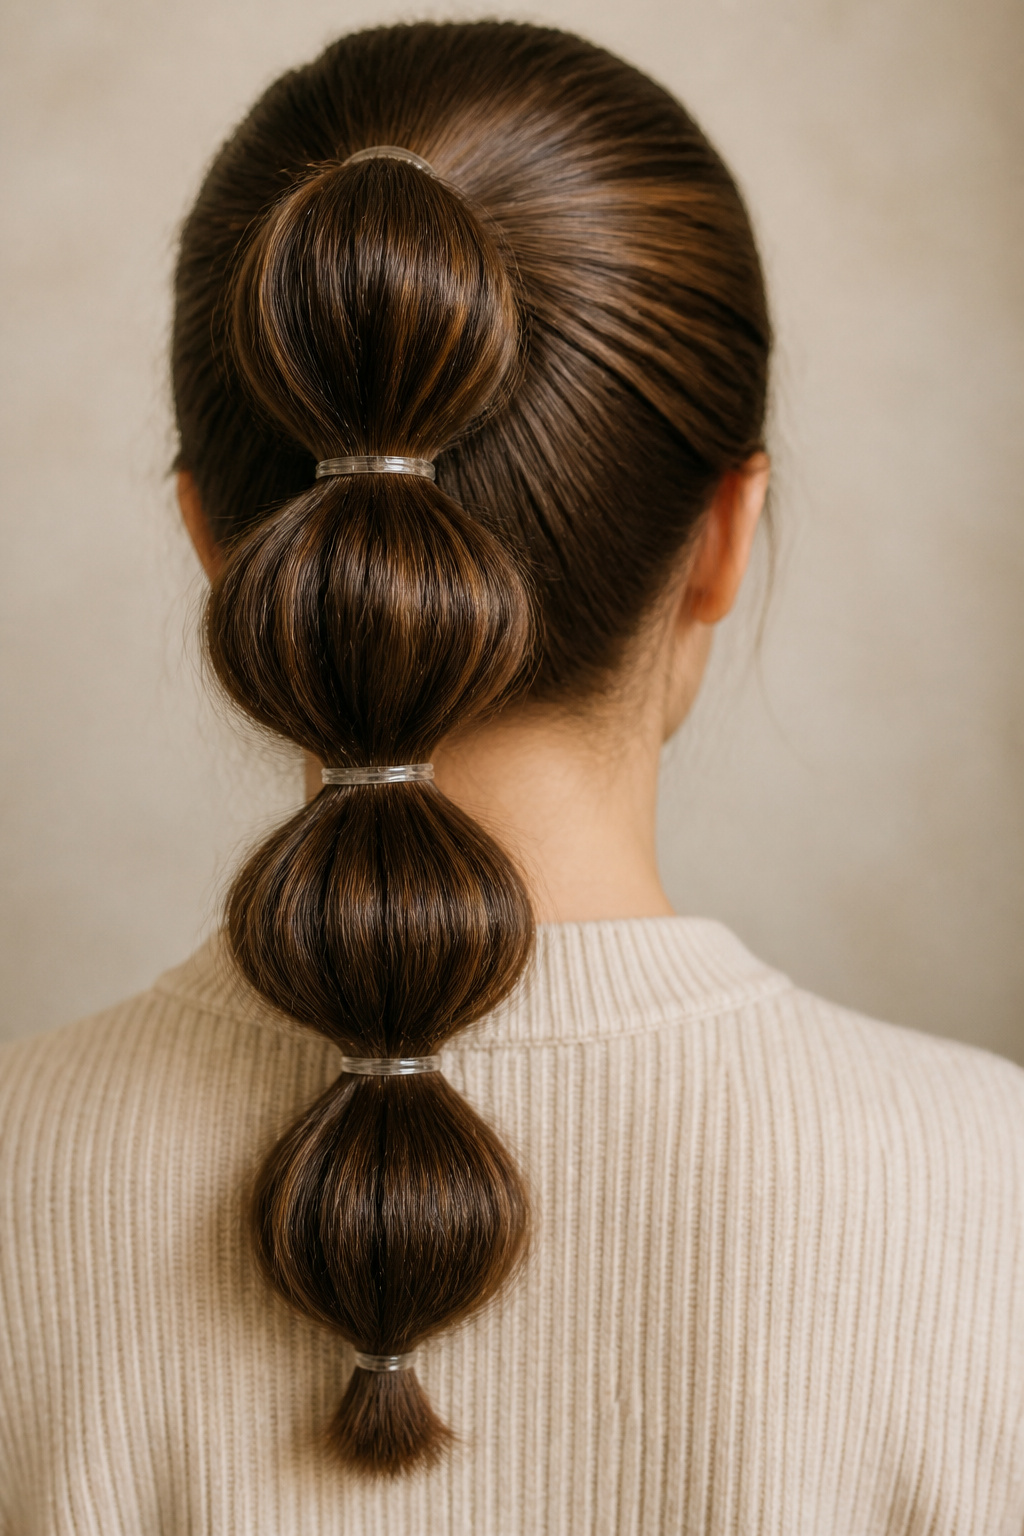
A bubble braid ponytail is adorable because it looks fancy while being mostly elastic work. The “bubbles” create texture that photographs well, even if the braid isn’t perfect. It’s a smart pick for kids with shorter hair because you don’t need a long continuous braid — you just need enough length to tie sections. If the wedding is indoors with flash, the raised sections catch light and make hair look fuller.
Start with a low ponytail using a soft elastic that won’t snag. Divide the length into sections by tying small clear elastics every 1.5-2 inches down the ponytail. Gently pull each bubble outward with your fingers to make the rounds. Finally, brush the top smooth and tuck any stray hairs under the last elastic with a bobby pin.
Use clear elastics for a clean look in photos; colored ones can show under bright lighting.
Don’t over-pull the bubbles — if they get too wide, the ponytail looks uneven.
3. Side-Swept Crown Twist with Gem Pins
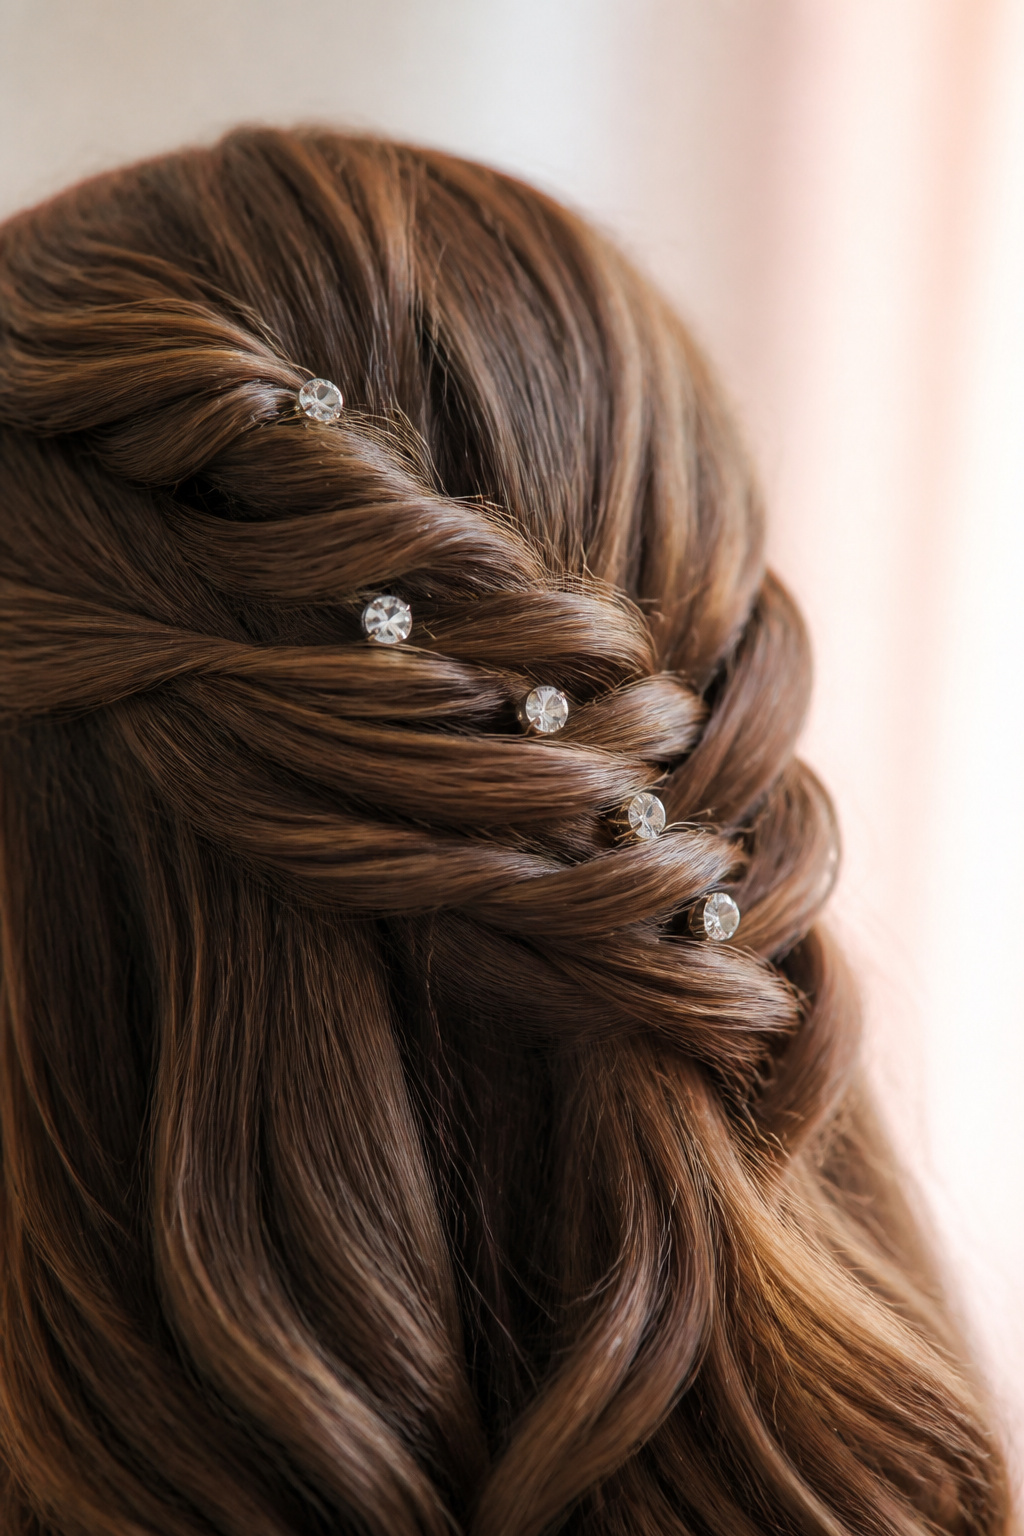
This hairstyle frames the face and keeps bangs or front layers controlled without a heavy updo. The twist looks “styled” but you’re only moving small sections, so it’s beginner-friendly. Gem pins add a wedding-day feel instantly, and the side-sweep makes it flattering for round and oval faces alike. It’s especially good for hair that won’t hold a slick bun because the pins anchor the twist in place.
Part the hair slightly off-center, then gather a small section from the front and twist it backward. Secure it near the crown with 2 bobby pins placed in an X shape. Repeat with one more small twist section from the next area and pin it to meet the first. Finish by smoothing the surface with a light gel or cream on your fingertips, then place two gem pins along the twist.
If pins slip, add one bobby pin under the twist first, then place the gem pins on top.
Don’t twist too tight at the hairline — it can pull and create lumps.
4. Classic French Braid into a Low Bun
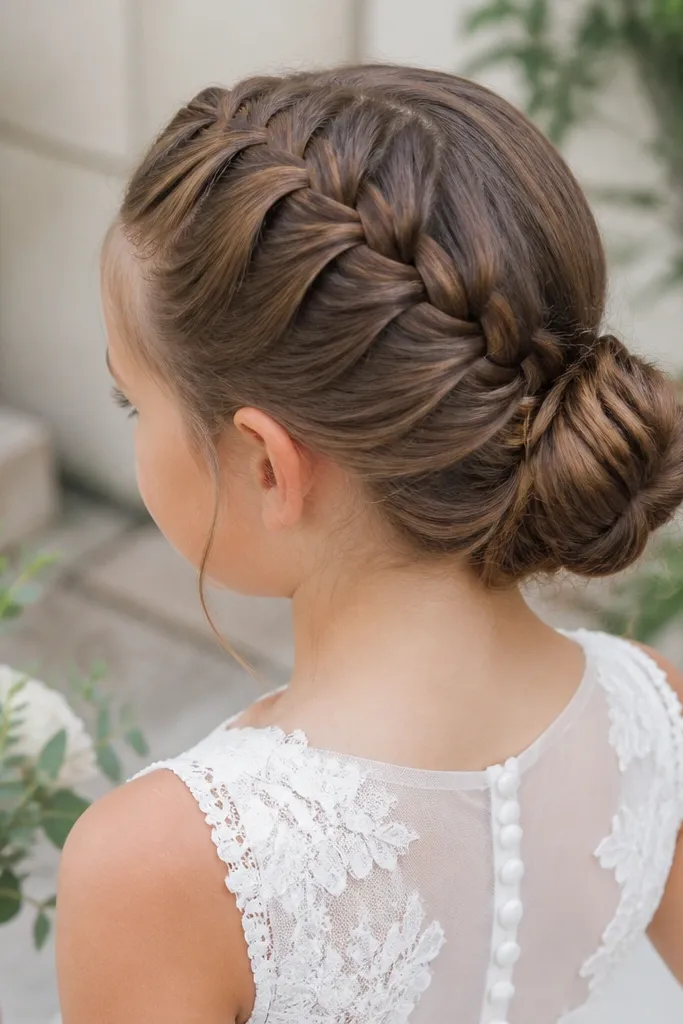
If you want a wedding-appropriate look that still feels kid-friendly, this is it. The French braid gives structure, and wrapping it into a low bun makes it comfortable for long events. It photographs beautifully from the side because you can see the braid texture and the smooth bun shape. This works best for kids with medium to thick hair, since the braid needs enough volume to hold its shape.
Start by creating a neat center or slight side part and begin a French braid from the front, adding hair as you go. Braid to the nape, then secure the end with an elastic. Wrap the braid into a low bun and pin it around the base with bobby pins, using 6-10 pins for hold. Smooth the top with a brush and lightly spray with water if flyaways pop up.
Do the bun at the nape, not higher — it keeps the neck comfortable for photos and dancing.
Skip big sections if the braid keeps loosening; smaller sections hold better.
5. Two-Section Waterfall Braid
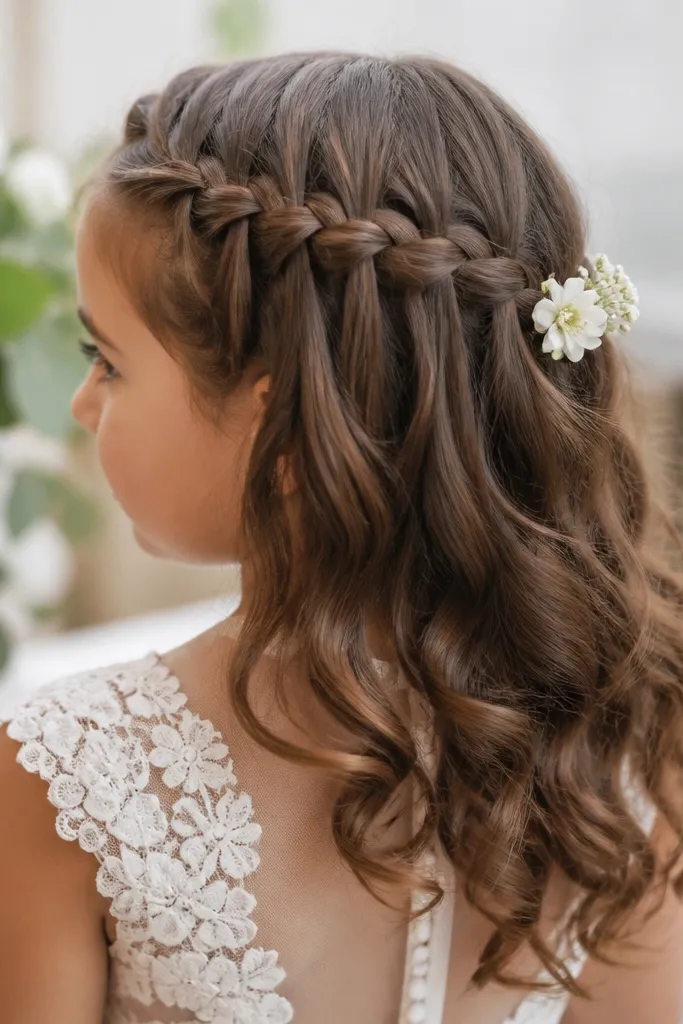
Start with a side part and take a small section near the temple. Braid across the top using three strands, but every time you pick up a new strand, drop the outer strand down and replace it with the new section. Continue for about 4-6 drops, then secure the braid end with a small elastic and bobby pins. Finish by brushing the dropped strands into loose waves.
Waterfall braids look delicate and wedding-y, but you don’t need advanced skills to get the pattern right. The “waterfall” effect happens because you intentionally drop one strand while taking the next, creating that layered look. This is a great pick for kids with wavy hair because the dropped strands blend naturally. It also keeps hair from being fully pulled back, which kids usually tolerate better than tight styles.
Skip thisDon’t skip the smoothing step on the top layer; messy tops make the pattern hard to read.
Quick tipUse a clear elastic at the end so it disappears in daylight and indoor flash.
6. Knotted Half-Up with Crisscross Pins
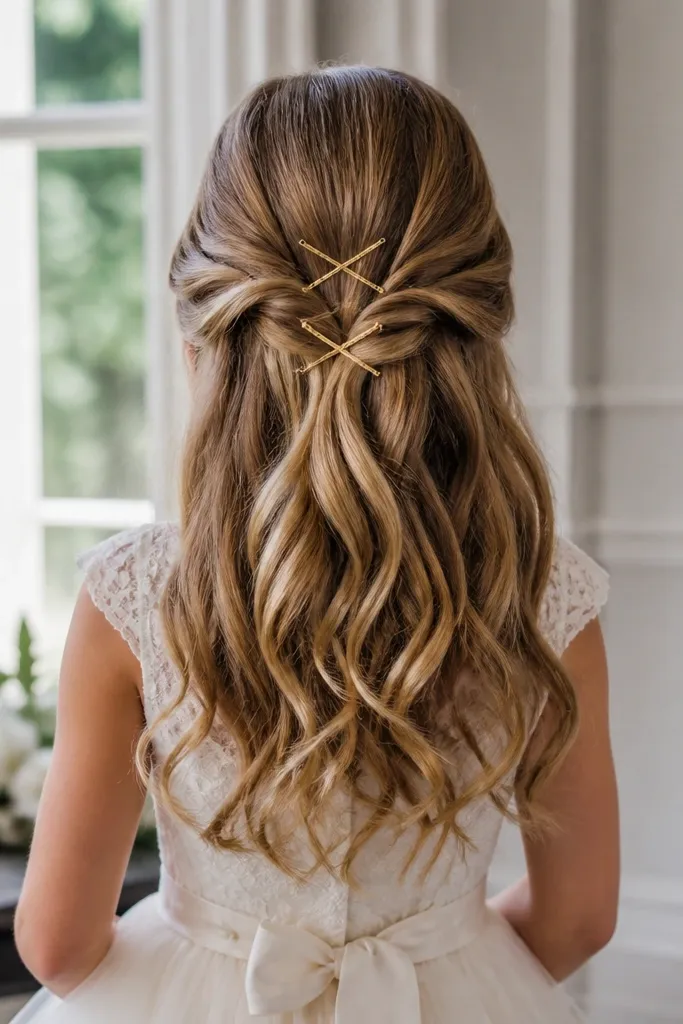
This look reads as “styled” because it creates a raised knot at the crown, but the technique is simple. You gather sections, tie them, and pin the knot down so it stays put during photo time and play. It works well for kids who hate tight buns, since the rest of the hair stays loose and comfortable. The crisscross pins add a clean finish that looks good even if the knot isn’t perfectly centered.
Part the hair horizontally into top and bottom sections. Take the top section and split it into two small halves, then tie them together with a small elastic to form a mini loop. Fold the loop down toward the head and pin it in place with two bobby pins crossing at an angle. Lightly smooth the surrounding hair and tuck any loose ends under the knot.
If the knot slides, add one bobby pin at the base before you crisscross the pins on top.
Avoid using a thick scrunchie for the tie; it makes the knot bulky.
7. Sleek Braided Headband with Loose Ends
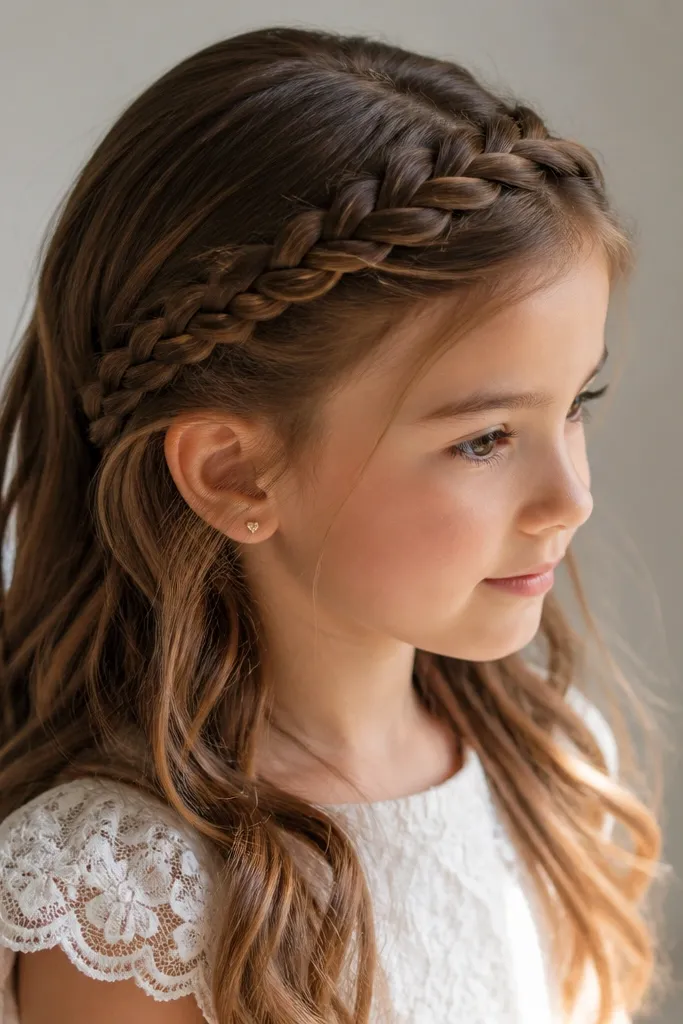
A braided headband is one of the best beginner-friendly wedding guest hairstyles because it instantly frames the face and keeps hair off the forehead. It’s also forgiving — if the braid isn’t tight, it still looks pretty. This works for straight hair and soft curls, and it looks especially sweet on kids with bangs or a short fringe. The loose ends behind keep the style comfortable and easy to move around in.
Start by parting the hair slightly off-center. Take a small section from one side near the temple and braid it into a simple three-strand braid. Pin the braid across the forehead to the other side, hiding the pin under the hairline. Repeat on the other side if you want a thicker headband, then brush the rest smooth and apply a tiny amount of smoothing cream to the surface.
Use two pins per side instead of one; it prevents the headband from popping up in photos.
Don’t leave the forehead area dry and fluffy — it makes the headband look accidental.
8. Low Twisted Crown with a Small Barrette
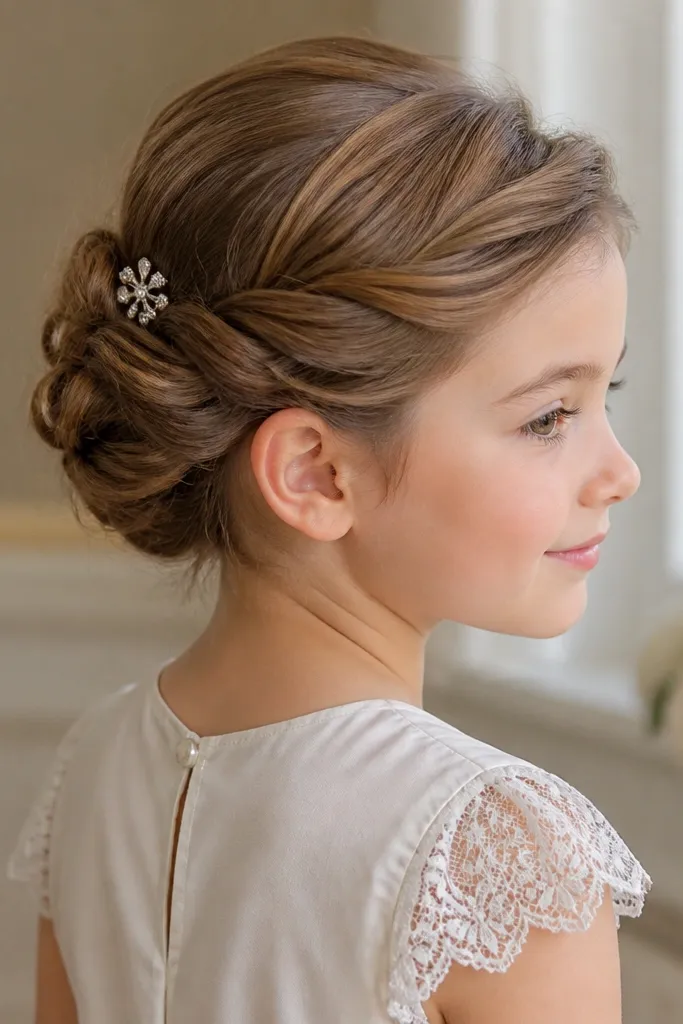
This hairstyle looks like a mini updo without the stress of a full bun. Two low twists create a crown effect, and a small barrette gives you a clean focal point for wedding photos. It’s great for kids with medium hair length who want their hair out of their face but still want it down-ish. The barrette hides the pin area, so it looks neat even if you’re still learning placement.
Create a slight side part. Twist a section from each side backward toward the nape, then cross them and pin them together under the hair. Place a small barrette over the pinned area so it looks intentional. Smooth the top with a soft brush and use one extra bobby pin near the ends if they try to slip.
Choose a barrette color that matches the wedding palette — it looks coordinated in photos.
Skip large barrettes; they look heavy on kids hair and can pull.
9. Half-Up Rope Twist with a Ribbon Tie
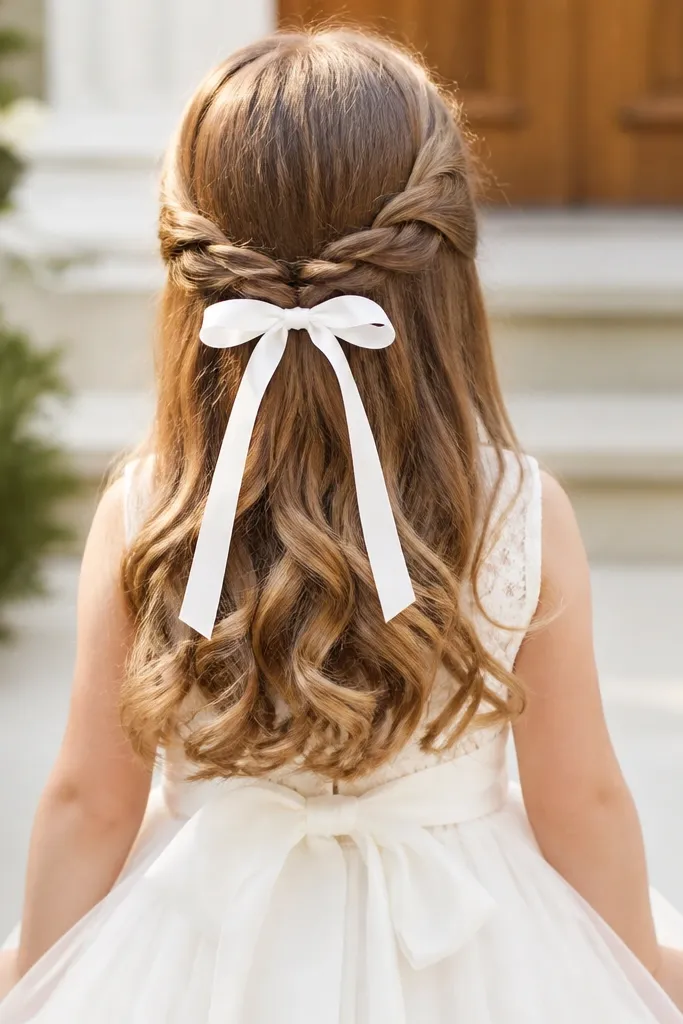
Split the top hair into two sections and twist each section the same direction until it coils. Wrap the two twisted sections together, then secure the end with a small elastic. Thread a ribbon through or tie it over the elastic, then tuck any loose ends and pin them under. Smooth the front with a little water so the rope twist looks defined.
Rope twists look polished because the twist pattern is clear, even from far away in photos. The technique is straightforward: twist two sections in the same direction, then wrap them together. Adding a ribbon tie instantly makes it wedding-appropriate and it hides the elastic if the tie is wide enough. This is a strong choice for beginners because you can redo one side quickly without redoing the whole head.
Skip thisDon’t twist with dry hair — it frizzes and the rope pattern blurs.
Quick tipUse a ribbon that’s at least 1 inch wide so it covers the elastic completely.
10. Bubble Braids with a Flower Clip Accent
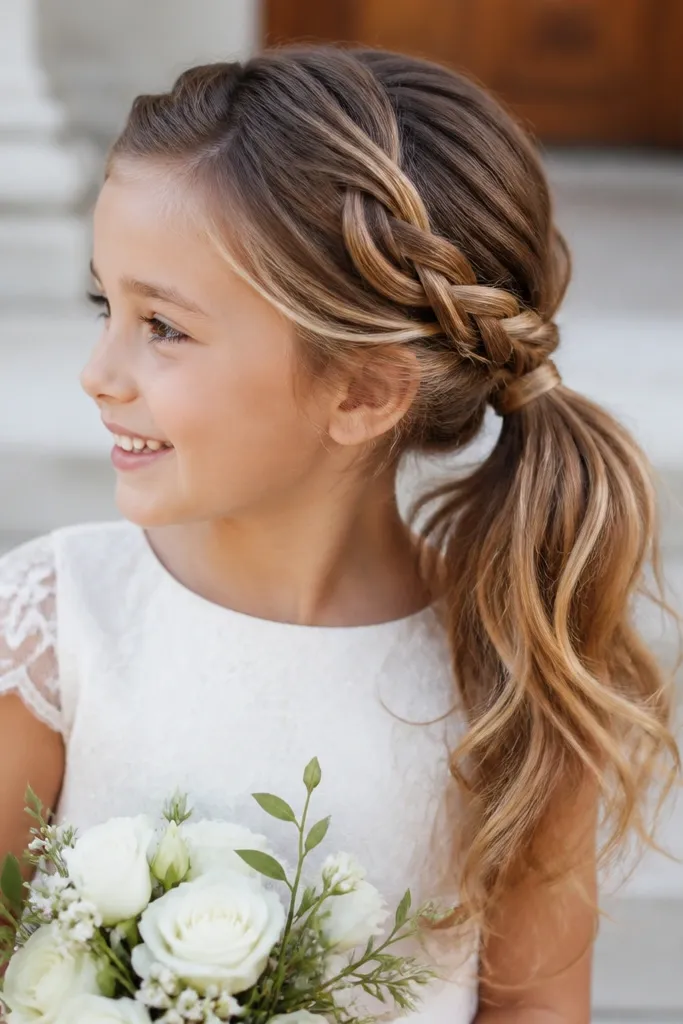
Make two low ponytails side by side and secure with elastics. Tie additional small elastics down each ponytail to form bubbles, then gently pull each bubble outward. Place a small flower clip at the base where the bubbles start, pinning it just under the hair line. Brush the top smooth and mist lightly to control flyaways.
Bubble braids already photograph cute, and the flower clip gives you that “wedding guest” vibe without extra work. This works well for kids who have hair that tangles easily because you keep sections short and secure them quickly. The flower accent also helps draw attention upward, which is flattering for photos and keeps the look from feeling plain. Choose this if the wedding venue is bright and you want the hair to stand out.
Skip thisSkip over-tight elastics; they can leave dents that show in close-up photos.
Quick tipBring bobby pins that match the hair color; the flower clip won’t hide stray pins.
11. Side Ponytail with Braided Wrap
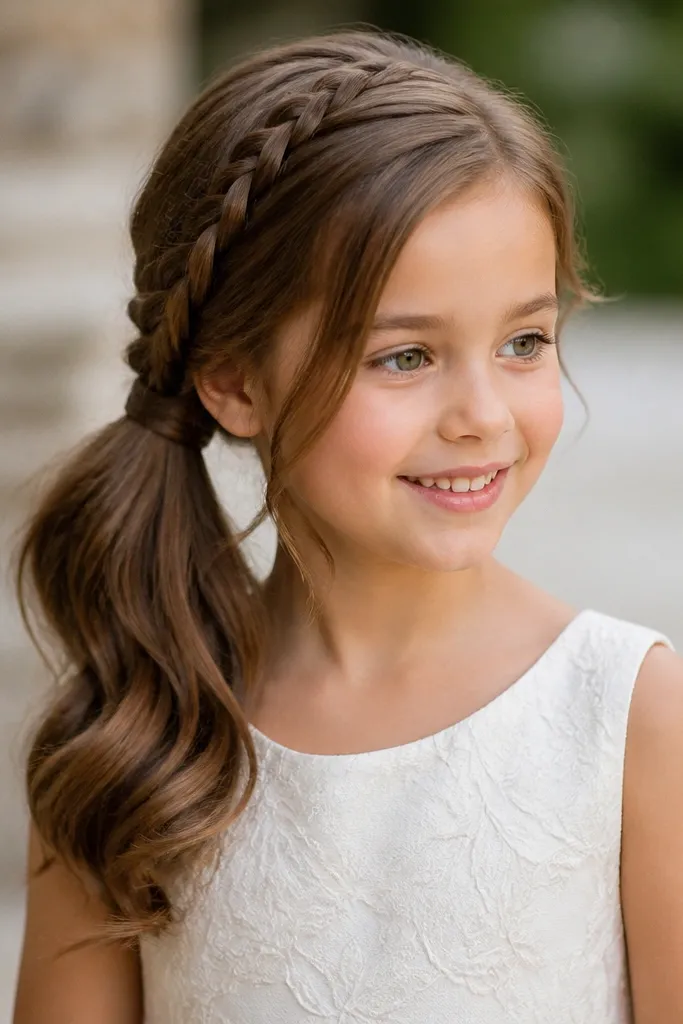
Part hair and gather it into a low side ponytail, securing with an elastic. Take a small strand from underneath the ponytail and braid it into a 3-strand braid. Wrap that braid around the elastic, then pin it under the ponytail with two bobby pins. Smooth the ponytail with a brush and add a tiny bit of shine cream to the surface if needed.
A side ponytail looks grown-up but still sweet when it’s braided at the base. The braided wrap hides the elastic and gives you a finished look without needing a full updo. It’s beginner-friendly because the braid is short and you only need to wrap it once around the ponytail. This style is great for kids with straight or slightly wavy hair that holds a ponytail cleanly.
Skip thisDon’t braid directly over the elastic; it can slip and unravel.
Quick tipIf the ponytail base shows, use a sock bun cover or ribbon strip under the elastic to hide it.
12. Twisted Space Buns with Mini Ribbons
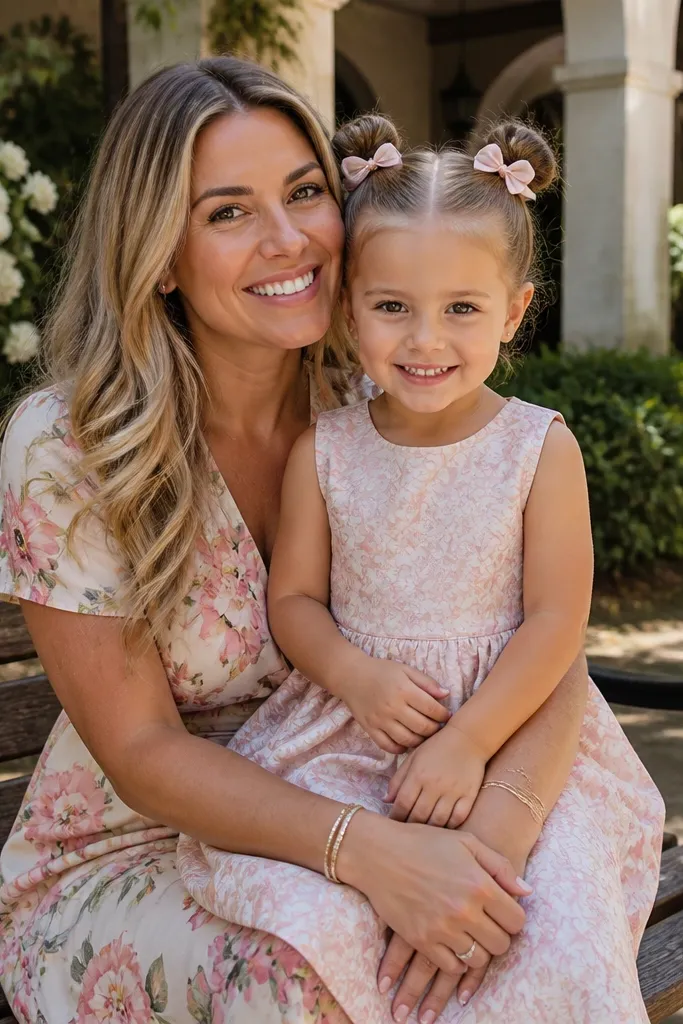
Part hair down the middle and divide into two equal sections. Twist each section from root to ends, then wrap into a bun and pin around the base. Secure with bobby pins, then add a mini ribbon tied around each bun. Finish by lightly brushing the top so cowlicks lay flat. Mist with water if the hair starts to puff.
Space buns are playful, and with the right twist technique they still look wedding-appropriate. Instead of messy buns, you twist the hair into sections first so the buns sit smooth and round in photos. Add mini ribbons and it reads cute, not costume. This is best for kids who can sit still for 15-20 minutes and who don’t mind their hair being gathered. It’s also a strong pick for outdoor weddings where wind would ruin loose hair.
Skip thisSkip uneven bun sizes; kids hair makes asymmetry obvious on camera.
Quick tipUse thicker ribbon for the buns; thin ribbon can slip and expose pins.
13. Top Knot with Wrapped Elastic Tail
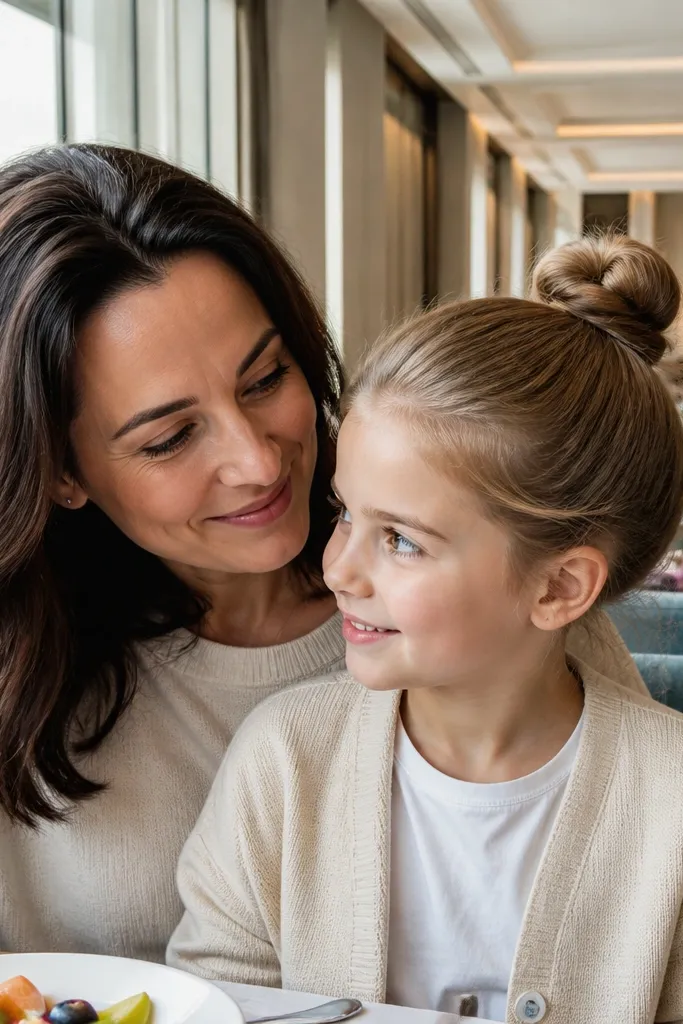
A top knot is one of the easiest ways to look polished fast, and it keeps hair out of the face for ceremony and photos. The “wrapped elastic tail” trick makes it look intentional instead of like a quick ponytail. This is great for kids with thicker hair because it gives enough grip for the knot to hold. If your child has fine hair, pair it with a tiny crown puff so the knot doesn’t collapse.
Brush hair up into a high ponytail and secure with a strong elastic. Divide the ponytail into two sections, wrap one section around the base, and pin it in place. Take the second section and wrap it over the first to hide the elastic, then pin again. Add one or two bobby pins along the edges to keep it smooth.
Do a quick crown puff with your fingers, not a comb, to avoid visible dents.
Don’t use heavy gel all over; it turns the knot shiny and sticky under heat.
14. Crown Braid with Ponytail Release
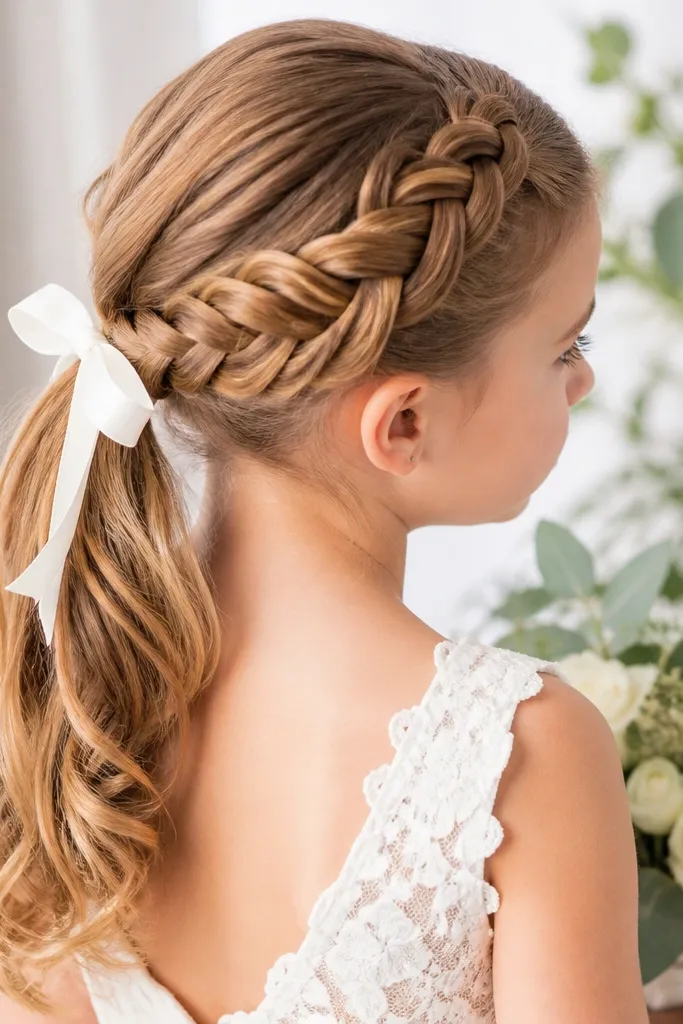
This style gives you the best of both worlds: a braided crown for structure and a ponytail for comfort. It’s photogenic because the crown braid creates a clean line around the head, while the ponytail adds movement when the kid walks. It’s also beginner-friendly because you’re braiding across the top, then switching to a simple ponytail. It works well for medium to long hair and for kids who get restless with full buns.
Start with a center part and braid along the crown, adding hair from each side as you go. Stop at the back of the head where the crown braid meets, then secure with an elastic. Gather the remaining hair into a ponytail, then pin the braid end under the ponytail base. Brush the surface smooth and spritz lightly so the crown braid looks crisp.
Place the ponytail slightly lower than you think; it looks better in portraits and prevents neck irritation.
Avoid leaving the crown braid ends sticking out; pin them flat before you secure the ponytail.
15. Classic Scarf-Style Ribbon Knot in a Low Bun
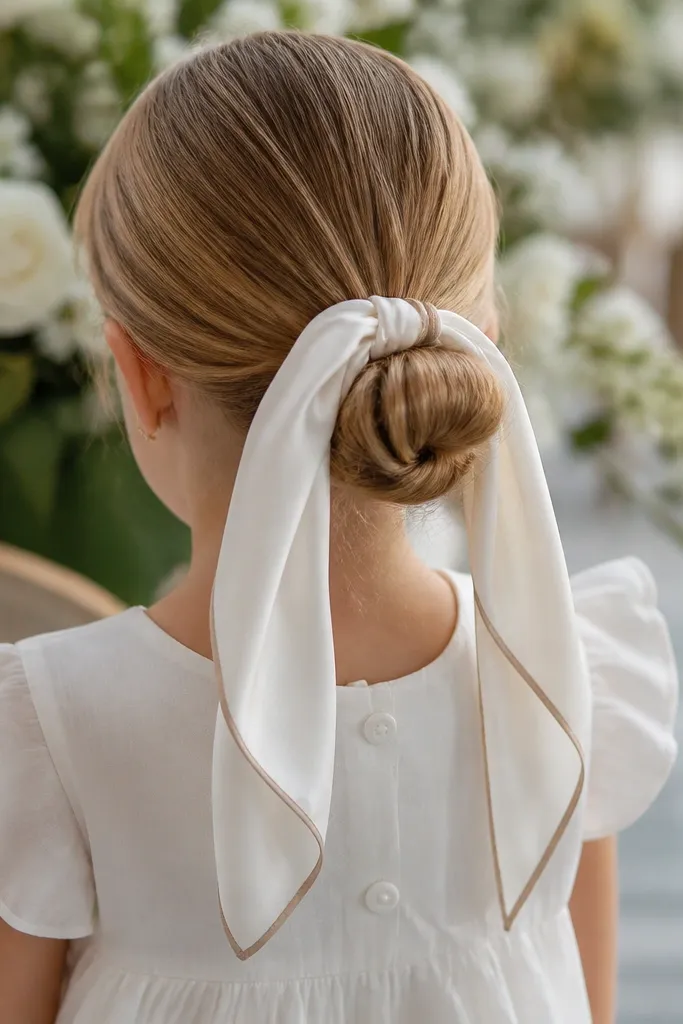
Gather hair into a low ponytail and twist it into a bun, pinning with bobby pins around the base. Wrap a ribbon or narrow scarf strip around the bun once, then tie a knot at the front or side of the bun. Tuck the ribbon ends under the bun and pin them so they don’t flop. Smooth flyaways with a damp brush and a tiny dab of smoothing cream.
A low bun plus a ribbon knot makes the look wedding-ready without relying on complicated hair skills. The bun keeps hair tidy, while the ribbon adds a soft, festive accent that shows up in photos. This is a great option for kids who can handle a bun but need the face area to stay clear. It also works across seasons because ribbon feels light in summer and sweet in winter.
Skip thisSkip too-long ribbon ends; they drag and snag on dresses.
Quick tipIf the ribbon is slippery, lightly mist the underside of the bun before tying.
16. Two Mini Braids into a Low Twist
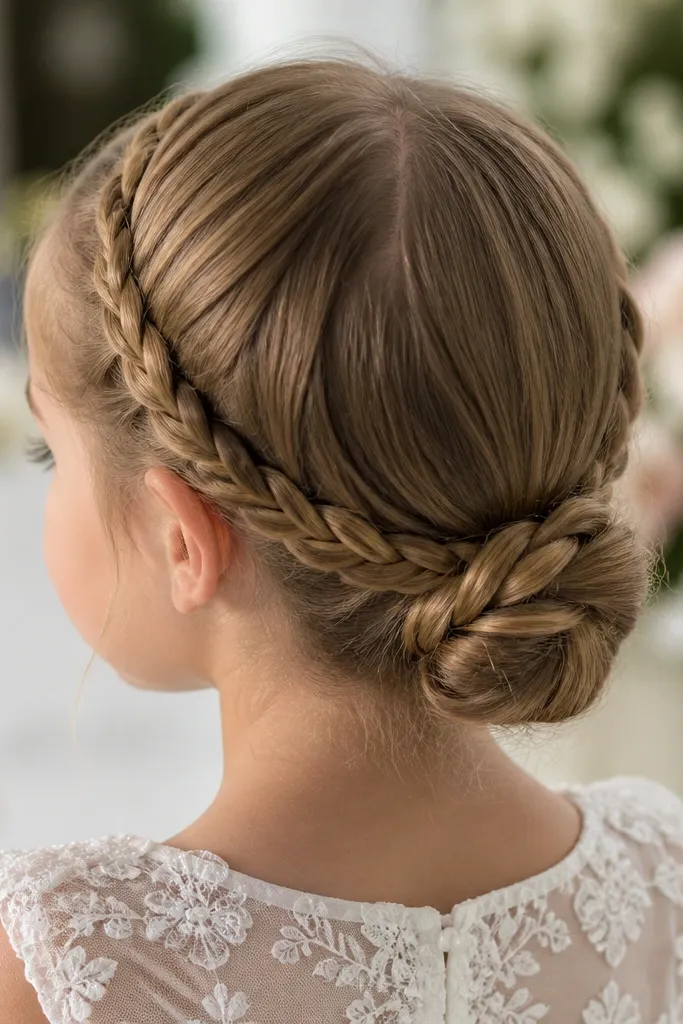
This hairstyle is a beginner win because you only do two small braids, then you do a simple twist. The result looks like a bigger style, but it’s fast and practical for kids who don’t sit still for long. The low twist keeps the hair comfortable and prevents tangles around the neck. It also looks cute with sleeves and collars because the style sits neatly at the nape.
Part hair and take two small sections from each side near the temples. Braid each section into a short 3-strand braid and secure with a tiny elastic. Gather the remaining hair, then twist it into a low twist and pin. Place the ends of the mini braids into the twist and pin them so everything looks connected.
Use smaller elastics for the mini braids; chunky bands show through thin hair.
Don’t place the twist too high; it can pull on the hairline.
17. Half-Up Crown Clips with Loose Waves
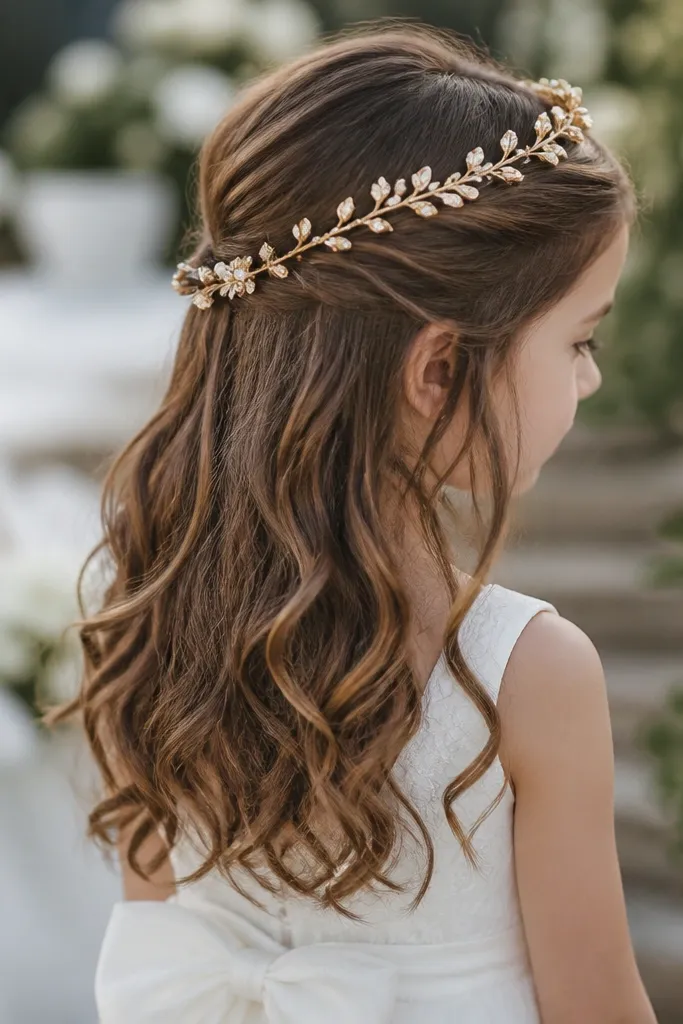
If you want something that looks styled without any braid work, crown clips are the answer. The half-up section lifts the face and keeps hair off cheeks, while loose waves add softness that looks great in motion. This is ideal for beginners because you’re only clipping, not building a structure. It also works for hair that refuses to hold a ponytail — the clips anchor just the top layer.
Brush hair and create a half-up section at about ear level. Lift the top layer and secure it with a small claw clip placed near the crown. If you want extra hold, add a second bobby pin under the clip where flyaways start. Style the remaining hair into loose waves using a wide-tooth comb and a light mist, then brush gently to separate the waves.
Clip placement matters — keep it slightly higher than the temples for a lifted look.
Skip heavy product on the loose section; it flattens waves and makes hair look greasy.
18. Dutch Braid Crown with a Single Elastic End
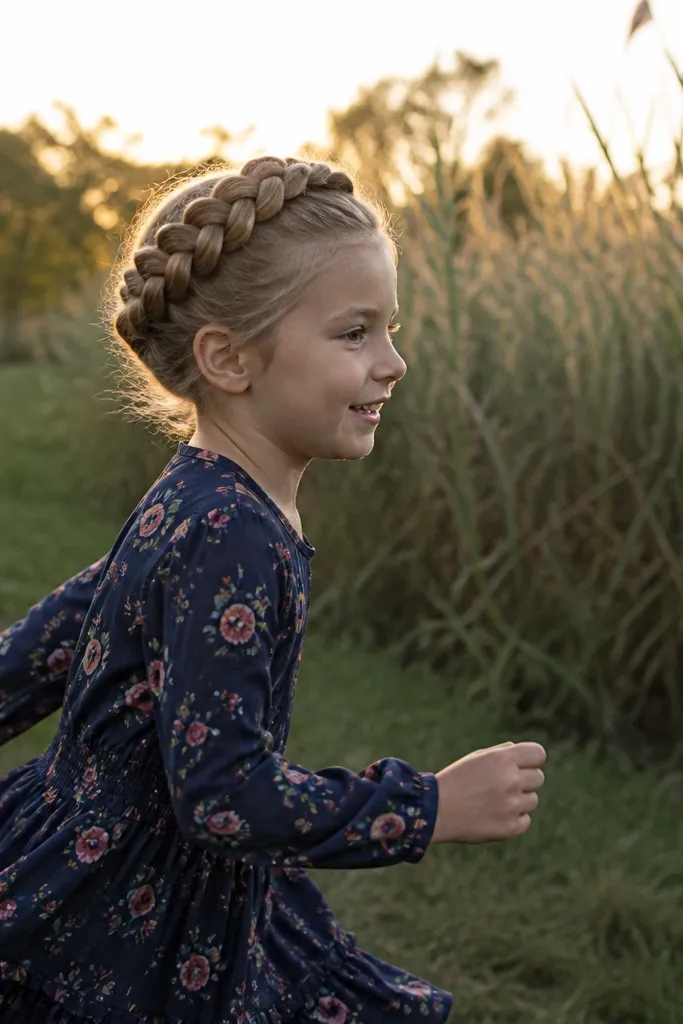
A Dutch braid crown looks bold and photo-friendly because the braid sits raised, not flat. You get that “wow” texture without needing a full updo. This is great for kids with medium to thick hair because the braid stands out and holds shape. It also stays put in wind better than loose styles, which matters for outdoor weddings.
Part hair and start a Dutch braid from the front, adding hair from each side. Keep the braid tight enough that it doesn’t balloon, but not so tight that the scalp looks pulled. Continue around the head until you reach the back, then secure the remaining braid with one elastic. Tuck the end under the crown and pin so it looks smooth and intentional.
Use a comb to separate sections evenly; uneven section sizes make the crown look lumpy.
Don’t braid too loose; a loose crown collapses fast during photos.
19. Twisted Low Pony with Side Flower Pin
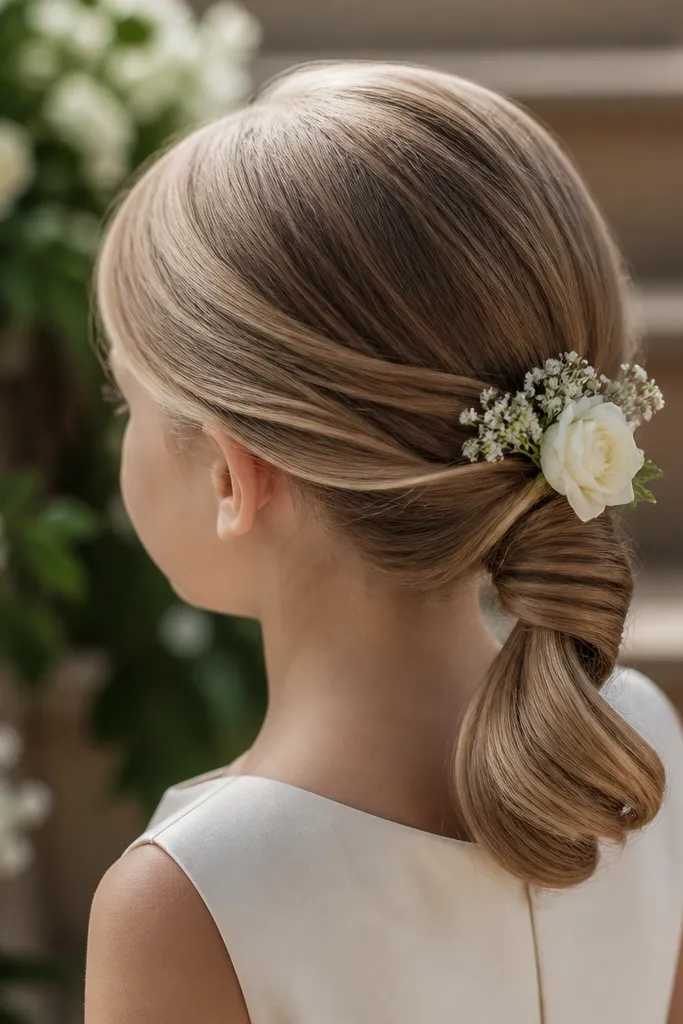
Brush hair into a low ponytail and secure with an elastic. Take a small strand around the base and twist it, then wrap it over the elastic and pin it underneath. Add a flower pin on the side where the strand meets the ponytail base. Smooth the ponytail with a brush and lightly mist to reduce flyaways.
This one is simple but it looks like you planned it. A low ponytail keeps hair tidy, and the twist wrap around the base hides the elastic so it doesn’t look basic. A side flower pin makes it feel wedding-ready without covering the whole head with accessories. This suits kids with straight hair or soft waves because the ponytail shape stays clean under movement.
Skip thisAvoid placing the flower pin too high; it can poke and distract in close photos.
Quick tipChoose a flower pin with a flat back; spiky backs snag on dresses and hair.
20. Three-Strand Braid Belt with Ribbon Bow
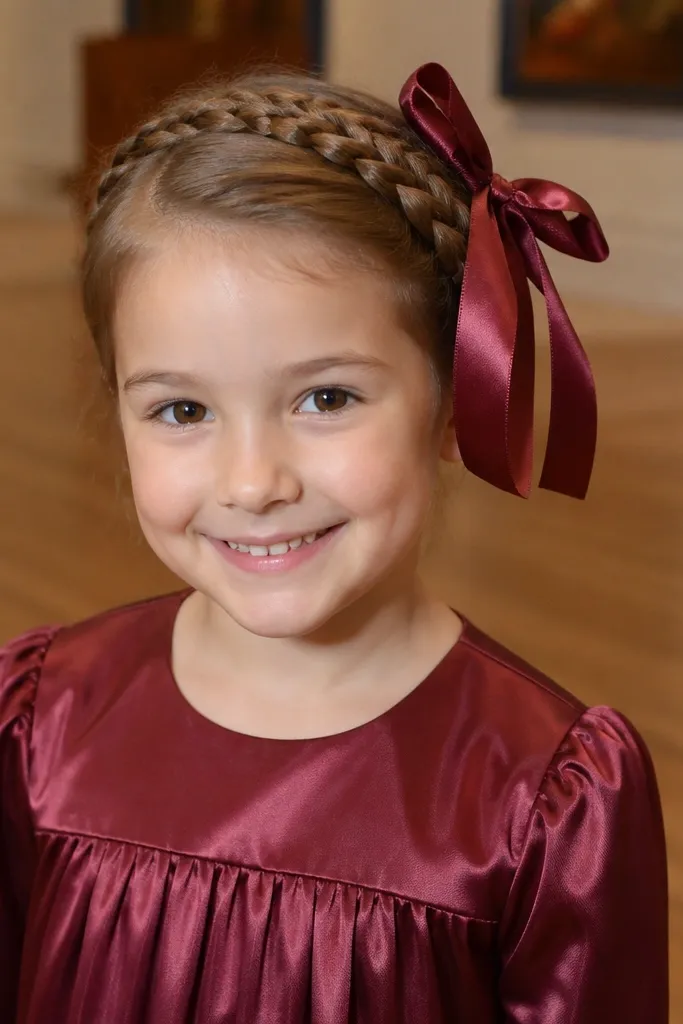
Part hair and braid a long three-strand braid from one side to the other, keeping it about 1 inch thick. Wrap the braid across the top of the head, pinning at both ends near the hairline. Tie a ribbon bow on the side where the braid end meets the pins. Brush the hair around the braid smooth so the braid sits flat and readable in photos.
This hairstyle looks like a headband made of braid, and it’s surprisingly beginner-friendly. You braid one long section, then wrap and pin it across the head like a belt, which means you’re not doing lots of small moves. The ribbon bow adds a festive wedding detail and helps cover pin points. It looks especially cute on kids with long hair that needs face control but still wants to flow down.
Skip thisDon’t use a slippery satin ribbon for the bow; it slides and loosens quickly.
Quick tipPin before you tie the bow — once the bow is on, it’s harder to adjust the braid placement.



