
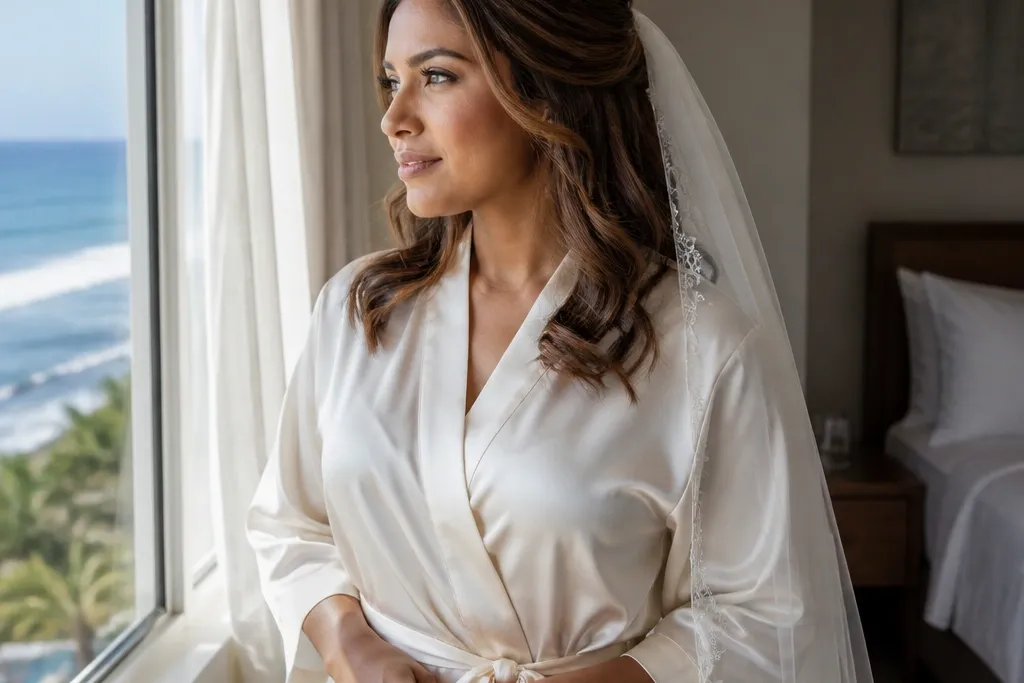
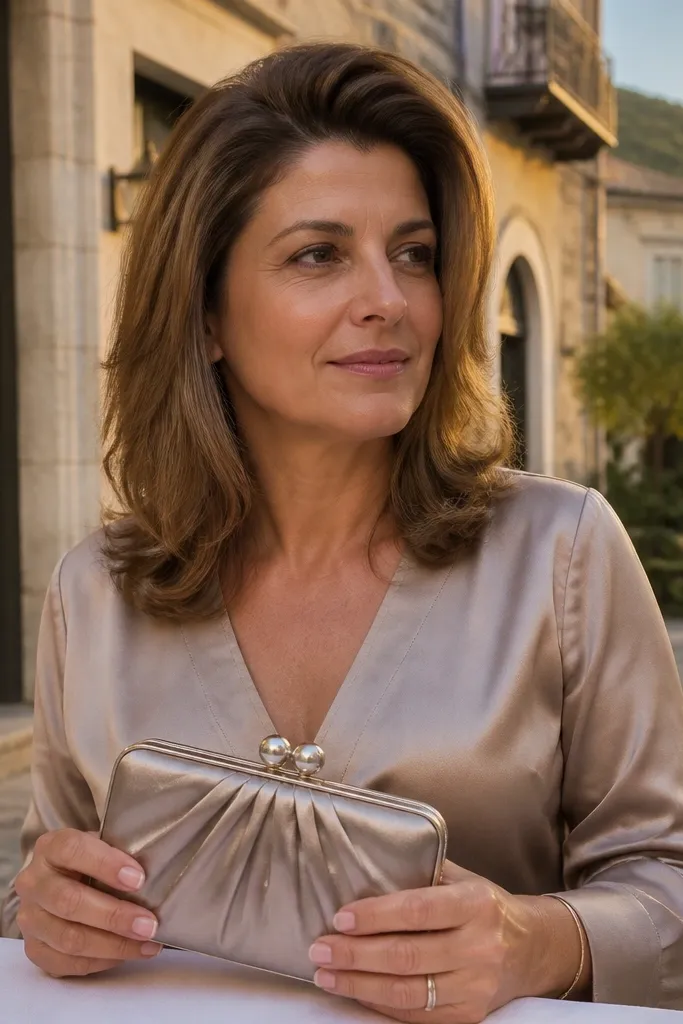
1. Deep Side-Part Soft Waves With Hidden Pin Sweep
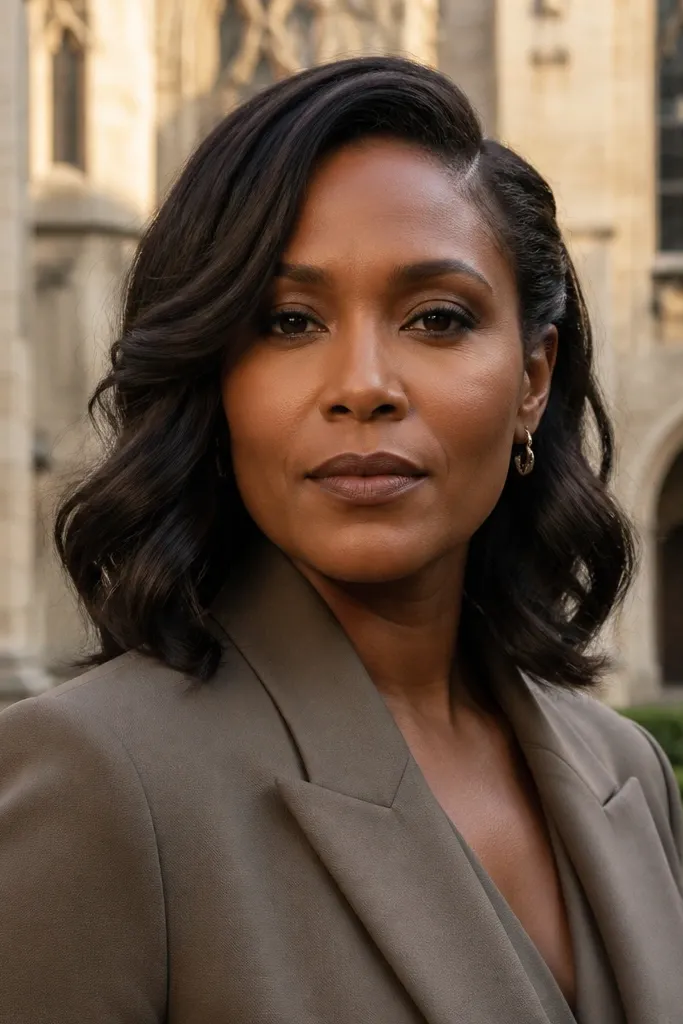
This is the easiest “camera-ready” look for shoulder-length hair because the deep side part creates instant shape and the pinned sweep stops the ends from flipping. The waves stay loose, but the hairline looks intentional, which is what you want in close-ups. It’s especially flattering if you have a slightly fuller cheek area since the side section draws the eye downward. Choose this when you want romantic movement without battling flyaways at the finish.
Start by blow-drying with a deep side part and directing the hair over the ear so the roots set in place. Curl in 1-inch sections, alternating directions only in the mid-lengths, then let the curls cool before you brush them into soft waves. Part your hair again where you want it to sit, then pull the front section back and pin it flat under the wave line using two crossing bobby pins. Finish with a light mist and a tiny dab of smoothing cream on the ends so the wave doesn’t frizz.
Quick tipIf your hair is fine, add a root-lift spray at the part line before heat styling so the crown doesn’t look flat.
Skip thisAvoid pinning the front section too low — it makes the wave line look heavy in photos.
2. Center-Part Polished Blowout With Micro-Volume Crown
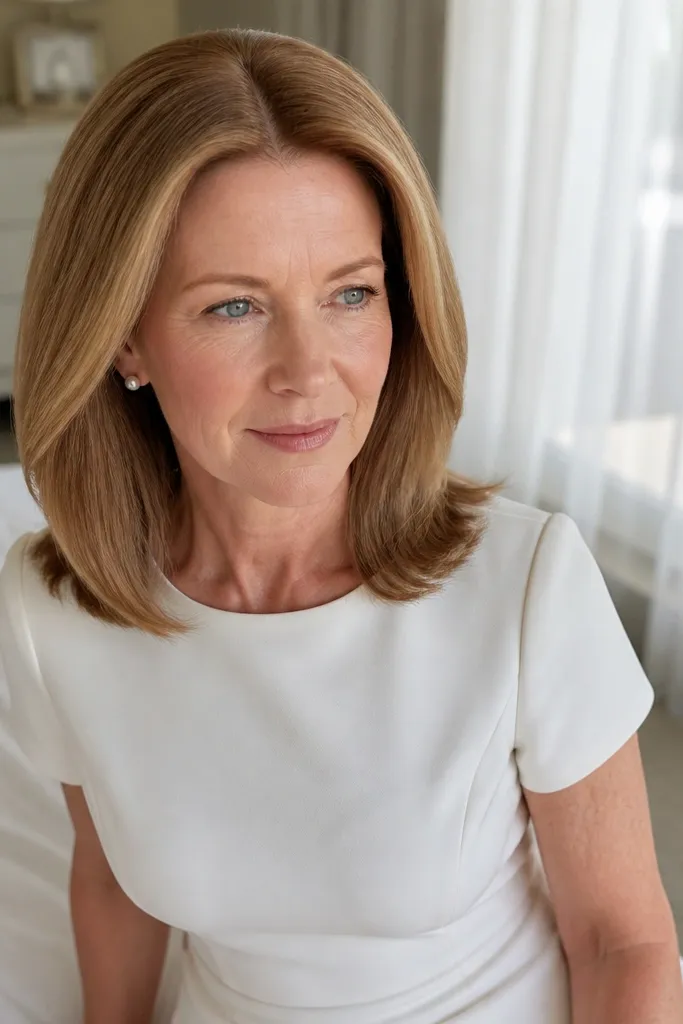
If you hate “hair that looks like it’s trying,” go polished. A center-part blowout gives you a clean frame for a veil, earrings, or a simple dress neckline. The micro-volume at the crown keeps it from looking limp, and the smooth finish photographs like silk even in daylight. This style suits straight or slightly wavy hair and works beautifully with minimal accessories.
Start with damp hair and apply a heat protectant plus a lightweight smoothing cream only from mid-length to ends. Blow-dry with the center part, lifting the roots at the crown using your brush tip for 20-30 seconds per section. Then use a flat round brush or paddle brush to pull the hair straight, keeping ends slightly turned under. Finish with a cool shot and a small amount of shine spray on the outer layer only.
Use a 2-3 minute cool-down window after blow-drying so the shape sets before you pin anything.
Skip heavy oil on the roots — it makes the part look greasy by the reception.
3. Half-Up Twist Knot for Shoulder-Length Ends
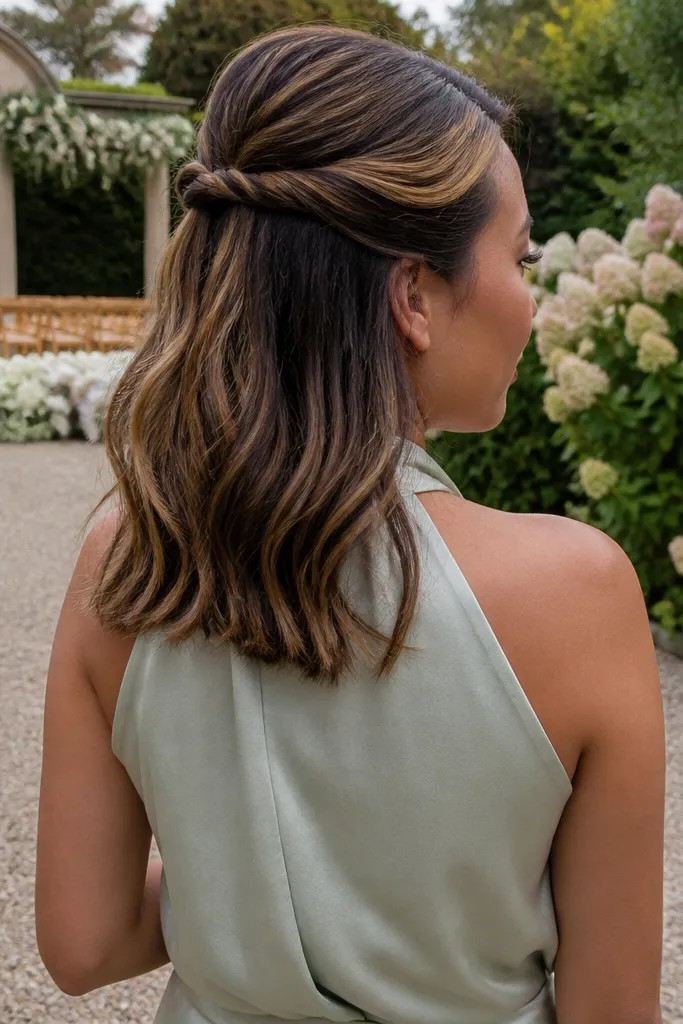
Half-up styles are the best safety net for shoulder-length hair because they give you hold without needing length for a full updo. The twist knot is photogenic because it looks intentional from the front and holds the ends so they don’t separate at the sides. It’s a strong choice if you’re wearing a hair comb or small veil since you can anchor the accessory right over the twist. Keep it soft, not tight, and it reads romantic rather than formal.
Start by creating a clean half-up section at eyebrow level (about 2-3 inches above your ears). Twist each side back, then cross the twists at the center and secure with a small elastic or two bobby pins. Curl the remaining hair in loose 1.25-inch sections, then brush through lightly so the ends fall in a unified shape. Set the twist with hairspray from 10-12 inches away and smooth flyaways around the hairline.
If your hair won’t hold curls, wrap the ends around the iron and hold for 6-8 seconds, then release and let the curl cool in your palm.
Don’t make the half-up section too high — it can look like a helmet on shoulder-length hair.
4. Lace-Braid Crown Halo Over Short Ends
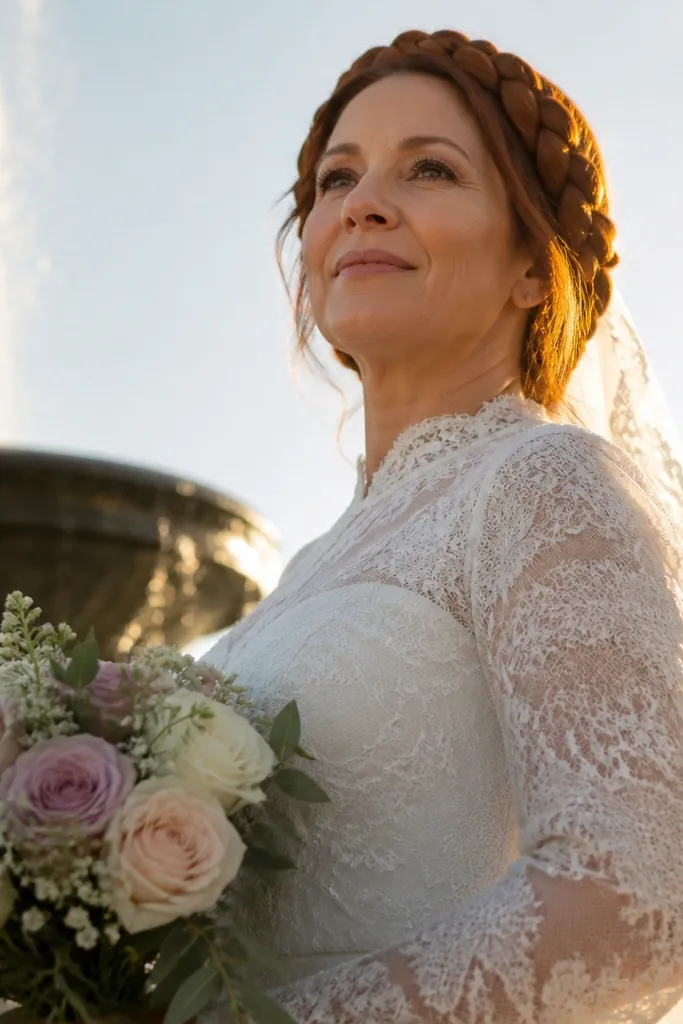
A crown halo braid is one of the prettiest ways to make shoulder-length hair look longer and more “done.” The trick is using a lace braid pattern that adds hair as you go, so the ends don’t stick out awkwardly. This style looks especially good with a flower crown vibe or a thin veil, and it frames the face without covering it. Choose this if you want a romantic, detailed look that still feels light and wearable.
Start by parting and separating two front sections that will feed the braid. Create a lace braid by taking a small outer strand from each side and adding it into the braid every few stitches as you move around the head. When you reach the back, tuck the remaining hair into the braid and pin the end flat with a pin that goes through multiple strands. Finish by gently pulling the braid slightly wider with your fingers so it looks airy, then mist lightly to lock it.
Use pins in a crisscross pattern at the braid end so it doesn’t shift during photos.
Avoid a tight braid — it can look bulky at shoulder length when it wraps around the crown.
5. Low Chignon With Pin-Set Volume at the Sides
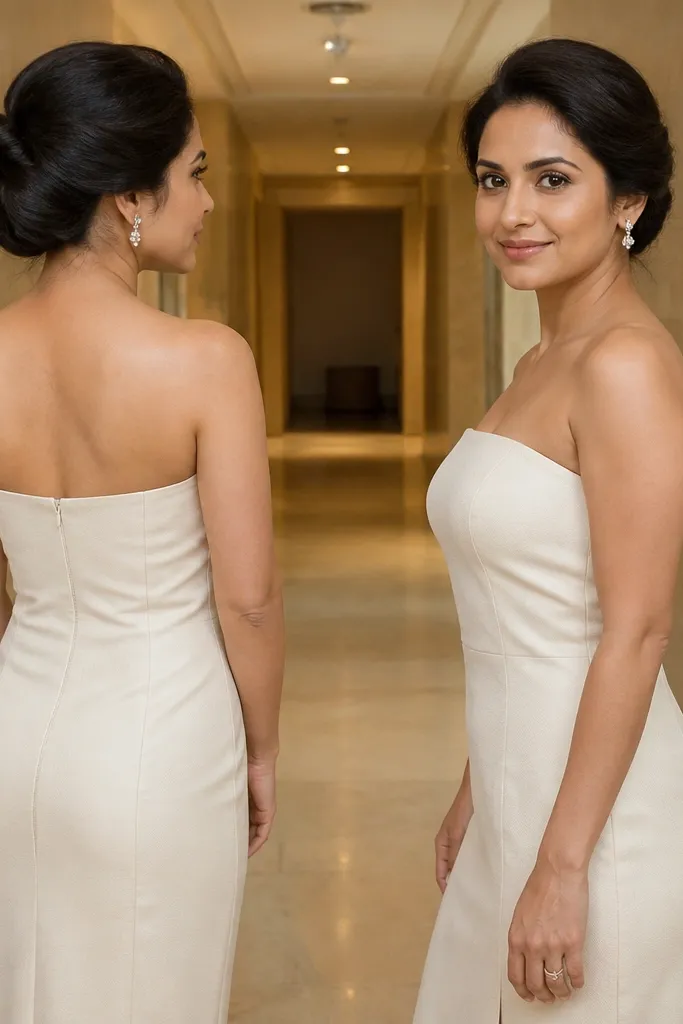
A low chignon looks classic, but shoulder-length hair needs help at the sides to avoid a flat, pancake base. This version uses pin-set volume so the bun looks full even when you don’t have long hair to wrap. It’s a great match for clean lines like strapless dresses, and it photographs well because the bun sits low and stays crisp. If your hair is fine, this style still works when you build the shape with the right placement.
Start by blow-drying with a slight bend at the ends, then create a low section at the nape. Tease only the top of the section lightly (not the roots) so you get lift inside the bun. Roll the hair into a low chignon and pin in layers: first two pins to lock the base, then additional pins around the perimeter to hide any short ends. Finish with a light hairspray coat and smooth the outer layer with a tiny bit of gel on your fingertips.
If you have flyaway baby hair, use a thin toothbrush with hairspray to tame it before you pin.
Don’t rely on one big elastic hold — short ends will pop out unless you pin the perimeter.
6. Bubble Braid Updo for Collarbones
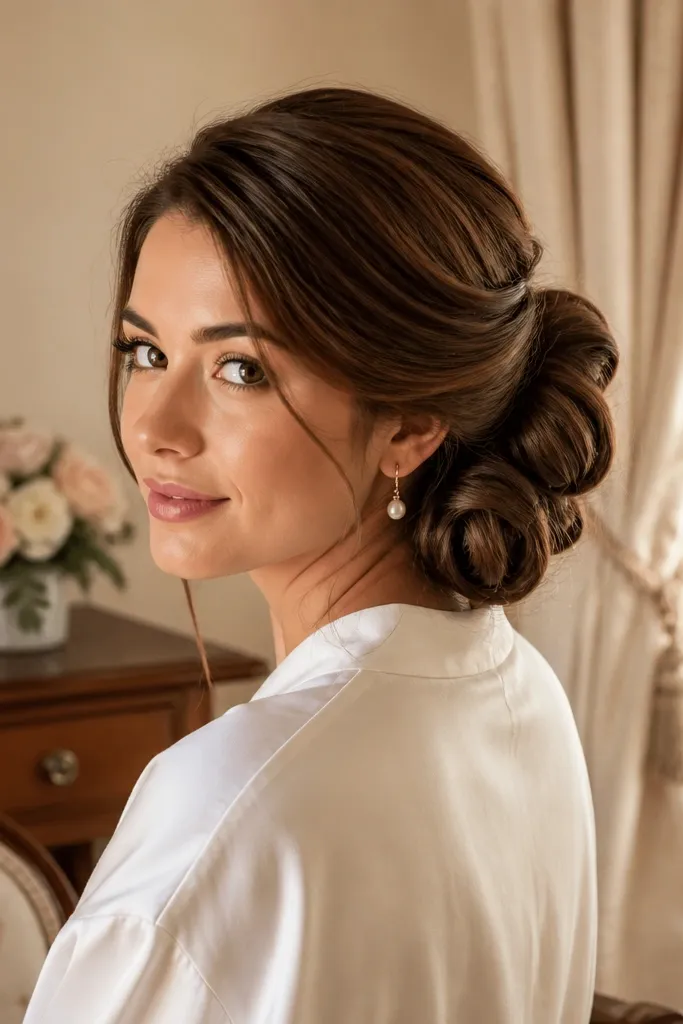
Bubble braids look playful and expensive at the same time, and they’re perfect for shoulder-length hair because the segments “fill in” the space. The rounded bubbles create dimension in photos, even if your hair is straight. This style suits casual-chic weddings and also pairs well with a sleek dress when you want texture. Keep it neat, not chunky, and it will read polished.
Start by parting your hair and gathering it into a low braid base at the nape using a small elastic. Create the bubble effect by gently pulling the braid sections outward every 1-1.5 inches, then secure each bubble with a tiny clear elastic. Continue down the braid, then tuck the braided tail into the last bubble and pin it flat. Finish by tightening the top anchor with one extra pin so the braid doesn’t slide.
Quick tipUse clear elastics sparingly — too many make the braid look shiny and thick in pictures.
Skip thisAvoid pulling the bubbles too hard; it can thin the braid and expose uneven strands.
7. Sleek Side Braid With Front-Row Face Frame
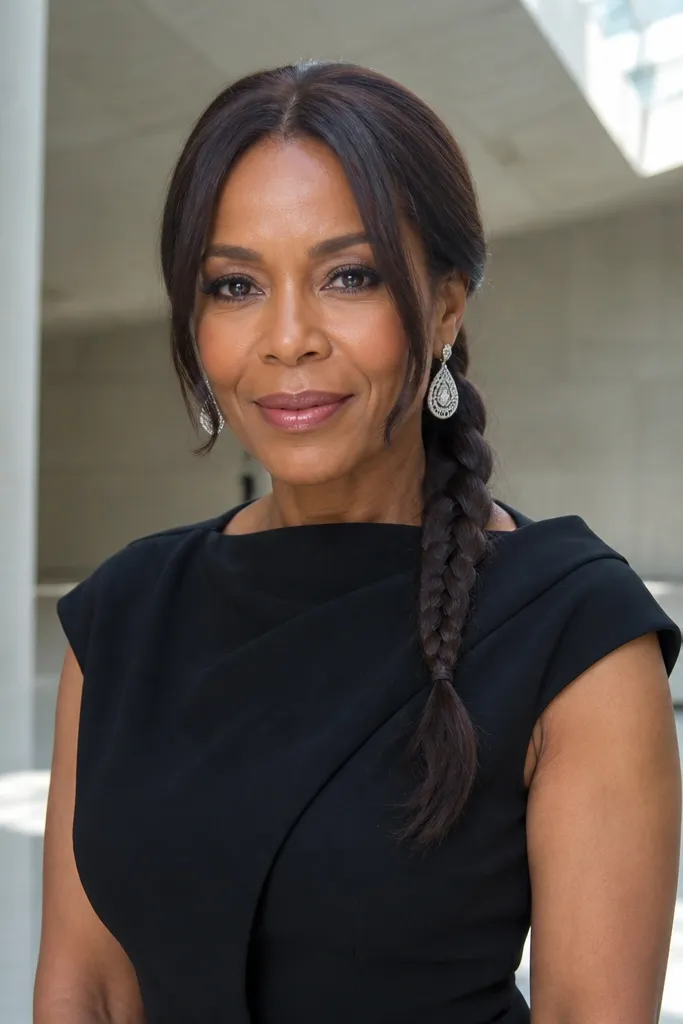
A sleek side braid gives you structure and lets your face stay visible, which is a win for shoulder-length hair. The front-row face frame makes it look styled rather than purely practical. This works well if you want a more modern look and you’re wearing statement earrings since the braid keeps the silhouette tight. Choose this when you want clean edges and photo contrast.
Start by smoothing hair with a light gel from roots to ends, then create a deep side part. Braid from the larger side using a tighter technique, keeping sections uniform so the braid looks even. Leave a small strand or two in front — about the width of a pencil — and pin the rest securely behind your ear. Finish by misting the braid, then curl or wave the face-frame strands lightly to blend with the braid texture.
For shine control, use gel on the outer layer only, not the whole head.
Don’t braid with dry, fluffy hair — you’ll fight frizz in every photo.
8. Soft Rope Twist With Wrapped Pins
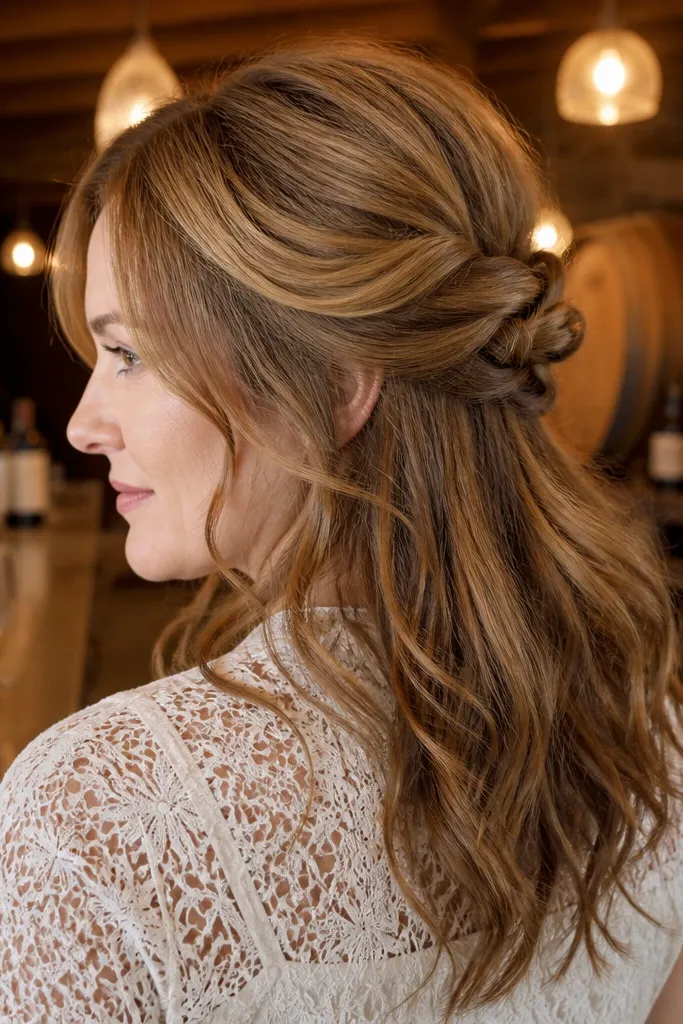
Rope twists look intricate but are very doable on shoulder-length hair because you’re not asking for a long wrap. The rope twist creates a braided texture without needing a full braid pattern, and the wrapped pins hide the hardware. This style is great for weddings that want something romantic but not overly formal. It also photographs beautifully from the side, which is where shoulder-length hair usually gets judged.
Start by sectioning hair into two halves and twisting each half in the same direction. Once both are twisted, cross them together in the opposite direction to create the rope look, then secure lightly with pins. Wrap a small strand around the pin points to cover them, then tuck the end under and pin again. Finish with a quick mist and gently separate the twist edges for softness.
Use two pin sizes: one for grip, one for smoothing so you don’t get bumps.
Avoid leaving twist sections too tight; it can look ropey and flat instead of dimensional.
9. Vintage Finger-Wave Corners at Shoulder Length
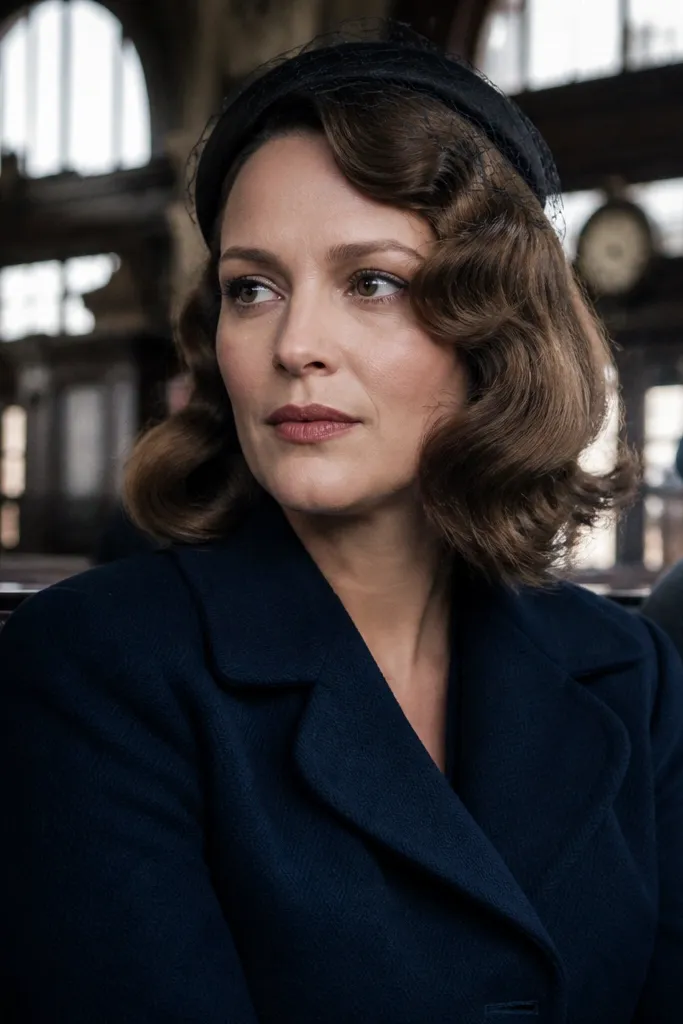
Finger waves at shoulder length look instantly bridal because they create crisp edges and a sculpted silhouette. The key is keeping the wave pattern tighter near the front and softer toward the ends so it doesn’t look like a costume. This style suits short bobs and lob lengths, especially with a vintage neckline or pearl earrings. It’s also one of the best ways to control frizz without needing heavy product everywhere.
Start with damp hair and apply a strong hold styling cream to the wave area only (front 6-8 inches). Create the first wave using a comb and your fingers, then set with clips along the pattern. Repeat wave by wave, then let it dry fully or use a hood dryer for even results. Once dry, remove clips, smooth the wave corners, and brush only the ends lightly so the waves stay defined.
If your hair is wavy already, reduce heat and focus on setting — finger waves look best when they dry in shape.
Skip flexible products — they blur wave edges and ruin the crisp look.
10. Glowy Half-Up Scrunch With Soft Crown Lift
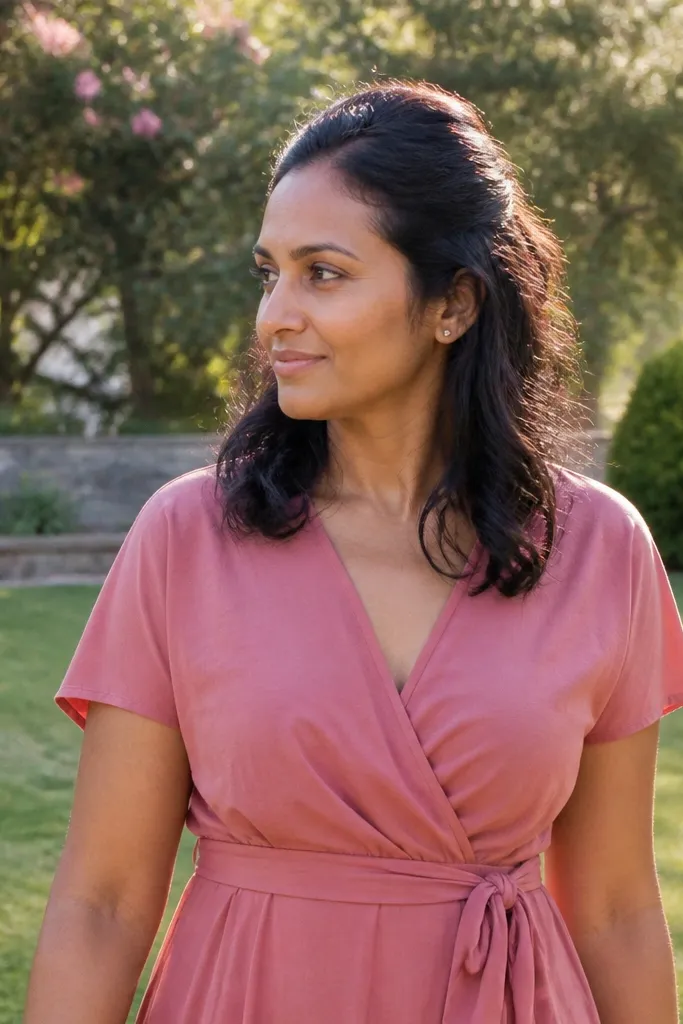
This is a “pretty but not fussy” look that works when your hair won’t hold classic curls. The scrunched texture adds volume at the crown and keeps the mid-lengths from falling flat. It’s perfect for beachy weddings, garden venues, and outdoor ceremonies where you want movement without losing shape. The half-up part keeps it bridal, while the scrunch keeps it modern and photo-friendly.
Start by applying mousse to damp hair, then scrunch and air-dry or diffuse until fully dry. Pick a half-up section and secure with an elastic, then loosen the top gently for crown lift. Curl the very front pieces lightly if you want more frame, then pin the elastic area with two bobby pins so it doesn’t show. Finish with a light shine mist sprayed only on the outer layer.
Diffuse on low heat and keep the nozzle moving — too much heat makes scrunch texture collapse.
Avoid heavy hairspray on day-one texture; it makes scrunch look stiff.
11. Sculpted French Twist for Shorter Lengths
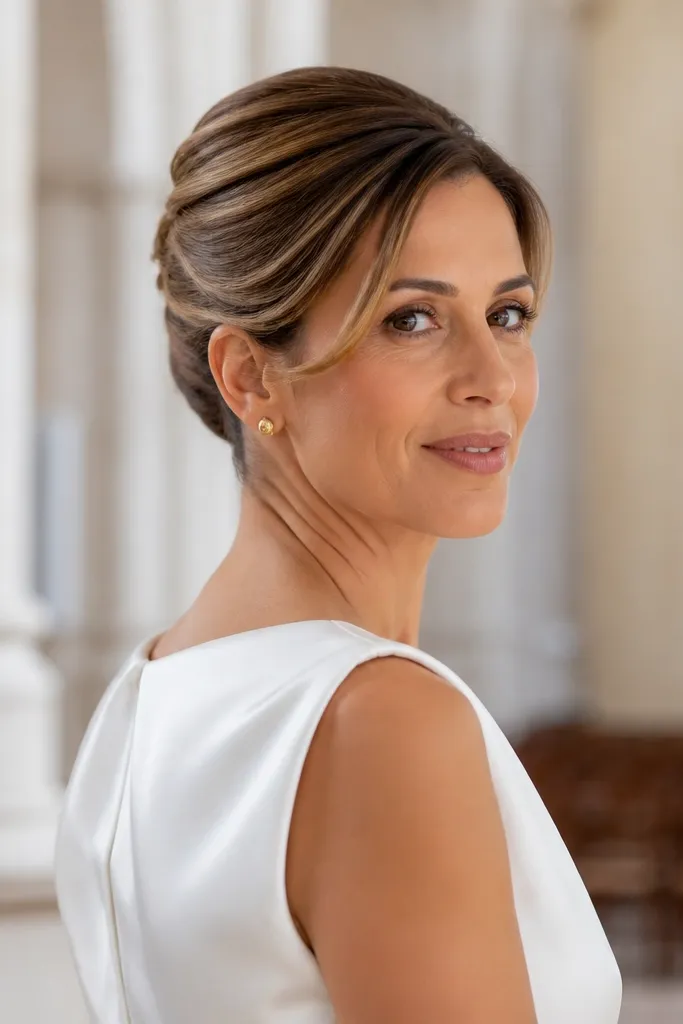
A French twist is the formal choice that still works for shoulder-length hair when you build a scaffold. The sculpted top is what makes it look bridal, not like a random bun. This style suits sleek gowns and covers the back of shoulder-length hair so you get a clean silhouette. It’s also a good option if you want your hair away from your neck in warm weather.
Start by creating a side part and blow-drying with a slight root lift. Gather hair into a low section and twist upwards, using a rat-tail comb to push hair into the twist shape as you roll. As you tuck, pin in layers from the inside out so the ends disappear under the twist. Finish by smoothing the top with a small amount of styling gel and misting to set.
Use a fine-tooth comb to hide short ends — shoulder-length strands catch on pins unless you direct them first.
Don’t attempt this with freshly washed hair that’s too slippery; grip matters for the twist shape.
12. Shoulder-Length Waterfall Braid With Loose Ends
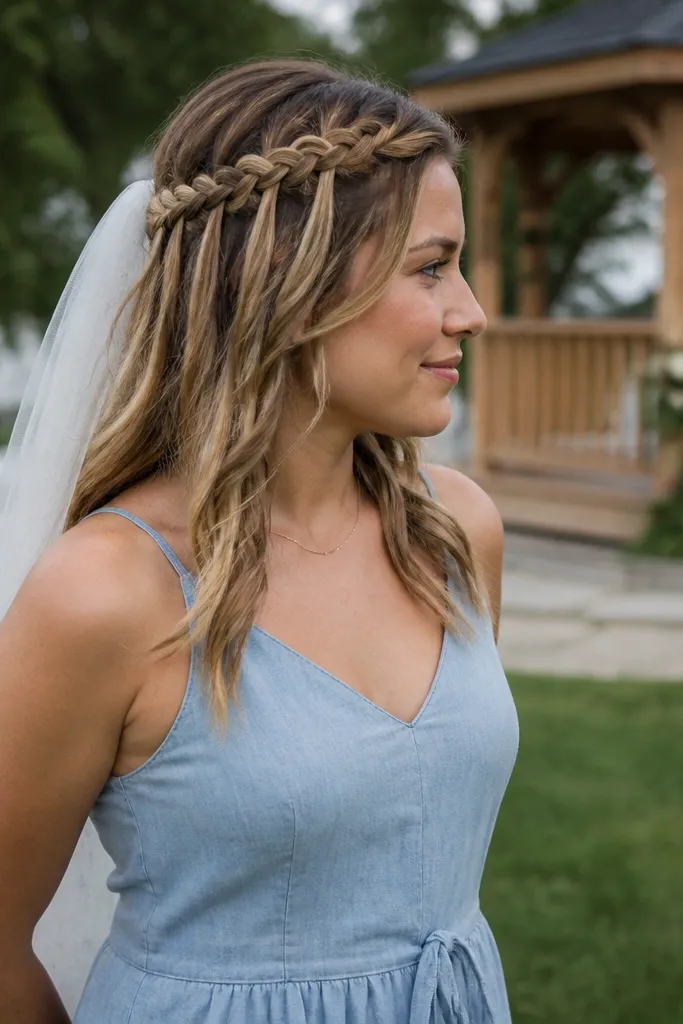
Waterfall braids look delicate, but the real win is that they guide your shoulder-length ends into a controlled, pretty flow. The “waterfall” strand placements keep the front airy while the braid itself stabilizes the shape. This style is ideal for ceremonies where you want movement, like a park wedding, because the braid adds structure without making hair look heavy. It also photographs well from the front because you can see the pattern clearly.
Start with a side part and lightly curl the ends so they fall in soft waves. Create the waterfall braid by taking a small section, crossing it into the braid, then releasing one strand downward before adding the next section from above. Continue along the side toward the back, then secure the braid end with pins. Finish by blending the loose waterfall strands into your curls and mist only the braid line to lock the pattern.
Use a slightly smaller braid section than you think — shoulder-length hair needs tighter sections for a clean waterfall look.
Avoid releasing too much hair at each waterfall step; it creates gaps and uneven spacing.
13. Tucked-Ends Low Pony With Soft Wave Base
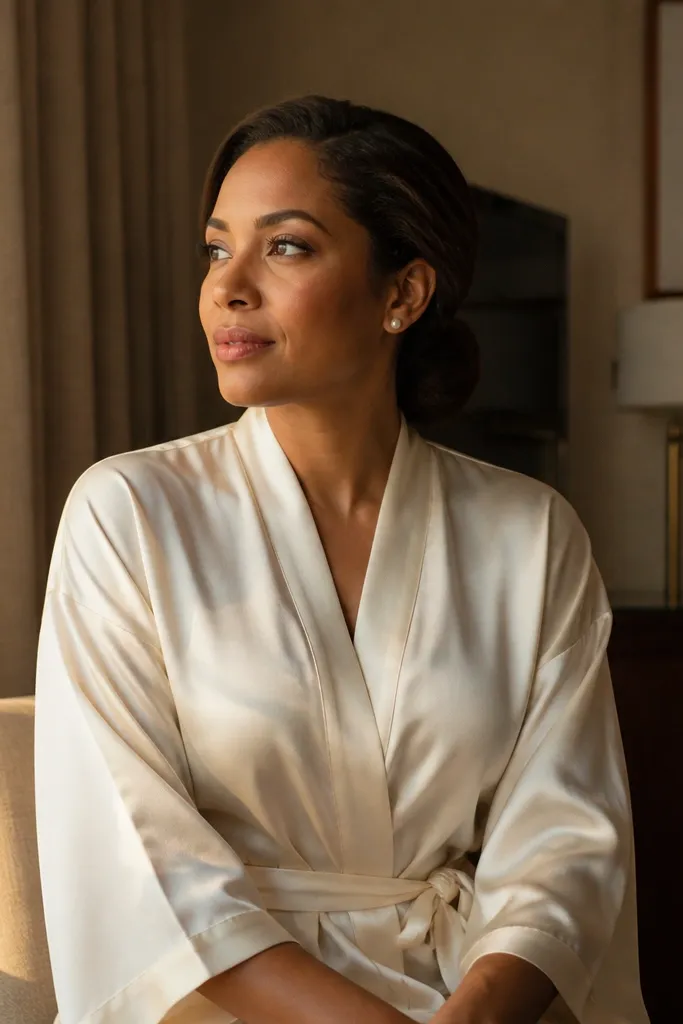
A low pony can look bridal when the ends are tucked and the base is shaped. For shoulder-length hair, the pony is often where styles fail because the ends separate — tucking them solves that. The soft wave base gives movement, and the low position keeps the look elegant rather than sporty. This works well with strap styles and clean necklines, especially if you want something that doesn’t require a full updo.
Start by adding a wave to the mid-lengths and ends using 1.25-inch sections, then brush through lightly. Gather hair into a low pony at the nape and secure with an elastic. Twist a small wrap strand around the elastic and tuck the remaining pony length under the base, pinning it so it sits flat. Finish with hairspray on the tucked area and a light mist over the waves.
Quick tipIf your pony looks flat, add a clip-in hair piece at the base only for photos, then remove after — it’s faster than forcing volume from short hair.
Skip thisSkip high-heat curling right up to the root; shoulder-length hair gets frizzy at the crown quickly.
14. Curled Bob-Flip With Crown Pin and Side Shine
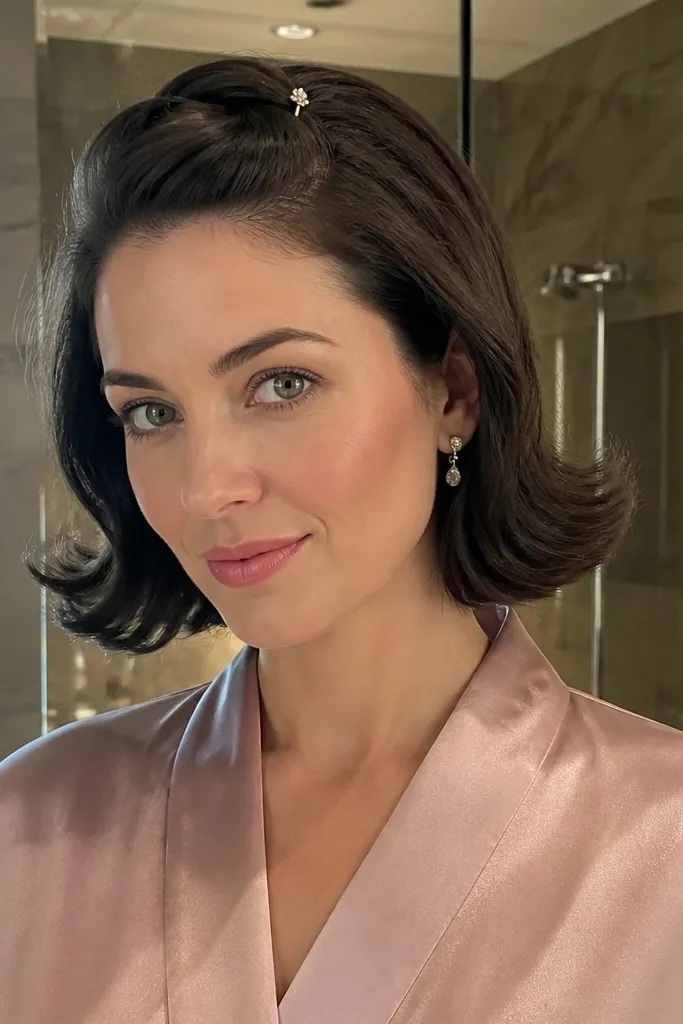
This style plays to shoulder-length’s best feature: the perfect flip. By curling the ends outward and adding one crown pin, you get a lifted shape that looks styled from every angle without needing a big updo. It’s great for short-to-shoulder bobs and lob lengths because the end flip creates a finished hemline. Add side shine and it reads bridal, not casual.
Start by blow-drying straight with a slight lift at the crown, then curl only the last 3-4 inches outward. Once cooled, use a small pin at the crown to secure any top flyaways and set the shape. Smooth the outer layer with a tiny amount of smoothing serum, then flip the ends into place with your fingers. Finish with a shine mist sprayed to the side so highlights show in photos.
Quick tipCurl the ends in the same direction for the front frame, then alternate only behind your ears for a natural look.
Skip thisAvoid pinning the crown too tight; it can flatten your roots and make the flip look uneven.
15. Braided Crown Bun With Short-End Tucks
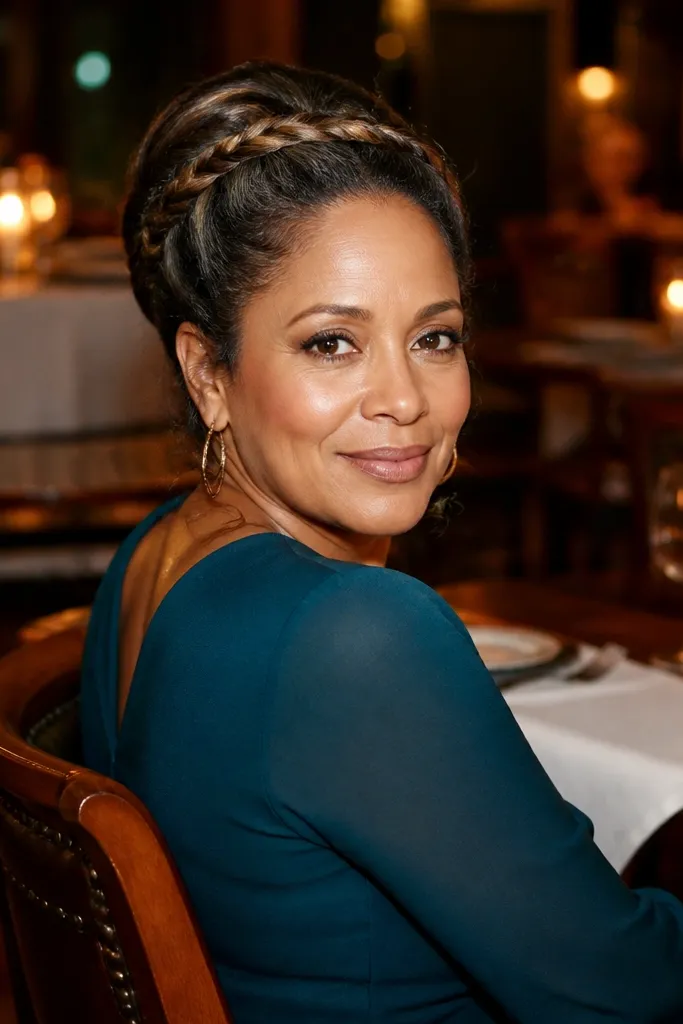
This is the “real updo” option that still works with shoulder-length hair because the braided crown creates structure while the bun tucks in the shorter pieces. The braid line adds texture and makes the top look fuller, which is exactly what shoulder-length hair lacks in formal styles. It’s a strong choice for evening weddings, especially if you want something ornate without going full cathedral complexity. From the front, it looks intentional; from the side, it looks secure.
Start by creating a braid band across the top of your head, using small sections and keeping it close to the scalp. Gather the remaining hair into a low bun and tuck short ends underneath, pinning them in two directions to lock them. Once the bun is secure, tuck the end of the braid into the bun and pin so the braid disappears into the structure. Finish with hairspray on the crown braid and a light smoothing mist on the bun surface.
Pin through the braid and into the bun base for extra security where shoulder-length strands loosen.
Avoid leaving the braid too loose at the temples; it shifts and shows gaps in photos.



